

I know the above heading is a lot to take in, but there is a lot going on. Firstly, Cruella (my wife) flew back to the UK (the usual way, holding tight to the broom handle, head down with chin straps on her hat and black gown flowing menacingly behind). She was rushing back to welcome the idiot son home from Japan. She was so excited at his arrival that she wanted to fly out and meet his plane. I advised against it and reminded her that they shoot down white balloons, so God knows what they would make of a fast moving black streak.
Anyway, the minute she flew off all the chickens went into a huff, mainly because I refused to give them all the treats that Cruella stuffs them with. Every morning I received a delegation standing and staring at me in silent disdain as I drank my morning tea. Eventually I relented and let them have a FaceTime call with Cruella. They all jabbered away in chickenese and I heard my name come up a few times followed by Cruella shouting “he did what”. The outcome is that they negotiated all their treats back and I have been instructed to give them extra when Tango the lonely blind Labrador is fed. I feel that Tango is incensed and he has taken to howling the blues hit “is there anybody lonely”. The photos below show the pressure I was under. Click on each photo for a larger view.


Anyway on with the gardening.
10th March 2023. Things I have been doing lately:
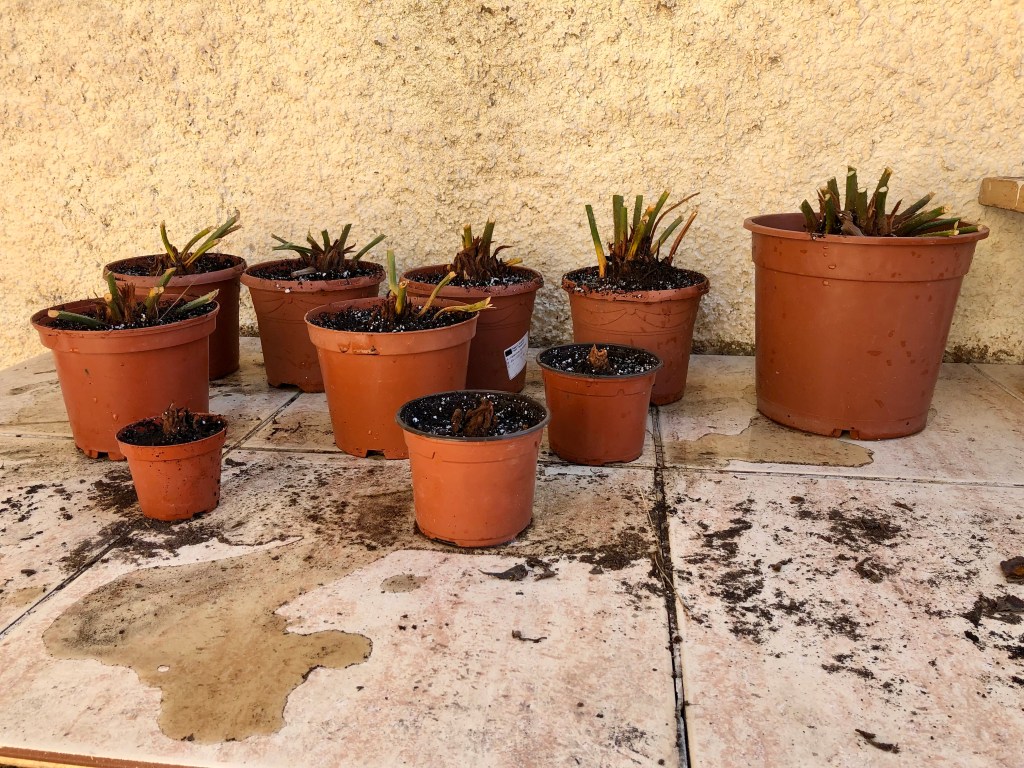
Potting up my Sago Palm pups. If you are following this blog closely, and I know you are, then you will remember that in my last post I removed pups from below my Sago Palm and left them for the cut scar to dry off. Well round about a week should do it, so if you cut some off now is the time to plant them up. The first thing you need to check is that the scar where you cut the pup off is completely dry. If it is then you are good to go. The photos below show the nicely dry scar and the pups excitedly waiting on the potting bench. Click on each photo for a larger view.


Like most Spanish plants, Sago Palms need a good free draining compost and this is especially the case when you are starting the pups off. In the past I have used a mixture of sand and compost with variable results, so this time I am using Perlite to make the compost nicely free draining. Mix up about 25% Perlite to 75% good compost (not China shop compost). If you have some of your own well rotted compost then chuck a bit of that in as well. Mix it really well till the Perlite is fully integrated into the compost. The photos below show my mixing processes. Click on each photo for a larger view.


It is important when potting up too chose the right size pot for the pup. Don’t pick too big a pot as this will leave too much soil that can become a bit rancid and attract pathogens. Instead keep them nice and tight. Firstly put a layer of compost at the bottom of the pot. Then gently place your pup on top pushing it down firmly to ensure good contact with the compost mix. Next fill around the sides of the pup firming down as you go. Don’t bury the pup just take the soil up to about three quarters of the pup and leave the rest sticking out. Finally water well and leave to stand in the shade. From on then let the pup dry out a bit between watering. Do not be tempted to take the pups out into the sun until they are well established. In a month or two you should see growth. The first photo below shows the planting process whilst the second shows the pups proudly in their right size pots. Click on each photo for a larger view.

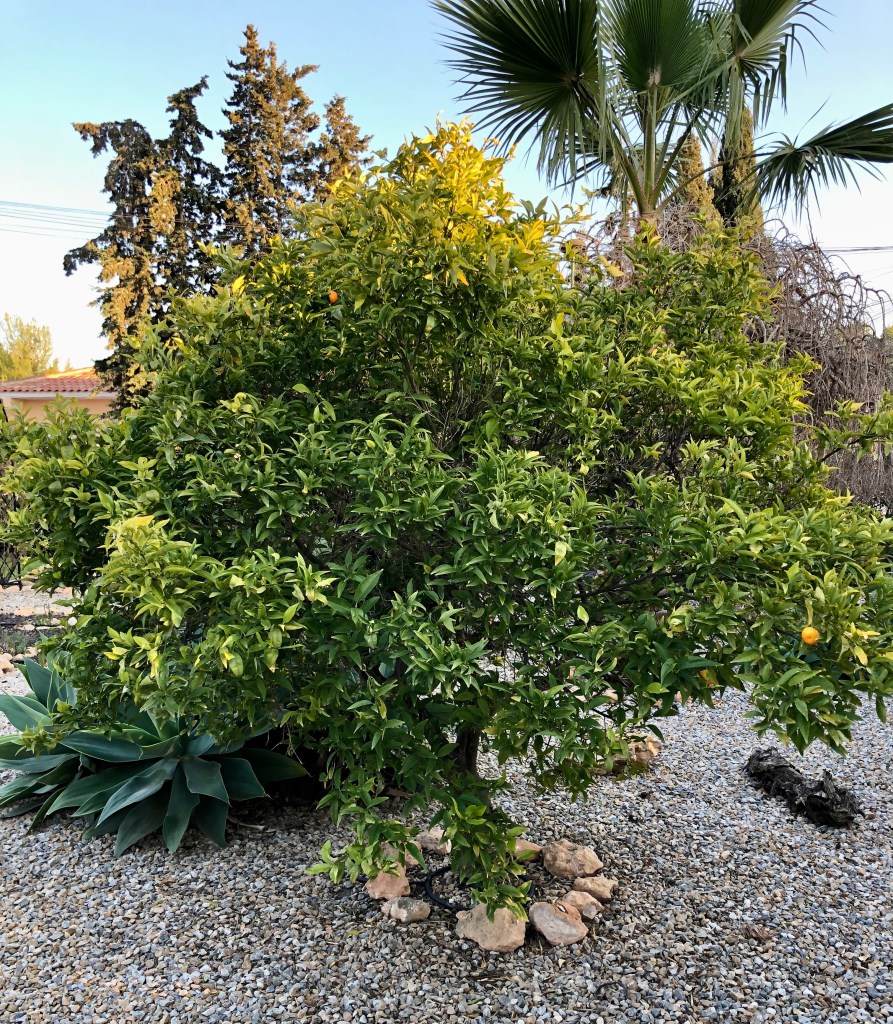
Pruning my orange trees. Now is the time to prune orange trees before the blossom arrives. I do this in three linked stages. First, I cut back any branches that are crossing, diseased or growing vertically. Second, I cut out a space at the centre of the tree that allows light to penetrate right to the heart of the tree. This is often likened to creating a wine glass shaped tree with the bowl of the glass represented by the space at the centre of the tree. Third, and last, using long reach lopers I cut back any branches that are too high to be practicable to pick fruit. If you undertake this process annually, it should take you no more than about 15 minutes per tree.
The work should begin with a quick survey of your trees so that you know what you are facing. I have 5 orange trees all of which require a customised approach. The photos below give an overview of some of my trees. Click on each photo for a larger view.


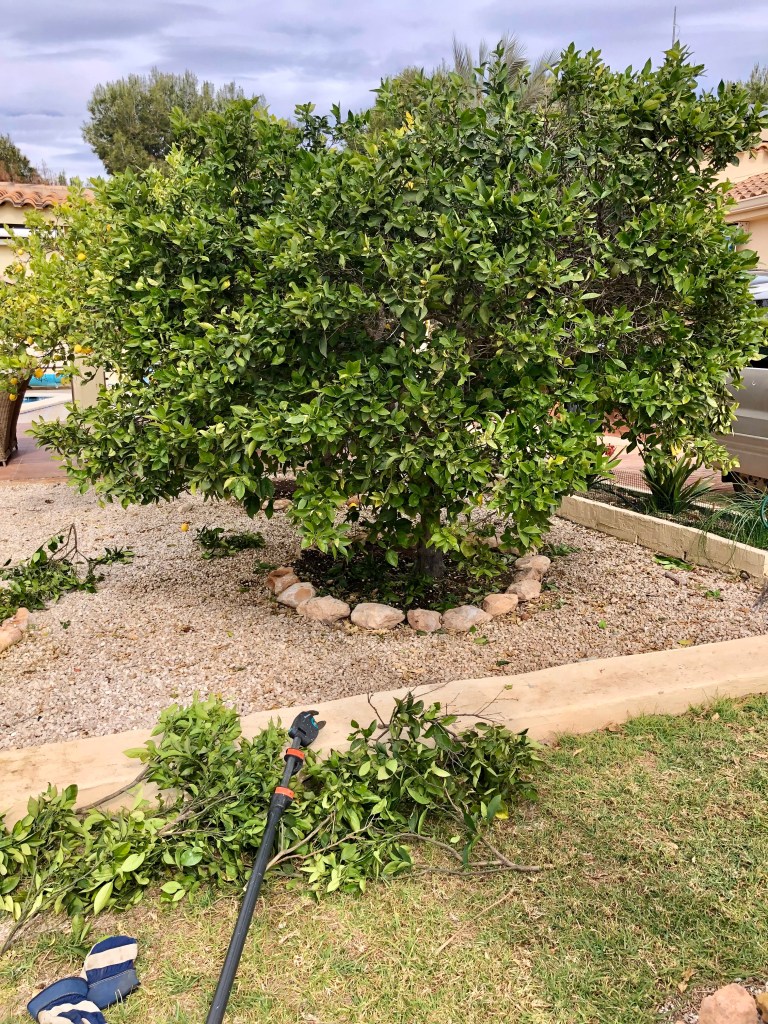
Next you need to move on to cutting out the centre of the tree to let light in. For this you will need lopers, secateurs, and possibly a saw. The photos below shows some of my trees with the cut out centre branches lying at the foot of the tree. The final photo shows the space at the centre you should be aiming for. Click on each photo for a larger view.


Finally using long reach lopers cut off the highest unreachable branches. If you don’t have long reach lopers then get the step ladder out and go through the centre of the tree. The photos below show my final trimming. Click on each photo for a larger view.


Repotting Agave Attenuata. These Agaves are quite popular in Spain as they are easy growing and tend to take care of themselves. I have a number of them in large groups around my garden with a few odd ones planted in pots. They have an endearing habit, in that over time they will bend towards the dominant position of the Sun. This is fine when they are planted in the ground, but in a pot it renders them unstable and liable to be blown over by the wind resulting in leaf damage.
To overcome this setback you can rotate the pot occasionally but eventually you will need to repot the plant into an upright position. However, let me pass on my secret of years of repotting them. Don’t attempt to dig the plant out of its pot roots and all. Instead, take a sharp saw and cut through the stem as close as possible to the soil. Throw away the old root and refill the pot with fresh free draining compost. Then peel off a few layers of the lower leaves, and if possible coat the stem with rooting hormone liquid (not absolutely necessary so don’t panic). When you are ready just pop the cut stem into its fresh compost in an upright position and you have a smart new upright Agave.
The first photo below shows the Agave had begun to lean so badly I had to prop it against a wall. The second shows the cut stem ready for replanting. The next shows the cut coated with hormone rooting liquid. And finally, the newly planted and refreshed plant. Click on each photo for a larger view.


We are getting WAY too many sago palms now. I merely nestle the pups into the ground that is covered with cedar needles. Since I could not discard the trunks, I cut them into segments, and nestled them in also. The trunks continued to make even more pups for rooting. Goodness, I do not even like these sago palms. (The original specimens needed to be removed, but were surrounded by concrete that needed to stay. They literally grew out of small holes in the concrete.)
LikeLike
That is so funny. They are much desired in Spain and cost a lot of money.
LikeLiked by 1 person
They are somewhat expensive here also, but I would not pay for them. I will need to give these away.
LikeLike