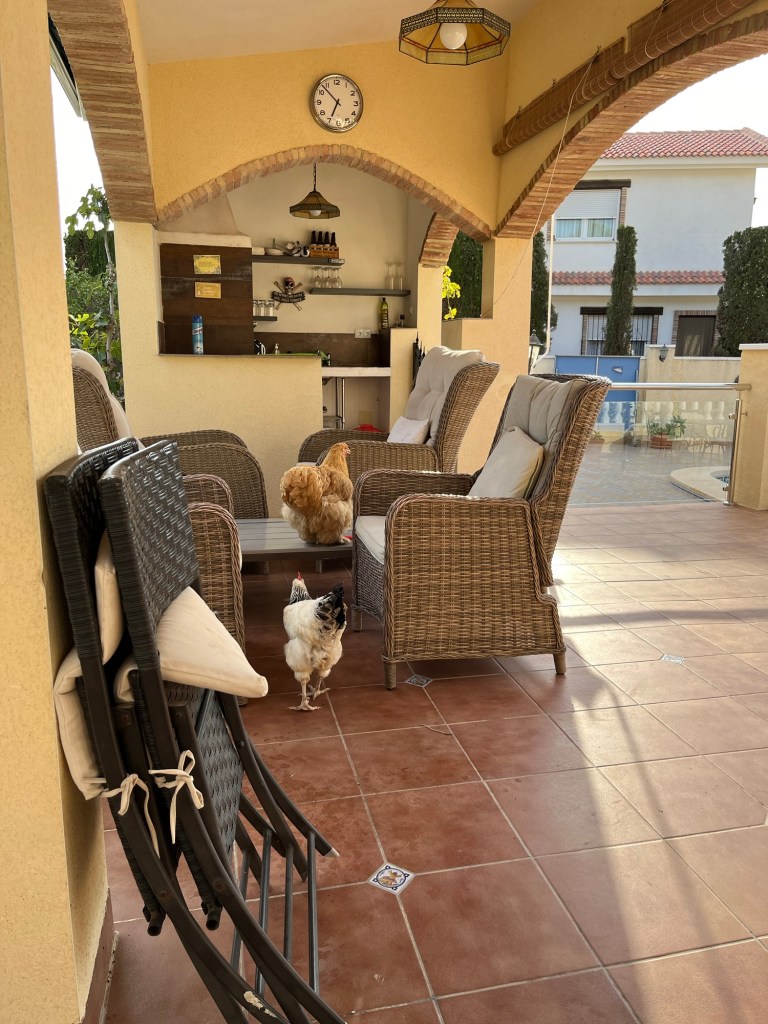
Cruella dreams of a chicken theme park whilst I tackle garden armageddon

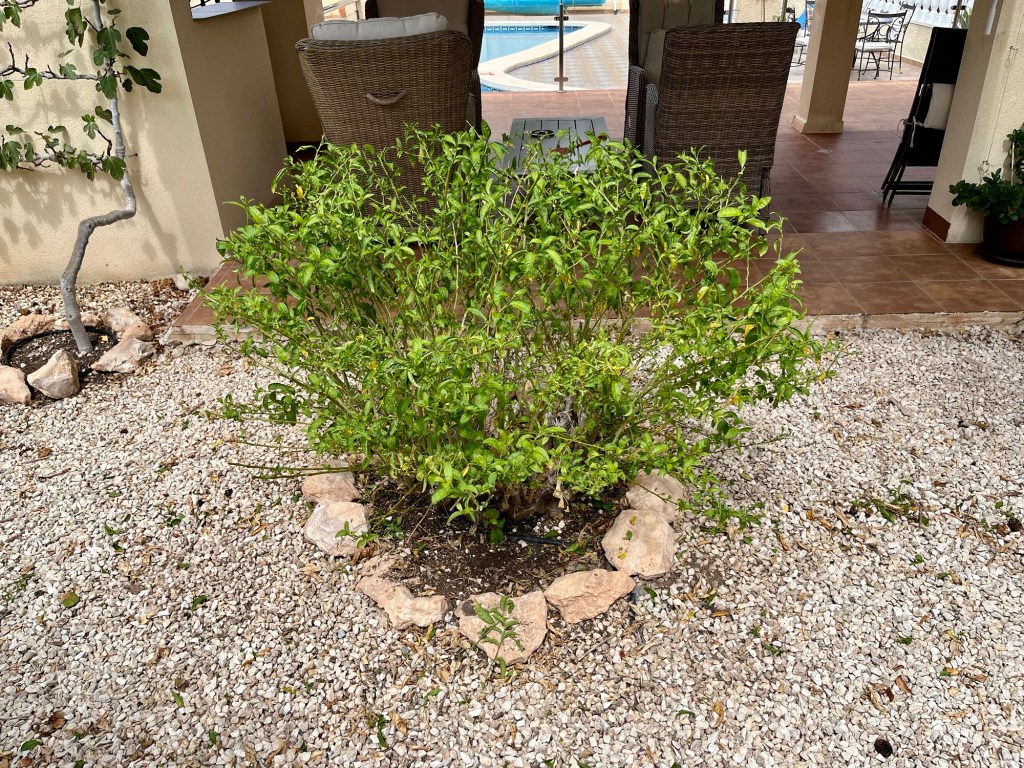
It’s hot and my garden looks as if it has been napalmed. All the plants are suffering from heat exhaustion and the whole thing presents a bizzare nightmarish picture of a wasted landscape occupied by chickens pecking over the bones of what was once a garden with the occasional lizard scurrying by.

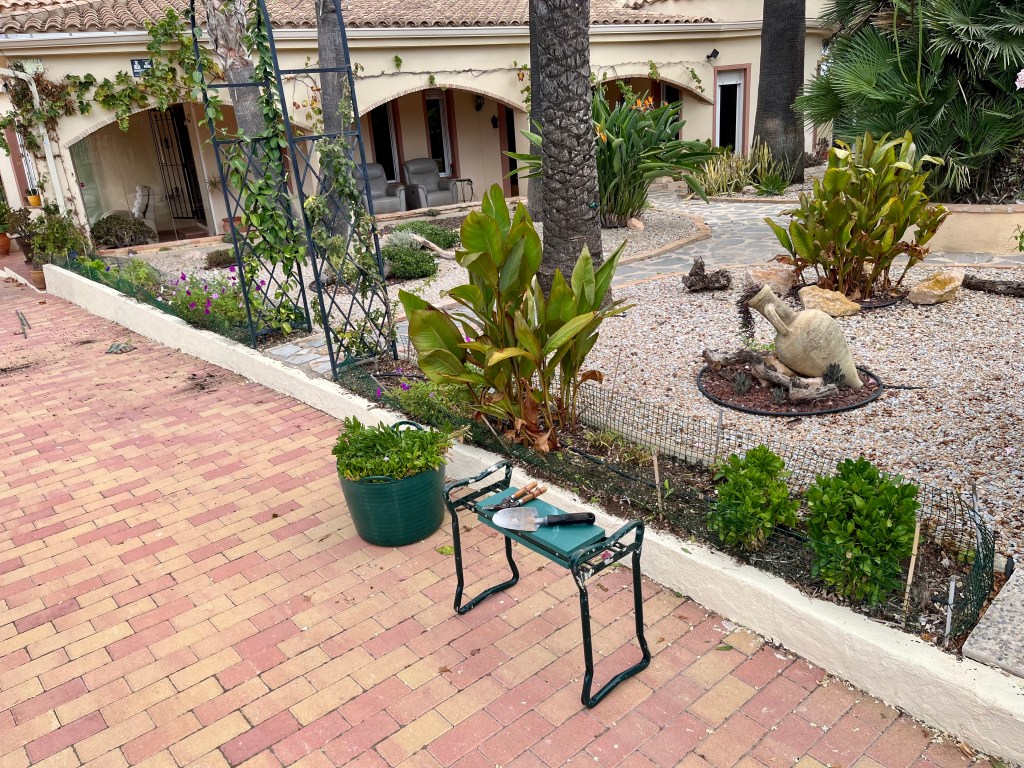
Still never mind, there is always something to be doing, so let’s get on with the gardening.

2nd September 2026. Things I have doing lately in the garden.

  • Deadheading like a champion
  • Mulching with pine needles
  • Dealing with my lawn
  • Loosening compost in my pots
  • Mourning my pomegranates

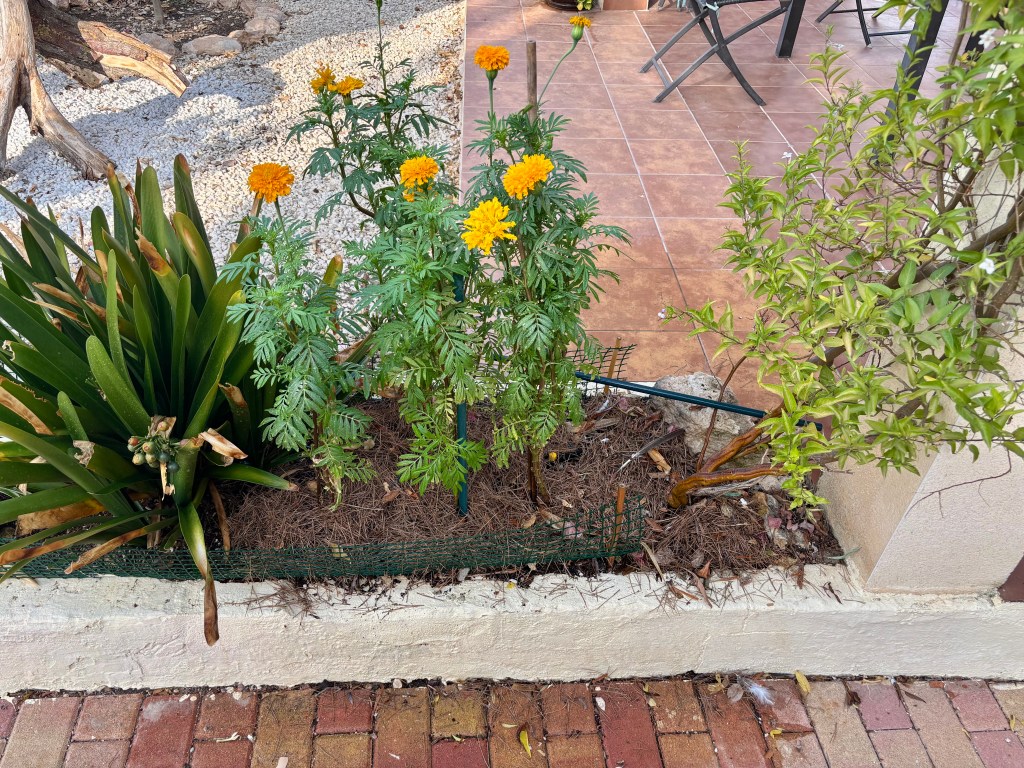
Deadheading like a champion. We are now entering peak deadheading season, so if you want your plants to keep flowering for the rest of the summer then you need to get out every day and deadhead spent flowers. Deadheading spent flowers isn’t just about keeping things tidy, it’s about forcing plants to keep on flowering.

All plants exist solely to go to seed. Left to their own devices they will flower once, produce seed and then just stop flowering. By deadheading you are stopping the plant fulfilling its primary function and it will immediately try again with another flower. The more you deadhead, the more flowers you get. The photo below shows the start of the big deadhead.
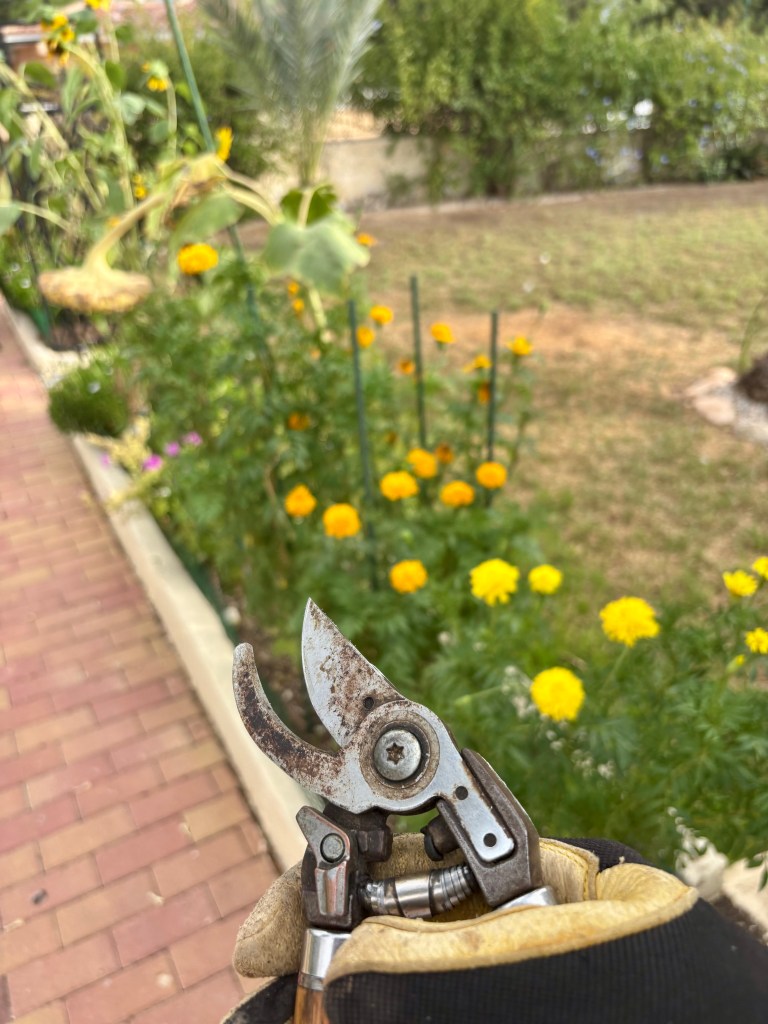
And so it begins

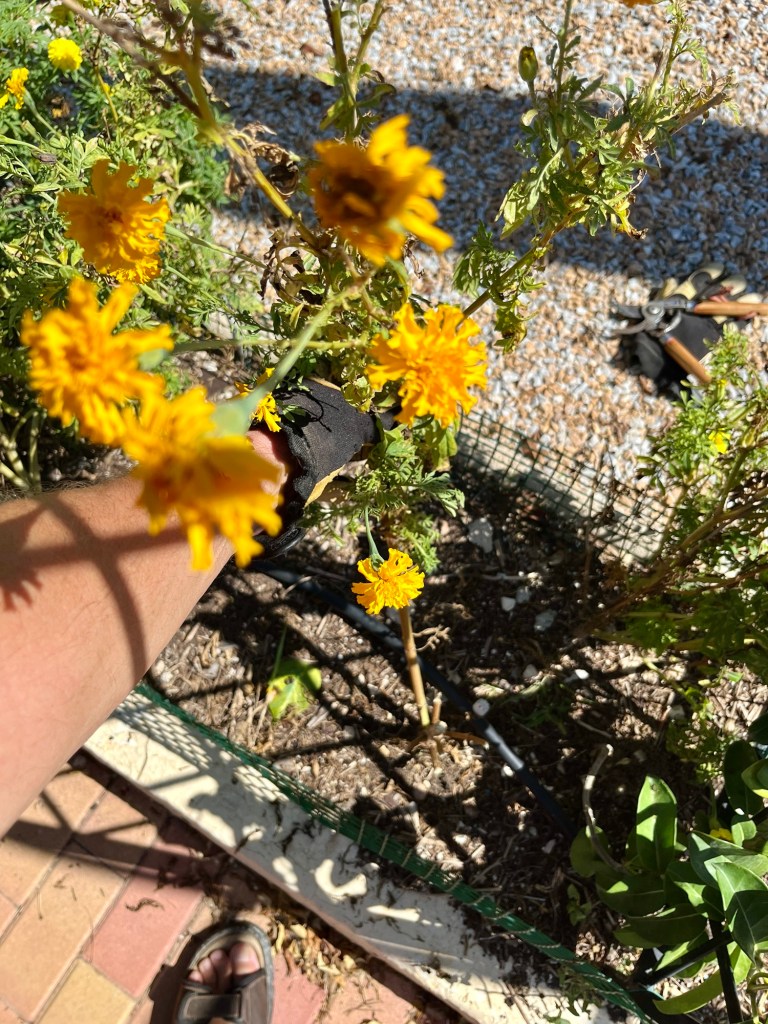
At its simplest deadheading is very simple you just cut off the dead flowers. However, don’t cut just under the spent flower, instead slide your secateurs down the flower stem till you meet the next set of leaves and cut just above there. By doing this you are not leaving a length of dead stem that could invite virus and pathogens into your plant. The technique is shown in the photos below.
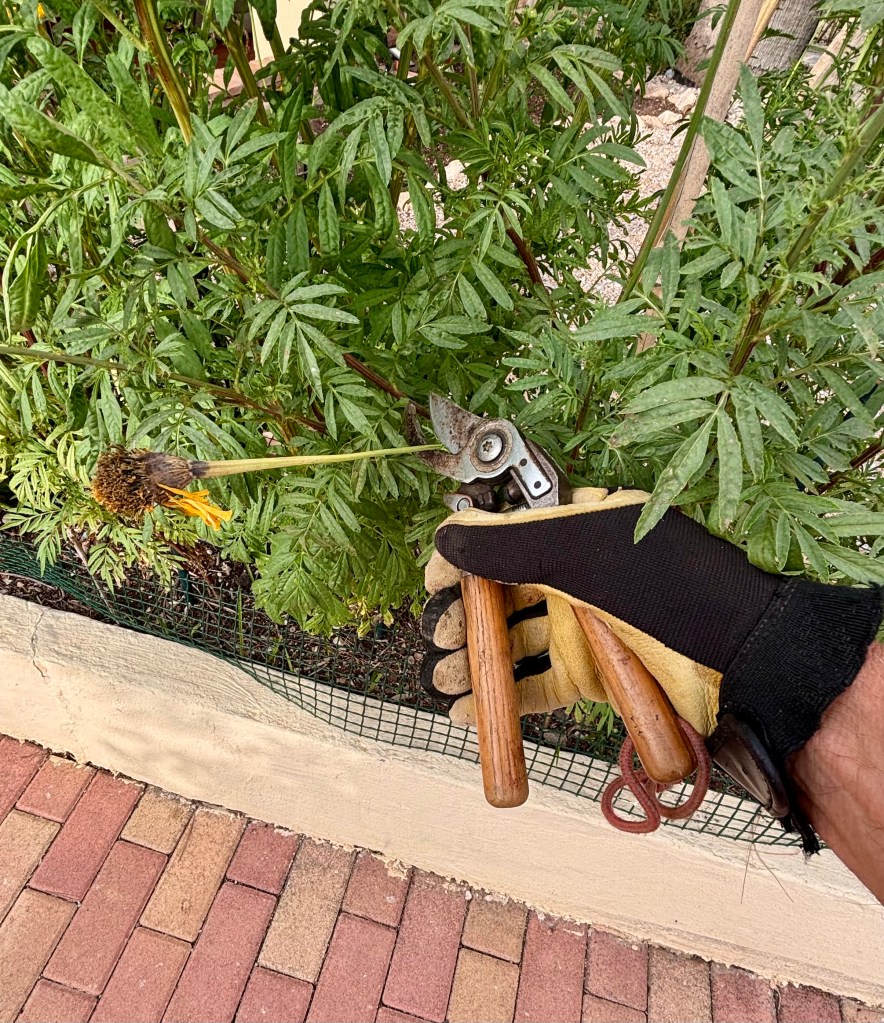
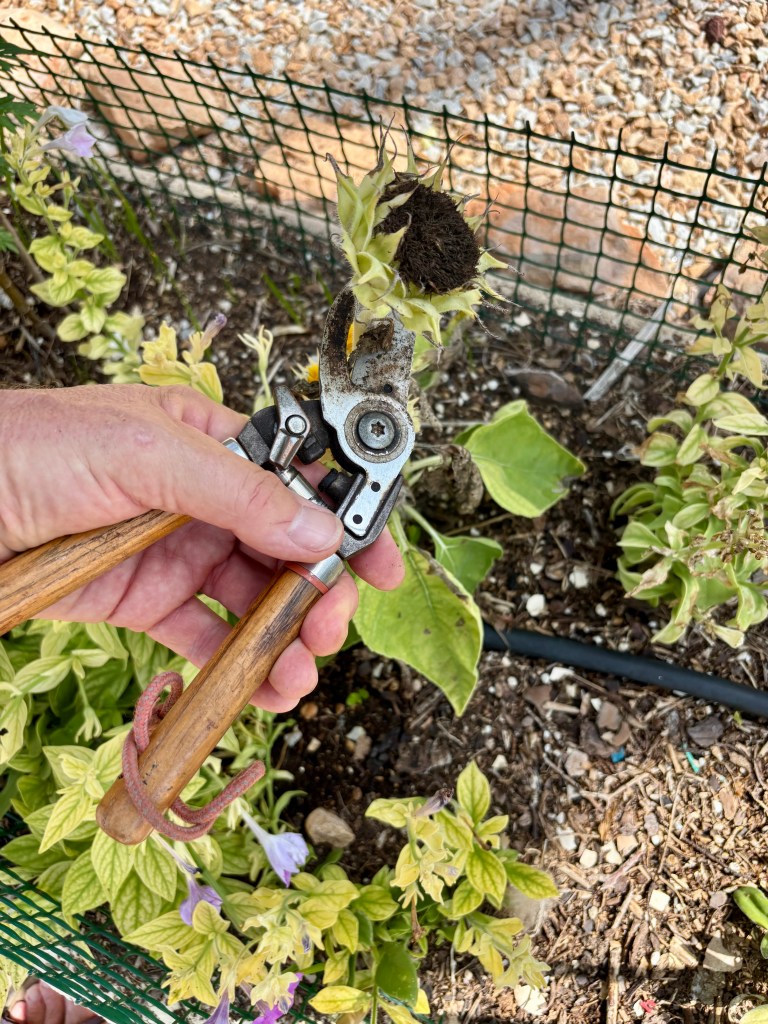
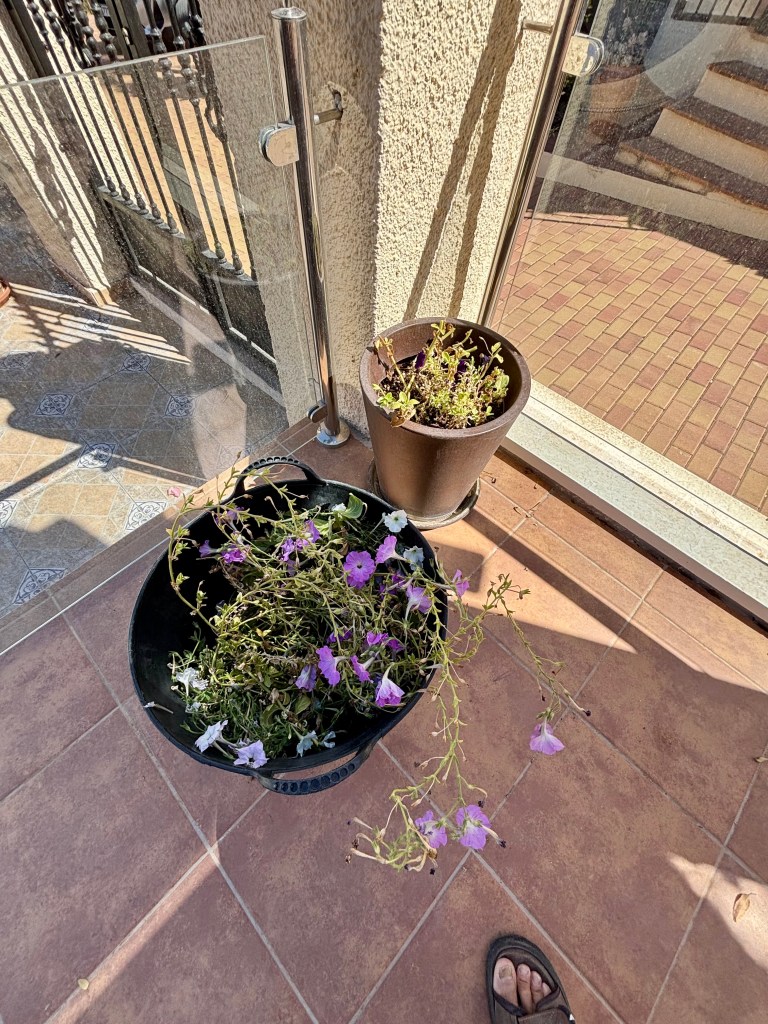
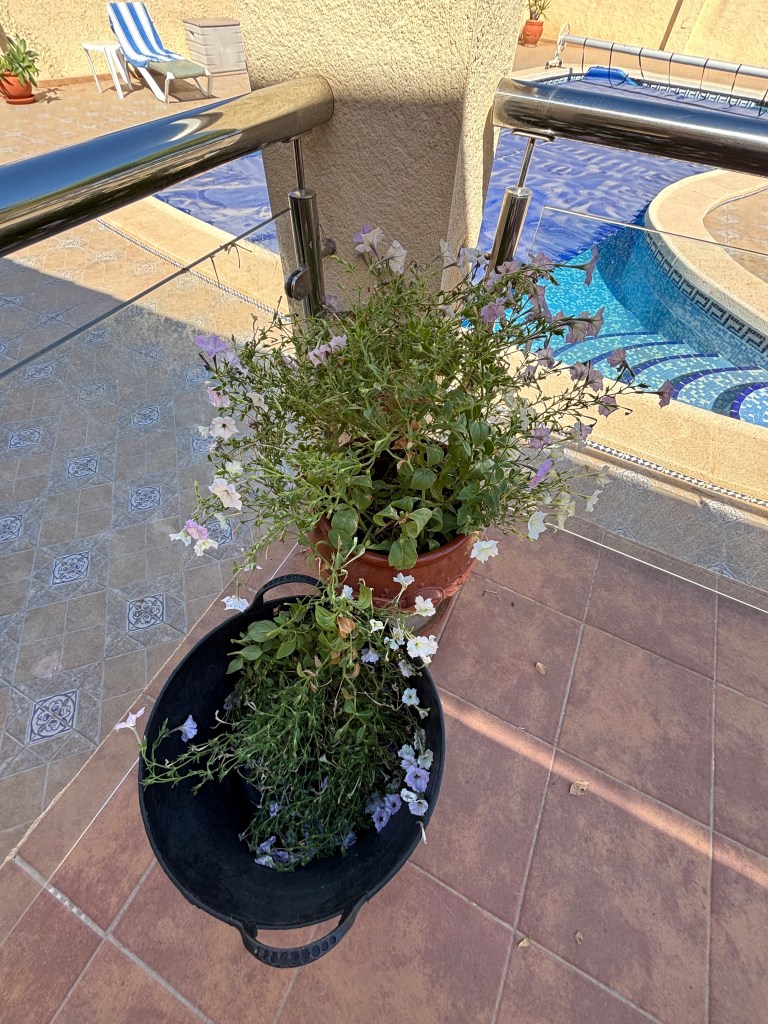
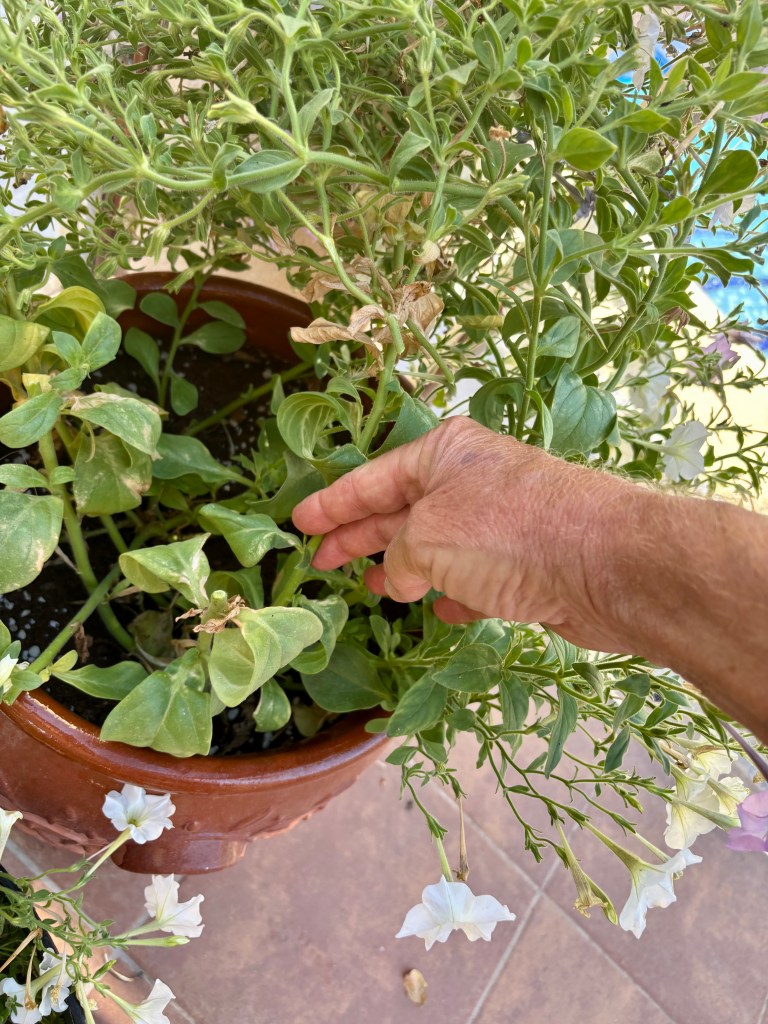
In addition to my normal deadheading I have had to make a drastic decision concerning my Petunias. Normally Petunias will reliably flower all summer and through to next Spring with just a bit of deadheading and tidying up. However, the heat this year has made them bolt and they have become leggy and straggly. I took the decision that they would not make it through the year unless I took drastic action. This meant cutting them right back, giving them a feed and hoping they will come back in the Autumn. The photos below show the Petunias haircut.
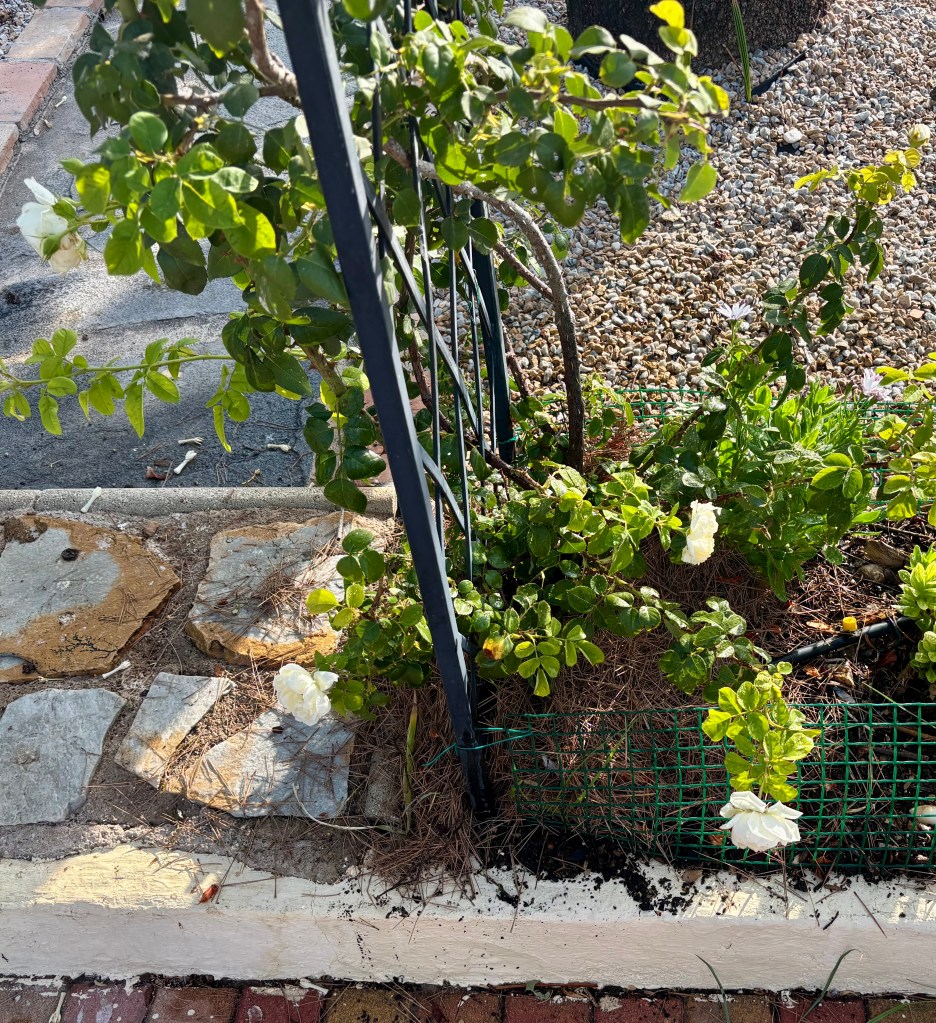
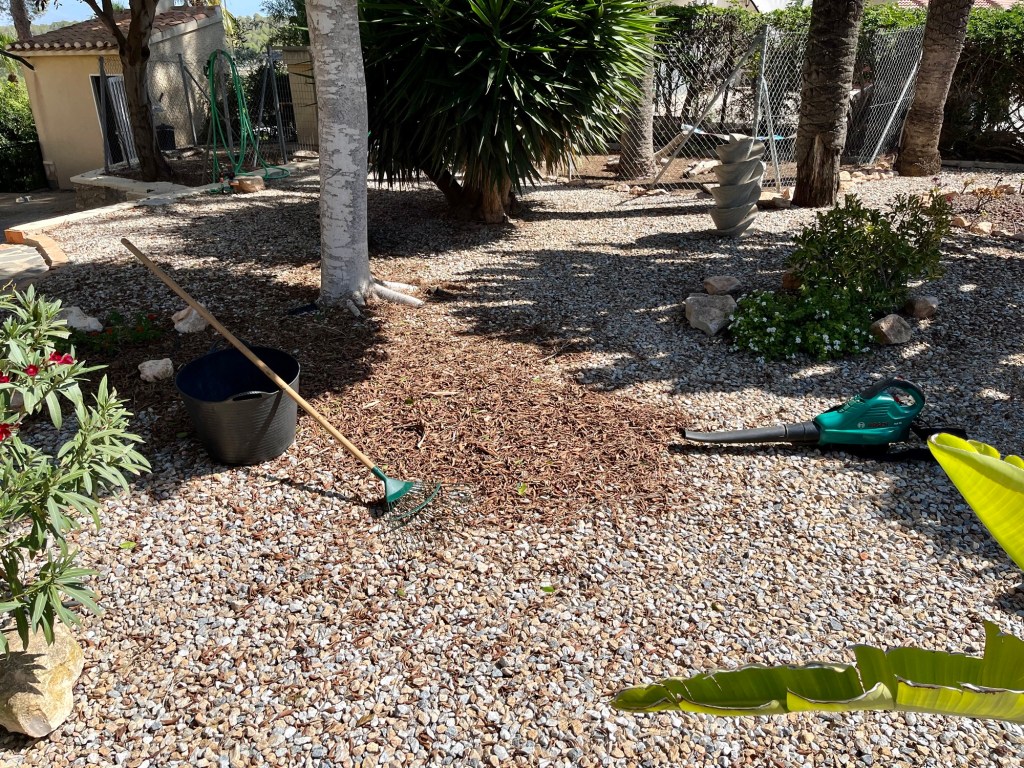
Mulching with pine needles. In the incredible heat we have had this summer I have been manfully attempting to mulch around plants that were suffering. Mulching as you know seals in moisture and protects your plants roots from the worst of the heat. Up to now I have been using compost and bark chippings but have always had a prejudice about using pine needles as I believed that they would overly acidify my soil. However, after a bit of basic research, I have been an idiot, it is not in fact true. Whilst pine needles may add a little bit of acidity it is nothing to worry about.

My research has changed my whole approach to pine needle mulch. Especially as I have a whole forest of pine needles in the wild wood part of my garden as can be seen in the photo below.
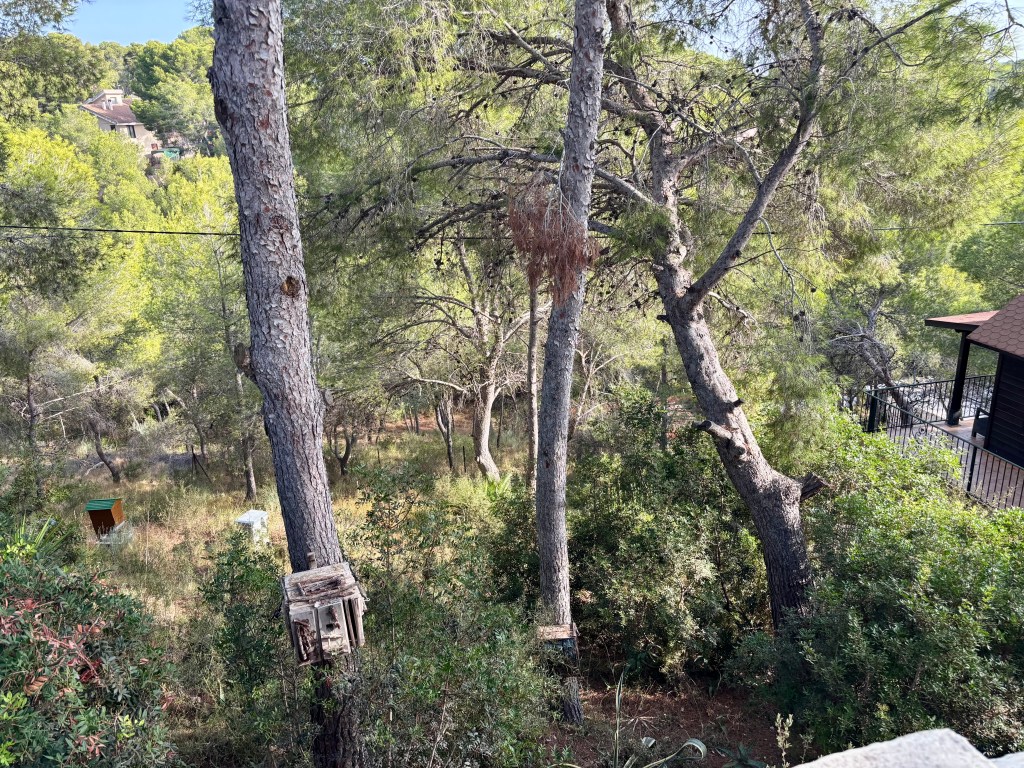
My future source of muchomulcho

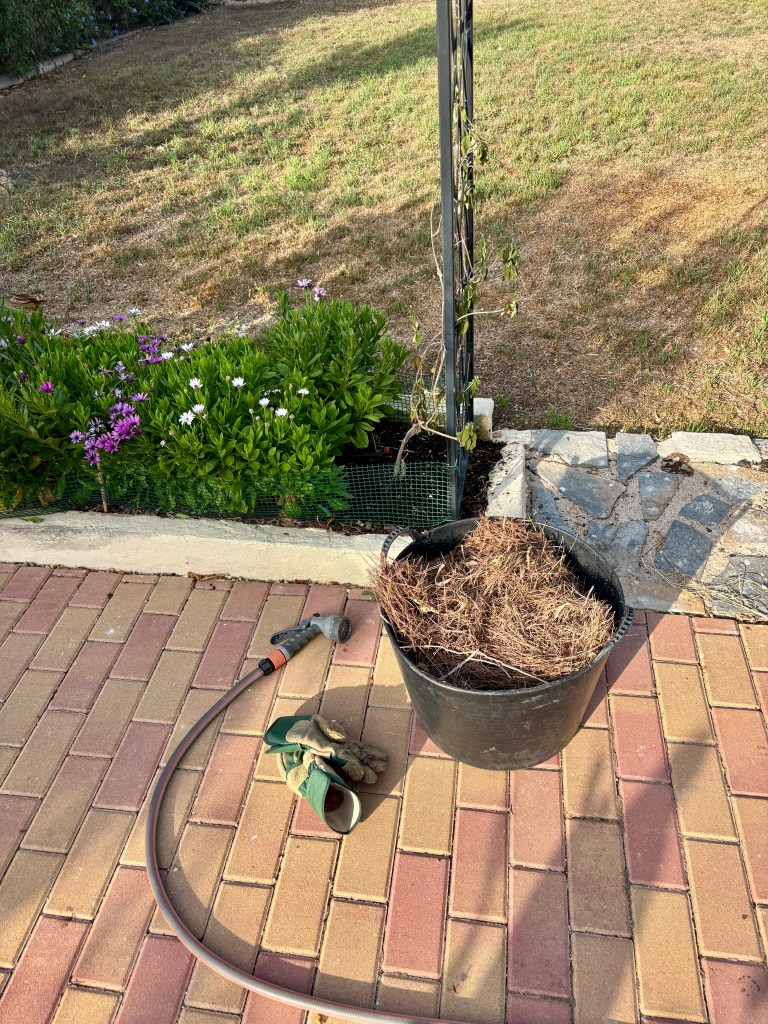
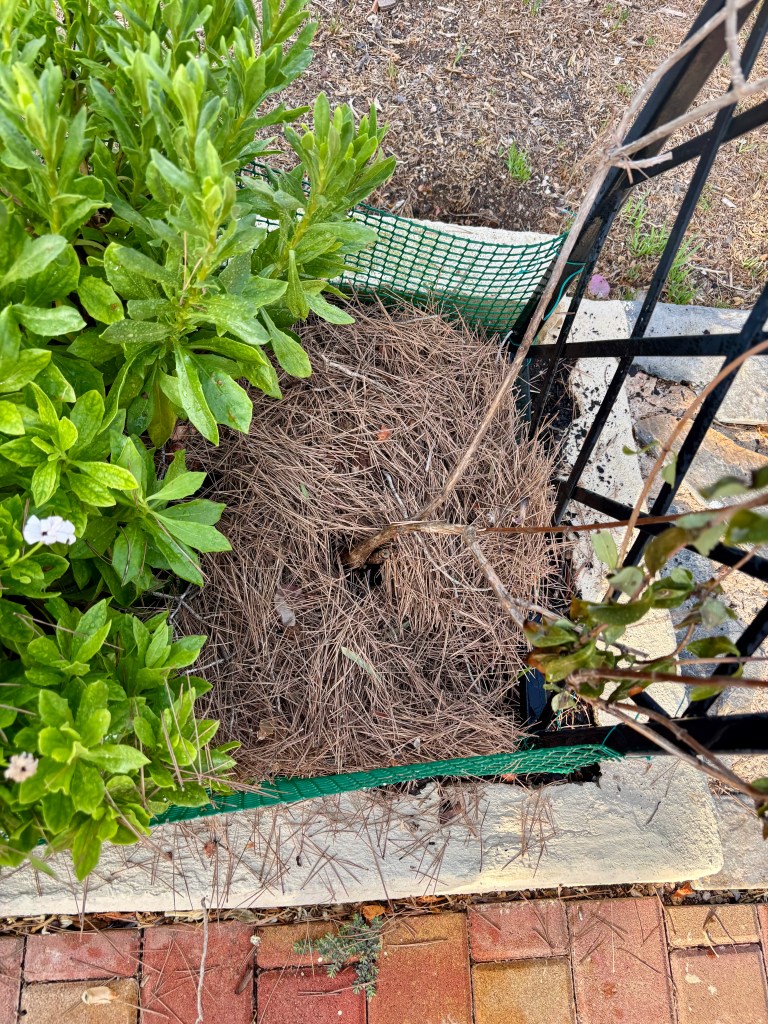
Armed with my new abundance of pine needle mulch I have been cheerfully stuffing it under and around my perennials. I have had such fun I will probably mix various amounts into my winter compost top dressing. See photos below.
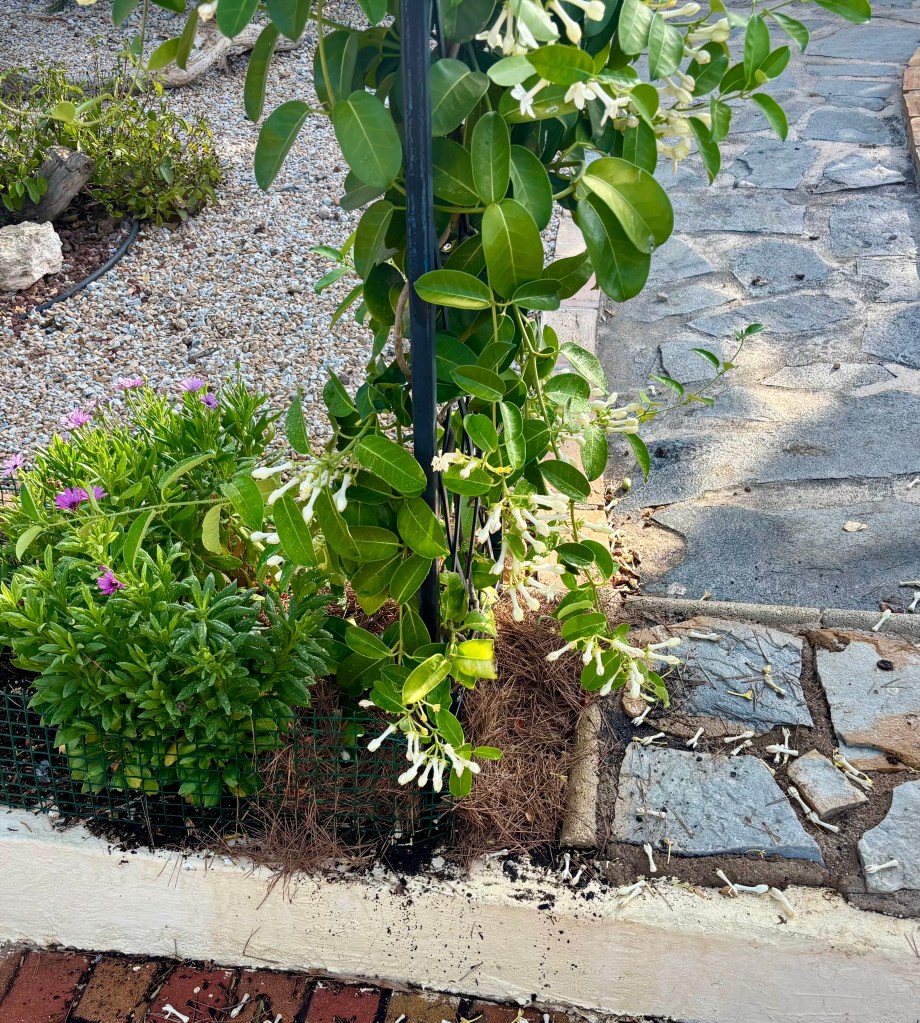
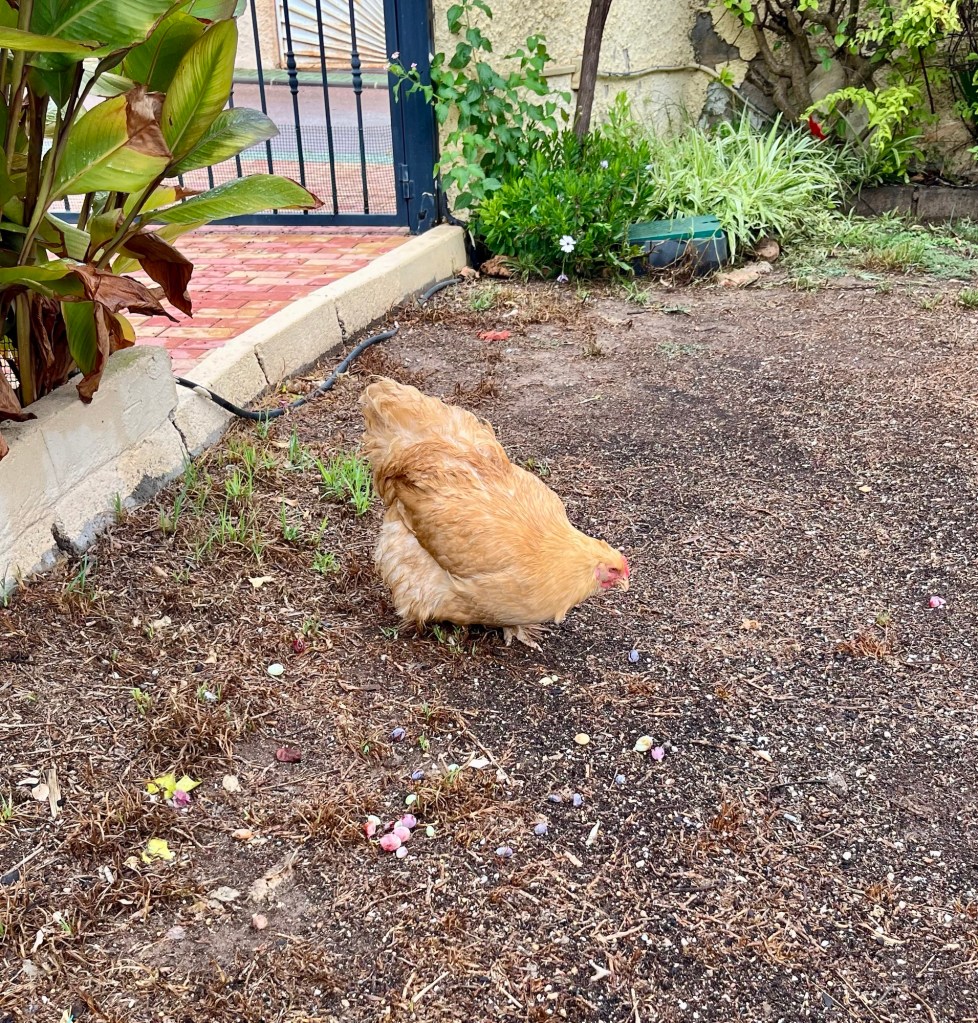
Dealing with my lawn. I assume most of you won’t have lawns; mind you neither technically do I. My lawn now resembles the Kalahari desert only with chickens instead of camels. The photo below is worth a thousand words.
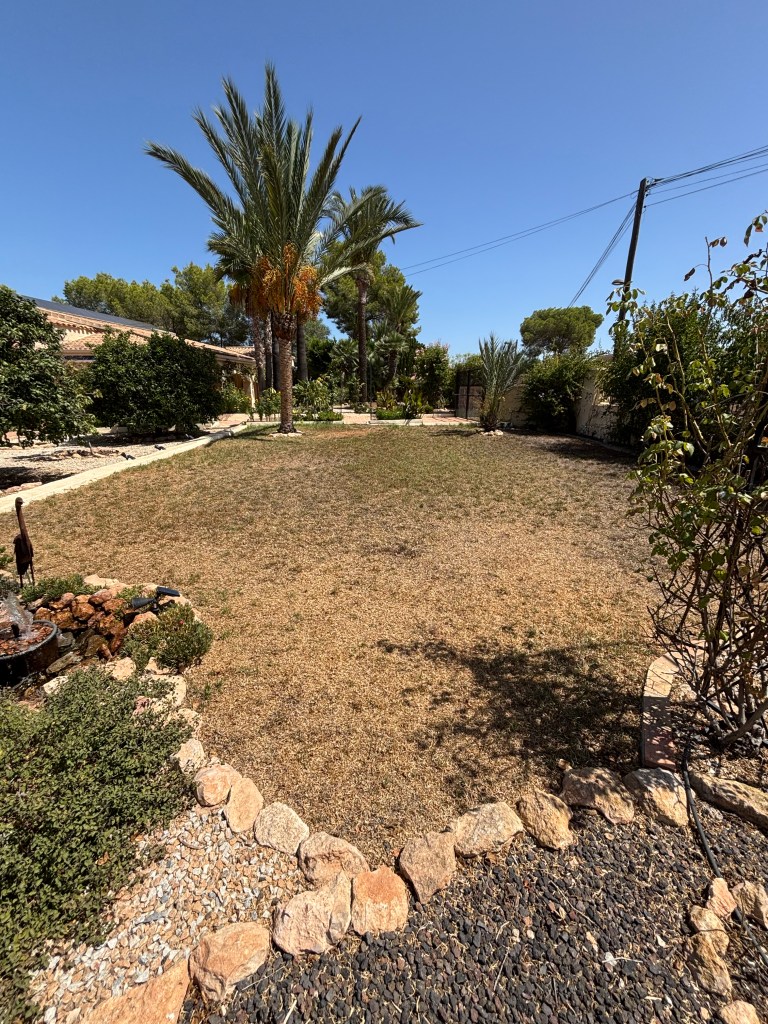
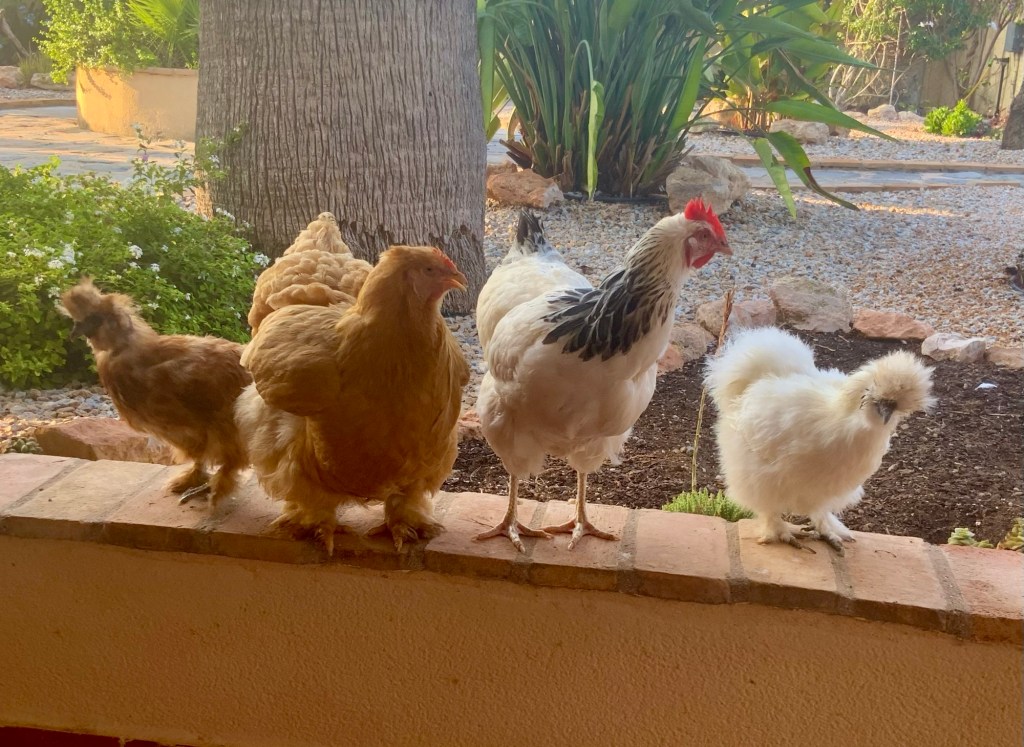
My future Chicken Theme park Chicken World

Yes, I know, I can hear you tutting serves him right for having a lawn in Spain. The alternative, as suggested by Cruella (my wife) is that I should turn it into a chicken theme park. She already has a business plan and envisages making lots of money from inviting other chicken owners to bring their girls for a day out. She has even thought of a name “Chicken World” and some rides:

  • The Chicken Run – a fast roller coaster
  • Cluck & Roll – spinning coaster
  • The Eggstreme – terrifying drop ride
  • The Hen Hang-Up – giant swinging ride
  • Flight of the Chicken – flying ride
  • The Rooster Rocket – high-speed launch ride
  • Wing & Scream – scary roller coaster
  • The Great Eggscape – escape-themed dark ride
  • Feather Fury – spinning thrill ride
  • The Coop Loop – looping coaster

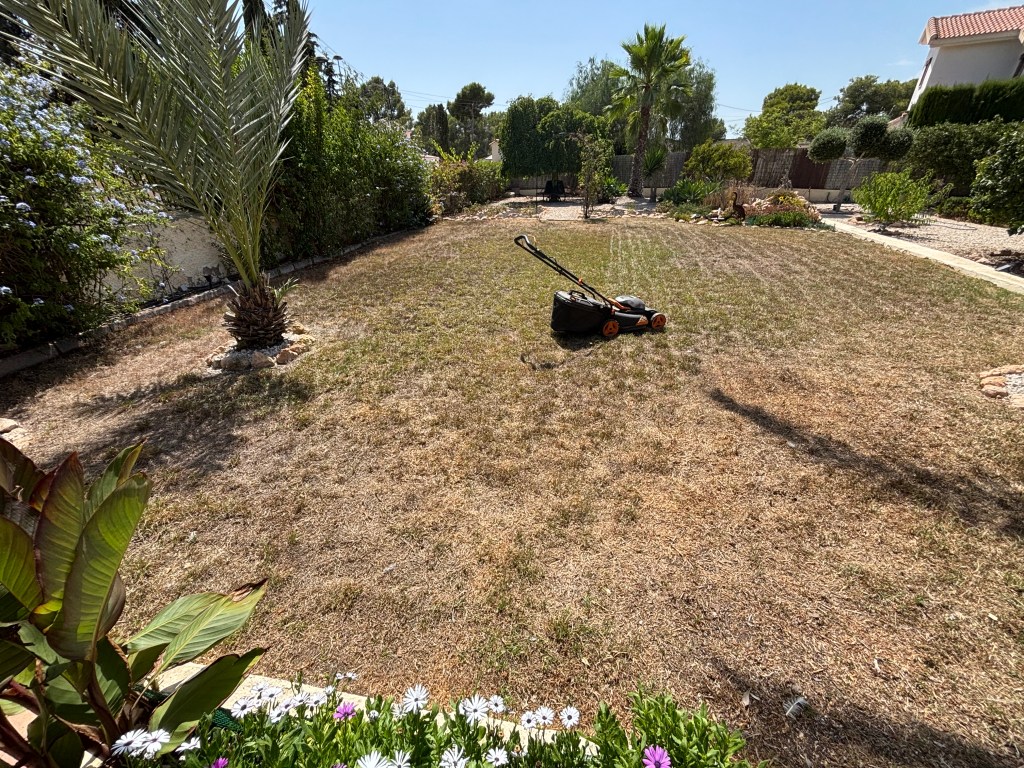
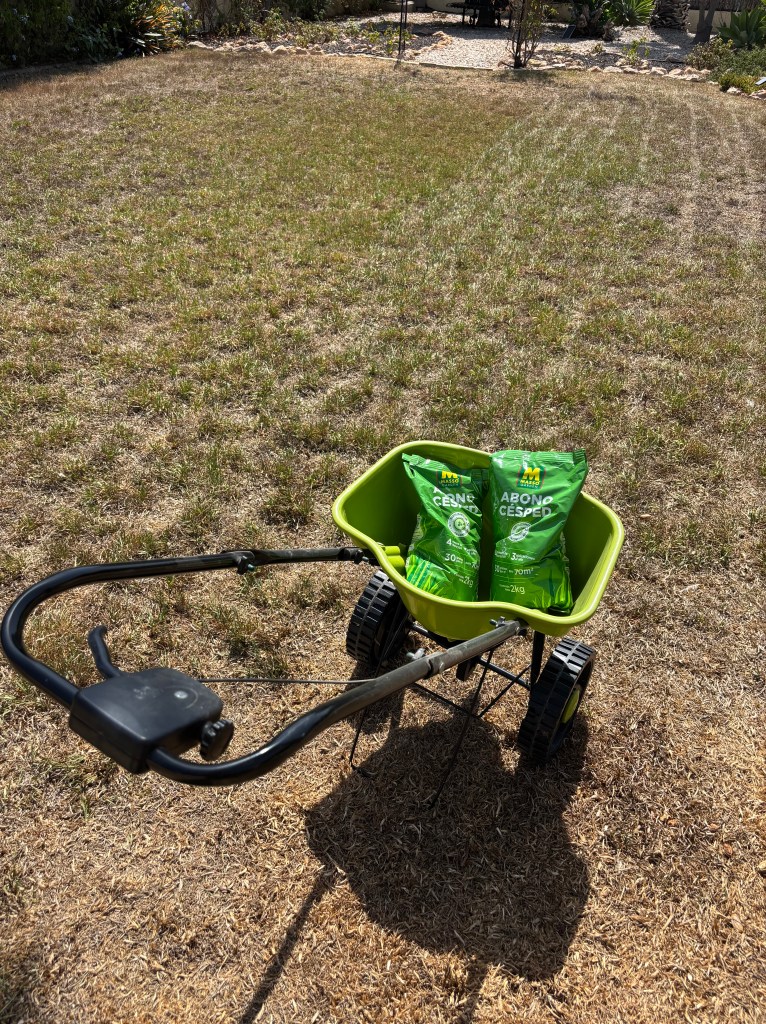
But putting all this silliness aside, if you have a lawn you don’t need to do too much till the winter scarify. But in the meantime, keep your lawn tidy with the tiniest of trims and give it a feed. See photos below.
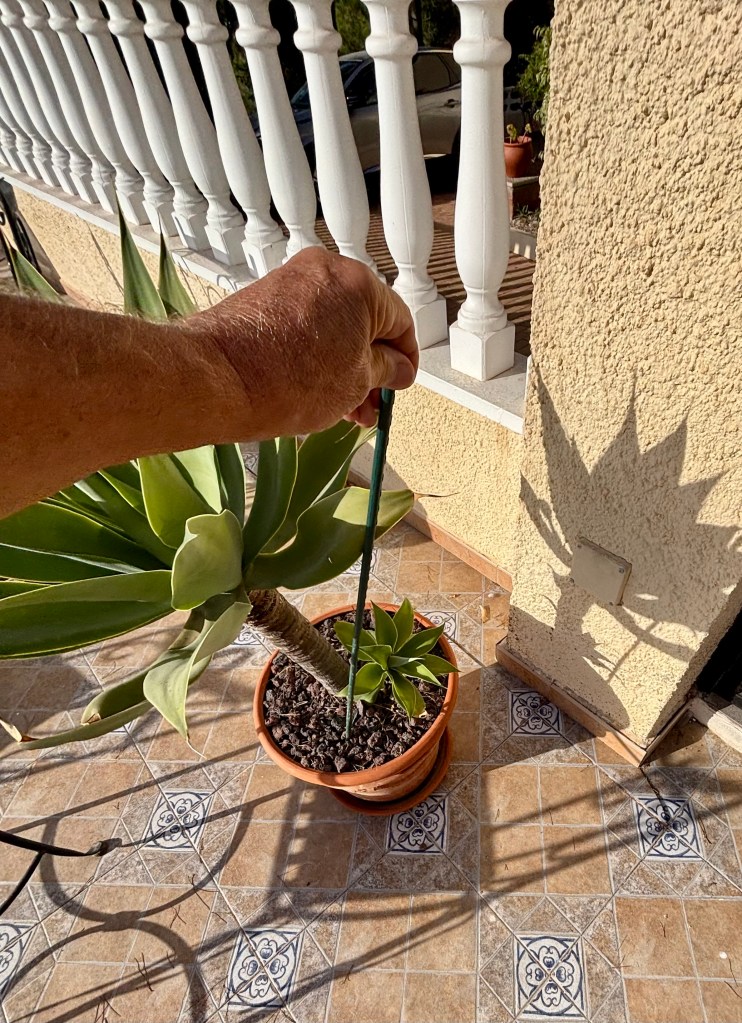
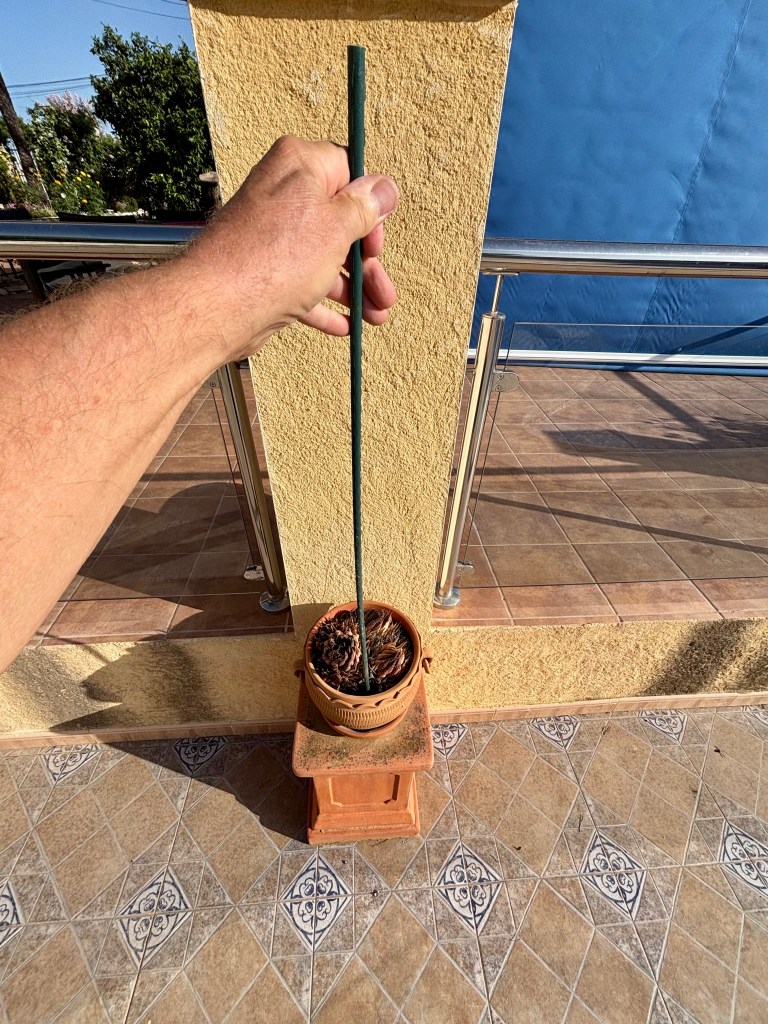
Loosening compost in my pots. It has been a long hot summer and if you look into your pots you will see that the compost has shrunk away from the edges of the pot and become compacted. If you leave it like this, then when you water the water will just run down the inside of the pot and exit through your drain holes leaving your plant roots completely untouched.

To overcome this and save your plants, take a cane and push it into your pot at various points and wiggle it around. This serves two purposes. Firstly, it loosens your soil and eases the compaction. Secondly, it provides vectors that allows the water to flow into your soil. This extremely complicated process is shown in the photos below.
Mourning my pomegranates. In my last blog post I talked about netting figs etc and how important it was before the fruit got ripe. I explained that the birds soon recognise exactly when the fruit can be eaten.

Despite my warnings I have been devastated by the loss of my meagre pomegranate crop. I only have one pomegranate tree and that self seeded in my hedges. Despite not being the planter of the tree, I have assiduously cared for it over the years and it has rewarded me with 5 or 6 pomegranates a year. Well not this year, I failed to take my own advice and didn’t notice the fruit becoming ripe. The result is the devastation below.
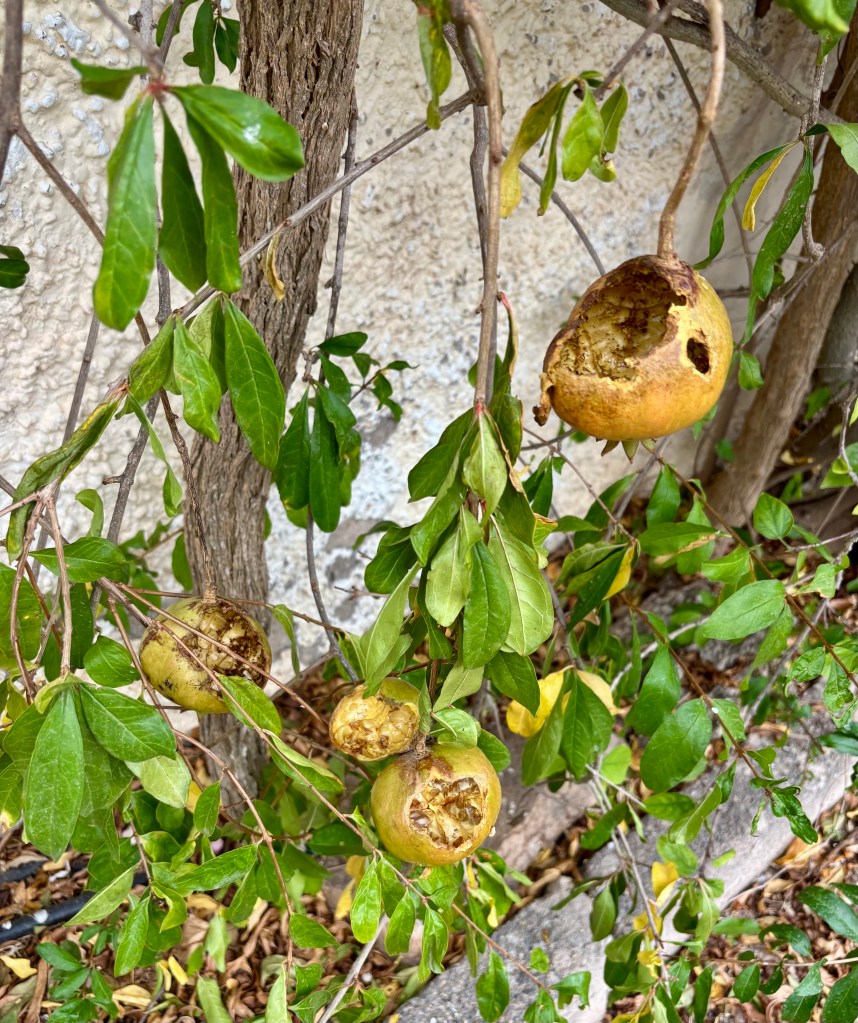
I think the chickens tipped off the birds.

It is time to get out there and gather seeds

Gardening never stops, it just has lulls. Technically a lull is a time that is less frenetic, when you can take stock, look around and begin to plan for the future. Now is our autumn lull, summer flowering is over and it is not yet time for our big winter cutback.

This is the perfect time to wander round your garden and look for seed heads and potential self seeding seedlings. So come on let’s get gardening.

29th September 2025. Things I have been doing lately:

  • Assessing flower beds
  • Checking for seedlings
  • Gathering seeds
  • Planning my lawn renovations

Assessing flower beds. By now most of the plants in your flowerbeds will have gone to seed or just gone over and died right back. You should now be going through your flowerbeds forensically examining what to keep, what to cut back, what to put on the compost and what will offer you seeds for next year.

The photos below show my forensic trawl taking out what needs to come out and overall assessing space for upcoming plants.


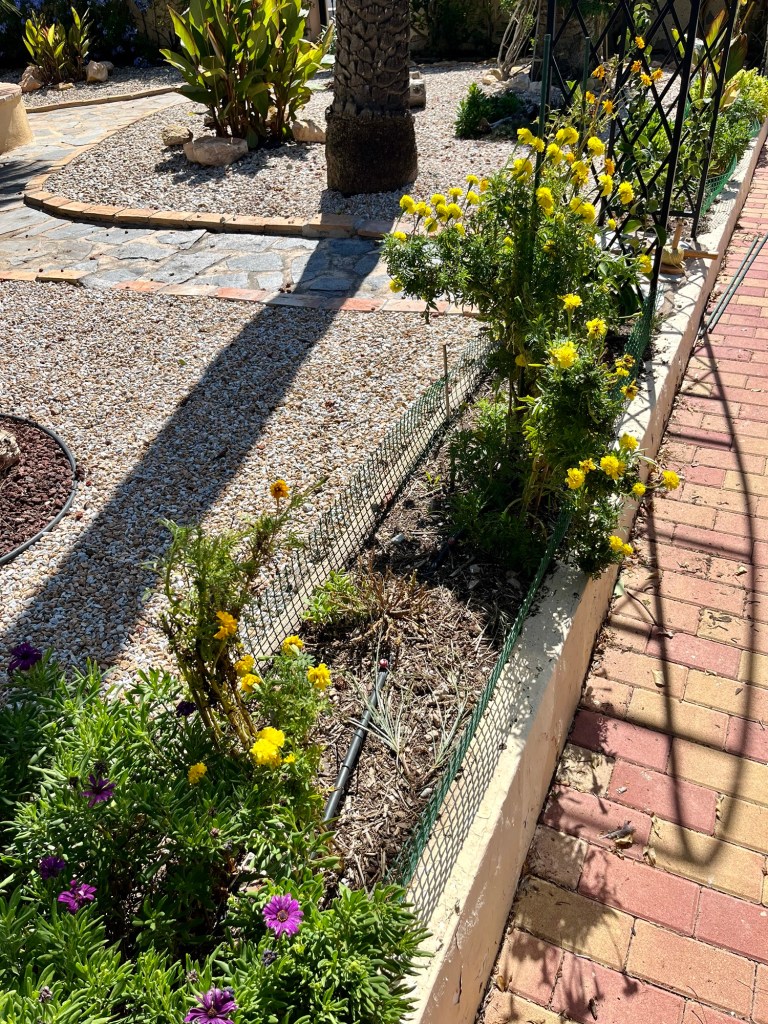
Checking for seedlings. Once I have removed or cutback and assessed what potential there is for seedheads, then I look carefully for seedlings coming through. A mainstay of my flowerbeds is Osteospermum (Daisy). This a is a free flowering self seeding perennial champion that will never let you down. Each year I will take the floppiest specimens out, cutback those with potential, and leave space for their self seeded seedlings to come through. The photo below shows the lovely little seedlings peeping through.

In a month or so when these have grown a bit bigger, I will either pot them up into seed trays or sometimes, I just relocate them into the positions I want them. Either way, it is hundreds of free plants.

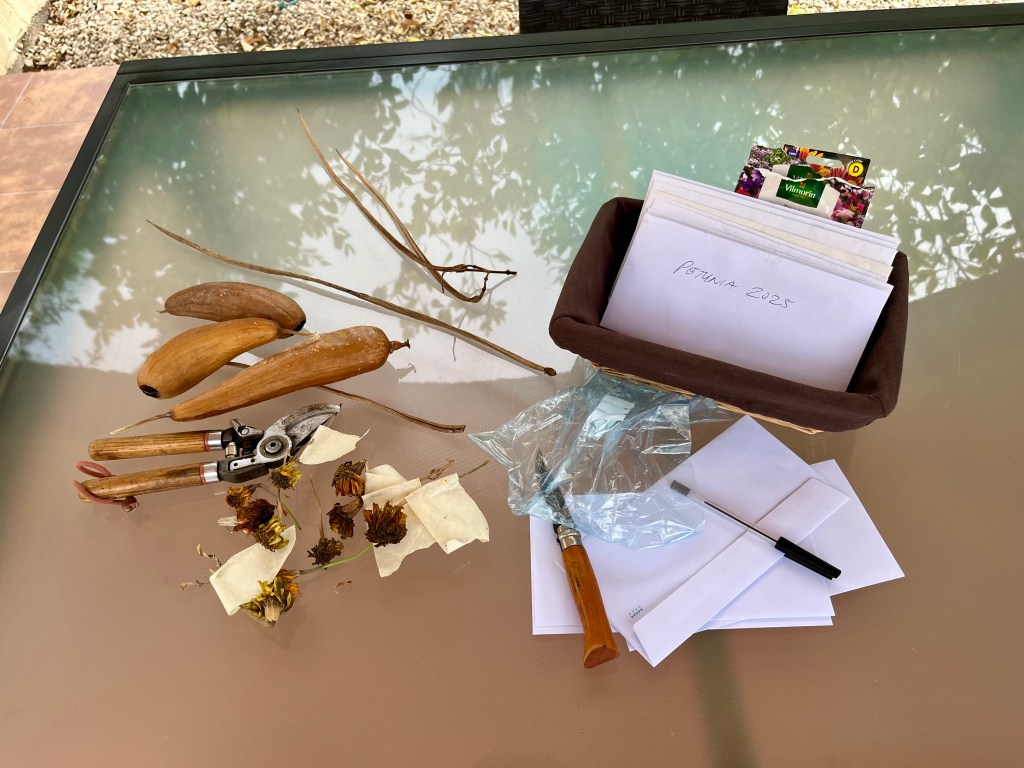
Gathering seeds. Once the flowerbeds have been examined it is time to begin looking around for seedheads. The photo below shows me setting off with my secateurs, gardening knife and plastic bag to hold seed heads.
If you just look in your garden there will be hundreds out there. I gathered the following:

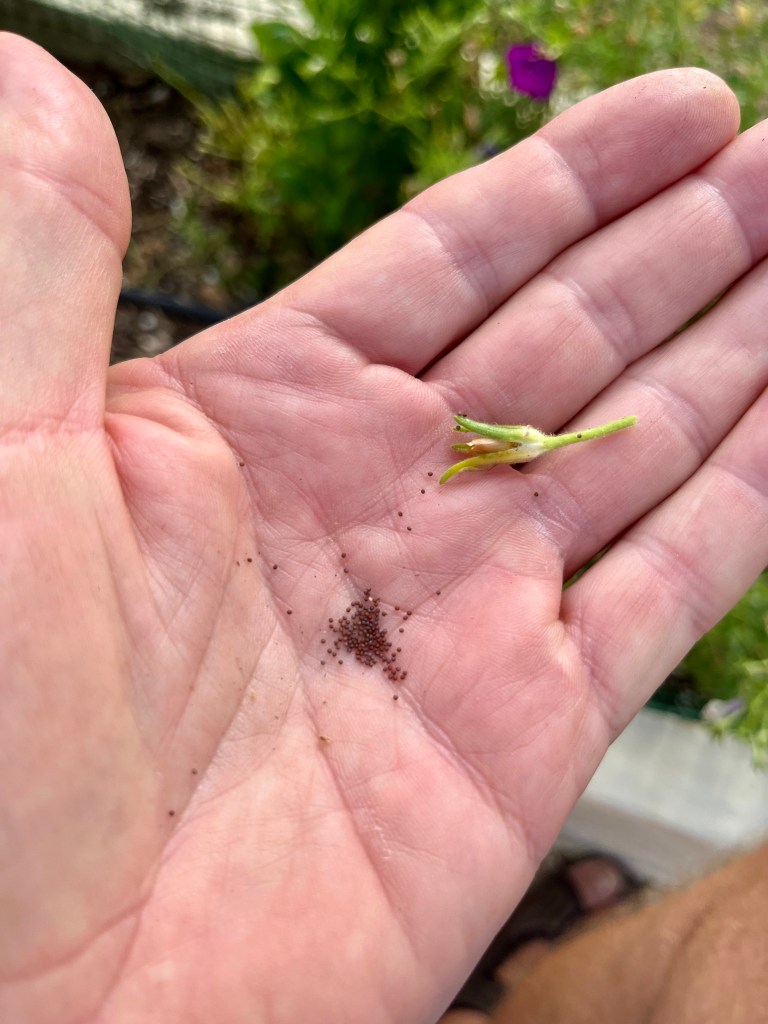
Petunias. This was my first time growing Petunia and they were a great success. The seeds heads are very tricky so don’t be put off. The seedheads are small and seeds are like dust. You need to get the seed head when it is just beginning to open and has a brownish look to its tips. See the photos below.

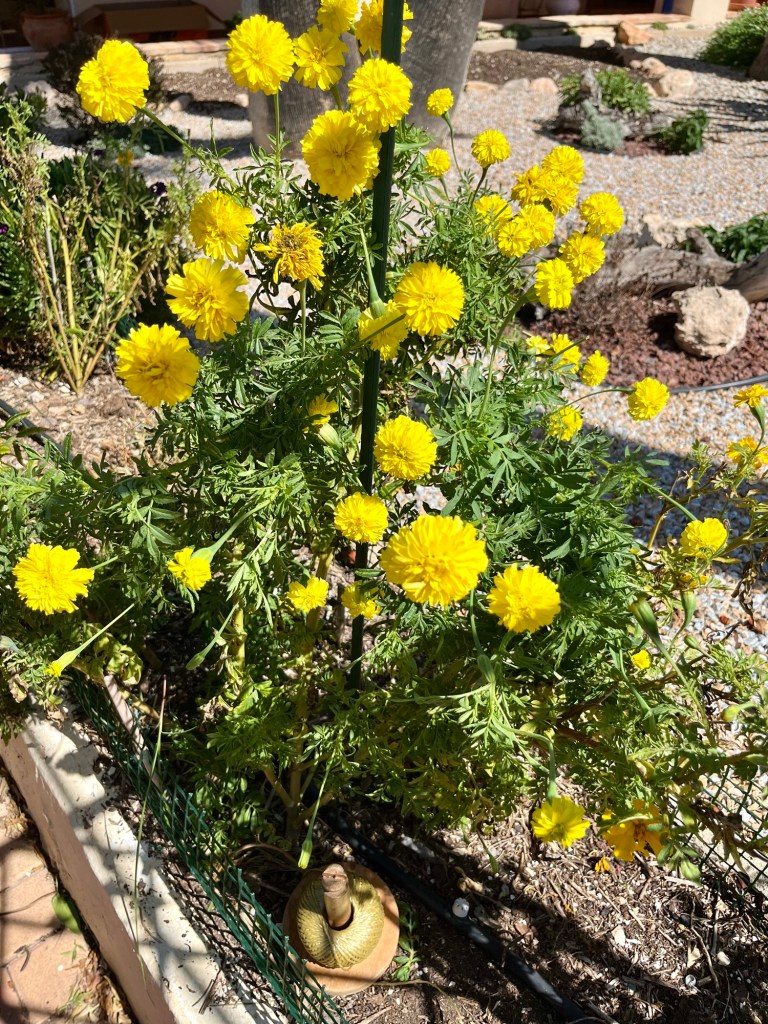
Marigolds. Another of my garden stalwarts and a great source of seed. I normally mark up the most promising flower with a piece of masking tape so that when it comes to collecting seeds, I can identify them. The photos below show my marked up seedheads ready for harvesting.

Each Marigold seedhead will provide you with hundreds of seeds. All you have to do is clean the seedhead up and then roll it between your thumb and forefinger and let the seeds cascade into your palm.

Pink Trumpet Vine. The pink trumpet vine has dramatic seedheads that are a decoration to the garden in their own right. Each seedhead is long and thin and can grow up to almost a metre in length. My tower of flower is covered in these lovely seed casings. See the photo below.

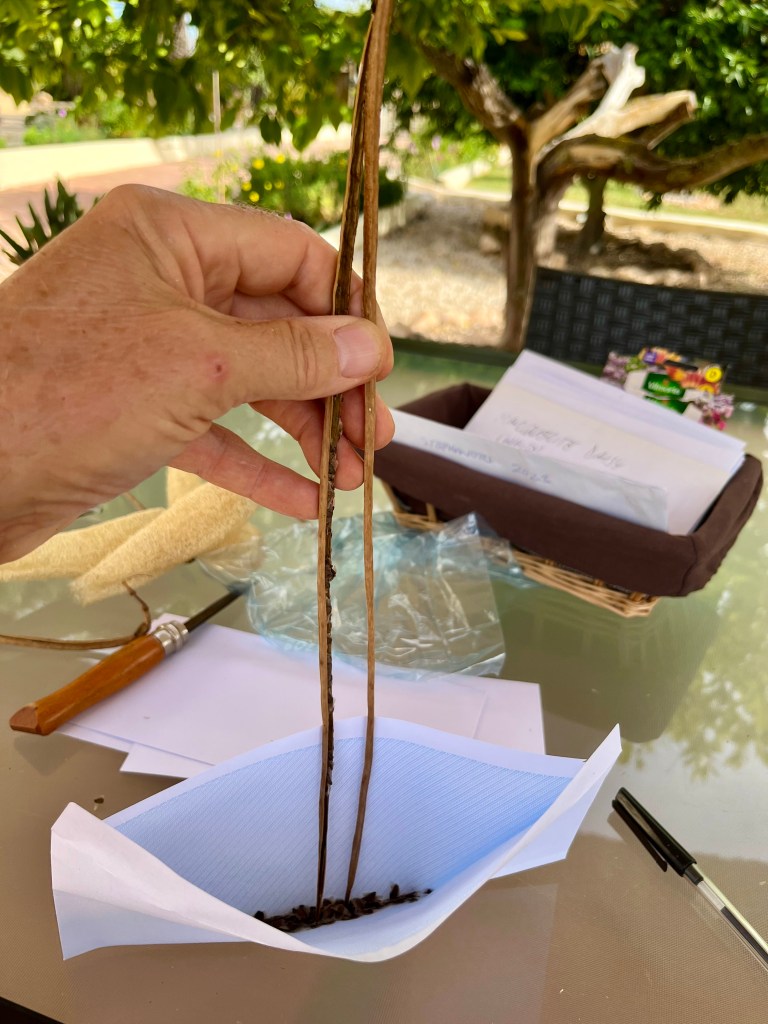
The secret with Pink Trumpet is to wait till the seed casings are completely dry and brown. Once they are ready they will easily split vertically to reveal their row of seeds waiting to be harvested. Don’t harvest these on a windy day as the seeds are meant to be airborne so will just blow away. Instead split the casings over a waiting envelope and let the seeds fall in. See photos below.

Loofahs. Some of your loofah seedheads should be ready by now, and again they must be fully brown and dry. In addition, to make sure they are ready, give them a little shake, and if they are ready you will hear the seeds rattling around inside. Don’t make the mistake of thinking your Loofah plants have died back, they have a habit of putting on another spurt of growth and producing new pods. The photos below show below shows some of my loofah ready to harvest.

With Loofahs you want to collect both the seeds and the pod itself. Regular readers will know that the pods have great exfoliant powers and are wonderful in your shower. I harvest quite a lot of these and sell them on to Cruella (my wife) and all the friends in her coven. They fly in from all over the netherworld as Loofahs are capable of removing even the most stubborn nose wart.

To access the seed crack open the top and pour the seeds into your palm. To harvest the pod just roll the pod between your hands till it cracks, peel of the dead skin and there you have it a loofah.

The final results of my efforts can be seen below. These will be safely stored in the dry and the dark, till God willing, I begin to work with them in the Spring.

I garden with tears in my eyes and the chickens gamble for Tango’s things

We all knew it was coming but it is now official; Tango the lonely blind Labrador is lonely no more and he can see. He has gone to be an Angel in God’s garden, joining his brother in chicken free glory.

We better get on with the gardening or this will end up as a tear stained blog filled with memories and no plants.

10th September 2025. Things I have been doing lately:

  • Giving hedges a little trim
  • A bit of messing around with trees
  • Beginning to harvest grapes
  • Using Cathie’s big pots
  • Tango bids farewell amidst unsightly chicken behaviour

Giving hedges a little trim. If you have hedges now is not the time to undertake a big cutback, that can wait till January. However, if your hedges are getting in the way of other plants or are stopping you walking round your garden, then now is not a bad time to get them back into shape as September is still warm and there will still be growth.

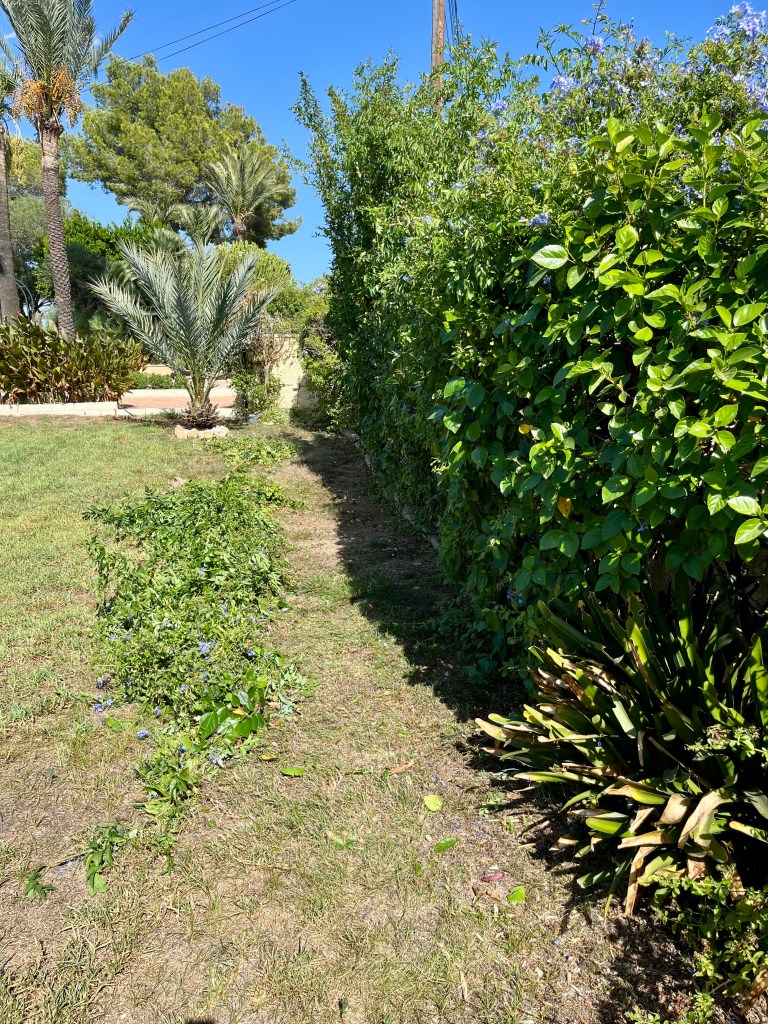
Some of my hedges overlook my lawn, and as such they shade part of the grass, more importantly they will impede my lawn work in October. The photos below show the problem.

Using my long handled hedge trimmers I just gently took off the ends of the main branches to expose the lawn ready for scarifying, top dressing, reseeding and feeding in October. See the difference below.

A bit of messing around with trees. Just like hedges, you shouldn’t really cut trees at the moment. However, there are two things you should be looking out for and dealing with.

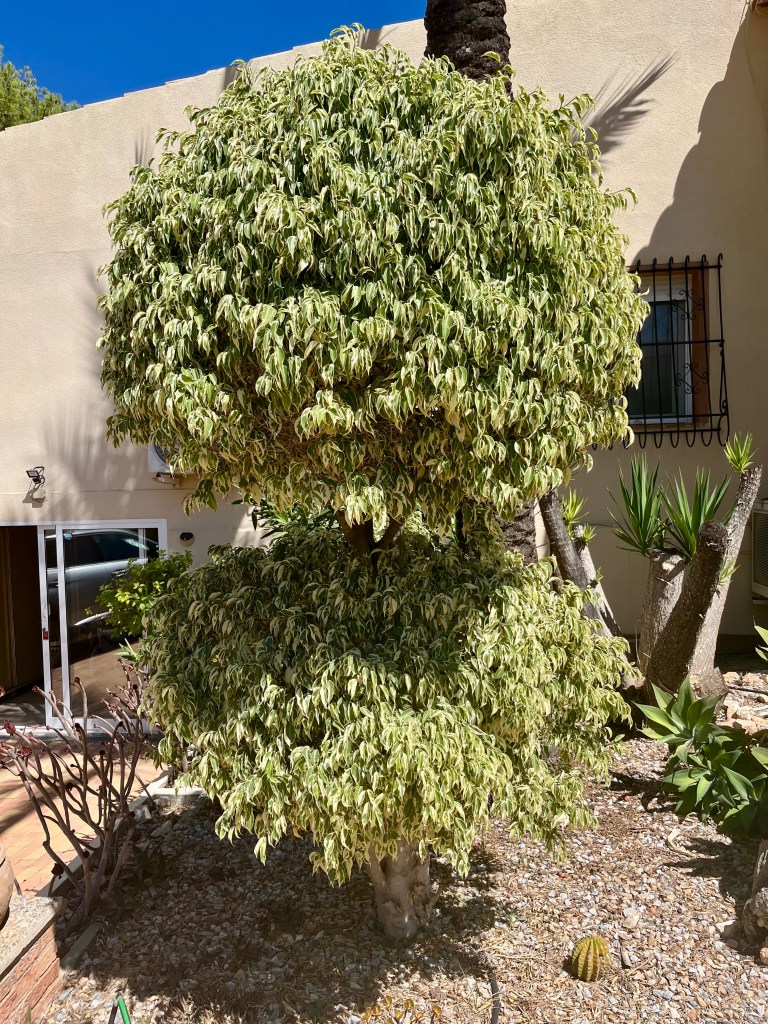
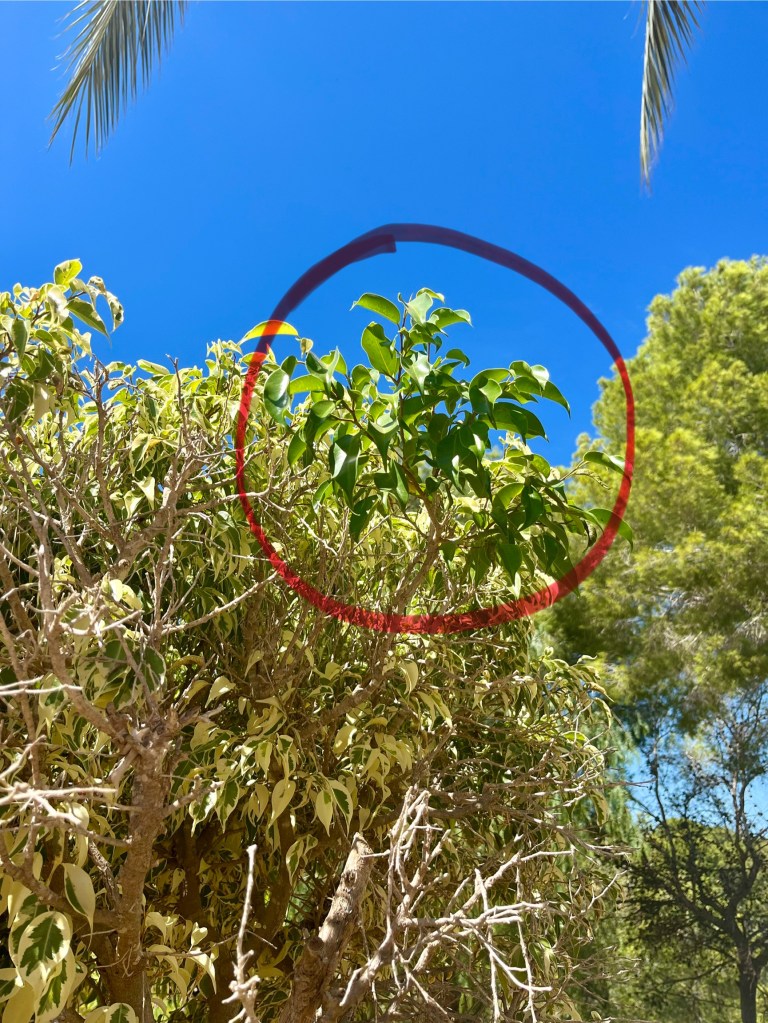
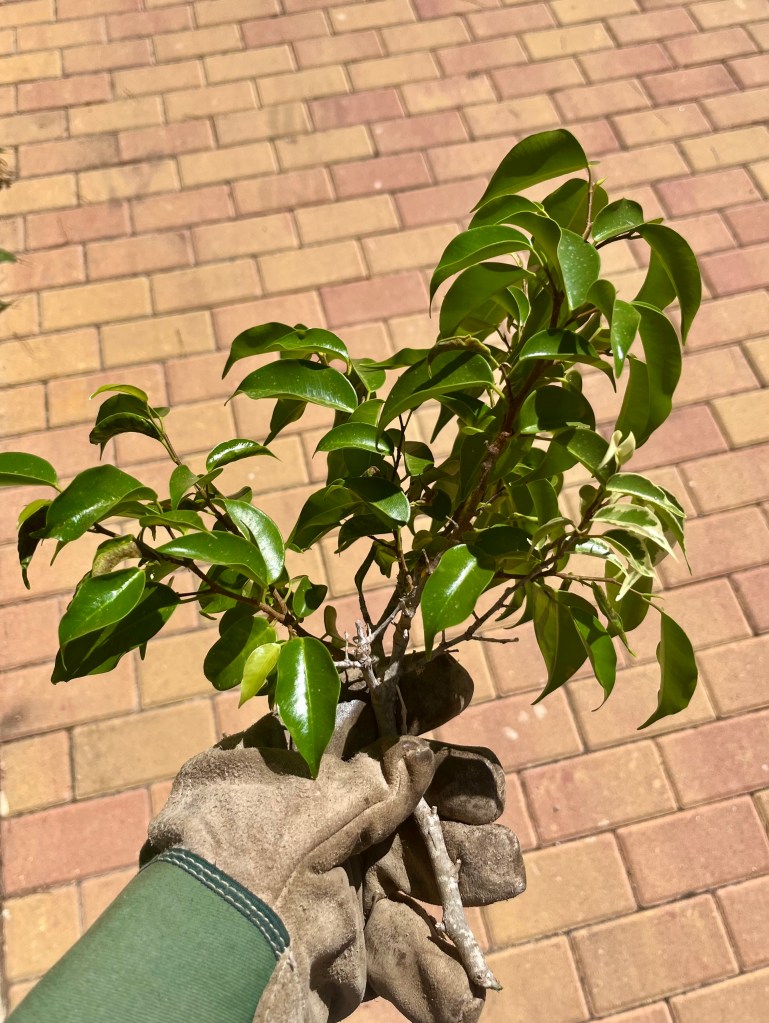
Firstly, if you have any variegated leafed trees then you need to keep an eye out for full green leafed growth. Fully green leaves have much more chlorophyll and are therefore better able to process sunlight than the variegated type. In effect this means if you do not cut out fully green growth then it will soon take over the tree and you no longer have variegation.

I have a weeping Ficus that I cloud prune, therefore I keep an eye on it for green growth. The photos below show my little tree, but then round the back I have discovered some full green growth. It had to go.

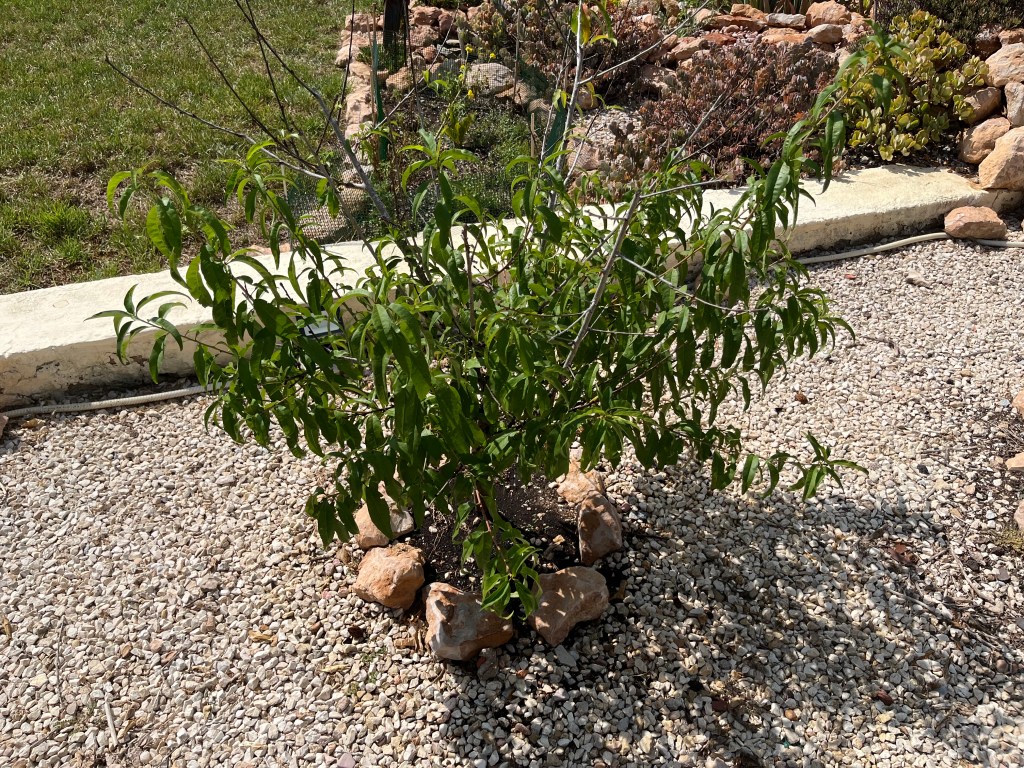
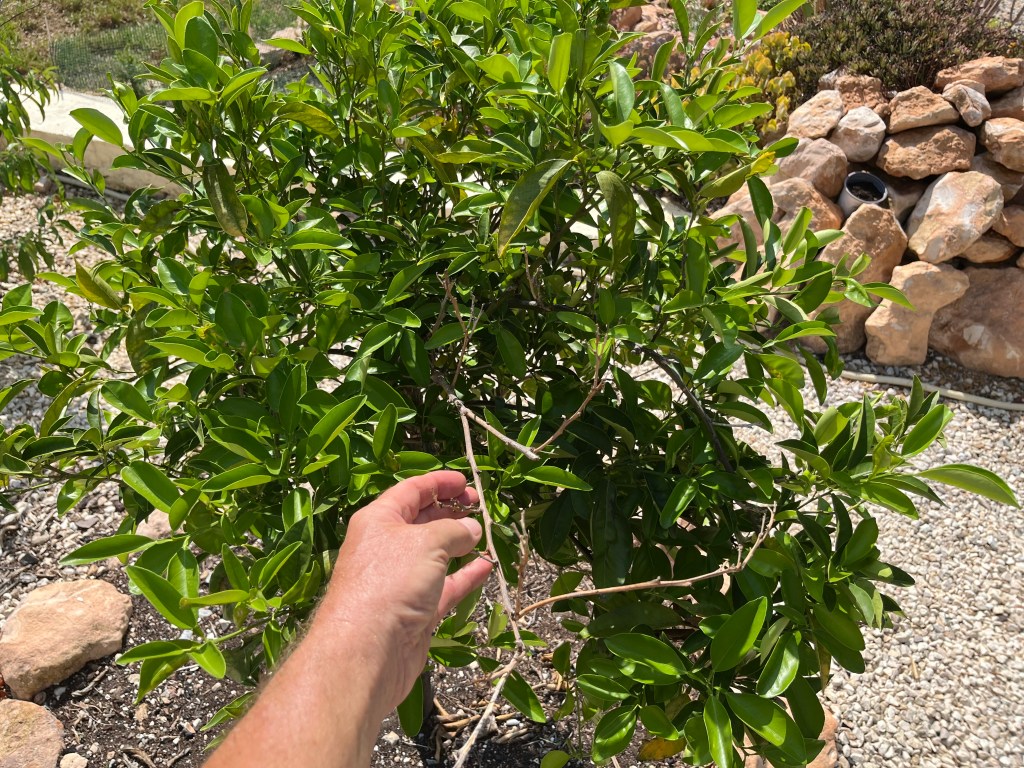
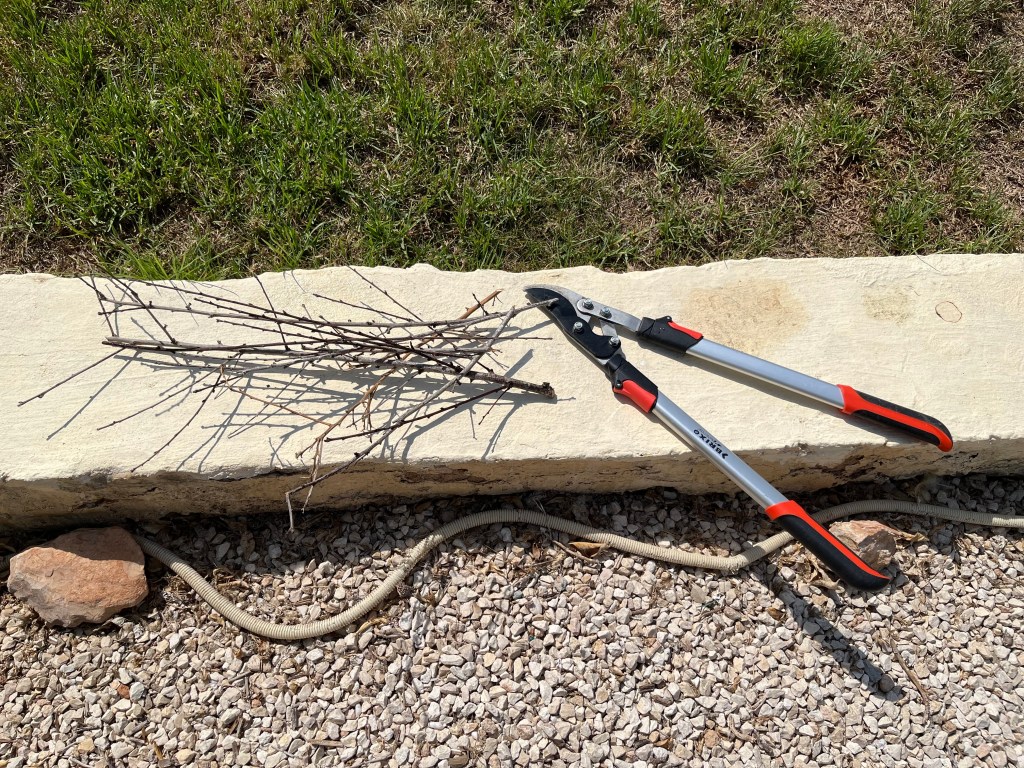
Secondly, If you have deciduous trees, that lose all their leaves in winter, then now is the time to look out for and cut out dead branches. Whilst the trees still have their leaves you are able to detect any branches that are totally leafless. Check that the branches are dead by scraping back the bark in a small area. If you see no green then the branches is dead. Just cut it right out at its base. The photos below show me taking out dead branches on a little peach tree.

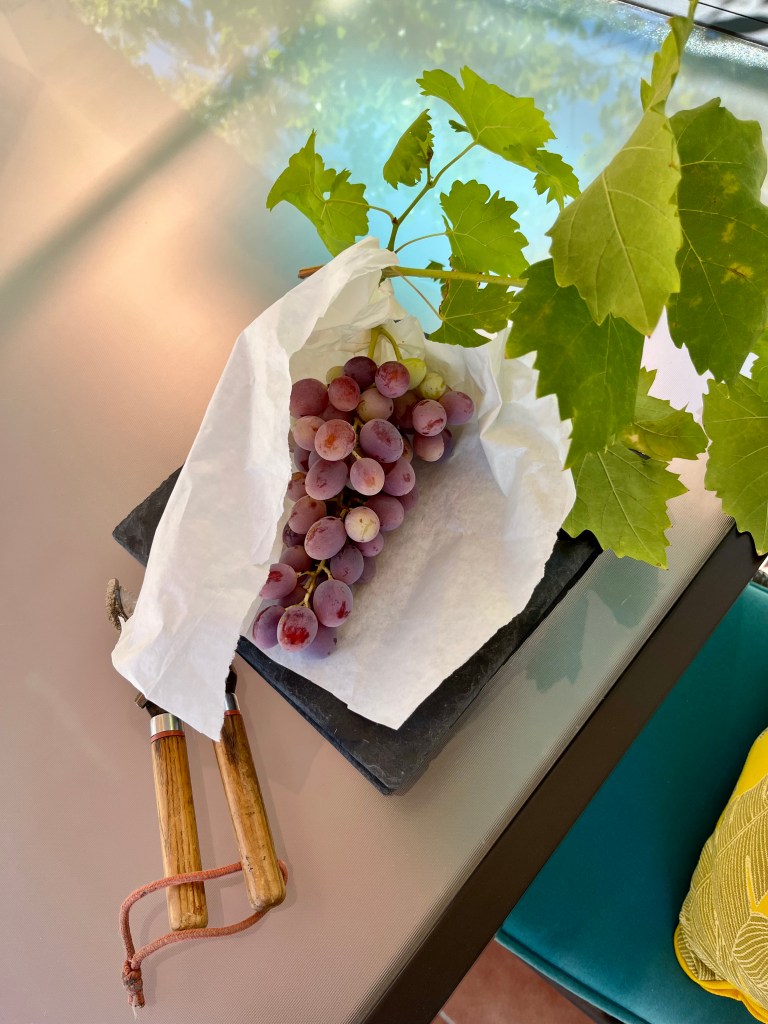
Beginning to harvest grapes. You will remember in a previous post that I recommended that you bag up your grapes to save them from pests and disease. Well if you did so then now is the time to begin harvesting.

On a weekly basis go round and look inside each of your little bags to see how your grapes are ripening. I recommend that you do not try to harvest them all at once, as they will ripen at different times, and anyway you can’t eat them all at once.

To harvest your grapes just cut the stem above the bag and remove your bunch. All you have to do then is give them a rinse, let them dry and refrigerate to eat at your leisure. See my efforts below.
Using Cathie’s big pots. My friend Cathie kindly donated two large interesting pots to me some 6 months ago. Cathie is one of those gardeners who has an eye for garden design, but an uncanny habit of killing any plant she touches.

Although I have pots, I never really consider myself a pot gardener. But these were too good to turn down so I have spent the past six months contemplating how to use them, what to plant in them and where to put them.

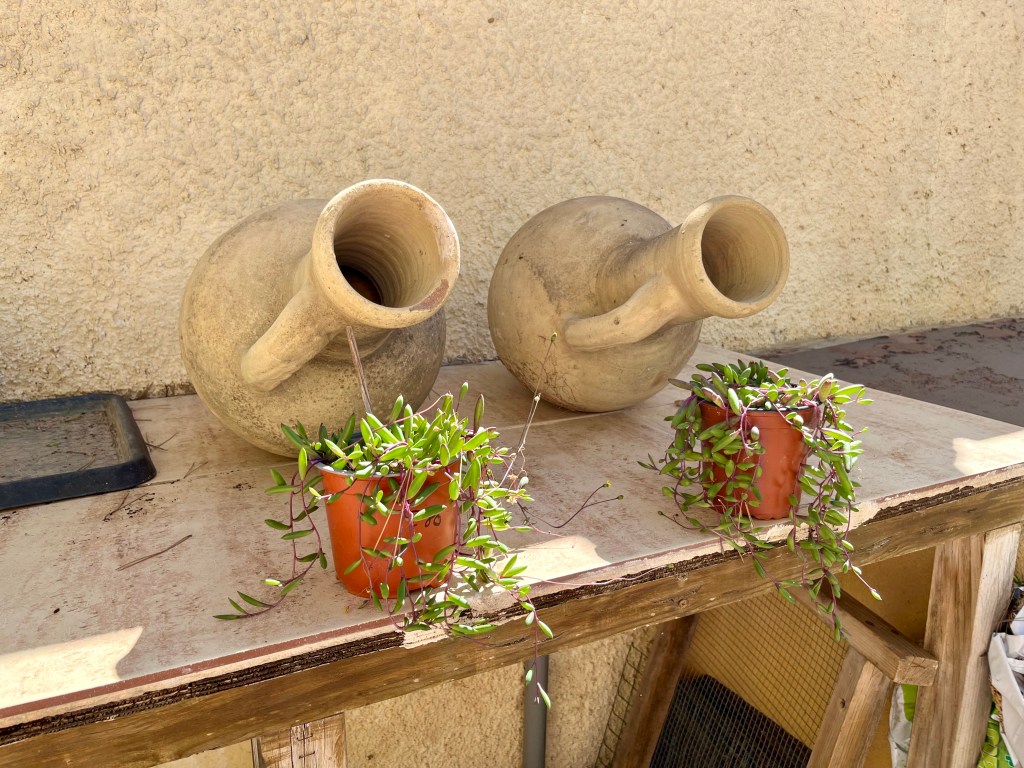
I have grown a variety of cuttings as potential pot residents, but eventually I have decided on “little pickles” as the tenants. The lovely pots and their potential new tenants can be seen in the photo below.
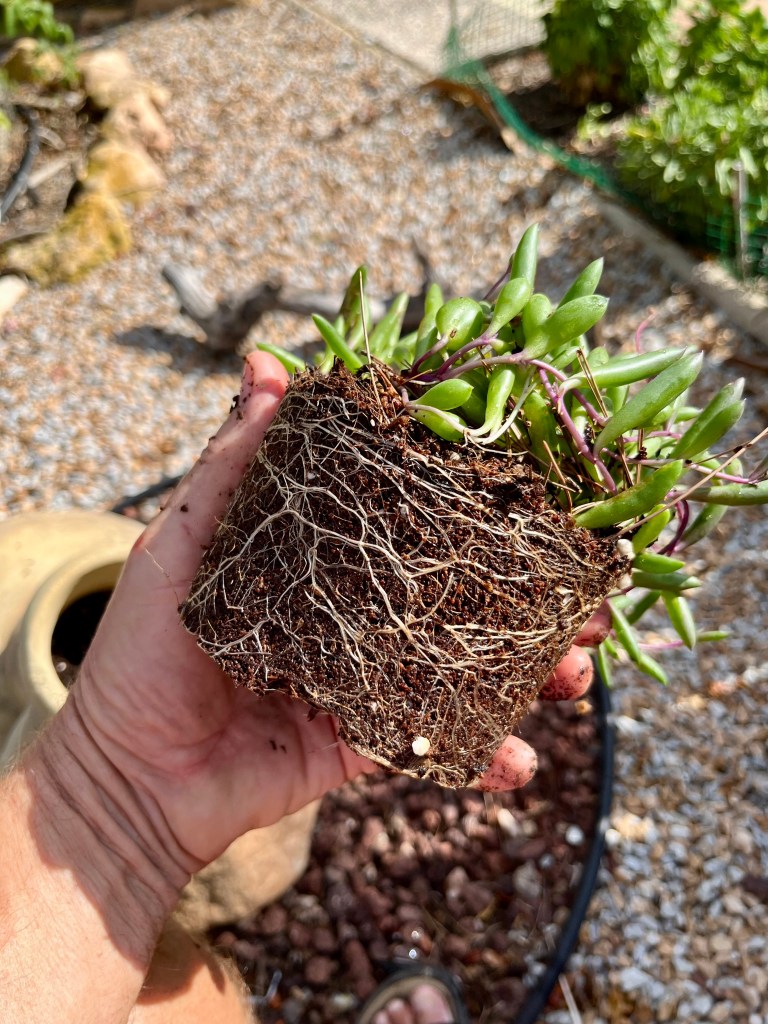
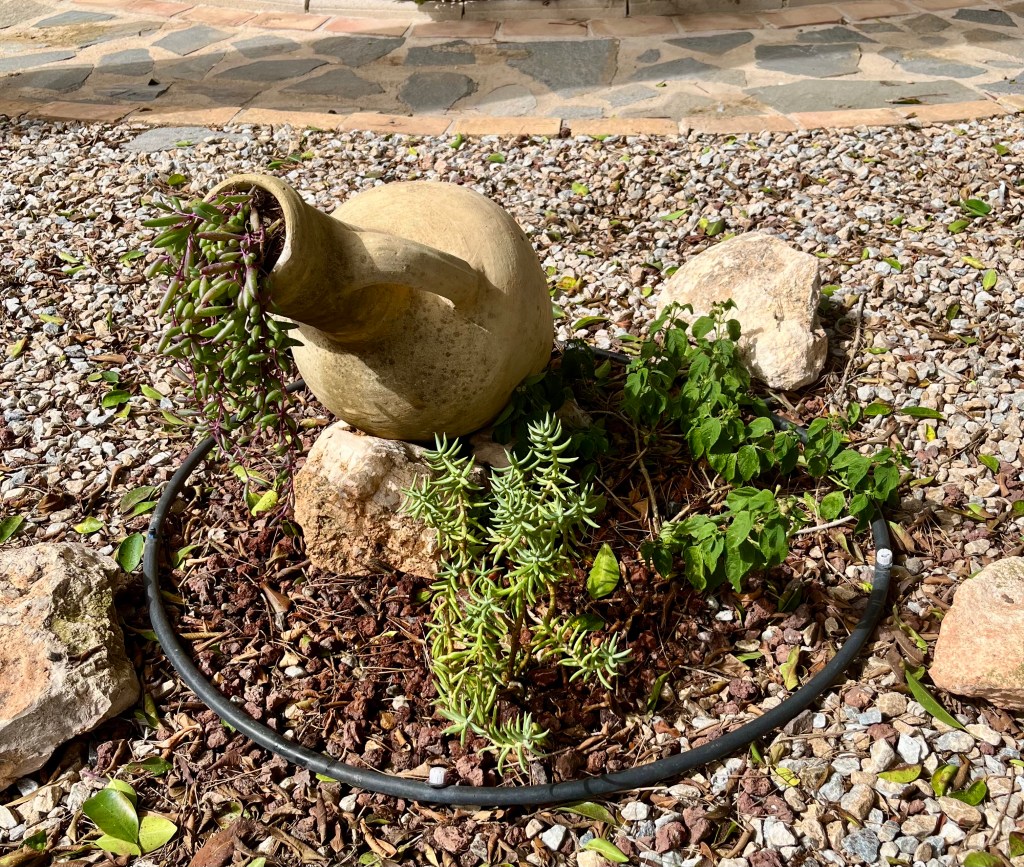
I didn’t want to just fill the pots with compost as this would have been a waste. So instead I stuffed half of each pot with old T-shirts and a few pots and topped up the remainder with compost rammed down. I then eased the little pickles out of their pots; both showed good root growth as can be seen below. I think they look rather nice in their final position. As they grow and cascade to touch the ground I will take some cuttings to give to Cathie to kill.
Tango bids farewell amidst unsightly chicken behaviour. We knew it was coming but it didn’t make it any easier. The vet duly called, Tango was sleeping and barely raised his head as the vet shaved his leg for his final injection. He passed so peacefully. Cruella (my wife) threw herself on his lifeless body in a fit of funereal histrionics, her chickens meanwhile gazed through the window at Tangos deathbed scene with blank eyed indifference.

The vet took Tango away and I went down to the Wild Wood to tell the bees. It is traditional when a member of the family passes away to go and tell the bees. I went to each hive and knocked three times and said the traditional words: “Bees, bees, hear what I say, poor old blind Tango has passed away.” The bees were very respectful and it gladdened my sad heart.

As I came up from the wood I could hear a cacophony of cackling Chickenese coupled with squabbling noises. As I rounded the corner of the house there was Cruella and her chickens throwing dice to decide who would get Tango’s various things. His bed, collars, brushes, dinner bowls and leads were all laid out in front of them as they gambled for them.

I rushed forward and gathered everything up and raced to my shed and locked myself in. They are out there now shouting profanities in Chickenese whilst Cruella keeps trying to get the door open. They have no respect, I think they’ve been drinking.

Tango when he was a puppy, he could see and he wasn’t lonely.


The ants have stolen my grass seed and I set up a chicken internment camp

Cruella (my wife) is away for almost three weeks. She is visiting our idiot son and subjecting him to what she calls “mother’s love” and what he calls harassment.

Anyway, the good news is that I am gardening on a 24 hour cycle. I divide each day into three 6 hour portions of gardening with two hours rest between each. I mainly sleep in the compost bin for the warmth and I wash in the water feature.

The bad news is that I have been tasked with taking care of Cruella’s chickens whilst she is gone. The last thing she said to me as she sat astride her broom – before taking off over the trees – was “look after my girls”. And I have, they have been locked up 24 hours a day with Tango the lonely blind Labrador acting as guard. All was going well till she found out. More later, on with the gardening.

22nd September 2024. Things I have been doing lately:

  • Continuing to deadhead and tie up.
  • Cleaning up leaves on gravel.
  • Revitalising my lawn
  • Setting up a chicken internment camp.

Continuing to deadhead and tie up. By now most of your flowering plants will be almost spent. But don’t give up on them yet, with careful care you can get another month of flowering.

Your starting point should be to assess which plants are worth bothering with, and which just need to come out and go to the compost heap. Any plant that is not producing new flower heads and where all you have is spent flowers, needs to come out. Alternatively, any plant that has at least 50% flowers and is still producing should be saved.

You will need to start by tying the plant to a cane to give it some support. Then deadhead on a daily basis. Given this encouragement there will be a lot more flowers.

The photos below show the various stages of saving your plants for some autumn colour. Click on each photo for a larger view.

Cleaning up leaves on gravel. This may seem like a mundane job and not really worth doing. But in my part of Spain (Costa Blanca) lots of people have enhanced their gardening by using gravel. Used properly with island planting gravel can really enhance a garden, and in our heat is a practical solution. My problem is when people completely gravel over their garden and turn them into what looks like a car park. Any way, my petty prejudices are for another day.

Whatever the reasons for gravel, if you have it, then you need to keep it clear of debris. Debris, such as leaves and pine needles will gradually mulch down into your gravel providing a lovely fine tilth ideal for weeds. So you need to keep your gravel clear or you will eventually lose it to weeds.

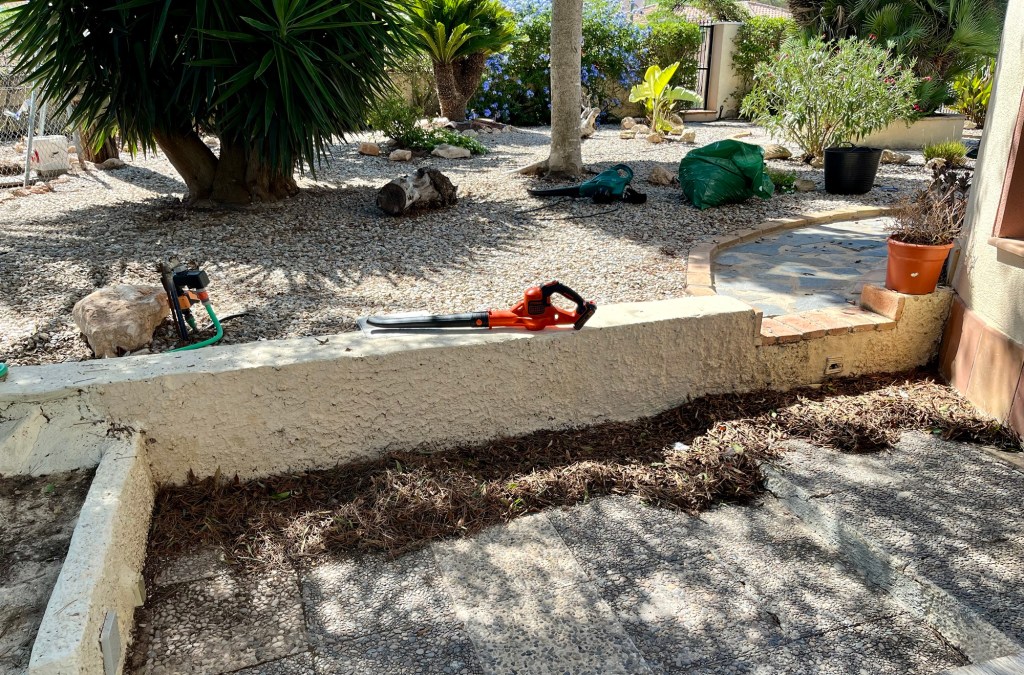
You can keep your gravel clear by raking on a regular basis, but a more practical approach – if you have a large garden – is to use a garden blower. The photos below show me in action with my regular clean up process.

Revitalising my lawn. Regular readers of this blog will know that I have neglected my lawn all Summer as I was contemplating giving up on grass. However, after a complete change of mind I have spent the past few weeks trying to revitalise my lawn and bring it back into some sort of shape.

Now I know that the vast majority of you do not have lawns, and think that I am mad, but I can’t help it, I just love to see the green in a Spanish garden. Anyway, there is no point in trying to talk me out of it, I have made up my mind.

If like me you a setting out to revitalise your lawn, then these are the various stages.

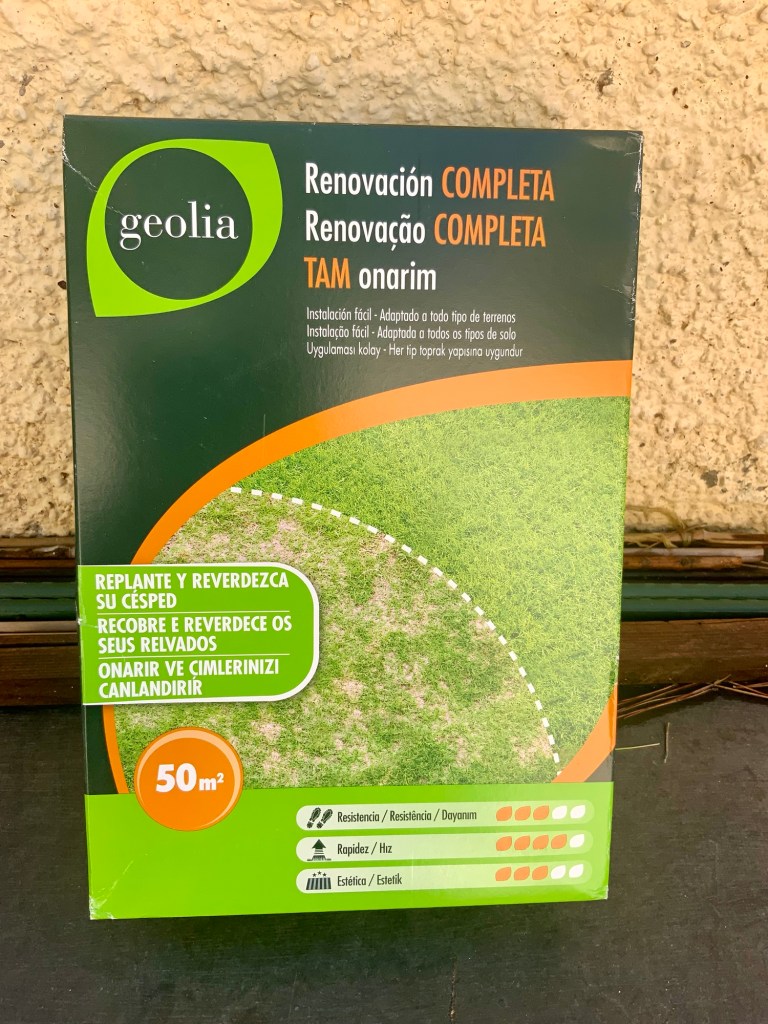
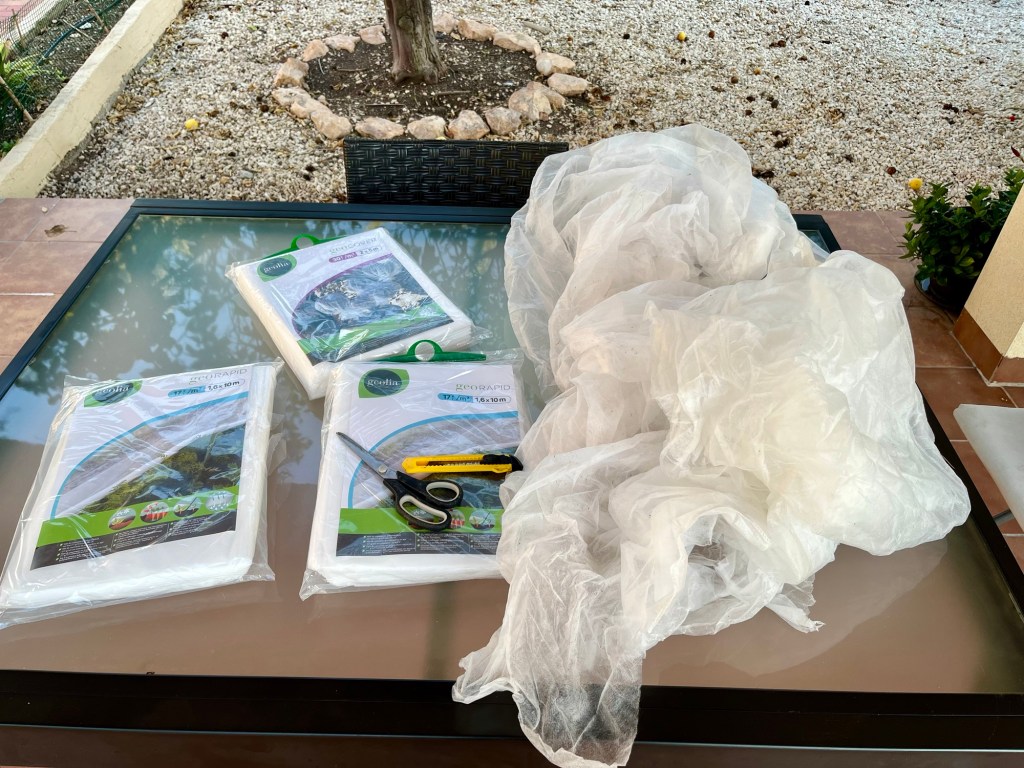
To start with you need to assemble the various things you will need. This will include a top dressing to provide a grow medium for your seeds. You will also need a good grass seed. This can be bewildering as there are so many different types. I chose one that was appropriate for renovation rather than a new lawn. Lastly, you will need a membrane to cover your new seeds and keep them from the birds (and chickens). The photos below show my assembled accoutrements. Click on each photo for a larger view.

To start your renovation process you will need to rake (with a garden tine) and remove the thatch. Before applying your top dressing. The photos below show my main problem areas and the start of my raking. Click on each photo for a larger view.

You need to rake in both directions firstly to remove the thatch then to provide a key for your new top dressing.

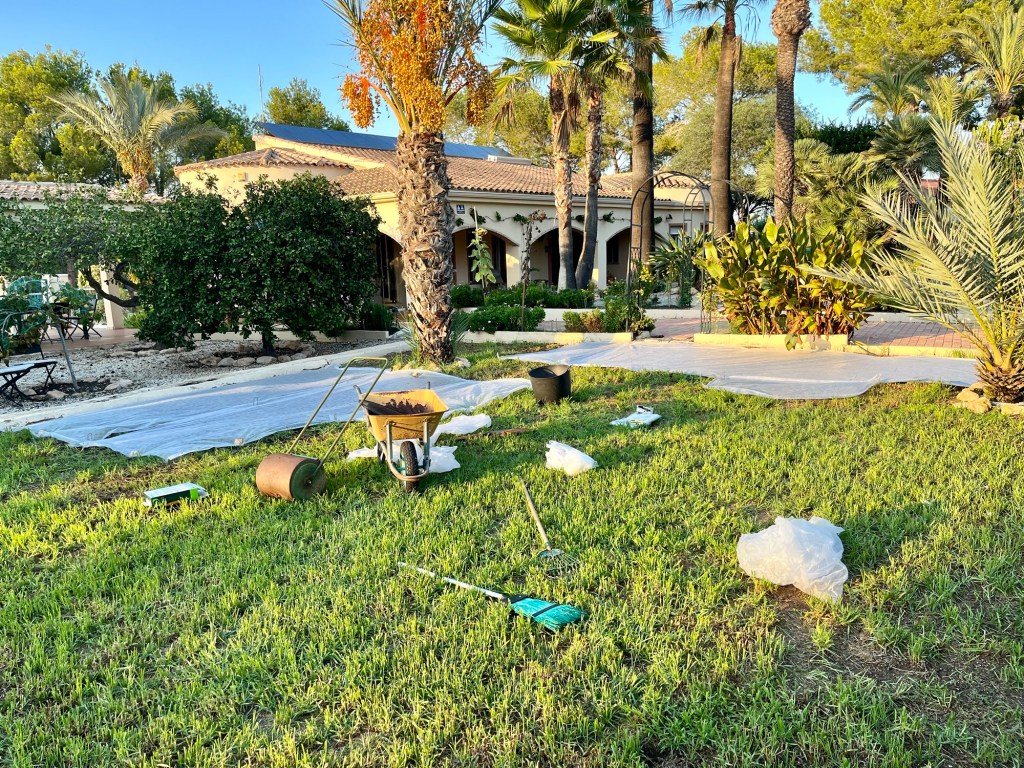
Once you have completed the above you then need to add your top dressing and brush this over the area you are about to seed. When you are ready, sow your seed by moving across the patch and then traversing from side to side to ensure an even spread. Finish off by sieving some top dressing to cover your seeds and then rolling the area to ensure good contact between the seed and the soil. The photos below show the various stages. Click on each photo for a larger view.

The final task is to completely cover the seeded area with a protective membrane to ensure that the birds can’t rob you of your precious seed. The photos below show some of my work, I did go on to do more.

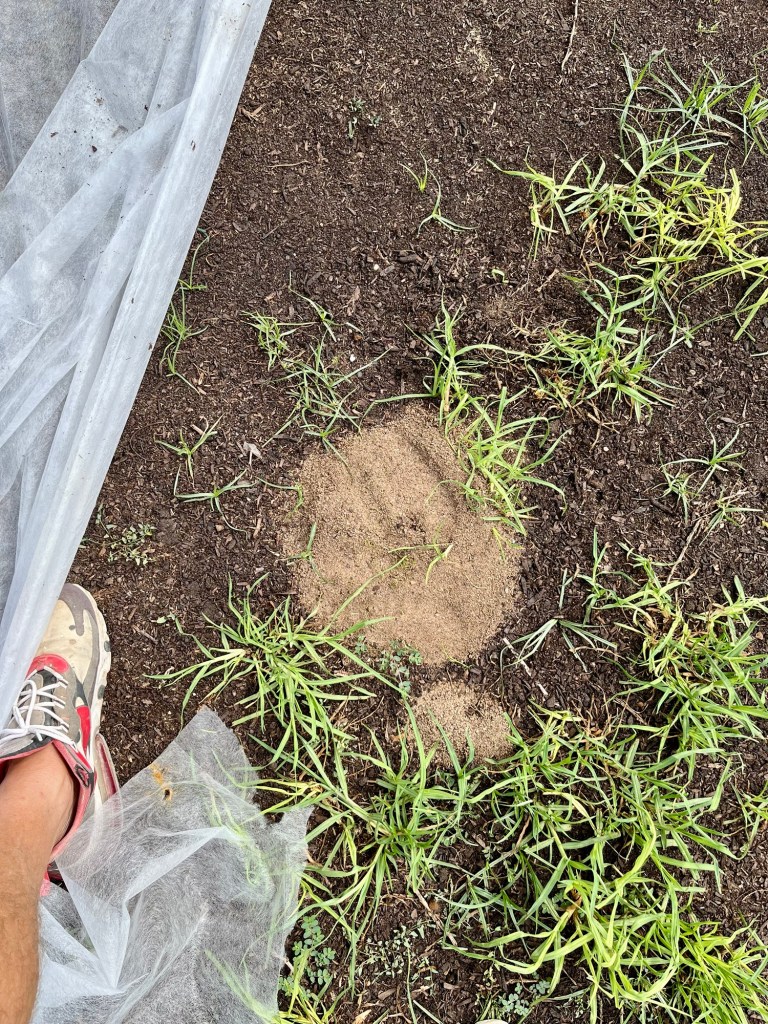
As with all things gardening, nothing is simple. Resting safe in the knowledge that I had protected my precious seed from birds, I completely forgot the danger of ants.

Grass seed provides ants with an ideal take-away of ready made and packaged food. I had forgotten how they had robbed me a few years ago, when they happily trundled all my grass seed under ground.

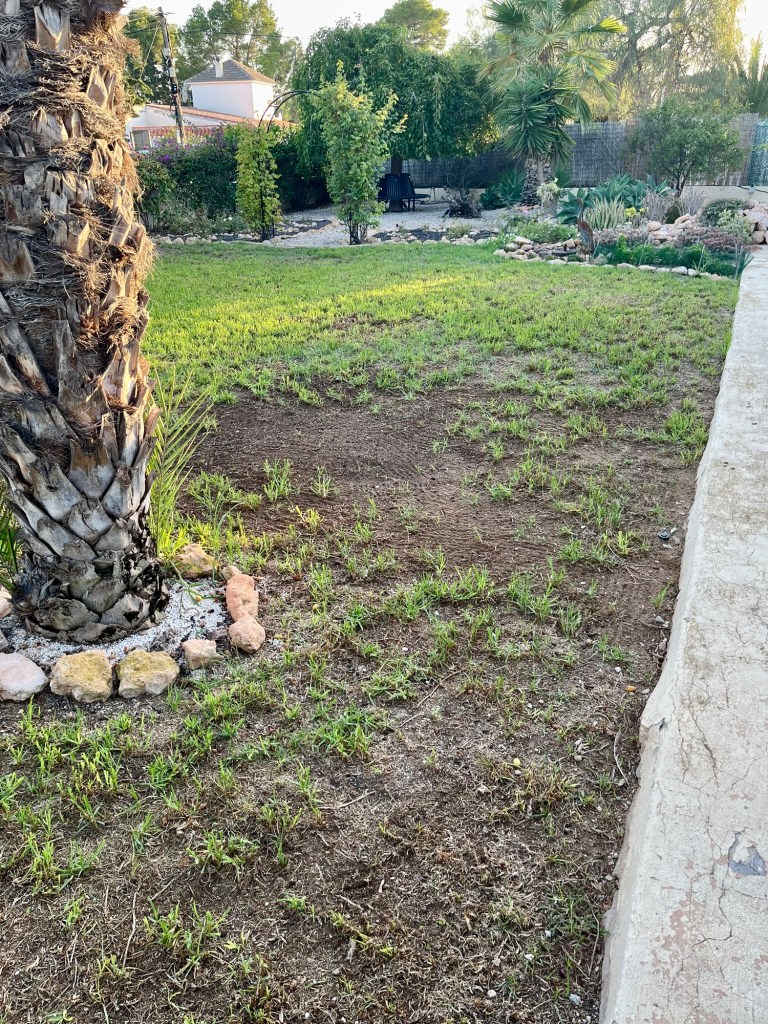
Sure enough they came back. I was happily perusing my work a few days later when I noticed an earth disturbance under my membrane. When I pulled the membrane back to check, sure enough there was a volcanic entrance to Hades, into which all my grass seed had been taken. The photos below show the horror, together with my retribution. Click on each photo for a larger view.

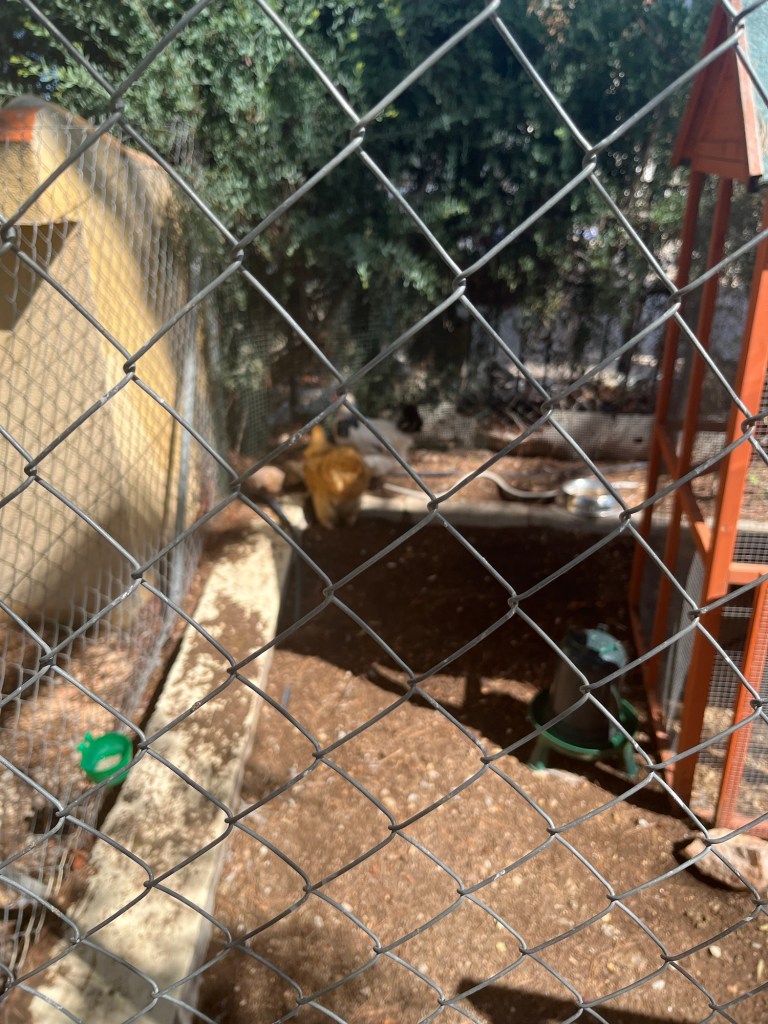
Setting up a chicken internment camp. As soon as Cruella (my wife) had disappeared over the trees, I immediately locked all the chickens up in their coop. Ostensibly this was so they would not interfere with my gardening, but really it was for revenge for all the indignities both they and Cruella had inflicted on me.

You should have seen their faces. Every time I walked by they would all rush to the wire and jabber away in Chickenese indignantly. Although I don’t speak Chickenese I could tell from their faces what they were saying. Basically, “let us out…we are going to tell our Mum…you will be for it when she gets back”. But I just ignored them happily pointing at my ear in a pantomime fashion whilst shouting in a loud voice “sorry I don’t speak Chickenese”. The photos below show their imprisonment. Click on each photo for a larger view.

Everything was going well for a few days. I was getting on with the gardening and Tango the lonely blind Labrador was enjoying his role as a guard dog; he was very keen on the uniform. Yes, I know we are both perfectly cognisant with the flaws in his role, but he is old and it gives him purpose.

Anyway, it all fell apart after five days. Cruella rang up asking me how things were. I explained everything was fine and there were no problems. She asked to speak to her girls, but I said they were not here as they were running around the garden. I thought I had got away with it as there was no way the chickens could contact her as I had taken all their phones away and cut off their Wi-Fi.

The next day she phoned back incandescent with rage. “What have you done” she screamed. “Nothing” I replied, “don’t lie to me, let me speak to the girls”. I tried to stall, I said they were sleeping etc, but all to no avail. I asked her why she thought there was something wrong, and her only reply was “I can feel it there has been a disturbance in the Chicken Force”.

The upshot of all this was that I had to put Helga the Hen on the phone. As I said previously I don’t speak Chickenese, but I could pick up phrases like… “he has done what!…how long” I might have got away with it but Tango turned Kings Evidence. He had taken off his uniform and confessed everything to Cruella. When later I berated him as a traitor he said he had mental health issues.

Well they are out again, roaming the garden stealing what is left of my grass seed. I still don’t know how they got word to Cruella (my wife), but I have my suspicions. I have seen them talking to a white Dove that has been in their coop. But I don’t think it is a Dove, I think it is a stool pigeon. See the photo below.

If you look carefully the little brown one has just passed the pigeon a note

The Summer has been a gardening disaster and now I am being terrorised by a chicken

To be honest I am really fed up with this summer, it has been a gardening disaster: my seedlings never properly germinated, my lawn looks like the surface of the moon, my figs and grapes have been eaten by birds, my favourite Agave died, my Dame de Noche refused to flower and now I am being terrorised by Cruella’s new chicken.

I could cry. But never mind, we gardeners are made of sterner stuff, let’s get on with the gardening – what’s left of it.

1st September 2024. Things I have been doing lately:

  • Repairing the lawn
  • Chopping down the dead Agave
  • Pruning the Dame de Noche
  • Netting fruit
  • Taking summer cuttings
  • Dealing with Helga the hen

Repairing the lawn. The last time I posted about my lawn I was in the depths of despair. The lack of rain and constant chicken attacks had made a mockery of my grass. I was seriously contemplating tearing it all up and planting a range of new beds with succulents. But after many a sleepless night I have decided to take Madonna’s advice in her greatest hit and I am definitely keeping my baby (the lawn).

This has meant I am now in the process of planning a major renovation. The first thing I did was feed the grass and I have now re-started a twice weekly irrigation programme. I will be ordering new Grama type grass seed for the Autumn. The photos below show the challenge I face. Click on each photo for a larger view.
Chopping down the dead Agave. I have lots of Agave Attenuata around my garden and I particularly love this plant as it forms a family of pups around the main plant. Every 10-20 or so years the main plant will flower spectacularly in a huge arc of flowers and then die just as spectacularly leaving behind the motherless pups.

Over a period of time 3-5 years the pups will sit there motherless until one suddenly decides to become mummy and grows much bigger, and so the cycle continues.

Once the main stem has finished its magnificent flowering, then it is time to cut it right back. The photo below shows me with the Agave in all its flowering pomp.

I sang to her every night as she slowly passed away

The next photos show the poor Agave 3 months later accompanied by a photo of its orphan pups. Click on each photo for a larger view.

Finally the flowering spike is cut off and makes its way ceremonially to the compost bin. I do not take the death of an Agave lightly and therefore ensure that all due bereavement procedures are followed.

I dress in black and the compost bins are draped in black crepe. We set off from the point where the flowering arch has been cut and process across the big lawn and down the drive to the compost bins. Tango the lonely blind Labrador has black rosettes either side of his ears and he follows mournfully behind the wheel barrow. Chopin’s Funeral March from Sonata number 2 is played loudly.

Cruella and her chickens line up, but only to mock me and Tango. They point at us and shriek away in Chickenese, especially when poor Tango goes the wrong way or bumps into a tree.

When we arrive at the compost bin I lay the big Agave to rest and sprinkle composting powder over her and say a prayer. Our last ceremonial flourish is the last post, but this was somewhat spoiled as when I stepped back to salute, Tango was right behind me and I fell over backwards. We both ended up in a sprawling heap which caused paroxysms of mirth from Cruella and her cackling crew.

Click on each photo for a larger view.

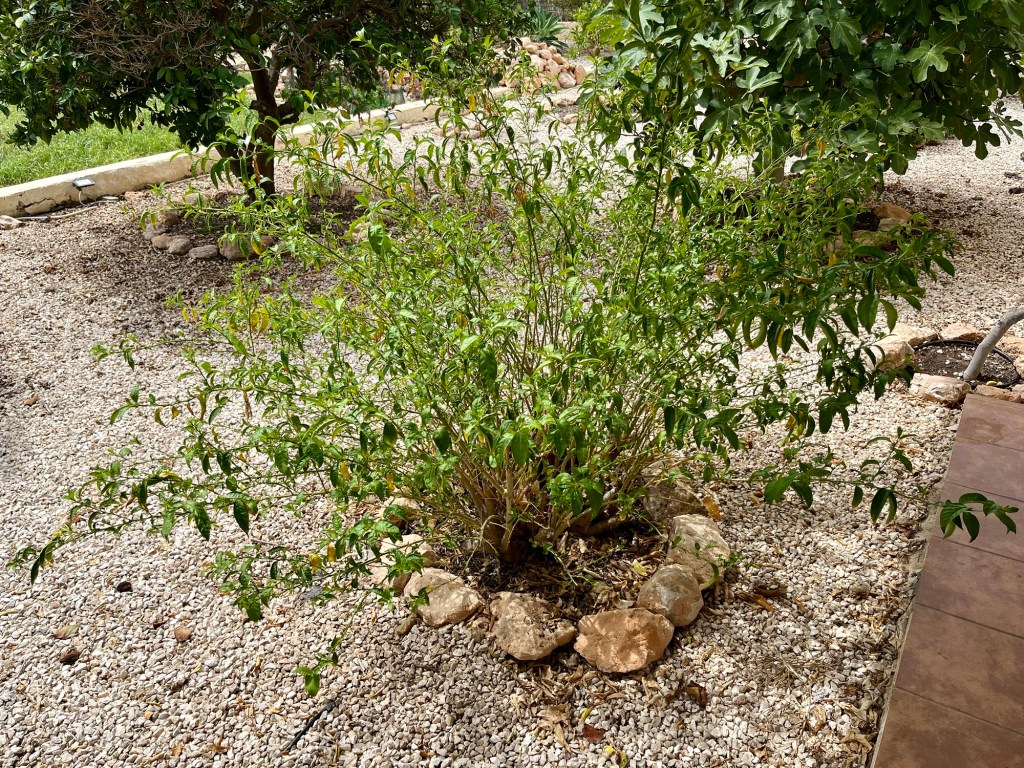
Pruning the Dame de Noche. If you have a Dame de Noche, and many of you will have – then it has been a terrible year for this normally reliable night scenter. The severe lack of rain has meant then even mature well rooted plants like mine have struggled to produce blooms.

The normal pruning procedure I use for this plant involves cutting back by a third in late August to encourage a second flowering followed by a big cut back in January to about 12-18 inches. This has not been possible this year because of the state of the plant, see the photo below.

Not one flower this year

Instead of the normal pruning procedure I have taken one third of the foliage away and I will not cut back in January. This will mean that the plant will be substantially bigger next year, but I am hoping that the winter rains will bulk it up. The photo below shows my Dame de Noche finished for this year.

Better luck next year

Netting fruit. The only soft fruit I have left this year is my Persimmons. Normally, I would net them at the same time as my figs, but given that I was late with the figs and suffered huge bird depredations, I was not going to make the same mistake again.

Persimmon will slowly go from a soft blush red to a bright yellow as they mature. The birds are watching them just as you are, and they know exactly when they are at their best.

You need to net now with a small mesh net (so you don’t end up with birds hanging upside down each morning). As the fruits mature you can take them off and let them ripen off the tree. They are lovely in fruit salads or eaten directly with a spoon. The photos below show my little tree full of fruit and eventually netted. Click on each photo for a larger view.

Taking summer cuttings. Most plants will by now be heading for seed, but occasionally as you wander round your garden you may notice the odd particularly lush plant that is bursting with new growth. If you find them, then why not try some late summer cuttings.

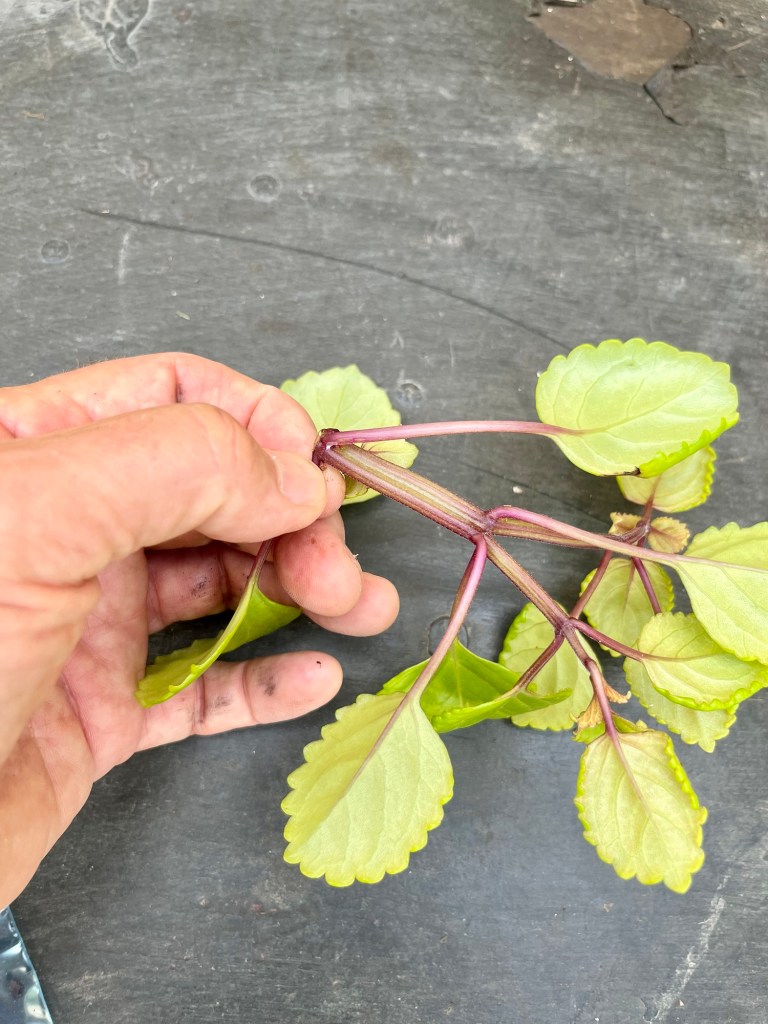
I have a Swedish Ivy (Creeping Charlie) in a pot that I got as a root cutting from my friend Camilla. This is bursting with new growth and I have decided to take some cuttings. The photo below shows the plant bursting with new growth.

I could easily take 10 cuttings off this plant

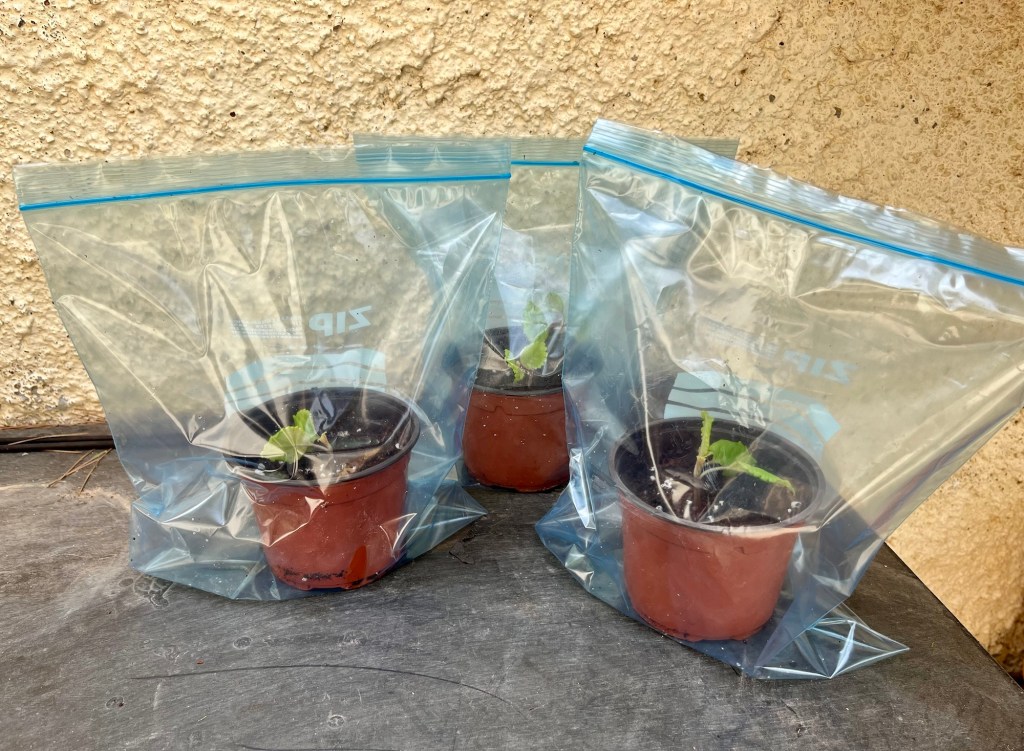
When you take cuttings this time of year it is useful to purchase some ziplock plastic bags (sold in every supermarket) these will aid humidity by keeping the plant moist. It is also useful to have some rooting liquid or powder (not necessary but useful). The photo below shows my preparations.

Once you are ready fill 4 inch pots with a good compost and water them well. Take the cuttings from just below a growth node, and then using your thumbnail pinch out all the leaves up the cutting stem leaving just a couple of leaves at the top. Dip each cutting in hormone liquid before planting it securely in the pot. Place the pot in the ziplock bag and seal.

It is a good idea to open the bag at the top for about half an hour each day and ensure you keep the cuttings in the shade for a few weeks until growth starts. See photos below. Click on each photo for a larger view.

Remember open for half an hour each day

Dealing with Helga the hen. Regular readers of this blog will remember that Cruella (my wife) favourite hen died last month. She quickly announced that her girls would need a new friend and promptly ordered another giant chicken.

Helga the giant hen duly arrived two days later. Cruella was immediately smitten and declared her the love of her life. In case you are interested I am seventh on this particular list. First the idiot son, then the four chickens followed by Tango the lonely blind Labrador and then me. The photos below show Helga and the new line up. Click on each photo for a larger view.

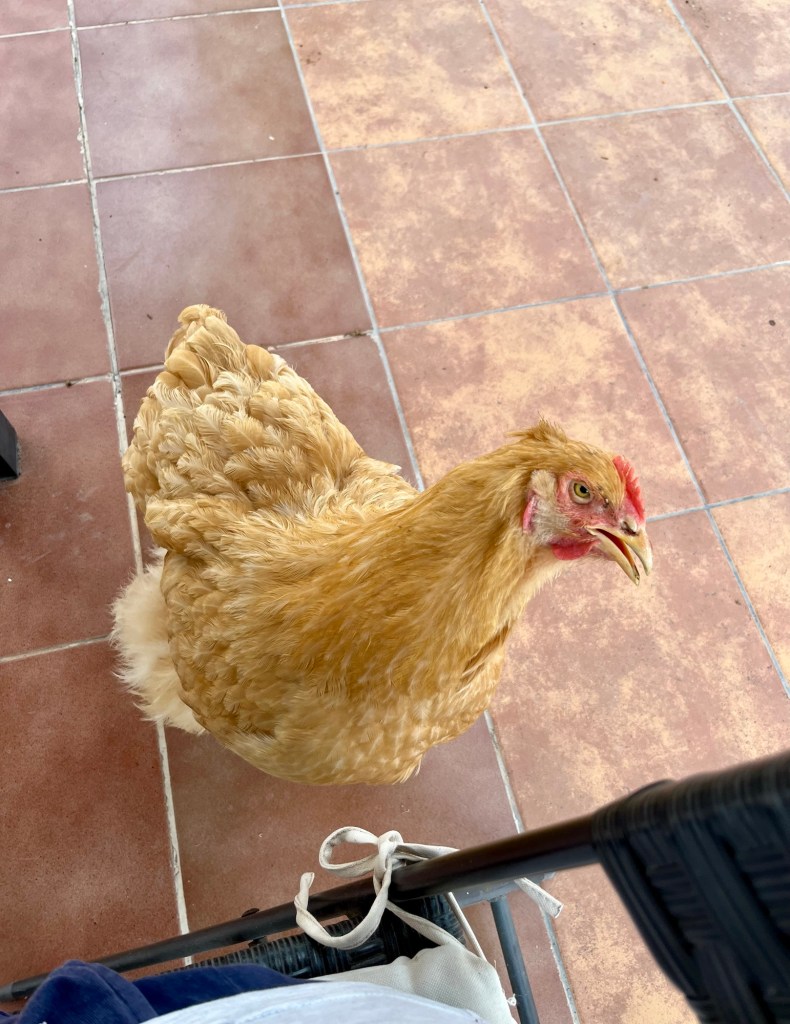
In a stupid attempt to curry favour with Cruella I started to feed Helga by hand with what was left of my figs and grapes. This has resulted in her continually following me everywhere demanding more food. If I fail to give her a grape or fig she starts to peck my toes. I have tried shouting at her but she only speaks chickenese.

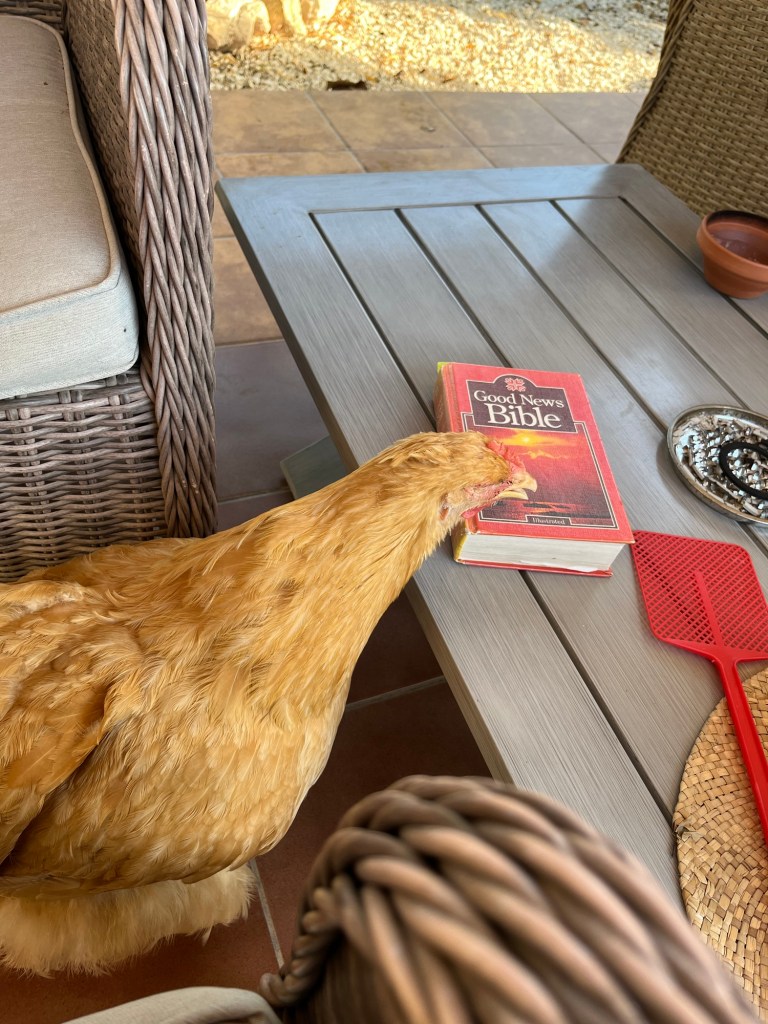
I have explained to Cruella (my wife) that Helga is out of control, but she says it’s only girlish fun. But you can see from the photos below that she sits on my chair, waits on the table to be fed, stops me reading my Bible and is currently sitting beside me as I write this. I fear for the future. Click on each photo for a larger view.

I delve into the border lands and Tango gets picked in an identity parade

I hate to tell you this but summer is coming to an end and there is lots you need to do now to get the garden ready for next year. But, even though there is lots to do don’t forget to enjoy the garden through the late summer phase. Just to give you an overview, this post covers the following:

  • thinning out your borders and beds
  • collecting seeds for next year
  • picking fruit
  • Taking care of your roses
  • Kerry’s olive tree is shaping up
  • Tango the lonely blind Labrador gets framed

9th September 2023. Things I have been doing lately:

Thinning out your borders and beds. All of your borders and beds will now be getting past their best. But if you want your plants to keep blooming till the end, then you will need to do a bit of work.

Firstly, you need to keep deadheading every day. The deadheading process stops the plant concentrating on seed production and will ensure that it keeps on flowering. There will come a point where the plant can produce no more flowers, this is usually by the time it has more than 50% dead or dying stems. When this happens, you should let the plant die gracefully but leave it in place for a few weeks to feed the insects.

Secondly, you need to thin out your dead plants after leaving them in place for a few weeks. By eventually removing dead plants you are letting more air and sun get to those remaining. In addition you are exposing the soil so that those plants you want to self seed (in my case Osteospermums) can drop their seed and eventually give you hundred of Autumn seedlings. The photo below shows a typical trug of deadheads and dead plants.

Every bit goes into the compost bin to produce next years compost

Collecting seeds for next year. If you mark up your best blooms each year and then collect their seed, you begin to build up a range of large, strong super blooming plants that are resistant to disease. The photo below shows me with some of my Marigolds that I have selectively bred over more than 10 years. Note that instead of being 10 inches high, they are over a metre and bursting with flowers.

I apologise for the selfie, I still don’t know where to look, but Cruella refused to take a photo of me with my hat on.

Collecting and storing seeds is easy, so there is no excuse for anyone not trying. I always start by harvesting those flowers that I had marked early in the summer as the best blooms that I may want seed from. The photo below shows some of the many that I marked up. You can see why I mark them when they are in bloom, because you can tell nothing from the dried seed head. The final photo below shows the range of seeds I was collecting. From left to right:

  • Dutch Marigolds
  • Ordinary Marigolds
  • Pink Trumpet Vine
  • Jasminium

The seed collecting process for Marigolds is very simple, you just have to remember to mark up the best blooms early in the summer. There are 5 simple stages shown in the photos below.

  1. select the seed head and snap off the stem
  2. gently rub off the fuzz on top of the seed head
  3. roll the seed head between your finger and thumb whilst gently squeezing
  4. let the seeds fall into your other hand whilst continuing to roll and squeeze
  5. let the seeds fall gently between your hands whilst blowing to remove chaff

The process for Trumpet vine is different. Here the seed develop in long seed cases that can be over a metre long. To access these seeds you need to gently squeeze them till they split and expose the seeds lying in rows within the seed case. I find it is best to release these seeds over a waiting envelope or they inevitably will blow away (which is exactly what they are meant to do in nature). The technique is shown below. Click on each photo for a larger view.

With Jasminium I use a similar technique, but in this case you have to release the seeds directly into the envelope or they just go everywhere. Again the technique is shown below. Click on each photo for a larger view.

Once you have collected your seeds, place them into new white envelopes, label them with the species and year, then store them in a cool dark place till you need them.

Keep picking fruit. By now most of your fruits should be ripe or almost there. The trick to getting the most of your fruit is to beat the birds to it. Hopefully you will have netted most of your fruit, but if you haven’t, the birds will be blessing you. You need to check your fruit every day and pick off anything that is ripe. Don’t try and leave all your fruit on the tree thinking that you will pick it all together when ripe. The birds will beat you to it every time. Birds know exactly when fruit is ripe as they have amazing colour sight far better than human beings. Whilst we only have three colour detecting cones in our eyes, birds have four and can see in ultraviolet so they know exactly by the colour when your fruit is ripe. The photos below show an example of my daily fruit picking. Click on each photo for a larger view.

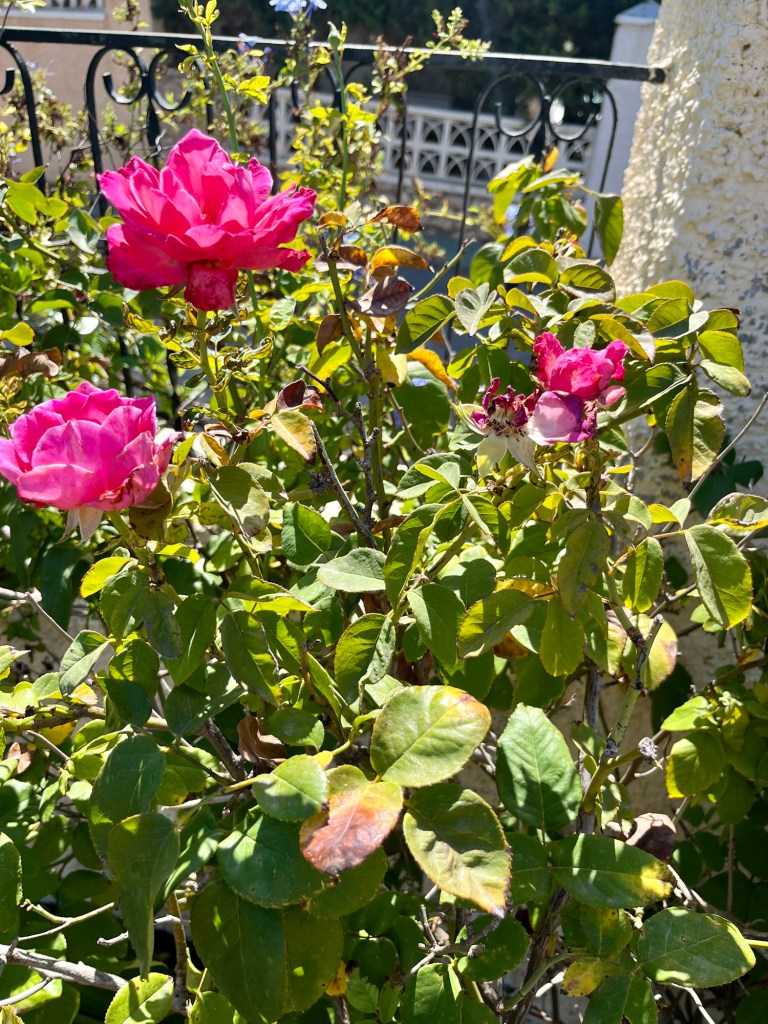
Taking care of your roses. Roses grow wonderfully well in Spain if they are looked after properly. This means plenty of water and feeding at least three a year. We are now about to see the late September second flowering of roses. For this to be successful you need to give your roses a deep watering (in addition to your normal regime) once a week. Also you need to give them the last feed of the year. If you do both these things now you will be well rewarded. The first photo shows an action packed deep watering in progress, whilst the second shows one type of rose feed you could use. Click on each photo for a larger view.

Kerry’s olive tree. Regular readers of this blog will remember that my friends Kerry and her husband Glynn had inherited a mature olive tree when they moved into their new house. They foolishly accepted my advice that it should be reshaped and cloud pruned to give their garden an interesting focal point. Under my technical direction Kerry and Glynn helped to reshape the tree into what at first looked like a tree blasted by lightning.

Despite Glynn’s threats and Kerry’s tears I assured them that all would be well. The photos below show how the tree is developing nicely and we will be able to reshape it in the next few months. I will keep you abreast of progress; I am just glad they have called off their lawyers. Click on each photo for a larger view.

Tango the lonely blind Labrador has been framed. What happened was this. I came out one morning and one of my large standards in a big pot had been smashed. I knew straight away it was the chickens as I found feathers all around the smashed pot. When I confronted Cruella (my wife), she denied everything and said her girls would never do something like that. But I knew it was just more intimidation as part of their Just Stop Watering (JSW) campaign. The photos below show the smashed pot and the damning feather evidence. Click on each photo for a larger view.

Anyway she insisted that under the UN Chicken Rights Legislation we must follow due process and have an identity parade and a trial. The whole thing was a set up and Tango didn’t stand a chance. The identity parade included Tango and a fat chicken called Bertha (who Cruella said had a protected characteristic and should not be body shamed). Tango was of course picked out.

The whole trial was then conducted in chickenese and Tango was refused legal aid and an interpreter; I tried to help but I only know chickenese for “get out of that bloody flower bed”. The end result was that poor old Tango was sentenced to a weeks solitary confinement in his kennel. When I told him the sentence he was very stoical and accepted his fate. His head did bow and a few tears fell from his translucent milky white eyes.

The first photos below show the judge and the jury, no wonder Tango was fitted up. The final photo shows Tango when I told him of his sentence: brave, stoical and accepting. The only good news is that I spent the week in there with him; I read him “Lassie” stories and we shouted anti chicken slogans till late in the night. We only stopped chanting when Cruella turned off the lights; I sprayed “Tango is innocent” on the chicken coop. Click on each photo for a larger view.

My garden has suffered the desolation of Mordor and Cruella has taught her chickens to hunt as a pack!

I’m back, I know I didn’t tell you I was away mainly because I now work on a need to know basis, as every time I go away Cruella (my wife) and her fancy chickens devastate the garden. Well enough is enough I broke down In tears when I saw the neglect and wilful damage they had inflicted on the garden. The photos below speak for themselves. Click on each photo for a larger view.

To make matters worse whilst I was berating Cruella for the damage she and her fancy chickens had caused, she just sat there stroking the little white one and whispering chickenese into its ear like some Bond villain. Just then I caught a slight movement under a fig tree as the chickens operating in unison had stalked a little bird and made it fly into the fig net. The photos below show the hunting party setting off, followed by their lookout who is set to keep a eye on me. The next photo shows “big Bertha” stalking like a lioness under the fig tree. The final photos show the poor little bird that I managed to rescue and free. Click on each photo for a larger view.

This is in danger of becoming a chicken blog, so let’s get on with the gardening.

24th September 2022. Things I have been doing lately:

Gathering seeds. Now we are moving towards autumn it is time to look around your garden for seed heads to provide you with next year’s plants. In my garden at this time of year, there are usually seedheads to be gathered from:

  • Marigolds
  • Sun flowers
  • Trumpet vine
  • Loofahs
  • Jasminium

And so much more as we move into autumn. Even if you have never grown from seed , why not try it, it can prove very addictive. The photos below show an array of seed heads picked and ready to be processed. Click on each photo for a larger view.

Most seed are very easy to process. The photos below show how to harvest Marigold seeds. First only pick the seed heads when they are fully dry and completely brown with no sign of green. Then rub off the top part of the seed head which is made up of a rough nape. Following this roll the seed head between your thumb and forefinger pressing gently to crush the seed head and release the seeds. When you have all the seeds let them fall between your palms as you blow gently to separate the seed from the chaff. Finally store the seeds in an envelope till you need them next year. Click on each photo for a larger view.

Processing Loofahs. I gave lots of loofah seeds out during my open garden day so I am sure you will all now be ready to reap your harvest. The secret with loofahs is that you must leave them till they are completely dry, brown and wrinkled (yes, I know, just like me). The secret to knowing if they are ready for harvesting is to shake the pods, and if you can hear the seeds rattling free inside, then they are ready.

To harvest loofahs you just follow these simple steps:

  1. Use your secateurs to clip the pods off leaving about 2cm of stem.
  2. Then holding the pod upright just use your thumb to flip open the top of the pod by pressing on the side of the stem. This will easily come away leaving a hole the size of 2€ coin.
  3. All you need to do then is to pour the seeds out into your hand.
  4. Next grasp the now empty pod between your hands and gently crush it to loosen the skin covering the pod.
  5. Peel off the pod skin
  6. And there you have it a lovely loofah to keep your skin supple and beautiful.

I would let you have some, but Cruella takes my whole crop and sells them to her coven as nose wart removers. The whole process is shown below. Click on each photo for a larger view.

Tying up Cannas. At this time of the year large cannas can begin to look a bit untidy. But don’t chop them down! You need all the goodness from the stems to start flowing back into the corm (ugly bulb) which will form next years plant . So for now you need to tie your cannas into an upright position for a couple of months till they get really scraggy, brown and raggedy, (yes, I know we have already had that joke).

I use broomsticks for this as they are strong enough to bang into the ground and tie the canna up even in strong winds. This year I bought myself some new broomsticks and Cruella thought I had bought her a present. I didn’t have the heart to tell her so I fitted her broom on a new stick. The photos below show the process. Click on each photo for a larger view.

Clearing borders and applying mulch. By now a lot of the plants in your borders will be well past their best. Once you have collected any seed that you want, then it is time to clear your borders and get them ready for cutings, seedlings and bulbs. Because not all plants die off conveniently at the same time, it is better to do this in stages. Don’t be tempted to just clear everything because a few plants are looking untidy. There are two main benefits of leaving plants a bit longer. Firstly, as already mentioned it allows seed heads to mature. But secondly, and just as important it allows the birds and insects to feed on the decaying plants. Sometimes it pays to be an untidy gardener for a few weeks.

The photos below show the start of my border clearing process and the application of a thick rich mulch to renews the soil. My friend Hilary has just started composting and is excited to get going and it may sound slightly pathetic but nothing beats the sight and smell of your first home made compost. Cruella just shouted out “shut up you idiot”, but she has her chickens all I have is my compost. Click on each photo for a larger view.

Mulch ado about nothing and how Cruella did well

Well I’m back from visiting my English garden and I have to be honest with you, I was apprehensive about coming back. As you know I left Cruella (my wife) in charge and this normally has disastrous consequences; but to be fair it wasn’t all bad. Anyway more of Cruella later, lets get on with the jobs we need to be doing now.

28th September 2021. Things I have been doing lately:

Cutting the grass. Before I went to England I gave the grass its final feed of the year. Normally I feed the grass 4 times a year with the last feed in late September early October. If you feed the grass after September it normally won’t get time to take the feed up before it stops growing. However, this has not been a normal year and we had quite a bit of rain whilst I was away, which in turn made the newly fed grass grow like crazy.

This was made worse by the horror of finding that my large petrol strimmer which trims the lawn edges had broken down and I would have to use a smaller electric one which I keep as a standby. The photos below show the extent of the grass growth. Click on each photo for a larger view.

Eventually after a hard days mowing I had everything back as it should be. Remember to keep your mower on its highest setting at this time of the year so that the lawn can go into the Winter with some protective cover to prevent wear. Ideallly the grass should be left between 5-10 cms depending on your preference and likely wear. The photos show the lawn mid mow and my final view from sitting under the Mulberry tree. Click on each photo for a larger view.

The last of the Loofahs. As a title of a film I give you that this lacks the drama of “the last of the Mohicans”, but it has merit. Most of the loofahs are now harvested and I have started emptying the pots. It has been a fantastic year with a very good crop of beauty products. I have lots of seeds so if you would like some just contact me and pop round if you live near Campoverde. If not contact me and I will give you my address and you can then send me a stamped self addressed envelope and I will send you some seeds with instructions how to grow them. The photo below shows the last of the Loofahs.

The little ones I use for washing up sponges.

Whilst we are dealing with seeds, Autumn is the best time to be perusing seed catalogues on line and deciding what you will be planting next year. I picked up a few packets whilst I was in England that I will be using for my full Sun borders. See photo below.

The big Sunflowers will be used for a competition in our village supporting the work of the Church.

Mulching your trees. If you have fruit trees it is always a good idea at this time of year to give them a lovely deep mulch with compost from your compost bin. If you don’t have a compost bin, then firstly, shame on you. But secondly don’t worry as you can always buy bags of compost and use these. The idea is that mulching will improve your soil, by encouraging worms and other beneficial insects, whilst at the same time improving moisture retention in your soil.

Now mulching isn’t a case of just bunging some compost down and hoping for the best. You have to go about it systematically to realise the best results.

  1. Inspect your trees and remove any suckers that are growing from the branches, especially any that may be growing from the bottom. Suckers are easily recognisable as they are bright green and grow straight up. To remove them just hold the sucker and pull it straight down and it will come away easily. See photo below.
Note the sucker coming from below the soil as this may be coming from below the tree graft and therefore be root stock so it definitely needs to go.

2. Hoe around your trees to remove any weeds and break up the soil. This is an important stage as impacted soil will stop water penetration and you need the soil and the compost mulch to mix.

3. Thoroughly water your trees and then give them a good feed with a specialist feed and not just a general purpose feed. The photos below show stages 2 and 3. Click on each photo for a larger view.

4. Now the hard work starts emptying the compost bin and mulching round your trees. This is back breaking but worth it. I give each tree a wheelbarrow of mulch spread to a depth of about 3 inches around the trunk. Make sure that you leave space around the trunk so that there is no chance of rot getting at the trunk. Also make sure you expose the tree graft so that you do not encourage growth from below the graft. The first photo below show my compost bin ready for emptying. The next shows a barrowful of black gold as I dramatically call compost. The final photo shows me carefully removing the mulch away from the tree graft on a small tree. Click on each photo for a larger view.

5. Finally the best stage. Resting and having a pot of tea safe in the knowledge that you will not have to mulch your trees till next year.

Well done thou good and faithful servant

Cruella did well. This is not a phrase you will hear from me very often in relation to Cruella and the garden. But in two recent cases she has been good. Firstly, amongst her other duties I left her with, was the care of a pot of Chilli Peppers I had been bringing on. When I left the chillis were green but would soon ripen. I feared for them, but when I got back they were ripening lovely and Cruella had been harvesting them every day. Given all her many other gardening disasters I asked why this time was different. For a moment she looked coy and then said “they remind me of drops of blood”. The photo below shows Cruella and her Chillis.

Cruella’s second triumph was in helping me tie up a Diplodemia which was growing furiously up a cane in its pot. I wanted to keep this in a pot but grow it along some string. Not many people know this, but Cruella is very good at tying all sorts of knots. I asked her a long time ago where she got this talent, but she just shrugged her shoulders and said “you know, we’re taught it early on, nobody wants a wriggling sacrifice”. I didn’t ask any more. The photo below shows Cruella midst knot tying, followed by the successfully tied plant. Click on each photo for a larger view.

When I asked Cruella to tie the plant up I informed her that she would be using my best string. She feigned incredulity and mocked the fact that I have “best string”. I carefully explained to her that best string is used for tying things up where I need the string to last for a few years. My basic string is used only when I want the string to rot away within a few months. She only laughed at me and said did I ever wonder why people find me boring. Because of this I didn’t like to mention that I am thinking of introducing an intermediate string category. The photo below shows my current two categories of string.

You can see what I mean about an intermediate category.

Cruella has destroyed our English garden


You will remember from my previous post that I was leaving our Spanish garden in the supposed care of Cruella (my wife), and heading to off to see what was happening in our English garden. The aim of my visit was, in order of importance:

  1. Rescue and reshape our English garden
  2. Visit some gardens of note that I haven’t seen for a while
  3. Make sure our idiot son was ok

Remember that old saying “it is better to travel in hope than to arrive” well its true.

15th September 2021. Things I have been doing lately:

Cutting back our jungle. Regular readers of this blog will know that our English garden is a long narrow rectangular walled garden adjacent to the river Medway. It is designed as an easy maintenance garden as most of the time we are in Spain. It has Flag paving on the ground and the walls are adorned with a series of climbers which flow up and over the wall. I had told Cruella exactly what to do when she was last over, but she completely ignored my advice and neglected the garden apart for the fact that she touched two precious plants and killed them. The photos below show the extent of her crimes. Click on each photo for a larger view.

The worse thing was that she has place garden statuary around the garden and animated them as an alarm against intruders. There was a malign looking lamb, an evil duck with ducklings and a decapitated head. When I first went into the garden they all started screaming at once. The ducks quacked evil high pitched quacks, the lamb bleated like an old rusty door being slowly opened and the decapitated head screamed out intruder, intruder, but in Latin “intrusor”. The photos below show the evil trio. Click on each photo for a larger view.

The photos below show the garden finally cut back and generally tidied up. I fear the Box is a goner, but I will wait and see. Click on each photo for a larger view.

Sissinghurst Castle. I have always wanted to visit Sissinghurst Castle the home of Vita Sackville West the famous writer and more importantly gardener. Vita was not an innovator but she did some things very well including planting borders in a single colour. I took our idiot son with me to try and educate him and to give the banking profession a rest from chaos. I asked him if he would take a photo of me in the famous “white garden” which he did by making me look as if I am wearing a Tutu.

Margot Fonteyn would be envious

Another feature that I liked at Sissinghurst was the dry garden. This consisted of large rocks, gravel and pebbles with intermittent Mediterranean planting. This would work very well in Spain and I might even think of working this into my large lawn. The photos below give you some idea what it is like. Click on each photo for a larger view.

RHS Wisley. As a member of the RHS I try and make a visit at least once a year to see what is going on and if I can pick up any tips and get my moneys worth out of my membership. Unfortunately the gardens didn’t look at their best – possibly because it is late in the year. In addition the RHS has gone mad on wild flower meadows and wild planting which seemed to be everywhere. The photos below show some of the things that interested me including another dry garden that would work in Spain. Click on each photo for a larger view.

The Rangers House Greenwich. If you have ever visited Greenwich park, then the chances are that you have concentrated on the view across London and the Royal Observatory. But you will probably have missed the Rangers House which sits right at the back of the park. The house used to have a beautiful Rose garden, which again, and unfortunately now has intermittent planting of wild flowers and roses. I don’t want to seem curmudgeonly but formal rose planting and wildflower meadows do not sit well together. Judge for yourself from the photos below I am off to write a letter of complaint to the Times. Click on each photo for a larger view.


Visit to Steve’s garden. My friend Steve lives in West London and gardens on a typical London plot. Clay just about six inches below the surface that has been improved by years of spreading compost. Where possible I always include a visit to Steve’s garden because he is one of those gardeners who could stick a dry twig in the ground and it would sprout almost immediately. There is not much we Spanish gardeners can learn from this garden as everything he grows would shrivel and die in the Spanish sun.

Anyway, just to make you hanker after floriferous displays here are some photos of Steve’s garden. Ending with a photo of Steve and me. After seeing this photograph he rang me the next day and has sworn that he is now on a diet; I will make sure he keeps it up. Click on each photo for a larger view.

This time next year he will be as thin as a stick

Cruella is making bird and bee Porridge and destroying my garden

By the time you read this you read this I will be tending my English garden. I know I should have told you before I left but I was too ashamed of the fact that I have left Cruella (my wife) in charge of the Spanish garden. I have left her copious written instructions but I know she will just ignore them. When I took her round the other night (she only comes out at night) and explained everything I could tell she was just feigning interest. Each time I explained something to her she just said “yeah, yeah, whatever”, when I remonstrated with her over her lack of interest she just said “blah de blah”.

Anyway, here is what I was up to before I left.

7th September 2021. Things I have been doing lately.

Trimming back Lemon trees. By now most of your lemons should be off the tree and any that are left will not be much good. Now is the time to tidy your trees up before the new crop begins to set. Your starting point should always be to cut out any diseased, crossing or upright growth. Having done this make sure you create a hole in the centre of the canopy to let light get into the centre of the tree. Finish off by lightly trimming around the outside of the tree to bring it back into shape.

I only have one old Lemon tree and over the years I have been shaping it around the dining area of our outside kitchen. To create what I grandly term “a dining arbour”. The photo below shows the tree before the start of the big trim. Click on each photo for a larger view.

The next two photos show the outcome of my labour. Where possible I shred the leaves and branches and add them to the compost bin. But the lemons would make the heap too acid so they are thrown into the wild wood. Click on each photo for a larger view.

Removing fig nets and tying in espalier. By now all your figs should be over and it is time to remove your nets; this assumes that you sensibly netted them. If you didn’t net then you probably have fat grateful birds in your garden!. Don’t try and remove fig nets to save them for next year, it is just not worth the trouble, you will only damage the tree and it is not as if nets are prohibitively expensive.

Using scissors just move around the tree and cut all the net off with as little damage to the tree as possible. Whilst I do not recycle the nets, I always save the CDs that I hang on the trees to scare the birds. I worry that no one uses CDs anymore and that the birds won’t be scared by my hanging a copy of my Spotify subscription. The photos below show my net cutting activity together with my CD retrieval. Click on each photo for a larger view.

In addition to my normal fig tree I also have an espalier tree that I have been growing against the wall of our outside kitchen for some 5/6 years. This is netted in a similar way to the big fig tree. But the difference is that once the net is removed it is time to tie in the branches to ensure that they follow the espalier wires. The photos below show the espalier netted, then de-netted (a term I have just invented) and finally you can see a branch being tied in to maintain the espalier. Click on each photo for a larger view.

The final episode in my de-netting odyssey is to transfer a portion of my removed net to my Persimmon tree. The Persimmons are gradually beginning to ripen. But they do this very slowly which means you can sometimes forget them. However, the birds never forget, they know exactly when the time is right to strike by the colouring of the fruit, so it is best to get your net in place now to save tragedy later. The first photo below shows the first signs of ripening, whilst the second shows my trusty recycled net in place together with a selection of Mantovani’s greatest hits on CD.

Tidying borders. My last act before leaving for our English garden was to clear out the long borders along our drive. Because they are in fierce sun all day I only plant things here that can stand this ferocity. My succesion planting keeps this area in flower from early March till the end of August. The planting normally includes:

  • Various bulbs
  • Carnation and Dianthus
  • Flag Iris
  • Marigolds
  • Osteospermums

When it comes to clearing out borders I have been taking out individual plants by hand as they are spent. But now it is time to get industrial, just use your hedge trimmers to take off the sides and tops of the Osteospermum. This allows you to get a good look inside to see which plants are too woody, and which it is worth trimming back and letting go through the winter. In a future post I will cover the self sown seedlings that will be coming through soon in this area.

The photos below show my hedge trimmer strategy in action, finishing with my overloaded compost bin. The final photo shows my nice cleared beds and clean drive ready for the winter. Click on each photo for a larger view.

Cutting patterns on the lawn. This time of year I like to let the lawn grow quite long to encourage seed setting and to help the birds and bees. My lawn becomes alive with bees and lots of little birds happily pecking away. I wander among them like a latter day St Francis. However, Cruella calls this the time of the great harvest and sets traps and makes bird and bee gruel for her breakfast.

I always cut a pattern just for fun. The photo below shows this years homage to the Yellow Brick Road.

Frank L Baum would be proud of me.

Seeds, seedlings and attempted murder

I know the above heading may seem slightly incongruous and doesn’t match the requirements of a gardening blog, but let me explain. Cruella (my wife) has for years despaired of getting me to come in from the garden at meal times. Over the years she has tried many options including: shouting loudly, ringing a bell, banging a dinner gong and even blowing a vuvuzela (at the time of the South African World Cup).

But now she has gone too far. She has taken up archery and now regularly fires arrows at me before every meal. I have become accustomed to the swish of air as another close miss whistles past my ear, or the thwock sound made by an arrow slamming into a tree I am standing beside. She has even perfected the technique used by Legolas in the Lord of the Rings, whereby she can fire arrows rapidly. Sometimes I will be cutting the lawn and suddenly I am surrounded by a ring of arrows rapidly thudding into the lawn.

Anyway she has gone too far and I am thinking of reporting her for attempted murder. The other day I was sitting at the spot where I rest between the far end of the garden and the shed. I use this spot to stop and think about what I am supposed to be getting from the shed; it saves time as if I go straight to the shed I will forget and have to go back to the beginning again. To cut a long story short, as I sat there innocently contemplating my mission to the shed, suddenly thwack an arrow went straight through my oldest (and best) gardening hat. When I complained to Cruella that this was attempted murder and she had gone too far. She merely smiled and said she was practising. The photo below shows me moments after the attempt on my life, (note the damage to my hat).


17th September. Things I have been doing lately:

🧎‍♂️ Gathering seeds. September is the time when you should be scurrying around checking all your plants for seedheads. Most plants will have set seed and there is a wide variety if you just look.

🌸 Margeurites provide the best and easiest way to get new plants. Instead of gathering their seed, just rub the seedheads between your finger and thumb and let them drop to the soil and just water them where they fall. Within a few weeks you will have lots of little seedlings popping up. Once they have at least four leaves then you can prick them out by easing them from the soil with a trowel. and repot them into trays. You can then plant these out in your borders in mid January and they will flower from May all the way through till December.

The first photo below shows my seed spreading technique. The second shows the lovely little seedlings, the third shows them being eased out of the soil and the final photo shows the 96 new plants I now have. Click on each photo for a larger view.

🌼 Grey Santolina. These are lovely drought tolerant plants that grow well in Spain and their small yellow flowers stand out against their grey foliage. To get seeds from these plants you simply cut off a number of former flowering stems. Take them to a table where you can sit and gently roll the seed heads between your finger and thumb, letting the seeds fall into an envelope for safe keeping . These can then be sown in trays in mid January. The first photo below shows the Santolina being harvested for seed. The second photo shows me sitting peacefully on a hot day harvesting the seeds. Note my new hat sitting on the table beside me – whenever Cruella comes near me I whip it off defensively. Click on each photo for a larger view.

🌻 Sunflower seeds. Regular readers of this blog will remember that after the great seed disaster of 2020 I was forced to plant an odd arrangement of things. One of the great successes of Summer was the Sunflowers. These grew magnificently high and flowered beautifully. A few blogs back I showed you how to cut the heads off and dry them in preparation for harvesting seed. After thoroughly drying the heads it is now time to harvest the seeds.

Using a fork pry the seeds out from the seed head into a bowl. It is important that the seed head is completely dry. Then using various type of sieves, sift them as much as possible to separate the seeds from the chaff. Once you have as many seeds as you want, place them in a plastic box and store them in a cool, dry, dark space. When you are finished place the seedheads out in your garden so that the birds can get the rest of the seeds that you don’t want.

The first photo shows my efforts at manfully prising the seeds out of the heads. The second photo shows my sieving efforts (Don’t tell Cruella, I borrowed these from the kitchen). The third photo shows the seeds boxed up and ready to be planted next Spring. The last photo shows the seed heads lying on the lawn ready to feed the birds. Click on each photo for a larger view.

I have a bald spot and Cruella is treating it

The misunderstanding started when I said to Cruella (my wife) that I was worried about my bald spot. She assured me that I shouldn’t worry as it happens to many men my age and that she still finds me attractive “in some ways”. Before I could explain that I was talking about the lawn she had whipped up a potion consisting of Cabbage leaves, frog spawn and what looked like coughed up phlegm. She proceeded to rub this into my head; anyway, to cut a long story short that’s how I ended up with a green head and having to wear a hat.

25th September: Things I have been doing lately.

👨‍🦲 Repairing a bald spot on the lawn. After the wear and tear of Summer (and two marauding Labradors) my lawn has developed a large bald area that is in need of repairing. If you have a lawn, then now is the time to repair it by re-sowing seed. The end of September and the first 2 weeks of October are the optimum time to undertake repairs to your lawn. The ground is still hot, but the scorching Sun of Summer is less fierce.

There are a number of stages to repairing a lawn:

Mow the grass very short in the effected area and then rake the area with a grass rake to pull up the grass thatch and expose the soil for the seed to contact.

Mix up an appropriate soil and compost mixture to form the base for your seeds to root. Deposit the soil/compost over the area and evenly spread with your rake. Once the solid mix has been evenly distributed roll it then check for lumps or hollows that need smoothing out or filling. The first photo below shows the Mantillo mix that formed the main base of my mixture.

Once your soil is prepared, sow your chosen grass seed. I use a Grama Kikyu mix which is a spreading grass that is very drought resistant (it is expensive but worth it). I have been hiding money from Cruella in my sock drawer to pay for it. From the photo below you can see that this seed is contained in a small pellet mixture that both feeds the seed and (hopefully) repels birds.

Once you have sown your seed use your rake to gradually tease the soil so that it partially covers your seed. This will ensure that the seeds have some contact with the soil. You then need to roll the whole area again to firm the seeds down and ensure soil contact. The photos below showing me raking and rolling, which is the gardeners equivalent of rock and roll. Cruella took these pictures but before she did so she questioned whether I was going to put a shirt on (I didn’t, it’s a small act of rebellion, but it’s what keeps me going). I also kept my hat on as my head is still green.

Finally, cover with a permeable membrane. This will keep the birds off and also ensure a nice humid growing temperature for the seeds. However, all this effort will be wasted unless you water at least three times a day. If the grass seed drys out it will just die very quickly.

I borrowed some of Cruella’s old shrouds for the membrane.

🥀 Dead head Roses. Don’t forget to keep deadheading your Roses. If you do this assiduously over the next month or so you will get flowers right through to November. The photos below show some of my Roses which are now coming into their second annual bloom.

Cruella has summoned a storm – and I was almost arrested

Our recent drought in Spain is about to end spectacularly and Cruella (my wife) is claiming the credit. She said she could no longer stand my being depressed about the lack of rain and to cheer me up she has summoned a storm. She spent most of last night on the roof holding on to the TV aerial dancing around, waving her arms about and chanting incantations. I had to go up and get her down as the police came around and said they had reports of an old lady pole dancing on my roof-they wanted to know if I had a license for dancing.

11th September: Things I have been doing lately.

🌨 Water Management: As the storm arrives you need to capture as much water as possible – get water butts, put out buckets, use old dustbins; anything so long as you capture the precious water. Even the smallest garden needs water so there is no excuse, especially in Spain where we have prolonged droughts. You will need this water throughout the year and it’s free so you cut down your water bill. The first photo below shows my compost bin lids raised ready to capture water to soak the compost. The second photo shows my large water tank surrounded by large dustbins into which I siphon water off. The last photo shows one of my extra large Ali Baba water butts.

🥀 Feed your Roses. Now is the time to give your Roses their last feed of the Summer. From my perspective it has not been “a good year for the Roses” no matter what Elvia Costello says. The drought has left them desiccated and therefore open to everything from Aphids to Rust. But never mind there is always next year. By feeding them now you will set them up to be ready for Winter pruning and next years growth. There are lots of Rose feeds so take your choice, but don’t buy cheap ones as they won’t really work. The photo below show the one I am using at the moment.

Other brands are available

🥅 Take nets off Figs. Assuming you have netted your Figs then they are probably now at an end and you have enjoyed a Summer of delicious Figs. If not then just pick off all the half pecked Figs that the birds have destroyed (I told you what would happen and you only have yourself to blame). Anyway, cut the nets off now, don’t try and save them for next year, it is not worth it as they will have holes in them somewhere.

If you have an espalier Fig as I have then begin the process of tying in this year’s growth. You will complete the tying in later when you prune. The first photo below shows my espalier Fig with its netting. The second photo shows a branch with a tie.

🌱 Cut off citrus suckers. By now all your citrus trees should have their new fruit growing strongly. To ensure that all the goodness goes into the fruit and not into unproductive new growth, you have to cut off stem and trunk suckers. Suckers will be especially prevalent in old trees and can be seen as upward growing very bright green soft shoots. Just take them off by gently pulling down on them. The photo below shows one of my trees with the suckers marked and ready to be pulled off.

Never give a sucker an even break

🌾 Cut off Yucca flower spikes. It has been a good year for Yucca flower spikes, so I hope you have enjoyed them. As the spikes die back cut them off so that the the plant does not go on to produce seed. This will be an ongoing task for the next few weeks as the spikes will come at different times. You can just leave them till they have all flowered, but this looks untidy and distracts from the lovely fresh quality of the new white flower spikes. The photos below show some of my Yuccas at various stages of flowering.

I’m back and it’s all systems go

Cruella (my wife) and I arrived back from our English house to find that we had had a massive thunder storm in Spain whilst we were in England. Hooray, every water butt was full to overflowing, and the grass which I had fed before we went away was so green it could have been in Ireland. With this Great joy comes obvious responsibilities: grass needs to be mown, weeds need to be sprayed, Doves need to be sacrificed (as far as Cruella is concerned). But nevertheless besides these mundane chores there is lots of exciting things to do to keep an old gardener happy.

25th September: Things I have been doing lately.

🌴 Harvesting Dates. After my great success of sun drying figs I am now going to try sun ripening Dates. You will remember in my last post – if you were paying attention – that because of the great drought there was a huge crop of Dates on our Palms this year. Well, I have started to harvest them for the first time. Normally, I just leave them for the squirrels and the birds, but this year there are so many I thought. I deserved some. Dates can be harvested early and then will continue to ripen in the Sun.

The first photo below shows one of our few short Phoenix Palms overflowing with Dates. Most of our trees are about 30/40 feet high and I don’t trust Cruella to hold the ladder. But this one has enough fruit for an experiment in date ripening. You can leave the Dates on the tree to ripen fully, but the chances are that the squirrels and birds will beat you to it. Try not to harvest them when they are green, but wait just that little bit longer till they turn a yellowy colour.

E1D2D8EA-BE1C-4AF8-837C-70AF711B9D56
Don’t get confused there are also solar light on the tree.

The first job is to cut off the stalks which hold the dates in strands. This is a tricky job as the branches have long strong spikes sticking out all along their length. You should wear strong gardening gloves (but they will still get you). You can either cut the stalks off with a saw or, in my case I used long handled shears. The second photo below shows my crop laid out ready for separating the Dates from the stalks.

The next stage involves sitting in the shade and gently removing the Dates from the stalk by hand. You should only take the best ones with overall continuity of colour. The Dates  come off easily enough with a slight twist. The third photo below shows my Date stripping station (now I read that again it seems slightly creepy) sorry @#me too.

The final stage is to lay the harvested Dates out in the sun to ripen. As you can see from the photo below, I have laid the Dates on tea towels stolen from the kitchen and then covered them with a couple of Cruella’s hats. The idea of the tea towels is that it makes it easier to just wrap up the Dates and bring them in each night. I will let you know how I get on.

202E3A1C-6683-4795-9736-857B199A09B0
Everyone assumes that Cruella only has pointy hats; but she wore these to Ascot in 1857.

🍊 Feeding fruit trees. October is really the last month you should be feeding fruit trees. So, if you haven’t done it yet get out and do it soon. The process is very simple just hoe around the base of the tree to remove any weeds and break up the soil. Then apply the type of feed you prefer, but it must not be just a general feed, you need a specialist food for fruiting trees. You can get this in either liquid or granulated form. My preference is to use liquid form for most of the year, but for this last feed I will use a longer lasting granulated form. Liquid feed is a bit like fast food you eat it quickly, it tastes nice and then it’s gone. Granulated food is like a four course meal at a nice restaurant; you digest it slowly, enjoy every bit and always remember it. I am thinking of giving this garden stuff up and becoming a restaurant critic.

The photo below shows the feed that I use (others are available) note my trusty hoe standing near by (no I’m not going there again, I have already apologised), also don’t forget to hoe the feed in and also water it if it does not rain within two days.

0646B932-F204-4129-8364-D1E4BD0E0DB9
One man went to hoe…

A little bit of Spanglish gardening

Cruella (my wife) and I are currently at our English house, so I thought I would embellish my international gardening credentials by doing a two countries post on the blog. Before we went away I had some things to finish off in our Spanish garden and of course when I got to England I had the usual cutting back issues.

Anyway without any further ado let’s play international gardening.

16th September: Things I have been doing lately.

🍑 Removing nets from soft fruits. By now all your fruits such as figs and grapes should have finished fruiting and you can now take off the protective nets. If you didn’t put nets up then you probably didn’t have any fruit, but the birds did! It is important to take the nets off now as they can always be a hazard to small birds. The best thing to do is cut the nets off, they will probably have some holes in anyway, and if you try and take them off to save for next year you will only damage the tree. Nets are very cheap so don’t be such a cheapskate, buy new ones next year.

If you have Persimmons don’t take the nets off yet, for although the fruit appears hard, as it ripens on the tree so it becomes soft and the birds will be triggered by the bright yellow colour of the ripe fruit. Also don’t worry if all the leaves have fallen off your Persimmon tree this is meant to happen; the leaves are meant to sacrifice themselves for the fruit. A bit like Jesus, if you think about it.

The photo below shows some old bloke cutting the nets off a fig tree. Cruella says this is me, but I have a different image in my minds eye and I don’t believe her.

61A18FBD-F8D8-4E74-8C80-5C9F7587834D
With the net and those sandals I think I look a bit like Kirk Douglas in Spartacus. It must be the way I wield the scissors.

👅 Letting Mother in Laws Tongue see the light of day. Mother in Laws Tongue or Sansevieria trifasciata is a common plant here in Spain and is loved for its variegated leaves and drought hardiness. I have various clumps here in the garden and I noticed a large lump pushing through the membrane next to one of them. Out of curiosity I slit the membrane open and there were two new little Mother in Laws Tongue. From the photo below you can see they look just like the little creature that popped out of John Hurts chest in “Alien”.

74F14C85-D3D7-4A1C-939B-FC79E077D9EB
In space no one can hear you scream …ditto garden

🍇 Picking the grapes of wrath. The photo below shows the sum total of our grape crop this summer. I have three grape vines and this is all I get thanks to the great drought. Luckily I am not relying on this grape harvest for wine.

5B0A95F2-0887-4C99-9DA7-C0421CEE21EA
Won’t get many bottles out of this.

🏴󠁧󠁢󠁥󠁮󠁧󠁿 And so to England.

As usual when we arrived our English garden is a bit overgrown and wild. But this actually quite suits it as it is set out as a small walled garden with the river as a backdrop.

✂️ Cutting things back in the back garden. The first thing I usually have to do is a gentle cut back of everything. The aim of this is just to shape things up a little bit and make sure we can walk up and down the garden safely.  The main cutback comes in January.

The first photo below shows the back garden just as I am about to cut it back. Apart from a general tidy up, in particular, I cut back the Roses that tend to have Hips at the end of the season. I am not really a fan of hips so I take them off so that the plant does not waste energy on them. Another plant that needs a tiny trim is the Hydrangeas. These grow over the pathway down the garden, but I really barely touch them. You must leave the spent Hydrangeas flowers on till next year’s new growth comes through. These protect the new growth from frost; this of course does not apply in our part of Spain, but in England it is very important.

The Second and third photos below show the Rose hips and the spent Hydrangea flowers. The final photo shows a large Oleander that I had to cut back a few years ago as it suffered in an English snow storm. I think I will cut it back again this year as it got a touch of frost last Winter and is just too big for its position.

E48C3D83-22A9-47B7-8B4C-AA3B552115CE
Indiana Jones and the Brown compost bin

C2BB01B6-C33C-4C28-BA2D-BD8C2B892EF9
The Oleander before its cutback… I haven’t told it yet.

✂️ Cutting things back in the front garden. The front garden like the back garden is small “but perfectly formed”. There is a small walled island bed planted with various shrubs lots of Yuccas and various medium size trees and shrubs. The main cut back here does not come till January, so again it is just a matter of tidying and trimming up. The only difference is the Yucca flower spikes. Like Spain the unusual hot weather in England has produced a fantastic and profuse flowering of Yucca. You need to cut these off when the flowering is over so that the plant does not waste its strength on seeds. The photo below shows the Yucca before trimming.

C5A56B1E-908B-417D-8C2C-F683FECC224C
Note the tree in the background trying to gain access to the house through the windows.

And still the drought continues….wait a minute it’s raining

Everyone loves the Sun, I love the Sun, but you can have too much of a good thing. The current drought means there are no deep water reserves in the soil and no matter how deep plants send their roots they are still having difficulty finding water. Of course I in my desperation come along and water the soil which in turn makes the roots head for the surface to get the water the Sun then scorches the shallow roots and kills the plant; I feel like an accessory to murder.

7th September: Things I have been doing lately

🥐 Feeding the lawn. If you have any lawn left as opposed to desert dunes, then now is the time to give it the last feed of the Summer. Apply a high Potash feed using either a wheeled spreader or just broadcast it by hand. The only problem with hand broadcasting is that it can lead to patchy results with high doses that cause grass scorching or low doses that mean not enough feed. So if you can justify it get yourself a wheeled spreader, they don’t cost very much and you need to use it about six times a year.

This feed is important as the grass will have become exhausted with all that growing and now needs to recuperate during the cooler months. By doing this now you will get your reward with stronger brighter grass in the Spring. The photo below shows my spreader ready to go to work and a sack of the feed that I use.

53ED95CB-1C8C-4B47-AD7A-19BC407DF4F1
I am hiding behind the Palm

🍂 Composting Autumn leaves. I know the height of Summer is a strange time to be thinking about Autumn leaves but that’s gardening for you. No doubt you will remember that I told you last Autumn to rake up all your leaves place them in sacks aerated by puncturing with a fork and then leave them in a dark place. Well if you did, it’s time to get them out. Leaves compost in a different way to normal plant matter so are best kept out of the compost heap for a while. I usually wait about 6-8 months then add them to the normal compost heap. By this time they will have done their main compost period and can be happily mixed in to add nice rich loam to your compost. The photo below shows one of my six sacks of leaves about to go to it’s final resting place in the compost heap. I have put one bag in every two weeks so that they are layered into the heap. This is riveting stuff I don’t know about you, but I’m on the edge of my seat.

D7127A28-0534-4B24-B0A8-918A5206002D
I am hoping for photo of the year in Composting World!

🥔 Digging up Butternut Squash. Sadly my Butternut Squash have totally failed to provide me with even one little Squash this year all because of the drought. Last year was a bumper crop and Cruella (my wife) has been making Butternut Squash curries all year and using them in all sorts of spells. She even knitted little blonde wigs for them and had a line of Butternut Squash Donald Trumps (she is a big fan).

After feeding, watering and caring for them night and day I decided that enough was enough, they were not going to produce Squashes now so they had to go. In the end I dug up almost 20 metres of Butternut Sqash tendrils. The photo below shows one of the three barrow loads that went on the compost.

D50EE811-89DD-40A1-95AC-BC3C28B2230A
All leaf and no Squash

🌴 Checking out dates. Not that kind, I’m not thinking about “Tinder”, Anyway I thought it was something you lit fires with. No, I mean Date Palms. One of the big successes of this dry summer besides Figs, have been dates. I have a number of Phoenix Date Palm trees and all of them are bursting with dates, see photos below. The squirrels in my garden will have a fabulous time, but I plan to give them some competition. After my great success with sun dried Figs, I now plan to sun dry the dates. The only problem is Cruella and I are going to our English house for a couple of weeks and I don’t know if the squirrels will have left any by the time I return. I’ll let you know what happens.

💦 Its raining! My prayers have been answered it is just starting to rain; and quite heavily too. Much to Cruella’s amusement this has sparked a burst of frenetic activity from me. Firstly, I have to race round and open the lids of the compost bins so that they benefit from the rain. Then a quick sprint around all the water timers turning them to “off”, all 11 of them. Stopping only to tie up a wayward shoe lace, I then jog round all the water butts and tanks to make sure every thing is open and clear, ready to receive the lovely rain water. I place a large plastic box by each water butt ready to run off any excess and lastly I place three large plastic dustbins besides my large 1,000 litre tank ready to run off any overspill into each of the dustbins in turn. I have also decided to stick any Naya plants that are normally undercover into puddles for a drink; why not it’s free.

The first photo below shows me in unbelieving supplication as the first drops of rain begin to fall. The second photo shows my collection of water receptacles by the big water tank. The final photo shows a Lantana and an Aloe enjoying a drink in a puddle.


A mystery White fly is eating my Ficus and I am not amused

This post was going to be full of Zen like calm as we ran through the things that need tidying up as we end summer. That was before I discovered this tiny white fly and the bugger is eating my Ficus (weeping fig). I had to resort to international detective work to find out what it is, and it turns out if I’ve got it, then it is coming to bush near you very soon.

We will deal with the Zen stuff at the end of this post, but let’s get on with this fly emergency; I wish I had a pole to slide down, or at least a siren.

27th September, Things I have been doing lately:

🥊 Dealing with the fig whitefly: Yup that is what it is. After searching through the internet and talking to gardeners in the US, I have identified it as the fig whitefly (Singhiella simplex) which comes from the Order Hemiptera which also includes Aphids. Evidently it is relatively new to the US where it is destroying weeping figs just for fun and leaving large parts of Florida gardens completely bereft of their ficus hedges.

I discovered the little blighter purely by chance. I have two Ficus weeping figs, one is a smallish bush and the other is more tree like. Anyway, the small one started shedding its leaves quite dramatically and at first I thought it was an irrigation problem; but as they don’t need much water I was perplexed. Then I thought it might have been accidently hit by some wind borne weed killer as I had been spraying gravel near it. To help it recover from what I thought was weedkiller I was just applying a watering can full of feed and pushing back the leaves to get to the roots I was suddenly engulfed in a cloud of very small flies. It was only then that I twigged (plant pun) what was wrong. The clever little sod hides on variegated weeping figs, but because of its colour it sticks to the white part so you can never see it.

The fig whitefly has up to three egg laying periods in a season and the immature stage sits under the leaves not moving and sucking the life out of the leaves. Although there are some natural predators, not enough to deal with its astounding birth rate, so if you want to stop it you have to spray or drench the roots. If you want my advice go out and shake your Ficus now and I bet the little blighters are there – this could be a new dance craze, called doing the Ficus shake. See the picture below of my poor Ficus, you have been warned.

IMG_1587

🍇 Trim back grape vines. Although it is not time for the big grape vine cut back, you can make the plant healthier by cutting back any lower sucker type growth close    to the ground. This has the benefit of not only making the plant look tidier, but also it ensures that its energy is going into the vines that will fruit next year. The first picture below shows one of our small vines that needed tidying, the second picture shows it showing off its legs like some hussy.

🌳 Trim suckers off the trunk of Californian false peppers. The False pepper is a lovely tree and we have lots of them in my area of Spain. But I have mentioned in previous posts that to keep it tidy you need to do a big cutback every 2 or three years and take off more or less all the branches and just leave the trunk. This then encourages the weeping willow effect that is so lovely. The drawback in this is that once you cut off the branches, then twice a year you need to cut off the suckers that swarm from the trunk. This is very easy as they are soft and pliable and can easily be removed quickly by a hedge trimmer. The first picture below shows the tree before trimming whilst the second shows it with what looks like designer stubble.

🍊 Trim suckers off the trunk of citrus trees. Talking of suckers, you should never give them an even break; I have used this rather lame joke in previous posts, but I believe in recycling. Anyway, at this time of year your orange and lemon trees will start to sucker like crazy. You will see bright green little shoots starting out all over the trunk of your trees. You need to take these off as they will take away the energy that you need to get your fruit ripe. Wearing gardening gloves, just pull the sucker down against the trunk and it will come away in your hand. If you have left it there too long and it has gone a darker green, then you will need to use secateurs to remove it. The picture below shows me in action removing a sucker.

IMG_1588

👃 How is your Dame de Noche. If you have followed my advice in previous posts about when to prune your plant for best flowering; and I am sure you have, then you should have a magnificent flush of flowers that scent late summer barbecues. If you didn’t follow my advice then you are currently looking at a very uninspiring green lump of bush, and it’s your own fault. See the picture below of my Dame de Noche in late flower’ I am encouraging “petal envy”.

IMG_1548
Hello flower.


I am thinking of becoming a mad scientist


I have always been an admirer of mad scientists, the likes of Dr Frankenstein, Dr Moreau, Dr Emmet Brown and of course Dr Sheldon Cooper are all long time heroes of mine. It’s the idea of experimenting that I like, not the mad bit. But anyway, the whole point of this is that I decided to conduct my own experiment with plants. I have started with Spiderwort because that sounds the sort of name mad science experiments would have. It’s right up there with “Quaitermass and the pit” or “the Andromeda Project”. ‘The Spiderwort Question” is my chosen title, pretty cool eh!

24th September: Things I have been doing lately.

🕷 The Spiderwort Question. I might have bigged this up too much, for as most of you know Spiderwort or Trascedentia is a lovely Naya or terrace plant that is quite common here in Spain and in other warm climes, see the first picture below. Spiderwort can be grown in pots or can act as ground cover. It needs partial shade otherwise it will not thrive and will also lose the distinctive stripe on its leaves. The main problem I have found with Spiderwort over the years is that it can sometimes die back in the winter to such an extent that you can lose it. Therefore my strategy to date has been to take cuttings so that I am ready with replacements.

Now for the experimental bit; this year I am going to try three different ways of growing these cuttings on. I have bought a white coat from Amazon and I did try to get a stethoscope but my wife found out and stopped me. The white coat looks very fetching by the way and it appears that gardening’s great gain was a sad loss to mad scientistry. Anyway, back to the experiment. To take cuttings from Spiderwort you need a very sharp knife (secateurs will crush the stem); cut just below a side shoot on a long trailing stem. Then peel off all the leaves apart from a couple at the top, you are then ready to plant your cutting, see picture two below.

I know the excitements building, but here is my new three step trial that will eventually answer “The Spiderwort Question” – I am thinking of commissioning special music to go with me saying that. The first lot of cuttings I have planted as normal with four around the side of a 4 inch pot, see picture three below. The second ones I have just popped into a glass of rainwater that I have placed on a windowsill on my Naya, see picture four below. The third ones I have layered into little slits in the soil about 1 inch deep with the stem lying along the slit and the leaves coming out of the soil, see picture five below.

I shall be reporting back on progress in a few weeks; I will probably announce the results here, but it depends I may be called to the UN to report direct, we shall see, either way I will be wearing my white coat.

🍋 Watching fruit ripen: this time of year you have to keep an eye on any fruit that is on your trees to make sure you pick it at its optimum. You also have to make sure that nets etc are in place to ensure that birds don’t enjoy your fruit before you do.     At the moment I am watching Persimmon (kaka in Spain) and Pomegranates.

Persimmon will be ripe when it is fully bright yellow and slightly squashy to the feel. The colour of the fruit triggers the birds interest, so you have to net and go round every morning to squeeze the fruit for ripeness. See first picture below.

Pomagranates, of which I have a few (this lost verse to “My Way” never made it to the final Sinatra version). People some times think that as Pomegranates have such a tough skin there is no need to net them, but this is wrong, certain birds can soon strip a Pomegranate crop. As I only have a few, and they are well hidden in a hedge, I have not netted them. However, if I had a big tree with a good crop, I would definitely net. Anyway, to tell if Pomegranates are ripe they need to be going a lovely deep red russet colour and when you ping them with your finger they should give off a slightly metallic sound. See second photo below.

I have a new pup!

It is all very exciting round here at the moment, just as summer is winding down so we enter the season of “mists and mellow fruitfulness” as our old friend John Keats said; classic poetry and gardening – what’s not to like. Anyway, there is lots to be getting on with in the garden, not least harvesting fruit and taking late cuttings etc.

22nd September: Things I have been doing lately.

👶 Harvesting Sago Palm pups. As everyone knows Sago Palms are very expensive, but not if you can get them for free. Yup, all you have to do is watch out for when your Sago Palm starts to “pup”. The pup is a small mini Sago Palm that appears at the base of the plant, I don’t think daddy Palms are involved – at least I hope not, this is a wholesome family blog with a Christian message. Anyway, when this mini pup appears at the base of the plant – see first picture below – just dig around it carefully to expose what looks like a small coconut attached to the main trunk by a hard woody structure. Then taking a sharp spade cut down as close to the pup as you can. This takes a fair bit of force, but if you persevere you will succeed in loosening the pup from its mum. You will then have what looks like a mangled coconut with fronds sticking out the top, see second photo.

Cut off the fronds to leave you with a woody coconut with a scar on one side where you cut it from the Palm. Clean this up with a hard brush being careful not to do any more damage to the scarred area. You then need to leave the pup in a dry cool area out of the sun, for about two weeks till the scar heals over, see third photo. This stage is important so don’t be tempted to just plant the pup, as infection will get in, the pup will die, and I will phone the Spanish RSPCA equivalent and they will prosecute you.

After two weeks plant the pup in a tight fit pot, in a mixture of sand and compost. This needs to be free draining so 25% sand to 75% compost should be about right. I have made the mistake of making the mix 50/50 before with subsequent disaster. Water this lightly and keep it dry to the touch, too wet and it will rot. Keep an eye on it and hopefully in about six weeks you should see fronds growing from the top. See photo four for a happy pup in his bed.

IMG_1050
Look to the left of the main trunk and you can see the pup

IMG_1547
A pup in his bed – I’ve called him Rex

I am raising another man’s plant as my own

I really wanted to concentrate in this Post on finishing off the lawn chores and in general tidying up around the garden, but events have overtaken me. I have to conclude today’s post with a tale of betrayal and cuckoldry (look it up).

13th September: Things I have been doing lately

🌿 Clearing leaves and debris off stones and lawns. As this summer has been exceptionally hot we have seen lots of trees dropping copious amounts of leaves. You already know that if the drop on lawns you must clean them up before they kill off the grass. But it is just as important to clean up if you have laid gravel. The danger with gravel is that if you do not clean up leaves and debris then it will eventually mulch down between your gravel and provide an excellent leaf humus for weeds and unwanted tree seedlings. If you look carefully at the first photo below you will see a gravelled area of our garden which has accumulated leaves. This needs to be cleared up whilst the leaves are still whole and before they break down into leaf humus.

The best thing to do with this is wait for a very dry day when there is no strong winds, then using a leaf blower or leaf rake if you are a technophobe. In my case I use my leaf blower to blow all the leaves onto the lawn. Once I have successfully chased the leaves around for an hour or so, I then use my mower set on a high setting to hoover them up. This has three benefits. Firstly, it means you don’t have to bag all the leaves up as the mower does this. Secondly, you can use the shredded leaves in your compost. Thirdly, and probably most importantly the lawn mower shredding action will deposit a very fine leaf mold directly to the roots of your grass. What’s not to like! The second picture below shows the leaves successfully blown onto the lawn. I know I won’t win a Pulitzer Prize for photography, but I just wanted you to see how hard I was working.

🥔 Clearing up after Butternut Squash and Melons. By now most of your Butternut Squash and Melons should be harvested. I just have two plants at the far end of our small orchard that have three fruits on them. But the rest have been harvested and I needed to clean up the area as we have a Church event in our garden this weekend. Just pull the Squash and Melon vegetation directly out of the ground by holding the main stem close to the soil and easing it out. All of this lovely vegetation should then be put on your compost heap.

Melons as I have mentioned before have been a disaster this year because of them pesky ants. However, I shall have my wife take my annual photograph with the Squash and you will see it soon – I know you can’t wait. The photo below shows a nicely cleared orchard; if you look closely you will see the two Squash plants awaiting harvest at the far end.

IMG_1061
Spot the Squash

🐥 Paternity tests for plants! As the heading to this post so dramatically says, it has come to my attention that I am raising another man’s plant; actually it’s “woman” but that doesn’t sound so dramatic. Anyway, to get on with the story. You will remember I told you a few months back that whilst I was In England for three weeks. I left the garden to be looked after by my friend Karl in conjunction with my wife. I left explicit and detailed instructions for all aspects of garden care, but they still managed to destroy my tomato plants – which I may have mentioned in the past. However, just when I thought it was all behind me and there was no other ways they could hurt me (in a gardening sense of course) it has all come flooding back.

This is how the story unfolds. I had been given a cutting of a lovely Solanum with a nice blue flower and I had duly potted it on. As with all cuttings they do not look very distinctive in this early stage so I always place them in a certain order so I know who is who. These events took place early to mid summer when I usually have cuttings and seedlings all over the place. Included in my cuttings was a Dame de Noche which I was hoping to grow for my friend Daphne. Anyway, to cut a long story short Karl and my wife switched the plants around and then, I believe deliberately, but I could not prove it in a court of law, killed all the seedlings and cuttings through neglect. When they told me of this outcome, I was of course disappointed but when I enquired after the blue Solanum they both assured me that it was the sole survivor.

Since that fateful day I have cosseted the Solanum as the sole survivor of the Killing Fields of 2017, as I like to call this summers massacre. I have potted it on and eventually planted it out ready to start climbing up trellis. You may remember that a few Posts back I featured it as a survivor of Chlorosis; which I sat up all night nursing it through. Although things seemed fine I first started to harbour suspicions that all was not what it seemed. The first signs were the leaves seemed a bit large, but to be honest I didn’t want to admit to myself that something was wrong. I talked to my wife about it but she assured me that it was all in my imagination. Though I did notice she phoned Karl directly after this conversation.

Anyway, the flowers started to form and my excitement rose. However, again I became suspicious as they were the wrong shape, and the plant itself was trying to form a bush rather than climb. Although it has not flowered yet, I decided that it was time to confront my wife. Oh, she cried and denied it, but eventually she cracked and confessed. She promises me that it was only once, it didn’t mean anything, and it would never happen again. But once you lose trust in a gardening sense there is not much point in going on. We are now going to counselling and I have promised to raise the plant as my own. Daphne will have to wait till next year for her Dame de Noche and I have challenged Karl to a duel. The picture below shows the Dame de Noche, the good things is people think it looks like me!

IMG_1062
At least it’s not ginger