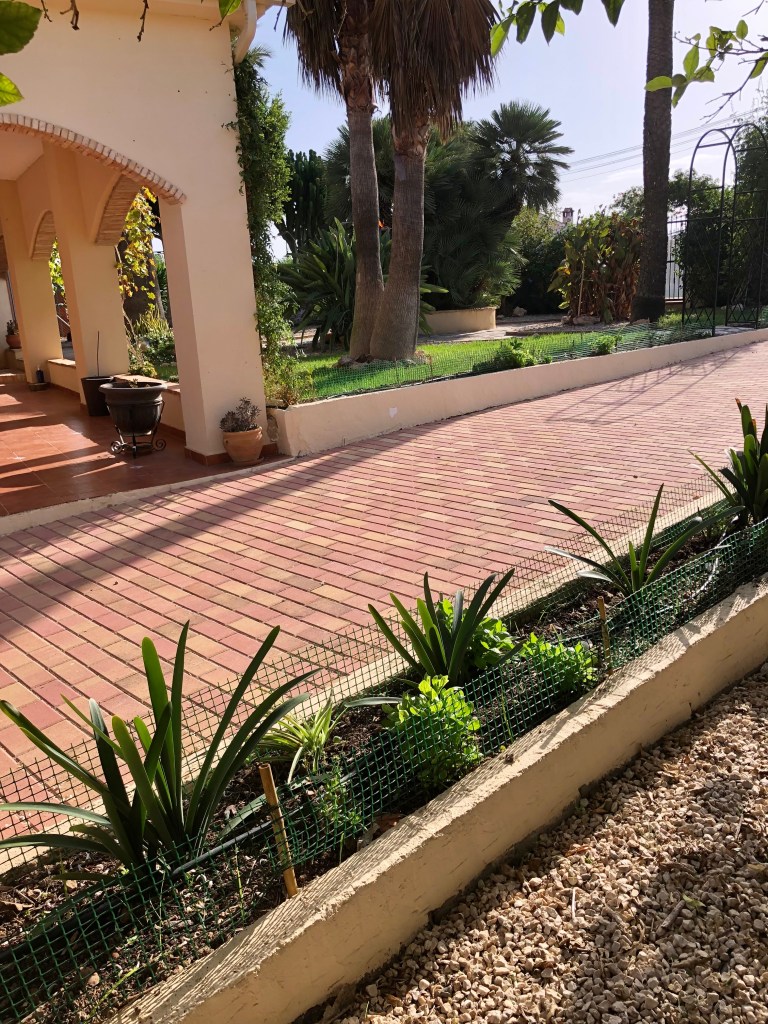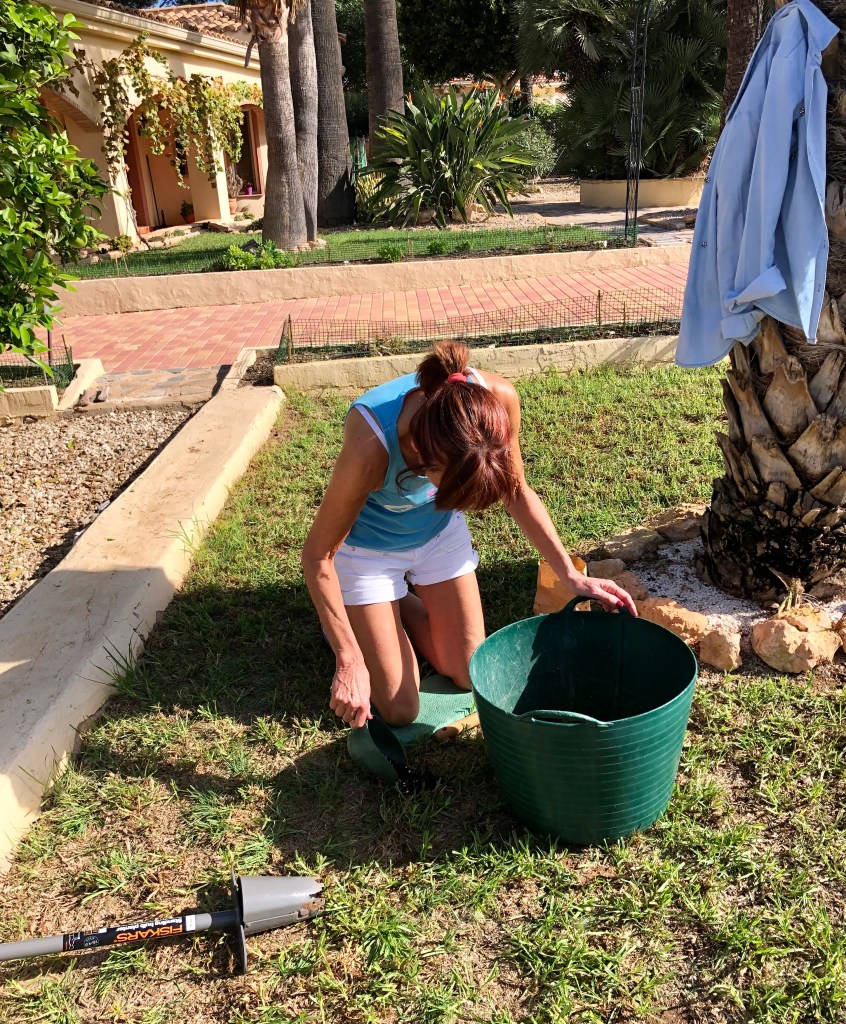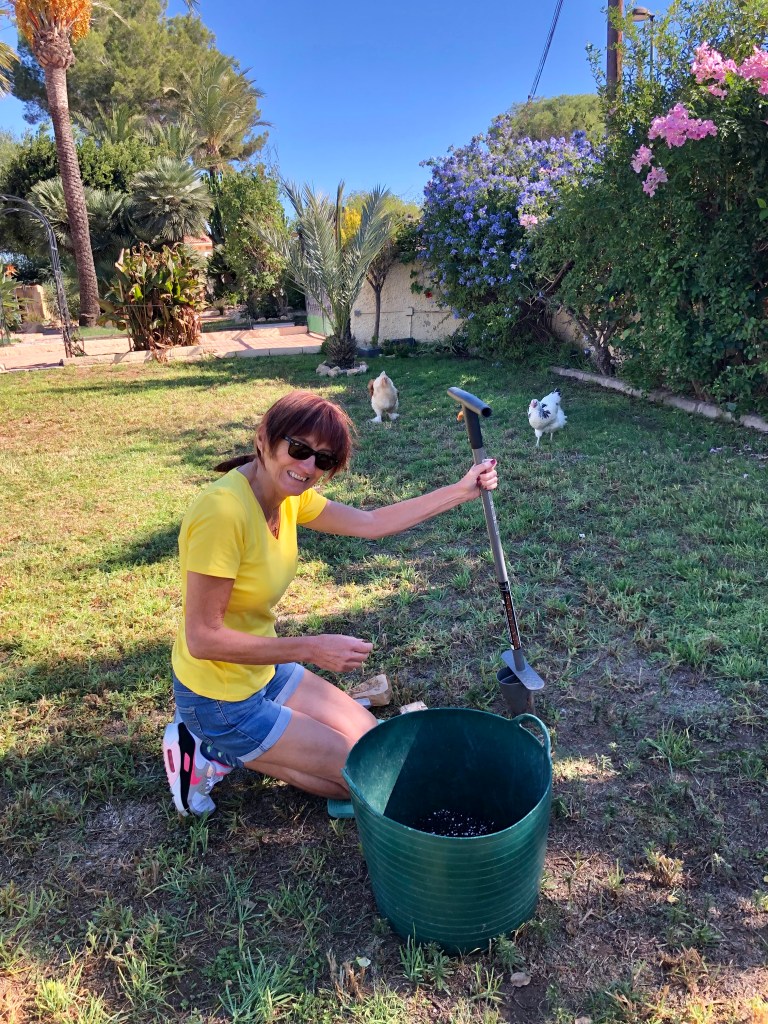

I have a bulb plan, Cruella has become Frankenstein and the little white chicken is back from the dead

This was going to be a straightforward gardening blog packed full of all the things we gardeners need to get on with at the end of Summer; it was to be calming and reflective instilling peace into our souls. All of this has been destroyed by the return of the little white chicken from the grave. How it happened was this. I was calmly digging holes for bulbs when I caught a flash of movement from the corner of my eye, and there walking towards me was the little white chicken! Yes, the one I buried just the other week. I will tell you more later, I need to talk about gardening to keep me sane.

23rd October 2022. Things I have been doing lately:

Making a bulb plan. Bulbs are not something that we often think of for our gardens here in Spain. In most gardens it is all succulents and gravel, however, bulbs can give your garden an added delight in the Spring and late Autumn. You can plant bulbs individually, in drifts dotted throughout your lawn or in dramatic clumps springing up as islands of beauty in your gravelled areas.

There are lots of online bulb suppliers who will deliver a range of healthy bulbs ready for you to plant now or in the Spring. I favour an organisation called “Farmer Gracy”who have a superb on line catalogue and excellent service and delivery. But there are many others. Or you could just buy a few packets of bulbs from your local garden centre. The photo below shows the delight of my bulbs arriving for autumn planting.

Half the joy is browsing the catalogue and then making your choices, I am like a child in a sweet shop

But don’t just rush out and begin planting. If you do, you will never remember where things are planted, you need to make a bulb plan. Just basically measure your planting area and draw up a simple plans that shows you where you have planted your bulbs. Drawing the plan up also helps you to reflect upon which bulbs will go where. You can then allow for shade, full sun and companion planting. The photo below shows the start of my bulb plan process.

Such fun it is like working in God’s planning office

The photos below show some examples of my various bulb plans. Every garden is obviously different, but a bulb plan will make you think it all through, it will also tell you what you planted, where you planted them and in what quantity. Click on each photo for a larger view.

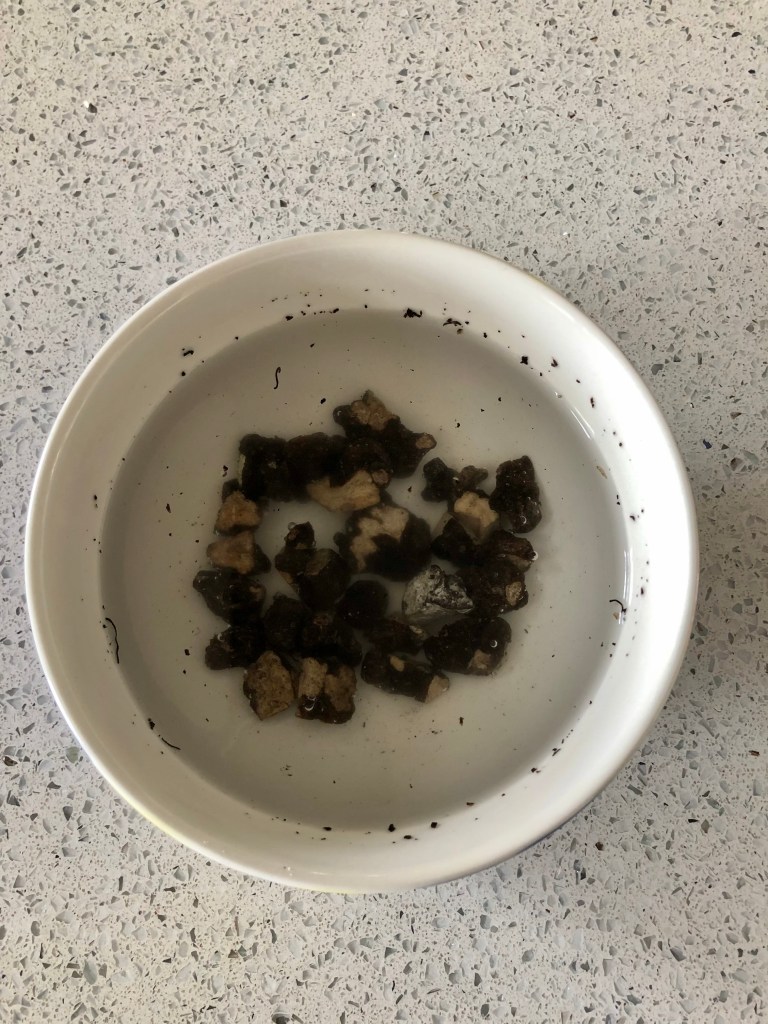
It is important to remember that not all bulbs are the same; some will need special treatment before planting such as chilling or soaking but mostly they are very straightforward. Just remember the golden rule “pointy end” faces up. The photos below show some of my bulb planting activities. The first photos shows some anemones being soaked before planting out in a shady area with companion planting of Kaffir Lillies. The next photo shows some tulips ready for clump planting. The final photo shows how I mark each bulb planted area with a white stone. This is essential as it will stop me hoeing off the new shoots and guide my companion planting in the Spring. Click on each photo for a larger view.

Finally a couple of photos of me with my new super duper heavyweight bulb planter. You will definitely need one of these if like me you plan some drift planting across your lawn. Even with this tool you will need heavy rain or a good watering to make your Spanish lawn soft enough to plant through grass. Click on each photo for a larger view.

Time to remove fruit netting. By now all the fruit should be off your trees and there is no need for netting to remain in place. It is good practice to take netting down as it stops birds being caught up in raggedy nets and obviously you can’t prune back in Spring with nets on. Don’t try and save nets for next year as it is just not worth it, just cut them off. The photo below shows my net removing efforts and some last minute fruits. Click on each photo for a larger view.

There is one danger you should remember when removing nets from fig trees, apart from falling off the ladder and breaking your neck, and that is burns from fig sap. Stupidly I ignored my normal advice of wearing covering clothes, and instead pulled the net off wearing just a vest and shirts. The result was a series of sap burns to my skin. The photos below show you just some of the damage so be careful, especially at pruning time, and only prune in January when the sap has stopped rising. Click on each photo for a larger view.

Time to plant out your spring cuttings. Sometimes you will have plants sitting on your potting bench and they seem as if they have been there forever doing nothing, then suddenly they come to life as they have made sufficient root to begin growing. I have just planted out a Stephanotis and a Jasmine and will soon plant out a rose, all of which have come into growth spurts. I can thoroughly recommend taking cuttings, there is nothing as satisfying as seeing a little twig you potted up six months ago suddenly come to life. The first photo below shows the little Jasmine in its new home, followed by the Stephanotis ready to propel itself up a trellis. Click on each photo for a larger view.

Take Dipladenia cuttings. If you have Dipladenia, and lots of you do, because it is now very popular in Spain, then why not take some cuttings. Just cut off some strongly growing stems (with a knife never secateurs), pinch out the lower leaves, leaving just a few at the top. Then dip in rooting hormone if you have it (not essential) and plant them in fours around the side of a four inch pot. They probably won’t all root, but you will definitely get some new plants out of the process and it’s free. The photos below show how simple it is. Click on each photo for a larger view.

The resurrection of the little white chicken. As a Christian I obviously believe in resurrection, but not for chickens. So it was to my amazement that I witnessed the second coming of the little white chicken. There it was strolling around the garden spying on me as usual, despite the fact I had recently buried it. I confronted Cruella (my wife) about this phenomenon and her only comment was “oh is she back already, good, we have work to do”. I’ve checked the grave it’s empty.

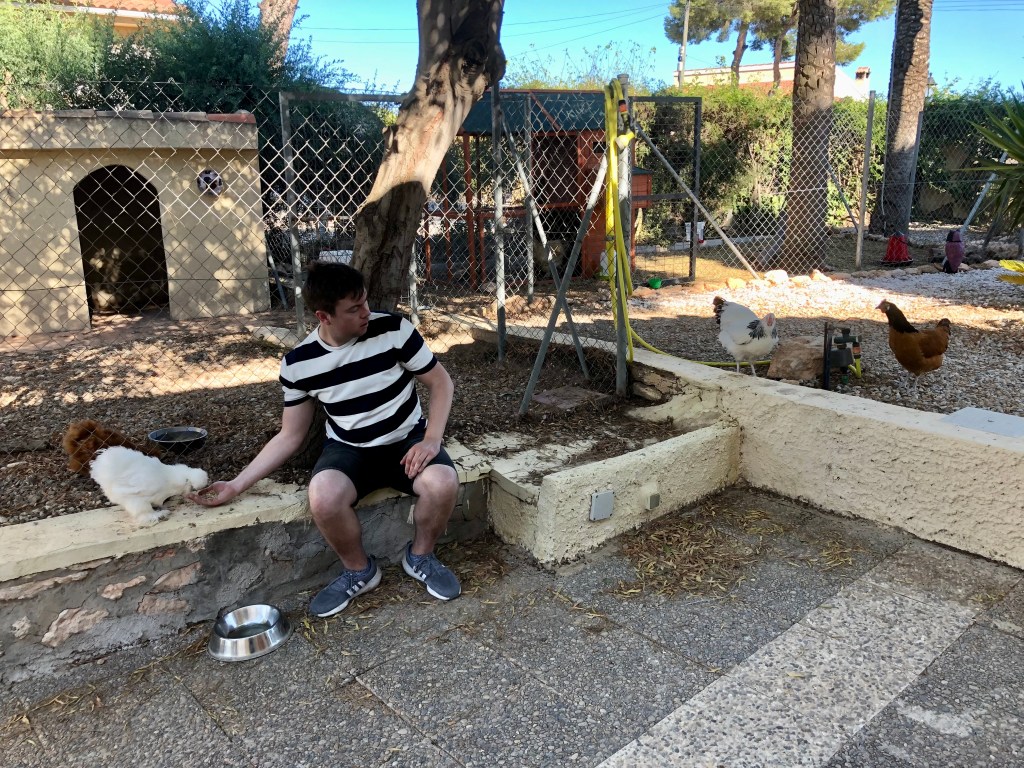
You know the worse thing? The little white chicken is now accompanied by a small black chicken with a white head, who is now its evil companion. I accused Cruella (my wife) of conducting Frankenstein like experiments with chickens and mixing body parts, which she of course denied. But I know something is up because every time she sees the little white chicken she shouts out “she lives” and cackles like a maniac. The photos below show Cruella speaking chickenese to her new, or recycled girls! Click on each photo for a larger view.

Finally, Cruella (my wife) has adopted a new chicken hairstyle that she affects when marching her girls up and down the garden as they chant in chickenese. I am thinking of moving.

She just told me a joke in chickenese and then started laughing at me

The little white chicken is dead but Tango the blind Labrador is keeping morale up

It is with great sadness that I have to tell you that the little white chicken, or as I called it “the spy”, is dead. Cruella (my wife) was at our English house with the idiot son, so all the blame has fallen on me. Despite my assuring her it was not my fault, she has lapsed into only speaking chickenese and muttering darkly with her remaining “girls”. I sleep with the wardrobe pushed up against my bedroom door.

In mitigation, this is how it happened. The little white chicken began to look ill, wouldn’t eat, and barely came out of the coop. With the help of YouTube, chicken websites and other reliable sources I diagnosed that she was egg-bound. One of the remedies offered was to bath her in Epsom Salts. At great expense I ordered Epsom Salts and duly bathed her, towel dried her and then blow dried her. By the time I finished she looked like a fluffy cotton bud had exploded. But it was to no avail, as she died anyway. But as the photos below show at least she died clean. She lies at rest in the Wild Wood. Cruella goes to her grave every night and howls in chickenese whilst I cower down by the compost bins. Click on each photo for a larger view.

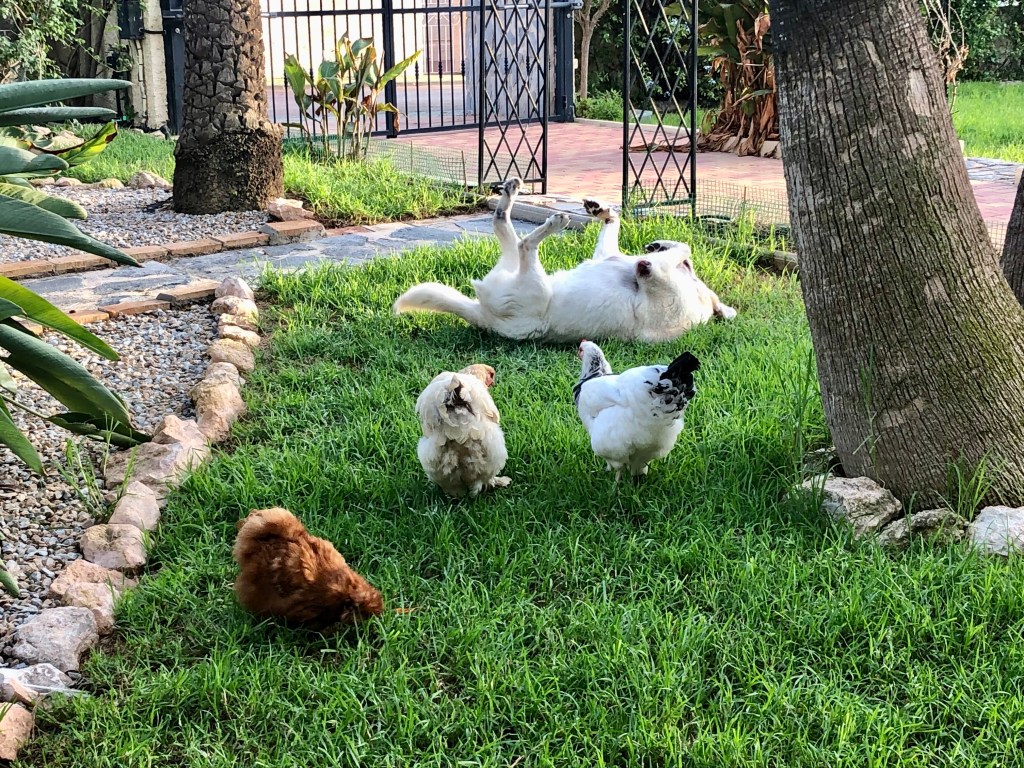
However, there is some good news before we get on with the gardening. I have taught Tango the blind Labrador to do “rollovers” to cheer up the other chickens. The photos below show Tango performing to a rapt audience of bemused Click on each photo for a larger view.

11th October 2022. Things I have been doing lately:

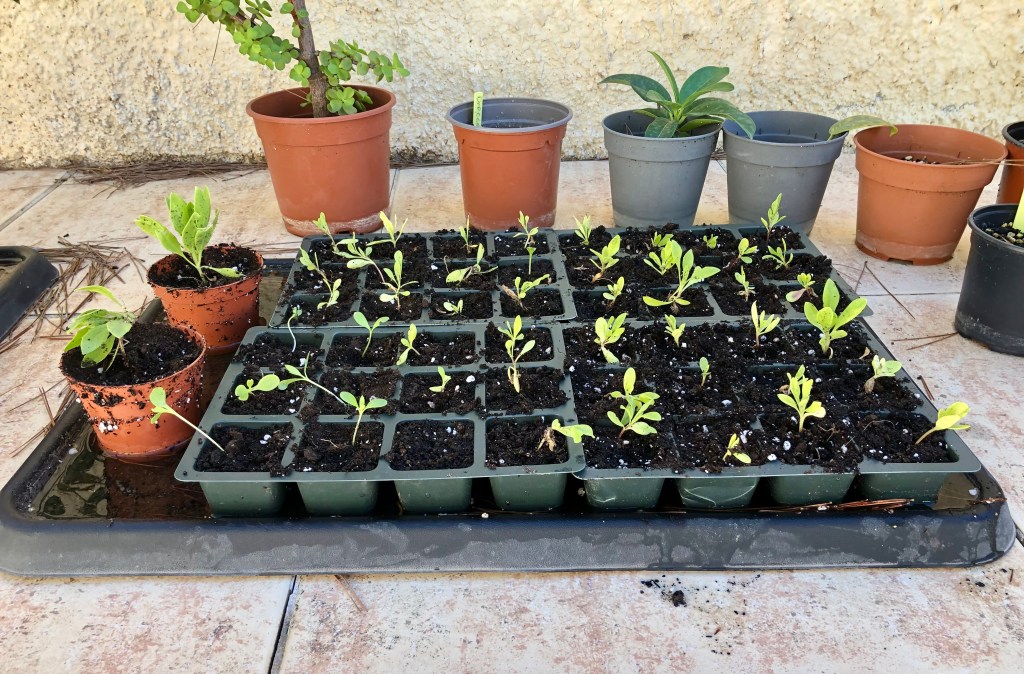
Potting up seedlings. If you have osteospermums in your garden or any Margarita type Daisy, then they are magnificent self seeders and now is the time to dig up the seedlings and pot them on. I also cut back some mature osteospermum and leave them in the beds to over winter, but mostly I rely on fresh seedlings each year.

The process is simple. Look under and around any Osteospermums and you will see a profuse amount of little seedlings. Gently ease these out in clumps using your trowel to lever them out of the soil. Then holding them by the leaf, never the stem, pot them up into pre prepared seed trays in a free draining compost with added Perlite for drainage. The first photo below shows the little seedlings waiting to be plucked to new life. The second shows the pre-prepared seed trays, the third shows my trowel action. The next shows a seedling with healthy roots being transplanted. The final photo shows the trays of happy seedlings. It just shows how simple it is to get new free plants from your garden. Click on each photo for a larger view.

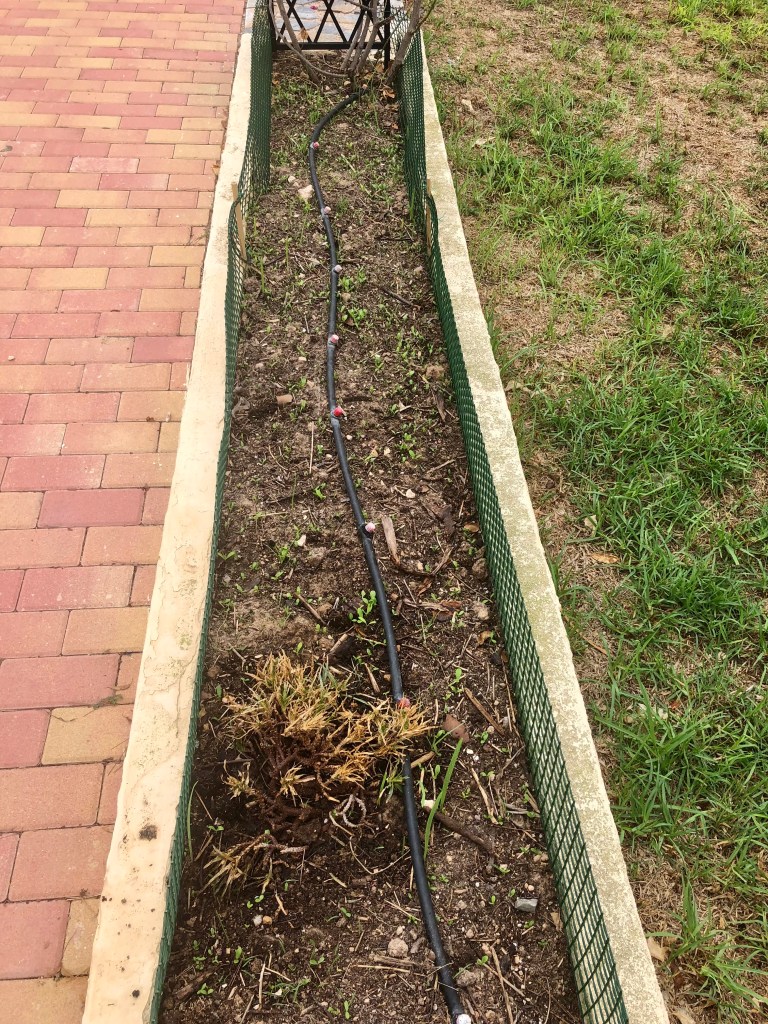
Clearing and mulching beds. By now you should have cleared all of your summer plants out of your beds and borders and it is now time to give them a good mulch before putting in your winter bulbs and plants. After clearing the beds of plants, give them a thorough hoeing to clear out any residual weeds. Following this thoroughly water before adding your mulch as this will ensure that the mulch will lock in moisture. Do not plant anything in the beds for at least two weeks to allow any remaining weeds to show themselves before a final hoe and planting.

The first two photos show the final clear up. The third shows the necessary watering before the mulch. The next shows the finished bed waiting for its new plants. The final photo shows a bed that I mulched a couple of weeks ago, and you can see the weeds making a re-appearance. Click on each photo for a larger view.

Time to take your last cuttings of the year. October is the last month you can take cuttings in Spain. Any later cuttings will not have time to make some root before the cold weather. Prepare everything before taking any cuttings, as it is important you get your new cuttings into the soil as soon as possible to stop any drying out. The first photo below shows everything you need before starting. This includes:

  • Pre-prepared pots
  • A sharp knife to take cuttings (never use secateurs as these can crush stems)
  • Rooting hormone liquid or powder (not absolutely necessary, but can help)
  • A dibber to make holes for your cuttings

The final photo shows my tray of winter cuttings that I am preparing for a friend who has a particularly dry garden. Click on each photo for a larger view.

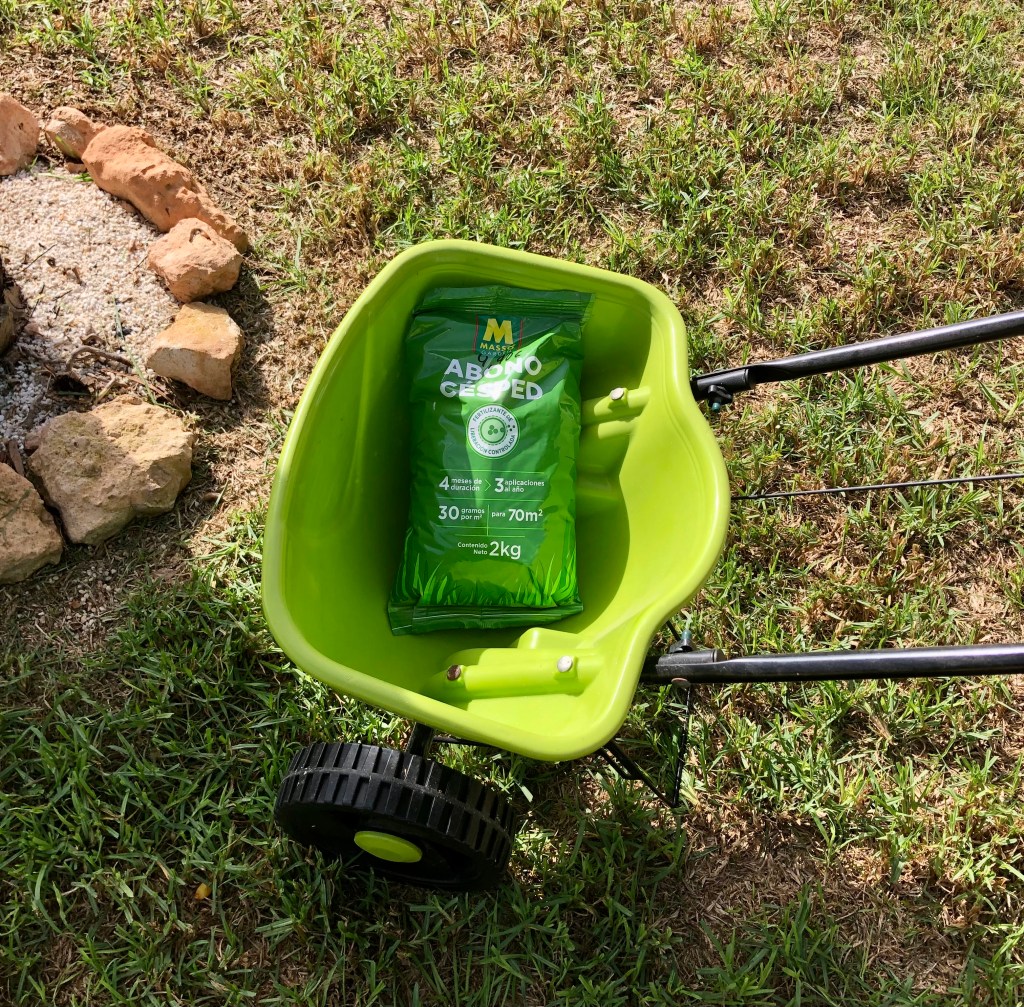
Some last jobs. There are always last jobs to be done in a garden at this time of year. I would recommend trimming Jasmine back to the wall or supporting trellis. Left to it’s own devices Jasmine will flop forward and inhibit the growth underneath making it go brown. By trimming it back you will encourage good healthy new growth all over the plant. Another final job is to give your lawn its final feed of the year. This needs to be done when your grass still has some growth or you are wasting your time and money. The first photo below shows my trimmed back Jasmine. The second shows the grass food I use (others are available). Click on each photo for a larger view.

My garden has suffered the desolation of Mordor and Cruella has taught her chickens to hunt as a pack!

I’m back, I know I didn’t tell you I was away mainly because I now work on a need to know basis, as every time I go away Cruella (my wife) and her fancy chickens devastate the garden. Well enough is enough I broke down In tears when I saw the neglect and wilful damage they had inflicted on the garden. The photos below speak for themselves. Click on each photo for a larger view.

To make matters worse whilst I was berating Cruella for the damage she and her fancy chickens had caused, she just sat there stroking the little white one and whispering chickenese into its ear like some Bond villain. Just then I caught a slight movement under a fig tree as the chickens operating in unison had stalked a little bird and made it fly into the fig net. The photos below show the hunting party setting off, followed by their lookout who is set to keep a eye on me. The next photo shows “big Bertha” stalking like a lioness under the fig tree. The final photos show the poor little bird that I managed to rescue and free. Click on each photo for a larger view.

This is in danger of becoming a chicken blog, so let’s get on with the gardening.

24th September 2022. Things I have been doing lately:

Gathering seeds. Now we are moving towards autumn it is time to look around your garden for seed heads to provide you with next year’s plants. In my garden at this time of year, there are usually seedheads to be gathered from:

  • Marigolds
  • Sun flowers
  • Trumpet vine
  • Loofahs
  • Jasminium

And so much more as we move into autumn. Even if you have never grown from seed , why not try it, it can prove very addictive. The photos below show an array of seed heads picked and ready to be processed. Click on each photo for a larger view.

Most seed are very easy to process. The photos below show how to harvest Marigold seeds. First only pick the seed heads when they are fully dry and completely brown with no sign of green. Then rub off the top part of the seed head which is made up of a rough nape. Following this roll the seed head between your thumb and forefinger pressing gently to crush the seed head and release the seeds. When you have all the seeds let them fall between your palms as you blow gently to separate the seed from the chaff. Finally store the seeds in an envelope till you need them next year. Click on each photo for a larger view.

Processing Loofahs. I gave lots of loofah seeds out during my open garden day so I am sure you will all now be ready to reap your harvest. The secret with loofahs is that you must leave them till they are completely dry, brown and wrinkled (yes, I know, just like me). The secret to knowing if they are ready for harvesting is to shake the pods, and if you can hear the seeds rattling free inside, then they are ready.

To harvest loofahs you just follow these simple steps:

  1. Use your secateurs to clip the pods off leaving about 2cm of stem.
  2. Then holding the pod upright just use your thumb to flip open the top of the pod by pressing on the side of the stem. This will easily come away leaving a hole the size of 2€ coin.
  3. All you need to do then is to pour the seeds out into your hand.
  4. Next grasp the now empty pod between your hands and gently crush it to loosen the skin covering the pod.
  5. Peel off the pod skin
  6. And there you have it a lovely loofah to keep your skin supple and beautiful.

I would let you have some, but Cruella takes my whole crop and sells them to her coven as nose wart removers. The whole process is shown below. Click on each photo for a larger view.

Tying up Cannas. At this time of the year large cannas can begin to look a bit untidy. But don’t chop them down! You need all the goodness from the stems to start flowing back into the corm (ugly bulb) which will form next years plant . So for now you need to tie your cannas into an upright position for a couple of months till they get really scraggy, brown and raggedy, (yes, I know we have already had that joke).

I use broomsticks for this as they are strong enough to bang into the ground and tie the canna up even in strong winds. This year I bought myself some new broomsticks and Cruella thought I had bought her a present. I didn’t have the heart to tell her so I fitted her broom on a new stick. The photos below show the process. Click on each photo for a larger view.

Clearing borders and applying mulch. By now a lot of the plants in your borders will be well past their best. Once you have collected any seed that you want, then it is time to clear your borders and get them ready for cutings, seedlings and bulbs. Because not all plants die off conveniently at the same time, it is better to do this in stages. Don’t be tempted to just clear everything because a few plants are looking untidy. There are two main benefits of leaving plants a bit longer. Firstly, as already mentioned it allows seed heads to mature. But secondly, and just as important it allows the birds and insects to feed on the decaying plants. Sometimes it pays to be an untidy gardener for a few weeks.

The photos below show the start of my border clearing process and the application of a thick rich mulch to renews the soil. My friend Hilary has just started composting and is excited to get going and it may sound slightly pathetic but nothing beats the sight and smell of your first home made compost. Cruella just shouted out “shut up you idiot”, but she has her chickens all I have is my compost. Click on each photo for a larger view.

It is time for the Costa Blanca Cut and Cruella has started the chicken wars

The above heading may appear confusing but I have to tell you I am having a hard time of it at the moment with Cruella (my wife) and her fancy chickens. But more of this later, it is time to get on with the Costa Blanca Cut (CBC). Yes, that is right CBC! It is a term that I invented last year that denotes the time when you can judiciously trim all your flowering hedges and shrubs to hopefully get a late summer bust of flowering whilst at the same time making your garden look neater.

I have to confess that I stole the idea from “the Chelsea Chop” which is the period just after the Chelsea Flower Show when you can cut back; I think my term is better and the timing is just right for our hot summers. Anyway let’s get on with the gardening.

23rd August 2022. Things I have been doing lately:

Trimming hedges. Regular readers of this blog will remember that I have a range of densely packed hedges along the front of my garden. I packed them together so that they would fight for space and provide a dense flowering wall. Whilst this works very well, at this time of year it is necessary to trim them back just enough to encourage new flowerings and to keep them neat.

The first photos below show some of my hedges inside and outside my garden in all their glory. From this you can see there are still lots of flowering but some are attempting to go to seed. Click on each photo for a larger view.

All that is required to bring your garden back into shape and give you more flowers, is that you lightly trim back with a hedge trimmer or shears. Do not over do this, the big cut back is in January, so remember less is more. The photo below shows me manfully using my large extendable trimmer to good effect – mind you I now have a bad back, again! Click on each photo for a larger view.

The photos below show the extent of my cut back, but remember it will all be worth while with masses of new flowers within a month. Click on each photo for a larger view.

Trimming Olive trees. Regular readers will remember that I trimmed my olive tree by cloud pruning it years ago into a series of balls. To keep this shape sharp, you need to prune back 3 or 4 times a year. The before and after effects can be seen in the photos below. Click on each photo for a larger view.

Time to trim standards. If you have flowering standards in your garden it is always difficult to give them a trim as you are torn between the nice neat shape of a standard and their many flowers. Well, you can have both as long as you trim little and often. This approach will keep the plant flowering and the bees will love you, whilst at the same time keeping your nice round ball. The first photos below show my standards floriferous but out of shape whilst the second photos show them reshaped; I am happy to tel you they are already flowering.

Time to cut the lawn. Yes, I know it is madness having a lawn on the Costa Blanca, but there you have it, I’ve got one. Obviously there has not been much mowing going on in our current heatwave. But sometimes you have to clean up general debris from the grass. This means setting your mower blades as high as possible and just running the mower over the garden much like a hoover. The photo below shows the end results of my mowing. I call my lawn Schwarzenegger as it always comes back.

The chicken wars have started. Regular readers of this blog will know that Cruella (my wife) hasn’t been the same since the cat died. The cat and her were very close, the cat happily sat behind her whenever she flew on her broomstick. In addition Cruella would use the cat as a “familiar” by whispering instructions into her ear which the cat happily carried out. As you all know she has now gotten over the loss of the cat by buying herself a flock of fancy chickens; and this is where it has all gone wrong.

Who would have thought that chickens were incompatible with a neat well designed garden. Well let me tell you they are. Despite spending a fortune on a coop and fencing to create what can only be described as a chicken paradise, Cruella has now decided that “her girls” need to be free to roam. The result of this is that chickens have proceeded to take liberties with the garden (have you seen their feet) They mock me and Tango the lonely blind Labrador as they strut around the garden as if they have diplomatic immunity.

The photos below show how they deliberately mock poor old Tangos space. Click on each photo for a larger view.

A raiding party

Well I have had enough me and Tango are fighting back. I have bought myself one of those super soaker water pistols and happily chase them around the garden and squirt them when ever they commit any garden transgressions. Tango is taking a more pacifist route and has written to the Kennel Club and asked for asylum. The photo below shows my trusty pistol ready for action.

I’m locked and loaded

The only problem is that Cruella is fighting back and has started whispering malign instructions into the Chicken’s ears – just as she did with the cat, see photo below. Just the other night I woke up in bed only to find the little white chicken perched on my chest and pecking my nose. That’s it the chicken wars have begun and I am fighting to save the garden.

They both speak chickenese as they know I can’t understand; but I have picked up that three puck pucks followed by a cluck means danger

Tie up, deadhead and cane!

Summary

This episode is also available as a blog post: https://spanish-garden.com/2022/08/08/tie-up-deadhead-and-cane/

Transcription

Tie up, deadhead and cane!

The above heading is reflective of the activities you should now be undertaking in your garden as we move towards the back end of summer. Unfortunately when I mention these activities my garden blog tends to be inundated with requests for rude sexual services which have nothing to do with gardening. Cruella (my wife) accused me of doing this deliberately, but I remained dignified and only replied “honi soit qui mal y pense”, she then accused me of swearing at her in Swedish!

Anyway as summer goes on and things flop over – oh my God, there I go again, I think I have developed Tourette’s syndrome – you need to keep on top of the garden. Enough of this, let’s get on with the gardening .

8th August 2022. Things I have been doing lately:

Tying up various plants. All along your borders and beds your flowers will be at their absolutes best. To keep them this way for as long as possible then you need to deahead every day and use cane and string to keep your plants upright. Now when it comes to string, we gardeners need the right string for the job. To achieve this you need 3 types of string as a minimum. String type 1 (the thinnest) can be used for tying up annuals as it will rot within a year, as will they. String type 2 (referred to as intermediate) can be used for tying in perennials, roses etc as it will last for up to to 5 years and allow the shape you are trying to achieve become set. String type 3 (referred to as heavy) can be used for trees and heavy perennial branches etc as it will last for up to 10 years. The plastic coated wire shown can be used to tie in light stems.

The photo below shows the strings. This photo will form part of my doctoral thesis “String gauges and their uses by type in the twenty first century garden”

Cruella mocked me by saying what type of man has three categories of string. I merely walked away muttering under my breath – a real man

Deadheading. If you want flowers all summer then you need to deadhead daily. But not all flowers are deadheaded in the same way:

Sunflowers. Don’t deadhead sunflowers yet, let the seeds fully form so that you can either use them next year, or let the birds feed on seeds. But you will need to tie them up so that they don’t collapse. Use stout canes to keep them as upright as possible. Keep an eye on the dead flower head and when it has fully died and dried scrape the covering off the top of the flower and underneath will be the seeds packed tightly together. Using your thumb, see if you can remove one or two seeds easily; if you cannot then leave it a week or so until the seeds are loose.

The first photo below shows my mini sunflowers tied up and waiting for their seeds to be ready. The second photo shows that they are not ready yet. Click on each photo for a larger view.

Cannas. Although canna are favoured because of their lovely large colourful leaves, they can also produce nice flower spikes. When deadheading canna be careful not to cut off the coming flower spike. Because the flower spikes come in twos they often dieback at different times, so do not take off the complete flower head but only the one that is dead. The photo below shows me deadheading the correct flower spike.

Marigolds. I could deadhead my marigolds twice a day and that still wouldn’t be enough. They love this hot weather and they are flowering like crazy. To deadhead marigolds you must be careful not to leave any long bits of stem that not only look unattractive, but could let in disease. With your secateurs move down the stem away from the dead flower head until the next stem bifurcation and cut there. The first photo below shows my lovely marigolds, the others show me mid prune. Click on each photo for a larger view.

Other plants you should be deadheading at the moment include: Dipladenia, Bird of Paradise, Kaffir lilies and any flowering agaves or aloes. See photos below: Click on each photo for a larger view.

Shadowman. Gardening can be a lonely job so I have invented a gardening companion who follows me round all day I call him “shadowman”.We chat about various things as we wander round the garden, but he has to go as soon as the sun goes down; which is the exact opposite of Cruella and her friends who have to hide when the sun comes out. I thought you might like to see a photo.

Pretty cool eh!

Sawfly caterpillars, Brynhildr and the chicken Furies

I was happily meandering through my roses yesterday, when you can imagine my distress and horror as I saw the unmistakable trail of destruction left by sawfly caterpillars. I went weak at the knees and my life flashed before me. Eventually I pulled myself together and screamed at the top of my voice ”sawfly caterpillars emergency, emegency”. And now you know why I am rushing this special post out.

23rd July 2022. Things I have been doing lately:

Dealing with a sawfly caterpillar infestation. Those of you who have roses need to go out now and check whether you have sawfly caterpillars on them. The tell tale sign of an infestation is that starting from the top of a rose stem and going towards the ground all the leaves will have been eaten leaving a mere filigree of leaves. The photo below shows the damage to my roses.

If you look carefully you can see the stem is tear stained

To understand what is happening here, you have to understand the life cycle of the very clever sawfly. Mummy sawfly gets her name from the fact that at the bottom of her abdomen she has a saw like implement that she uses to saw a long strip from a rose stem. Once she has completed the sawing she then uses the same implement to insert a large number of eggs into individual cells along the cut which she then seals over. The cut is always made towards the top of the rose branch so that when the caterpillars hatch they then happily eat their way down your rose (getting bigger and fatter as they go) before eventually imbedding themselves in the soil before it all starts again.

Now here is the tricky part, you cannot kill sawfly caterpillars with caterpillar spray, because they are not caterpillars, they are larvae. Even though they look like a caterpillar act like a caterpillar etc. Anyway, the only way you can break this cycle is to pick them off by hand and then dispose of them. The funny thing is that they try to stop you by rearing up and looking at you with their pretend eyes and acting as if they have a sting. This works with birds, but not with us old intrepid gardeners. The first photo below shows mummy sawfly’s nursery. Whilst the second photo shows the extent of the infestation and the defensive position of the caterpillars. Click on each photo for a larger view.

I was just about to dispose of the collected caterpillars in the time honoured way of seeing if they could swim, when from out of nowhere I heard the music from Wagner’s The Ride of the Valkyries. Suddenly Cruella (my wife) appeared in a winged helmet, running across the lawn leading a motley crew of chickens. “Onward girls, onward”she kept screaming (in chickenese) as she pushed me roughly aside and the chickens attacked the sawfly caterpillars. Cruella was moving too fast for me to get a photo, but the photo below is a good depiction.

Since the sawfly incident Cruella has insisted I call her Brynhildr, she prefers the traditional spelling

The outcome was never in doubt as Cruella (or Brynhildr as she now insists on being called) and her chicken Furies descended on the sawfly caterpillars. The photos below show the ensuing massacre. Click on each photo for a larger view.

Cruella has now demanded that I take the name Siegfried, but I have refused as I know how it all ends and I am staying away from the Rhine.

Giant Marigolds, must do jobs and the Chicken Messiah

Yes, I know its hot and you just can’t bear it, but you knew all that when you started gardening so remember our motto: “when the going gets tough, the tough get hoeing”. Anyway, you think you’ve got problems, the idiot son has been with us on holiday and Cruella (my wife) has fixated on him being the next Chicken Messiah and leading her flock to the promised land. More chicken stuff later, in the meantime let’s get on with the important gardening.

18th July. Things I have been doing lately:

Selecting flowers for next years seeds. Wherever, possible I grow plants from my own seeds or cuttings. This not only improves your knowledge of gardening and is very inexpensive, but more importantly it will bring you joy. To get the best seeds you need to assess your plants as they flower. Look for good strong plants, with well shaped colourful flowers. You then need to select the best and mark them by placing a piece of masking tape around the stem; this will stop you deadheading the selected flowers as you want them to go fully to seed. There is no point waiting till all the flowers are dead and then selecting seedpods as they all look the same. The photos below show my flower marking system in action. Click on each photo for a larger view.

One of the major benefits of selecting flowers is that in the Darwinian sense you are mimicking natural selection and will get bigger better blooms. The photos below show me with some Marigolds that are over a metre to a metre and a half tall. I have been selecting these for about 6 years. Click on each photo for a larger view.

Time to cut back your Dame de Noche. If you have Dame de Noche (night scented Jasmine), and you want late season flowers, then now is the time to cut back. Cut the whole plant back by a third (no more). By taking a third off you will stimulate the plant into a growth burst that will reward you with a full flowering in September that will fill your late summer evenings with its intoxicating perfume. The photos below show my Dame de Noche before and after its trim. Click on each photo for a larger view.

Dealing with pests. With the intense heat you are probably not getting out in your garden as much as you should. But this does not mean that nobody else is in your garden. On the contrary garden pests are enjoying this weather, and proliferating and destroying your plants. You need to get out there and check stems and under leaves to see what is eating your prize plants. How you deal with these pests is up to you, chemicals or no chemicals, but deal with them you must.

The photos below show pests getting set to destroy parts of my garden. The first photo shows Farmer Ants happily setting up a Greenfly farm on my Dame de Noche, whilst the second shows an infestation on my Dipladenia. Click on each photo for a larger view.

Shading plants. I always argue that the right plant, in the right place should be able to stand anything thrown at it by the weather. And I stand by this maxim providing the plant is in the ground. However, if it is in a pot then it is different. Plants in the ground can always take their roots deeper to find cool and moisture. But this is not the case with plants in pots, they have no where to go and they are trapped in hot plastic buckets.

I don’t really grow vegetables, but at the moment I am growing some Chillis and a couple of Avocados and they are normally fine in full sun. But lately it has just been too much for them and they have been dropping leaves in distress and in the case of the Avocado it has become badly scorched. I have had to move all these plants to the rear North facing terrace where they will get early morning and late aftrenoon sun, but miss the terrible heat of the middle of the day. They are all now recovering, but the Avocado looks terrible and gives me reproachful looks every time I walk by.

The first photo below shows the plants now thankfully recovering in the shade. The second photo shows the Avocado reproaching me. Click on each photo for a larger view.

The coming of the Chicken Messiah. As I mentioned earlier our idiot son is with us on holiday and he has immediately taken to Cruella’s fancy chickens, but more importantly they have taken to him. The chickens follow him round, feed from his hand and let him cuddle them as he puts them to “bed” at night Cruella is in paroxysm’s of joy as she believes he is the promised one, “the chicken Messiah”. Given that Cruella is our local Church Warden, I mentioned that this might be seen as blasphemous, but she quickly countered with “we are talking chickens here not our Lord and Saviour”.

Anyway the upshot is that she wants him to leave his very successful career in City finance and come back home to be the Chosen One. To this end she is teaching him Chickenese and the hidden secrets of chicken wrangling. Me! I just ignore it all and carry on gardening.

The various photos below show the idiot son and his new found chicken followers. The next photos show Cruella conducting her evening Chickenese lessons from her perch beside the coop. The final photo shows the Chicken Messiah with Tango the lonely blind Labrador. Tango doesn’t even know we have chickens I’ve told him we have a CD of farmyard sounds. Click on each photo for a larger view.

Poor old Tango they even go into his kennel and drink his water

It is time for the world fig netting championship – and Cruella steals the show

Yes it is that time of the year again when you have to net your figs and other soft fruits, as failure to do so will only make the local birds happy and fat, whilst driving you insane. Regular readers of this blog will know that as part of my committment to international gardening and world peace I encourage fig netting teams from across the globe to assist me in this annual event. Past competitors have included teams from Northern Ireland, Scotland, Hemel Hempstead and Wigan.

This years competition filled me with a frisson of excitement as not only were last years champions from Wigan returning, but they would be facing a crack French team with all the bad will of Brexit adding a competitive edge. Anyway on with the gardening.

5th July 2022. Things I have been doing lately:

Preparing figs for netting. I have two fig trees one is a standard tree that I prune and pollard every winter whilst the other is an espalier that I have been gradually growing up a wall for about 8 years. The first photo below shows the large fig after its Winter pruning whilst the second shows the espalier in Winter. Click on each photo for a larger view.

Before netting your figs check that the tree is in good condition to ensure maximum fruiting. From the photos below you can see some yellowing in the leaves of the espalier, denoting chlorosis or lack of iron. This was quickly overcome with a good feed and a large dose of iron, and in a few days everything was looking good. Click on each photo for a larger view.

The next major problem before netting was to try and get the large fig to an appropriate size for netting. Now you should not prune figs in the summer for two main reasons. Firstly, they will weep a stringent sap all over you and it burns. Second, there is a possibility of letting in disease. However, needs must it had to be lightly pruned or the net could not go over.. The photos below show me manfully trimming a few of the longer branches whilst dodging the caustic sap shown in the final photo. Click on each photo for a larger view.

The last thing you have to do before netting, is to make sure you have the right size mesh netting. Too small a mesh means that the birds wont see it and will damage themselves flying in to it. Too large a mesh then the birds will think they can get in and you will end up with a lot of fat birds hanging upside down in your net each morning. The photo below shows the right size net as chosen by Goldilocks.


The world fig netting championship. With all the preparations done, the waiting was over and it was time to introduce the teams. I normally start the contest with a team line up, photos and playing of respective national anthems, followed by an opening speech of welcome given by me. However, this years opening ceremony was somewhat chaotic as Cruella (my wife) insisted that she should be involved and give the opening speech. However, this proved to be extremely problematic. As regular readers will know Cruella has recently purchased 5 fancy chickens which she dotes on and has even taken to speaking to them in what she calls ”chickenese”. Because of this she insisted in conducting the whole opening speech in chickenese, whilst simultaneosly placing her arms on her hips like wings and bobbing up and down like a demented chicken. The photo below tells it all.

The speech went something like: puck, puck , puck, squawk

Throwing down the fig challenge. Before things can start the captain of last years winning team from Wigan has to throw a fig at the opposition team, and if they pick it up then the challenge is accepted. The photo below shows Gordon the captain of Wigan throwing the ceremonial fig at the French, before John the French captain picks it up. The second photo shows the French ceremonial bow in accepting the challenge. Throughout this ceremony Cruella can be seen shouting out instructions in chickenese whilst still doing her chicken dance. Click on each photo for a larger view.

Stretching the net. The first stage of fig netting is the ceremonial stretching of the net. This stage encourages teamwork and lowers the potential of violence later in the competition. The whole process got off to a shaky start with the two captains adopting macho one handed net stretches. The first photo below shows the French captain adopting his aggressive one hand net hold. The second photo shows that the Wigan captain reciprocates. The only redeeming feature about this stage was that both the women competitors could be seen working in cooperation whilst I tried to calm the whole situation down. Click on each photo for a larger view.

The photos below show some other aspects of the net stretching that may be of interest to gardeners and anthropologists.

Unfortunately this stage ended slightly acrimoniously (as can be seen in the photos below) when the French captain accused the Wigan team of flying a drone overhead to spy on their technique, whilst Cruella insisted on showing everyone how to tie a net around your waist and do the chicken dance. Luckily I was able to calm things down by doing the ceremonial jog around the net which seemed to distract everyone. Click on each photo for a larger view.

This is harder than it looks as it involves 20 circumnavigations of the net running forwards and 10 backward

Raising the net. This stage is the most complex part of fig netting as it requires close cooperation between the teams. To be honest it should have gone far smoother than it eventually did, as I had already laid out all the necessary equipment and tools as can be seen in the photo below.

It is all in the preparation, or so I thought

Things got off to a pretty friendly start as can be seen in the photo below. But I knew there would be trouble as Cruella demanded a leading role as main net lifter. I only agreed because it was the only way I could keep the aggression low between the two captains and keep them apart. Click on each photo for a larger view.

However, the whole thing started to go wrong quite quickly when Cruella began to cry and hyper ventilate saying she was trapped in the net and wanted out; at first no one understood her as she was speaking chickenese. The photo below shows Cruella in distress.

I had to place Cruella in her chicken coop with her flock to calm her down

With Cruella safely out of the way I took over and we soon had the whole process back on track as can be seen from the photos below. Click on each photo for a larger view.

Tying down the net. As the evening drew on the final stage of the netting process; tying down was soon upon us. Basically this involves using lengths of string to tie the net to the lower branches of the tree. This is usually a non contentious stage as most aggression has been used up in the early stages. The photos below show a high level of cooperation between both teams. But the final photo shows one last flare up between the two team captains as they unexpectedly come across each other in the foliage. Click on each photo for a larger view.

I had to throw myself between them to stop violence

The annual fig netting championship dinner. I am pleased to say that overall things went well, we managed to get to the annual dinner and award ceremony in the evening without too much violence. The only problem was that Cruella insisted on giving the annual dinner closing speech; yep, you’ve guessed it, in chickenese. The photo below shows Cruella mid flow whilst Camilla from the Wigan team looks on mystified, Ann from the French team looks away in bewilderment and John the French captain can’t suppress a laugh. Meanwhile Gordon the Wigan captain is a seething mass of inchoate rage.

The main thrust of Cruella’s speech was: puck, puck , puck puck-puck-puck; it went down very well

I Choose joy over design and Cruella has a new business idea

Sometimes in the most impeccably designed gardens there is a slight lack of joy that has been replaced by meticulousness, neatness has removed spontaneity and love of plants has given way to colour symmetry. And that dear readers is why I have broken all my design rules and grown my mini sunflowers; just for the heck of it. But more of my joy later, it is so hot and there is so much to be getting on with, and to add a frisson of danger Cruella (my wife) is back with a new business idea.

20th June 2022. Things I have been doing lately:

Keeping Geraniums alive. Many people in Spain have more or less given up on geraniums because of the blight of geranium moths. These small moths lay their eggs underneath the flowers and on the stems of geraniums before they hatch out and burrow into the plant leaving it an unsightly mess that eventually dies. I have only started growing geraniums again last year, and I have a steely determination to keep them alive. My routine that has worked so far, involves the following.

  1. Taking each plant out of its pot holder once a week and holding it up to inspect underneath the leaves.
  2. Where I find any browning or decaying leaves I remove these at the same time as deadheading.
  3. Feed each plant with a specific geranium feed; this keeps them strong and able to withstand any moth damage.
  4. Spray all over the plants with special anti moth insecticide (do not spray in sunlight).

The photos below show the war of the moths in action. I told Cruella (my wife) I am thinking of making myself a Moth Man costume; however, she reckons that all my clothes look like a Moth Man costume. Click on each photo for a larger view.

Digging up garlic. I normally plant a few cloves of garlic under one of my trees each Autumn and harvest my little crop roundabout now. This has worked well in previous years, but has been disappointing this year. The bad weather in the Spring and the recent extreme heat has meant that when I dug up the harvest it was very disappointing. Given that I only grow four plants, two of them had small skinny bulblets rather than the large plump bulbs I normally find.

Anyway, if you want to grow garlic, start in October by planting a few cloves finger deep. Dig them up roundabout now, but always use a spade not a fork as you do not want to puncture the bulbs. Once you have dug the plant up leave the stem and leaves attached and place them in a shaded dry area to give them time to dry out. Do not attempt to wash the soil off the garlic bulbs as this will just create mould. Instead leave them to fully dry out and then gently brush the dirt off after a couple of weeks. You can then start to use the garlic just as you would from a shop.

The first photo below shows me getting ready to dig up the crop. The second shows me using a spade to go round and gently lift the crop. The final photo shows my disappointing crop waiting to dry. I can’t help but believe that Cruella (my wife) may have had something to do with this crop failure. For obvious reasons she doesn’t like garlic. Click on each photo for a larger view.

I am still going to hang it outside my bedroom door

The joy of sunflowers. I try to plan my garden where possible with scale, colour and design kept in some sort of proportion. But earlier this spring you may recall I got a sudden fancy for another little flowerbed and created one next to my water feature. Normally the dictates of garden design meant that to keep the scale and design of the water feature I should have planted low growing plants with small foliage and flowers. But bugger, that I fancied some real joyous heart stopping fun plants. So I planted Mini Sunflowers, a new type of clump forming Marigold and Gazanias.

The result has been joyous and it makes my smile everytime I walk across the lawn towards the new flower bed. Even at this stage, before its full development it is fantastic. Yes, it is out of scale, viewed from some angles it looks awkward. But viewed full on, you cannot help but smile; I have chosen joy over design and I’m so pleased.

The first photo below shows my little flowerbed viewed from the rear, and I can hear you say what has he done , it is totally out of scale. But wait for it, the second shows the same flowerbed how you are meant to view it. All you can do is smile; and say thank you God.

Nothing to see here
Ta da!

Succession planting. Because I love my mini sunflowers so much I am going to use them in my summer succesion planting in the borders along my drive. The basic idea behind succession planting is that as one set of plants die back so you have another set growing ready to infill border spaces. I don’t want to go into the full process here, but I will comeback to it in the Spring.

But at the moment I have been removing some Osteospermums to create gaps in the borders which I will now infill with my lovely new sunflowers. The photos below show that I have taken out selected plants to create the necessary gaps, but still left enough Osteospermums to ensure lots of seeds for next year.

Below are some photos of gaps (photo journalism at its best), followed by one of my mini Sunflowers ready to create smiles. Click on each photo for a larger view.

You will note that slug and snail protection has been sprinkled around the stem

Cruella returns with a new business idea. Cruella (my wife) has been at our English house with our idiot son and has returned with a whole new business idea to add to her existing product lines. A few months ago Cruella decided that as I spend all my time in the garden she needed some new interests, hence, Cruella Enterprises. So far her product lines include:

  • Magic loofahs, guaranteed to remove even the most stubborn nose warts.
  • Eggs from her fancy chickens at roughly €500 per egg.

She now proposes to add to her product lines a whole range of commercial signs for the busy witch. When I pointed out that she only ever sells 13 of anything which is exactly the number of people in her Coven, she flew into a rage and screamed that I never back her in anything she does and that I am always trying to undermine her. Anyway it turns out that the Chicken Coop is quite comfortable.

The photo below shows Cruella’s new range of signs, they will be in full production by Halloween.

Plant, Weed, Feed and Deadhead

No I am not talking about Johnny Depp’s solicitors, but the jobs you should be doing now in your garden; oh and looking after chickens of which there is more later. Summer is now in full swing and there are some jobs you need to be doing every day if you want to stay on top of things. But before that some of the things I never got time to post before Open Garden Day took up all my time.

The things I did a little while ago and forgot to tell you:

Planting Loofahs. Regular readers of this blog will remember that I grew Loofahs last year for the first time, and they were such a success with Cruella (my wife) and her friends from the Coven where they were in such demand for their skin smoothing properties and efficient removal of nose warts.

You will remeber that I planted the seeds in March and it was time to pot them up. Loofah do not like their roots to be disturbed so I always plant them in 4 inch pots before carefully transferring them to a larger pot – two to a pot. Loofahs love full sun, lots of water and a weekly feed. The first photo below shows my loofahs ready for potting. The second shows the extensive roots and the next photo shows the loofahs in position ready to grow through my balustrade. And finally the loofahs as they are now. Click on each photo for a larger view.

Planting up my new flower bed. Regular readers will remember that I created a new flower bed a month or so ago. This was now ready to be planted up with mini sunflowers, Marigolds and Gazanias all grown from seed. The first photo below shows the planting in process. Followed by the newly completed bed and then a photo I took just the other day. The final photo shows the mini sunflowers stripped of their lower leaves to allow light into the underplanting. This process does not weaken the sunflower as the top layer of leaves are the important ones. Click on each photo for a larger view.


8th June. Things I have been doing lately:

Now, that our we are up to date it is time to settle down into the routine maintenance work that will sustain your garden through the summer so here we go.

Waging war on weeds. People often say to me that they don’t worry about weeds as the summer sun soon dries them all up. I hate to tell you this, but you better keep up your weeding otherwise all those weeds will flower, turn to seed, and their offspring will revisit you for a thousand generations. The best time to weed is in the morning, when the soil is slightly damp with dew, or even better after rain. Your first line of defence is to hoe regularly. But when you do have to hand weed between plants, don’t just pluck the leaves off the weed, instead grip it firmly at the base and wiggle it around till you can free the roots and extract the whole plant. I’m not showing any photos of weeds, you know what they look like.
Feeding plants. Just as you cannot survive on one meal a year, the same is true of plants. Now that we are in peak growing season, a regular weekly feed will make your plants healthy and vibrant. The photo below shows the variety of plant foods that I use. But I do not want you to get hung up about the different types. A standard universal feed will be ok for most plants. It is only old fuss pots like me that prefer to use specialised feeds.

This looks like a little plant food choir

The feeds shown can all be bought in normal garden centres. Left to right they are:

  • Ordhid feed
  • Fruiting plants feed
  • Universal feed
  • Granular longer lasting universal feed (can be scattered in flower beds)
  • A mix of iron that I add a glug to all feeds
  • Geranium feed
  • Acid lovers feed
  • Citrus feed

Deadhead if you want more flowers. Deadheading is the Cinderella of gardeners chores. A lot of people don’t bother as they think it takes up too much time, but if you do it then your plants will be become showy princesses. The first thing to do is grow your thumbnails long. This is an important tip as it saves you the time going to the shed to fetch your secateurs. Instead you merely nip spent flower heads off between your thumb and forefinger. The photo below shows my thumbnail ready for action together with those of my wife (Cruella). Click on each photo for a larger view.

Deadheading should be a daily job now that Summer is in full swing, and your reward will be abundant repeat flowering. Different plants are deadheaded in different ways. Dipladenia, which have become very popular in Spain are deadheaded by pulling spent flowers gently from the stem. Marigolds should have their first sets of buds pinched out between thumb and forefinger to encourage bushy growth and mass flowering, once flowered then deadhead rigorously. Dianthus and carnations should be nipped between thumb and forefinger and of course roses should be done with secateurs by taking back to the next viable bud node. The photos below show deadheading in action; and you thought Tom Cruise in Top Gun Maverick was the hight of thrills, gardening beats it every time. Click on each photo for a larger view.

Taking care of chickens. And who says men can’t multi task. Cruella (my wife) has flown back to our English house to spend all her time cuddling and sniffing the idiot son. She has foolishly left me and Tango the blind Labrador in charge of her fancy chickens. This has added 3 hours to the end of my already busy days as I try to round up the chickens and make them go to bed.

I have tried various techniques, bribery with food, creeping up on them, involving friends as chicken wranglers and rounding them up with Tango the blind Labrador. The last of these has been the least successful as Tango and I have charged around, him bumping into trees and knocking me over whilst the chickens flee in every direction. To be fair it is not Tangos fault he cant see the chickens, they can see him and all he gets is me shouting ever more frantic instructions that I have recycled from “One Man and his Dog” the TV programme about shepherds; and I have no idea what “come by” means.

The photo below shows the chickens in action and poor old Tango lying exhausted after our nightly efforts. Click on each photo for a larger view.

Its Open Garden Day soon – but Cruella is trying to upstage me with fancy chickens

Everyone knows how hard I work to try and make our local Open Garden day a success, but this year Cruella (my wife) has decided to try and upstage me by purchasing chickens. I wouldn’t mind if they were ordinary chickens, I could cope with that, but she now has little fancy fluffy chickens and large ones that appear to be wearing trousers. She has threatened to rename Open Garden Day “Chicken Day 2022”and invite all her strange friends. When I complained she just screamed “you and your bloody garden, get over it”. She has taken to calling me chicken and making clucking noises every time she sees me. I am making enquiries about moving and taking the garden; I will keep you informed.

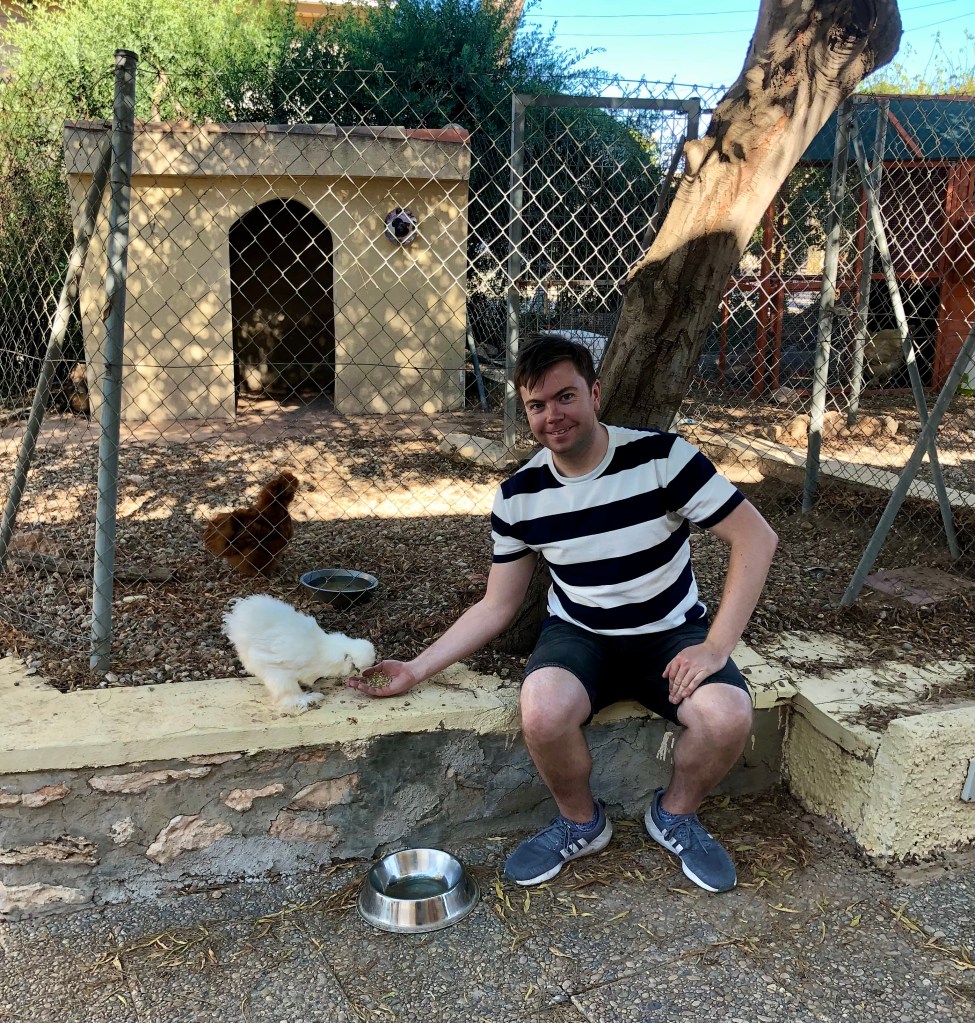
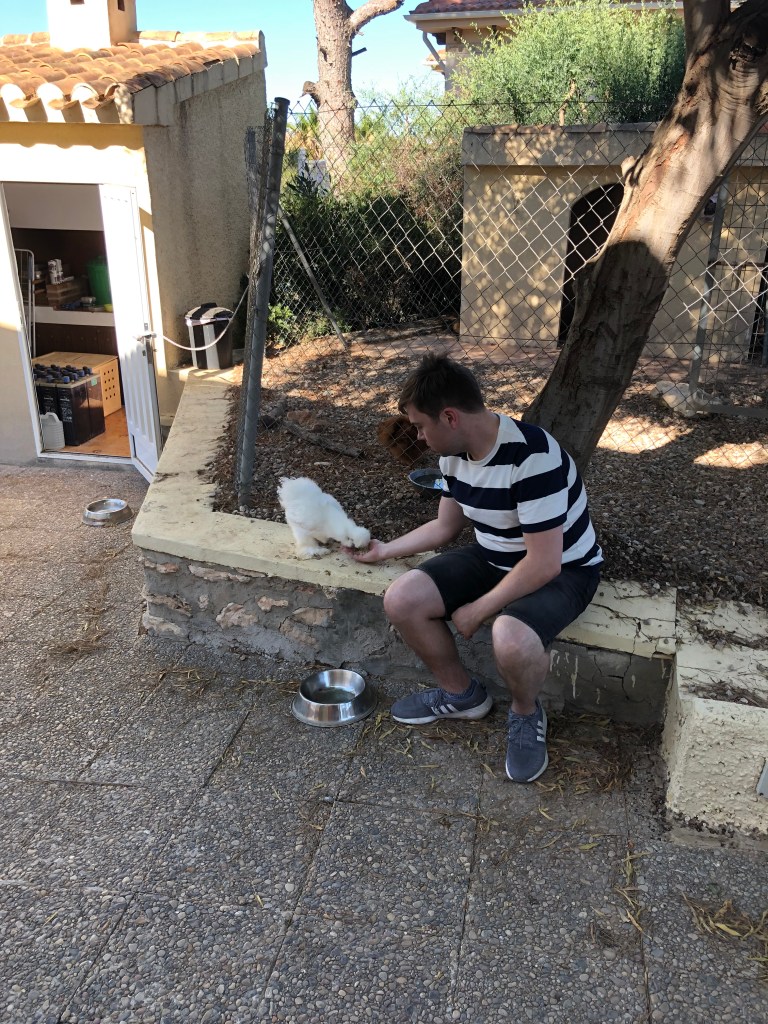
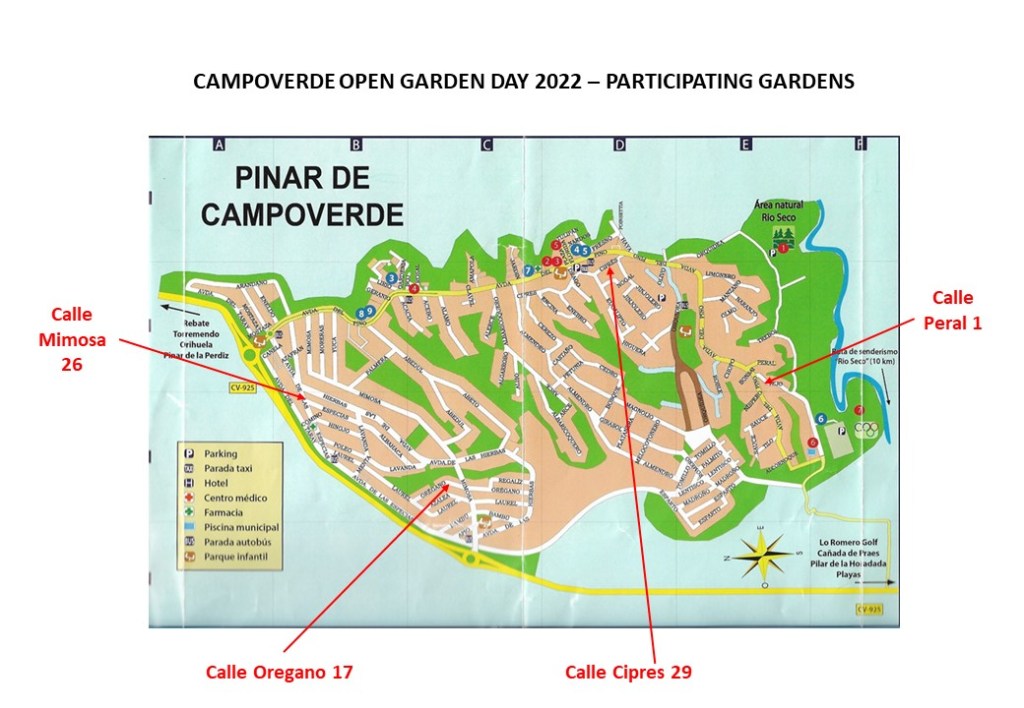
In the meantime if you want to come along to Open Garden Day then the details are below. But Cruella has insisted that in order to provide balance I have to include a photo of her with one of her fancy chickens.

Note the Chicken legs, and the chicken has quite nice legs too

I have been victimised by an ungrateful Blackbird

In these times of re-wilding etc, we are supposed to try and harmonise our activity with the natural world. And personally I have been doing my bit by feeding a local Blackbird with a large number of Rose Chafer maggots as I empty a compost bin. In total I must have given this Blackbird over 60 maggots, but has it been grateful. No it bloody hasn’t it has started digging in my seed trays and has now moved on to digging up new seedlings when they are planted out. To see seeds and seedlings I have lovingly cared for torn up by this winged demon has been unbearable.

I approached Cruella (my wife) to ask about the rogue ungrateful demon, as she is usually behind any plan to destroy the garden; but she denied any knowledge apart from offering to find 23 others if I want to make a pie. I have become like David Copperfield’s aunt Betsey and her alarm at donkeys, only in my case it is Blackbirds. At the first sight of any Blackbird I jump up and run out into the garden flapping my arms and screaming “Blackbirds”.

The first photos below show one of the many maggots I have been feeding the ungrateful bird followed by some of the senseless damage he caused in return. Click on each photo for a larger view.

The next photos show my attempts at defence. At first I tried suspending a CD disk over the seedlings, but this didn’t stop him so I was forced to cage my seedlings in. Click on each photo for a larger view.

Lastly, the culprit himself who when thwarted by my defences turned to digging up seedlings. Click on each photo for a larger view.

16th May 2022. Things I have been doing lately:

We are about to get into full summer mode, so there are some jobs you need to get sorted before the big onslaught starts.

Clearing leaves. Whilst the great autumn fall of leaves has gone, there will still be leaves falling on to your lawn and gravelled areas. Yes, they may be few and far between, and you may just stop noticing them, but they mulch down to a fine tilth and present a perfect medium for weeds. so get out your blower, rake etc and clean them up. The photo below shows the fruits of my efforts.

I huffed and I puffed and I blew the leaves down

Time to look at the lawn. I know it is only idiots like me that have a lawn in Spain, but if you have one fhen you have to take care of it. This includes starting the first cut of the year. After all the rain my lawn is looking quite lush, but at the same time its is absolutely full of wild false garlic. This is obviously weed of the year and is very prevalent at the moment in Pinar de Campoverde where I live. Whilst wild garlic has its upsides, such as lots of Cruella (my wife) special friends dont visit, this obviously has to be dealt with. My strategy to date involves three prongs. Firstly, I pull all the flowerheads off as I wander round the garden, Secondly, I hoe it out of the borders, and thirdly I treat it with selective weedkiller and mow the lawn so it just looks like grass. The main problem is that it happily grows from little bulblets under the lawn.

In addition to dealing with wild garlic, now is the time to feed your lawn. Ideally you should feed your lawn round about three times over the summer growing season. If you don’t feed then your lawn will become exhausted with weak growth. The first photo below shows the horror of wild garlic, the second shows my trusty mower surrounded by a forest of wild garlic, the final photo shows the start of the lawn feeding season. Click on each photo for a larger view.

Deadhead and cutback bulbs. If you have followed my advice, and I am sure you did, then you will have cut the seed heads off your bulbs a number of weeks ago. Well now is the time to cut the stems right back to the ground. Once you have done this then top dress them with a deep layer of compost. Don’t forget to say goodnight and thank them for flowering, and if you can say a little prayer with them just as you would with a child going to bed at night. The first photo below shows the deadheading process, followed by the big cutdown, the overflowing compost bin and finally top dressing.

Final trim of hedges. Although I am being preyed upon by a maniac Blackbird it does not mean I have any ill intentions to birds in general, so that is why now is the absolute last time to cut back your hedges until September. Bird’s nests will proliferate throughout your hedges and just because you cant see them doesn’t mean they are not there. So lay aside your shears and trimmers and enjoy the birdsong. The photos below show the light trim given to the Solanum by my front gate. Click on each photo for a larger view.

Its time to deal with the Palm Weevil before it gets your trees

When I told Cruella (my wife) that I had to urgently deal with the Red Palm Weevil, she just curled her lip and scornfully replied “it’s only a bloody beetle get over it”. I hope this conveys some of the pressure I face on a daily basis. I would leave her but she is holding the garden ransom, and on a number of occasions she has threatened to curse the ground so nothing grows. All of this may seem strange especially as she is our local Church Warden, but I think she is working undercover.

4th May 2022. Things I have been doing lately:

Dealing with Palm weevils. First some background. The red palm weevil first arrived in Spain in 1994 probably in a cargo of trees from Egypt. Since then it has rapidly infested Spanish Phoenix palms. At the moment it appears not to attack Washingtonia palms in Spain but it has been known to do so elsewhere. In the main it will attack trees under 20 years old but not exclusively.

The adults will cause a certain amount of damage by feeding, but the main damage is caused by the larvae. The adult female lays up to 200 eggs at the base of the fronds in the crown of the tree. When these hatch, they merrily munch their way up the inside of the fronds, eventually resulting in the fronds collapsing and the tree dying. In a severe infestation you can put your ear to the trunk of the tree and hear the grubs feeding. The first photo below shows the enemy. The second shows some of my palm trees and explains why I need to be careful.

The Palm Weevil in my palm, but not the tree.
Note that my trees are neatly trimmed, but only cut in winter when the weevil is not around

Preventative treatment for palm weevil. When you first arrive in Spain, no matter how good a gardener you are, you are not prepared for the palm weevil as we do not experience it in Northern European. When you lose a palm you are distraught, so it is important to act quickly. If the tree is relatively low, or you can reach the crown with a short ladder, then you can spray the crown and this should act as a preventative.

If the tree is large then you need to either bring in professional sprayers every couple of months, or devise a method that can deliver chemicals directly to the crown of the tree. I have devised and revised a method over the years that works for me, so please feel free to copy the system described below.

Preparing the palms. At its simplest this process seeks to deliver the chemicals into the trunk of the palm which the rising sap will then take up to the crown of the tree and infuse the fronds with weevil killing chemicals. Over the years I have refined and revised my methods. But at the heart of the process is to drill a hole at a 30 degree angle half way into the trunk round about a metre from the ground. You then need to insert a piece of simple irrigation pipe into the hole. The hole and the tube is at this angle because you don’t want the chemical dribbling out and also you want to keep a gravitational pull on the chemicals so that they constantly feed into the tree. (I hope that doesn’t sound complicated, as it is not).

The first photo shows a simple perforated tube inserted into the trunk which could be topped up each month. The next photo shows my new deluxe minimalist weevil killer (top of the range). This has a short piece of tubing just to fit into the tree (this version stops the perforations clogging up). Note that each version has a cap at the end, this is to stop anything else getting into the tree. Make your own one up or just stick a bit of rag in there. The final photo shows the weevil system in place. You can see from the angle of the cap that the liquid is always being forced into the tree by gravity. Click on each photo for a larger view.

The equipment. All the equipment is very cheap and can be bought in any local gardening store. The photos below shows the basic equipment and mixing method which is simple. Click on each photo for a larger view.

  • a proprietary weevil killing chemical that can be diluted
  • a measuring jug to make sure you get the right amount of water (in my case 1 litre)
  • a garden syringe to measure out the chemical before adding it to the water
  • an old Fairy Liquid bottle needed to squirt the chemicals into the tree

The process. Once you have mixed your chemicals, then how you use them depends on the palm size. The first photo shows my trusty Fairy Liquid bottle being used to squirt liquid into the trunk. This method is used for high trees where you cannot get to the top.

The second photo is the method used for small trees. Just use your Fairy Liquid bottle (other brands are available) to squirt the chemicals on to the base of the palm fronds. This will act as a deterrent to the adult weevils.

The final photo is the process for those trees that are just a bit too big to get at easily. You could get a ladder out, but if you can’t be bothered. Just squirt the chemicals up into the base of the fronds. Don’t do this on a windy day and if possible wear a mask. Many a day I have weevil proofed myself and it doesn’t taste nice.

Don’t despair if you lose a palm. I lost two palms when I first arrived in Spain and I was of course upset. The thing to do is don’t just chop the tree down and leave an unsightly trunk shaped root sticking up in your garden. Nor should you try and make a table out of the palm by chopping it back and placing a table top on it. The resulting table will never be in the right place and you will eventually abandon it.

Instead, what I did was to get the palm chopped back to about 12ft. I then wrapped mesh around the trunk and grew climbers up its length. This gives a spectacular display of flowers all summer and is a joy to behold. The photo below shows my dead palm tree brought back to life.

It’s time to make your bed

I am of course speaking of flower beds. You can never have enough flower beds, the sight of a packed floriferous bed is enough to set your heart singing and make you begin to wax poetical. Here in Spain it can be depressing when you see how many people have tiled or completely gravelled their garden turning it into what looks like a car park or a landing strip. Yes, I know all the reasons, easy maintenance, heat of the Sun etc, but such gardens will never make your heart sing. But the good news is that it can all be reversible, whether its gravel, tiles or grass, new beds can be created. And here is how!

30th April 2022. Things I have been doing lately.

Creating a new flower bed. Now is the perfect time to create a new flower bed in your garden and bring life, vibrancy and wild life into your garden. Gardens are living things and you should not be afraid to make changes. With this spirit in mind I decided to create a new flower bed. And here are the stages you need to undertake; and it is the same for tiles, gravel or grass.

Mark out the shape of your bed. You should never just start digging, as that way lies regret. Instead using a hosepipe to provide an outline try various shapes that you might like your bed to be. If you like take photos of each shape and think about it overnight and consult with your partner. I never discuss aspects of the garden with Cruella (my wife) as her point of reference is always a graveyard. The photos below show my two possible main shapes. Click on each photo for a larger view.

Once you have decided on your basic shape, then you need to mark it out using ground marking spray. If you are digging out a grassed area the it is helpful to spray with weed killer and leave a week. The first photo below shows the marker paint that I use. The second photo shows the site ready for digging out. Click on each photo for a larger view.

Digging out. When you are making a new bed, there is no point scraping a bit of soil away and hoping for the best. You have to create a new soil bed that is rich in nutrients and will last for years. In my case this meant digging down at least four inches, and maybe more if you are digging out a previously gravelled area. The first photo below show my digging out stage.Followed by loading all turf squares into the compost bin. Finally, my fully dug out bed. Click on each photo for a larger view.

Filling the bed with compost. If you do not have a compost bin, then shame on you, but all is not lost just fill the bed with bags of compost. The picture below shows me getting ready to fill my wheelbarrow with the first of 8 loads that were required to fill that little bed.

Key things to note in this photo. Cockroach spray at the ready, water bowl on the ground ready to drown Rose Chafer giant maggots, and I am wearing shoes as I am fed up with cockroaches running between my toes.

The first photo below shows the beginning of filling the bed, when you do this it is important that where possible you mix in some of the old soil. The second photo shows the bed filled and finally the last photo shows the boundary stones in place. Click on each photo for a larger view.

Having tea. Stopping and having a pot of tea is one of the most important things a gardener can do. At the end of a tiring task make your self a pot of tea and have one of your favourite biscuits. This not only gives you a well earned rest, it gives the blackbirds time to forage around for insects in your new bed. The first photo shows my Darjeeling leaf tea brewing under my favourite teacosy. The second photo shows my special biscuit warming up over my cup and beautifully melting the syrup in the biscuit. Click on each photo for a larger view.

Finally a picture of Tango the blind lonely Labrador after a hard day watching me work.

Its a hard life

For everything there is a season…a time to plant and a time to harvest 

Hey, I’ve gone all Biblical on you by quoting Ecclesiastes 3-2 in the above heading. But as a quote it is very apt for this time of year for two reasons. Firstly, Cruella (my wife) is back from her visit to the UK and she is angry because the conflict in the Ukraine meant she had to fly low and consequently her new broom is shredded. This in turn has meant that through fear I have been sleeping with my Bible under my pillow and a string of garlic around my neck; hence the quote. Secondly, it is time to deadhead and tidy up spring plants so that we can encourage new growth. Lets get on with the gardening.

16th April 2022. Things I have been doing lately:

Cutting back early Spring flowers. Now most early spring flowers only really have one flush of flowers, but sometimes with the right encouragement you can coax a second flowering from them. So, if you want some more flowers then you have to be quite ruthless and radically deadhead now.

You can start by deadheading your Euoniums these have flowered spectacularly this year all over our part of Spain because of the heavy rains. But now it is more or less all over. Dont leave the untidy now brown flowerheads on your plant snip them off at the point below the flower where you can see the stem thinning. If you keave the flowerheads on they will either eventually die back and fall off over a period of time, or, the plant will try to grow through the defunct flower. Either way you are left with an untidy plant in your garden for months.

The first photo below shows you where you should prune your dead Euniom flowers. The second photo shows a plant trying to grow through the flower. Click on each photo for a larger view.

Other early Spring flowerers in my garden that need cutting back now include Ice Plants. These come in a variety of colours and add real charm to the garden in early Spring. You now need to trim these using either small hand shears (which I prefer) or if you don’t have these just use ordinary garden shears. The first photo below shows an Ice plant in need of pruning. The second shows me just gently going over the plant trimmimg off only the dead flower heads, try not to cut into foliage. Click on each photo for a larger view.

Feeding plants. Now that the growing season is getting underway it is important that you begin your plant feeding routine. Now there are lots of different plant foods, and I don’t want you to get hung up about it. If you just have a small garden or terrace, then normally a general purpose feed will do most things and not really harm anything. However, if you have a larger garden then where possible specialist feeds can help.

The main feeds I use can be seen in the photo below. From left to right they are: Fruiting non citrus plants, general purpose feed, Citrus feed for oranges and lemons etc. An iron mix which I add a glug to every feed, Rose feed and finally Orchid feed. There are plenty of brands so just choose the ones that suit your garden and pocket.

A plant feast

Removing tree suckers. An important thing to note when feeding your citrus trees is that you must remove all tree suckers. Suckering mainly occurs in older trees, where the tree takes the easy route of not pumping all the goodness up to existing branches and leaves, and instead throws out new soft suckers further down the trunk. You can recognise suckers by their bright green soft whippy growth and tendency to grow straight up. To remove them all you have to do is pull them sharply downwards and they will come away easily. The photos below show suckers and my suckering action. Click on each photo for a larger view.

Encouraging gardeners. It is important that we gardeners encourage the next generation of gardeners, and where possible draw new people into the wonderful world of gardening. For those all over the world who read this blog I am including two ways in which I am currently encouraging gardeners: Open Garden Day and The Sunflower Challenge. Both will raise some funds for the work of our local Church in our community, but just as importantly they will draw people into gardening. Why not replicate these in your area or country. Please feel free to copy and make the world a greener place. Click on each photo for a larger view.

If you would like further information on how to set up either or both these events , then just contact me.

A happy and blessed Easter to all Spanish gardeners

At this wonderful time of year when new life is springing from the earth and we await the resurrection of Christ, I would like to wish all followers of spanish-garden.com a blessed Easter to you and all your family.

James McAllister

Cruella’s weather curse continues but I seek revenge by turning the kitchen into a seed factory 

The bad weather that Cruella (my wife) cursed me with when she left to visit our idiot son has continued now for almost a month. I was at my wits end as I needed to get seeds going, and then I had a good idea, why not turn our kitchen into a seed factory. I laid out all the seeds I needed to get going and I mixed everything up in the kitchen. The first photo below shows my seeds laid out ready to go. The second photo shows Cruella’s kitchen cabinet, I didn’t dare touch anything on there. Click on each photo for a larger view.

4th April 2022. Things I have been doing lately:

Soaking seeds prior to sowing. Some seeds benefit from soaking prior to sowing and this is mainly for two reasons. Hard seeds such as loofah and sunflower etc benefit from a soaking in warm water to soften the seed casing. Others such as Jasminium and Trumpet Vine that are blown on the wind are given a short soak to mimic the ideal conditions when they hit the ground.

Loofah seeds are best soaked for three days in warm, but not hot water. I just place them in a cereal bowl by the sink, and just keep topping it up with warm water. After three days dry the seeds and then plant them in four inch pots. Place two seeds in each pot with the weaker seedling being removed later. The first photo below shows my loofah seeds happily bathing in warm water. Then being dried off in paper towel before being sown in four inch pots. Click on each photo for a larger view.

Jasminium. This is my first year attempting to grow Jasminium from seed so I am quite excited. I got a few seedpods from my existing plant and they were very large and tactile. See photos below. Click on each photo for a larger view.

The seeds were only soaked over night before being placed in one of Cruella’s colanders for straining, and then planted on the surface of a seed tray before being gently covered with a sprinkling of compost. See photos below. Click on each photo for a larger view.

Chilli seeds. I grew some chillis last year which were a great success with Cruella. She even started looking after them whilst I was away as she said they reminded her of little drops of blood. In a previous post, last Autumn, I explained how you leave a chilli pod on the plant to get wrinkly and give the seeds time to mature. I then dried them on tin foil in the sun and stored them to sow this year. I planted the seeds in fibre pots so as to minimise root disturbance when planting out as they don’t like their roots to be disturbed. I planted two to a pot and sprinkle covered with compost. Again the weaker seedling will be removed. The photos below show the process. Click on each photo for a larger view.

Keeping seeds warm. Most seeds need to be kept at a warm temperature to encourage germination, but the problem is that it is too wet and cold to put them outside. In the UK you could put them on a sunny window ledge indoors, but in Spain houses tend not to have internal window ledges. So instead I have placed them in a little naya that has glass curtains and covered them with a sheet of perspex – don’t tell Cruella. The photo below shows my seeds happily basking in the warm. And the good news is some have sprouted already.

The bell on the table is for Cruella to summon me when she needs more gruel

Accepting failure: Gardening, like life, has its successes and failures, and whilst I never like to give up on a plant, sometimes I just have to accept the inevitable. Regular readers of this blog will know that I planted Golden Photus cuttings in a pot on my Naya about 6 months ago. And at first they seemed to grow well and I even bought a special stake for them to grow up. But no matter what I did they just seemed to wilt. It wouldn’t have mattered so much but this particular plant was a favourite of Tango the lonely blind Labrador. Every day without failure Tango would bump his head on the plant pot as he exited the front door, and then by way of compensation he would always sniff the plant.

I had decided to replace the Photus with a geranium that was thriving on the nearby window ledge. The first photo below shows the dying Photus and the upstart geranium in their respective positions before the the great replacement. The second photo shows the reproachful look that Tango gave me when he discovered what I had done. The final photo shows Tango disdainfully staying away from me that evening. Normally he sits right by me whilst I drink wine and we discuss the days gardening, but he would have nothing to do with me. Luckily he had forgiven me by breakfast time. Click on each photo for a larger view.

He wouldn’t even lie in his bed, and I think his little blind eyes were crying

Cruella curses the weather and I thwart a bamboo escape

Cruella (my wife) flew off to England the other day to visit our idiot son. She was a bit worried about the Russians but I explained they would never pick up her broomstick on their radar as she flies so low. But as a precaution she insisted on carrying a cage full of bats to decoy any incoming missiles.

She asked me to do some decorating whilst she was gone, but I refused as I said I would be too busy in the garden. She snorted “I think you will find that you won’t be”; and that dear reader is how we have ended up with days of endless rain – I can only apologise.

24th March 2022. Things I have been doing lately.

Wandering around disconsolate in the rain. The weather has been atrocious – and yes, I know we needed it, but just not this much. This has meant that all the stuff we should be doing now in the garden is delayed. Seeds have not been planted, lawns have not been cut, cuttings are drowning, citrus blossom is being damaged and that is just the start. The photos below sum up my gardening at the moment.

The first photo shows one of my two large water butts overflowing, The next shows what I now call my canal. Followed by my water storage area. Then some of my poor cuttings drowning. Finally, poor old Tango the lonely blind Labrador finding his dinner by the splashing sound in his bowl.

Things you should not be doing in your garden. I know its counter intuitive for a gardening blog to be telling you not to garden, but I am afraid at the moment, that’s how it has to be.

Lawns. don’t attempt to cut your grass whilst it is this wet you will only damage the grass and probably your mower. Similarly, don’t feed your grass, I know it is growing like Topsy, but any feed you try and put into it now will just be washed through before it can do any good. The photo below shows one of my lawns sulking in the rain.

Yes, I know it looks rough, and I am ashamed

Fruit trees. All of your citrus fruit trees will be in full blossom and they were looking and smelling lovely. However, whilst this rain will be good for growth, it may unfortunately damage our future crops for two reasons. Firstly, the force of the rain will have stripped off quite a lot of blossom which will lower yield. Secondly, most of the pollinators cannot fly in this weather so the opportunity to pollinate may be lost. Lastly, you should be feeding your citrus trees weekly whilst they are in blossom, but stop at the moment as the rain will just wash your feed straight through. Wait for a dry day before feeding again. The photo below shows one of my orange trees waiting forlornly for a pollinator.

All dressed up and her date has stood her up… see you later pollinator

Thwarting a bamboo escape. Tango the lonely blind Labrador and I wandered disconsolately round the garden today; me in full wet weather gear and Tango gamely following and painfully banging his head on every tree. Suddenly I saw that my green bamboo was setting up to make a jail break. Now bamboo are lovely, but they are notorious for invasive spreading. This means that if you decide to grow them, then you need to plant a barrier to stop them escaping. I had planted this particular plant inside a square of large tiles that I has inserted into the ground to act as a barrier to possible spreading. I had left the tiles sticking out of the ground by about an inch, as bamboo spread by ground runners which I would see as they tried to leap the tiles.

The crafty bamboo had opened up one side of my tile square and has just started sending out a runner. If I had not caught this then it would have rapidly sent out its runner, which in turn would have sent up a bamboo cane every six inches or so. I was nearly the owner of Campoverde’s first rain forest theme park. Anyway, I have caught it (hopefully) pulled it up out of the soil and will deal with it when it stops raining (if ever).

The first photo shows my discovery and preparation to dig up the escape tunnel. The second shows where it was off to. The third shows the extent of the escape I thwarted.

Each of the nodes you see on the root stem are a potential bamboo cane. I am thinking of putting up searchlights

Thinking of better days to come. By now we should have been planting seeds, but the weather has just been too bad. The photo below shows the promise of happier days to come – I cant wait, and I still haven’t done that decorating.

Little packets of potential, we will be singing round the potting bench soon

Cruella creates a marsh and I sing laments with the Agave Attenuata

I know the above heading doesn’t fill you with optimism, but it has been a very trying time. Cruella (my wife) has flooded part of the garden and destroyed my Lavender and on top of all this I caught her trying to poison me again! As if this is not bad enough I have two Agave Attenuata passing on to Gods garden in heaven. Anyway lets get on with the gardening, or whats left of it.

13th March 2022. Things I have been doing lately.

Removing Lavender. I knew there was something wrong with the Lavender around my water feature. It should have been starting to flower by now but it has remained stubbornly grey and dull. When I checked the stems there was no sign of green but more importantly the ground around the water feature was soggy and water logged. As I am sure you all know Lavender requires very dry soil with very little watering.

I remembered that I had asked Cruella to keep the water feature topped up when I was away. When I confronted her she admitted that she had forgotten to turn off the hose and had left it running over night. I told her enough was enough and that I was going to tell everyone what she had done in my blog. she just smiled at me malignly and said I might regret that. Anyway to cut a long story short, when I came in 10 minutes later I found her about to poison my teapot. The photo below could probably be used in a criminal prosecution.

I took the concoction off her and threw it into the sink; we now need a new sink as it melted

The first photo shows the lavender looking suspiciously dead, whilst the second shows it heading towards the compost heap. Click on each photo for a larger view.

It is time to cut your palms: If you have palms trees, especially Phoenix Palms, then now is the time to get them pruned back. The Palm Weevil will be emerging soon as the weather begins to warm and they like nothing better than a nice freshly cut palm frond. Depending on the weather you probably have till the end of April before they fully emerge, so you better get cracking. If you have large Palms then you will need the services of a Palmista, don’t try and climb up long ladders wielding a chain saw, leave it to the professionals unless you have excellent health insurance.

The photos below show some of my 13 large palms freshly cut and looking neat and trim. The final photo shows the enemy. Click on each photo for a larger view.

Planting Aeonium cuttings. When large Palm tree are cut back there are certain disadvantages. Those large palm fronds that look so light and airy 40 feet up in the air are actually 15/20 foot long branches that are spiky and extremely heavy as they thud to the ground. Despite my best efforts to protect plants there are always casualties.

The easiest plant to deal with after destruction is the Aeonium. Just simply make up a nice free draining compost mix, go round and pick up the stems that have been knocked off the plant. Cut the stem With a sharp knife, leaving it roughly half its length. Fill the requisite number of 4 inch pots with your compost and then water them whilst they stand in a trug. This is my tip of the day, by watering them in a trug you allow the pots to sit in the water for a few minutes before taking them out to drain. The residual water in your trug can be poured over your compost heap or over some deserving plants. Your cuttings will soon take and can be planted out in about 3 months .The photos below show this process in action. Click on each photo for a larger view.

Preparing to plant seeds. You may be tempted to begin planting your seeds, but depending where you are in Spain, it may be too early. Even in the lovely sunny Costa Blanca night time temperatures are still too low for good germination. Leave it a few weeks and things will begin to warm up nicely. This doesn’t mean you can’t do anything. There are a couple of practical things you can be doing now that will get you off to a good start.

Firstly you can get out all your seed trays and check them over for damage; cracks and splits in trays mean you will lose water. Also it is very important that you thoroughly clean your trays of any trace of last years soil as it may harbour viruses and pathogens that could destroy this years seedlings.

Secondly, you can prepare your planting medium. For seeds you need a very free draining compost. I find the ideal mixture is two parts of a good store bought compost together with one part Perlite to give you that nice free drainage that seedlings prefer.

The first photo below shows some my seeds trays drying in the sun, the second shows the start of the mixing process, the following shows what the final compost mix should look like, and finally, the compost I am using. Other composts are available, but please do not buy a cheap one as it will be inferior and lead to poor germination. Click on each photo for a larger view.

Singing to my plants. Regular readers of this blog will know that I am a firm exponent of singing and talking to plants; and on occasions poetry can be efficacious. However it is important to match your output to the appropriate stage of the plants life. Seedlings and cuttings like jolly songs and nursery rhymes. Whilst mature plants are happy with show songs mixed in with a bit of country music; in my experience very few plants like rock music.

Anyway, the whole point of this is that I currently have two Agave Attenuata coming to the end of their flowering life, which in effect means death. I wouldn’t mind, but for a plant that usually only flowers after 10 or more years and then only once, I have had three in a year. Cruella thinks this signals the “end of days” and the second coming, I think its just good gardening.

With end of life plants your songs and poetry are obviously different to those you would sing or read to say, bulbs, because you know they are coming back. Both the Attenuata and I know we are talking end of life care. This involves a lot of tears, late night talks about when they were young, and often I will bring out old photos of when they were seedlings. We sing mainly opera and a few requiems. My aria of choice for these situations is always “Che gelida manina” from La Boheme with me singing the part of Rudolfo and the Attenuata as Mimi.

The end is near and we have started singing “Sona Anadati” so she knows we are at the end stage. I am dreading the death scene when I have to sing and sob “Mimi…Mimi” if you haven’t heard this then listen to it and cry. The first photos below show my Attenuata at the beginning of their flowering. The final photo shows me and the large Attenuata singing the aria “Che gelida manina”; you will notice I am holding her hand as the role demanda. Cruella took the final photo at my request, but she kept mockingly saying “I can’t hear the plant sing”; I replied “of course not, for that you need a Soul”. Click on each photo for a larger view.

Note the sadness, gravitas and poise I bring to this role