
The struggle with the big Ficus a modern day story of heroism

This post has an end of term feel about it as I have at last finished all my jobs before I start planting seeds in a few weeks. But don’t get complacent as this post includes the traditional battle of the big Ficus tree, whereby I try and cut back into shape my big Ficus tree, whilst it tries to generally, cut, maim and impale me. But hey ho its just another gardening adventure.

27th February 2022. Things I have been doing lately:

Dividing Fountain grass. Regular readers will remember that in my last post I told you how Cruella (my wife) had destroyed my Fountain grass seeds whilst I was away. As I explained last time, this left me no choice but to divide the plant as its centre has died. This is quite common in grasses and other clump forming plants like Iris, Agapanthus etc. The photo below shows the grass with its centre that will never grow again.

There’s a hole in my Fountain grass dear Lisa

If you have a plant that looks like this then you need to divide it as the centre will never grow back. There is a good part and a bad part of dividing plants. The good part if that by dividing you get more plants. The bad part is that it can be back breaking digging out an established large plant. Anyway on with how to do it.

Firstly you need to assemble all the tools you will need which will include the following:

  • A large metal lever
  • 2 forks
  • 2 spades
  • A saw
  • A wheelbarrow

The first item on the list, the large lever is a bonus. I don’t have one but my neighbour Bill who is a car mechanic kindly lent me his.

Start be clearing the area around the plant so that you have room to work. Then using your fork work your way around the plant, gently trying to lift the edges. Then using a spade and the large lever begin to attempt to lever the plant out. It is important that you try not to damage the roots; so go as deep under the plant as you can. Once you have the plant out and into your wheelbarrow (I needed Cruella’s help to lift it) then take it to your lawn or a similar area where the falling soil won’t be a nuisance. Next place two forks back to back in the centre of the plant and attempt to lever it apart, if you have a lever then use that as well. Once you have the plant basically divided, then use your saw to cut out the dead parts and to divide the plant into new manageable chunks. Try and make sure that you leave sufficient root on each part to allow the plant to regrow. The photos below tell the story. Click on each photo for a larger view.

Planting a peach tree cutting. If you have any tree cuttings that you have been growing over winter, then now is the time to get them in the ground. You can normally tell when a tree cutting is ready for planting out. Firstly it should have had a good year of growing in a pot and you should have gradually cut off side-shoots to develop a nascent trunk. Next it should be showing some leaf buds that have taken on a slightly “furry” look and feel.

When planting your new tree out, you will need a mixture of 50% compost and 50% soil from the hole you have dug. It is also helpful if you have some Mycorrizhal Fungi which helps stimulate root growth, this can be bought online. Sprinkle some of the fungi into the planting hole and then sprinkle some over the roots before planting. When you plant make sure that you gently, but firmly, tread down the soil around the planting ball. Finish by placing a stake at an angle across the bottom of the trunk to provide support in strong winds.

The photos below show my little peach tree being planted. Click on each photo for a larger view.

The titanic struggle with the big Ficus. To be honest given the damage that this tree has done to me over the years, I am sometimes tempted to misspell Ficus! Anyway if you have not been privy to this annual battle before, let me briefly give you the background. About 10 years ago I cut the central trunk out of this particular tree to create the attractive donut effect you see in some Spanish towns. Since that point I am obliged to prune the tree each year to keep its shape. The main problem is that the tree gets bigger every year, whilst I get smaller. The photo below shows the tree ready for its annual reshape.

It just oozes malevolence

The tree has always resented the indignity inflicted on it all those years ago, and consequently it has sought revenge ever since. I dread the annual reshaping as I know it will be painful. Over the years the tree has inflicted untold damage upon me, including: concussion, broken fingers, dramatic blood loss, and cuts and abrasions too numerous to mention.

I plan my approach carefully each year. I don’t sleep for weeks and when I do I have nightmares about the struggle ahead. I start by cutting underneath the tree to flatten the bottom all the way around. I then spend the rest of the first day reshaping the bottom half of the sides. Day two finds me on my platform reshaping the top part of the sides. By day three I am doing the really dangerous stuff; overreaching on a ladder to cut the top and then climbing into the centre to reshape the middle. The photos below show me in action. Click on each photo for a larger view.

Finally I thought I would treat you to some photos of my finished work. In the photos below you can see the Cheshire Cat safely back on his perch at the centre of the tree. Some avant garde photos taken by me lying under the tree; I have to take these quickly as if I lay there too long Cruella trys to bury me. Finally the tree in all its reshaped glory. Click on each photo for a larger view.

I’m back with gardening and teapots, what’s not to like.

I’m back! I know I didn’t tell you I was going away, but it is for the best. If I tell Cruella (my wife) that I am going away she does terrible things to the garden whilst pretending she is caring for it. That is why I told her that I was just popping out for a moment and walked back through the door on Tuesday three weeks later. She didn’t even notice I was gone.

Anyway, I had a nice time caring for our English garden and seeing our idiot son. I fear however there was a culture clash, I tried to drag him to museums, theatre and gardens, which he manfully resisted. Whilst simultaneously dragging me to bars, restaurants and football matches which my liver and waistline are now both regretting.

Anyway, enough of this folderol on with the gardening.

18th February 2022. Things I have been doing lately:

Dealing with Cruella’s damage. The next few weeks are literally the calm before the Spring descends upon us for real, and you will end up running around your garden trying to keep up with nature as it bursts forth. Before you get set to planting your seeds etc there are some last minute things you need to be doing.

My first job was to repair the damage Cruella had inflicted upon the garden. As I toured the garden on my return I saw various signs of Cruellas neglect. I asked where my tray of fountain grass seeds had gone – Regular readers of this blog will remember I sowed these seeds about 6 weeks ago, kept them inside, and only just placed them outside before going off. Cruella denied all knowledge, but eventually I found them as the photo below shows.

I cried

I will now have to split the parent Fountain grass in the next day or two or it will be too late this year. I will cover this process in my next post.

After getting over the disaster of the fountain grass seeds, I asked her where my orchid had gone. She produced a pot from behind her back and said “is this what you are looking for”. See photo below for the remnants of my orchid. Luckily after clearing all the dead away I found a glimmer of green. It is in intensive care.

Feeding Citrus Trees. People often ask me if, or when they should feed their citrus trees. Well the answer is simple, once you see the first sight of blossoms on your trees, then begin to feed weekly. It doesn’t matter if you still have oranges or lemons on your trees you need to start feeding. You need to use a specialist citrus feed which can either be liquid or granulated, but it needs to be citrus feed. Feeding your trees now will assist the blossom to bring on a good crop of fruit later this year.

The photos below show the tell tale signs that it is time to feed. The second photo shows one of the feeds I use; other feeds are available, but this works for me.

Repairing paths and lawns. By now you will have noticed that weeds are growing like crazy. It is sort of counter intuitive for us Brits as we expect weeds to grow in the summer. But in Spain weeds grow strongly in the winter as it is too hot in the summer and they would just be burnt off.

You will find weeds growing strongly in your paths and gravelled areas, but also on your lawn. Dealing with weeds on paths and gravelled areas is relatively easy, you just spray with your weedkiller of choice. Now I know that lots of you like to take an organic, non-chemical approach to weed killing. But I am old fashioned and prefer to nuke them with chemicals. But, whatever your preference lawns are different to paths and gravel. The photo below shows my drive midst weed spraying.

Begone damned weeds

When dealing with lawns the big problem this time of year is broad leaved weeds and patches or holes in your lawn. Dealing with weeds first. Broad leaved weeds are a group of weeds that send out their leaves in a rosette around their stem thereby shading out all competition and of course your grass. I have found the best way to defeat this class of weed is to first mow your lawn. When you mow you cut off the top section of the weed, but this leaves the root intact. This in turn forces the weeds into a growth spurt and it quickly puts on a lot of leaf growth. You can then happily spray these nice new leaves in a weeks time with a selective weed killer for lawns.

There is no point seeding holes and patches on your lawn at the moment as the grass has not yet really started to grow and all you would be doing is providing a picnic for ants who will happily carry away your grass seed. Instead just mix some good compost with a bit of top soil and fill in your holes and cover your bald patches. Most Spanish grass when it starts to grow will soon grow into your treated areas. If like me you suffer from squirrels and blackbirds, then place a bit of wire mesh over your treated area.

The first photo below shows my trusty mower ready for its first action of the year. The second shows some of my patched areas, and lastly a photo of the selective weed killer I use.

Finally to teapots. What do teapots have to do with gardening I hear you ask?Well, gardening is hard but enjoyable work that gives us gardeners great pleasure. But sometimes we forget to stop, sit back and just look at our gardens in way that allows us to absorb the beauty of nature, appreciate our hard work and God’s hand in our labour. And this is where tea comes in, get yourself a teapot, make some real leaf tea and sit back and enjoy.

Cruella (my wife) insisted that nobody would be interested in the tea and gardening nexus and that everybody would think I was boring, well we will just have to see. I thought you might be interested in my recent visit to the teapot museum. The first photo below shows me luxuriating in the depth of the teapot museum. The seond shows some plant based teapots that will definitely pique your interest. The next photo shows the extent of the collection? followed by a photo of Sue who owns the collection showing me the teapots that got her started. Finally, and I know I am building up to a peak of excitement the next photos show the gardening theme teapot I bought from the museum followed by the gardening themed teacosy knitted by my friend Sara for which I will ever be grateful.

When I proudly showed Cruella (my wife) this post she just scoffed and said nobody would be interested in my stupid teapots. She then ran into her lair and emerged proclaiming this is what I call a teapot; I wouldn’t mind but she only drinks coffee!

This is a life model

I have become a hedge fund manager – without the fund

I am continuing with the big winter cutback, and the end is almost in sight. The really big job over the last week or so has been cutting back my hedges. I have about 150 metres of hedges that consist of a wide variety of plants. If you don’t have a hedge, then you really should consider planting one, they are a joy to behold for a number of reasons:

  • they present continuous flowering for about 9 months of the year
  • provide shelter and nesting for birds
  • they are a larder for bees and other pollinators
  • they are easily maintained, just requiring a winter cutback
  • they provide a living alternative to walls

I am thinking about writing a novella entitled “in praise of hedges”. Anyway on with the gardening.

24th January 2022. Things I have been doing lately:

Cutting back hedges. The annual cutback of hedges needs to be done before the end of January as most hedge plants have a very short dormant period before they are back in bud again. If you want a hedge then be brave and pack it out with all your favourites. Don’t be tempted to go for one type of plant, as you should be aiming for a floriferous wall of planting rather than monoculture greenery.

I pack my hedge plants relatively close together and encourage them to fight for light. I have to act as the referee to stop any one plant taking over, but they all grow strong and flower like crazy. Just for information, in case you are thinking of planting a hedge, my hedge includes the following:

  • Hibiscus
  • Plumbago
  • Bignonia
  • Pink Trumpet Vine
  • Jasmine
  • Jasmine variegated
  • Roses
  • Bougainvillea
  • White Mulberry (self seeded)
  • Pomegranate (self seeded)
  • Callestimon

The photos below show the hedge from various angles prior to me beginning the big cutback. Click on each photo for a larger view.

This is not even the whole hedge. I need a wide angle lense or something

The cut back process is simple. First you need to trim the sides of the hedge; but don’t trim them straight, instead try to angle your cut so that the bottom of the hedge is slightly wider than the top. By doing this you will stop the top shading the bottom and leading to sparse growth at the bottom. Next, you need to square off the top. The ideal tool is electric hedge trimmers to create a nice even level that lets every plant get some light. I use a small platform for this work as it saves me bobbing up and down steps. I also have long handled lopers ready for the particularly tough stems.

The photos below show the big cutback in action. I think I look particularly dashing as I sweep all before me. The final photo shows my annual cuttings victory dance. Click on each photo for a larger view.

I could be mistaken for a giant in a sack race

And finally some photos of my hedges cutback for another year. They will start growing again within a month, and then off we go again. Isn’t God wonderful to provide us with such joy. Click on each photo for a larger view.

Pruning Sago Palms. Many gardens have sago palms in my part of Spain. They provide a bit of the exotic mixed with Jurrasic Park. You can if you like just leave them to themselves and let them grow into a big spikey ball, or, you can trim them back to give shape and interest. My preference is to do the latter.

When pruning sago palms my method is to use long handled lopers to prune up from the bottom towards the top but leaving at least two rows of stems at the top. By leaving two rows you are providing yourself with an insurance policy in case anything happens to one of them. Also if you prune from the top you are cutting out the growth part of the plant and will probably damage it. You can prune sagos this way whether they are in the ground or in a pot.

The photos below show my large sago before and after its prune followed by a smaller plant in a pot. Click on each photo for a larger view.

I am facing the final battle. Apart from trimming up a few ground cover lantanas etc that is more or less the big cutback completed. There is only one final obstacle that stands in my way. And it is a big one. Yes, the giant Ficus awaits our annual battle. Regular readers of this blog will remember that I pruned and shaped this tree about 10 years ago to leave it with a doughnut type hole in its centre. For its part the tree has never forgiven me and viciously protests against its annual cutback. I have fallen out of this tree more times than I care to forget. It has given me vicious lacerations on my skull. Broken my fingers and hurt my back so much that sometimes I look like Quasimodo.

To date I have always eventually triumphed in our annual battle, but to be honest I think I might just be too old for another beating. I am thinking of bringing in a contractor; I will let you know what I decide. In the meantime here is a photo of my opponent; he gets bigger every year, whilst I shrink.

He exudes an air of menace, I cant sleep at night

Cruella has designed clothing for blind dogs, whilst I have lost a gallon of blood and turned to alcohol

Cruella is still fragile concerning the departure of the idiot son, I have only to mention him and she flees to his room and dives into his bed. I know what you are thinking this must be making it very hard for me to get on with the big winter cut back, and you are right, but Cruella fails to see my point. Anyway I managed to get her out of the house for a few hours whilst I got on with the important things.

I suggested to her that she should make one of her favourite meals, “Witches pie”, see photo below. If you don’t know this particular dish, the main ingredients are: Eye of newt, and toe of frog, wool of bat, and tongue of dog, Adder’s fork, and blind worm’s sting, Lizard’s leg, and owlet’s wing. Anyway I cleverly threw away all her Lizard’s legs and she had to go shopping. The things we gardeners have to do.

It tastes better than it sounds

13th January 2022. Things I have been doing lately:

Pruning Roses. You need to start pruning your roses now as they will have already started to bud and you don’t want them to waste their energy just for you to prune it off.

Now I am going to start this section with a health warning . Pruning roses always results in considerable blood loss, no matter how careful you are. And if you are an old idiot like me who also takes aspirin to thin his blood, then you are going to bleed like a stuck pig. And this is where alcohol comes in. You need to get yourself some antiseptic alcohol from your local Farmacia and be ready to apply this to the many cuts you will receive from your roses. I don’t want to overly alarm you, but 11 million people die of sepsis each year, and we gardeners are prime candidates with all our cuts and hands in the soil etc. So why not take precautions. The first photo below shows some of the rose inflicted cuts to my legs and arms, I daren’t show you my hands as they are X rated. The second photo shows my alcohol, go get some. Click on each photo for a larger view.

Pruning climbing roses. You prune climbing and standard roses in different ways. With climbing roses you are aiming to keep height and main stem length. This means you do not cut back the main upward growth, instead you should aim to prune back side shoots (to an upward facing bud) by as much as two thirds. This will push all the initial growth into the main stem and the side stems will soon grow out as summer progresses and give you lots of flowers.

When pruning all roses start by cutting out any diseased, weak or crossing growth. Then, in the case of climbers, stand back and tuck in to your trellis or support all the stems you want to retain. After this prune back all the side shoots by two thirds and finish by tying in any long loose upward stems to stop them being wrecked by strong winds. Finally check for suckers that may be coming from below the soil just by the roots, remove these by twisting them rather than using secateurs. That’s it, done for another year.

The first photos below show my climbing roses before their annual prune, followed by the pruning and tying in process in action, and then finally the finished plants. If you cant see any difference, then I despair as it took me two hours to prune these four roses. Click on each photo for a larger view.

Pruning standard roses. When pruning standard roses the process is completely different to climbing roses. The overall aim is to reduce the size of the whole plant by at least a third, but you can take it back by two thirds, and even in extremis right back almost to the soil. However, you would only cut a rose right back if you were aiming to regenerate an old plant or one that has been severely weakened by a pest or disease.

Just as with climbing roses, start by pruning out all diseased, weak or crossing stems. You are aiming to leave an open space at the centre of the plant much like a wine glass shape. The pruning cut is the same for all roses. Go to the stem you are going to prune and then follow it down to the nearest outward facing bud that is roughly at the height you wish to prune. Cut a sloping cut with your secateurs just above the bud. The rose will grow from this point and the outward facing bud will ensure it does not grow towards the centre.

The first photos below show my main rose beds prior to pruning, whilst the last photo show some of my my pruned beds. Click on each photo for a larger view.

If you look carefully you will see grass growing under my roses. I find this shameful, but I have laboured every year to remove it , and lost countless pints of blood in my pursuit of rose perfection.

Cutting back grasses and bamboo. Many gardens in Spain have a variety of grasses and bamboos and these are prime candidates to cut back now. If you leave them then they will just become big lumps of green that will look like an explosion in a cushion factory. Instead, if you cut back now you will get fresh invigorated growth and it also gives you the opportunity to rake out unsightly dead growth.

There is no great science or skill to cutting back grasses. Just get your shears or better still a hedge trimmer and cut them back to a low mound. Once you have cut them back, put on your gardening gloves and rake your fingers in and out of the mound to remove any old growth. The first photo shows my grass ready for its annual trim. The next photo shows my inimitable grass raking technique; don’t be afraid to get right in there and rake all the dead stuff out (who cares about snakes – only kidding). Finally you can see my grass reduced to a mound. The hole in the middle tells me that it is time to subdivide the plant, but I am too tired today. Click on each photo for a larger view.

When dealing with bamboo you can be much more radical and cut it back almost to the ground. I only have one bamboo plant that I have encased within four sunken tiles to stop potential spreading. To be honest I envisaged its tall stems waving in the wind beside my water feature, and that as a side benefit I would get lots of canes for the garden. But instead it has failed to thrive and I still lack canes for the garden. The photos below show my puny bamboo before and after its radical prune. Click on each photo for a larger view.

Trimming Myrtle. If you do not have Myrtle-leaf Milkwort in your garden then you are missing a treat. This long flowering shrub, thrives in full sun and needs very little water. Put it in the right place in your garden and you will have a show stopper. I have grown mine at the entrance to what I call my “technical area”, where I have my potting benches and compost bins. Cruella calls it “the dump”. I grow this plant so that it obscures the entrance to the technical area, and I can hide from Cruella. It also forms a magnificent backdrop when I have concerts with the plants on the potting bench. I swear that the Myrtle sways as we all belt out “…riding along on a crest of a wave and the sun is shining bright”. The photos below show Myrtle before and after her styling (real ladies get styled not pruned). Click on each photo for a larger view.

Cruella has designed clothing to help Tango see. Regular readers of this blog will know that we have one maurading Labrador left. The untimely death of his brother has left Tango as the lonely blind Labrador. In an effort to help Tango see her better Cruella has made a costume that she swears will enable him to follow her around. From the photo below you can see that things are not going well so far.

She’s behind you!

The idiot son has gone, Cruella has taken to his bed and I am in winter cutback heaven

The above heading says it all. Yes, the idiot son has gone back to ruin the UK banking system (move your savings). Cruella (my wife) has in the meantime sunk into the abyss of despair at losing someone she can mother and has taken to his bed wearing his hoodie and refuses to come out of his room. I meanwhile have been prioritising and getting on with the big winter cutback.

The only slight drawback is that the evil Peacock is still here, but at least he is patrolling outside the gate. The first picture shows Cruella (my wife) in her moment of despair (I will have to hide when she sees that I have posted this). The second picture shows the evil Peacock patrolling outside our gates, whilst Tango the lonely blind Labrador looks the wrong way. Click on each photo for a larger view.

Let’s get on with the gardening there is so much to do.

6th January 2022. Things I have been doing lately:

The big winter cutback. Your garden this summer will be defined by your actions over the next few weeks. Now is the time to cutback your plants fiercely, in order that they will be reinvigorated for the summer. Failure to cutback now will leave your plants weak, leggy and prone to disease. The cutback is also an opportunity to redefine the sight lines and paths in your garden and to freshen and renew your whole plot, whether it is a terrace or a plantation.

There are two main approaches to the big winter cutback.

  1. You can take a plant based approach, where you cutback your garden by plant type over a few weeks.
  2. You can take an area based approach where you cutback all the plants in a particular area of your garden at the same time.

Normally I favour the former but I will cover an area based approach in my next post.

Pollarding Californian False Pepper. The false pepper is a common site in our part of Spain with its weeping willow looks and its strings of small red berries. However, if left it can be unsightly and messy, growing to a huge size and discarding its berries into your pool and over your terrace in strong winds.

The secret to getting the best out of this tree is to pollard it hard every couple of years. It will soon grow back and provide you with its weeeping willow look, but this time in a manageable shape. The photos below show my false pepper, before, during and after its pollard. Click on each photo for a larger view.

Cutting back and dividing Cannas. If you have followed my advice (and I am sure you have), then you will have left your Cannas to go fully brown and withered to allow the goodness to go back down to the corm. I know this can look unsightly for a few weeks, but it is worth it as your Cannas will be refreshed and bursting with vigour for the summer. The photos below show my Cannas ready for cutting back. Click on each photo for a larger view.

The secret to cutting back cannas is to cut them off about 3 to 4 inches from the ground. By doing this you are ensuring that the plant will not think it can start sprouting again, and also by leaving a stalk of 3-4 inches you will stop ground water from seeping down and rotting the corm. The photos below show my cutting technique together with examples of what the finished cutback should look like. Click on each photo for a larger view.

The good thing about Canna is that they multiply under the soil and provide you with lots of new Cannas either to plant elsewhere in your garden or to pass on to friends. All you have to do is carefully dig up the clumps of corms every two to three years, divide them, and then replant them about 4 inches deep with the eyes on the corms facing upwards. The first photo below shows my gentle, but efficacious digging process, followed by my bounty of new corms ready to replant. Click on each photo for a larger view.

Trimming Weeping Ficus. Variegated Weeping Ficus are a common sight in the gardens of the Costa Blanca where they bring colour and interest. However, they can become shapeless lumps, so I think it is a good idea to do a little cloud pruning to bring some shape and expose their lovely white bark. The photo below shows my annual efforts before and afterwards. Click on each photo for a larger view.

Cutting back my flowering column. Regular readers of this blog will know that, some years ago, I created a flowering column of climbers around the trunk of a cut down palm. This is stunning in the summer and simply needs to be trimmed back with a hedge trimmer this time of year to keep it in shape. Cruella insisted that I involve the idiot son in some of my garden work as she accuses me of not spending enough time with him. Anyway, the photo below shows him helping; I insisted that he put his hat round the right way before starting but he still seems to be failing to follow the instructions on his belt.

Cruella insisted that he was not to go up ladders or do anything dangerous. She is standing just behind him out of picture with a safety net and I had to nail the step ladder to the ground.

Cutting back Dame de Noche. Night scented Jasmine is a lovely plant to have near a seating or dining area outdoors. It gives off a heavenly perfume that once smelled is unforgettable. However, like many Spanish plants, to get the best out of them you have to be cruel to be kind and cutback hard. You need to cutback your Dame de Noche by at least two thirds at this time of year. If you do it now then you are guaranteed that intoxicating scent in mid summer.

The first photo below shows my Dame de Noche in its uncut state standing at some 9 foot. The second photo shows it cut back to about 3 foot, but next year I will go lower. Click on each photo for a larger view.

The idiot son is coming home, the Peacock is back and I’m hiding from Cruella

Cruella (my wife) has been in a frenzy preparing for the Christmas visit of our idiot son. To most people this would just mean tidying the house and preparing his room, but to Cruella there is so much more to do. First she drew concentric chalk circles around the outside of our house, then she sacrificed a number of small animals, before finally howling at the moon and calling curses down upon the head of anyone who hindered his passage to Spain. I bought him a six pack of beer!

But perhaps most worrying is that Cruella, in her preparations for the idiot, has conjured up the Devil Peacock again (see picture below). He sits on our roof and keeps a ghoulish vigil, squawking and shrieking if anyone approaches the house; and his eyes glow red at night. Anyway, because of all this activity I have been able to keep under the radar and get on with quite a lot of gardening.

This is the best photo I could get. If I come any closer it alerts Cruella to my presence

17th December 2021. Things I have been doing lately:

Planting out seedlings. You need to get any seedlings you have been growing on into the ground very soon. Here in the Costa Blanca we do not get very cold winters and usually we have no frost. However, all seedlings will benefit from getting into the ground whilst the soil is still warm. If you remember from previous posts I collected some 120 Osteospermum and Marguerite daisy self sown seedlings and potted them up. I kept them out of full sun whilst they were taking root and then brought them out into the sun for a week before planting out.

The first photo below shows the newly pricked out seedlings resting on the potting bench, whilst the second shows them luxuriating in the sun before being planted out. Click on each photo for a larger view.

Before you plant out your new seedlings make sure that you thoroughly hoe the planting bed to remove all weeds; don’t be shy about getting your hands into the soil to clear out any stubborn weed seedlings. Also as you plant each individual seedling I like to fill the planting hole with water, followed by a prayer to give the little chaps a fighting chance. The photos below show me ready to begin hoeing, then my famous hand in the soil shot, and finally a healthy well rooted seedling ready to get growing. Click on each photo for a larger view.

In addition to planting out the Osteospermums I also planted out some Chlorophytum comosum, usually called spider plant. This under rated plant is very easy to grow and provides some nice winter variegated colour to shady areas. The photos below show the baby spiders ready to go. The second photo shows the strong root growth these plant can put on in just over a month. Click on each photo for a larger view.

Normally the final job for me when I plant out seedlings is to put up canes to protect them from my rampaging Labradors, Nero and Tango. But as regular readers of this blog will know Nero died not long ago and poor old Tango is blind and lonely. Anyway, I put up the canes just to make Tango feel better, I even kicked over a few canes and pretended to trample some seedlings to perk him up, but I am afraid his rampaging days are over. The photos below show my normally tempting cane structure and the sad, lonely, blind Tango resisting my encouragement. Click on each photo for a larger view.

Pruning grapevines. Grapevines can be safely cutback now as the sap will have stopped rising and most of the leaves will be off. You can, if you wish, wait till every last leaf drops, but if you do, you are in danger of cutting off the new growth as it tends to come through very quickly. To prune grapevines you simply need to cut off all the side growing shoots to leave a strong thickening stem. The photos below show my grapevines prior to pruning and in their newly pruned state. Don’t forget you can use the pruned side shoots as cuttings and they will take very well this time of year. Click on each photo for a larger view.

Pruning Fig trees. By now all the sap from your fig tree will have been drawn back into the roots and most of the leaves will have fallen. One of the benefits of pruning now is that you will not have the corrosive fig sap weeping out of every cut as this can cause burns to those of us with delicate skin. You may be interested to know that Cruella (my wife) uses fig sap as face cream; she swears by its efficacy in maintaining her complexion by keeping her deathly pallor and deepening her wrinkles.

I have two fig trees one of which is an espalier. Now the problem with fig trees is that they are robust and are capable of tremendous growth once they are mature. Left unpruned this can leave you with a behemoth of a tree that dominates your garden, darkens your house, and yet has unreachable fruit. When pruning mature figs you have to be brave and prune severely to an open structure that you maintain each year. As figs fruit on new growth you have to make sure that you do not cut branches back to the trunk or there will be no fruit on that branch.

The photos below show my trees before and after pruning. I know it looks drastic but they will be fine. Click on each photo for a larger view.

Now normally I would wheelbarrow away the prunings to shred them down by my shed, but in a burst of inspiration I decided to bring the shredder to them – this is how the wheel was invented and civilisation develops. In addition, in a further burst of inspiration I decided to place the shredded branches around my fig trees as a mulch. Now I have to give you a warning here, in case you rush headlong to copy my new approach. Normally, I would compost shreddings before placing them on soil as I have always believed that fresh tree shreddings would impart too much nitrogen to the soil. But hey ho, you only live once I’m going for it, call me crazy, but I’m just that kind of guy. The photos below show history being made. You might want to cut these out and save them to show to your grandchildren. Click on each photo for a larger view.

Clean your garden tools – and I clean Cruella’s hobby room

By now everything should have stopped growing in the garden, but apart from annuals you should not be cutting anything back yet till the end of this month at the earliest. If you chop things back too early you do not let the dying leaves do their job of returning the goodness back to the roots, bulbs, corms etc. So in this hiatus as we await the big cutback, there are a number of jobs you can be getting on with.

7th December 2021. Things I have been doing lately:

Cleaning my gardening tools. Now is the time to clean and overhaul all your gardening tools and get them ready for the new season. At its simplest this should include:

  • Tightening screws and nuts and bolts on tools
  • Checking handles are not loose
  • Washing down spades, forks and hoes of any dried in soil
  • Cleaning and oiling all small tools such as secateurs
  • Conclude by sharpening everything that needs sharpening

It is also useful to make a list of any tools you don’t currently have so that you can put them on your list to Santa. The first photo below shows some of my small tools ready for their annual overhaul. All you need is some oil such as WD40 to help you remove any rust, a small sand block to rub things down; (you can get this from DIY shops), some rags for wiping down and a sharpener to give some tools an edge. The second and third photos show the cleaning process in action. I happily spent a couple of hours down by the potting benches absorbed in this heavenly activity. Click on each photo for a larger view:

After all my efforts at cleaning I was proudly showing my work to Cruella when she started to compliment me on how well I had done, anyway the upshot was she asked if I could possibly clean the instruments in her hobby room. I spent the whole day in there and scrubbed everything clean even the stubborn red stains. I must admit overall I was pleased with my efforts, but unfortunately I couldn’t get the scratch marks off around the door, they were just too deep. The photo shows the hobby room after my big clean up.

I used two whole cans of WD40

Cleaning up fallen fruit. After the recent rains you will probably find that a lot of your fruit may have started to split and have fallen from the tree. This is caused by the pulp in the fruit expanding faster than the skin can grow, hence you get a split. It is ok to leave this on the ground for a couple of days so that the birds and insects can get a feed. But, do not leave fallen fruit any longer as it can become mouldy and introduce spores and pathogens into your soil that may cause long term damage. The photo below shows my timely clean up efforts.

Taking Ice Plant cuttings. One of the few plants in flower at the moment is the hardy Ice Plant. This lovely trailing plant is ideal for rockeries, or in my case planted out on my water feature. It is doing so well on the water feature ever since I diverted the water flow and created a rockery because of Cruella’s mouse army – see previous posts. Anyway, I want to plant some more on the water feature amongst the rocks.

It is easy to take cuttings from Ice Plant. In my case I used another plant that I have in a pot. Just find a nice strong growing non flowering stem and snip off about 4- 6 inches. Nip out the leaves all the way up the stem leaving a couple at the top. Plant 4 cuttings around the edge of a four inch pot filled with very free draining compost. when you have finished put the pot in a sheltered place out of the sun. They should start to root in about a month.

The first photo below shows the Ice Plant happily growing in my water feature rockery. The next photos show the host plant with lots of potential cuttings, and the cutting process in action. Click on each photo for a larger view.

A big snake has taken up residence in the rockery , I hope it eats Cruella’s mice army!

Getting ready to plant out seedlings. If you have been growing on seedlings in a shady area to protect them from the sun, now is the time to get them out in the sun ready for planting. Put your seedlings trays out in a sunny area for about a week so that you can acclimatise them before planting them out. You will need to get any hardy seedlings planted out before the end of December whilst the soil is still warm. The photo below shows a range of plants ready to go out in various spots around the garden.

Nothing beats the pleasure of planting out your own plants. Give it a go instead of buying forced plants from garden centres

Agave Attenuate flowering again. I have lots of Agave Attenuate planted around the garden and I am always taking cuttings and planting them elsewhere including in the Wild Wood. Well I don’t want to boast, but in this period of Advent when we are awaiting the birth of Jesus, I am awaiting the flowering of not one but two Agave Attenuate. Given that these plants normally flower about every 20 years, and I have already had a flowering elsewhere in the garden this year, it is nothing short of miraculous. The photos below show the two new Agave flowerings in the Wild Wood. Click on each photo for a larger view.

Birds and small animals return in Cruella’s absence and we clear the Wild Wood

Since Cruella (my wife) has been away at our English house visiting the idiot son, the garden is gradually returning to normal. Small animals and birds have started tentatively appearing again, admittedly they were very fearful at first bearing in mind many of their compatriots have been turned into soup, patés and table lamps by Cruella. But for the moment at least they are back and this means that I sit and have my morning pot of tea like St Francis of Assisi surrounded by small creatures and birds all gratefully twittering, mewing and growling with delight.

However, Cruella’s absence has been noted in our village and I have had to explain to people that she has gone to England to celebrate her birthday with her coven. I explained that it is a special birthday, as it is not every day you are 603. Anyway I have had to issue the photo below of Cruella to show that she is ok. The photo shows her outside coven HQ in her ceremonial evening regalia about to start the evening chant.

Cruella’s room is at the top of the right hand tower, the one without windows.

Anyway that’s enough about Cruella, let’s get on with the gardening.

27th November 2021. Things I have been doing lately:

Clearing the Wild Wood. Regular readers of this blog will know that there are many different parts to my garden all of which serve different purposes. The Wild Wood is an area that I keep as natural as possible, it mainly consists of pine trees, and Lentisco with all sorts of grasses and wild plants together with some odds and ends that I transplant down there. The Wild Wood also contains our guest accomodation which we had built specially so that guests could enjoy this area. In addition the Wild Wood is the graveyard of past pets and dare I say future ones; (don’t tell Tango the lonely blind Labrador). However, every 10 years or so it is necessary to undertake a general tidy up of the wood to ensure that general shrubs do not get to big and crowd out everything else. I call it managed diversity and Cruella calls it a mess. The photos below show the wood in its overgrown state. Click on each photo for a larger view.

Now of course I am too old to tackle this on my own, so I called for specialist help from a local contractor in my village. Dean, together with his son Lee have been chainsawing, strimming and generally cutting back for days. The photos below show them manfully getting stuck in. I am in charge of overall strategy and tea making. Click on each photo for a larger view.

And finally some photos of the Wild Wood cut back, but still wild and ready for a new lease of life in the Spring. Click on each photo for a larger view.

Cleaning up leaves for leaf mold. Whilst Dean and Lee have been doing the hard work in the Wild Wood, I have been been undertaking the first clean up of leaves ready to make leaf mould. There are only really two types of tree in my garden that offer the potential for leaf mold. These are my Fig trees and the big Mulberry. Leaf mold is in effect a side benefit of the necessary task of cleaning up fallen leaves. If you don’t clear up fallen leaves then they will smother your lawn and create a weed growing medium in your gravelled areas. I like to clear up fallen leaves in two stages. The first removes the bulk of leaves , whilst the second about a month later fully clears the area under the trees. The photos below show the Fig and Mulberry ready for the first clear up. Click on each photo for a larger view.

To make leaf mold you must rake up the leaves and place them into a plastic bag. It is important that you crush the leaves down into the bag, this not only gets you more leaves in each bag, but it helps the composting process. You will need to prick holes into your plastic bag to allow for air circulation and also make sure they are kept slightly moist. On e you have your bags filled, then place them in a shaded area well out of the Sun.

Now normally it can take 2 or more years to fully compost leaves, but, in my case I just add them to the general compost bin after about six months. The leaf clearing photos below include: a pile of leaves under the Mulberry tree, my leg in a plastic bag and plastic bags being pricked by a fork. I am beside myself with joy at my chances of winning the world’s most boring photograph category in the gardening section. Click on each photo for a larger view.

Planting garlic. Now that you have cleared all that space under your trees, then why not put it to good use by underplanting with garlic. Garlic is easy to grow and does not in any way harm the tree. Take a normal shop bought garlic bulb, split it up and select the fattest cloves. Strip off the papery outer coating from each clove and remember that you need to plant them with the flat part of the clove down. Stick your finger into the soil, using the full length of your finger, then pop a clove into each hole you make. Try and plant in some sort of pattern so that you will recognise the first shoots as they emerge and don’t hoe them off. I always plant in a cross pattern around the tree as I am a Christian, but also because it annoys Cruella as most of her friends hate the thought of crosses and garlic.

The first photo below shows my shop bought garlic bulb ready for splitting. The second shows the separation of the fat and thin cloves (one of Jesus’s lesser known miracles). The third photo shows the correct way up to plant the bulbs, and finally a man with his finger stuck in the soil. And to think that Cruella says I am boring, well this will show her. Click on each photo for a larger view.

I am thinking of having this reproduced as a print for sale in poster shops

Cruella has flown to England but she still misses the cat

Cruella (my wife) has flown off to our English house to visit our idiot son; but I must admit it has all been a bit traumatic. The problem was that ever since the cat died she has not been able to balance her broom properly. Normally the cat would sit at the back providing appropriate ballast and balance. But since Cruella, in her grief, mummified her, she just can’t get the weight right and our late cat keeps falling off the back. The end result is that she had to do a series of trial flights up and down the lawn before leaving which resulted in multiple mishaps as she toppled forward and over the handle. I was really worried that some real damage would be done, but thankfully all the plants are ok.

16th November. Things I have been doing lately:

Taking hardwood cuttings. Continuing the theme of how to get plants for free, it is time to take as many hardwood cuttings as possible. I am sure you are used to taking softwood cuttings in the Spring. Well, it is more or less the same technique, but the cuttings will be from wood that has hardened off rather than the nice green whippy stems you take in Spring. I have taken three types of hardwood cuttings this week.

Myrtle. The Myrtle bush is one of my favourites as it is very hardy, needs little water and trys to flower all year. I have an excellent specimen beside the path that leads to my potting area. I wanted to take some cuttings as friends often admire this plant and it will give me an opportunity to pass it on. The photo below shows my Myrtle still in flower.

Myrtle is such a lovely name for a girl, I am going to re-popularise it through the power of cuttings

When taking hardwood cuttings you have to find a non flowering stem and using your knife (never secateurs as they can crush) cut it about six inches long. Whilst you do not have to rush hardwood cuttings straight into a plastic bag to stop them drying out – as you do with soft wood cuttings. You should still try and get them potted up as soon as possible. Strip off all the leaves from your stem apart from a few at the top and then pop up to 4 cuttings around the edge of a six inch pot. The first photo below shows my cuttings ready for potting, whilst the second shows them happily bedded down for Winter. Click on each photo for a larger view.

Roses. Are ideal for hardwood cuttings, so if you have a favourite rose, then why not try and replicate it now. With roses you need to take the cuttings from this years growth, which means the stem should be green and not brown. You need to cut a stem that is about as thick as a pencil and which has no sign of disease. The photos below show my choice of stem and the eventual cuttings. Click on each photo for a larger view.

With rose cuttings you need to cut off all the leaves which will leave you with a bare twig. I know it sounds stupid but you must not mix up the top and bottom of the cuttings as roses do not grow upside down; though they may possibly pop out in Australia! Other good tips are to slightly nick the leaf nodes on the stem with a knife to encourage them all to root. Also, cut the bottom of the stem at a 45 degree angle to give you more rooting potential. When you are ready pop them into a 6/8inch pot and leave them at the back of the potting bench well out of the sun. If all goes well you can pot them on individually in late spring, and then, plant them out next autumn (God willing). The photo below shows my cuttings ready for planting followed by them bedding down for the winter. Click on each photo for a larger view.

Mulberry. The last hardwood cutting I have been taking this week has been Mulberry. Now Mulberry is a tree and I shouldn’t really take cuttings this time of year as the sap has stopped rising and the leaves are falling. However, a nice old Spanish lady who admires my tree has asked for a cutting for her daughter. I have told her it may not take and asked if she could wait till the spring, but it appears time is of the essence, so I am at least trying.

Same routine as before find your best non flowering stem, cut it about 6 inches long, trim it back and then pot it up. I think the Mulberry will do better in a very free draining compost, so I have mixed in lots of Perlite. The photos below show the cuttings process, the compost mix and the eventual pot. One last thing before we leave hardwood cuttings; make sure that you label all your pots as one hardwood cutting looks much like another. Click on each photo for a larger view.

Taking seeds from Fountain Grass. Lots of gardens in Spain have Fountain Grass and it is a fantastic showy plant. I have a lovely specimen which I have had for about 10 years and it never fails to impress. Just cut it back hard in January and it will start growing almost immediately, and by Summer will be back to its stunning best. The photo below shows my grass.

If you want to propagate your fountain grass then you have two options. You can take seed now just by running your cupped hand up any stalk that has promising looking seeds. Another option is to wait till January, and after the plant has been cut back, you can lift it and divide it. I am going to do both if necessary. I have taken a selection of seeds and sown them in free draining compost with Perlite added. I have then lightly covered them with soil. I await the outcome, but if all else fails, then it is dig and divide time. The photos below show the seed collection and sowing process. Click on each photo for a larger view.

The last of the Chillis. This sounds a bit like an eskimo version of the “last of the Mohicans”. But no, nothing so prosaic, my two Chilli plants are now exhausted and are ready for the compost bin. I have to say they have been a great hit, especially with Cruella who loved the fact that they looked like drops of blood. But all good things come to an end. Over the past month I have kept one fully ripe Chilli hanging on the plant so that it fully matures and its seeds ripen. So whilst the rest of the plant goes on the compost this little Chilli will be father/mother to a whole new generation. By the way don’t forget to say thank you to your plant as you place it gently in the compost.

To harvest Chilli seeds you just need one good ripe Chilli. Cut the top and bottom off, and then with a sharp knife split the Chilli lengthwise. Over a plate tease out the seeds, removing as much detritus as possible. Then take you plate and put it somewhere in full sun for about an hour. You are best to do this on a window sill indoors otherwise the dried seeds will blow away. Once the seeds are nicely dried out place the seeds in an envelope in a cool dark place till you are ready to plant out next spring.

The first photo below shows my old Chilli ready for the great compost bin. The second photo shows my seed Chilli together with the last of its unripe brethren. The final photo shows my seeds ready for drying off. Click on each photo for a larger view.

Hand weeding around bulbs. Some people pay a fortune for psychotherapy, others attend Mindfulness classes, still others lie on psychiatrists couches telling them about their dreams, whilst a pitiful few take psychotropic drugs. Whereas, if you follow my advice you just need to do a bit of close concentration hand weeding. Now I know Cruella isn’t here, but I can just hear her saying … ”you are just soooo boring”. But we will see who gets the last laugh when I start advertising my classes. Close hand-weeding is positively therapeutic as you concentrate and focus on a simple but beneficial task. Anyway, enough of my money making schemes.

A problem we gardeners face this time of year is that just as bulbs are starting to pop through the soil, so are perennial grass weeds. Now if you are not careful, it is easy to carelessly hoe off the tops of all your bulbs which can ruin your whole early spring flowering. So, the answer is to set aside your hoe, cast aside your gardening gloves, get down on your knees … and pray! No I’m only kidding I am sure you pray anyway. But at the moment get down on your knees and get your hands into the soil and remove the blades of grass by hand weeding. Although blades of grass and bulb shoots may superficially look the same, if you feel them with your ungloved hand you will see that bulb shoots are rounded whilst grass blades are; well blades. This easy distinction means that you can pluck out the grass blades weekly, until such time as the growing bulbs will shade them out.

The first photo below shows my zen and the art of hand-weeding technique, whilst the second shows the fruits of my labour. If you are interested I am thinking of holding weekly classes. All together now Ohm, Ohm. Click on each photo for a larger view.

Cruella has sent me a plague of wooly aphids and a vulture!

Now that Autumn is upon us, the days are shorter and we gardeners are having to pack as much as possible into our days before we lose the light. All of this would be bad enough is it wasn’t for the fact that Cruella (my wife) has cursed me again. Regular readers of this blog will know that this is a regular occurrence, but this time it is not the usual stuff like a plague of boils, or being struck dumb, or having to hop on one leg for a week. This time it is serious she has cursed the garden. All will become clear below.

4th November 2021. Things I have been doing lately:

Dealing with Wooly Aphids. The first sign of Cruella’s curse appeared the very next morning as I did my morning patrol of the garden. Passing under my large Ficus tree, to my horror I found it totally festooned with Wooly Aphids. To those of you not familiar with Wooly Aphids, they are like normal Aphids only with a white fur coat. Wooly Aphids secrete a wooly wax white coat around their colony whilst they use their mouth parts to suck the life out of your plant. If you see evidence of wooly aphids on your plants then you need to deal with them.

Now I don’t want to exaggerate or make a drama out of a crisis, they usually wont kill your plant (especially a tree), but they can be a vector that allows other diseases into your plant. In most cases your first port of call should be to use a high pressure hose to wash the nests away. I have been doing this every morning for a week, and I am confident of victory. The first photos below show the scale of the infestation. whilst the final photo shows my heroic hose work. Click on each photo for a larger view.

Take that you pesky aphids

Mulching your flower beds. Readers of recent posts will remember that I have finished mulching my fruit trees with compost from my bins. Now is the time to mulch your flower beds to get your soil ready for Spring sowing. Mulching has a number of benefits. Firstly, it introduces worms and beneficial nutrients into your soil, secondly it increases moisture retention and lastly it inhibits weed growth. What’s not to like! However, to mulch properly you need to undertake the following stages.

  1. Hoe your flower beds every night for a week, this will ensure that you get rid of any weeds and it also breaks the soil surface up to enable it to engage with the mulch
  2. After you have finished your thorough weeding, water the newly hoed beds to thoroughly soak the soil
  3. Apply a layer of mulch as thick as you reasonably can
  4. Gently use your hoe to mix the soil and the mulch together

The first photo below shows the start of my nightly hoe. The second photo shows the watering and mulch spreading stages. You also get a bonus appearance by Tango the blind lonely Labrador as he gobbles up the fallen dates from under a palm. The final photo shows my gentle hoe/mix methodology. Click on each photo for a larger view.

Pruning standards. Standards are those plants which have a bare stem topped off with a small round canopy, a bit like a lollipop. Standards are quite often grown in pots and if they are, as in my case, then now is the time to prune them to make sure they do not suffer wind damage. The first photos below show my standards very top heavy and ripe for wind damage. Click on each photo for a larger view.

From the photos below you can see that I have been very radical and taken them right back. But don’t worry they will be back with re-growth starting quite quickly. You may think you do not have to do this as your standards are in heavy pots – as mine are- however, stems can still snap even when the pot doesn’t fall over. Click on each photo for a larger view.

Cloud prune Olives. Regular readers will know that I cloud pruned an Olive tree some years ago and this needs to be reshaped two or three times a year. The whole point of cloud pruning is that you keep the shape sharp, otherwise in my case you get odd shaped balls. When I informed Cruella (my wife) that my balls were an odd shape and needed pruning, she collapsed with laughter. Personally I find this low level sea side humour demeaning. Anyway ignoring this vulgarity the first photo below shows my misshaped balls – for goodness sake, not you as well! Followed by my reshaped balls. That’s it “Honi soit que mal y pense”. Click on each photo for a larger view.

My perfectly shaped balls

Keep scarifying lawn patches. You will remember in my last post that I scarified my lawn with my scary machine. If there are still patches of stubborn thatch on your lawn then you need to remove them by using a leaf/lawn rake as below.

Clean up fallen leaves on gravel. This is a continuous job during autumn and winter. If you leave fallen leaves on your gravel, then they will mulch down to form an excellent medium for weeds. It is far better to pick them up now by using a blower and leaf rake than waiting till spring when your gravelled areas will be a sea of weeds. The photo below shows my tried and trusted technique of leaf wrangling.

Cruella has sent a Vulture. As if wooly aphids weren’t enough a Vulture has appeared in our village. People keep wondering how it got here and what it wants, but I had a shrewd idea that Cruella was behind this. When I asked Cruella if she had seen it, she said “of course, it is just here to do a little job”. Since then I keep moving in the garden, and never lie down. It is circling overhead as I write this post and I think it is looking at me in a funny way. The photos below shows it sitting on a roof nearby watching me.

Cruella and her friends scared my lawn

When I told Cruella (my wife) that I wasn’t looking forward to scarifying and slitting the lawn. I explained to her that the scarifying machine was terrifying. Don’t worry she instantly said I’ll do it, I like scarifying and I will invite some friends over to help. And that dear reader is how it came about that I woke up the next morning to find Cruella and her terrifying friends dancing around the lawn in ritualistic circles. The photo below explains all.

It took me ages to get the scorch marks off the lawn

23rd October 2021. Things I have been doing lately:

Scarifying the lawn. If you have a lawn – and I recognise that not many people do in Spain – then now is the time to give it a reviving scarification. All lawns get a build up of thick matted dead grass, which if left in place long term will cause water logging and patchiness. To stop this happening then you need to completely scarify the lawn every year or at least every two years. Now if you have a small lawn then you can do this with a grass rake, just scratch away at the surface and gradually remove all the underlying dead grass which has formed a thatch.

However, if like me you have a large lawn then you are better off buying or renting a scarifier. I have owned a scarifier for about 3 years but have to work up my courage to use it. It makes a tremendous noise stirs up huge clouds of dust and coats me from head to toe in dead grass. To scarify your lawn, first cut it very short, then water it and wait till the next afternoon before scarifying. The blades of grass should be dry, but the soil moist. All you have to do then is just hang on and pray for dear life. The photos below show me toiling in the wake of the scarifier.

It is not time to prune trees or to undertake the big Winter cut back; that will all happen in January. However, there is some tidying up you can be doing. Here are some of the things I am up to at the moment.

Trimming up the False Pepper tree. The Californian or Peruvian False Pepper Tree is a big favourite in Spain. This tree with its weeping willow looks can be a stunner in any garden, providing you keep it neatly trimmed. Too often I see glowering monstrosities spilling over garden fences and onto the pavement. To get the best out of this tree keep it neat but not constrained. I trim my tree back about every 6 months to keep its shape and do a drastic chop back every 5 years. The photos below show my False Pepper before its very overdue trim and in its new neatly coiffed appearance.

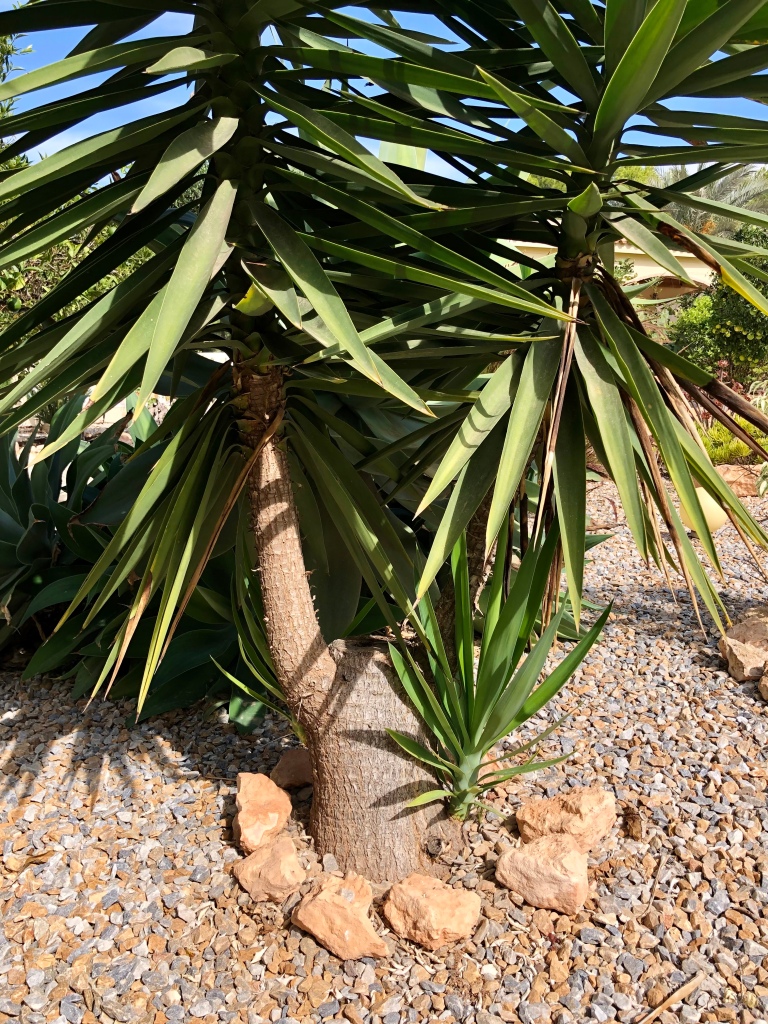
Tidy Yuccas and Palms. If you have growth coming from the bottom of your Palm trees and unwanted growth on your Yuccas (all of which sounds a bit Frankie Howerd; international readers will need to look him up on Google) then now is the time to take them off. This growth saps strength from the main plant and to my eyes is not aesthetically pleasing. Just using long handled lopers slice off the unwanted foliage and compost where appropriate. The photos below some examples of foliage I removed.

In addition to snipping off the unwanted foliage I also tackled the big cutback of my European Fan Palms. The photos below show the battle; I emerged the victor bloodied but unbowed.

Tying up Cannas. By now your Cannas will be looking untidy and scraggly. But don’t you dare cut them down; if you do you will be left with weak, weedy growth next Spring. Instead you need to tie your Cannas up and hold them in place. By doing this you will be allowing the plant to draw the maximum benefit from the foliage back into the Corm (ugly bulb) fattening it up and getting it ready to burst with life next Spring. The photos below show some of my Cannas newly tied up but looking like Cruella after a night at the Coven.

Finally check your irrigation. Now that we are firmly moving into Autumn you need to do a couple of things with your irrigation systems. Firstly, alter your timings to allow for the fact that most things will either stop growing, or grow only very slowly. So you will need to alter the watering intervals and also the length of watering time. Secondly, you need to check your batteries. I have 10 seperate watering timers, but I change all the batteries at the same time to ensure that all are in good working order. It is a false economy to think some are ok, and that way lies confusion. Dont forget to make a note of the date when you did the big battery change over. The photo below shows me at the start of the process.

This is one of my least complicated configurations.

I’m taking cuttings and growing seedlings whilst Cruella is growing a puppy

As the poet Keats said, “It is the season of mists and mellow fruitfulness”which means it is time for seedlings, cuttings and new plantings . All of this exciting activity can be found in this post ; what’s not to like lets get gardening

11th October 2021. Things I have been doing lately:

Collecting the Persimmon harvest. The Persimmon or Caqui as the Spanish call it is a lovely soft and very sweet fruit which looks much like a large tomato when it is ripe. This is my last fruit of the season and is well worth waiting for. When it is ripe you can just cut the top off the fruit and then using a small spoon you can eat as if you were eating a yoghurt from a pot.

I would highly recommend getting a Persimmon tree. it is easy to grow doesn’t get too big and a new tree can be planted out anytime between now and the end of January. When the tree is fruiting you will need to net it as the bright red colouring of the fruit as it ripens signals dinner time to the birds. When you harvest the fruit you need to ensure that you snip it off leaving some stem still attached. You can use the fruit directly from the tree in a manner of ways. served individually as a pudding, spooned out into your cereal or porridge, or just eat it as a snack.

The photos below show the netted Persimmon tree safe from birds, being harvested with stalk attached and finally ready to eat. Click on each photo for a larger view.

Harvesting seedlings. Regular readers of this blog will remember that I removed all of the Osteospermums from my flower beds a couple of months ago. I did this because they get woody and leggy after a long Spring/Summer of flowering, but also safe in the knowledge that they would have set seed. By removing the parent plants I let in air and moisture to the seedlings confident that they would soon show up. Well the photo below shows that they didn’t let me down.

Hello new plants I’m your Daddy

Once the seedlings look big enough to prick out then there are a few simple stages before you get your nice new plants:

  • First prepare a nice free draining compost by mixing a good amount of Perlite into your compost.
  • Fill plug trays with your nice compost making sure to tamp it down to remove air pockets, but not so much that you compact the compost.
  • Thoroughly water and drain the plug trays then using your dibber make a nice wide hole so that you can get all the roots in

Each of the above stages are shown in the photos below. Click on each photo for a larger view.

Now the preparation is over, it is time to go get your new plants.

  • Using your trowel slide it under a group of seedlings and ease them to the surface. Take care not to damage their delicate roots.
  • Gently separate the seedlings and begin to pick out those with the most leaves and the best roots.
  • Holding the seedlings only by the leaves, gently lower them into your pre-prepared holes pushing their roots into place with a pencil and cover them.
  • Finally stand back and admire the fact that you now have 96 new free plants.
When grown on each plant would cost you 4 euro, so you see it makes sense to grow from seeds and cuttings.

Taking late summer cuttings. Now is an ideal time to take a few late summer cuttings. And if they take then great, but if they don’t you have lost nothing. I don’t normally grow geraniums and pelargoniums because of the dreaded geranium moth. But I grew some this Summer and sprayed them regularly and they were ok, so I have decided to take some cuttings. The photo below shows my plants ready to be reshaped for winter and to provide me with my cuttings.

The first thing to do is to search down into the plant and look for a non flowering stem that has not gone woody. Geraniums stems will turn woody quite quickly, but you are looking for the succulent still green stem. Cut of the stem and then cut off all the leaves on the stem leaving only a couple at the top. Next dip your cut and prepared stem into some hormone rooting liquid before planting against the edge of a four inch pot. You can plant two cuttings to each pot. Finally place a cane at the centre of your pot and place the pot into a plastic bag. Blow the bag up with your breath so it is full of nice carbon dioxide and then tie at the top with twine. This neat little wigwam will stop your cutting drying out over the next few weeks. You can use this method to take soft wood cuttings over the next month. The photos below show the process. Click on each photo for a larger view.

8 geraniums to add to my 96 seedlings

Planting Golden Pothos. Before I went on my recent trip to the UK to see our idiot son. I put some Golden Pothos cuttings in a glass of water to see if I could grow them on. Regular readers will remember that I have a Golden Pothos on my Naya that I grandly wish to grow around a mirror. I had attempted planting cuttings straight into the pot but they failed, so I thought this method might work. I am pleasd to say that they produced good roots and are now planted in the main pot to supplement the mother plant.

The photos below shows the new roots in all their glory, and finally planted in with the mother plant. Click on each photo for a larger view.

Cruella is growing a puppy. When I told Cruella (my wife) all about the seedlings and cuttings that I had taken to make new plants, and explained to her the process, she feigned her normal disinterest. However, despite her show of indifference I could see that she was somewhat interested; I can always tell because the wart on the end of her nose glows and makes her look like an evil Rudolf the red nosed reindeer.

Anyway a few hours later I found her furiously brushing Tango our blind Labrador, or as we now call him “last of the Labradors”. When I enquired what she was doing she informed me that she would use the hair brushed from Tango to grow him a new companion. When I complained that she was being stupid, she said it is either that or she would raise Nero (our recently deceased Labrador) from the dead! The photo below shows Cruella and Tango together with her potting material.

Mulch ado about nothing and how Cruella did well

Well I’m back from visiting my English garden and I have to be honest with you, I was apprehensive about coming back. As you know I left Cruella (my wife) in charge and this normally has disastrous consequences; but to be fair it wasn’t all bad. Anyway more of Cruella later, lets get on with the jobs we need to be doing now.

28th September 2021. Things I have been doing lately:

Cutting the grass. Before I went to England I gave the grass its final feed of the year. Normally I feed the grass 4 times a year with the last feed in late September early October. If you feed the grass after September it normally won’t get time to take the feed up before it stops growing. However, this has not been a normal year and we had quite a bit of rain whilst I was away, which in turn made the newly fed grass grow like crazy.

This was made worse by the horror of finding that my large petrol strimmer which trims the lawn edges had broken down and I would have to use a smaller electric one which I keep as a standby. The photos below show the extent of the grass growth. Click on each photo for a larger view.

Eventually after a hard days mowing I had everything back as it should be. Remember to keep your mower on its highest setting at this time of the year so that the lawn can go into the Winter with some protective cover to prevent wear. Ideallly the grass should be left between 5-10 cms depending on your preference and likely wear. The photos show the lawn mid mow and my final view from sitting under the Mulberry tree. Click on each photo for a larger view.

The last of the Loofahs. As a title of a film I give you that this lacks the drama of “the last of the Mohicans”, but it has merit. Most of the loofahs are now harvested and I have started emptying the pots. It has been a fantastic year with a very good crop of beauty products. I have lots of seeds so if you would like some just contact me and pop round if you live near Campoverde. If not contact me and I will give you my address and you can then send me a stamped self addressed envelope and I will send you some seeds with instructions how to grow them. The photo below shows the last of the Loofahs.

The little ones I use for washing up sponges.

Whilst we are dealing with seeds, Autumn is the best time to be perusing seed catalogues on line and deciding what you will be planting next year. I picked up a few packets whilst I was in England that I will be using for my full Sun borders. See photo below.

The big Sunflowers will be used for a competition in our village supporting the work of the Church.

Mulching your trees. If you have fruit trees it is always a good idea at this time of year to give them a lovely deep mulch with compost from your compost bin. If you don’t have a compost bin, then firstly, shame on you. But secondly don’t worry as you can always buy bags of compost and use these. The idea is that mulching will improve your soil, by encouraging worms and other beneficial insects, whilst at the same time improving moisture retention in your soil.

Now mulching isn’t a case of just bunging some compost down and hoping for the best. You have to go about it systematically to realise the best results.

  1. Inspect your trees and remove any suckers that are growing from the branches, especially any that may be growing from the bottom. Suckers are easily recognisable as they are bright green and grow straight up. To remove them just hold the sucker and pull it straight down and it will come away easily. See photo below.
Note the sucker coming from below the soil as this may be coming from below the tree graft and therefore be root stock so it definitely needs to go.

2. Hoe around your trees to remove any weeds and break up the soil. This is an important stage as impacted soil will stop water penetration and you need the soil and the compost mulch to mix.

3. Thoroughly water your trees and then give them a good feed with a specialist feed and not just a general purpose feed. The photos below show stages 2 and 3. Click on each photo for a larger view.

4. Now the hard work starts emptying the compost bin and mulching round your trees. This is back breaking but worth it. I give each tree a wheelbarrow of mulch spread to a depth of about 3 inches around the trunk. Make sure that you leave space around the trunk so that there is no chance of rot getting at the trunk. Also make sure you expose the tree graft so that you do not encourage growth from below the graft. The first photo below show my compost bin ready for emptying. The next shows a barrowful of black gold as I dramatically call compost. The final photo shows me carefully removing the mulch away from the tree graft on a small tree. Click on each photo for a larger view.

5. Finally the best stage. Resting and having a pot of tea safe in the knowledge that you will not have to mulch your trees till next year.

Well done thou good and faithful servant

Cruella did well. This is not a phrase you will hear from me very often in relation to Cruella and the garden. But in two recent cases she has been good. Firstly, amongst her other duties I left her with, was the care of a pot of Chilli Peppers I had been bringing on. When I left the chillis were green but would soon ripen. I feared for them, but when I got back they were ripening lovely and Cruella had been harvesting them every day. Given all her many other gardening disasters I asked why this time was different. For a moment she looked coy and then said “they remind me of drops of blood”. The photo below shows Cruella and her Chillis.

Cruella’s second triumph was in helping me tie up a Diplodemia which was growing furiously up a cane in its pot. I wanted to keep this in a pot but grow it along some string. Not many people know this, but Cruella is very good at tying all sorts of knots. I asked her a long time ago where she got this talent, but she just shrugged her shoulders and said “you know, we’re taught it early on, nobody wants a wriggling sacrifice”. I didn’t ask any more. The photo below shows Cruella midst knot tying, followed by the successfully tied plant. Click on each photo for a larger view.

When I asked Cruella to tie the plant up I informed her that she would be using my best string. She feigned incredulity and mocked the fact that I have “best string”. I carefully explained to her that best string is used for tying things up where I need the string to last for a few years. My basic string is used only when I want the string to rot away within a few months. She only laughed at me and said did I ever wonder why people find me boring. Because of this I didn’t like to mention that I am thinking of introducing an intermediate string category. The photo below shows my current two categories of string.

You can see what I mean about an intermediate category.

Cruella has destroyed our English garden


You will remember from my previous post that I was leaving our Spanish garden in the supposed care of Cruella (my wife), and heading to off to see what was happening in our English garden. The aim of my visit was, in order of importance:

  1. Rescue and reshape our English garden
  2. Visit some gardens of note that I haven’t seen for a while
  3. Make sure our idiot son was ok

Remember that old saying “it is better to travel in hope than to arrive” well its true.

15th September 2021. Things I have been doing lately:

Cutting back our jungle. Regular readers of this blog will know that our English garden is a long narrow rectangular walled garden adjacent to the river Medway. It is designed as an easy maintenance garden as most of the time we are in Spain. It has Flag paving on the ground and the walls are adorned with a series of climbers which flow up and over the wall. I had told Cruella exactly what to do when she was last over, but she completely ignored my advice and neglected the garden apart for the fact that she touched two precious plants and killed them. The photos below show the extent of her crimes. Click on each photo for a larger view.

The worse thing was that she has place garden statuary around the garden and animated them as an alarm against intruders. There was a malign looking lamb, an evil duck with ducklings and a decapitated head. When I first went into the garden they all started screaming at once. The ducks quacked evil high pitched quacks, the lamb bleated like an old rusty door being slowly opened and the decapitated head screamed out intruder, intruder, but in Latin “intrusor”. The photos below show the evil trio. Click on each photo for a larger view.

The photos below show the garden finally cut back and generally tidied up. I fear the Box is a goner, but I will wait and see. Click on each photo for a larger view.

Sissinghurst Castle. I have always wanted to visit Sissinghurst Castle the home of Vita Sackville West the famous writer and more importantly gardener. Vita was not an innovator but she did some things very well including planting borders in a single colour. I took our idiot son with me to try and educate him and to give the banking profession a rest from chaos. I asked him if he would take a photo of me in the famous “white garden” which he did by making me look as if I am wearing a Tutu.

Margot Fonteyn would be envious

Another feature that I liked at Sissinghurst was the dry garden. This consisted of large rocks, gravel and pebbles with intermittent Mediterranean planting. This would work very well in Spain and I might even think of working this into my large lawn. The photos below give you some idea what it is like. Click on each photo for a larger view.

RHS Wisley. As a member of the RHS I try and make a visit at least once a year to see what is going on and if I can pick up any tips and get my moneys worth out of my membership. Unfortunately the gardens didn’t look at their best – possibly because it is late in the year. In addition the RHS has gone mad on wild flower meadows and wild planting which seemed to be everywhere. The photos below show some of the things that interested me including another dry garden that would work in Spain. Click on each photo for a larger view.

The Rangers House Greenwich. If you have ever visited Greenwich park, then the chances are that you have concentrated on the view across London and the Royal Observatory. But you will probably have missed the Rangers House which sits right at the back of the park. The house used to have a beautiful Rose garden, which again, and unfortunately now has intermittent planting of wild flowers and roses. I don’t want to seem curmudgeonly but formal rose planting and wildflower meadows do not sit well together. Judge for yourself from the photos below I am off to write a letter of complaint to the Times. Click on each photo for a larger view.


Visit to Steve’s garden. My friend Steve lives in West London and gardens on a typical London plot. Clay just about six inches below the surface that has been improved by years of spreading compost. Where possible I always include a visit to Steve’s garden because he is one of those gardeners who could stick a dry twig in the ground and it would sprout almost immediately. There is not much we Spanish gardeners can learn from this garden as everything he grows would shrivel and die in the Spanish sun.

Anyway, just to make you hanker after floriferous displays here are some photos of Steve’s garden. Ending with a photo of Steve and me. After seeing this photograph he rang me the next day and has sworn that he is now on a diet; I will make sure he keeps it up. Click on each photo for a larger view.

This time next year he will be as thin as a stick

Cruella is making bird and bee Porridge and destroying my garden

By the time you read this you read this I will be tending my English garden. I know I should have told you before I left but I was too ashamed of the fact that I have left Cruella (my wife) in charge of the Spanish garden. I have left her copious written instructions but I know she will just ignore them. When I took her round the other night (she only comes out at night) and explained everything I could tell she was just feigning interest. Each time I explained something to her she just said “yeah, yeah, whatever”, when I remonstrated with her over her lack of interest she just said “blah de blah”.

Anyway, here is what I was up to before I left.

7th September 2021. Things I have been doing lately.

Trimming back Lemon trees. By now most of your lemons should be off the tree and any that are left will not be much good. Now is the time to tidy your trees up before the new crop begins to set. Your starting point should always be to cut out any diseased, crossing or upright growth. Having done this make sure you create a hole in the centre of the canopy to let light get into the centre of the tree. Finish off by lightly trimming around the outside of the tree to bring it back into shape.

I only have one old Lemon tree and over the years I have been shaping it around the dining area of our outside kitchen. To create what I grandly term “a dining arbour”. The photo below shows the tree before the start of the big trim. Click on each photo for a larger view.

The next two photos show the outcome of my labour. Where possible I shred the leaves and branches and add them to the compost bin. But the lemons would make the heap too acid so they are thrown into the wild wood. Click on each photo for a larger view.
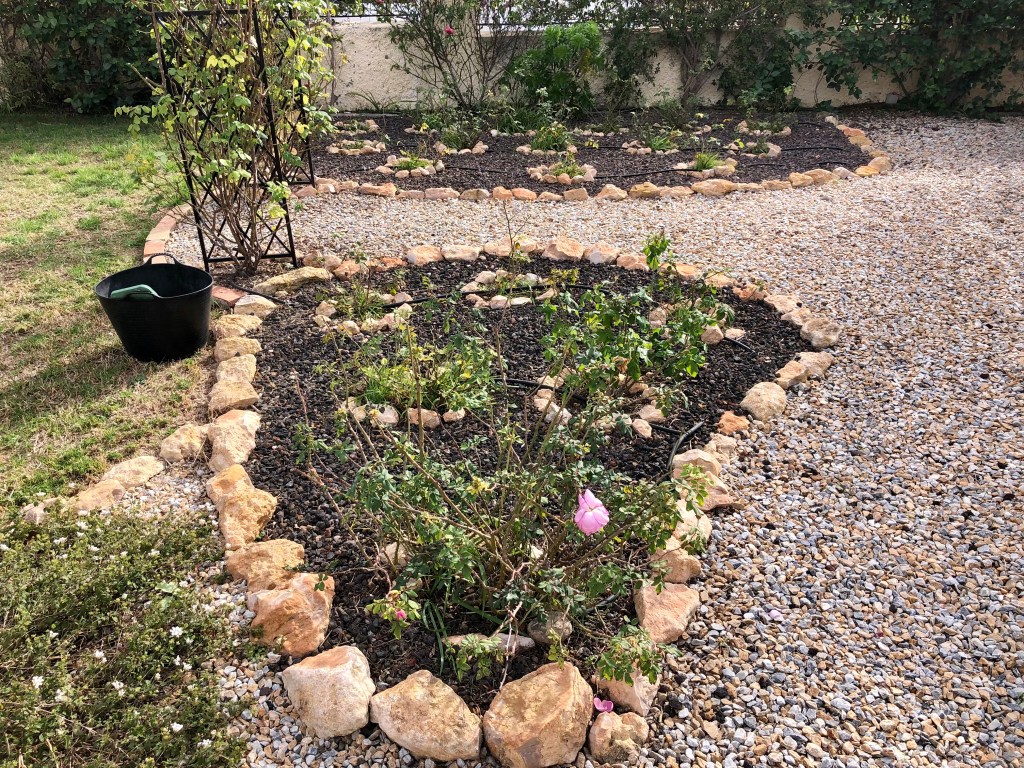
Removing fig nets and tying in espalier. By now all your figs should be over and it is time to remove your nets; this assumes that you sensibly netted them. If you didn’t net then you probably have fat grateful birds in your garden!. Don’t try and remove fig nets to save them for next year, it is just not worth the trouble, you will only damage the tree and it is not as if nets are prohibitively expensive.

Using scissors just move around the tree and cut all the net off with as little damage to the tree as possible. Whilst I do not recycle the nets, I always save the CDs that I hang on the trees to scare the birds. I worry that no one uses CDs anymore and that the birds won’t be scared by my hanging a copy of my Spotify subscription. The photos below show my net cutting activity together with my CD retrieval. Click on each photo for a larger view.

In addition to my normal fig tree I also have an espalier tree that I have been growing against the wall of our outside kitchen for some 5/6 years. This is netted in a similar way to the big fig tree. But the difference is that once the net is removed it is time to tie in the branches to ensure that they follow the espalier wires. The photos below show the espalier netted, then de-netted (a term I have just invented) and finally you can see a branch being tied in to maintain the espalier. Click on each photo for a larger view.

The final episode in my de-netting odyssey is to transfer a portion of my removed net to my Persimmon tree. The Persimmons are gradually beginning to ripen. But they do this very slowly which means you can sometimes forget them. However, the birds never forget, they know exactly when the time is right to strike by the colouring of the fruit, so it is best to get your net in place now to save tragedy later. The first photo below shows the first signs of ripening, whilst the second shows my trusty recycled net in place together with a selection of Mantovani’s greatest hits on CD.

Tidying borders. My last act before leaving for our English garden was to clear out the long borders along our drive. Because they are in fierce sun all day I only plant things here that can stand this ferocity. My succesion planting keeps this area in flower from early March till the end of August. The planting normally includes:

  • Various bulbs
  • Carnation and Dianthus
  • Flag Iris
  • Marigolds
  • Osteospermums

When it comes to clearing out borders I have been taking out individual plants by hand as they are spent. But now it is time to get industrial, just use your hedge trimmers to take off the sides and tops of the Osteospermum. This allows you to get a good look inside to see which plants are too woody, and which it is worth trimming back and letting go through the winter. In a future post I will cover the self sown seedlings that will be coming through soon in this area.

The photos below show my hedge trimmer strategy in action, finishing with my overloaded compost bin. The final photo shows my nice cleared beds and clean drive ready for the winter. Click on each photo for a larger view.

Cutting patterns on the lawn. This time of year I like to let the lawn grow quite long to encourage seed setting and to help the birds and bees. My lawn becomes alive with bees and lots of little birds happily pecking away. I wander among them like a latter day St Francis. However, Cruella calls this the time of the great harvest and sets traps and makes bird and bee gruel for her breakfast.

I always cut a pattern just for fun. The photo below shows this years homage to the Yellow Brick Road.

Frank L Baum would be proud of me.

Cruella hears the death rattle of the Loofah

As Summer moves smoothly towards its decline it is time for us to be harvesting the bounty of our labours. For me this means fruits, seeds, berries and loofahs. My fig trees have supplied a bountiful harvest, whilst this years Marigolds have been astounding especially as they followed a lovely show from the Sunflowers. But to be honest it’s the loofahs that have been the greatest success and caused the greatest consternation to Cruella (my wife).

21st August. Things I have been doing lately:

Harvesting Loofahs. If you haven’t grown loofahs, then you really should. They are a lovely annual climber which produce a profusion of large yellow flowers which the bees love, with the added bonus of loofah gourds which are fantastic for skin care. It was Cruella’s idea that I should grow loofahs as she had heard that it was good for exfoliating the skin in general and the removal of warts on the nose in particular, both of which are perennial problems in Cruella’s coven.

Cruella became impatient for the loofah harvest and would ask me daily when they would be ready. I explained that when the gourds turn completely brown and I can hear the seeds rattle, then they would be ready. In that case she said they are ready. When I asked her how she knew she explained that she could hear their death rattle as she passed them every day. I asked what it sounded like and she said just like a human death rattle; I left it there. The photos below show. Cruella confirming the loofah death rattle.

When your first loofah harvest is ready, all the gourds will be a deep dried brown and you will be able to hear the seeds rattle. If you are lucky you may get a second harvest. The first photo below shows some of my loofahs ready to be harvested. The second photo shows a second harvest coming on. The third photo shows the bag that Cruella gave me to store the harvest in, she thought it very fitting. Click on each photo for a larger view.

Processing loofahs. Processing a loofah gourd could not be easier. First you gather in all the gourds that are ready. The photo below shows part of my harvest.

You start off the process by snapping off the end of the gourd which is opposite to the stem. This presents you with a neat little hole at one end from which you can pour out the plentiful seeds. Once you have all the seeds out you should gently crush the gourd by rolling it in your hands. This process will crack the skin and allow for it to be peeled off very easily. The loofah is then ready for use. The final part of the process is is to gently blow away the seeds paper like coating. The easiest way to do this is to toss the seeds into the air and blow; between you and the wind they will all fly away.

The first photo below shows how easy it is to snap off the end of the gourd (it works every time without fail). The second photo shows the seeds pouring out. The third photo shows my gentle crushing technique. In the next photo you can see the bathroom ready loofah. Finally my award winning gentle seed blowing. Click on each photo for a larger view.

Harvesting Marigold seeds. Regular readers of this blog will remember that I told you to mark the first and best of your Marigold blooms by placing a strip of masking tape around the best blooms. The purpose of this was to mark where the best blooms where and to make sure that you didn’t deadhead them.

The photo below shows some of my saved seed heads just after I harvested them. They are ready for harvest when they are fully brown and dried looking. Never harvest them when they are wet with rain or dew. It is best to harvest late on a hot sunny afternoon as this will stop any rot or mildew setting in whilst the seeds are being stored.

To begin harvesting the seeds, cut off the stem and marker flag. Then holding the seed pod upright gently pull and rub off the remnants of petals and bits of furze on top of the seed pod. Once all this has been removed gently roll and crush the seed pod between your thumb and forefinger. If you keep up a gentle pressure the seeds will gradually flow out into your hand. This process can be seen in the photos below. Click on each photo for a larger view.

Finally the photos below show the saved seeds ready to be stored in a plain white sealable envelope ready for planting next Spring. Isn’t God good. Click on each photo for a larger view.

Finally I have a new friend. Most of the regular readers of this blog will know that I lead a wretched existence as I scurry between the potting bench, compost bins and the safety of my shed. I have a haunted look about me and try to stay in the shadows. All of this is brought about by Cruella (my wife) who seems constantly intent on findings things for me to do other than gardening; she has no sense of priority.

Anyway, a light has entered my darkness. I have made a new friend. It is a baby squirrel that introduced itself to me one morning by running up my leg (I had shorts on at the time). We now meet regularly when I feed him large nuts which he sits bedside me happily chomping away. He is obviously mad as he has no fear and is happy to come a find me wherever I am hiding in the garden. The photo shows my little squirrel chomping a nut.

My greatest fear is that Cruella will sniff him out. She is already sniffing the air and goes around saying fee fi fo fum. She may grind his bones to make her bread!

My breakfast has come back to life in the compost bin

I recognise that this is not the normal heading one would expect to find in a gardening blog, but these are strange times. Cruella (my wife) is missing our idiot son who has returned to London to continue wrecking the banking system after his brief holiday here in Spain. This has left Cruella bereft and with time on her hands, both of which are things that are dangerous for me.

Without things to distract her Cruella notices me and my happy life of gardening all day comes under close scrutiny. Worse still she wants to know what I am doing, how I feel about things and even wants to talk about our relationship. Most of the time I can just mumble platitudes and gradually fade into the background before slipping away. But the other thing that happens is Cruella in her unhappiness can distort nature. Which brings me to the point of my breakfast coming back to life in the compost bin.

8th August 2021. Things I have been doing lately:

Growing Avocados. Every Sunday for breakfast I have poached eggs on a bed of mashed Avocados on toast.; yes I know it’s boring, but I like it. Anyway, since Cruella has distorted nature, I have noticed a sudden profusion of avocados growing in my resting compost bin. These have sprung up from the middle of the compost at a rapid pace. The photo below shows two of the avocados reaching for the light, I now have 6.

It’s alive

I have now potted these up. I left them standing in the shade for a few days, just so that they could get used to the light. They have now been moved to full Sun and I cut one back just to see if I could encourage new and more bushy growth down the stem. This has been a great success and I expect to get them all in the ground next year. The first photo below shows the stem bursting from the avocado stone. The second shows them resting in the shade. The final photo is a bit blurry but you can see the new growth coming from the cutback stem. Click on each photo for a larger view.

Keep up the deadheading. I know I keep on about it, but you must deadhead daily if you want a long flowering season from your plants over the summer. Most plants will turn fully to seed production if about 50% of the plant is not deadheaded. The plant thinks that it has enough seed for its future propagation and will no longer bother with flowers but instead concentrate all its energy on the seeds. By deadheading you are forcing the plant to produce more flowers to make future seed.

Different plants will require different types of deadheading, but the simplest rule is do not leave any dead stem that can look unsightly and potentially become infected. This means you don’t just cut off the flower head, but you slide your secateurs down the stem till you come to a leaf junction and you cut there. The photo below shows me deadheading Marigolds.

Don’t forget – everything goes in the compost to improve your soil next year

If you deadhead daily you will get a wonderful display all Summer. The photo below shows some of the Marigolds which line my drive. These have been in bloom since late April.

Not bad for one packet of seeds

Solving the problem of a shady Naya. Here in Spain Nayas (shaded verandas) are an essential especially in our current exceptionally hot weather. Much as I love my naya, there is one spot just by my front door where plants continually fail to thrive. In the past I have put this down to Cruella going past and looking at them, but she assures me she never flys in by the front door, so it must just be lack of light.

Anyway, I have found the solution, and it was staring me right in the face all the time. The back of my house is North facing and I have brightened this up by growing shade loving plants in trays on the window ledges. Amongst these is “Golden Pothos” a variegated ivy type plant. This grows very well in this area and I suddenly had the thought why no try it on the Naya. Well, it just loves it, it is growing like Topsy, and it’s variegation lights up the shade on the Naya. I have now taken a series of stem cuttings from the mother plant to supplement my original cutting which I am now growing up a stick and hopefully, eventually around a mirror.

The first photo below shows the the Golden Pothos growing in trays on the window ledges at the back of the house. The second shows the newly tied up plant ready to grow up the stick. The third shows my cuttings paraphernalia, with the final photo showing the plant ready to give me a display that will be both vertical and trailing. Wish me luck I will let you know how it gets on. Click on each photo for a larger view.

Forget the Chelsea Chop, I have invented the Costa Blanca Cut

When I informed Cruella (my wife) that I had invented a whole new gardening procedure to replace the Chelsea Chop, she instantly exploded saying if you think we are going vegetarian then you can forget it. After I had explained that the Chelsea Chop was not a cut of meat she calmed down, but kept mumbling about sausages for over half an hour. Anyway, all of you gardeners know what I mean and I am sure will share my excitement.

Normally the Chelsea Chop refers to a cutback of herbaceous perennials that takes place at the end of May in the UK and coincides with the RHS Chelsea Flower Show. The aim is to cutback whilst the plants have had their first blooms and are still growing vigorously with the aim of getting much more flowering. This of course doesn’t apply to Spain, but after experimenting last year in July, I am proud to announce the Costa Blanca Cut (pat pending) is here to stay. I haven’t sold the film rights yet, but I want to be played by George Clooney whilst Cruella has expressed a preference for Morticia from the Addams Family.

Anyway on with the gardening.

30th July 2021. Things I have been doing lately.

The Costa Blanca Cut. Before beginning the Cut you need to decide which plants in your garden will benefit and assemble the necessary equipment. From my experiments so far any herbaceous woody perennials including Plumbago, Bignonia, Jasmine, Bougainvillea etc. If cut back now all should give a really strong second show of blooms. The photo below shows my assembled equipment.

This was just an advance scouting party.

Hedges. All across the front of my garden I have planted a large hedge that contains all the favourites that grow in the Costa Blanca. Over the years I have crowded more in and allowed them to fight for space to flower. This works exceptionally well and normally only requires a big cutback in January. But because the display can get a bit tired in July I invented the Costa Blanca Cut.

The first photos below show various aspects of my hedge in full bloom and before the Cut. Do not trim right back, but just shape the plant up by taking 6 to 12 inches off the stem. Click on each photo for a larger view.

The photos below show the hedge after the Costa Blanca Cut. As you can see the plants have been reshaped and lifted but they still have plenty of blooms. This will hopefully spur new growth into the Autumn. Click on each photo for a larger view.

Last but not least a sack of flowers that have been sacrificed for the greater good of the garden.

This could be a Nosegay for a giant.

Trimming the Flowering column. Regular readers of this blog will recall that years ago I had a diseased palm cut down to about 12 ft which I then wrapped in mesh and used as a support for climbers. This has been a spectacular success and was a prime candidate for the Cut. The climbers include: Solanum, and Pink Trumpet Vine with a later addition of Stephanotis. The Trumpet Vine produces magnificent and showy seed pods up to a metre long, but I don’t want them now as this stops the plant re flowering. By trimming up now I will have more flowers plus the seed pods in late September. The photos below show the flowers column before and after its trim.

Cut down Sunflowers. By now your Sunflowers should be over and done with. By all means keep the seed head to feed the birds, but otherwise cut them down now. With my Sunflowers I just cut off the stem about 6 inches from the ground. By leaving the root in the ground till the Autumn I stop all the disruption that would entail by dragging a large root ball out from the middle of a plant packed border. The photo below shows some of my Sunflowers making their last journey to the compost bin. As I wheel the wheelbarrow to the bin I sing the requiem Pie Jesu it seems to comfort us all.

By this time rigor mortis had set in.

Keep trimming Lavender. If you want your Lavender to keep having successive flower stems, then you need to trim it back as soon as the flower stems go black. I explained in the last post how to do this so I won’t repeat here. But just to say where you have a large plant, or lots to do, don’t hesitate to use your hedge trimmers as they will do an excellent job and save you lots of time. The photo shows the big Lavender clumps by one of my water features which were trimmed with hedge trimmers at the same time as I was undertaking the big Cut on my hedges. Click on each photo for a larger view.

Thin fruit. I don’t normally thin citrus fruits as they usually take care of this themselves. Similarly with Figs, I patrol the trees every day and take fruit off as it becomes ripe. The exception is Persimmon. I have a small Persimmon tree which is now about 5 years old and provides me with a small selection of its lovely fruit each year. However, to make the fruit larger and to stop it dropping too many fruits, I thin where bunches of fruits are too close to each other. The photos below show prime candidates for thinning whereby I take out the middle fruit where there are three. Click on each photo for a larger view.

I have been gardening in the nude so Cruella has made me invisible, and the idiot son has heatstroke.

In an attempt to deal with the grief at losing Nero (the Labrador), I have been gardening all day throughout the current oppressive heat. Of necessity this has meant that I have divested myself of all my clothes, apart from my gardening hat of course. Cruella (my wife) is concerned that the neighbours may see me so she has rendered me invisible. Anyway more of this nonsense later, let’s get on with the gardening .

12th July 2021. Things I have been doing lately:

Keeping gravelled areas clear. With all this heat, trees and perennials are starting to shed their leaves and foliage. This is a defensive mechanism to stop the plant losing too much water. The outcome of this is that gravelled areas of your garden will start to get covered with plant detritus which will soon mulch down into the gravel presenting a perfect mulch for weeds to take seed. To overcome this you need to rake or blow these areas clear. Failure to do this will mean that a whole new generation of weeds etc will spring forth from your gravel this autumn to torment you.

The photo below shows me cleaning up one of my gravelled areas; or at least it would if Cruella hadn’t made me invisible. If you look carefully to the left you can still see my shadow as I bent down to pick up the trug.

You can’t see it, but I have a very fetching all over tan

Cutting back foliage. Because of the heat you may find it necessary to trim back some of your plants foliage. This is especially the case if the plants are in pots as they will not be able to drive their roots down in search of water. I have had to trim back two large standards that grow in pots in my swimming pool area. Normally these would be lightly trimmed back after flowering and then severely pruned in the Autumn. However, the current extreme heat has meant that I have had to trim and sacrifice some short term flowering for the sake of the overall plant health. The first photo below shows the Standards with rampant foliage, whilst the second shows their life saving trim.

In addition to the Standards I decided to trim back two Red Peach cuttings I have been growing on. The largest of these will go in the ground next year, but in the meantime they need to be cut back because of the stress. From the photos of the before and after, you can see that I have just trimmed them back to give them a bit of trunk.

Pruning back a badly mauled Dame de Noche. I have a large mature Night scented Jasmine which is placed right beside our outside kitchen and seating area. Normally I can coax this plant to provide its exotic scent throughout mid to late Summer. However, the plant is liable to greenfly, whilst normally this is not a problem if you catch it on time. This year it had a bad infestation in early May and through my carelessness I didn’t spray until the infestation was well underway. When I did finally spray that stopped the infestation, but it was too late as the soft Spring growth was damaged by the sucking Aphids (when I saw the damage I didn’t say “sucking”.

Unfortunately the outcome is that I have had to take the plant back about six inches. This will lose me the mid Summer flowering, but I should get flowering and scent by Mid August. The first photo below shows the distortion caused to the stems by the Aphids. The next two photos show the Dame de.Noche before and after its trim.

Checking irrigation. Just because you put an irrigation system in a number of years ago, does not mean it is still in full working order. The current intense sunshine and high heat levels will play havoc with your irrigation system, causing leaks, clogs and general breakages. In addition the Spanish authorities have a habit of turning down water pressure in the Summer, which means water from your irrigation system may not actually be reaching your plants. By the time you notice that your plants are wilting it may already be too late.

You need to overhaul your system now by doing the following:

  • Turn on your system
  • Go round looking for any leaks and repair these
  • Once all the leaks are repaired, turn your system back on
  • With the system fully on, adjust each nozzle individually to make sure each plant is getting the necessary amount of water
  • Finally check that the batteries in your timers are still ok

The first photo below shows one of my many recent leaks that is now thankfully repaired. The cause of the leak can be seen in the second photo. From this you can see that the tube had become brittle in the sun and developed splits and cracks.

I have entered the Gardeners Turner Prize competition. I collect watering cans like Cruella (my wife) collects other peoples finger nails, small dead animals and noxious substances. She is continually berating me and asking why I need more watering cans, but when I explain that there is a watering can for every occasion, she merely scoffs that when I die the lot will be thrown out; we are working on our relationship, but overall I think we are getting on better.

Anyway, I digress. If like me you have a lot of watering cans, and like me you are always falling over them., then behold in the photo below my new artistic creation.

What’s not to like, practical and artistic. They are not all there, I need a bigger trellis

The idiot son got heatstroke. I may have mentioned that the idiot son is over on holiday. This has sent Cruella into paroxysms of motherhood. He is being fed like a big fat cuckoo chick and his every whim is being met. He watches what he wants on television, sits in the front of the car while I am left in the boot. But the worst thing is that she insists on carrying him on her back wherever we go. If you don’t believe me see the photo below. She carried him around for 5 hours the other day in the blazing sun and then he got heatstroke and she loved giving him cold baths.

She likens the whole process to St Christopher carrying God. I told her this was blasphemy and she would not go to heaven. She merely replied that she has another reservation waiting

Nero is dead – but he was framed by the squirrels and blackbirds

It is with great sadness that I have to inform you that Nero is dead. No not the Roman emperor, he died in 68 AD. I mean Nero one of our Labradors. Regular readers of this blog will know that we have (had) two Labradors who regularly featured in posts as they mauraded around the garden destroying my gardening efforts. Both dogs are old; but we still think of them as puppies, Nero was 10 whilst Tango is 12. Both suffered multiple ailments, Tango is blind and Nero suffered from bad arthritis, a dodgy liver and terminal stupidity.

This is what happened. We knew Nero was ill and the Vet warned us it was probably terminal. We asked if he would survive long enough for our idiot son to see him before he died. Both he and Nero were very close in intelligence and behaviour. But unfortunately it was not to be Nero died in my arms at 1.15am on Sunday morning and the idiot son arrived at 10.30 am. The idiot son and I dug his grave in our wild wood and he was laid to rest with all due ceremony. Cruella (my wife) at first wanted to reanimate Nero as she euphemistically called raising him from the dead, but eventually agreed to just sing “Dido’s Lament”. I read the epic poem “Beth Gelert” and the idiot son performed an expressive hip hop mime he had specially composed based on unrequited bereavement.

My reading of Beth Gelert was no accident, as the saddest thing is that Nero was infamous for digging up the lawn, causing me great fury and many hours patching it up. It turns out that Nero was innocent all along, just like Gelert. Since his demise digging activity has taken place and it appears that Nero was framed by squirrels and blackbirds who were the culprits all along. Because of this terrible injustice Cruella has insisted that I walk barefoot to Thomas á Becket’s shrine in Canterbury to make penance.

In memory of Nero I have included some photos below, but just so you know what he was like here are some of his greatest hits:

  • He ate a whole giant poisonous Toad and nearly died
  • He ate a blanket (yes a blanket) and Cruella had to pull it whole out of his bottom
  • He careered through flower beds and destroyed thousands of plants
  • He snapped his leg ligaments whilst running on the beach and I had to carry him half a mile to the car whist he was soaking wet and covered in sand; he weighed 45 kilos
  • He could swim whilst at the same time holding three tennis balls in his mouth
  • If you got in the way of Nero and a tennis ball whilst in the pool he would claw his way over you to get to it
  • He won best in show at our local dog show as a puppy by just sitting like a sack of depressed coal
  • He dug up the lawn on numerous occasions (offence now rescinded)

The first photo below shows Nero resting by a newly dug hole in the lawn, whilst the second shows Cruella trying to protect him from what has now turned out to be my unjustified wrath. Click on each photo for a larger view.

The photo below show a young brave and ambitious Nero being taught to swim by his big brother Tango.

And finally his grave in the Wild Wood. Normal garden blogging will resume when I am back from my penitential pilgrimage to Canterbury.

My final apology for wronging Nero will reach out beyond the grave. May the regret of Llewelyn at the death of Gelert serve him as a suitable epitaph.

Vain, vain was all Llewellyn’s woe; 
” Best of thy kind, adieu! 
The frantic deed which laid thee low. 
This heart shall ever rue!”