Yes it is true that Campoverde Open Garden Day is this Saturday 24th May, the weather is predicted to be fantastic, and there will be 7 gardens open from 11-4pm. But I can’t vouch for the veracity of the rest of the claims in the above title.
The problem is that Cruella (my wife) insisted that she should be in charge of marketing for Open Garden Day. At first I resisted this, but I eventually gave in when she threatened to set fire to the compost bins.
Her big marketing plan revolves around stunning feats performed by the chickens and the bees. She promises to start with the chickens performing complex Morris dances. This mainly involves Cruella scattering lots of chicken feed on the ground and as the chickens scurry to and fro to get it, she leaps around banging a tambourine calling out the time.
Whilst all this is going on she promises the bees will fly past overhead in formation and eventually swoop down to spell out “Don’t worry, bee happy”. The big finale involves a mixed chicken and bee fancy dress parade. Some of the bees are coming as Buzz Light year, whilst others will be dressed as Beeyonce. The chicken costumes include Hen Solo and the Beak Rider.
To be honest, I don’t know if Cruella will pull it off. So don’t come to Open Garden Day for Cruella’s spectacular. Instead come along and visit seven interesting gardens, talk to the gardeners, share knowledge and indulge in some light refreshments.
The best thing is that it’s all free, all we ask is that you make a small donation to Campoverde Church for our work with children. All the information you need is below. See you there.
The end of dance practice. I am told the dove has a starring role. The bees are just out of camera shot.
I know the above title is a bit confusing, but all will become clear later. But in the meantime you need to be continuing to plant seeds and now you can also begin to take cuttings from your strongly growing perennials. Take action now, or you are doomed to continue buying expensive plants from Garden Centres which in many cases die within a few weeks. In the meantime I am getting ready to welcome my bees! and getting on with the gardening.
10th April 2025. Things I have been doing lately:
Treating for Palm Weevil
Finishing patching the lawn
Starting my plant feeding regime
Taking cuttings
Pricking out seedlings
Getting ready for my bees
Treating for Palm Weevils. The dreaded Palm Weevil has started flying now that the weather has got better. This large beetle lays its eggs mainly in Phoenix Palms and the subsequent grubs munch the trees to death. You should not be cutting your palms at this time of year as the beetle can smell a cut palm from a long distance. The photo below shows some of my many palms cut by a professional Palmista before the beetles were flying.
Because my palms are too large to treat at the crown I developed a different method of delivering chemicals to the crown. This involves drilling a hole diagonally half way into your palms trunk. Fill the resultant bore hole with proprietary weevil killing chemicals, and allow the sap to take the chemicals up into the crown and infuse all the fronds with killer chemicals. One nibble of your palm and the beetle is dead.
This is a simple method that once in place will ensure your palms are beetle free. All you need to do is keep topping up the chemicals every month or so, and once a year poke a steel rod in the hole to keep the scar open and stop the tree calcifying it over. The photos below show me in action.
Clear the bore annuallyPour in the chemicalsSeal the hole with stopper
Finish patching the lawn. If you have a lawn then now is the time to do any last minute reseeding on bald patches. I don’t know why I bother really, my lawn is now just a chicken playground. But anyway, if your lawn needs patching up just scratch and scarify the bald part. Add some top dressing. Then sprinkle some grass seed and cover with fleece. Keep the area moist and the warmth of the earth should do the rest. The photos below show my efforts.
Scarify and top dressThe seed I useA patchwork lawn
Start your plant feeding regime. You should have already started your citrus feeding routine, and now is the time to start feeding other fruiting trees and shrubs. Don’t be tempted to think one size fits all, and that you only need a general purpose feed. Yes, a general purpose feed will do no harm, but it will not contain specific nutrients that are targeted at different plant types.
The photo below shows the variety of different types of feed that I use. In addition each watering can gets a “Glug” (old English term) of iron.
Taking cuttings. If you have a favourite plant, or just want to multiply your existing stock of plants for free, then now is the time to take cuttings. The cuttings you take now can be allowed to develop over summer on the potting bench, ready to be planted out in the autumn.
My first cuttings have been taken from Dianthus, Trailing Lantana and Little Pickles. See photos below.
An easy way to take cuttings is to go around with a sealable plastic bag and your pruning knife (never secateurs as they crush stems) and select non flowering stems. Take at least three cuttings from each plant by cutting just below a leaf or growth node. Place your cuttings straight into your bag to stop them drying out as you wander round.
Once you are back at your potting bench, make sure you have the following to hand:
good free draining compost with added vermiculite
a selection of sealable ziploc plastic bags (available in every supermarket)
short pieces of can cut to about six inches
rooting hormone powder or liquid (not essential but helps)
Fill 4 inch pots with your good free draining compost, water them well, and tamp down the compost to remove air pockets. Take your cutting, remove all leaves up till about the top two, holding your cuttings by the leaf, dip them into your rooting compound and then place gently into pre prepared dibber holes around the side of your pot (3 or 4 to each pot).
Push your little cane right into the centre of the pot and then seal the whole pot into your plastic ziploc bag. The cane will stop the plastic bag collapsing onto your cuttings and starting rot. Place your pots in the shade and leave them alone. They will have a mini micro climate so will not need watering till they get some roots and new growth. It is a good idea to open the bags every 3 days or so just to refresh the air, but only for a moment don’t leave them open. I like to breathe into them as I think a dose of Co2 might help! The photos below show the process.
Pricking out seedlings. You will remember in my last post that I have been sowing seeds. This should be a regular feature of every gardeners calendar whether you have a huge plot or a small terrace. The joy of growing seeds and seeing them developing is an essential part of being a gardener. Don’t be lured into huge garden centres to buy, at great expense, plants that you could easily grow yourself. Any way enough of. My ranting.
When seeds have sprouted and have at least two “true leaves”- discount the first two leaves and wait till there at least four or more. Then It is time to “prick out”, cue laughter, stop it. When you prick out seedlings you are basically easing them out of their seed tray and replanting them in individual modular plug trays to give them more growing room.
I use a pencil to gently ease out a group of seedlings, then separate them and holding them by a leaf ( if you hold them by the stem then you may damage the seedling), I carefully transplant them into watered and prepared plug trays. This can be quite an intense process so I tend to do it over a couple of days. Once the seedlings are rehomed, then keep them out of direct sun in a sheltered spot until they settle in and then gradually accustom them to direct sun. The photos below show the process.
Getting ready for my bees. It has been a year in the planning but my bees arrive later this month. I will be setting up two hives which will be a wonderful addition to my garden. I have been taking an online bee course, I have watched numerous YouTube videos and I am as ready as can bee (sorry about the pun). The photo below shows my hives ready for occupation.
Cruella wants to turn our guest cabin (in the background) into a clubhouse for all her 20,oo4 girls
When I told Cruella (my wife) that bees are mainly female she became quite animated and said that her girls would prepare a welcome party to help the bees settle in. I explained that wouldn’t be necessary but she started rambling about girls leaving home and the need to feel welcomed she eventually ended up calling me an unfeeling chauvinist and shouting girl power slogans at me.
Anyway the outcome is that she and her chickens. have been preparing banners and posters to welcome the bees, they have even started knitting little sweaters as gift as for the bees for them all to wear for the welcome barbecue. I will keep you informed of how it goes when 20,000 bees meet 4 chickens and Cruella.
The last thing I tackle in my winter cutback is to prune back my big ficus tree. This sits majestically in a gravelled area on part of my front garden. The pruning is a mammoth task mainly because the ficus gets bigger year by year whilst I get smaller over the same time frame. Those of you who regularly follow this blog will remember that I pruned this tree back to a donut effect over 13 years ago by cutting out the central trunk to create a hole in the middle into which I inserted a statue of the Cheshire Cat from Alice’s Adventure in Wonderland.
The big ficus has always seen this reshaping as an affront to its dignity, and as such has sought to punish me over the years by various means including:
Becoming infested with wooly aphids and many other creatures
Deliberately dropping its leaves to make the gravel area untidy
Tripping me up in its roots
Throwing me off my ladder when I am entering the centre of the tree
Anyway let’s get on with the gardening:
24th February 2025. Things I have been doing lately:
Pruning the big Ficus
Surviving chicken assisination attempts
Pruning the big Ficus. An important part of my pre-pruning ritual is to build up my courage by pre-prune psyching out. This is a bit like boxers at the weigh in. We stare at each other, I strike postures around the tree and issue a series of blood curdling threats. For its part the tree just waits silently knowing its time is coming. To be honest my pre-prune ritual was hindered by Cruella’s (my wife) chickens constantly mocking me and deliberately making “chicken” sounds. The first two photos below show the terror of the big Ficus, the final photo shows the centre of the tree overgrown and ready for reshaping.
The first stage in pruning is to begin to open up the centre of the tree to let light in. This involves using long reach electric trimmers. The photo below shows the first few trimmings. Note the two trugs at the base of the tree these are to protect existing plants from damage.
I then move on to trimming the sides of the tree.This takes place in two stages.The first stage involves me walking around the tree trimming up the bottom half and underneath before standing on my platform to trim the top half. The photos below show the action.
When the sides are finished the tree begins to take shape. The photos below show the sides trimmed and ready for the top and inside to be cut.
Getting up inside the tree is the bit that I dread most. I have to climb the ladder then stand at the centre of the tree precariously balancing on the main branches whilst reaching out with the long trimmers to get at the farthest branches. This year has been more precarious than most for chicken related reasons that I outline later. The photos below show me in action. Where you can’t see me, I’m in the middle of the tree.
The final act is the big clean up. I do this over a couple of days so that most of the moisture has gone out of the cut leaves making them easier to gather up. The photo below shows the official end of the big cut back and the declaration that Spring has come.
The chickens try to assassinate me. I didn’t like to mention this when I was telling you about the big tree, as I was a bit upset and emotional. It all started about two weeks ago when Cruella (my wife) casually mentioned the British government’s “Assisted Dying Bill”. She enquired. Whether I had given any thought to perhaps not being a burden to her and her girls.
Since then she has asked me to sign various documents, I don’t quite know what they are for, but she has assured me they are just admin and nothing to worry about. Evidently it turns out we might be going to Switzerland for a holiday. I only became suspicious when I found the tickets and I haven’t got a return.
Since signing those documents I have had a few near miss accidents, things have fallen on me, my food has tasted funny and my electric blanket appears to have been rewired. I have started taking precautions and the only place I felt safe was in the garden hiding by the compost bins.
That all changed when I was cutting back the big tree. When I was up the ladder I could see Cruella and her chickens close by in deep conspiratorial discussion. Suddenly without any warning the chickens all charged at the ladder. Screaming in Chickenese “banzai” (I know that’s Japanese, but that’s what it sounded like). I only survived by clinging to the tree as the ladder fell away.
Cruella apologised, and I accepted that accidents happen, and I wouldn’t have minded but it happened twice more. On the last occasions I was left up the tree for 6 hours. When eventually I got down I found Cruella and the chickens had remodelled my bedroom and thrown all my clothes out. I am consulting a solicitor.
I am currently at our English house freezing despite the heating being on very, very high. The days are grey and misty, punctuated by heavy down pours, the only gardening I can do is to look out the window and plan. So when you have romantic longings for gardening in the UK, be careful what you wish for.
Despite the weather I am blessed to be free from Cruella (my wife) and her chickens; but I want to confess I am worried about the last part of my big winter cutback when I reshape the big Ficus tree. Anyway, on with the gardening.
6th February 2025. Things I have been doing lately:
Preparing your flower beds and planting seedlings
Pruning roses
Cutting back palms
Cutting back hedges
Preparing your flower beds and planting seedlings. Over the past few weeks I have been clearing out my flower beds, weeding them and then mulching with compost. Normally, I remove self seeded plants such as Osteospermum and put them into seed trays to grow on and then plant later. This year I am cutting out the seed tray part and re-siting and replanting the Osteospermum as I go along. The photos below show the flower beds in the process of being cleaned up followed by the seedlings being replanted.
The photos below show the strong seedlings ready for transplanting. You can only do this with strong over winterers like Osteospermum. Do not try and plant new plants now as they will just rot in the ground.
Finally, the beds all set out with their new seedlings. I will interplant these with Marigolds and other spring plants as I grow them from seed.
Pruning roses. Now if you are a rose lover you can fetishise rose pruning. Over the years I have lost gallons of blood as I carefully prune back my roses to exactly just the right bud. I have castigated others who have left their roses unpruned or worse still pruned them badly.
I now have lots of rose bushes and adopt a more cavalier approach. Instead of carefully pruning each stem I get out my hedge trimmers and take everything back to about six inches. If necessary I will go back in a few weeks and trim up any straggly stems with my secateurs. The photos below show below shows pruning in action.
Cutting back palms. Now is the time to cutback all types of palms. The sap has been drawn down into the roots, there is no growth, and most importantly the dreaded palm weevil is not flying. Do not be tempted to cut back in the warmer weather as the palm weevil will smell your cut and soon home in on your tree. For larger palm trees I always use a professional Palmista, do not try and cut back large trees yourself as it is extremely dangerous.
I have a lovely stand of European Fan Palms planted in a rotunda on my front path. These serve to block the view from the street towards the house and need cutting back yearly. To prune palms all you need to do is cutback the old drooping fronds, stopping when you have only fronds that are pointing upwards at about 45 degrees. The photos below show my palms ready for their annual trim.
And finally here they are looking all trim and ready for another years growth.
Bringing hedges back into shape. Hedges are an important part of my garden as they mark boundaries so much better than fences, and they flower, which fences never do. I have about 200 metres or more of hedges all tightly packed and encouraged to fight to earn the right to flower. These include:
Bignonia
Plumbago
Trumpet vine
Jasmine
Roses
Bower vine
Bougainvillea
Hibiscus
In addition to all of the above I have two self seeded trees that have found their way in: a white maple and pomegranate both of which add a bit of contrast in height. The rule with hedges is very simple; everything is cut back drastically to the same height, with the edges taken back straight to encourage light into other areas. The photos below show my hedges before, during and after their prune. Click on each photo for a larger view.
The final act of hedge pruning is to shred the thicker stems from the maple and the pomegranate and use them as mulch under other trees. Click on each photo for a larger view.
The big winter cutback continues, and this post covers the main jobs you should be doing in your garden right now. Remember, don’t delay as growth will start in late February and you will have missed the window to prepare your garden for summer.
All is going well with my cutback and I have managed to find a use for the chickens in the garden; Cruella (my wife) is not impressed. Anyway, this is what I have been up to:
19th January. Things I have been doing lately:
Pruning figs safely
Pruning grapevines
Cutting back ornamental grasses
Pruning figs safely
Mulching with chickens
A well maintained fig tree is a joy: it not only looks good, but it provides you with hundreds of juicy figs. Unfortunately the majority of figs trees in gardens in Spain are large bulky behemoths that are far too big with fruit that is impossible to reach. Maintaining your fig tree is simple. If you have a young fig tree (less than 7 years old), then just prune to keep the tree trim and with an open centre. If however you have a large tree, or one that you want to keep manageable then I would recommend pruning to a “pollard”. When pollarding you take the tree right back to a few key branches then let it grow annually from these knuckles. Unfortunately you may lose fruit for the first year, but thereafter it will be much better.
I have two fig trees one that is pollarded and one that is espalied. The photos below show both trees when they are in full leaf. Click on each photo for a larger view.
The important point to remember when you are pruning figs is that they will weep a very caustic sap from their pruning wounds so you must not attempt to prune until January or February when the sap will have returned to the roots. Even then it is best to wear a long sleeve shirt, gloves and eye protectors.
The photos below show both of my figs with their leaves off and safe to prune.
The large free standing tree was pollarded a few years ago so all that I need to do is to take back this year’s growth to the knuckles. Using lopers, and secateurs I cut everything right back to knuckle, but be careful not to take it right back or you will breech the “collar” of the branch where the next growth comes from. Leave a centimetre or two.
The first photo below shows the structure of the knuckle, the second shows a knuckle pruned, and finally the tree cutback for another year and ready to burst into leaf in about a month.
Pruning the espalier tree is different. I want this to grow along the wall on the wires that I have trained it. So the main stem I have stopped growing and want no more upward growth. Neither do I want growth at the back against the wall, or any growth that goes to the right, as I am espaling to the left. In this case I trim all the side shoots back to the lead branches. The end result is shown in the photo below.
Pruning grapevines. Pruning grapevines is very similar to pruning espalied figs. You need to take all the side shoots away and take everything back to the main vine. I have three grapevines. One grows along the front of the house and is mainly ornamental as it gets mildew each year because of its position against the wall. The others grow along wires attached to balustrades and therefore have lots of air flow and ventilation. See photos below. Click on each photo for a larger view.
In each case I just move along the main stem taking out any side shoots and taking everything back to the one strong vine. The photos below show the vines pruned. You may be interested to note that I am using the large Euphorbia at the end to grow the vine through, hopefully this will be a nice feature in a couple of years.
Cutting back ornamental grasses. You have to be determined when cutting back ornamental grasses. You might think “well they don’t look too bad let’s leave it this year”. But if you are lenient then this years growth will soon fallback into a matted mess, that will not only look untidy, but will hinder this years new growth.
Cutting back grasses is simple, just use your hedge trimmer or shears to cut right back to a small mound shape. The photos below show one of my my grasses before and after its trim. Click on each photo for a larger view.
Shearing Lantana. Lantana are a perennial favourite in Spanish gardens. It is a reliable and hardy shrub that produces a continuous flow of lovely little flowers all summer. I prefer trailing Lantana and these do not need much pruning, but to keep them in shape you should shear around the outside to keep them neat. The first photos below show my main Lantanas ready for a trim, whilst the second shows them brought back into shape. Click on each photo for a larger view.
Mulching with chickens. If you have a compost bin, (and if not, why not?), then now is the time to start mulching your flower borders and under trees with your compost. If you don’t have your own compost then buy some from a garden centre. The benefits of mulching is that you replenish the micro organisms in your soil and generally enrich and enhance your growing medium. The photo below shows my composting area with a full bin and one in the process of being emptied.
This is a gardening gold mine
Normally I spread mulch under all my fruit trees, only to see the bloody chickens kick it all over the place. This year I had a great idea, instead of spreading the mulch I left it piled around the tree trunks and just as I hoped the chickens then spread it for me. The photos below show the chickens in action. Click on each photo for a larger view.
When I rushed in to tell Cruella (my wife) about my great idea, she said “you are exploiting my girls” and demanded reparations for slavery. I explained that they were enjoying it. Despite my explanation she stormed off furiously and called all the chickens together. Since then she has given all the chickens what she calls “slave names” and keeps muttering about the underground railway and heading north. As if all this wasn’t bad enough they have started chanting in chickenese what sounds like work songs. So far I can make out “Go Down Moses” and “Nobody Knows the Troubles I’ve Seen”.
Anyway the upshot of all this is that she demands I pay them a living wage. I agreed that they should benefit from their labour and promptly produced a plate of maggots from the compost. Cruella ran away screaming, but the chickens seemed pleased, if a little perplexed.
Well it has finally arrived, it is time for the big winter cutback. Depending where you are in Spain you have a maximum of two months (January and February) to get you garden in shape and to guarantee a healthy floriferous garden this summer.
The basic idea of cutting back is that you take out all last summers old growth, you take the opportunity to reshape plants that have become ungainly and you allow light to get into plants that have become congested. If you don’t cutback then you will not get the best out of your plants and your garden can end up as a brown messy jungle with no definition and few flowers.
But don’t worry, even if you don’t quite know what you are doing, as most plants apart from spring bulbs are dormant and you can’t do too much damage. So get out there, take your time, do it in weeks rather than days your reward will come in Summer.
13th January 2025. Things I have been doing lately:
Reshaping Yucca
Bringing climbing plants back into shape
Cutting back Canna
Pruning Dame de Noche
Trimming grasses
Dealing with the Chicken Prince
Reshaping Yucca. You may remember in my last post I talked about the need to bring Yuccas under control and cut back to a size where you can appreciate the flower spikes. I have now taken a month or so to look at my yucca and decide where I want to cut. So aided by the idiot son I set out to resize all my yucca.
Yucca are a cane and not a tree as they are sometimes mistakenly called. In effect this means that you can cut the trunk back to almost any point, and the plant will regrow from there. You can use either a chainsaw, or more flexibly, a bow saw. Most plants will cut relatively easily, but you must wear eye protection and gloves or you will get a nasty spiking. In addition large yuccas will be very heavy, and just because they look light and spindly in the air, they are extremely heavy and will cause you serious damage if they fall on you. The photos below show my yuccas before their prune. Click on each photo for a larger view.
The photos below show the pruned yucca in the same order as above with the addition of the head gardener and idiot assistant.
Bringing climbing plants back into shape. Most climbing plants will climb for two basic reasons:
1. To escape competition at ground level from other plants. 2. To out compete other plants for sun by throwing out flowering side shoots.
Because of this growing habit most climbing plants will require pruning at the end of every summer. Failure to do this will result in the plant becoming congested and normally flopping over itself and thereby killing off the growth underneath. The simplest and easiest way to prune most climbers is just take a hedge trimmer or shears and skim up the face up the plant shearing off last summers extended side shoots. This will keep your plants tidy and ready for next summer. The photos below show examples of climbers I have started to cutback. Click on each photo for a larger view.
Solanum beforeSolanum afterClimbing Rose before Climbing rose after
The photos below show an old palm tree trunk with various climbers growing up it. This includes: Trumpet Vine, Jasmine, Stephanotis and Bower Vine. I just run the hedge trimmers over it to tidy it up and it is ready for another year. The photos below show you before and after.
Cutting back Canna. Normally Canna are beautiful showy plants with exotic foliage and stunning flower spikes. However, this year has been a bit of a disaster. Because of a lack of early rain the rhizomes did not swell enough and most plants were half size.
I have left my plants to die right back before cutting them down to just about 3 or 4 inches from the ground. By cutting back to this level you are telling the plant that there is no point trying to regrow this year and it might as well wait till the spring. Also, by leaving a small stalk you will stop rain water seeping into the rhizome and rotting it. The photos below show some of my disappointing cannas, followed by the correct level of stalk to leave. Click on each photo for a larger view.
Pruning Dame de Noche. Now is the time to give your Dame de Noche their big winter cutback. If your plant is more than three years old then you can drastically cut back if you wish. Last year was not a great year for my plant so instead of taking it right back to 50cm or so, I am going to leave it a little bigger so that it gets a jump start in the Spring. The simplest way to prune Dame de Noche is by running hedge trimmers over them and shaping them into a mound. The photos below show my plant before and after its trim. Click on each photo for a larger view.
Dealing with the Chicken Prince. The idiot son duly arrived for Christmas and Cruella (my wife) immediately went into a frenzy of mothering. In many ways this suited me as I could start the big winter cutback without interruption. But it only lasted a day or two before she confronted me with a wide eyed manic look declaring “he is the one”, I knew the answer, but I had to ask who? “It’s him”she declared our son is the Chicken Prince.
Anyway it turned out that she had decided that the idiot was a natural with chickens and therefore was now her rightful heir to the chickens. She hoped I wouldn’t be too upset at being usurped, but to be honest I didn’t know what she was on about. She then proceeded to regale me with tales of his expert chicken handling; as seen in the photos below. Click on each photo for a larger view.
I explained if he fed me bloody grapes every day (see first photo) then I would sit on his knee. She ignored my protestations at the price of grapes and informed me he was now on an advanced course of Chickenese and grooming. As far as I know this involves lessons every day where they sit in a circle on the lawn and chat away in Chickenese. I think he is still at an early stage but it sounds a bit like this:
I insisted that if the chickens were to be groomed, then Tango the lonely blind Labrador should be involved. After much arguing she agreed. The photos below show them all lined up on the lawn for grooming. I insisted that Tango should be first.
They tried to rush Tango through but I insisted that as he was “special needs” they needed to spend extra time on him. The photos below show Tango being pampered. The sad thing was he gave little squeaks when they brushed him on his many bruises from bumping into things.
They spent twice as long on the chickens as they did on Tango, and to make matters worse they awarded a prize to Helga as the best groomed animal. The photos below show shows the awards ceremony.
Tango and I boycotted the ceremony and sat in the shed. I held a mirror up to him – even though he can’t see -and assured him how lovely he looked, but tears still fell from his little milky eyes. I didn’t tell him he came fifth!
Now that is what you call a title, no messing around or euphemisms, you know exactly what you are getting in this blog post. It is the last real post before we begin the big winter cutback, so there is still lots to do. Added to this I have had the problem of Cruella (my wife) preparing the chickens for a Ball. Anyway on with the gardening.
12th December 2024. Things I have been doing lately:
Gathering seeds
Composting leaves
Last minute clean up jobs you need to do
Planting out cuttings
Cruella prepares the chickens for a Ball
Gathering seeds. Take a look around your garden at this time of year and you will find lots of seed heads and pods ripe for picking. If you pick them off now, store them to dry, and plant them next Spring, then you will have lots of lovely new plants for free. But what’s more you will be on your way to being a gardener rather than a shopper for plants.
You will have lots of different seed heads in your garden of all different types, just waiting for you to harvest them. To process the seeds is very simple.
Wait until your seed heads have completed their cycle, the flowers have died and fallen off and the seed pod that is left has gone fully dry and brown.
Cut the seed head off with your secateurs and if possible leave a little bit of stem.
Place the seed heads into a plain white envelopes, one for each type of seed, until you are ready to process them.
Depending on the type of seed pod, the process is more or less the same; carefully remove all the outer casing of the seed pod till you expose the seed. Pour this into the palm of your hand.
Gently blow across the seeds as you transfer them between your palms, this just removes any chaff.
Place the seeds in plain white envelopes by type with the name and year clearly written on the envelope and store them in a cool dark place (a drawer is fine).
The process is shown for Marigolds and Trumpet Vine in the photos below. Click on each photo for a larger view.
MarigoldsTrumpet VineRipe seed headsCruella took the photos I look younger in real lifeRoll seedhead between your fingersGently blow away the chaffJust split trumpet vine seed pods Let the seeds flow into your handMy seeds ready to be stored away safely for Spring planting
Composting leaves. Most gardens have a tree or two, and as we all know deciduous trees shed their leaves every Autumn. Now you can either see these fallen leaves as a mess that needs to be cleaned up, or, you can see the leaves as compost gold.
I have lots of pine trees, but their leaves whilst perfectly compostable over time, tend to produce an acid compost. So if you have lots of pine trees it is ok to add pine needles to your compost bin, but no more than 10% of each layer. However, if you have a deciduous tree, like my large Mulberry or even better a Fig with its large leaves then you are lucky. The photo below shows my Mulberry and one of my figs shedding their leaves. Click on each photo for a larger view.
You don’t have to wait till all the leaves are off your trees. Instead get into the habit of clearing the leaves once every two weeks. Just rake the leaves up into piles and then store them in plastic garden sacks. See photos below.
Leaves compost in a different way to normal compost, so don’t just add them to your compost bin. Store them in plastic sacks, but before you store them prick the sack with a fork in a number of places to allow for air circulation. You will need to store your sacks somewhere in your garden where they won’t be unsightly and where they do not get sun. See photos.
Your leaf compost will be ready in about a year, roughly the same time as you will be harvesting the next lot. You can cheat if you want. After about six months just pour the sack into your normal compost. It won’t be fully composted, but when you get to my age you go for quick wins.
Last minute clean up jobs you need to do. There is still a few little jobs you need to do before next month’s big cut back.
You can start by cleaning up fallen citrus fruit such as oranges and lemons. The recent high winds here in the Costa Blanca has meant we have lots of fallen fruit. If you leave this fruit on the ground for any length of time then you will get an active green mould growing on it. Left to itself this will release spores which are not very healthy for other plants or us. My efforts to stop a future plague are shown below. Click on each photo for a larger view.
If you have Fig trees that still have residual fruit, just take them off. Any fruit left on your trees will never mature and will only take strength away from the tree. With figs the sap will not yet have been drawn back into the roots so be careful you don’t get a sap burn.
Take all the fruits offLook carefully and you can see the caustic sap seeping out.
Planting out cuttings. If you have any cuttings you have grown out, then now is a good time to get them in the ground. There is still warmth and moisture in the ground so it will not be a great shock.
I have grown a number of cuttings over the Spring and Summer. During the Summer I mostly just dot these around the garden in pots, just to see how they get on. By now I will have either put them into larger pots or if they have really performed then they go into the ground.
I have a problem area in one of my hedges where a Jasmine cutting is being very slow to grow to fill the gap left by a dead Hibiscus. The photo below shows the problem. From the photo you can see that there is Plumbago to its left and Pink Trumpet Vine to its right. The idea was that the Jasmine would grow and provide colour variety between these two.
In order to deal with this problem I have been growing a Trumpet Vine to add to my hedge. I like to keep hedges over planted and competing for space and light thereby guaranteeing more flowers. The Trumpet Vine has grown strongly during the Summer and now needs to go into the ground. The Jasmine has had its chance, now for some competition. The photo below shows the new gap filling contender.
I have trimmed it back ready for its transplantation. On a sad note, my lovely teapot confection on the pillar was blown over and smashed in the recent storm; Cruella is devastated.
When planting out make sure you do all the usual stuff like clear the area of any weeds or stones then dig a planting hole big enough not to cramp the roots. When you take the plant out of its pot make sure to tease out the roots so that they can be encouraged to reach into their new soil. Also, if possible sprinkle some Mycorrizhal rooting powder into the planting hole and onto the roots as this will definitely aid early root growth. The photos below show the process. Click on each photo for a larger view.
Cruella prepares her chickens for a Ball. It all started when Cruella (my wife) read a magazine article about Queen Charlottes Ball where debutantes are presented and come out into society. She breathlessly told me that this was just the sort of opportunity her girls needed, and if they could only come out formally she would be the happiest mother alive – I have given up explaining that she is not their mother.
Despite my explaining that Queen Charlotte’s Ball was not for chickens, she refused to accept this and began looking up Finishing Schools in Switzerland. I only averted her flying to Switzerland by persuading her that it would be far better if she prepared the girls for “finishing” at home.
It has been almost a month now and every day has been filled with Cruella schooling her girls in all sorts of arcane skills and manners. They start most mornings with “dining etiquette”, this involves politely pecking at their food, not pecking each other and definitely no eating worms. This is followed by “elocution”, to be honest as it is all in chickenese, I have no real idea what they are saying. They all cluck away as Cruella nods enthusiastically, but it does sound a bit like “how now brown cow” but in chickenese.
The afternoons are spent in “deportment, dance and formal bowing”. It is quite fascinating, especially if you have never seen a chicken walk up and down with a book on its head. Dance is my favourite as Cruella stands in the middle of the lawn playing Mozart on her phone whilst shouting out the timings. Despite her best efforts the chickens gyrate wildly in a figure of eight in front of her and all end up colliding and fighting.
I am involved in the formal bowing part. I have to sit on a chair pretending to be the King whilst Cruella acting as a Herald formally calls each of her girls forward and introduces them to me. Each bird has a new sash in soft pink silk and they formally approach me and bow. From my perspective though the whole effect is ruined by them poohing on my shoes. The photo below shows a dancing lesson in action.
The music was Mozart – Ascanio in Alba, the dancing was appalling
I suppose I better start with the bad news; Big Bertha my wife’s favourite chicken is dead! The really bad news is that I am being accused of deliberately killing her (the chicken that is). I won’t go in to it all now, we will do the garden stuff first then I will plead my innocence.
11th August 2024. Things I have been doing lately:
The late Summer cutback
Gathering in the few crops the birds have left me
Continuing to deadhead
Dealing with the fall out from the death of Big Bertha
The late Summer cutback. As we move towards late summer here in Spain the heat has been building for months and we have had no rain in the Costa Blanca. This has meant that most of us will have lost some plants and the rest of the garden looks very wilted and sorry for itself.
Now is the time to stroll round your garden in the cool of evening and decide whether some areas need cutting back. There are two main reasons for cutting back at this time of the year. Firstly, you may want to redefine the shape of your plants where they have got floppy and overblown. Secondly you may want to cut off old growth to encourage a new flush of flowers or green growth.
The photos below show the bottom of my drive where the large Peruvian false pepper tree and the Myrtle bush normally make for an attractive scenario that draws the eye down the drive. The first photo shows them both slightly out of shape, whilst the second shows them back at their best after trimming. Click on each photo for a larger view.
If you have hedges (and I have a lot), then now is a good time to give them a light trim to bring them back into shape and stop them shadowing lawns and your bedding plants. Don’t be tempted to trim hedges before round about now as you may disturb or even destroy bird nests. But also remember this is not the big winter cutback so don’t cut into wood, unless you really need to, instead just concentrate on taking back leaf. The photos below my various trimming efforts before and after. Click on each photo for a larger view.
If you have arches over gates or other entry points into your garden then tidy these up as well so that cars don’t get scratched and people don’t snag their clothes on overgrown plants. The photos below show some little areas of tidying up. Click on each photo for a larger view.
Gathering in the few crops the birds have left me. Regular readers of this blog will remember that I prepared my fig trees for netting just before I went away for a couple of weeks. Unfortunately, when I got back, I didn’t get around to netting them as I became distracted with other tasks. Then I stupidly decided not to net them this year as an experiment. The results were predictable. A good third of my fig crop is being lost to birds. Each morning I go out and harvest that days ripened figs, but large numbers have been pecked by birds, most annoyingly sometimes just one peck, but enough to spoil the fruit. The photos below show the morning devastation. Click on each photo for a larger view.
The photo below shows a typical morning collection including the spoiled figs that I will never enjoy.
In addition to figs I have been harvesting my grapes. I don’t normally bag or net grapes as it would be too time consuming. The secret with grapes is not to try and harvest them before they are ripe. Grapes do not continue to ripen once they are cut, so you have to be patient.
Keep an eye on your grapes, twice a day if necessary. Taste one each day as they get close to ripening. Then once you are happy take off the ripe bunches straight away. The birds will know exactly when your grapes are at their best so don’t leave them any longer than necessary. The photos below show my grapes waiting to be harvested, and then the daily harvest. Click on each photo for a larger view.
Continuing to deadhead. I know it is hot, and you have cold beer and wine waiting for you. But, if you don’t deadhead daily then you will run out of flowers in late summer. Once most plants have 50% of dead flowers going to seed, then they will stop even trying to put on more flowers. By deadheading daily you are forcing the plant to produce more flowers to reproduce itself. The photo below, shows me on my daily rounds.
Dealing with the fall out from the death of Big Bertha. I started this post by informing you that Big Bertha, my wife (Cruella’s) favourite chicken had died. But let’s start with the facts. Yes Bertha is dead, and yes I may have had something to do with her demise. But I feel I need to explain and get you to understand the sequence of events and extenuating circumstances. But just to remind you of the late great Big Bertha, she is the one on the left in the photo below, in case you hadn’t guessed.
What happened was this. I have a spray irrigation system watering under all of our fruit trees on a timed system. It was a hot evening and Bertha had positioned herself under one of the trees where she seemed to be happily enjoying the irrigation spray. I thought it was funny and even took the photo below to show Cruella.
Anyway, that night when Cruella went to put her to bed and gave her, her normal goodnight cuddle (all I get is goodnight pig), she discovered that Bertha was soaking wet. The next day Cruella came hurtling into the house in hysterics screaming that Bertha was dead and that I had murdered her. It turns out that when Cruella went to let her girls out Bertha didn’t appear, only to be discovered stiff as a board.
I can’t begin to tell you what it has been like in our house since. The recriminations and hysterics are terrible. They all shout and scream at me in chickenese and accuse me of Water Boarding Bertha. Cruella has already reported me to the ICC (International Chicken Court). She gets things mixed up and insists that the ICC is somewhere in Europe overseen by William Hague who she insists will see that justice is done.
We had Bertha’s funeral yesterday down in our wild wood. It wasn’t really a funeral as Cruella insisted that Big Bertha was burned on a funeral pyre. We all stood around, Cruella and her girls all wore black and sang dirges in chickenese. As the flames licked around Big Bertha’s corpse they all burst out into loud wailing. I just stood there, all I could think of was KFC!
I have had to leave the garden. Cruella (my wife) demanded we go back to our English house to celebrate the 30th birthday of our idiot son. She insisted we have house sitters with previous experience of chickens as she was worried her girls would pine; no mention of needing gardening experience. Every night she insisted on FaceTime calls with the chickens; I wasn’t involved as they all spoke chickenese. I had to comfort myself by looking on Google maps at the garden.
Anyway on with the gardening; or what’s left of it.
30th July 2024. Things I have been doing lately.
Dealing with water leaks everywhere.
Bringing the borders back under control
Dealing with the desertification of the lawn
Celebrating the idiots birthday
Dealing with water leaks everywhere. I spent many sleepless nights worrying about the garden whilst I was away. Cruella complained that my nightly mumbling kept her awake, but to be honest I don’t know how she could even hear me as the area of ceiling she normally hangs from is right over the other side of the bedroom.
Anyway, you can imagine the state of the garden when I got back. But the worst things was the many leaks that had sprung up all over my various irrigation systems. Our water bills are normally high, but the one that met us on our return was €700? Apart from a mains leak which was creating a new swimming pool for me, the rest were leaks from split irrigation pipes.
I normally keep an eye on all my irrigation pipes, but it just shows you that even a couple of weeks away can make a big difference. Irrigation pipes in Spain become very brittle in the sun and as a consequence are liable to splits. So get outside now and start your checks.
turn all your irrigation systems off
turn them on one at a time
as you turn each system on walk the length of the piping looking for leaks or suspicious area of lush growth
once you detect a leak cut out a decent length of the piping as it will usually be weak in other areas close by
connect the piping with appropriate connectors ( see below)
then check that your repair is not leaking
I possess more piping and irrigation connectors than most hardware stores
The photo below shows my mobile leak repair tools as I deal with yet another leak.
Just to give you an idea of the scale of the problem I have faced, it has taken two days to track down and repair most of the leaks. The photos below show some of the areas where I am leaking money. Click on each photo for a larger view.
I don’t even know what this one does!
Bringing the borders back under control. By now all of your borders should be in full flower, and ideally you should be deadheading and staking up each day. The photos below show the state of my borders upon my return. Click on each photo for a larger view.
To the superficial eye, these may look fine, (not that I am accusing you of having superficial eyes). But to me there are heads to be deadheaded and stems to be staked. I tend to stake things first and then go round and deadhead. In this way I can see any dead flowers that may be dropping down.
At this time of year the gardeners best friend are canes and twine. The photos below show me getting ready to go. Try not to use very long canes as this is not cost effective, instead cut long canes into four. Not only does this save you money, it will also stop you having expensive eye surgery when you bend down and poke your eye out. Click on each photo for a larger view.
Once you are set to go, wander round looking for drooping and fallen stems. Most plants will stop flowering if there is a kink or break in their stem. You need to get them upright as soon as possible. I know it may sound stupid, but there is a correct way to tie up a plant. Ideally you should form a figure of eight around the cane and the plant stem. You achieve this by first tying your twine around the stake and then forming another loop around the plant stem. The idea is to stop the stem chafing against the stake, thereby causing a wound that may let pathogens in. The photo below shows how well I attended to knot tying in the Scouts.
For some reason Cruella (my wife) is very good at tying knots. I asked her about this one day and she told me it is all about tying down small animals for sacrifice!
Once you have tied everything up, then it is time to go around deadheading. Remember don’t just cut off the flower head, go back to the next leaf node and cut just above there. In this was you will not leave dead stem for infection to enter. Once you have finished deadheading the obvious, take a good look into your borders to see whether anything else interesting is popping up. I cut back my mini sunflowers and discovered some lovely new little blooms at the bottom of their stems, see the photos below. Click on each photo for a larger view.
The last thing I do when I am deadheading is to go round with single handed shears and take off all seed heads from Osteospermums and the Honeysuckle.
Dealing with the desertification of the lawn. My lawn as I jokingly call it has suffered greatly this dry summer. But to be honest my biggest problem is chickens. In the Spring I could have reseeded areas, and I could even do it this autumn. However, if I put any seed down the chickens would scoff it immediately. I am rethinking the whole lawn thing, but just to give you an idea of the problem of desertification, see the photos below. Any idea or suggestions are welcome. Click on each photo for a larger view.
Celebrating the idiots birthday. Cruella (my wife) insisted that I put a celebratory birthday photo of the idiot son into my blog. I protested that it was a gardening blog and as such nobody would be interested. She threatened me that if I didn’t put a photo in the blog she would set fire to my shed.
Anyway, here it is. Cruella is on the left, you can just see a hint of her tail though she has tried to tuck it away, normally you could see her horns but she is cleverly burying them in the beard of the idiot boy. I am on the right, the idiot is in the middle.
I have been away, I know I didn’t tell you, but I just slip away and creep back, it is best for the garden. If Cruella (my wife) knows I am away she takes down all my chicken defences and dances around the garden with her girls shouting about freedom and chicken rights. She told me she that she sees her self as a latter day Isadora Duncan whilst being an admirer of Just Stop Oil, chicken division.
When I crept back in after a week away she said “where have you been?”. I told her I had just been down by the compost bins and she nodded ok. She then casually informed me she was preparing for the Olympics; anyway, on with the gardening, more later.
29th June 2024. Things I have been doing lately:
Taking fig cuttings
Planting out loofahs
Trimming back to encourage new growth
Trumpet vine and the Blackbird
The chicken Olympics
Taking fig cuttings. By now your fig tree should be putting on leaf and fruit at a great pace. This means there will lots of lush green growth which is ideal for taking cuttings. If you fancy a new fig tree for free, or would like to donate one to a friend, then now is the time to take a few cuttings.
I must warn you that when taking fig cuttings at this time of year you have to be very careful of the white sap that will weep from the cut wound as this will be very caustic and can give you a nasty burn. But taking this into account and dressed accordingly in long sleeved T shirt and wearing gloves, all you need to do is select a lush non fruiting stem and cut just below a leaf node. See photo below.
Try and take a number of cuttings as this will give you a better chance of success. Once you have all your cuttings, take them back to your potting bench and remove all the leaves apart from a couple at the end of each stem. See photo below.
Once you have trimmed your cuttings up, leave them for a couple of hours in the shade so that the dripping sap can dry up. Once the sap has dried dip the end of each cutting into hormone rooting powder or liquid (this is not essential, but it helps). Plant each of the cuttings around the edge of a six inch pot, I usually plant four to a pot, but it is up to you. Finally place your potted cuttings in the shade on your potting bench and wait. Most will die, but hopefully some will sprout new leaves and give you a future fig tree. The first photo below shows the stems being dipped in rooting liquid, whilst the second shows the new cuttings in their new home ready to go into shade for a few weeks. Click on each photo for a larger view.
Planting out loofahs. Those of you who came to my open garden day were given some loofah seeds to plant, and hopefully you did? Loofahs are lovely plants, an annual that grows quickly as a climber, has lovely yellow flowers and as an end product you have a loofah to use in your shower as an exfoliant. What is not to like; Cruella’s Coven swears by my loofahs wart removing powers.
I planted some loofah seeds some time ago and it is now time to pot them on. The photo below shows my little seedlings ready for a new home.
The secret to success when potting on loofahs, is to recognise that they really don’t like their roots to be disturbed. I plant them two to a 9 inch pot, but before planting them I place each of the pots into the new pot and build compost around them, then I gently ease out the loofah beforecarefully slotting it into its newly prepared home. The first photo below shows them being prepared for their new pot, whilst the second shows the strong root growth after only a few weeks. Click on each photo for a larger view.
Finally a couple of photos of their quick growth. Each plant can grow up to 10 to 15ft and give you 8 or more fruits. Click on each photo for a larger view.
Trimming back to encourage new growth. By now most plants will have flowered and will happily go to seed if you let them. But if you want flushes of new flowers all summer, then don’t let them. Both perennials and annuals can benefit from deadheading and trimming.
I have been deadheading roses daily for the past couple of months, but as yet have not started on the Marigolds. But look for those perennials that flower in a flush. Don’t bother with secateurs for flowers that all come at once; instead get your shears out and give them a hair cut.
The photos below show some of the plants I have been shearing starting with one of the most unusual “spiral grass”. Click on each photo for a larger view.
If you have multi head sunflowers, then take off the individual heads as they die back. But don’t forget to let the final flower head go to seed for the birds.
One of my favourites is the lovely Fairy Fan Flower. It flowers all in one rush and after the bloom has gone off trim all the flowers and you will get a second flush. The photos below show the plant after its trim and the successful second flush just coming through. Click on each photo for a larger view.
Gaura is another of those plants that benefit from the complete flush of flowers being taken off. Gaura, like Lavender, does not like you cutting too deep into the wood so just take off the flowers and the first bit of green. The cutback Gaura shown below will soon give me another lovely flush of flower spikes. Click on each photo for a larger view.
Trumpet vine and the Blackbird. Each year I take seeds from my Trumpet Vines and carefully set them aside to grow them in the Spring. Every year to date the seeds have failed; mainly my fault. But this year I eventually managed to get eight through to the seedling stage. When I came to prick them out and pot them on, I bought the best compost, mixed it with Perlite and prepared 4 inch pots for each seedling . This painstaking process can be seen in the photos below. Click on each photo for a larger view.
Once I completed this task I wandered into the house to boast to Cruella about my success. I swear I was in the house no more than 5 minutes before I went back to the potting bench. As I turned the corner to the potting bench I caught a flash of black wing before my eyes fell on the devastation. A blackbird had dug up all my new seedlings and thrown them around.
Crying out with anguish I rushed back into the house to ask Cruella if she knew anything about this. That must be “Shadowstrike” she said, “I told him he could play in the garden”. The devastation left by the stupid bird can be seen in the photo below. To make matters worse he now follows me round the garden smirking.
The chicken Olympics. It appears that whilst I was away Cruella (my wife) became concerned that her girls appear to be getting fat. At first she blamed it on ultra processed foods and has written to the WHO complaining. Then she lighted on the fact that wonder drugs can stop obesity, and tried to order Wegovy and Ozempic. The vet refused to prescribe them as he said she just needs to cut back their food. She stormed out shouting that she would not put up with fat shaming and would be reporting him to Weight Watchers.
Anyway, the end result is that she has started to train the chickens for the Paris Olympics. She has already written to the IOCC (International Olympic Chicken Committee). I told her chickens are not allowed in the Olympics, but she just said I was stupid and should just stick to gardening.
Cruella has bought herself a whistle, megaphone and stop watch and the chickens are now trained every morning. They start with leg stretches, which I entitled the “drumstick roll. This is followed by running around the garden in circles whilst chanting improving slogans in Chickenese. Their coop is plastered with self improvement slogans such as
Be best chicken you can be
Cluck your best and the rest will follow
Feathers high, spirits higher
Every day is a chance to spread your wings
Beneath every feather beats a strong heart
Find your flock, lead with pride
The photos below show you some of their early morning training sessions. Click on each photo for a larger view.
Early morning runBertha taking a short cutLittle brown one is lastChicken licken posing for the podiumExhaustionThe podiumTango at the start of training Tango at the end of training
After two weeks of training and exhortation she asked me how I thought they looked. I said “they are still fat”. I’m sleeping in the shed with Tango the lonely blind Labrador and the big rat.
It’s warming up, there is a hint of buds and we gardeners are waking from our winter torpor, it’s almost Spring, and you know what Spring means – seeds! Yes, it’s time to start thinking about how you will fill your Summer garden with floriferous beauty, and there is no better way than to grow your own garden from seed. I know that lots of you love to rush off to the Garden Centre and stack your trolley high with all sorts of unsuitable plants. But think how much more fulfilling it will be if you can grow your own garden.
Now I am not being a purist, of course you can buy plants, but why not give seeds a chance (start with a couple of easy to grow packets) once you start it is addictive and may I say a lot cheaper. As you can tell from my enthusiasm I have already got things underway. I was so filled with the joys of gardening that I rushed out and got Cruella (my wife) a Valentines Day gift. Sadly it all went wrong as the chickens deliberately sabotage my efforts. Anyway on with the gardening.
24th February 2024. Things I have been doing lately:
Harvesting self sown seedlings
Sowing the first seeds
Harvesting and sowing Chilli seeds
Preparing for the death of Agave Attenuata
Regretting my Valentines Day purchase
Harvesting self sown seedlings. One of the best way to get your garden going in Spring, is to take a look around your flower beds and check for any self sown seedlings that your summer flowers may have left you as a gift. One of the most prolific self sowers in Spain is the Maragaritte Daisy/Osteospermum. These lovely long flowering Daisies will drop hundreds of seeds which by now will have formed into little seedlings. The photo below shows just one part of my garden with thousands of seedlings.
But the trick is not to leave the seedlings where they have self sown, instead you need to harvest them and pot them up to let them grow on a bit before planting them out where you want them. The photos below show me harvesting the seedlings by gently prising them out of the soil with a trowel before placing each seedling into individual seedling trays. Note the close attention from big Bertha. (she has reverted and is no longer known as Bert, it was something to do with the chest binders that Cruella bought from John Lewis). Click on each photo for a larger view.
I have to cover the seedlings with glass as the Blackbirds will soon be digging
Sowing the first seeds. There is nothing better than contemplating the seeds you harvested from last year and deciding which order you are going to sow them. The photo below shows my preparations and the delight of contemplating things to come. Click on each photo for a larger view.
Before you get carried away with sowing seeds there is some basic preparation you need to undertake. If you are sowing into pots or seed trays you have used before, then it is important that you thoroughly wash them inside and outside. The last thing you want to do is carry over viruses and pathogens that are lurking in the residue of last year’s soil. All that is basically required is that you use a powerful hose jet to wash away any soil residue. The photos below show some of my seed trays after their annual ablutions. Click on each photo for a larger view.
insideand out
Once you are ready to sow your seeds then you need to mix a good compost (not from China shop) together with Perlite to form a nice free draining medium that will not leave your little seeds waterlogged. Most seeds mainly require sprinkling on the surface of your compost then covering with a light sprinkling of compost.
Once you have lightly tamped down the surface to ensure seed and soil contact, then you need to place your seeds trays in a light warm area such as a window sill, or greenhouse. Be careful of fierce sun as this will dry the compost out to quickly. I buy a cheap little mini green house and use it for 2 or three years and then discard and start again. You will only need it for a couple of months at the most. The photos below show my seed sowing activity followed by my seed trays resting in their new home. Click on each photo for a larger view.
Harvesting and sowing Chilli seeds. Chilli plants are a joy to grow as they are so prolific. I leave my chilli plants to fruit over a two year period with just a chop back at the end of the year. The third year I remove the old plants and sow new seed in lovely fresh compost. By doing this I am getting rid of the old tired compost and creating a whole new generation of plants. The first photo below show my tired old plants heading for the compost heap, followed by the ripe seed pods that I have left on the plants and which will form my next generation. Click on each photo for a larger view.
Getting the seeds is very simple. Using a scalpel, or very sharp knife, slice carefully down the side of the dried seed pod and carefully tease out the seeds that will be there waiting for you. The photos below show my scalpel work, together with the gathered seeds. The final photo shows the seeds scattered evenly across a seed tray before being lightly covered with compost. Click on each photo for a larger view.
Preparing for the death of Agave Attenuata. Losing any plant is a dreadful experience for us gardeners. We tend them, nurture them, watch them grow day by day and experience joy when they flower. That makes it all the more poignant when you lose an Agave Attenuata.
These lovely plants are very popular in Spain as they are one of the few “unarmed Agaves”, by this I mean they neither have teeth or spikes so won’t stab or cut you. They also have a charming habit of creating lots of pups which eventually surround them like a loving family. They take a long time to flower (12-20 years) and like lots of Agaves, when they do, they die leaving only their orphaned pups to cope on their own. The photo below shows a family of orphaned pups who lost their Mum about 5 years ago.
Eventually one of the orphans will go on to adopt the role of mother but it can take a long time. I think the one at the back right is shaping up to be Mum.
Regular readers of this blog will know that I have been lucky enough to see a number of my Attenuata flower. It has always been a painful process made much worse by the mockery of Cruella (my wife) who constantly heckles me in my sorrow by shouting “it’s only a plant, get over it”. On one occasion she proposed what she termed “assistant plant dying” and said that both me and the plant should go off to Dignitas!
As always on these occasions I conduct myself with dignity and commit my evenings to sitting by the plant as it flowers. We talk over old times, when it was just a little pup and I reassure her that all her pups will be taken care of when she goes. The photos below show my cherished Agave developing her flower spike. The beauty of the flower spike is marred by the tragedy of her oncoming demise. Click on each photo for a larger view.
As her flower spike gets taller so she gets weaker, and this is when I start to sing. All Agaves have a tendency for classical opera, so I tend to sing arias mainly from Puccini and especially La Bohéme.
We start early on when she has accepted she is going. I hold her flower spike and sing “Che gelida manini”. As we progress she takes on the part of Mimi and I Rodolfo as she coquettishly sings “Sì, mi chiamano Mimì”. We both then finish the day with “O Soave faniculla” the pups act as the chorus and as she finishes on the famous high “C” we are all in tears. I am dreading the future. The photos below show us singing the first act, if you look carefully you can see the pups leaning into the chorus whilst visible signs of decay can now be seen on their mum. We shall sing the famous deathbed scene of Act 4 in a couple of weeks, in the meantime I am giving bereavement classes to the pups. Click on each photo for a larger view.
“Che gelida manini”“O Soave faniculla”
Regretting my Valentines Day purchase. As if things weren’t bad enough with my poor Agave, Cruella (my wife) had demanded that I make an effort for Valentines Day and get her something romantic. I racked my brain for days and eventually came up with the perfect present that was both practical, stylish, and suited to her personality. At great cost I bought her a new titanium based, multi positional short take off and landing broom. The photos below show this wonder of modern technology in both its extended long take off mode and its shortened take off mode.
Given that most of her current brooms are what you would term shoddy, I thought she would be delighted. She took one look at it and proclaimed “I wouldn’t be seen dead on that modern crap”. She stormed off in a huff and spent all of Valentine’s Day with her chickens murmuring darkly in chickenese whilst occasionally giving me black looks. The upside was that I could get on with sowing seeds!
Well by now most of you should have just about completed your big winter cutback and this is my penultimate instalment of my marathon effort. This of course only applies to those of us who don’t have frosts, some of you might not even have started yet – good luck.
This post covers the following areas and plants of my garden:
cutting back trailing lantana
pruning grape vines
cutting palms
bringing hedges back into shape
31st January 2024. Things I have been doing lately:
Cutting back trailing lantana. I use trailing lantana and other trailing plants in many areas of my garden as part of island planting which I use to break up and add interest to areas of stones and gravel. The photos below show some of my lantana islands. Click on each photo for a larger view.
When cutting back lantana it pays to be brave. Using your secateurs cut back hard to just above a leaf juncture. By taking it back this far you will be removing most of the old wood and encouraging strong new foliage in just a few weeks. When you do this the plant itself will actually get larger each year as you are cutting it back on much larger root stock.
When cutting back low growth plants at this time of year be sure to wear your garden gloves. Snakes and all sorts can be happily hibernating under your plants and they don’t like being disturbed. The photos below show my lantana happily cutback together with a large toad sleeping away. Click on each photo for a larger view.
Even Cruella’s chickens were too scared to wake it up.
Pruning back grape vines. When pruning grape vines you are looking to just take off the side shoots to leave a small stump for the new fruit growth. Do not cut the main stem! the aim is to leave this to thicken and lengthen over the years to act as a superhighway for the sap for the whole vine. The photo below shows the best place to cut.
Don’t be tempted to cut right to the stem as you will lose the fruit.
I have three grapevines: one runs along the front of the house and two grow through balustrade at the side of my pool. The photos below show my grapevines prior to pruning, you can also see that I have encouraged one of my vines to grow up and through a Euphorbia. Click on each photo for a larger view.
Finally some of my handiwork. These vines will start sprouting within a month and off we go again. With correct pruning the vine will get stronger each year and eventually before you know it you will be making your own wine. Click on each photo for a larger view.
Cutting palms. Now is the time to prune and tidy up your palms as the sap will be down, the palm weevil will not be flying and most viruses will be dormant. However, do not be tempted to climb large palms and hack at them. You will probably fall off the ladder or cut yourself and bleed profusely. Leave it to the professionals.
The only palms I cut myself are Sago Palms and European Fan Palms, both of which I can reach from the ground with long lopers. I dealt with cutting sago palms earlier in the big cutback so I was left with my stand of fan palms. These consist of four main palms and their multitude of pups which grow in a small redonda we have created in a pathway. The photo below shows the palms prior to their cutback.
From the photo you can see that it is becoming an important feature of the garden. To stop it dominating and overwhelming this part of the garden it is necessary to thin it, reshape it and lift the crown of each palm.
Using long lopers I first go round the edges of the palms cutting out wayward fronds that are ruining the round shape. For the bottom growth I am not so worried about keeping the symmetry of the palm I am more interested in keeping the lower growth within the redonda.
Once I am happy with the lower shape I then use very long extended lopers to take the top growth of each palm back to just two rows of fronds. The two row bit is important as I will always have a spare if something happens to one of them. The photos below show the resultant frond massacre. Click on each photo for a larger view.
Bringing hedges back into shape. Hedges are an important part of my garden as they mark boundaries so much better than fences, and they flower, which fences never do. I have about 200 metres or more of hedges all tightly packed and encouraged to fight to earn the right to flower. These include:
Bignonia
Plumbago
Trumpet vine
Jasmine
Roses
Bower vine
Bougainvillea
Hibiscus
In addition to all of the above I have two self seeded trees that have found their way in: a white maple and pomegranate both of which add a bit of contrast in height. The rule with hedges is very simple; everything is cut back drastically to the same height, with the edges taken back straight to encourage light into other areas. The photos below show my hedges before, during and after their prune. Click on each photo for a larger view.
The final act of hedge pruning is to shred the thicker stems from the maple and the pomegranate and use them as mulch under other trees. Click on each photo for a larger view.
I am referred to a Tribunal. I am too upset to cover this item in this post, and also I have to prepare my defence against accusations of making the sky fall in. Hopefully, I will be able to talk about it in my next post.
Who knew that gardening could be so Rock and Roll; I always thought Guns and Roses was a stupid name anyway. If you have roses and figs, then now is the time to get them pruned back. Add a little bit of grass for you old hippies and we are really rocking. To think that Cruella (my wife) thinks that gardening is boring. Without further ado, let’s get on with the big cutback .
17th January. Things I have been doing lately:
Pruning Roses. People sometimes make out that there is a lot of mystique about the timing and methods of pruning back roses. But roses are very hardy and can take quite a lot of rough handling. The photos below show some of my roses ready for their annual prune. Click on each photo for a larger view.
It is important to remember that climbing roses are pruned differently to bush roses. With climbing roses I recommend running hedge trimmers lightly up the length of the plant just removing excess side growth without cutting the upward stems. In this way you will maintain height but get rid of bulk. The photos below show my climbing roses before and after their trim. Click on each photo for a larger view.
Now if like me you have lots of roses (I have 30) then pruning can be quite a time consuming process, so I recommend that you do it in two linked stages. First, be brave and get out your hedge trimmer or shears and just prune back all your roses to the required height – I recommend taking off at least two thirds of the height.
Second, get on your knees and prune each individual plant as follows. With bush roses the simplest method is to prune back by about two thirds to the nearest outward facing bud joint. As part of this process take out any crossing or diseased stems to leave a nice open centre to the plant a bit like a wine glass. The photos below show my roses pruned. Click on each photo for a larger view.
The more perceptive amongst you will note that the final photograph shows that you can barely see the pruned rose from the leaf debris and grasses growing through. I am sorry to tell you that this is when it gets difficult and when the real hard work starts. Oh and unfortunately you will lose a lot of blood. Using a pointed trowel you need to get under each rose and remove all the leaf debris and dig out the weeds and grasses. The rose thorns will get you no matter how good your gardening gloves and you will bleed quite a lot.
This is the important part so please pay attention. Sepsis though rare affects a number of gardeners each year. If you cut yourself – and you will – then it is important that at the end of your pruning blood bath you wash your hands and then bathe your cuts with an alcohol solution to ward off infection. The photos below show my lovely rose beds all restored and ready for this year’s growth. The final photo shows the all important alcohol to sterilise your many cuts. Click on each photo for a larger view.
Pruning fig trees. Most fig trees in Spain are allowed to grow into giant behemoths sprawling over gardens like something conjured up by Gandalf. Their fruit is often too high to harvest and they shade out other plants nearby. I have two fig trees: an espalier and a free standing tree. As a lover of figs both of my trees are cosseted. They are fed, netted and pruned at exactly the correct time, and in return they provide me with abundant fruit. My trees are shown below in their unpruned state. Click on each photo for a larger view.
You should only prune figs when you are sure the sap has returned to the roots as figs have a caustic sap which can inflict quite severe burns if you foolishly cut any branches during the growing season. There are many ways to prune figs, but whatever your chosen method there are two key elements.First, ensure that you have trained your tree so that you can easily reach the fruit at the height of the growing season. Second, prune to achieve an open aspect at the centre of the tree to let in maximum light and air.
The pruning method I have chosen for my free standing tree is to pollard it back to six main branches each of which have numerous stems during the growing season. For the espalier fig, I just remove perpendicular side shoots to encourage lateral growth along wires. The photos below show you both trees after their prune. Click on each photo for a larger view.
If you want to propagate your trees either to have more, or to give to friends, then this is the ideal time. Many of the branches you have pruned off will have buds just waiting to spring into growth. Choose some of the best of these; I always look for healthy strong branches with multiple buds at the end. Cut them back to about 30cm just below a growth node then dip the ends into growth rooting hormone (don’t worry if you don’t have this it probably will still work). Pot them up in free draining compost and leave them in the winter sun. With a bit of luck you will have some new trees in the late springtime.
The first photo below shows my choice of potential cuttings. This is followed by an indication of where to cut. Then the process of dipping into hormone rooting liquid. My free draining mixture one part compost to four parts soil is shown as an action photo of a trug. Finally my little cuttings ready to get going. Click on each photo for a larger view.
Cutting back Fountain grass. I have one large Fountain grass which unfortunately had died in the middle as most grasses will do over time. I split it just over a year ago and replanted 3 into my own garden and gave some to my friend Camilla who is making a new wonderful garden. Anyway, now is the time to cut back grasses. The simplest way to cut back grasses is just to use your hedge trimmers to gently trim around the plant to make a small mound shape. Do not be tempted to square the grass off (as Ayuntamientos have a habit of doing) this guarantees a short life before the centre dies back. By creating a mound you maximise the light and air to the plant.
The photos below show my little transplants before their cut back and finally how it should look after cutting. Each mound will get bigger each year until eventually the splitting process takes place again. Click on each photo for a larger view.
Yes, it is that time of year when we gardeners have to get out there and cut everything back. Failure to take action now will mean that your garden will not fulfil its potential this Summer. Over the next few weeks I will be pruning, cutting back and generally getting my garden into shape for the coming summer. I will be working with the types of plants you have in your Spanish gardens, so just follow what I do over the next few posts and we can guarantee a lovely garden this summer.
Unlike most of you I have certain hindrances whilst doing my garden, namely: Cruella (my wife), her brood of chickens from hell, and as a special treat the idiot son has come home for a holiday and Cruella has declared him a chicken whisperer. Anyway, let’s get on with the gardening.
10th January 2024. Things I have been doing lately:
Over the next few posts I will keep you up to date with the big winter cutback, but this particular post will cover the following:
Pollarding Peruvian False Pepper trees
Pruning Sago Palms
Cutting back Dame de Noche
Pruning climbers
Dealing with the chicken whisperer
Pollarding Peruvian False Pepper trees: This tree can be found in many Spanish gardens. Its weeping willow type foliage and lovely little red peppercorn fruits provide an attractive tree that can grow up to 15 metres tall. However, too often the false pepper is allowed to grow into a huge behemoth that whips around in the wind and covers you terraces in discarded foliage and blocks your swimming pool skimmers. The photo below shows my tree before pollarding.
Left to grow this tree canopy would double in size over the next few years.
The secret to keeping the false pepper as a useful part of your garden landscape is to ensure that you pollard it every 5 years or so. Pollarding involves radically pruning back the main branches which reshapes the tree and encourages secondary growth that will stay manageable for a few years. When pollarding you need to use a chain saw or bow saw to cut each of the main branches about 6 inches from the base of the branch. By keeping the correct distance from the base of the branch you will not damage the branch “collar” which contains the growth instructions for the branch.
Luckily the idiot son was visiting so I persuaded him to help me pollard the tree. I had to promise him copious quantities of beer and Cruella insisted that I held the bottom of the ladder at all times. The photos below show the idiot in action with the final photo showing the finished pollard. Click on each photo for a larger view.
I wanted him to use the chain saw but Cruella wouldn’t let himThe final pollard will last at least five years
Pruning Sago Palms: The slow growing sago palm is another perrenial favourite in most Spanish gardens. These can be majestic if pruned correctly, but if just left to their own devices, they are just another green lump in your garden. There are two schools of thought on pruning sago palms. The first says that you must leave the fading yellowing fronds on the plant as they provide nutrients. The other says keep it pruned and tidy and if necessary give it a feed. I support the latter process and always prune mine back to two rows of fronds from the top. Two rows is important as if you left just one row and then these became diseased then you could lose the plant. I have two main sago palms; one is in the ground and the other in a pot. Both are shown below. Click on each photo for a larger view.
From the photos above you can see that both are due a trim. Using long handled lopers I gradually move round the trunks taking off rows of fronds until I am left with just two rows on each stem. The photos below show my handiwork.
The final stage in pruning the sago palm is to remove any pups it has thrown from the base of its trunk. These look like mini sago palms that are emerging, and you can pot these up, but that is for another days post. Today we just need to take them off to tidy up the plant. The first photo below indicates the pups circled in red. You just need to remove these with your secateurs or lopers and then the plant is left nice and tidy for the summer.
Cutting back Dame de Noche. The lady of the night which is a night scented Jasmine needs to have its final cut back now if you are to enjoy its lovely scent in the summer. You should have already cut the plant back by a third after its first flowering to allow a second flush of flowers. This final cutback can be quite drastic to encourage a healthy shapely growth. Depending on the age of your plant you can take it back to 6 inches.
The first two photos below show my dame de Noche looking straggly and ready for its cutback. Notice that I have planted my dame de Noche close to our outside seating and eating area so that we can benefit from the beautiful night scent. Click on each photo for a larger view.
The next photos show the plant cutback and ready for its final pruning. To finish the prune use your secateurs to open up the centre of the plant to take out crossing stems and let light and air in.
The final prune leaves the centre of the plant open
Pruning climbers: The trick with pruning climbers is that you do not want to lose height but you do want to reduce bulk so that you can let light into the plant. So in effect what you need to do is remove side shoots. The simplest way to do this is to run your electric hedge trimmers up the front of the plant aiming to stay away from the upward growth. Lacking hedge trimmers just use garden shears to achieve the same effect.
So far I have cut back the Solanum that grows up the side of my outside kitchen and dining area and also my column of plants that I trained up a palm trunk. The photos below show that all that is needed is to just take away bulk and bring back shape. Click on each photo for a larger view.
BeforeAfter
Finally, don’t be tempted to feed or overwater the plants you have pruned. Wait a couple of months till you see new leaf growth and then give a light feed.
Dealing with the chicken whisperer. Whilst I have been dealing with the start of the big Winter cutback, Cruella (my wife) has been training the idiot son in the art of chicken whispering. She is trying to convince him to leave the world of Finance and become her rightful heir, or as she calls him “Prince of Chickens”. So far he is holding out, but she is making him follow a strict curriculum of chicken studies. This includes lessons in Chickenese every morning followed by hands on work with the chickens in the afternoon. Early evening is spent in the so called art of chicken whispering. The later evening is spent in the rites and mysteries of putting the chickens to bed, but I can’t tell you anything about this as I am not allowed to see what goes on.
The photos below give you an idea of what they get up to, I did have some others but Cruella made me delete them! I am only allowed to show you these ones as Cruella is using them in his graduation album. Click on each photo for a larger view.


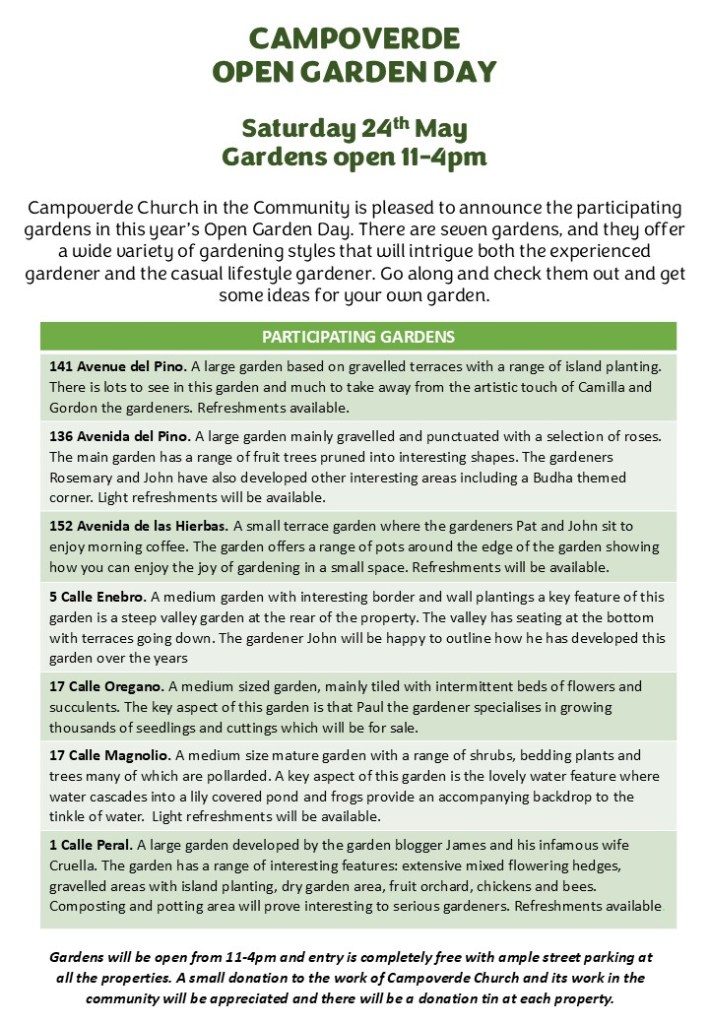
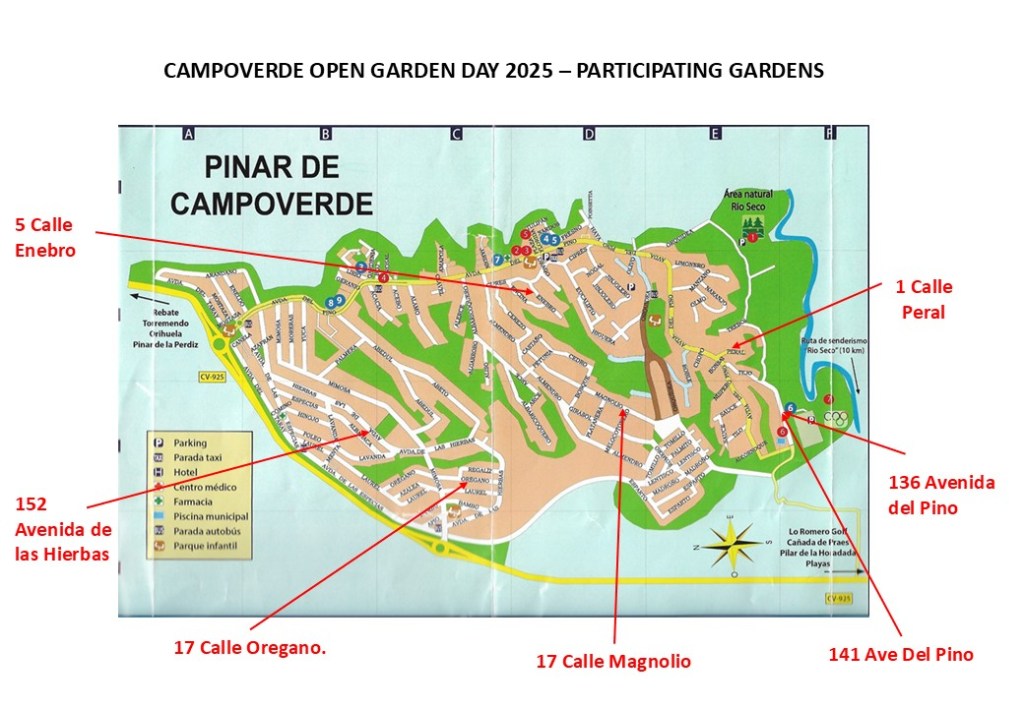
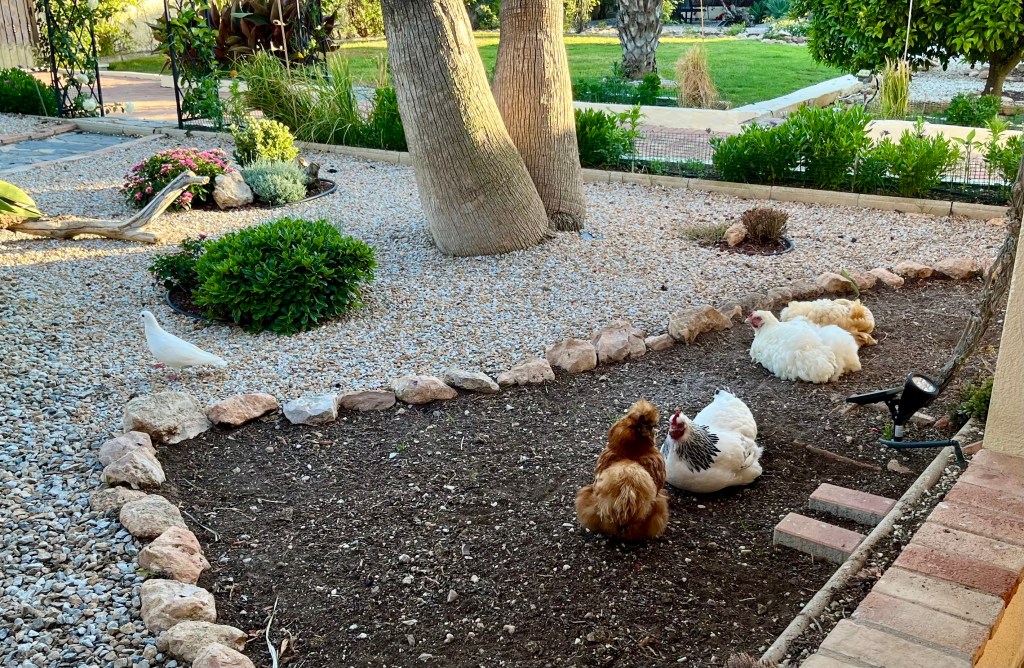
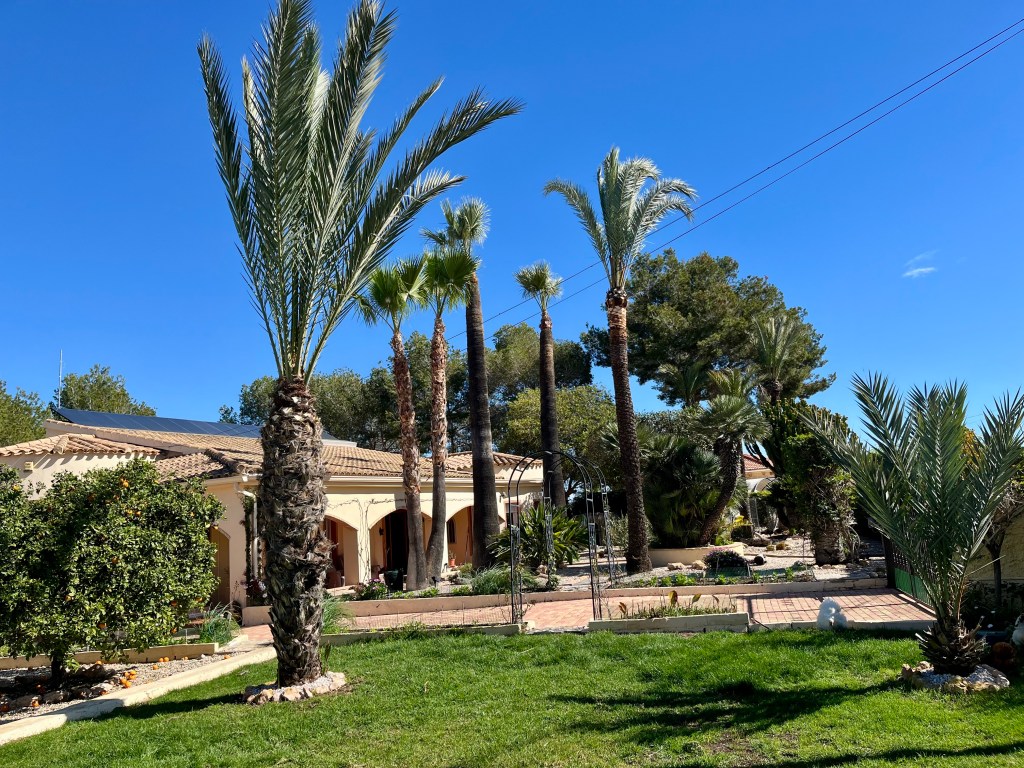

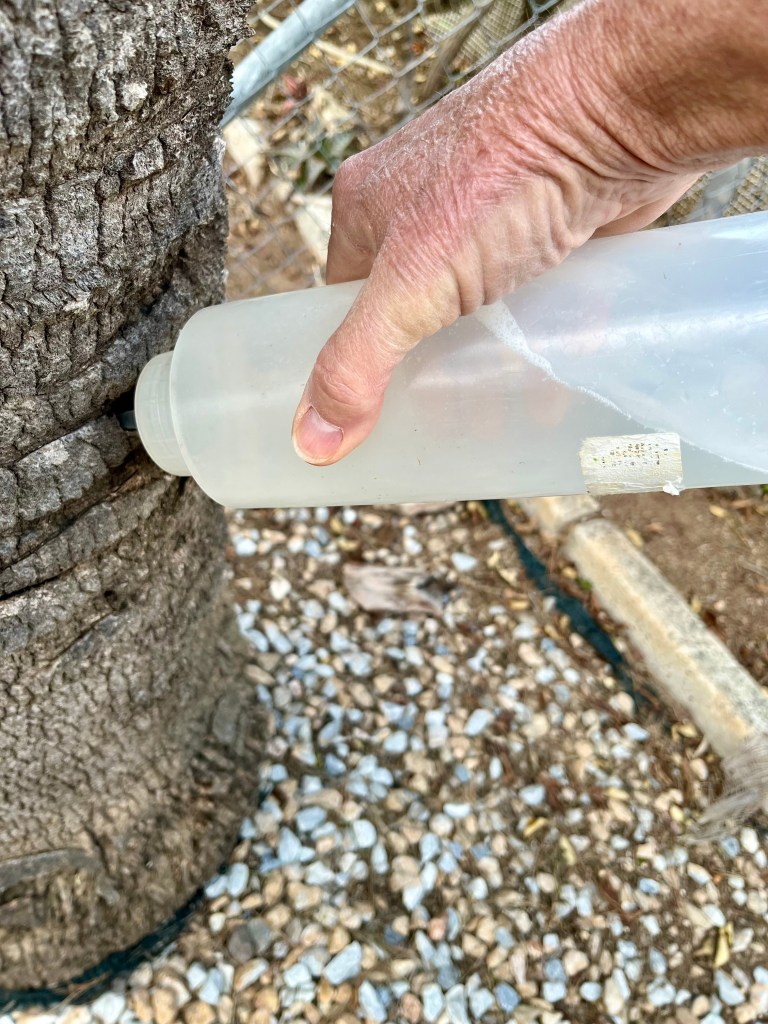


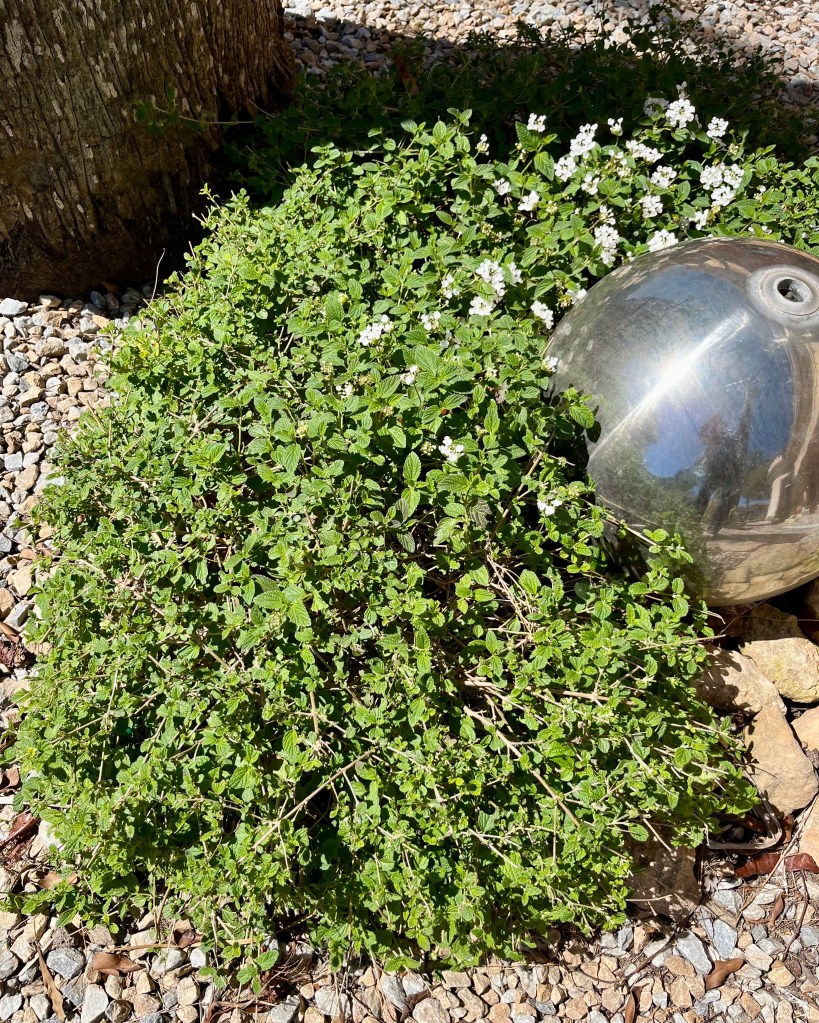
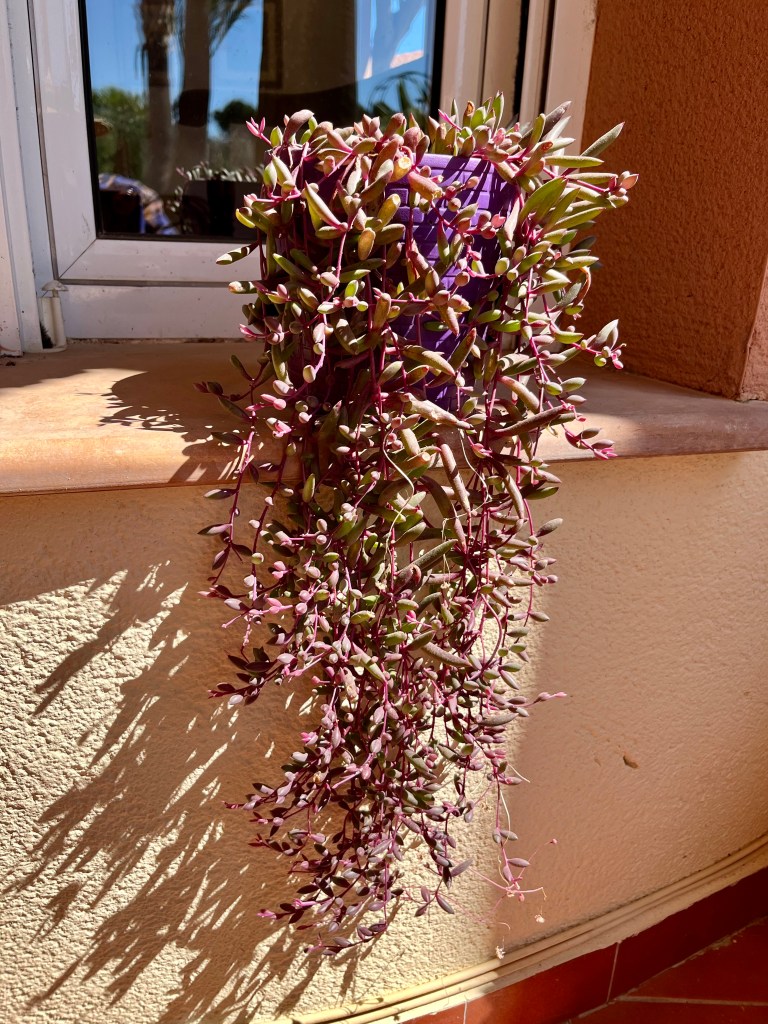
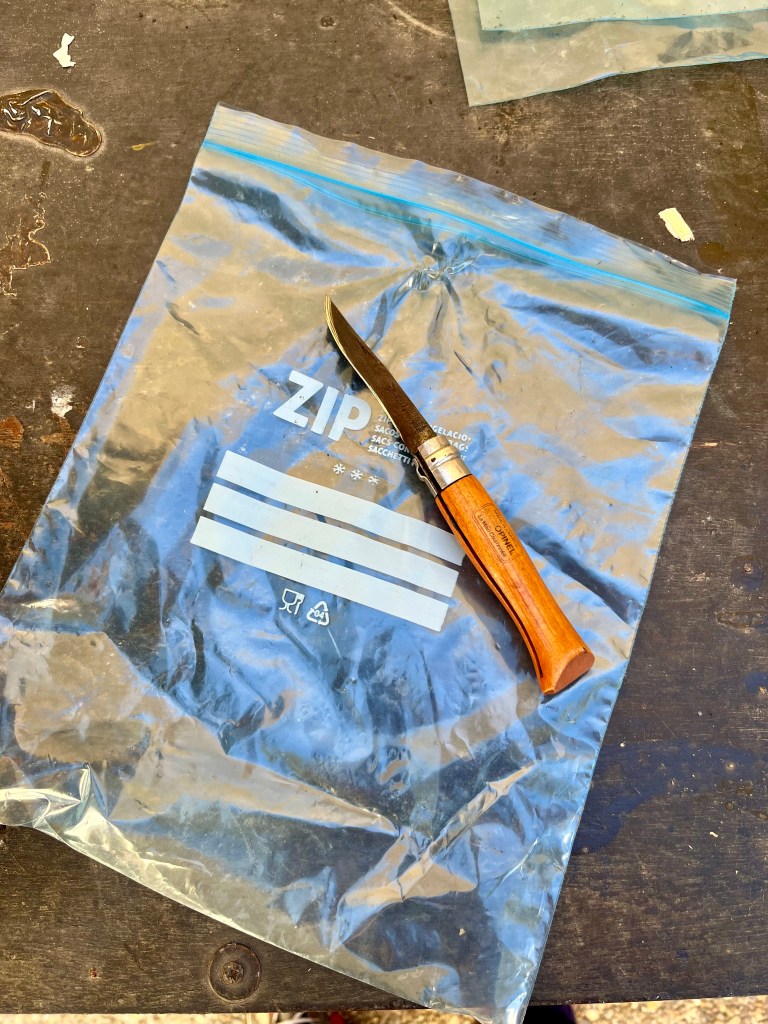

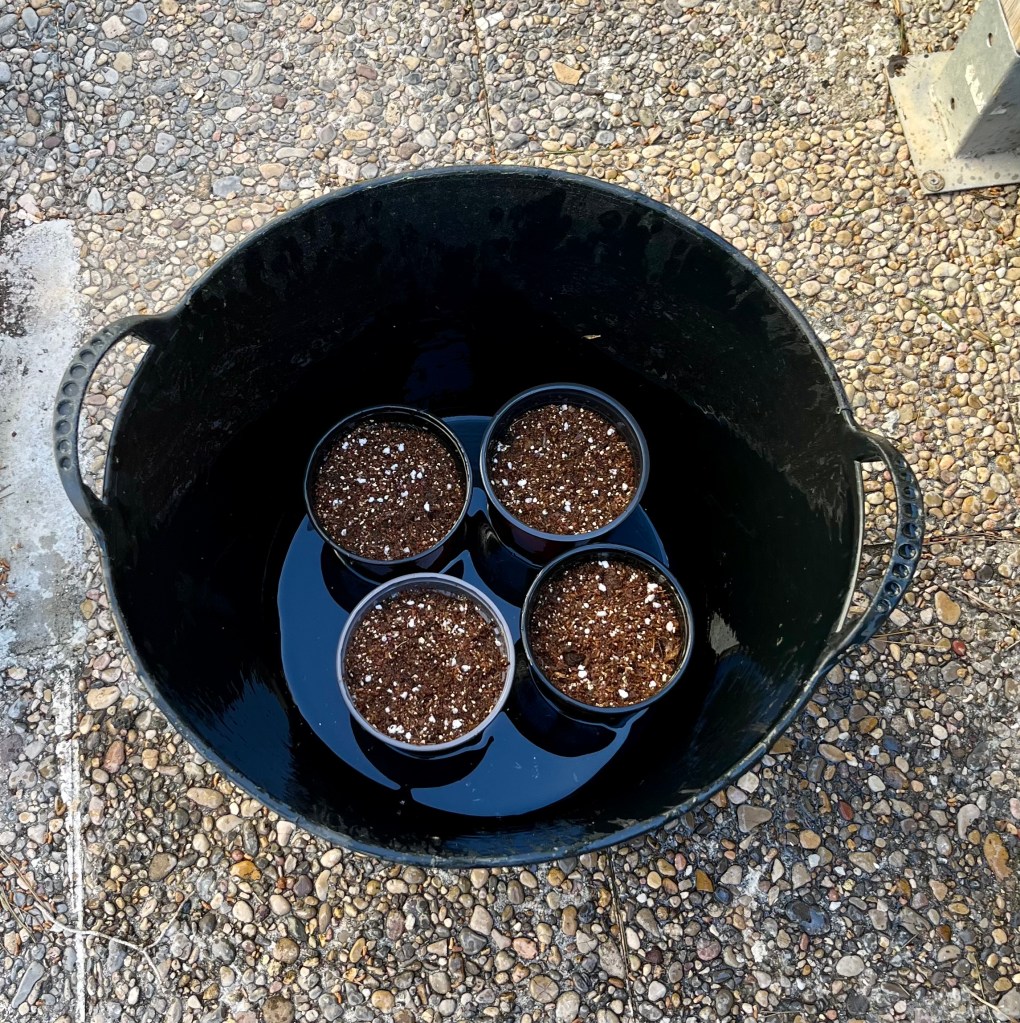


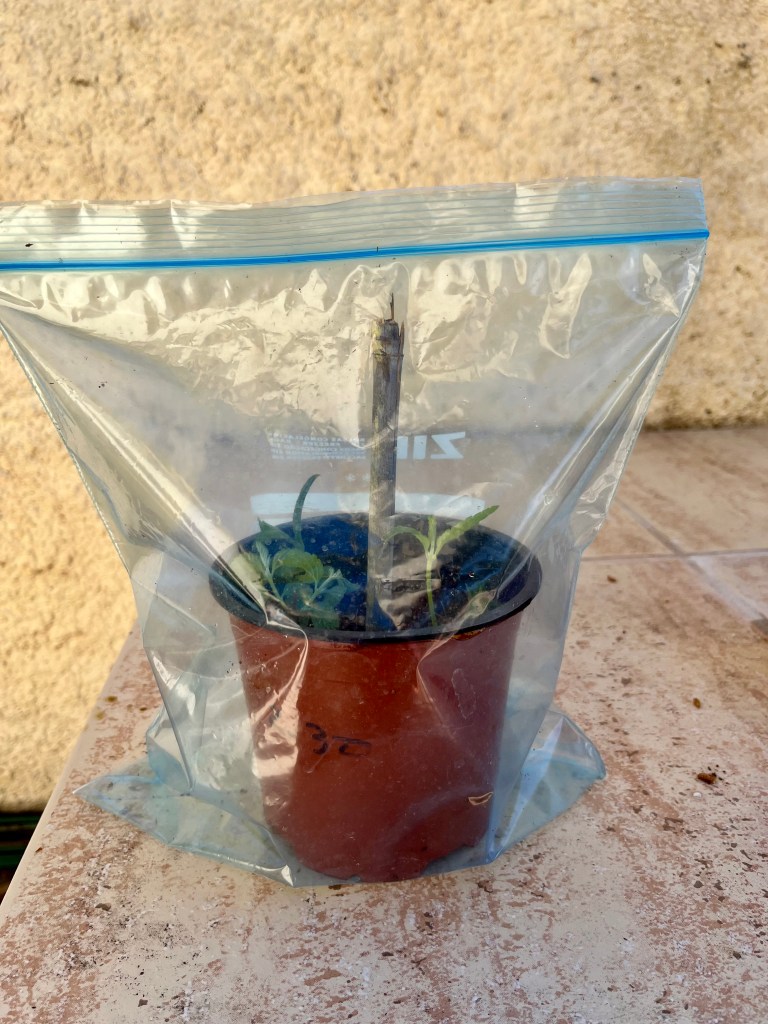
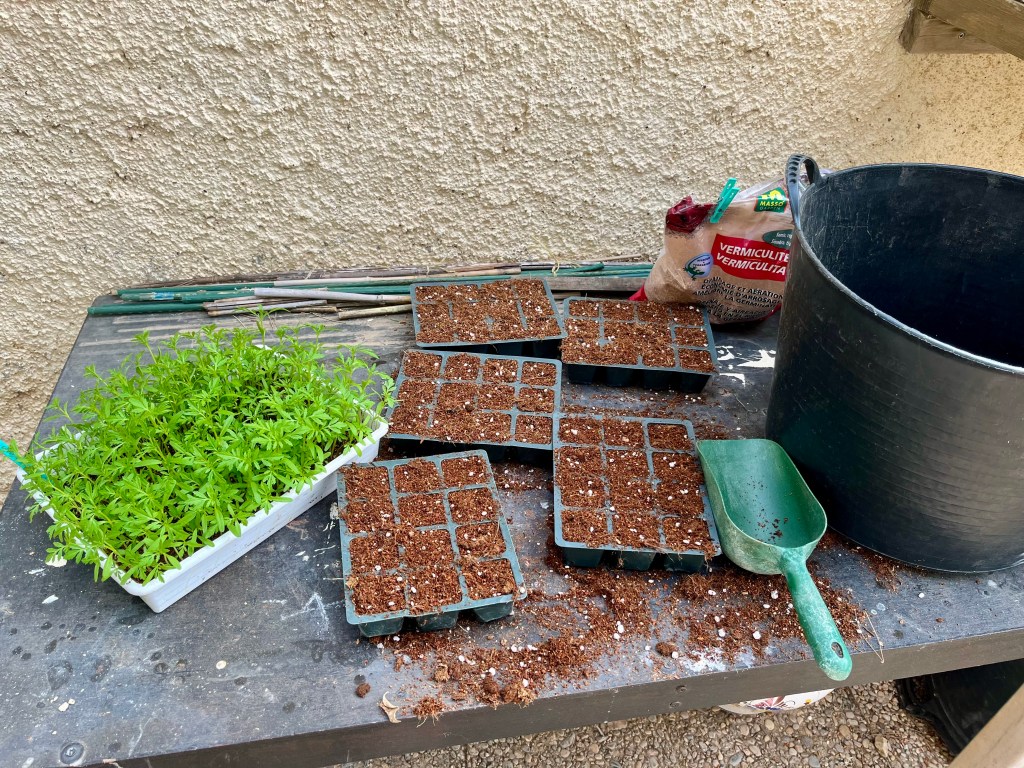


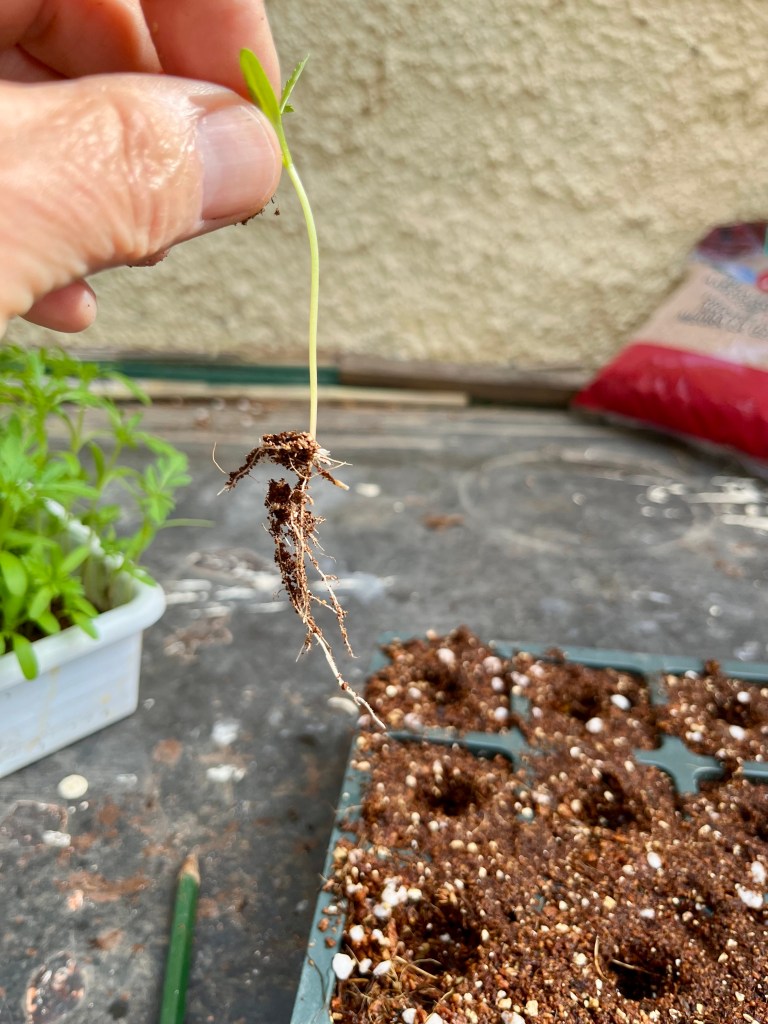
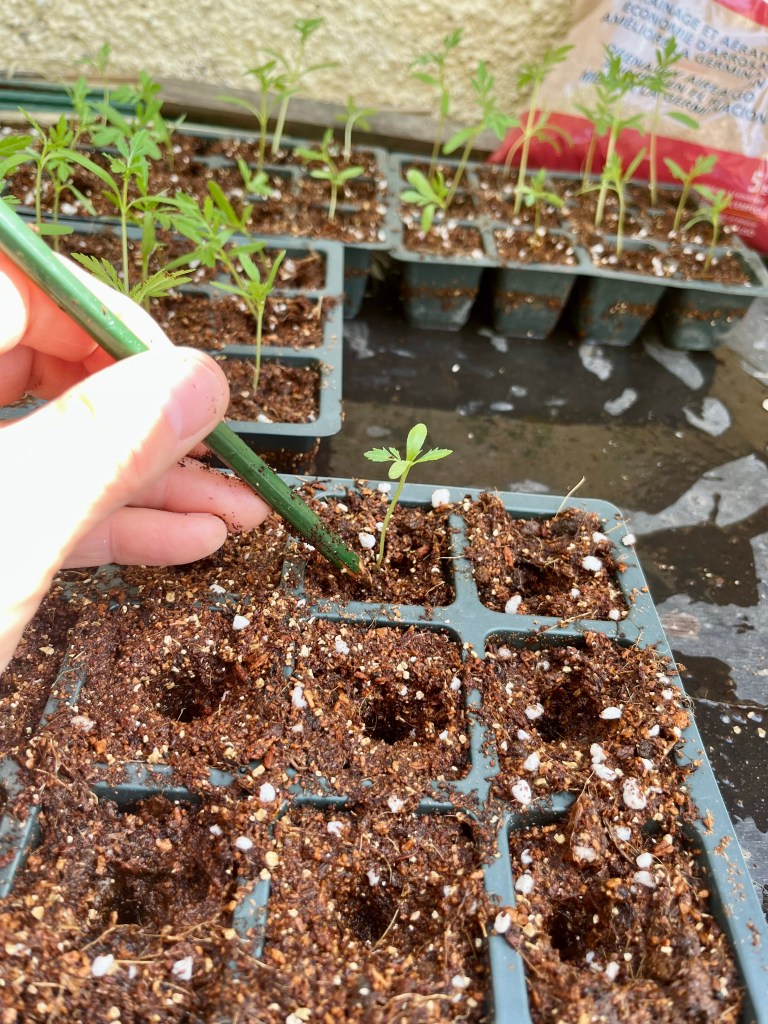

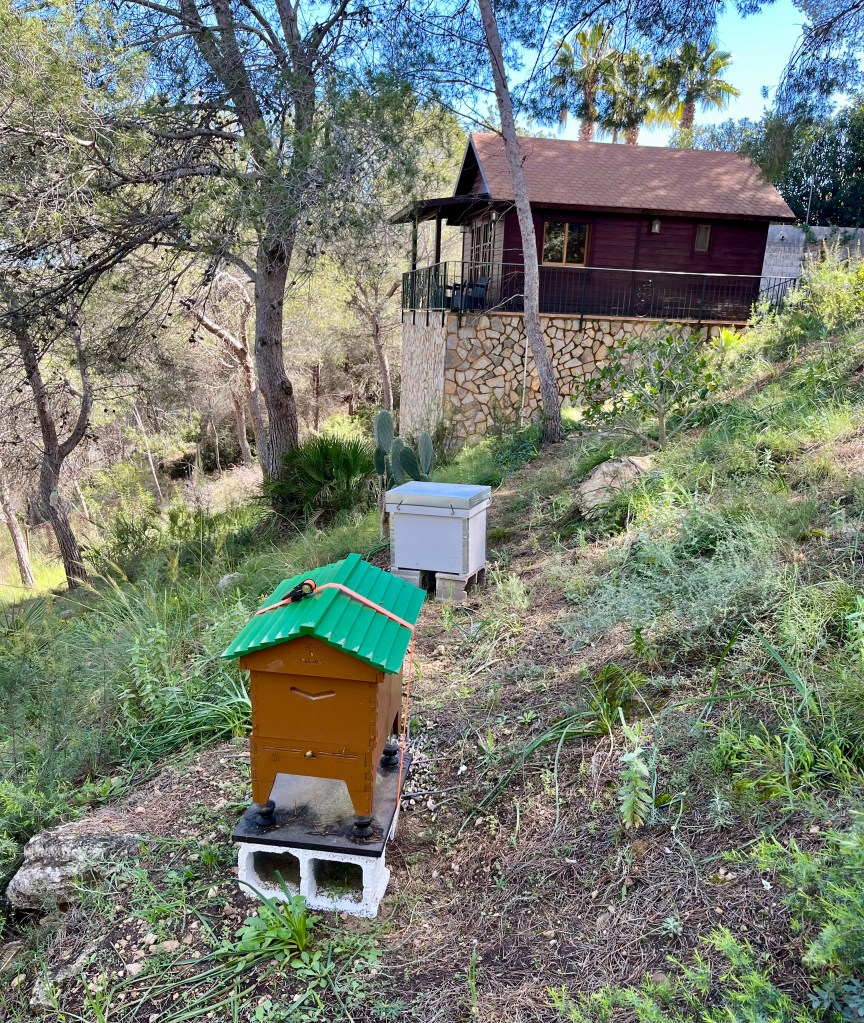


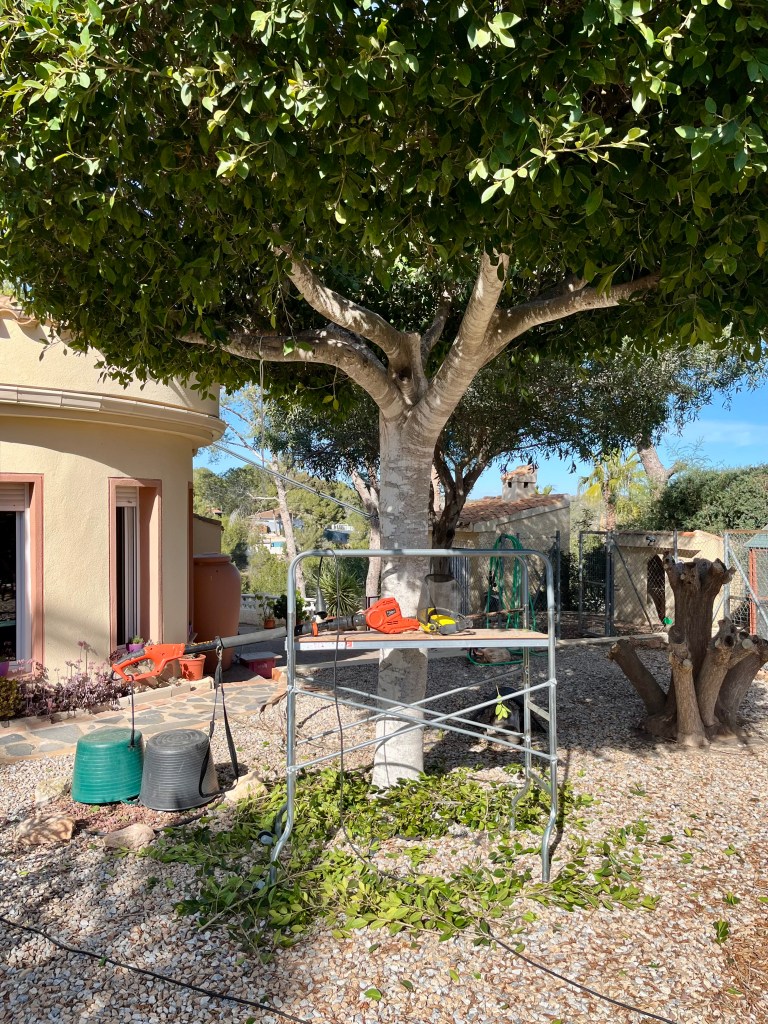


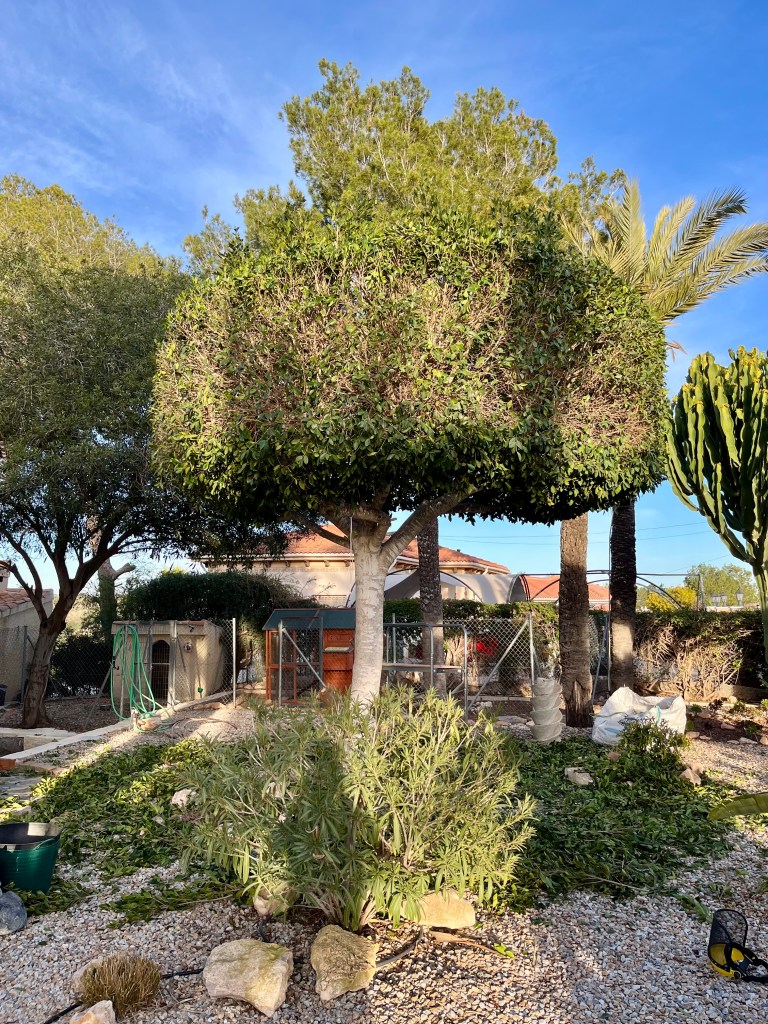
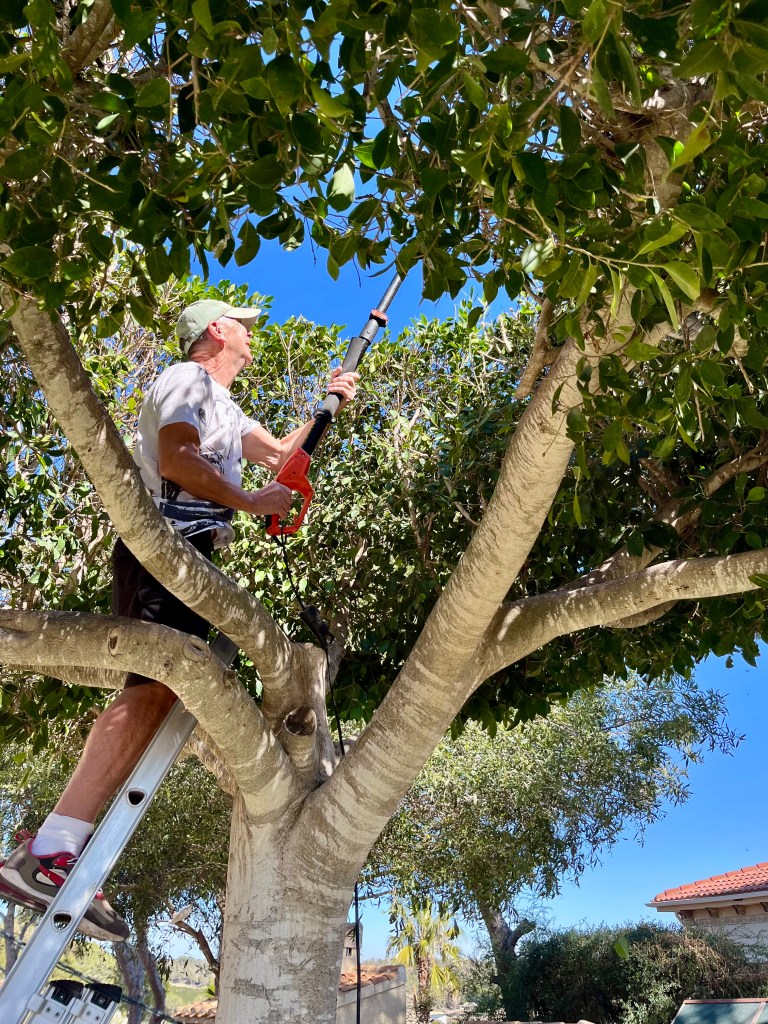


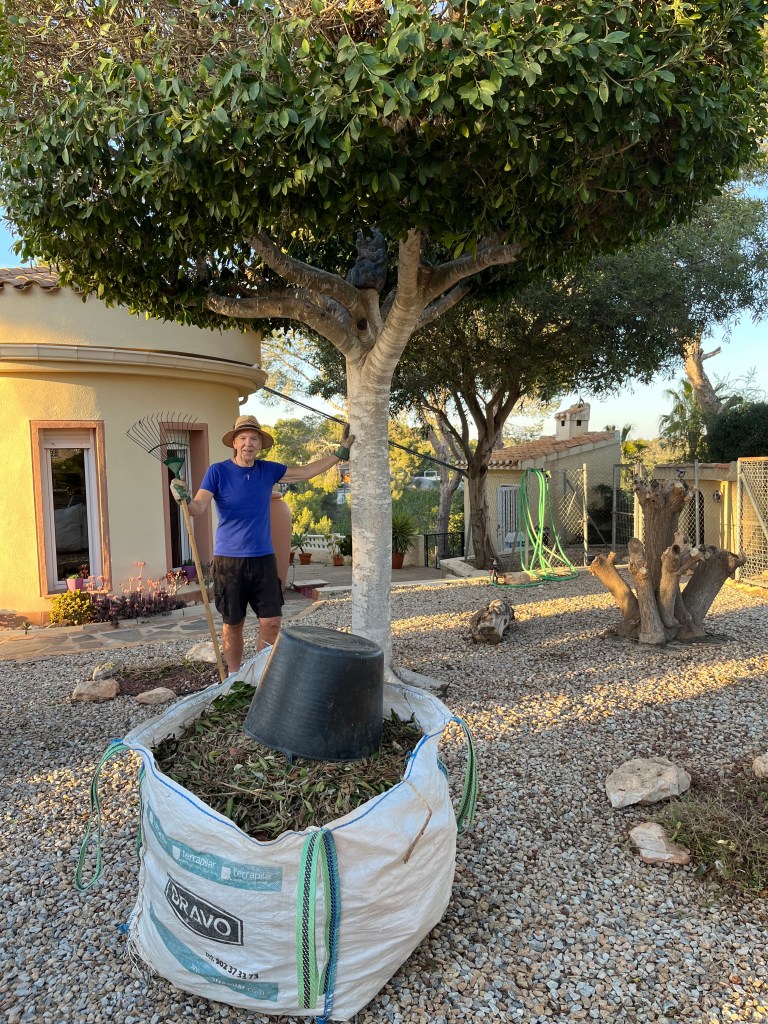

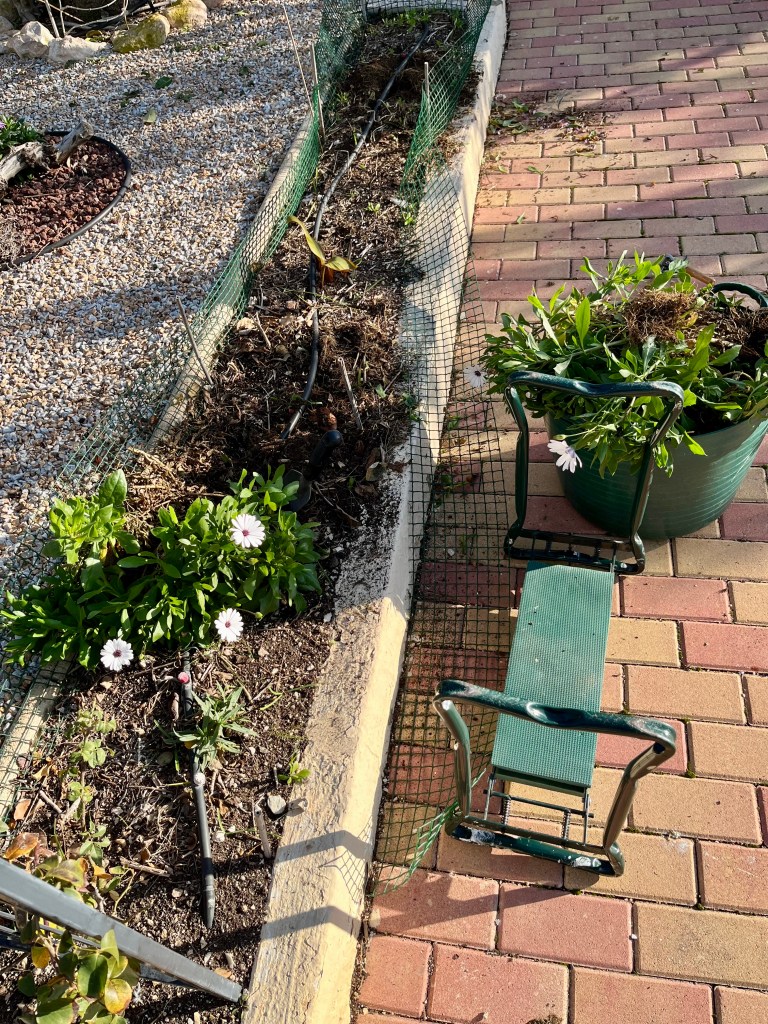
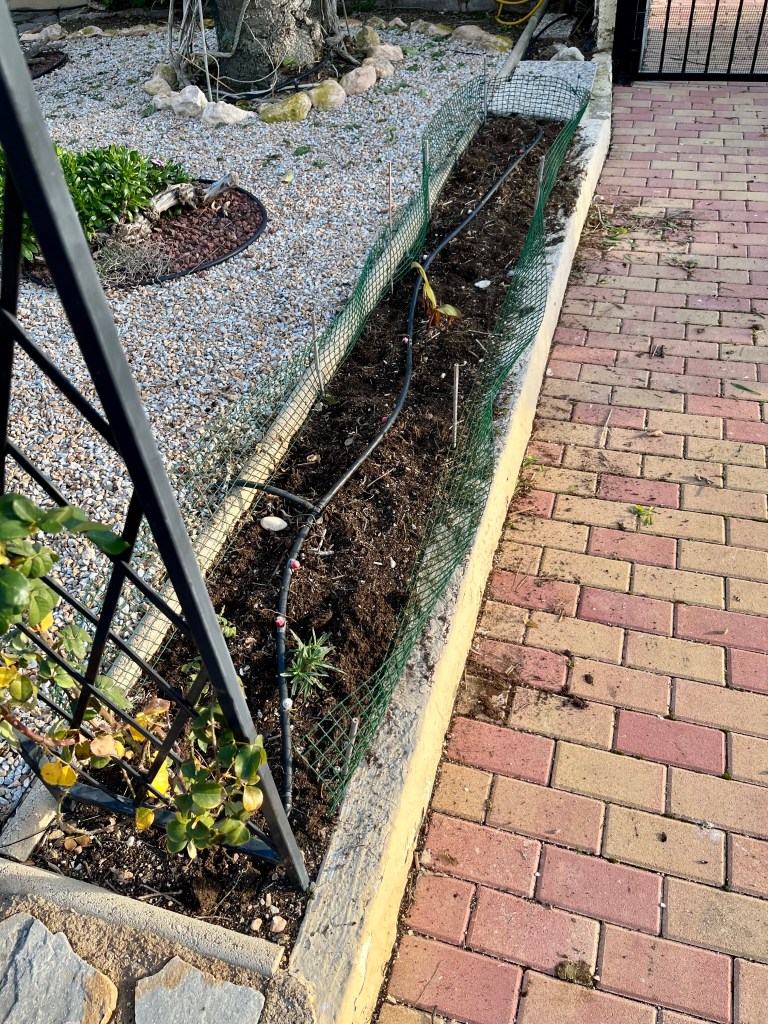
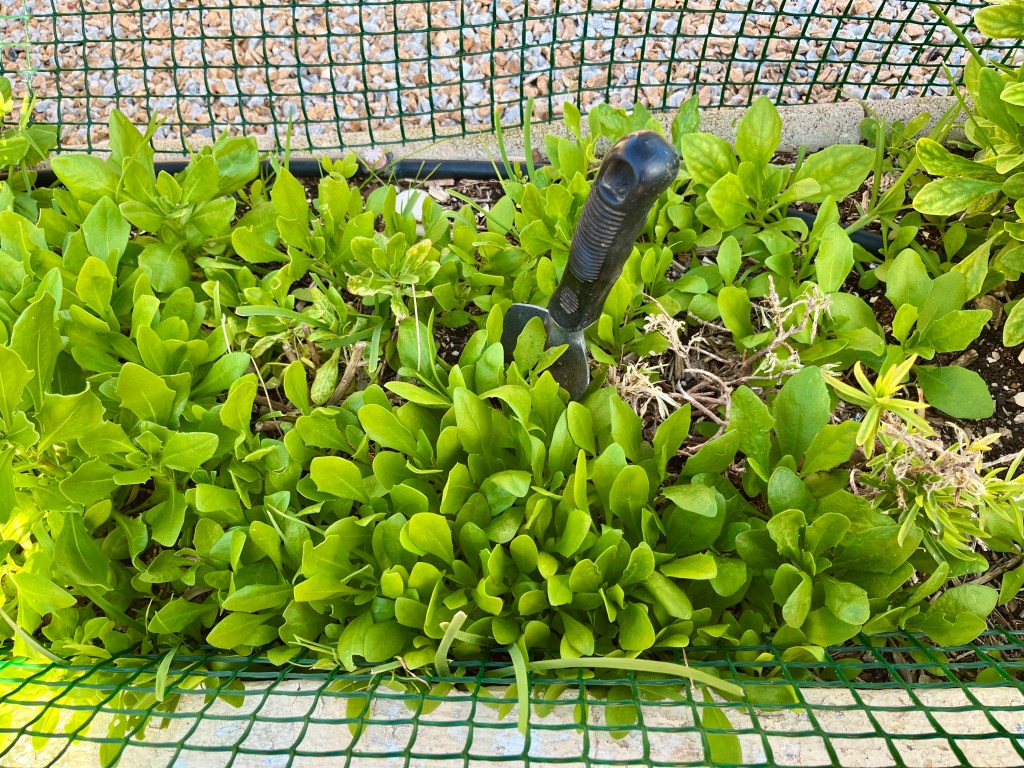
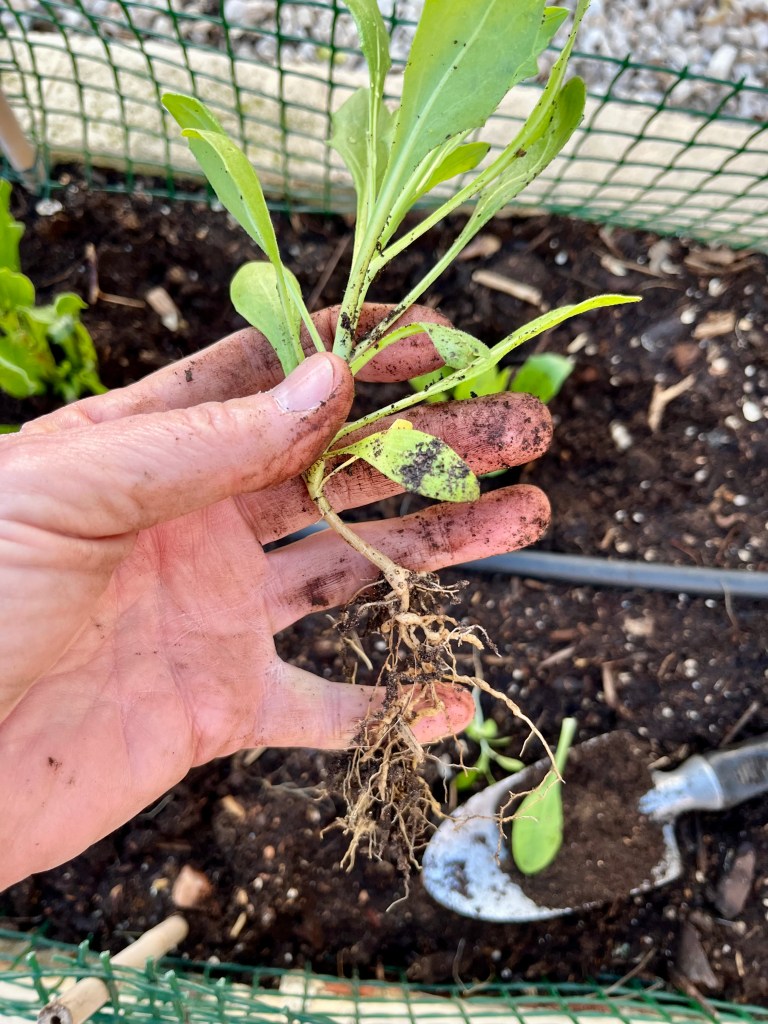
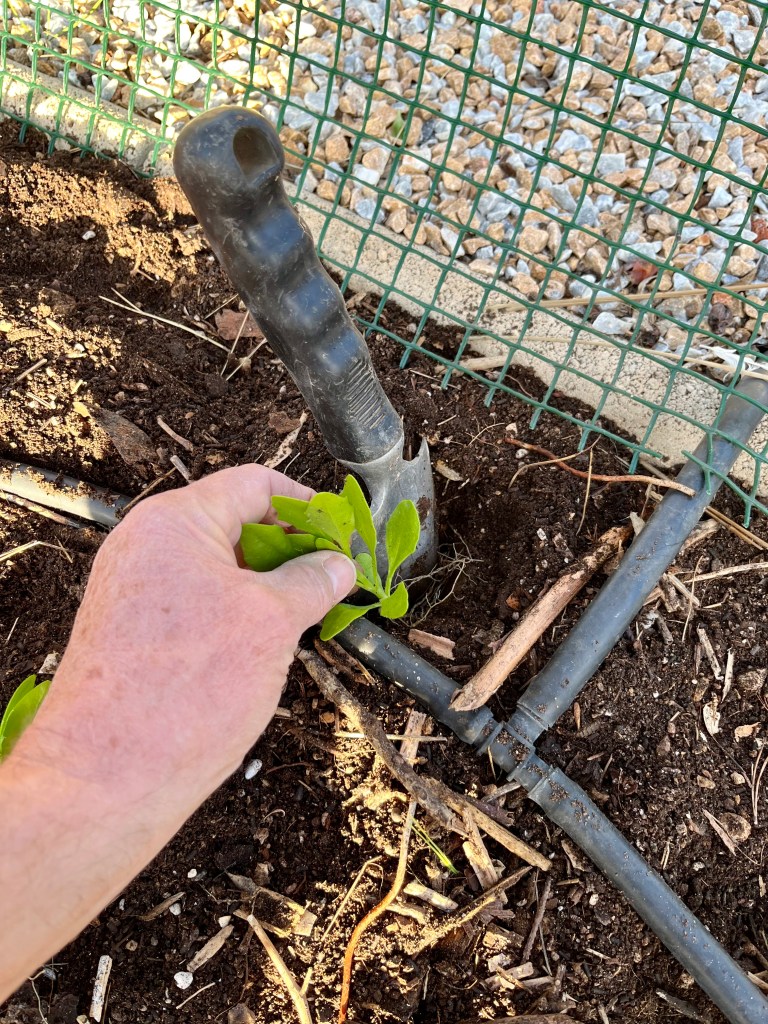


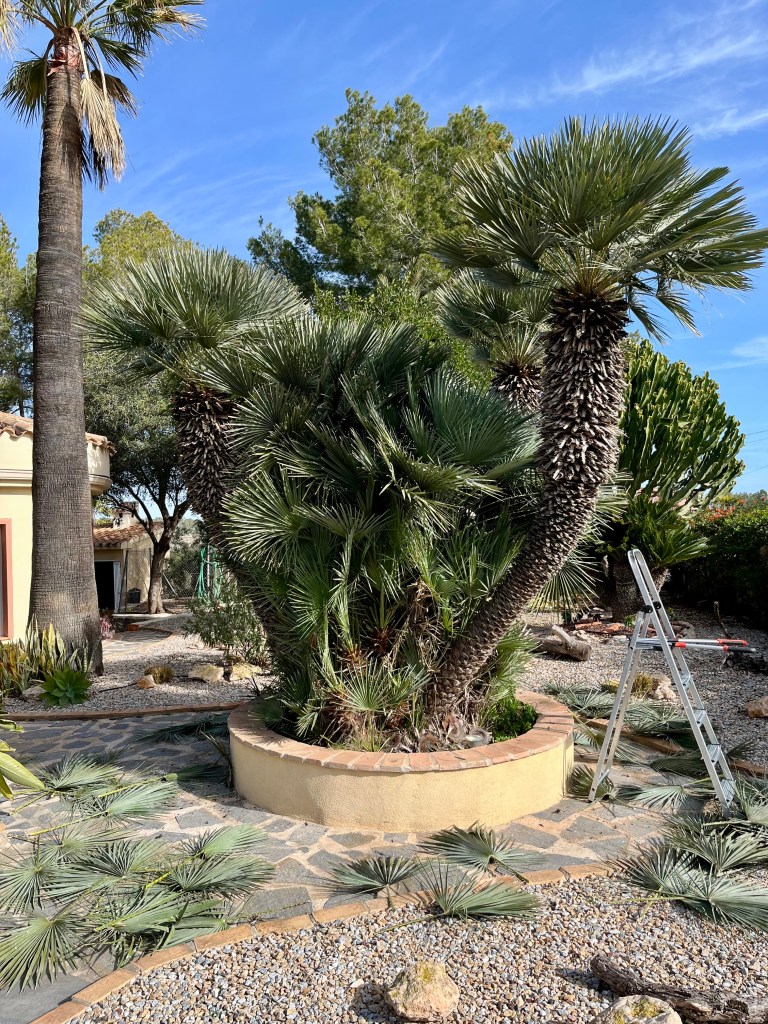

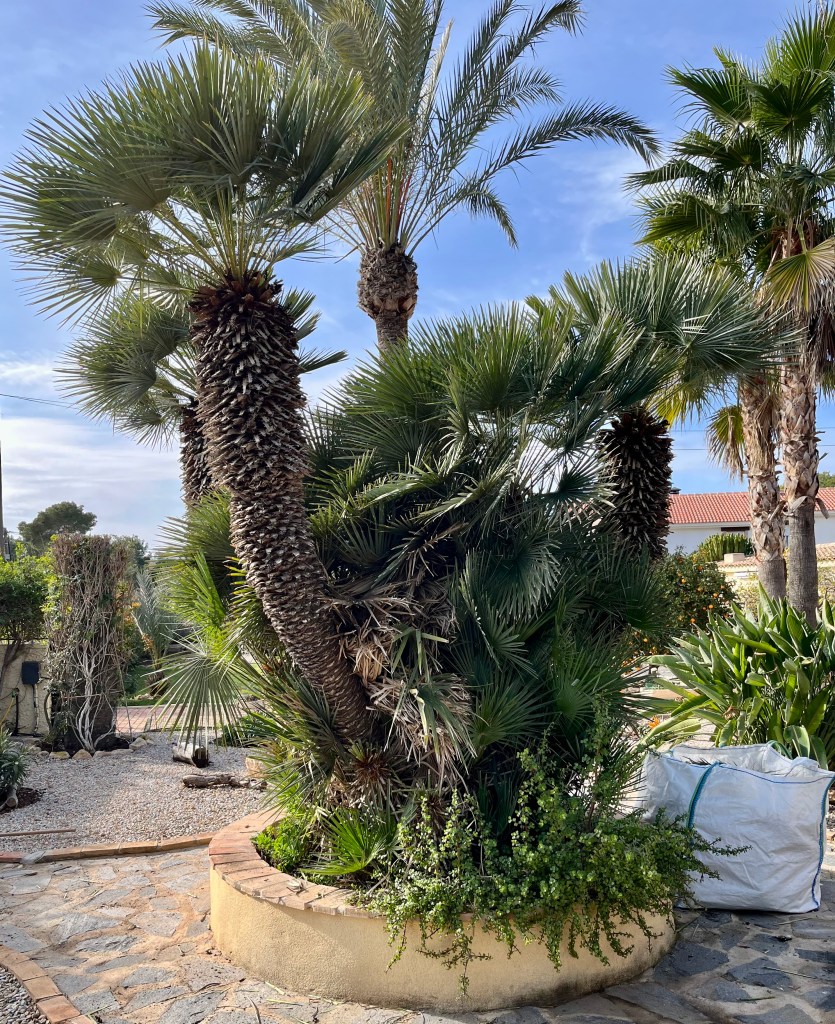


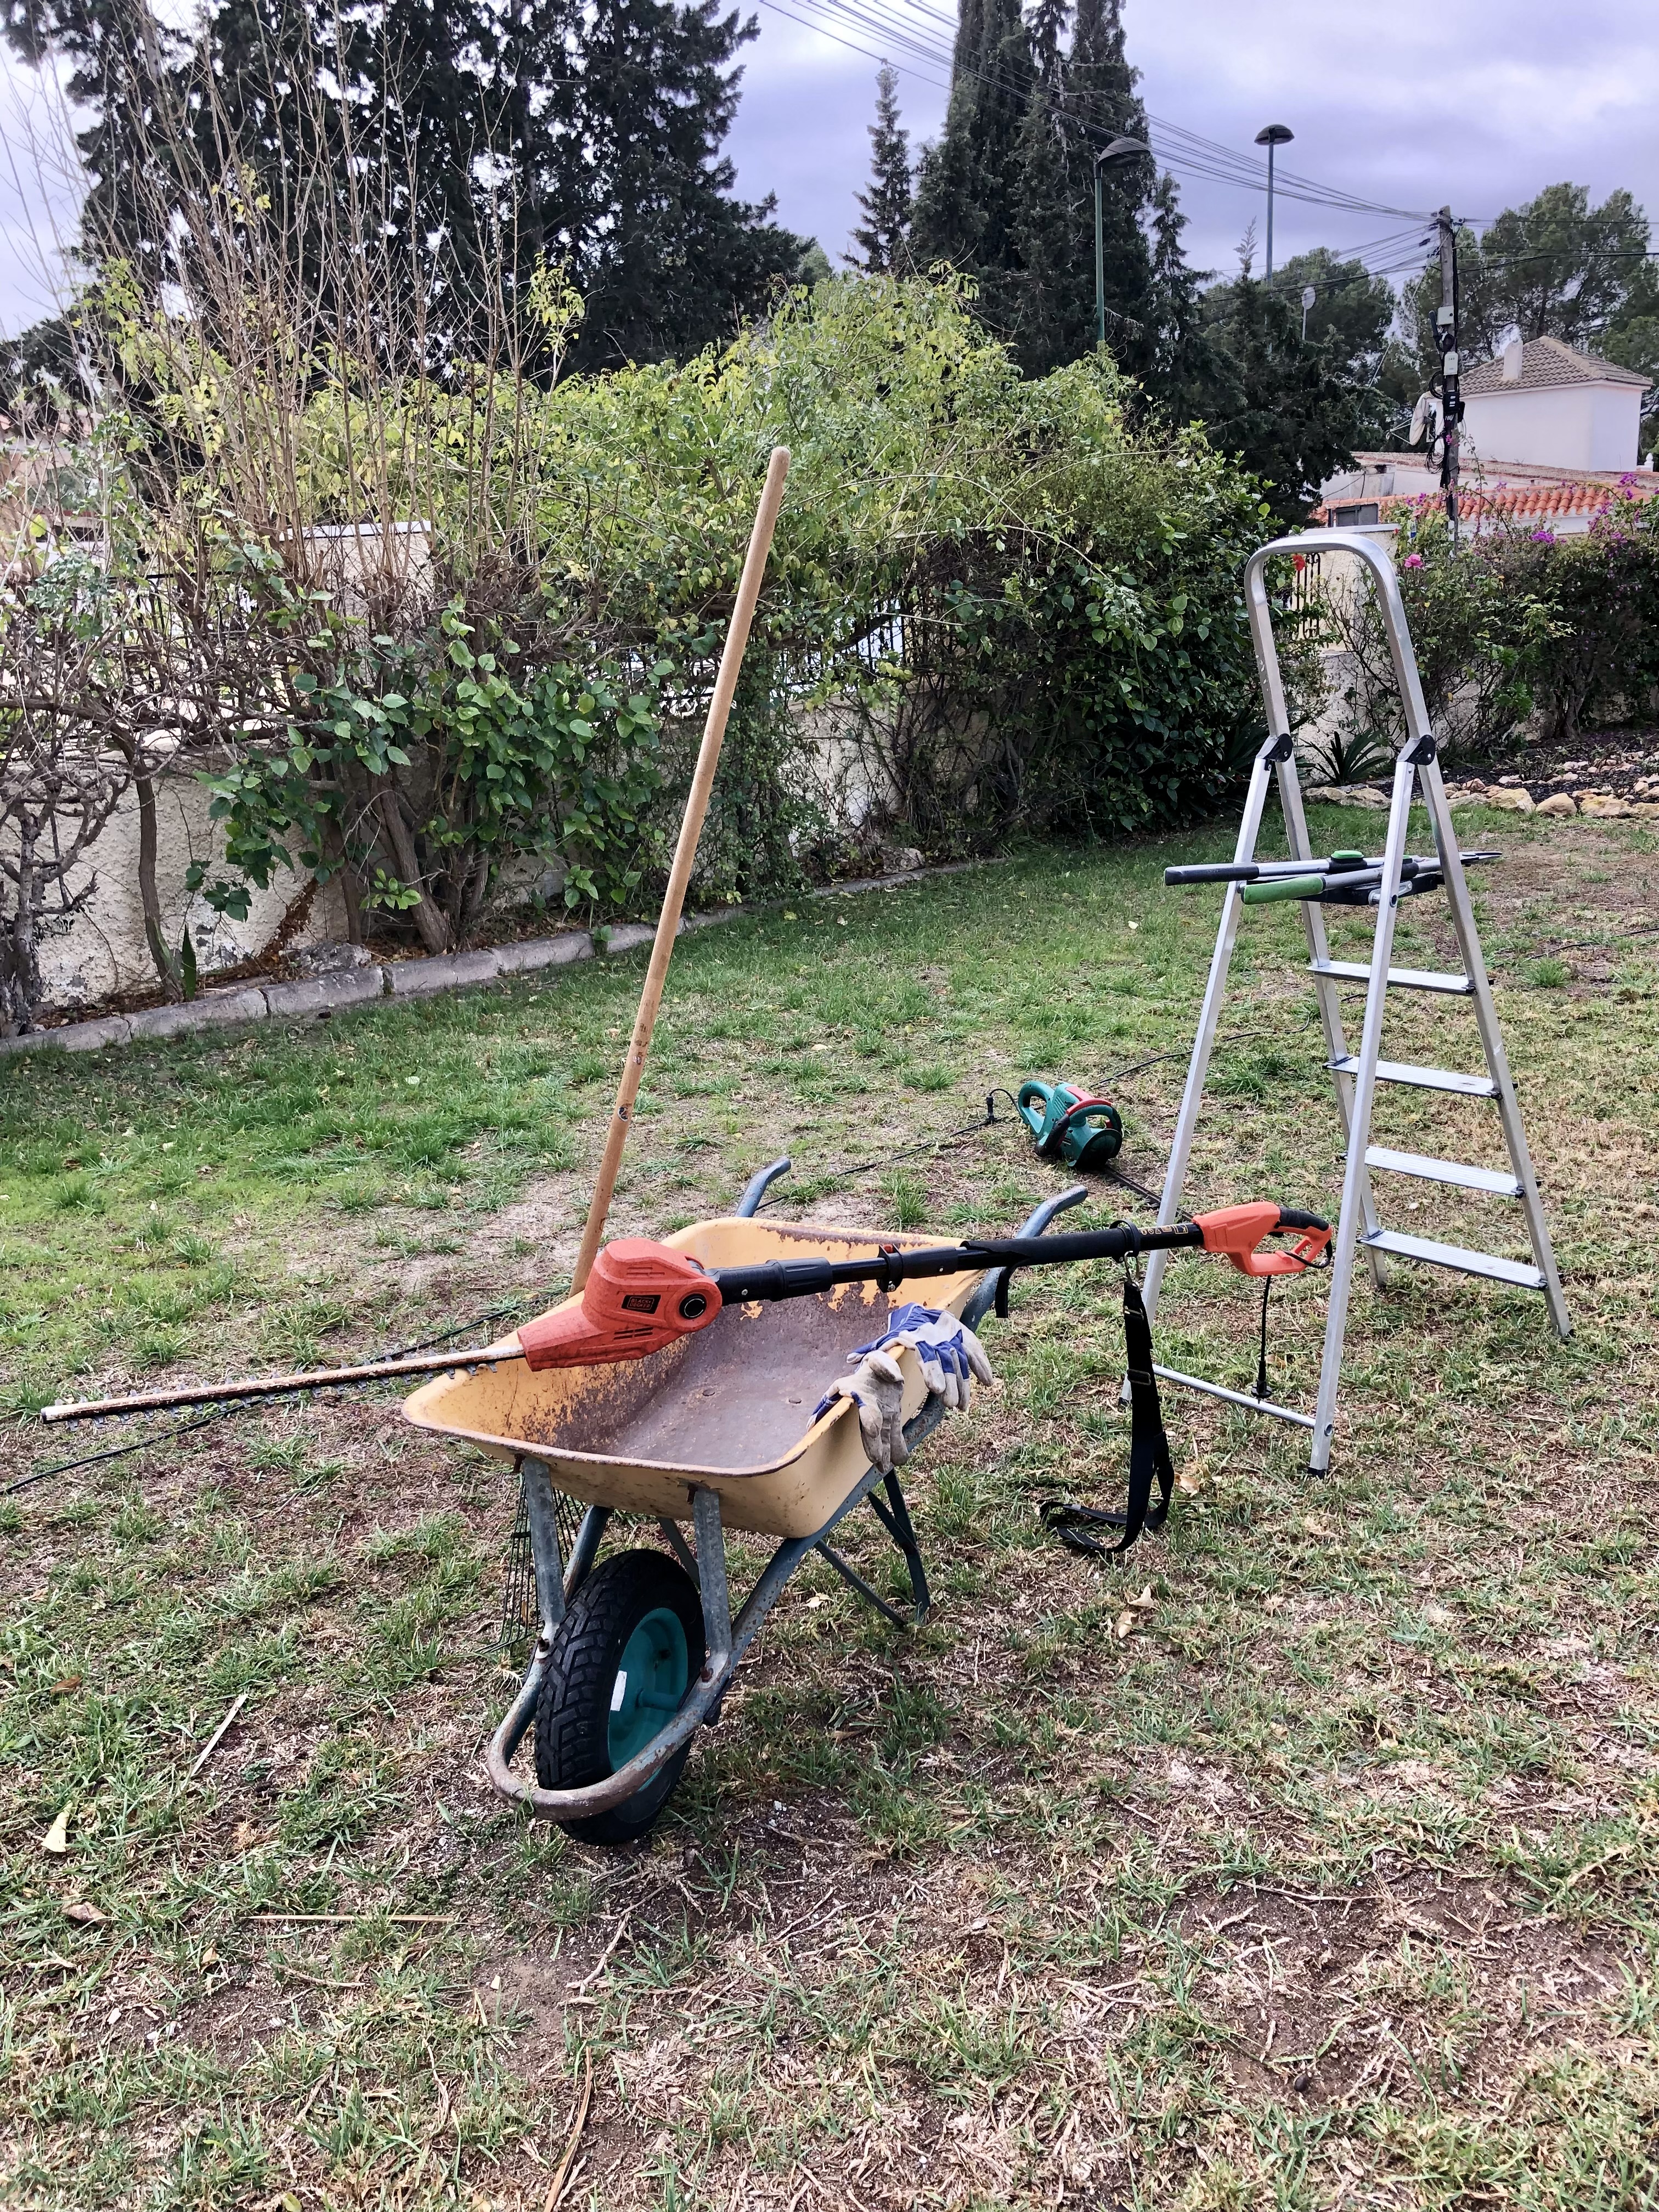
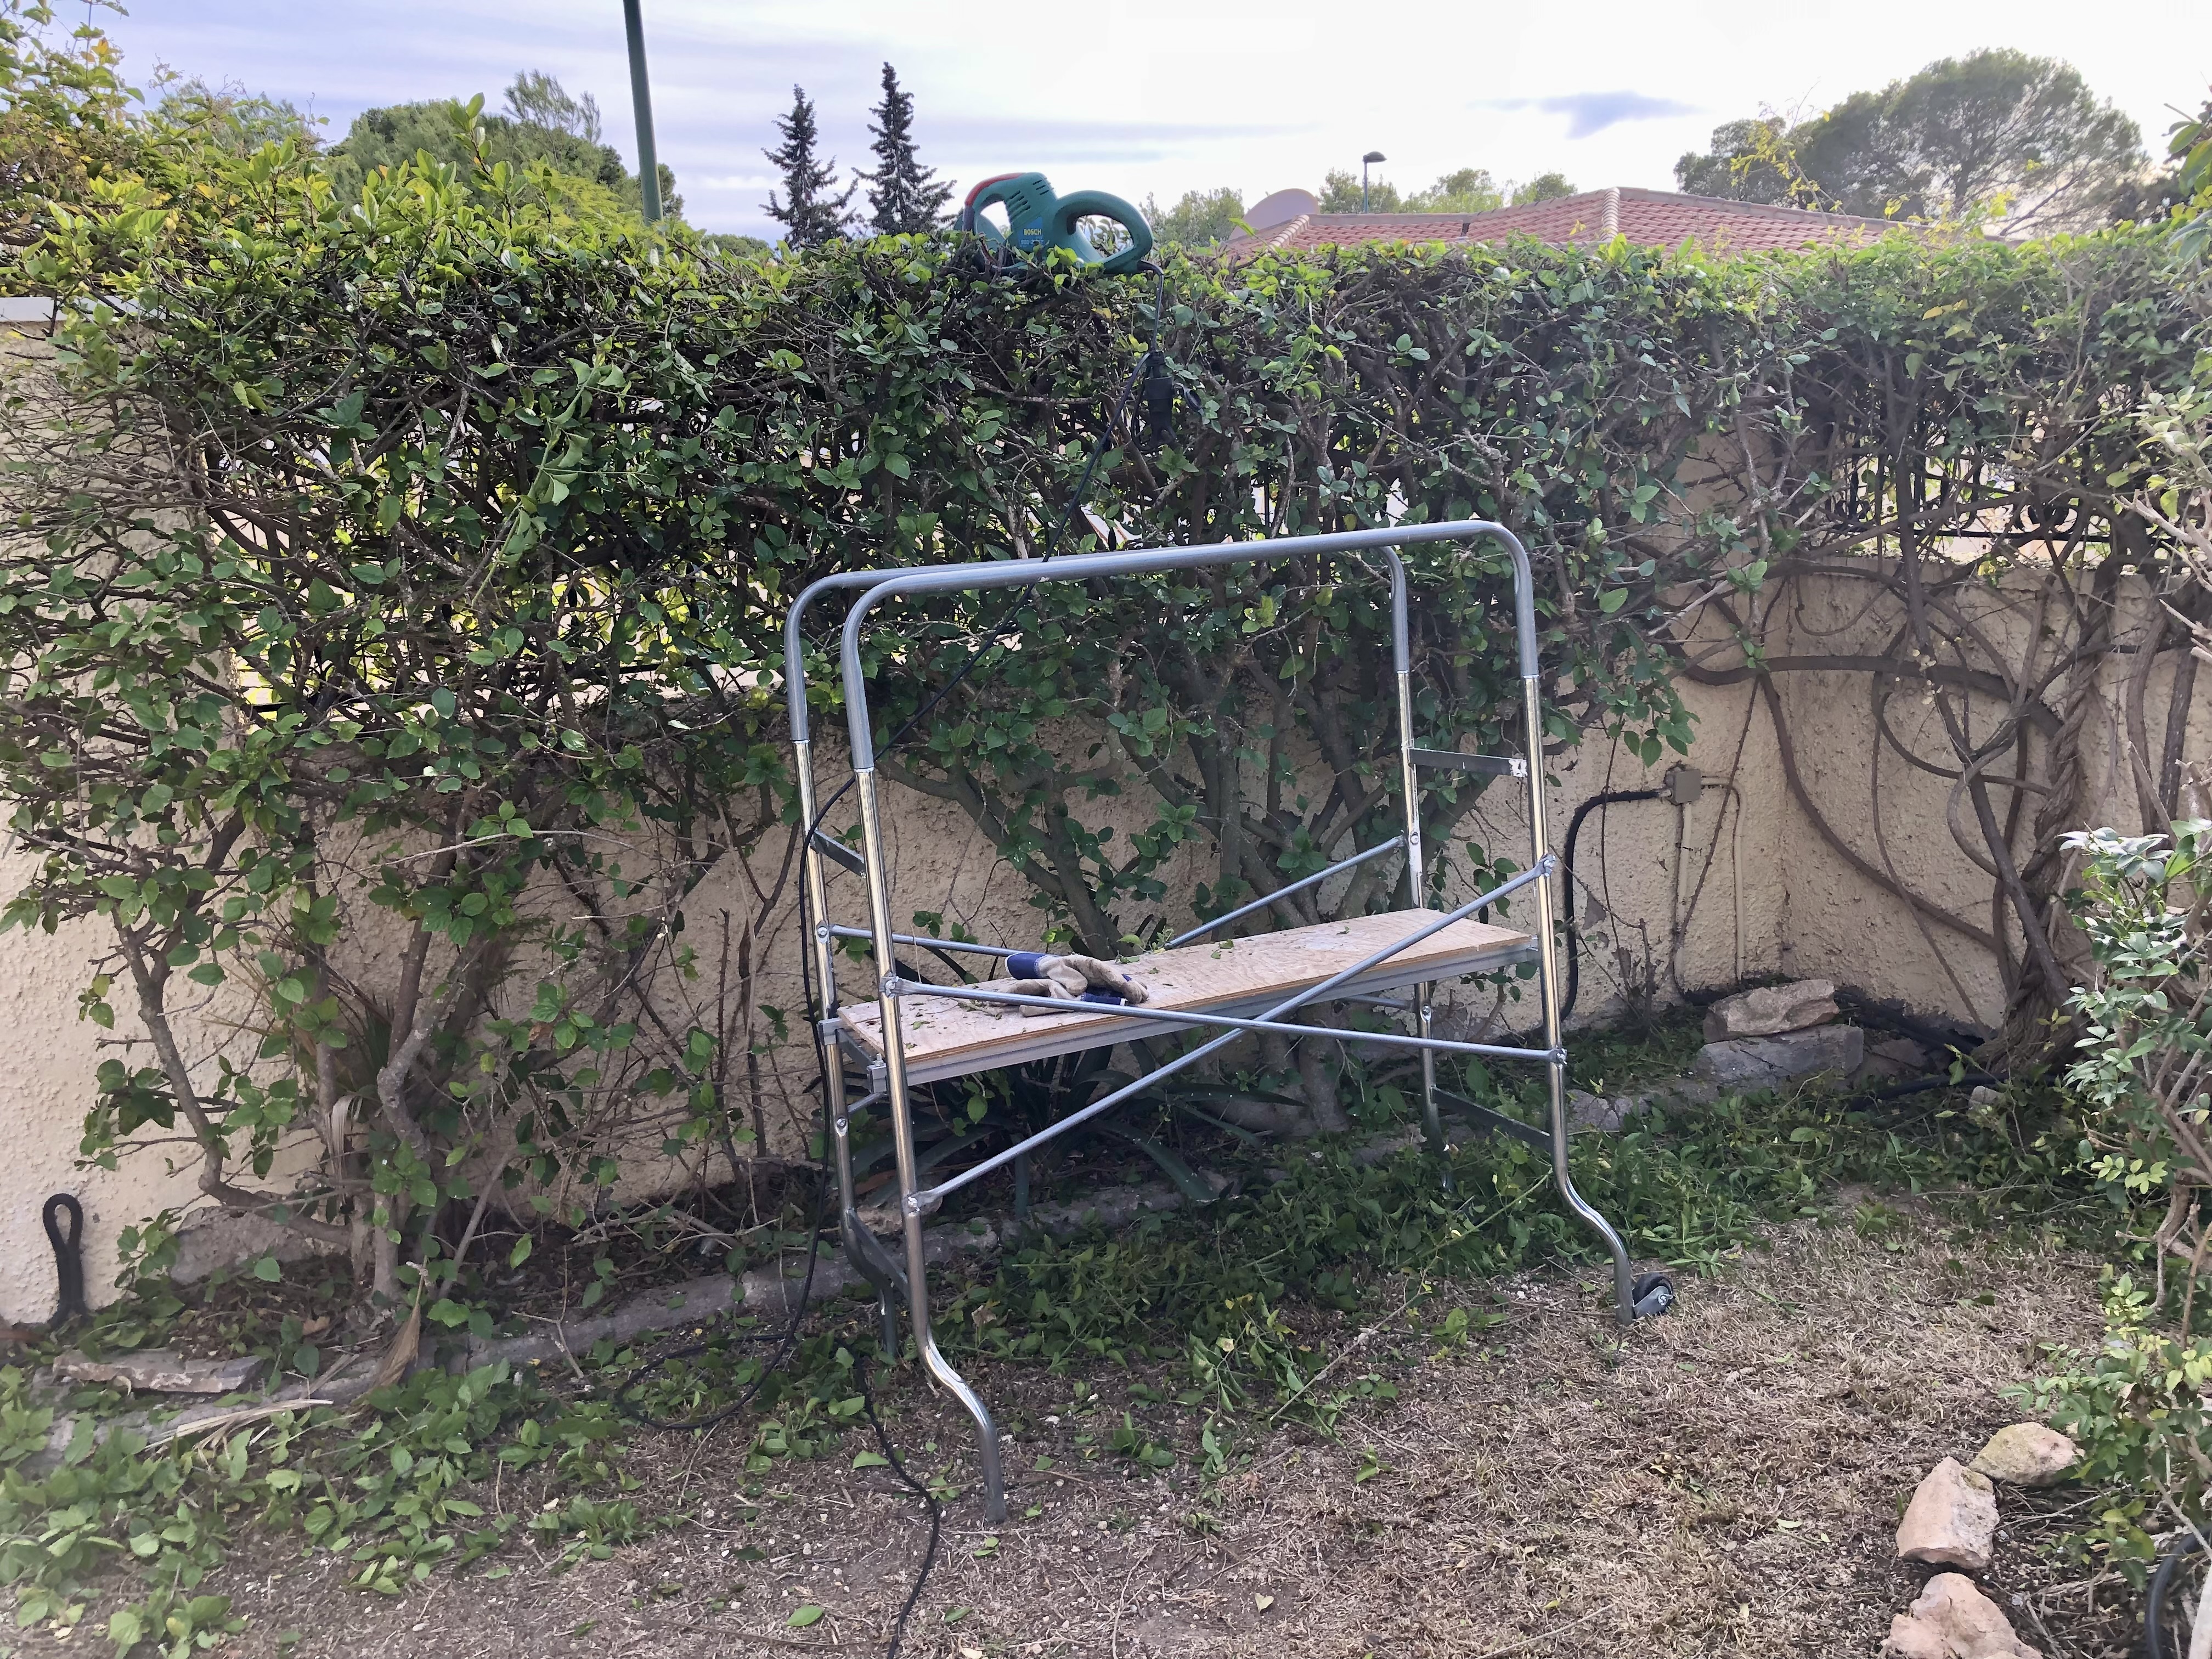


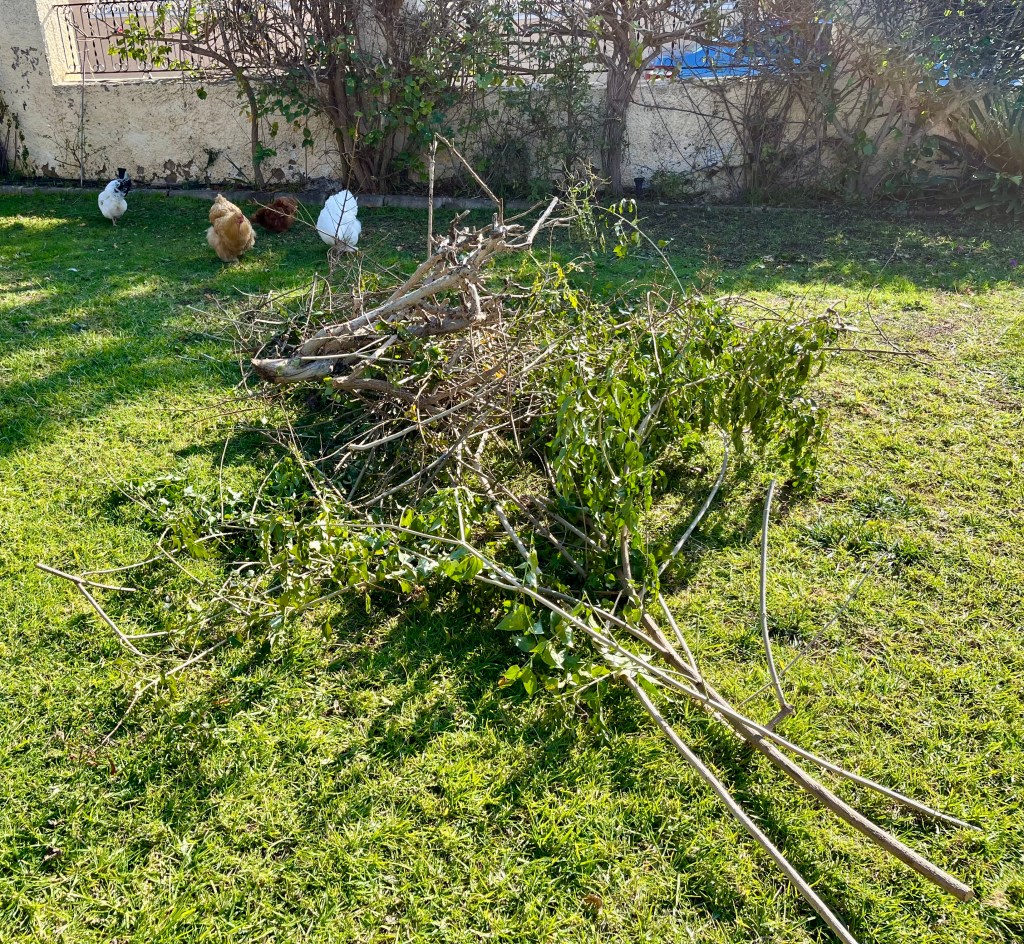
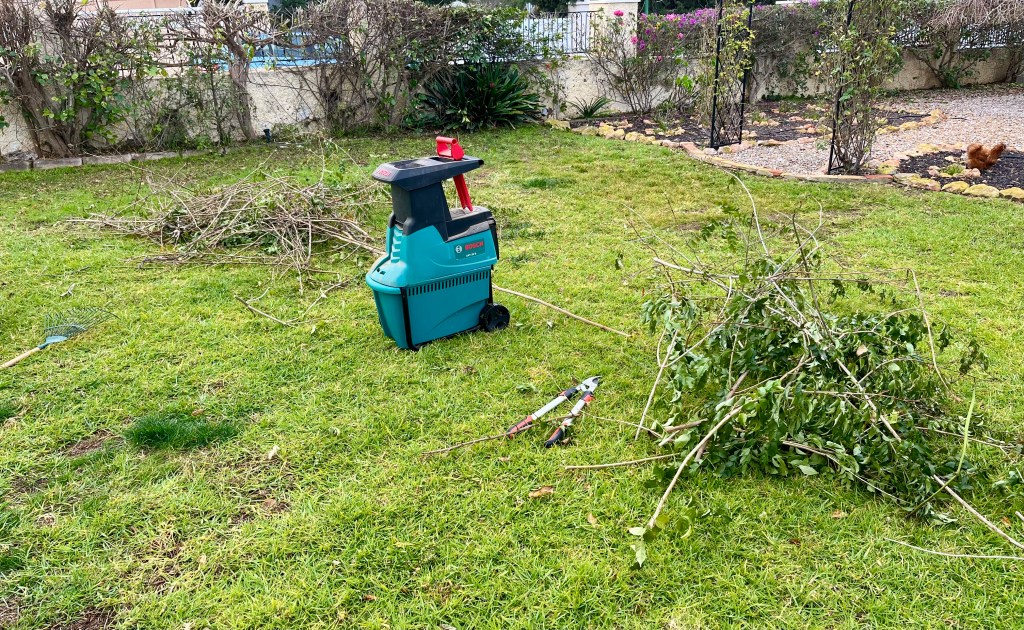


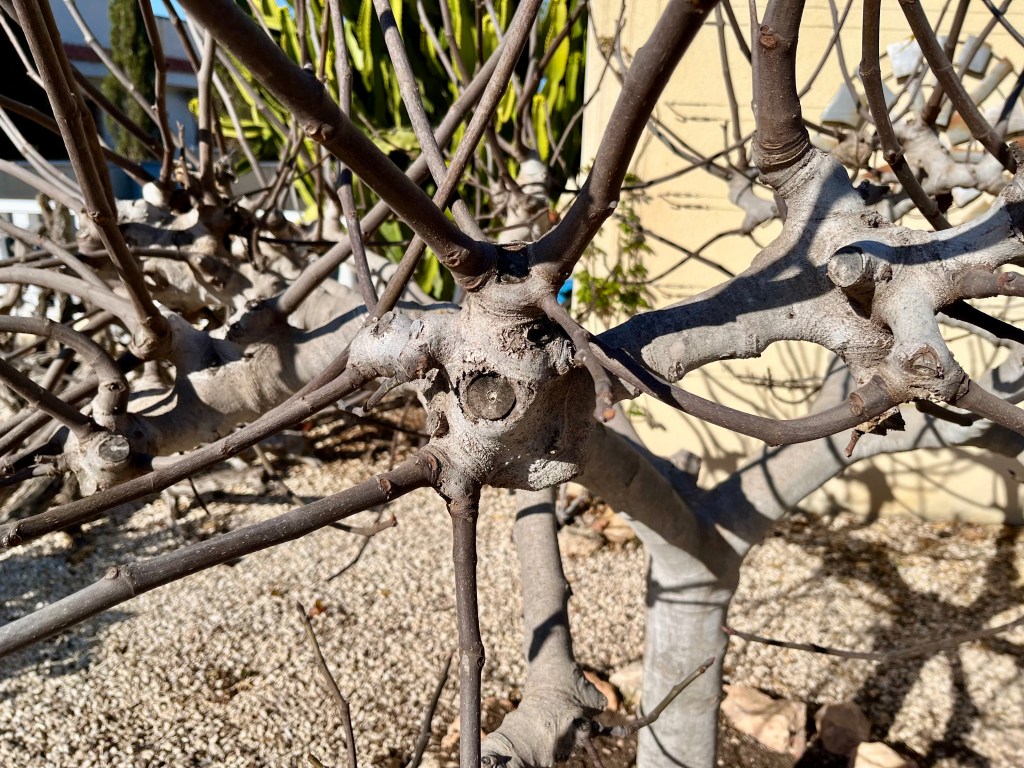


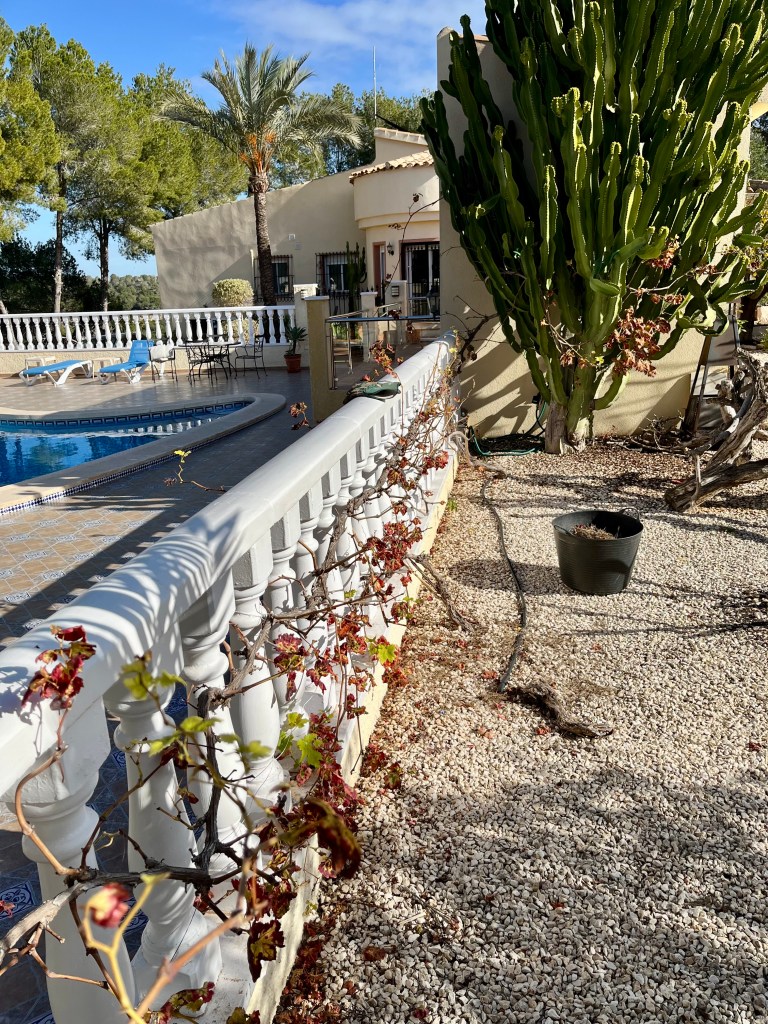


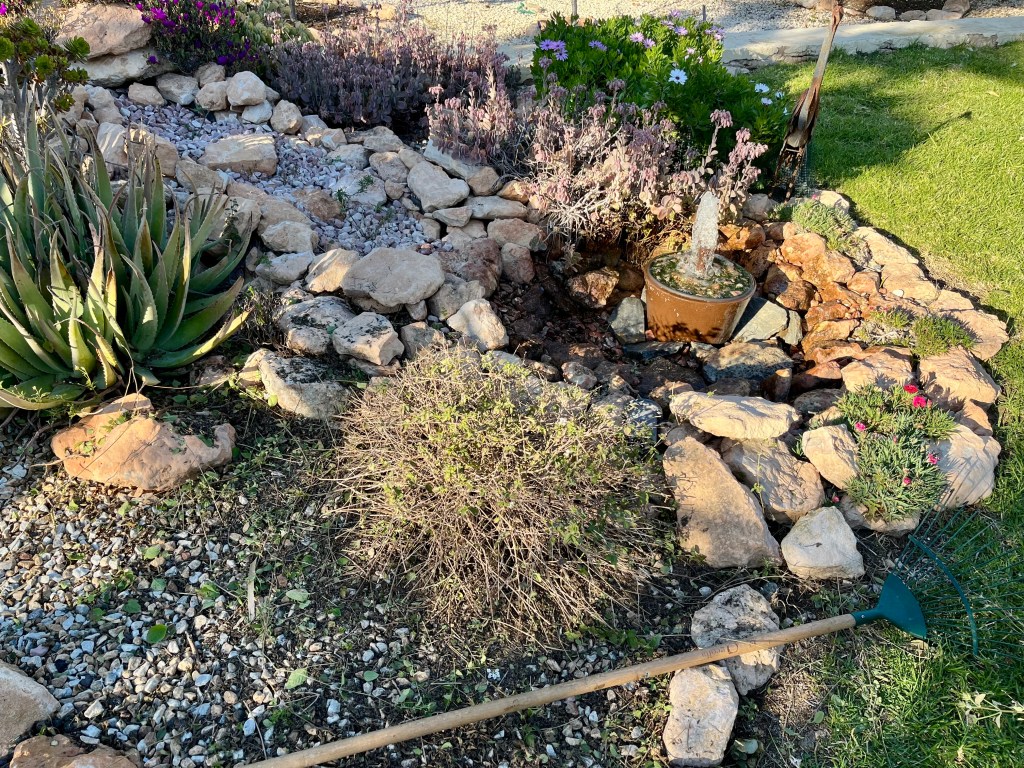


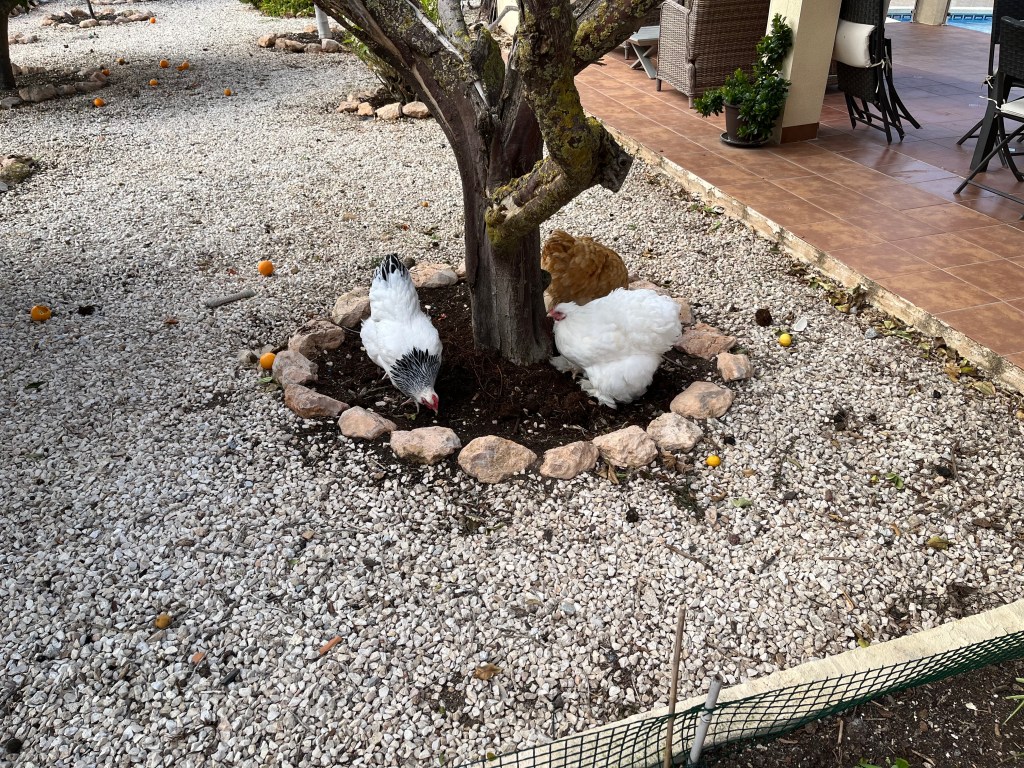

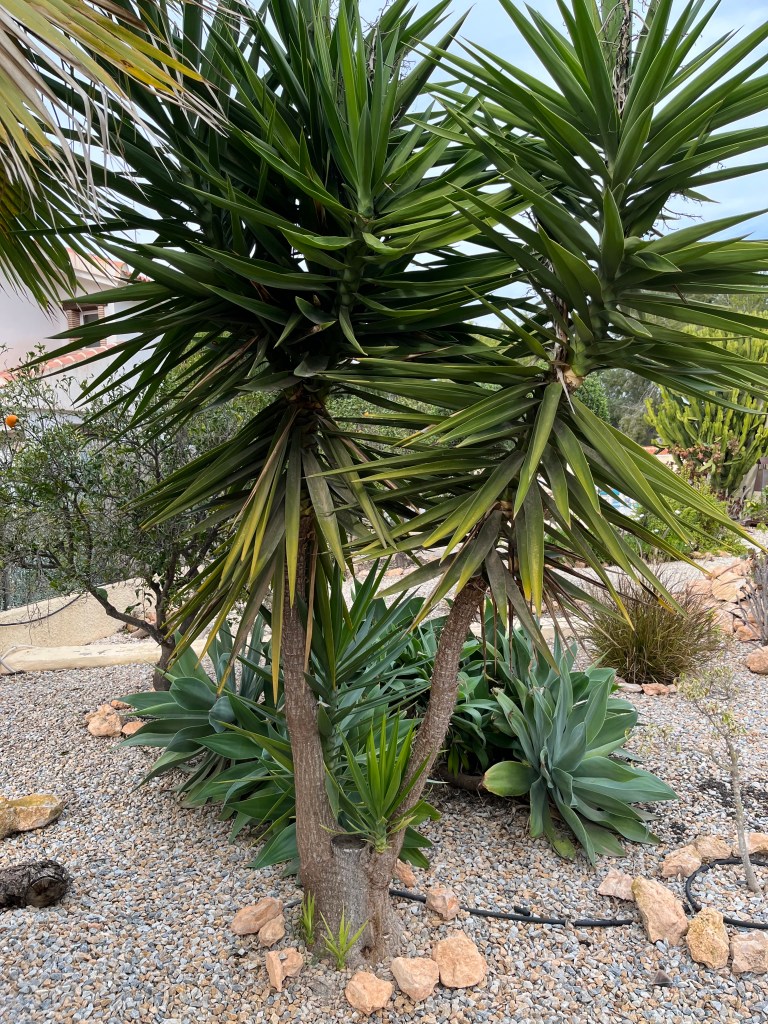
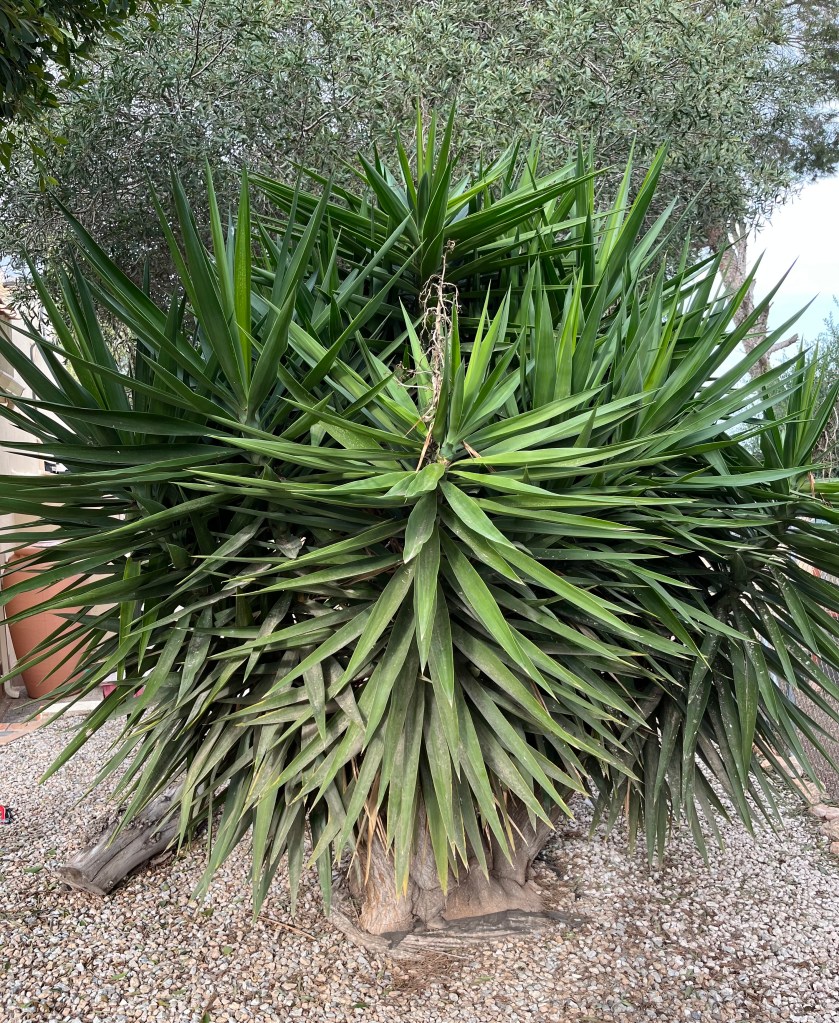
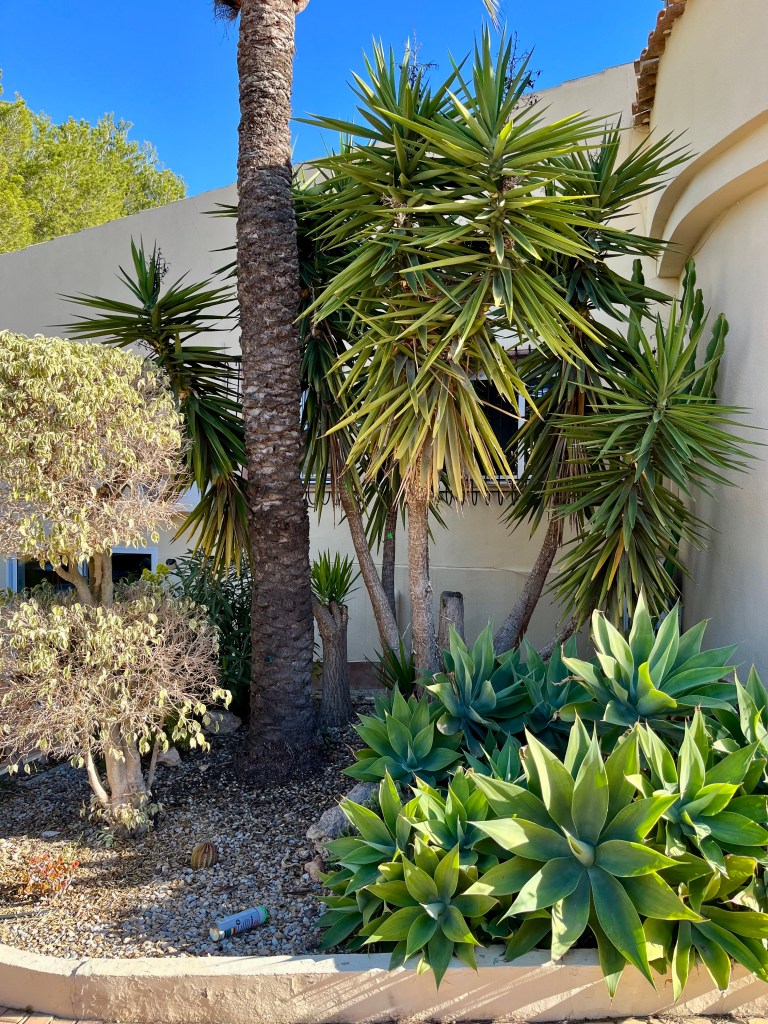

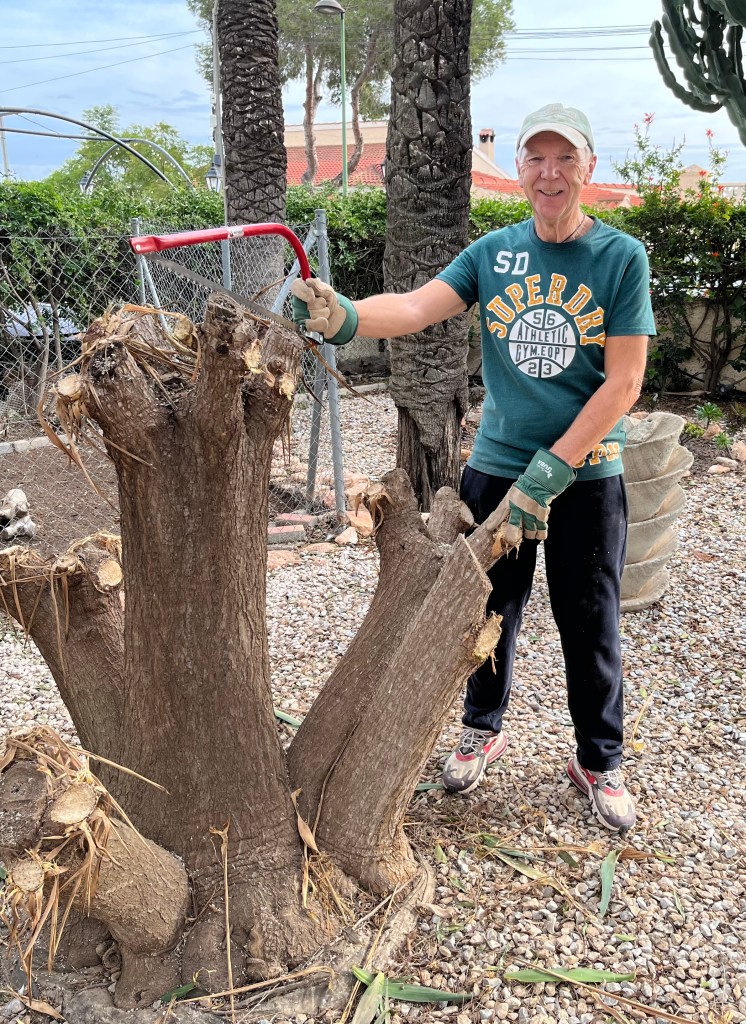
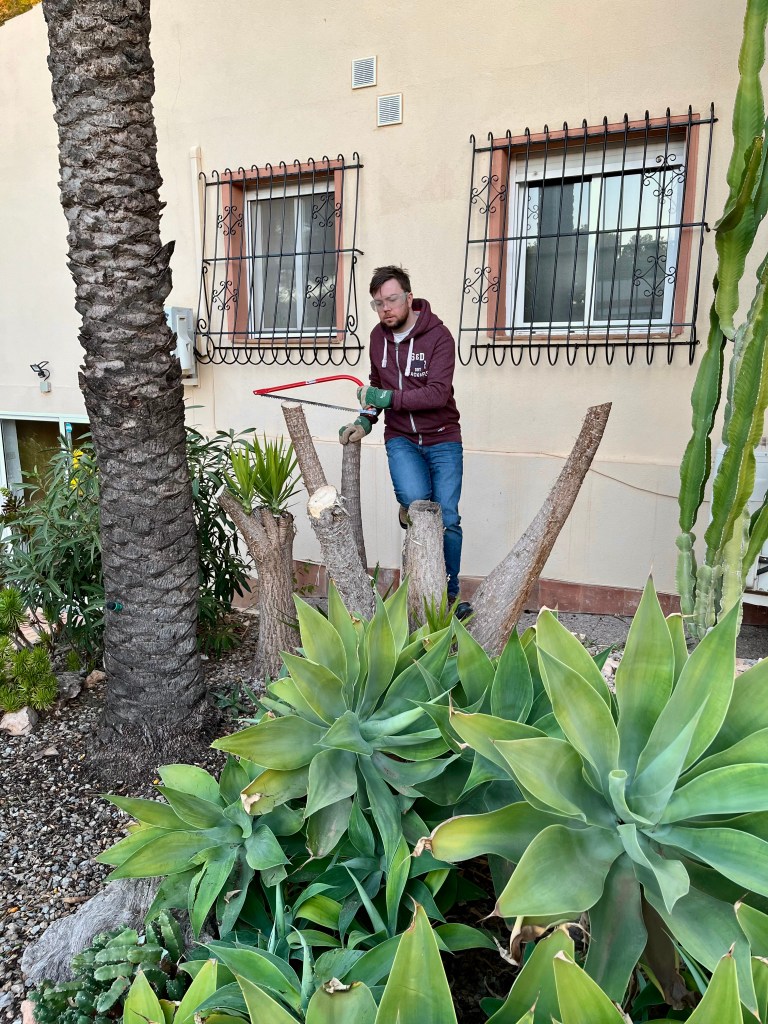
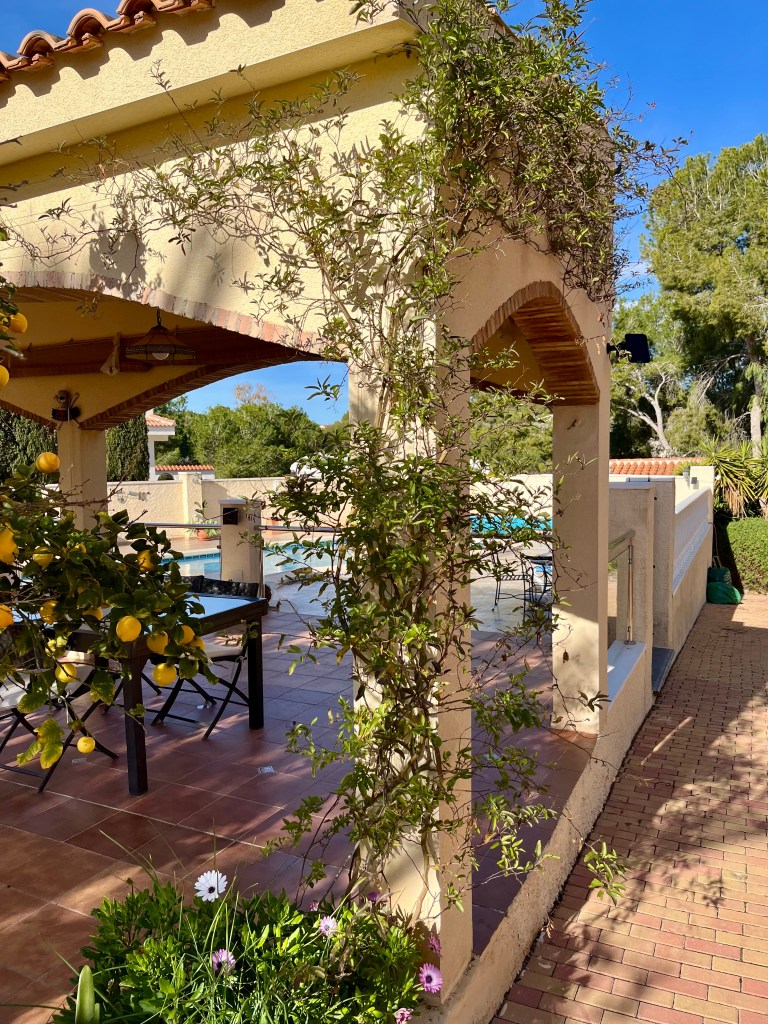

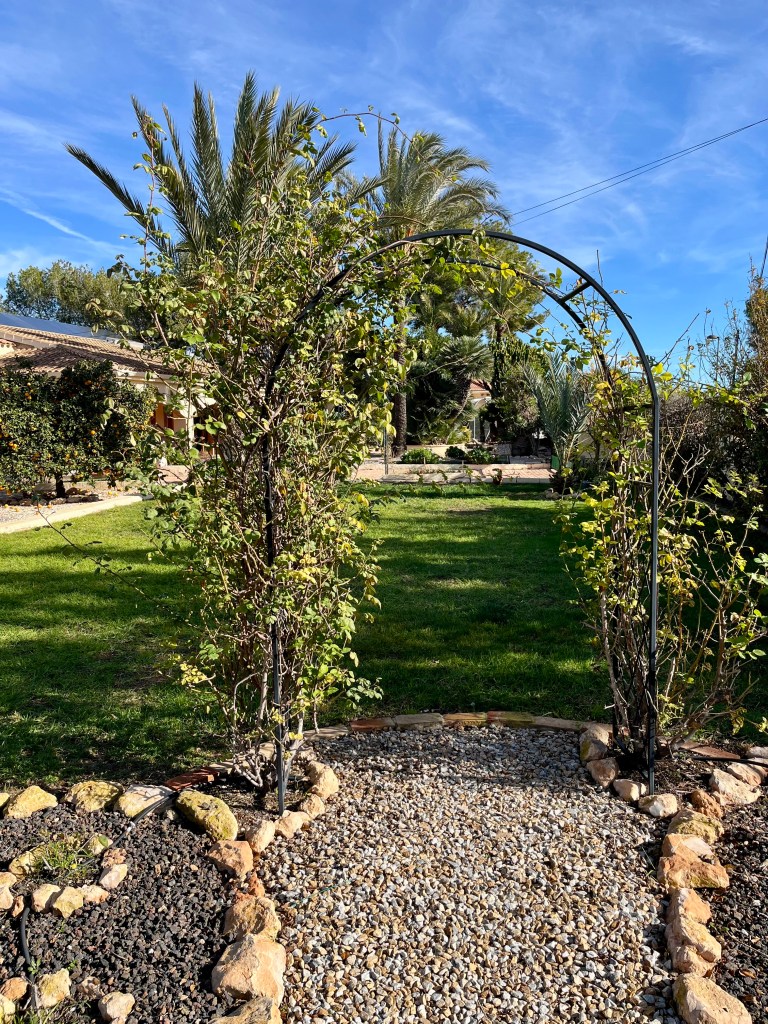
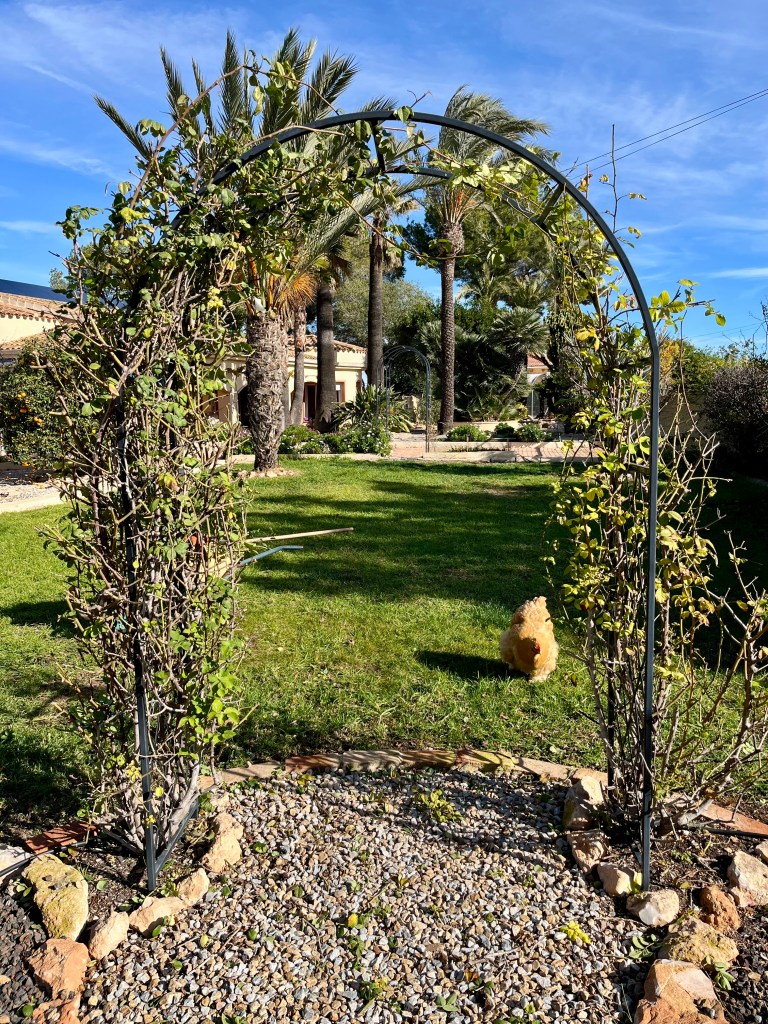
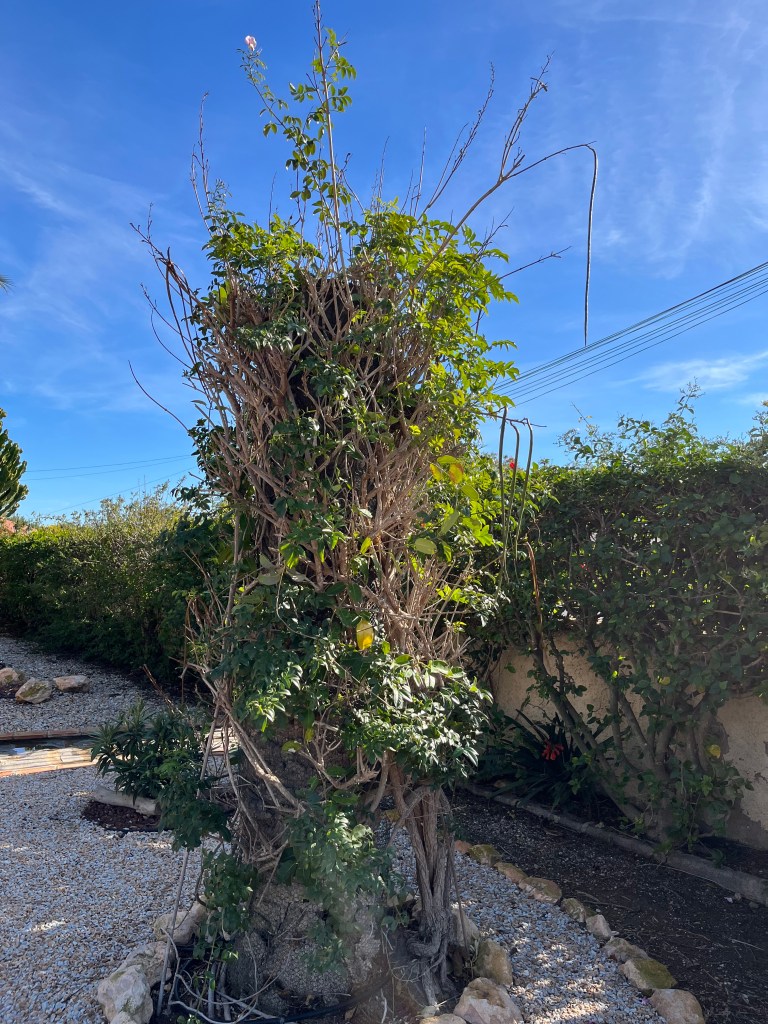

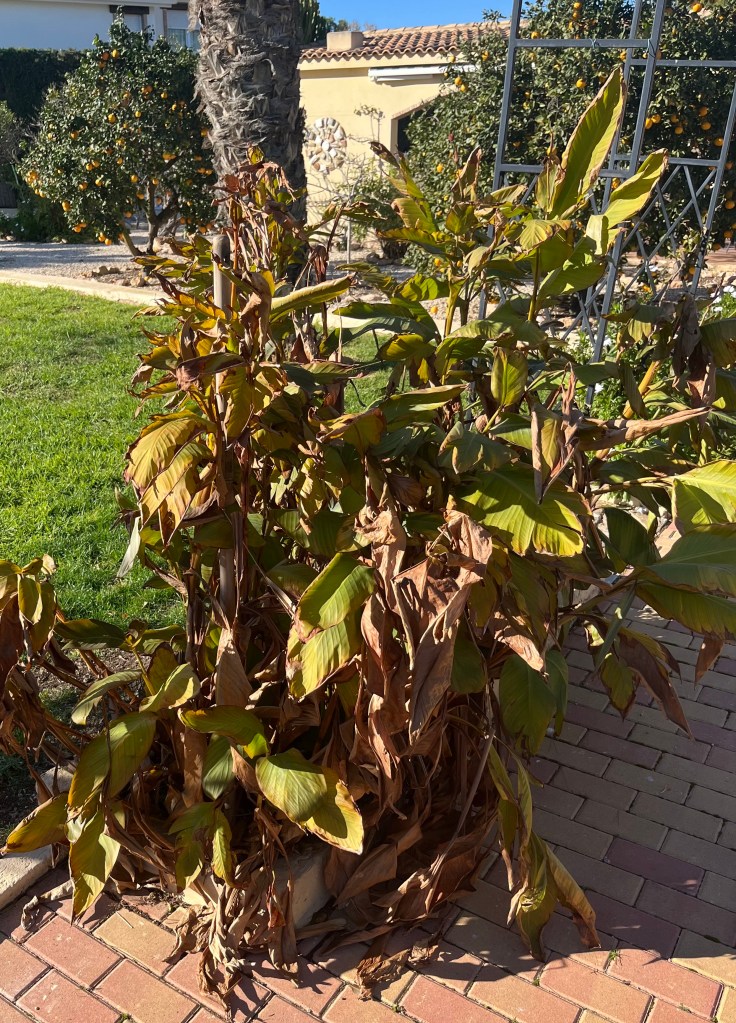


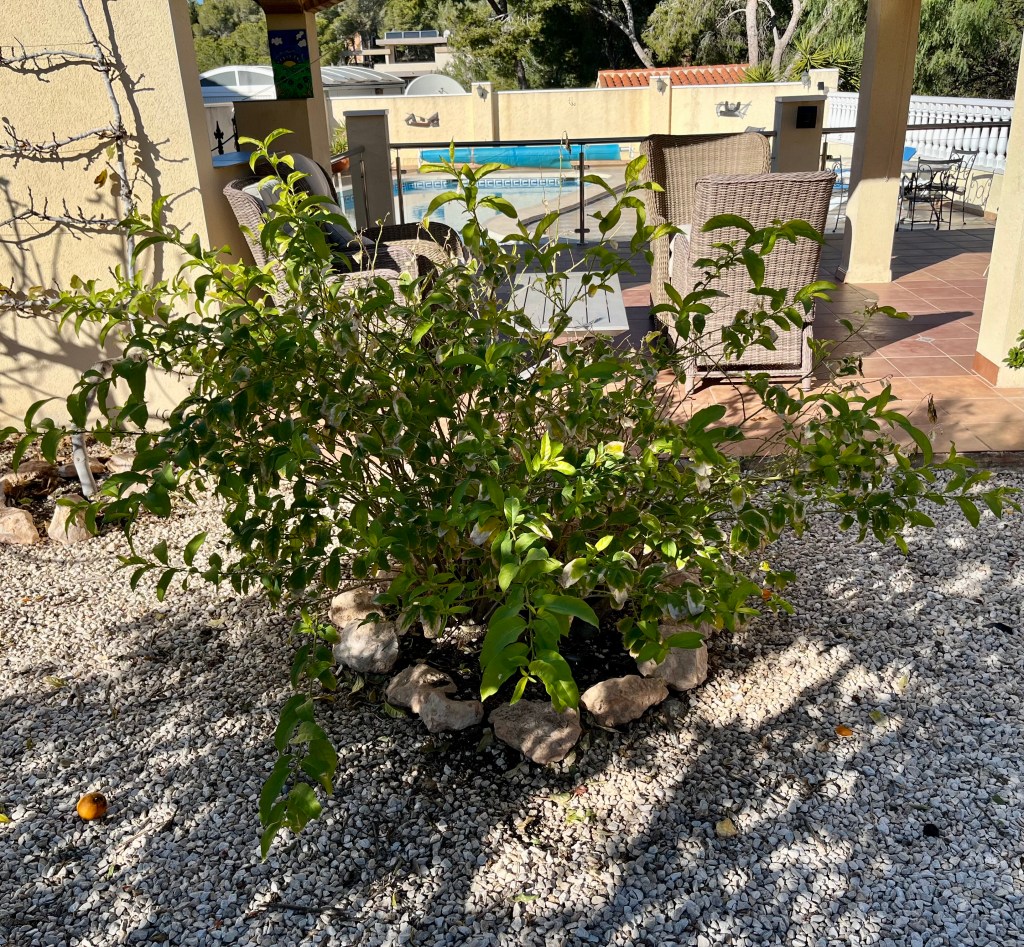

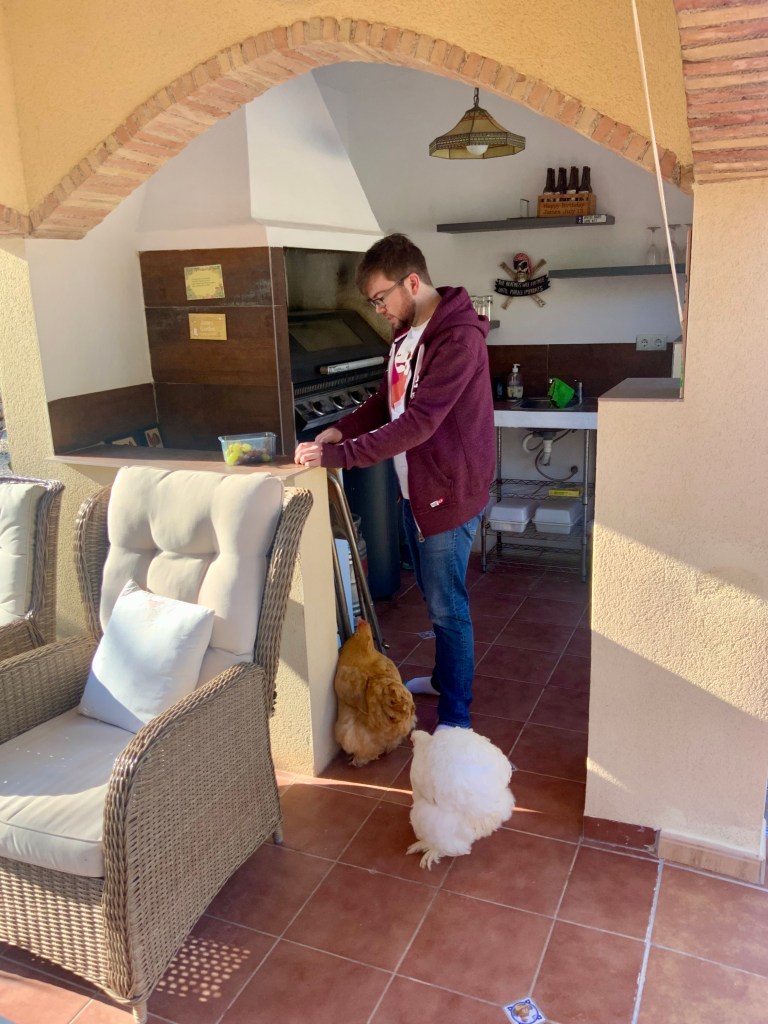


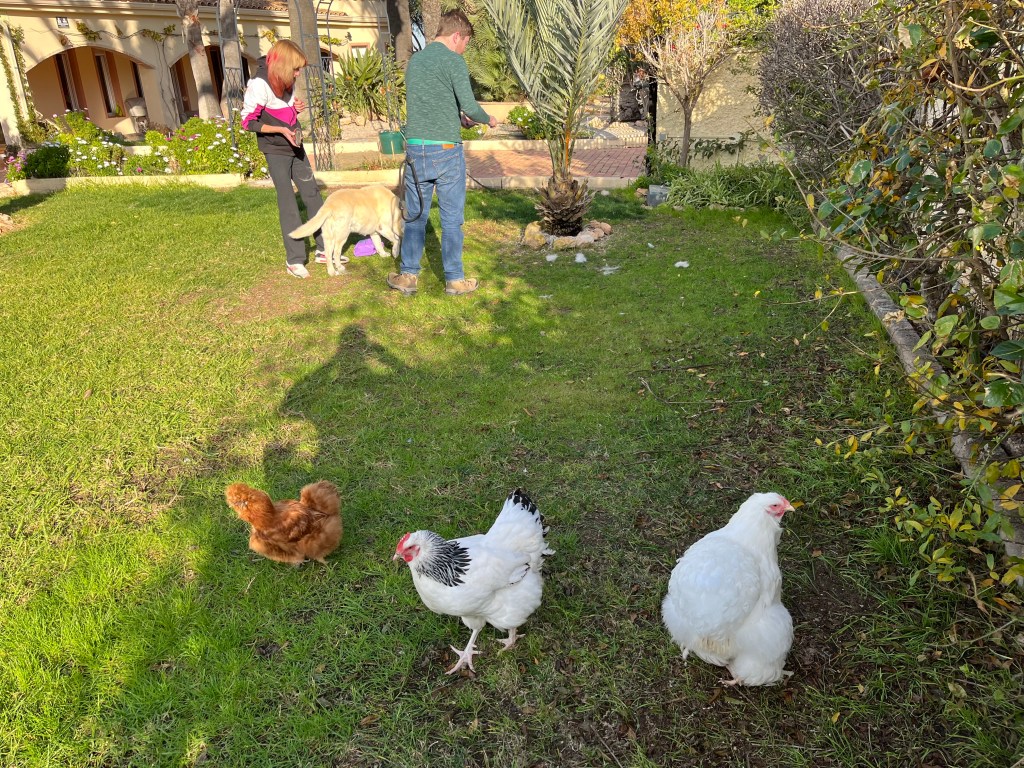

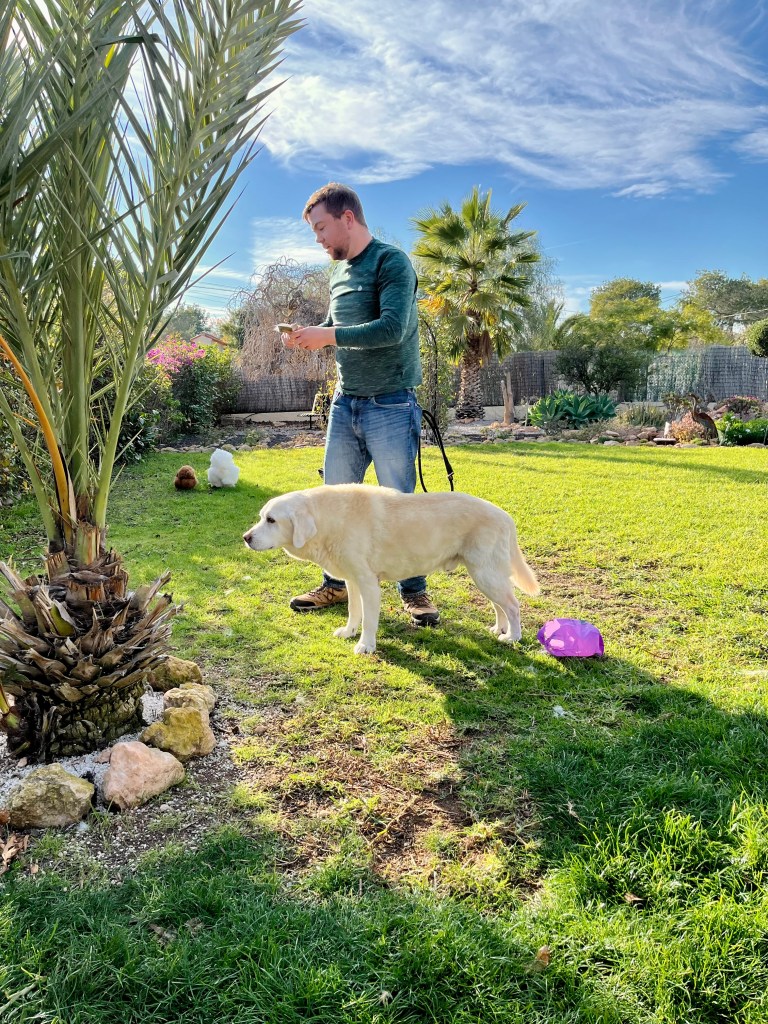

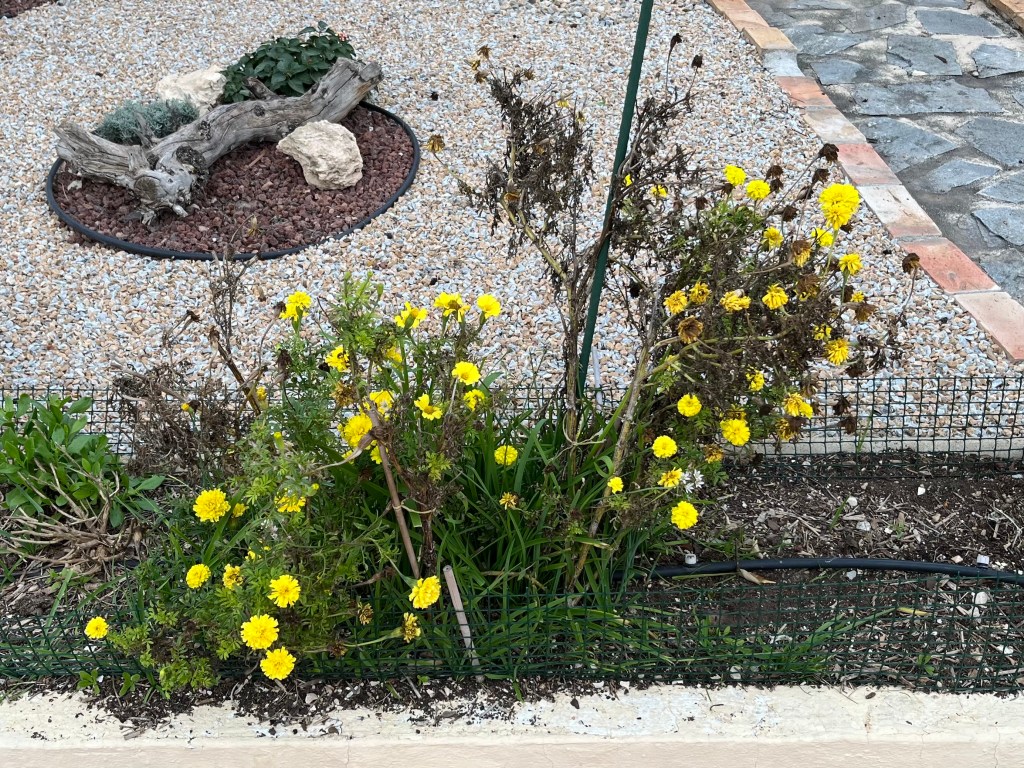
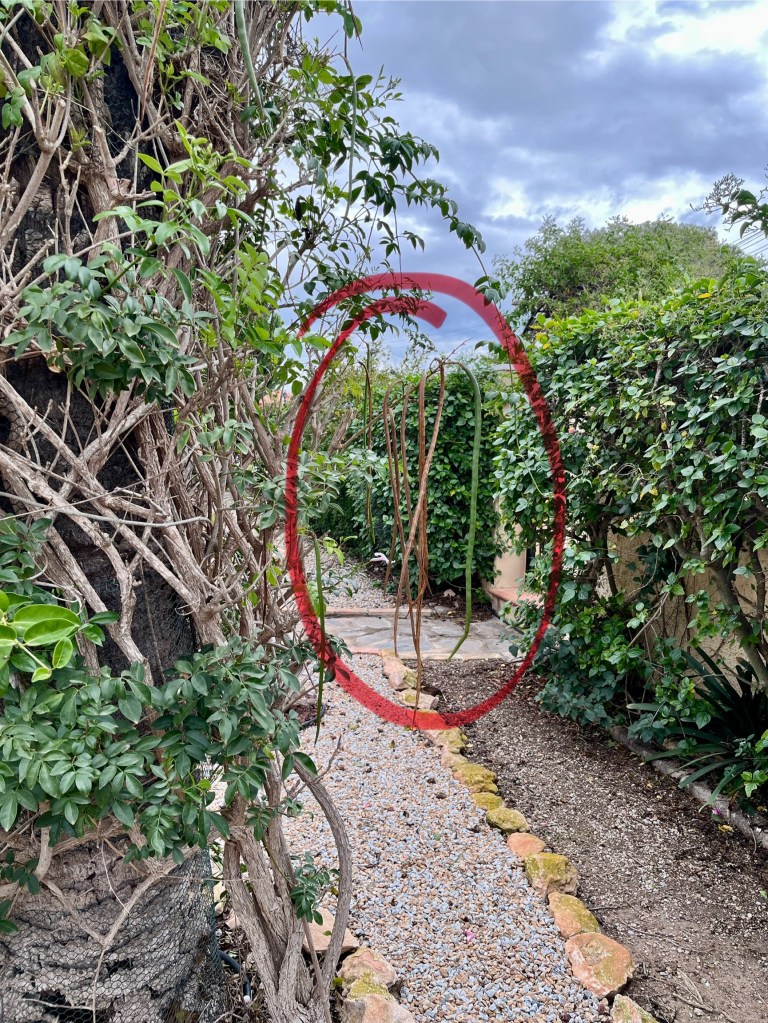

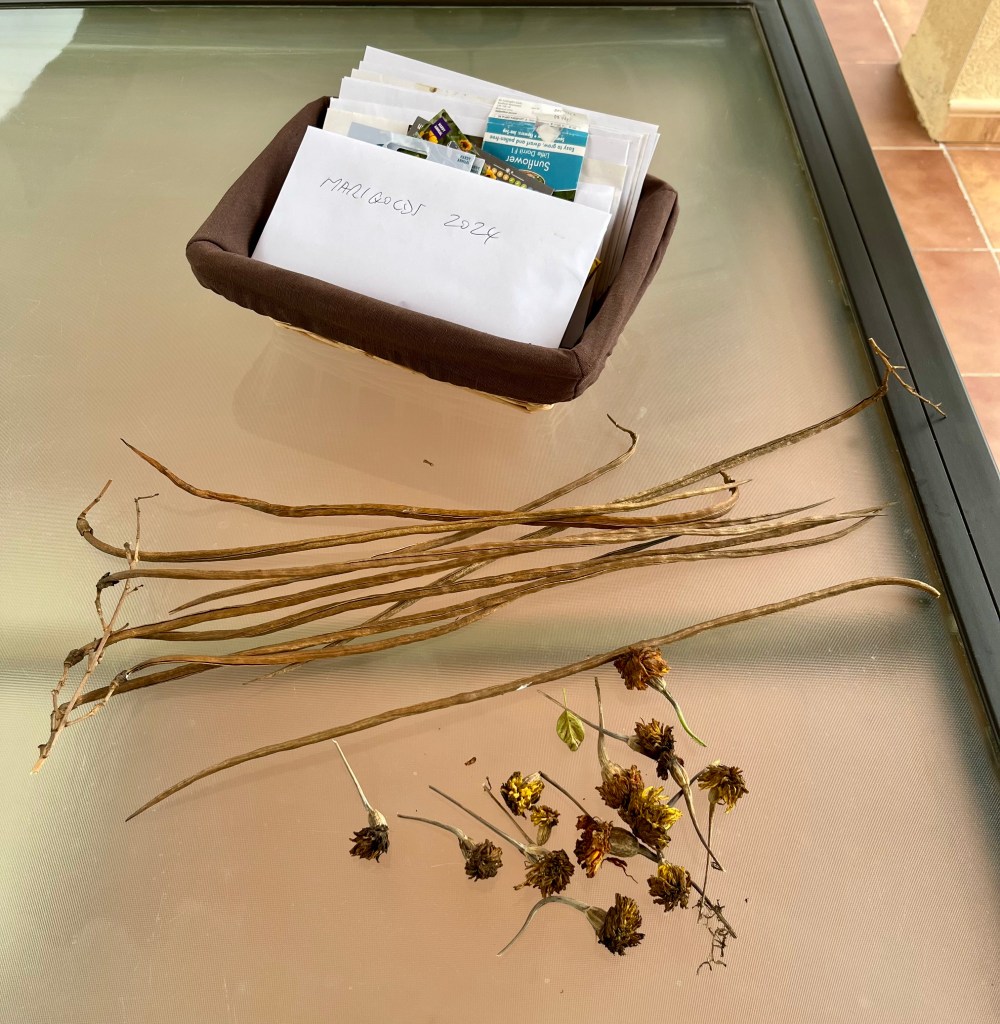
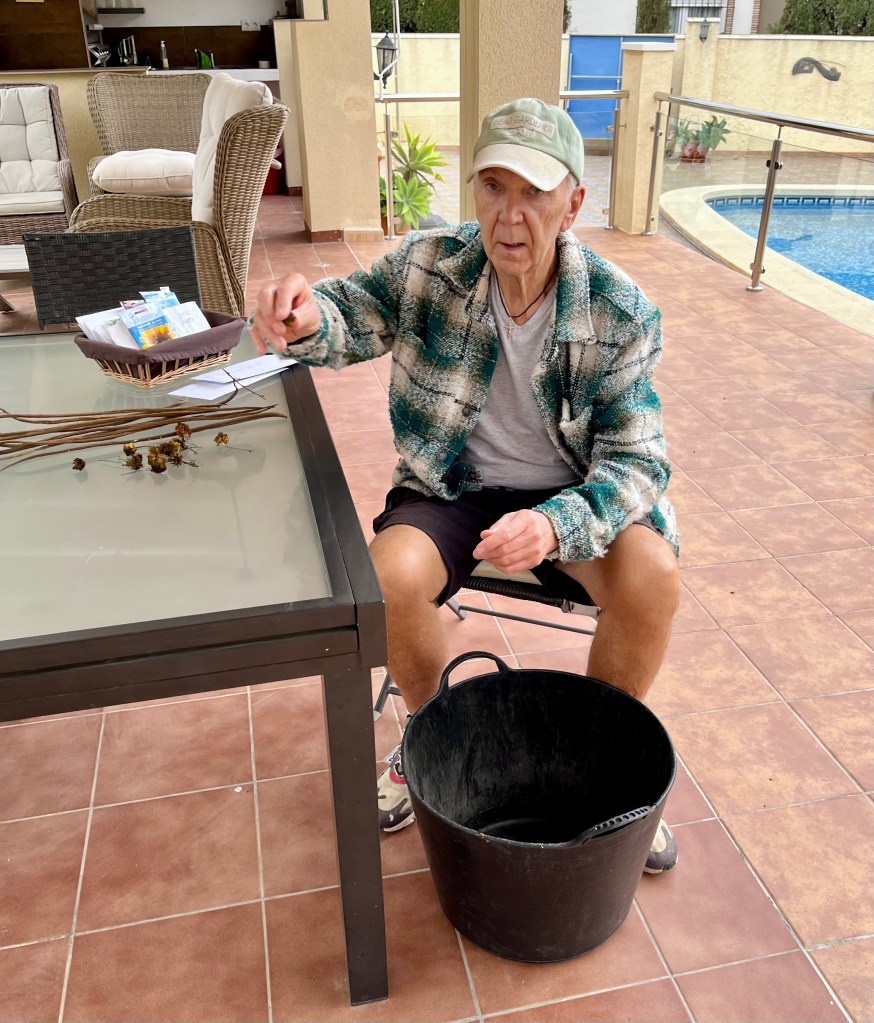


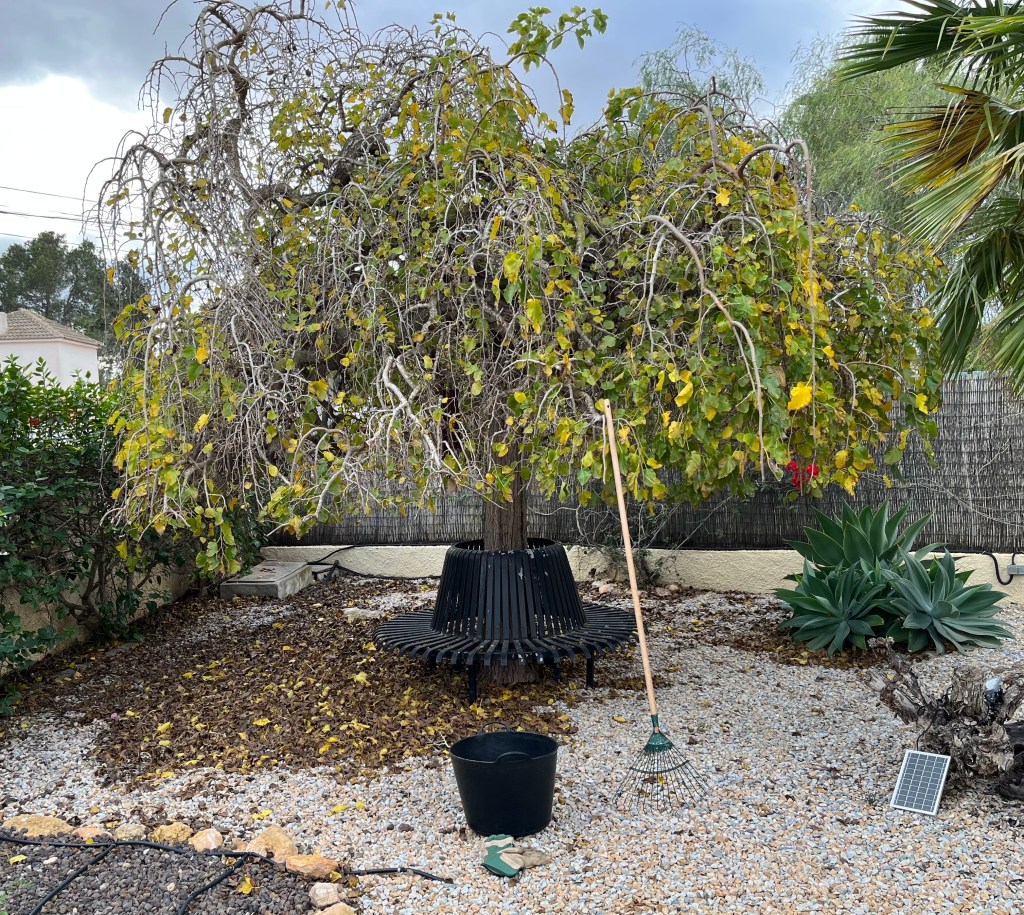
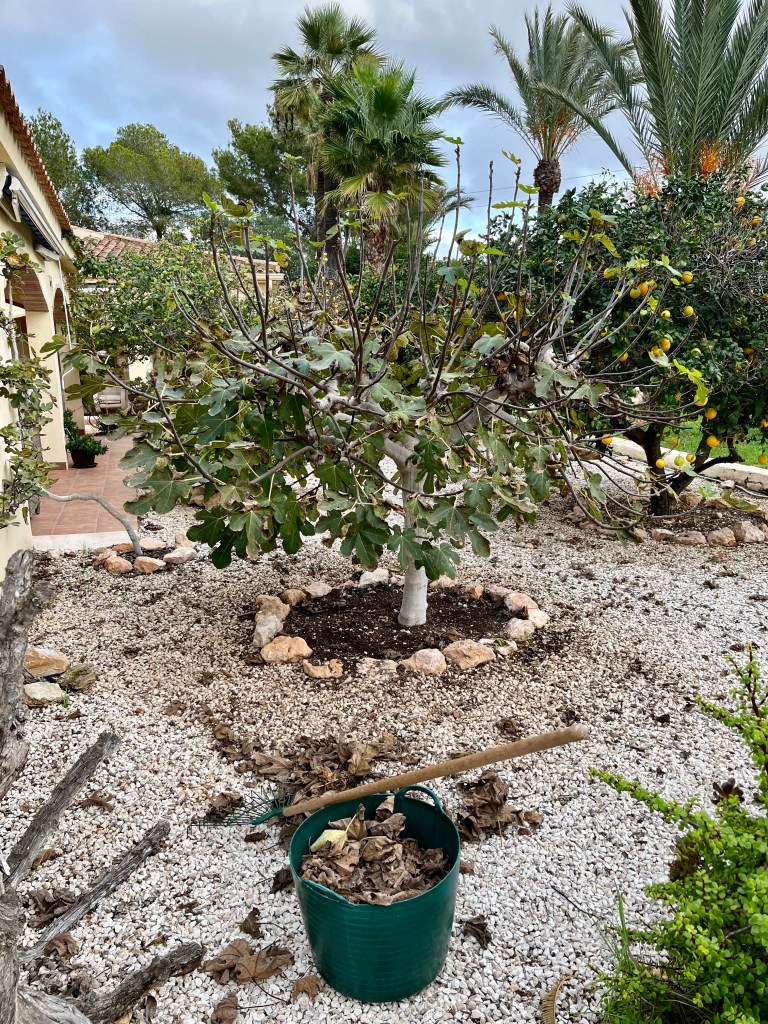
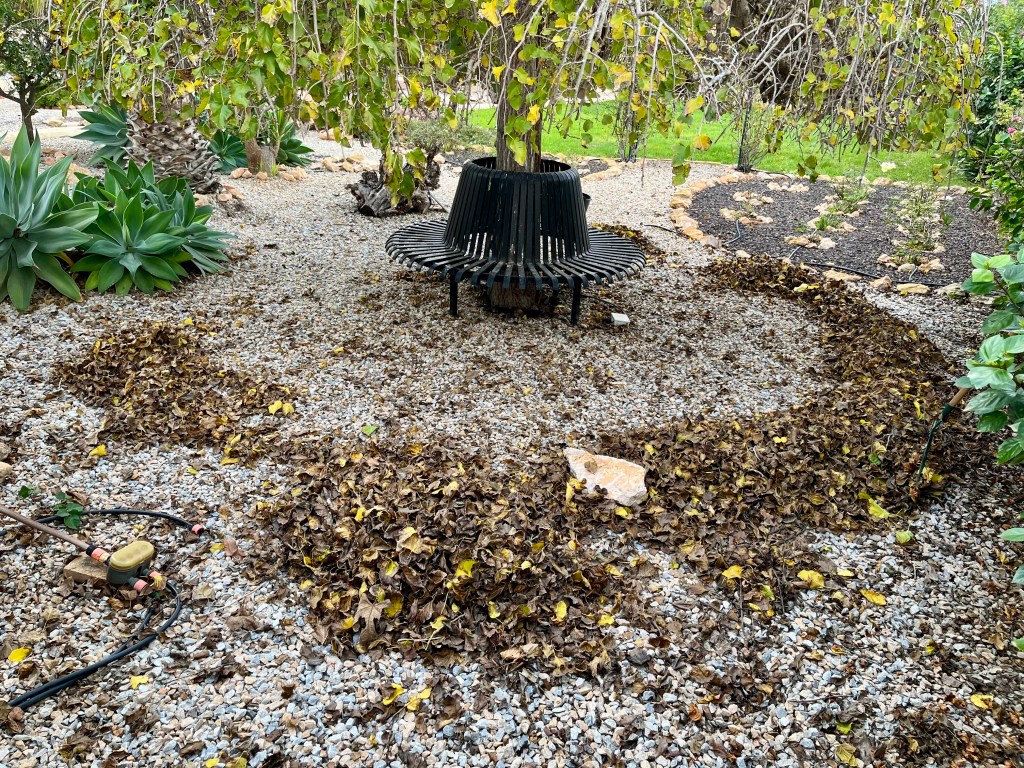


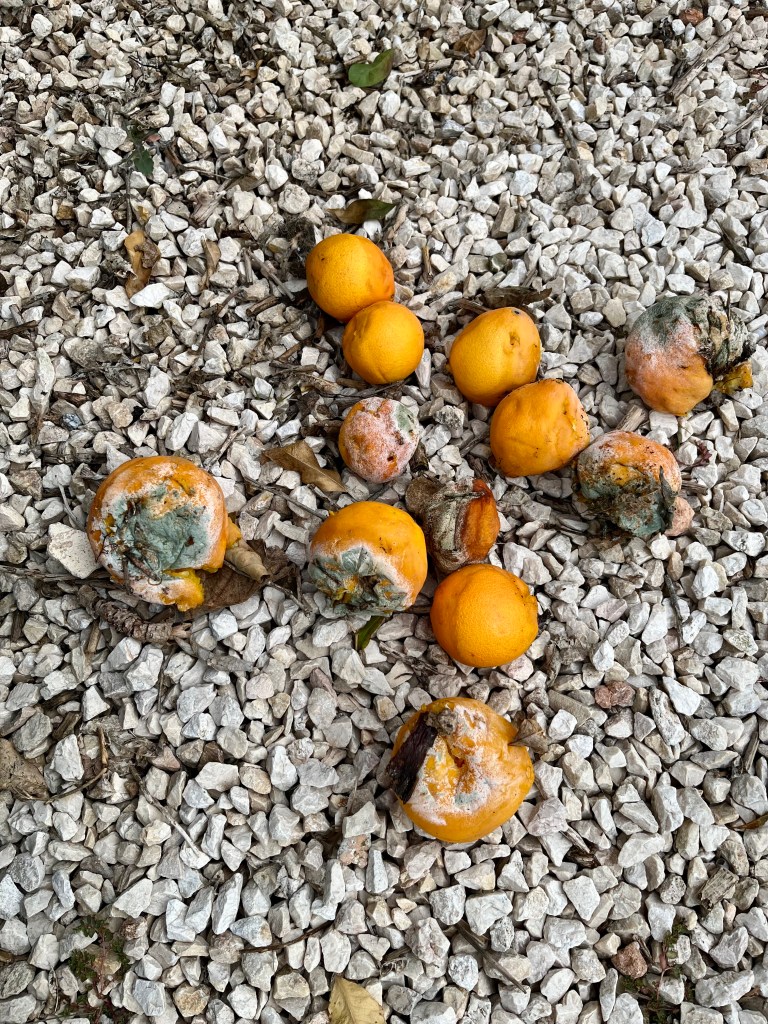


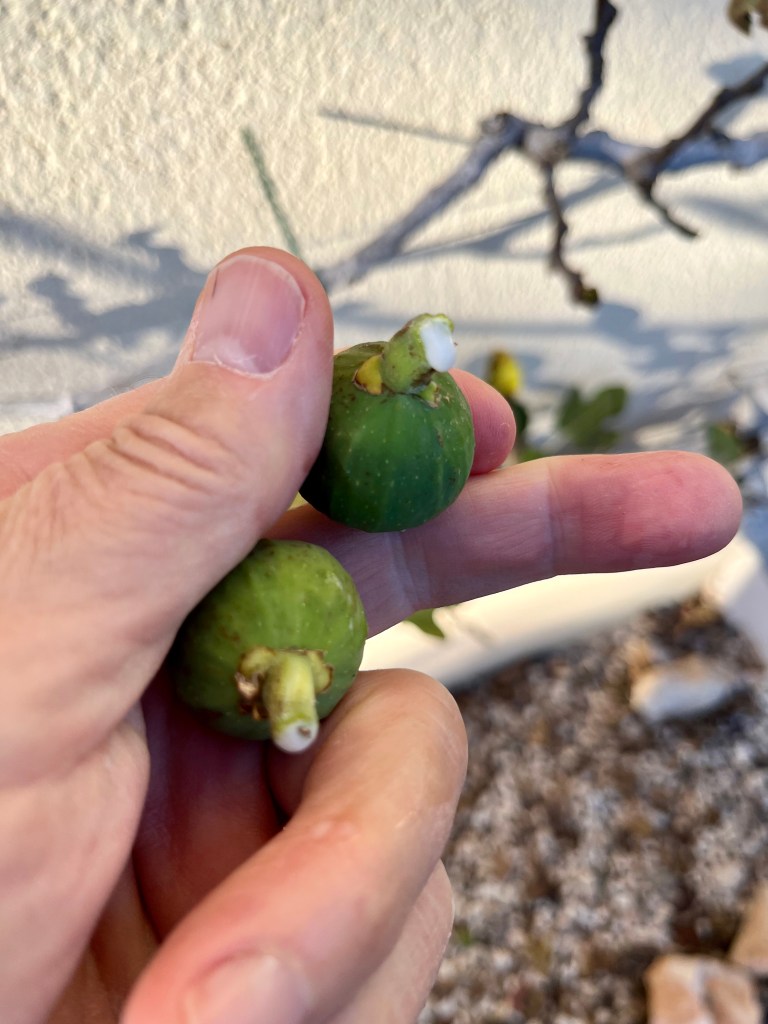

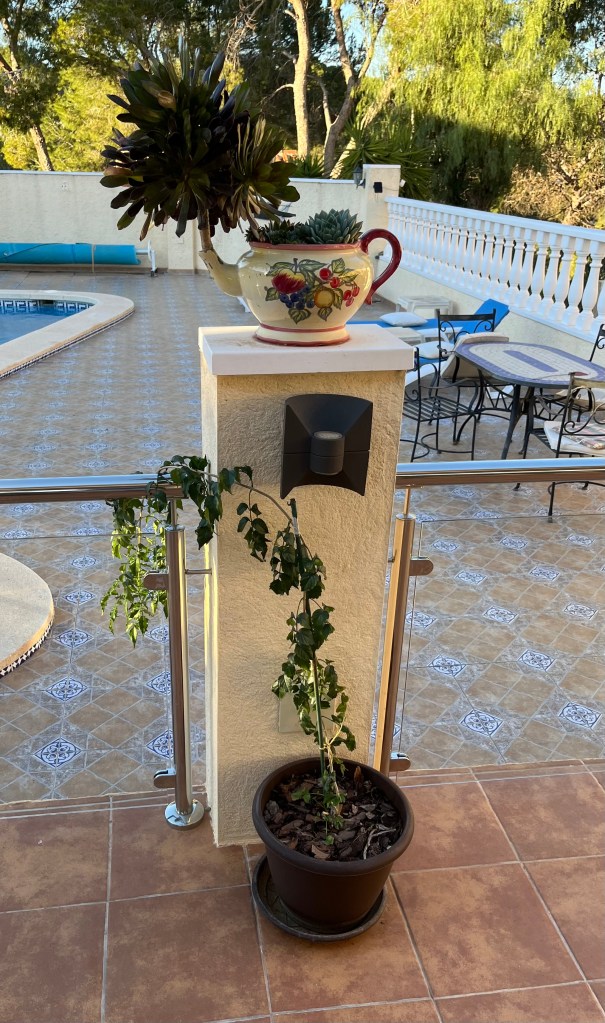

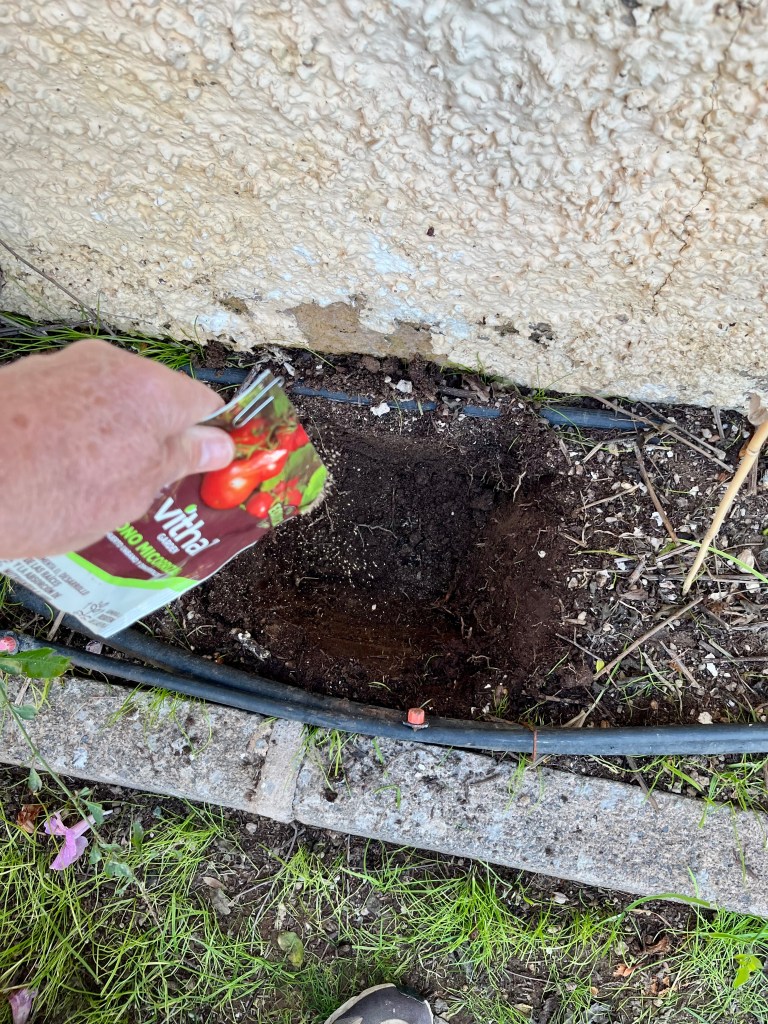

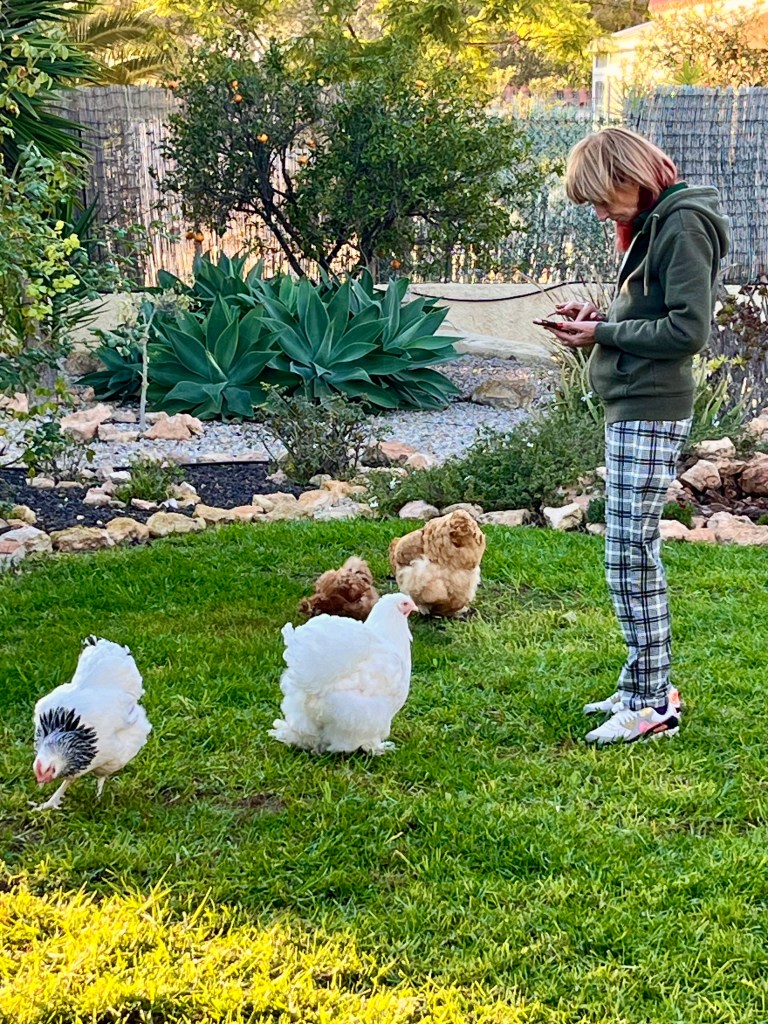
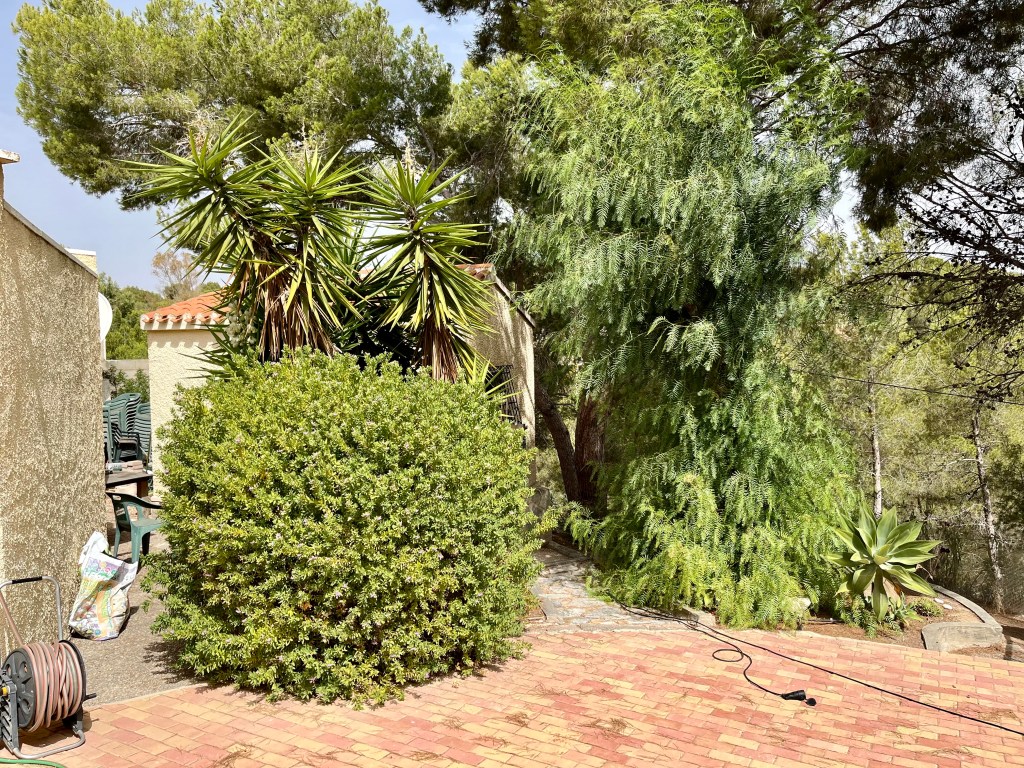
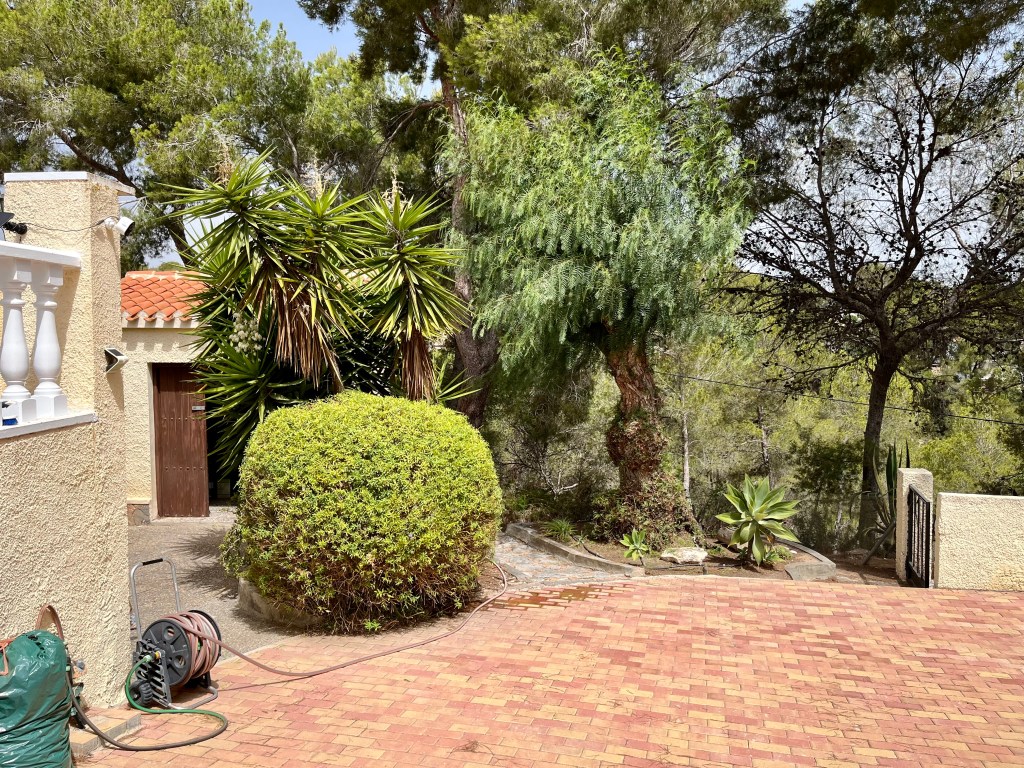

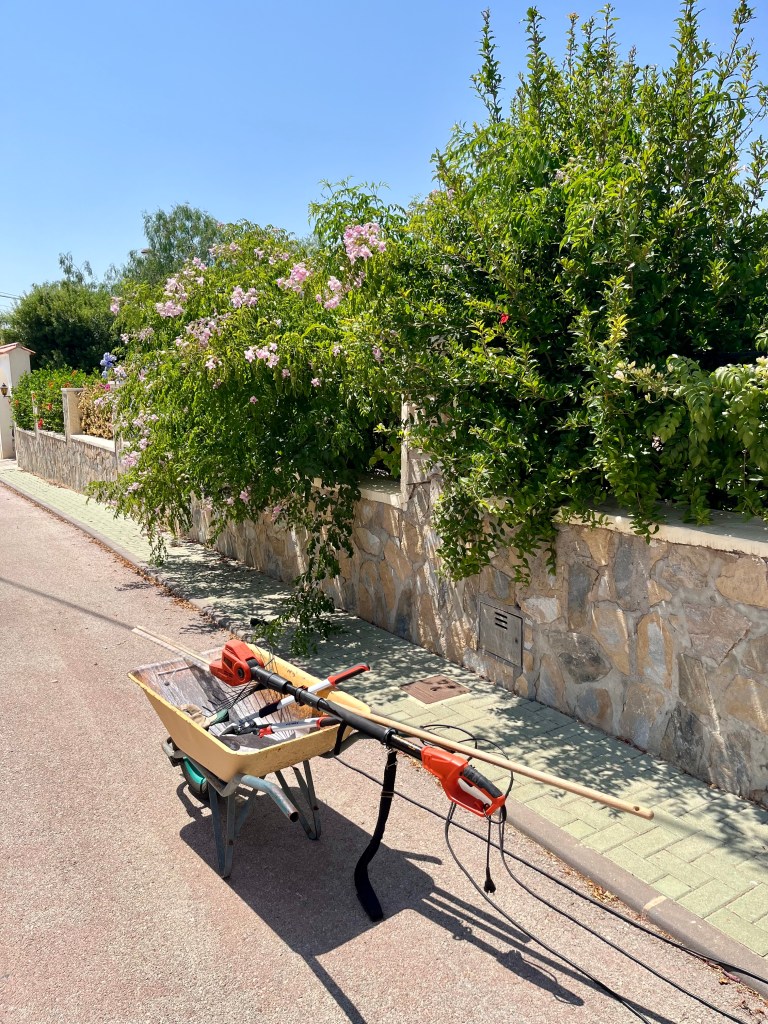


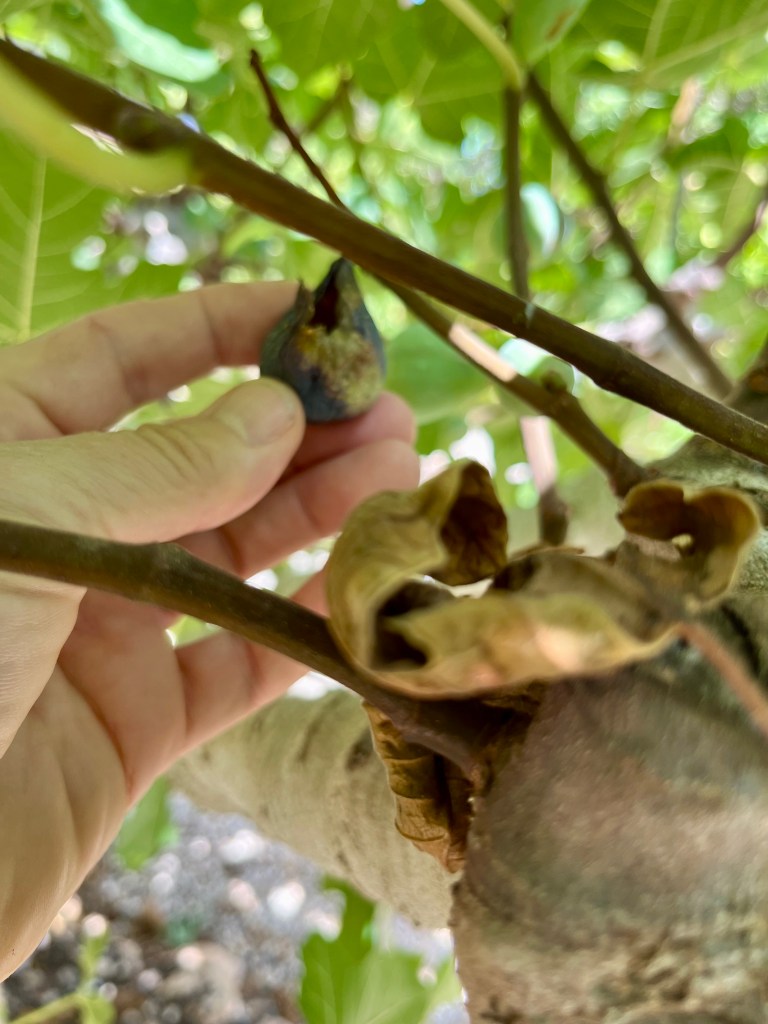


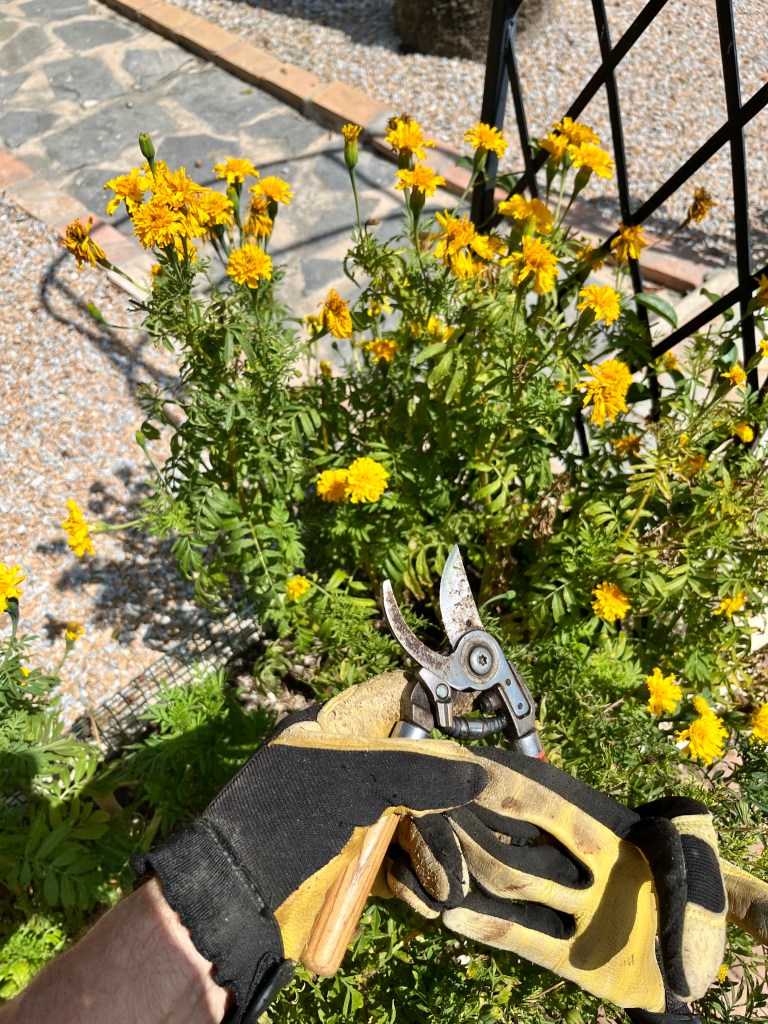


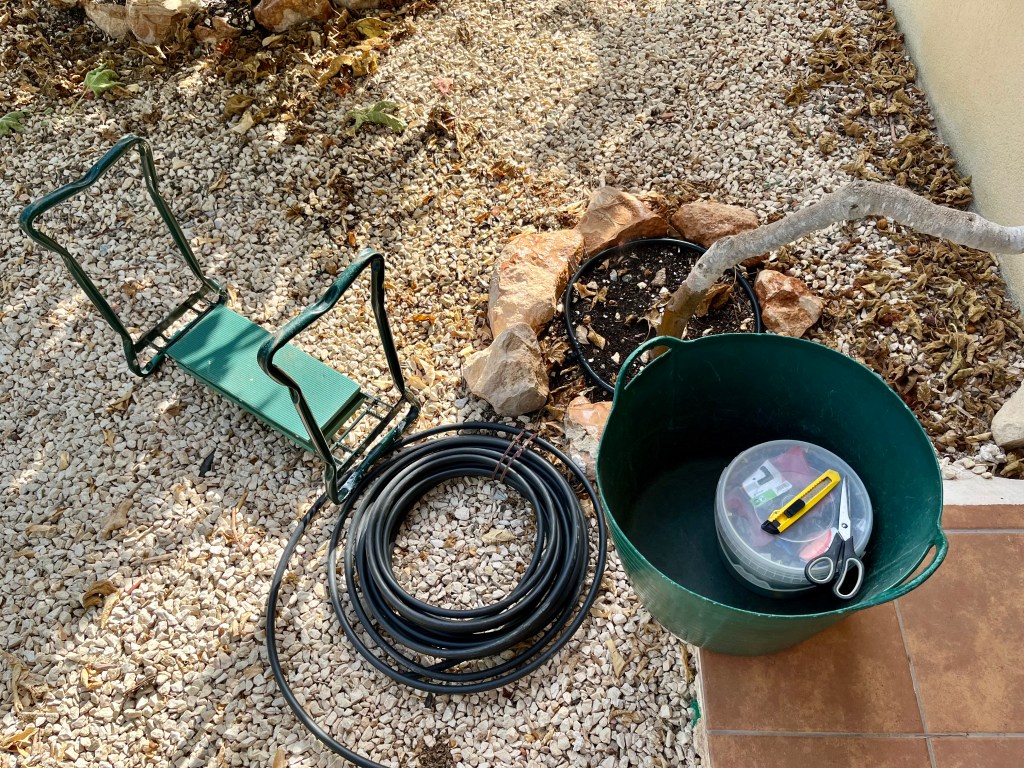


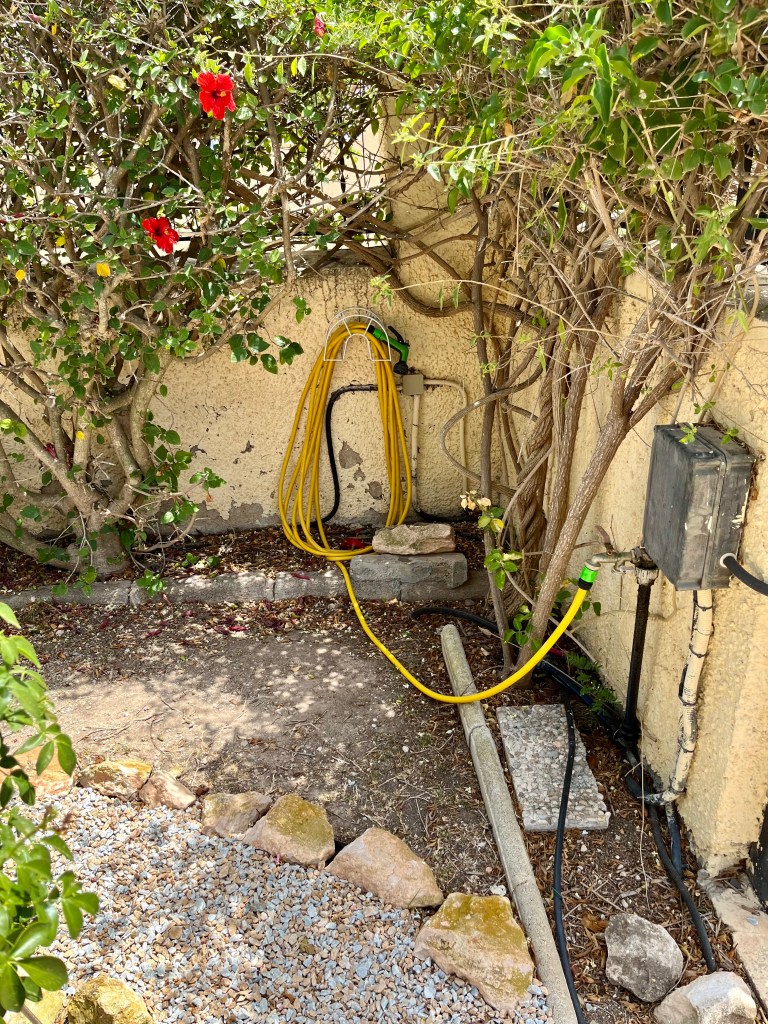


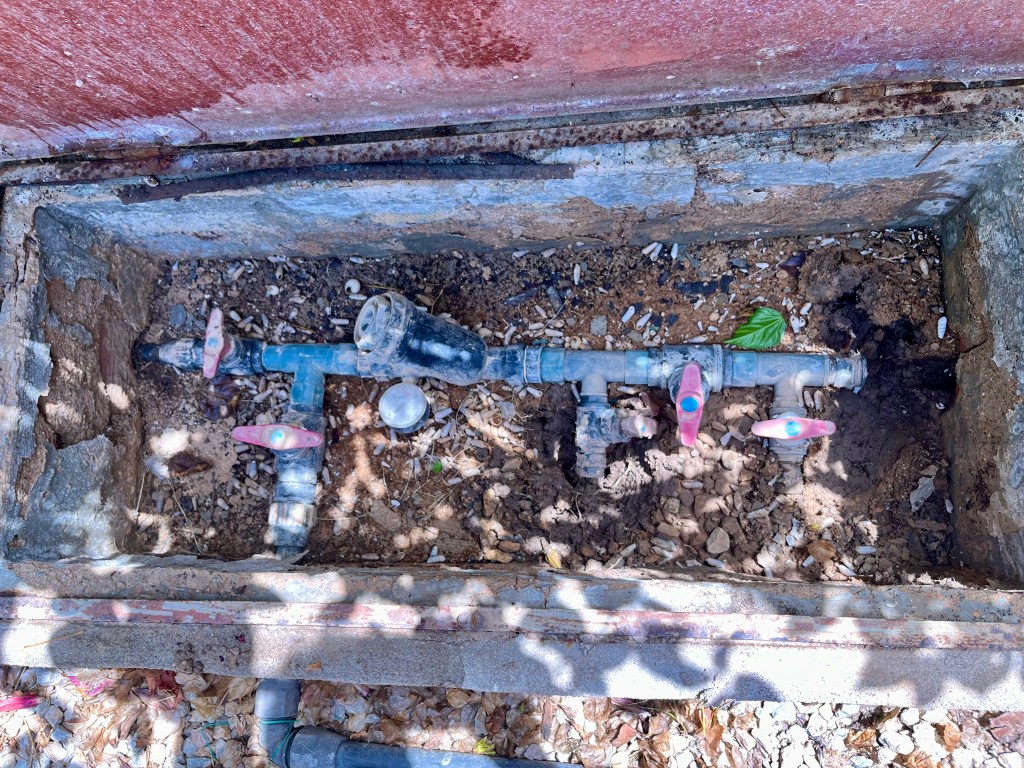
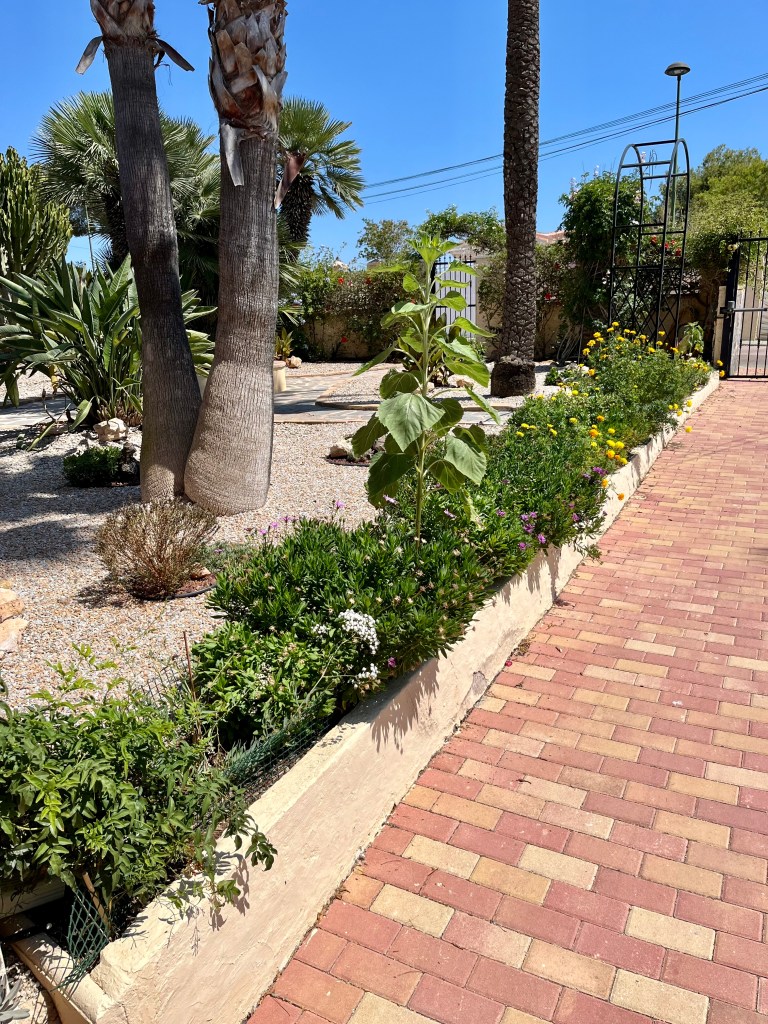

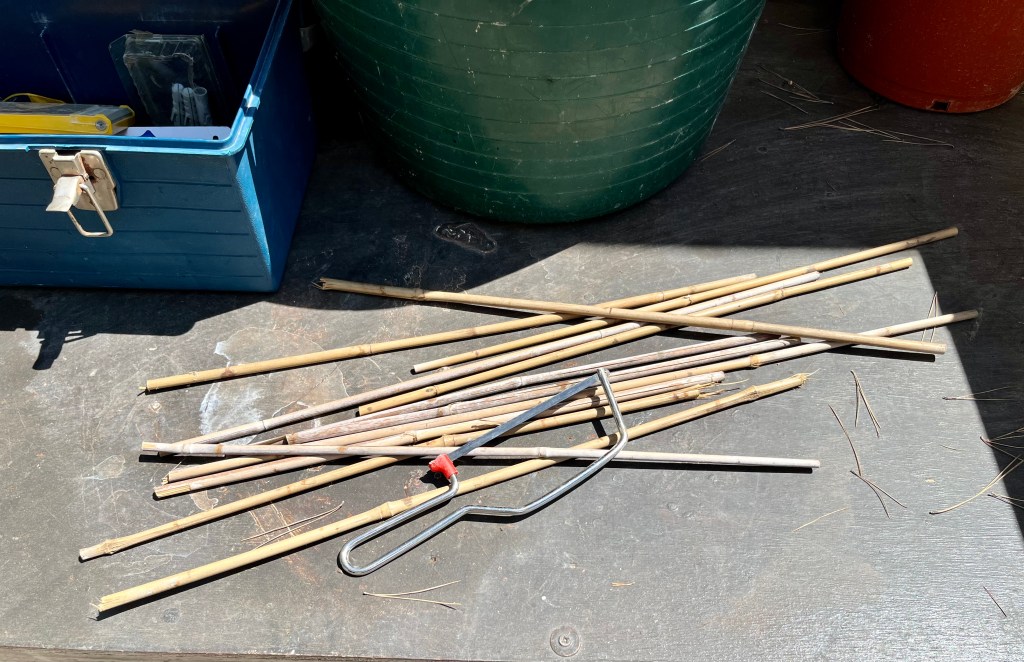

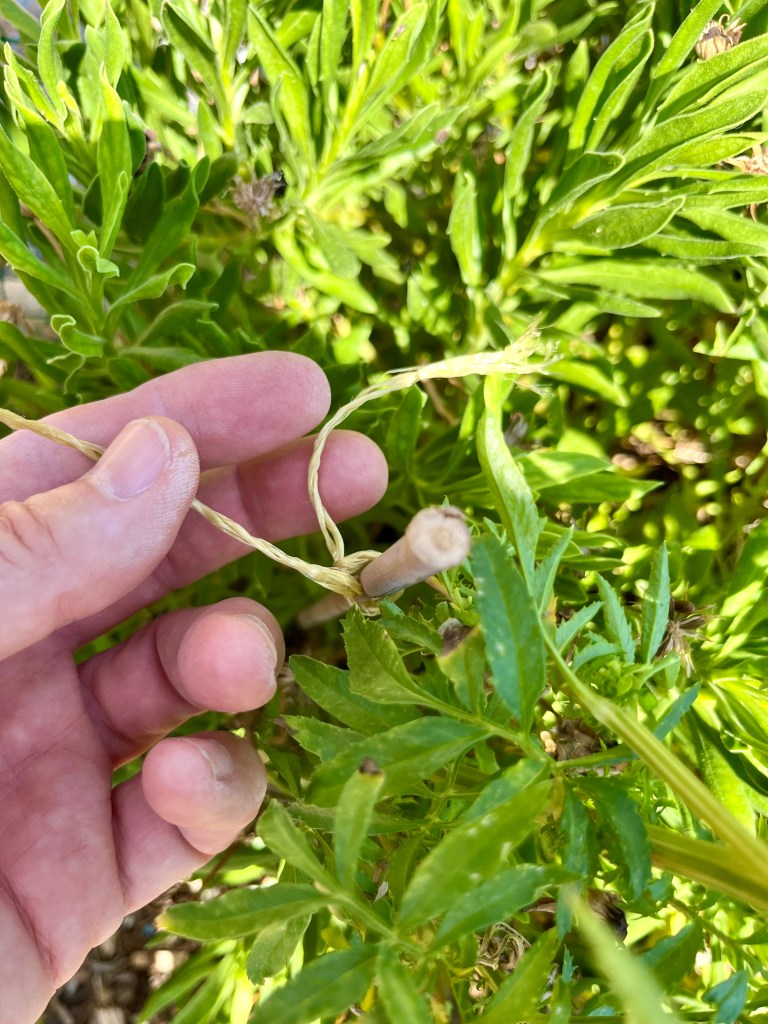


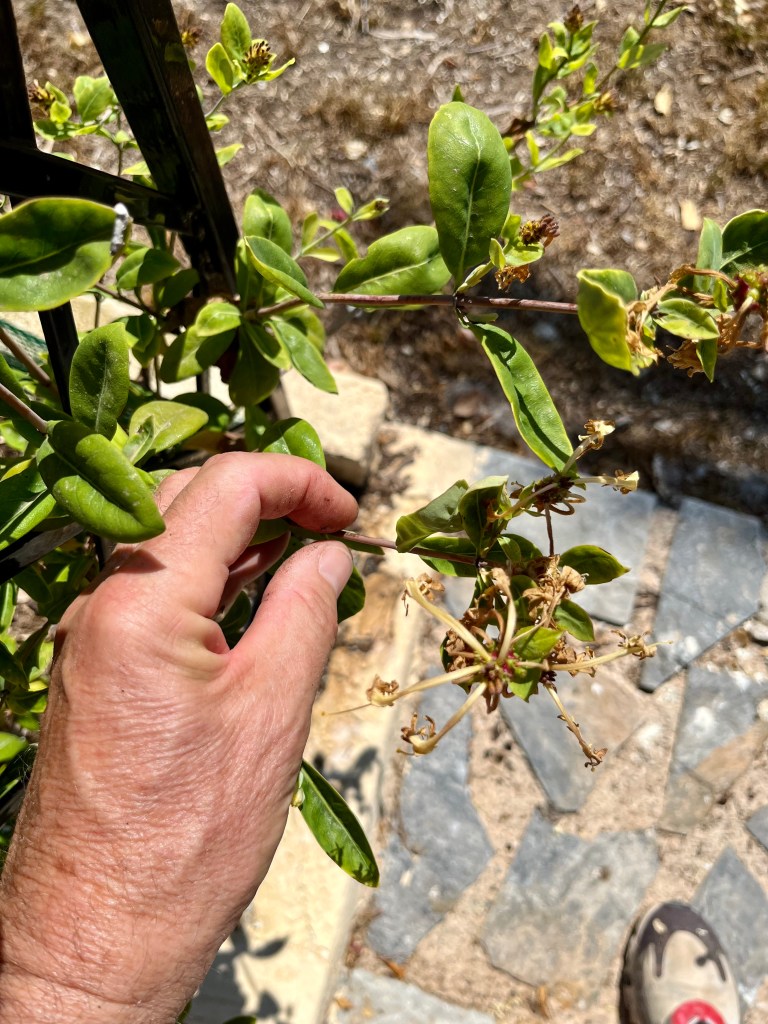


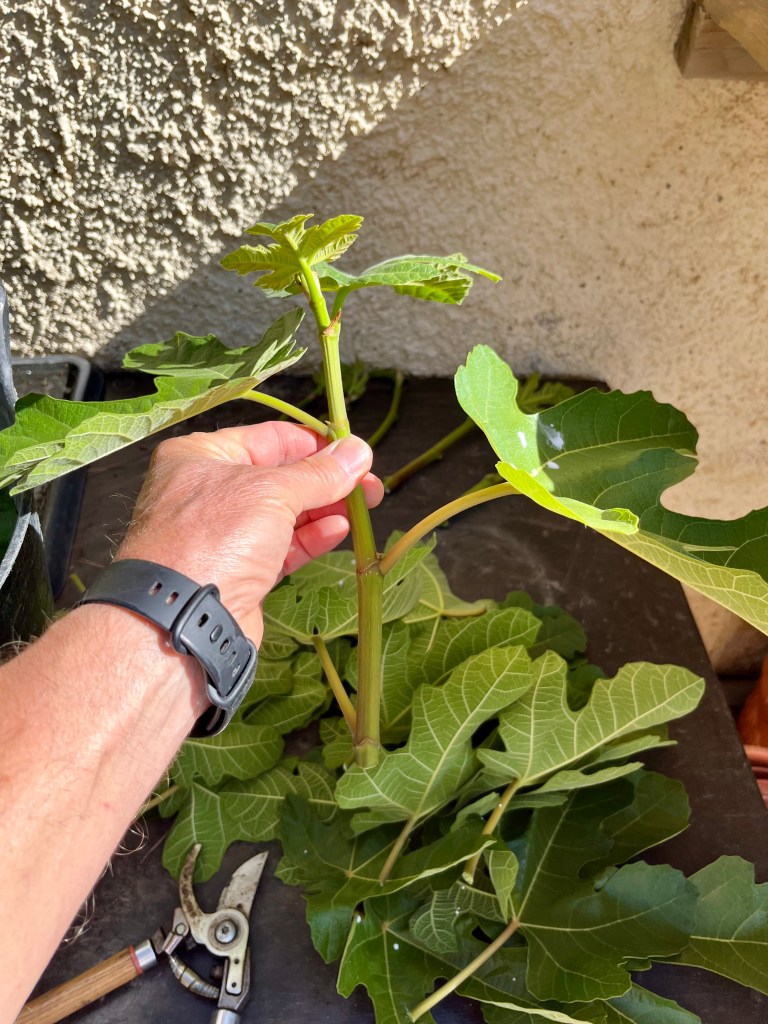
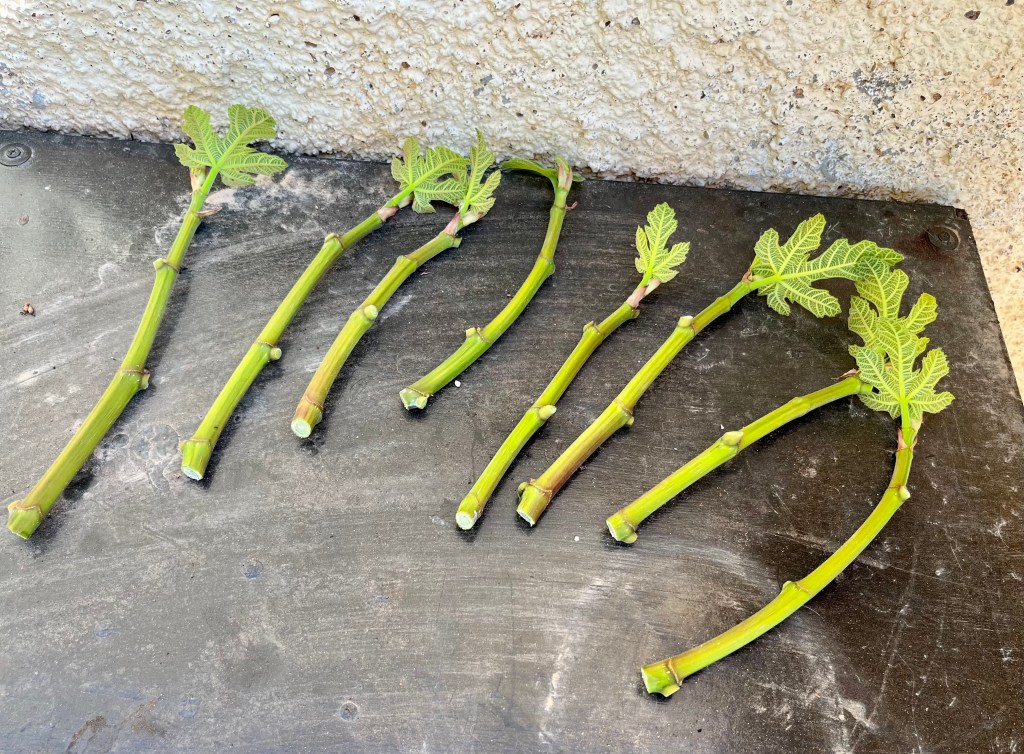
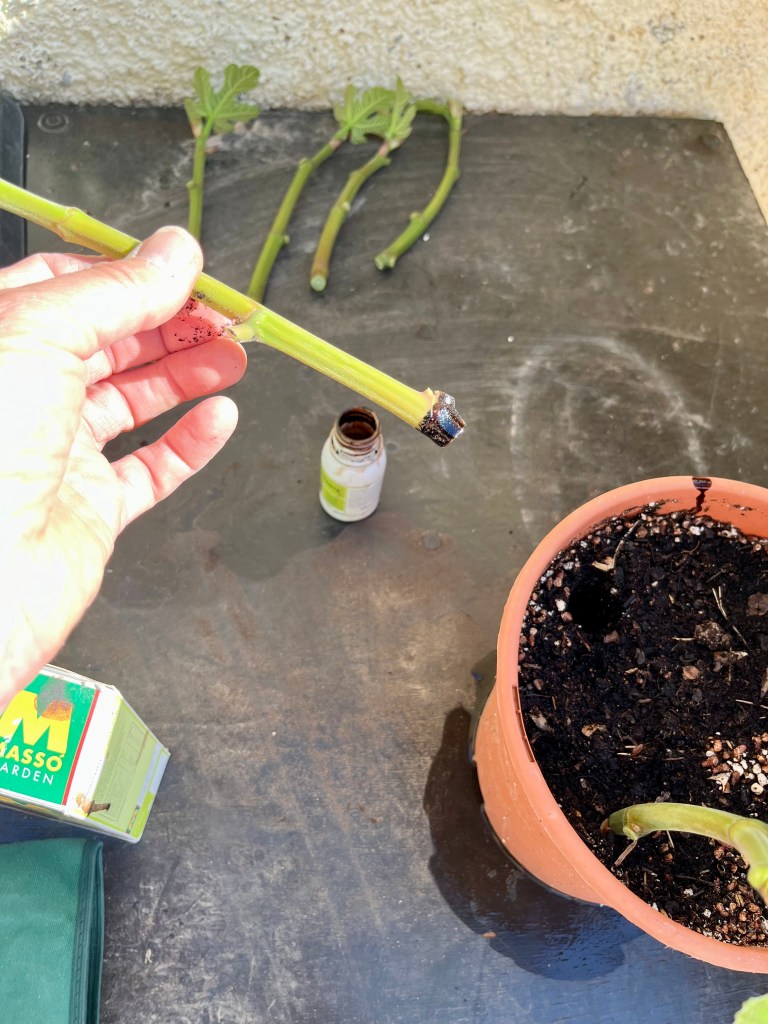

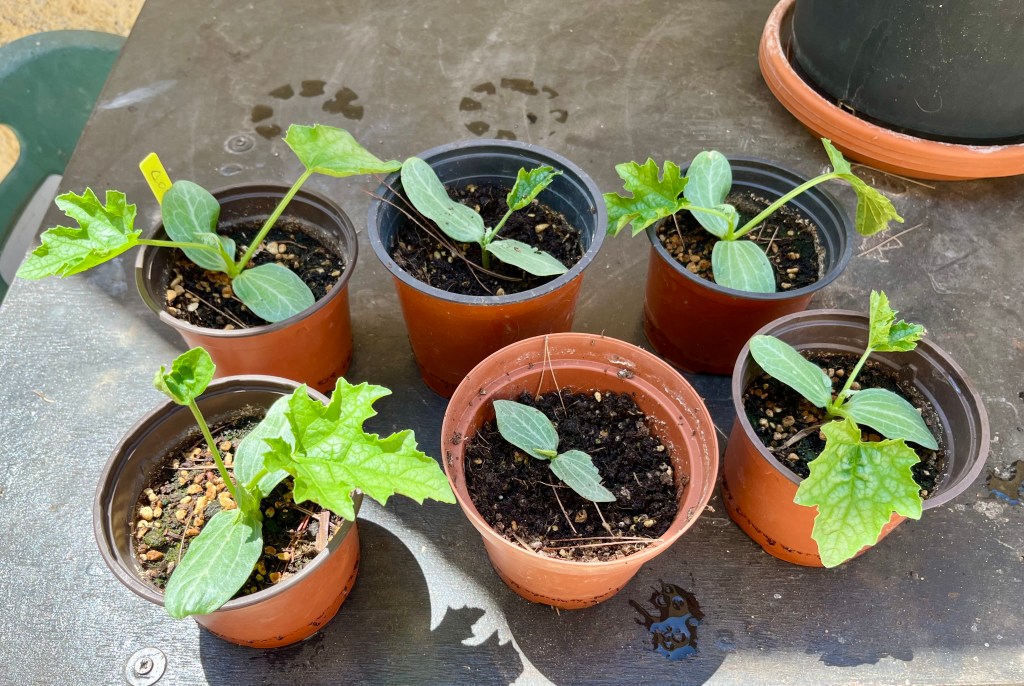


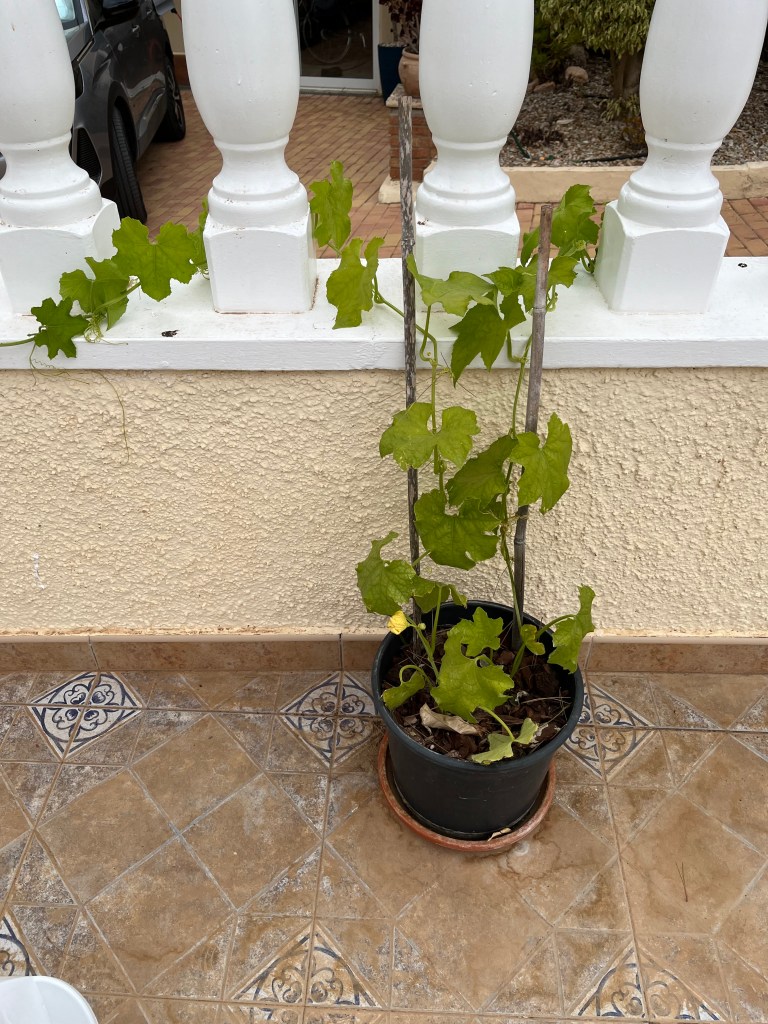


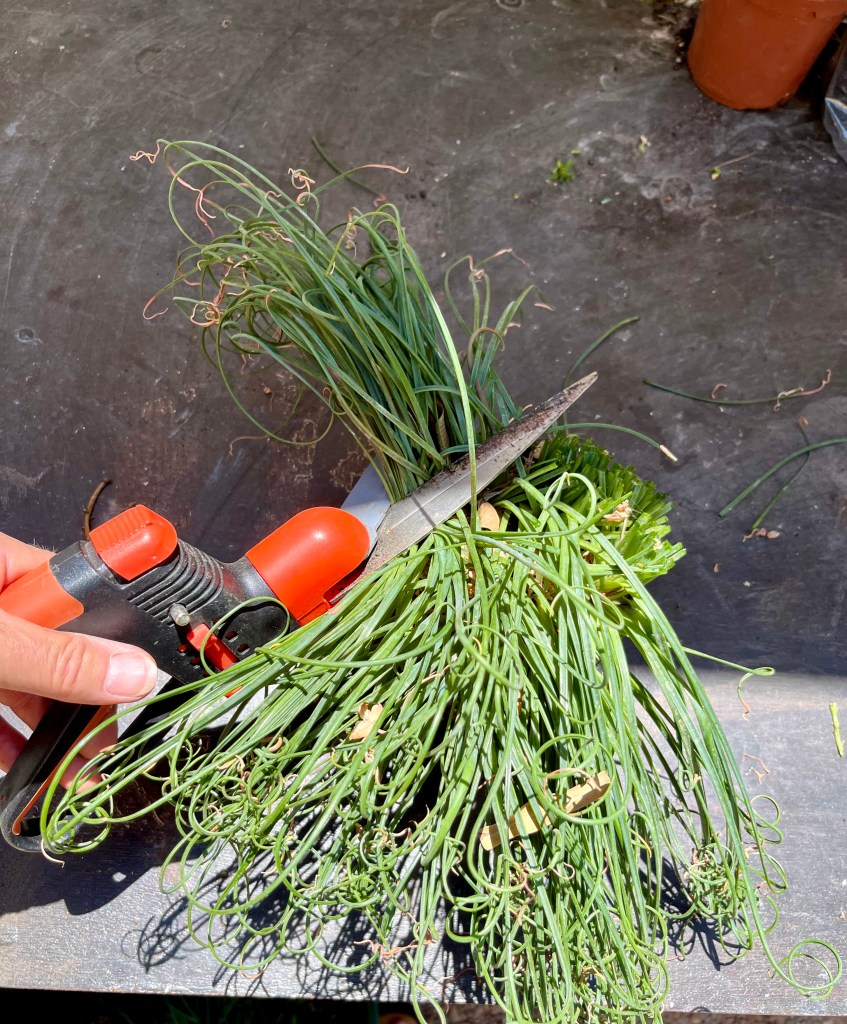


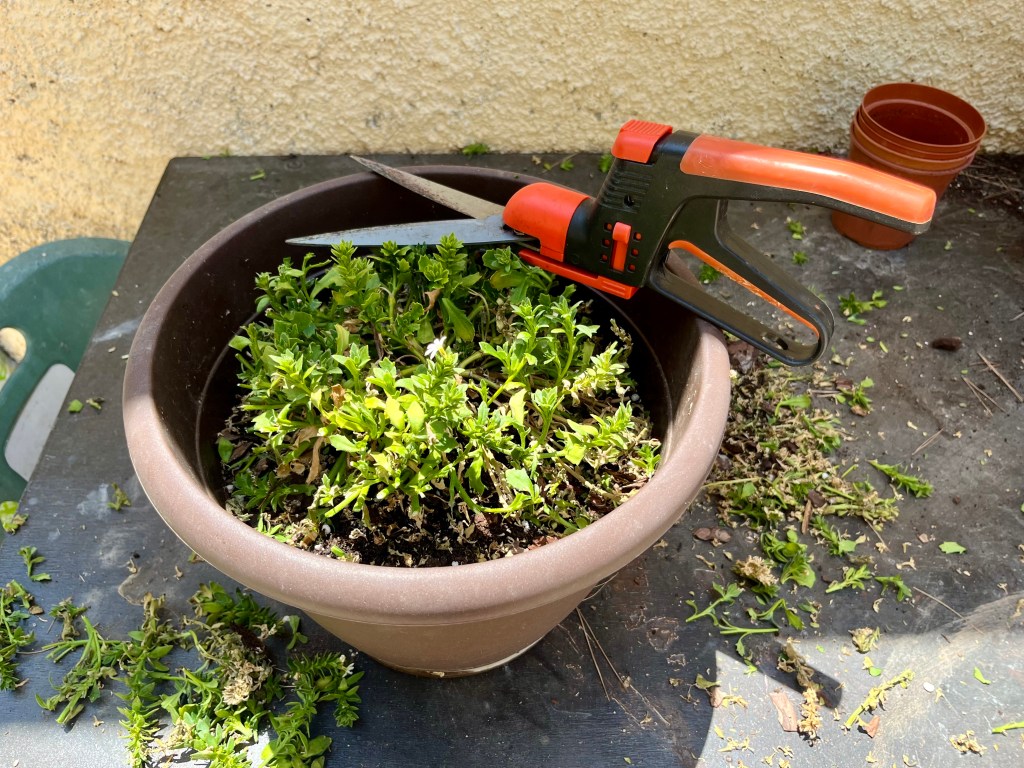
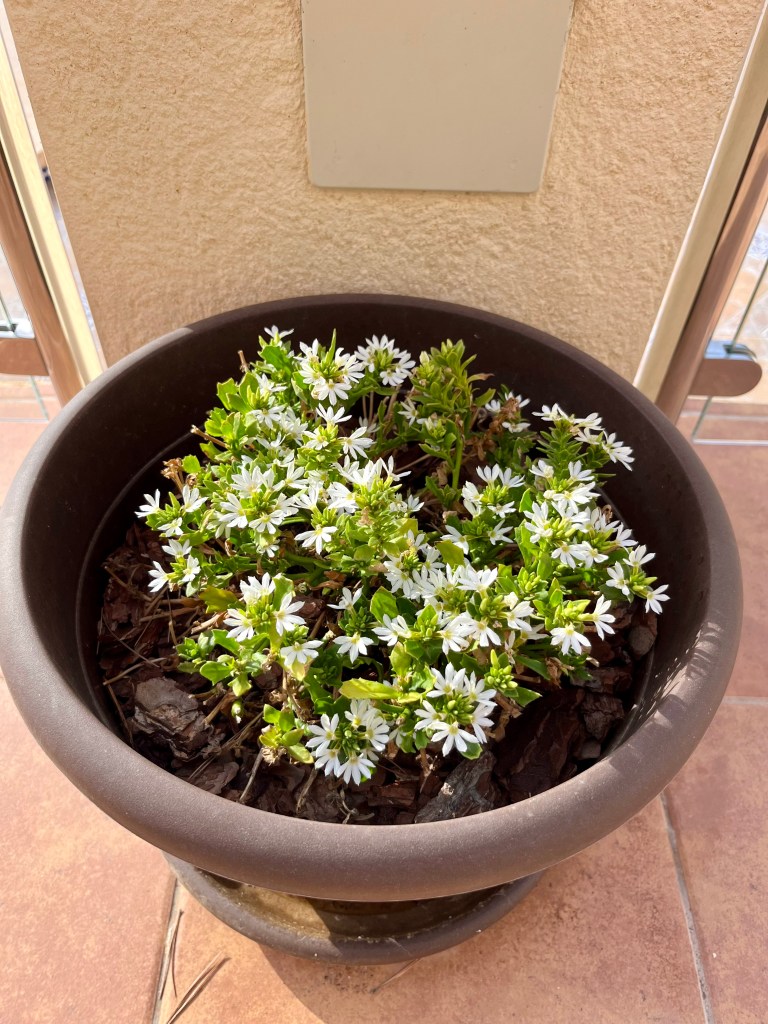
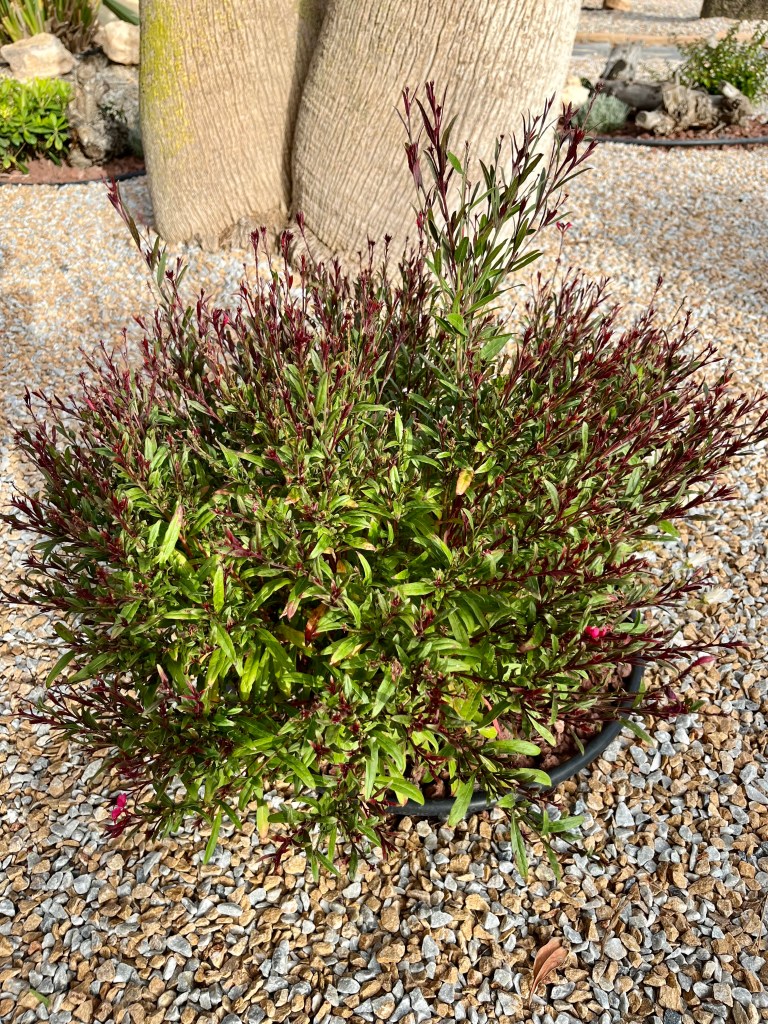
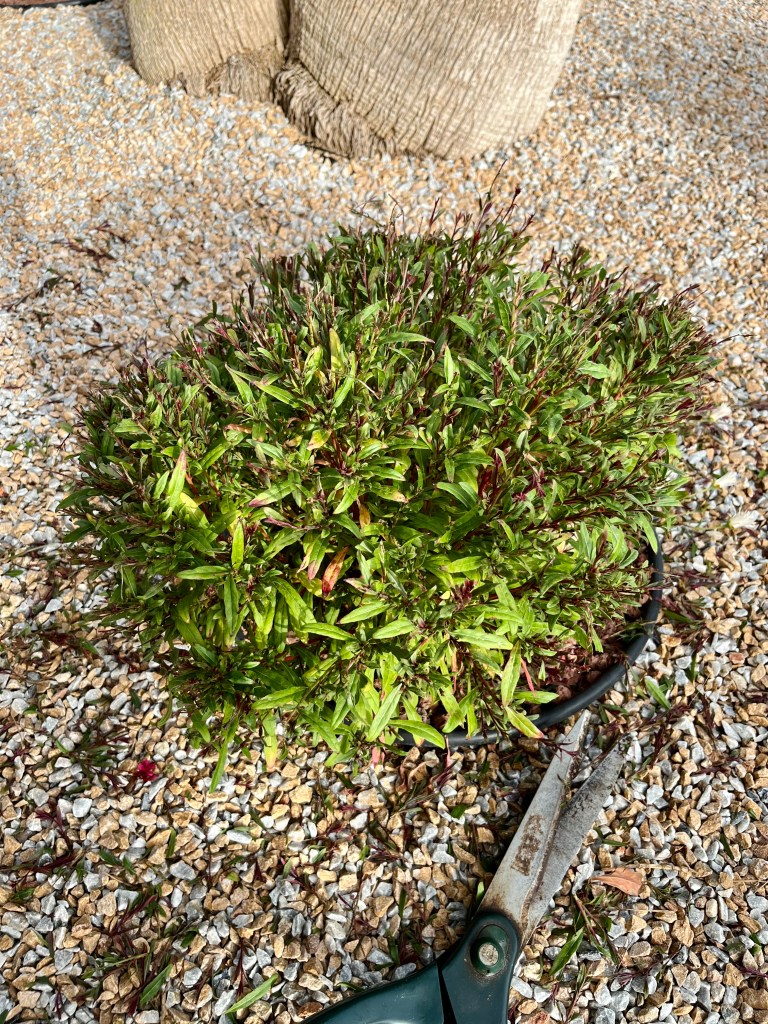

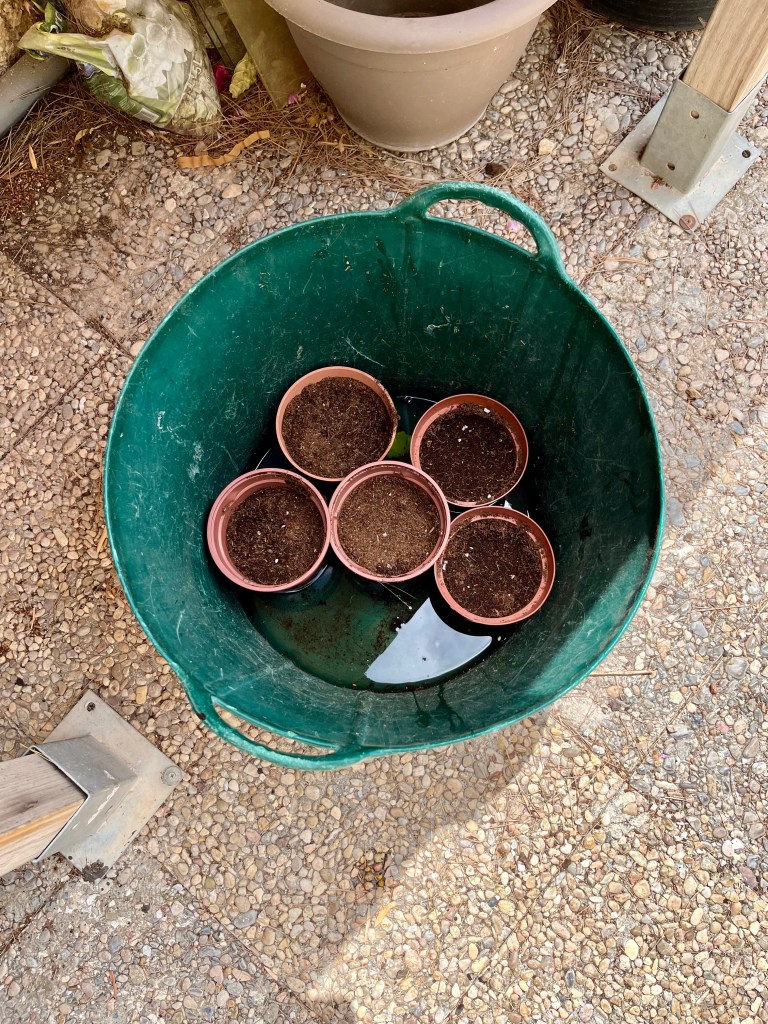

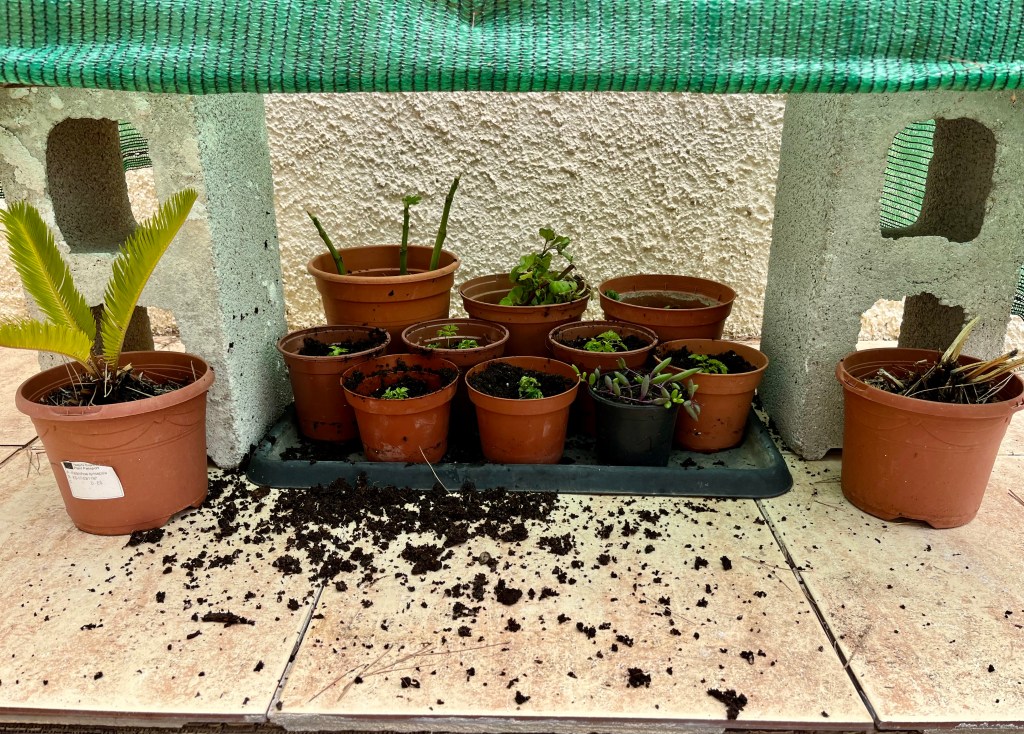
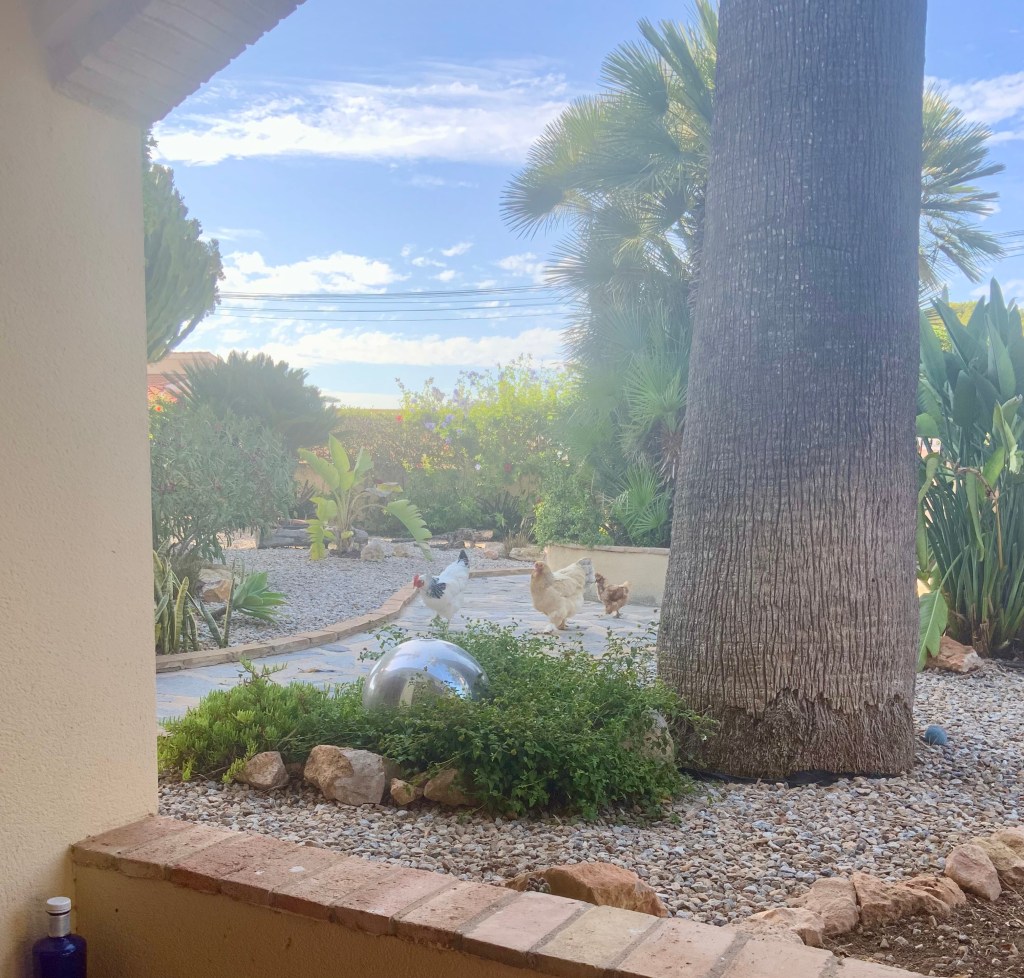

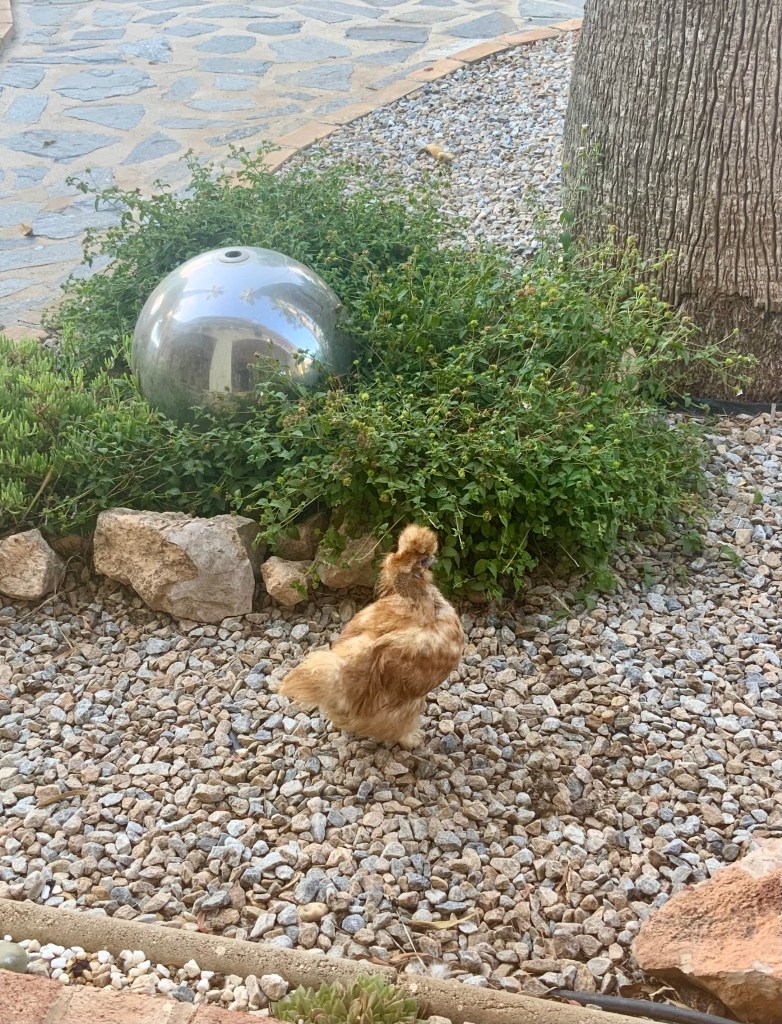


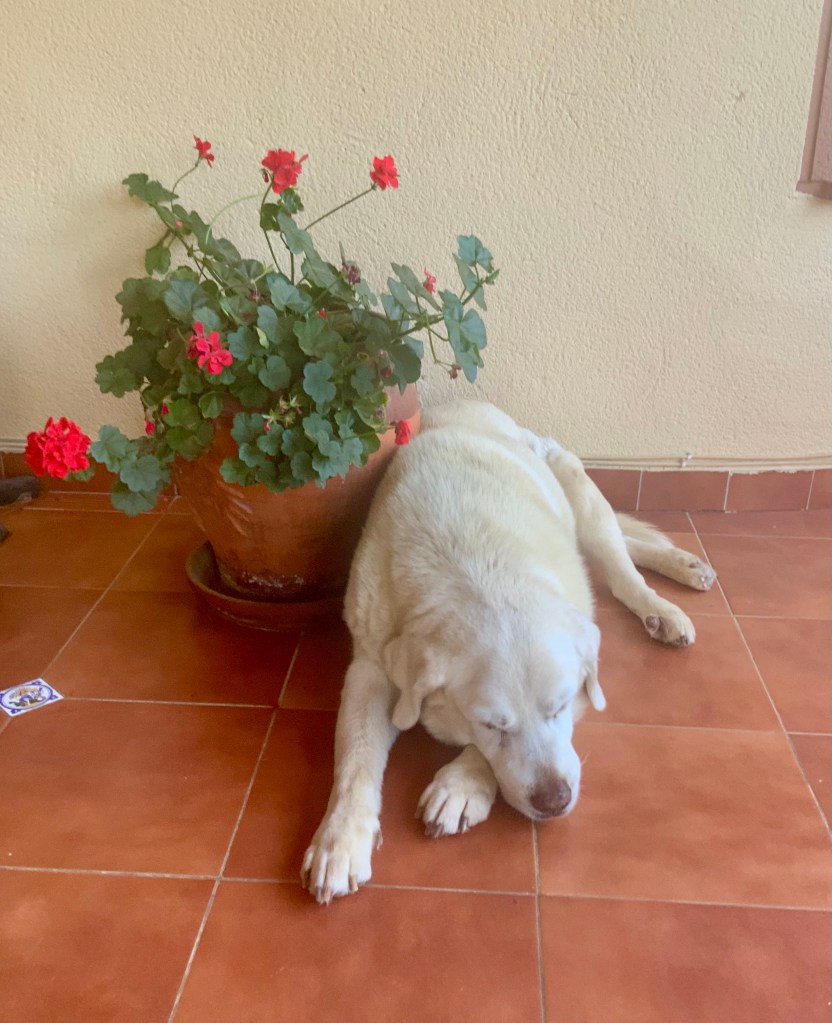

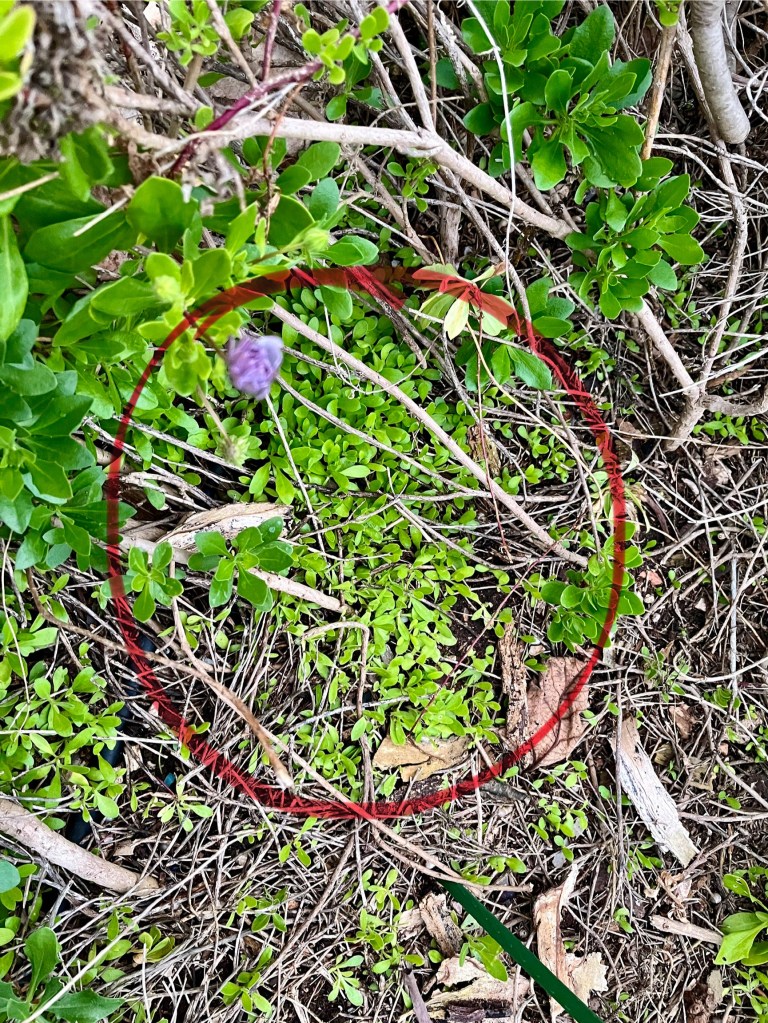


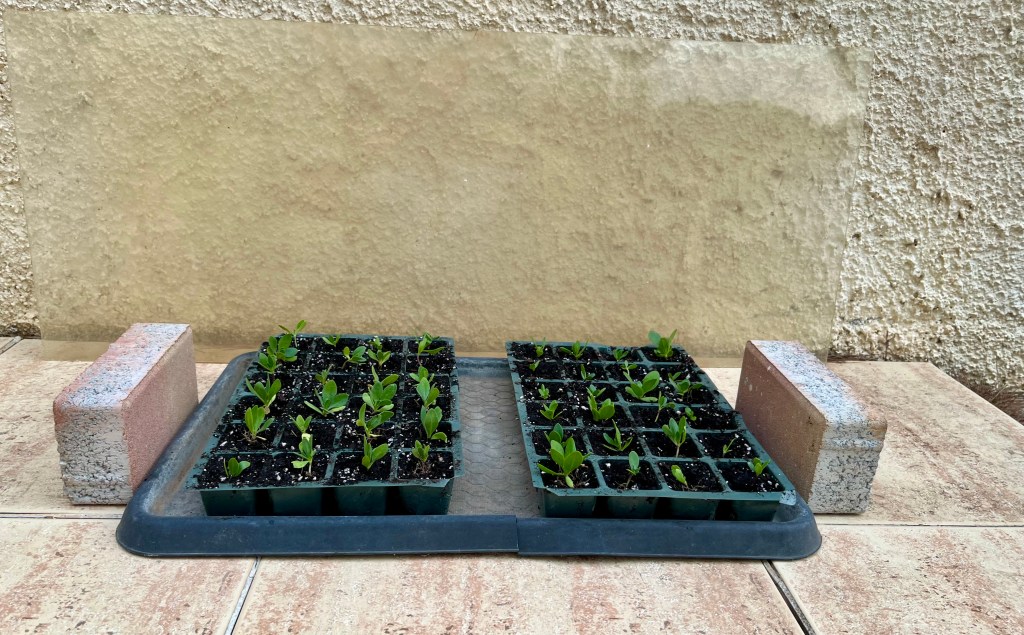
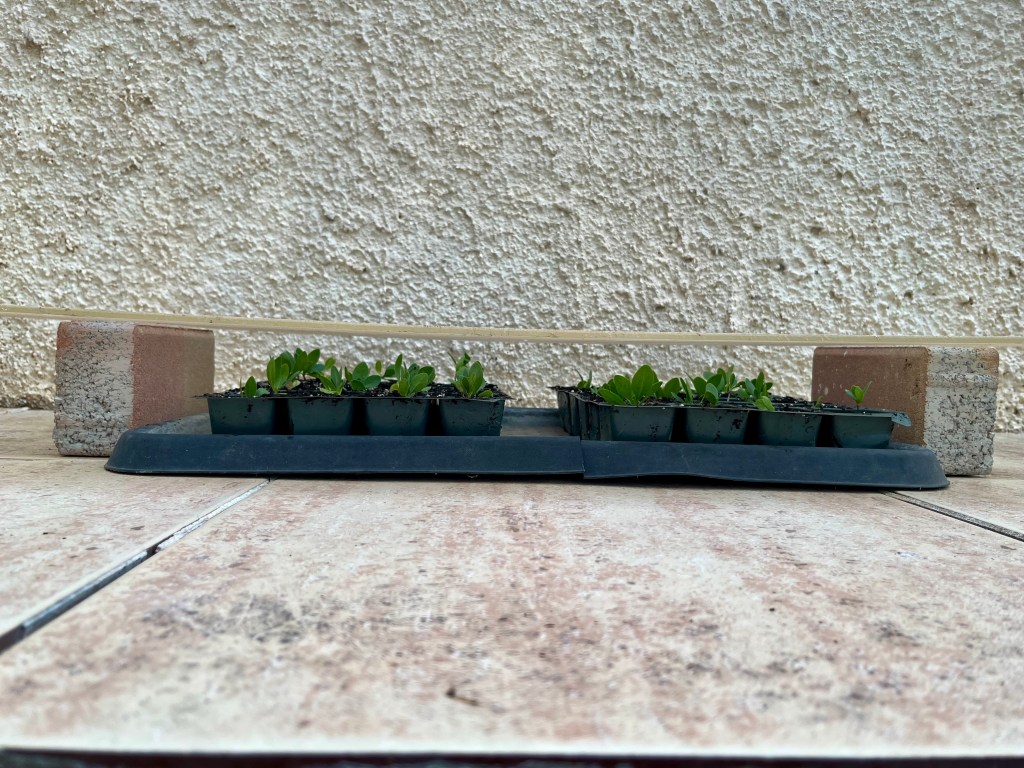
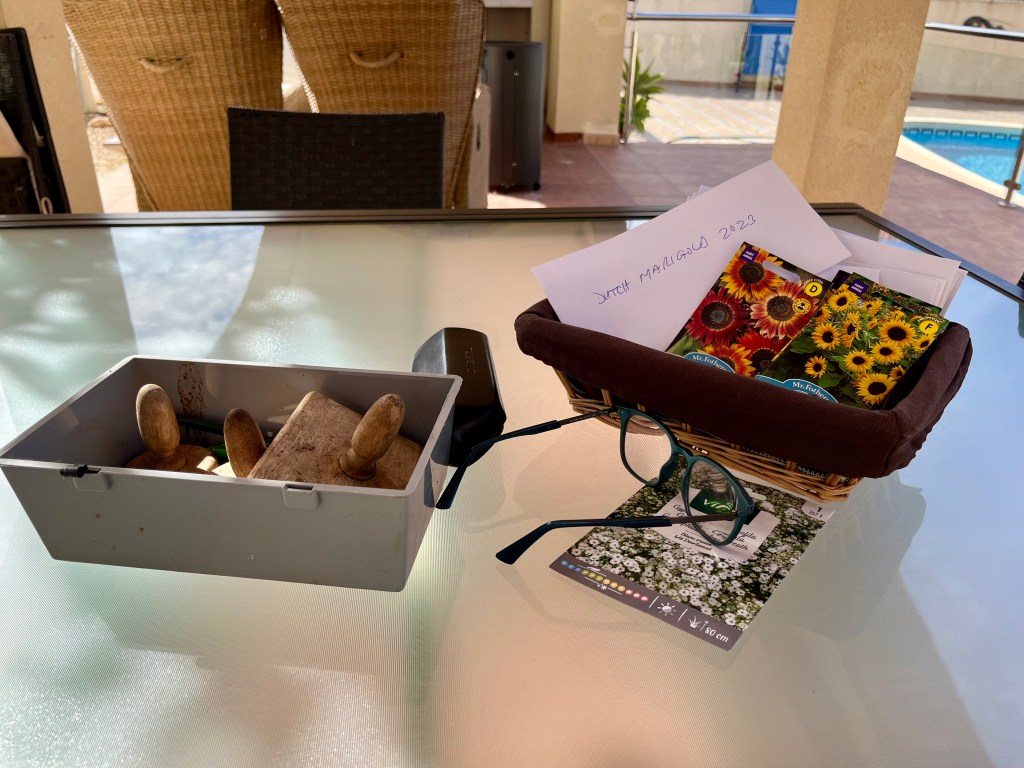

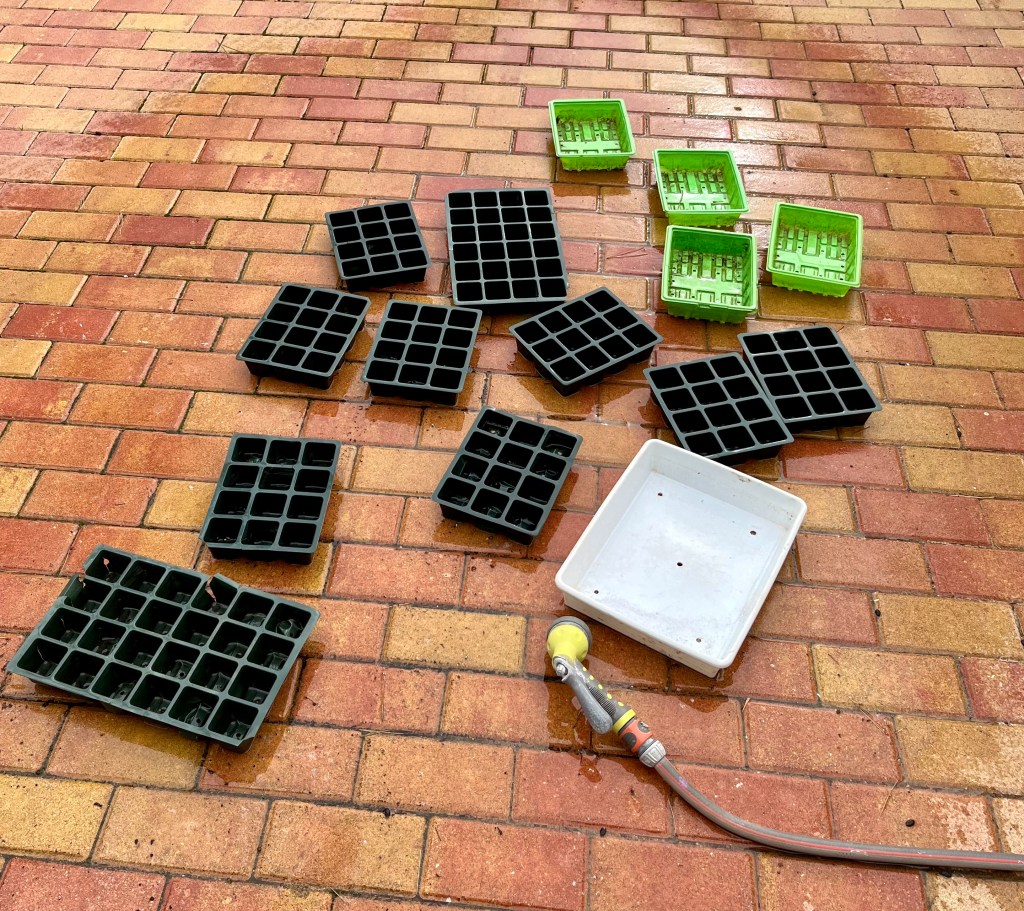
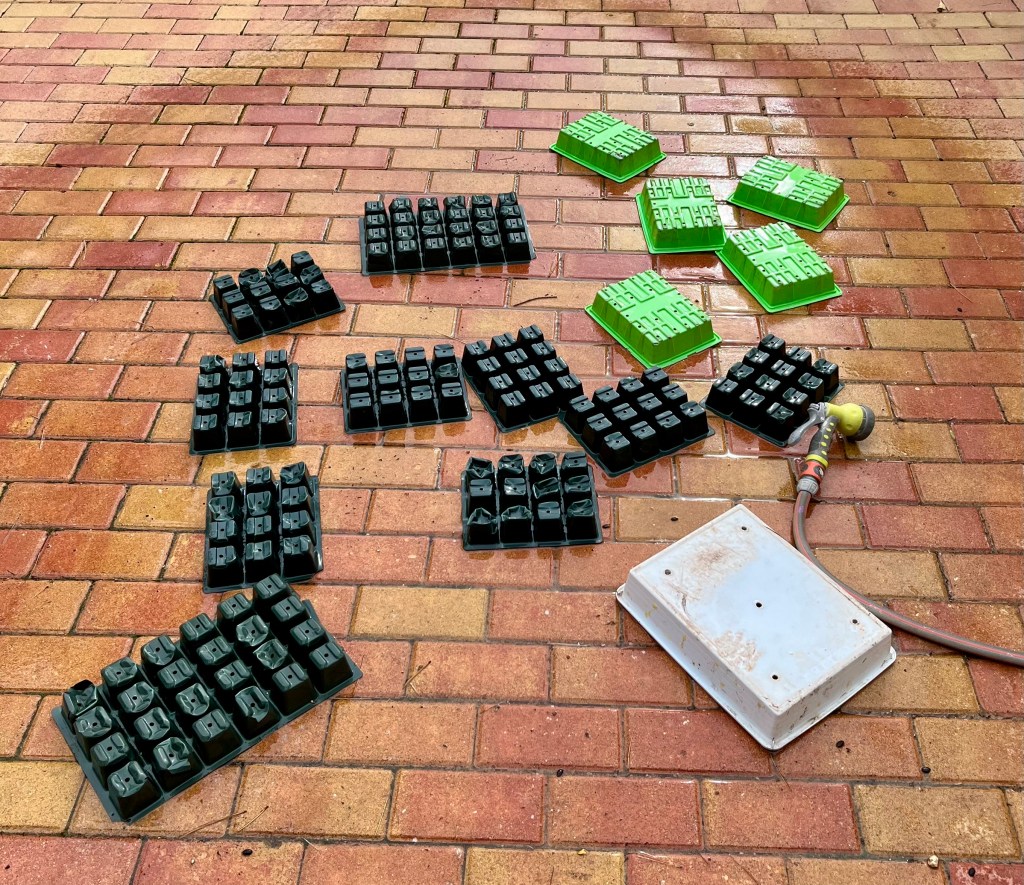
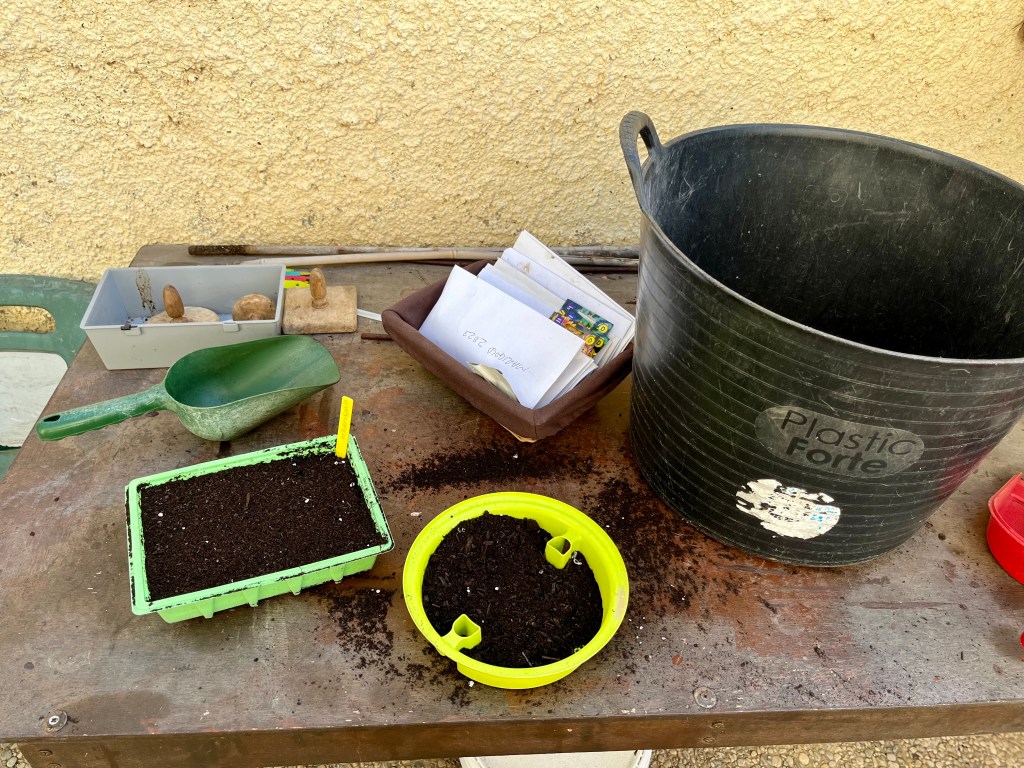

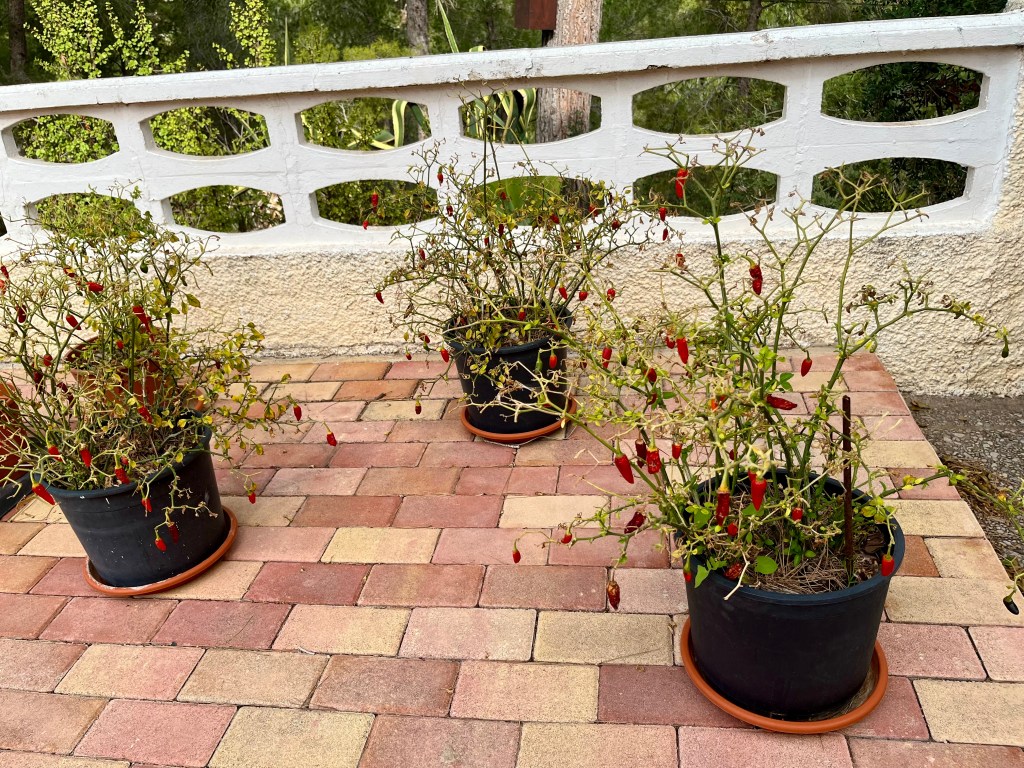
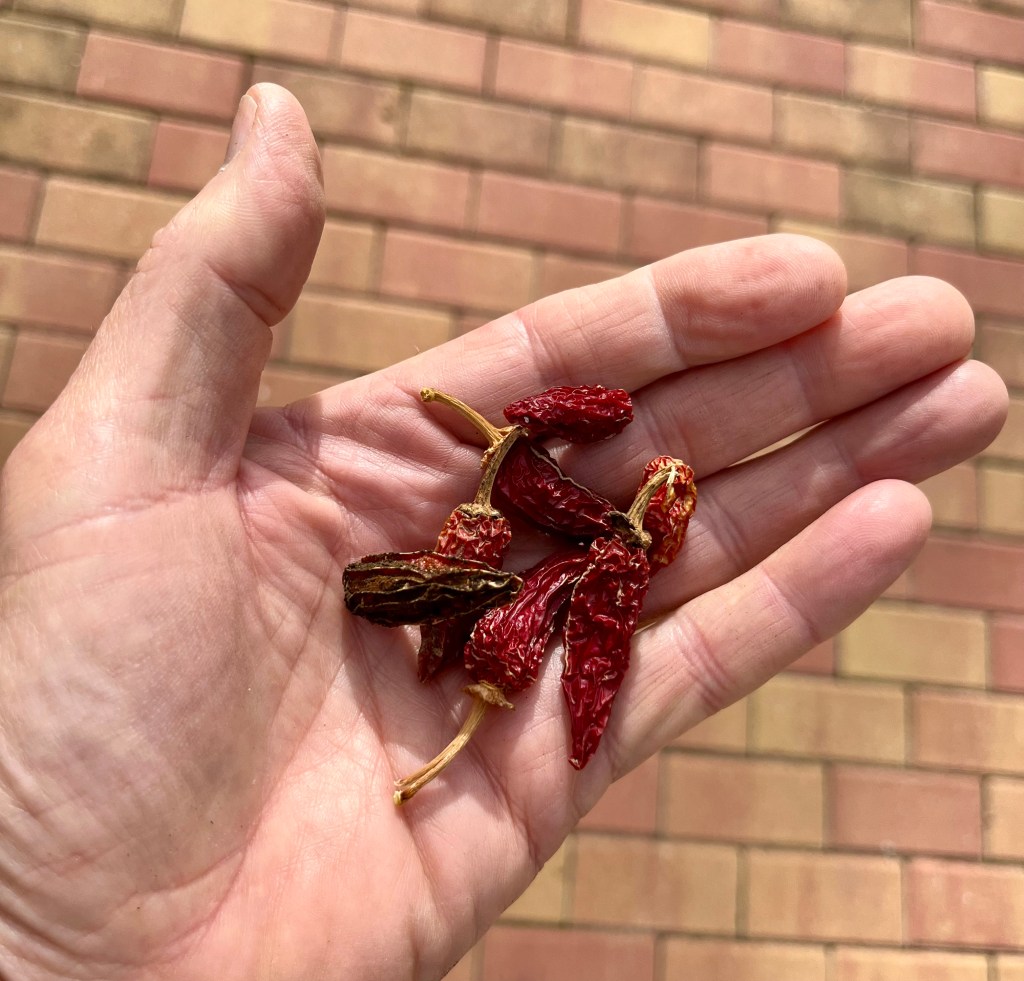

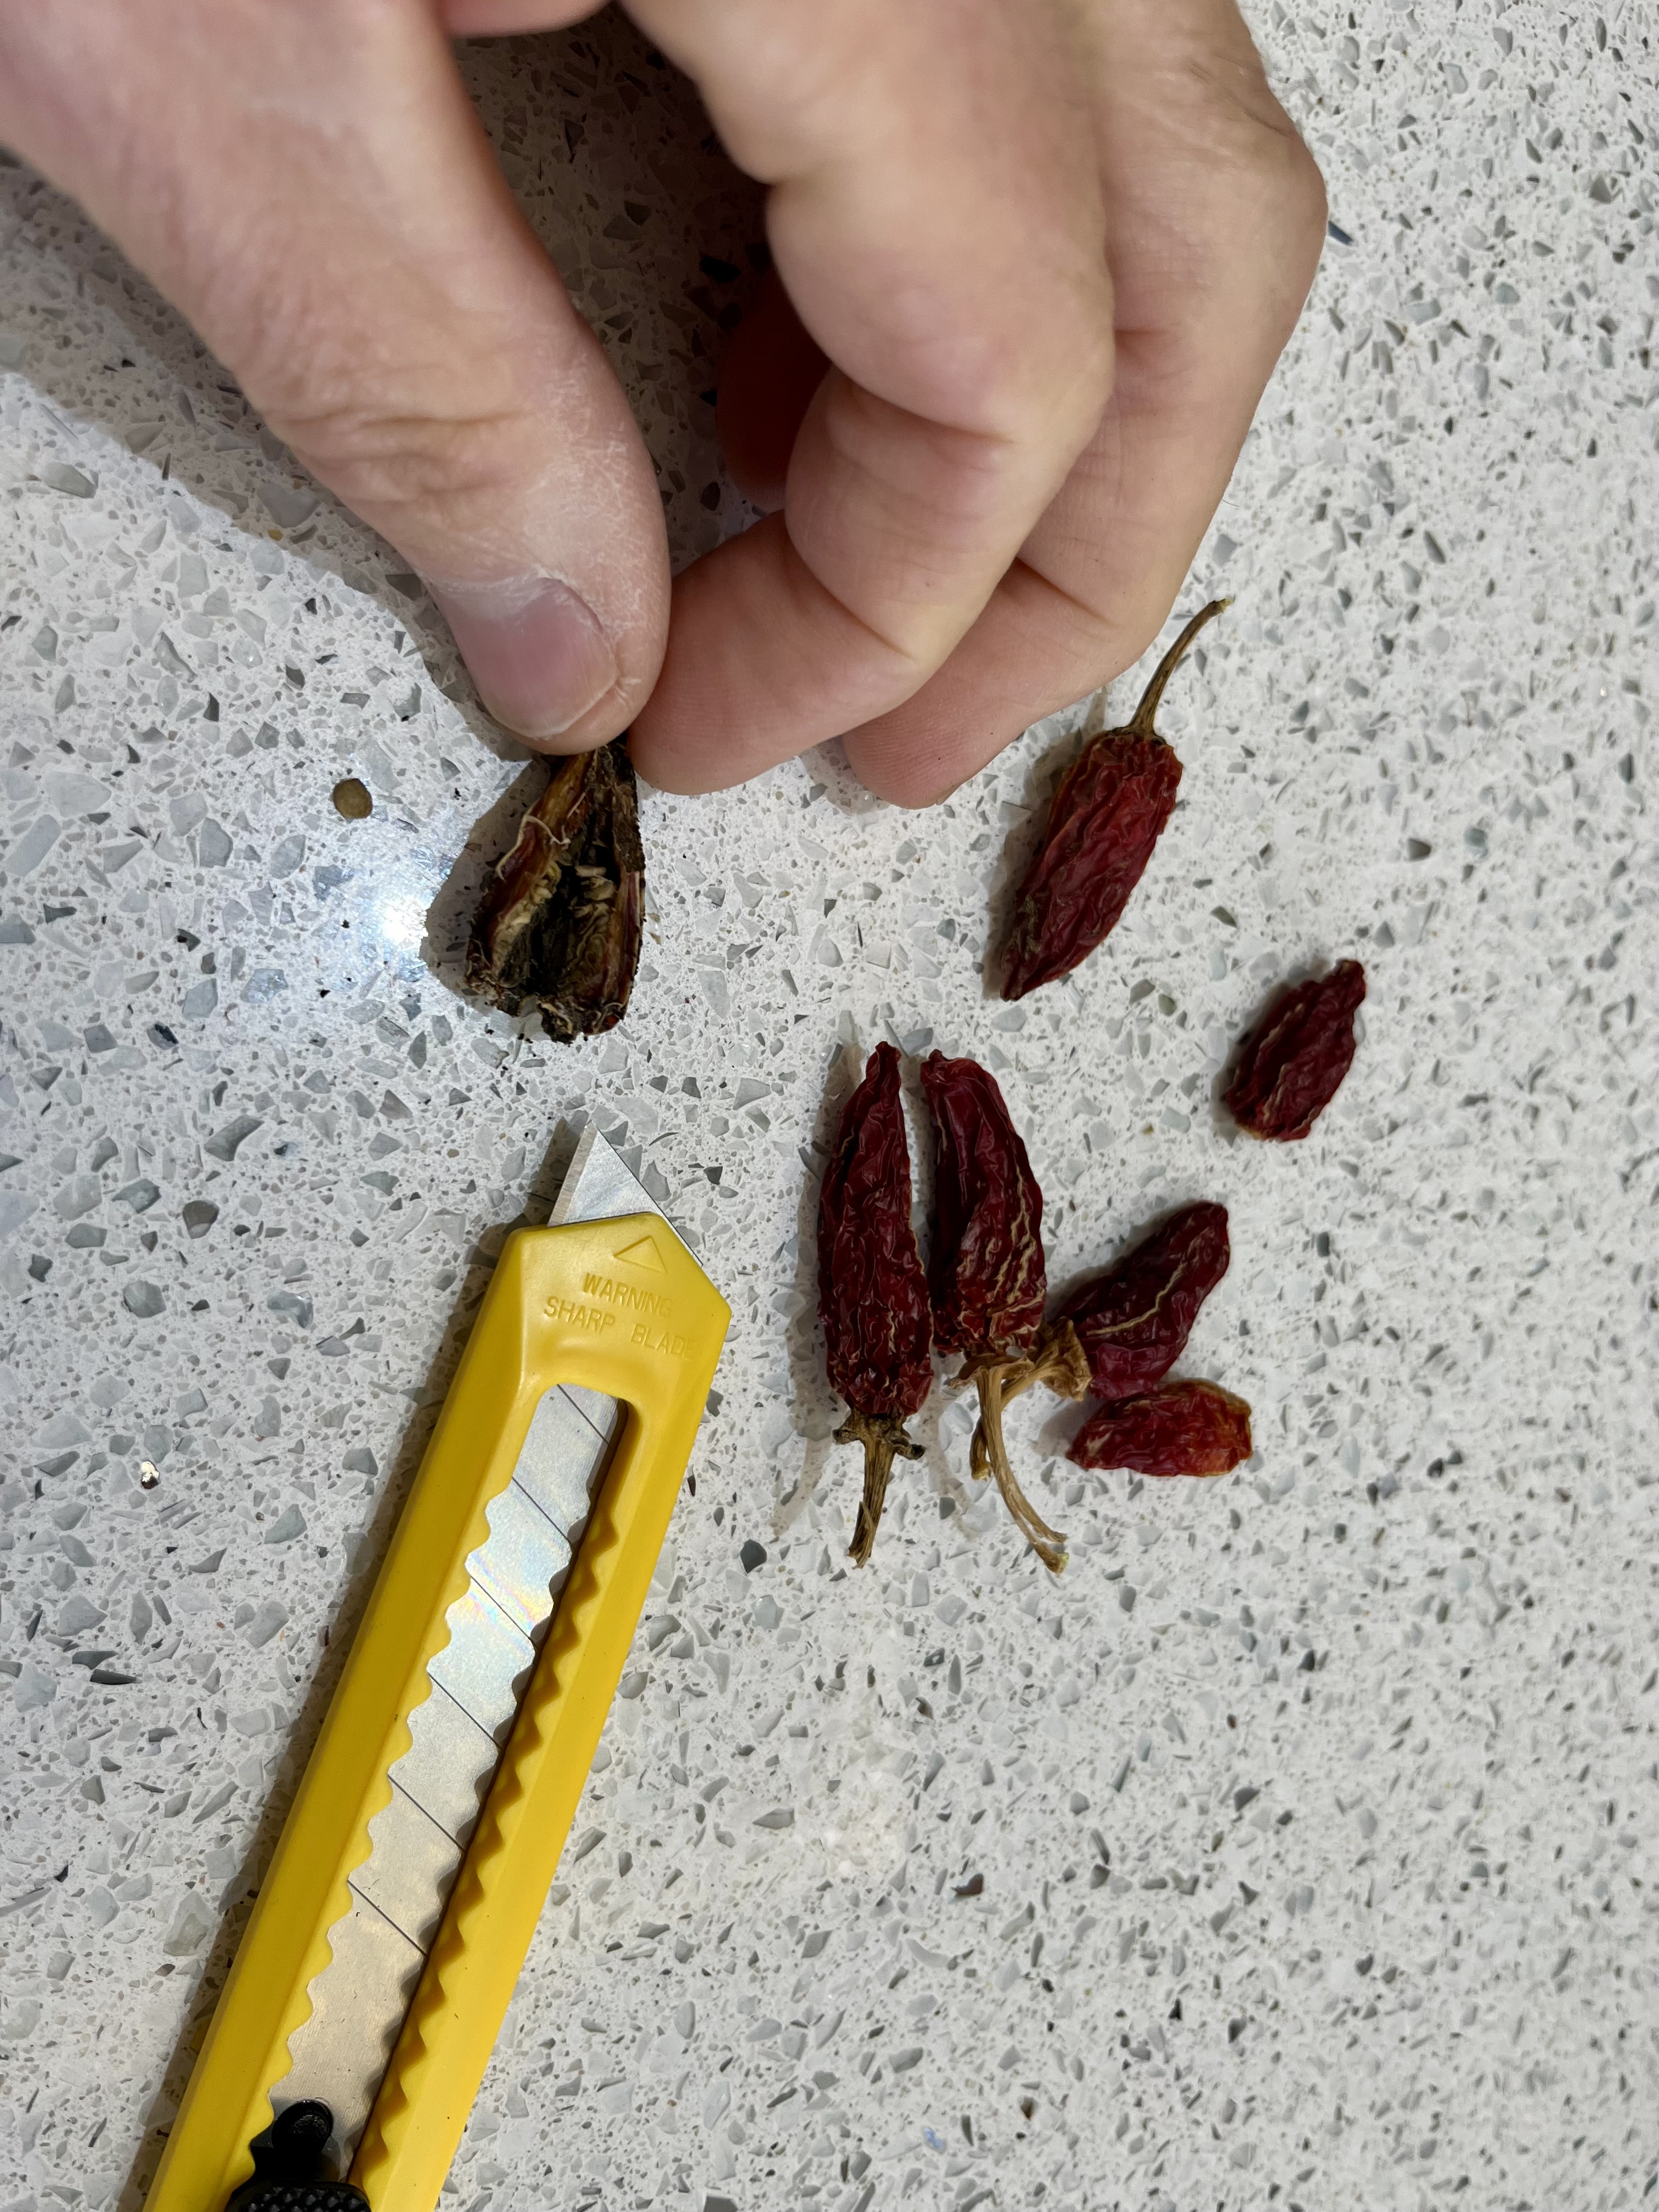

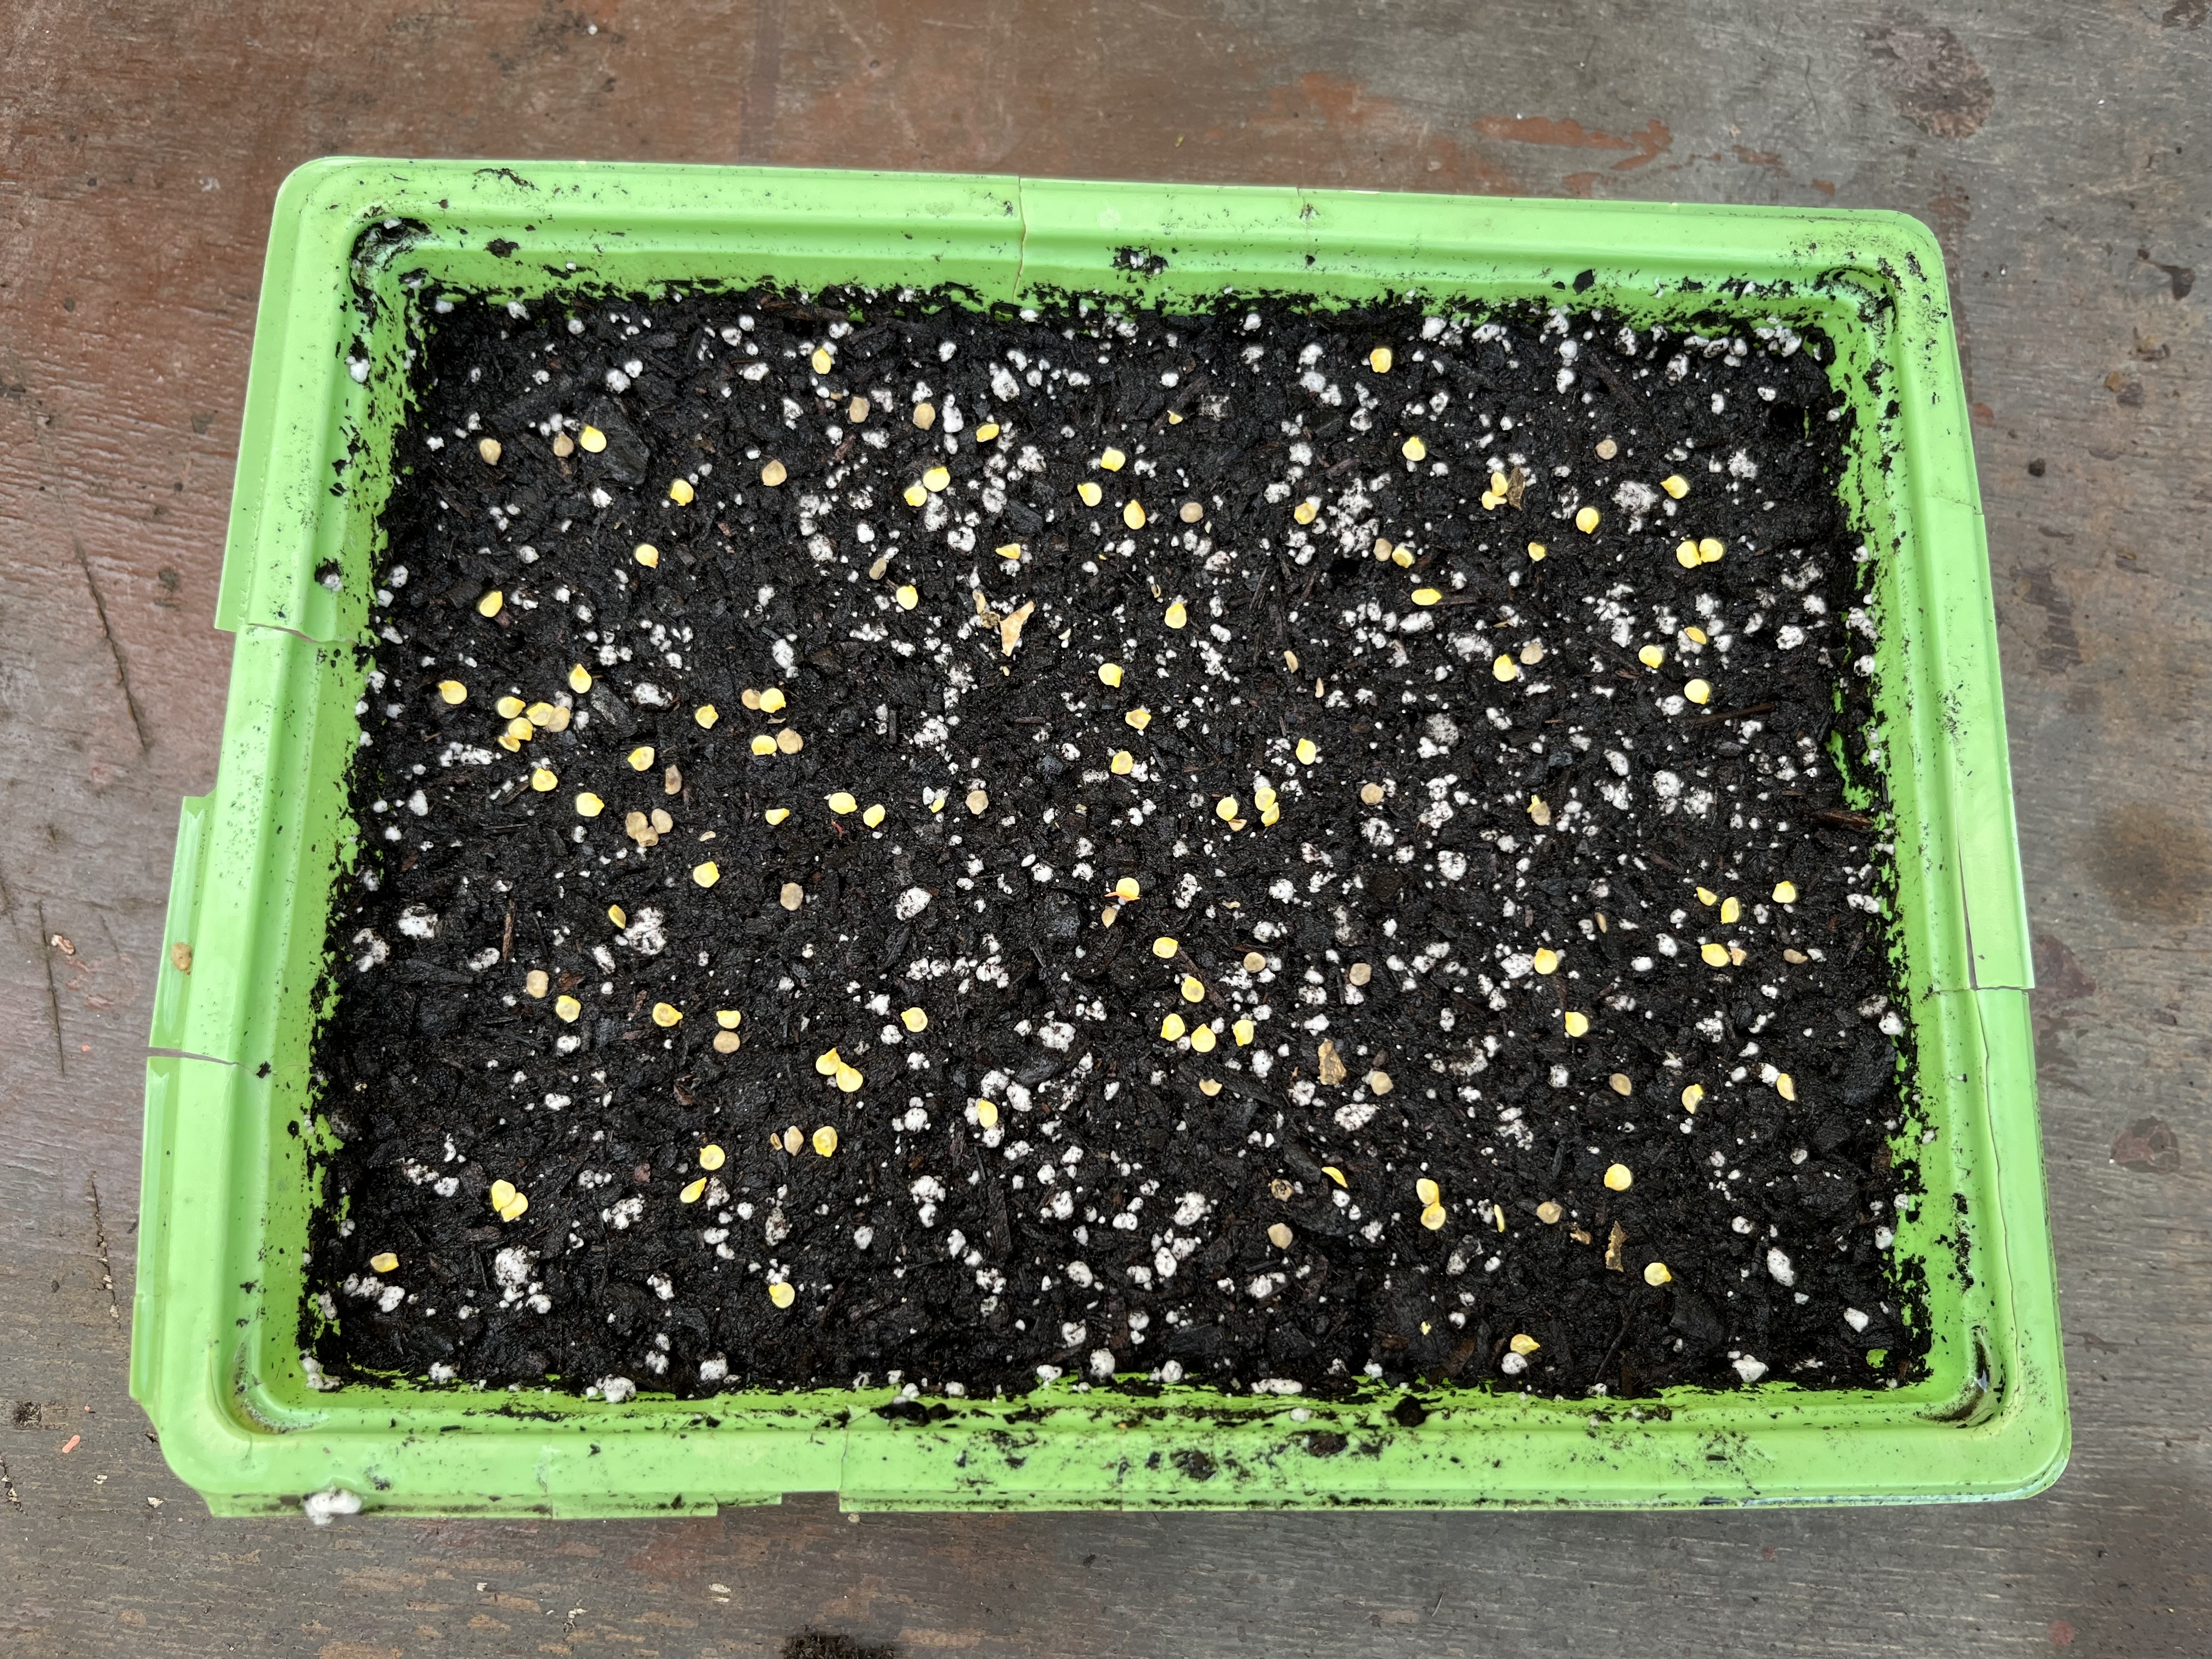


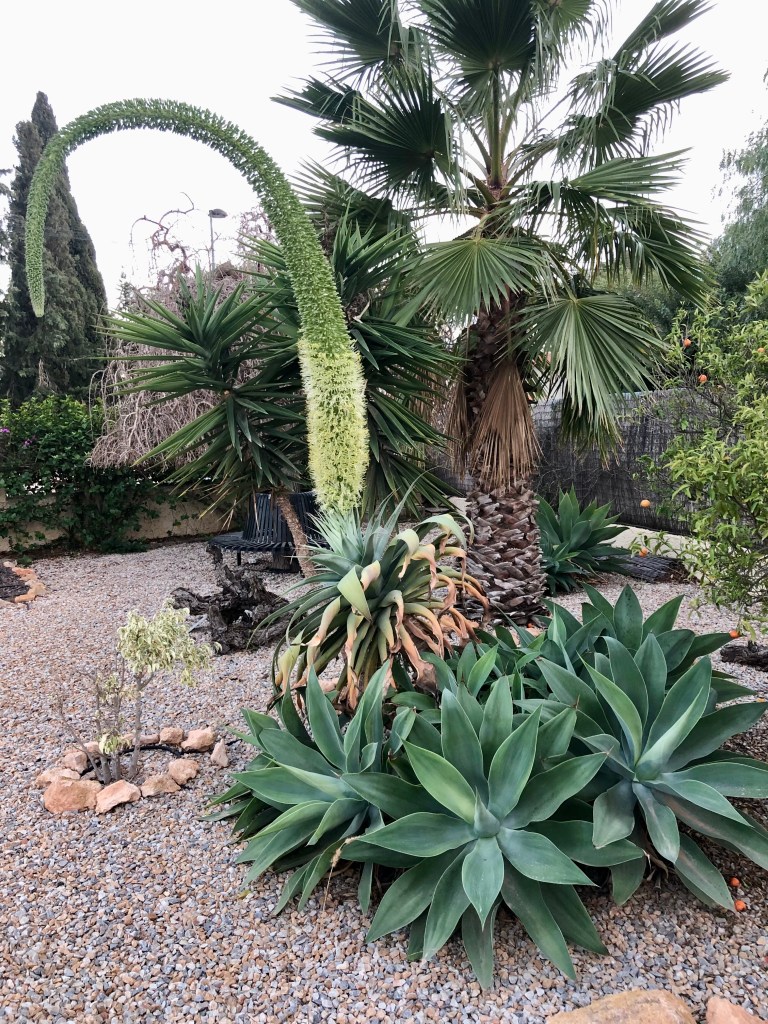

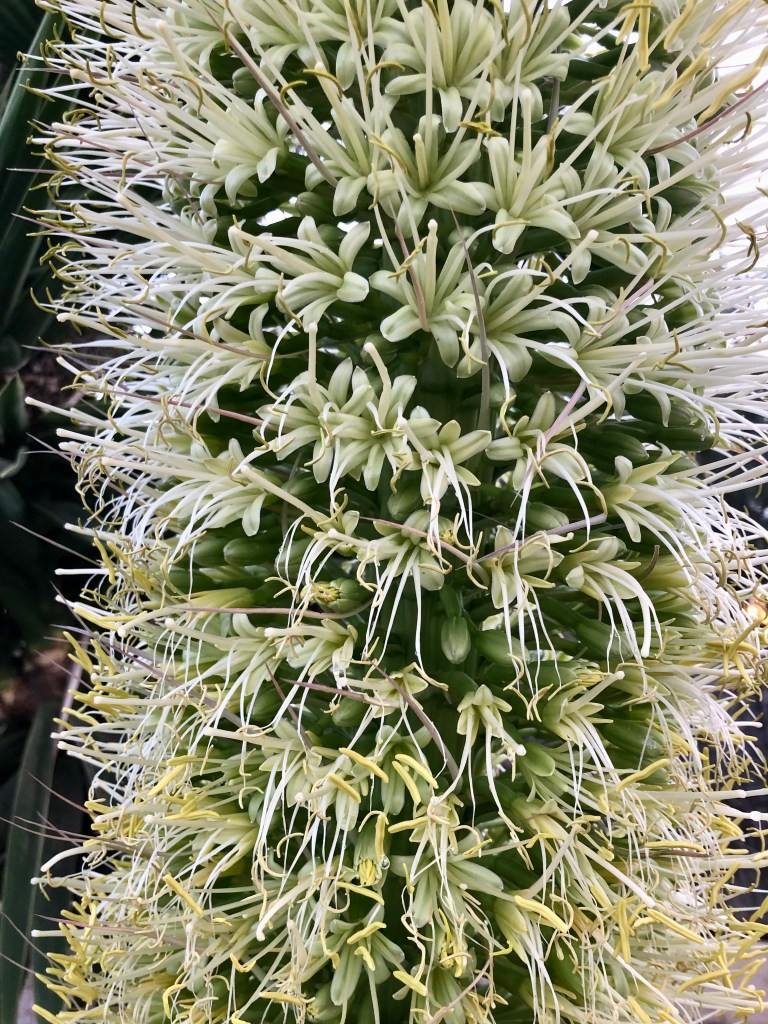


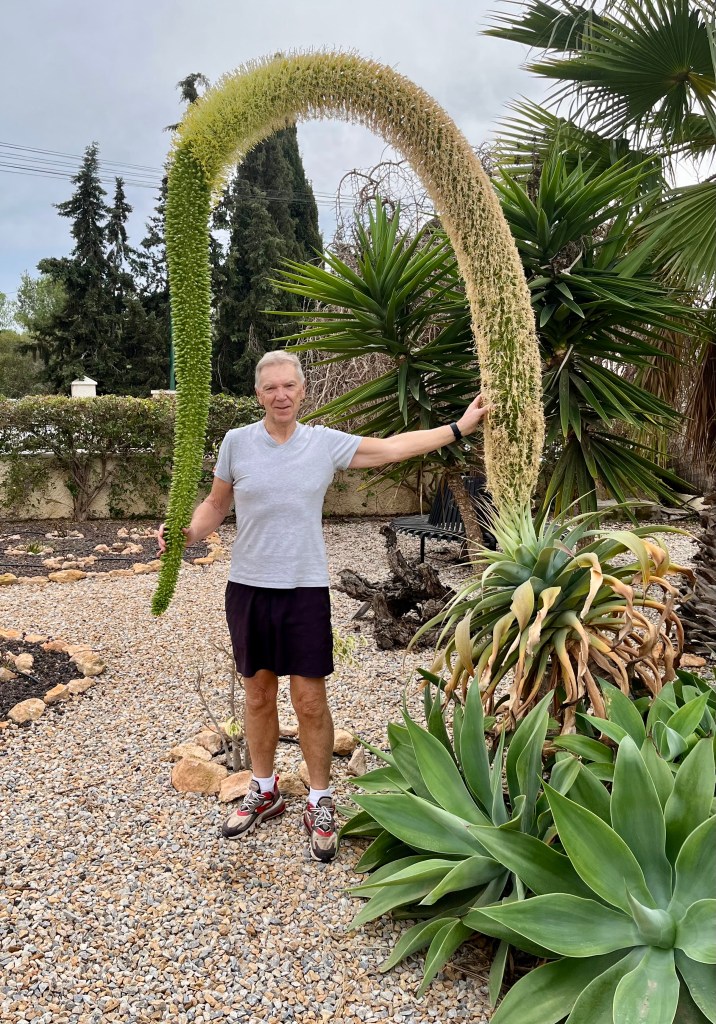
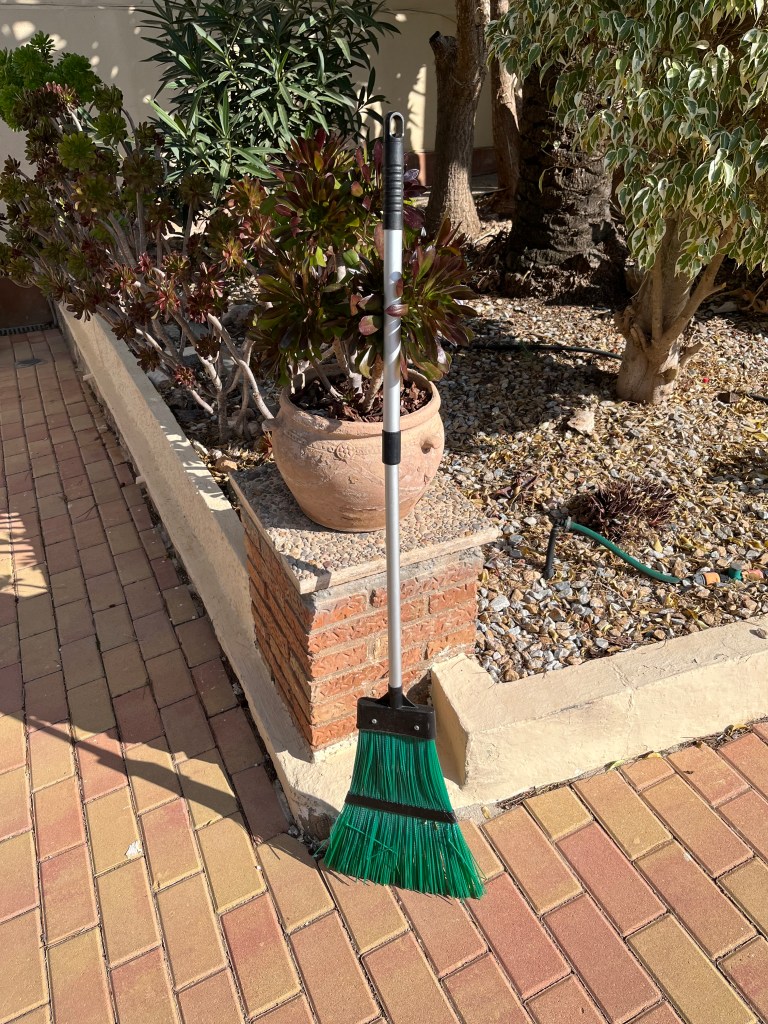
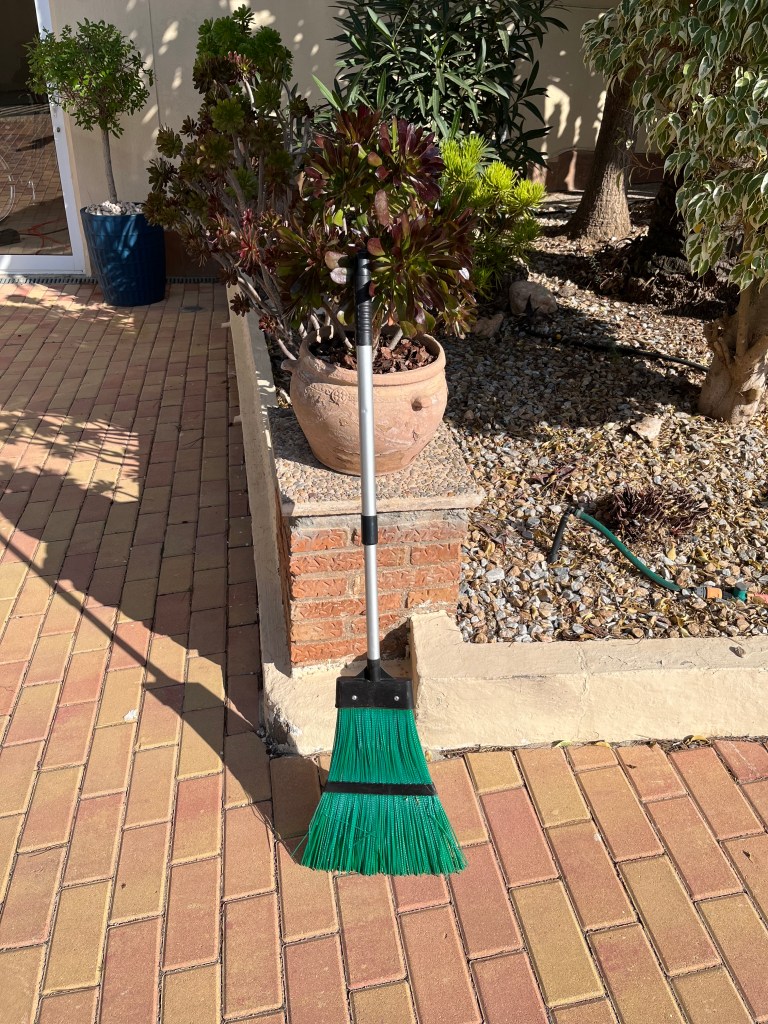
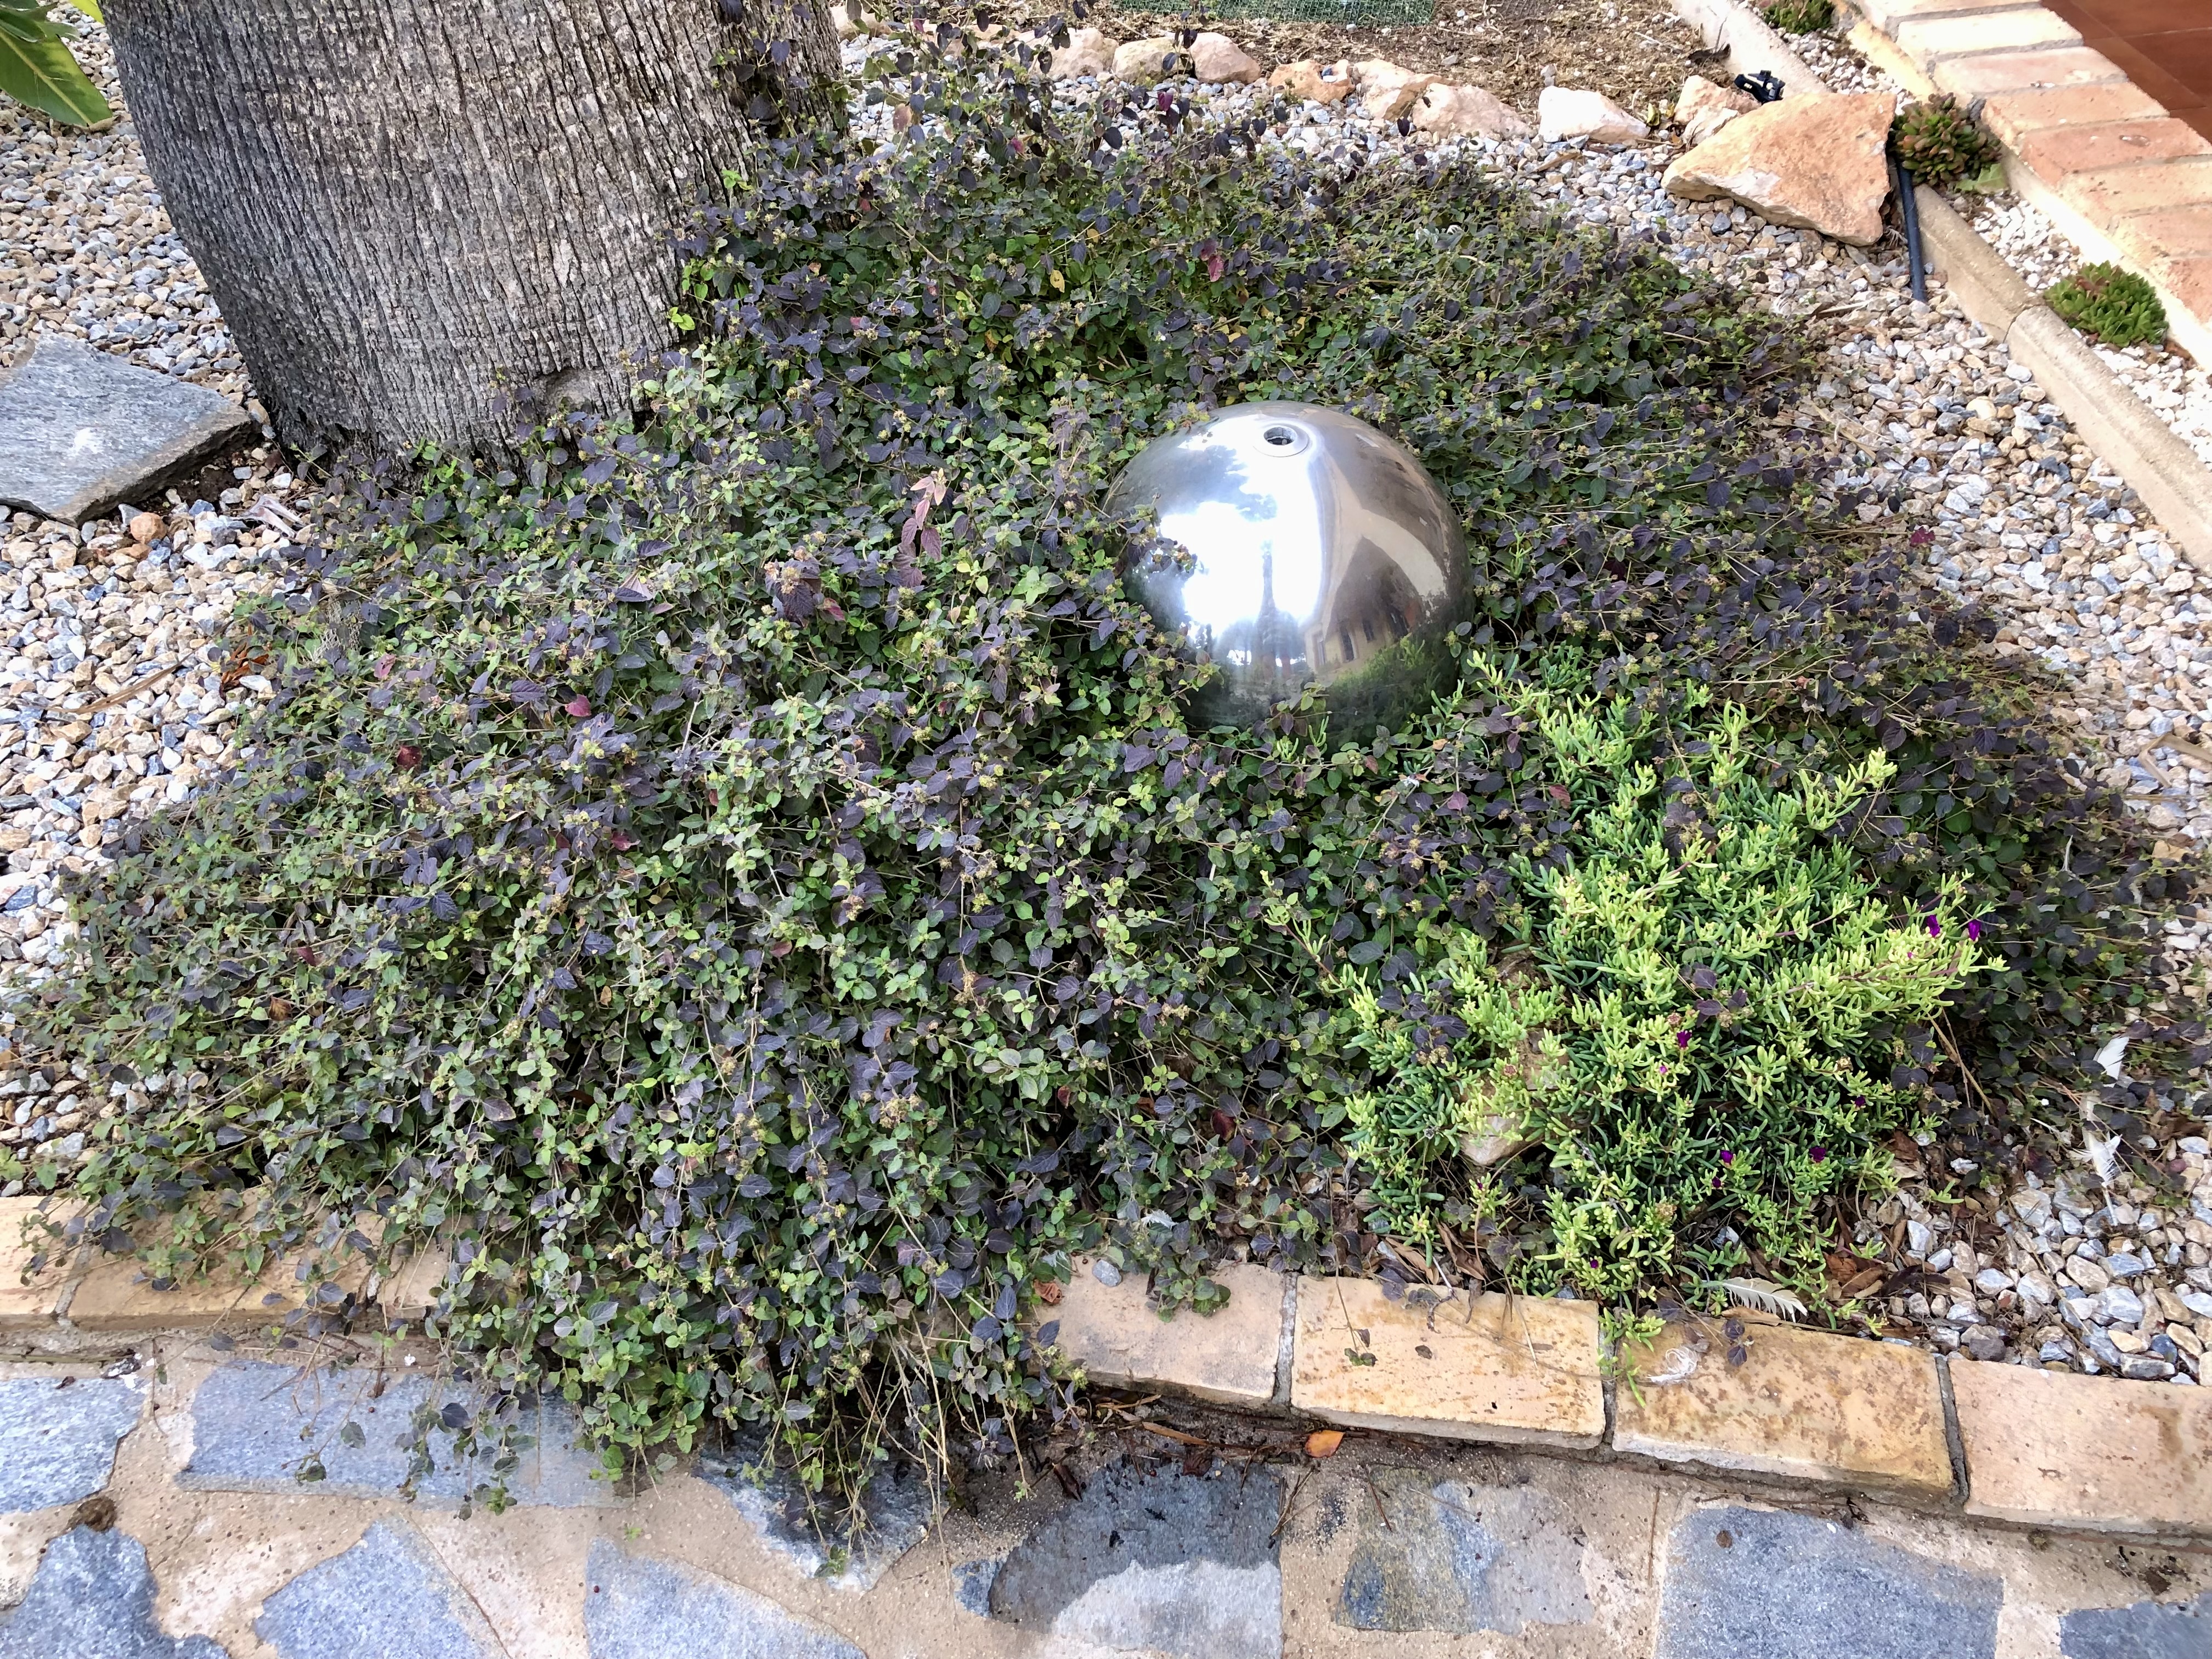


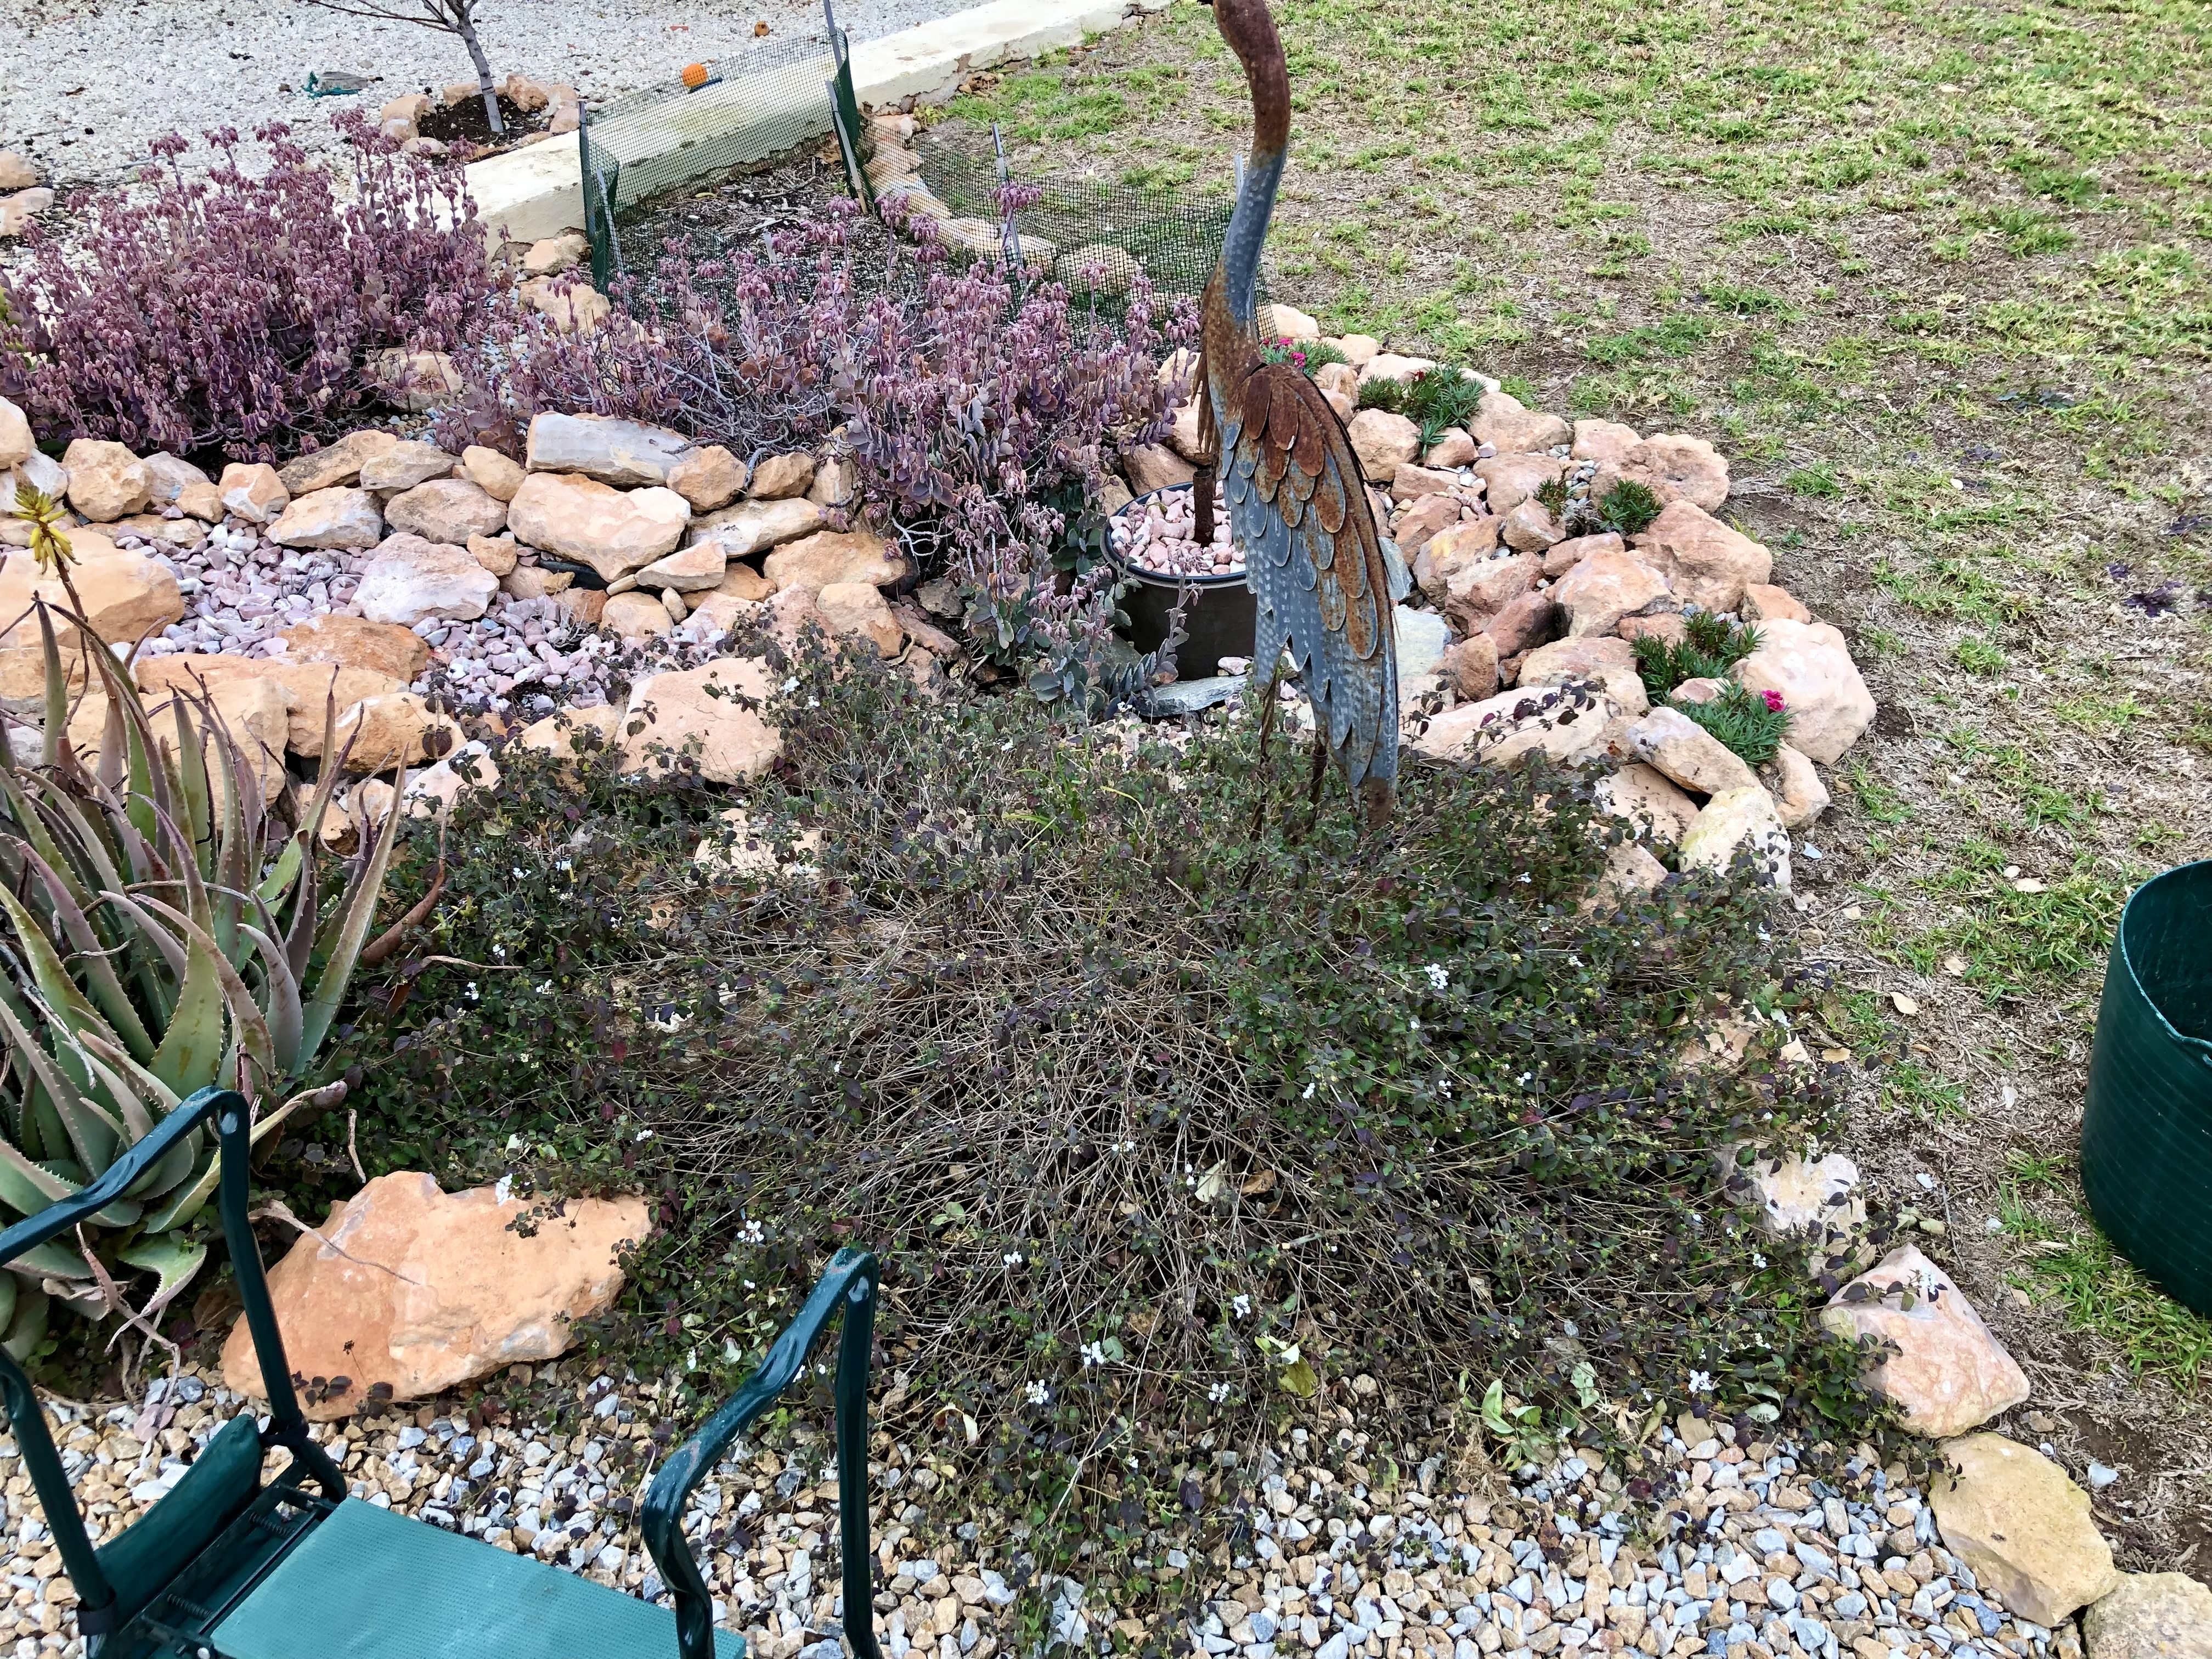


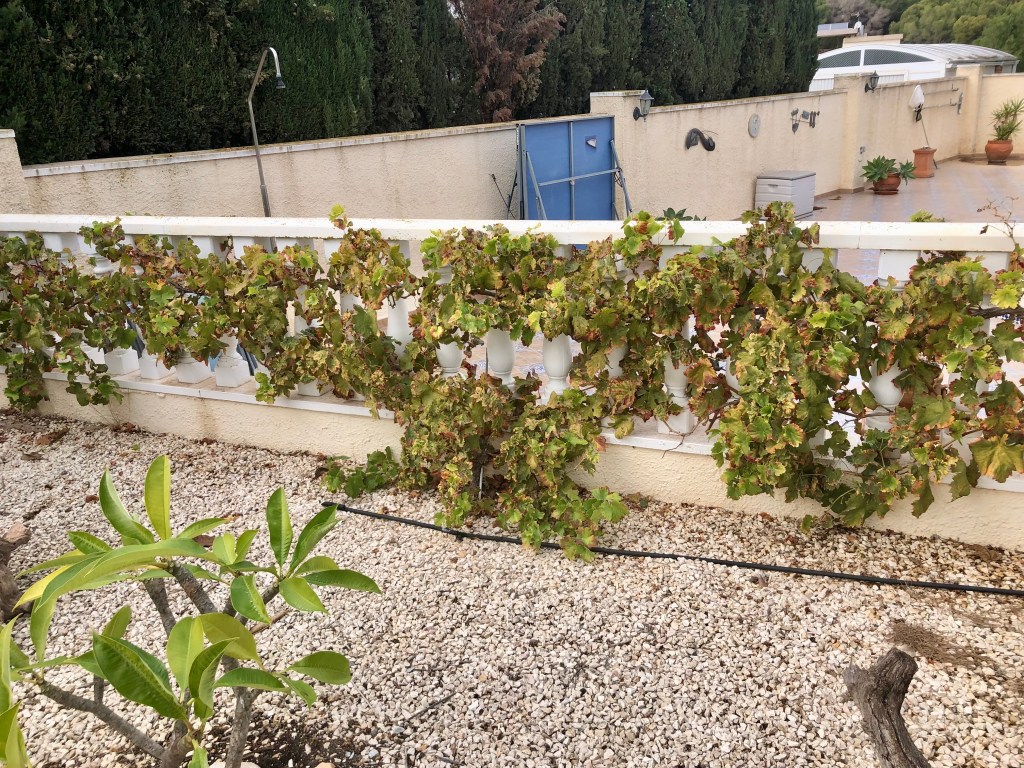
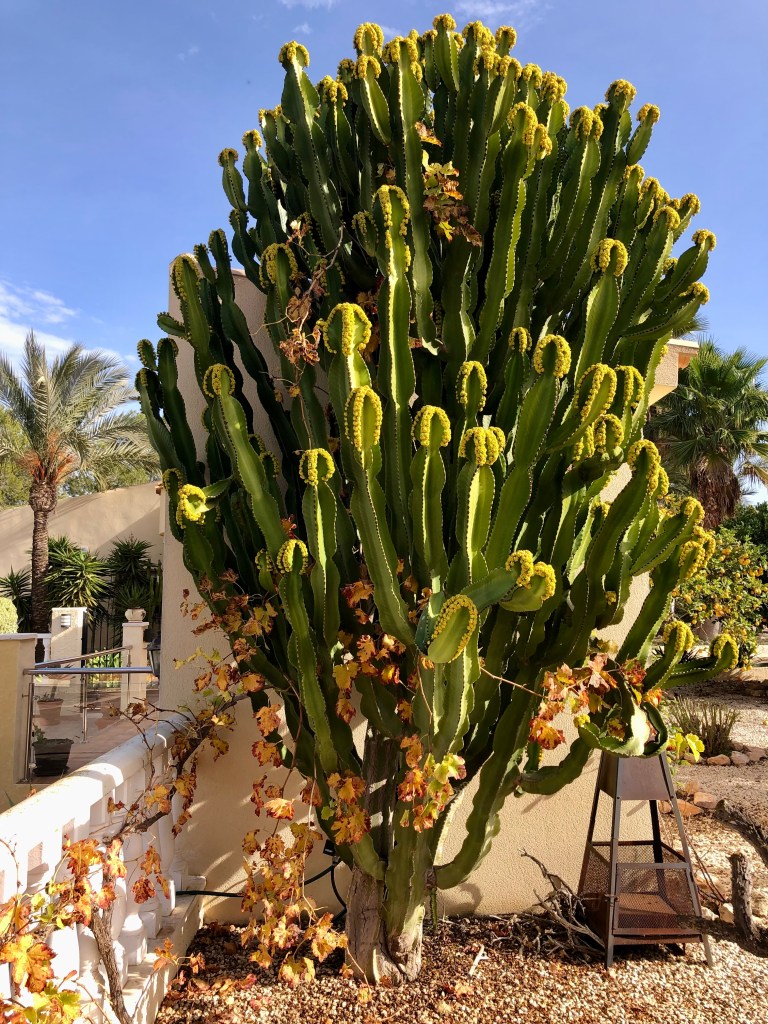

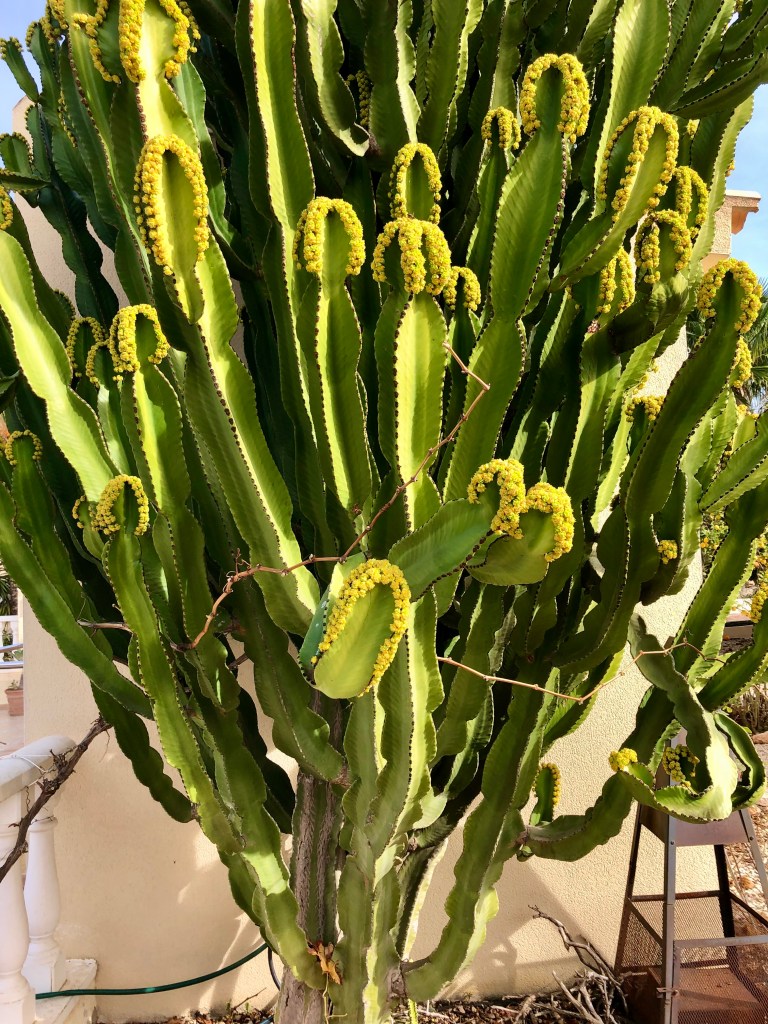
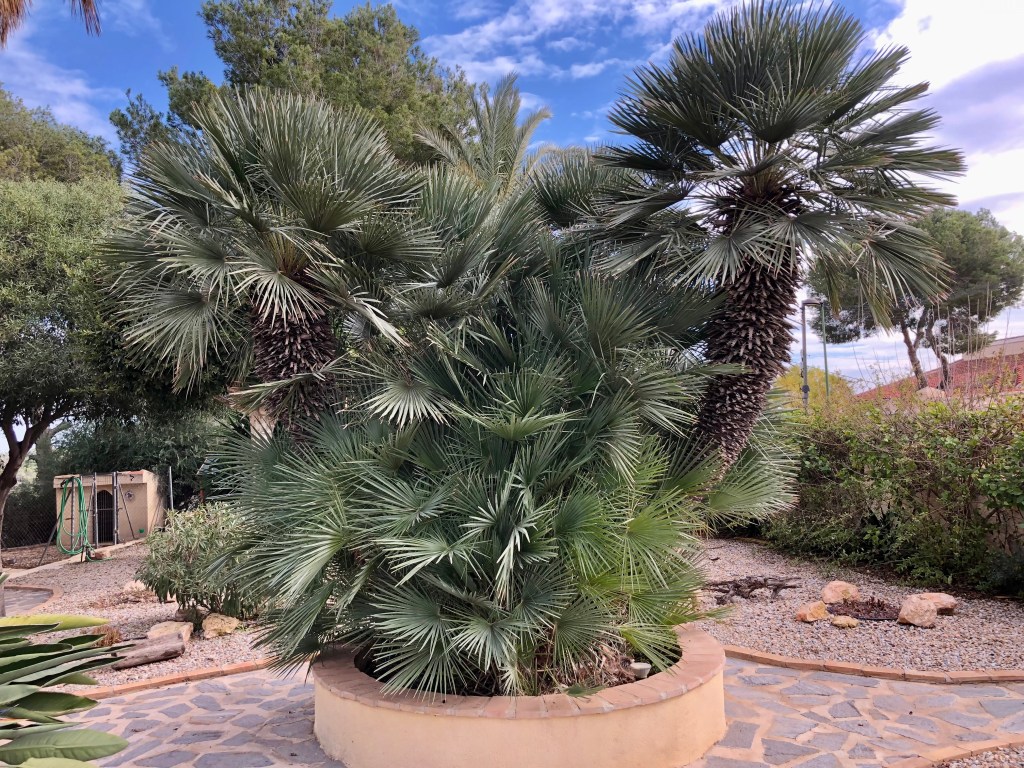
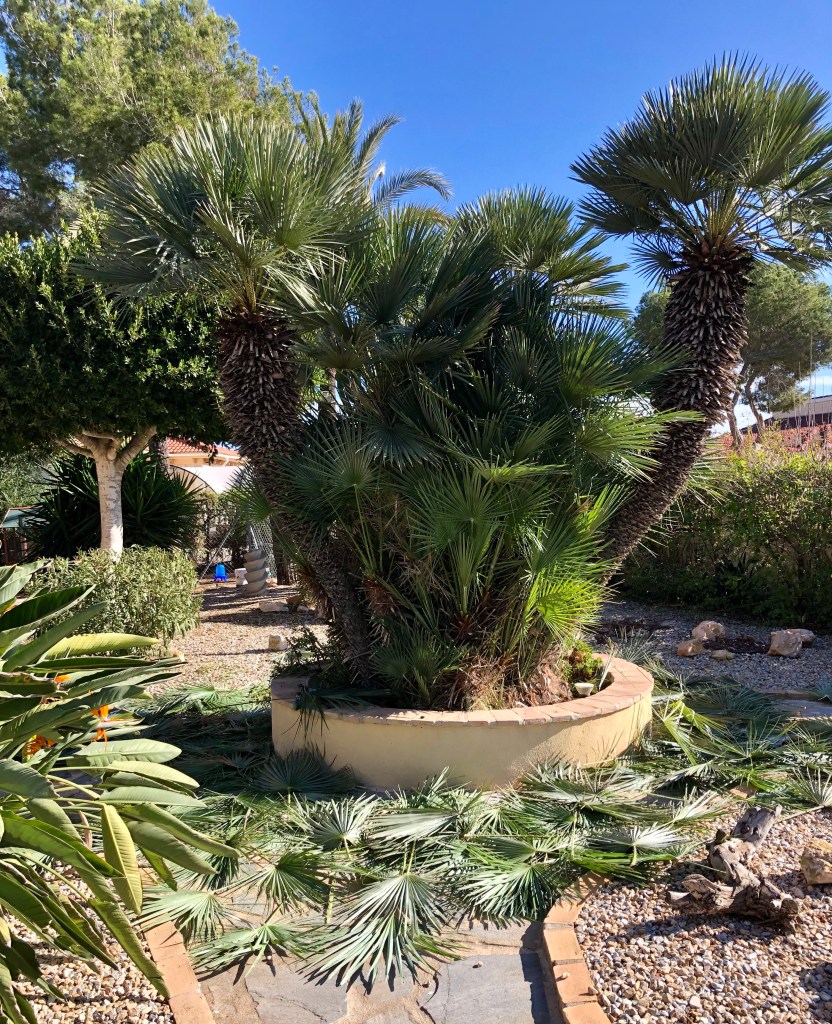

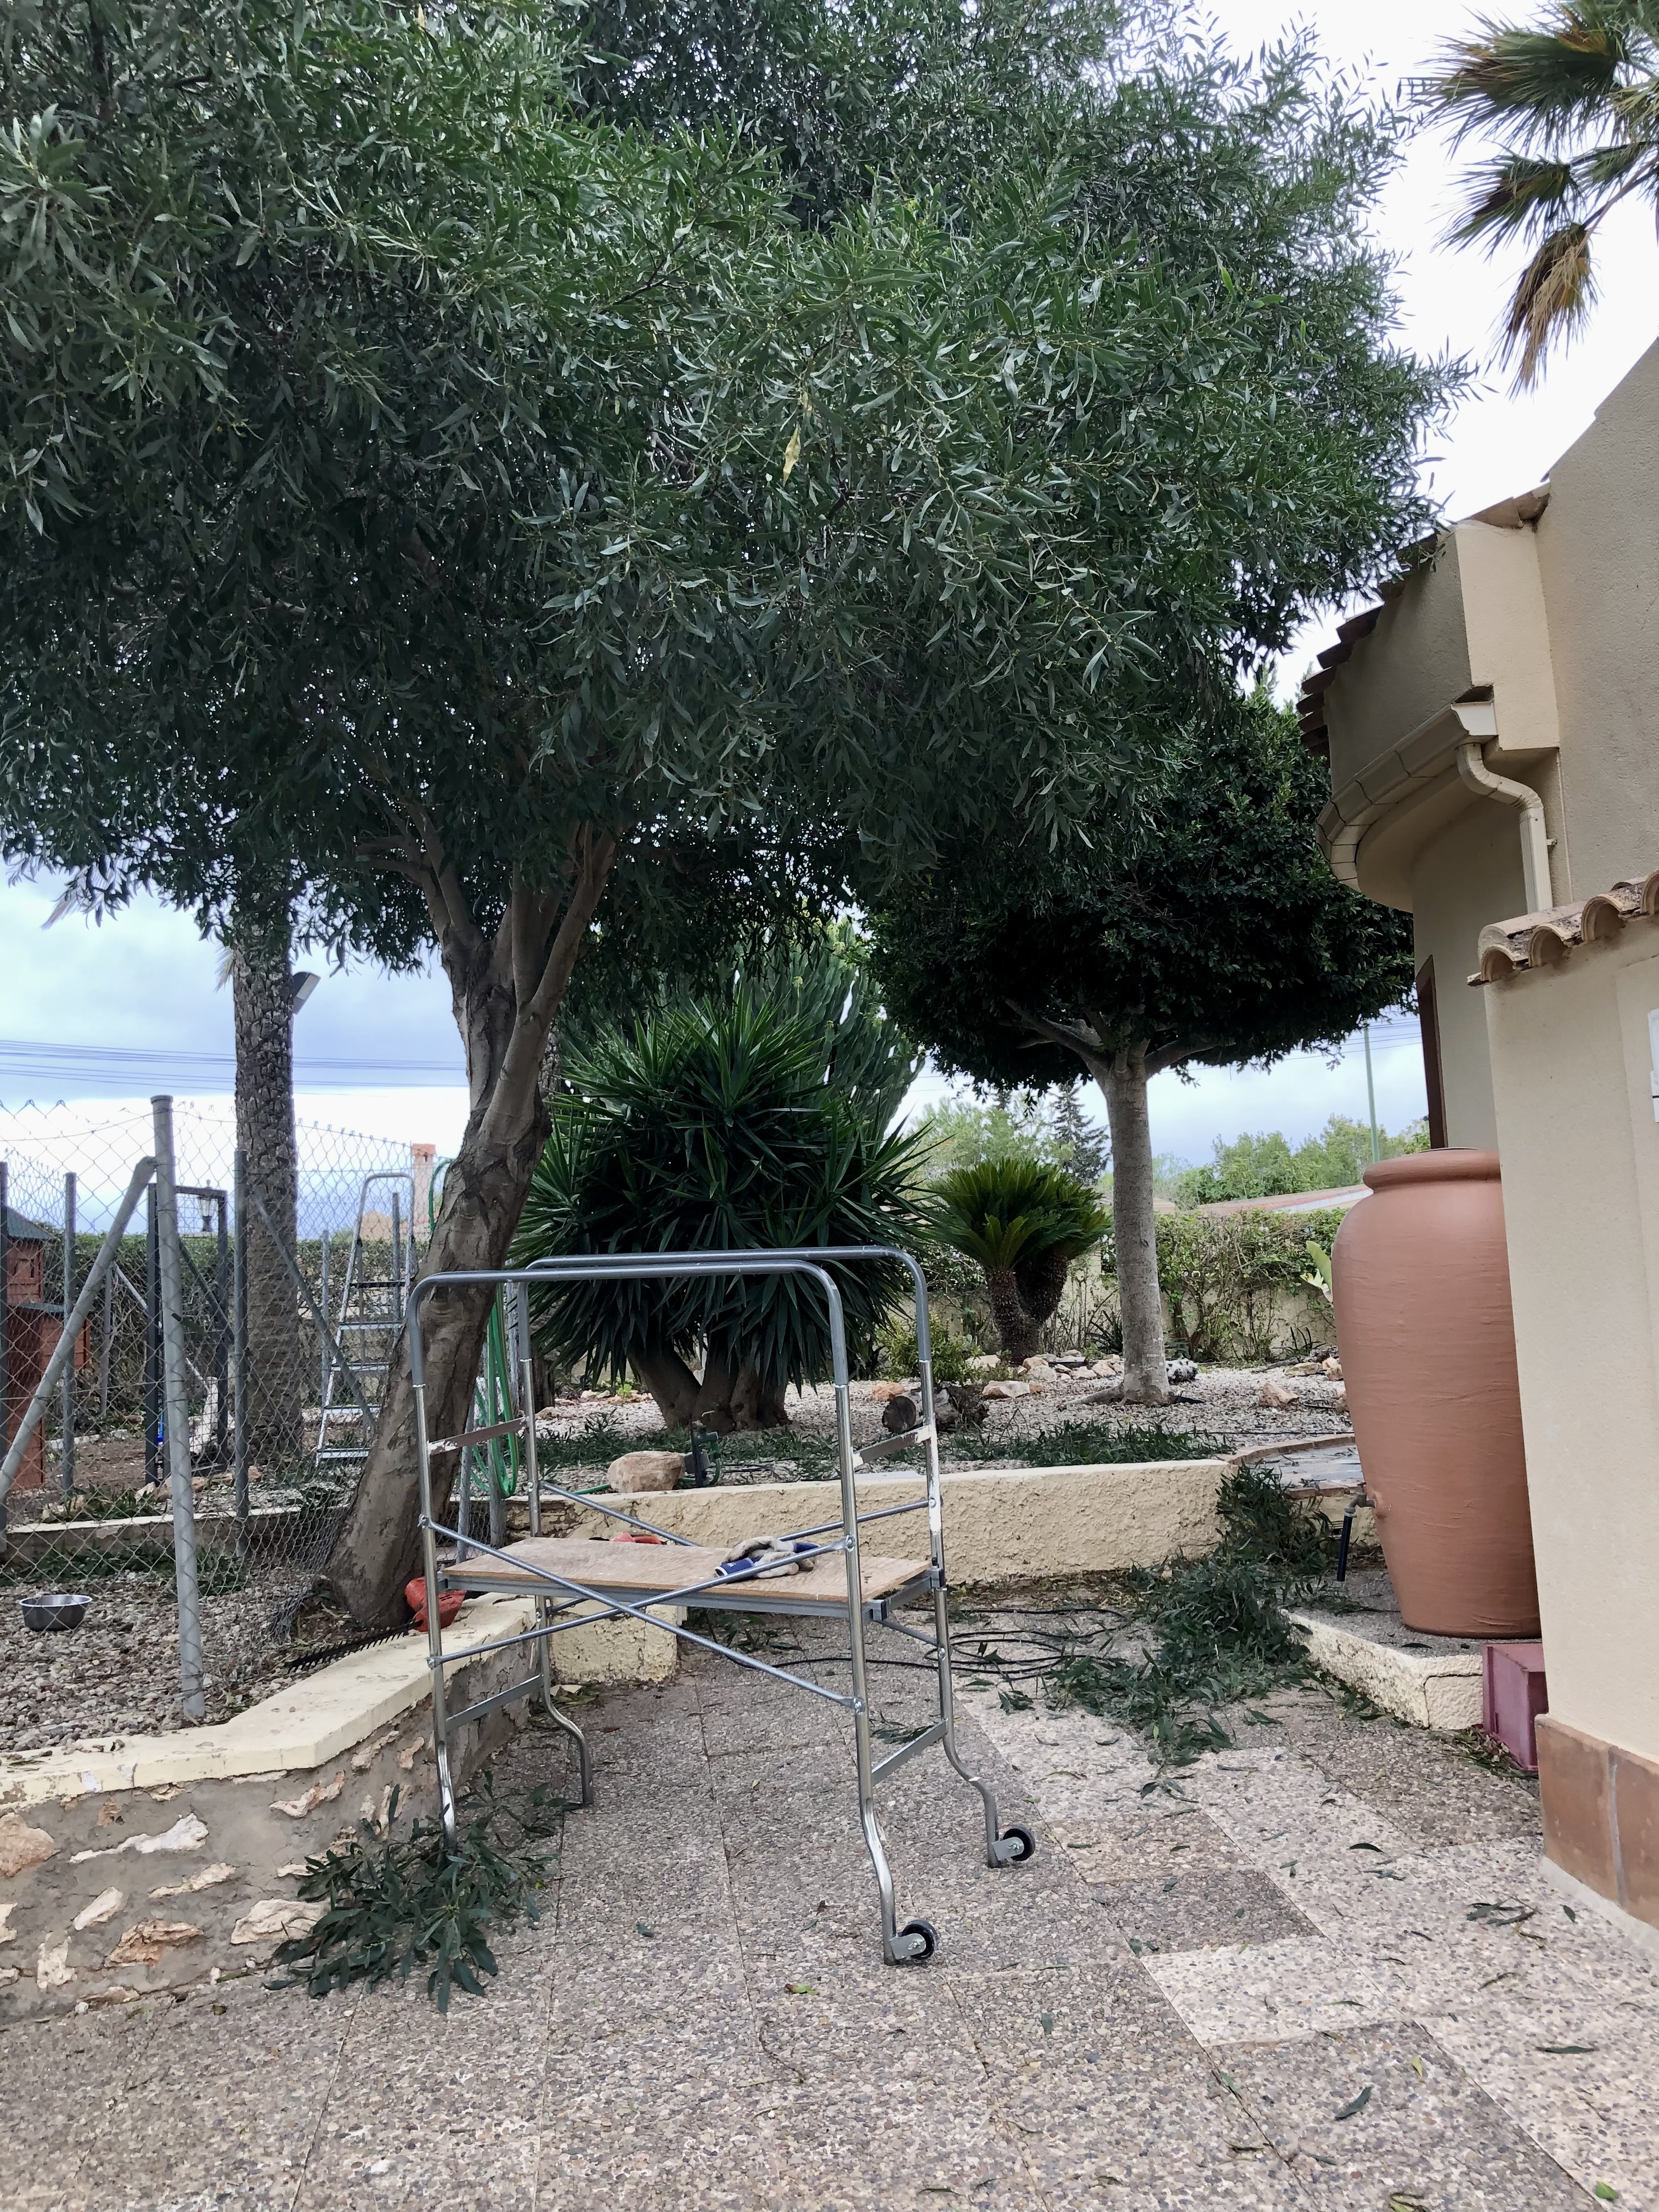


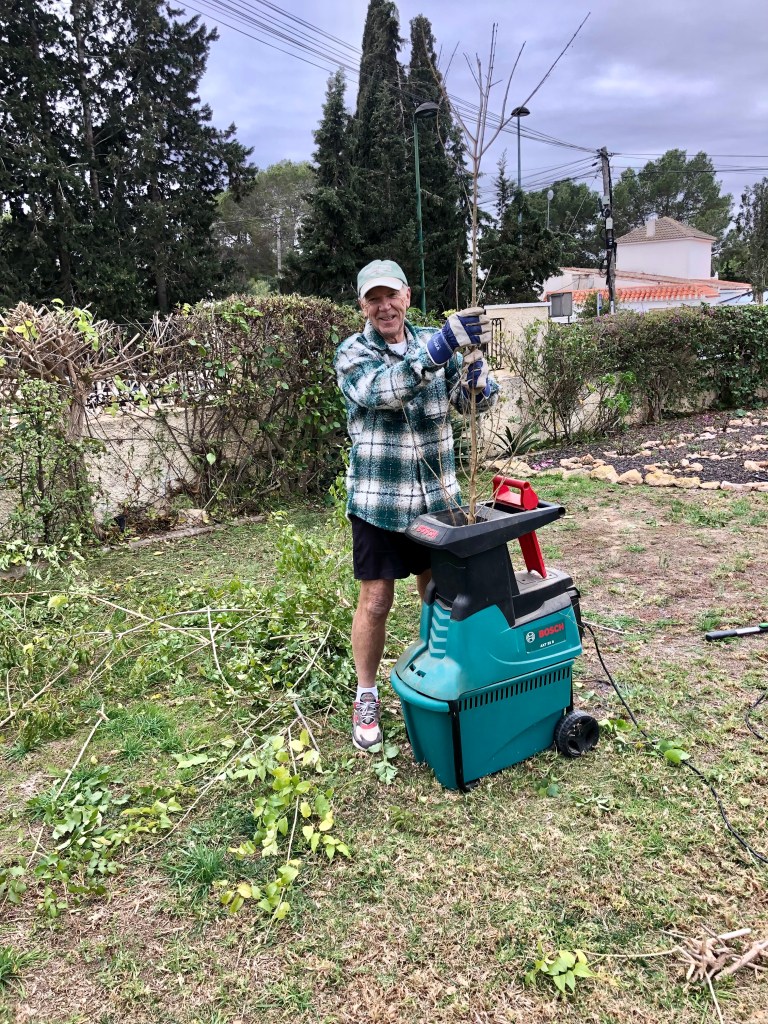


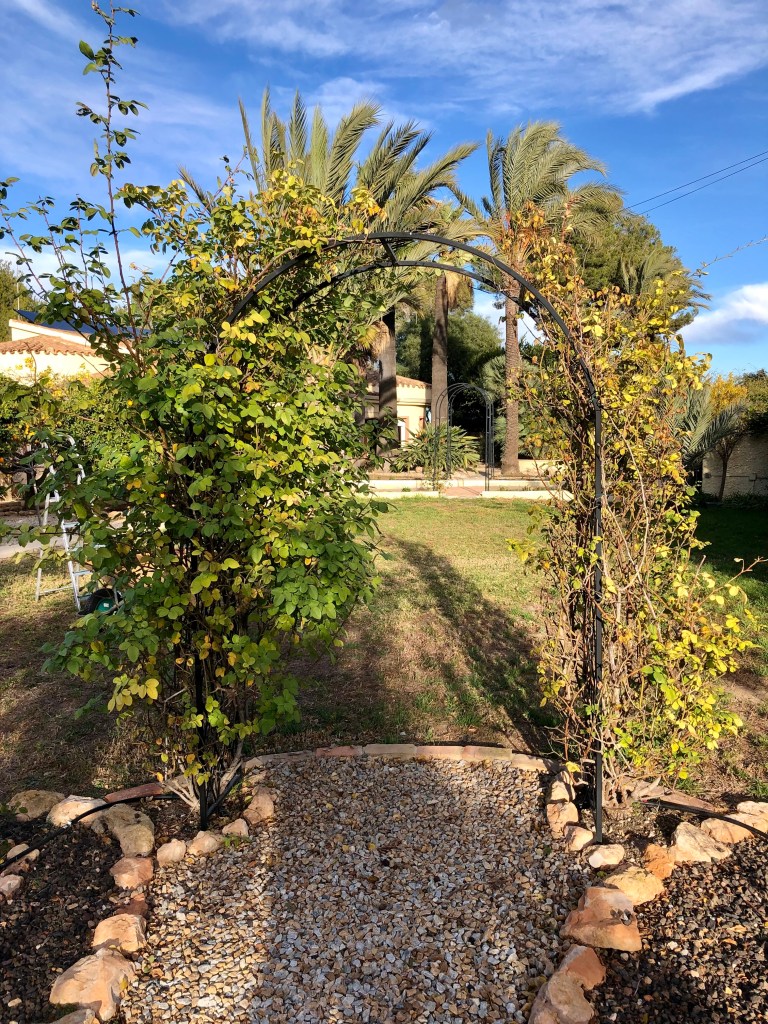


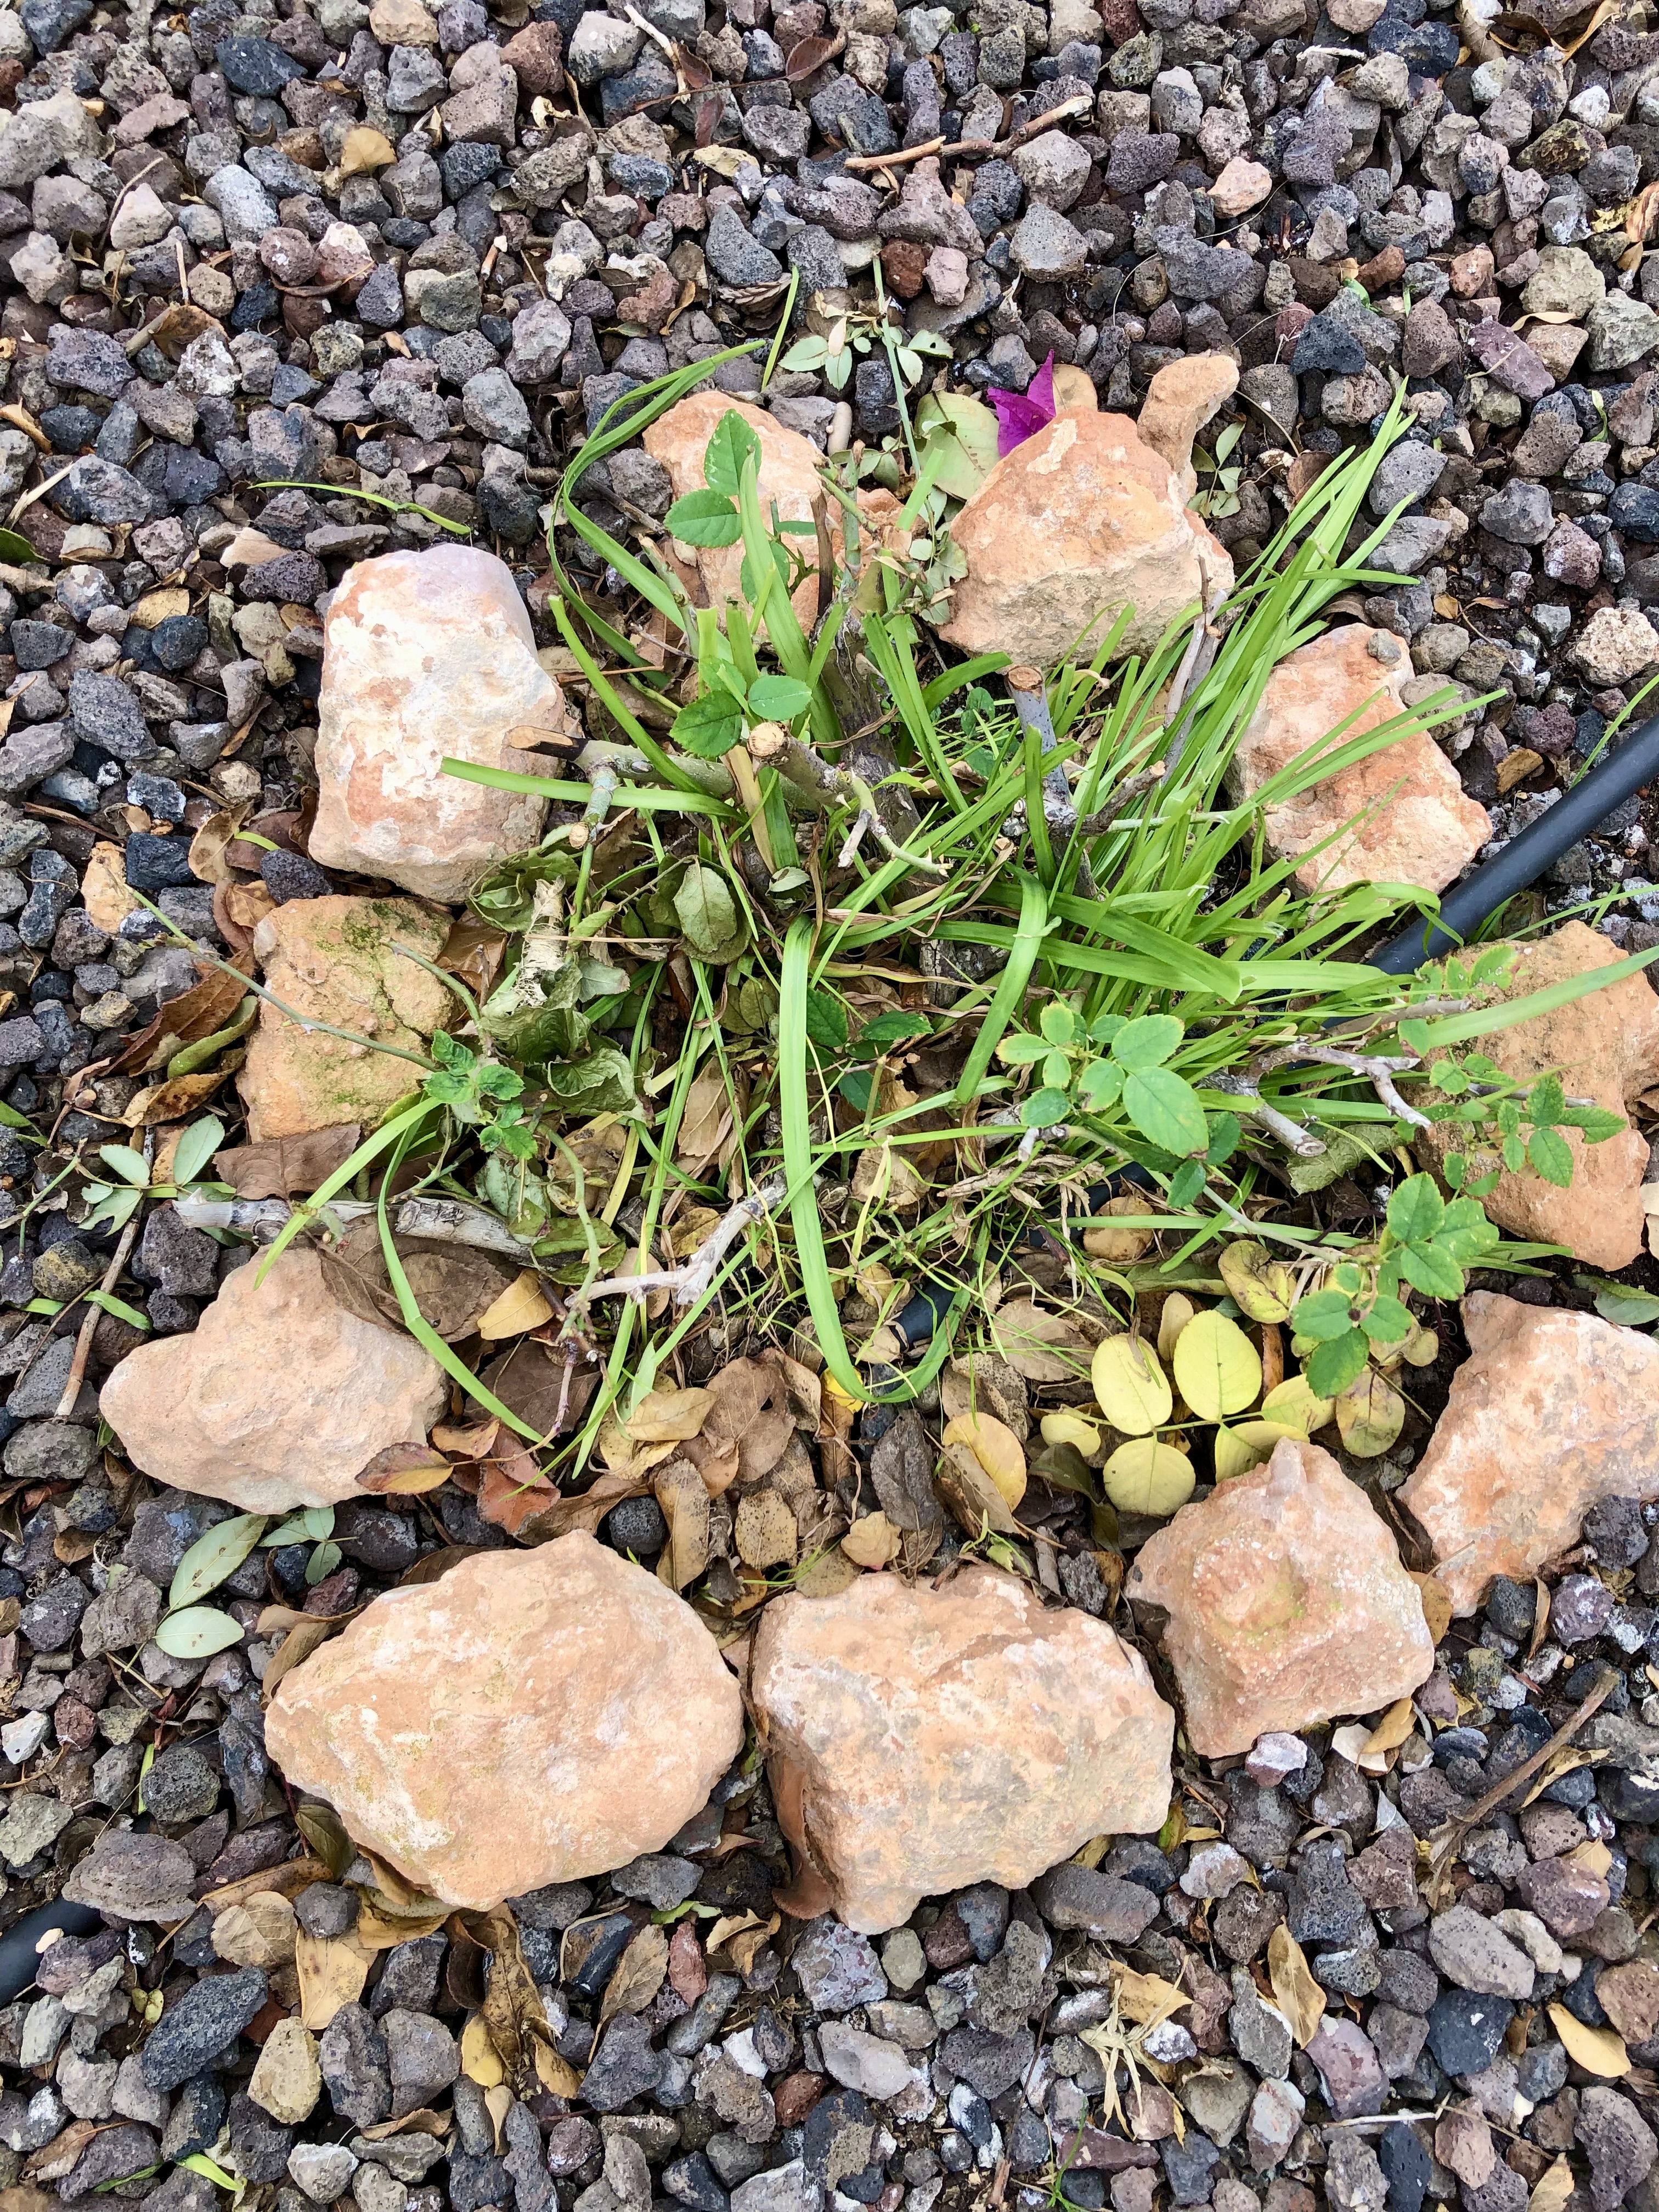


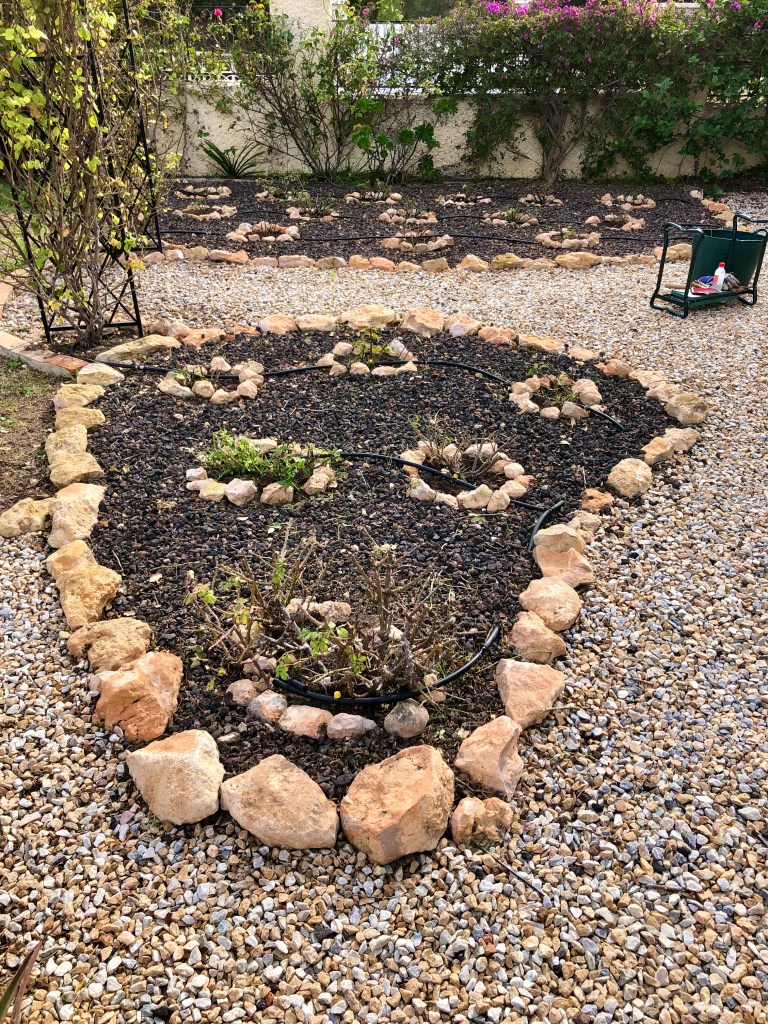

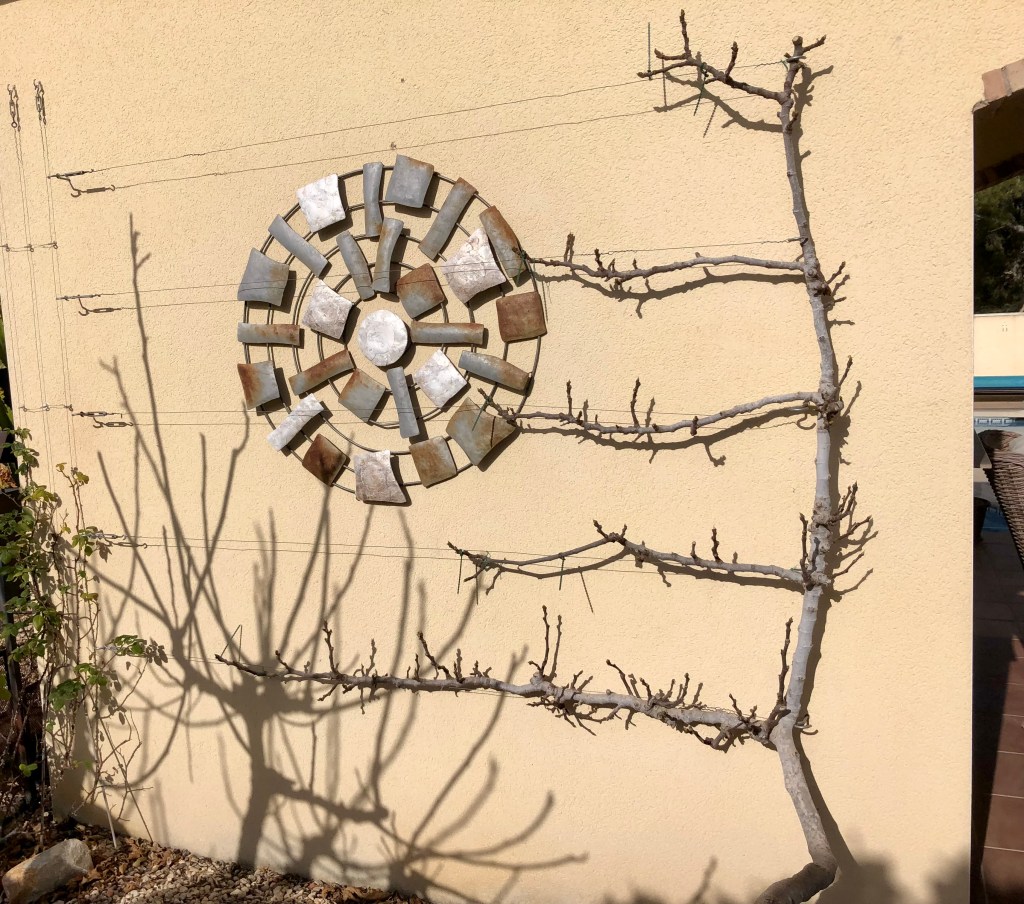

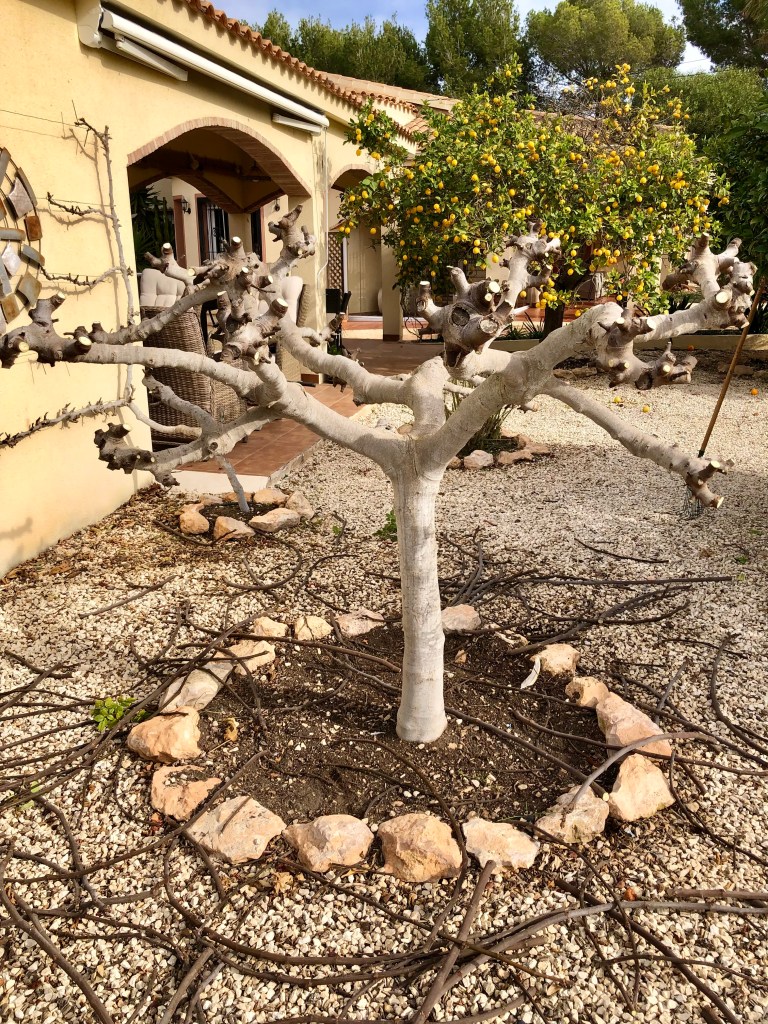


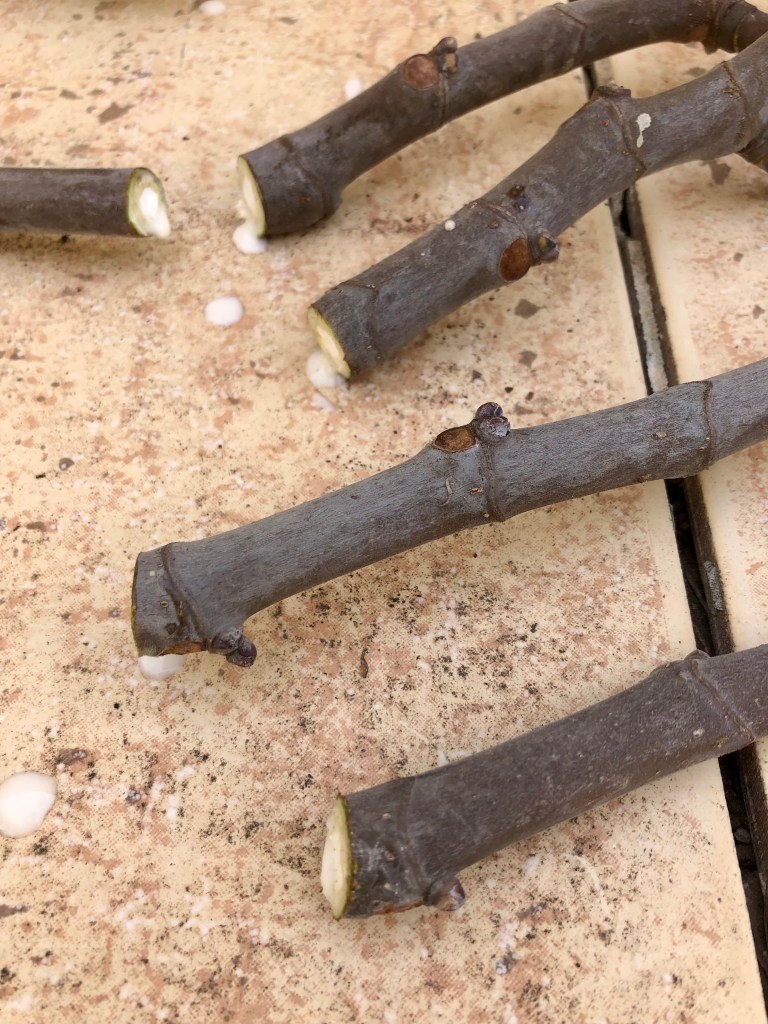


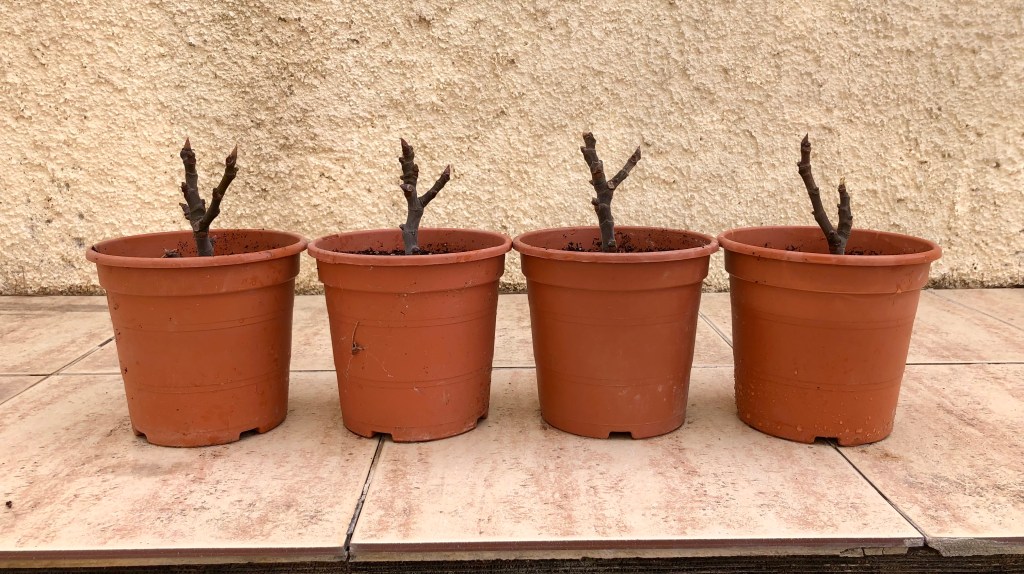


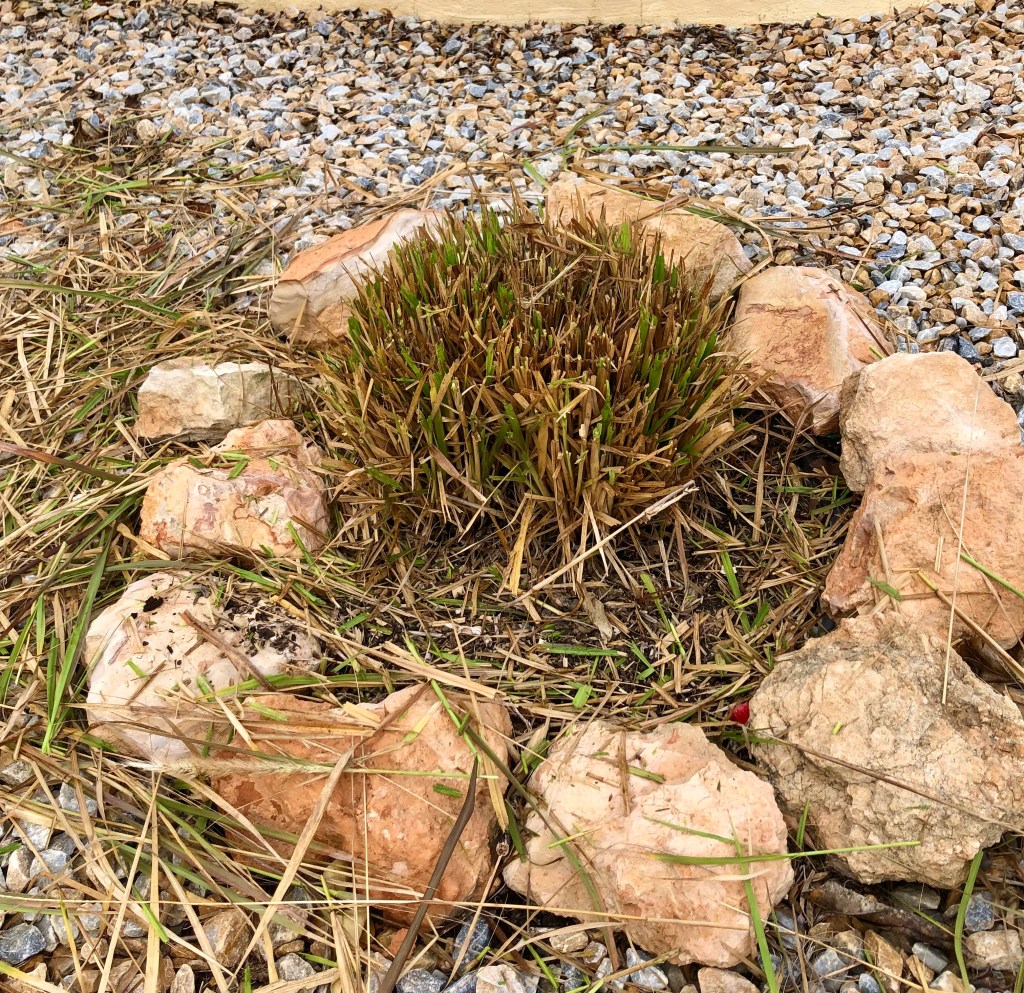

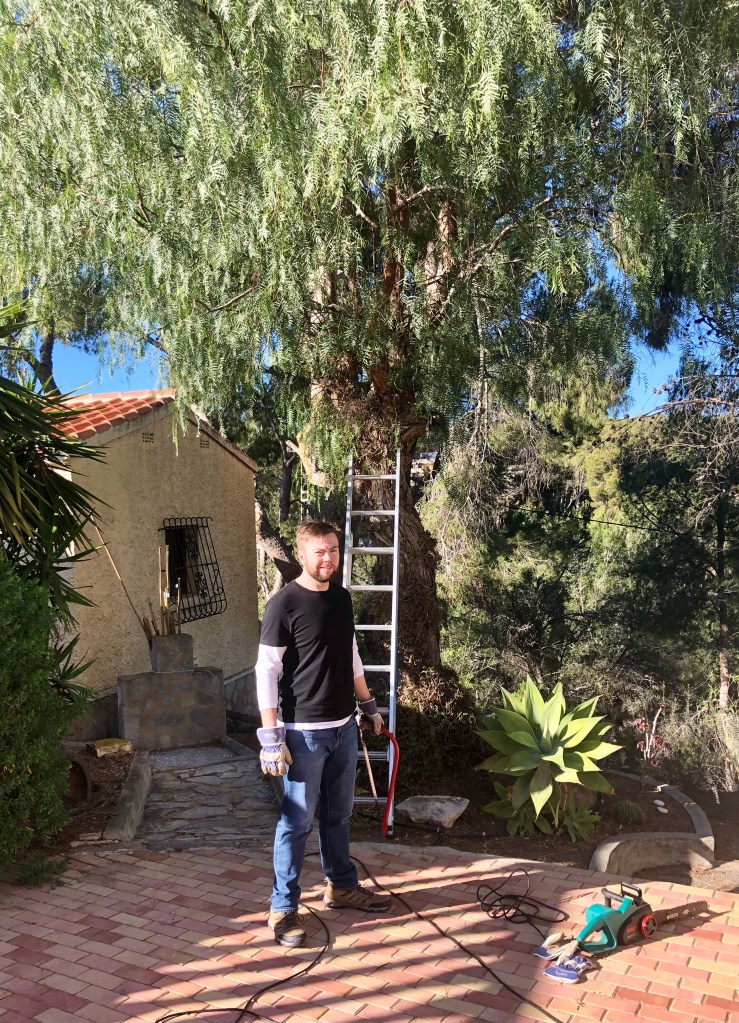

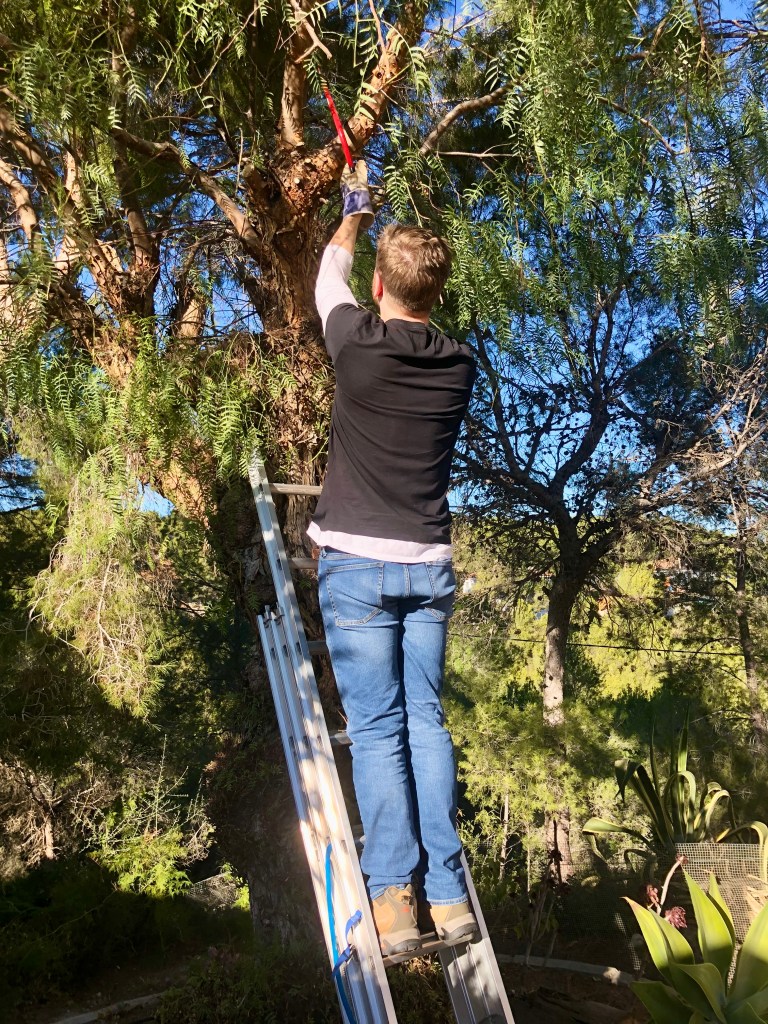
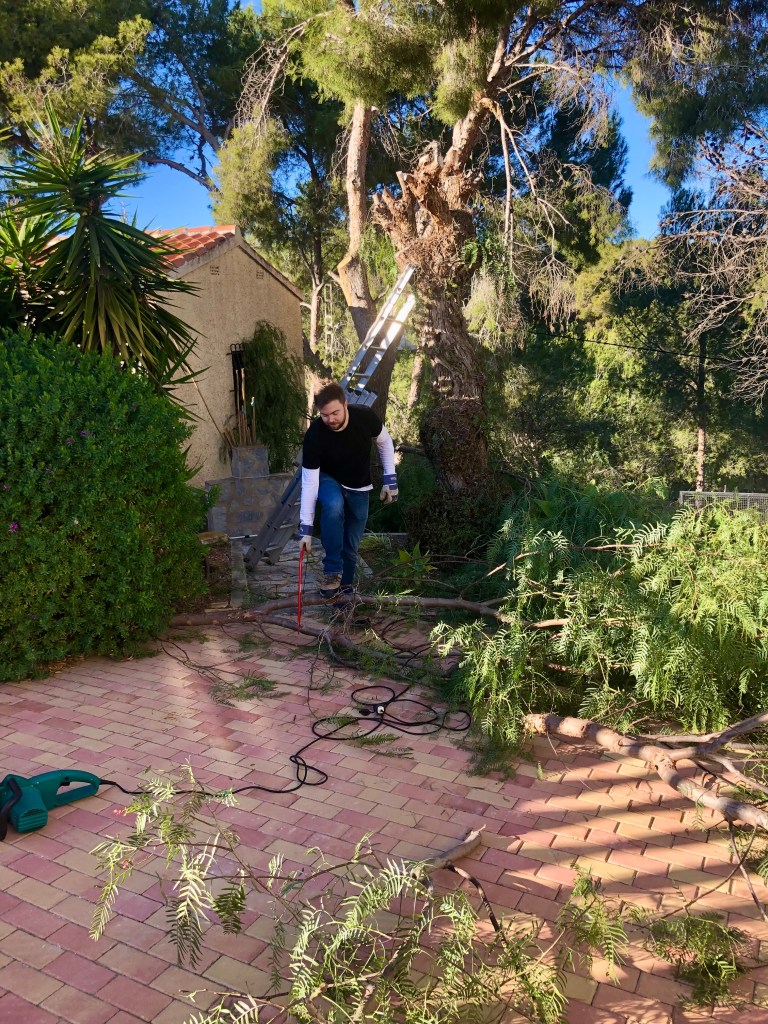


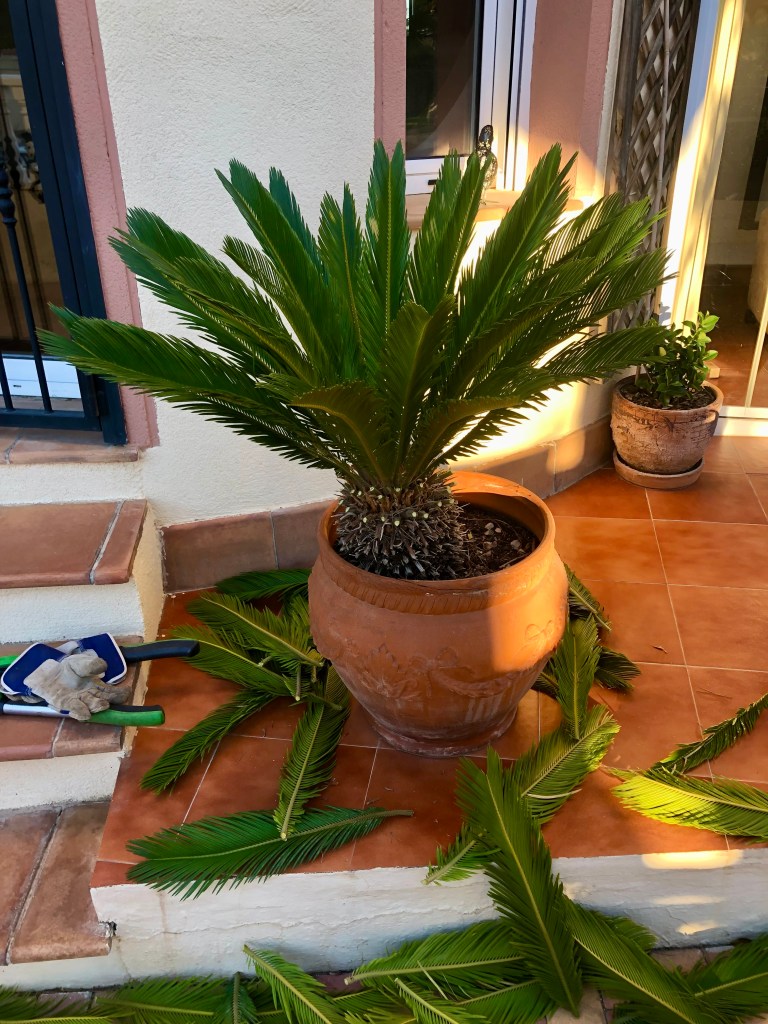

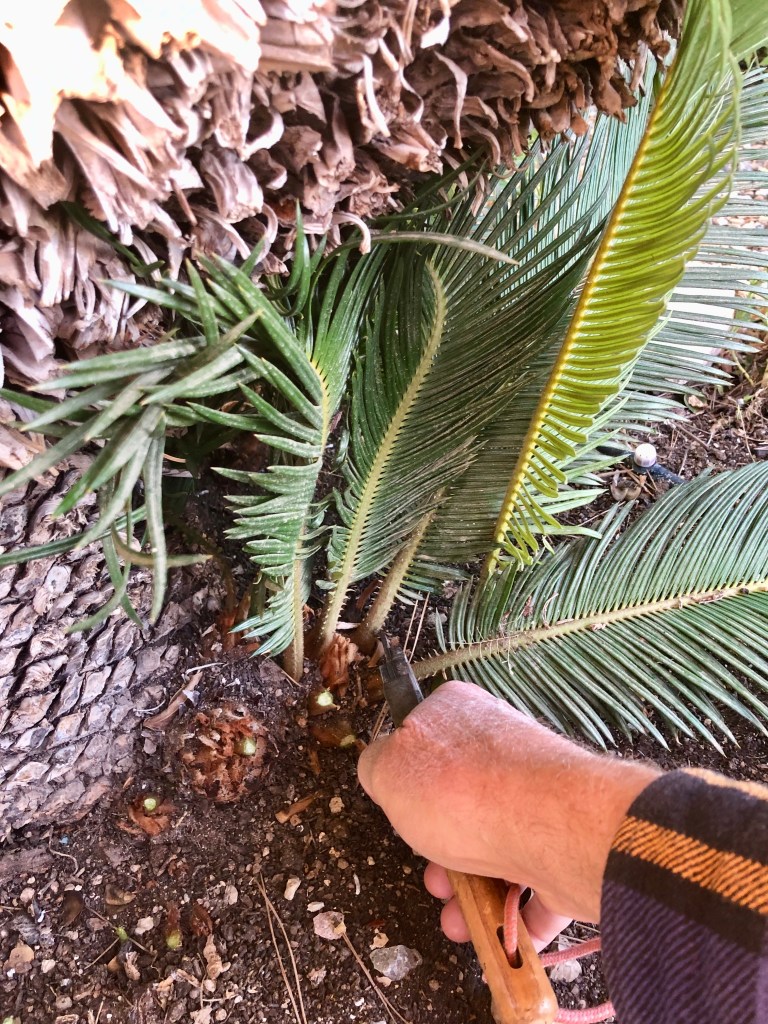
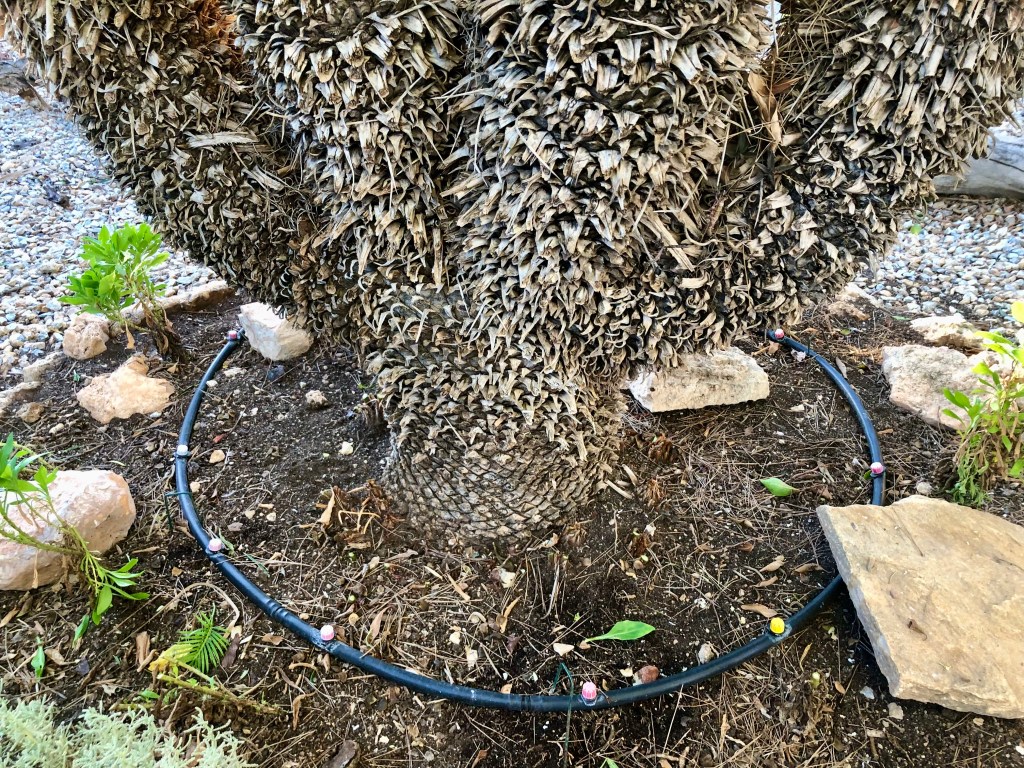
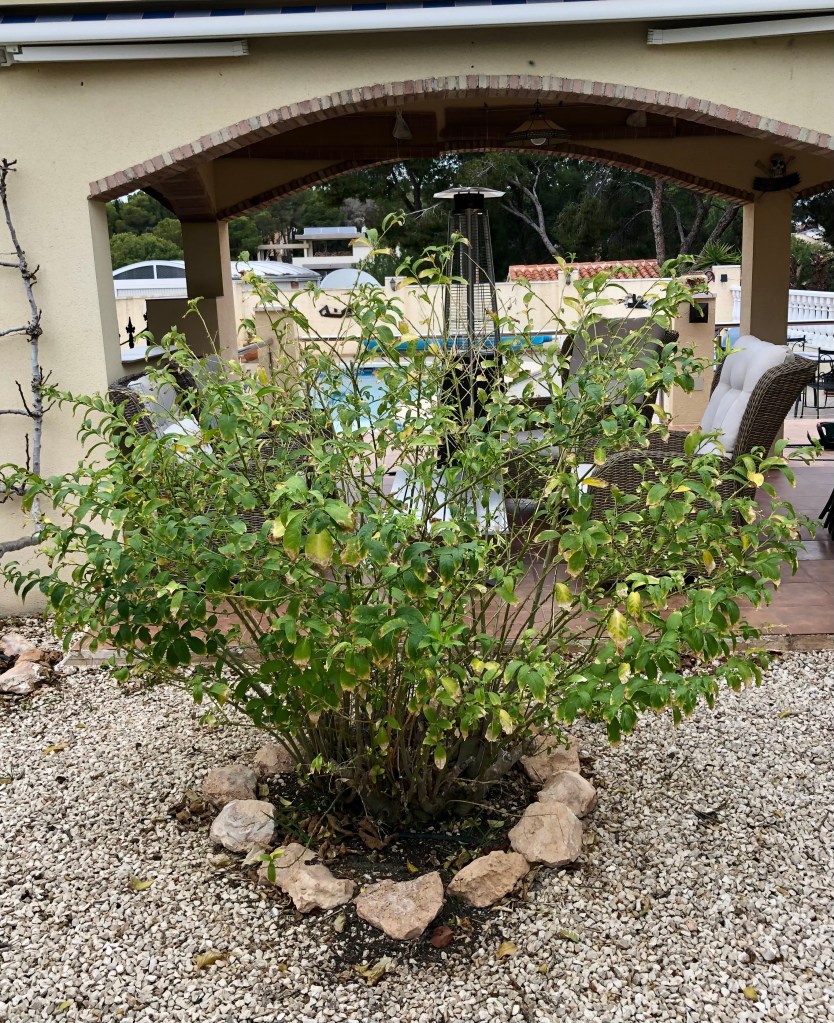


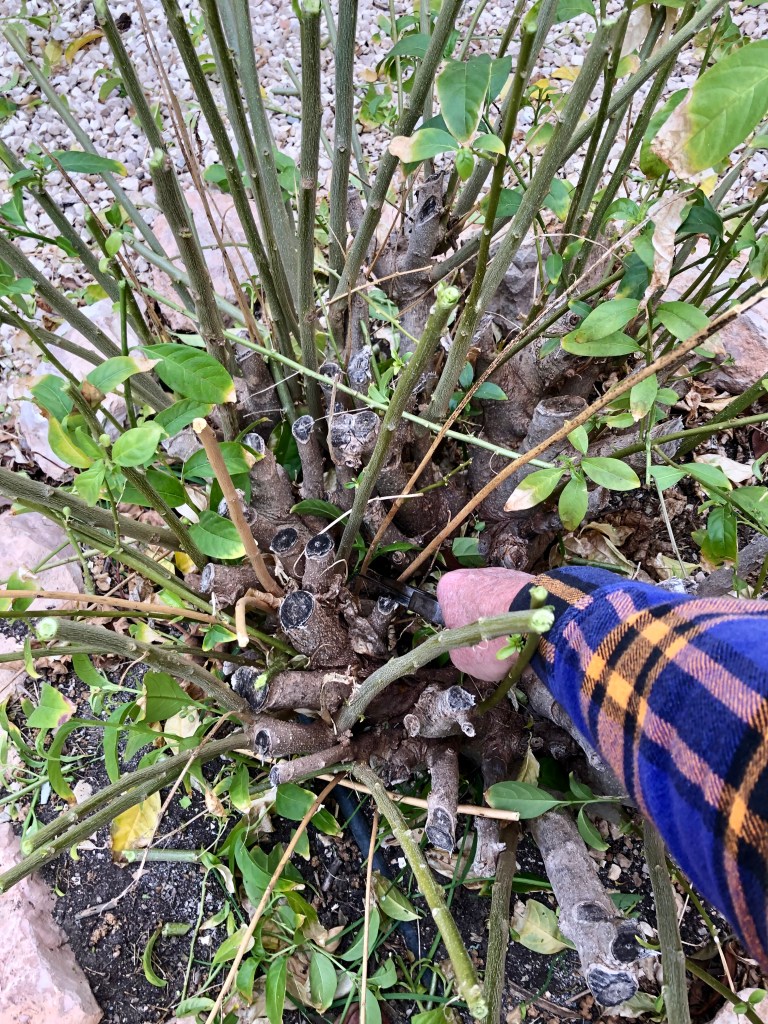


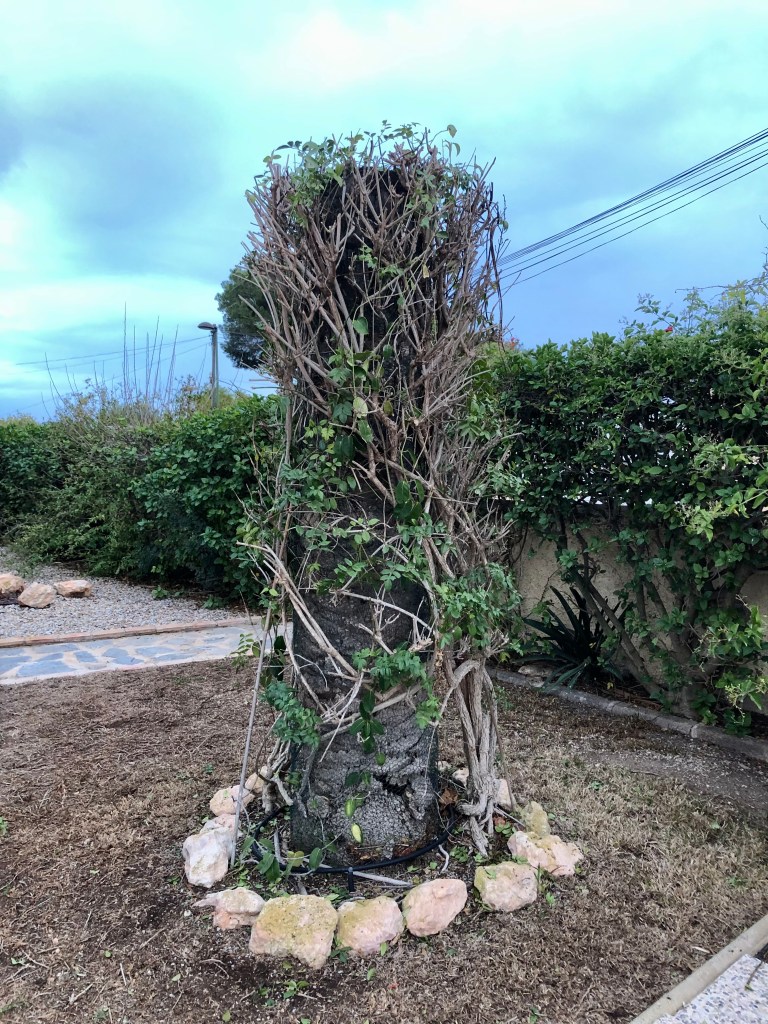


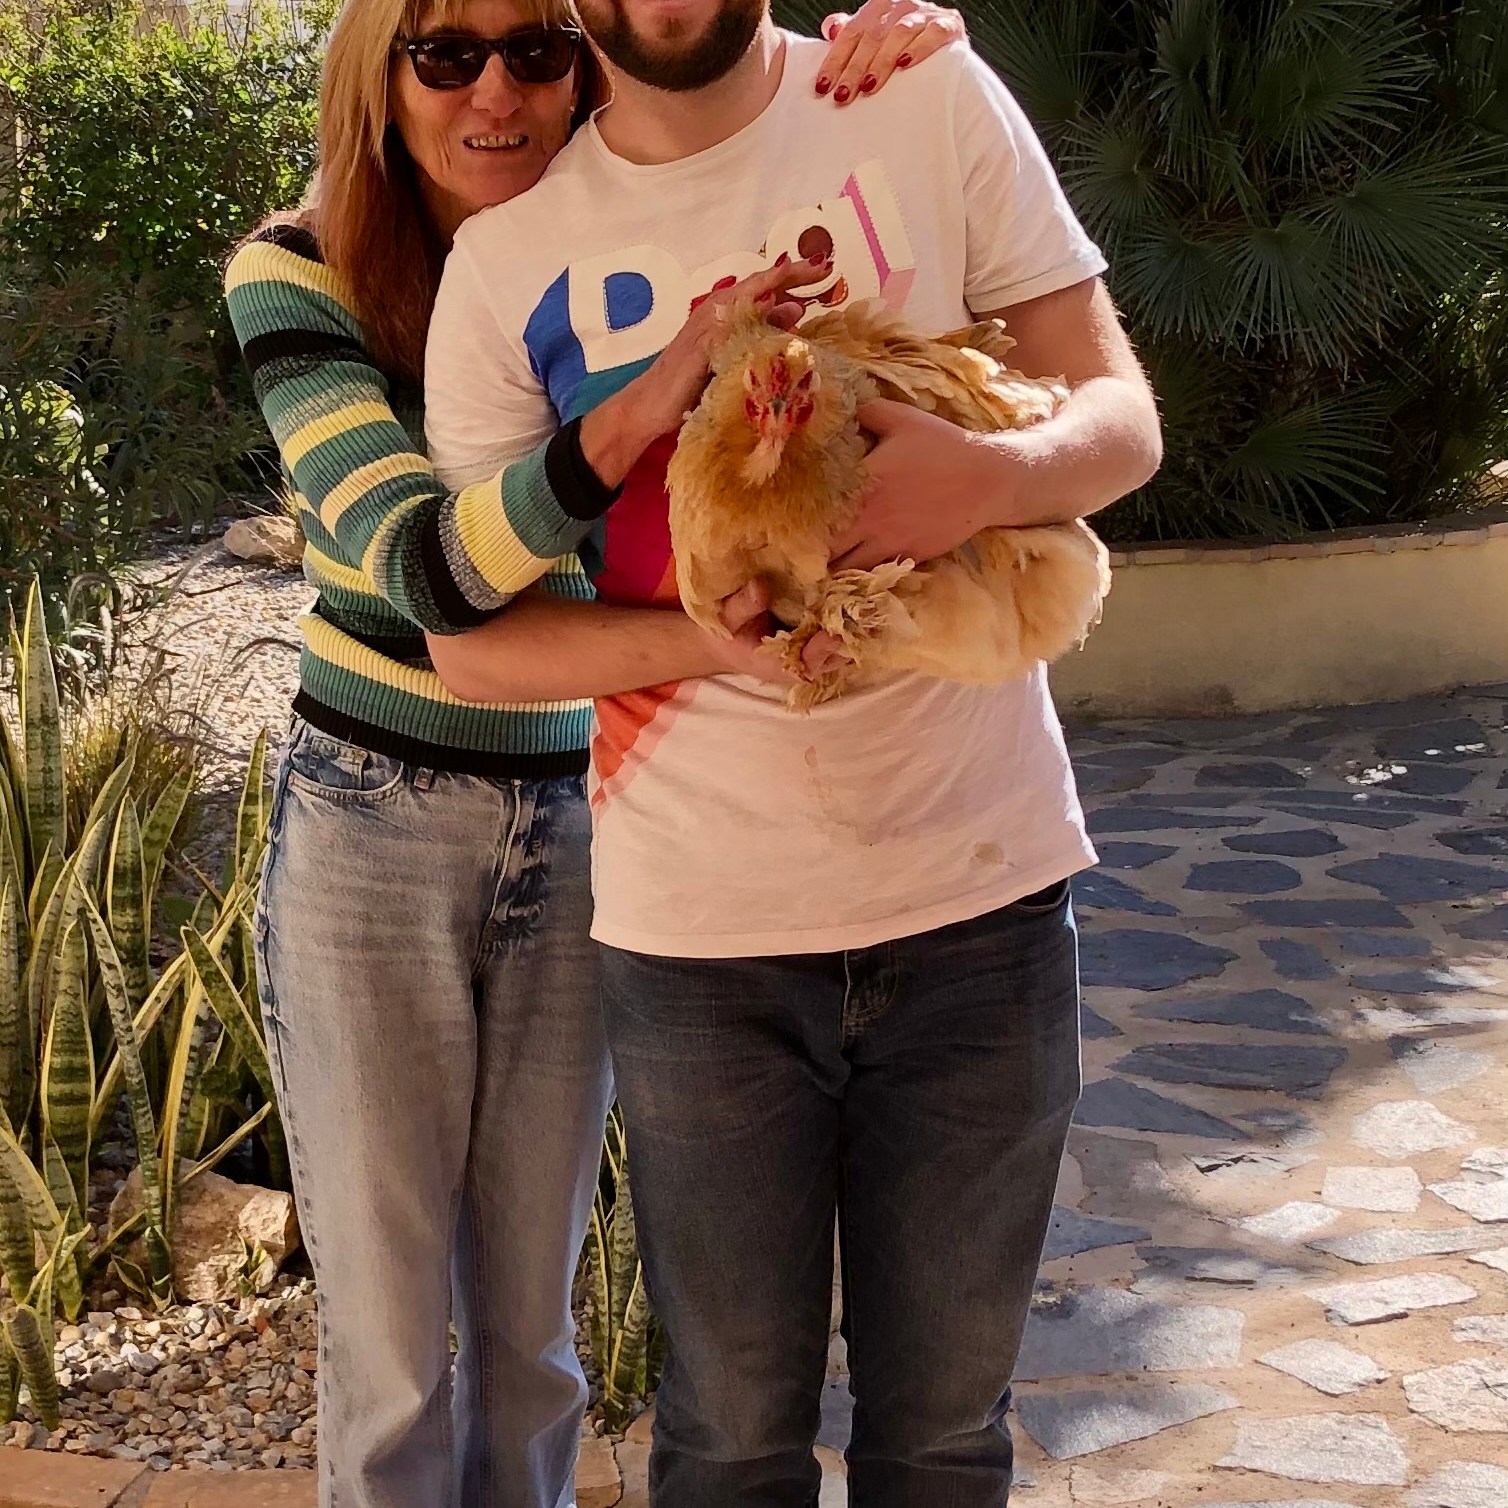

You must be logged in to post a comment.