Spring has sprung and I have been dobbed in by a Dove

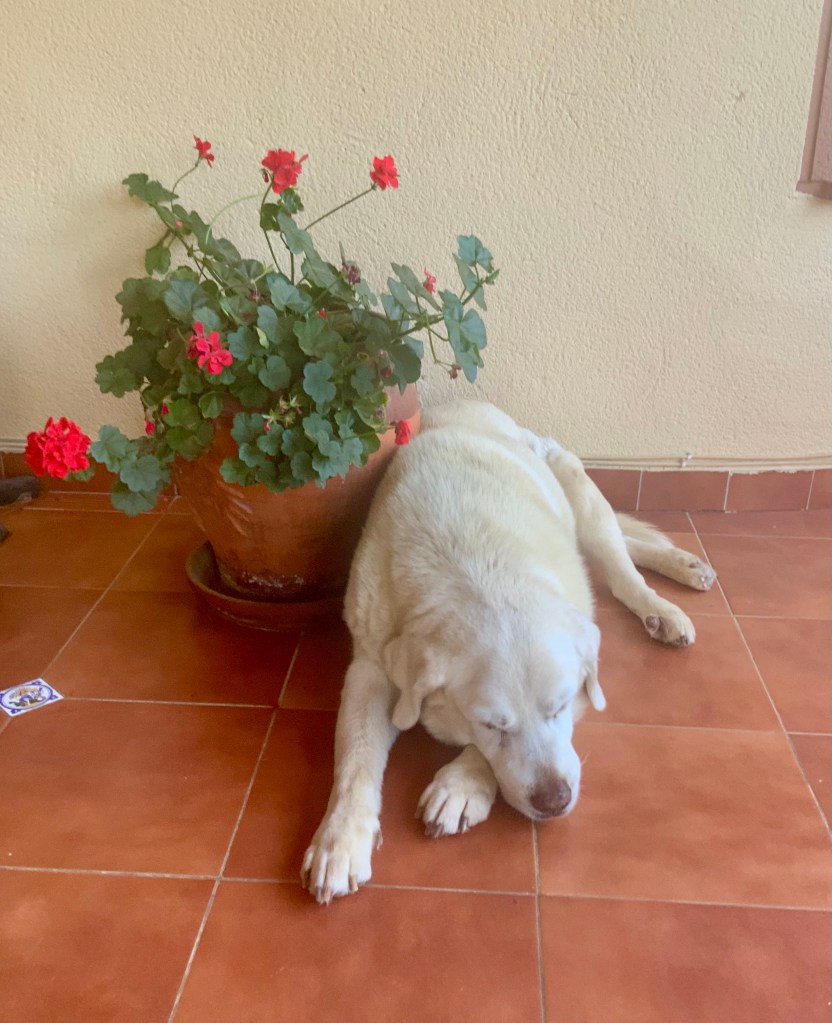
Cruella (my wife) is at our English house ruining the life of our idiot son. I am in charge of everything here: the house, the car, Tango the lonely blind Labrador and the bloody chickens. I just ignore everything and garden all day, the chickens don’t get fed unless they ask directly, and I don’t understand chickenese. It was all going so well until Cruella somehow found out. There were consequences, but more of that later.

Spring is such an exciting time for us gardeners and there is so many things that we need to be getting on with.

15th March 2025. Things I have been doing lately.

  • Deadheading Aeoniums
  • Refreshing plants in pots
  • Reviving your lawn
  • Planting seeds
  • Dealing with a traitor pigeon

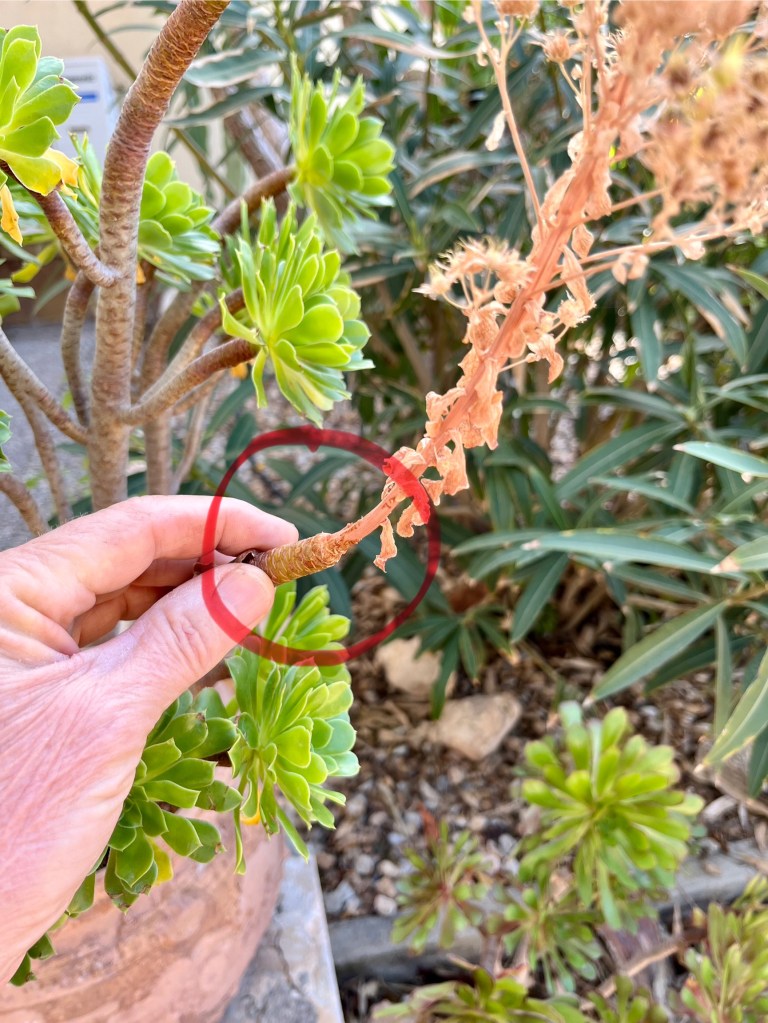
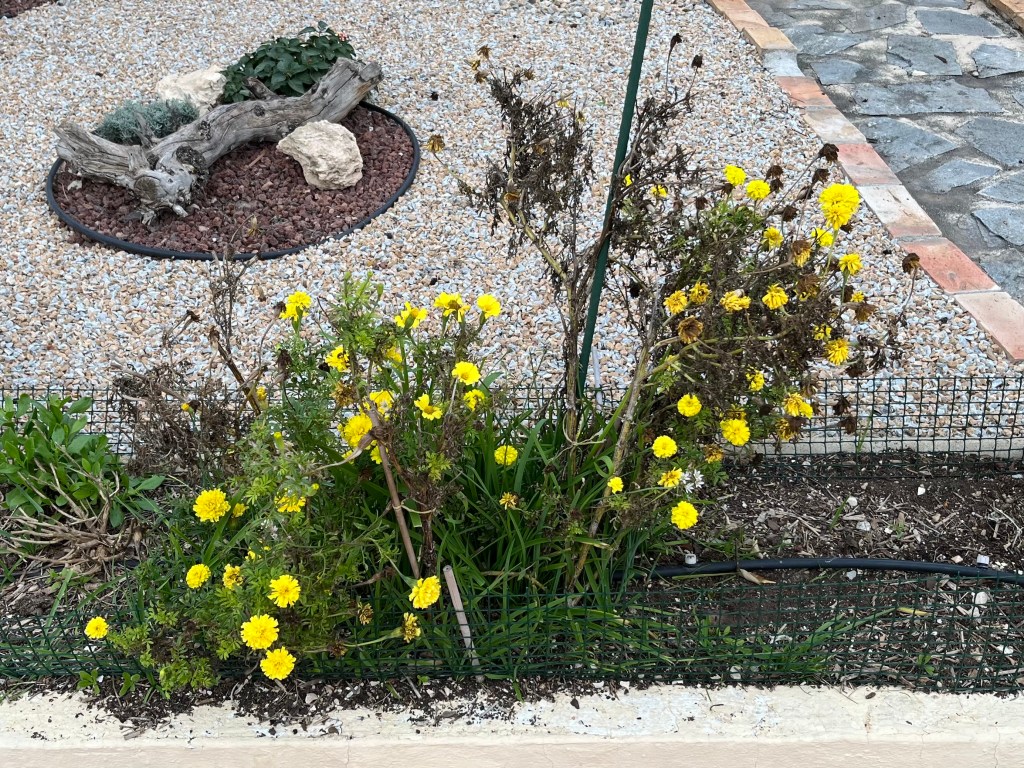
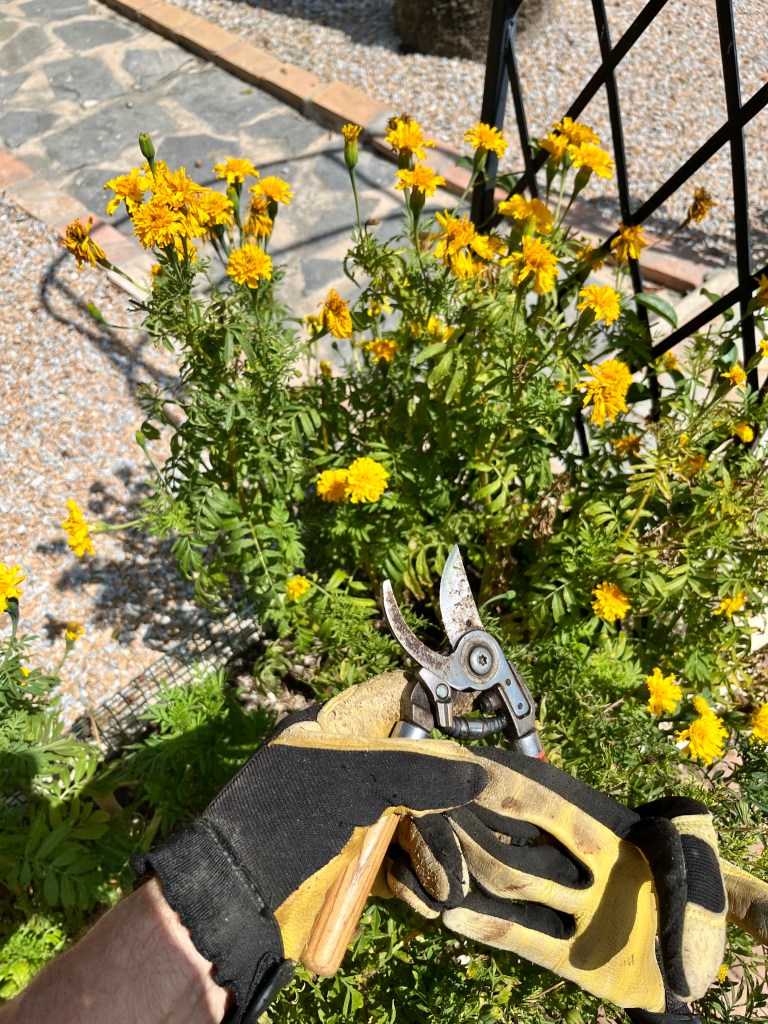
Deadheading Aeoniums. By now most of your Aeoniums should have finished flowering and it is time to tidy them up by a bit of judicious deadheading. The process is simple. Look just below the spent flower and you will see that the plant stem has started to thin and is noticeably thinner. The plant is naturally cutting off the flower as it no longer needs it. All you have to do is help it along, using your secateurs cut the stem at the thinnest point below the flower. The photos below show the process. Click on each photo for a larger view.

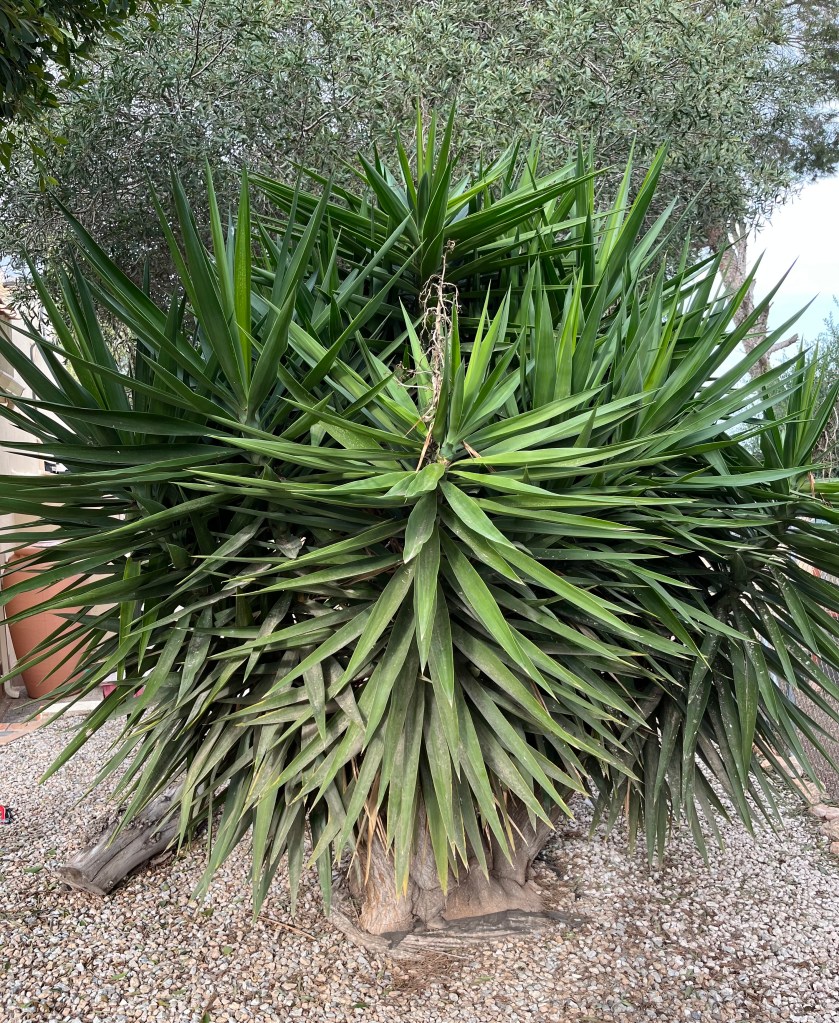
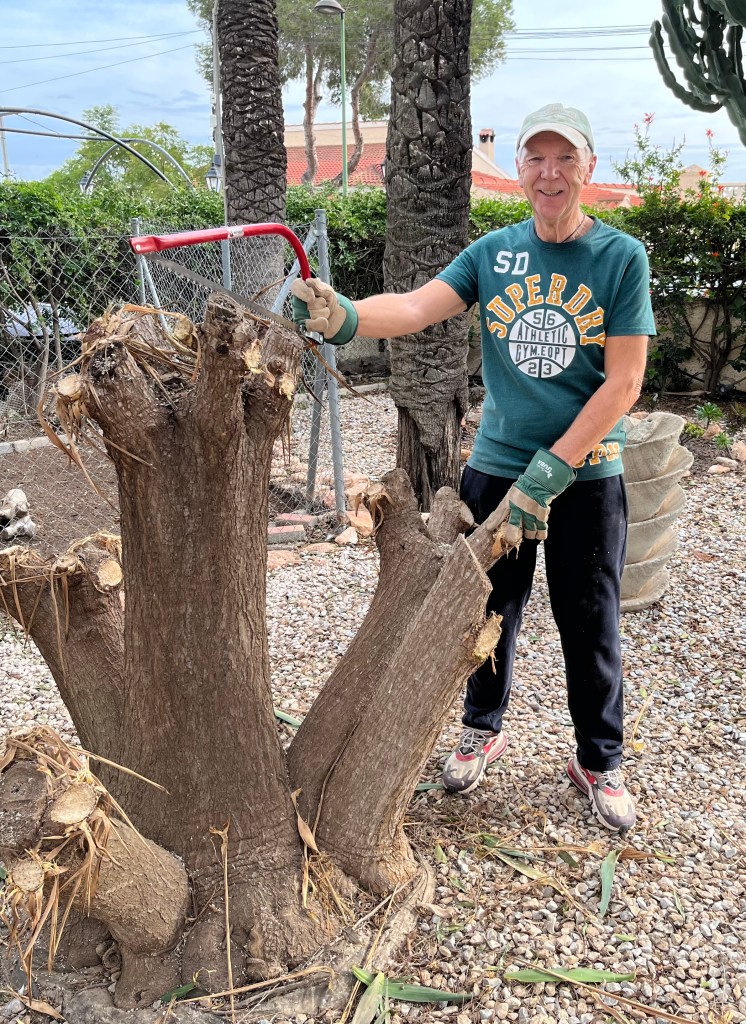
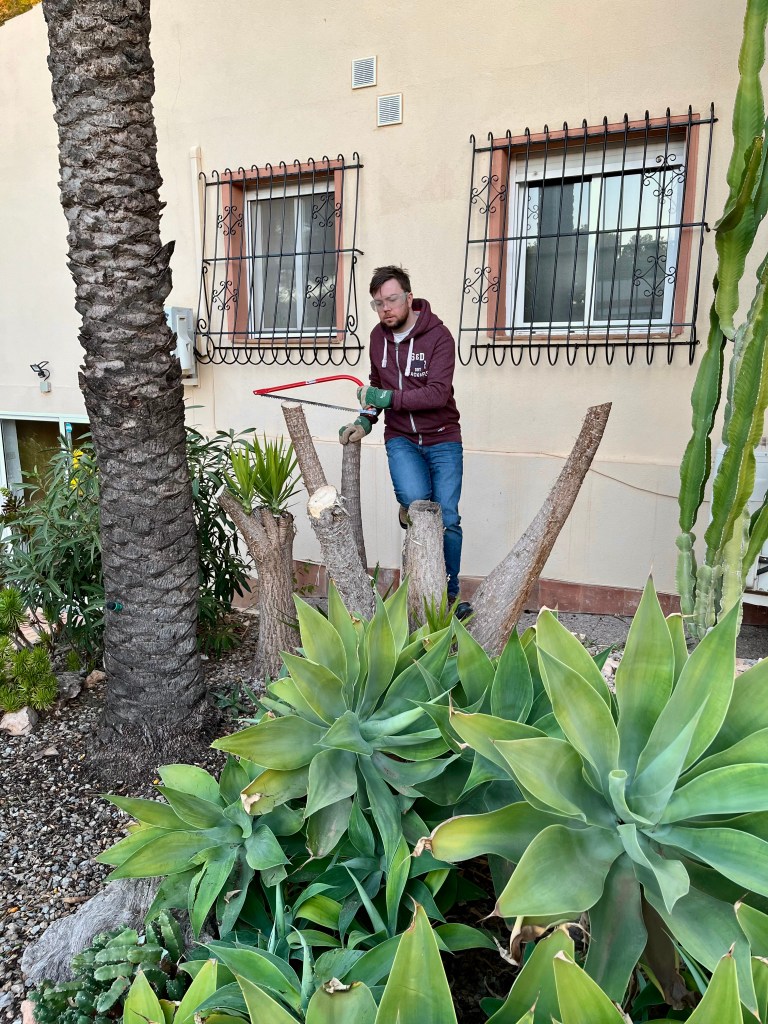
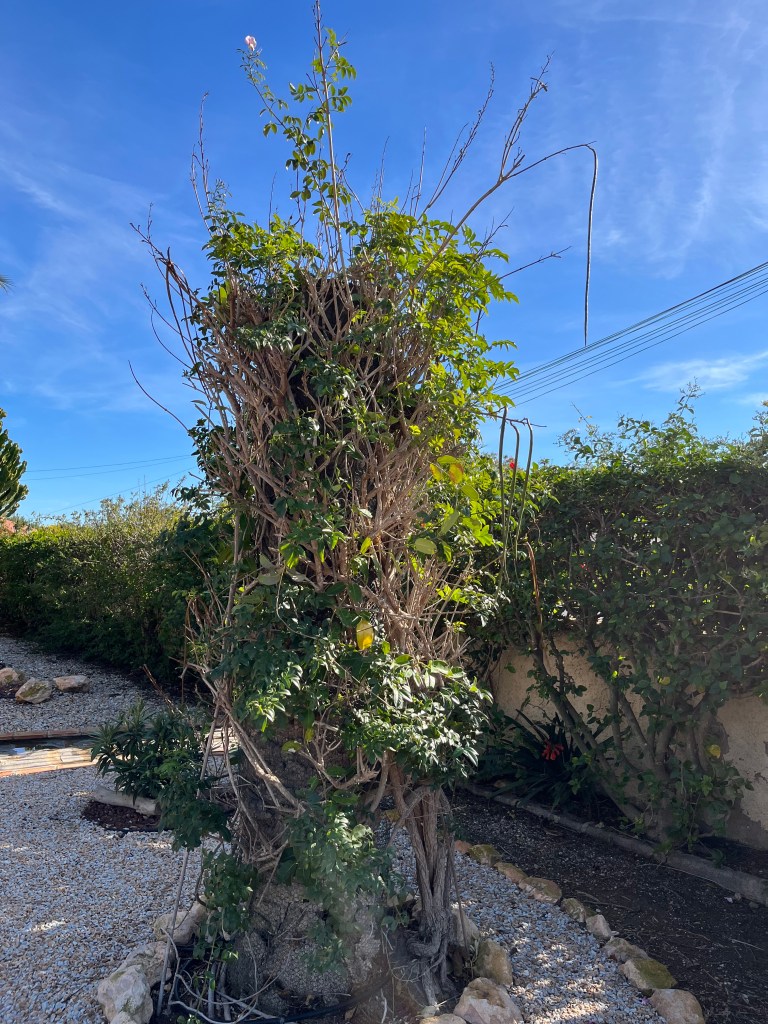
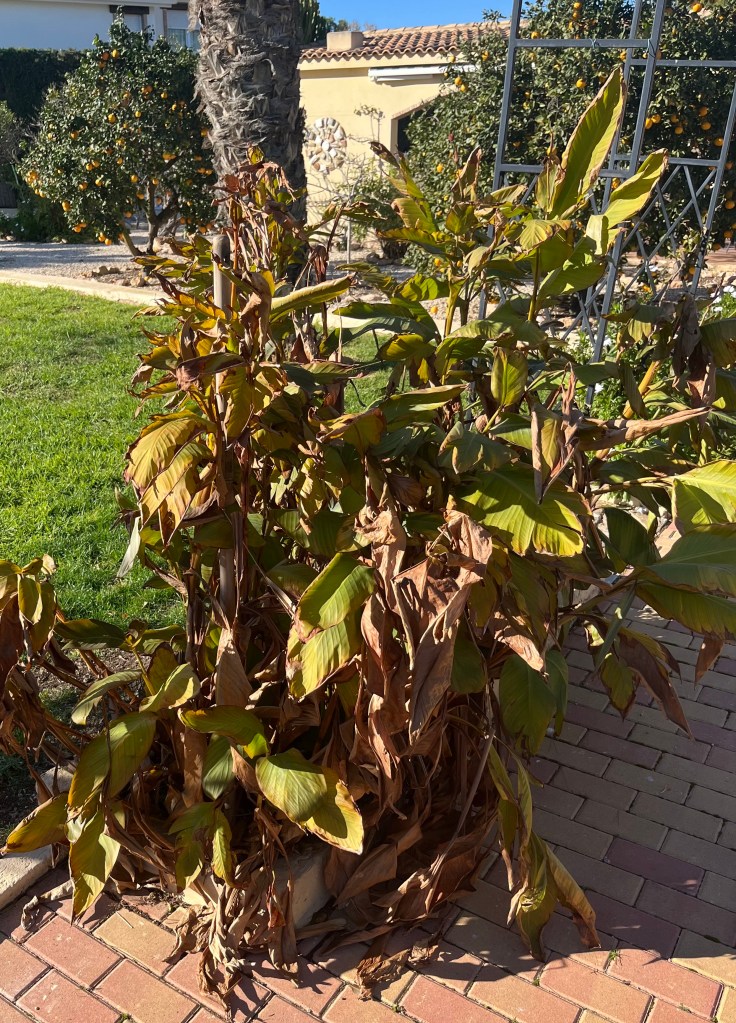
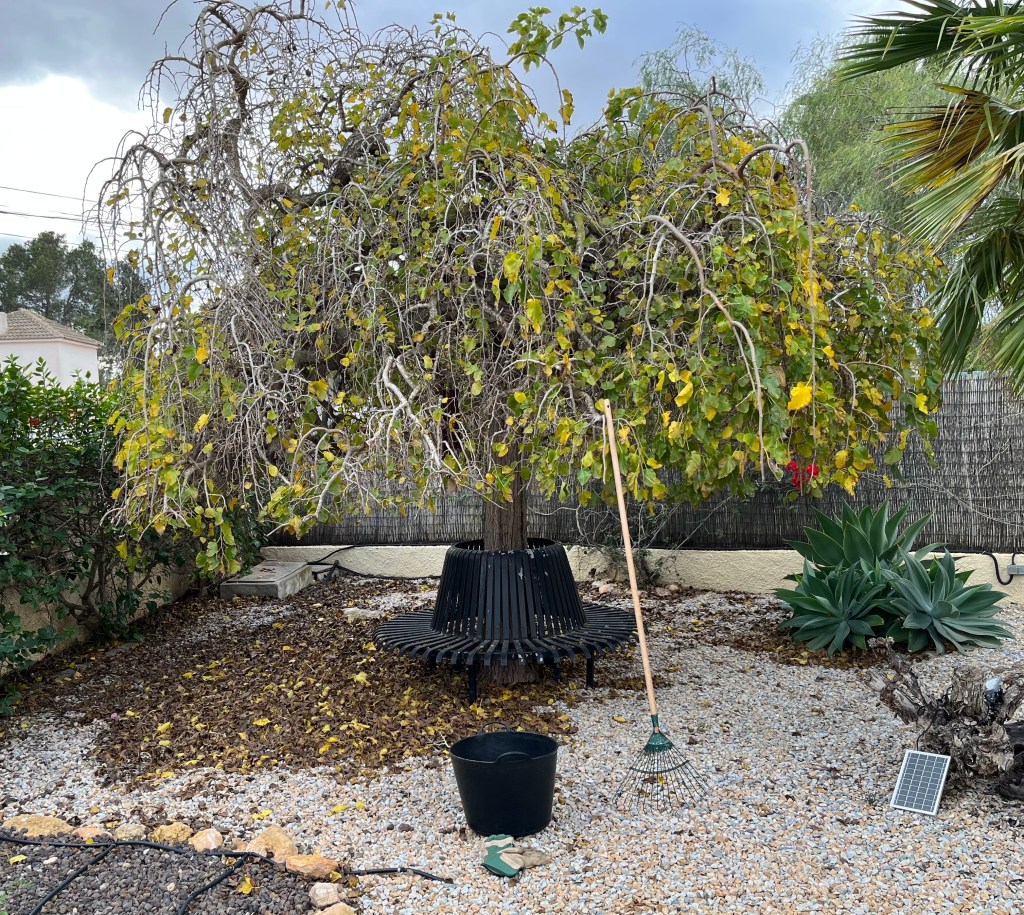
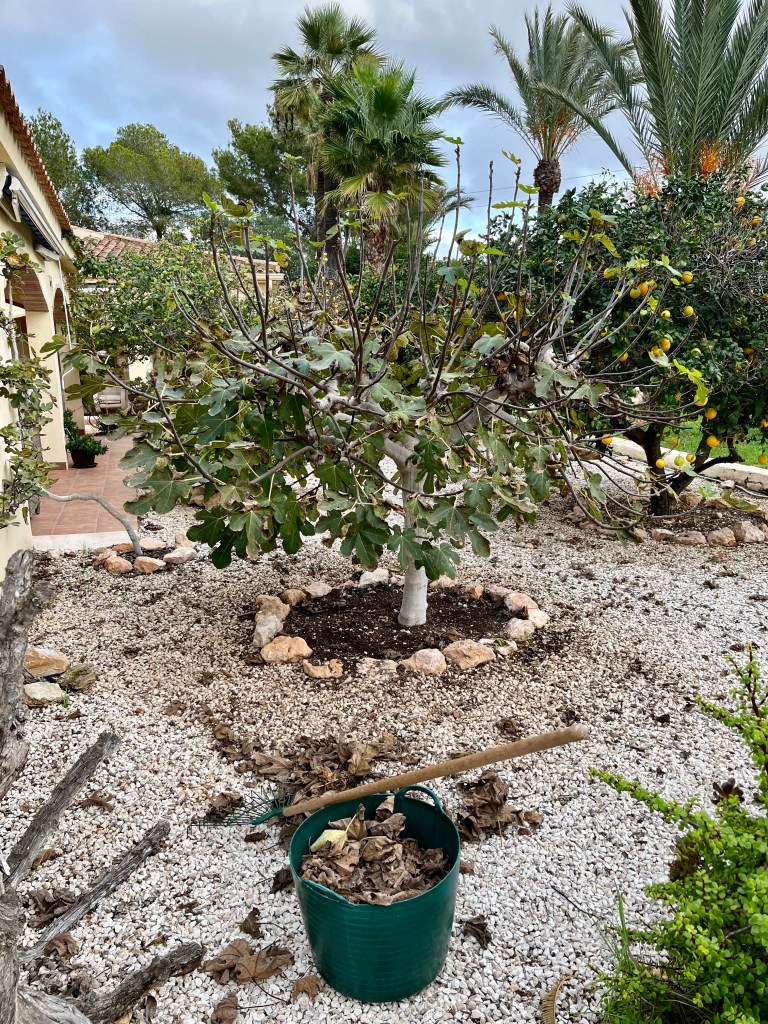
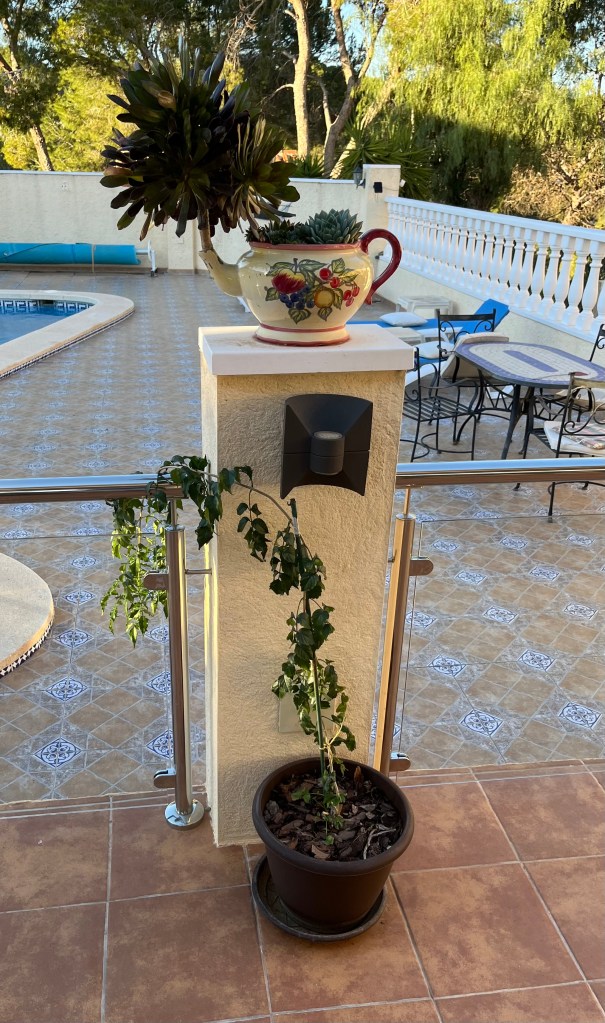
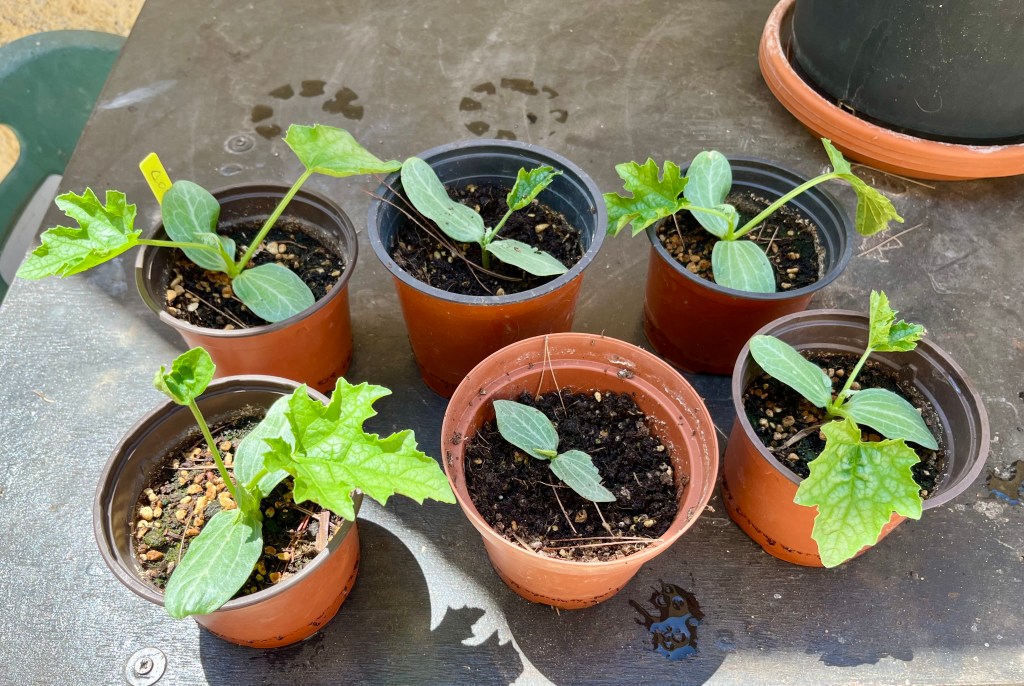
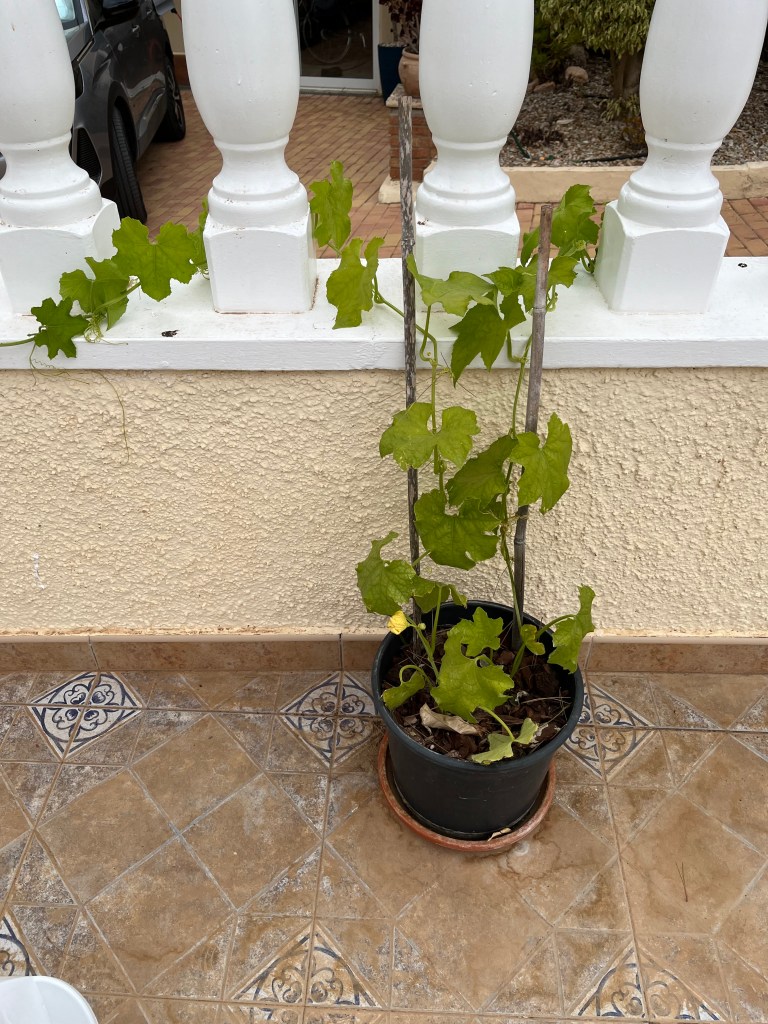
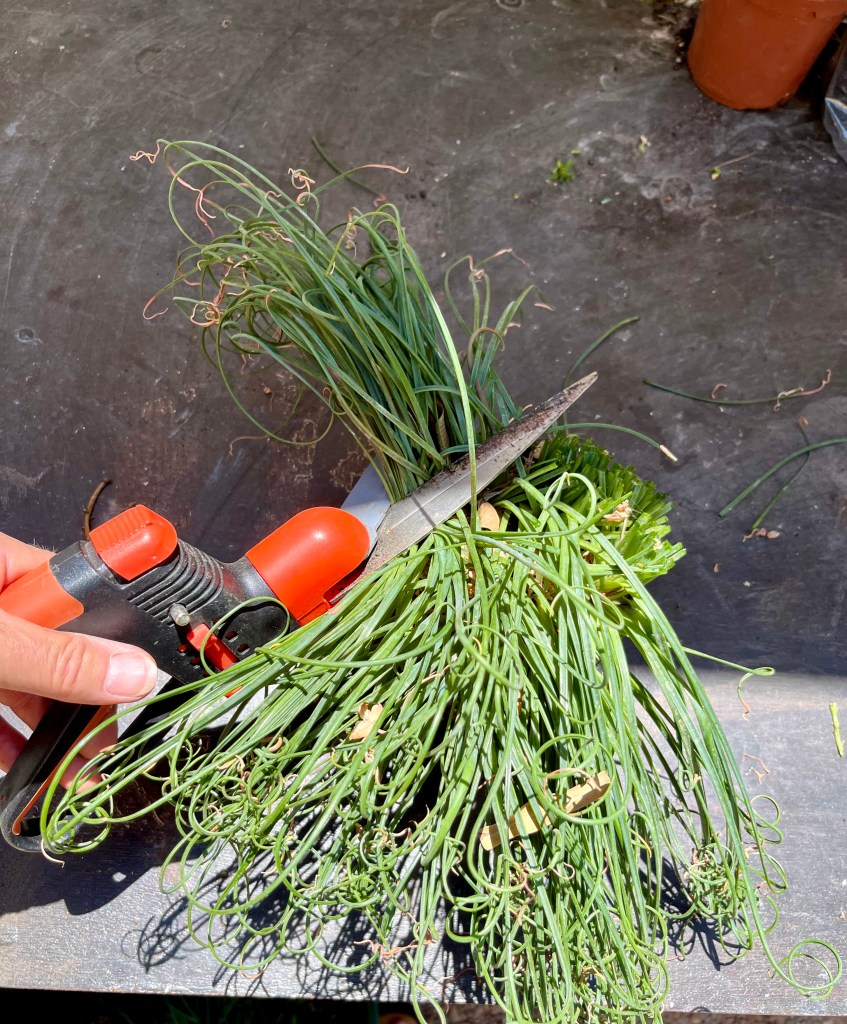
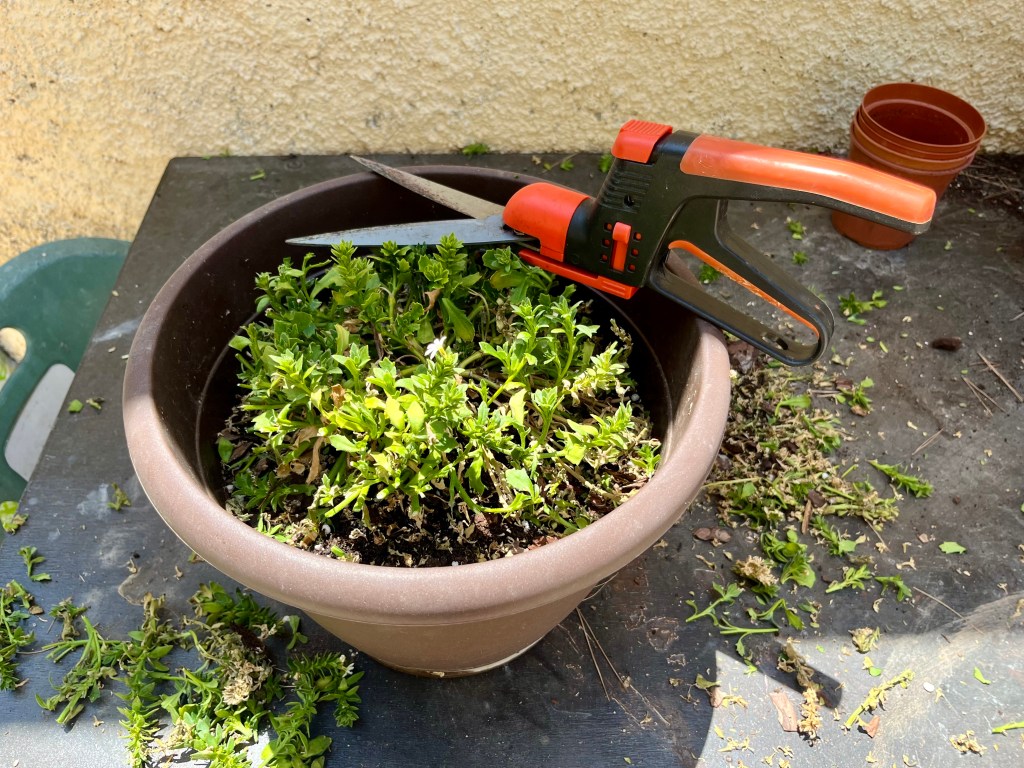
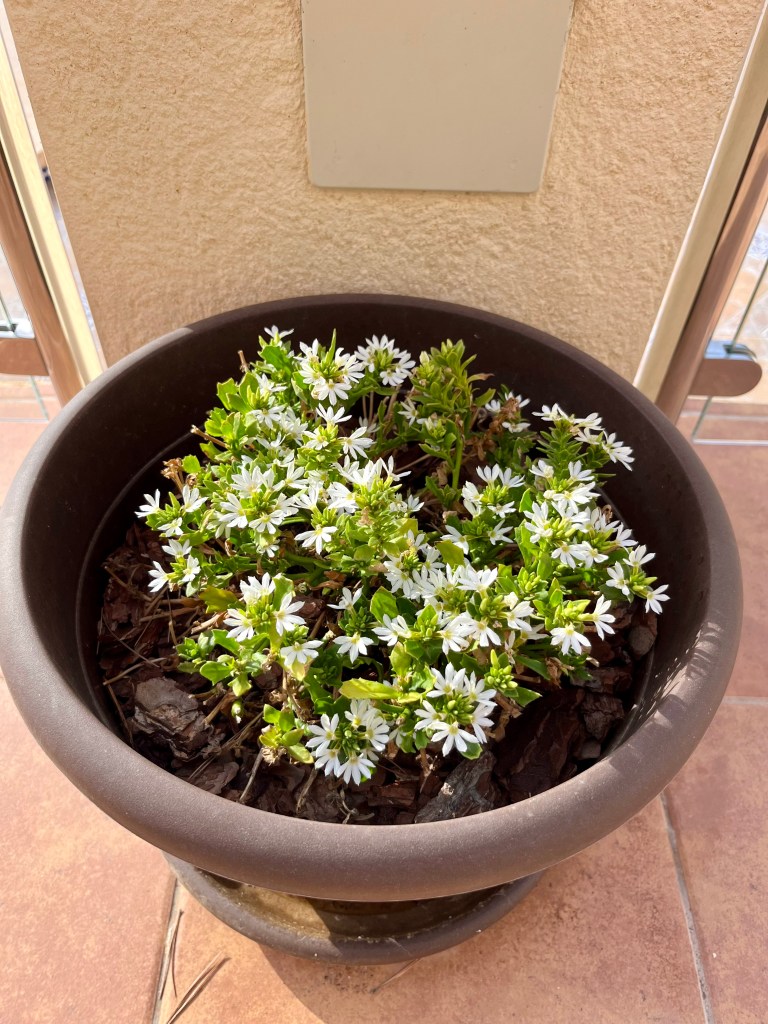
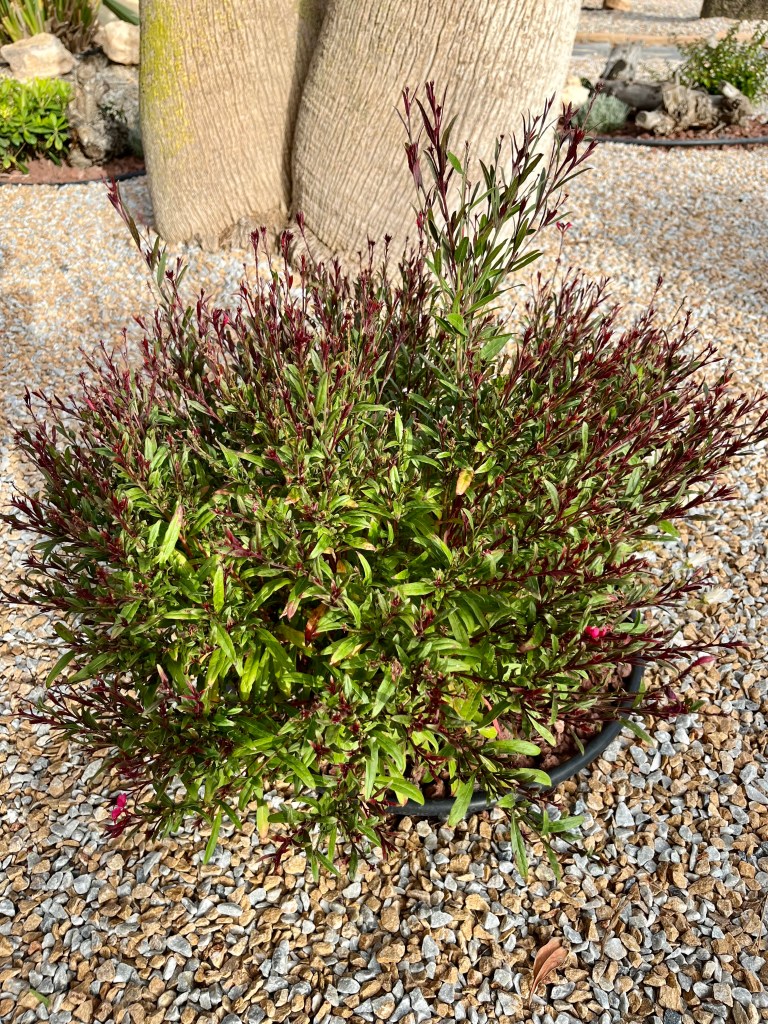
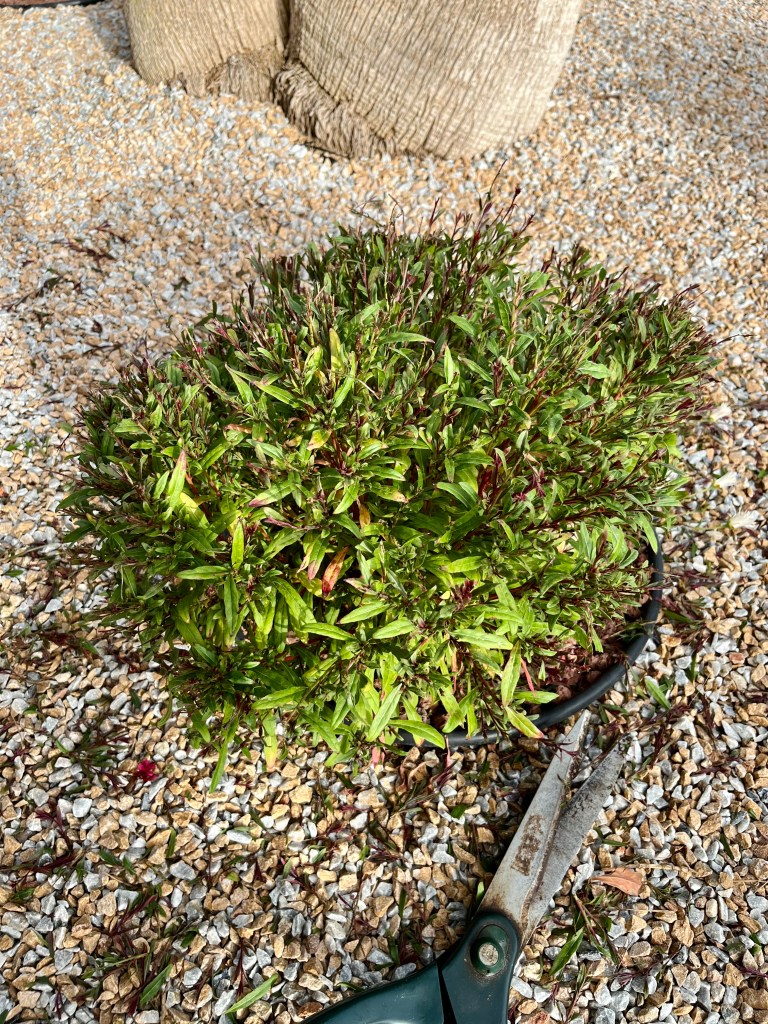
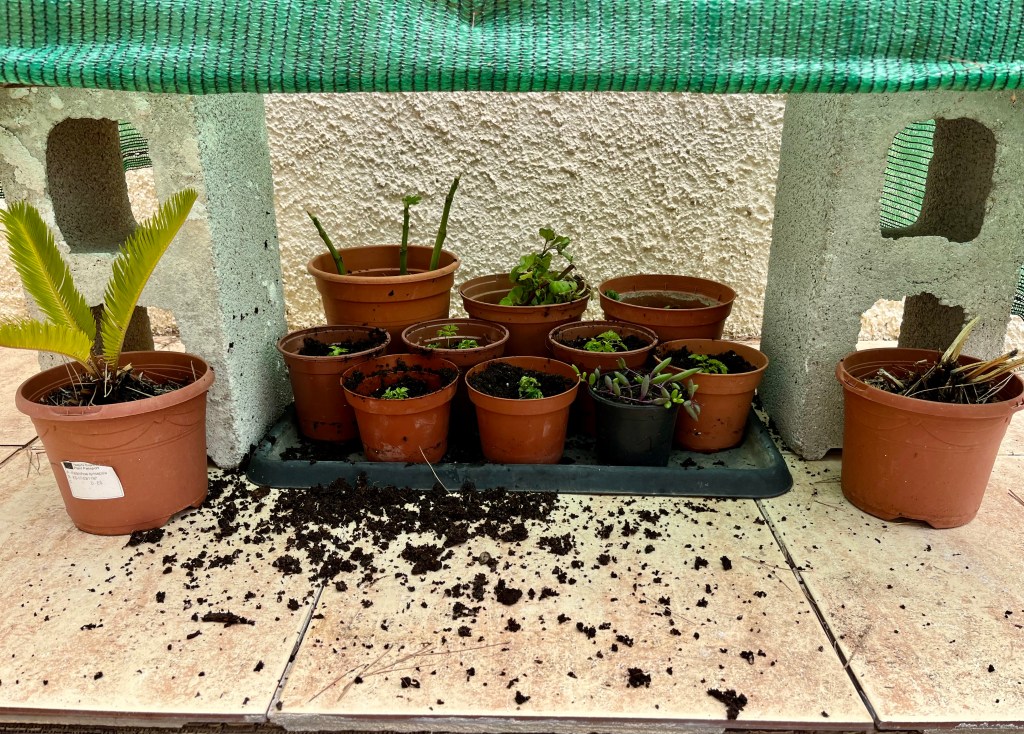
Refreshing plants in pots. If you have plants in pots then now is the time to refresh them. Over time plants can become untidy, pot bound and in need of fresh compost. Walk around and have a good look at all your plants in pots. The first thing to do is sit down and pull out all the debris, dead leaves and detritus that has built up.

Next, prune back any dead or dying stems and reshape the plant. Finally, most plants can only thrive for a couple of years in the same compost. Tease the plant out of its pot being careful of the roots then fill with fresh compost and gently ease the plant back into its pot. The photos below show a number of my potted plants all looking a bit bedraggled, overcrowded and in need of attention.

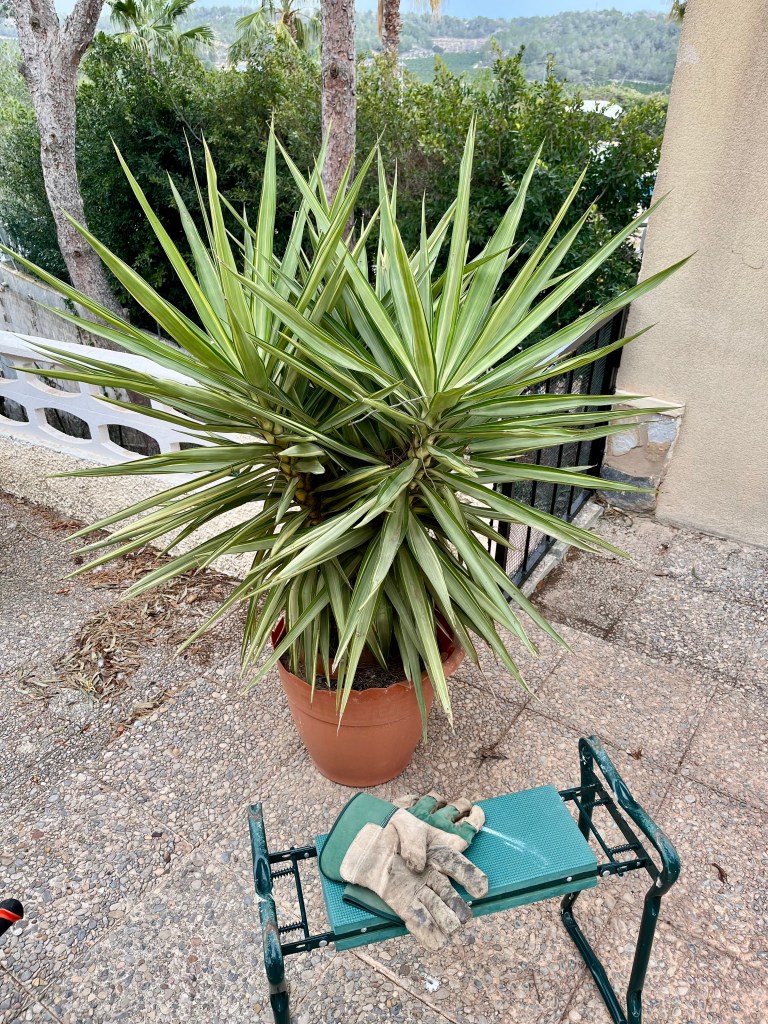
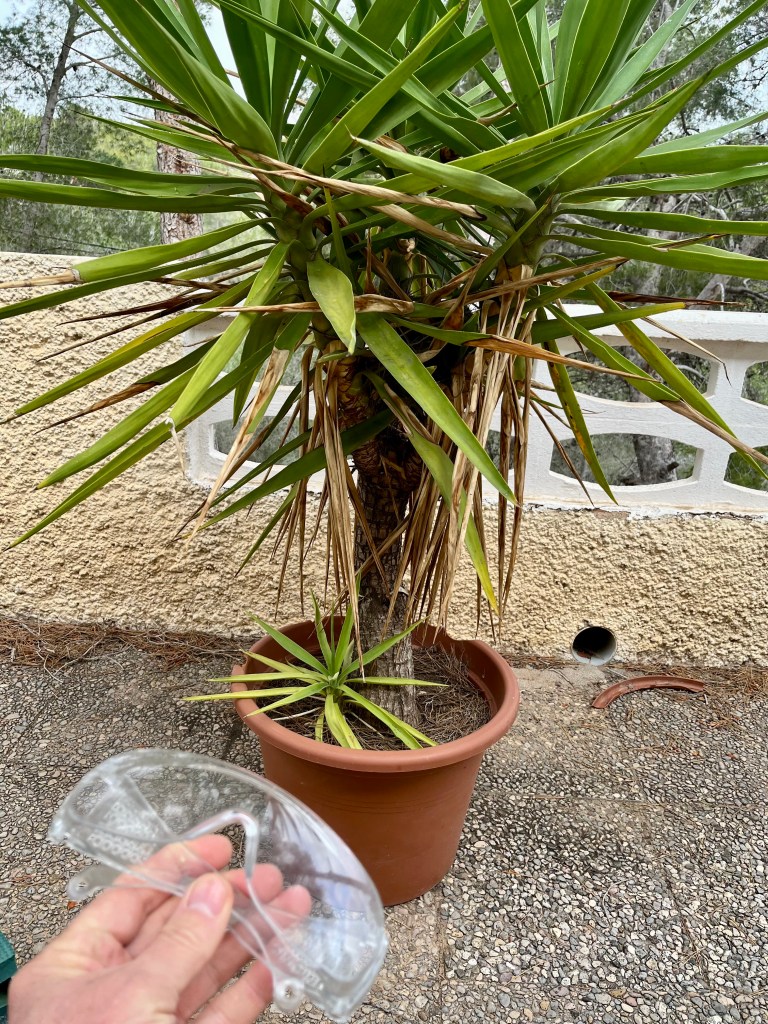
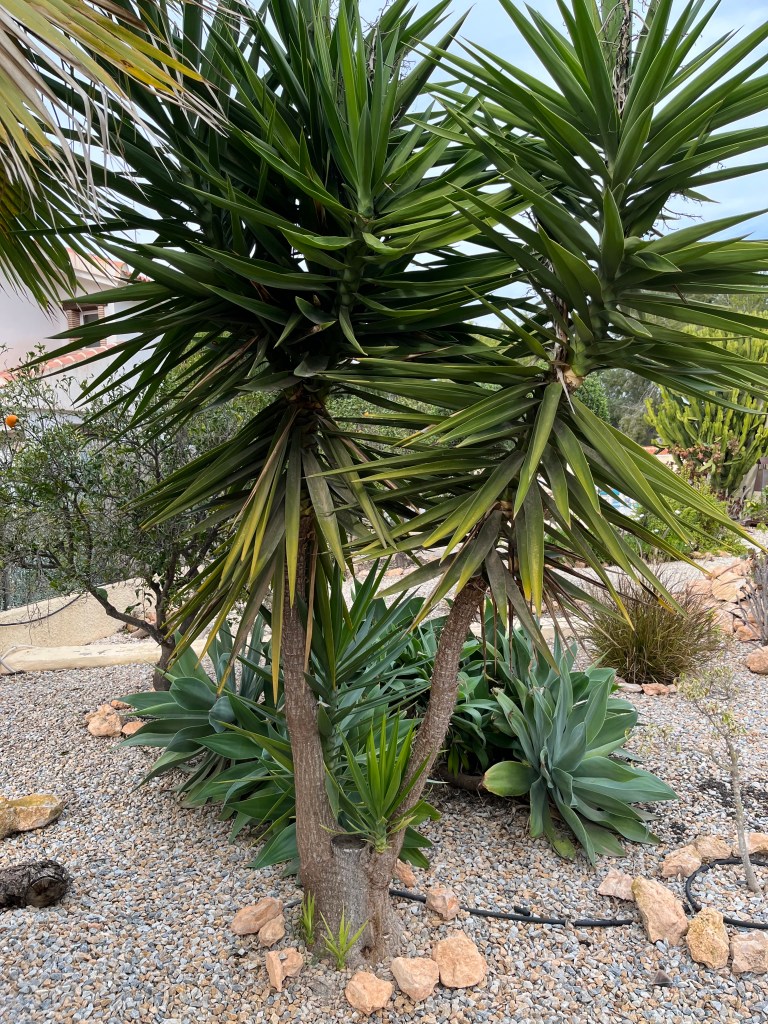
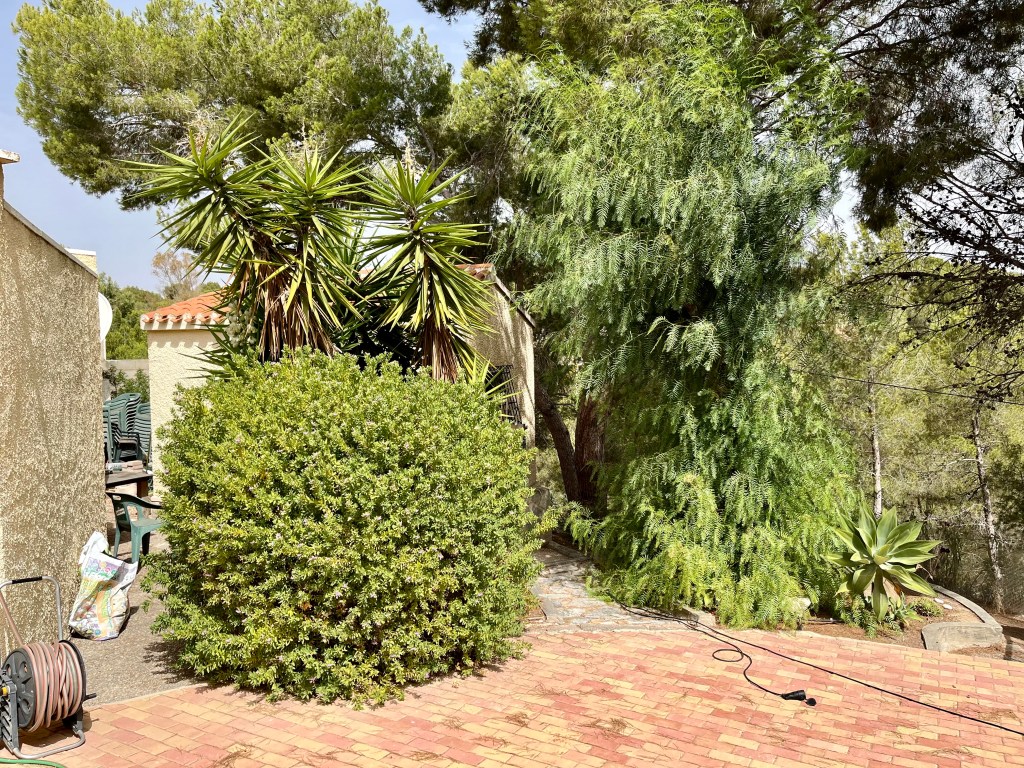
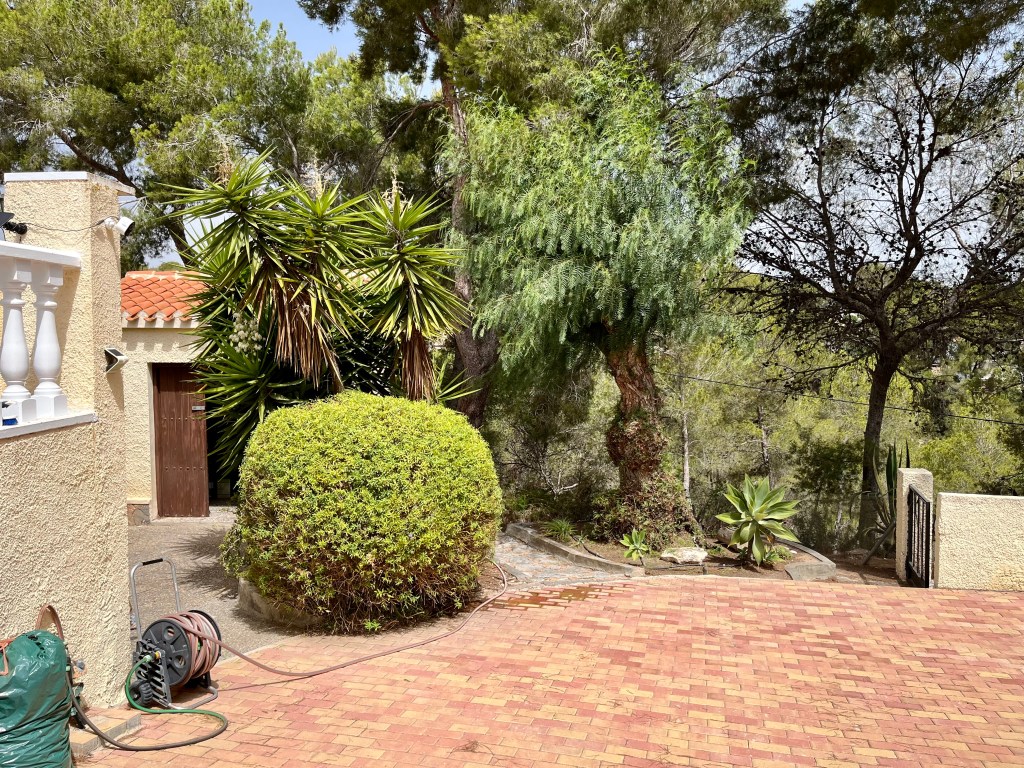
It is important to note that if you are tidying up Yucca and other spikey or spiny plants, then it is essential that you wear eye and hand protection. The photos below show what a difference a tidy up makes in restoring each plants self esteem!

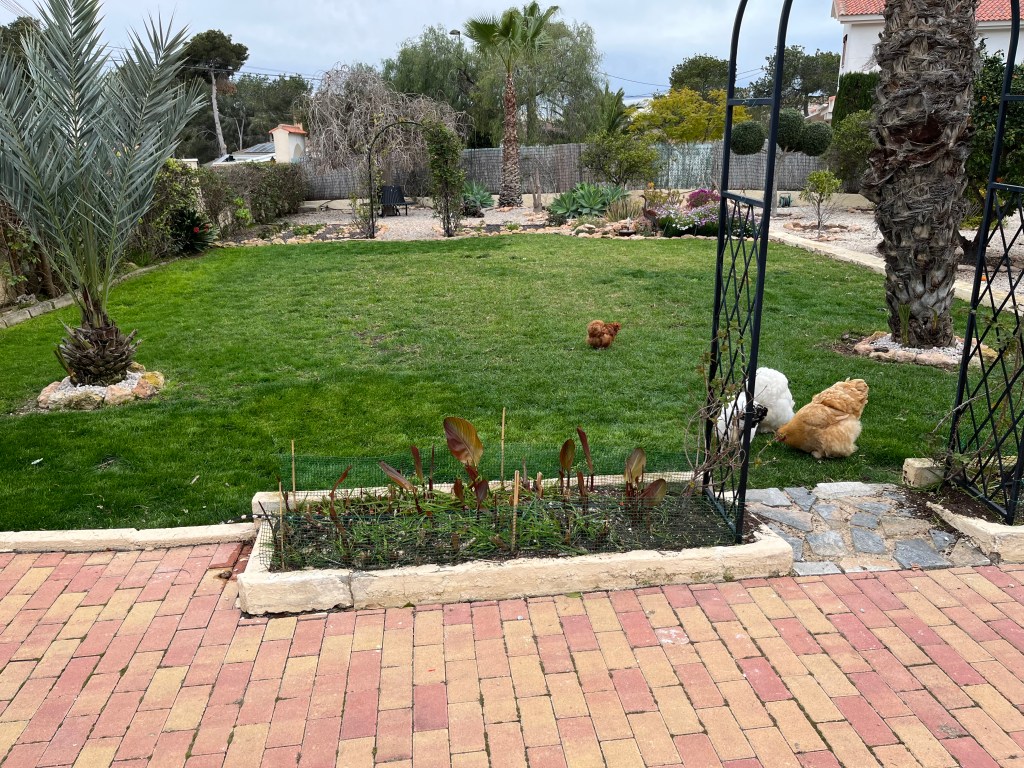
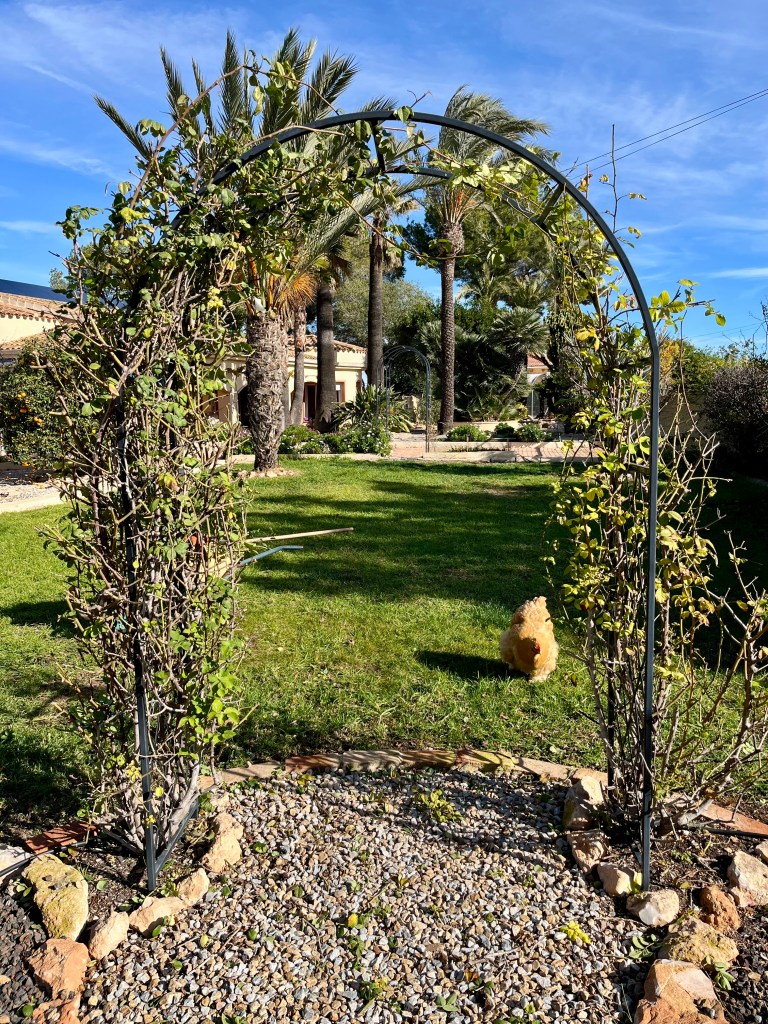
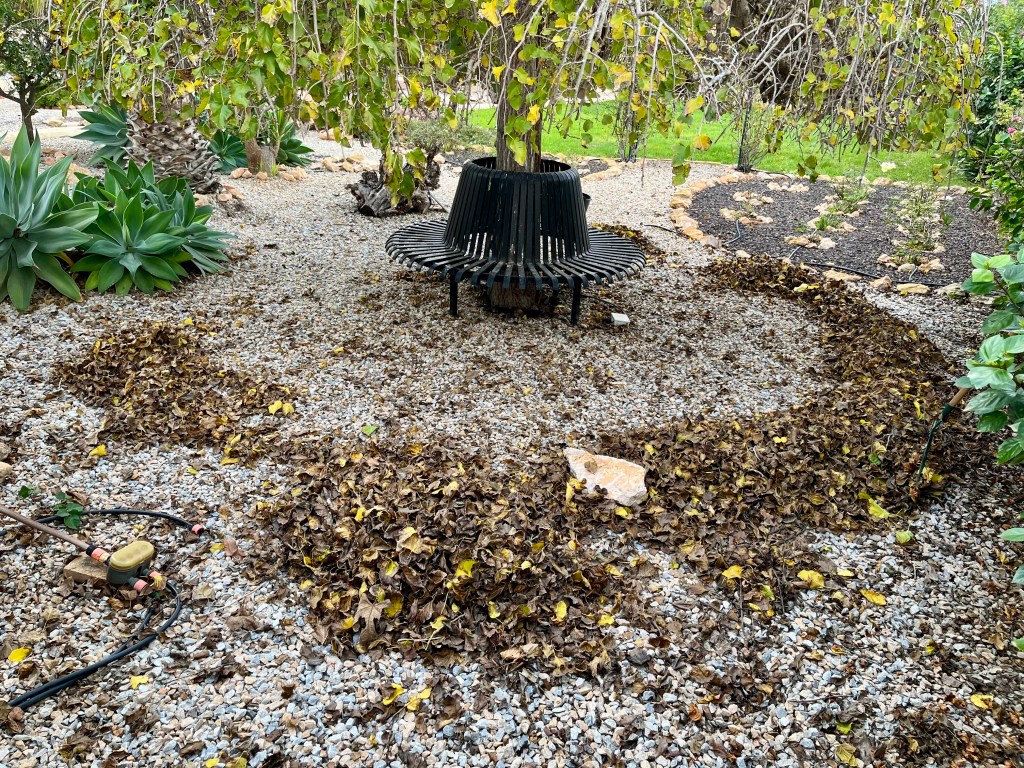
Reviving your lawn. I know that not many of you have lawns in Spain, but those of you in the US and other parts of Europe are in love with your grass. But like love, if neglected it soon dies. And so it is with your lawn, Spring is the time to revive the love affair with your lawn. There are a number of things you should be doing:

  • rake out areas that are dead or dying
  • apply a selective weed killer
  • top dress with a specialist compost
  • feed with a specialist feed
  • reseed when the weather is warm enough in your area

The photos below show all of this activity going on in my lawn, with the final photo showing the lawn after its first cut of the season.

I have to admit photos from this angle do flatter the lawn, there are a few bareish patches

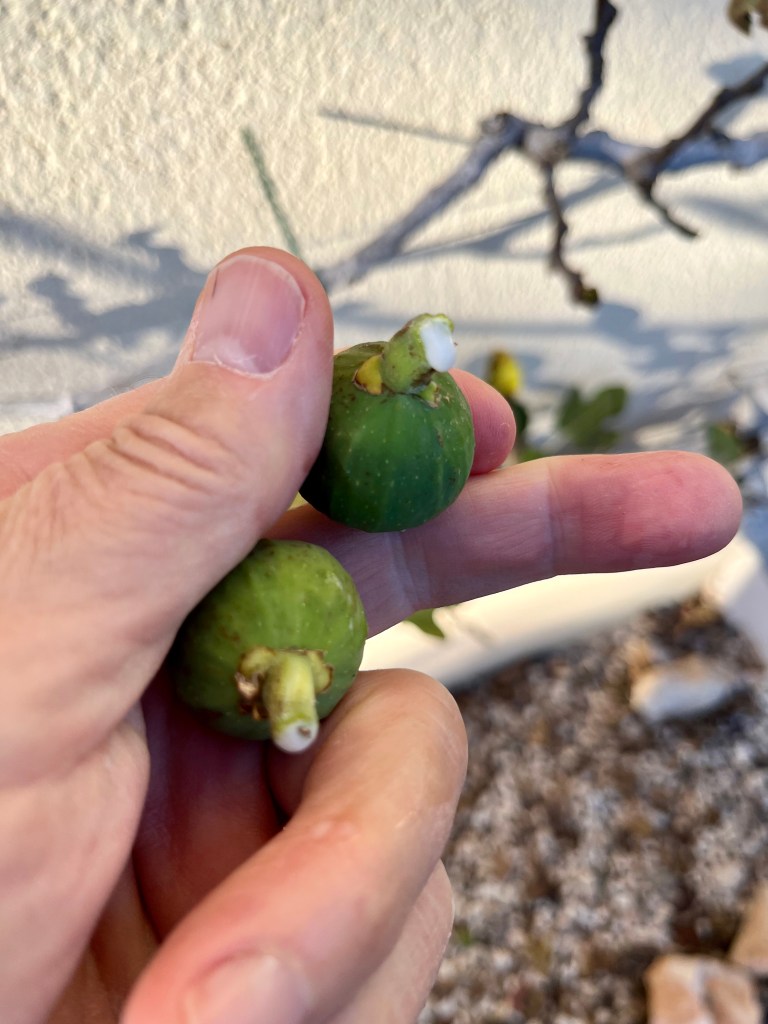
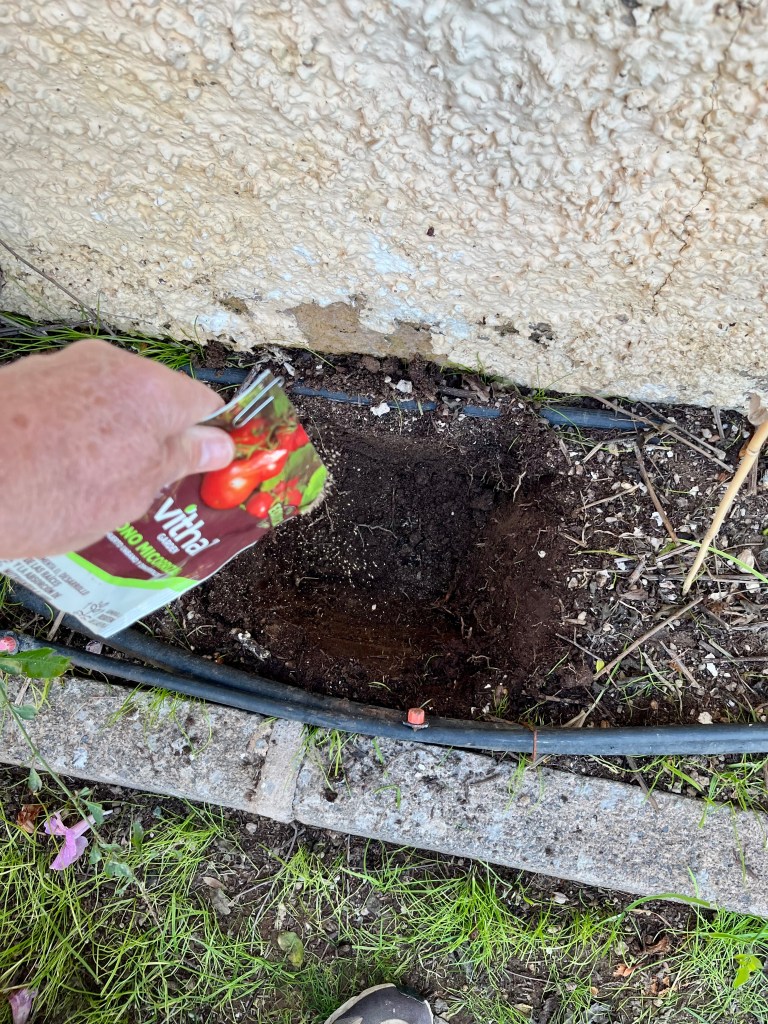
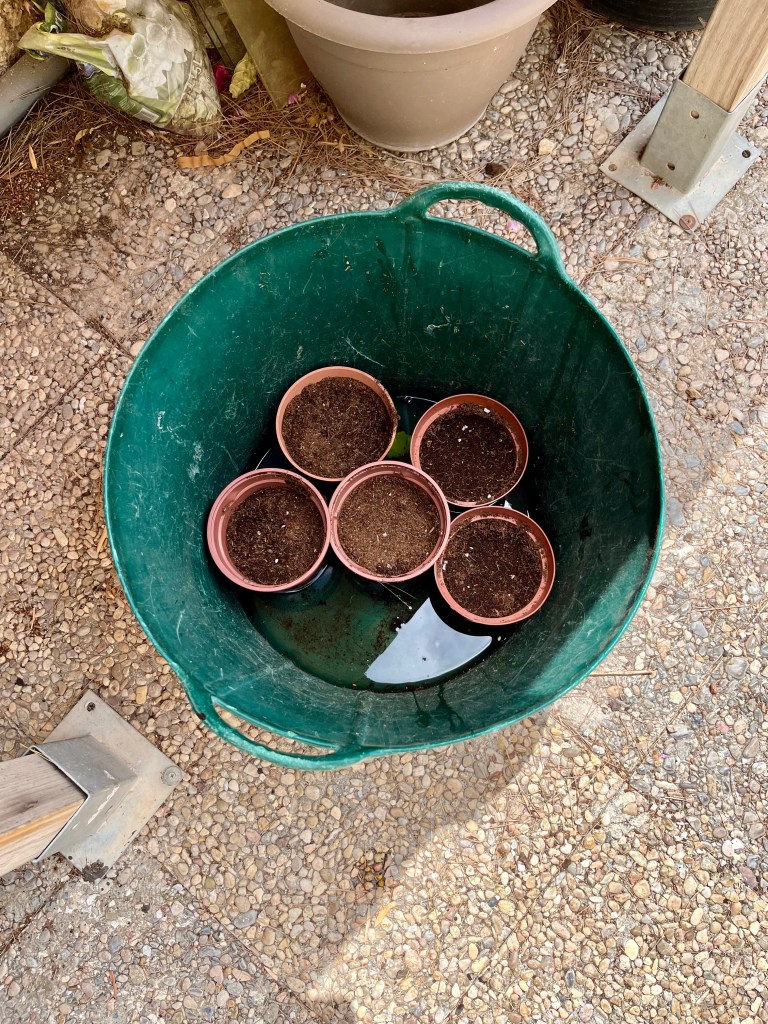
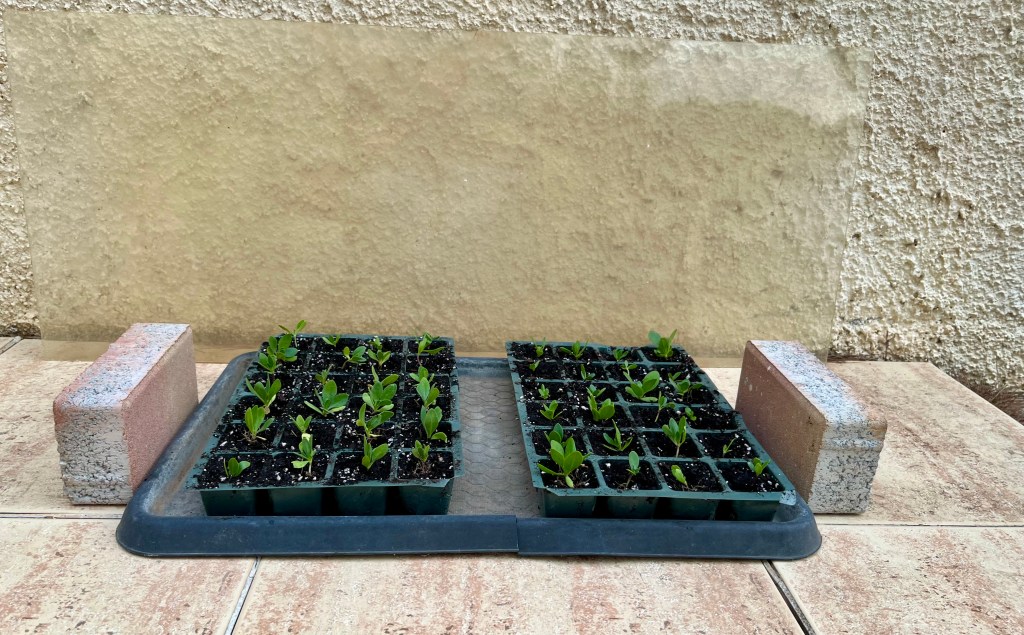
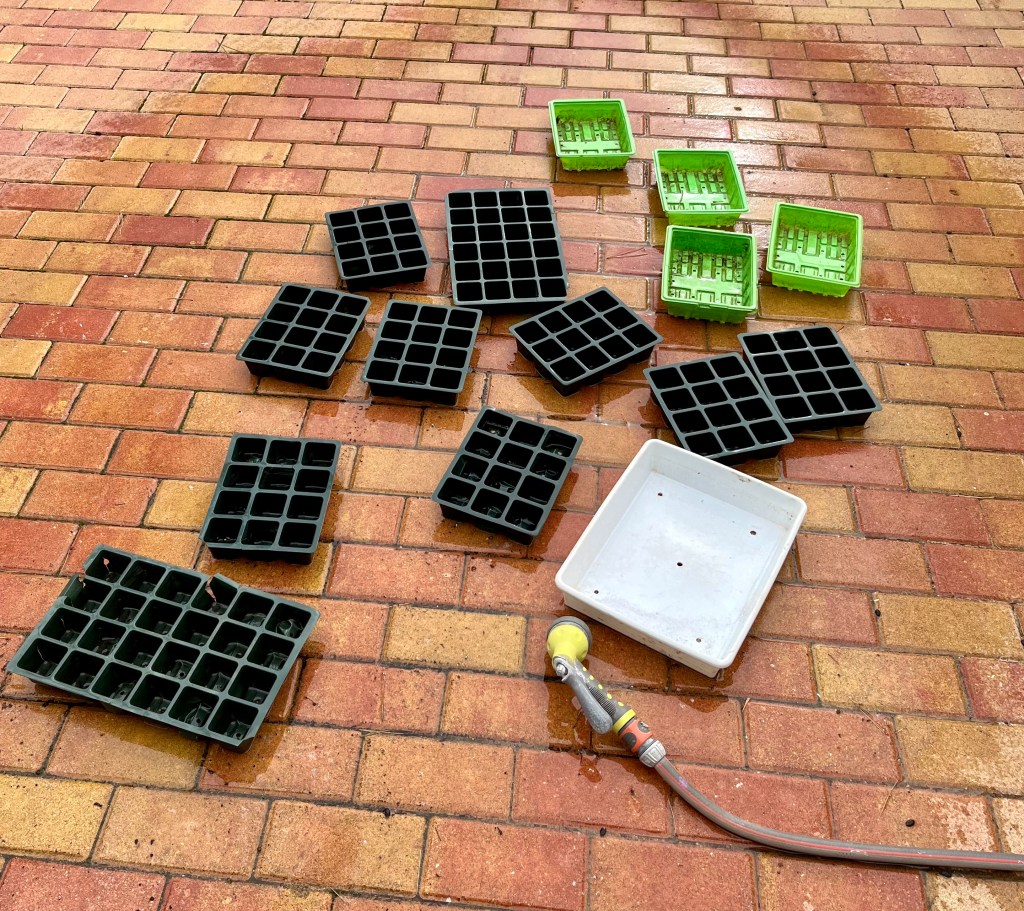
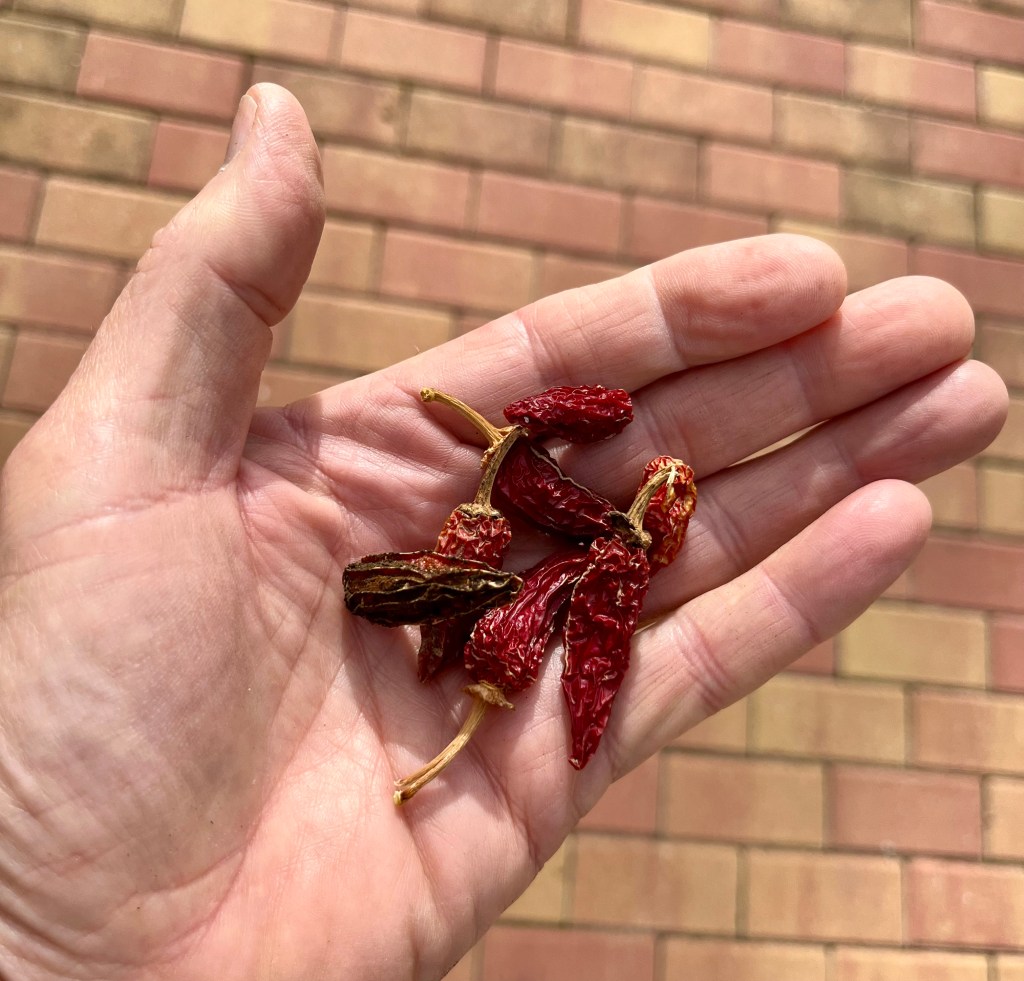
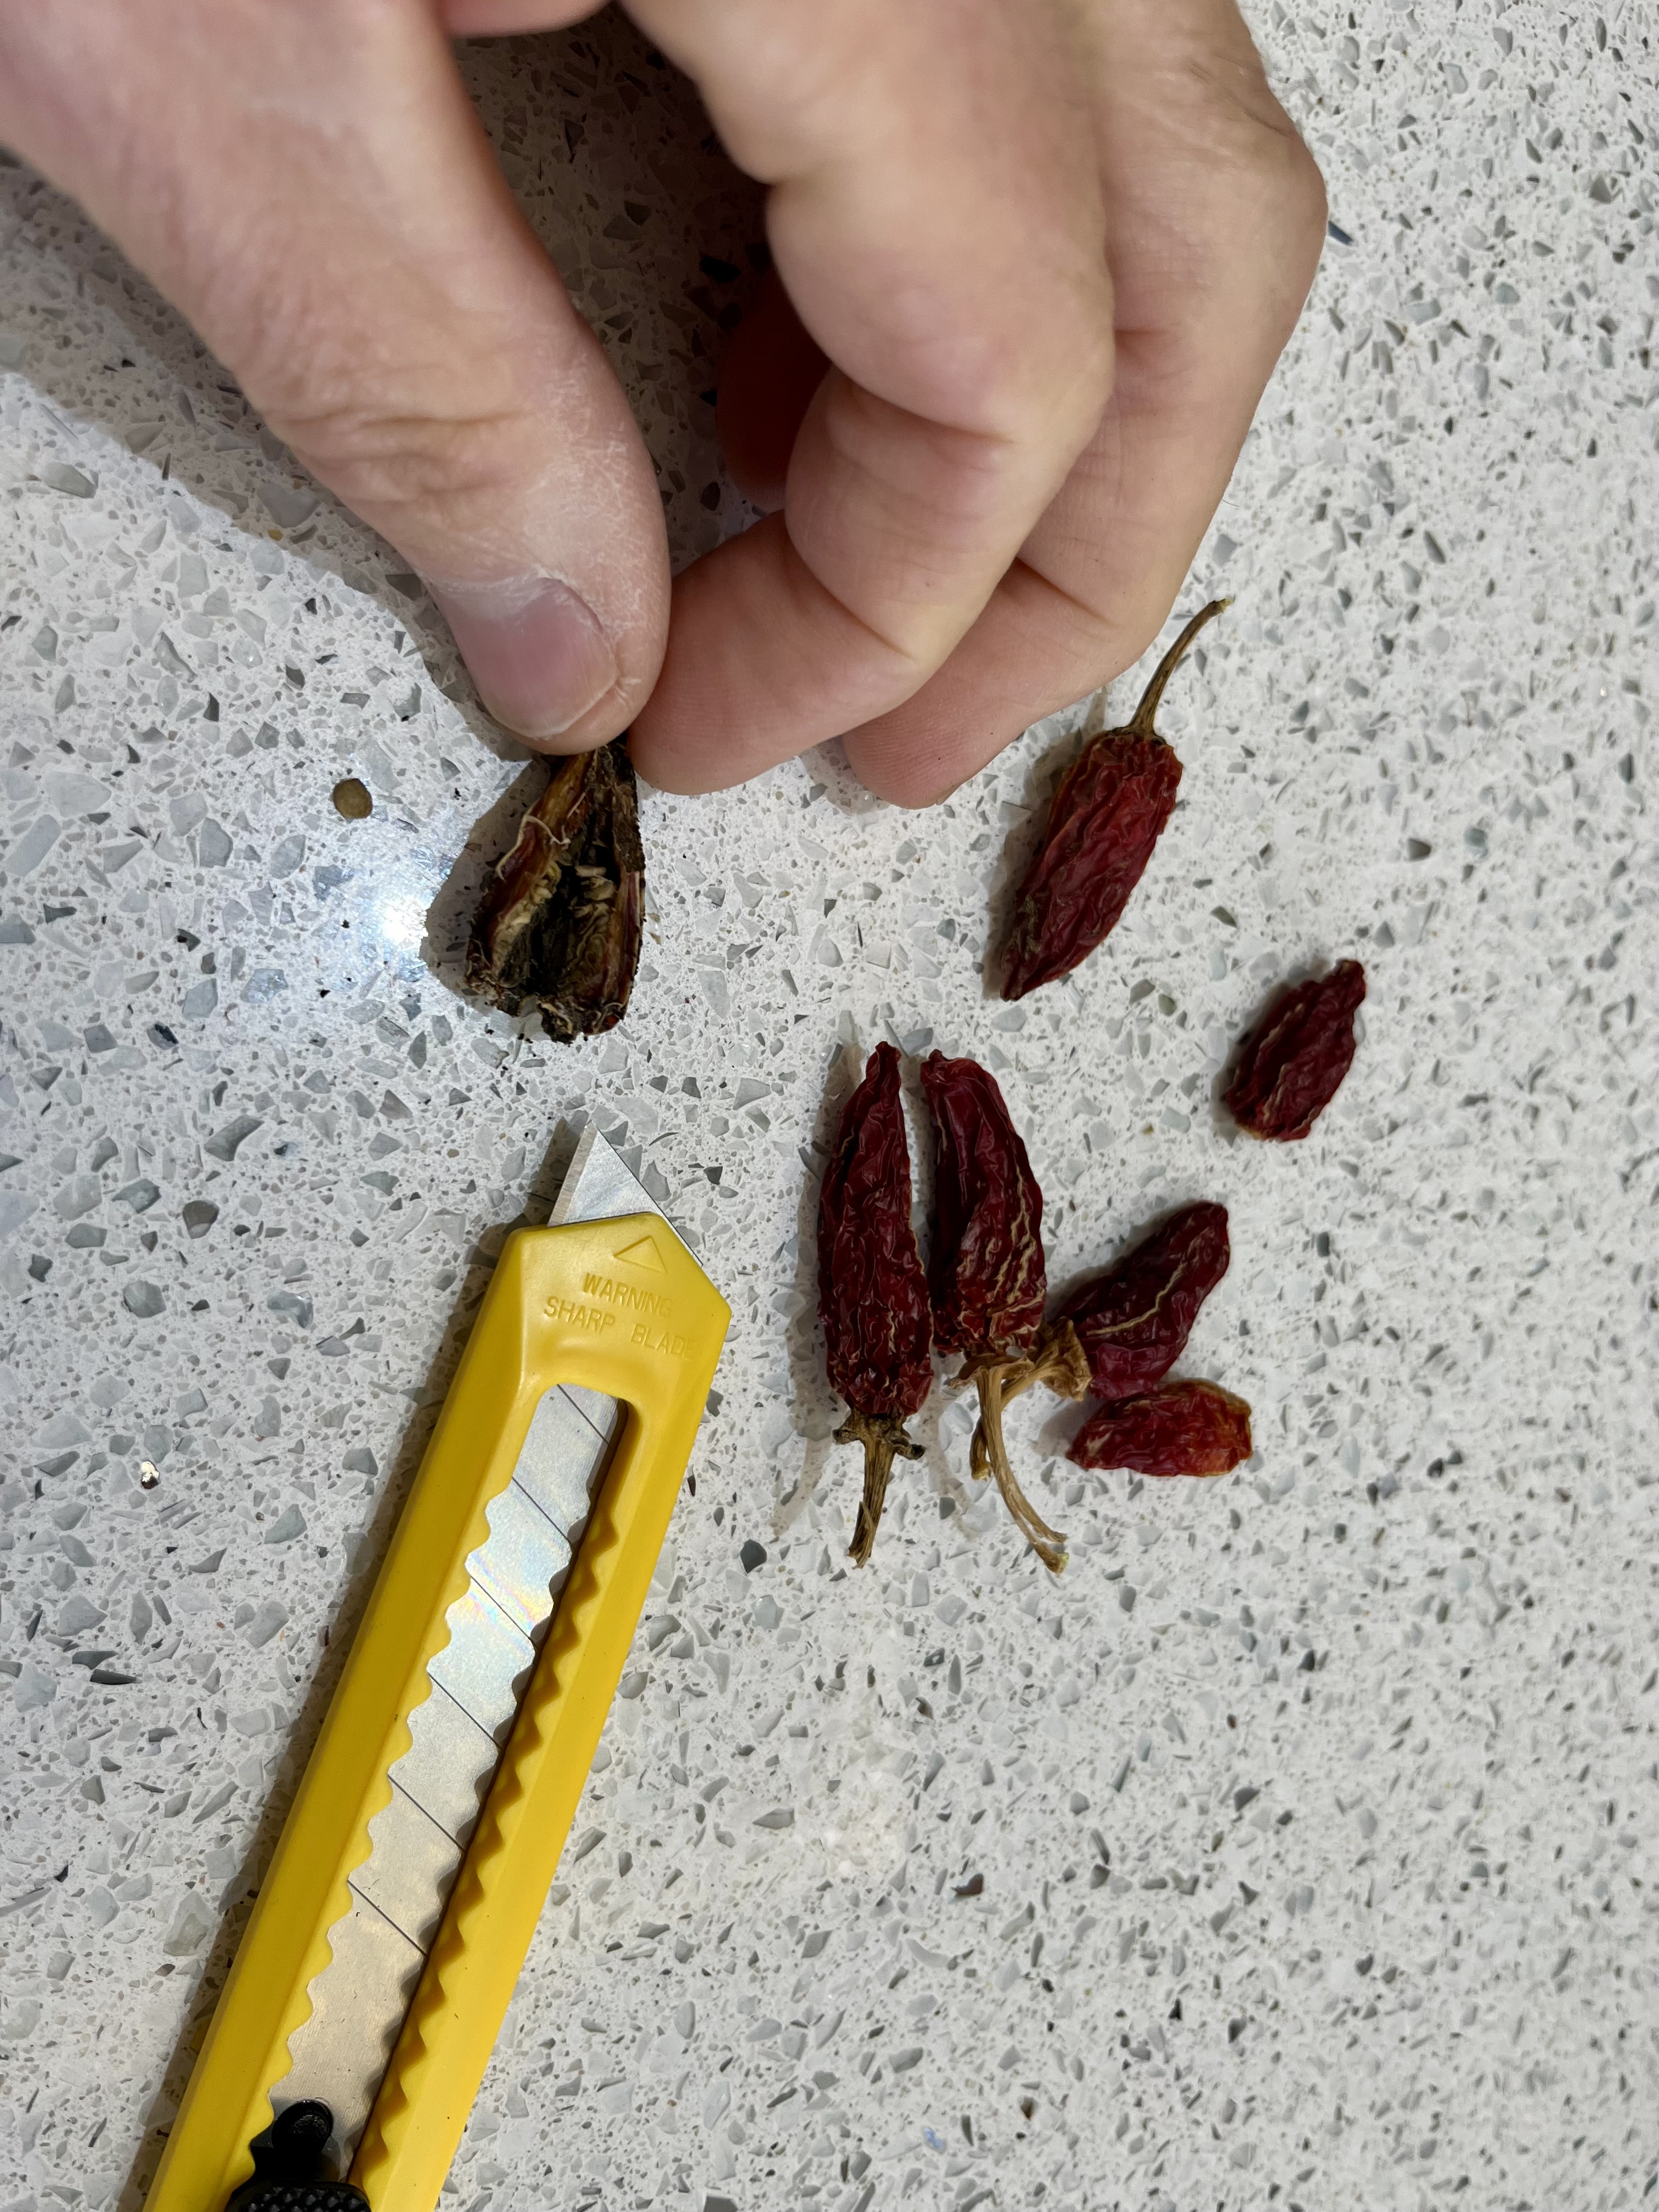
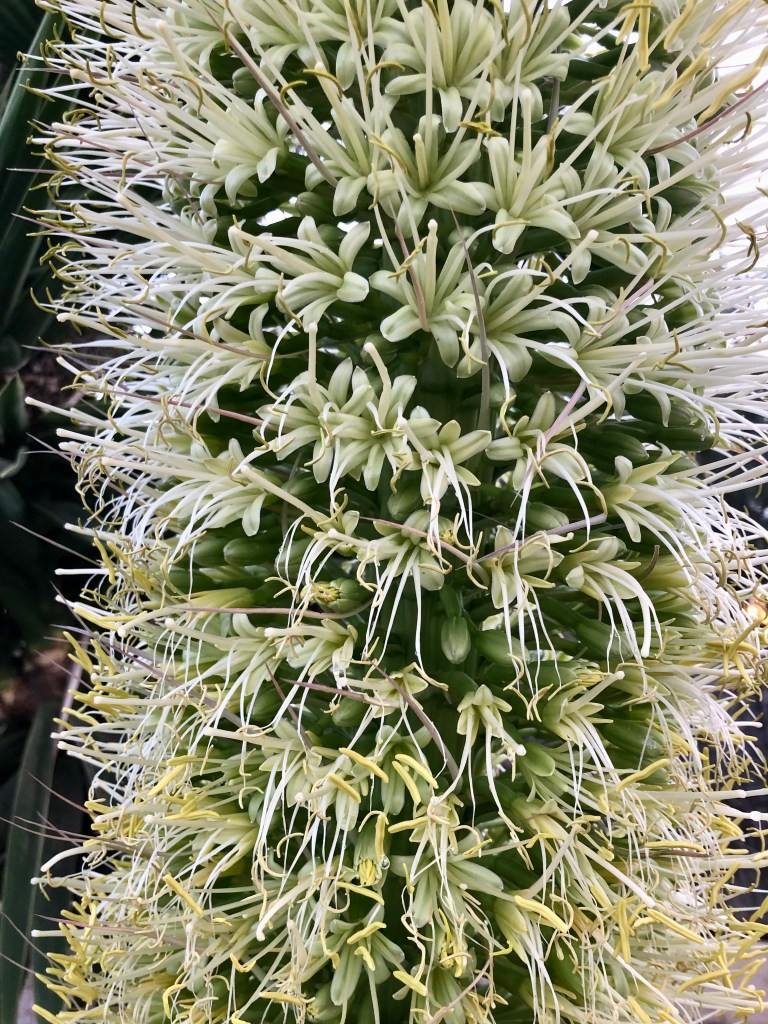
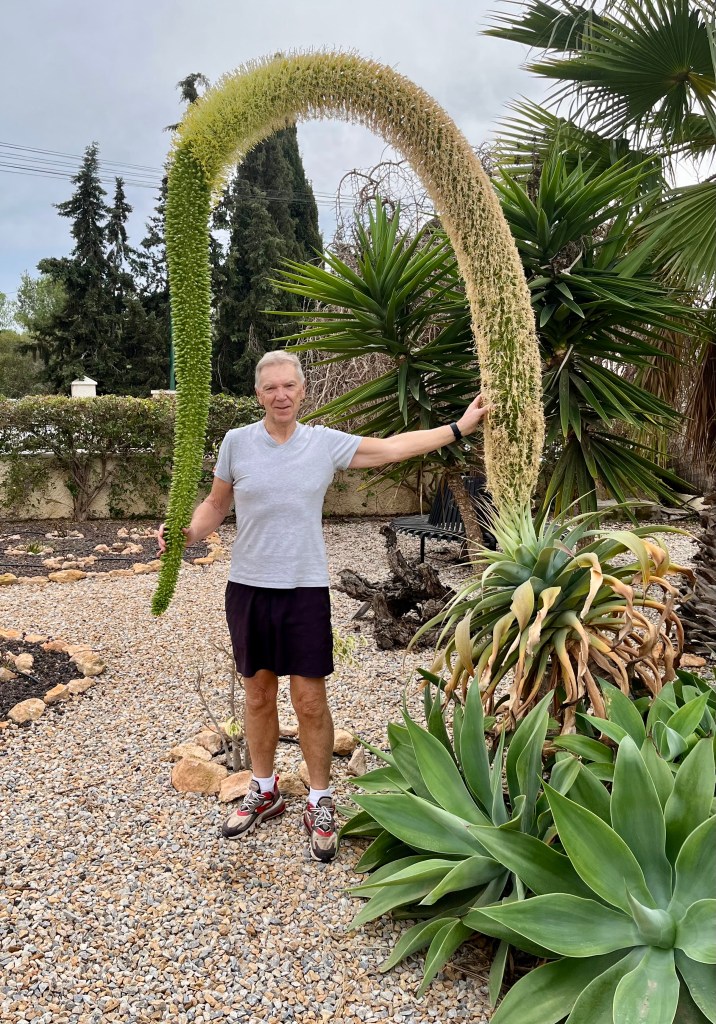
Planting seeds. Oh the joy and delight in planting seeds and creating your own plants. Not only is it cost effective; as you get hundreds of plants for a few Euros, but also you will really be gardening rather than just shopping for plants.

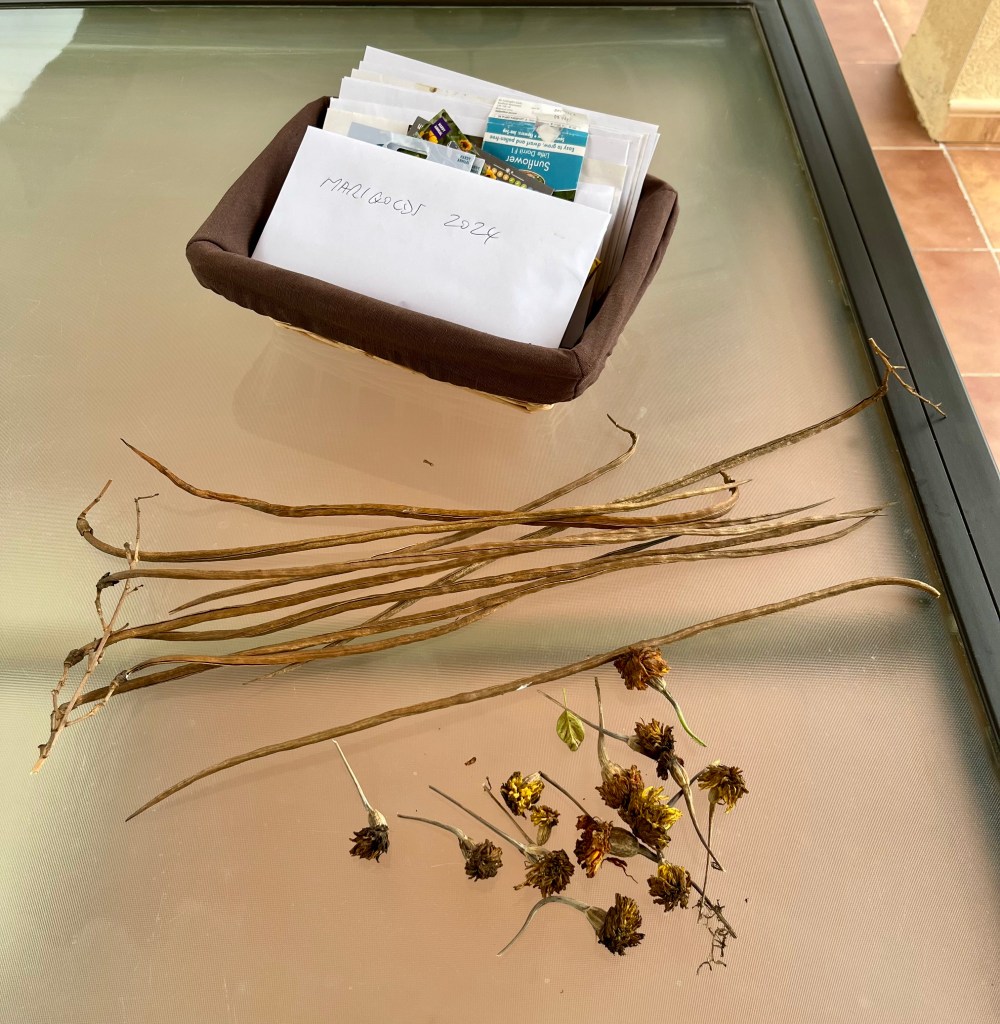
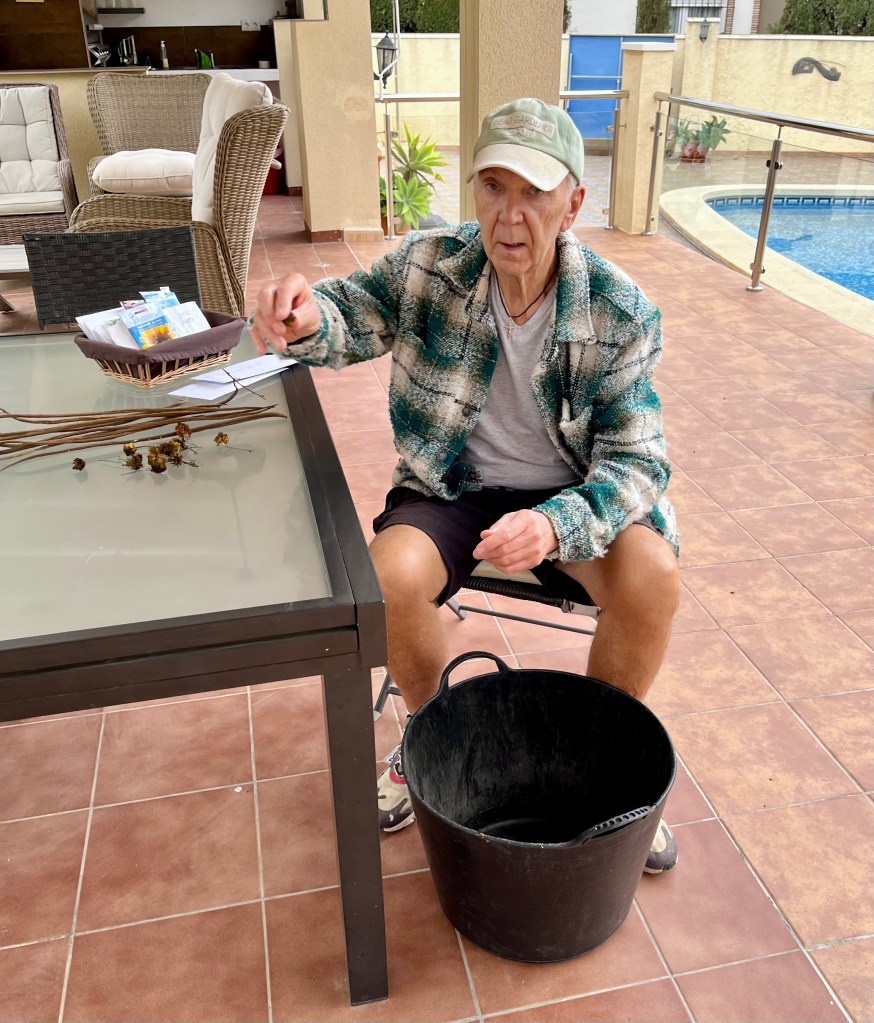
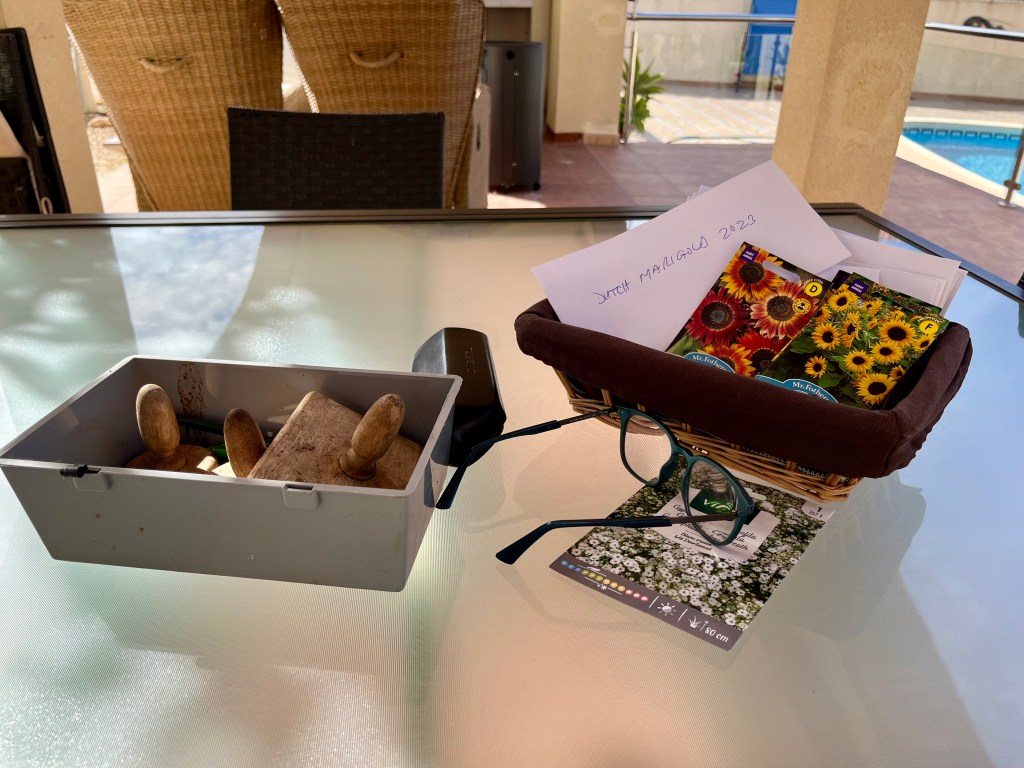
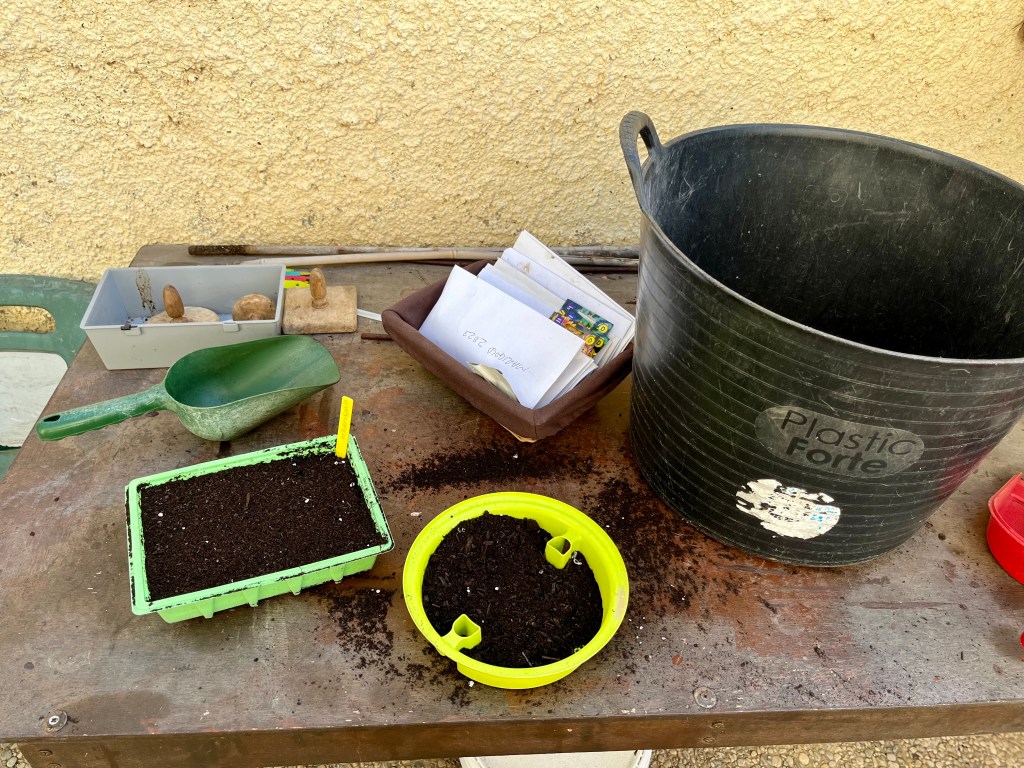
If you have never planted seeds before then don’t panic, it is so simple. Go out to the local Garden Centre or supermarket check out the packets of seeds and buy a few packets of the ones you like. Try and pick ones that are easy to grow and suitable for your local climate and garden. But better still, why not gather seeds from your garden this summer and start your own seed collection. The photo below shows some of my collection.

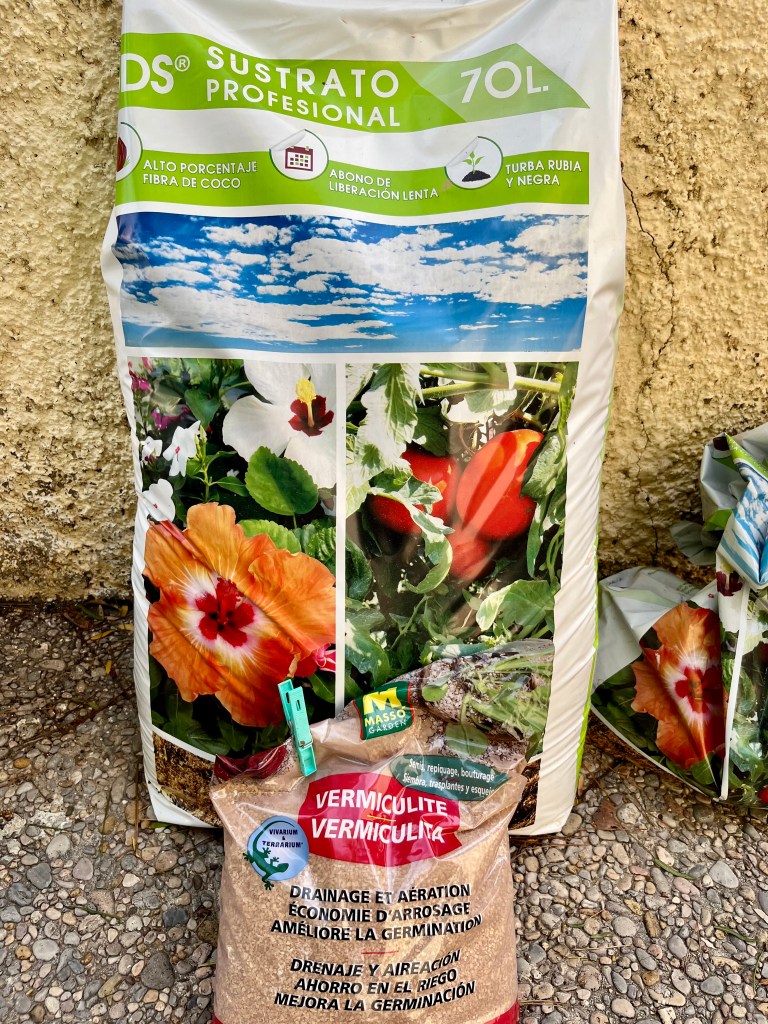
The key to success in seed growing is the growing medium you use. Pick the best compost you can afford, and make sure it is for seedlings. You can help your compost by making it as free draining as possible, so buy some vermiculite to mix in with your compost. The photo below shows the stuff I use.

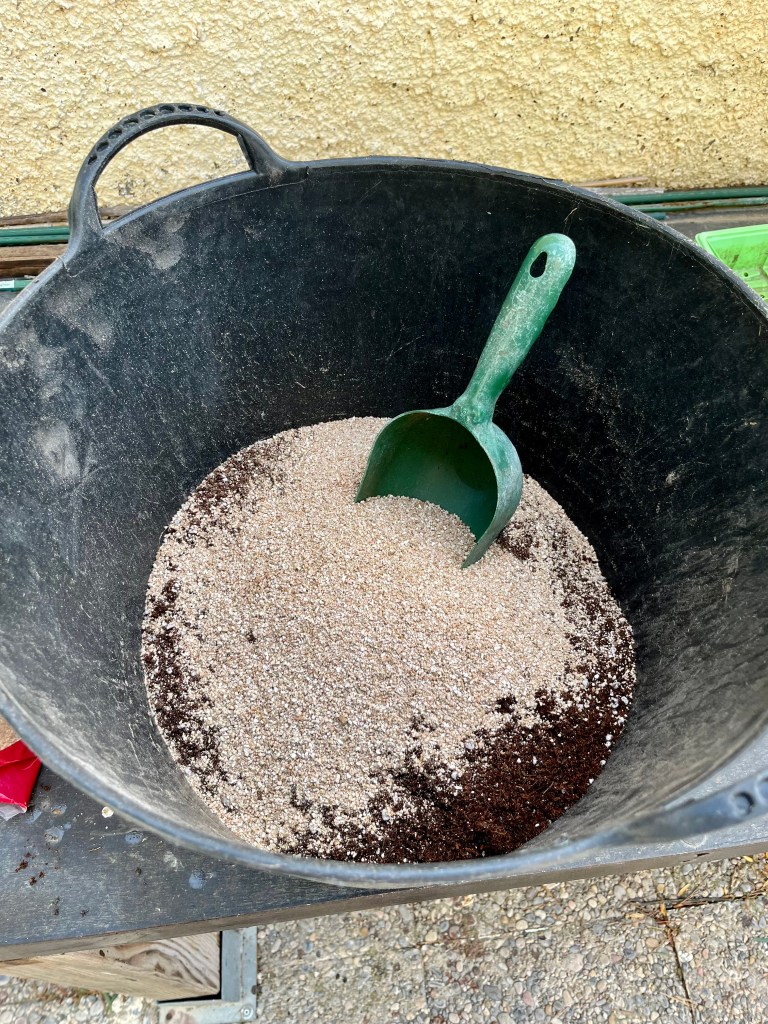
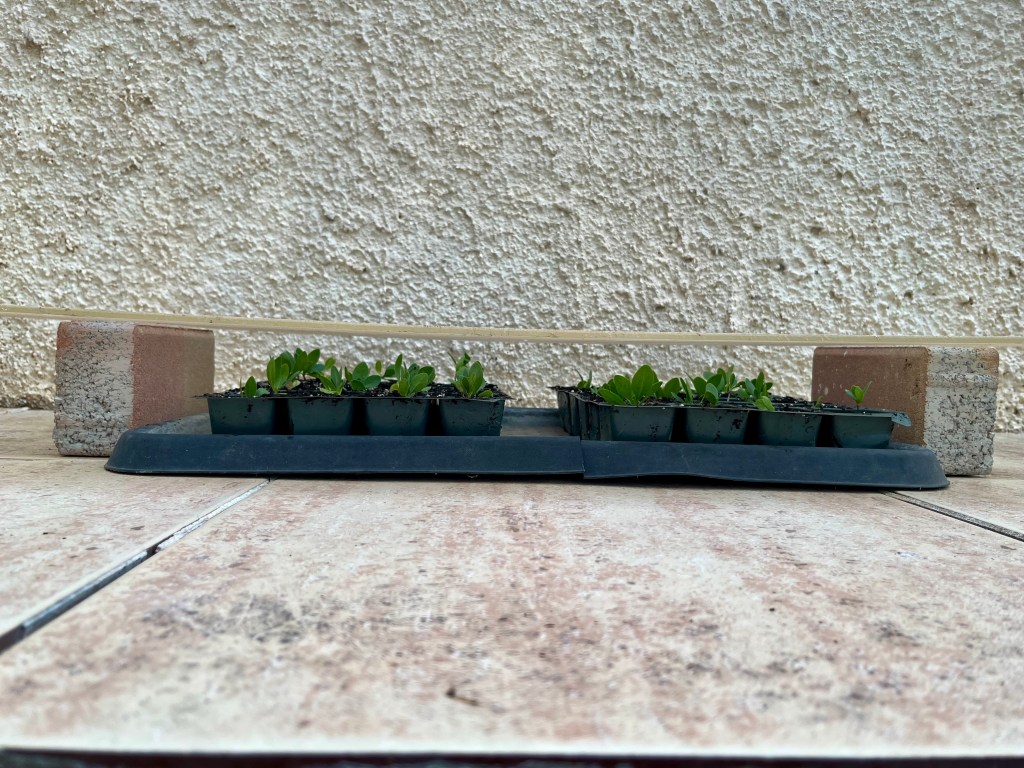
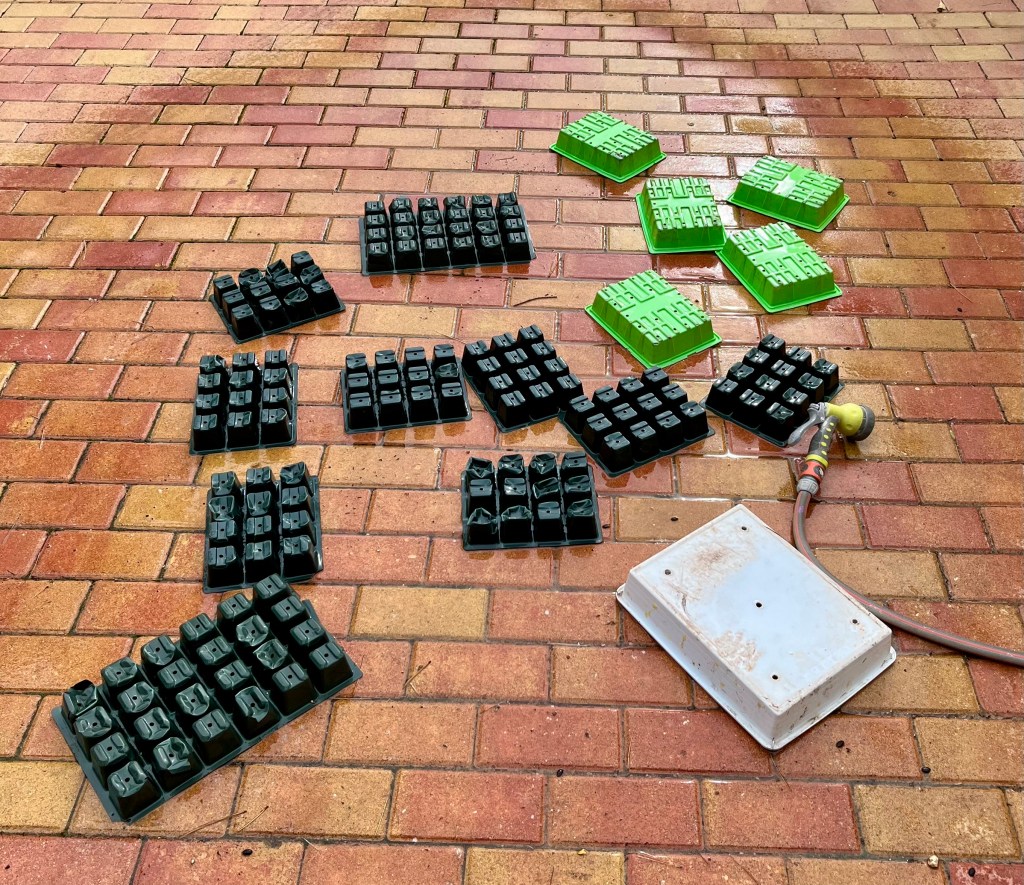
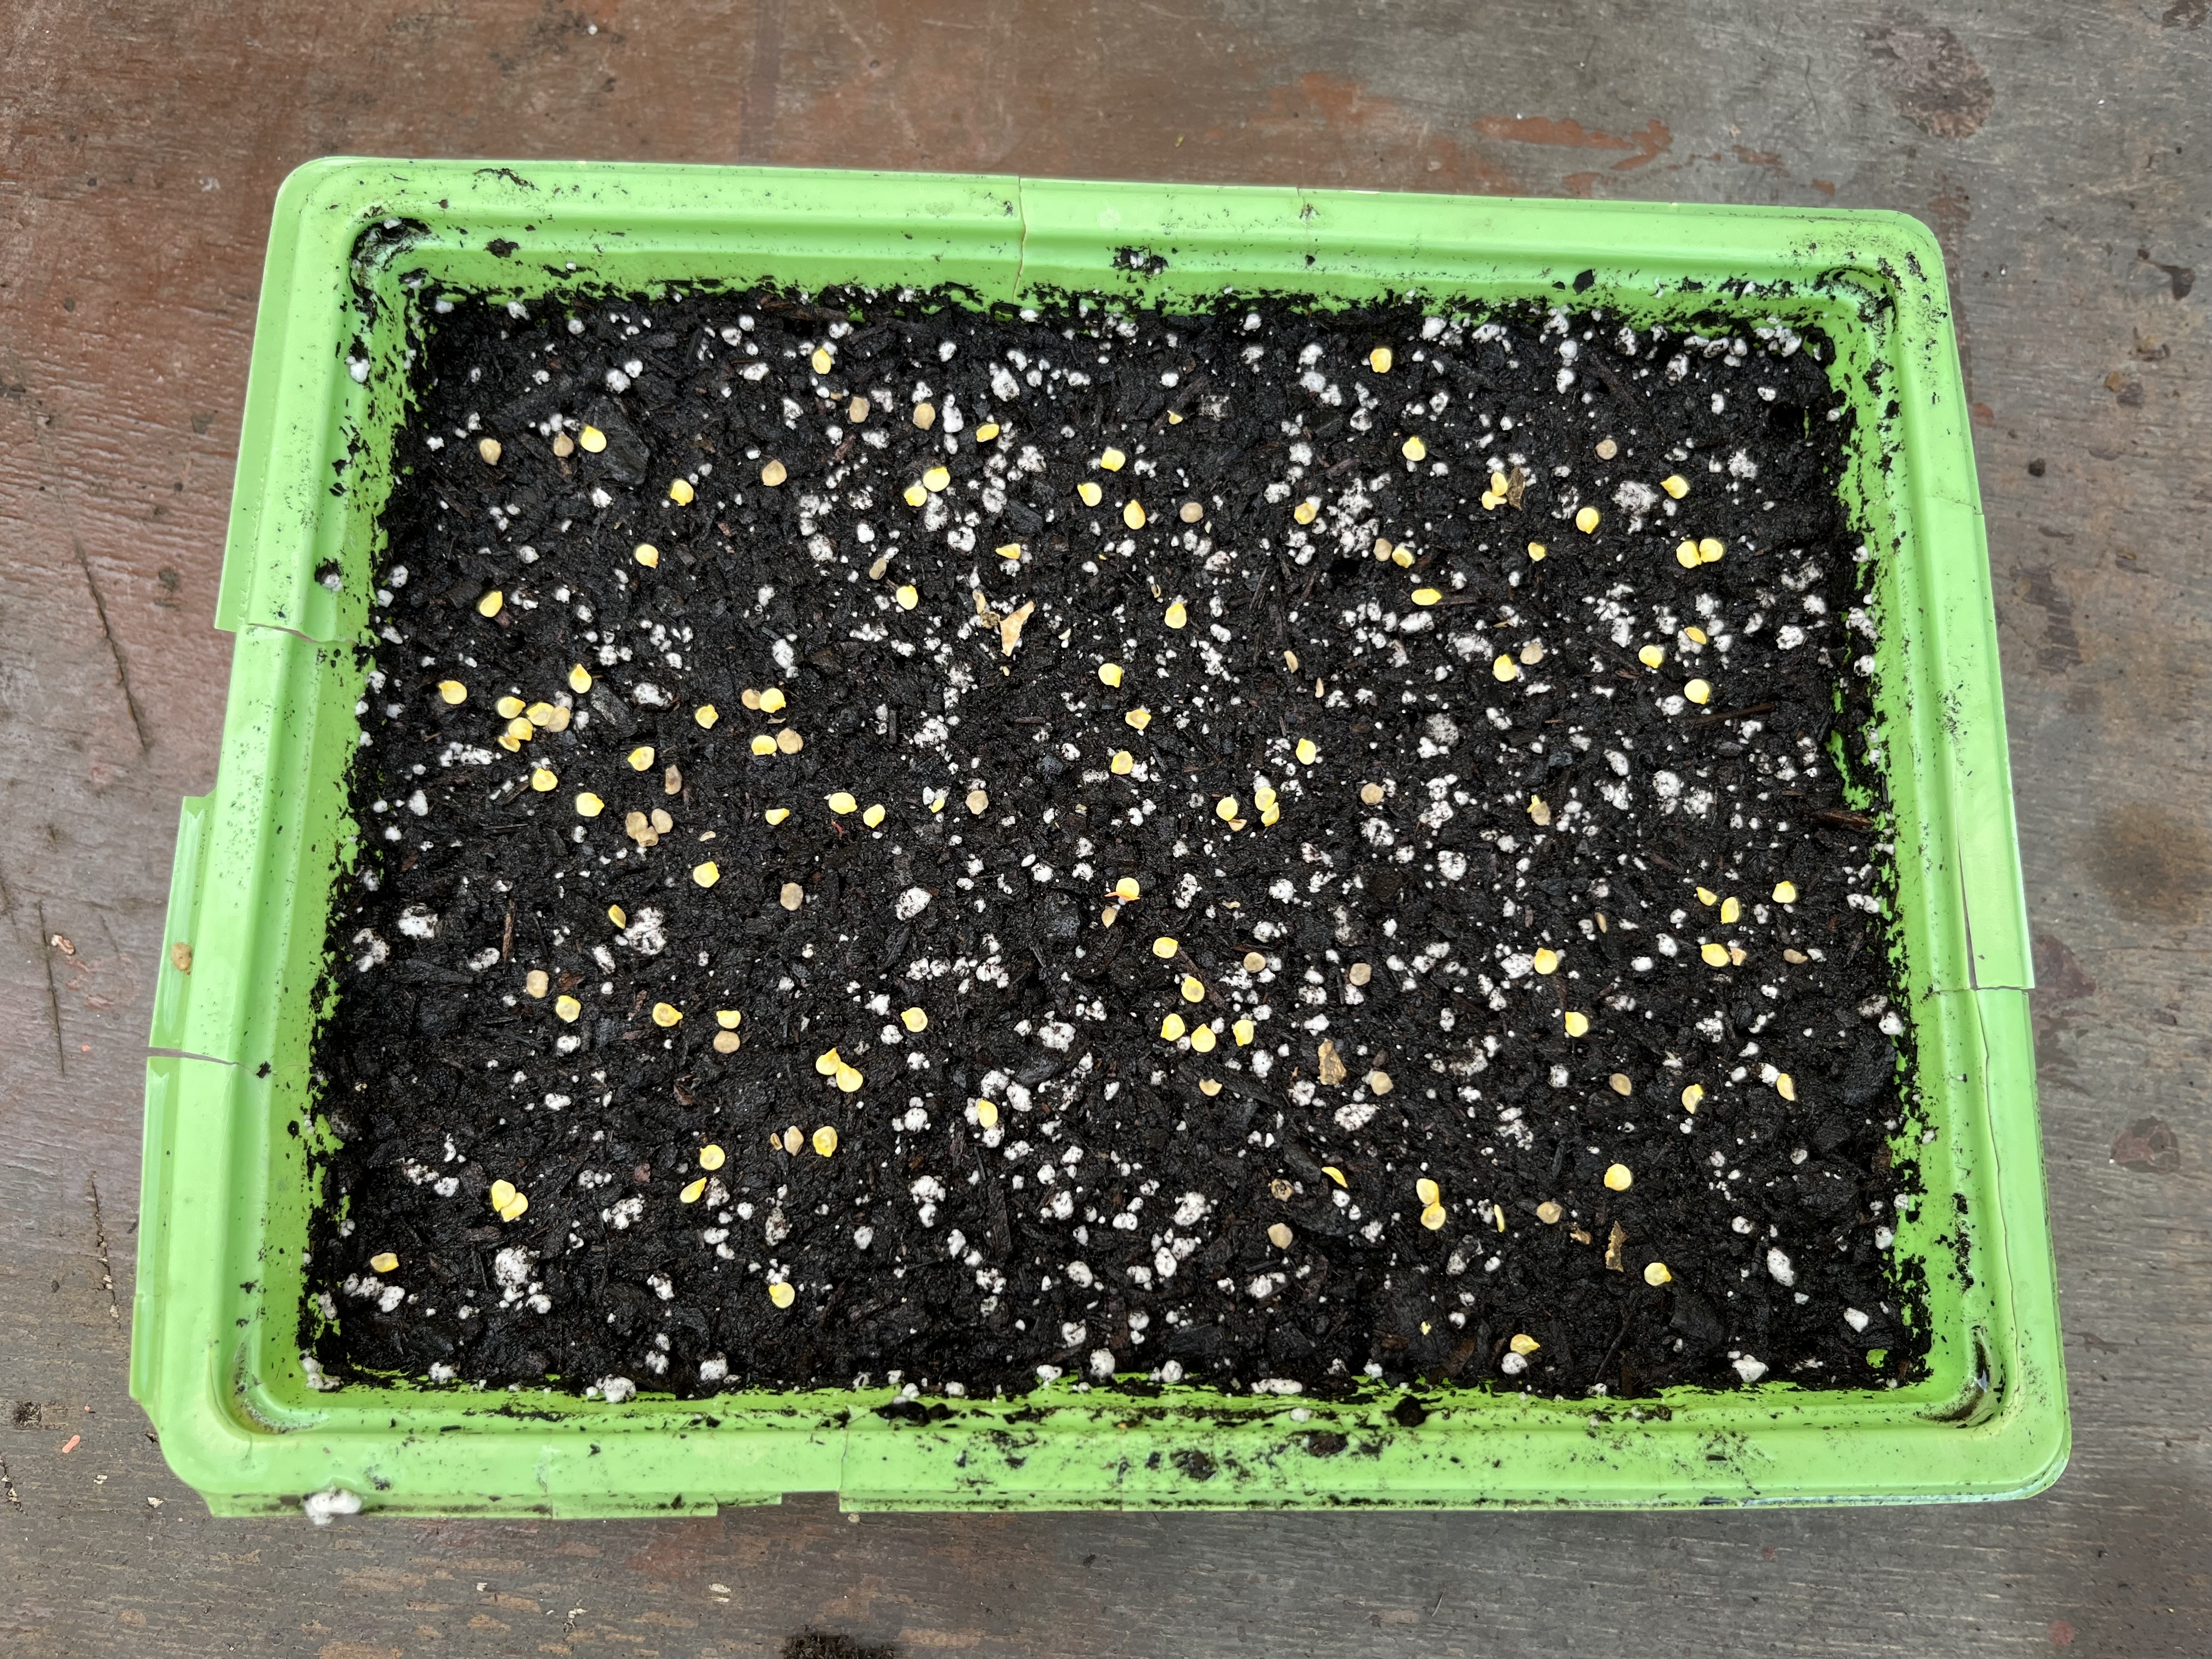
Mix your compost and couple of handfuls of Vermiculite in a trug. Make sure there are no lumps in your mixture then fill up some seed trays. Finish by tamping down the compost in the seed tray to get rid of any air pockets. The photos below show the process.

When you have your seeds trays ready, then just follow the instructions on the packet. Most seeds are sprinkled on the surface of the compost then lightly covered with compost. The photos below show this process.

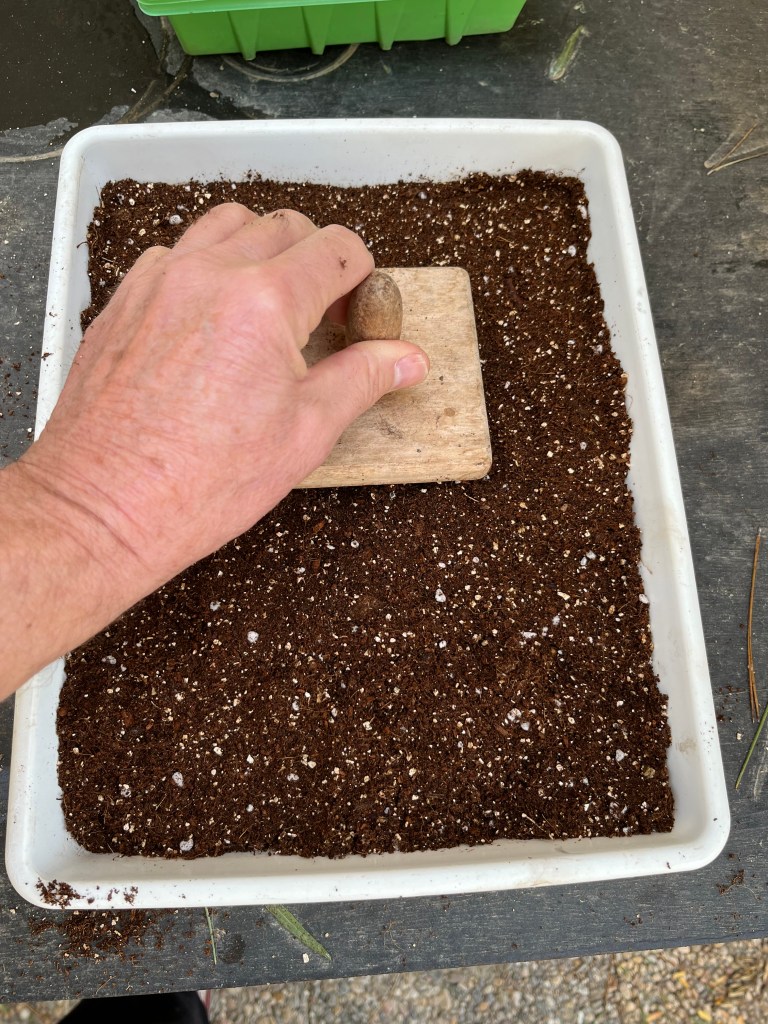
With larger seeds the process is slightly different. Most larger seeds need to be sown individually in 4 inch pots or cellular seed trays. Just fill the pots or cells with compost, water lightly. Then using a pencil or dibber make a hole about half and inch deep pop your seed in and pinch the top of the hole closed. The photos below show this process.

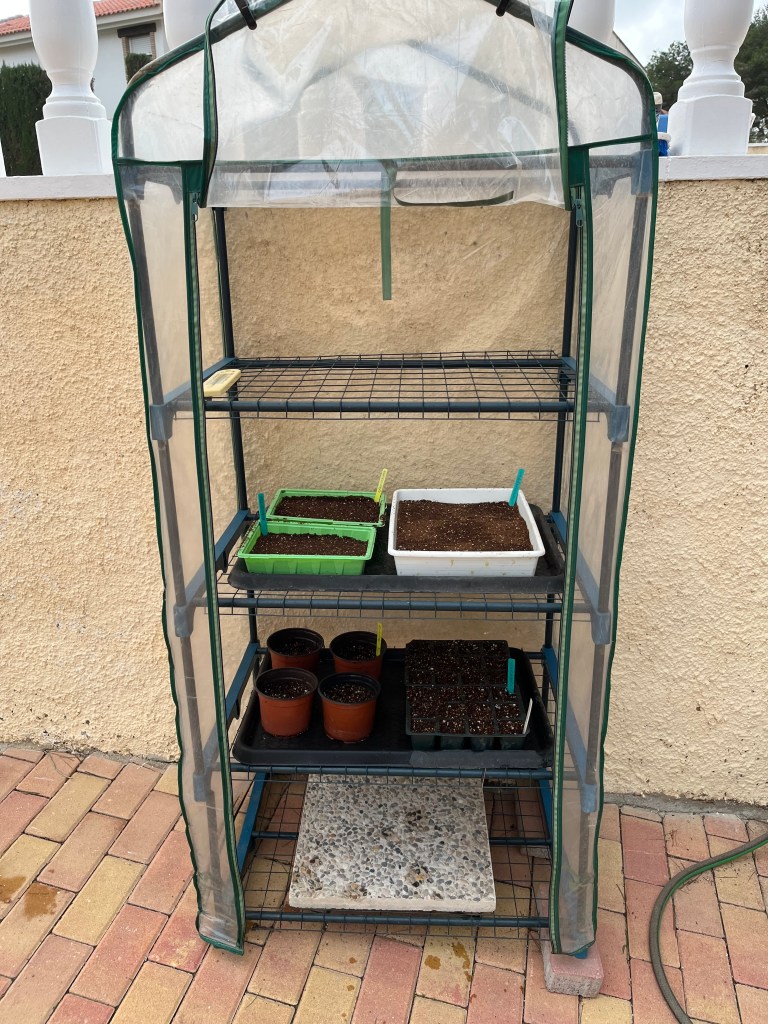
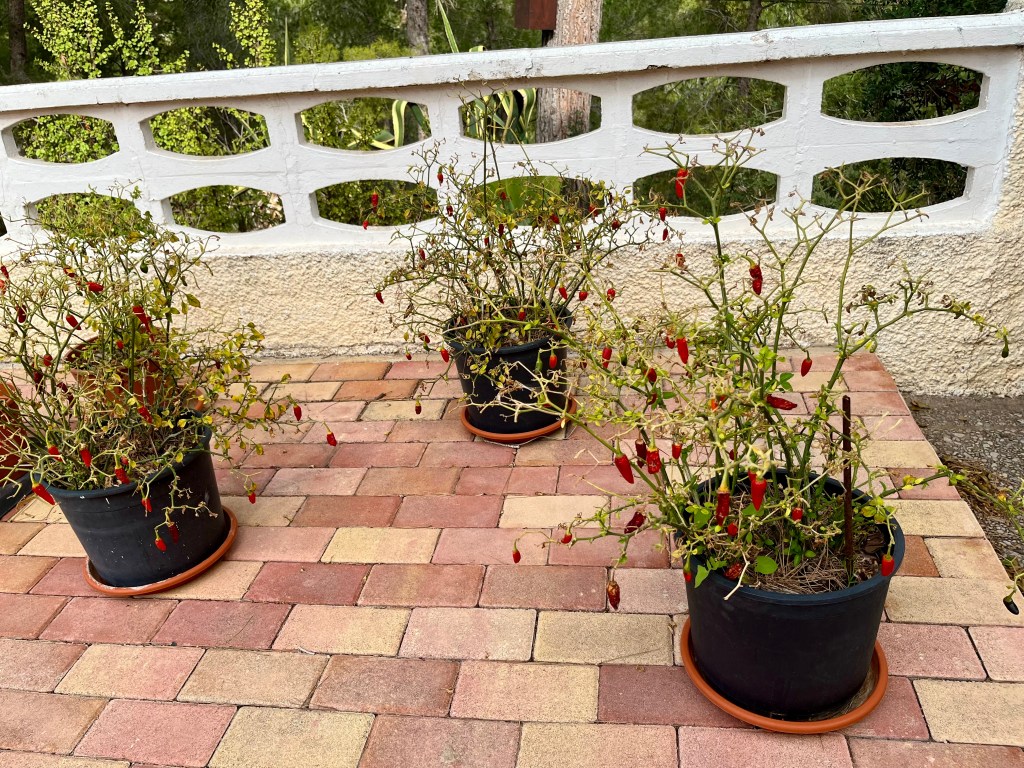
The final,part of the whole process is to put your new seeds somewhere warm to allow them time to germinate. This need not be expensive you can use a window ledge indoors or just buy a real cheap mini greenhouse, you will only need it for a few weeks. The photos below shows my first seeds planted and in my mini greenhouse. The final photo is four days later and God has worked his magic and I have lovely new plants.

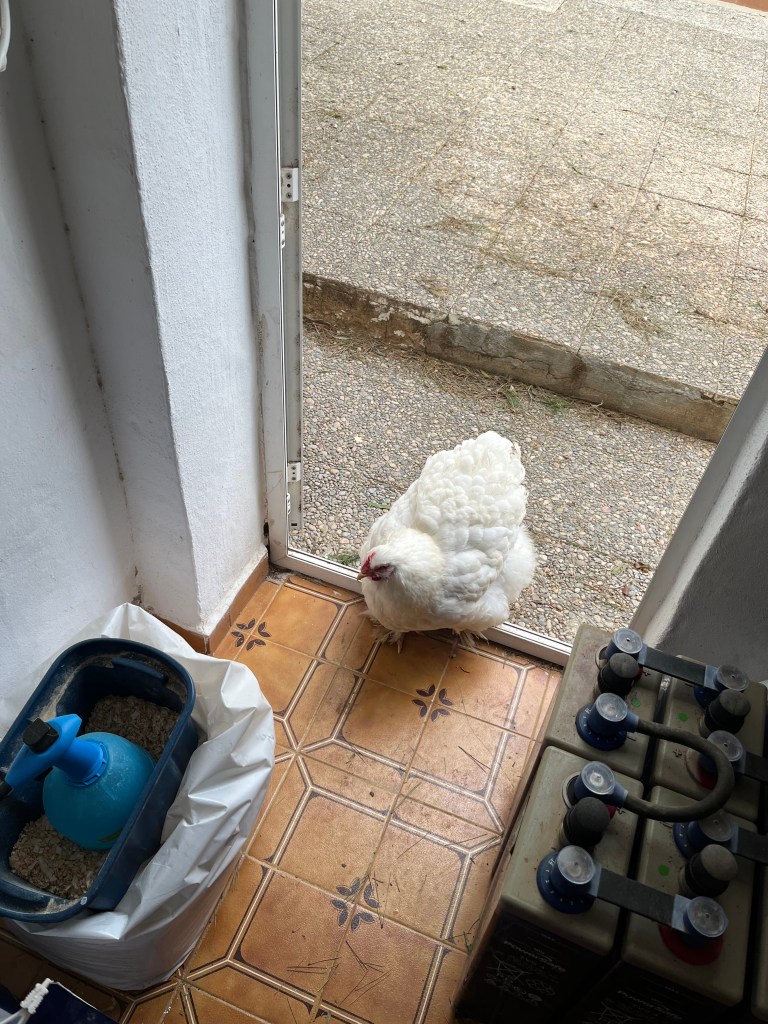
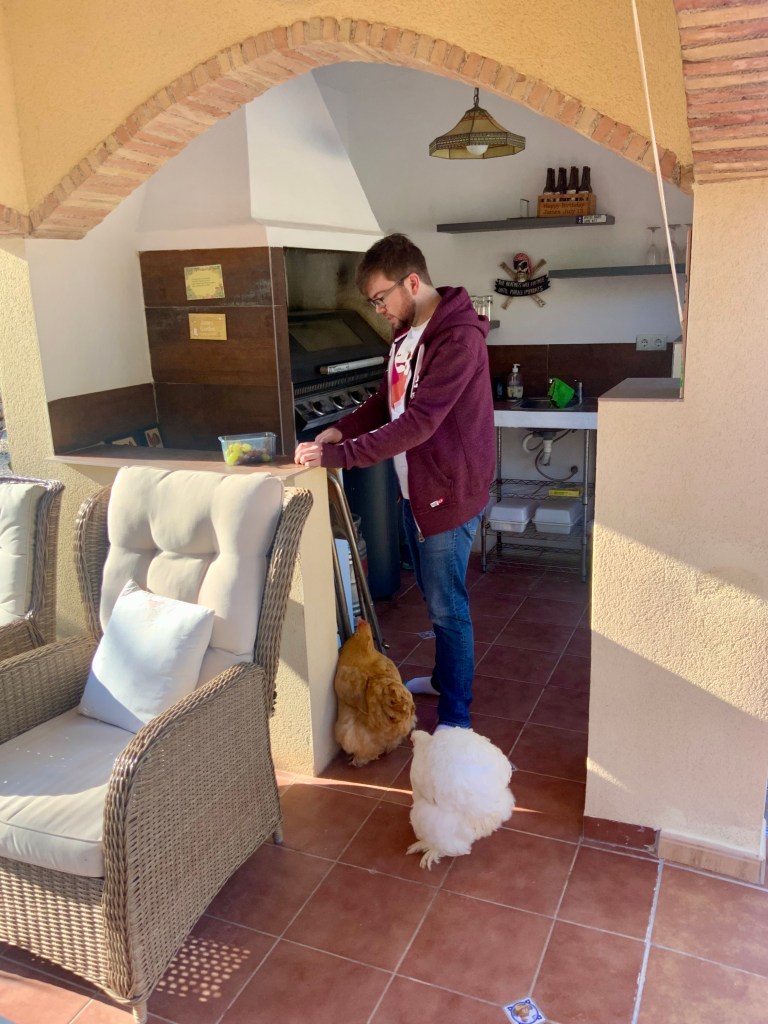
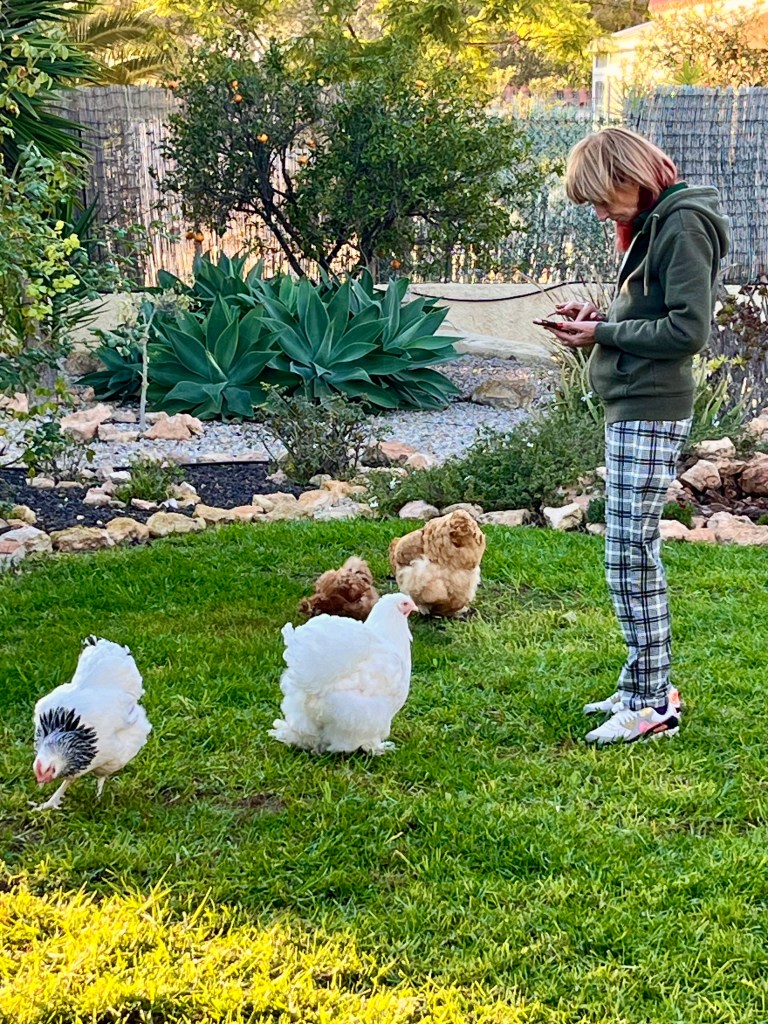
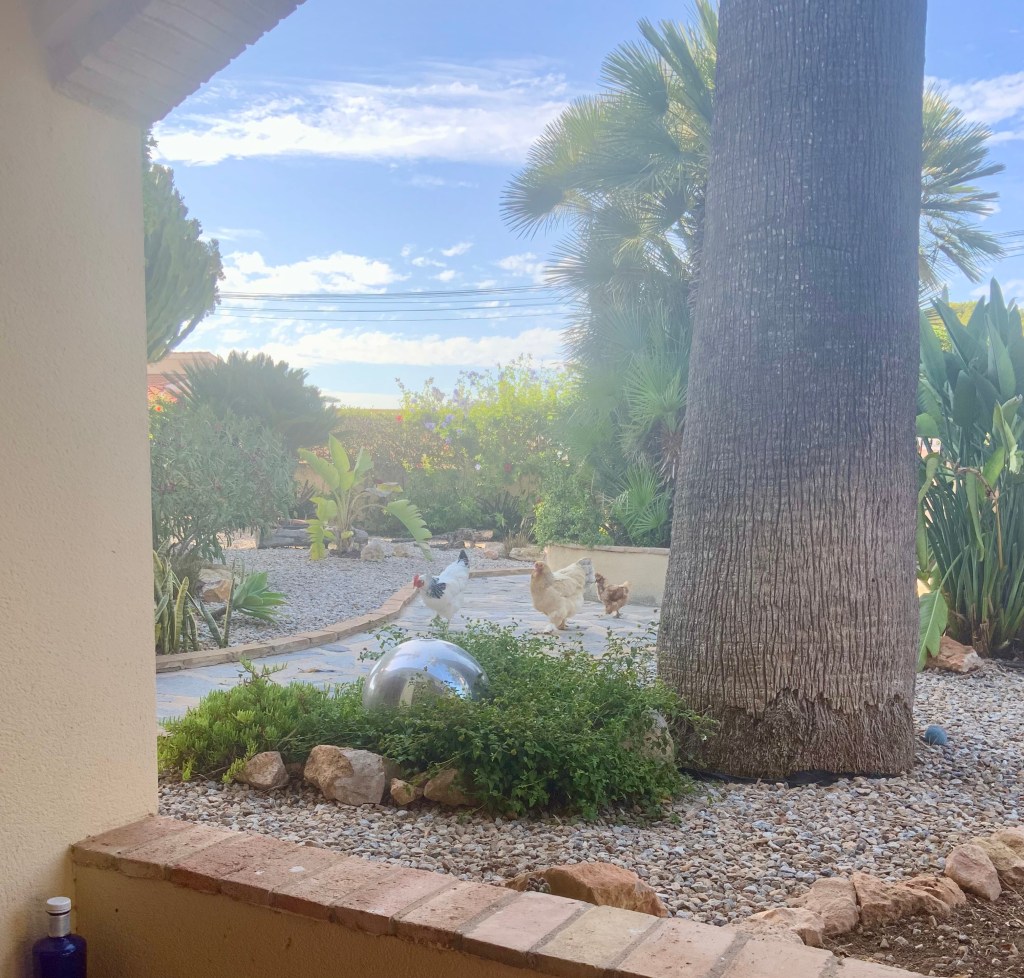
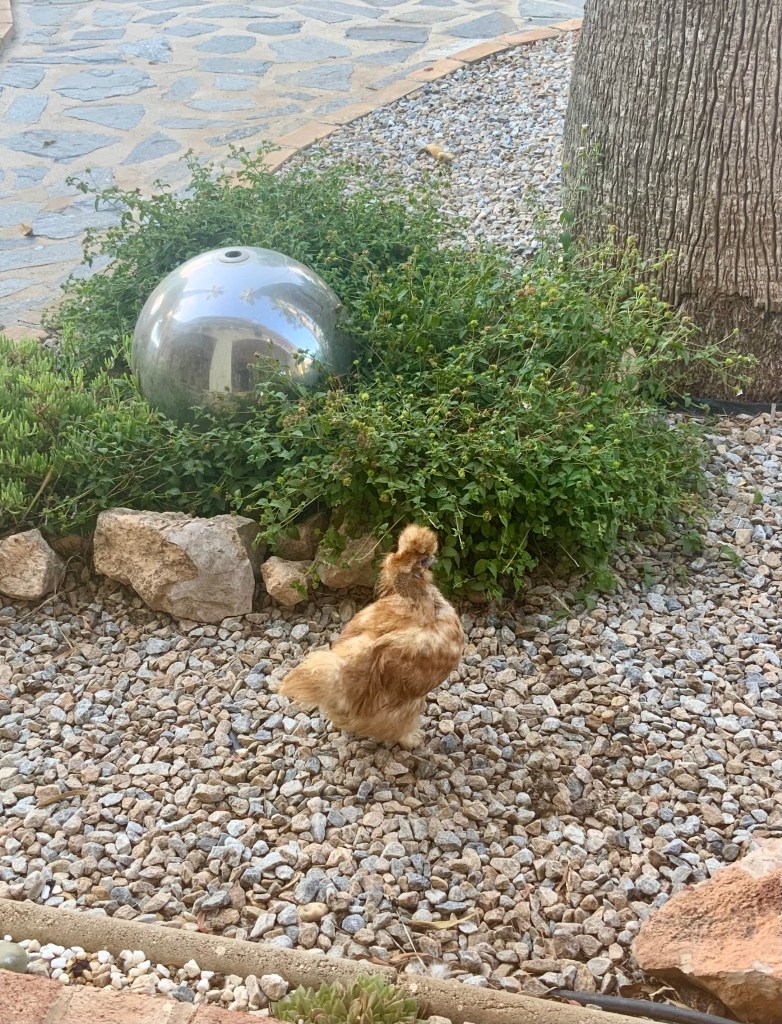
Dealing with a traitor pigeon. Whilst Cruella is away I take the opportunity to show the chickens whose boss. This means no special treats, early bed times, and restricted exercise periods. As you would expect this has engendered lots of discontent. In the past the chickens have somehow got a message to Cruella (my wife) and I have been made to reverse my restrictions including having to publicly apologise to the chickens whilst they smirk at me.

Anyway, this time I had taken the necessary precautions to stop them communicating. All chickens had been frisked for phones, I changed the Wi-Fi password and taped over the ChickenCam Cruella had insisted on; I told her there was an electrical problem.

I had to put up with all their squeaking and frantic gesticulations, but I just point to my ear and shout “me no speak chickenese” it drives them mad. They have held meetings, protest marches and even sent Elsa to plead their case. The photos below show their attempts to protest.

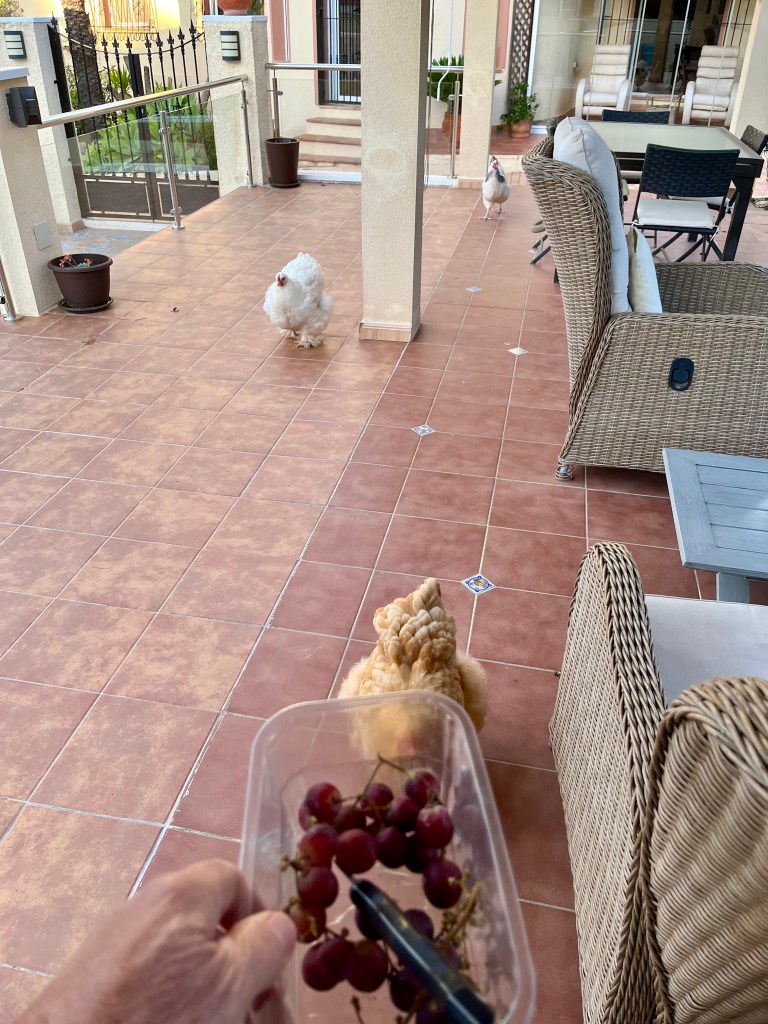
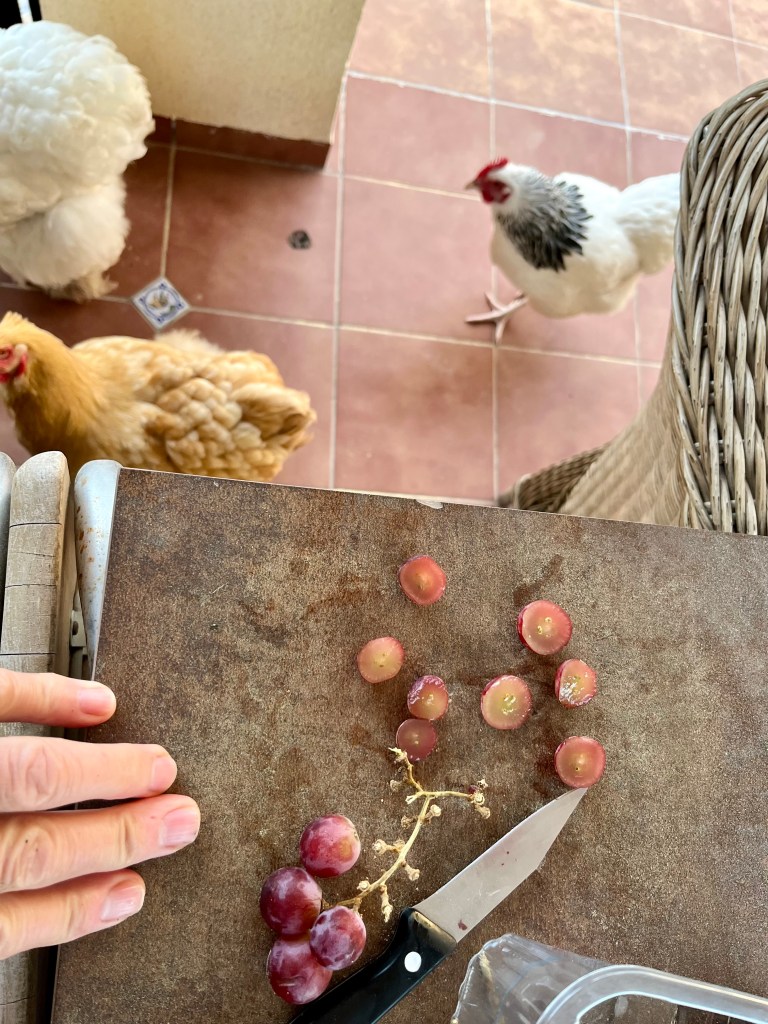
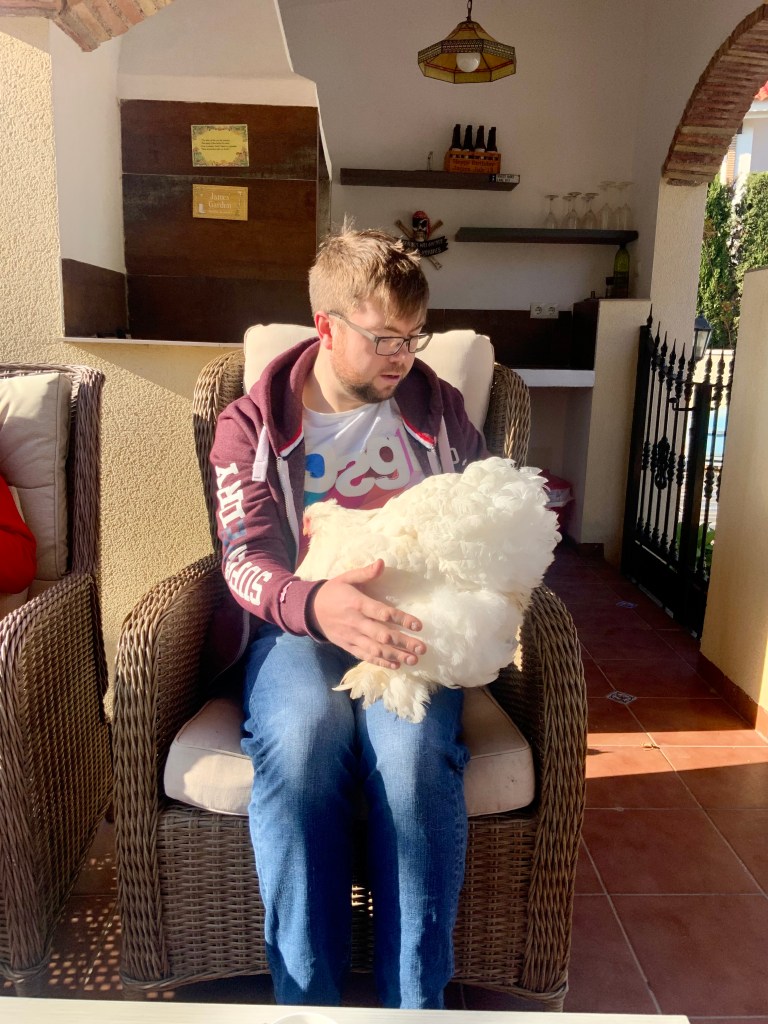
But I held out and was really pleased with myself until a furious phone call from Cruella. She was literally screaming at me “what have you done to my girls” I pleaded ignorance, but it was no good, she knew everything. I tried to blame Tango the lonely blind Labrador, but to no end. The end result was that she insisted that I make it up to the girls. I had to put Elsa on the phone, they chatted away in chickense, in what sounded a very animated call. The end result was that the chickens had demanded reparations and I have been forced to give them grapes every day. The photos below show the humiliation.

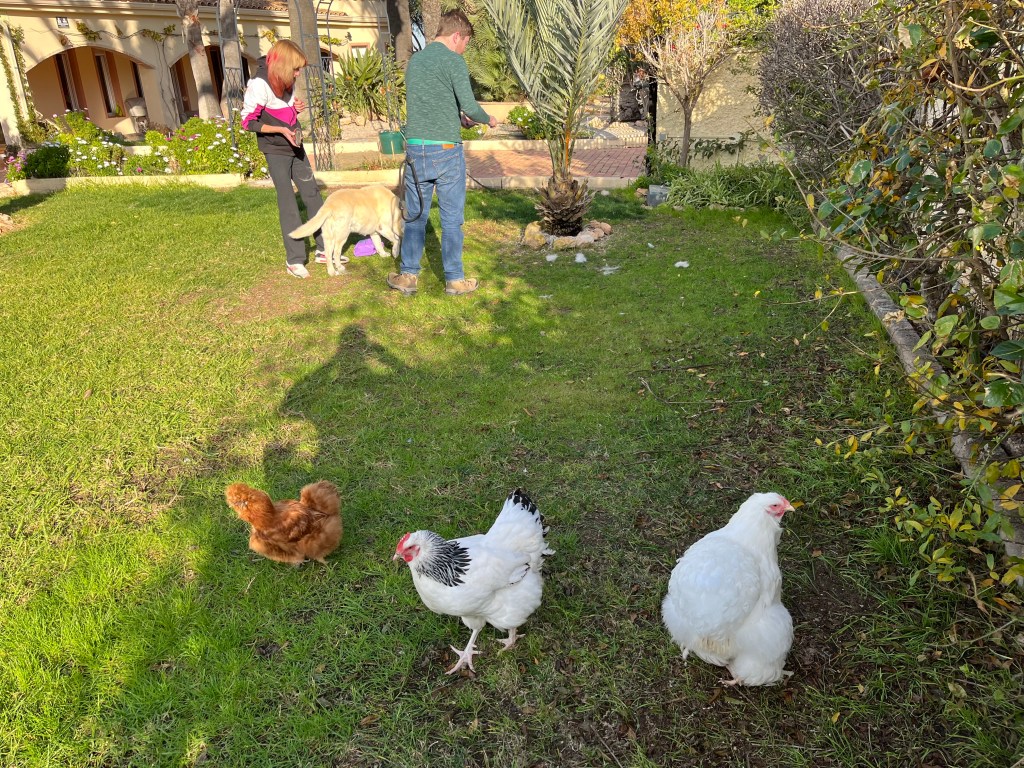
I couldn’t understand how Cruella had found out about my neglect of the chickens, especially after all my precautions. Then it came to me, I had covered everything apart from the bloody Dove that Cruella has adopted. It seems I thought it was an innocent Dove, when all along it was a stool pigeon! Photo of the traitor below – I didn’t give it any grapes!

The big winter cutback Part 1. Cruella hails the idiot son as the Chicken Prince

Well it has finally arrived, it is time for the big winter cutback. Depending where you are in Spain you have a maximum of two months (January and February) to get you garden in shape and to guarantee a healthy floriferous garden this summer.

The basic idea of cutting back is that you take out all last summers old growth, you take the opportunity to reshape plants that have become ungainly and you allow light to get into plants that have become congested. If you don’t cutback then you will not get the best out of your plants and your garden can end up as a brown messy jungle with no definition and few flowers.

But don’t worry, even if you don’t quite know what you are doing, as most plants apart from spring bulbs are dormant and you can’t do too much damage. So get out there, take your time, do it in weeks rather than days your reward will come in Summer.

13th January 2025. Things I have been doing lately:

  • Reshaping Yucca
  • Bringing climbing plants back into shape
  • Cutting back Canna
  • Pruning Dame de Noche
  • Trimming grasses
  • Dealing with the Chicken Prince

Reshaping Yucca. You may remember in my last post I talked about the need to bring Yuccas under control and cut back to a size where you can appreciate the flower spikes. I have now taken a month or so to look at my yucca and decide where I want to cut. So aided by the idiot son I set out to resize all my yucca.

Yucca are a cane and not a tree as they are sometimes mistakenly called. In effect this means that you can cut the trunk back to almost any point, and the plant will regrow from there. You can use either a chainsaw, or more flexibly, a bow saw. Most plants will cut relatively easily, but you must wear eye protection and gloves or you will get a nasty spiking. In addition large yuccas will be very heavy, and just because they look light and spindly in the air, they are extremely heavy and will cause you serious damage if they fall on you. The photos below show my yuccas before their prune. Click on each photo for a larger view.

The photos below show the pruned yucca in the same order as above with the addition of the head gardener and idiot assistant.


Bringing climbing plants back into shape. Most climbing plants will climb for two basic reasons:

1. To escape competition at ground level from other plants.
2. To out compete other plants for sun by throwing out flowering side shoots.

Because of this growing habit most climbing plants will require pruning at the end of every summer. Failure to do this will result in the plant becoming congested and normally flopping over itself and thereby killing off the growth underneath. The simplest and easiest way to prune most climbers is just take a hedge trimmer or shears and skim up the face up the plant shearing off last summers extended side shoots. This will keep your plants tidy and ready for next summer. The photos below show examples of climbers I have started to cutback. Click on each photo for a larger view.

The photos below show an old palm tree trunk with various climbers growing up it. This includes: Trumpet Vine, Jasmine, Stephanotis and Bower Vine. I just run the hedge trimmers over it to tidy it up and it is ready for another year. The photos below show you before and after.

Cutting back Canna. Normally Canna are beautiful showy plants with exotic foliage and stunning flower spikes. However, this year has been a bit of a disaster. Because of a lack of early rain the rhizomes did not swell enough and most plants were half size.

I have left my plants to die right back before cutting them down to just about 3 or 4 inches from the ground. By cutting back to this level you are telling the plant that there is no point trying to regrow this year and it might as well wait till the spring. Also, by leaving a small stalk you will stop rain water seeping into the rhizome and rotting it. The photos below show some of my disappointing cannas, followed by the correct level of stalk to leave. Click on each photo for a larger view.

Pruning Dame de Noche. Now is the time to give your Dame de Noche their big winter cutback. If your plant is more than three years old then you can drastically cut back if you wish. Last year was not a great year for my plant so instead of taking it right back to 50cm or so, I am going to leave it a little bigger so that it gets a jump start in the Spring. The simplest way to prune Dame de Noche is by running hedge trimmers over them and shaping them into a mound. The photos below show my plant before and after its trim. Click on each photo for a larger view.

Dealing with the Chicken Prince. The idiot son duly arrived for Christmas and Cruella (my wife) immediately went into a frenzy of mothering. In many ways this suited me as I could start the big winter cutback without interruption. But it only lasted a day or two before she confronted me with a wide eyed manic look declaring “he is the one”, I knew the answer, but I had to ask who? “It’s him”she declared our son is the Chicken Prince.

Anyway it turned out that she had decided that the idiot was a natural with chickens and therefore was now her rightful heir to the chickens. She hoped I wouldn’t be too upset at being usurped, but to be honest I didn’t know what she was on about. She then proceeded to regale me with tales of his expert chicken handling; as seen in the photos below. Click on each photo for a larger view.

I explained if he fed me bloody grapes every day (see first photo) then I would sit on his knee. She ignored my protestations at the price of grapes and informed me he was now on an advanced course of Chickenese and grooming. As far as I know this involves lessons every day where they sit in a circle on the lawn and chat away in Chickenese. I think he is still at an early stage but it sounds a bit like this:

“Cluck!” “Cluck-cluck!” “Ba-kawk!” “Squawk!” “Brrr-cluck!”“Bawk-bawk!”

I insisted that if the chickens were to be groomed, then Tango the lonely blind Labrador should be involved. After much arguing she agreed. The photos below show them all lined up on the lawn for grooming. I insisted that Tango should be first.

They tried to rush Tango through but I insisted that as he was “special needs” they needed to spend extra time on him. The photos below show Tango being pampered. The sad thing was he gave little squeaks when they brushed him on his many bruises from bumping into things.

They spent twice as long on the chickens as they did on Tango, and to make matters worse they awarded a prize to Helga as the best groomed animal. The photos below show shows the awards ceremony.

Tango and I boycotted the ceremony and sat in the shed. I held a mirror up to him – even though he can’t see -and assured him how lovely he looked, but tears still fell from his little milky eyes. I didn’t tell him he came fifth!

Gathering seeds, composting leaves, cleaning up and the chickens go to the Ball

Now that is what you call a title, no messing around or euphemisms, you know exactly what you are getting in this blog post. It is the last real post before we begin the big winter cutback, so there is still lots to do. Added to this I have had the problem of Cruella (my wife) preparing the chickens for a Ball. Anyway on with the gardening.

12th December 2024. Things I have been doing lately:

  • Gathering seeds
  • Composting leaves
  • Last minute clean up jobs you need to do
  • Planting out cuttings
  • Cruella prepares the chickens for a Ball

Gathering seeds. Take a look around your garden at this time of year and you will find lots of seed heads and pods ripe for picking. If you pick them off now, store them to dry, and plant them next Spring, then you will have lots of lovely new plants for free. But what’s more you will be on your way to being a gardener rather than a shopper for plants.

You will have lots of different seed heads in your garden of all different types, just waiting for you to harvest them. To process the seeds is very simple.

  • Wait until your seed heads have completed their cycle, the flowers have died and fallen off and the seed pod that is left has gone fully dry and brown.
  • Cut the seed head off with your secateurs and if possible leave a little bit of stem.
  • Place the seed heads into a plain white envelopes, one for each type of seed, until you are ready to process them.
  • Depending on the type of seed pod, the process is more or less the same; carefully remove all the outer casing of the seed pod till you expose the seed. Pour this into the palm of your hand.
  • Gently blow across the seeds as you transfer them between your palms, this just removes any chaff.
  • Place the seeds in plain white envelopes by type with the name and year clearly written on the envelope and store them in a cool dark place (a drawer is fine).

The process is shown for Marigolds and Trumpet Vine in the photos below. Click on each photo for a larger view.

Composting leaves. Most gardens have a tree or two, and as we all know deciduous trees shed their leaves every Autumn. Now you can either see these fallen leaves as a mess that needs to be cleaned up, or, you can see the leaves as compost gold.

I have lots of pine trees, but their leaves whilst perfectly compostable over time, tend to produce an acid compost. So if you have lots of pine trees it is ok to add pine needles to your compost bin, but no more than 10% of each layer. However, if you have a deciduous tree, like my large Mulberry or even better a Fig with its large leaves then you are lucky. The photo below shows my Mulberry and one of my figs shedding their leaves. Click on each photo for a larger view.

You don’t have to wait till all the leaves are off your trees. Instead get into the habit of clearing the leaves once every two weeks. Just rake the leaves up into piles and then store them in plastic garden sacks. See photos below.

Leaves compost in a different way to normal compost, so don’t just add them to your compost bin. Store them in plastic sacks, but before you store them prick the sack with a fork in a number of places to allow for air circulation. You will need to store your sacks somewhere in your garden where they won’t be unsightly and where they do not get sun. See photos.

Your leaf compost will be ready in about a year, roughly the same time as you will be harvesting the next lot. You can cheat if you want. After about six months just pour the sack into your normal compost. It won’t be fully composted, but when you get to my age you go for quick wins.

Last minute clean up jobs you need to do. There is still a few little jobs you need to do before next month’s big cut back.

You can start by cleaning up fallen citrus fruit such as oranges and lemons. The recent high winds here in the Costa Blanca has meant we have lots of fallen fruit. If you leave this fruit on the ground for any length of time then you will get an active green mould growing on it. Left to itself this will release spores which are not very healthy for other plants or us. My efforts to stop a future plague are shown below. Click on each photo for a larger view.

If you have Fig trees that still have residual fruit, just take them off. Any fruit left on your trees will never mature and will only take strength away from the tree. With figs the sap will not yet have been drawn back into the roots so be careful you don’t get a sap burn.

Planting out cuttings. If you have any cuttings you have grown out, then now is a good time to get them in the ground. There is still warmth and moisture in the ground so it will not be a great shock.

I have grown a number of cuttings over the Spring and Summer. During the Summer I mostly just dot these around the garden in pots, just to see how they get on. By now I will have either put them into larger pots or if they have really performed then they go into the ground.

I have a problem area in one of my hedges where a Jasmine cutting is being very slow to grow to fill the gap left by a dead Hibiscus. The photo below shows the problem. From the photo you can see that there is Plumbago to its left and Pink Trumpet Vine to its right. The idea was that the Jasmine would grow and provide colour variety between these two.

In order to deal with this problem I have been growing a Trumpet Vine to add to my hedge. I like to keep hedges over planted and competing for space and light thereby guaranteeing more flowers. The Trumpet Vine has grown strongly during the Summer and now needs to go into the ground. The Jasmine has had its chance, now for some competition. The photo below shows the new gap filling contender.

I have trimmed it back ready for its transplantation. On a sad note, my lovely teapot confection on the pillar was blown over and smashed in the recent storm; Cruella is devastated.

When planting out make sure you do all the usual stuff like clear the area of any weeds or stones then dig a planting hole big enough not to cramp the roots. When you take the plant out of its pot make sure to tease out the roots so that they can be encouraged to reach into their new soil. Also, if possible sprinkle some Mycorrizhal rooting powder into the planting hole and onto the roots as this will definitely aid early root growth. The photos below show the process. Click on each photo for a larger view.

Cruella prepares her chickens for a Ball. It all started when Cruella (my wife) read a magazine article about Queen Charlottes Ball where debutantes are presented and come out into society. She breathlessly told me that this was just the sort of opportunity her girls needed, and if they could only come out formally she would be the happiest mother alive – I have given up explaining that she is not their mother.

Despite my explaining that Queen Charlotte’s Ball was not for chickens, she refused to accept this and began looking up Finishing Schools in Switzerland. I only averted her flying to Switzerland by persuading her that it would be far better if she prepared the girls for “finishing” at home.

It has been almost a month now and every day has been filled with Cruella schooling her girls in all sorts of arcane skills and manners. They start most mornings with “dining etiquette”, this involves politely pecking at their food, not pecking each other and definitely no eating worms. This is followed by “elocution”, to be honest as it is all in chickenese, I have no real idea what they are saying. They all cluck away as Cruella nods enthusiastically, but it does sound a bit like “how now brown cow” but in chickenese.

The afternoons are spent in “deportment, dance and formal bowing”. It is quite fascinating, especially if you have never seen a chicken walk up and down with a book on its head. Dance is my favourite as Cruella stands in the middle of the lawn playing Mozart on her phone whilst shouting out the timings. Despite her best efforts the chickens gyrate wildly in a figure of eight in front of her and all end up colliding and fighting.

I am involved in the formal bowing part. I have to sit on a chair pretending to be the King whilst Cruella acting as a Herald formally calls each of her girls forward and introduces them to me. Each bird has a new sash in soft pink silk and they formally approach me and bow. From my perspective though the whole effect is ruined by them poohing on my shoes. The photo below shows a dancing lesson in action.

The music was Mozart – Ascanio in Alba, the dancing was appalling

The big summer cutback, I forgot to net my figs and I am accused of killing Big Bertha

I suppose I better start with the bad news; Big Bertha my wife’s favourite chicken is dead! The really bad news is that I am being accused of deliberately killing her (the chicken that is). I won’t go in to it all now, we will do the garden stuff first then I will plead my innocence.

11th August 2024. Things I have been doing lately:

  • The late Summer cutback
  • Gathering in the few crops the birds have left me
  • Continuing to deadhead
  • Dealing with the fall out from the death of Big Bertha

The late Summer cutback. As we move towards late summer here in Spain the heat has been building for months and we have had no rain in the Costa Blanca. This has meant that most of us will have lost some plants and the rest of the garden looks very wilted and sorry for itself.

Now is the time to stroll round your garden in the cool of evening and decide whether some areas need cutting back. There are two main reasons for cutting back at this time of the year. Firstly, you may want to redefine the shape of your plants where they have got floppy and overblown. Secondly you may want to cut off old growth to encourage a new flush of flowers or green growth.

The photos below show the bottom of my drive where the large Peruvian false pepper tree and the Myrtle bush normally make for an attractive scenario that draws the eye down the drive. The first photo shows them both slightly out of shape, whilst the second shows them back at their best after trimming. Click on each photo for a larger view.

If you have hedges (and I have a lot), then now is a good time to give them a light trim to bring them back into shape and stop them shadowing lawns and your bedding plants. Don’t be tempted to trim hedges before round about now as you may disturb or even destroy bird nests. But also remember this is not the big winter cutback so don’t cut into wood, unless you really need to, instead just concentrate on taking back leaf. The photos below my various trimming efforts before and after. Click on each photo for a larger view.

If you have arches over gates or other entry points into your garden then tidy these up as well so that cars don’t get scratched and people don’t snag their clothes on overgrown plants. The photos below show some little areas of tidying up. Click on each photo for a larger view.

Gathering in the few crops the birds have left me. Regular readers of this blog will remember that I prepared my fig trees for netting just before I went away for a couple of weeks. Unfortunately, when I got back, I didn’t get around to netting them as I became distracted with other tasks. Then I stupidly decided not to net them this year as an experiment. The results were predictable. A good third of my fig crop is being lost to birds. Each morning I go out and harvest that days ripened figs, but large numbers have been pecked by birds, most annoyingly sometimes just one peck, but enough to spoil the fruit. The photos below show the morning devastation. Click on each photo for a larger view.

The photo below shows a typical morning collection including the spoiled figs that I will never enjoy.

In addition to figs I have been harvesting my grapes. I don’t normally bag or net grapes as it would be too time consuming. The secret with grapes is not to try and harvest them before they are ripe. Grapes do not continue to ripen once they are cut, so you have to be patient.

Keep an eye on your grapes, twice a day if necessary. Taste one each day as they get close to ripening. Then once you are happy take off the ripe bunches straight away. The birds will know exactly when your grapes are at their best so don’t leave them any longer than necessary. The photos below show my grapes waiting to be harvested, and then the daily harvest. Click on each photo for a larger view.

Continuing to deadhead. I know it is hot, and you have cold beer and wine waiting for you. But, if you don’t deadhead daily then you will run out of flowers in late summer. Once most plants have 50% of dead flowers going to seed, then they will stop even trying to put on more flowers. By deadheading daily you are forcing the plant to produce more flowers to reproduce itself. The photo below, shows me on my daily rounds.

Dealing with the fall out from the death of Big Bertha. I started this post by informing you that Big Bertha, my wife (Cruella’s) favourite chicken had died. But let’s start with the facts. Yes Bertha is dead, and yes I may have had something to do with her demise. But I feel I need to explain and get you to understand the sequence of events and extenuating circumstances. But just to remind you of the late great Big Bertha, she is the one on the left in the photo below, in case you hadn’t guessed.

What happened was this. I have a spray irrigation system watering under all of our fruit trees on a timed system. It was a hot evening and Bertha had positioned herself under one of the trees where she seemed to be happily enjoying the irrigation spray. I thought it was funny and even took the photo below to show Cruella.

Anyway, that night when Cruella went to put her to bed and gave her, her normal goodnight cuddle (all I get is goodnight pig), she discovered that Bertha was soaking wet. The next day Cruella came hurtling into the house in hysterics screaming that Bertha was dead and that I had murdered her. It turns out that when Cruella went to let her girls out Bertha didn’t appear, only to be discovered stiff as a board.

I can’t begin to tell you what it has been like in our house since. The recriminations and hysterics are terrible. They all shout and scream at me in chickenese and accuse me of Water Boarding Bertha. Cruella has already reported me to the ICC (International Chicken Court). She gets things mixed up and insists that the ICC is somewhere in Europe overseen by William Hague who she insists will see that justice is done.

We had Bertha’s funeral yesterday down in our wild wood. It wasn’t really a funeral as Cruella insisted that Big Bertha was burned on a funeral pyre. We all stood around, Cruella and her girls all wore black and sang dirges in chickenese. As the flames licked around Big Bertha’s corpse they all burst out into loud wailing. I just stood there, all I could think of was KFC!

Pruning, trimming, a Blackbird broke my heart and Cruella has entered the chicken Olympics

I have been away, I know I didn’t tell you, but I just slip away and creep back, it is best for the garden. If Cruella (my wife) knows I am away she takes down all my chicken defences and dances around the garden with her girls shouting about freedom and chicken rights. She told me she that she sees her self as a latter day Isadora Duncan whilst being an admirer of Just Stop Oil, chicken division.

When I crept back in after a week away she said “where have you been?”. I told her I had just been down by the compost bins and she nodded ok. She then casually informed me she was preparing for the Olympics; anyway, on with the gardening, more later.

29th June 2024. Things I have been doing lately:

  • Taking fig cuttings
  • Planting out loofahs
  • Trimming back to encourage new growth
  • Trumpet vine and the Blackbird
  • The chicken Olympics

Taking fig cuttings. By now your fig tree should be putting on leaf and fruit at a great pace. This means there will lots of lush green growth which is ideal for taking cuttings. If you fancy a new fig tree for free, or would like to donate one to a friend, then now is the time to take a few cuttings.

I must warn you that when taking fig cuttings at this time of year you have to be very careful of the white sap that will weep from the cut wound as this will be very caustic and can give you a nasty burn. But taking this into account and dressed accordingly in long sleeved T shirt and wearing gloves, all you need to do is select a lush non fruiting stem and cut just below a leaf node. See photo below.

Try and take a number of cuttings as this will give you a better chance of success. Once you have all your cuttings, take them back to your potting bench and remove all the leaves apart from a couple at the end of each stem. See photo below.

Once you have trimmed your cuttings up, leave them for a couple of hours in the shade so that the dripping sap can dry up. Once the sap has dried dip the end of each cutting into hormone rooting powder or liquid (this is not essential, but it helps). Plant each of the cuttings around the edge of a six inch pot, I usually plant four to a pot, but it is up to you. Finally place your potted cuttings in the shade on your potting bench and wait. Most will die, but hopefully some will sprout new leaves and give you a future fig tree. The first photo below shows the stems being dipped in rooting liquid, whilst the second shows the new cuttings in their new home ready to go into shade for a few weeks. Click on each photo for a larger view.

Planting out loofahs. Those of you who came to my open garden day were given some loofah seeds to plant, and hopefully you did? Loofahs are lovely plants, an annual that grows quickly as a climber, has lovely yellow flowers and as an end product you have a loofah to use in your shower as an exfoliant. What is not to like; Cruella’s Coven swears by my loofahs wart removing powers.

I planted some loofah seeds some time ago and it is now time to pot them on. The photo below shows my little seedlings ready for a new home.

The secret to success when potting on loofahs, is to recognise that they really don’t like their roots to be disturbed. I plant them two to a 9 inch pot, but before planting them I place each of the pots into the new pot and build compost around them, then I gently ease out the loofah beforecarefully slotting it into its newly prepared home. The first photo below shows them being prepared for their new pot, whilst the second shows the strong root growth after only a few weeks. Click on each photo for a larger view.

Finally a couple of photos of their quick growth. Each plant can grow up to 10 to 15ft and give you 8 or more fruits. Click on each photo for a larger view.

Trimming back to encourage new growth. By now most plants will have flowered and will happily go to seed if you let them. But if you want flushes of new flowers all summer, then don’t let them. Both perennials and annuals can benefit from deadheading and trimming.

I have been deadheading roses daily for the past couple of months, but as yet have not started on the Marigolds. But look for those perennials that flower in a flush. Don’t bother with secateurs for flowers that all come at once; instead get your shears out and give them a hair cut.

The photos below show some of the plants I have been shearing starting with one of the most unusual “spiral grass”. Click on each photo for a larger view.

If you have multi head sunflowers, then take off the individual heads as they die back. But don’t forget to let the final flower head go to seed for the birds.

One of my favourites is the lovely Fairy Fan Flower. It flowers all in one rush and after the bloom has gone off trim all the flowers and you will get a second flush. The photos below show the plant after its trim and the successful second flush just coming through. Click on each photo for a larger view.

Gaura is another of those plants that benefit from the complete flush of flowers being taken off. Gaura, like Lavender, does not like you cutting too deep into the wood so just take off the flowers and the first bit of green. The cutback Gaura shown below will soon give me another lovely flush of flower spikes. Click on each photo for a larger view.

Trumpet vine and the Blackbird. Each year I take seeds from my Trumpet Vines and carefully set them aside to grow them in the Spring. Every year to date the seeds have failed; mainly my fault. But this year I eventually managed to get eight through to the seedling stage. When I came to prick them out and pot them on, I bought the best compost, mixed it with Perlite and prepared 4 inch pots for each seedling . This painstaking process can be seen in the photos below. Click on each photo for a larger view.

Once I completed this task I wandered into the house to boast to Cruella about my success. I swear I was in the house no more than 5 minutes before I went back to the potting bench. As I turned the corner to the potting bench I caught a flash of black wing before my eyes fell on the devastation. A blackbird had dug up all my new seedlings and thrown them around.

Crying out with anguish I rushed back into the house to ask Cruella if she knew anything about this. That must be “Shadowstrike” she said, “I told him he could play in the garden”. The devastation left by the stupid bird can be seen in the photo below. To make matters worse he now follows me round the garden smirking.

The chicken Olympics. It appears that whilst I was away Cruella (my wife) became concerned that her girls appear to be getting fat. At first she blamed it on ultra processed foods and has written to the WHO complaining. Then she lighted on the fact that wonder drugs can stop obesity, and tried to order Wegovy and Ozempic. The vet refused to prescribe them as he said she just needs to cut back their food. She stormed out shouting that she would not put up with fat shaming and would be reporting him to Weight Watchers.

Anyway, the end result is that she has started to train the chickens for the Paris Olympics. She has already written to the IOCC (International Olympic Chicken Committee). I told her chickens are not allowed in the Olympics, but she just said I was stupid and should just stick to gardening.

Cruella has bought herself a whistle, megaphone and stop watch and the chickens are now trained every morning. They start with leg stretches, which I entitled the “drumstick roll. This is followed by running around the garden in circles whilst chanting improving slogans in Chickenese. Their coop is plastered with self improvement slogans such as

  • Be best chicken you can be
  • Cluck your best and the rest will follow
  • Feathers high, spirits higher
  • Every day is a chance to spread your wings
  • Beneath every feather beats a strong heart
  • Find your flock, lead with pride

The photos below show you some of their early morning training sessions. Click on each photo for a larger view.

After two weeks of training and exhortation she asked me how I thought they looked. I said “they are still fat”. I’m sleeping in the shed with Tango the lonely blind Labrador and the big rat.

It’s time to sow, I sing to the dying Agave and have a bad Valentine’s Day

It’s warming up, there is a hint of buds and we gardeners are waking from our winter torpor, it’s almost Spring, and you know what Spring means – seeds! Yes, it’s time to start thinking about how you will fill your Summer garden with floriferous beauty, and there is no better way than to grow your own garden from seed. I know that lots of you love to rush off to the Garden Centre and stack your trolley high with all sorts of unsuitable plants. But think how much more fulfilling it will be if you can grow your own garden.

Now I am not being a purist, of course you can buy plants, but why not give seeds a chance (start with a couple of easy to grow packets) once you start it is addictive and may I say a lot cheaper. As you can tell from my enthusiasm I have already got things underway. I was so filled with the joys of gardening that I rushed out and got Cruella (my wife) a Valentines Day gift. Sadly it all went wrong as the chickens deliberately sabotage my efforts. Anyway on with the gardening.

24th February 2024. Things I have been doing lately:

  • Harvesting self sown seedlings
  • Sowing the first seeds
  • Harvesting and sowing Chilli seeds
  • Preparing for the death of Agave Attenuata
  • Regretting my Valentines Day purchase

Harvesting self sown seedlings. One of the best way to get your garden going in Spring, is to take a look around your flower beds and check for any self sown seedlings that your summer flowers may have left you as a gift. One of the most prolific self sowers in Spain is the Maragaritte Daisy/Osteospermum. These lovely long flowering Daisies will drop hundreds of seeds which by now will have formed into little seedlings. The photo below shows just one part of my garden with thousands of seedlings.

But the trick is not to leave the seedlings where they have self sown, instead you need to harvest them and pot them up to let them grow on a bit before planting them out where you want them. The photos below show me harvesting the seedlings by gently prising them out of the soil with a trowel before placing each seedling into individual seedling trays. Note the close attention from big Bertha. (she has reverted and is no longer known as Bert, it was something to do with the chest binders that Cruella bought from John Lewis). Click on each photo for a larger view.

Sowing the first seeds. There is nothing better than contemplating the seeds you harvested from last year and deciding which order you are going to sow them. The photo below shows my preparations and the delight of contemplating things to come. Click on each photo for a larger view.

Before you get carried away with sowing seeds there is some basic preparation you need to undertake. If you are sowing into pots or seed trays you have used before, then it is important that you thoroughly wash them inside and outside. The last thing you want to do is carry over viruses and pathogens that are lurking in the residue of last year’s soil. All that is basically required is that you use a powerful hose jet to wash away any soil residue. The photos below show some of my seed trays after their annual ablutions. Click on each photo for a larger view.

Once you are ready to sow your seeds then you need to mix a good compost (not from China shop) together with Perlite to form a nice free draining medium that will not leave your little seeds waterlogged. Most seeds mainly require sprinkling on the surface of your compost then covering with a light sprinkling of compost.

Once you have lightly tamped down the surface to ensure seed and soil contact, then you need to place your seeds trays in a light warm area such as a window sill, or greenhouse. Be careful of fierce sun as this will dry the compost out to quickly. I buy a cheap little mini green house and use it for 2 or three years and then discard and start again. You will only need it for a couple of months at the most. The photos below show my seed sowing activity followed by my seed trays resting in their new home. Click on each photo for a larger view.

Harvesting and sowing Chilli seeds. Chilli plants are a joy to grow as they are so prolific. I leave my chilli plants to fruit over a two year period with just a chop back at the end of the year. The third year I remove the old plants and sow new seed in lovely fresh compost. By doing this I am getting rid of the old tired compost and creating a whole new generation of plants. The first photo below show my tired old plants heading for the compost heap, followed by the ripe seed pods that I have left on the plants and which will form my next generation.
Click on each photo for a larger view.

Getting the seeds is very simple. Using a scalpel, or very sharp knife, slice carefully down the side of the dried seed pod and carefully tease out the seeds that will be there waiting for you. The photos below show my scalpel work, together with the gathered seeds. The final photo shows the seeds scattered evenly across a seed tray before being lightly covered with compost. Click on each photo for a larger view.

Preparing for the death of Agave Attenuata. Losing any plant is a dreadful experience for us gardeners. We tend them, nurture them, watch them grow day by day and experience joy when they flower. That makes it all the more poignant when you lose an Agave Attenuata.

These lovely plants are very popular in Spain as they are one of the few “unarmed Agaves”, by this I mean they neither have teeth or spikes so won’t stab or cut you. They also have a charming habit of creating lots of pups which eventually surround them like a loving family. They take a long time to flower (12-20 years) and like lots of Agaves, when they do, they die leaving only their orphaned pups to cope on their own. The photo below shows a family of orphaned pups who lost their Mum about 5 years ago.

Eventually one of the orphans will go on to adopt the role of mother but it can take a long time. I think the one at the back right is shaping up to be Mum.

Regular readers of this blog will know that I have been lucky enough to see a number of my Attenuata flower. It has always been a painful process made much worse by the mockery of Cruella (my wife) who constantly heckles me in my sorrow by shouting “it’s only a plant, get over it”. On one occasion she proposed what she termed “assistant plant dying” and said that both me and the plant should go off to Dignitas!

As always on these occasions I conduct myself with dignity and commit my evenings to sitting by the plant as it flowers. We talk over old times, when it was just a little pup and I reassure her that all her pups will be taken care of when she goes. The photos below show my cherished Agave developing her flower spike. The beauty of the flower spike is marred by the tragedy of her oncoming demise. Click on each photo for a larger view.

As her flower spike gets taller so she gets weaker, and this is when I start to sing. All Agaves have a tendency for classical opera, so I tend to sing arias mainly from Puccini and especially La Bohéme.

We start early on when she has accepted she is going. I hold her flower spike and sing “Che gelida manini”. As we progress she takes on the part of Mimi and I Rodolfo as she coquettishly sings “Sì, mi chiamano Mimì”. We both then finish the day with “O Soave faniculla” the pups act as the chorus and as she finishes on the famous high “C” we are all in tears. I am dreading the future. The photos below show us singing the first act, if you look carefully you can see the pups leaning into the chorus whilst visible signs of decay can now be seen on their mum. We shall sing the famous deathbed scene of Act 4 in a couple of weeks, in the meantime I am giving bereavement classes to the pups. Click on each photo for a larger view.

Regretting my Valentines Day purchase. As if things weren’t bad enough with my poor Agave, Cruella (my wife) had demanded that I make an effort for Valentines Day and get her something romantic. I racked my brain for days and eventually came up with the perfect present that was both practical, stylish, and suited to her personality. At great cost I bought her a new titanium based, multi positional short take off and landing broom. The photos below show this wonder of modern technology in both its extended long take off mode and its shortened take off mode.

Given that most of her current brooms are what you would term shoddy, I thought she would be delighted. She took one look at it and proclaimed “I wouldn’t be seen dead on that modern crap”. She stormed off in a huff and spent all of Valentine’s Day with her chickens murmuring darkly in chickenese whilst occasionally giving me black looks. The upside was that I could get on with sowing seeds!