It’s almost time for the big winter cutback and the chickens get their new hats

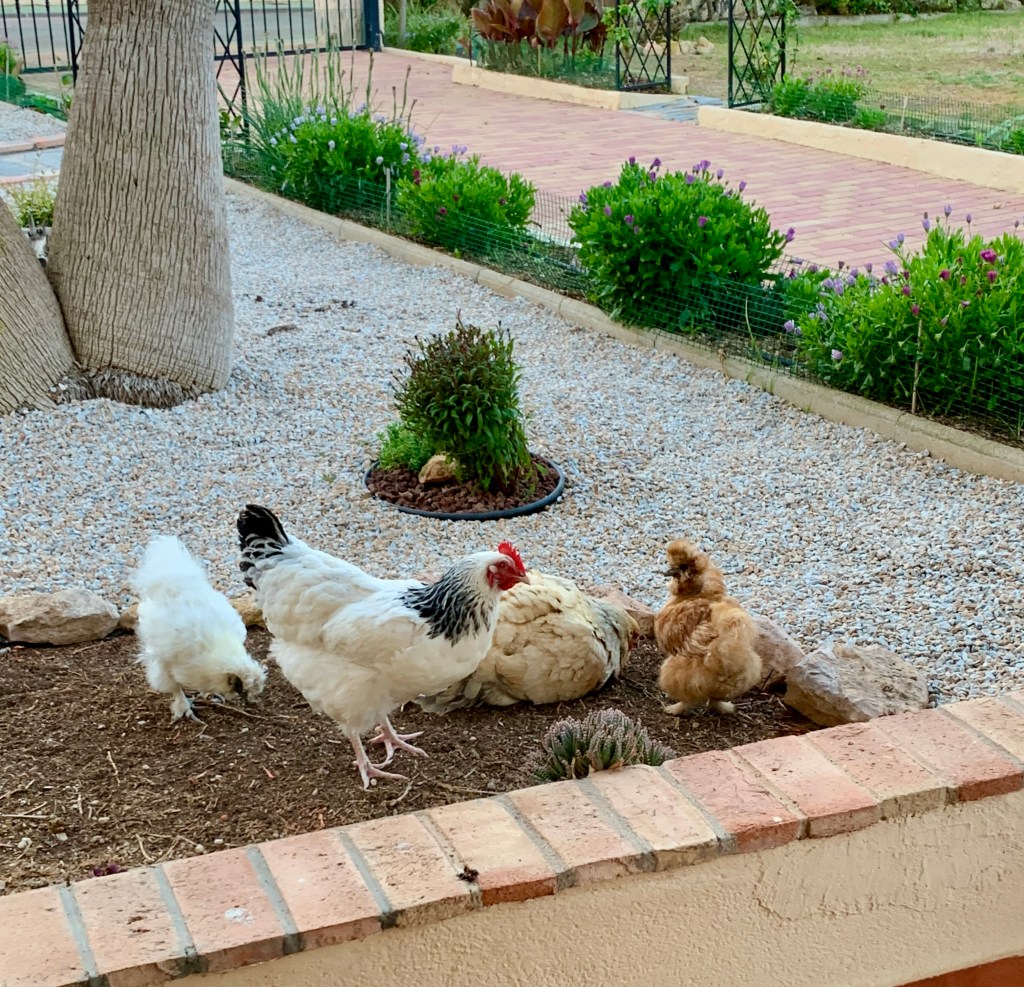
In times past gardeners would have judged when to begin the big winter cutback by the weather and seasons. But when your wife has chickens you know it’s almost time when the chickens get their new winter hats.

Cruella (my wife) has been knitting for days to provide her girls with their new winter bobble hats. They get them every year for Christmas along with their other presents. Their hats are always in a variety of colours to best reflect their personalities and they all have different colour bobbles on top. Some even have little tie up chin straps so they don’t fall off as they peck for food.

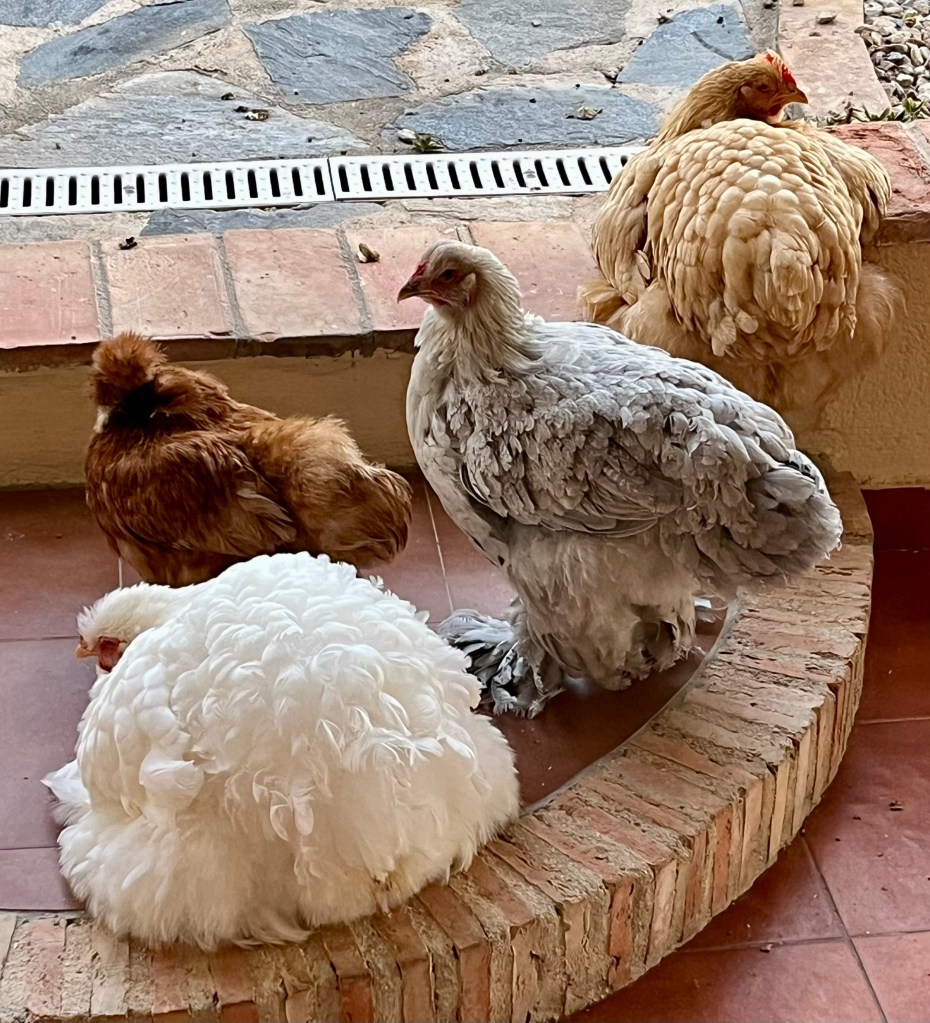
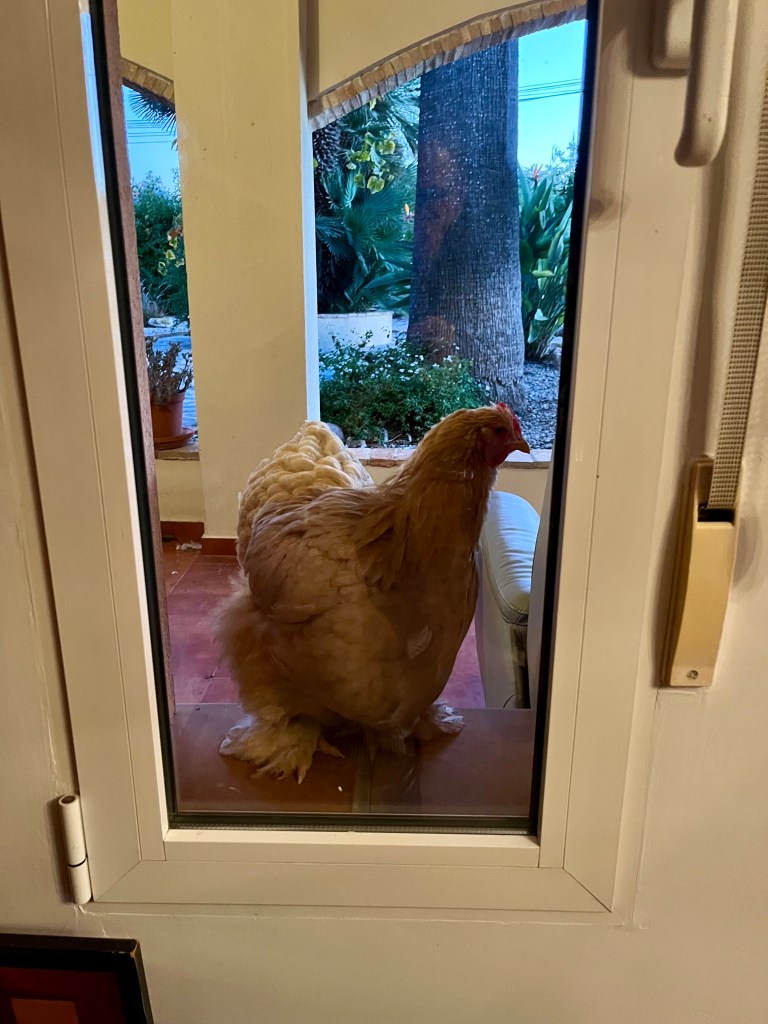
She knows when it is time to begin knitting as the chickens gather in a huddle on our Naya to get out of the cold winds. Helga (her favourite and a really clever chicken) even flys up to the window ledges and taps on the glass to be let in. Cruella (my wife) even begins to gather them up and carry them to bed every night and sometimes stays out there for hours with them; I think they have wine!

The photo below shows the sure signs that Cruella needs to get knitting.

Cruella heads to the coop with Isabella for a night of wine and nibbles

Anyway enough of this nonsense here are a few things you can be getting on with as we work our way up to the big winter cutback.

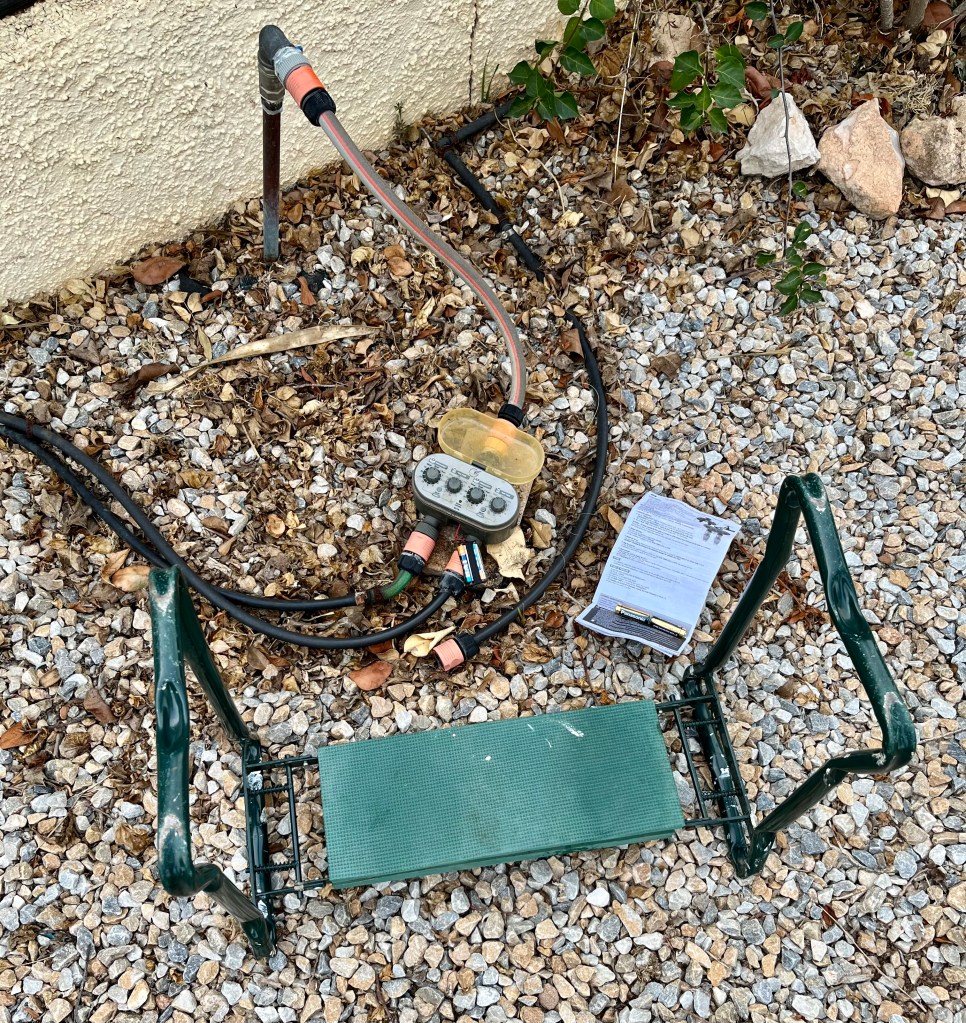
5th December 2025. Things I have been doing lately:

  • Planting bare root roses
  • Lifting and separating canna
  • Peeling Yucca

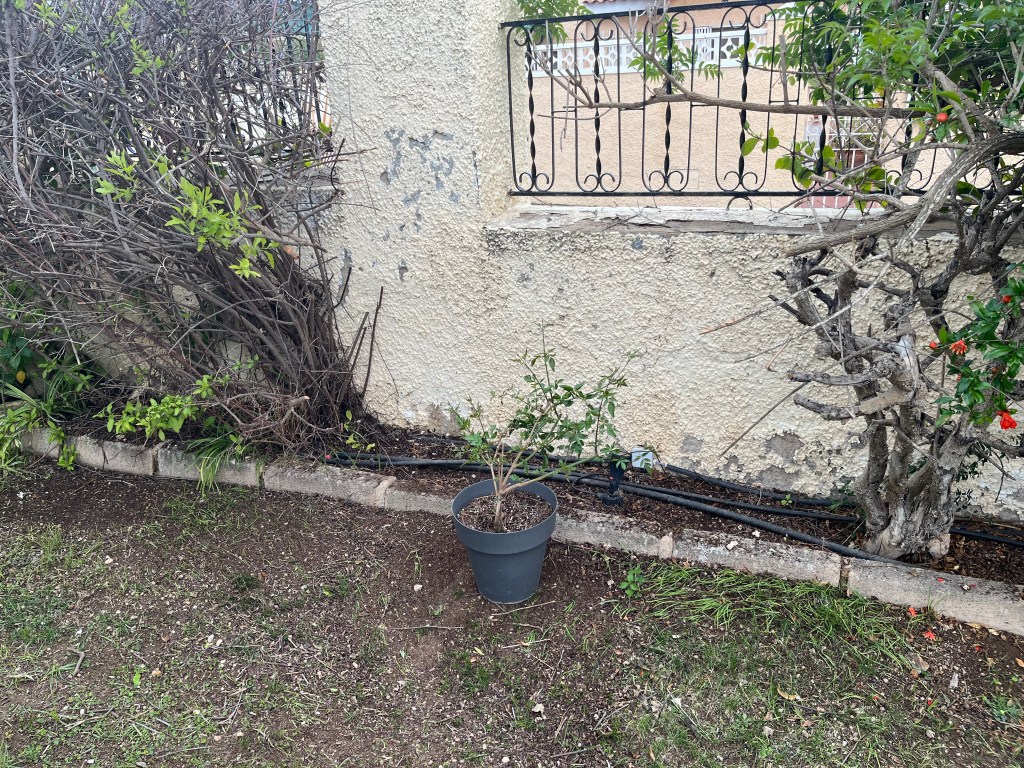
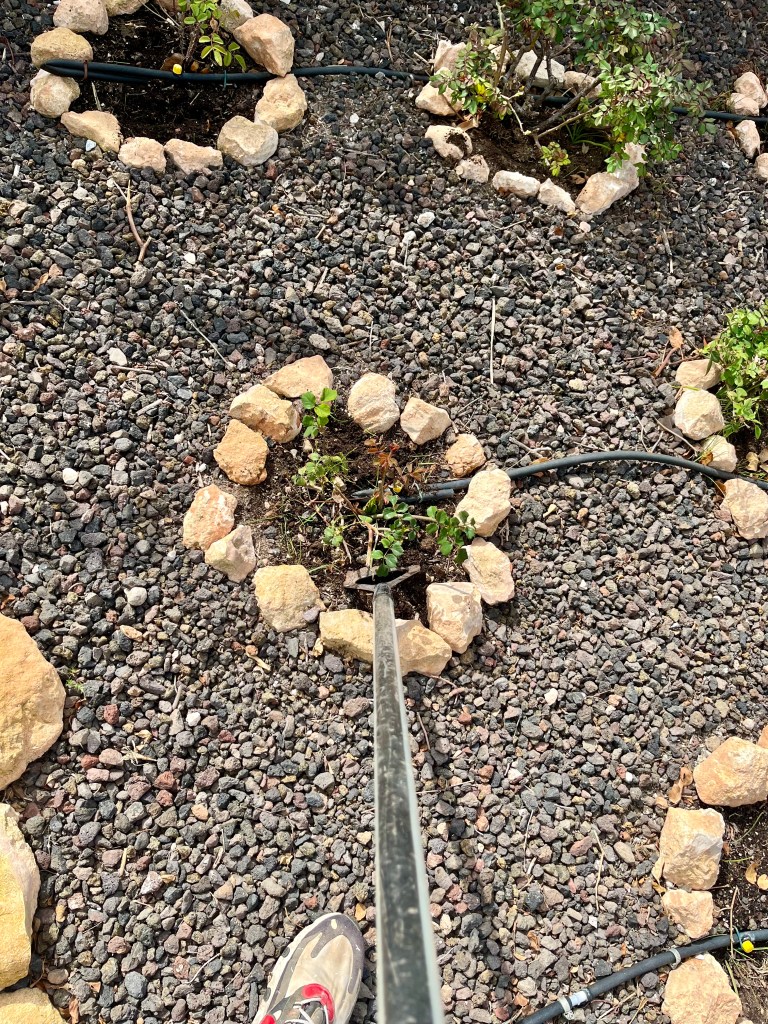
Planting bare root roses. Roses do surprisingly well in Spain especially if you plant them at the right time and make proper preparations for their future success. I have had a couple of Roses die back on me and now is the time to dig them out and replace them.

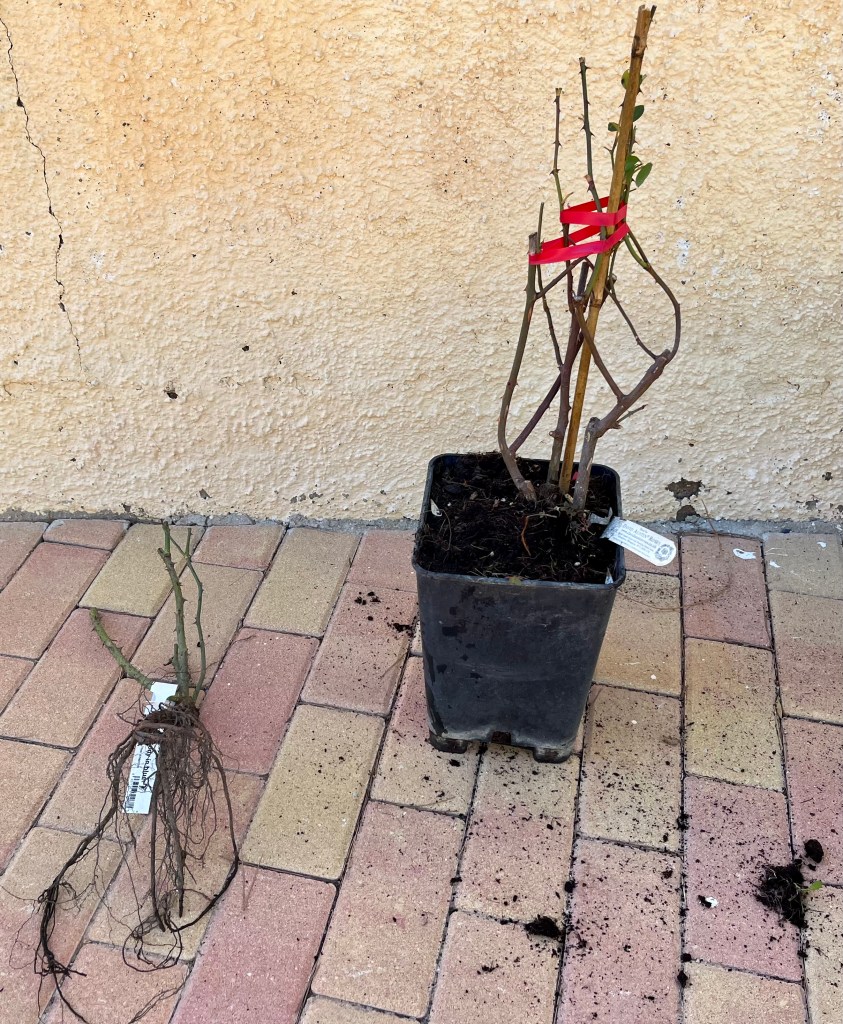
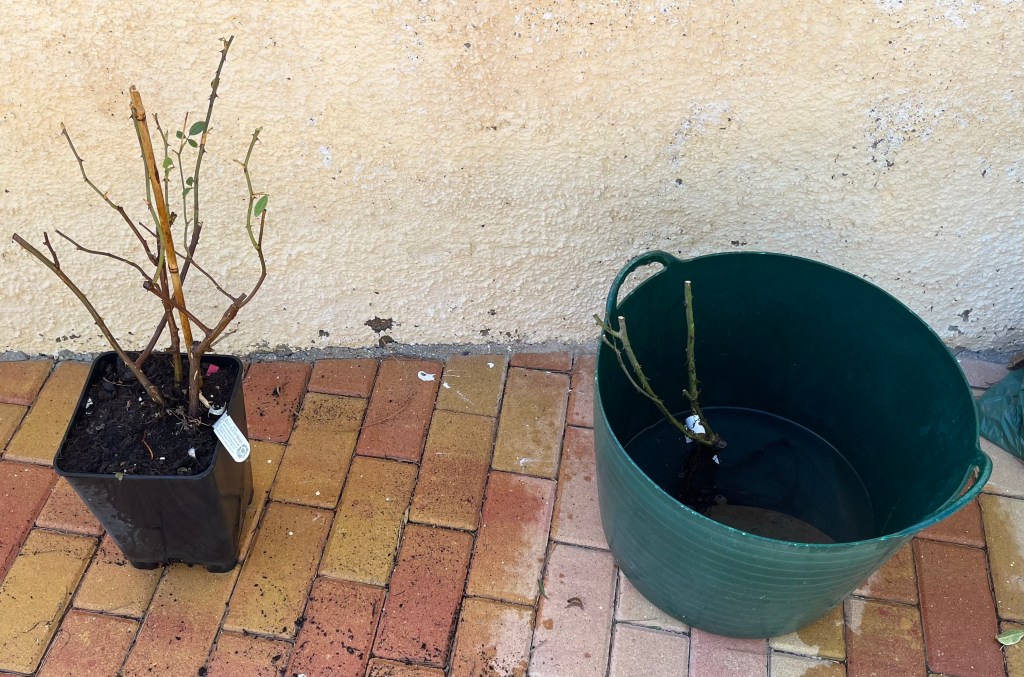
I have chosen two roses for their new interest. One is “Rhapsody in Blue” which is the first blue rose whilst the other is a new Rambler to replace a current disappointing climber. Both can be seen below as they arrived. The first thing you need to do is soak them for at least 4 hours to get them fully hydrated after their travels.

Remember you can’t just plant roses directly into the hole left by an old rose. Roses are very hungry feeders and quickly deplete the soil of all beneficial nutrients, therefore you need to completely replace and replenish the soil before you replant.

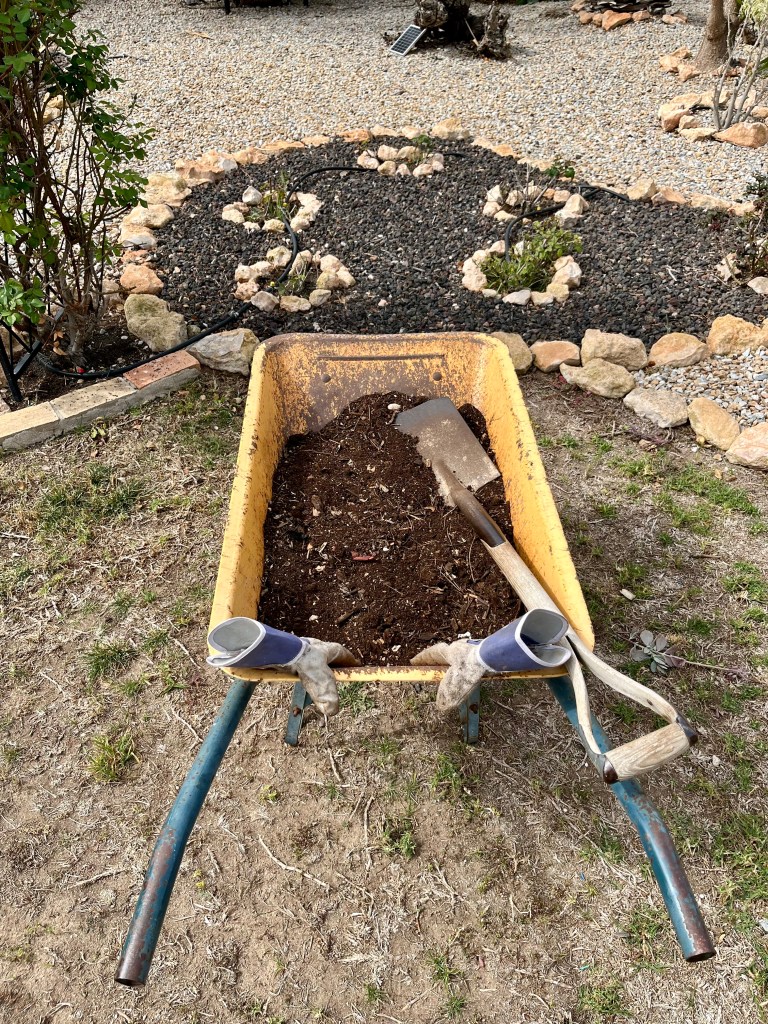
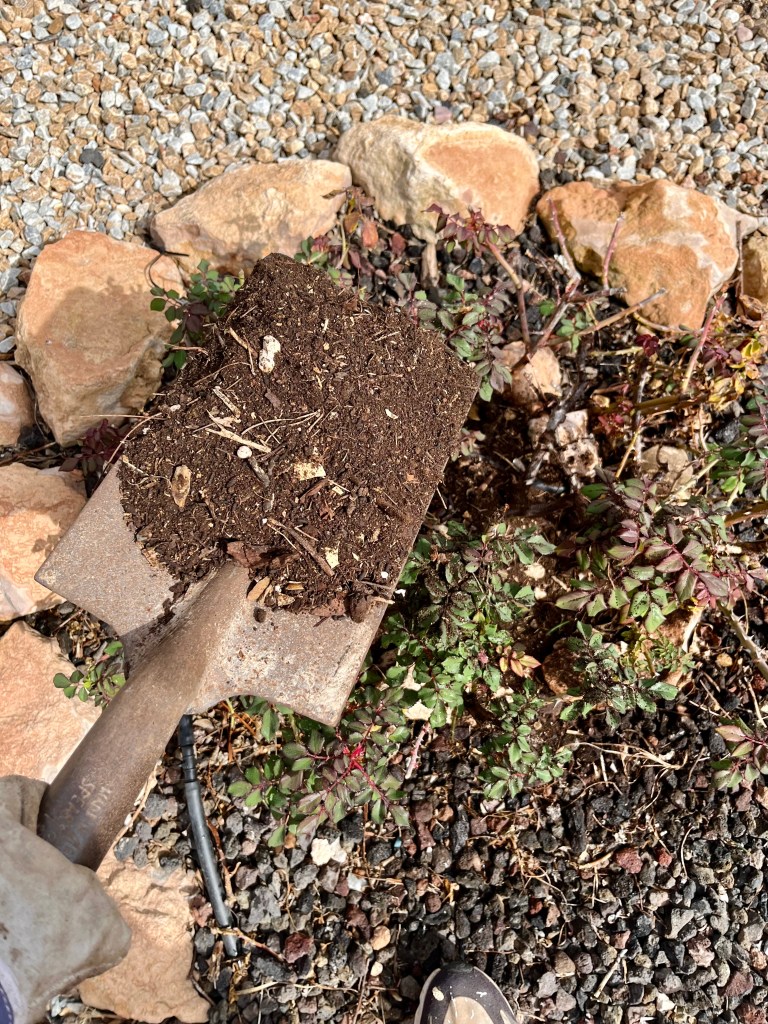
I mix up a special mixture of 1/3 rd of my old compost, 1/3rd good professional compost and 1/3rd horse manure compost. I add a bit of Rose food to this mix and always sprinkle the roots with Myocorrhizal Fungus to help quick rooting. The photos below show this process in action.

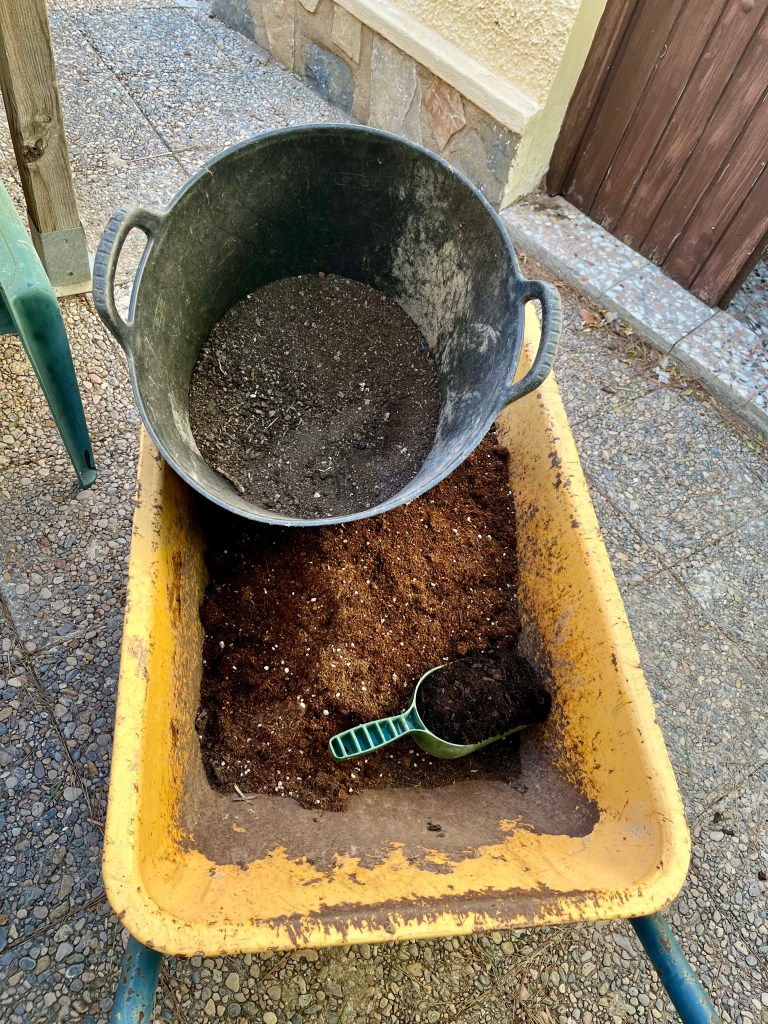
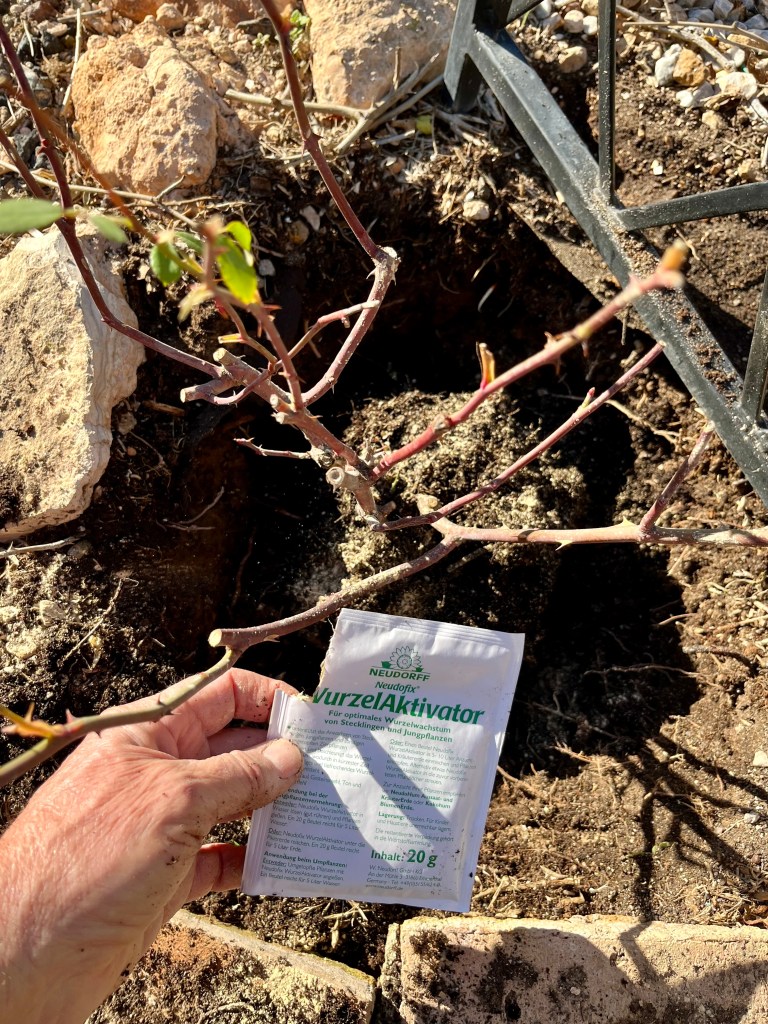
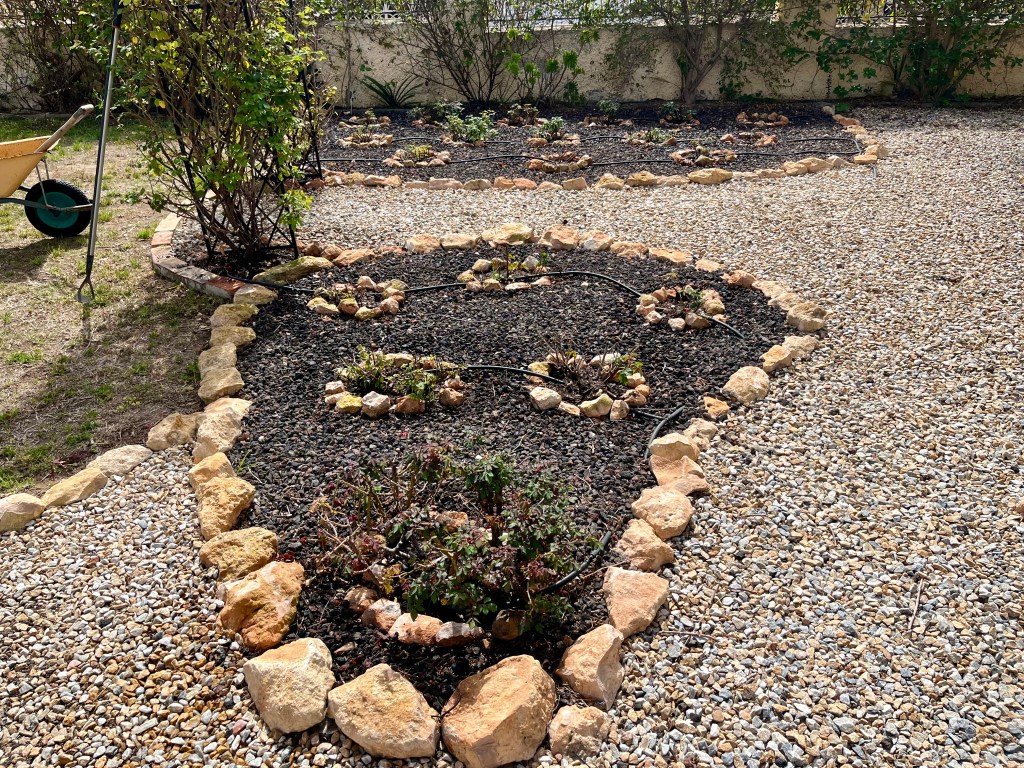
When you have the planting hole ready then fill it with water and let it drain away whilst you have a cup of tea. For bare root and container roses there are two different planting levels. Bare root roses need to be planted with their bud junction at least three inches under the soil, whilst container roses should keep the same soil level as in the pot when replanted. The photos below show them planted.

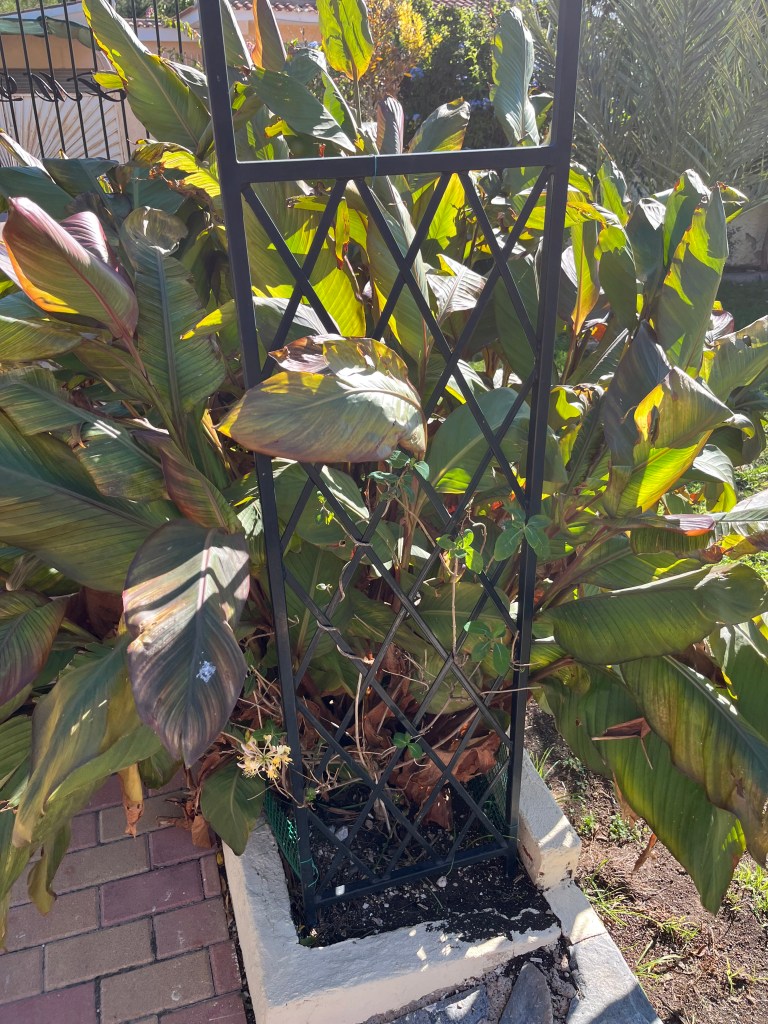
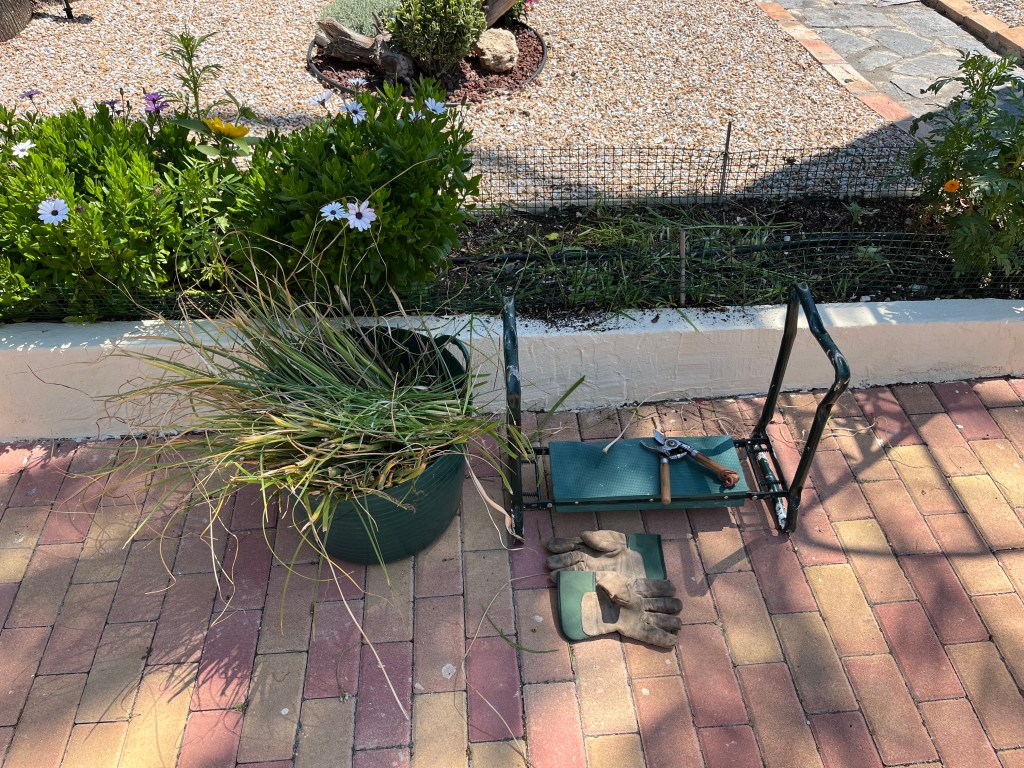
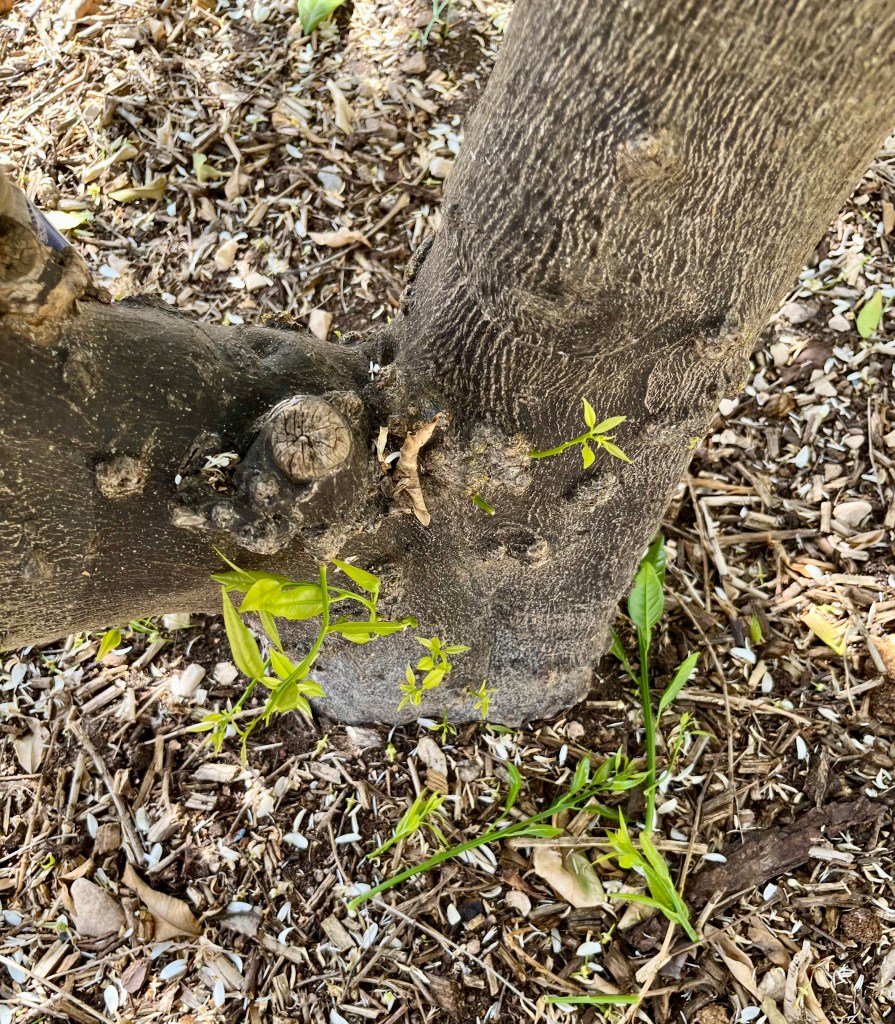
Lifting and separating Cannas. Canna are beautiful plants for Spanish gardens as their lush foliage and beautiful flower spikes add height and colour to any garden. The secret to getting the most from Cannas is to lift and separate them every 3-5 years as they can become congested.

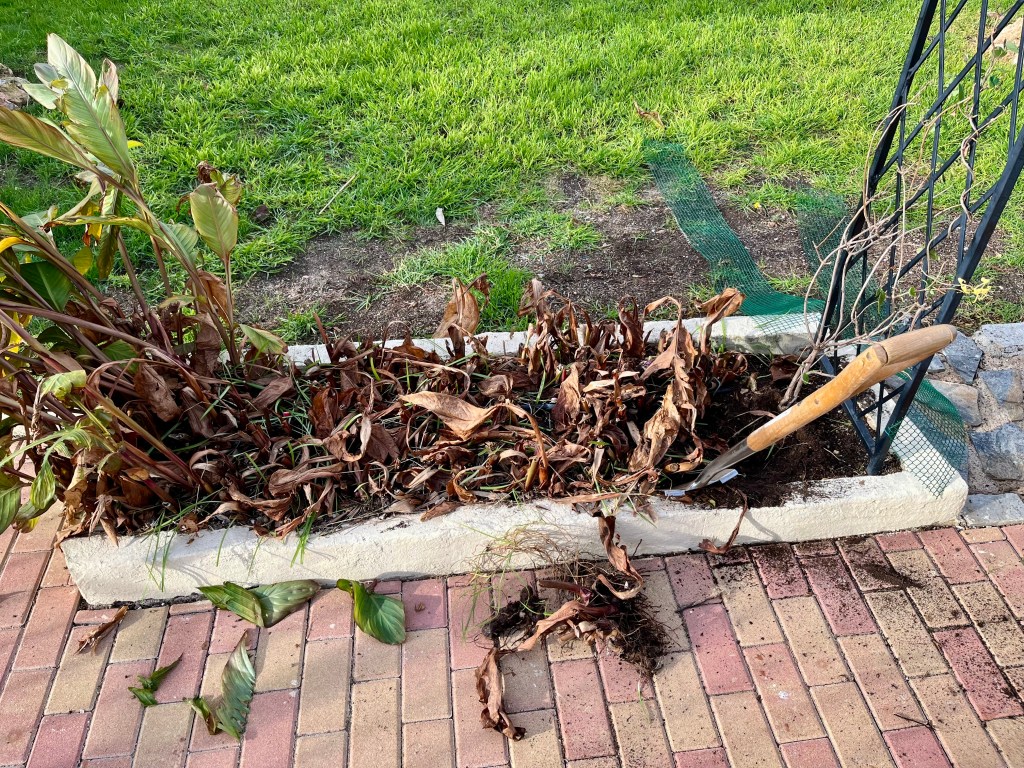
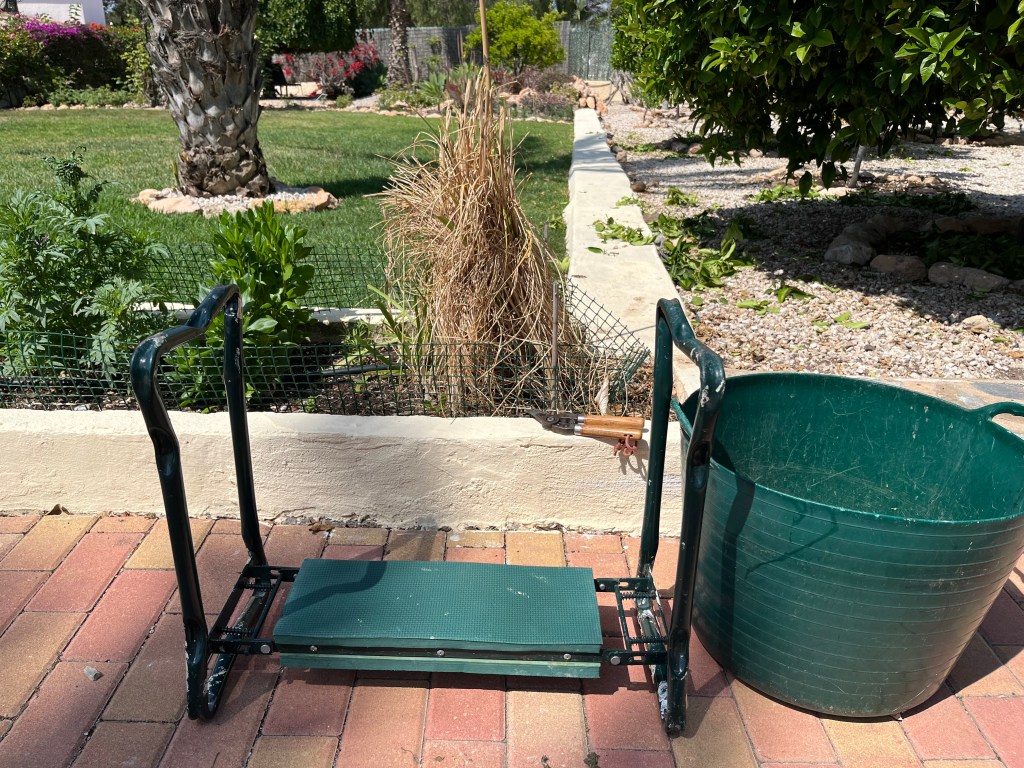
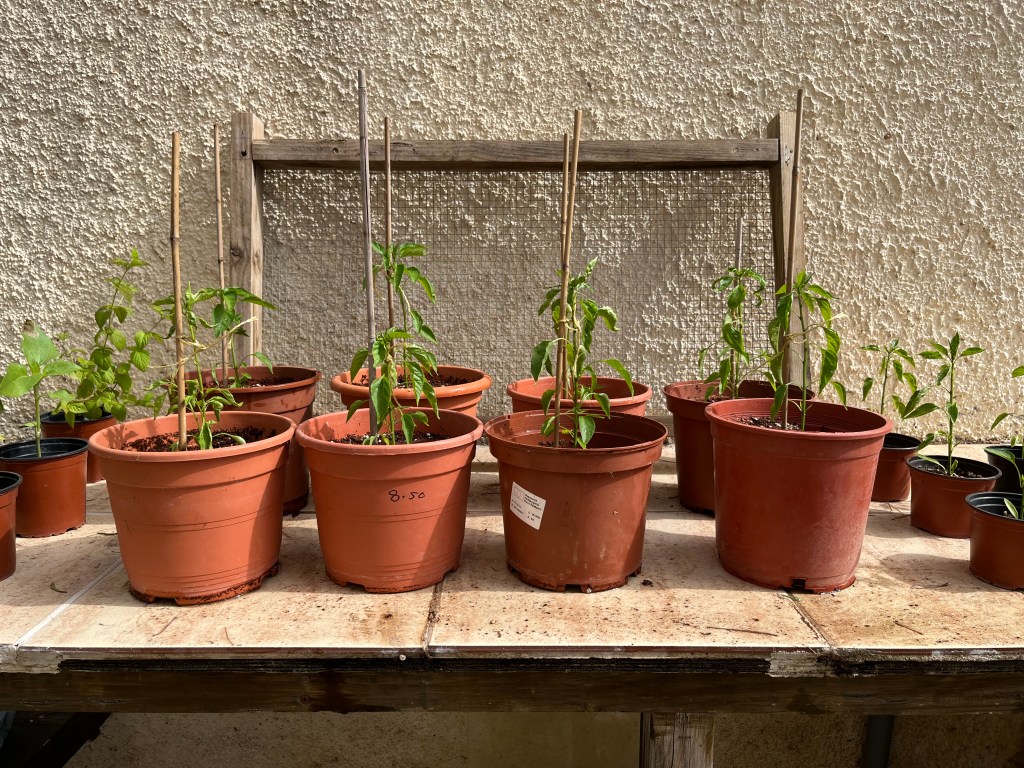
Cannas grow from rhizomes (ugly bulbs) and they produce more and more flowering nodes on each rhizome and therefore need to be separated every few years. Cannas can be left each winter till their foliage is quite brown and raggedy, then you need to cut their stems back to 3 to 5 inches from the ground. The photos below show foliage before cutting back and the correct size to cutback the stems.

Remember you must leave 3 to 5 inches of stem

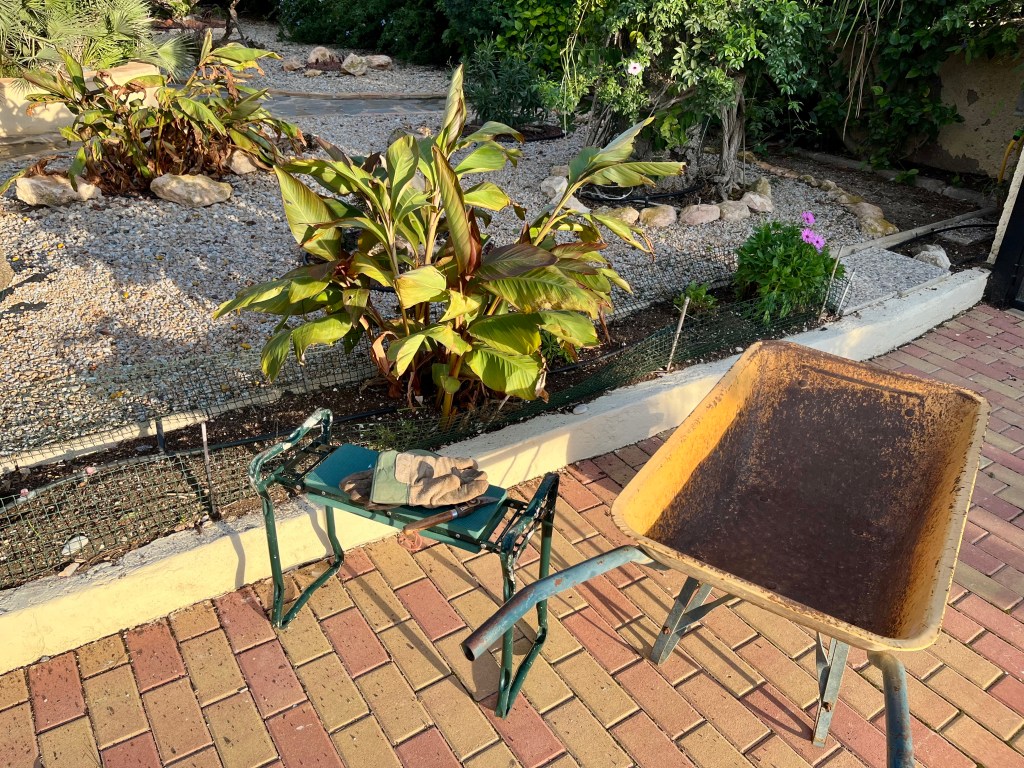
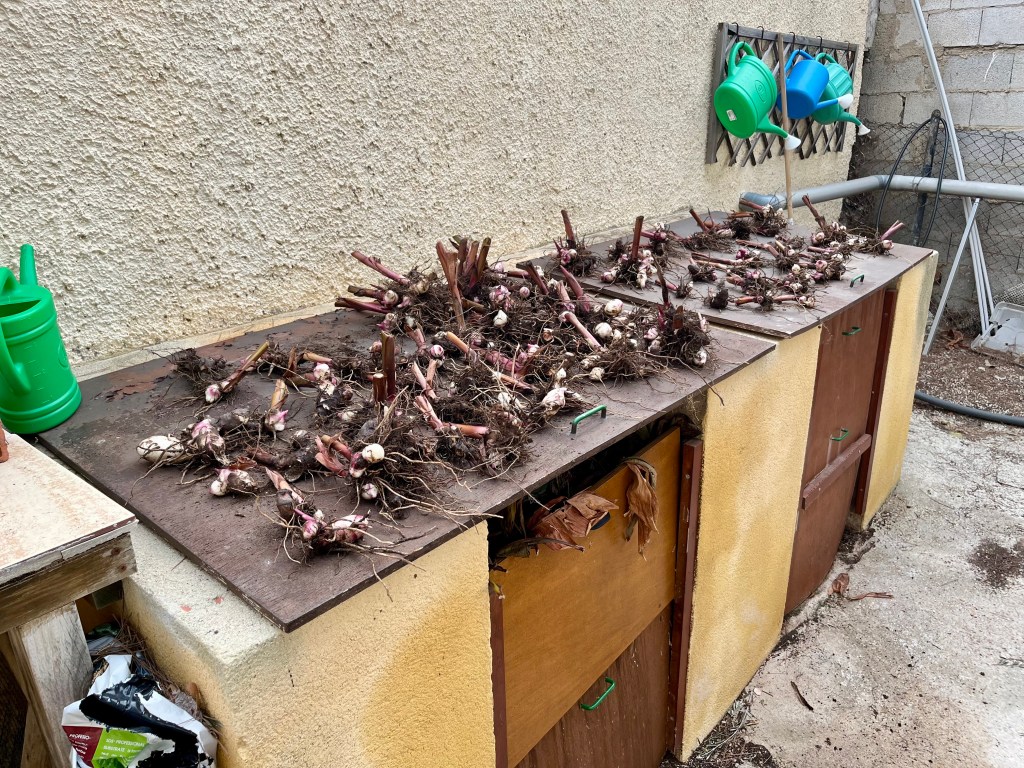
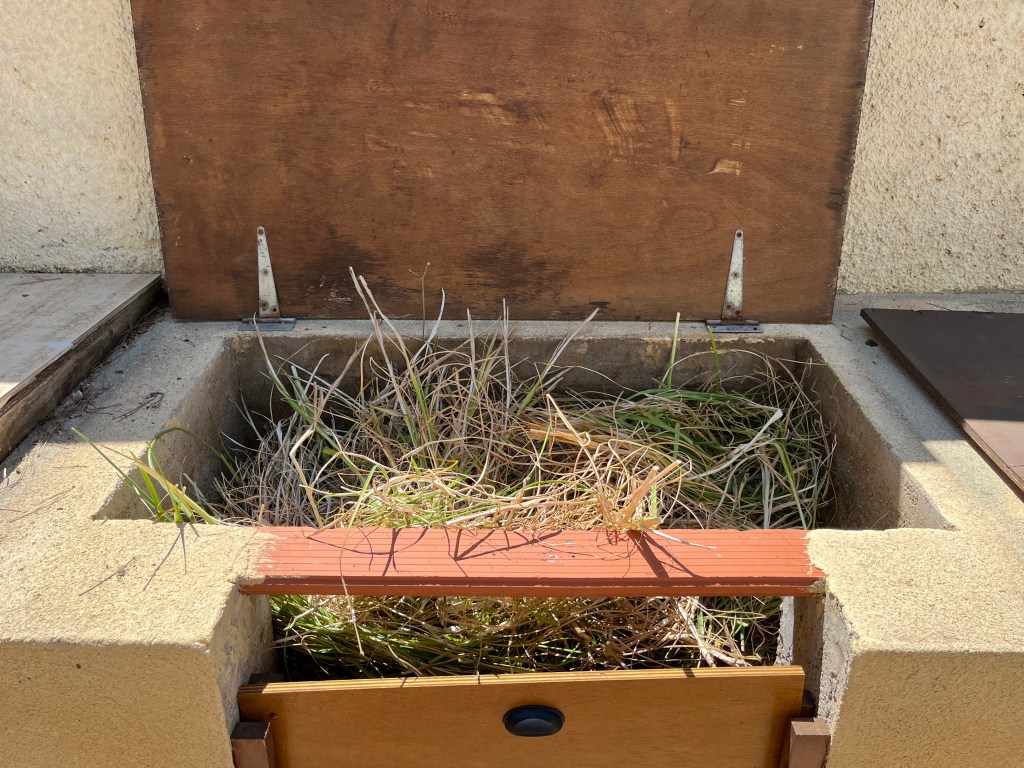
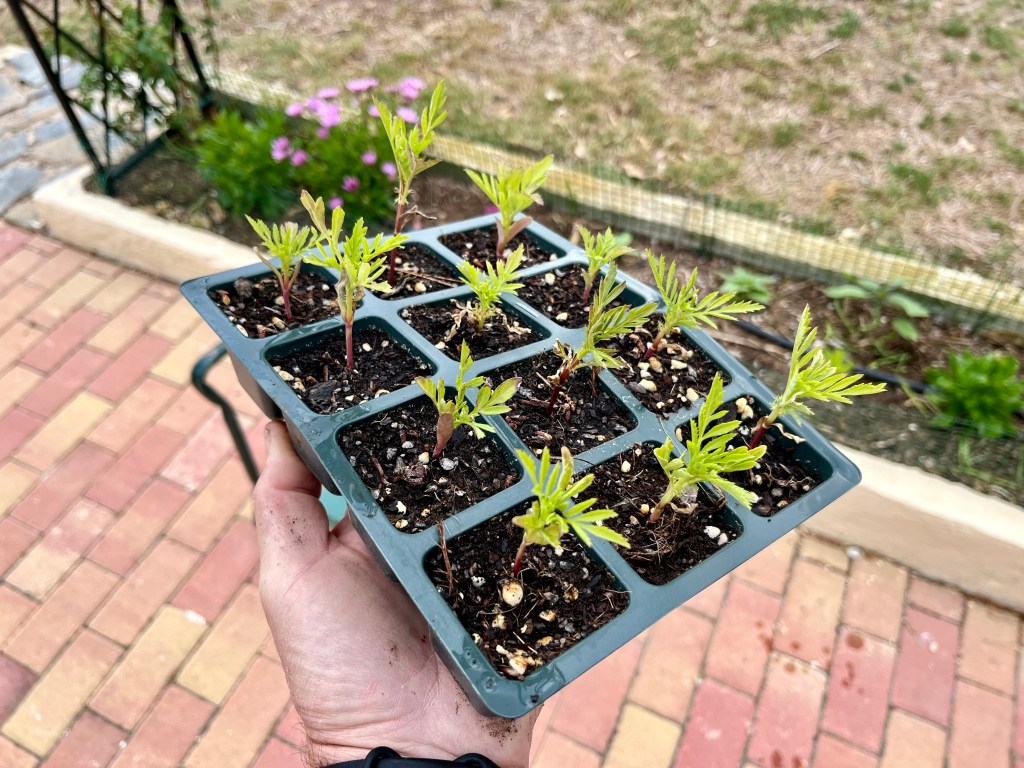
Once you have cut the stems back then it is time to lift and separate the rhizomes. Just ease them out with a fork and spade. You will be surprised how many new rhizomes and canna plants you now have. The photo below shows my new harvest of canna rhizomes drying out on top of my compost bin lids. They will now be stored in the dry and out of the sun till I plant them again or give them away to friends.

Lots of new Canna

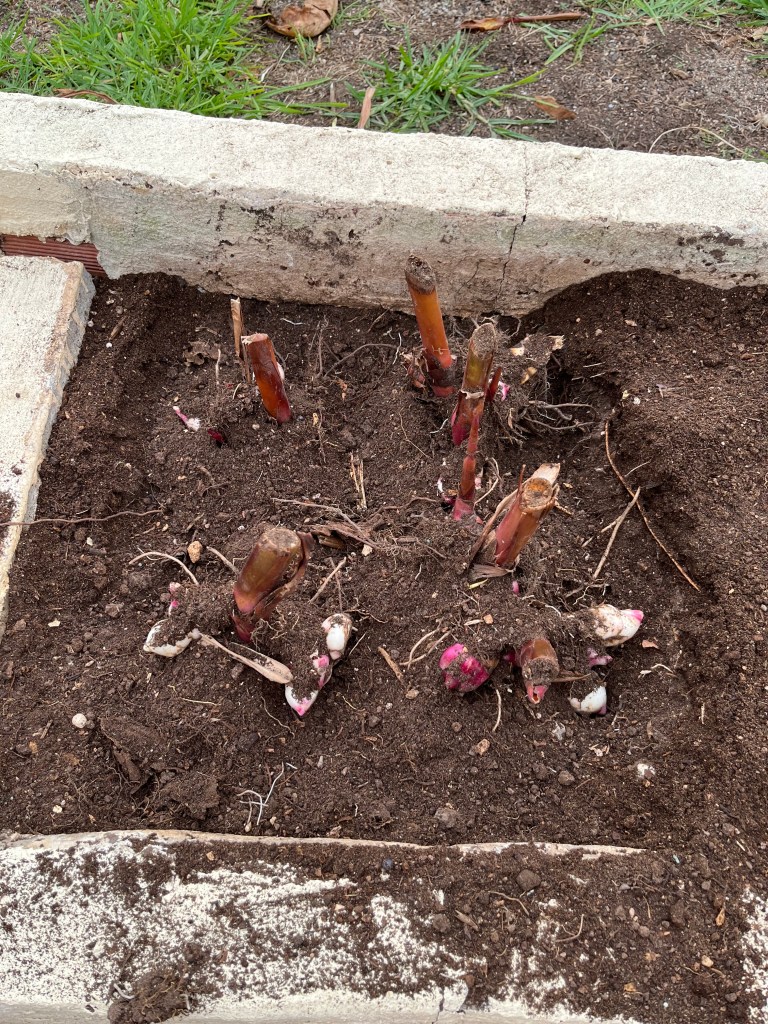
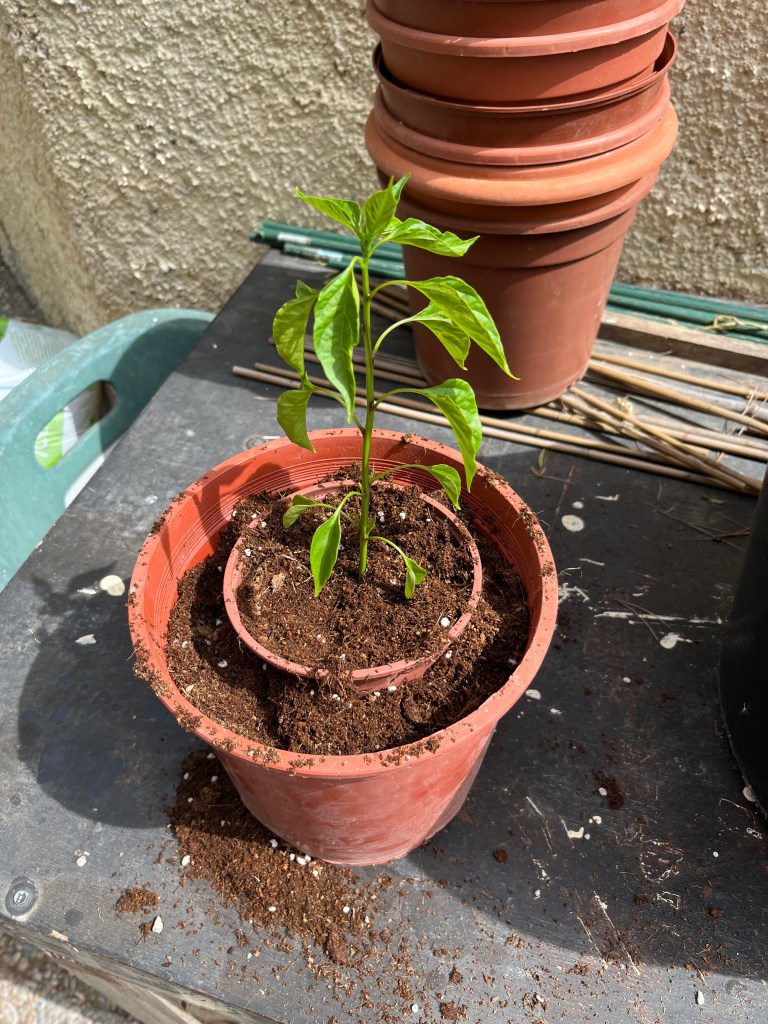
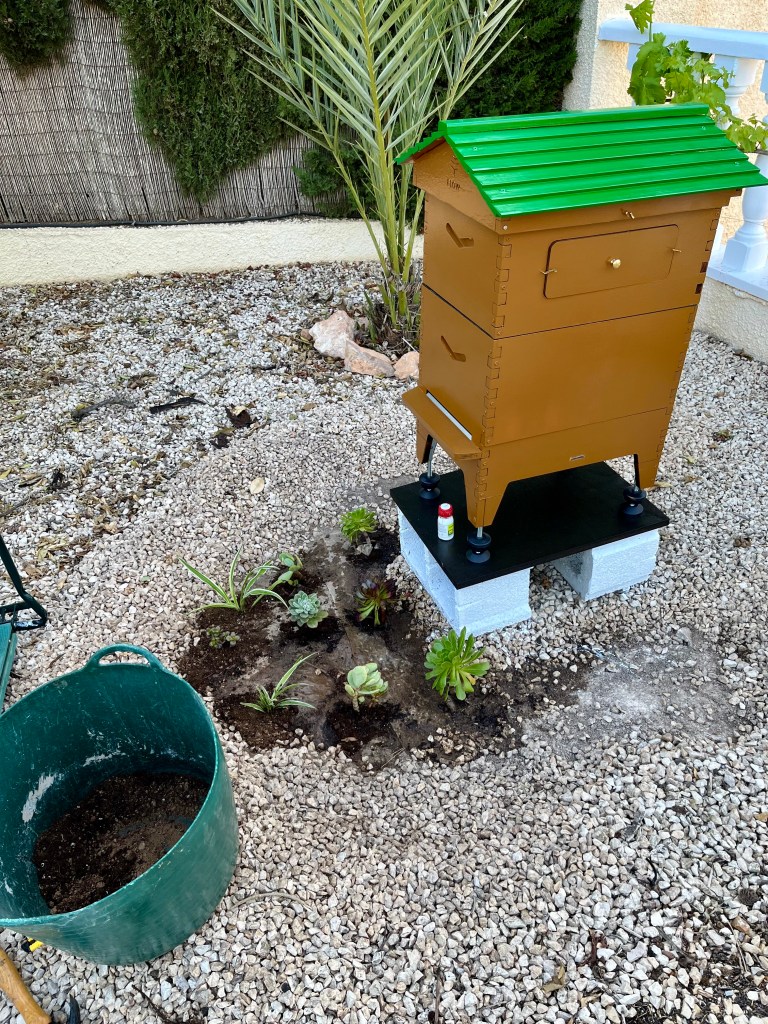
Finally, when planting cannas you need to bury the rhizomes just below the surface of the soil with the old stem sticking out of the soil. The new flowers will come from nodes on the rhizomes and not from the stem. The stem is only there to stop water seeping into and rotting the rhizomes. The photo below shows some that I am just replanting (note the depth).

It’s very important that you plant just below the surface with the stem sticking out.

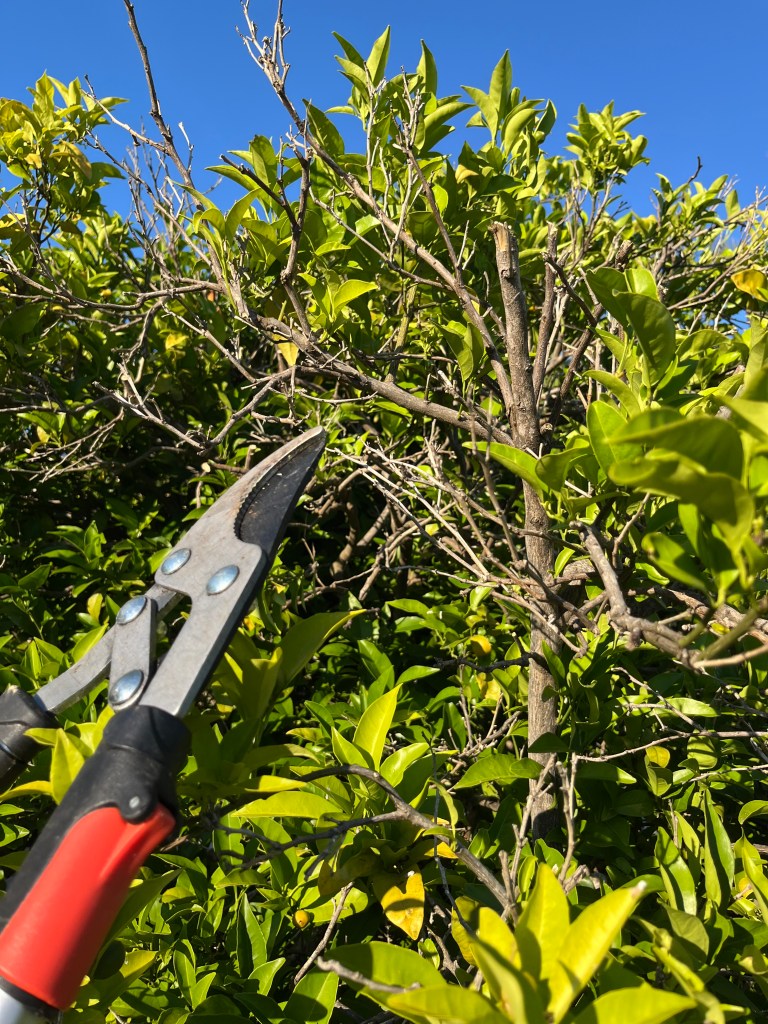
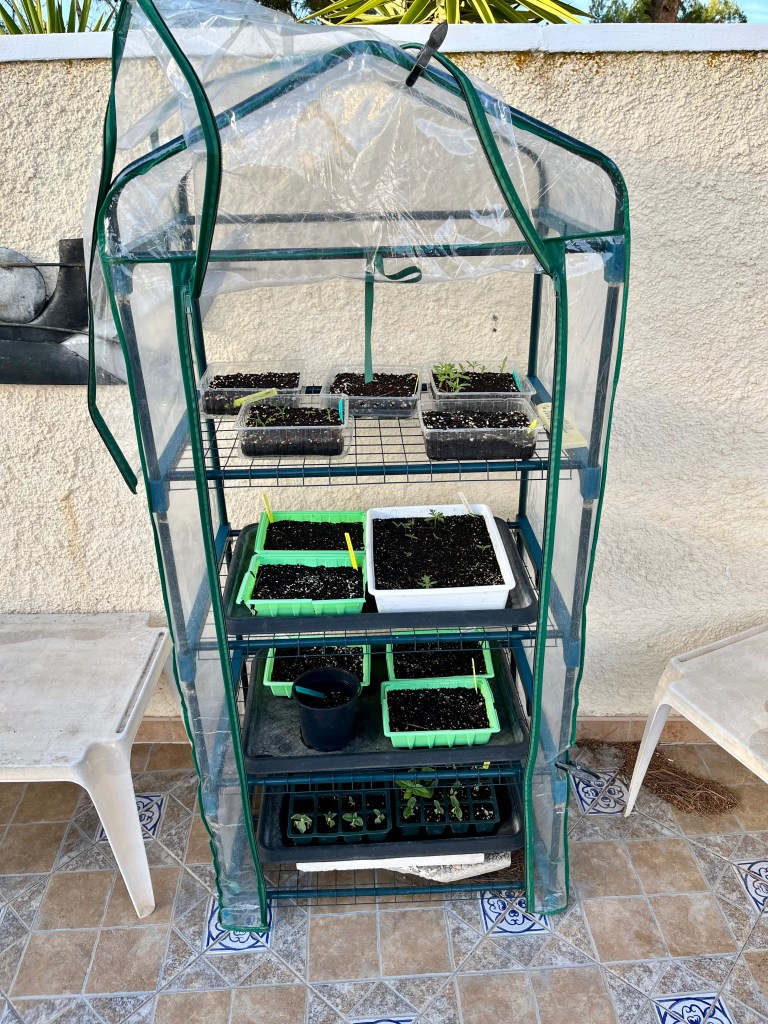
Peeling Yucca. If you live in a windy area and you have large Yucca in pots, then now is the time to peel them otherwise they will blow over in the wind and probably smash your nice pot.

The back of my house has different type of succulents and yucca in pots and this area can be very windy in the winter. I have given up using many clay pots in this area as they tend to end up smashed as the plants go over. However, peeling the yucca leaf blades makes them less susceptible to being blown over. Just peel one blade at a time by pulling down sharply; make sure you wear protective glasses and gloves as yucca blades are both sharp and pointy.

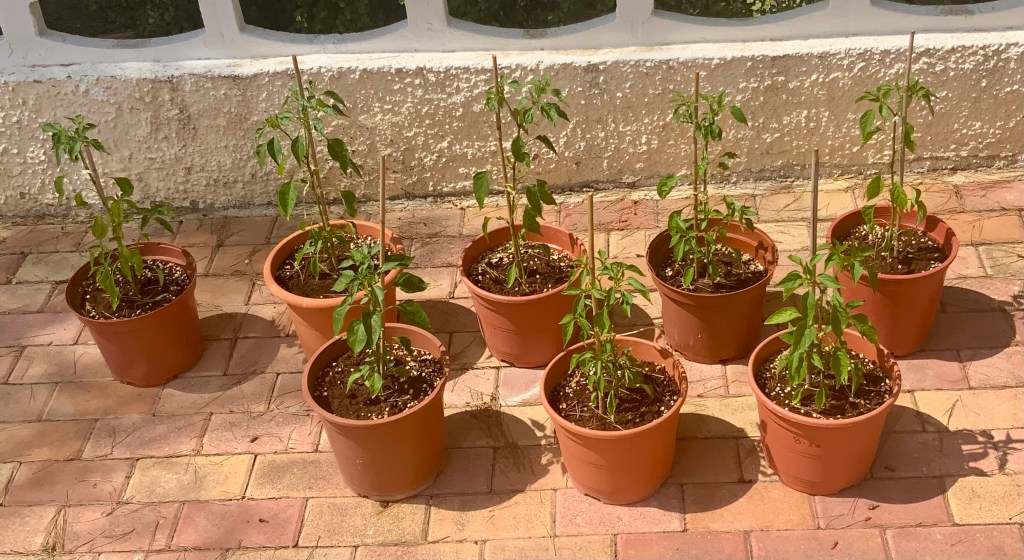
The photos below show my yuccas and other succulents peeled and shorn ready for wintry gusts.

I am gardening through all sorts of adversity and the chickens won’t go to bed

I know this is a gardening blog, and most of you will have little sympathy for my current animal problems. But bear with me I haven’t been able to blog for weeks because I have been overwhelmed by non gardening issues. All of this has been caused by Cruella (my wife) heading off to our English house to oversee the purchase of a new house for the idiot son.

She took off about three weeks ago. It was bad enough that she scorched the lawn on take off (new broom problem), she also left me in charge of all the animals. Amongst other things I currently face the following problems.

  • Tango the lonely blind Labrador can no longer walk properly or get up from lying down. This means I have to lift up his back end whilst he scrabbles to get lift off from the floor. We then comically stumble outside me half carrying him whilst he trys to maintain his dignity.
  • The bees are making wonky comb in one of my hives and I can’t find the Queen. All the frames are stuck together and the bees have made a large wax football in their hive.
  • The chickens have become truculent and won’t go to bed at night. They are demanding to be carried to the coop individually and kissed good night.

Now do you see my problems.; but don’t worry I am still gardening furiously every day.

22nd June 2025. Things I have been doing lately.

  • Cutting back dead Iris
  • Feeding and scarifying the lawn
  • Gently trimming fruit trees
  • Potting up Chillis
  • Mistreating chickens

Cutting back dead Iris. It is all over this year for Iris and if you have followed my advice you will have deadheaded the flower head and left the stems to go fully brown. If you have, well done, as you are guaranteed lovely flowers next year from your replenished bulbs.

All you have to do now is give a good compost mulch over the area previously occupied by the Iris. This will replenish the soil and prepare it for your succession planting. I will be putting Petunia And some sun flowers in these areas.

It is important that you thank them for all their lovely flowers, wish them goodnight and a safe sleep and promise them that God willing you will see them next year. The photos below show the process of saying goodbye to the Iris for another year.

Feeding and scarifying the lawn. I know not many of you have lawns in Spain but if you aspire to one, this is what you need to be doing now.

Firstly, set your mower on the very highest setting and don’t be tempted to bring it down till October. If you cut your lawn too short it will undoubtedly get scorched in the summer heat. Next you may need to give your lawn a very light scarifying with a rake. This is not the big winter scarifying and you should not use a machine. The aim is to stop any thatch developing and inhibiting new growth. Finally give the lawn a feed. The photos below show the process.

Gently trimming fruit trees. Trimming fruit trees is a controversial topic at this time of the year. Some gardeners would balk at the fact that you may lose some setting fruit. But hey ho we rogue gardeners don’t mind pushing the gardening envelope.

The basic idea is that all the old fruit is more or less off your citrus trees, you now have two main jobs. Taking off any suckers and opening the centre of the tree up to let in light and air. If you look at the two trees below you can see the problem. Their centres are congested and they have branches that are too high to properly pick fruit. Click on each photo for a larger view.

The first thing to do is open up the centre using a hedge trimmer or shears/lopers. The process is shown in the photos below and the outcome.

Potting up Chillis. The process of potting up seedlings is the same whether it is Chillis or otherwise. So if you haven’t grown some Chillis this year (although they are easy to grow from seed), don’t worry just apply the technique to all potting up. See description and photos below.

  • Place your plant inside its existing pot into the larger pot then back fill with compost. In this way you will prevent root disruption.
  • Once you have backfilled the new pot, ease the plant out of its old pot and gently firm it into the plant shape hole in the new pot.
  • Water the pot by standing it in a trug so that it can absorb water up through its roots.
  • If necessary tie the new plant up to a cane. Always tie in a figure of 8. First around the cane then loop around the plant this stopes the stem rubbing on the cane.
  • Stand the pot in the semi shade for a day or two, then get it out in the sun.

Mistreating chickens. At the start of this post I mentioned my chicken problem, it all comes down to the fact that they won’t go to bed in their coop at night, instead they insist on sleeping in a big huddle just outside the front door on the Naya.

When I told Cruella (my wife) about the problem she told me I was mistreating them and that they had to be carried to bed individually, sung to and then kissed on the head before being put gently into their place in the coop. I of course demurred and have developed my own technique.

This involves two stages. At dusk, when I find them in a huddle just going off to sleep, I brush them all awake by nudging them with a broom. They all then start to panic and run around I pursue with the broom and guide them all into the coop.

After dark, they have then formed a huddle by the door of their coop and are fast asleep. I then grab them one by one and stuff them through the coop hatch. I start with the largest all the way down to the smallest and as I push them in they fit together like one of those Russian dolls. The photos below show my technique.

The dusk chase down.
My approaching shadow installs terror before I stuff them up one by one.

But don’t worry, I am not an insensitive beast; just to prove it I have taught the little white Dove to eat out of my hand.

I am preparing for Open Garden Day and Cruella is preparing for ChickenFest 24; we both can’t be right!

It’s that time of year again when the good people in our village of Campoverde are persuaded by me to open their gardens to the public. As Cruella (my wife) is away at our English house pestering the idiot son I have been able to get on with things. The only slight hiccup is that she is determined that Open Garden Day should be retitled ChickenFest 24 and that her girls should take centre stage. I am not sleeping at night with worry, she is ordering special costumes from designers and she is calling it “Cluck Couture” she says she will be the next Victoria Beckham; I fear the worst. Anyway on with the gardening; more details about Open Garden at the end of this post.

11th May 2024. Things I have been doing lately:

There is lots to be getting on with in the garden as summer begins to make its appearance, including:

  • Cloud pruning your olive trees
  • Keeping up the deadheading with Dianthus and Chrysanthemum
  • Filling gaps in your hedges
  • Dealing with False Garlic
  • Admitting it has been a terrible season for seeds
  • Campoverde Open Garden Day

Cloud pruning olive trees. If you have olive trees and you don’t really use the olives, then you know what a mess they can make of your garden with squashed rotting olives mixed with bird poo. An alternative to this is to cloud prune your tree into an interesting shape that is aesthetically pleasing to you.

I cloud pruned my olive tree a number of years ago and once you have done the initial shaping, all that is required is to lightly reshape two or three times a year. The photos below show my olive tree before and after its short back and sides. Click on each photo for a larger view.

Keeping up the deadheading with Dianthus and Chrysanthemum. Although we are not at peak deadheading season you will still need to deadhead plants that are in flower if you want to see repeat flowering. Two early flowerers here in Spain are Dianthus and Chrysanthemum. Both are dealt with differently.

With Dianthus you should carefully nip out dead flowers using your thumb and forefinger. If you try to use secateurs then you will definitely damage the twin flower sitting beside the spent one. I have mentioned before about growing your thumb nails long in the summer, and this is why; your long thumbnails ensure you always have home grown secateurs with you at all times. The photos below show my thumbnails in action. Click on each photo for a larger view.

Chrysanthemum are different. Because they flower so lushly and in a dense flower formation you can be fooled into thinking that once the flowers start dying it is all over for another year. But this is not the case, if you push back the dead and dying flowers you will see another flush of little buds ready to come forward.

What you need to do, is on a daily basis snip off the dead flowers and a portion of attached stem to lower the flowering level to let light into the news buds. It is also a good idea to give the plant a good feed to encourage the new flush of flowers. The photos below show me exposing the next generation of lovely flowers. Click on each photo for a larger view.

Filling gaps in your hedges. Hedges are an important part of my garden as they provide a riot of colour throughout the summer. I have deliberately packed my hedges tight, as this forces them to fight for space, light and air, which in turn produces profuse flowering.

Unfortunately some times a plant dies (not often with hedges), but I recently lost a Plumbago which would have left a dead space in my summer hedges. Normally I would have had to take a cutting from an existing plant and grow it on, all of which would have taken time. Fortunately, my friend Pip from Church had a Jasmine which she was dissatisfied with and kindly donated it to me.

Normally I would be looking to plant hedging plants in November or at the latest January. But needs must. My starting point was to use a chainsaw to cut the new plant some breathing space within the hedge. This will allow it to get established this summer before the rest of the hedge comes rushing in. The photos below show the gap created. Click on each photo for a larger view.

Once I had made space then it was necessary to dig out a decent sized planting hole, fill it with water, let it drain and then dig in some good compost. Hedges are generally greedy feeders and they will deplete the soil, so it is necessary to give your new plant the best possible start by replenishing the soil. The photos below show the new plant settling in. By the end of summer the gap will be completely filled with hedges. Click on each photo for a larger view.

Dealing with False Garlic. False slender garlic is a weed. But, like many weeds it has a lovely flower. I don’t really mind it growing in the only lawn I have left (thank you chickens). But I don’t want it in my flowerbeds. If you are not in Spain this won’t be much of a problem to you. But here in Spain it is a pain (alliteration).

False garlic grows from a tiny bulb that in turn grows from a set seed. Short of digging the bulbs up up there is not much you can do. However, over the years I have found that by pulling the flowers out stem and all, you can gradually outcompete and exhaust the bulb. It is important that you pull out as much of the stem as possible. The plant has spent so much energy creating the stem, so when you remove it, it exhausts the bulb trying to grow another. It may take years but you will eventually win the war. The photos below show me involved in a minor skirmish. Click on each photo for a larger view.

Admitting it has been a terrible season for seeds. I don’t know about you, but it has been a terrible year for seeds. Everything has either not germinated, or if it has the seedlings are scrawny little things. Normally at this time of year my potting bench would be filled with trays of healthy seedlings waiting to take their place in the garden.

Currently everything I have is now planted in the garden, and even then they do not look that healthy. Apart from the early season chicken sabotage, it has just been one of those years. The photos below show my seedling season ending with a whimper. Click on each photo for a larger view.

Campoverde Open Garden Day. Yes, it is that time of year again when I want you all to come along and have a wander around some of the nice gardens here in Pinar de Campoverde. This is not a competition and these are not show gardens, but just some local people who are keen gardeners opening their garden for the day for a good cause. All the details are shown below, and you will have a lovely day.

The only problem I am still having to deal with is Cruella (my wife) insisting that the day should be turned into ChickenFest 24“a clebration of all things chicken”. I mentioned earlier that she is ordering some special costumes for “her girls”, so called Cluck Couture. She has been emailing me asking me to measure her girls so she gets the right sizes. I have tried my best but to be honest I don’t know where a chicken waist is.

Tango the lonely blind Labrador asked me to ask her if he was to have a special costume for the day. When I asked her she just laughed and said “I’m not wasting any money on that blind mutt”. When I told him he wasn’t to have a costume, he tried to put a brave face on it, but tears sprang into the corners of his little milky eyes and dropped off the end of his nose.

Anyway the upshot of it is that I am trying to run him up a costume from some old compost sacks. It may not be much, but at least he will have a cape and a little flower pot hat. The photos below show the bloody chickens waiting to be measured up for their Cluck Couture and poor Tango the lonely blind Labrador dreaming of his costume. Click on each photo for a larger view.

Oh, I nearly forgot below are the details for Campoverde Open Garden Day. I look forward to seeing you there.

Trees, bees and bereavement

What about the above for the headline of a blog post. It has everything alliteration, drama and a hint of menace. However, now that we are swinging into summer there are a number of things you should be doing, and a number of things you should stop doing. So this is what I will be covering in this post.

  • What you should be doing with your citrus trees and other fruits
  • Dealing with seedlings
  • Time to give roses a feed and mulch
  • Check your irrigation system and timers
  • The final days of the big Agave Attenuata
  • I am getting bees

6th April 2024 Things I have been doing lately.

What you should be doing with your citrus trees and other fruits. By now all of your citrus trees should be in full bloom. So it is time to stop messing around with them and just let them get on with it. Don’t cut, don’t prod, don’t replant, just leave them alone. There are however, three exceptions.

Firstly, make sure that you remove any suckers that are growing on the trunk of your trees. Suckers are bright green, pliable small shoots that have a habit of popping out on your tree trunks this time of year (especially on older trees). Suckers take away the goodness from your tree before it gets to the leaves and fruit. Especially deleterious are suckers growing from below the earth at the foot of the trunk as these will often be growing from below the graft and will probably be root stock. The photos below show examples of suckers on my trees. Click on each photo for a larger view.

The simplest way to deal with suckers is to don your gardening gloves and go around pulling sharply down on each sucker. If you catch suckers early they will come away very easily. However, if they have been left for a while they will have hardened to wood, in this case you will need your secateurs, and need to cut as close to the trunk as possible. If you leave a spur it will grow back.

Secondly, go around each of your trees and look for branches that are absolutely dead – no leaves and definitely no blossom. By now these are definitely dead so you can cut them right back. This process lets air and light into the tree; but remember no other cutting. The photo below shows me actively hunting dead branches.

Thirdly, you should have been actively feeding your citrus from January; so if you haven’t been, get on with it. There are a variety of feeds you can use whether pelleted or liquid, but you must always use a citrus feed rather than a general purpose feed. I also find it helps if you can give them a glug of iron. The photo below shows some of the feeds that I use.

In addition to feeding citrus trees you can start feeding other fruiting trees and vines. In this case do not use citrus feed, but another specialist feed for fruiting plants. The feed second from the left in the photo above is the one I use.

Dealing with seedlings. Normally by this time of year I have a potting bench full of seedlings ready for pricking out and potting on. However, this year has been a disaster. Apart from the chicken vandalism; which I mentioned in my last post, whereby the chickens threw over my mini greenhouse and killed all my first seeds. I resowed them all and then inflicted another disaster on myself. Because of the changeable weather I left all my seedling trays in my mini greenhouse for the day whilst I was out, but unfortunately the sun came blazing back and by the time I got home all my seeds had been baked..

The photos below show the various stages of disaster with my mini greenhouse. I have tried to rescue what I can but as you can see very few seeds have germinated. Don’t let this put you off planting seeds, they are normally a fantastic way to stock your garden and improve your gardening skills. You can still plant seeds now, but make sure you do not put them in a mini greenhouse, but instead make sure they are out of the sun for the fiercest part of the day. The one consolation I have is that my cuttings and bare root plants are coming on fine. Click on each photo for a larger view.

Time to give roses a feed and mulch. Roses grow surprisingly well in Spain, but it is time now to mulch them and feed them to get the best blooms this summer. Before feeding I highly recommend that you mulch. This is a simple process involving 3 stages.

  1. Hoe all around your roses to remove all weeds, you can do this by hand but it can be a bit prickly.
  2. Water your roses profusely.
  3. Apply a thick mulch of about two inches using either bark or compost.

Once you have mulched then you can start to apply feed. Roses are hungry feeders so I feed once every month. The photos below show the mulching process followed by a photo of the feed that I use (others are available). Click on each photo for a larger view.

Check your irrigation system and timers. Irrigation and timers are essential in the Spanish garden. I know you think you will remember to water your plants, but you will forget and they will start to die. However, irrigation timers are no good to you if they have run out of battery or your irrigation pipes are leaking all over the place.

I have 6 separate irrigation timers in the various parts of my garden and a couple of hundred yards of irrigation pipe. Now is the time to go around and change all the batteries in your timers. Once you have changed your batteries, turn your irrigation on (one at a time) and wander round checking for leaks. The photos below show some of my irrigation issues, including all the various instructions for my many and varied timers and a few leak issues. Click on each photo for a larger view.

The final days of the big Agave Attenuata. Regular readers of this blog will know that one of my large Agave Attenuata has flowered spectacularly and is now dying. As a mark of respect for the dying plant I spend days in quiet contemplation and discussion with the plant as the end comes near. We talk about all the good times when she was a mere pup and laugh about how she kept bending the wrong way when I wanted her to grow in another direction. She is obviously concerned for her pups but I have reassured her and promised I will always look after them.

Sadly the end is here. We always spend the last few hours singing her favourite arias. We have been singing Madame Butterfly with her taking the part of Cio-Cio-San (Madama Butterfly), whilst I reluctantly play the part of Lieutenant Pinkerton. We end with the tragedy of Cio-Cio San’s suicide whilst singing “Con onor muore”. I asked Cruella (my wife) to take some photographs during the aria so that I could keep her memory alive for her pups.

The photos below show us singing. Her final words were “Io muoio con onore”; if you look carefully you can see that I am crying. Cruella just laughed and said she couldn’t hear the plant singing and all the neighbours think I am mad. I told her she can’t hear the plant singing as it requires a soul. Click on each photo for a larger view.

I am getting bees. I must confess I was a little bit down for a few days after the Agave death. Even Cruella was worried about me and decided to ask me what I wanted for my birthday, I said no it’s ok. But she insisted, saying go on I will get you anything you want. And that’s how I am getting bees. Watch this space. The photo below shows my hive ready assembled for their arrival at the end of the month. I have even planted them a little flower bed to welcome them.