I don’t know normally dedicate a post to one subject as there is too much gardening to do. But I decided to dedicate this post to discussing cutting Palm trees properly because I am fed up seeing palm trees butchered by men with chainsaws.
Now any idiot can buy a chainsaw and claim that they are a professional. And no doubt it will definitely be cheaper than the real professional. But the end result is ugly butchered trees that have been hacked to pieces and are now ripe for a visit from the Palm Weevil.
Now whether you take my advice or carry on butchering your trees it is up to you but here we go.
16th March 2026. Things I have been doing lately.
Well to be honest, it’s not things I have been doing, it’s things I have been getting done. Cutting Palms is the only thing that I do not do myself in my garden. There are four reasons for this:
The aforementioned I cannot stand seeing butchered palms
I have twelve palm trees some of which are 40ft high
I am old and wish to preserve my bones
The idiot son has made me promise not to climb ladders as I often fall off
Why cut your palms? There are lots of good aesthetic reasons for cutting your palms. Probably one of the least important is that they look messy, unsightly and blight your garden. The photo below shows a typical example.
Not only unsightly but also dangerous
The thing is not only does this look unsightly it also dangerous as the added wind resistance can make the tree susceptible to wind rock and eventually falling. In addition all that dead vegetation hanging down is an ideal home for virus and of course the dreaded Palm Weevil shown in the photo below.
Here is one I caught last Summer
Whilst the Red Palm Weevil mainly attacks Phoenix Palms, there have been instances of it attacking Washingtonia and other species.
I have dealt with treating against Palm Weevil in other posts so if you have a problem just use the search button and you will find the relevant post.
When to cut your Palms. The best time to cut your Palms is between January and March. This is the period when most of your trees growth is over for the season and is also the time when the Palm Weevil will not normally be flying.
If you cut your Palms at any other time, especially during the hight of summer, then you are inviting the Palm Weevil to come and lay its eggs in your tree. When Palm trees are cut in the summer they will ooze sap. This sap can be smelled by the Palm Weevil which I am told has an amazing smell and a highly developed olfactory glans. Research has shown that the weevil can smell a damaged or cut tree from over 1 kilometre away.
How to cut your palm trees. At its simplest you should aim to have your tree cutback so that the remaining fronds are more or less upright. The photo below shows some of my newly cutback palms.
Don’t they look lovely, unfortunately they don’t stay that way
Why use a professional Palmerero. The title Palmerero is commonly used to refer to a professional palm tree cutter in Spain. These are highly trained and skilled individuals who know everything about palm trees and how to prune them. As I said at the start of this post you will find lots of men with ladders and chainsaws who will cut your trees back a lot cheaper, but may well end up damaging your trees and leaving them unsightly.
Palmereros do not use any machinery. Instead they use a specialised knife called a corbellote or in different parts of Spain a corvellot to prune and trim the trees. Because they do not use ladders Palmereros will use a climbing technique that involves specialist boots and a harness to scale even the highest trees. This means they are not hacking at your palms from the top of a short ladder and instead can get right up to the crown to inspect for damage.
I have used the same Palmerero, Antonio for over 15 years and have always been satisfied with his work. He and his son arrive and graft away all day and then clean everything up and take it away. I have included some photos of Antonio at work.
Here is Antonio at work shaving one of my small palms. I am showing you a photo with a small palm as you can see the specialist boots, harness and cutting tool
That’s it for another year, everything packed up and off they go. Unfortunately there will always be a little bit of collateral damage from 15ft palm fronds falling 40ft.
I am sure there are many other Palmereros available but I am happy to recommend Antonio. He covers most of the Costa Blanca as far as Benidorm so het tells me. This is totally unsolicited but here is Antonio’s number 630389536.
Cruella (my wife) is at our English house assisting our idiot son to move house and I am in sole charge of everything here. I am having a great time, I garden all day and hang around the compost bin and potting bench talking to the cuttings. At night when the chickens won’t go to bed I stuff them up through the coop entrance one after the other and they all end up like those Russian dolls forming one giant chicken.
But more worryingly the little white Dove has disappeared, but by way of compensation God has sent me a little blue rabbit. I will explain everything later but we need to get on with the gardening as it’s Spring and we don’t have a moment to lose.
12th March 2026. Things I have been doing lately.
Preparing and revitalising you borders
Planting out winter seedlings
Planting annual seeds
Feeding and mulching roses
Tidying and feeding Bird of Paradise
Cutting back Allysium
Feeding grass
Dealing with the loss of the little white dove and the arrival of the rabbit
Preparing and revitalising your borders. Spring is a fantastic time for gardeners, the soil is warming up and nature is poised to leap forward. Your job as a gardener is to get ahead of the game and make all the necessary preparations to ensure a good summer.
One of the first things you need to do is to weed, water and mulch your flowerbeds and borders. You can’t just keep sticking plants into the same soil every year without making an attempt to replenish it. Replenished soil is revitalised soil that will reward you with stronger plants and bigger flowers.
Ideally use mulch from your compost heap, but if you have still failed to start composting, then just buy a few bags of cheap compost from a China shop. Hoe the beds thoroughly first to remove any weeds and clear any leaf debris. Once you have done this deeply water the borders and then apply a thick mulch of compost; ideally at least 2 inches thick. Don’t worry about digging it in the worms will do that for you. The photos below show my mulching efforts accompanied by the chickens who like the maggots from the compost.
Compost À la maggotChicken chuck wagon2 inches thick
Planting out winter seedlings. In the autumn I pricked out lots of self seeded Osteospermums and planted these up in trays to grow on during the winter. Now is the time to plant out any seedlings you have been growing on as they will have become quite root bound. The photos below show my planting into the newly mulched borders.
You need to tease the roots outPlant 8 to 12 inches apart
Planting annual seeds. Don’t rush out and buy lots of plants from garden centres. Instead grow your own from seed. It is easy and very cost effective. If you haven’t got nice warm window ledges in your home, then buy a cheap little plastic greenhouse either on line or from Leroy Merlin. You will only need a little greenhouse for a month or two but it gives you a lovely start to Spring. The photos below show my little greenhouse being assembled. I need a new one every 2-3 years as the sun perishes the plastic.
Once you have your little greenhouse then mix up or buy a suitable seed compost. You need a free draining fine compost for the little seed roots to work through. I mix some of my own compost, together with a premium bought compost and then add Vermiculite for drainage. You can see the result below.
Once you have your compost ready then it is time to get your seeds out. I usually save seeds and these form the majority of my planting. But this year I am changing the main flowers in my borders to a mixture of Gazania, Cosmos, Salvia and Petunia. It is important to change every 5 or so years as continually planting the same can lead to virus building up in the soil. The photos below show shows the new choice.
Finally, on seeds, sow them thinly and make sure you label them as you will surely forget what you have planted in each seed tray. When sowing them thinly, the simplest and most effective way that I have found is to pour the seeds into the palm of one hand. Let them form a basic line in the crease of your palm, and then tap gently on the side of your hand with your other hand whilst moving your palm across the surface of the compost. Go ahead try it, it works magnificently.
Feeding and mulching roses. Roses are greedy feeders and if you want to get them off to a good start then now is the time for the first feed. To my shame every winter grass grows up beside my roses and I hate it, but just can’t get rid of it. See shameful photo below.
I am mortified and mightily ashamed
Before I can feed my roses I need to get down on my hand and knees, and over a two day period remove the grass once more. I do it over two days as the blood loss I sustain from working under the roses is horrendous. By the end of the two days I normally need a blood transfusion and have used a few bottles of antiseptic formula.
Once the grass is gone I apply the rose food in great handfuls and then completely top up with good compost from my bins. I heap the compost up around the roses as this will soon be taken into the earth. I complete the whole process with deep watering (which always guarantees it will rain the next day). The photos below show the outcome, and I am proud of my roses once more till next winter.
Tidying and feeding Bird of Paradise. The winter months will have taken a toll upon your Bird of Paradise (Strelitzia). So if you want to get the best out of it this summer, you need to do two things. First, cut back any old flowered stems, tidy up the flowers and cut out diseased stems. Secondly, you need to give it a good feed now and every month during the summer.
When cutting back flowering stems you can usually get at least one more flowering stem by cutting back to the diagonal joints shown in the photos below. Also don’t be afraid to peel dead petals out of flowers to make them cleaner and less likely to get insect attacks. See photos below.
My plant looking a bit tired and unfed after the winterTidy flowersCut out diseased stemsCut flowers stems back to a diagonal joint
Cutting back Alyssum. These lovely plants were a star in my garden last summer and have now flowered all winter. I grew them from seed and they have given me great joy with their constant flowering. To keep them going all the time, all I need to do is occasionally shear off all their flowers and off they go again. See photo below.
BeforeAfter
Feeding grass. If you have a lawn (and yes I know not many of you sane people have). Feed it now, this will be the first of four feeds over the growing season.
Dealing with the loss of the little white dove and the arrival of the rabbit. Regular readers of this blog will know that a little white dove arrived in our garden about a year ago, and since then has had accommodation built specially for her, she was fed special food, and has joined in Chickenese classes with Cruella (my wife) and her girls.
Well sadly I have to report that the little white dove has been missing for a few weeks. Cruella has been fretting from day one and insisted that I contact the police. I told her not to be so stupid. She then insisted that we contact the Bureau for Dove Investigations (BDI), to my surprise it appears there is such a thing. They have said that as it is spring the little white dove may have gone off to mate. Cruella is dismayed about not having an engagement party, but has calmed down a lot now that she has started knitting onesies for the future chicks when they visit. Myself, I think it was probably a cat.
Well you can imagine my surprise when no sooner had the little white dove disappeared than a little blue rabbit appeared in the garden. It sleeps in a bed of Osteospermum and comes out during the day to frolic with the chickens on the lawn.
Cruella claims it is an answer to her prayers as she has always wanted a boy. This upset the idiot son, but he got over it. Anyway Cruella and her girls have named him Peter. I thought after the Apostle and founder of the Church, but no it seems after the Beatrix Potter character.
The big winter cutback is now complete. Normally at the completion of the big cutback I stand back and survey the garden with quiet satisfaction, but this year has been marred by controversy.
Pruning my big Ficus tree is normally the last item on the cutback, mainly because it is a mammoth struggle between man and tree, resulting in the loss of much blood, severe bruising, sprains and spectacular falls from a great height. However, this year I did it differently resulting in hurtful insults from the tree accusing me of cowardice. To be honest I am a bit ashamed of my actions and don’t really want to talk about it, but more later, for now let’s get on with the gardening.
15th February 2026. Things I have been doing lately:
Cutting back ornamental grasses
Planting new trees
Dealing with the big Ficus and accusations of cowardice
Cutting back ornamental grasses. If you have ornamental grasses then you know how lovely they look in the autumn and winter. Their long floating blades and fronds blowing in the autumn winds add movement and texture to the garden at a time when it can look a bit bereft and boring.
I mainly favour large Fountain grasses for their stately bronzed fronds, although I do have one smaller blue grass which has yet to reach its full potential. The photos below show my grasses before their trim.
Most of my grasses are transplants from bigger plants that I have separated over the years and in the last few weeks they have looked lovely. However, if you don’t cut your grasses back now then they will become congested with old growth and you will hinder this years growth.
All you have to do is get your hedge trimmers or shears and cut the whole thing back to a small mound. Once you have the grass cut back then get your garden gloves on and pull out any dead grass from the centre of your plant. Gloves are important as grasses can be sharp. The photos below show my efforts at clearing the congestion at the centre of one of my grasses, and the finished and trimmed plant ready for new growth to bust through in about a month.
You need to get right into the centreAll ready for Spring growth
Planting new trees. My only lemon tree has been gracefully dying for about 2 years which has been a cause of great concern to Cruella (my wife) who relies on it for lemons for her gin. It is an old tree, and I have been carefully managing its decline. However, it has reached the end and it had to go, especially if I was to get a new tree in this year. The photos below show my old tree leaving this earth gracefully.
This is not assisted dying, this is loving family care of an old and dear friendA last fond farewell25 fruitful years come to an end
If you are going to plant new trees in the Costa Blanca area, then you only have a planting window between November and March to get your new tree into the ground. Any later than this then your new tree will have difficulty getting going in the heat. By getting it in whilst the soil is beginning to warm and there is some rain around but the sun is not too hot, then your new tree has a chance to set some root before the heat of the summer.
The first thing you have to decide is the position of your new tree. My fruit trees are in two parallel lines in a typical orchard style. In effect this means that my new tree will be in line, but essentially it needs to be at least 3 metres from the trunk of my old tree. The reason for this is simple. The soil around the old tree will be depleted and the roots of the old tree are still in the soil and won’t rot for a few years.
Your next decision is what type of new tree to buy. You can buy spindly things grown from seed, mid size trees grown on grafts, or cut down larger trees. I prefer mid size trees grown on grafts as they are relatively mature, won’t have the frailties of seed grown trees or the potential disease of cut down trees. Anyway, which ever you choose soak it in a bucket for at least three hours before planting. The photo below shows my chosen tree draining after its soak.
New life, new hope
Once you have your tree it is time to get it into the ground. Dig a hole as big as you can, ideally twice the size of the root ball (but to be honest these days I am lucky if I can dig a hole). Chop out any roots you find from the old tree. When you are happy with your hole, fill it with water and let it drain. The photos below show my progress.
Old roots The holeHeres to 25 fruitful years
Now to the important part of planting your tree. Your aim is to give your new tree the best chance of survival, and that means careful preparation. First, ease your tree out of its pot and carefully spread the roots out of their pot shape. Next, sprinkle the roots with Mycorrhizal fungi to encourage root growth (you can buy this in most garden centres).
Now plant your tree in a 50/50 mix of really good compost and the existing soil, ensuring that you firm the soil well down by treading it in. It’s really important at this stage that you do not cover the the graft with soil. The graft is the swelling at the bottom of the trunk. If you cover this with soil you may get growth from the graft host. See photos below.
Sprinkling the magic of fungusNever cover the graft and keep an eye on it
Finally, when you are happy with your little tree, you will need to stake it against “root rock” which can happen in high winds and stop your tree taking. All you have to do then is to water it profusely for the first few weeks and enjoy its first year of growth.
Luckily this was staked before the recent horrendous winds
Dealing with the big Ficus and accusations of cowardice. Regular readers of this blog will know that I finish the big winter cutback by pruning my big ficus tree. Years ago I shaped this tree into a pruned donut shape by cutting out its central trunk. This meant that in the spring each year I had to prune and reshape the tree to retain its donut effect.
Some of you might envisage that this would seem to be a rather easy task. But no, the ficus is big and tall and has a vicious temper. It has never forgiven me for the original removal of its central trunk, and it takes every opportunity to smash, bash, cut and bruise me in our annual encounters. The photo below shows me mid battle in years gone past.
Happy carefree days; I usually fell out of the tree
Normally I can feel it malevolently watching me as I go about all the tasks in the big winter cutback. Sometimes if the wind is blowing in the right direction I can hear its leaves rustling and whispering vicious threats of what it is going to inflict upon my body. Every year so far I have psyched myself up through a mixture of prayer, character building readings and a little yoga. But this year something just snapped. I couldn’t face it.
I blame the fact I had been softened up by the rest of the garden before this big encounter. The roses had made me bleed so badly I became anemic. Falls from and through the hedges bruised my body so badly that the police were called in and Cruella (my wife) accused of domestic violence. My back and bones hurt so much from digging that I am now a chiropractor case study. And all of this physical and mental damage whilst being constantly insulted and laughed at by chickens.
So the obvious happened, I called in tree surgeons to prune and cutback the big ficus. To be honest, they did a lovely job and pruned right back into shape. But that is not the point, since then the ficus has loudly proclaimed that I am a coward to all the plants in the garden. I lost respect amongst the plants and my authority was being questioned even amongst seedlings. I could barely look at the ficus with its knowing sneers and open contempt. The photos below show the big ficus after its professional prune.
Look carefully what do you seeA nice open canopyThe Cheshire Cat back in place
After days of torment and sleepless nights I knew I had to gain the respect of the garden or it would be all over. Suddenly it came to me. If you look at the first photo of the ficus above you will note that the left hand edge of the tree canopy is slightly higher than the right – the tree was lop sided and looked unbalanced. This was it, my opportunity to regain face and respect in the garden.
I boldly got out my ladders, platform and tools and with a great deal of ceremony and fuss began to re-trim the tree to give it a semblance of balance. As I worked the tree stayed silent, but I knew it was looking at me; at first with pitying hostility but as I proceeded it eventually melted into looks of understanding, trust and comradeship. The photos below show me at work.
You can’t see me I’m in the tree
Well I am pleased to tell you that it all ended well. After I had finished I sat in its boughs and we discussed past battles and skirmishes. We laughed and cried about our antics when we were both younger telling each other our favourite parts of our various battles. Eventually it was getting dark so I climbed down. But I am pleased to tell you that it doesn’t end there. We have agreed to collaborate on a book, we have a tentative title; “The Old Man and the Tree” what do you think, it has a sort of ring to it, Hemingway would love it.
On we go with the big winter cutback, part 3. You should be more than half way through the systematic cutback of your garden, your back is aching, your compost bins are filling up, the cold and wet days haven’t stopped you and the end is in sight.
All was going well until Cruella (my wife) demanded that I stop messing around gardening and create a new soft play area for her girls. I explained how essential the winter cutback was but she refused to be moved insisting it was a human right as covered under the UN Charter and the ECHR. I explained that her chickens were not human and therefore not covered under this legislation. She has now hired human rights lawyers and is seeking a judicial review. Anyway enough of this nonsense on with the gardening.
24th January 2026. Things I have been doing lately:
Pruning fig trees
Dealing with broad leafed weeds in grass
Cleaning up and composting leaves
Cutting back hedges
Refurbishing the chicken soft play area
Pruning fig trees. Most fig trees in Spain are left to grow into huge towering hulks that lower over gardens in threatening sprawls. All too often their fruit is too high to pick and when it falls it makes a sticky mess all around the trunk mixed in with bird poo that creates a dead zone under the tree.
It needn’t be this way you can carefully train your fig to be a fruitful adornment to your garden. The starting point is radical pruning. Now this can be scary as you have to prune back to a few strategic branches spaced around the trunk of the tree. Once you have pruned your tree back to these strategic branches, then all you have to do is cut back to these branches at the end of each growing season. The photo below shows one of my trees ready for its annual cutback.
From this photo you can see that the tree has been pollarded back to selected branches and the long “whippy” growth is the only part that will be pruned. Before you begin pruning ensure that all the leaves are off the tree as this will mean that the caustic sap has drained back to the roots and you are in no danger of being burnt.
All you need to do then is snip all the new growth off using your long handled lopers. Just take them back to the knuckle at the end of the branch and the new growth will grow from this point. The photo below shows the tree ready for the new growth.
In addition to my standard fig I also have an espalied fig that I have trained along a wall over a number of years. The process is the same; just take off the side shoots and leave the main branch. The photos below show the espalied fig before and after.
Dealing with broad leaf weeds in grass. Now I know not many of you have lawns in Spain, and that is perfectly understandable. However, for those of you that have, now is the time to treat for broad leaved weeds.
Broad leaf weeds such as Dandelion etc are growing ferociously at this time of the year. They, spread their leaves out, kill the grass underneath and then set seed to give you another generation. You can if you wish, go round and remove all of these weeds by hand, but it is a time consuming and difficult process. Instead use a selective weed killer. This can be sprayed on to the offending weeds without harming the grass. The photos below show the problem and the solution.
Cleaning up and composting leaves. An integral part of the big cut back process is that you will create lot of fallen leaves, which taken together with the normal winter leaf fall will have left you with various piles blown all over your garden. The temptation is to just leave them and let them blow around. But the danger with this approach is that the leaves will gradually breakdown into a fine tilth on your gravelled areas and on paths creating a lovely medium for weeds. In addition they provide a perfect environment for slugs and snails to foray forth and eat your new plants. The photo below shows a perfect slug and weed environment.
You have to clean them up, but don’t do it grudgingly, and don’t just throw them away. Instead compost your leaves to make a lovely top dressing mulch for next autumn. The first thing to do is to sweep or blow your leaves into heaps. Then load them into plastic sacks, making sure to crunch them down as you go. Once you have filled your sacks, puncture them with a garden fork in a few places to encourage air circulation. Once you are ready store them in a shady corner of your garden and just forget about them for 6 months. After this time they will make a nice mulch for top dressing. The photos below show my world famous sack pricking technique and my leaves shady corner.
Cutting back hedges. I take joy in hedges as they provide a floriferous back drop to the garden and a wonderful home for lots of wildlife. As I wander around I see thousands of houses with 2 metre high walls all around their garden. A good well planted mixed hedge will give you all the security and privacy of a wall but with the added bonus of an ever changing backdrop throughout the seasons.
But as hedges are living things you have to cut them back once a year. Over the years I have developed a technique of planting hedging plants quite close together and making them fight for air, light and space. This technique encourages prolific flowering and is a joy to behold. The photos below shows some of my hedges and the battle of the big cutback. Click on each photo for a larger view.
At the end of the cutback process don’t just throw everything away, instead shred what you can and then either compost the material, or where appropriate spread it as a mulch under your trees. See the photos below.
Refurbishing the chicken soft play area. I am ashamed to admit that I have a chicken soft play area in my garden. Basically it’s an area that once was lawn. It is located right in front of our Naya (Verandha) where Cruella and I sit and take our morning tea. I took out the grass and replaced it with cheap compost, this then allows Cruella’s girls to disport themselves first thing in the morning whilst Cruella feeds them sliced grapes and gives them their instructions for the day.
All of this activity takes place in Chickenese so I have no understanding of what’s going on. Over the years I have picked up key words in Chickenese, but not much, mainly I only understand when she points at me; so I now know the chickenese word for “pig”.
Anyway, I had to stop the big winter cutback to refurbish the soft play area with new compost. She also wants me to install a swing and a slide, but I have refused . Hence my being referred to various international bodies for chicken human rights abuses. I know she is talking nonsense, but I am beginning to worry as I have received several threatening legal letters. She tells me a date is set for hearings so I am thinking of Lawyering up.
The photos below show the start of the refurbishment of the soft play area. Then just when I get the surface all nice and neat they dig it up again.
Well after all the fun and festivities of Christmas it is time to get on with the big Winter cutback. If you get out into your garden now you will not only lose a few pounds and feel better, but your garden will thank you this summer with lovely refreshed growth.
If you have a large garden then you need to plan your winter cutback over a number of weeks. If you have no other plan, then the simplest way is to start with your smallest plants and work your way up to the really big ones. If you follow what I am doing over the 4 or so stages of my winter cutback then we will cover most common plants in Spain.
I have to admit that my annual winter cutback has been much disrupted by the visit of my idiot son. Cruella (my wife) has been beside herself for weeks preparing for his visit, especially since he will be taking his advanced certificate in chicken care. Under Cruella’s supervision he has been taking exams from The University of Applied Chicken Care – motto: “Sapientia ab Ovo”.
Anyway enough of this nonsense let’s get on with the big winter cutback.
8th January 2026. Things I have been doing lately:
Reshaping Yucca to improve garden design
Trimming Sago Palms
Pruning Solanum
Reshaping trailing Lantana
Pruning roses
Invigilating chicken exams
Reshaping Yucca to improve garden design. If you follow this blog then you will remember that I posted a short while ago about cutting and reshaping Yucca. However, I left one large stand of Yucca out of my last pruning round as I wanted to give more thought to reshaping it.
The area I was contemplating stands at the bottom of my drive and over the years I have created a pleasing combination of: Yucca, Californian False Pepper tree and a large bush Myrtle. Together these present a pleasing vista at the end of the drive. However, they had all become rather ill defined and needed to be brought back into harmony. The photo below shows the problem.
Although I had reshaped the Myrtle, the Yucca and the tree were still too entangled
The solution was to reshape the Yucca by cutting it back to different levels. When this regrows – as it will within 6 months it will once more present an attractive integrated perspective. The False Pepper tree will be refreshed by being completely pollarded in about a year. The resultant cutback can be seen in the photos below. Remember, gardening is all about planning for the future – whether you will see it or not. A real gardener plants trees, he will never sit in the shade of.
Trimming Sago Palms. Sago Palms are prized plants in many Spanish gardens. They provide structure, but are slow growing and because of this are very expensive. So if you have one you need to take care of it. I have a number of Sago Palms of various sizes, but the two that need attention are a large multi branch plant in my front garden and a smaller version in a pot. Photos below.
I like to keep these plants relatively tidy, which mainly involves taking off all the fronds apart from the top two rows. It is important that you leave at least two rows to continue nourishing the plant. Also two rows should guarantee that if you lose one, you still have a back up.
To trim Sago Palms I use long handled lopers to get right into the base of the fronds. You also need to wear eye protection and gloves as they can be very spikey. The photos below show my newly trimmed plants.
Pruning Solanum. I have Solanum in many variations in my garden. Some free standing, others are either growing through hedges or climbing up walls. In this case I needed to prune my climber to keep it in shape. At its simplest this involves just getting your hedge trimmer or shears out and trimming the plant back to the wall, whilst at the same time being careful not to cut off any long sinewy runners (it is best to tuck all these in before you start to cut). The photos below show the before and after.
what do you mean you can’t see any difference
Reshaping trailing Lantana. I love trailing Lantana as its spreading habit provides the perfect setting for island planting into gravelled areas. In Spain too many people turn their gardens into gravel or tiled plant deserts. I understand this as the effort of watering unsuitable plants under a sometimes fierce sun can be disheartening as your garden turns to desert each summer and all your plants die.
Trailing Lantana provides the perfect antidote as they are fully climatised to Spain, need little watering, yet flower profusely all summer providing a green oasis in gravelled areas. I have lots of Lantana in all its forms throughout my garden so when it comes to the big winter cutback they are a relatively easy candidate. The photos below show some of the Lantana that are due a haircut.
You do not need to be fussy when cutting back Lantana. Get your hedge trimmers out and give them a good short back and sides. Once they have been trimmed back, you will start to see re growth within a month and off they go again. The photos below show my newly reshaped Lantana. Note that once I expose the area underneath the plants the chickens quickly move in to mop up any slugs, snails etc. Cruella accused me of exploiting her girls.
Pruning roses. At my house in England I prune roses in the usual way using secateurs and carefully cutting back to an outward facing bud etc. But in Spain I have lots of roses, and over the years have discovered that I do not need to be so delicate. Out come the hedge trimmers again, everything is cut back drastically.
I then leave everything for a week or so before I clear up the dried cuttings and only then do I go around with my secateurs checking for too much dead wood above buds and trimming back. The photos below show some of my roses before and after. And yes, I know that grass is growing under my roses and I am ashamed, but I have lost so much blood over the years trying to remove it that I have now reached a compromise.
Invigilating chicken exams. As I mentioned at the start of this post the idiot son will be taking his advanced certificate in chicken care. Under Cruella’s supervision he has been taking exams from The University of Applied Chicken Care. Cruella has decided that I should be the invigilator for his exams. The photos below show some of his efforts.
Basic chicken handling (small)Basic chicken handling (large)Rewarding and basic briberyHow high can a chicken jumpElsa discusses with Cruella how he is progressingSmiles all round as Helga confirms a pass
Cruella was euphoric at his pass and insisted that he was now ready for basic broom flying lessons. I warned her that this was just too much and should be postponed. But she insisted and the subsequent failure can be seen in the photos below.
He didn’t have the right equipment and he never really got off the ground. He landed on top of my compost bins and broke the lids; I am thinking of suing for damages.
Cruella shows him how it should be doneHe didn’t stand a chance with that equipment
As the gardening year draws to a close, I thank God for the peace, pleasure and knowledge that this year has brought forth from my garden. I extend to you and your family the joy of the season and wishes that your gardening activity in the coming year is both bountiful and floriferous.
Merry Christmas and a happy new year.
from
James, Cruella (my wife), her chickens, the little white Dove, the spirit of Tango the lonely blind Labrador and the idiot son.
Well it’s that time of year again when gardeners need to “stiffen up the sinews and summon up the blood…once more unto the garden, dear friends” yes, it is time for the big winter cutback.
If you prune and cutback your garden now you will see amazing results in spring and summer; failure to do so will leave your garden tired and browning during the summer months. Over the next few posts I will be be cutting back my garden which is full of common Spanish plants that you will find in your garden, and if you follow me week by week then by the time we have finished your garden will be ready for the summer.
The only thing that will hold me back is the obvious festivities celebrating the birth of Christ and the fact that Cruella (my wife) is in paroxysms of ecstasy as she awaits the arrival of our idiot son. All week she and the chickens have been preparing for the return this has included a special Christmas song, a dance and a Japanese Haku – he speaks Japanese and a bit of English! I thought you might like to see the Haku:
Wings flare, voices rise – Our lost chick returns at last, – Yuletide clucks resound.
In addition she has told the chickens that we are having Tofu for Christmas dinner which is of course inaccurate as we are having Turkey; so I now have to call it the “T”word in front of the chickens. The photo below shows the chickens practicing the Haku.
The little white dove leads the chorus
Anyway enough of this festive nonsense, on with the gardening.
13th December 2025. Things I have been doing lately:
Over wintering Chillis
Pruning Dame de Noche
Trimming Oleander
Cutting back my towers of flower
Pruning Mediterranean Fan Palms
Over wintering Chillis. I do not grow any vegetables apart from Chillis, and if you do the same then it is time to overwinter them.
By now your Chilli plants will be looking tired and a bit ragged and their compost will be completely exhausted. If you leave them like this over winter then they will die. The photos below shows my exhausted Chillis before their cutback and after the big trim. To revive them you first need to cut the whole plant back leaving just a few leaves low on the stem.
Bedraggled Renewed
Once you have done this you then need to ease each plant out of its large pot ready to fit into a smaller overwintering pot. As you take each plant out radically trim its roots – it won’t need all these roots in a small pot. You then need to repot your plants into a much smaller pot. You need to use a good quality compost to refresh them. Water profusely then leave them sitting on your potting bench over winter. When they start to show new growth in the spring, ease them out and back into their bigger pots and off you go again.
The photos below show the chilli reviving process in action.
Too much rootLight trimReady for pottingNice snug fitTime for a winter rest
Pruning Dame de Noche. Night flowering Jasmine is a perennial favourite in Spanish gardens, prized for it’s beautiful night scent it is often situated by outdoor seating areas.
This plant can grow very tall if left to its own devices, but it benefits from two prunes a year. Prune once after it has flowered in June/July and it will re flower. Give it a final cutback to your preferred height in Dec/Jan – you can go as low as 18 inches. As I gave my plant a very radical cutback last year, I am leaving it longer this year. The photos below shows my plant before and after its haircut.
Trimming Oleander. Oleander is a Spanish favourite grown either as a single plant or as a hedge. I have a few dotted around my garden mainly as statement plants or part of a set area arrangement.
The first photo below shows an Oleander that I grow in my dry garden area as part of a set arrangement with Osteospermums and yuccas etc. If not cutback every year or so then the Oleander will overwhelm the other low growing plants and ruin the symmetry of this part of the garden. You can cut Oleander back quite radically and it will spring back within a year or so.
The photo below shows an Oleander that stands alone in another part of my garden as a statement plant. Here I only need to prune a couple of inches off the edge to keep the plant shapely.
Cutting back my towers of flower. Regular readers of this blog will know that I grow a number of climbers up an old palm tree that I had chopped back a few years ago. This flowers profusely all summer and gives me a “tower of flower”. To trim this beauty back all I need to do is run my hedge clippers up it and it is ready for another year of flowering.
I would add a note of caution should you wish to copy me. At first you will be able to lean your ladder up against the old palm trunk as you trim. However, after a number of years the centre of the trunk will rot and it is not safe so you need to use a stepladder. Apart from that it is lovely as can be seen below with its seed pods giving winter interest before it is cut back.
Beautiful seedheadsStep Ladder after 5 yearsThe rot sets inAll ready for next years tower of flower
Pruning Mediterranean Fan Palms. December and January are the best time to prune palms as the dreaded Red Palm Weevil will not be flying. I have a professional Palmista for my large palms, but for a stand of Mediterranean Fan Palms I just get stuck in myself. The photo below shows the palms I need to cutback.
From these photos you can see that there are two key areas of pruning. Firstly the undergrowth of pups needs to be reduced so that you can successfully walk past the palms without being snagged. Secondly the crowns on the large palms need to be pruned back so that the top fronds stand up. When cutting back palms it is always wise to wear a thick jacket and make sure you wear goggles. Despite my best efforts I ended up with a Palm frond hanging by a thorn from my nostril – very painful.
Normally I use short handled lopers for the low growth and my long handled lopers to reach the crown. However, this year I experimented and used my new electric hedge trimmers to cut most of it back. I must confess it was a lot easier although not as neat as normal. The photos below show my efforts.
Hooray it’s that time of year again when I regale you with advice on the merits of composting. For weeks I have been excited about this but unfortunately I mentioned my excitement to Cruella (my wife). Since then she has mercilessly mocked me saying that compost is smelly and that I am an idiot for getting excited about dirt. To make matters worse her chickens have taken to following me around pretending to hold their beaks and shouting smelly in chickenese (at least I think that’s what they are shouting.
But I’ve got my own back. Remember that Coca Cola advert that appears on the television every Christmas, where a large truck with a picture of Santa Claus on the side goes through towns accompanied by the sound track singing “holidays are coming…holidays are coming”. Well that has been me for the past few weeks I have been singing “compost special is coming…compost special is coming”. To say this has annoyed Cruella (my wife) would be an understatement, so much so that I now mumble it under my breath, and when she says what did you just say, I reply “nothing”. I know it’s not much, but I count that as a small victory.
Anyway, on with the show let’s keep the excitement bubbling.
1st November 2025. Things I have been doing lately:
Why compost
How to compost
What to compost
What not to compost
The key ingredients of compost
what should compost look like
Why compost. All garden soil gets depleted over time and lose micro nutrients either they just get washed away by the rain or the plants take them up and the soil needs replenishing. Composting can help improve soil by adding back these nutrients and encouraging helpful bacteria that will break down and improve your soil. When added to your garden compost will help suppress weeds, lessen the need for chemical fertilisers, retain moisture and give you a warm feeling that you are doing a “green thing”. So no matter what your motivation, by composting you will be improving your garden and it will make you a better person.
How to compost. You don’t have to make a big deal out of composting and any one can do it. Whether you have a large garden or just a little patio garden with pots, adding compost will improve your garden. The basic need is to have a compost bin, or compost heap where you can store your compost. This can be very basic such as a little patch of your garden where you tip excess produce and cuttings etc. You could just have a heap in the corner covered by an old carpet, or if you like make a basic container out of chicken wire. It might be easier just to buy a compost bin from a store and there are thousands of them, from basic one simple bin, right up to multi-bin purpose built composting systems.
As you would expect, I have a purpose built composting system consisting of two large bins with lid for easy access and doors that can be raised to allow me to get at the compost from the bottom. The photo below shows my composting system.
Now, I don’t want you getting compost bin envy, that’s not the idea. I designed these and had them built when we first moved to this house because this size garden calls for this amount of compost. There are fruit trees to be mulched, lots of beds that need seasonal replenishing, lawns that need some topping and all the planting and stuff on the potting bench.
What to compost. Now you can compost most organic material. Examples would be:
all plant cuttings and mown grass
vegetable trimmings etc from your kitchen
old newspapers and cardboard
hair and fur from your dog, cat, hamster; even chicken feathers
twigs and branches up to about an inch thick
eggshells, coffee grounds and filters, tea bags
fruit, but not too many lemons or oranges as they will make the heap acidic
What not to compost. You must be careful not to compost the following:
cooked food of any sort (this will encourage rats and cockroaches). This includes: meat, bones, fish, fat or dairy
leaves or cuttings from plants that have been infected with disease or pathogens such as rust on Roses or mildew. If you compost these then you will infect the heap.
dog or cat poo; and don’t even think of human poo.
The key ingredients of compost. Quite simply good composting requires four things:
1. Green items: that add nitrogen (grass, leaves etc)
2. Brown items: that add carbon (twigs, branches, newspapers etc)
3. Water: to keep the heap moist but not wet (don’t let it dry out, but don’t over soak it)
4. Air: oxygen is needed to encourage the composting process, so once a month you need to stir your compost with a fork or spade to keep the air circulating.
There is one other vital ingredient that you can choose to add to your compost heap, and that is “compost accelerator”. This is normally added as a powder which encourages the development of microbes in your compost heap and speeds up the composting process.
The photo below shows all the key ingredients apart from air; but I assure you it is there. In the photo you will also see a special compost turning tool that I bought some 20 years ago. You just push this into your compost heap then the two little wings at the bottom of the rod come out as you pull up and the whole heap is lifted and turned. If you can find one, buy it.
What should compost look like? A question I am always asked (I lead an interesting life). The photos below show the current state of my compost bins. The first photo is the bin currently in use, and you can see all the ingredients I talked about above. The second photo shows the resting bin this has been in use for a few weeks that and has already had lots of compost removed. You can see from this photo that the bin is half empty, and this is because all the insects and beneficial microbes will have eaten stuff whilst making the compost. The final photo shows the finished compost; or as I call it black gold. Each of these bins will on average give me 20 wheel barrow loads of compost each year.
Gettting in the compost bin. One of the great joys at the end of a hard days gardening of trimming and cutting is to get in the compost bin and tread it all down. What do you mean you’ve never done this, just me then. One of the drawbacks of getting in the bin and stomping your compost down is that quite often you have cockroaches run up your legs which can be disquieting. To overcome this I have cut a board exactly the size of my bin which I fit into the top and then jump up and down on (patent applied for).
The photos below show my bin with the board in place, followed by a view of a reduced bin. Finally, I had to take a selfie of me in the bin as Cruella (my wife) refused to,come near because of cockroaches. Just after she took this photo, Cruella slammed the lid down and I was in there for two days. I must say they were the happiest two days of my life. She only got me out because the dishwasher needed emptying.
Gardening never stops, it just has lulls. Technically a lull is a time that is less frenetic, when you can take stock, look around and begin to plan for the future. Now is our autumn lull, summer flowering is over and it is not yet time for our big winter cutback.
This is the perfect time to wander round your garden and look for seed heads and potential self seeding seedlings. So come on let’s get gardening.
29th September 2025. Things I have been doing lately:
Assessing flower beds
Checking for seedlings
Gathering seeds
Planning my lawn renovations
Assessing flower beds. By now most of the plants in your flowerbeds will have gone to seed or just gone over and died right back. You should now be going through your flowerbeds forensically examining what to keep, what to cut back, what to put on the compost and what will offer you seeds for next year.
The photos below show my forensic trawl taking out what needs to come out and overall assessing space for upcoming plants.
Checking for seedlings. Once I have removed or cutback and assessed what potential there is for seedheads, then I look carefully for seedlings coming through. A mainstay of my flowerbeds is Osteospermum (Daisy). This a is a free flowering self seeding perennial champion that will never let you down. Each year I will take the floppiest specimens out, cutback those with potential, and leave space for their self seeded seedlings to come through. The photo below shows the lovely little seedlings peeping through.
In a month or so when these have grown a bit bigger, I will either pot them up into seed trays or sometimes, I just relocate them into the positions I want them. Either way, it is hundreds of free plants.
Gathering seeds. Once the flowerbeds have been examined it is time to begin looking around for seedheads. The photo below shows me setting off with my secateurs, gardening knife and plastic bag to hold seed heads. If you just look in your garden there will be hundreds out there. I gathered the following:
Petunias. This was my first time growing Petunia and they were a great success. The seeds heads are very tricky so don’t be put off. The seedheads are small and seeds are like dust. You need to get the seed head when it is just beginning to open and has a brownish look to its tips. See the photos below.
Marigolds. Another of my garden stalwarts and a great source of seed. I normally mark up the most promising flower with a piece of masking tape so that when it comes to collecting seeds, I can identify them. The photos below show my marked up seedheads ready for harvesting.
Each Marigold seedhead will provide you with hundreds of seeds. All you have to do is clean the seedhead up and then roll it between your thumb and forefinger and let the seeds cascade into your palm.
Pink Trumpet Vine. The pink trumpet vine has dramatic seedheads that are a decoration to the garden in their own right. Each seedhead is long and thin and can grow up to almost a metre in length. My tower of flower is covered in these lovely seed casings. See the photo below.
The secret with Pink Trumpet is to wait till the seed casings are completely dry and brown. Once they are ready they will easily split vertically to reveal their row of seeds waiting to be harvested. Don’t harvest these on a windy day as the seeds are meant to be airborne so will just blow away. Instead split the casings over a waiting envelope and let the seeds fall in. See photos below.
Loofahs. Some of your loofah seedheads should be ready by now, and again they must be fully brown and dry. In addition, to make sure they are ready, give them a little shake, and if they are ready you will hear the seeds rattling around inside. Don’t make the mistake of thinking your Loofah plants have died back, they have a habit of putting on another spurt of growth and producing new pods. The photos below show below shows some of my loofah ready to harvest.
With Loofahs you want to collect both the seeds and the pod itself. Regular readers will know that the pods have great exfoliant powers and are wonderful in your shower. I harvest quite a lot of these and sell them on to Cruella (my wife) and all the friends in her coven. They fly in from all over the netherworld as Loofahs are capable of removing even the most stubborn nose wart.
To access the seed crack open the top and pour the seeds into your palm. To harvest the pod just roll the pod between your hands till it cracks, peel of the dead skin and there you have it a loofah.
The final results of my efforts can be seen below. These will be safely stored in the dry and the dark, till God willing, I begin to work with them in the Spring.
We all knew it was coming but it is now official; Tango the lonely blind Labrador is lonely no more and he can see. He has gone to be an Angel in God’s garden, joining his brother in chicken free glory.
We better get on with the gardening or this will end up as a tear stained blog filled with memories and no plants.
10th September 2025. Things I have been doing lately:
Giving hedges a little trim. If you have hedges now is not the time to undertake a big cutback, that can wait till January. However, if your hedges are getting in the way of other plants or are stopping you walking round your garden, then now is not a bad time to get them back into shape as September is still warm and there will still be growth.
Some of my hedges overlook my lawn, and as such they shade part of the grass, more importantly they will impede my lawn work in October. The photos below show the problem.
Using my long handled hedge trimmers I just gently took off the ends of the main branches to expose the lawn ready for scarifying, top dressing, reseeding and feeding in October. See the difference below.
A bit of messing around with trees. Just like hedges, you shouldn’t really cut trees at the moment. However, there are two things you should be looking out for and dealing with.
Firstly, if you have any variegated leafed trees then you need to keep an eye out for full green leafed growth. Fully green leaves have much more chlorophyll and are therefore better able to process sunlight than the variegated type. In effect this means if you do not cut out fully green growth then it will soon take over the tree and you no longer have variegation.
I have a weeping Ficus that I cloud prune, therefore I keep an eye on it for green growth. The photos below show my little tree, but then round the back I have discovered some full green growth. It had to go.
Secondly, If you have deciduous trees, that lose all their leaves in winter, then now is the time to look out for and cut out dead branches. Whilst the trees still have their leaves you are able to detect any branches that are totally leafless. Check that the branches are dead by scraping back the bark in a small area. If you see no green then the branches is dead. Just cut it right out at its base. The photos below show me taking out dead branches on a little peach tree.
Beginning to harvest grapes. You will remember in a previous post that I recommended that you bag up your grapes to save them from pests and disease. Well if you did so then now is the time to begin harvesting.
On a weekly basis go round and look inside each of your little bags to see how your grapes are ripening. I recommend that you do not try to harvest them all at once, as they will ripen at different times, and anyway you can’t eat them all at once.
To harvest your grapes just cut the stem above the bag and remove your bunch. All you have to do then is give them a rinse, let them dry and refrigerate to eat at your leisure. See my efforts below.
Using Cathie’s big pots. My friend Cathie kindly donated two large interesting pots to me some 6 months ago. Cathie is one of those gardeners who has an eye for garden design, but an uncanny habit of killing any plant she touches.
Although I have pots, I never really consider myself a pot gardener. But these were too good to turn down so I have spent the past six months contemplating how to use them, what to plant in them and where to put them.
I have grown a variety of cuttings as potential pot residents, but eventually I have decided on “little pickles” as the tenants. The lovely pots and their potential new tenants can be seen in the photo below.
I didn’t want to just fill the pots with compost as this would have been a waste. So instead I stuffed half of each pot with old T-shirts and a few pots and topped up the remainder with compost rammed down. I then eased the little pickles out of their pots; both showed good root growth as can be seen below. I think they look rather nice in their final position. As they grow and cascade to touch the ground I will take some cuttings to give to Cathie to kill.
Tango bids farewell amidst unsightly chicken behaviour. We knew it was coming but it didn’t make it any easier. The vet duly called, Tango was sleeping and barely raised his head as the vet shaved his leg for his final injection. He passed so peacefully. Cruella (my wife) threw herself on his lifeless body in a fit of funereal histrionics, her chickens meanwhile gazed through the window at Tangos deathbed scene with blank eyed indifference.
The vet took Tango away and I went down to the Wild Wood to tell the bees. It is traditional when a member of the family passes away to go and tell the bees. I went to each hive and knocked three times and said the traditional words: “Bees, bees, hear what I say, poor old blind Tango has passed away.” The bees were very respectful and it gladdened my sad heart.
As I came up from the wood I could hear a cacophony of cackling Chickenese coupled with squabbling noises. As I rounded the corner of the house there was Cruella and her chickens throwing dice to decide who would get Tango’s various things. His bed, collars, brushes, dinner bowls and leads were all laid out in front of them as they gambled for them.
I rushed forward and gathered everything up and raced to my shed and locked myself in. They are out there now shouting profanities in Chickenese whilst Cruella keeps trying to get the door open. They have no respect, I think they’ve been drinking.
Tango when he was a puppy, he could see and he wasn’t lonely.
We are now in the dog days of Summer; the heat is intense, plants are wilting, water bills are high and Cruella (my wife) is refusing to fit nappies (diapers for US readers) to her chickens. I know it is all a bit surreal, but you should try living here. Anyway on with the gardening.
20th August 2025. Things I have been doing lately:
Selecting the best blooms for seed
Cutting back Petunias
Dealing with tree suckers
Rescuing a common houseleek
Petitioning for chicken nappies
Selecting the best blooms for seed. Now is the time to consider which blooms you are not going to deadhead, but instead save for next years seed. As you wander up and down your borders deadheading, look out for the best blooms and mark them for seed. To be honest I should have done this earlier in the summer but I have been just too busy.
The benefit of marking the best flowers for seed, is that you do not accidentally deadhead them. Just get some masking tape, select the blooms you want to save, and wrap a band of masking tape around the stem to remind you not to deadhead this particular flower. I do this because when the flowers shrivel and die they all look alike, but if I mark the best ones I will save them for my next years seed. The photos below show some of my marked blooms.
Cutting back Petunias. I have mentioned in recent post that I have been delighted with Petunias this year. They have flowered like crazy and given me much joy. As long as you deadhead them each day – by plucking off spent flowers – they will keep flowering. However, by now they are getting a bit leggy as you can see in the photo below.
For some reason this pot does extremely well
To keep them flowering then you need to cut back the longer stems by a third to half. Don’t do all of them just select a few each week and prune them with secateurs. The photos below show me pruning to ensure flowering all the way to October hopefully.
Dealing with tree suckers. Tree suckers are those little bright green shoots that you see sprouting from the bottom of the trunk on your trees. It is important that you remove these as they are in effect sucking the goodness out of your tree before it reaches the leaves and fruit.
Tree suckers are particularly a problem on older trees, especially those suckers that are growing from below the soil as these may be root stock suckers that are no good to anyone. You need to remove suckers on a regular basis. The simplest way is to pull sharply downwards on the sucker and tear it away from the trunk, this method is far better than cutting with secateurs, as it seems to inhibit further growth.
The photos below show a sample of my trees before and after with a variety of types of suckers. Click on each photo for a larger view.
Do not use your hands to remove suckers from palms
Rescuing a common house leek. I don’t have many succulents in pots, but a while ago I potted up some house leeks with a variety of other succulents and they looked rather nice. Well, they all started to die and rot and it was all my fault. It was simple really, my nice pot of succulents sat between two pots of petunias, and as I watered one pot of petunias and moved across to the next, I would just give the succulents a squirt of water. But never do this, or you will get what I got a pot of rot. See the photo below. Click on each photo for a larger view.
If you catch this in time, then the solution is simple, stop watering! Then you have to dig up the plants, clean them of dead foliage and rot and repot them in a nice free draining compost with added vermiculite. Once settled water them once a month if necessary The photos below show my little succulents being rescued and revived.
Petitioning for chicken nappies. I don’t know how to put this delicately, but Cruella’s chickens are poohing everywhere they shouldn’t. I expect them to pooh in the garden, in fact I welcome it. But lately they have been congregating on our Naya (veranda), covering it in Pooh and then sneaking into the house to torment Tango the lonely blind Labrador by poohing near him. He then rolls over to ease his many pains and ends up covered in chicken Pooh.
I approached Cruella (my wife) with the problem, but she flat out denied that it was her girls. She began to blush and exclaimed that her girls were too well brought up for such things and were well versed in “toilette”. Anyway I presented her with the photo evidence below. Click on each photo for a larger view.
Pooh covered Nayasneaking inthey are on tiptoesTango suspects they are there
At first she denied they were real photos and I must have photoshopped her girls in. When I insisted this was not the case she changed her story and said her girls were just popping in to see if Tango the lonely blind Labrador was ok!?
Anyway, she has refused my suggestion of chicken nappies and instead insisted that I should put up an old fly screen over the door. So far poor old Tango has got tangled in the screen and fallen out the door three times; the chickens just stand back and mock him in chickenese as he struggles to free himself. It is a bit like watching Samson being mocked in the temple of Dagon by the Philistines.
All of the above is true, and in that order. I know we are stretching it a bit as a gardening blog, but all I really want to do is garden, but other things keep interfering.
Our idiot son returned for his birthday weekend. Cruella (my wife) and her chickens had spent days preparing. There were banners, a specially commissioned song in Chickenese and a Haiku poem as he likes Japan.
Welcome, dearest one
The house wakes to your presence
Sunlight fills the rooms.
When Cruella told me that her girls were going to perform a special Haiku, I thought she meant Haka that the New Zealand rugby players do; I was looking forward to seeing chickens dancing and sticking out their tongues, you can imagine my disappointment. Anyway, on with the gardening.
19th July 2025. Things I have been doing lately:
Netting figs
Styling Yuccas
Singing to orphans as I clear the potting bench
Netting Figs If you have fig trees then now is the time to net them. Even though your figs are probably not quite ripe, don’t postpone this necessary task as the birds can easily strip a fig tree of ripe fruit overnight.
If you are going to net your figs or other fruits, then it is important that you use the correct small gauge mesh netting. If you use a larger open mesh then this will become invisible to the birds, they will fly into it and get caught. When you come out in the morning to inspect your figs you will find a flock of fat birds hanging upside down and flapping. The photo below shows the netting I use.
I have two fig trees, one of which I have espaliered along a wall. My normal approach is to invite different friends around to assist with this task. But Cruella insisted that it would be a good bonding activity for her girls and their brother (the idiot son). Despite my protests that chickens could not net, she insisted her girls had been raised to do anything a man could do.
I netted the espalier fig myself and would have gone on to try and net the big fig myself, but Cruella saw me and insisted I was denying her girls a “learning experience”. Anyway the photos below show the espalier being netted.
The first part of netting the big fig is to measure out and cut the amount of net needed. Once this is done you need to join together the two halves of the net as most nets are never wide enough to completely cover the tree. The photos below show Cruella and the idiot boy in action. I was in charge of strategy and Cruella decided it was too hot for the chickens and they should remain in the shade.
Cruella had already smothered them in sun screen
The photos below show the measuring out stage followed by the joining together stage.
The idiot boy trying to find the end of the netCruella waits patiently He eventually found itFor some strange reason he started to dance
The next stage is hauling your net over the top of the tree without it becoming ensnared into the branches at the top. I have developed a technique over the years that requires two people to manoeuvre the net down the side of the tree whilst I hoist the middle of the net up using an extendable pole. The photos below show this process in action.
Cruella holds it all togetherThe big lift
The final stage is tieing your net down around the tree to lower branches. The photos below shows the idiot son in action tying in, followed by a triumphant photo of me.
5 years in the scouts and still can’t tie a knotPost netting cuddle for ElsaNone of this would have been possible without my technical,expertise
When we had finally netted and tied down the tree, Cruella insisted that we should have a party to celebrate her girls first time netting; I pointed out that they hadn’t done anything but she accused me of nitpicking or possibly a “hate crime”. Anyway the party photos are below.
This was the cabaret the idiot boy doing his ventriloquism actCruella insisted her girls are carried to bed after a strenuous day
Styling Yuccas Those of you with Yuccas – and this means everyone in Spain – know that these can be useful, hardy, statuesque plants that can add height and interest to your garden. However once Yuccas get too tall or messy then they detract from your garden and end up looking like extras from those bad 1960’s westerns. It needn’t be this way. As Yuccas are canes they can be cut back and shaped to your desire and they will normally regrow from around your cut area.
Every 5 years or so I chop all my yuccas back to a manageable and interesting height. I then leave the cut plants for about 3 months or so till I start seeing regrowth. Usually there will be far more sprouting shoots than you require and some will be in the wrong place. All you need to do, is take your gardening knife, wander round the plant and choose the shoots that you wish to retain, those you don’t want just cut back cleanly where they join the trunk.
The photos below show where to prune and my various yuccas before and after their restyling. Click on each photo for a larger view.
Singing to orphans as I clear the potting bench
One of my saddest jobs as a gardeners is telling the plants that remain on the potting bench that unfortunately they won’t be going out in the garden. These are the orphans who have failed to be chosen, either because they are just not pretty enough or are just too immature. Now with the hot weather they won’t be able to be planted out.
I always start the talk the same way; I tell them they are “special”, and just because they haven’t been chosen doesn’t mean they can’t be happy. I talk about all their friends who are now growing in the garden and how they are getting on. Sometimes we cry, but that’s only to be expected, though I try not to break down in front of them.
I always end my talk the same way by telling them I have been proud to grow them, they haven’t let me down and God loves them for what they are. After my talk, and when everyone has dried their eyes, it’s on to the annual sing song.
This is my favourite part. I sit on the compost bin lid with my legs dangling over the edge and beat out the music to all their favourite songs. Mainly they like songs from the shows: Evita is one of their favourites as they like the drama. My absolute favourite is “Nelly the Elephant”, I bash this out really loudly and we all belt out the chorus. Cruella came round the corner and asked me why I was singing “Nelly the Elephant”. I explained it was our annual singing. She said “I didn’t hear any singing only you” I didn’t tell her you need a Soul to hear it.
Our finale is always the same song “The Sun will come out tomorrow” from the show Annie. It is always good to end on optimism. I kiss them all goodnight and slowly walk away. I postpone the compost bin till tomorrow!
Let me start with the non gardening bit; Sussex is not related to that “Meghan”, but the chicken Sussex, who unfortunately has died in the heat. I was walking past her and she just keeled over and died. Cruella (my wife) has accused me of being involved and has contacted the police, she refers to me as “the perp”. Technically I am on the run so don’t tell anyone where I am. On with the gardening.
4th July 2025. Things I have been doing lately:
Dressing grapevines and bagging grapes
Getting my figs ready for netting
Succession planting with Petunias
Goodbye to the mini greenhouse till next year
The death of Sussex
Dressing grapevines and bagging grapes. At this time of year your grapevines will be overflowing with leaf growth and hopefully some bunches of grapes. The photos below show my grapevines as leafy behemoths.
Too much leafy growth hinders grapesOrnamentals can be left leafy
Now if you are growing them to be ornamental – like the one at the front of my house – then this is fine. However, if you want to maximise grapes, then you need to dress your grapevines. This process has been going on for centuries and is even mentioned in the Bible. In effect it means, pruning, tying in, removing suckers, thinning leaves and generally maximising your opportunities for grapes.
At this time of year your will need to cutback the unproductive growth on your grapevine as this will take energy away from grape production. Just cutback to a leaf node on the longest branches and make sure you let light into the grapes. The photos below show firstly, where to cutback and secondly you can see that I am training a vine to go through an existing Euphorbia and along a wire ( just for fun).
Remember you are not pruning, just dressingThis branch has grown 4 metres since January
Finally, if you really want to get serious with your grapes, bag them into horticultural bags. This saves them from wasps, too much sun and other baddies. You can buy these bags in most garden centres in Spain and on Amazon. All you do is pop the grapes into the open end of the bag and then tie the bag at the top. By leaving the bottom open the grapes get air, and you get to check them occasionally. When they are ready just cut them off at the vine, turn the bag upside down and you have a ready made bag of grapes – enjoy!
It’s in the bag
Getting my figs ready for netting. Regular readers of this blog will know that I prune my figs back very hard each January in pollarding style. They always come back with tremendous growth and hopefully give me two flushes of fruits. The only slight setback with this method is that the new growth can hinder the necessary netting of the figs to stop birds eating everything. The photo below shows my very leafy figs
To successfully net the figs requires me to take off the longest branches. The danger in doing this in Summer is that when cut, figs weep a very caustic sap which will burn flesh quite severely. So before you cut, gear up with long sleeved jacket, proper shoes and socks a hat and preferably eye covering as well. The photos below show me dressed in my extreme winter gear ready to get cutting( I had to wear shorts it was so hot).
Cruella took these photos before she found out about SussexThis is my best severe weather gardening jacket
When you are cutting the fig, start from the bottom and work your way around the tree to the top. In this way you will not have caustic sap dripping on you as you work. The photos below show my working from the bottom and the caustic sap dripping from a cut branch.
Mind the sap
Finally don’t try and clear anything up for at least 24 hours, this will ensure that the sap will be completely dried both on the cuttings and the tree branches.
Don’t you dare touch this for at least 24 hours or off to A&E you will go
Succession planting with Petunias. A good gardener will have a succession plan for their garden to ensure that they have seasonal flowers nearly all year. Now I know that you are all good gardeners and you wouldn’t consider just going out every weekend and buying more plants from garden centres!
My final part of succession planting for this year is Petunias. These go into the spaces left by early bulbs and various Irises. A packet of Petunia seeds will provide you with hundreds of plants for just a few Euros. The photos below show the various stages of my little Petunias as they make their way to the planting beds.
Planting seedsPricking outLovely little rootsGrowing onAcclimatising but safe from the Blackbirds
With all succession planting the key is to reinvigorate and prepare the soil between each round of plantings. In this case it means lightly digging over the soil with a trowel, removing spent bulb stalks and them most importantly replenishing the soil with a layer of fresh compost from your compost bin. The photos below show this process.
Lovely free compost
Finally it is time to plant out the new seedlings. Remember you can only plant now with plants that you have grown from seed and fully acclimatised; plants bought from garden centres and planted now will usually die. The photos show some of the many seedlings I planted followed by a photo of the first flowers.
They will flower all the way through till October as long as you take off spent flowers by plucking not cutting
Goodbye to the mini greenhouse till next year. With just my cheap little mini greenhouse and packets of seeds I have managed to keep my garden in flower all year. It is now time to put the little greenhouse away together with all my seed trays. Remember you could easily do this starting from next January. You would not only save money, you would have the joy of nurturing your own plants from seeds to planting and see the wonders of God at close hand.
The roof has caved in, but I might just get another year out of itTreated carefully seed trays will last for years
The death of Sussex. I was just walking up the drive to deadhead some Marigolds, when I heard a squawking from under an Orange tree. I looked round and Sussex (the chicken) just keeled over and died. When I informed Cruella (my wife) she screamed “what have you done”. Despite all my protestations she insisted on gathering what she termed forensic evidence; she watches too much CSI type programmes.
Anyway, she swabbed the inside of my mouth with a cotton bud, took scrapings from under my nails and plucked a load of hair from my head. She has informed me that this is going off to the Lab and that I shouldn’t leave the country. She tried to get me to report to her every evening and surrender my Passport, but I refused.
So technically I am on the run. I mainly hide out in the shed and at night sleep in the compost bins. I only sneak out in the late evening to do a bit of deadheading or sometimes prune a few things back. She knows I am still here as she has placed police tape across all the gates to stop me getting away.
The photo below shows Sussex involved in a delegation lobbying me on some chicken rights issue.
The big winter cutback continues, and this post covers the main jobs you should be doing in your garden right now. Remember, don’t delay as growth will start in late February and you will have missed the window to prepare your garden for summer.
All is going well with my cutback and I have managed to find a use for the chickens in the garden; Cruella (my wife) is not impressed. Anyway, this is what I have been up to:
19th January. Things I have been doing lately:
Pruning figs safely
Pruning grapevines
Cutting back ornamental grasses
Pruning figs safely
Mulching with chickens
A well maintained fig tree is a joy: it not only looks good, but it provides you with hundreds of juicy figs. Unfortunately the majority of figs trees in gardens in Spain are large bulky behemoths that are far too big with fruit that is impossible to reach. Maintaining your fig tree is simple. If you have a young fig tree (less than 7 years old), then just prune to keep the tree trim and with an open centre. If however you have a large tree, or one that you want to keep manageable then I would recommend pruning to a “pollard”. When pollarding you take the tree right back to a few key branches then let it grow annually from these knuckles. Unfortunately you may lose fruit for the first year, but thereafter it will be much better.
I have two fig trees one that is pollarded and one that is espalied. The photos below show both trees when they are in full leaf. Click on each photo for a larger view.
The important point to remember when you are pruning figs is that they will weep a very caustic sap from their pruning wounds so you must not attempt to prune until January or February when the sap will have returned to the roots. Even then it is best to wear a long sleeve shirt, gloves and eye protectors.
The photos below show both of my figs with their leaves off and safe to prune.
The large free standing tree was pollarded a few years ago so all that I need to do is to take back this year’s growth to the knuckles. Using lopers, and secateurs I cut everything right back to knuckle, but be careful not to take it right back or you will breech the “collar” of the branch where the next growth comes from. Leave a centimetre or two.
The first photo below shows the structure of the knuckle, the second shows a knuckle pruned, and finally the tree cutback for another year and ready to burst into leaf in about a month.
Pruning the espalier tree is different. I want this to grow along the wall on the wires that I have trained it. So the main stem I have stopped growing and want no more upward growth. Neither do I want growth at the back against the wall, or any growth that goes to the right, as I am espaling to the left. In this case I trim all the side shoots back to the lead branches. The end result is shown in the photo below.
Pruning grapevines. Pruning grapevines is very similar to pruning espalied figs. You need to take all the side shoots away and take everything back to the main vine. I have three grapevines. One grows along the front of the house and is mainly ornamental as it gets mildew each year because of its position against the wall. The others grow along wires attached to balustrades and therefore have lots of air flow and ventilation. See photos below. Click on each photo for a larger view.
In each case I just move along the main stem taking out any side shoots and taking everything back to the one strong vine. The photos below show the vines pruned. You may be interested to note that I am using the large Euphorbia at the end to grow the vine through, hopefully this will be a nice feature in a couple of years.
Cutting back ornamental grasses. You have to be determined when cutting back ornamental grasses. You might think “well they don’t look too bad let’s leave it this year”. But if you are lenient then this years growth will soon fallback into a matted mess, that will not only look untidy, but will hinder this years new growth.
Cutting back grasses is simple, just use your hedge trimmer or shears to cut right back to a small mound shape. The photos below show one of my my grasses before and after its trim. Click on each photo for a larger view.
Shearing Lantana. Lantana are a perennial favourite in Spanish gardens. It is a reliable and hardy shrub that produces a continuous flow of lovely little flowers all summer. I prefer trailing Lantana and these do not need much pruning, but to keep them in shape you should shear around the outside to keep them neat. The first photos below show my main Lantanas ready for a trim, whilst the second shows them brought back into shape. Click on each photo for a larger view.
Mulching with chickens. If you have a compost bin, (and if not, why not?), then now is the time to start mulching your flower borders and under trees with your compost. If you don’t have your own compost then buy some from a garden centre. The benefits of mulching is that you replenish the micro organisms in your soil and generally enrich and enhance your growing medium. The photo below shows my composting area with a full bin and one in the process of being emptied.
This is a gardening gold mine
Normally I spread mulch under all my fruit trees, only to see the bloody chickens kick it all over the place. This year I had a great idea, instead of spreading the mulch I left it piled around the tree trunks and just as I hoped the chickens then spread it for me. The photos below show the chickens in action. Click on each photo for a larger view.
When I rushed in to tell Cruella (my wife) about my great idea, she said “you are exploiting my girls” and demanded reparations for slavery. I explained that they were enjoying it. Despite my explanation she stormed off furiously and called all the chickens together. Since then she has given all the chickens what she calls “slave names” and keeps muttering about the underground railway and heading north. As if all this wasn’t bad enough they have started chanting in chickenese what sounds like work songs. So far I can make out “Go Down Moses” and “Nobody Knows the Troubles I’ve Seen”.
Anyway the upshot of all this is that she demands I pay them a living wage. I agreed that they should benefit from their labour and promptly produced a plate of maggots from the compost. Cruella ran away screaming, but the chickens seemed pleased, if a little perplexed.
Now that we are into autumn and most flowering plants have died back and everything else is looking scraggly and scruffy, don’t be tempted to start cutting back. The recent much needed rain and the very warm autumn have meant that everything is having one last little burst of life.
If you cutback now you will stop all of God’s goodness being drawn back into the roots, bulbs, corms and rhizomes of your various plants. Your plants strength and growth next summer all depends on it drawing every last bit of goodness from its sap and leaves etc down into itself. Cut now and your plants will not fulfill their full, potential next year.
Instead of cutting back spend your time wandering round your garden tidying everything up and planning for next year. I have been happily pottering round the garden as Cruella (my wife) has flown off to support the British Farmers (Chicken Section) more of this later. But here is some of the stuff I have been doing.
25th November 2024. Things I have been doing lately:
Continue to clear up leaves
Remove suckers from your citrus trees
Trim standards
Tie back Canna and any other floppy plants
Get ready to cut yucca
Finish your lawn tasks
Cruella has left me for the farmers
Continue to clear up leaves. I know it sounds obvious and I keep telling you to do it, but it is important. If you leave leaves and let them settle in the gravelled areas of your garden, then they break down and present a perfect mulch for pernicious weeds. Don’t say I didn’t warn you! The photos below show my regular clean up efforts. Click on each photo for a larger view.
Remove suckers from your citrus trees. Nearly all of you have citrus trees, and people constantly ask me how to improve their crop. The best ways are correct pruning – but I will discuss that in the Spring, the next best way is to feed regularly during the blossom season, and last but not least remove all suckers on a regular basis. Suckers are those little bright green stems you find poking out of the trunk of your citrus trees, especially at this time of year. Suckers will divert your trees growth potential away from the main trunk and thereby weaken your tree.
You need to remove these by simply pulling straight down on the sucker stem as close to the trunk of your tree as possible. They will come away easily, but if you are not careful others will pop up, so you need to look at your trees weekly. The photos below show you examples of suckers on my trees and how to get rid of them. Click on each photo for a larger view.
Trim standards. If you have standards, then now is the time to give them the last trim of the year. The overall aim is to leave them in their basic shape so that they suddenly don’t get away from you next Spring. The photos below show my standards before and after their last trim. Click on each photo for a larger view.
Just a light trim nothing drastic.
Tie back Canna and any other floppy plants. It hasn’t been a good year for Cannas. The lack of early rain meant that their rhizomes (ugly bulbs) did not swell or develop new growth nodes. Most of my Cannas have been quite weedy and stunted. Just because your Cannas look all floppy and unsightly, don’t cut them back.
Instead you need to roughly tie them up and keep them in place until they have fully withered and gone completely brown. This will allow the last bits of goodness to be extracted down into the rhizomes ready for a better effort next year. The photos below show my Cannas tied up and ready for the chop, probably in January. Notice the lurking chickens, they have been tasked with spying on me. Click on each photo for a larger view.
They will get messy and embarrassing, but hang on in there no cutting till January.
Get ready to cut yucca. Everyone in Spain has Yucca, and sometimes they let them get so out of hand that they begin to resemble a large tree. Yucca are a good addition to any Spanish garden as they give shape, structure and sometimes drama. But if you want to get the best out of your yucca then you need to keep it appropriately proportioned to your garden, and a size where the flower spikes are not 20ft in the air where nobody can see them.
Don’t cut your Yucca yet, just think about it. What I mean by this is, it is a good idea to wander round envisioning what you want your yucca to look like. If you just cut before planning you will undoubtedly live to regret it. Yucca can sometimes be quite slow growing so you will have to live with your mistake for about a year.
I will be cutting my Yucca over the Christmas holiday when I can press gang my idiot son to help me. But as a preview the photos below show the yuccas I am currently thinking about. Click on each photo for a larger view.
These will be cut back at various levels to give added interest.
Finish your lawn tasks. I know not many of you have lawns. And yes, I know I am stupid having a lawn in Spain. But I can’t help it, it’s a man thing. My lawn suffered terrible depredations in our long summer drought and was reduced to desert. I even thought about abandoning a lawn all together and had begun designing other options.
However, the lawn has stayed, I top dressed the whole thing, fed it copiously and selectively weeded it. It is not perfect, I still have one largish bare patch, but I will do some more work in the spring, but at least I now don’t cry myself to sleep at night. The photos below show the current condition of the lawn. Click on each photo for a larger view.
My bald patch, it matches the one on my head.
Cruella has left me for the farmers. Last week Cruella (my wife) suprised me by suddenly announcing “the farmers need me, I have to go back”, normally I don’t really listen to what she says so at first I thought she said “Fur-murs”. I was wracking my brain for what a furry Mur would look like and why it would need Cruella, when she noticed my blank look of incomprehension.
Mistaking my look for concern – when really my heart was singing at my planned hours of undisturbed gardening – she said “farmers you idiot”, but don’t worry, I have asked the girls to keep an eye on you. Instantly my heart sank because I knew that what she really meant was “don’t try anything because the chickens will be watching you”. It is a little known fact that the East German Stasi used chickens to spy on their population.
Anyway, the upshot is that Cruella (my wife) flew off the other day dressed in a full chicken suit to take part in the national farmers demonstration in the UK. She assures me that she will be leading the Chicken Section on the protest march. She carried with her a load of placards that she and her girls had made with lots of protest slogans including:
“Our lives aren’t cheep
“Fowl play must end”
“We egg-spect better”
In the meantime I have been left with the chickens. They follow me everywhere, watch everything I do, and I think they have bugged the house. Even when I stop for a cup of tea, they silently sit and watch. To be honest I am finding it a bit unnerving. The photo below shows the problem.
If you look carefully their eyes glow red, and I am sure they have an antenna hidden in the Dame de Noche
Well it’s that time of the year again when we begin the slow process of winding down the garden for the year. However, just because the flowers have stopped coming and most of the fruit is now in, don’t think you can let up, there is still so much to do.
I am still working on my lawn , but as yet, it is not fit to be seen in public, maybe in the Spring. In the meantime I still have major chicken problems mainly involving digging, scratching and intimidating me by staring. But things have taken a strange turn as Cruella (my wife) has started holding chickens for Trump rallies! Ah well, more later, let’s get on with the gardening.
18th October 2024. Things I have been doing lately:
Harvesting the last of the summer fruits.
Autumn planting
Don’t forget these autumn jobs
Cruella holds chickens for Trump rallies
Harvesting the last of the summer fruits. Most of the summer fruits have gone now and we await the citrus fruits from December. But here in the Costa Blanca there is still a few fruits we can harvest:
Loofahs. I only grow loofahs for their cosmetic purposes. Once harvested and prepared they can be used as a skin defoliant whilst showering. Normally I make a small fortune this time of year selling loofahs to Cruella’s coven. They highly prize them for their ability to remove warts from their noses. However, the crop of loofahs this year has been terrible. The photo below shows my paltry crop ready for harvesting. Click on each photo for a larger view.
They had too much sunWatered every day and fertilised once per week and this is my reward
Neverthless, don’t let this put you off, loofahs are a lovely crop with lots of little yellow flowers and usually a crop of up to 10 loofahs per plant. Loofahs are simple to process.
When the pods are completely brown, dry and wrinkled (Cruella just looked over my shoulder and asked if I was writing about her); shake each pod and you should hear the seeds rattling inside. If so they are ready to harvest.
Using your secateurs cut off each pod leaving about 1 inch of stem attached.
Holding the pod upright, use your thumb to press against the stem and the top will pop off Leaving a neat hole at the top of the pod.
Turn the pod over and pour the many seeds into the palm of your hand. This is next years crop.
Once the seeds have been successfully harvested take the pod in both hands and gently crush it. This will cause the skin to crack and break open. You then just need to peel the skin away to reveal your lovely loofah. Store this in a drawer and each one can be used for about three months in your bathroom as a skin defoliant.
Lastly store all your seeds in a paper envelope and keep ina dark place till next year.
The photos below show this process in action. Click on each photo for a larger view.
Persimmons. Persimmons are a lovely juicy sweet fruit about the size of an apple normally, but this year, the size of a tomato. The birds love this fruit so you have to net and pick the crop daily. Luckily persimmon is one of those fruits that happily continue ripening after picking.
All you need to do is beat the birds to them every day, then just wash them and place them in the fridge. Use them daily, either eat them on their own or add them to your breakfast cereal, either way they are lovely.
The photos below show my persimmons happily washed and then nestling in my fridge ready for use. Spookily if you look carefully at the fridge photo you can see the face of Donald Trump smiling up at you. This is because Cruella (my wife) has purchased lots of Donald Trump chocolate bars which she uses in her “chickens for Trump rallies”. Click on each photo for a larger view.
Pomegranate. Pomegranates are really the last of my summer crops and I don’t really get many of them. In Spain, pomegranates are the most valued summer cash crop. Over the years I have tried many a routine aimed at retrieving the seeds to eat, but by far the best way is as follows:
Cut the pomegranate in half.
Hold the cut side down in the palm of your hand over a bowl.
Bash the round half of the fruit with a heavy wooden spoon
Let the seeds fall between your fingers into the bowl. Keep bashing till you have them all.
The photos below show my paltry crop and the process for retrieving the seeds. Click on each photo for a larger view.
Autumn planting. If you have taken some cuttings and you have grown them on, or if you have been to the garden centre and bought lots of plants, then now is the time to plant them out. The extreme heat of the summer has gone, but there is still plenty of warmth both in the air and the soil.
In the Costa Blanca we have a growth window between now and December when you can put plants in the ground or repot and you will still get some growth before everything more or less stops for the Winter. If possible try and stand your new plants in the area where you intend to plant them for at least a couple of days to see how they acclimatise.
My usual planting regime includes:
Watering thoroughly the new plants or cuttings the night before.
Digging the planting hole at least twice the size of the new plants roots.
Filling the planting hole with water and letting it drain.
Using Mycorrhizal fungi sprinkled on the roots (not essential but helpful).
Firming the new plant in with fresh compost and watering thoroughly.
The photos below show the planting process for some Swedish Ivy cuttings that I have been growing on for a couple of months. Click on each photo for a larger view.
Don’t forget these autumn jobs. In the rush to close your garden up for winter, don’t forget these two important jobs:
Feed all your plants in pots and maybe include a few of your favourites that are in the ground. By feeding them now you will be ensuring that they will still have some oomph (an old English gardening term) as they slowly subside into their period of non growth. In addition to feeding them add a little bit of Iron to each watering can just to stop them taking Chlorosis into the winter.
Lastly, don’t forget to take any nets off of tree or bushes you may have placed them on to save your fruit. Nets left on will definitely snare a few little birds as they search around for winter food. Photo aide memoir below. Click on each photo for a larger view.
Cruella holds chickens for Trump rallies. Cruella (my wife) has always been interested in politics, but usually she has stuck to British politics. Lately however, things have taken a strange turn and she has started following USA politics in general, and Donald Trump and the Republicans in particular.
This mania all started when someone told her that Donald Trump likes chickens. This knowledge made her determined that her and her girls would do all in their power to secure Trumps election to the Presidency. No matter what I tell her, she is convinced that she will have a vote in the elections and that when elected Mr Trump will support chicken emancipation and universal chicken suffrage.
I am only telling you all this because it is radically affecting my gardening. Every morning she holds a chickens for Trump rally and they march up and down the garden singing “Born in the USA” and “Eye of the Tiger”. This is followed by Cruella insisting that all the chickens drink out of her Trump mug. I consistently refused and stuck with my tea till she sent Helga to stop me by sitting on my teapot. The photos below show the latest idiocy. Click on each photo for a larger view.
The rally startsCruella toasting TrumpHelga joins inCruella made me send this photo to Trump for him to signHelga blockades my teapot
I have been away, I know I didn’t tell you, but I just slip away and creep back, it is best for the garden. If Cruella (my wife) knows I am away she takes down all my chicken defences and dances around the garden with her girls shouting about freedom and chicken rights. She told me she that she sees her self as a latter day Isadora Duncan whilst being an admirer of Just Stop Oil, chicken division.
When I crept back in after a week away she said “where have you been?”. I told her I had just been down by the compost bins and she nodded ok. She then casually informed me she was preparing for the Olympics; anyway, on with the gardening, more later.
29th June 2024. Things I have been doing lately:
Taking fig cuttings
Planting out loofahs
Trimming back to encourage new growth
Trumpet vine and the Blackbird
The chicken Olympics
Taking fig cuttings. By now your fig tree should be putting on leaf and fruit at a great pace. This means there will lots of lush green growth which is ideal for taking cuttings. If you fancy a new fig tree for free, or would like to donate one to a friend, then now is the time to take a few cuttings.
I must warn you that when taking fig cuttings at this time of year you have to be very careful of the white sap that will weep from the cut wound as this will be very caustic and can give you a nasty burn. But taking this into account and dressed accordingly in long sleeved T shirt and wearing gloves, all you need to do is select a lush non fruiting stem and cut just below a leaf node. See photo below.
Try and take a number of cuttings as this will give you a better chance of success. Once you have all your cuttings, take them back to your potting bench and remove all the leaves apart from a couple at the end of each stem. See photo below.
Once you have trimmed your cuttings up, leave them for a couple of hours in the shade so that the dripping sap can dry up. Once the sap has dried dip the end of each cutting into hormone rooting powder or liquid (this is not essential, but it helps). Plant each of the cuttings around the edge of a six inch pot, I usually plant four to a pot, but it is up to you. Finally place your potted cuttings in the shade on your potting bench and wait. Most will die, but hopefully some will sprout new leaves and give you a future fig tree. The first photo below shows the stems being dipped in rooting liquid, whilst the second shows the new cuttings in their new home ready to go into shade for a few weeks. Click on each photo for a larger view.
Planting out loofahs. Those of you who came to my open garden day were given some loofah seeds to plant, and hopefully you did? Loofahs are lovely plants, an annual that grows quickly as a climber, has lovely yellow flowers and as an end product you have a loofah to use in your shower as an exfoliant. What is not to like; Cruella’s Coven swears by my loofahs wart removing powers.
I planted some loofah seeds some time ago and it is now time to pot them on. The photo below shows my little seedlings ready for a new home.
The secret to success when potting on loofahs, is to recognise that they really don’t like their roots to be disturbed. I plant them two to a 9 inch pot, but before planting them I place each of the pots into the new pot and build compost around them, then I gently ease out the loofah beforecarefully slotting it into its newly prepared home. The first photo below shows them being prepared for their new pot, whilst the second shows the strong root growth after only a few weeks. Click on each photo for a larger view.
Finally a couple of photos of their quick growth. Each plant can grow up to 10 to 15ft and give you 8 or more fruits. Click on each photo for a larger view.
Trimming back to encourage new growth. By now most plants will have flowered and will happily go to seed if you let them. But if you want flushes of new flowers all summer, then don’t let them. Both perennials and annuals can benefit from deadheading and trimming.
I have been deadheading roses daily for the past couple of months, but as yet have not started on the Marigolds. But look for those perennials that flower in a flush. Don’t bother with secateurs for flowers that all come at once; instead get your shears out and give them a hair cut.
The photos below show some of the plants I have been shearing starting with one of the most unusual “spiral grass”. Click on each photo for a larger view.
If you have multi head sunflowers, then take off the individual heads as they die back. But don’t forget to let the final flower head go to seed for the birds.
One of my favourites is the lovely Fairy Fan Flower. It flowers all in one rush and after the bloom has gone off trim all the flowers and you will get a second flush. The photos below show the plant after its trim and the successful second flush just coming through. Click on each photo for a larger view.
Gaura is another of those plants that benefit from the complete flush of flowers being taken off. Gaura, like Lavender, does not like you cutting too deep into the wood so just take off the flowers and the first bit of green. The cutback Gaura shown below will soon give me another lovely flush of flower spikes. Click on each photo for a larger view.
Trumpet vine and the Blackbird. Each year I take seeds from my Trumpet Vines and carefully set them aside to grow them in the Spring. Every year to date the seeds have failed; mainly my fault. But this year I eventually managed to get eight through to the seedling stage. When I came to prick them out and pot them on, I bought the best compost, mixed it with Perlite and prepared 4 inch pots for each seedling . This painstaking process can be seen in the photos below. Click on each photo for a larger view.
Once I completed this task I wandered into the house to boast to Cruella about my success. I swear I was in the house no more than 5 minutes before I went back to the potting bench. As I turned the corner to the potting bench I caught a flash of black wing before my eyes fell on the devastation. A blackbird had dug up all my new seedlings and thrown them around.
Crying out with anguish I rushed back into the house to ask Cruella if she knew anything about this. That must be “Shadowstrike” she said, “I told him he could play in the garden”. The devastation left by the stupid bird can be seen in the photo below. To make matters worse he now follows me round the garden smirking.
The chicken Olympics. It appears that whilst I was away Cruella (my wife) became concerned that her girls appear to be getting fat. At first she blamed it on ultra processed foods and has written to the WHO complaining. Then she lighted on the fact that wonder drugs can stop obesity, and tried to order Wegovy and Ozempic. The vet refused to prescribe them as he said she just needs to cut back their food. She stormed out shouting that she would not put up with fat shaming and would be reporting him to Weight Watchers.
Anyway, the end result is that she has started to train the chickens for the Paris Olympics. She has already written to the IOCC (International Olympic Chicken Committee). I told her chickens are not allowed in the Olympics, but she just said I was stupid and should just stick to gardening.
Cruella has bought herself a whistle, megaphone and stop watch and the chickens are now trained every morning. They start with leg stretches, which I entitled the “drumstick roll. This is followed by running around the garden in circles whilst chanting improving slogans in Chickenese. Their coop is plastered with self improvement slogans such as
Be best chicken you can be
Cluck your best and the rest will follow
Feathers high, spirits higher
Every day is a chance to spread your wings
Beneath every feather beats a strong heart
Find your flock, lead with pride
The photos below show you some of their early morning training sessions. Click on each photo for a larger view.
Early morning runBertha taking a short cutLittle brown one is lastChicken licken posing for the podiumExhaustionThe podiumTango at the start of training Tango at the end of training
After two weeks of training and exhortation she asked me how I thought they looked. I said “they are still fat”. I’m sleeping in the shed with Tango the lonely blind Labrador and the big rat.
So this is it we have finally reached the end of the big winter cutback. It has taken about a month and I have left the worst till last. Regular readers of this blog will know that I always finish the cutback by tackling my large Ficus tree. I cut out the centre of this tree about 10 years ago to make a pleasing donut shape, but the tree has never forgiven me and takes every opportunity to do me harm. To be honest it comes second only to Cruella (my wife) in threatening my existence. I have fallen out of it, had branches fall on me, it has made me bleed, bashed and concussed me on numerous occasions.
And now you know why I leave this task to the very end. I have to work up my courage through extra physical exercises, primal scream therapy and I channel my inner Robert De Niro every time I look at the tree by shouting loudly “you looking at me…”. But it knows I am afraid despite all my braggadocio, I can see it smirk.
Anyway as if all that wasn’t bad enough Cruella (my wife) confronted me after my struggles with the tree and presented me with what she said was a writ, which she later said was a warrant. Anyway, whatever it was she just flashed this piece of paper in front of me and said it was official. But to be honest all I could see was some gobble-de-gook in her handwriting with a drawing of a chicken in the corner. Hey-ho more later, on with the gardening.
6th February 2004. Things I have been doing lately
Reshaping the little Weeping Fig. By way of warming up before the battle with the big Ficus, I decided to reshape my little weeping fig tree. Lots of people in Spain have these variegated weeping figs in their garden. They are lovely little trees that give colour and interest to even the smallest garden. However, because they are slow growing they can just sit there and be forgotten about.
To make them interesting you should consider cloud pruning them in to various shapes. Remembering that they are slow growing so don’t be too drastic and do it over a few years. The photo below shows the little fig with its trunk exposed (which I did a few years ago).
As it was time for its annual prune and I decided to prune back the lower growth with the eventual aim of having two pom poms of leaf with exposed trunk below and in the middle. The photo below shows the end result. I think it is quite fetching.
The battle with the big Ficus. The trouble with this annual battle is that I am getting older, smaller and weaker, whilst the tree is similarly getting older, but at the same time getting bigger and stronger. How long I can continue I don’t know, but I do know that if you show fear to rabid dogs or large trees then you are finished.
I always start this task the same way; I get Cruella (my wife) to take various picture of me posing in bravura poses in and around the tree. Then I assemble the various tools that I will need and leave them close to the tree to try and psyche it out. The photos below show the big tree in all its malevolence followed by my efforts at psyching it out. Click on each photo for a larger view.
I start the process by using my long reach electric trimmers to walk around the circumference of the tree gradually bringing the sides back into shape. The tree of course responds with ill will by continually dropping things onto my head and into my eyes. I keep my spirits up be singing hymns as I march round and round – onward Christian Soldiers is a favourite. The tree responds by moaning “the trees of the field”. The end of the first phase can be seen in the photos below. Click on each photo for a larger view.
The next, and most dangerous phase, involves climbing up into the tree, pruning the top flat and redefining the central donut. The photos below show me in the tree, this time I’m singing “nearer my God to thee”. The tree was singing “the fall of man how deep and great”. Click on each photo for a larger view.
The ascent of manI know you can’t see me but I am standing in the middle of the tree cutting away.
After it was all over my final act is to place the Cheshire Cat back into the centre of the tree.
The Cheshire Cat smiles for another year.
My appearance before the Tribunal. After all the highs and excitement of conquering the big tree for another year, you can only imagine my disappointment at being confronted by Cruella and her supposed writ/warrant. What it all came down to was that her chickens had complained that my activities in the big tree was making the sky fall in as things kept landing on their heads. To back this up she showed me the photos below as evidence. Click on each photo for a larger view.
When I complained that she had been reading her chickens the bedtime story of Chicken Licken which has exactly the same plot when the sky supposedly falls in on Henny Penny. She drew her self up to her full height thrust her hand out into my face and shouted loudly “always believe the chicken and not the hetro-normative establishment”.
Anyway she insisted there had to be a trial. Her jury consisted of the chickens. I was not allowed to call any witnesses in my own defence. When I tried to call big Bertha her biggest chicken as a witness on my behalf, there was a sudden cacophony of noise from all the chickens (in chickenese of course). Cruella then accused me of dead naming Bertha who now goes by the name Bert. As I looked across at Bertha I knew I had messed up as she was now sporting a waistcoat and smoking a pipe.
Well it was all down hill from there. Cruella called a whole range of witnesses including: Cocky-Locky, Ducky-Lucky, Goosey-Loosey and Turkey-Lurkey all of whom damned me in no uncertain terms. The end result is that I have been found guilty of a hate crime and sent into exile at our English house for a few weeks.
Who knew that gardening could be so Rock and Roll; I always thought Guns and Roses was a stupid name anyway. If you have roses and figs, then now is the time to get them pruned back. Add a little bit of grass for you old hippies and we are really rocking. To think that Cruella (my wife) thinks that gardening is boring. Without further ado, let’s get on with the big cutback .
17th January. Things I have been doing lately:
Pruning Roses. People sometimes make out that there is a lot of mystique about the timing and methods of pruning back roses. But roses are very hardy and can take quite a lot of rough handling. The photos below show some of my roses ready for their annual prune. Click on each photo for a larger view.
It is important to remember that climbing roses are pruned differently to bush roses. With climbing roses I recommend running hedge trimmers lightly up the length of the plant just removing excess side growth without cutting the upward stems. In this way you will maintain height but get rid of bulk. The photos below show my climbing roses before and after their trim. Click on each photo for a larger view.
Now if like me you have lots of roses (I have 30) then pruning can be quite a time consuming process, so I recommend that you do it in two linked stages. First, be brave and get out your hedge trimmer or shears and just prune back all your roses to the required height – I recommend taking off at least two thirds of the height.
Second, get on your knees and prune each individual plant as follows. With bush roses the simplest method is to prune back by about two thirds to the nearest outward facing bud joint. As part of this process take out any crossing or diseased stems to leave a nice open centre to the plant a bit like a wine glass. The photos below show my roses pruned. Click on each photo for a larger view.
The more perceptive amongst you will note that the final photograph shows that you can barely see the pruned rose from the leaf debris and grasses growing through. I am sorry to tell you that this is when it gets difficult and when the real hard work starts. Oh and unfortunately you will lose a lot of blood. Using a pointed trowel you need to get under each rose and remove all the leaf debris and dig out the weeds and grasses. The rose thorns will get you no matter how good your gardening gloves and you will bleed quite a lot.
This is the important part so please pay attention. Sepsis though rare affects a number of gardeners each year. If you cut yourself – and you will – then it is important that at the end of your pruning blood bath you wash your hands and then bathe your cuts with an alcohol solution to ward off infection. The photos below show my lovely rose beds all restored and ready for this year’s growth. The final photo shows the all important alcohol to sterilise your many cuts. Click on each photo for a larger view.
Pruning fig trees. Most fig trees in Spain are allowed to grow into giant behemoths sprawling over gardens like something conjured up by Gandalf. Their fruit is often too high to harvest and they shade out other plants nearby. I have two fig trees: an espalier and a free standing tree. As a lover of figs both of my trees are cosseted. They are fed, netted and pruned at exactly the correct time, and in return they provide me with abundant fruit. My trees are shown below in their unpruned state. Click on each photo for a larger view.
You should only prune figs when you are sure the sap has returned to the roots as figs have a caustic sap which can inflict quite severe burns if you foolishly cut any branches during the growing season. There are many ways to prune figs, but whatever your chosen method there are two key elements.First, ensure that you have trained your tree so that you can easily reach the fruit at the height of the growing season. Second, prune to achieve an open aspect at the centre of the tree to let in maximum light and air.
The pruning method I have chosen for my free standing tree is to pollard it back to six main branches each of which have numerous stems during the growing season. For the espalier fig, I just remove perpendicular side shoots to encourage lateral growth along wires. The photos below show you both trees after their prune. Click on each photo for a larger view.
If you want to propagate your trees either to have more, or to give to friends, then this is the ideal time. Many of the branches you have pruned off will have buds just waiting to spring into growth. Choose some of the best of these; I always look for healthy strong branches with multiple buds at the end. Cut them back to about 30cm just below a growth node then dip the ends into growth rooting hormone (don’t worry if you don’t have this it probably will still work). Pot them up in free draining compost and leave them in the winter sun. With a bit of luck you will have some new trees in the late springtime.
The first photo below shows my choice of potential cuttings. This is followed by an indication of where to cut. Then the process of dipping into hormone rooting liquid. My free draining mixture one part compost to four parts soil is shown as an action photo of a trug. Finally my little cuttings ready to get going. Click on each photo for a larger view.
Cutting back Fountain grass. I have one large Fountain grass which unfortunately had died in the middle as most grasses will do over time. I split it just over a year ago and replanted 3 into my own garden and gave some to my friend Camilla who is making a new wonderful garden. Anyway, now is the time to cut back grasses. The simplest way to cut back grasses is just to use your hedge trimmers to gently trim around the plant to make a small mound shape. Do not be tempted to square the grass off (as Ayuntamientos have a habit of doing) this guarantees a short life before the centre dies back. By creating a mound you maximise the light and air to the plant.
The photos below show my little transplants before their cut back and finally how it should look after cutting. Each mound will get bigger each year until eventually the splitting process takes place again. Click on each photo for a larger view.
Yes, it is that time of year when we gardeners have to get out there and cut everything back. Failure to take action now will mean that your garden will not fulfil its potential this Summer. Over the next few weeks I will be pruning, cutting back and generally getting my garden into shape for the coming summer. I will be working with the types of plants you have in your Spanish gardens, so just follow what I do over the next few posts and we can guarantee a lovely garden this summer.
Unlike most of you I have certain hindrances whilst doing my garden, namely: Cruella (my wife), her brood of chickens from hell, and as a special treat the idiot son has come home for a holiday and Cruella has declared him a chicken whisperer. Anyway, let’s get on with the gardening.
10th January 2024. Things I have been doing lately:
Over the next few posts I will keep you up to date with the big winter cutback, but this particular post will cover the following:
Pollarding Peruvian False Pepper trees
Pruning Sago Palms
Cutting back Dame de Noche
Pruning climbers
Dealing with the chicken whisperer
Pollarding Peruvian False Pepper trees: This tree can be found in many Spanish gardens. Its weeping willow type foliage and lovely little red peppercorn fruits provide an attractive tree that can grow up to 15 metres tall. However, too often the false pepper is allowed to grow into a huge behemoth that whips around in the wind and covers you terraces in discarded foliage and blocks your swimming pool skimmers. The photo below shows my tree before pollarding.
Left to grow this tree canopy would double in size over the next few years.
The secret to keeping the false pepper as a useful part of your garden landscape is to ensure that you pollard it every 5 years or so. Pollarding involves radically pruning back the main branches which reshapes the tree and encourages secondary growth that will stay manageable for a few years. When pollarding you need to use a chain saw or bow saw to cut each of the main branches about 6 inches from the base of the branch. By keeping the correct distance from the base of the branch you will not damage the branch “collar” which contains the growth instructions for the branch.
Luckily the idiot son was visiting so I persuaded him to help me pollard the tree. I had to promise him copious quantities of beer and Cruella insisted that I held the bottom of the ladder at all times. The photos below show the idiot in action with the final photo showing the finished pollard. Click on each photo for a larger view.
I wanted him to use the chain saw but Cruella wouldn’t let himThe final pollard will last at least five years
Pruning Sago Palms: The slow growing sago palm is another perrenial favourite in most Spanish gardens. These can be majestic if pruned correctly, but if just left to their own devices, they are just another green lump in your garden. There are two schools of thought on pruning sago palms. The first says that you must leave the fading yellowing fronds on the plant as they provide nutrients. The other says keep it pruned and tidy and if necessary give it a feed. I support the latter process and always prune mine back to two rows of fronds from the top. Two rows is important as if you left just one row and then these became diseased then you could lose the plant. I have two main sago palms; one is in the ground and the other in a pot. Both are shown below. Click on each photo for a larger view.
From the photos above you can see that both are due a trim. Using long handled lopers I gradually move round the trunks taking off rows of fronds until I am left with just two rows on each stem. The photos below show my handiwork.
The final stage in pruning the sago palm is to remove any pups it has thrown from the base of its trunk. These look like mini sago palms that are emerging, and you can pot these up, but that is for another days post. Today we just need to take them off to tidy up the plant. The first photo below indicates the pups circled in red. You just need to remove these with your secateurs or lopers and then the plant is left nice and tidy for the summer.
Cutting back Dame de Noche. The lady of the night which is a night scented Jasmine needs to have its final cut back now if you are to enjoy its lovely scent in the summer. You should have already cut the plant back by a third after its first flowering to allow a second flush of flowers. This final cutback can be quite drastic to encourage a healthy shapely growth. Depending on the age of your plant you can take it back to 6 inches.
The first two photos below show my dame de Noche looking straggly and ready for its cutback. Notice that I have planted my dame de Noche close to our outside seating and eating area so that we can benefit from the beautiful night scent. Click on each photo for a larger view.
The next photos show the plant cutback and ready for its final pruning. To finish the prune use your secateurs to open up the centre of the plant to take out crossing stems and let light and air in.
The final prune leaves the centre of the plant open
Pruning climbers: The trick with pruning climbers is that you do not want to lose height but you do want to reduce bulk so that you can let light into the plant. So in effect what you need to do is remove side shoots. The simplest way to do this is to run your electric hedge trimmers up the front of the plant aiming to stay away from the upward growth. Lacking hedge trimmers just use garden shears to achieve the same effect.
So far I have cut back the Solanum that grows up the side of my outside kitchen and dining area and also my column of plants that I trained up a palm trunk. The photos below show that all that is needed is to just take away bulk and bring back shape. Click on each photo for a larger view.
BeforeAfter
Finally, don’t be tempted to feed or overwater the plants you have pruned. Wait a couple of months till you see new leaf growth and then give a light feed.
Dealing with the chicken whisperer. Whilst I have been dealing with the start of the big Winter cutback, Cruella (my wife) has been training the idiot son in the art of chicken whispering. She is trying to convince him to leave the world of Finance and become her rightful heir, or as she calls him “Prince of Chickens”. So far he is holding out, but she is making him follow a strict curriculum of chicken studies. This includes lessons in Chickenese every morning followed by hands on work with the chickens in the afternoon. Early evening is spent in the so called art of chicken whispering. The later evening is spent in the rites and mysteries of putting the chickens to bed, but I can’t tell you anything about this as I am not allowed to see what goes on.
The photos below give you an idea of what they get up to, I did have some others but Cruella made me delete them! I am only allowed to show you these ones as Cruella is using them in his graduation album. Click on each photo for a larger view.


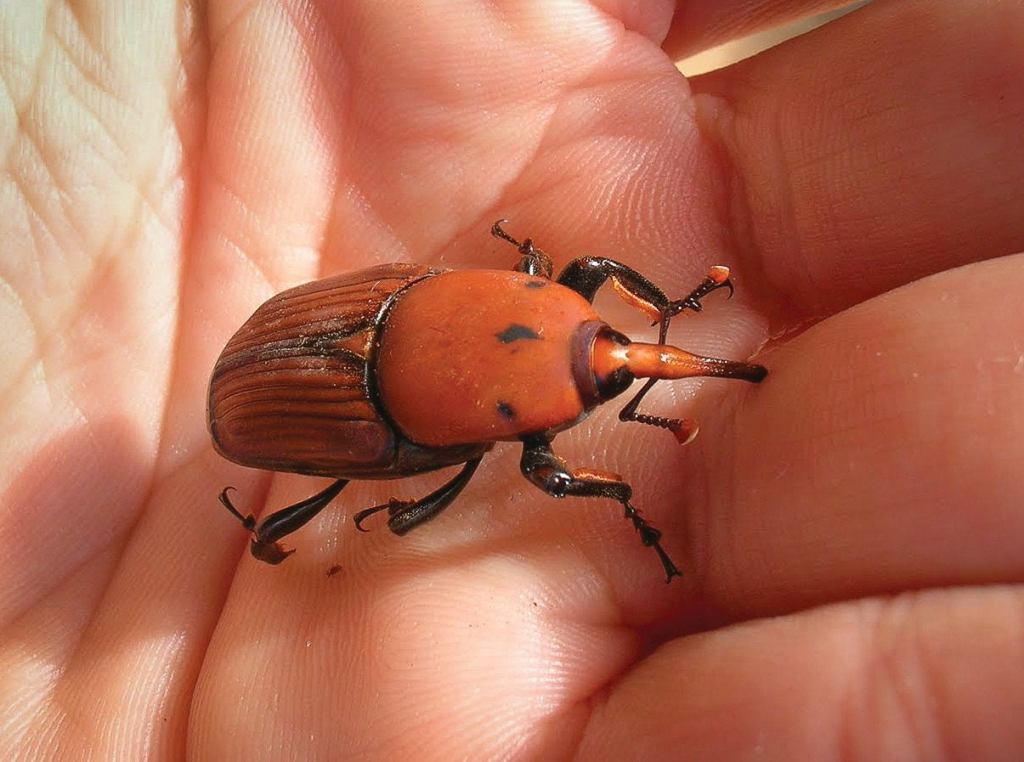
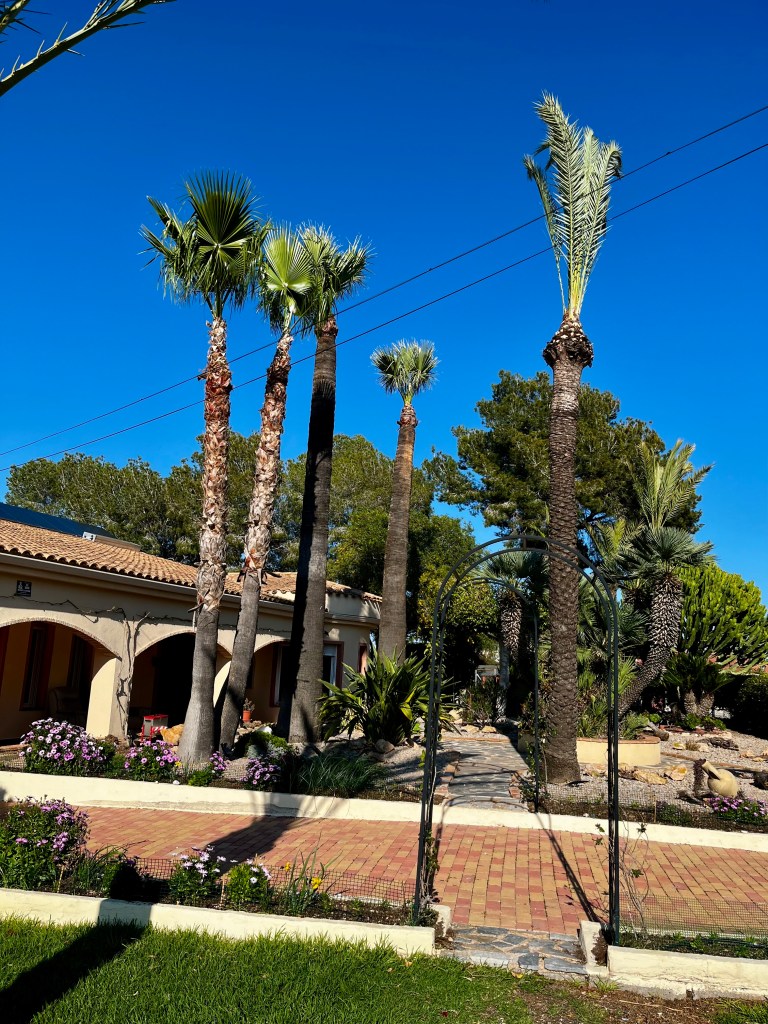
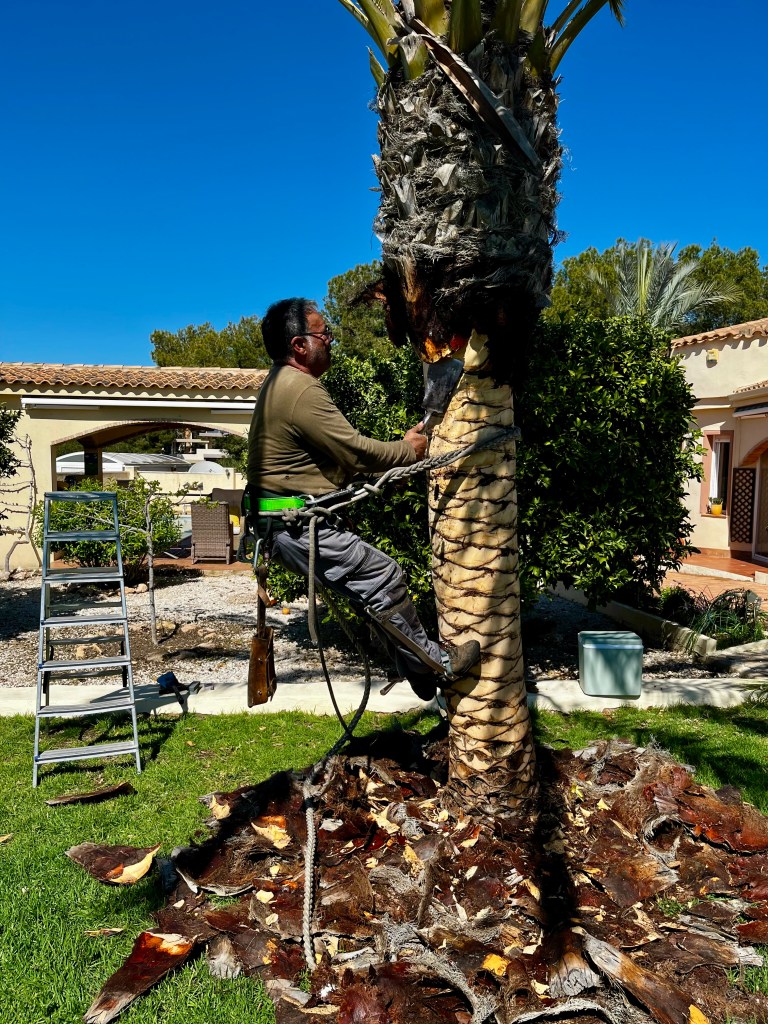
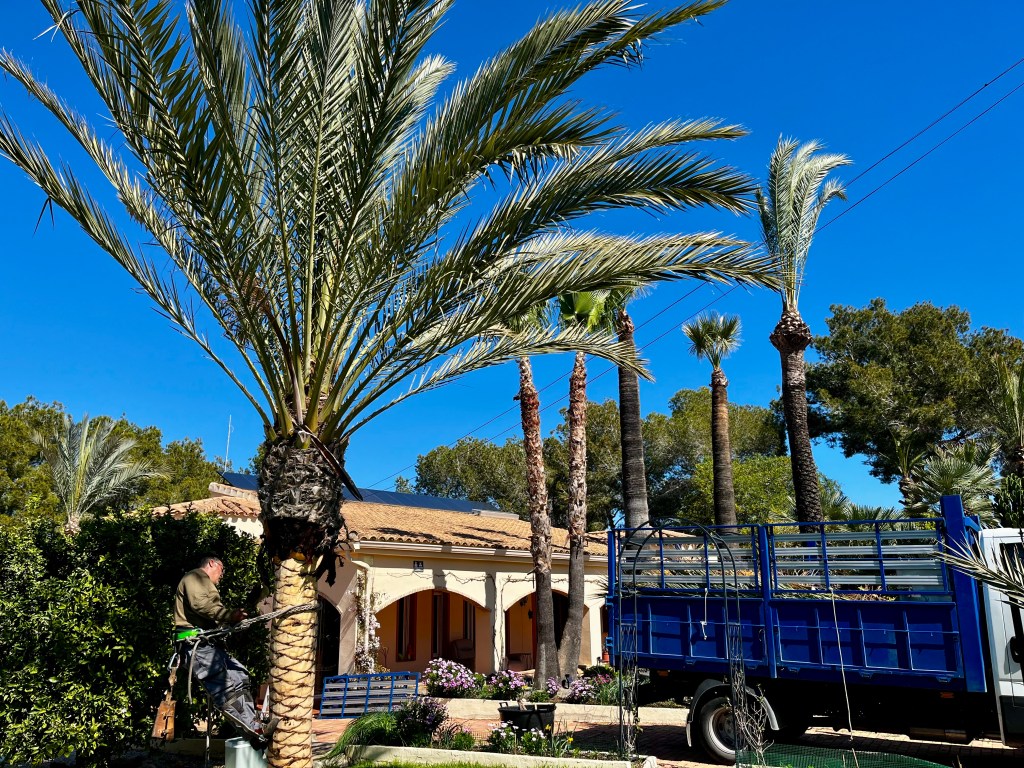
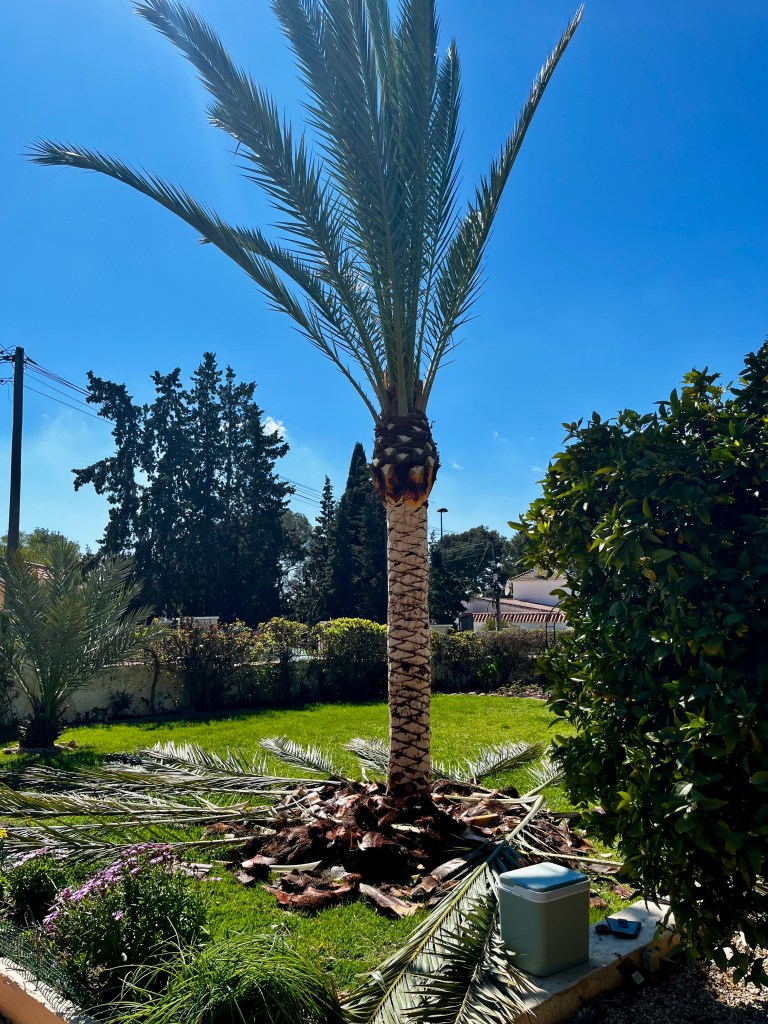
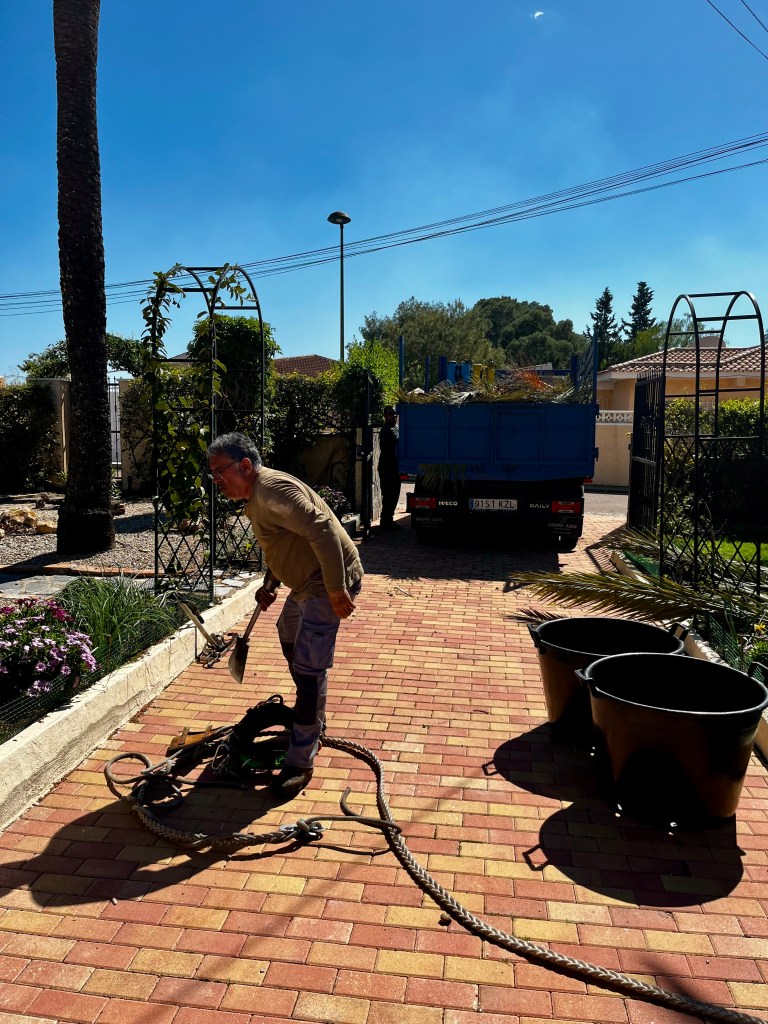
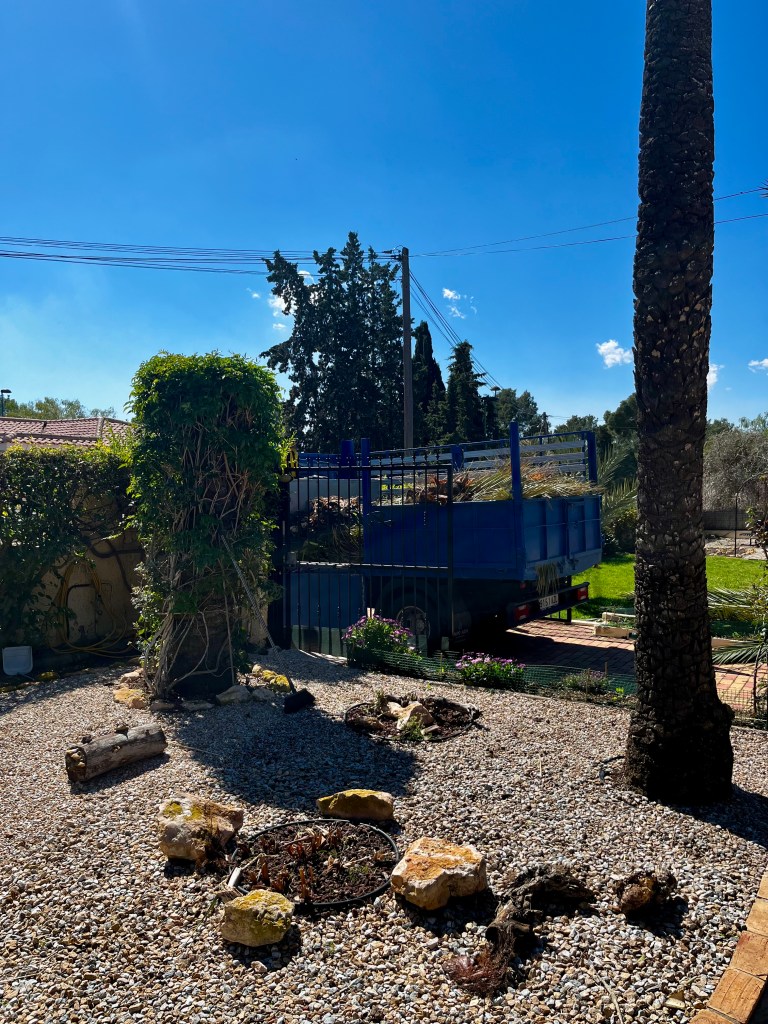

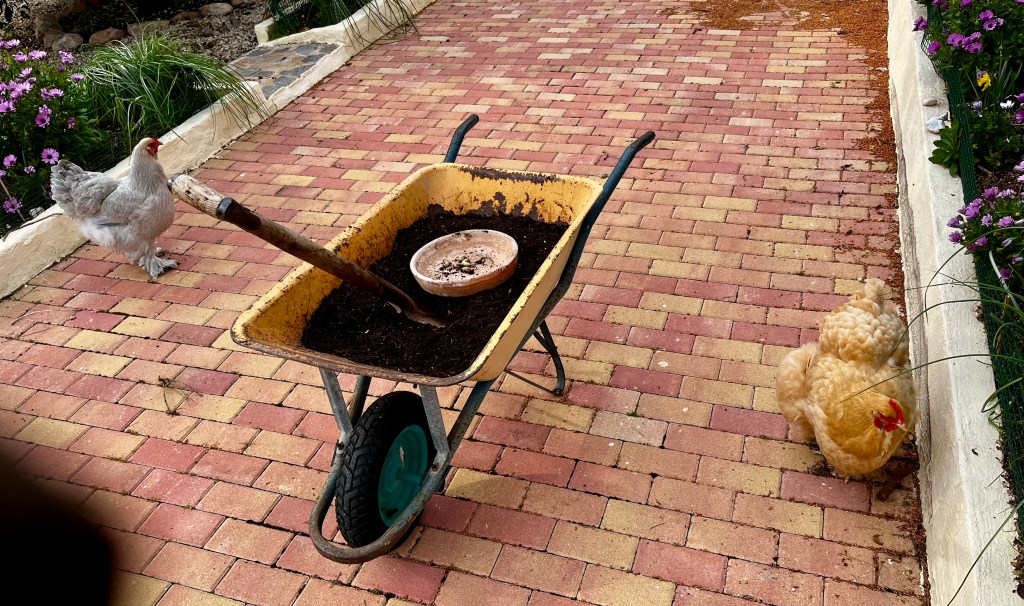
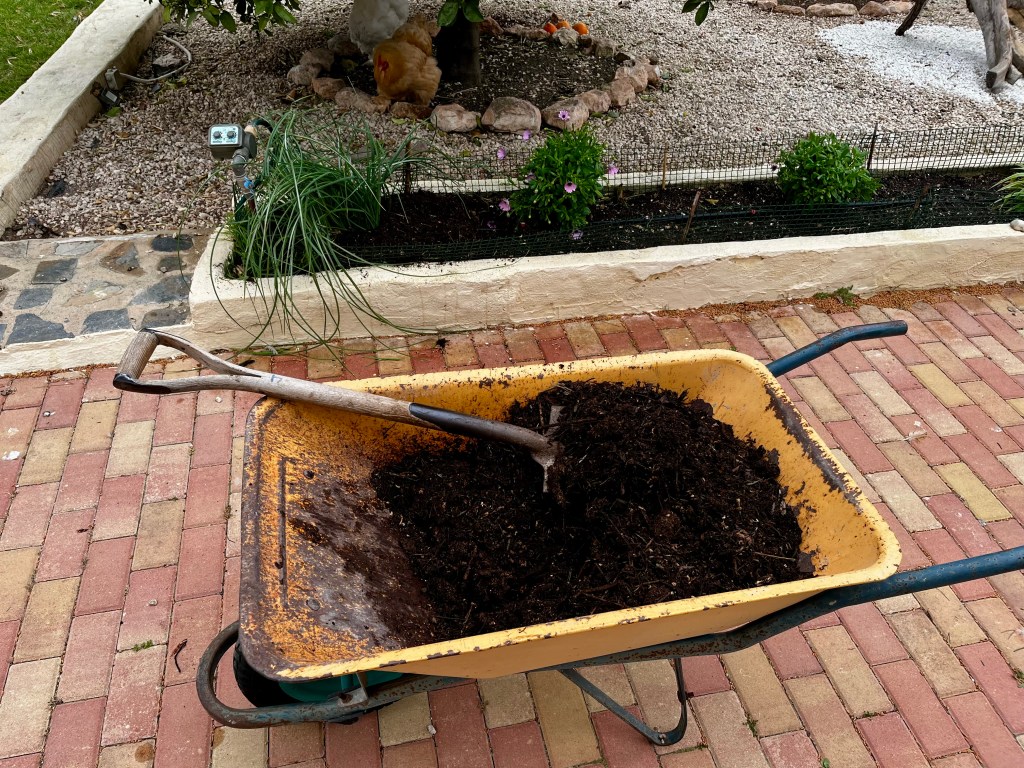
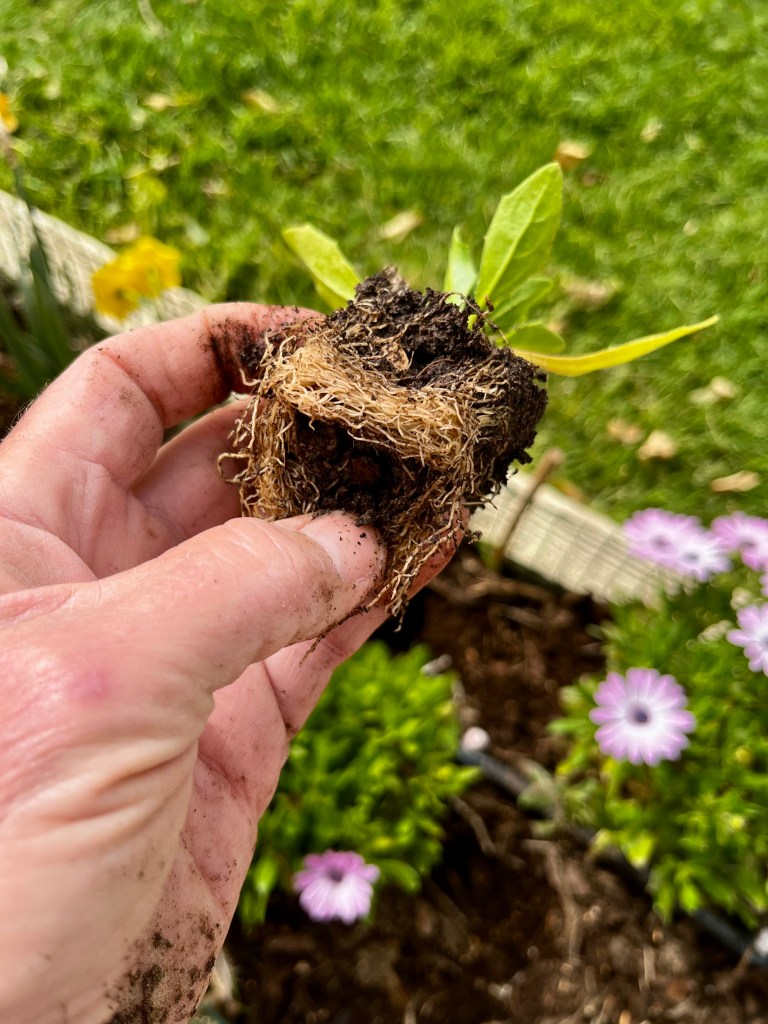
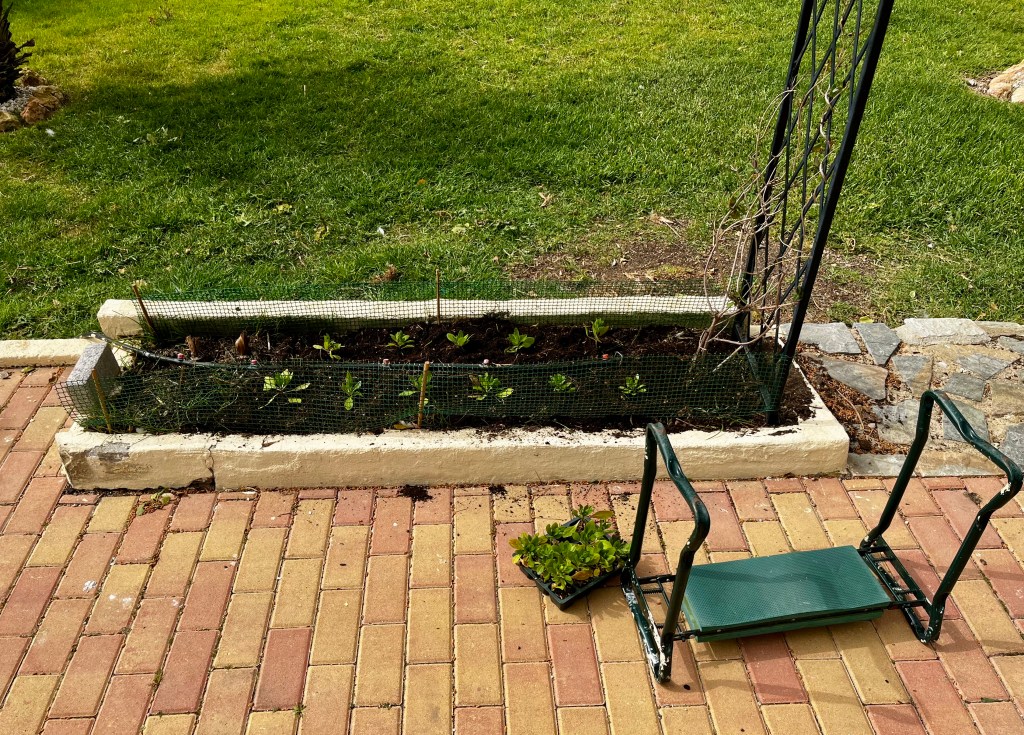
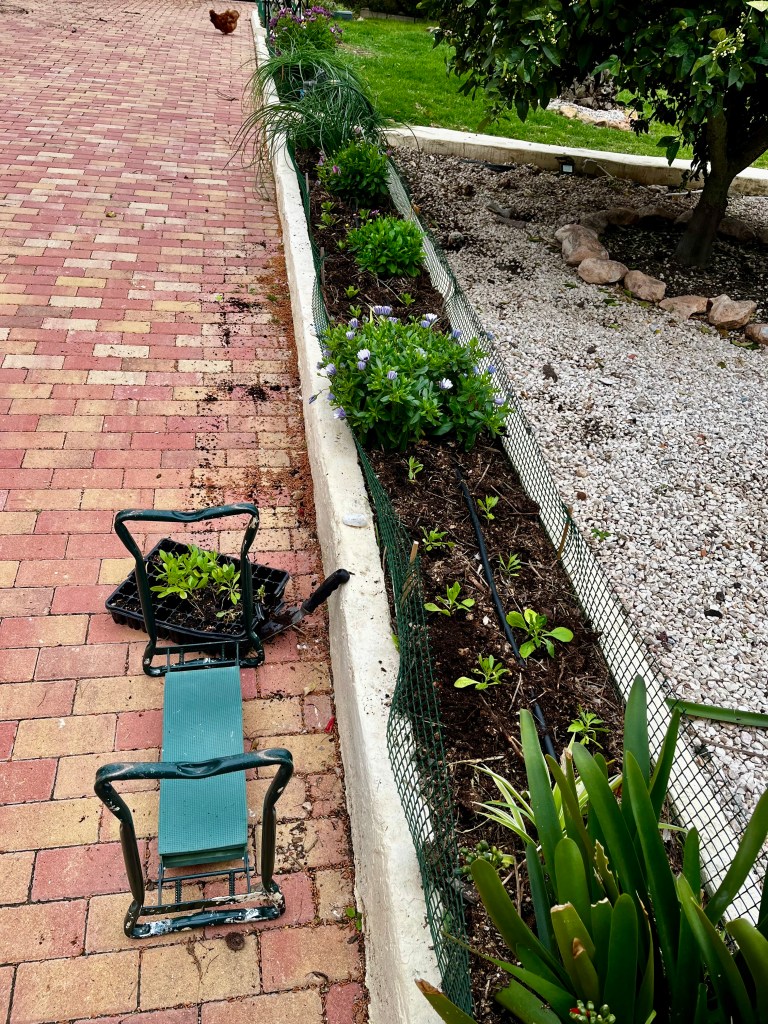
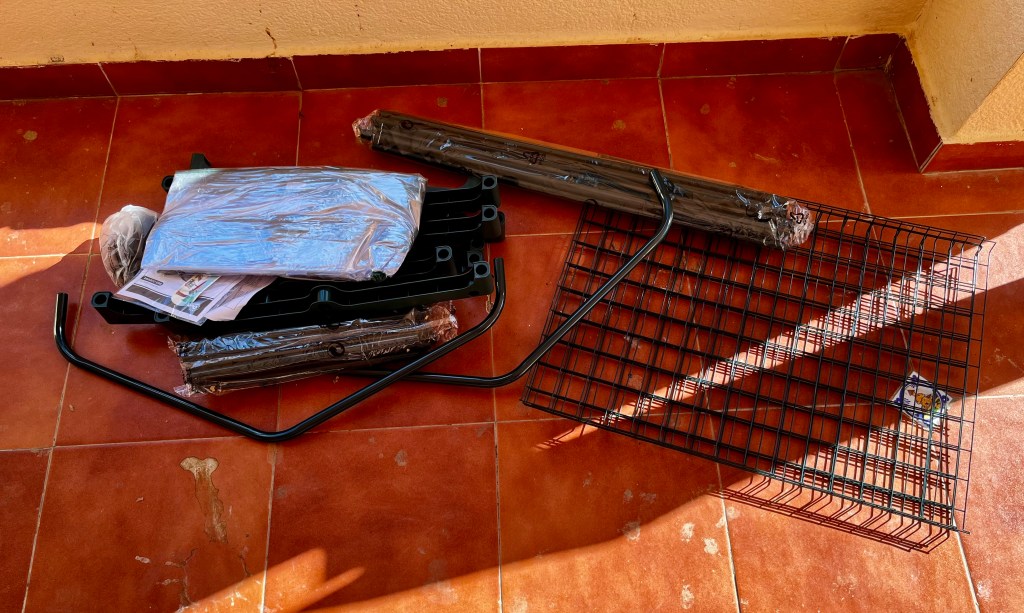
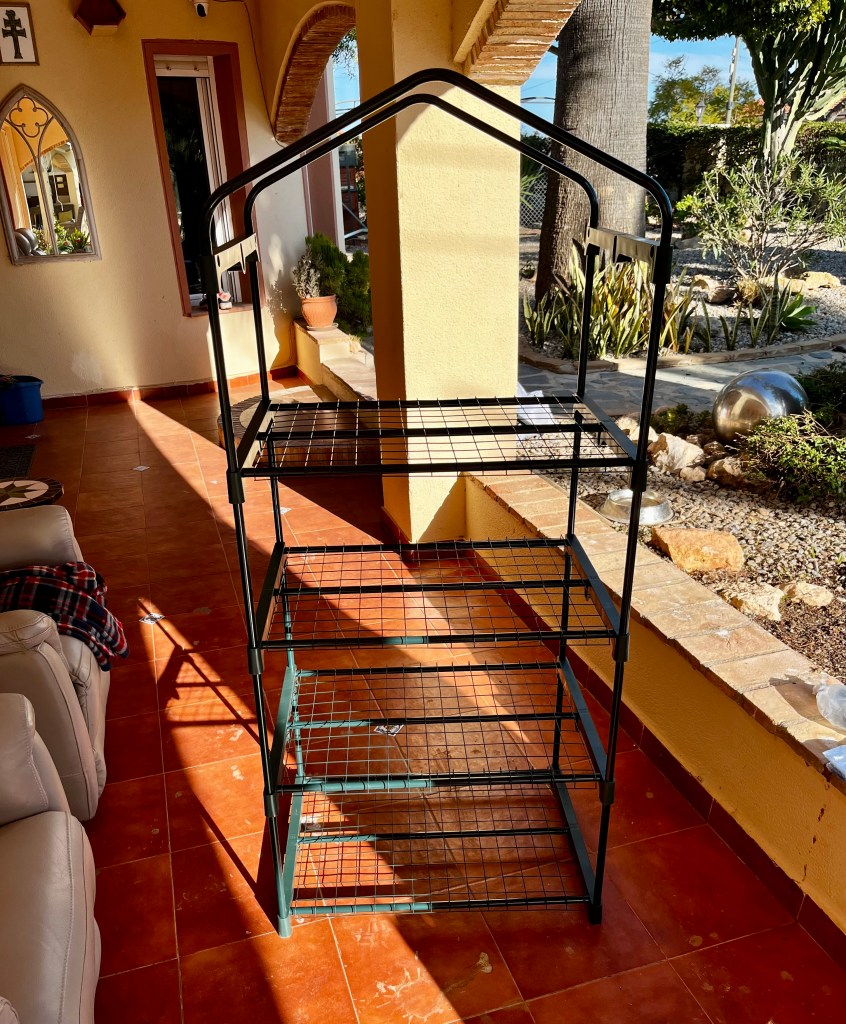
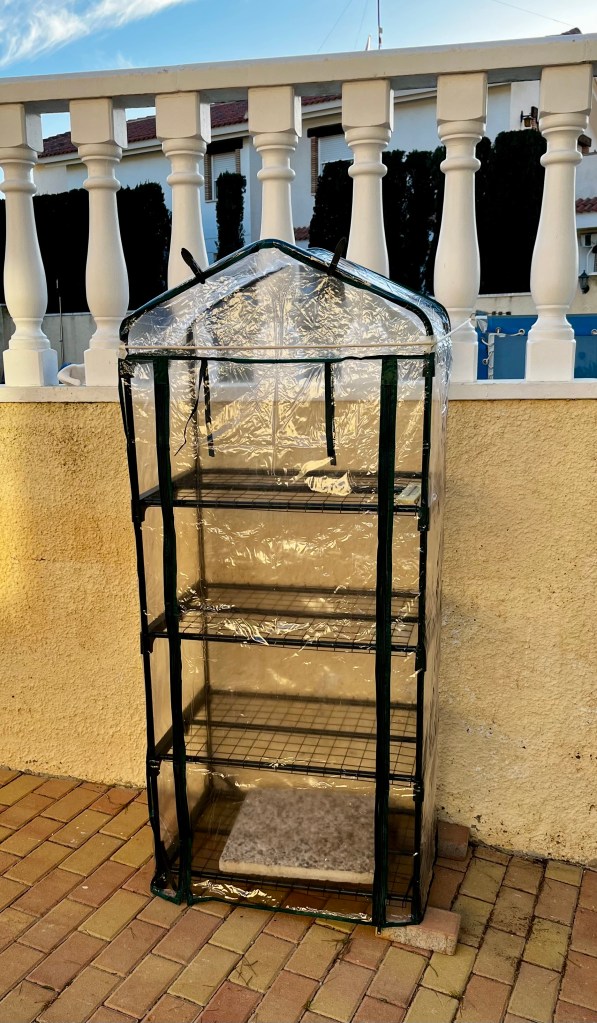
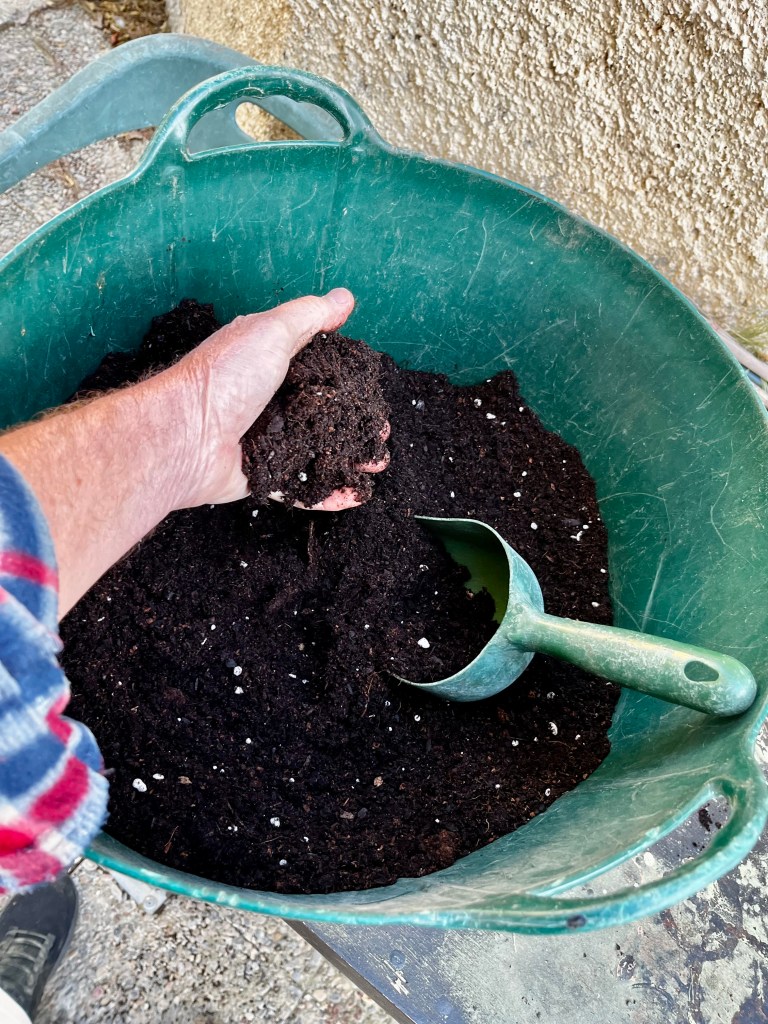
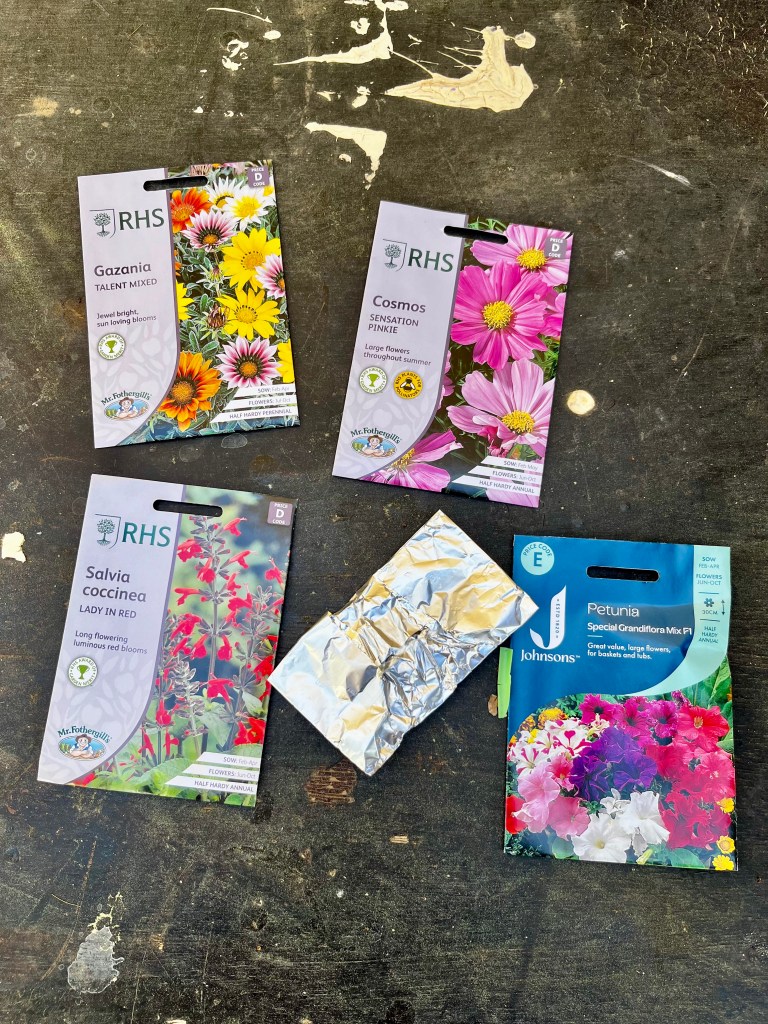
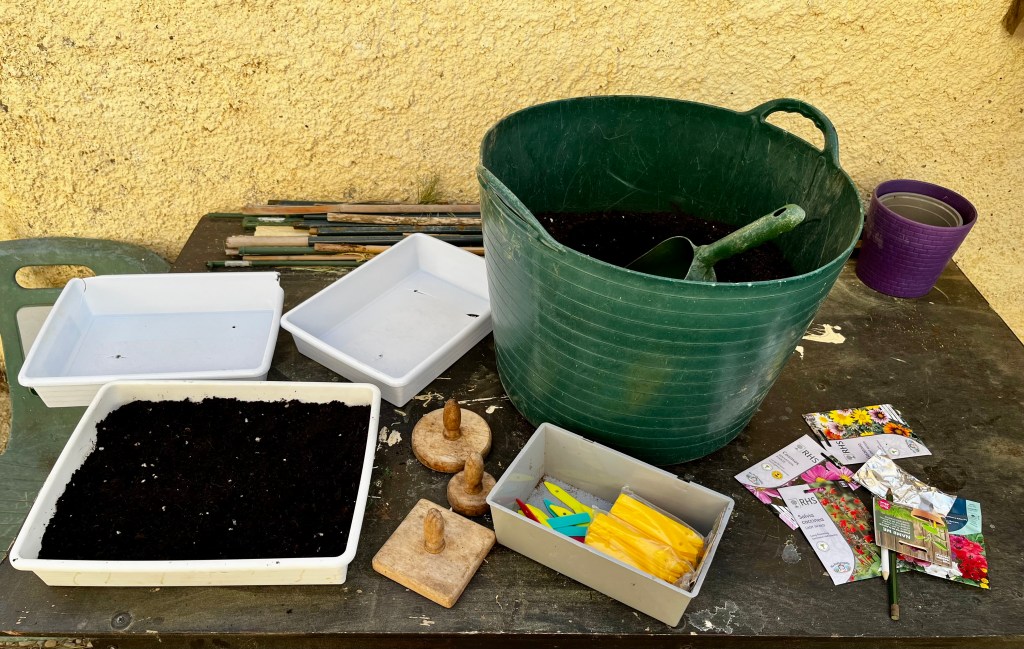
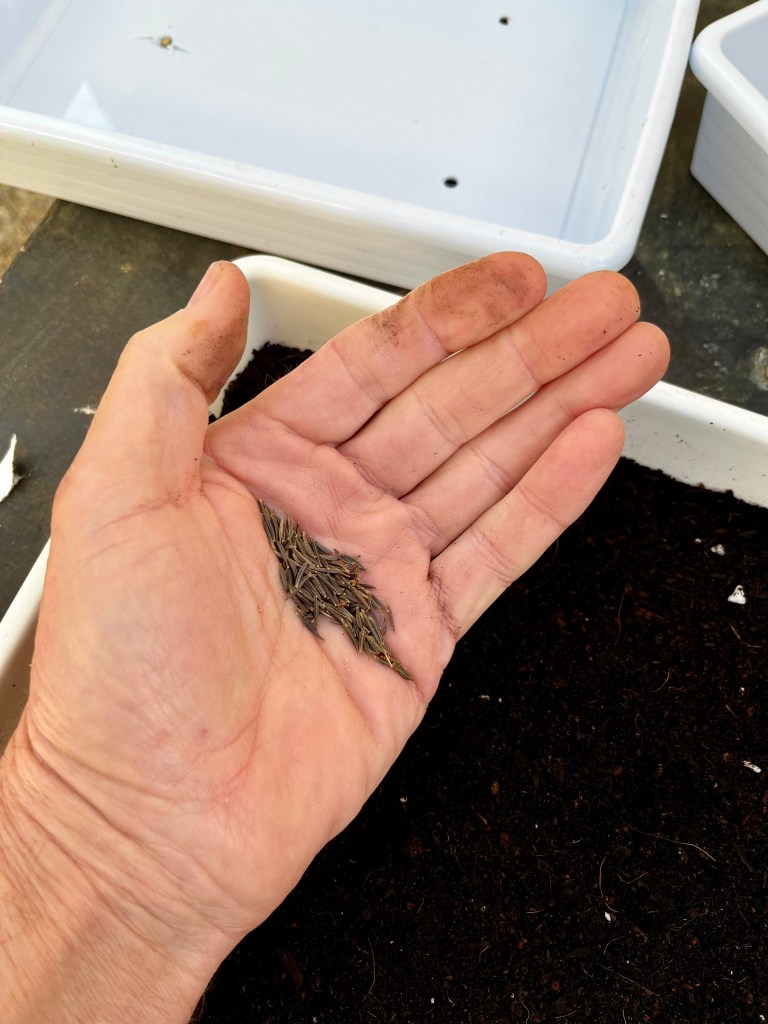
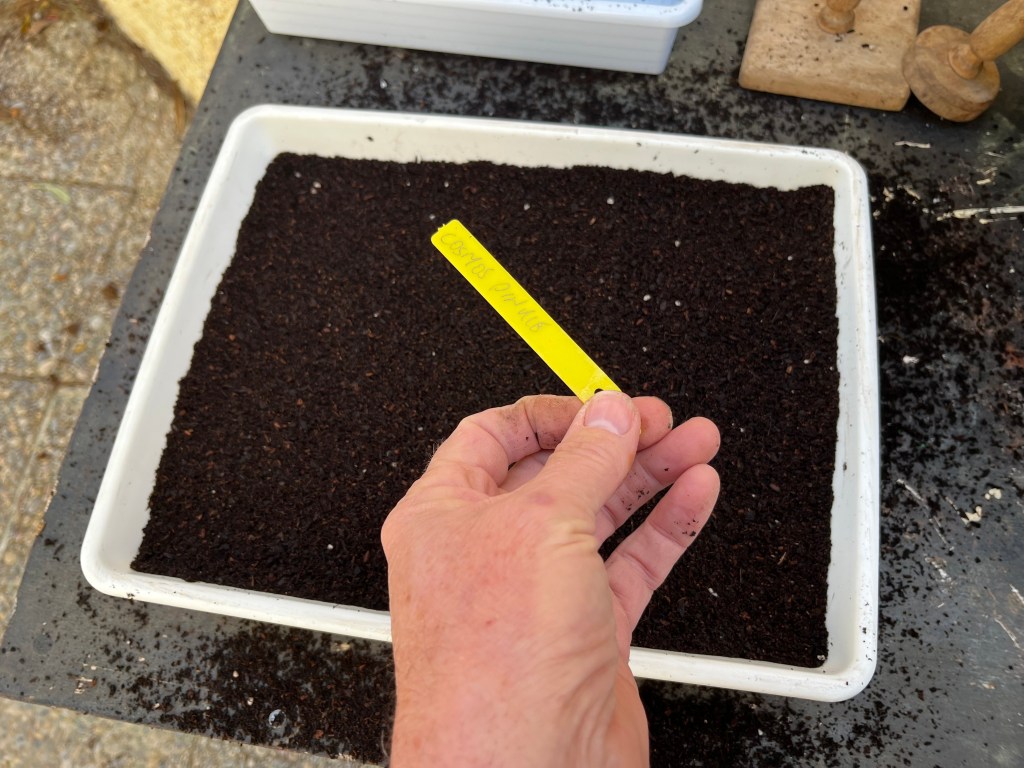
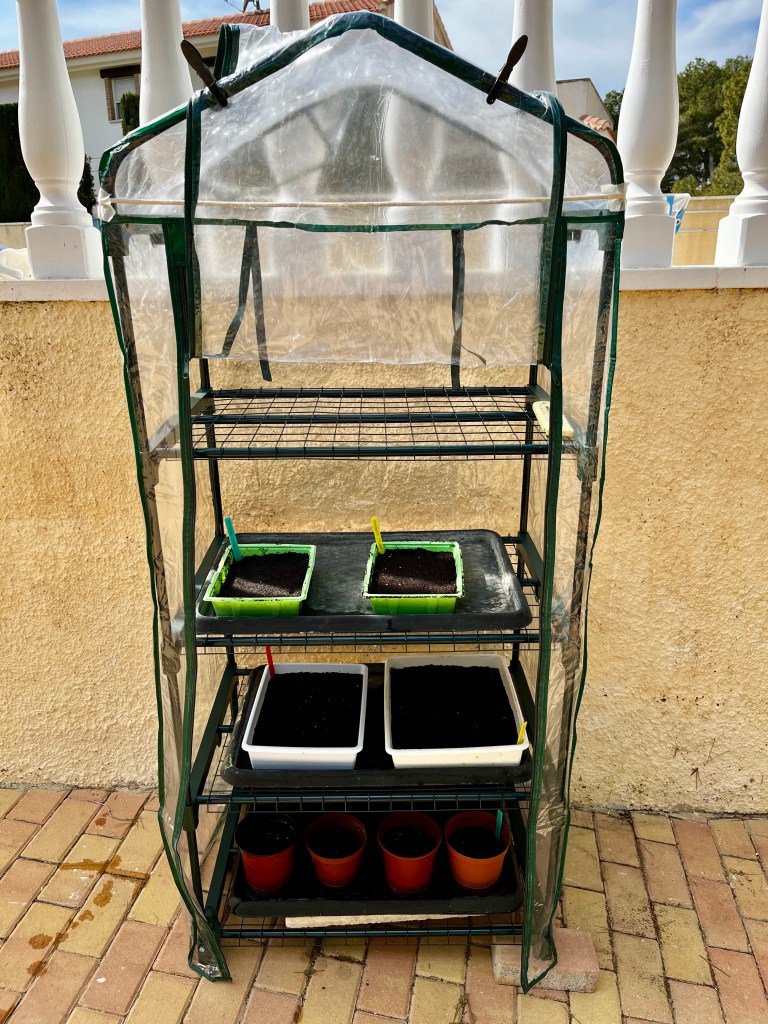
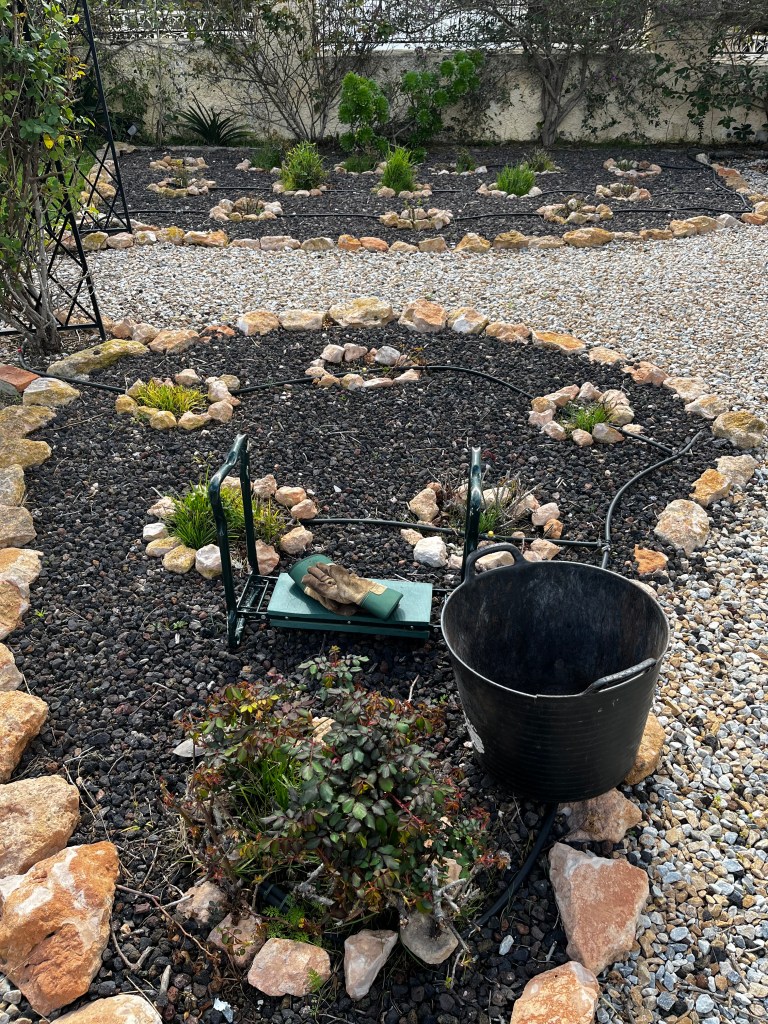
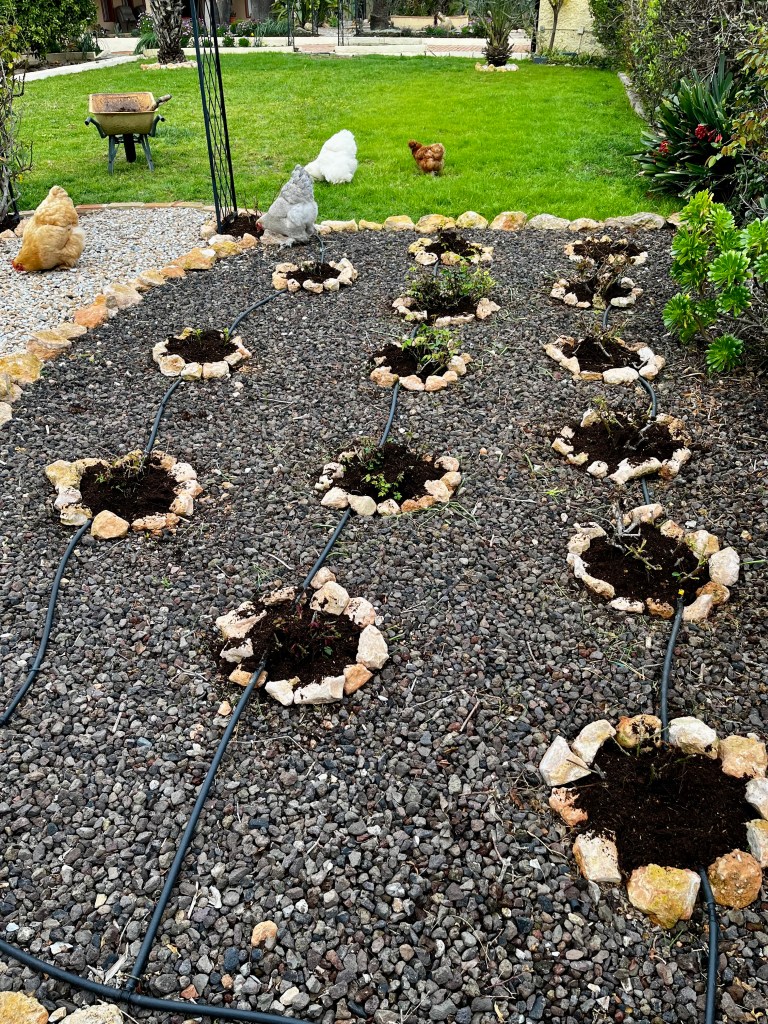
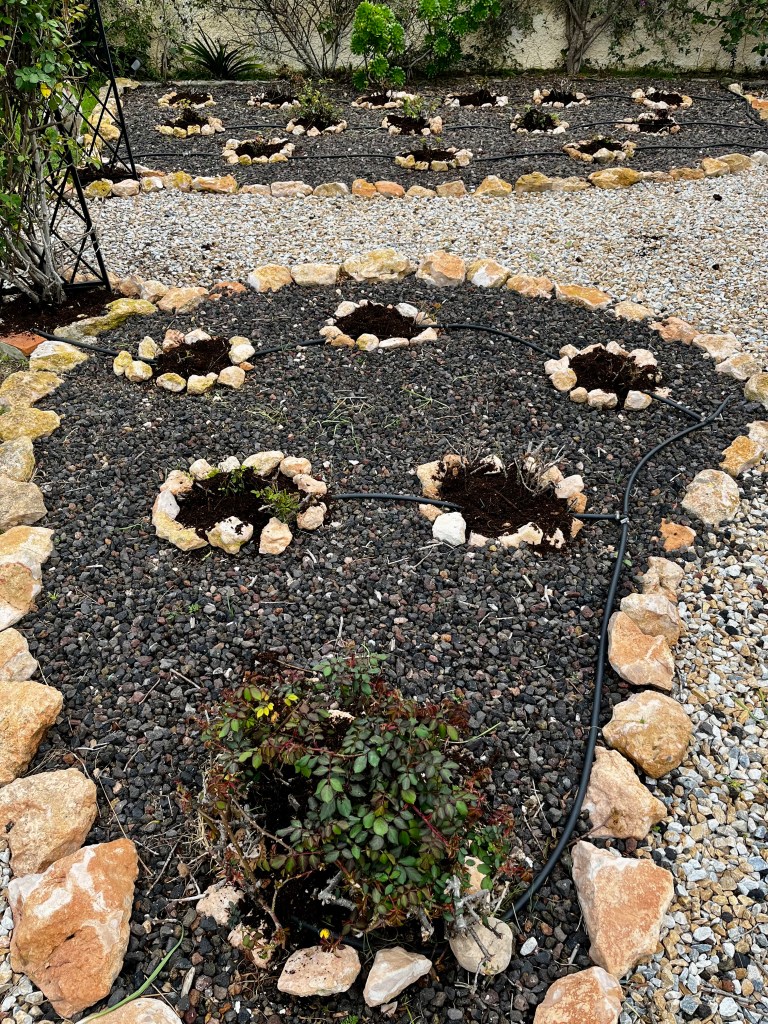
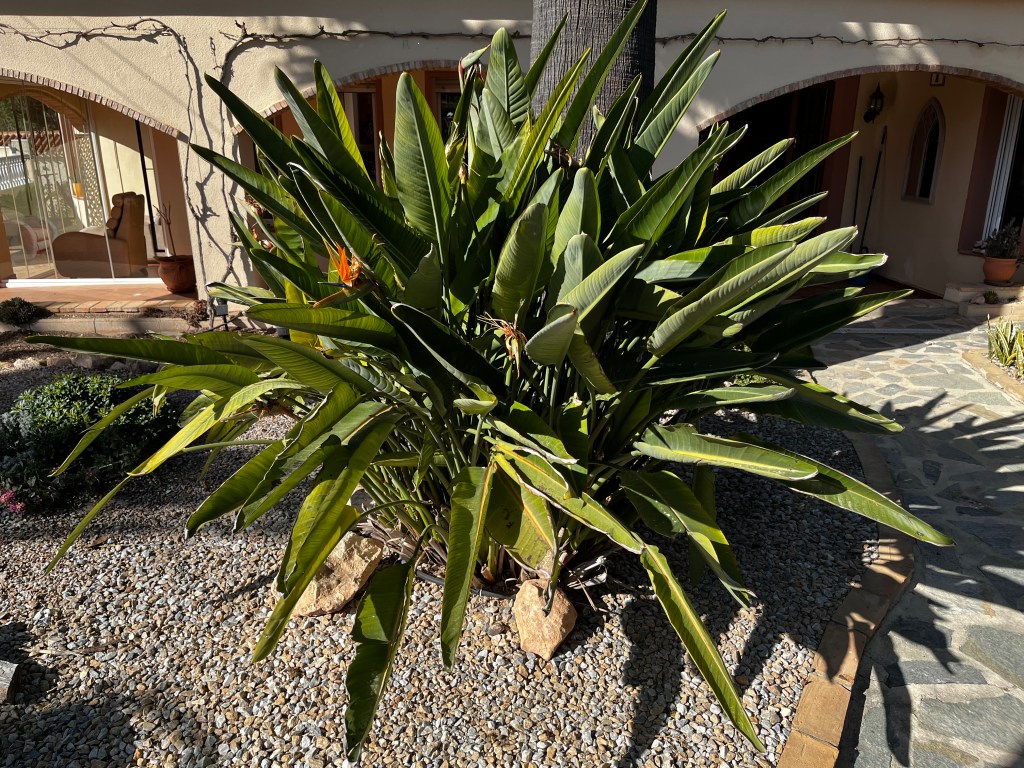
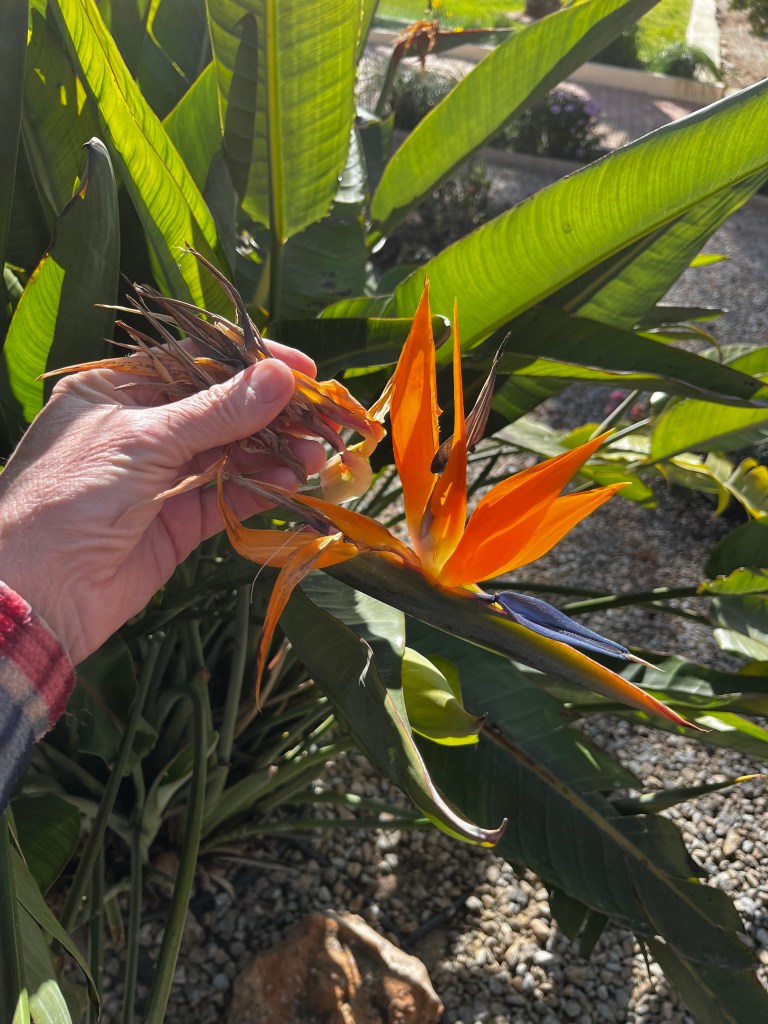
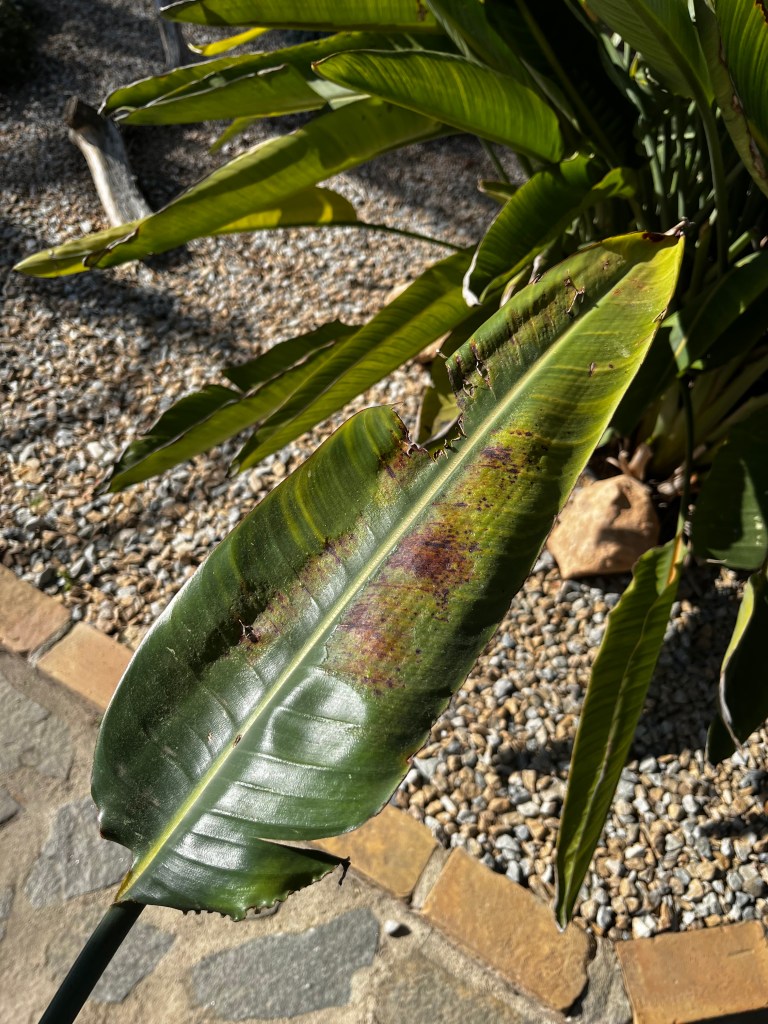
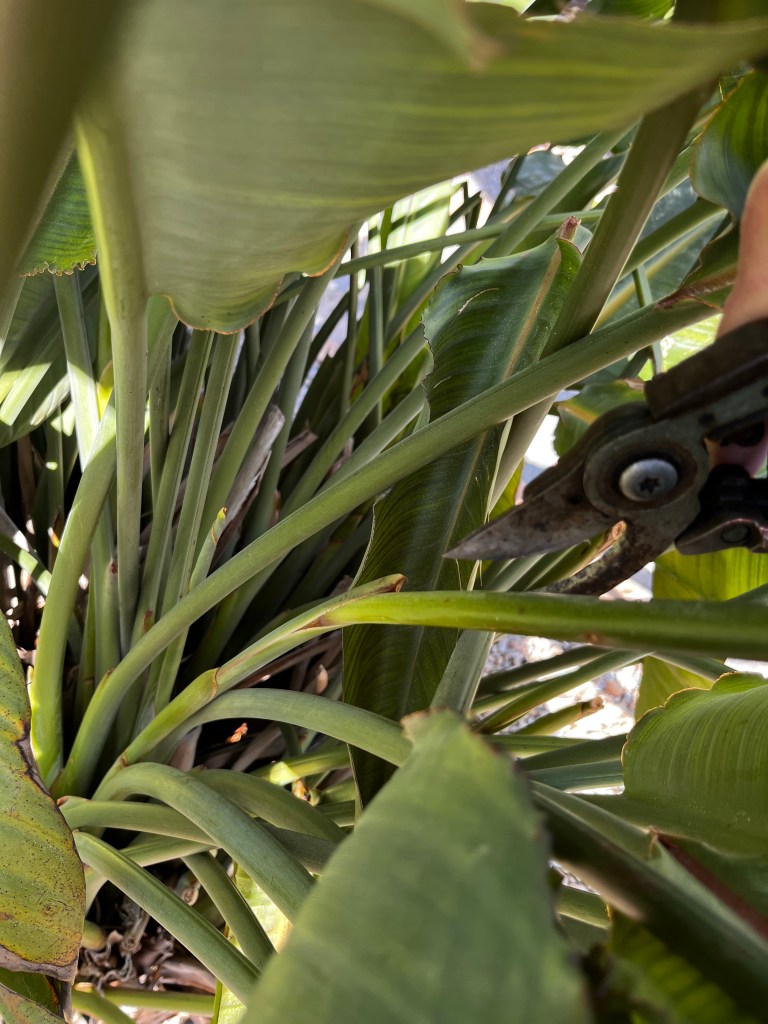
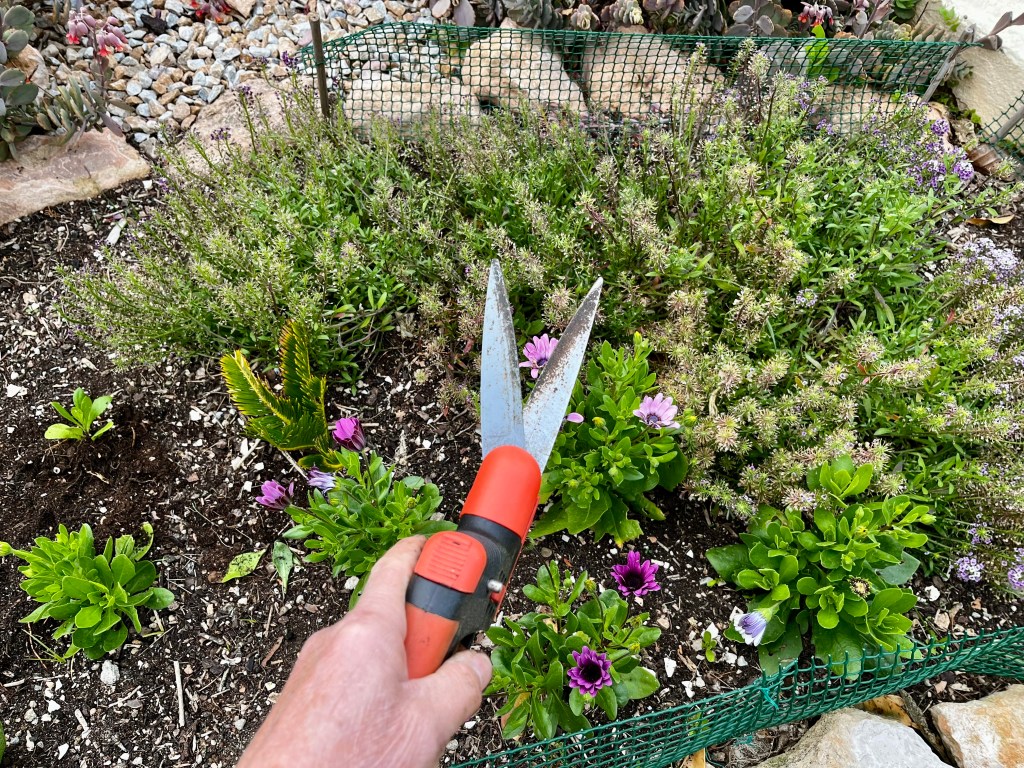
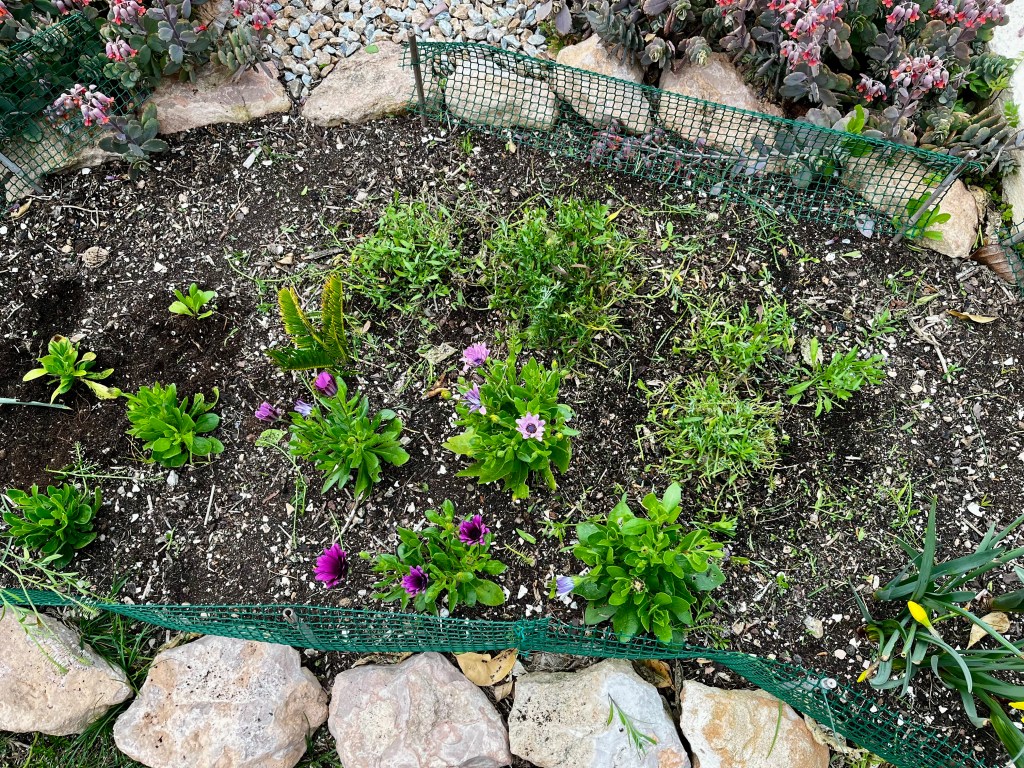
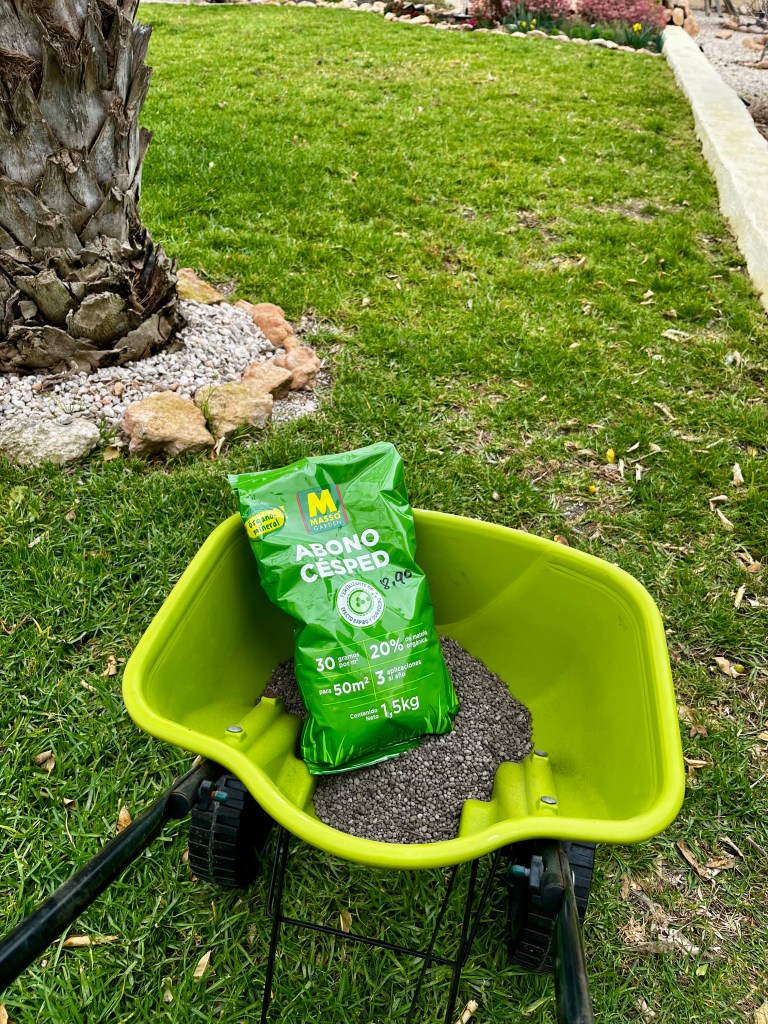
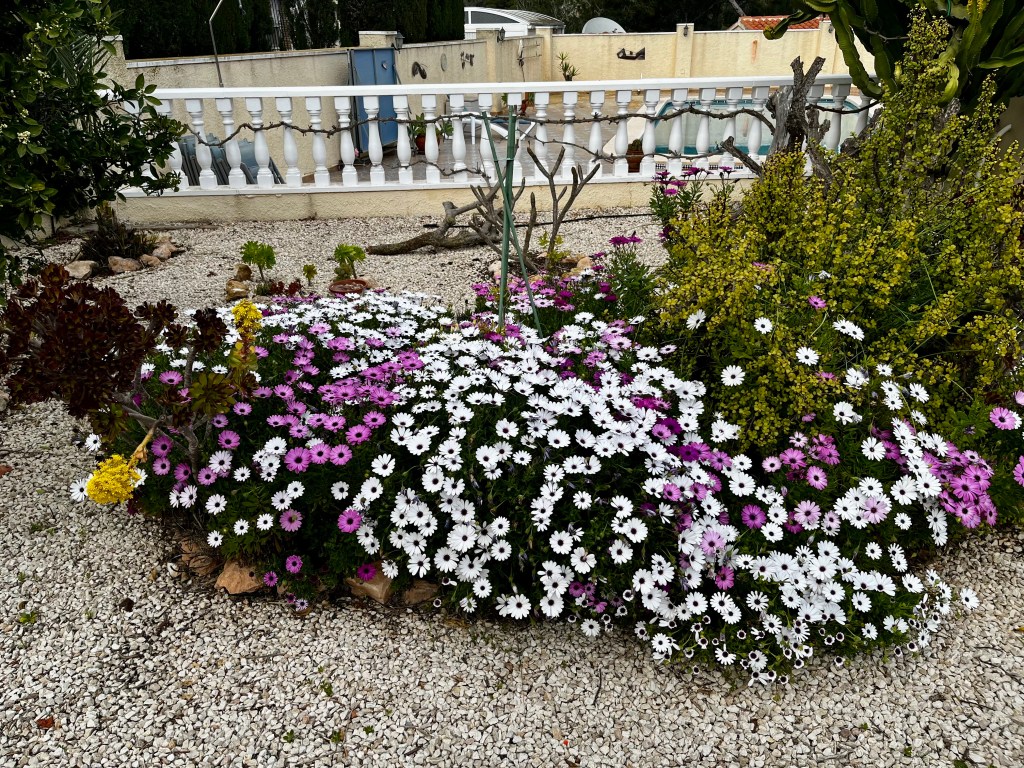
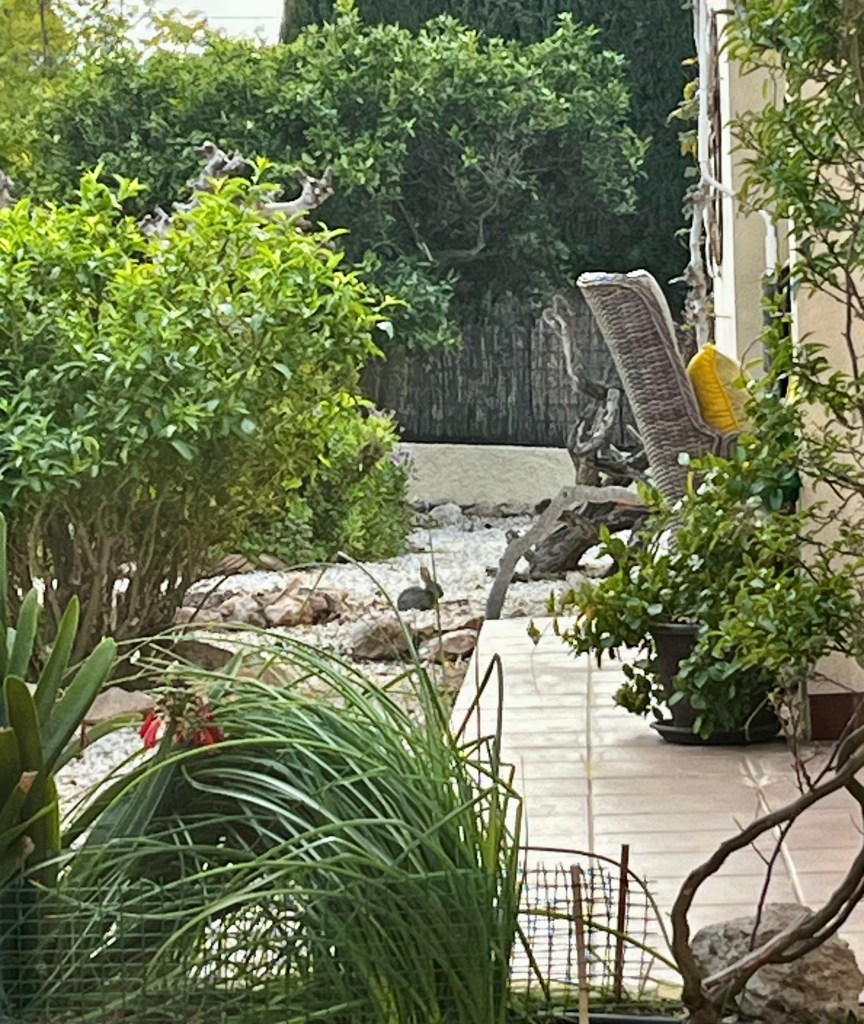
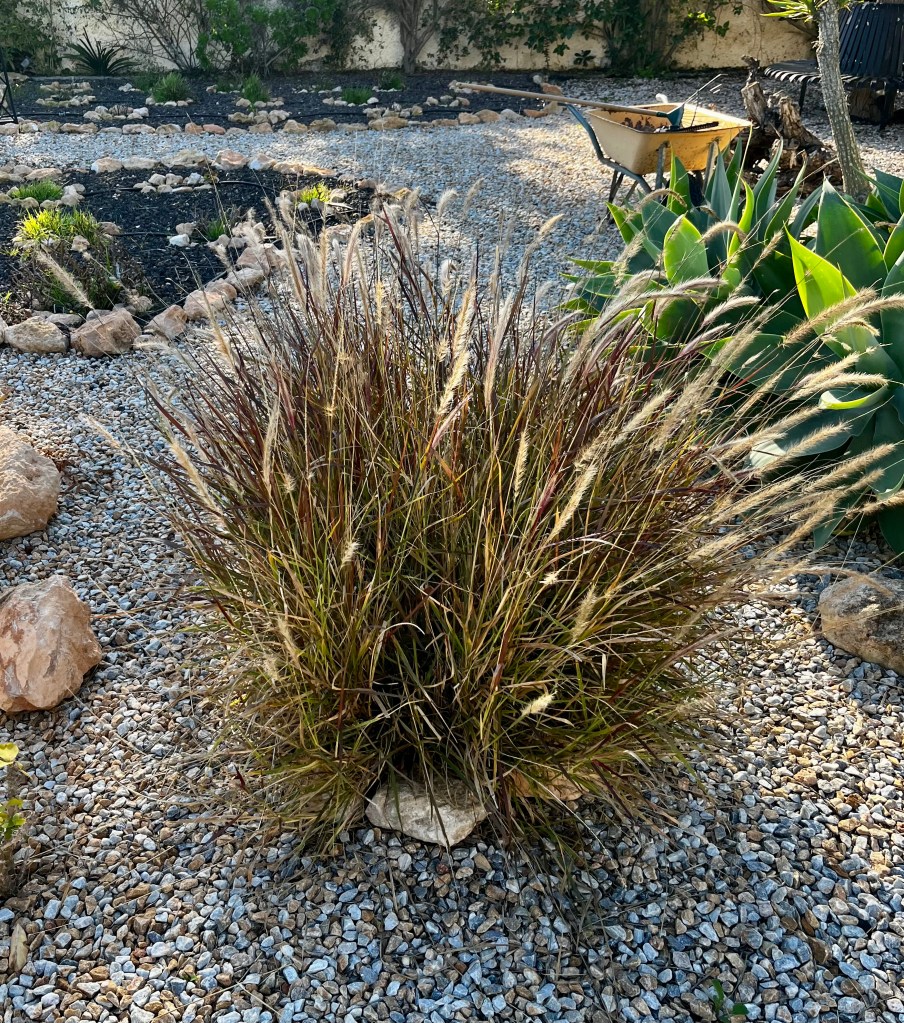
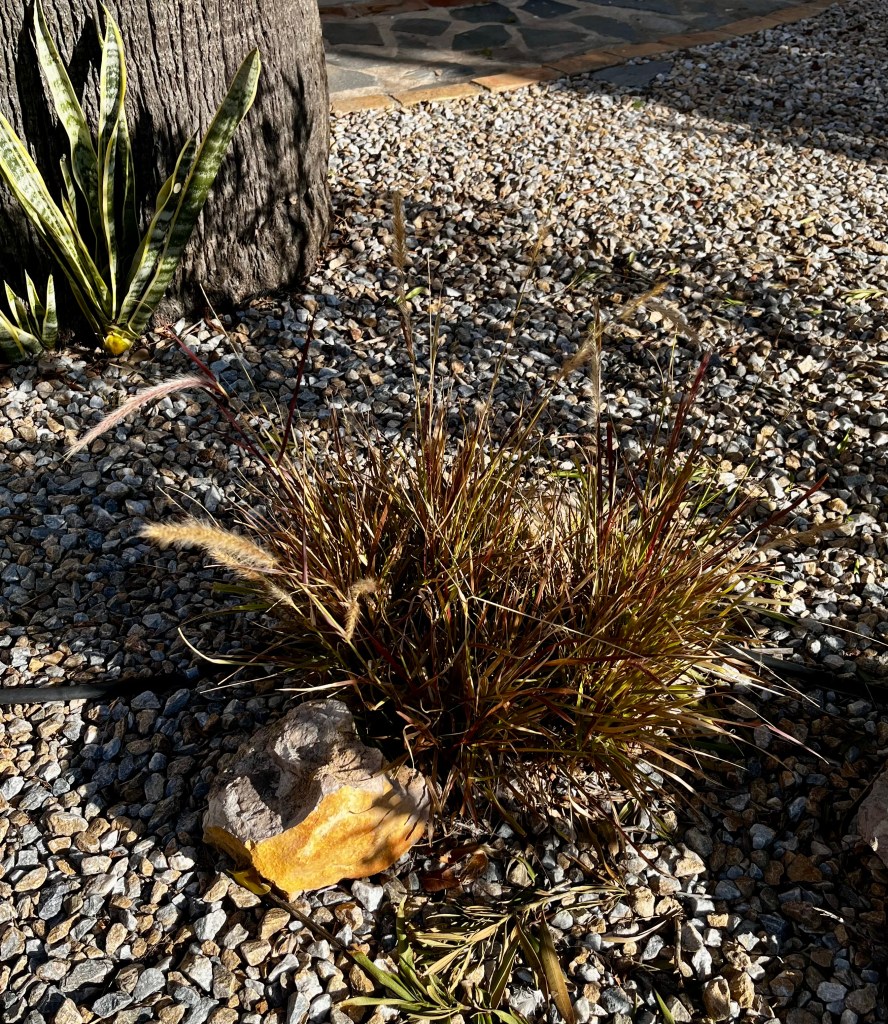
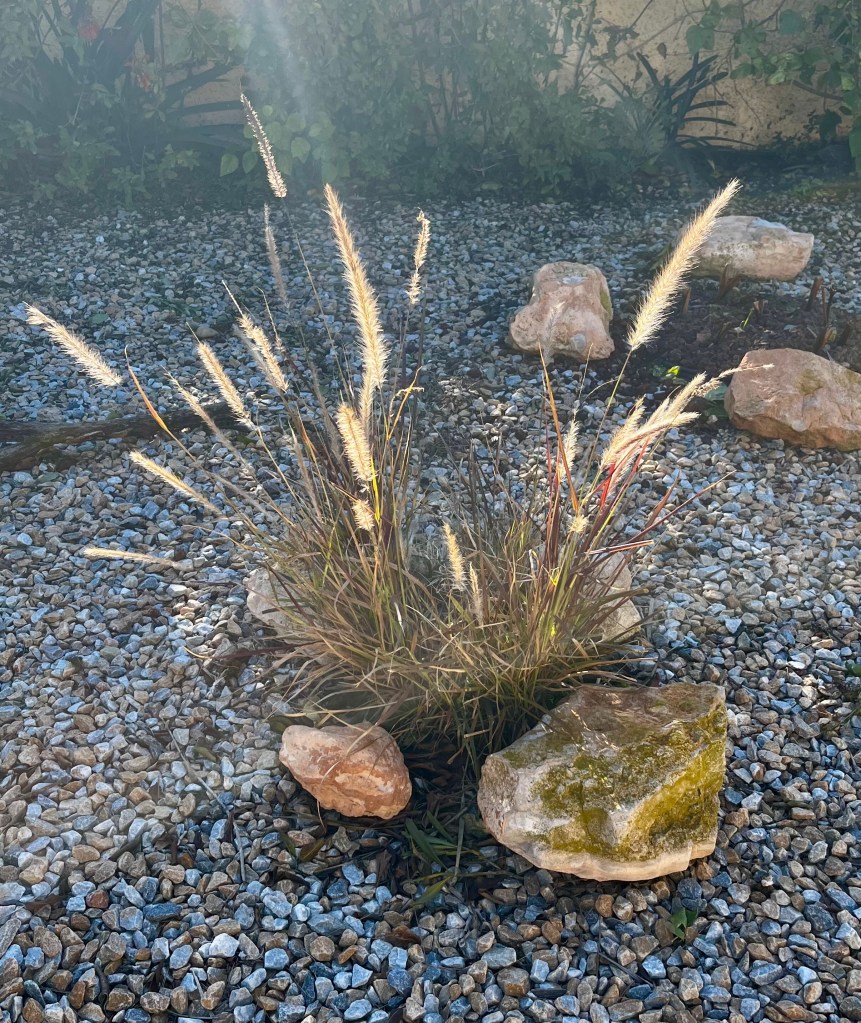
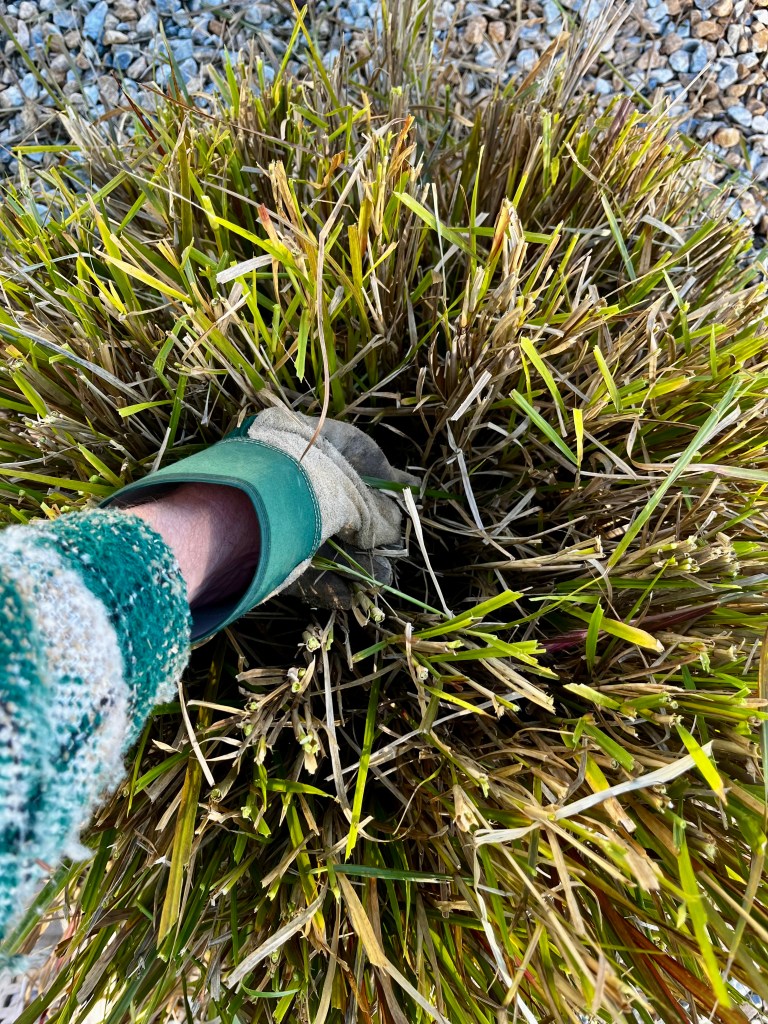
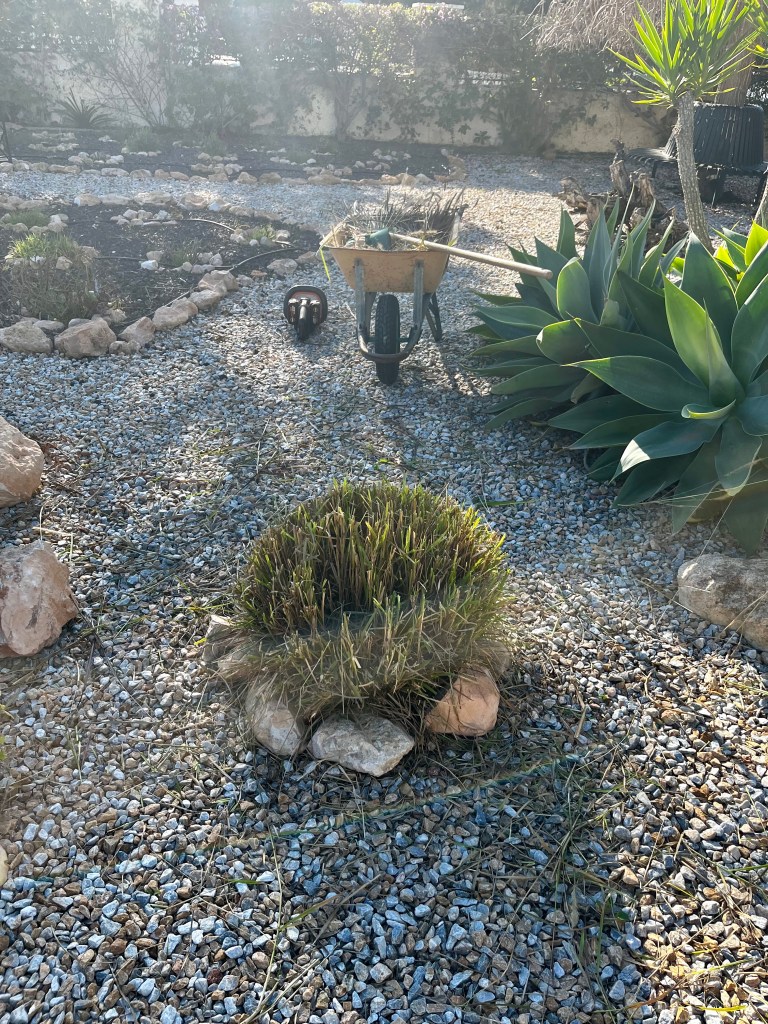
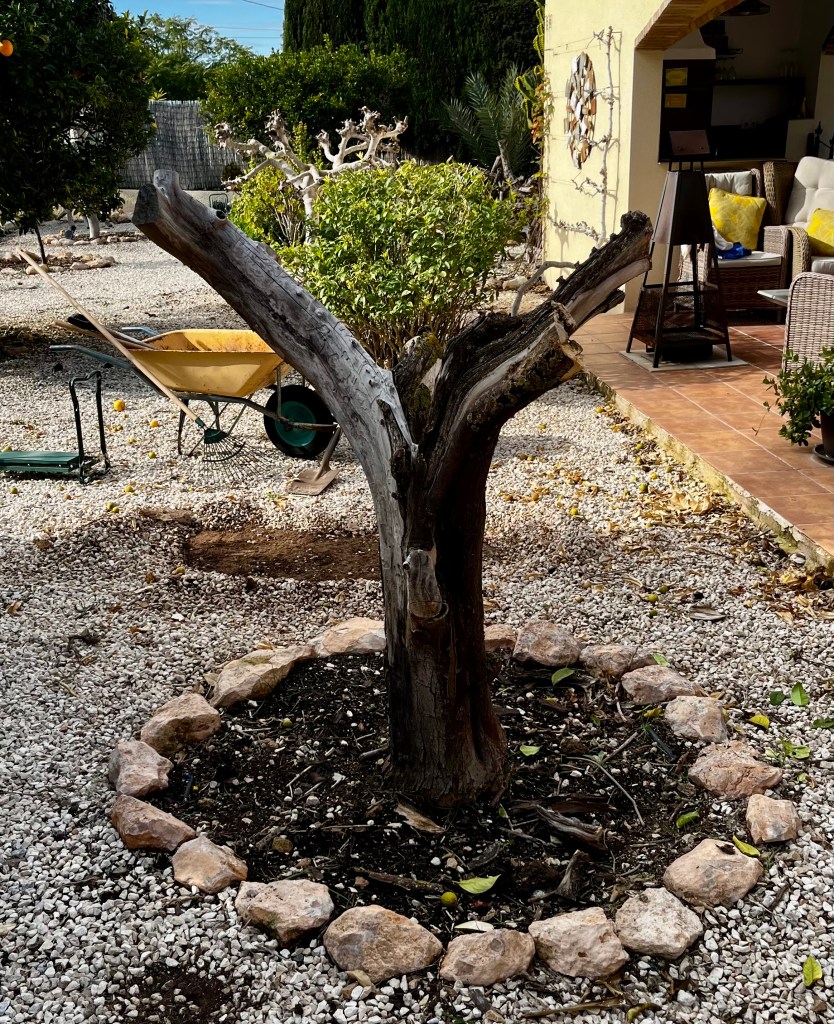
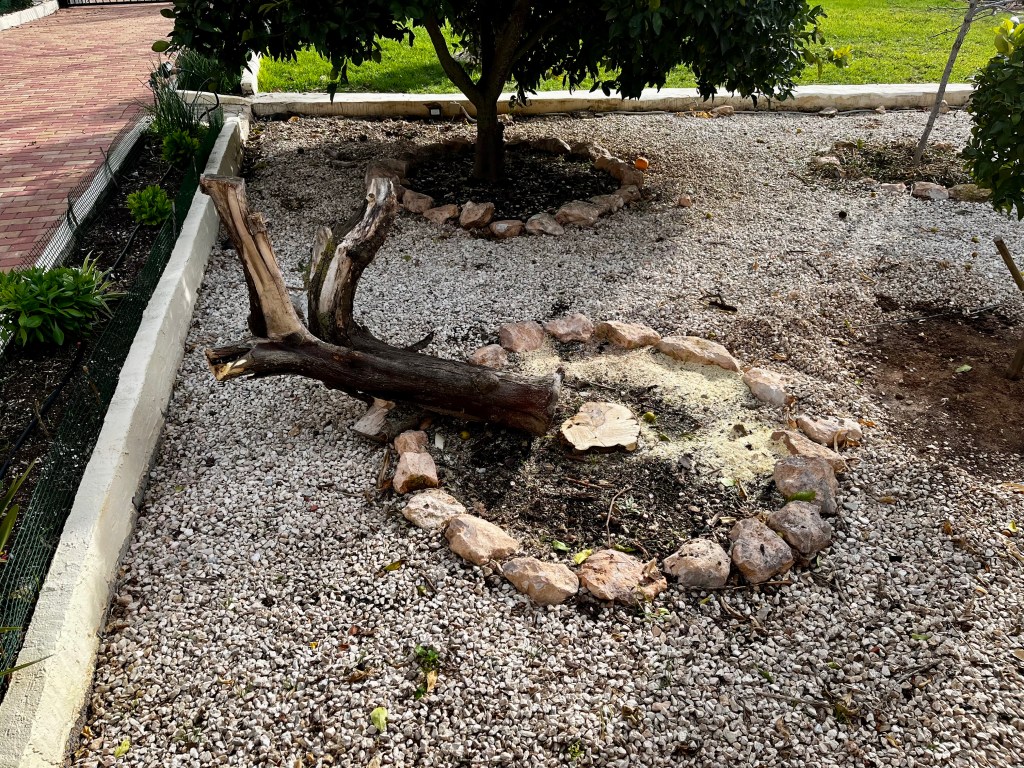
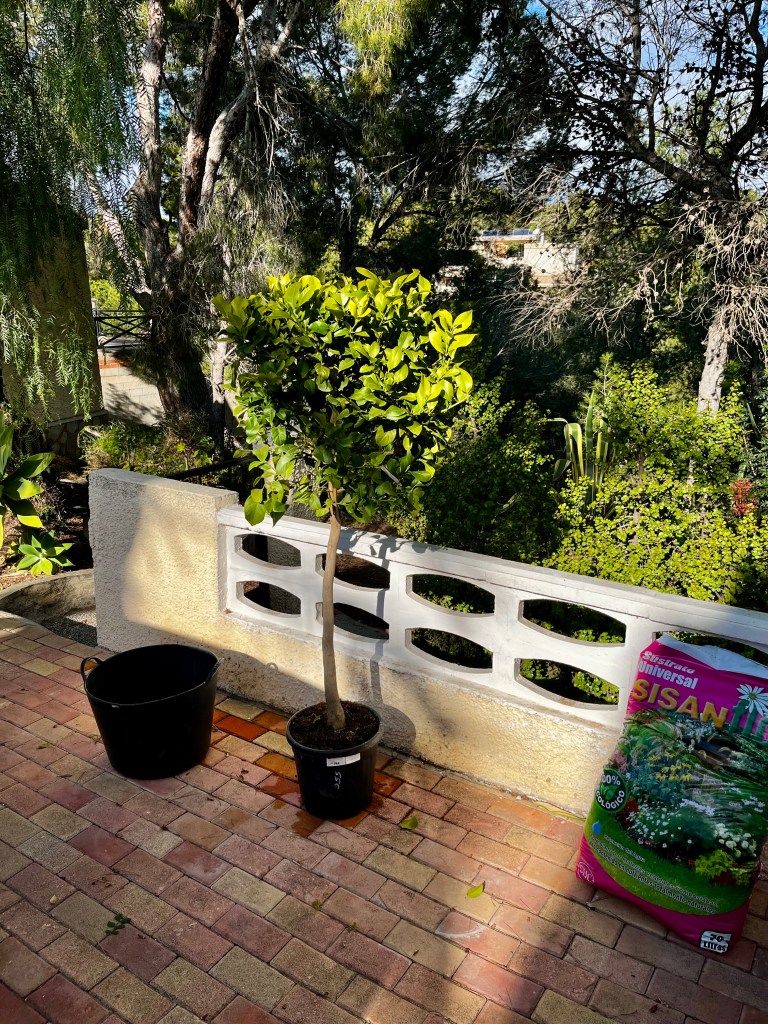
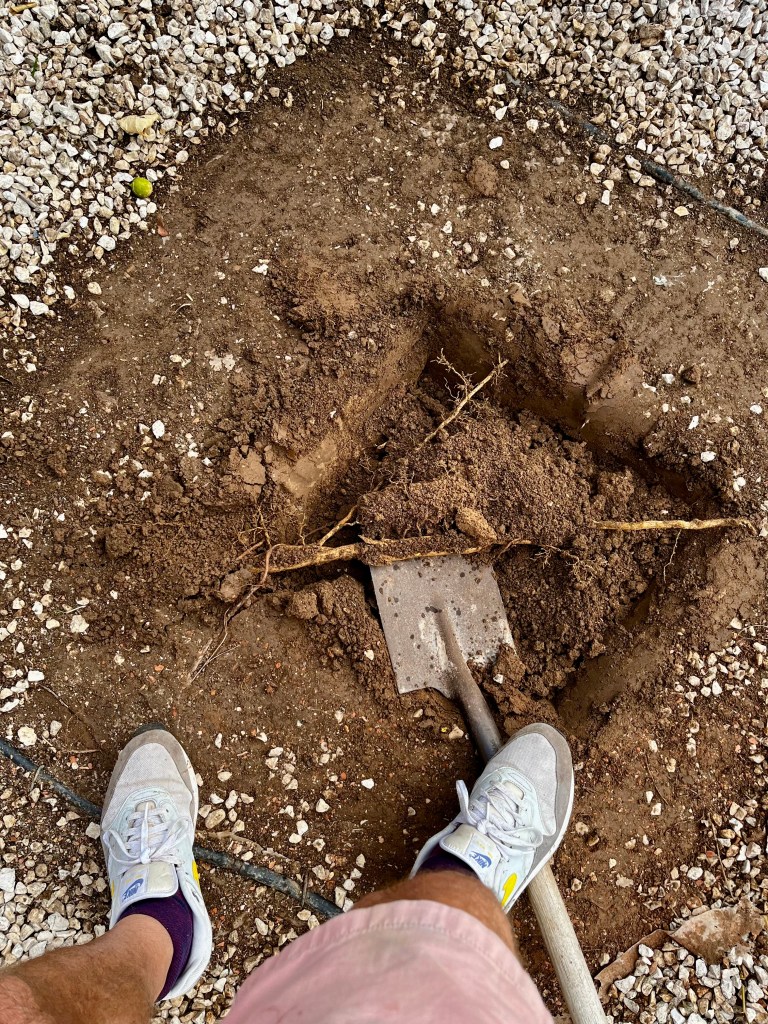
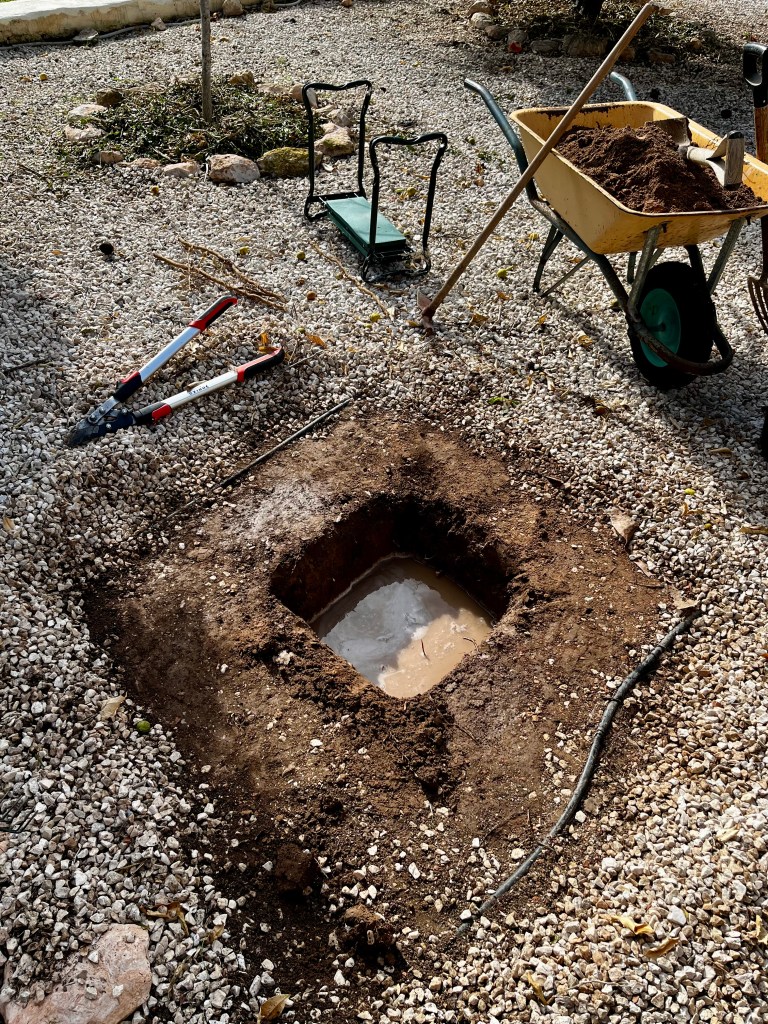
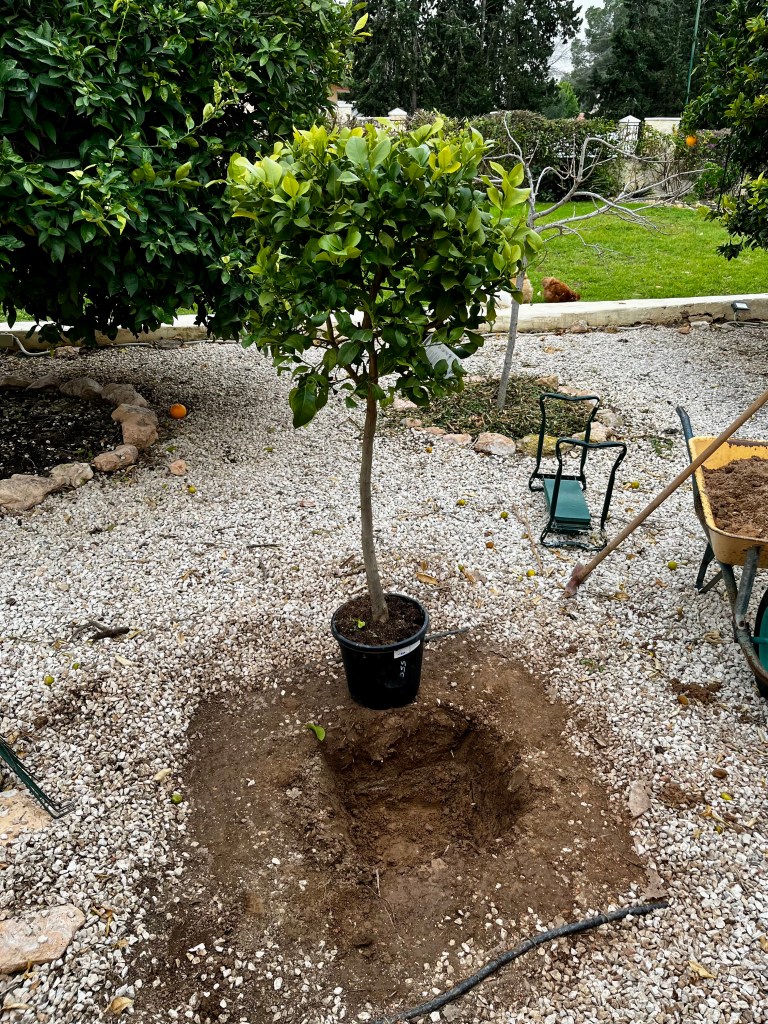
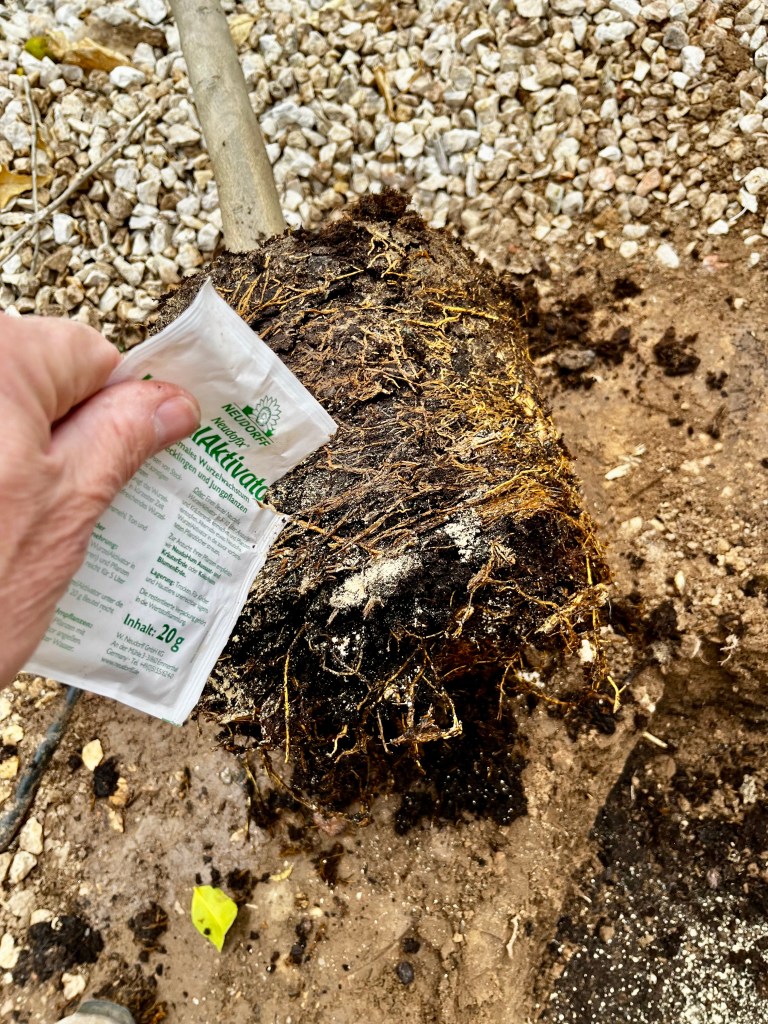
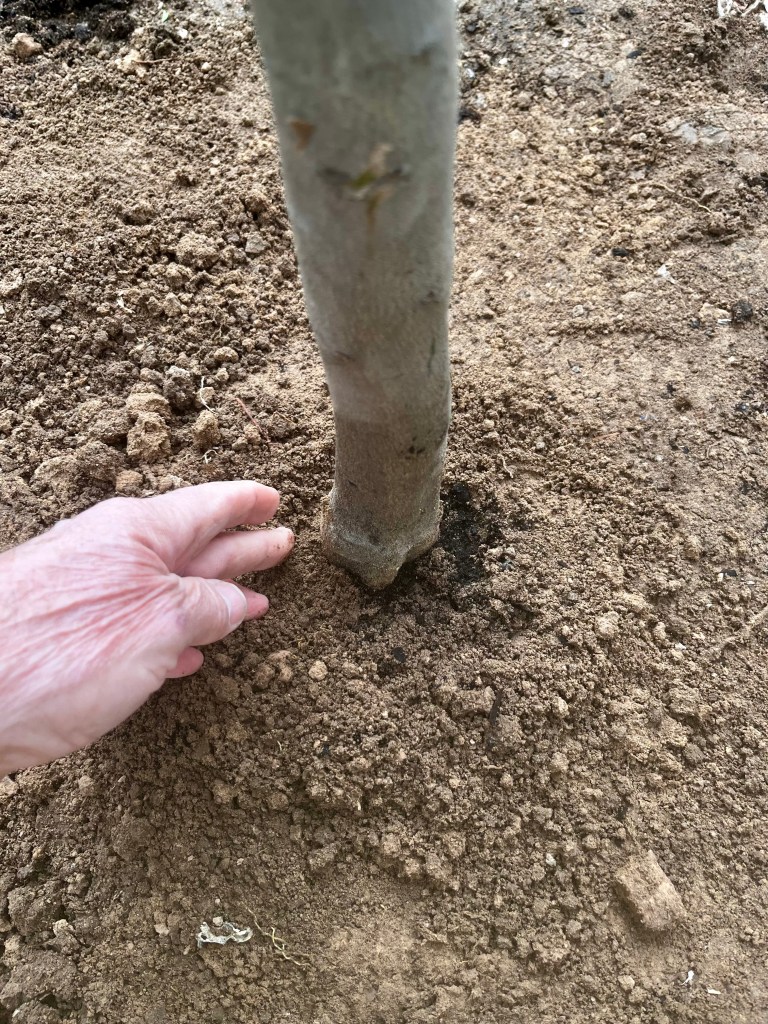
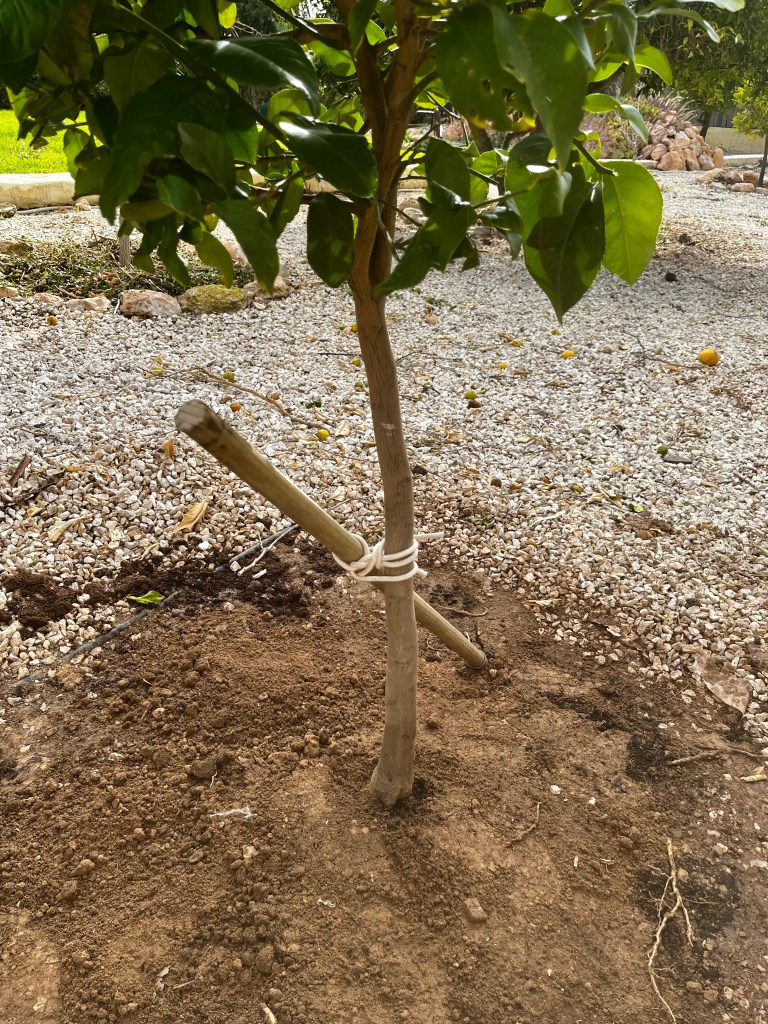

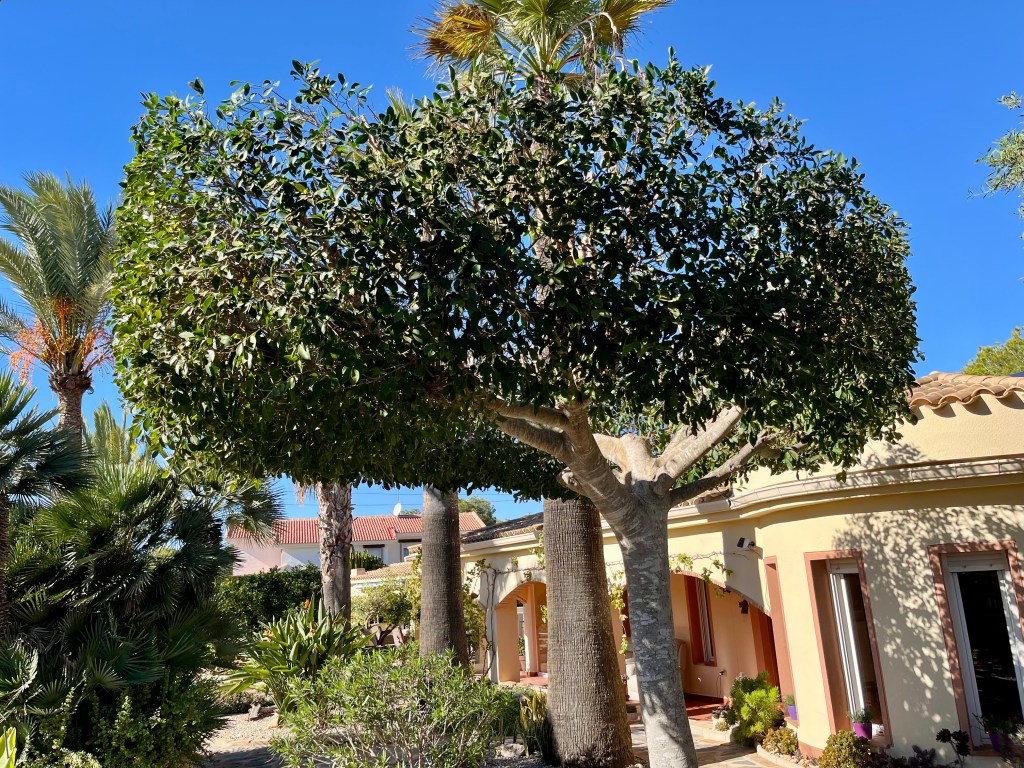
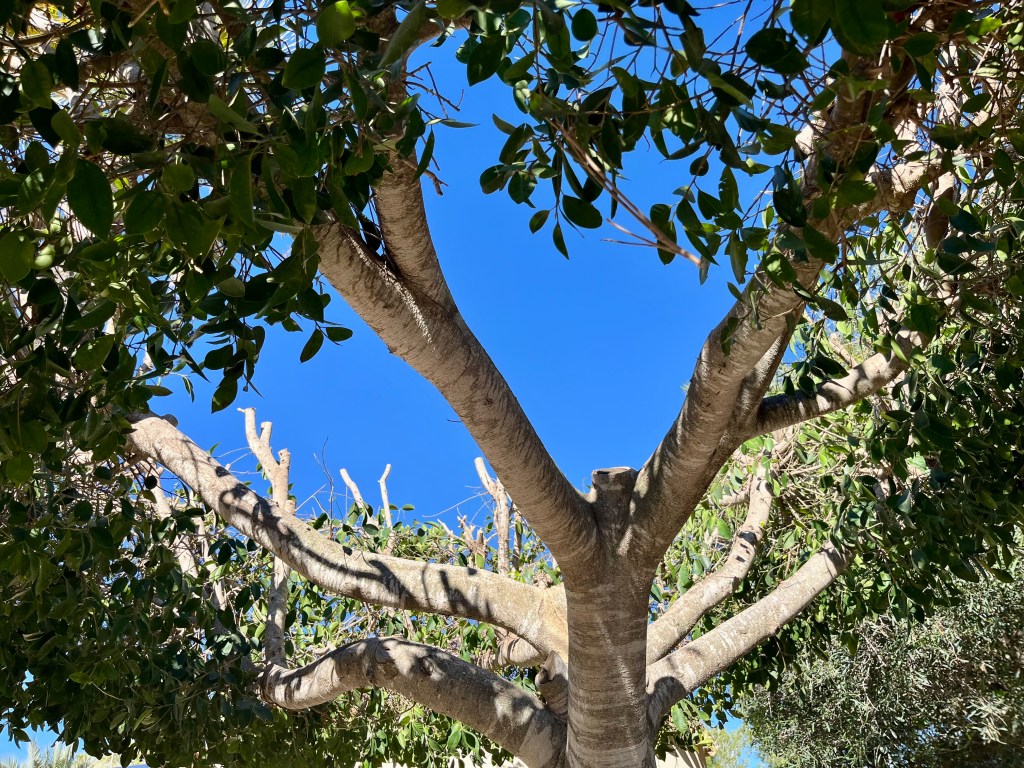
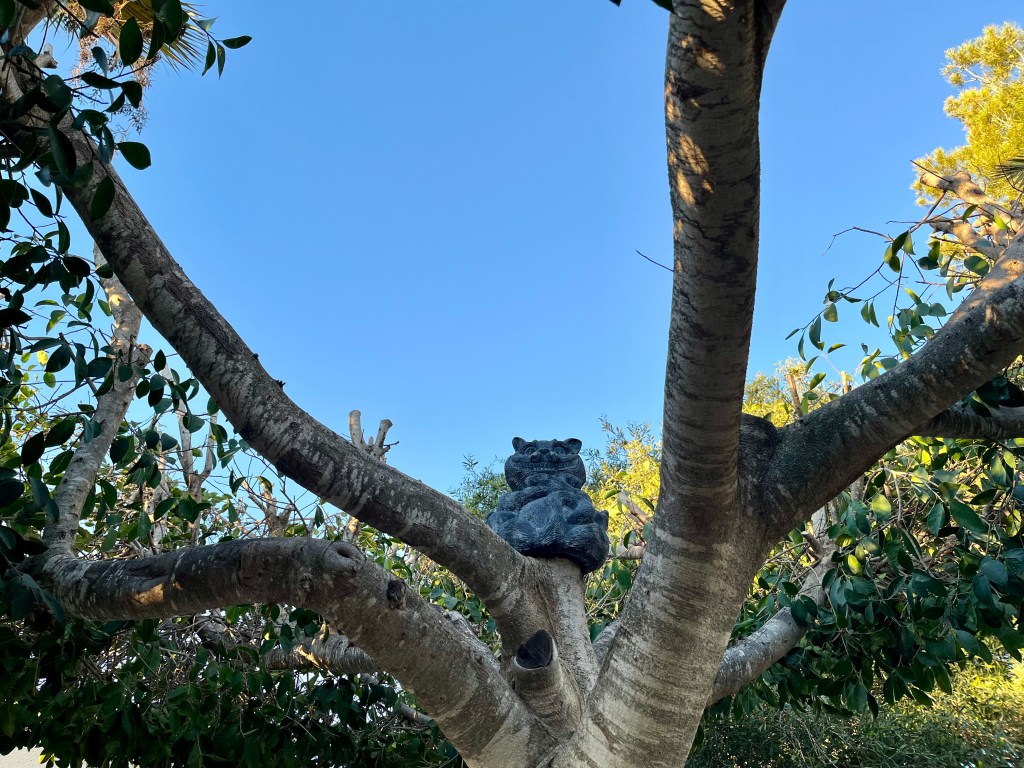
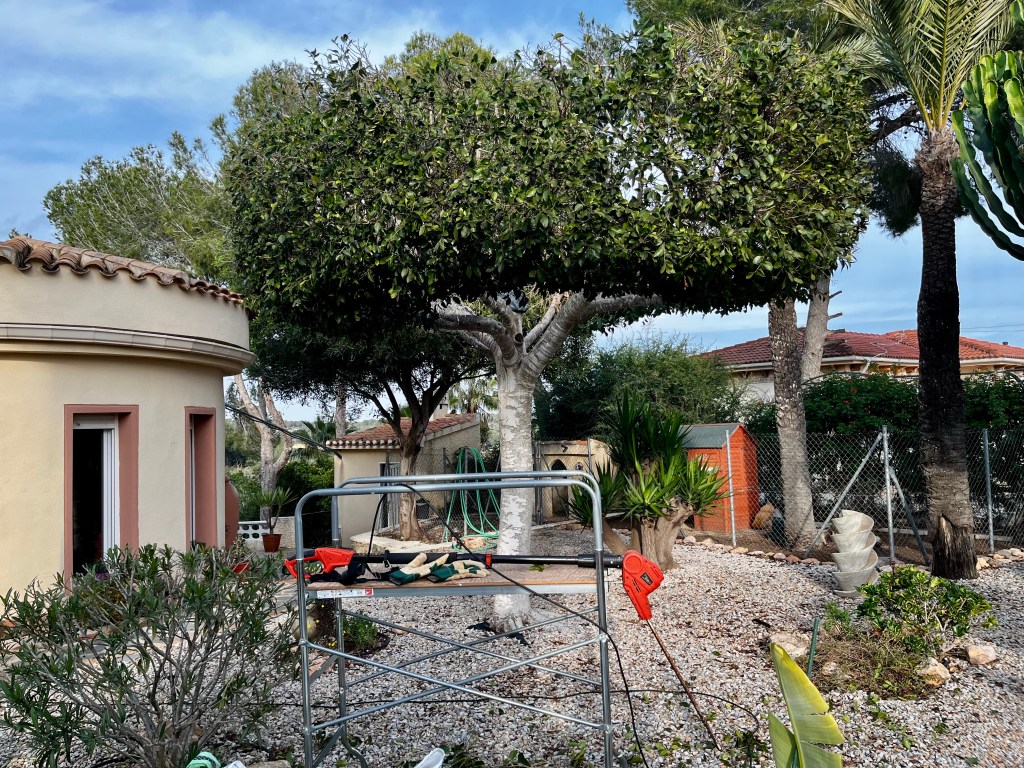
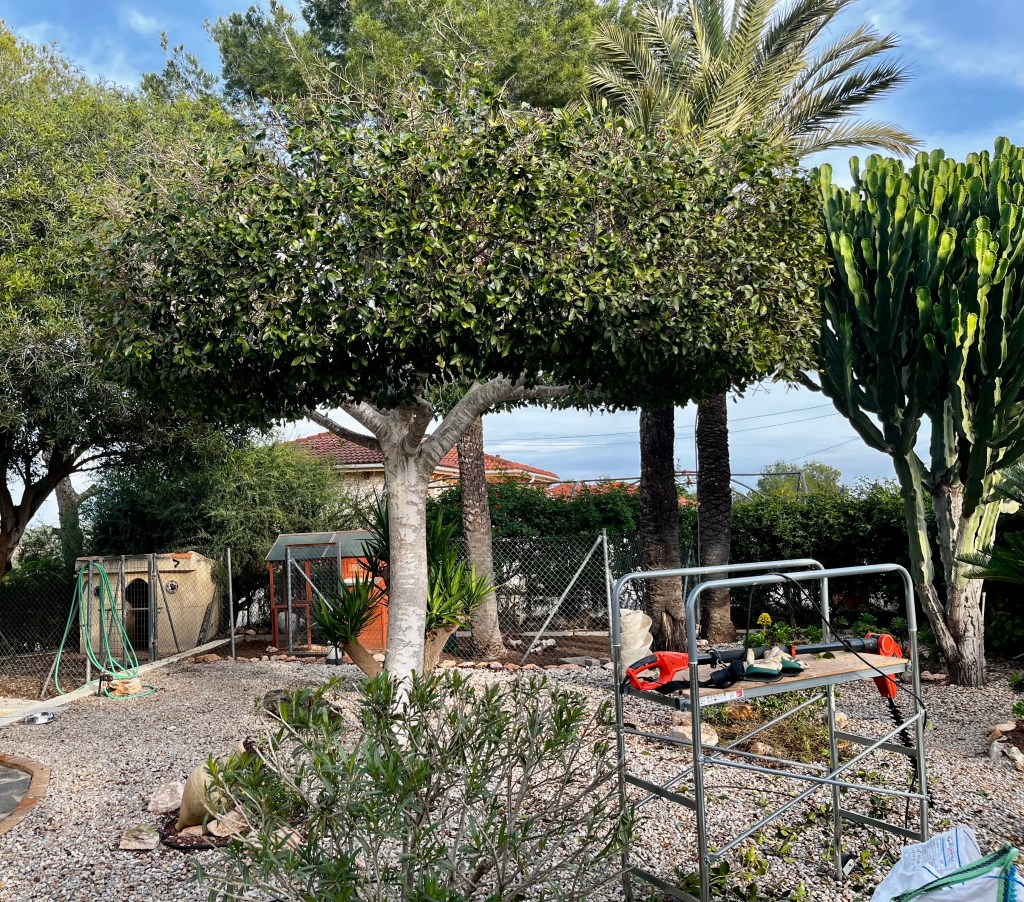
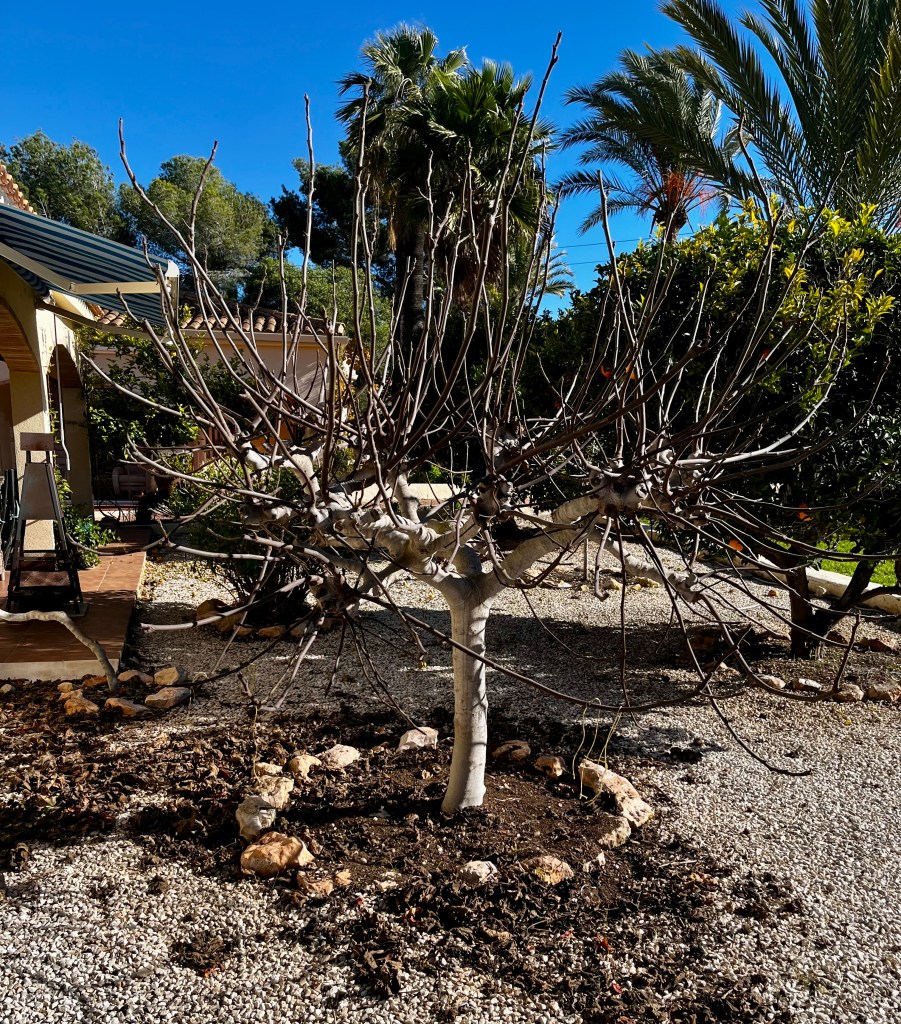
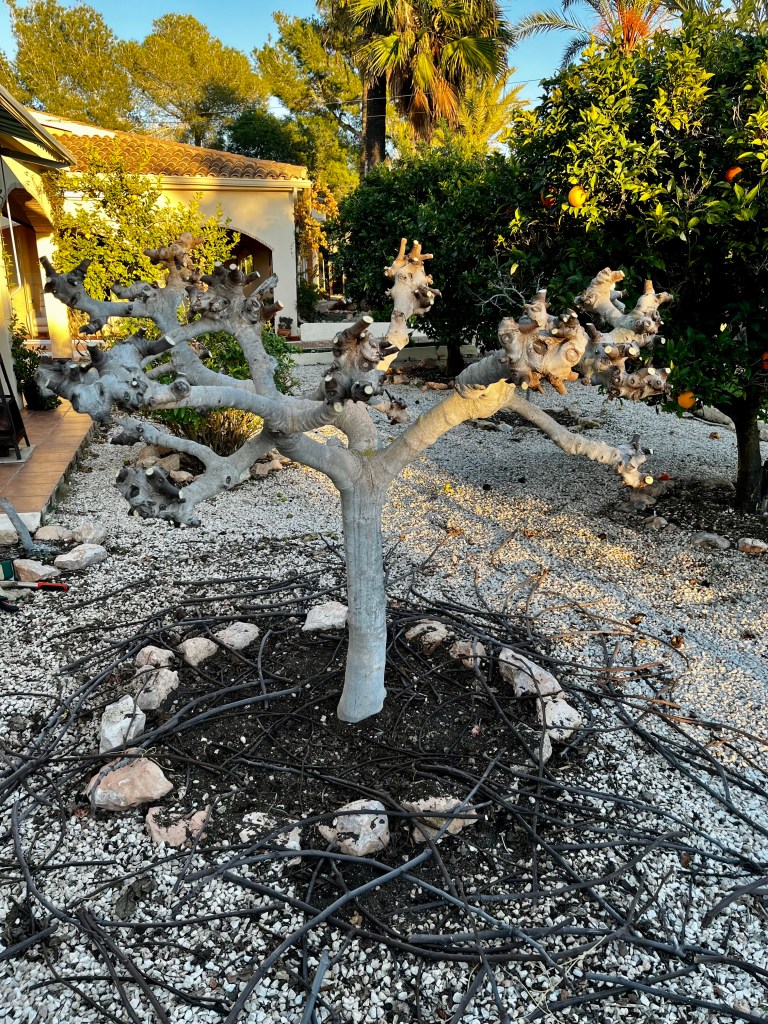
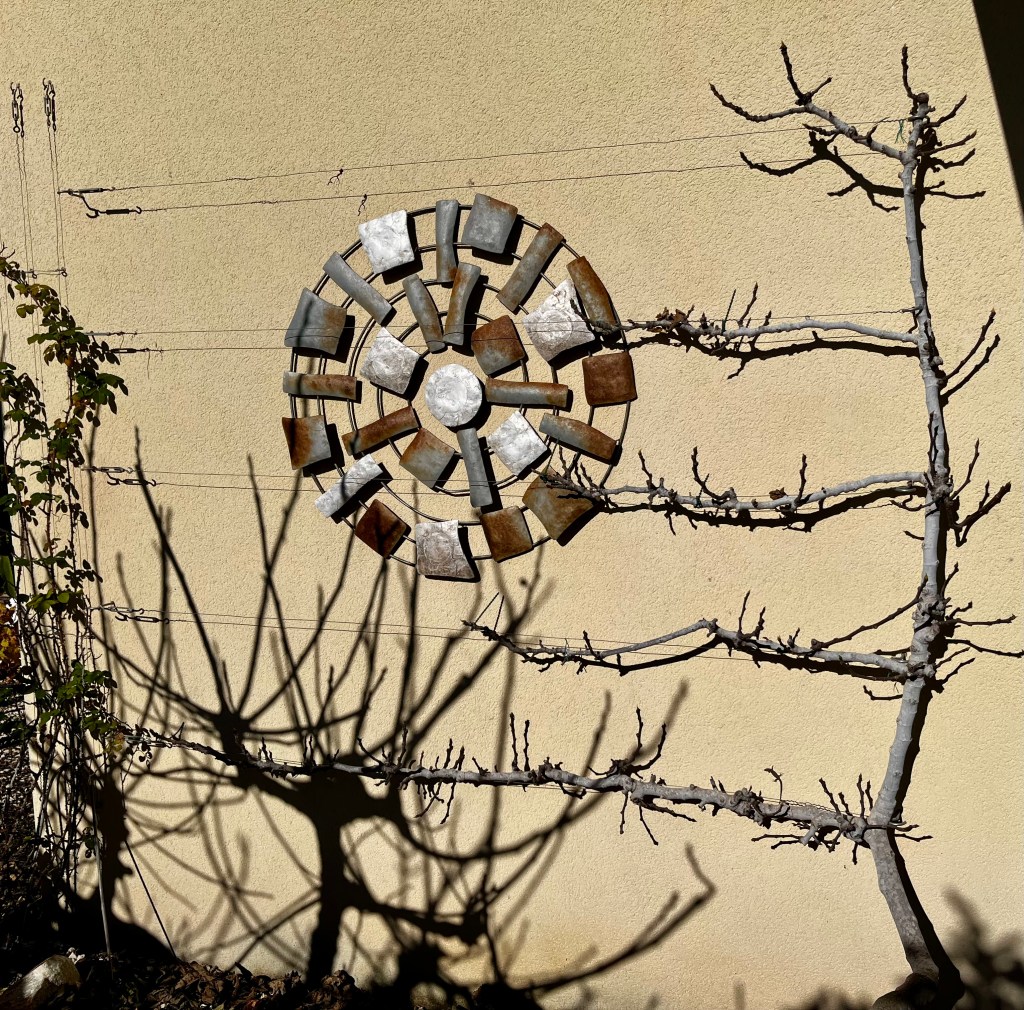
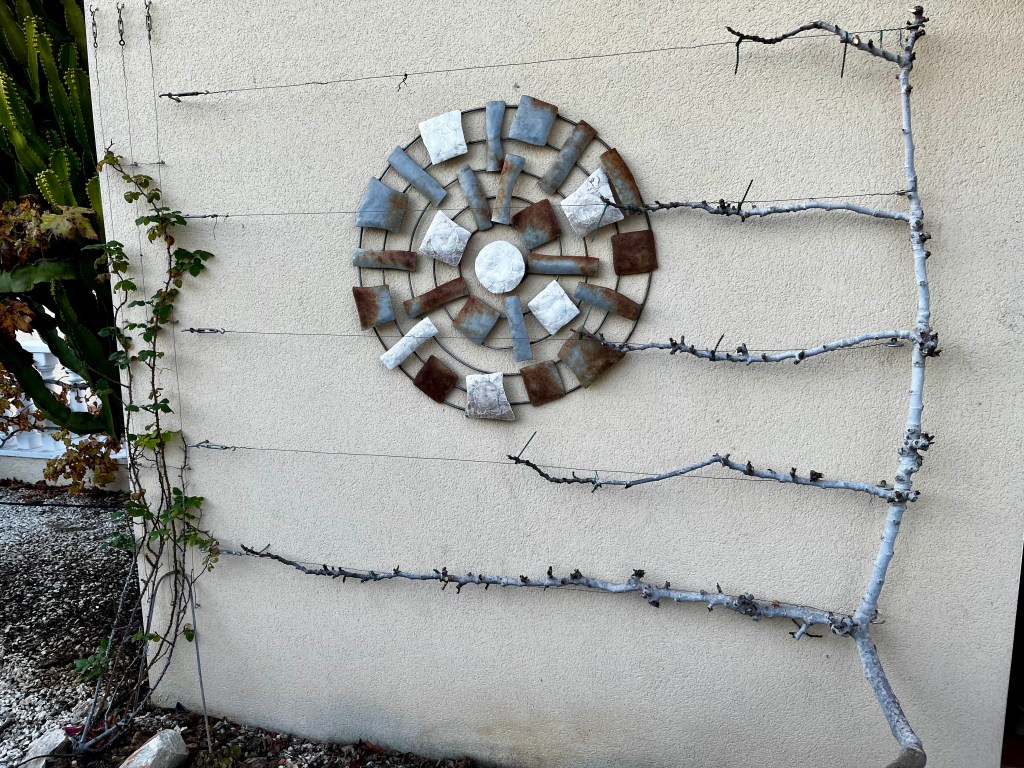
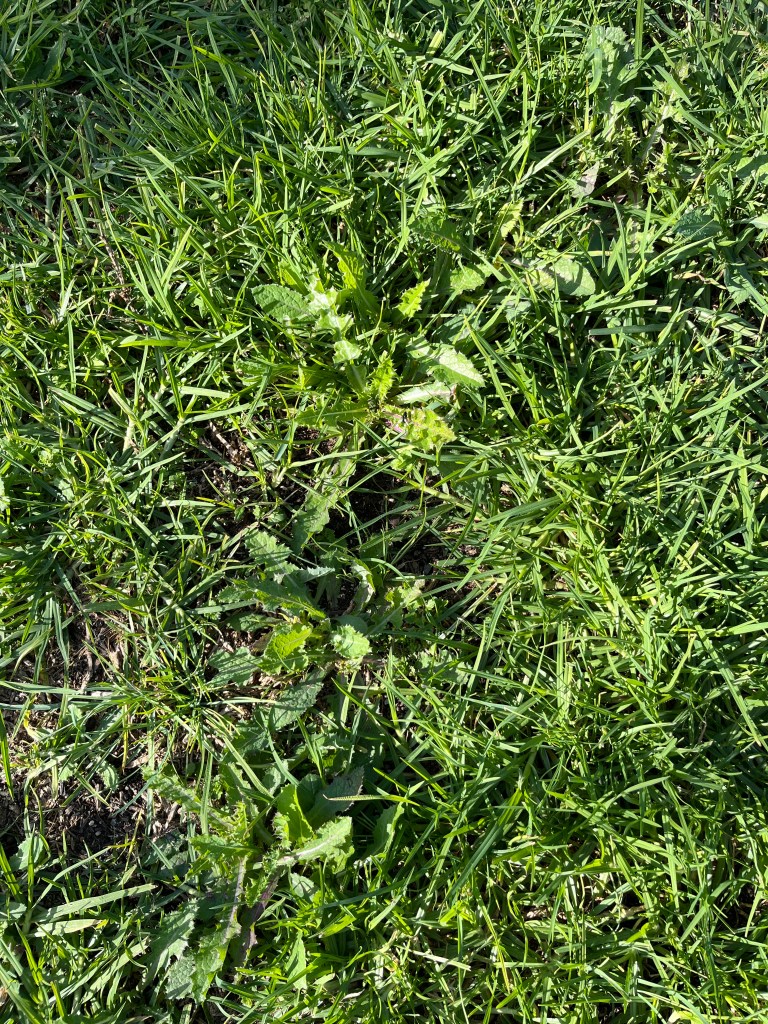
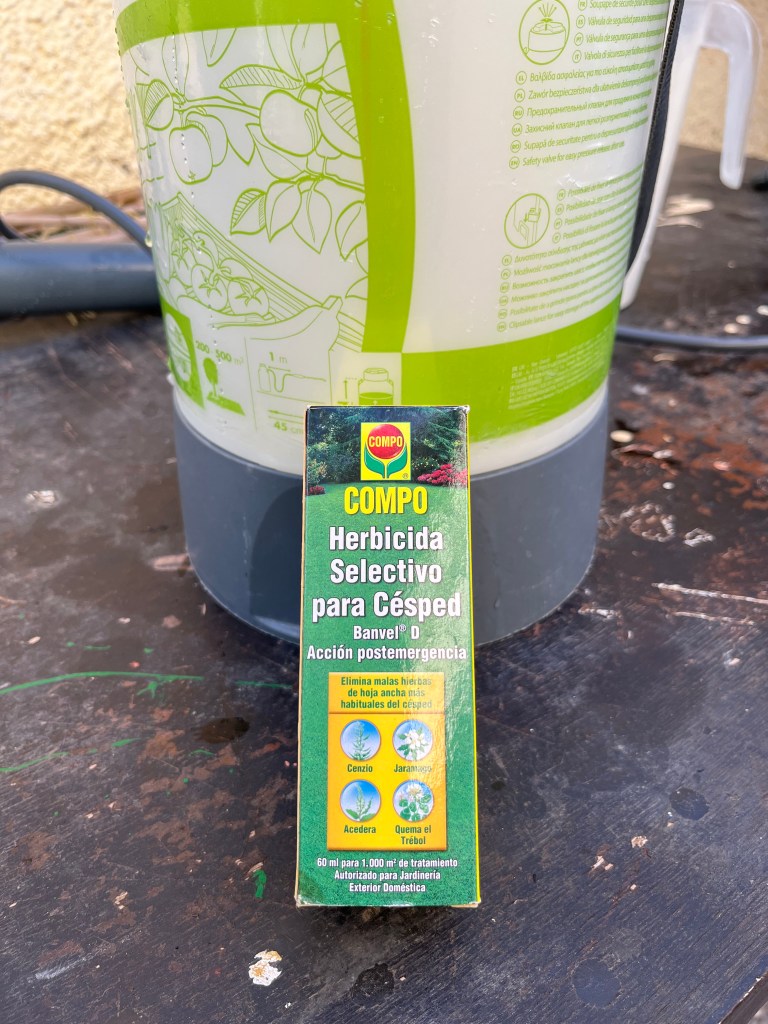
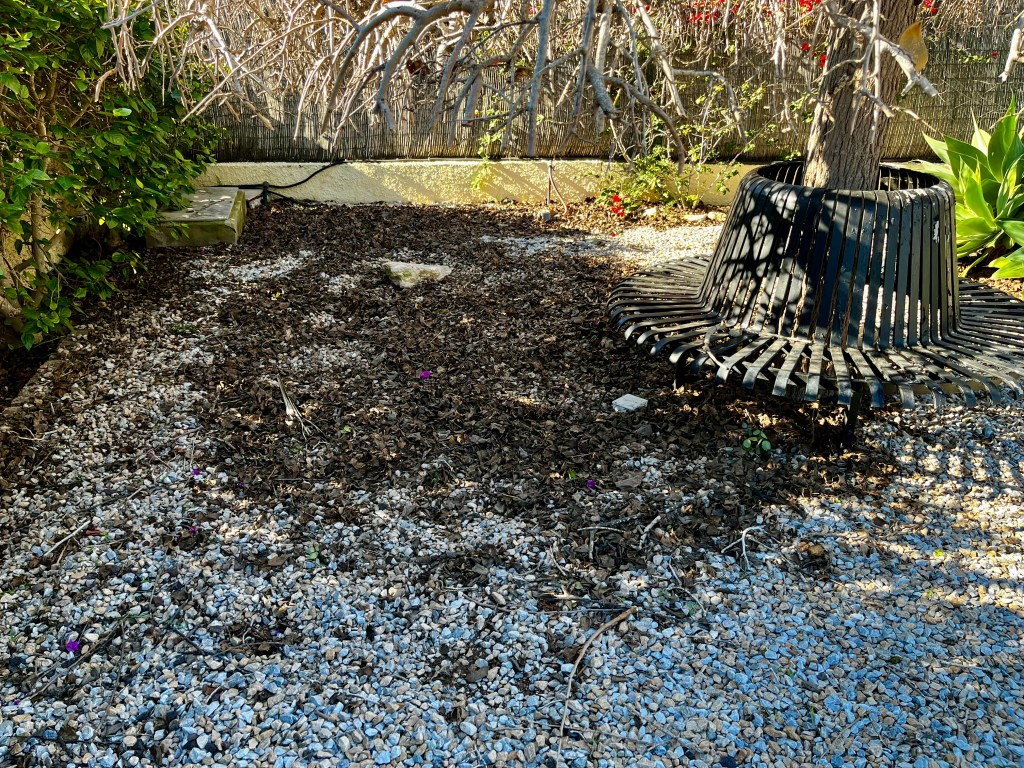
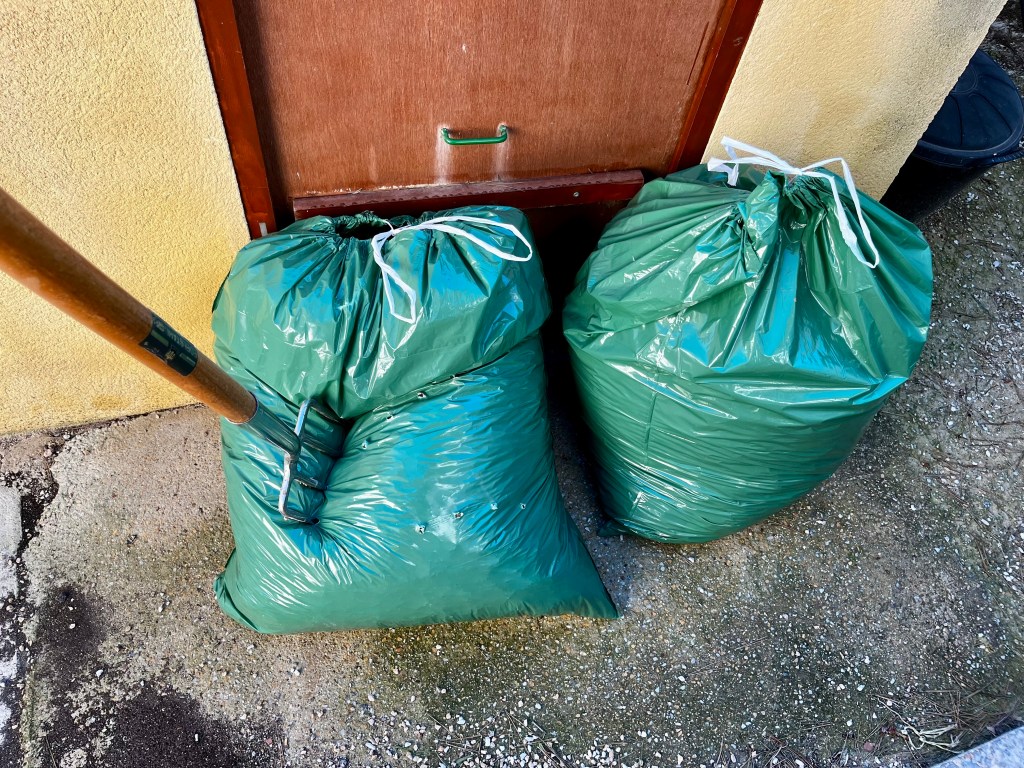
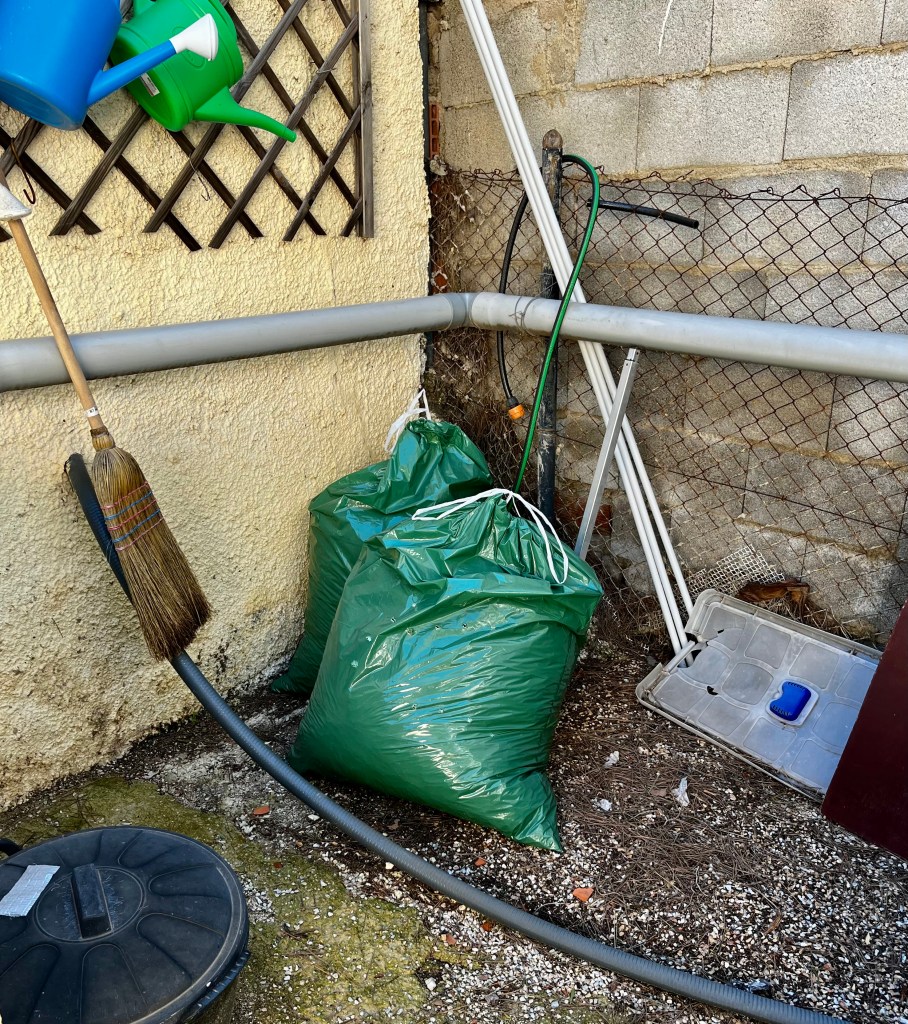
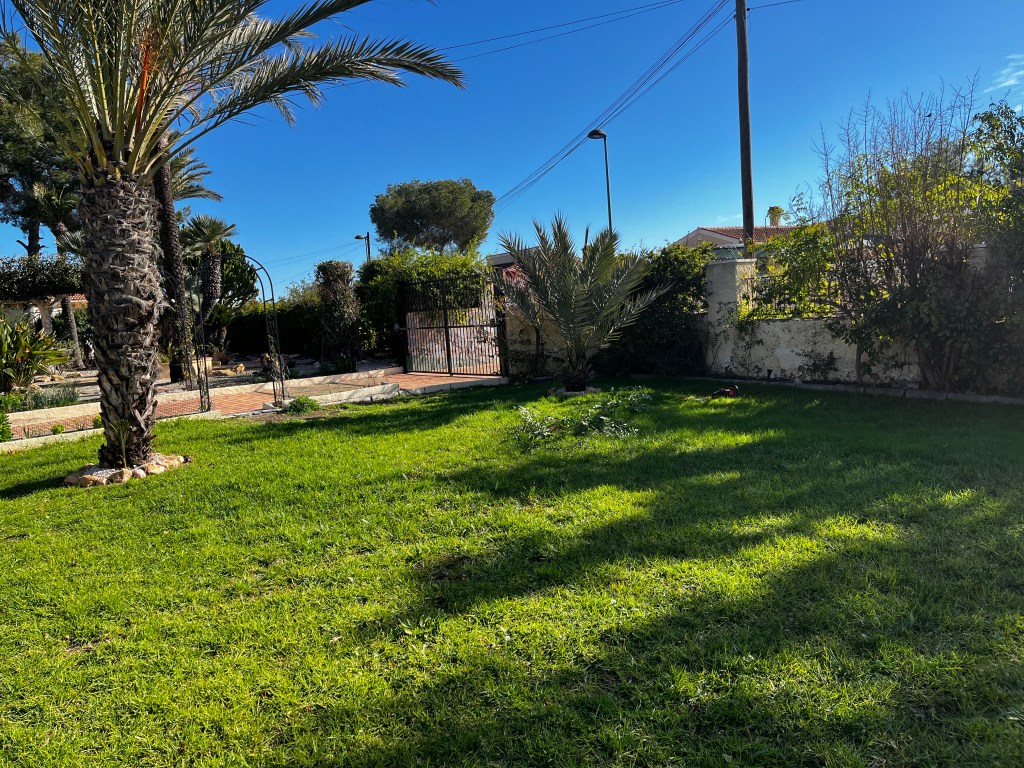
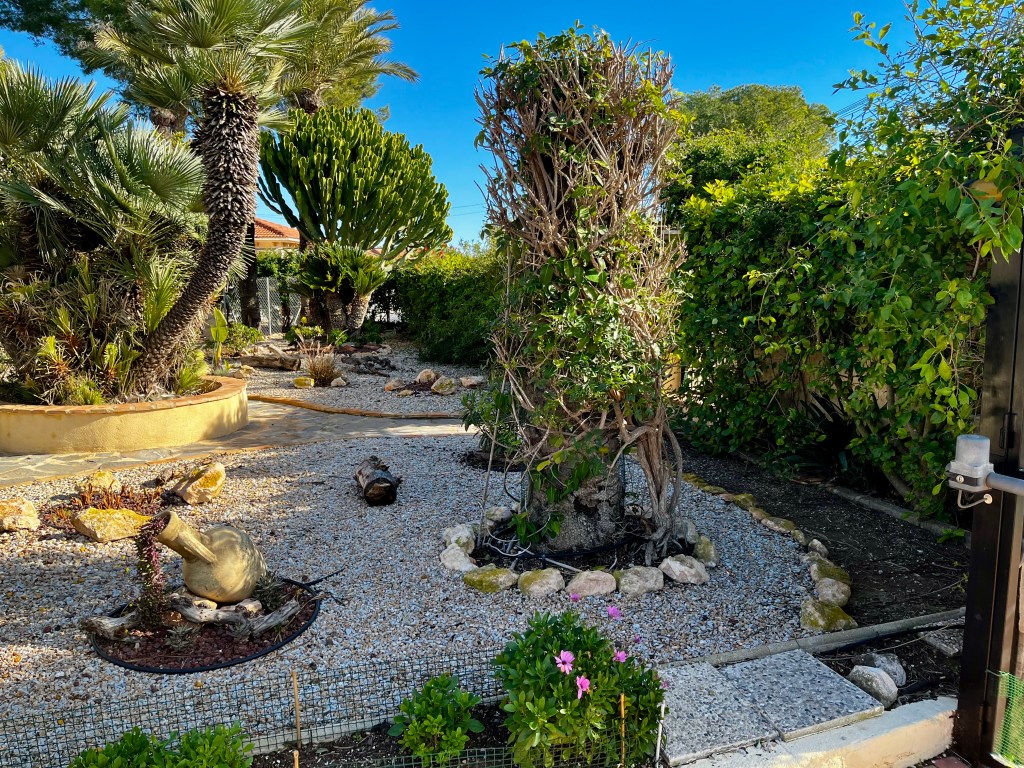
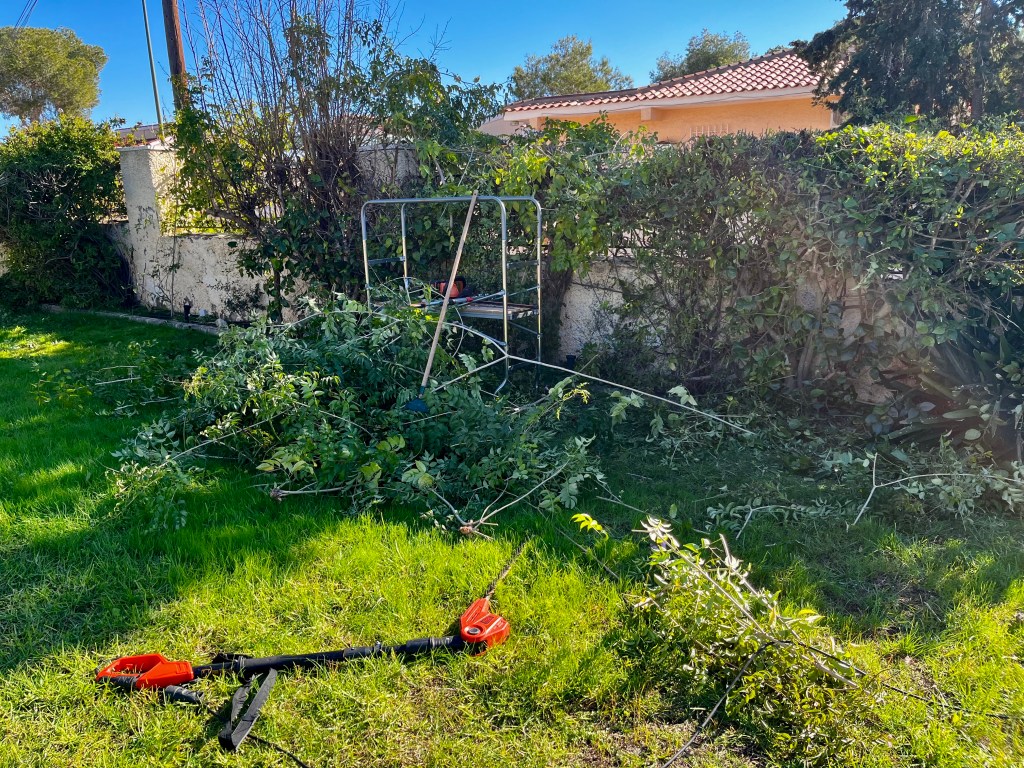
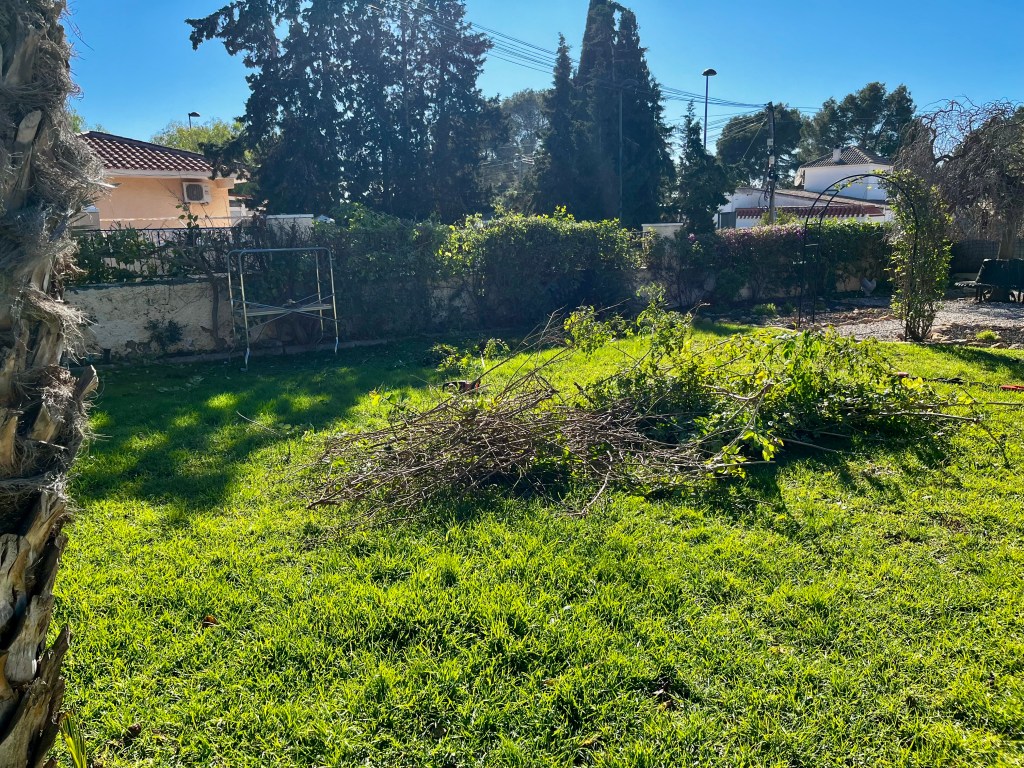
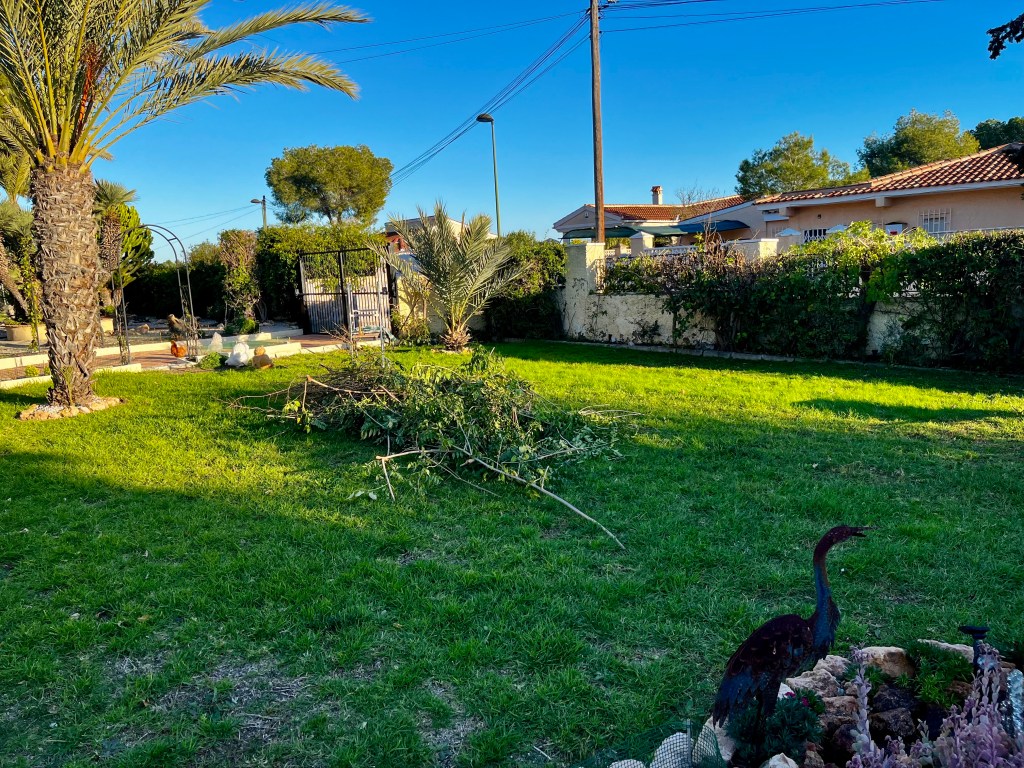
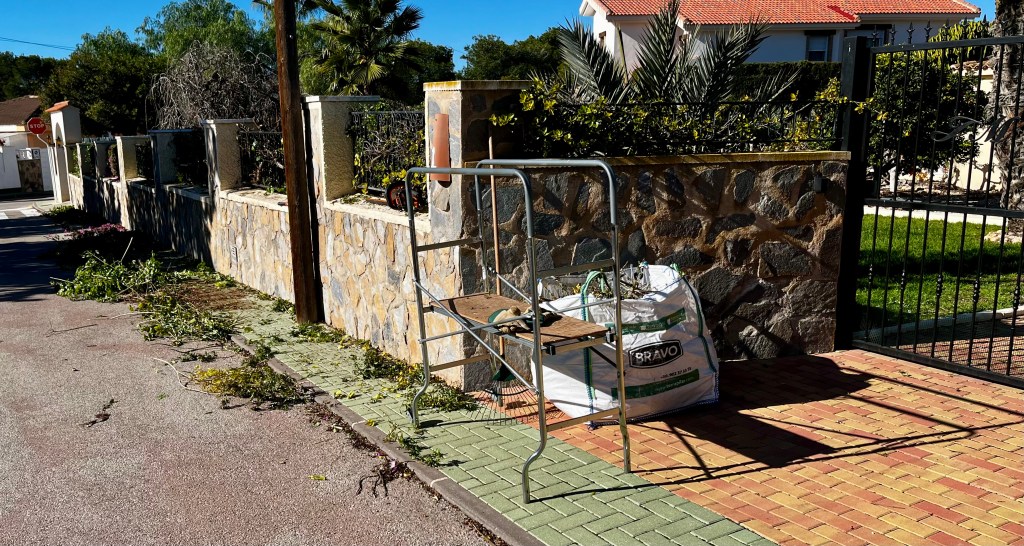
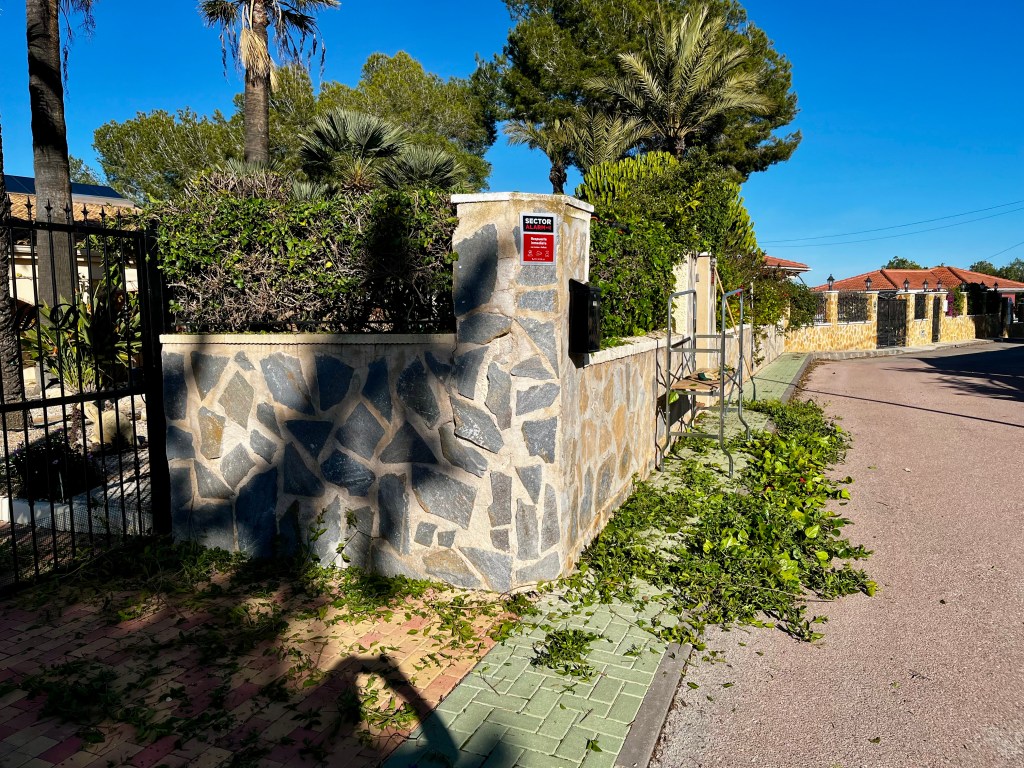
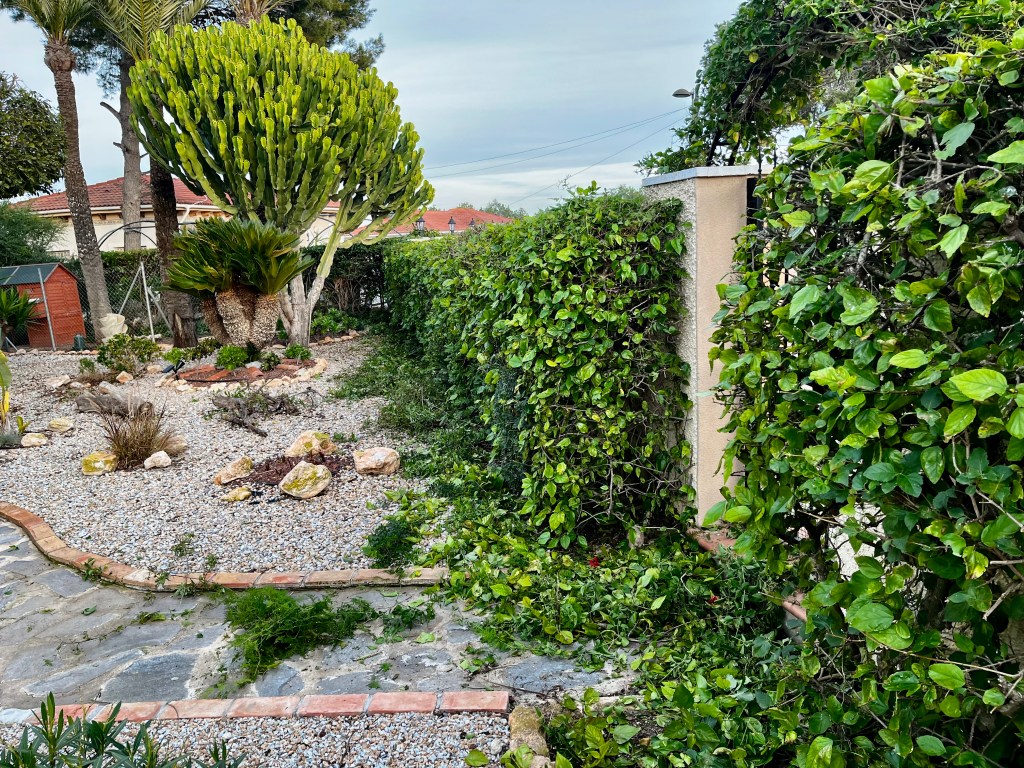
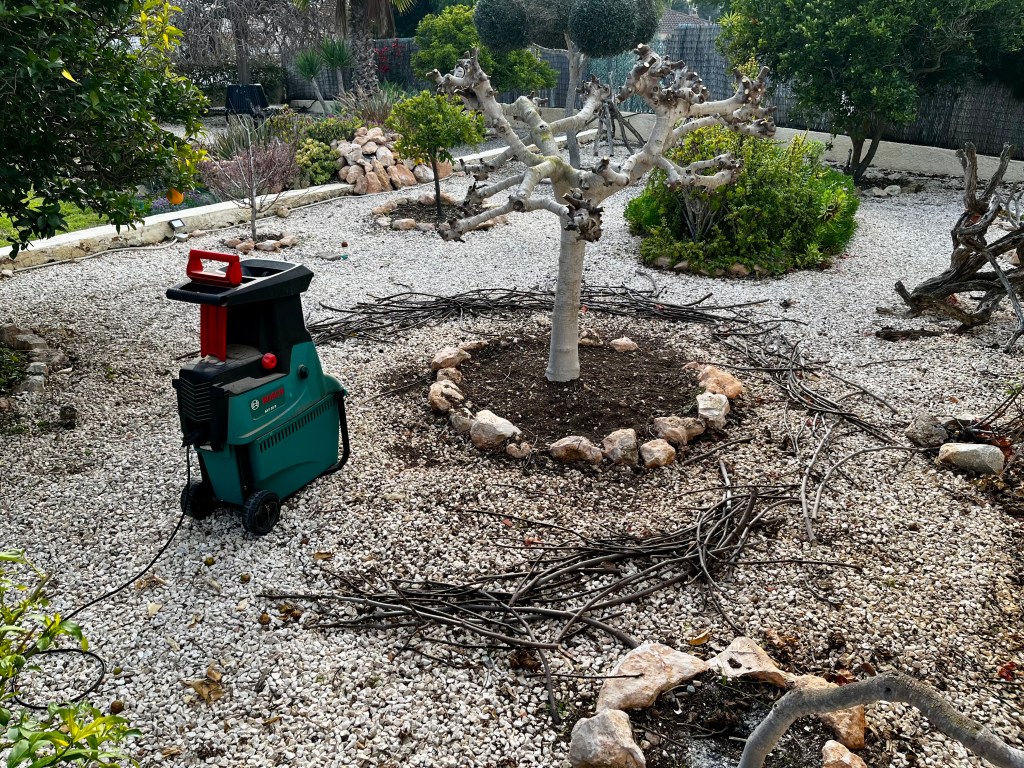
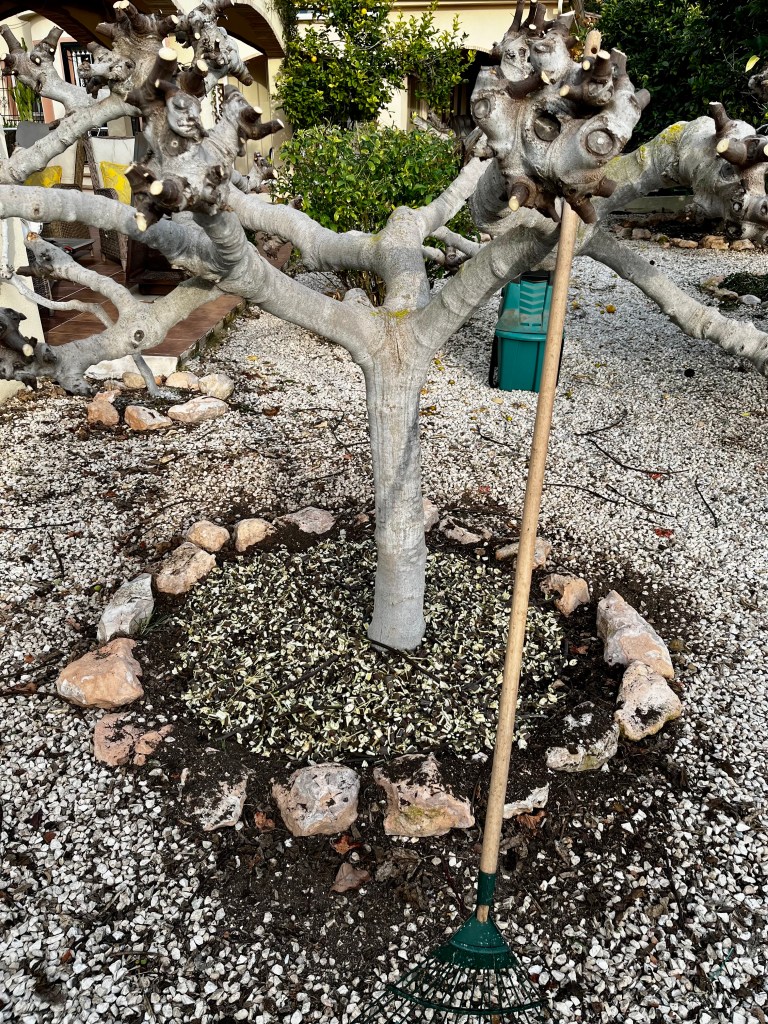
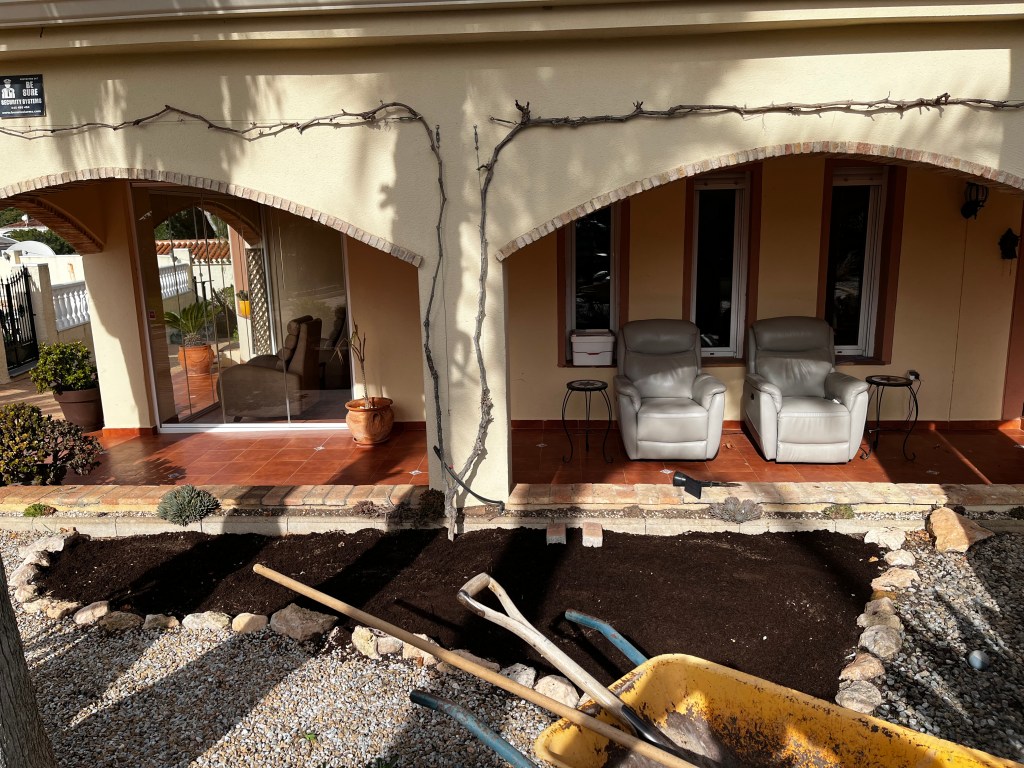
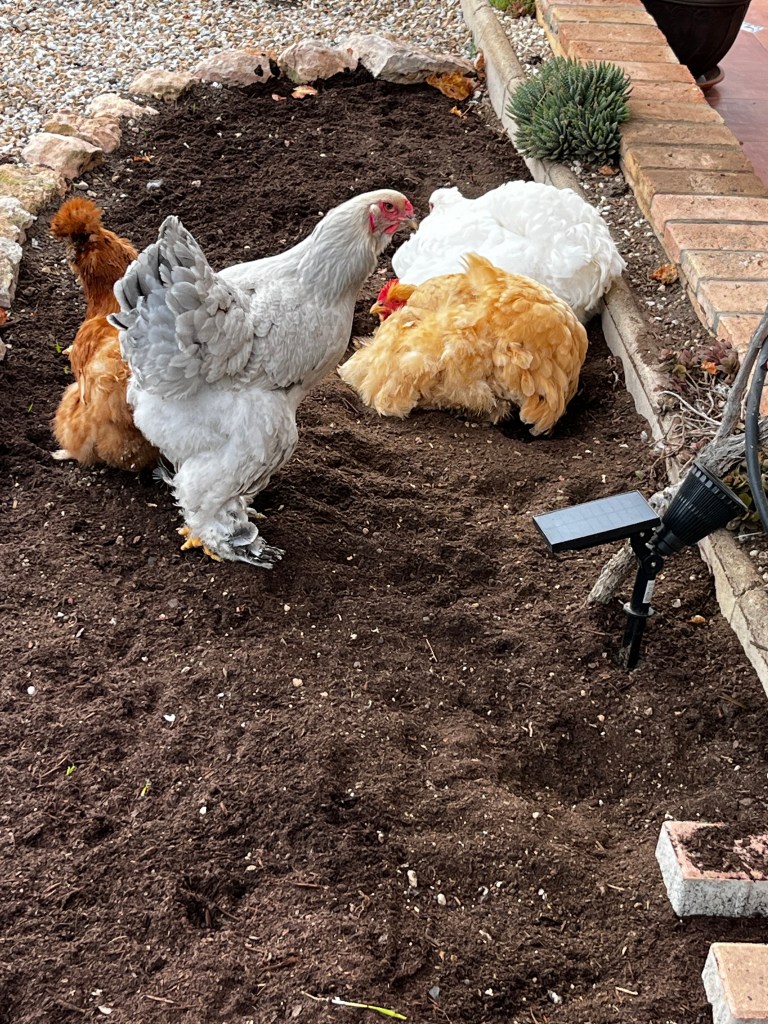
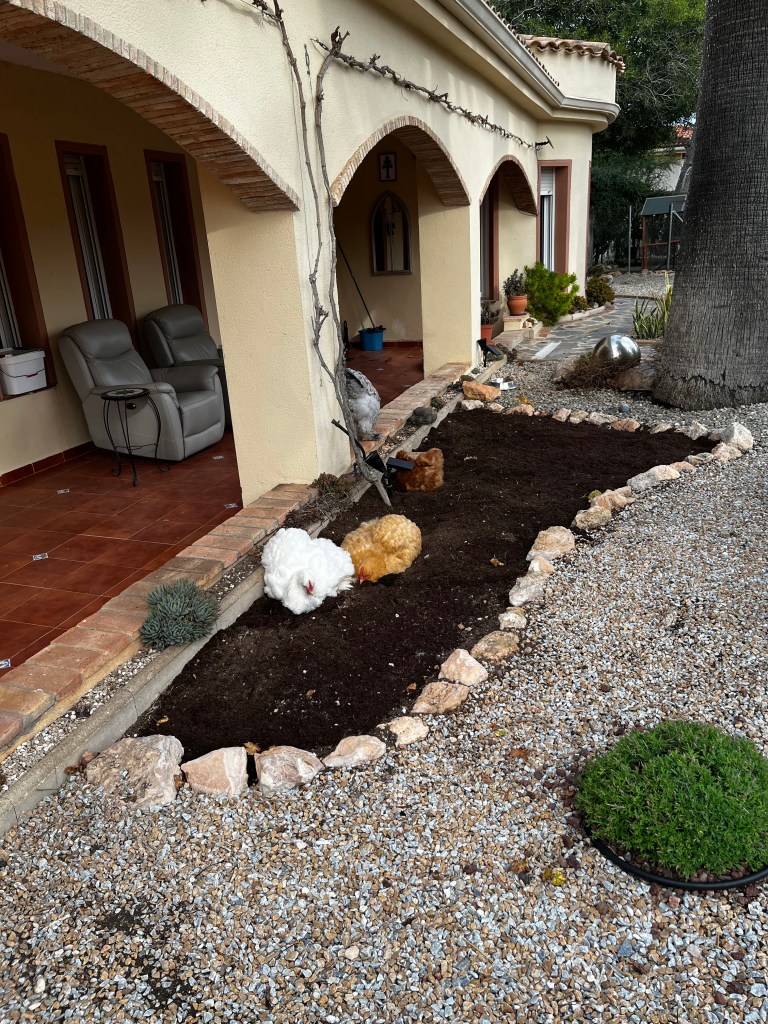
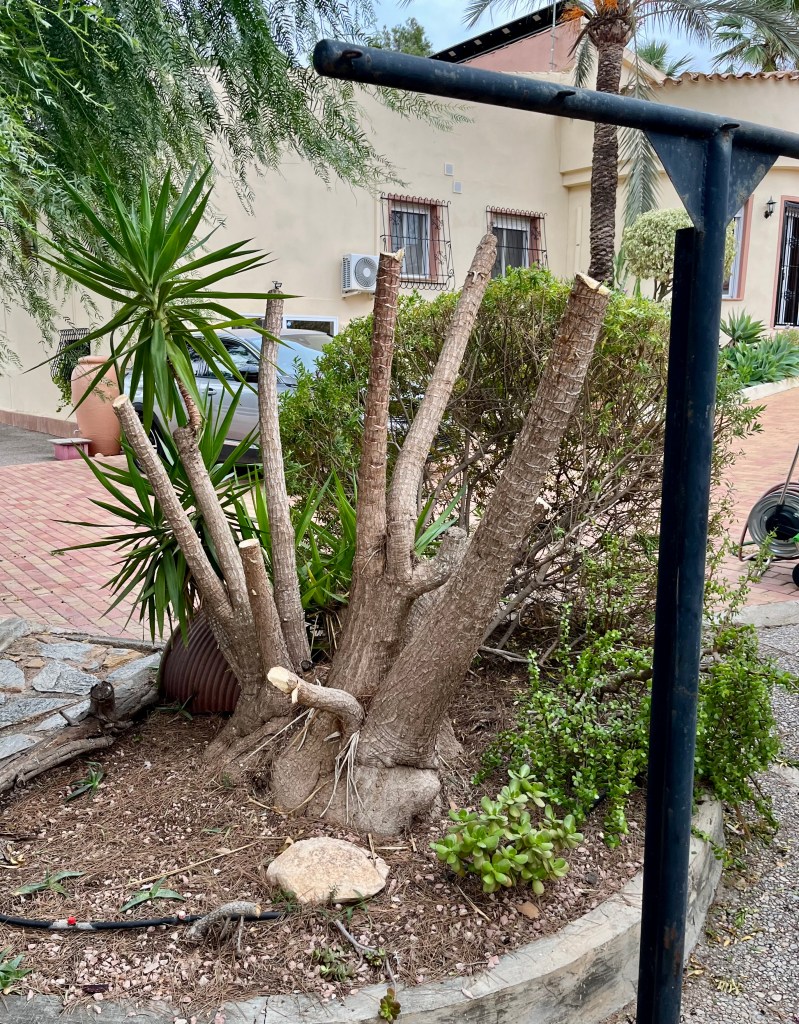
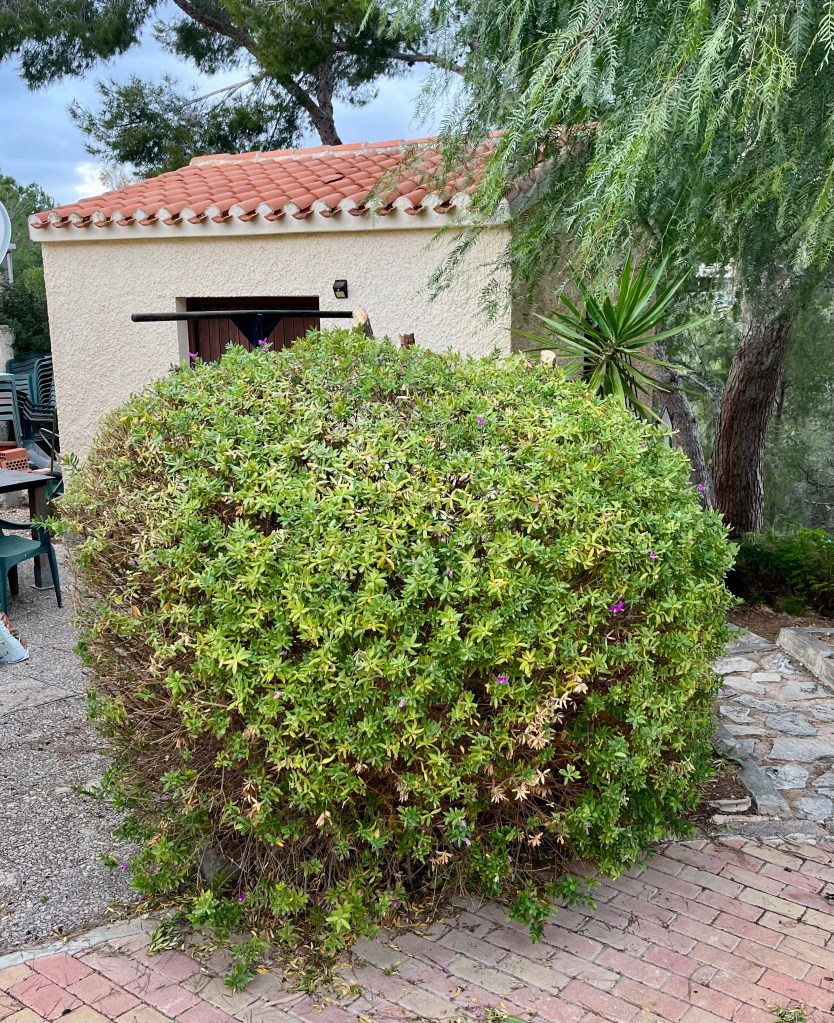
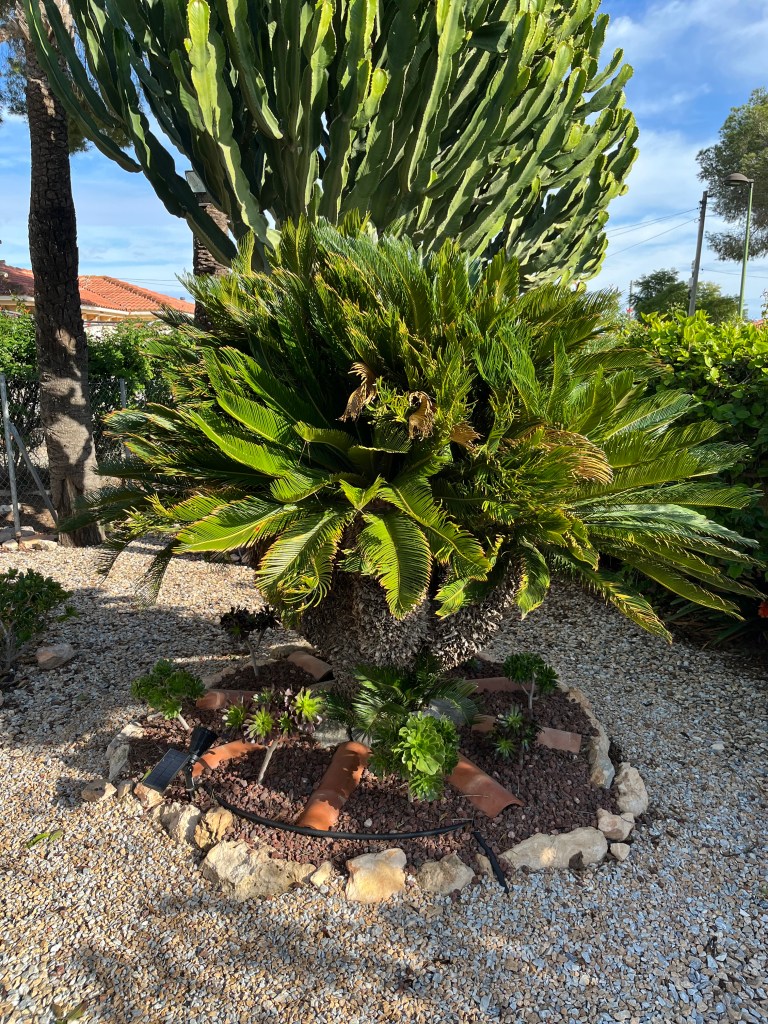

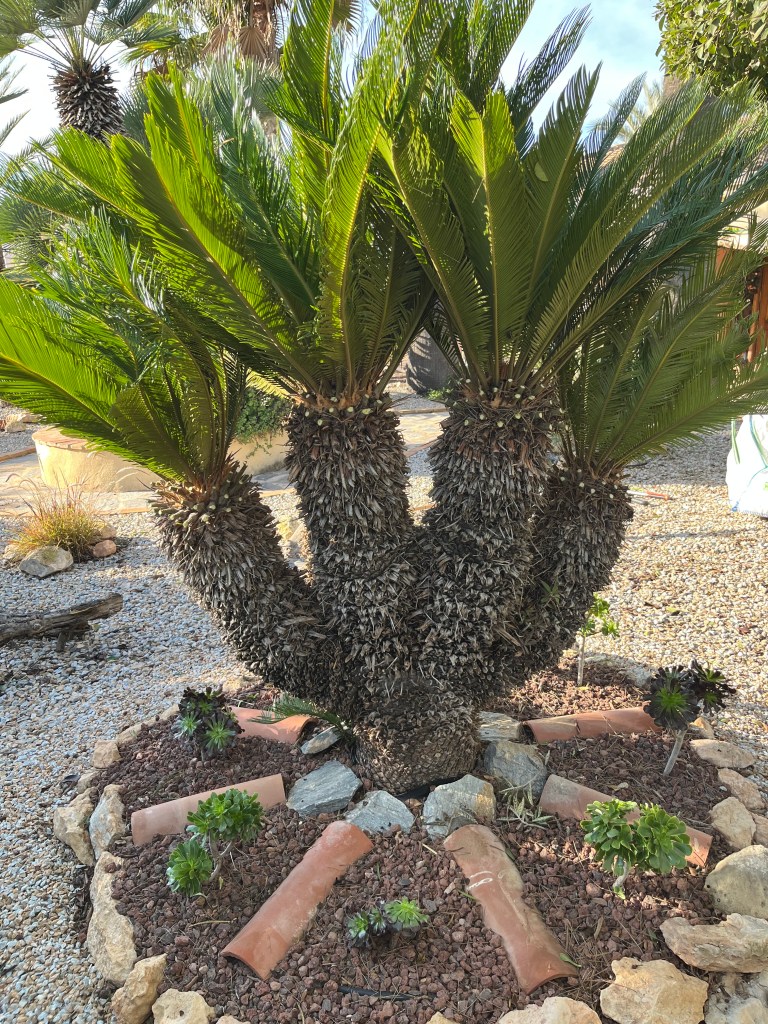

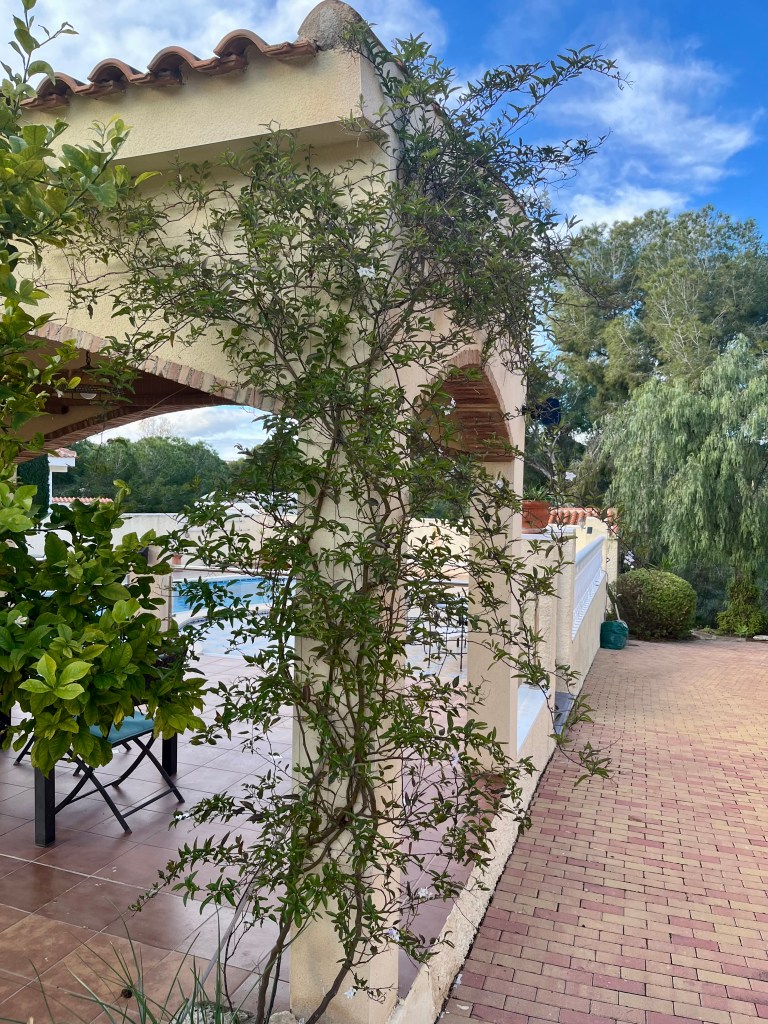
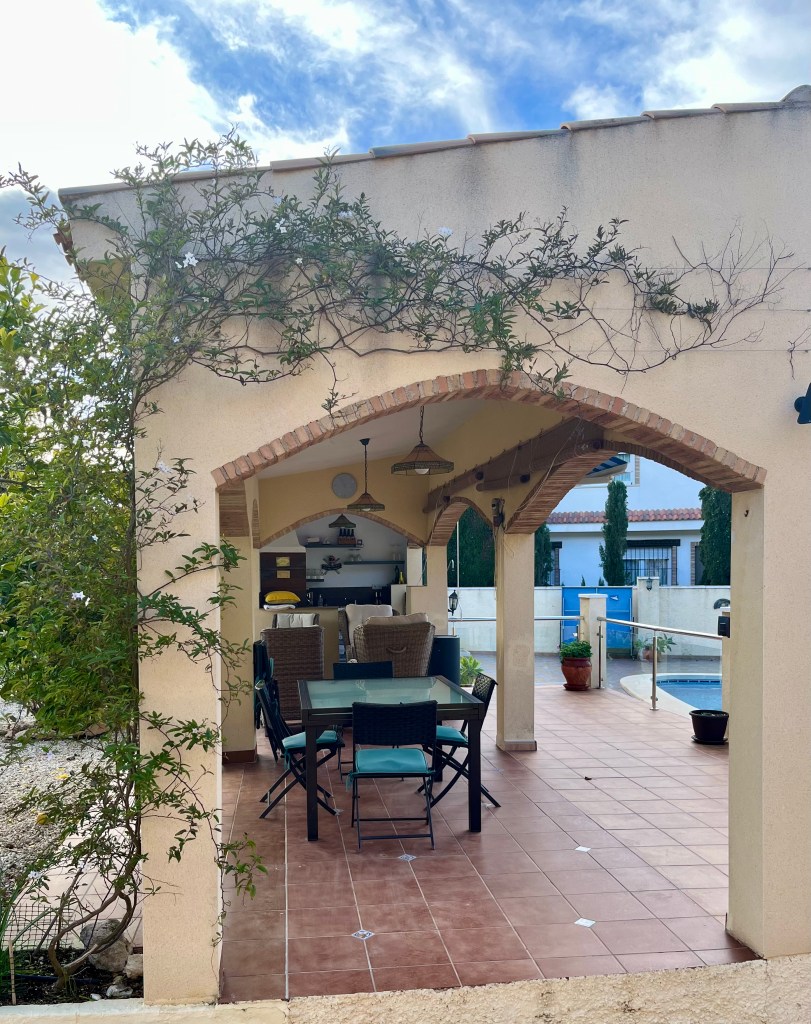
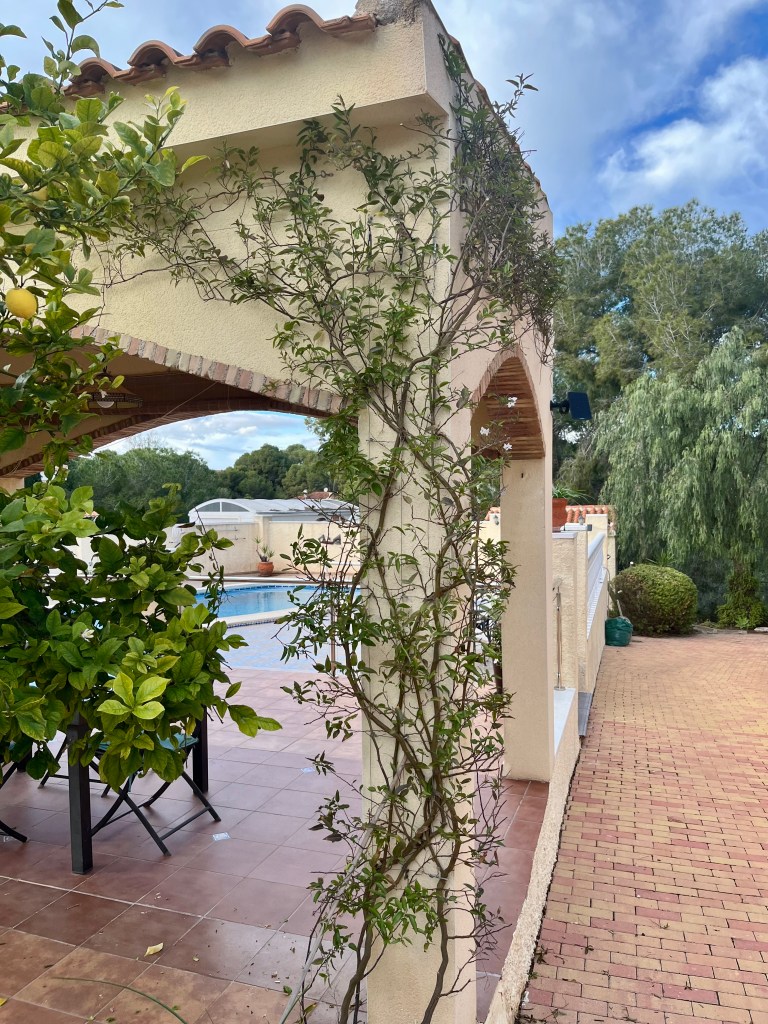

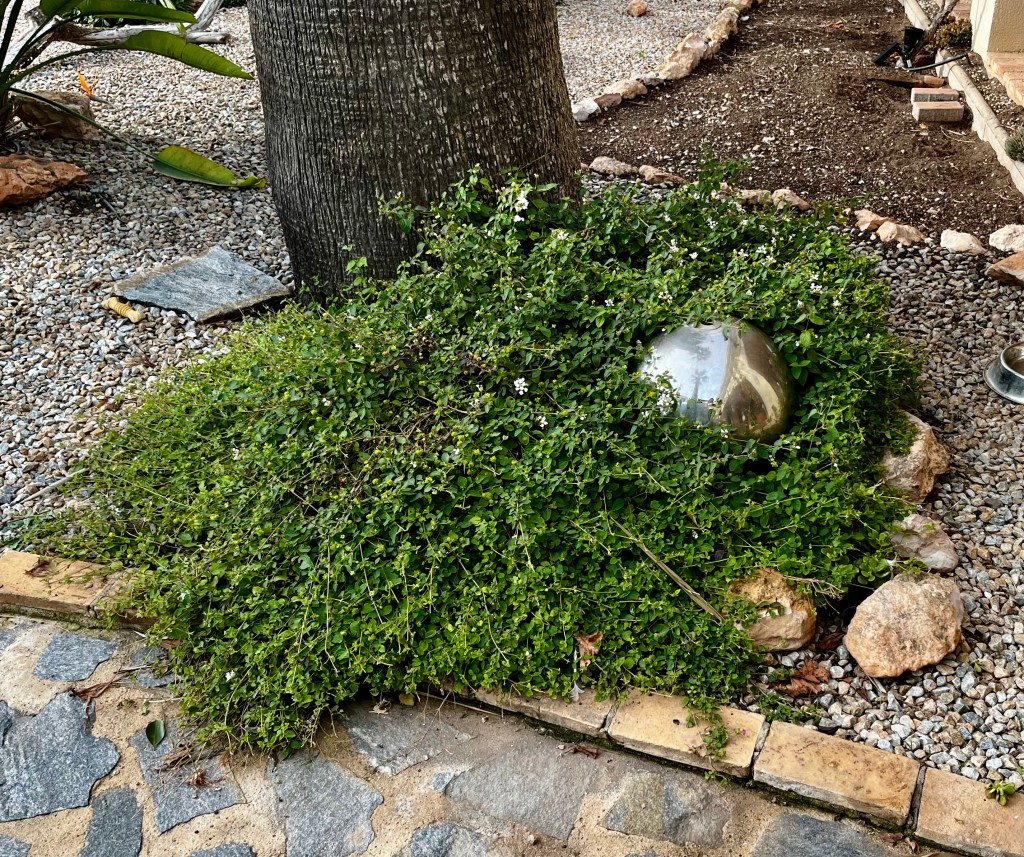
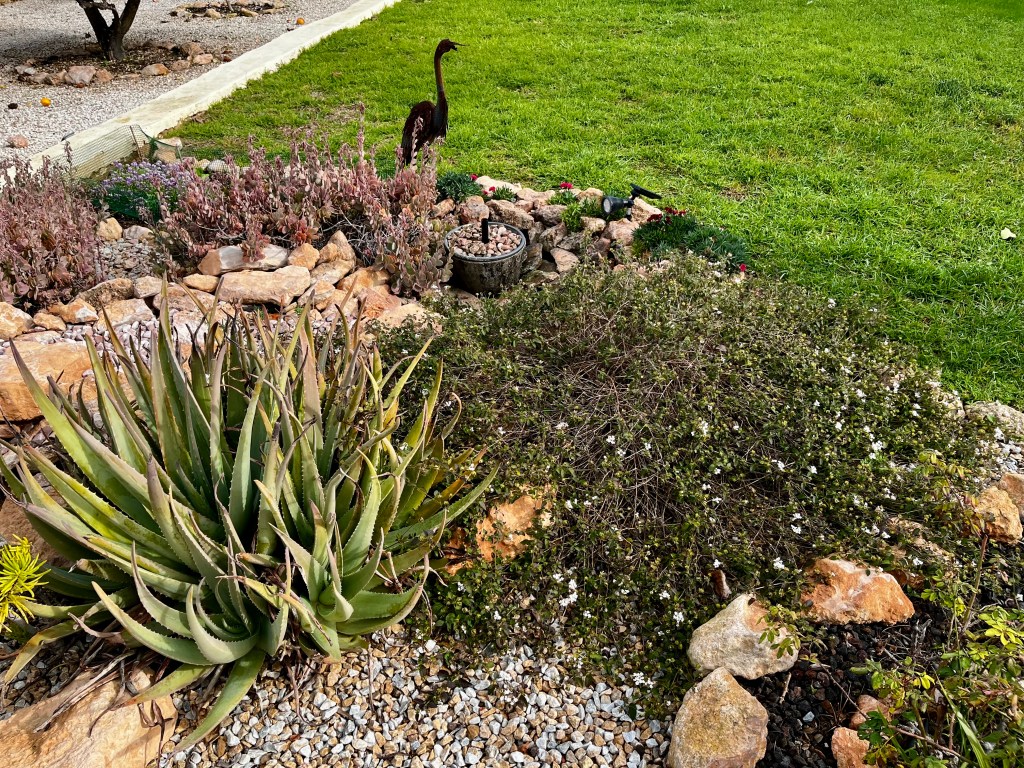
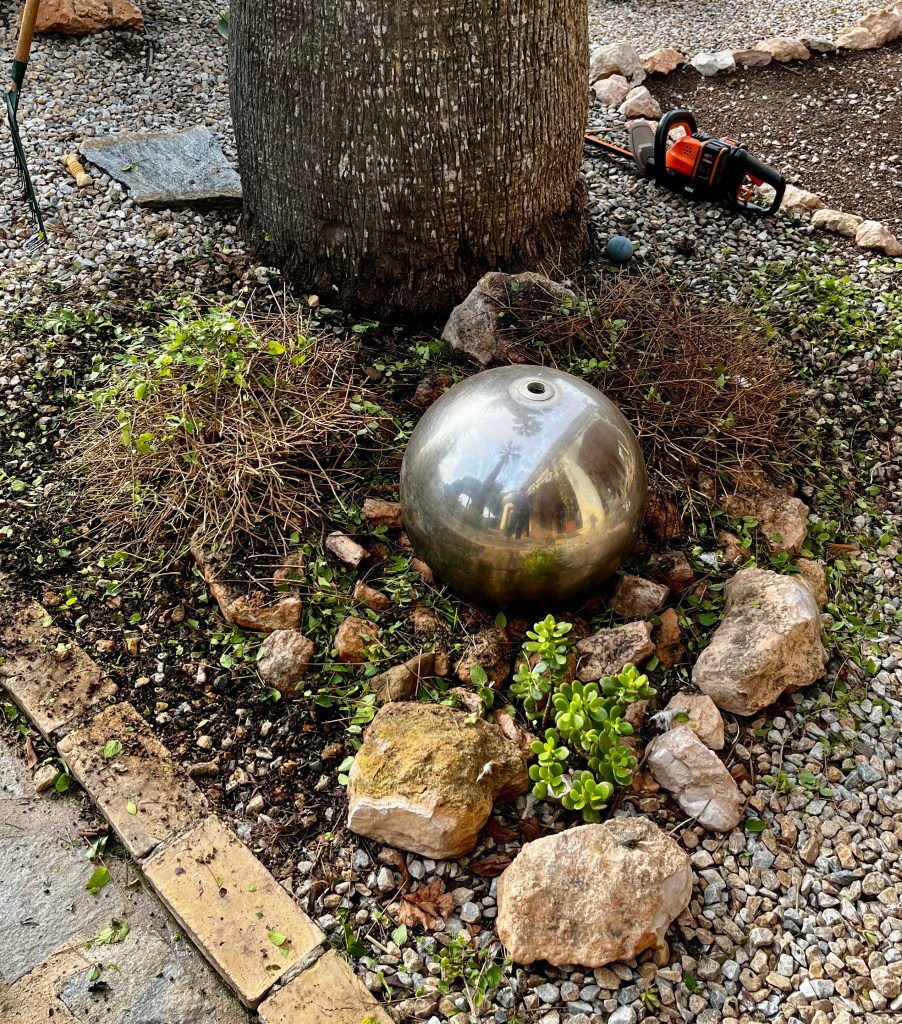
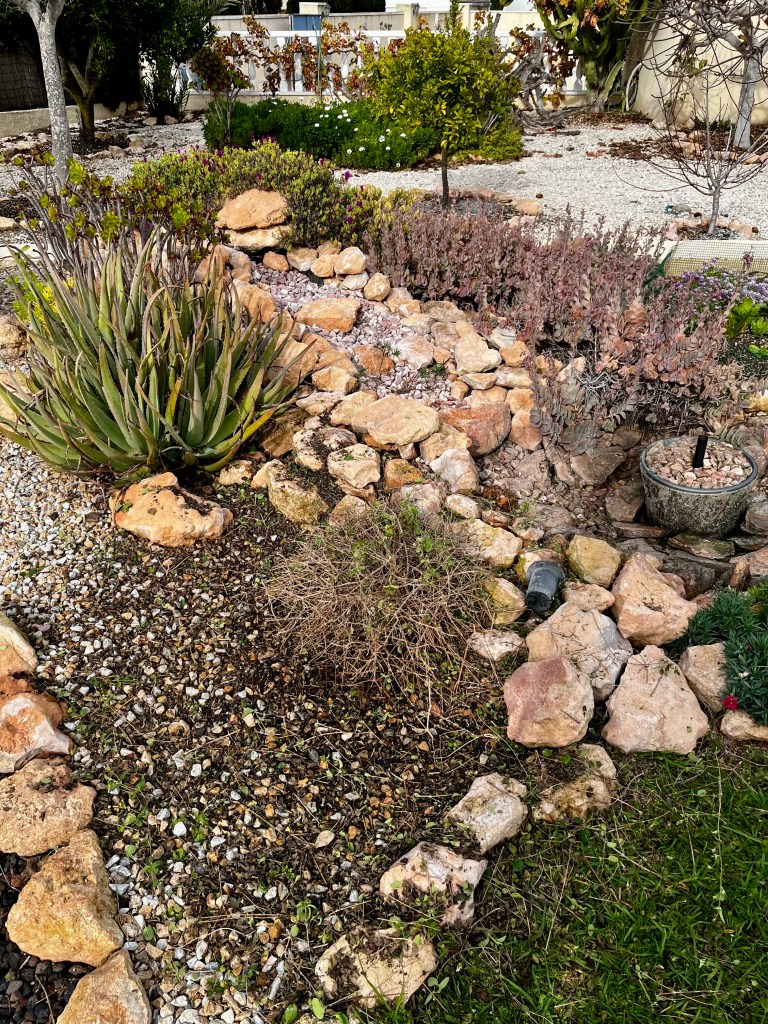
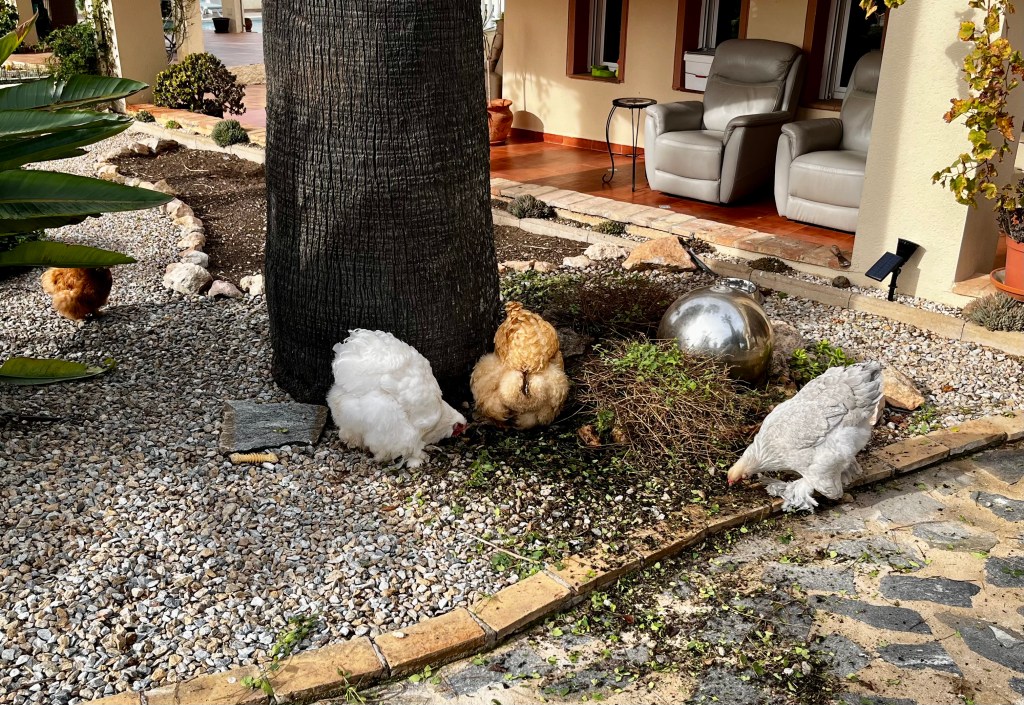
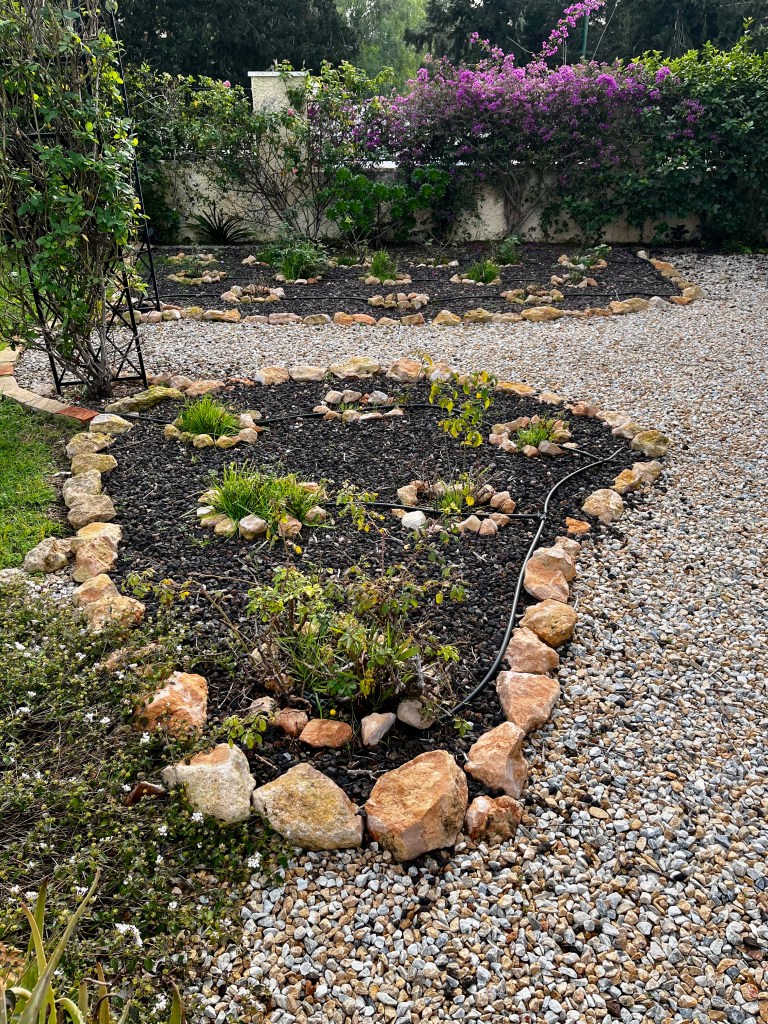
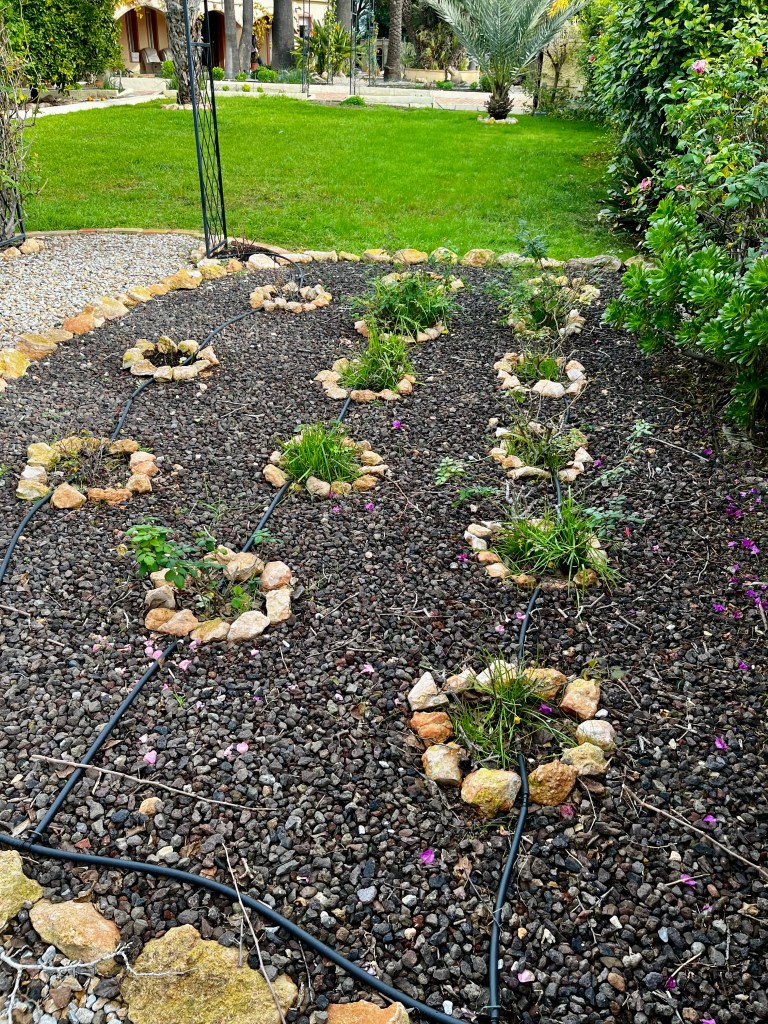


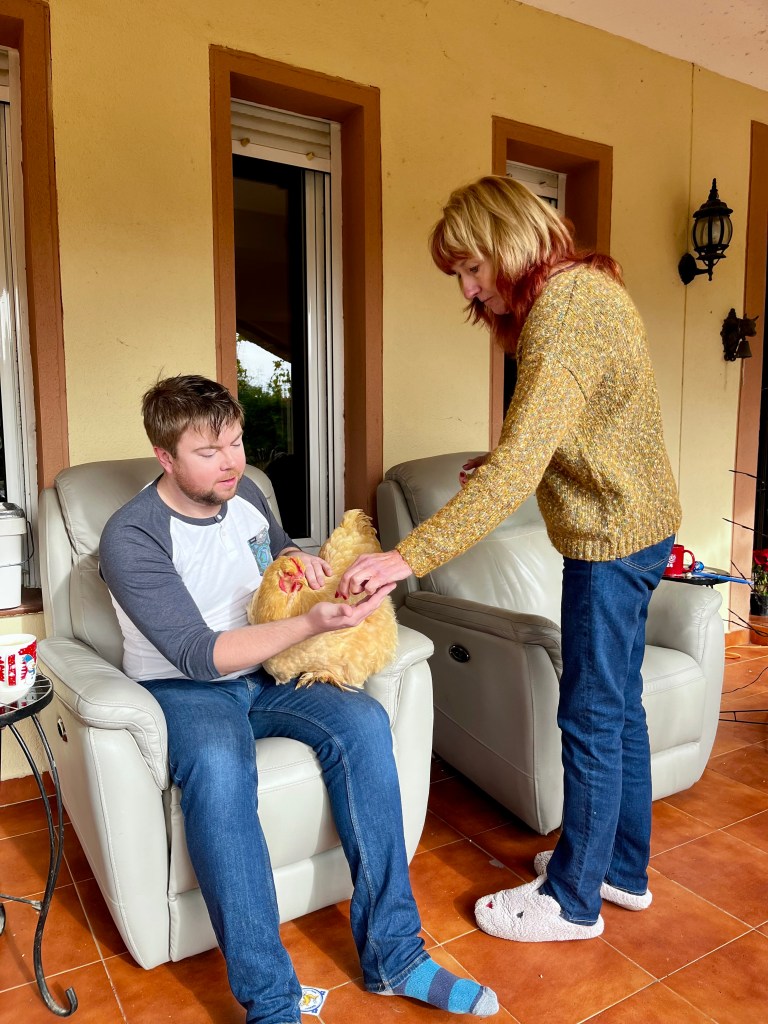


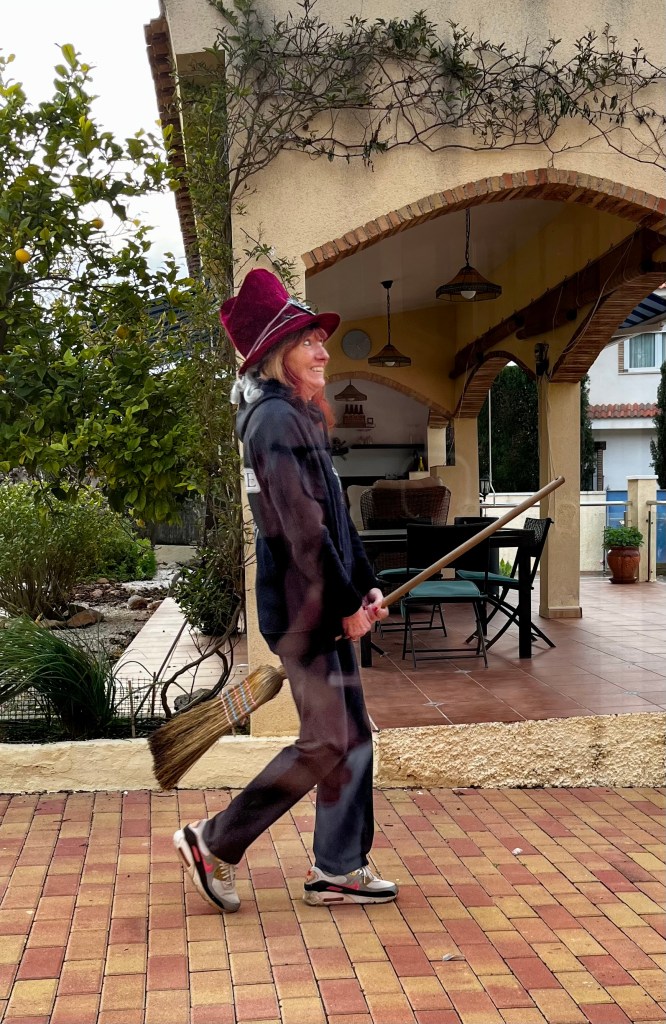
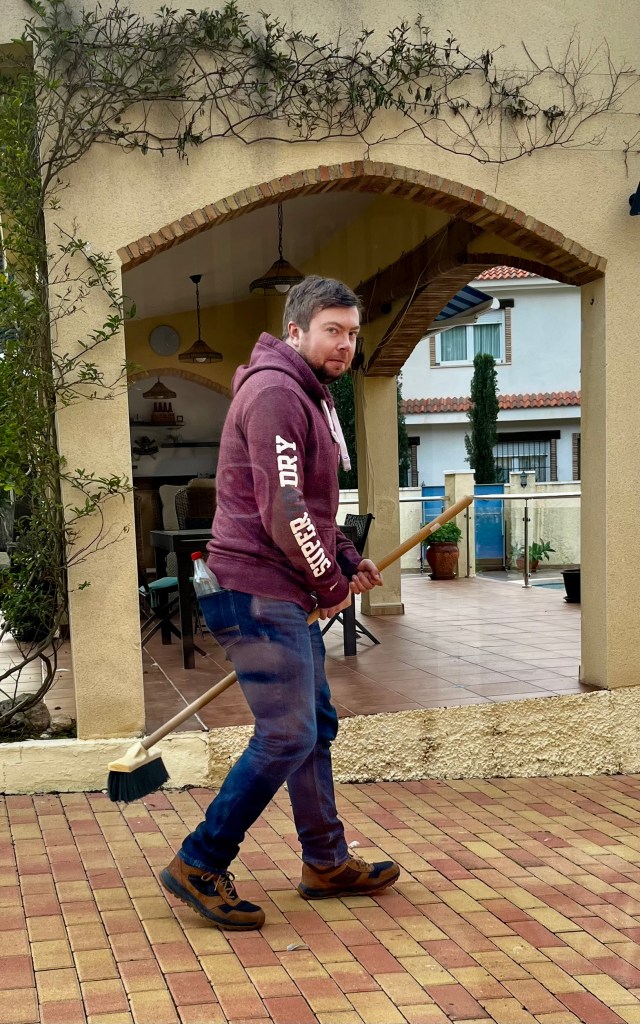


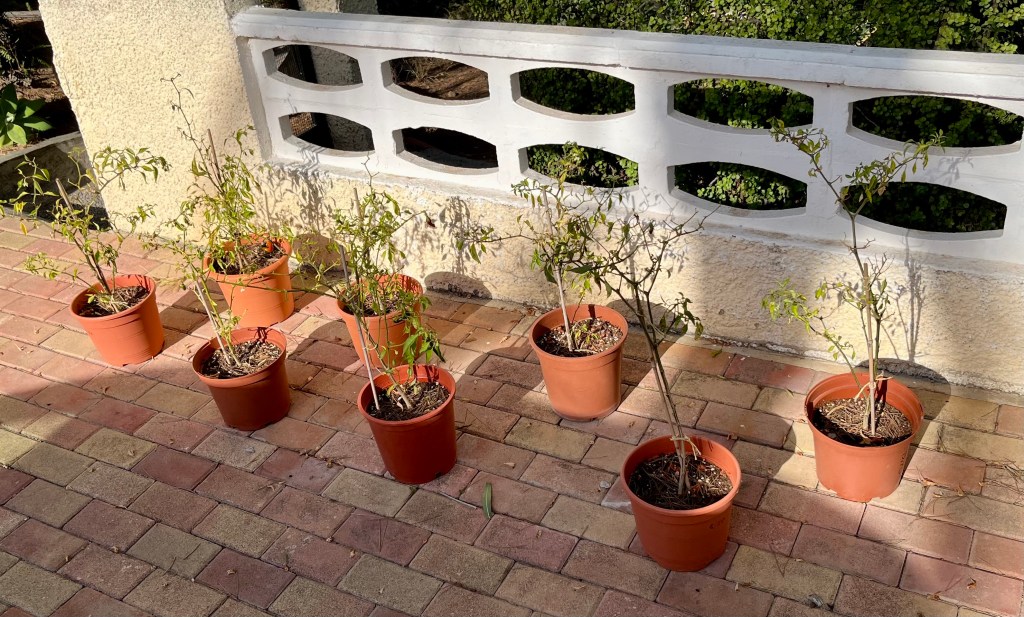

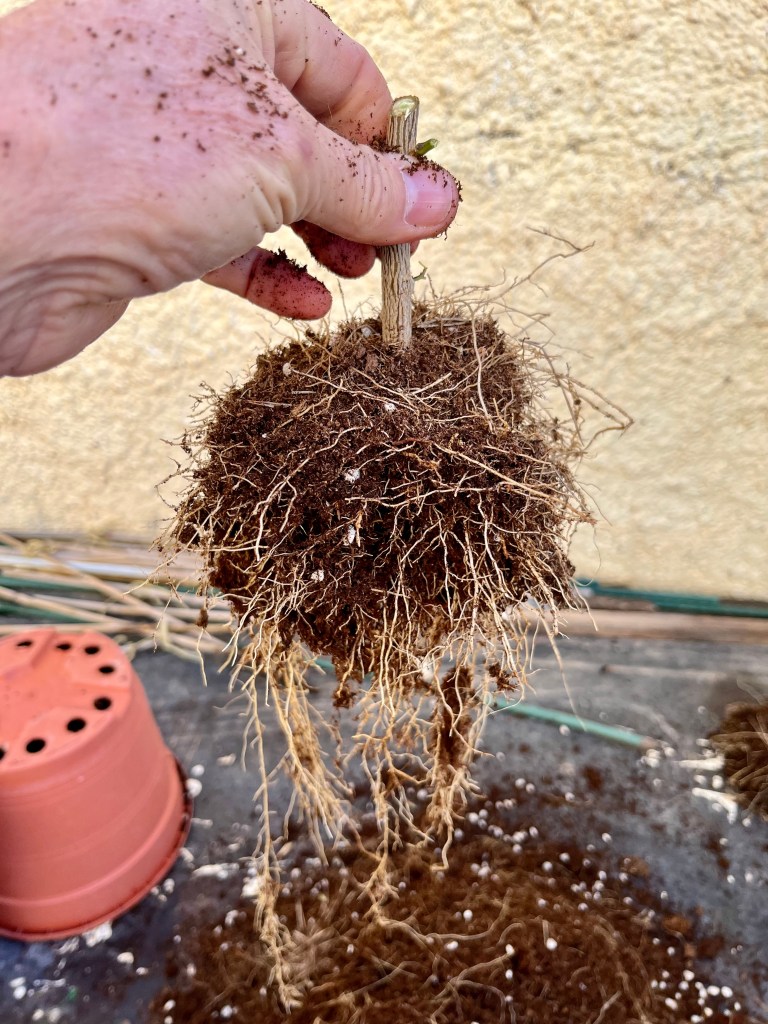


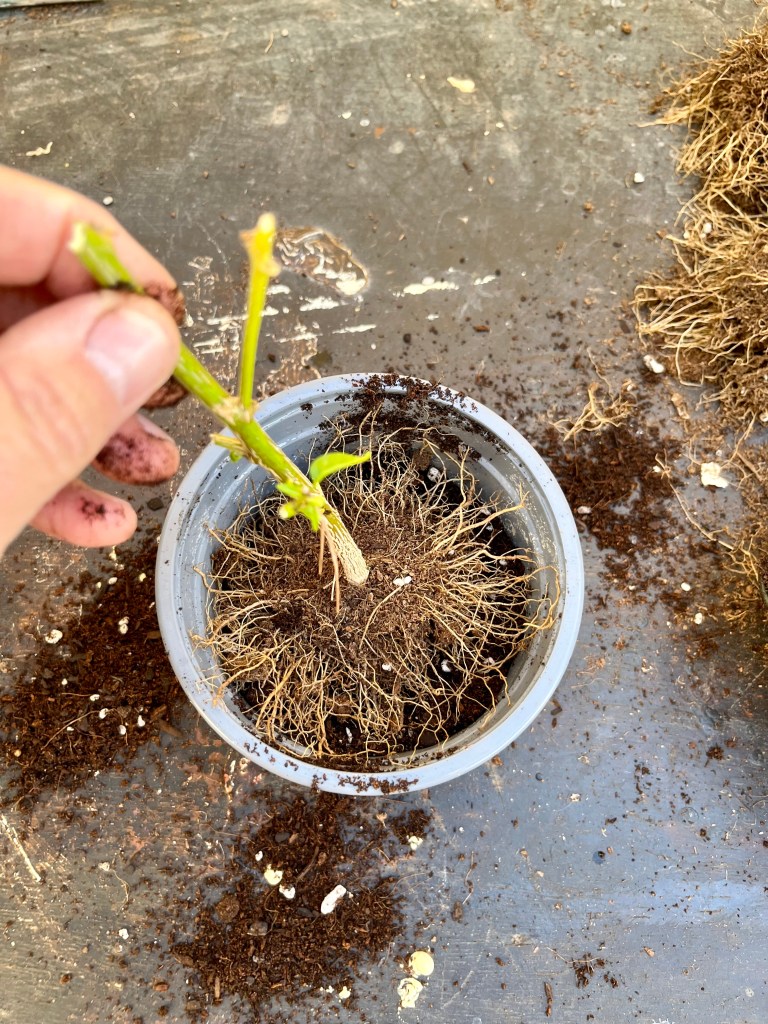

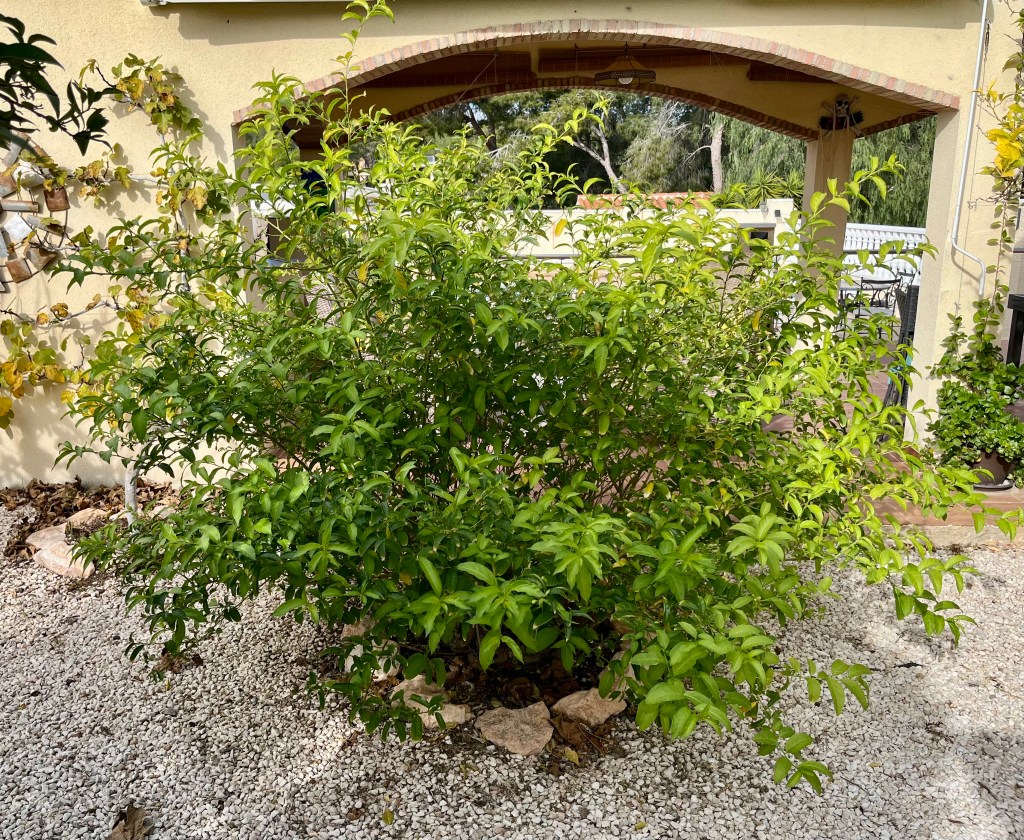


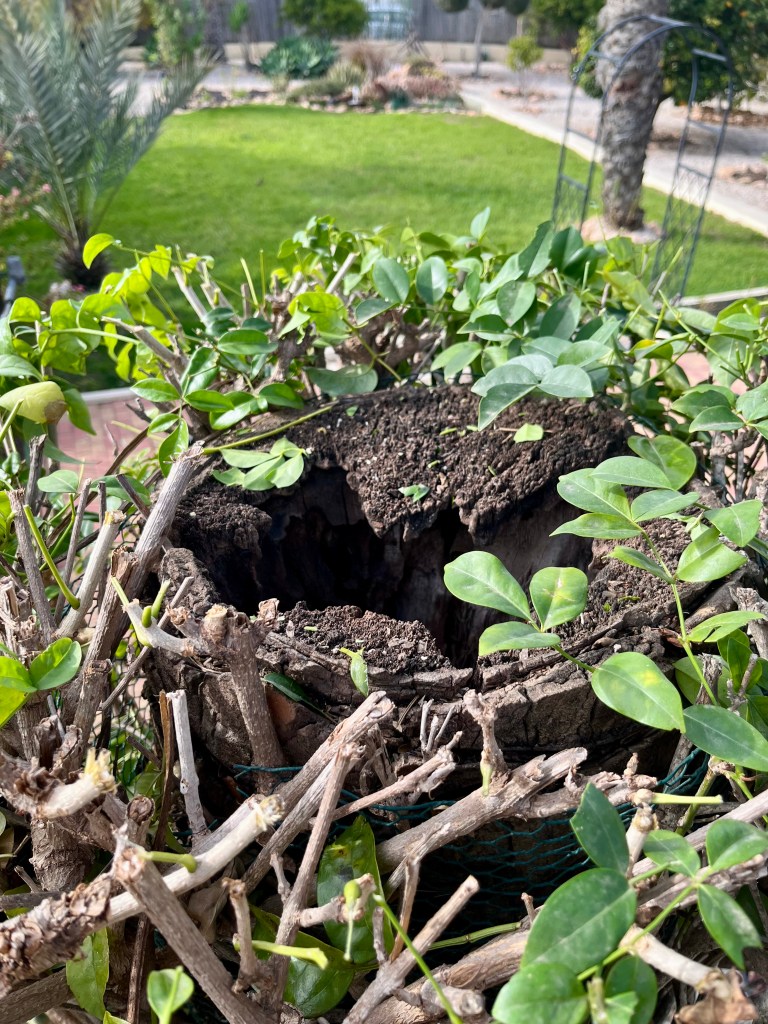


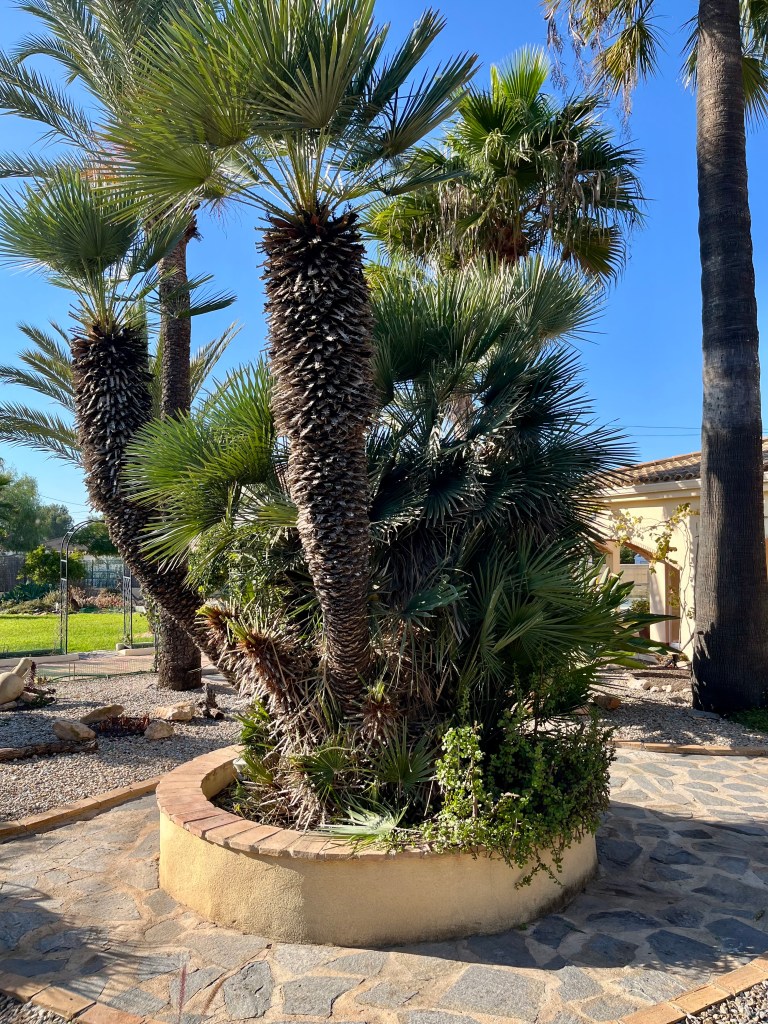

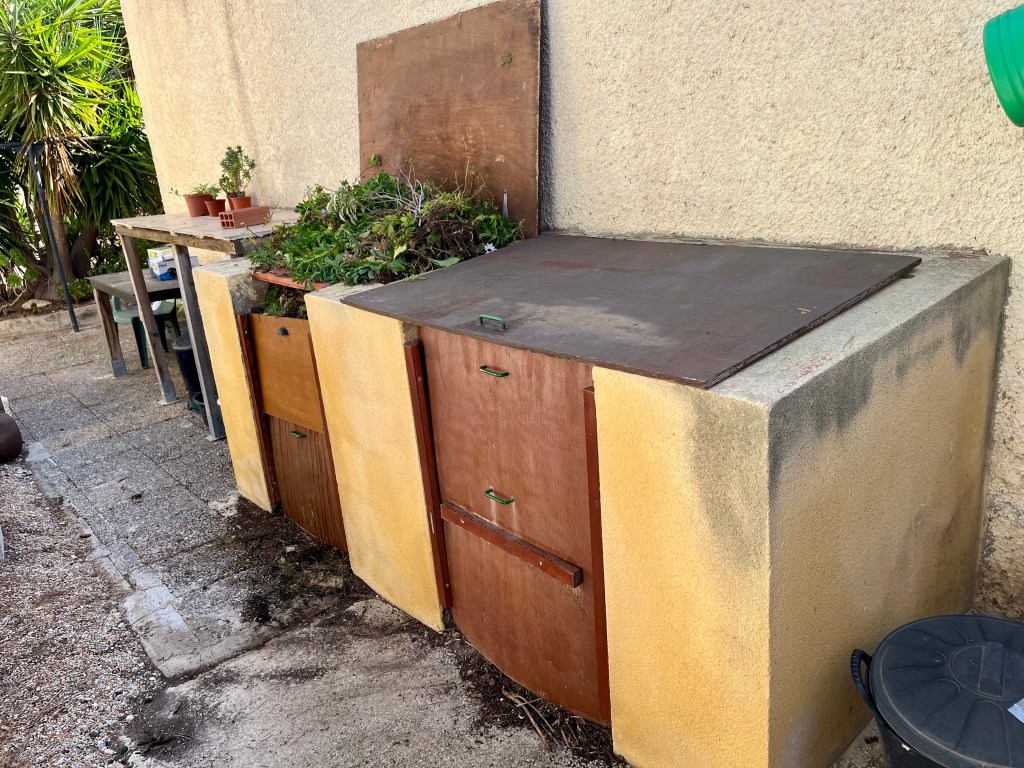
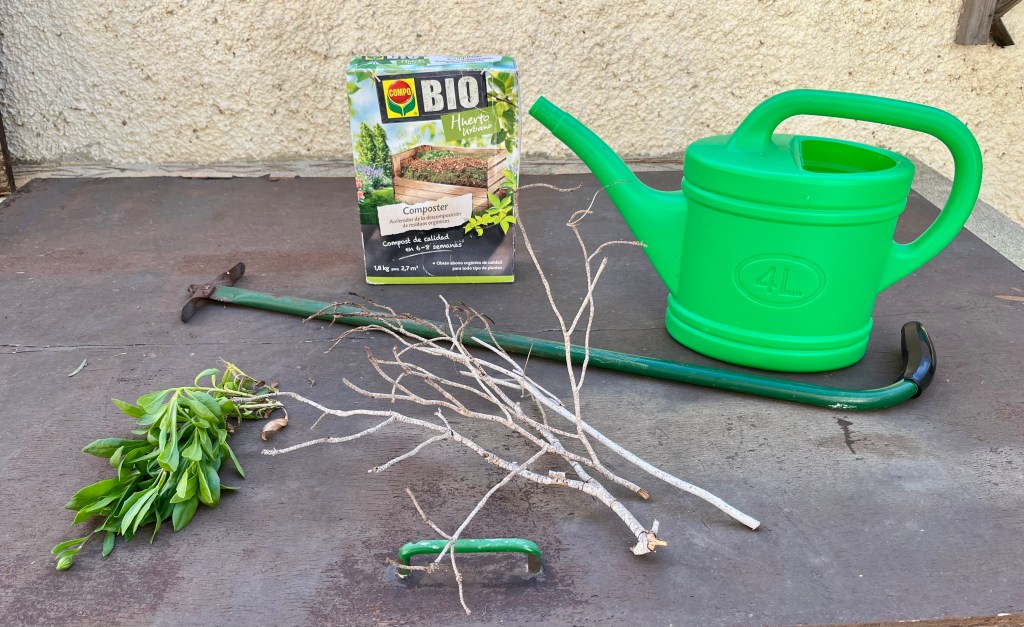
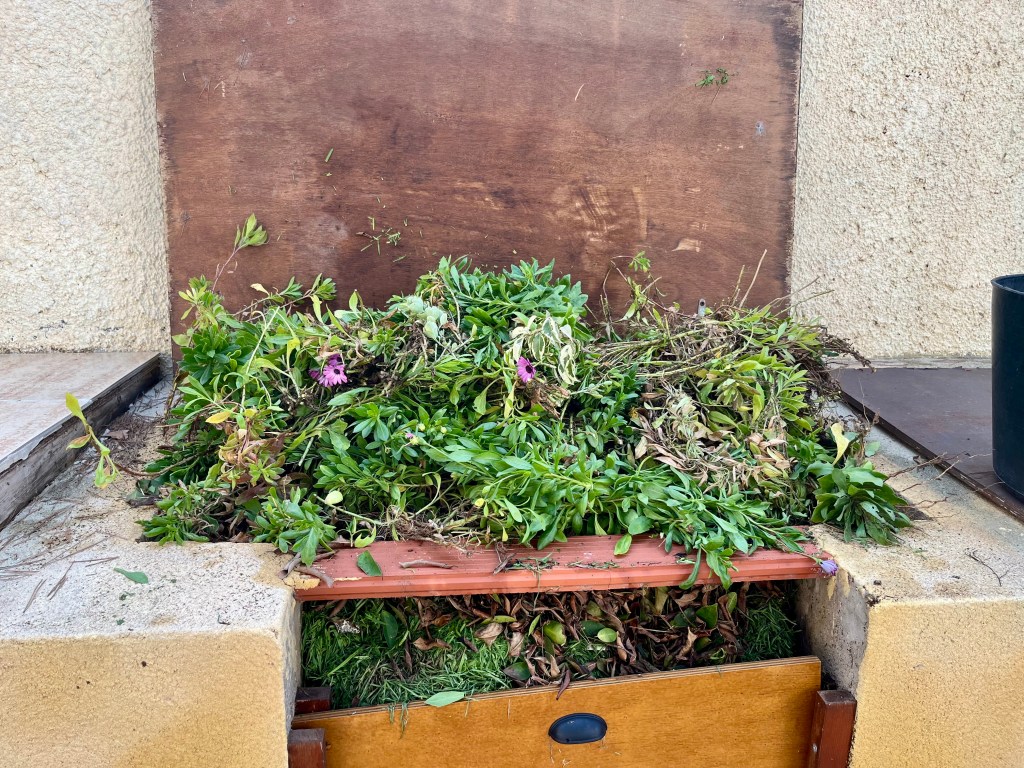
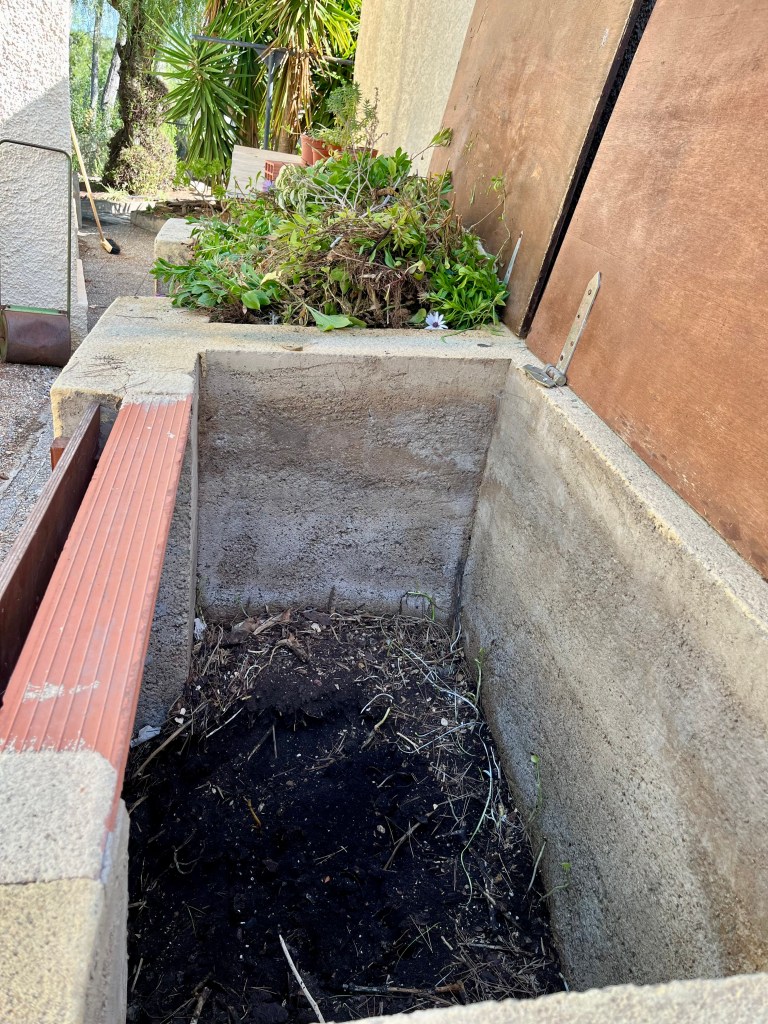


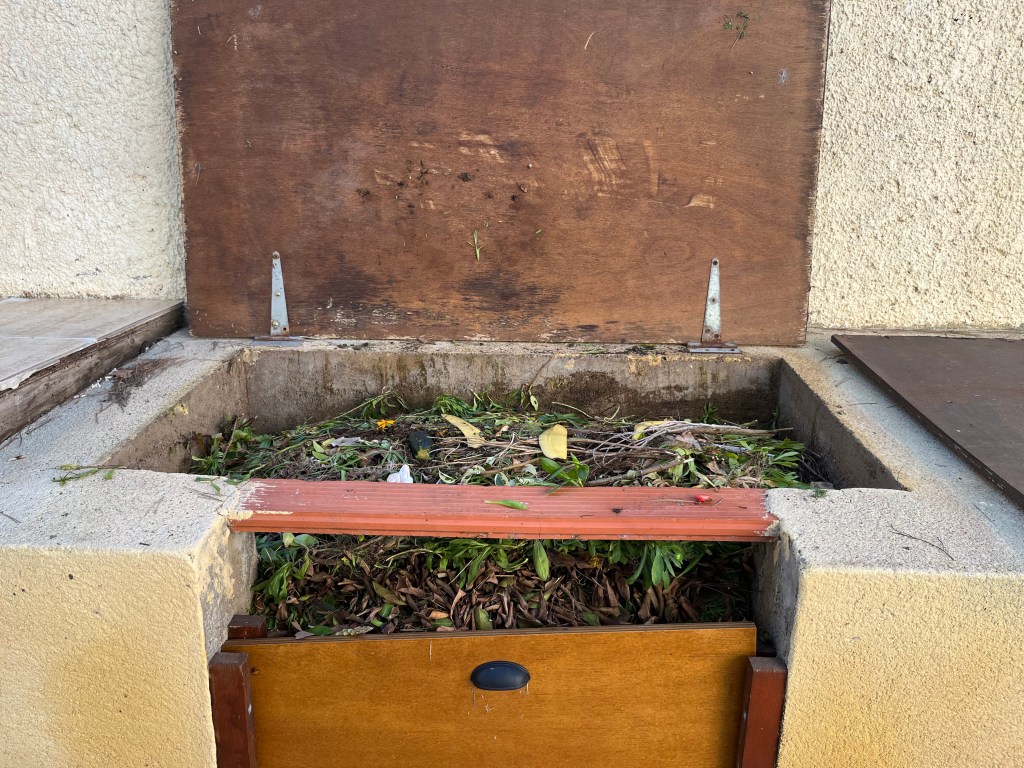


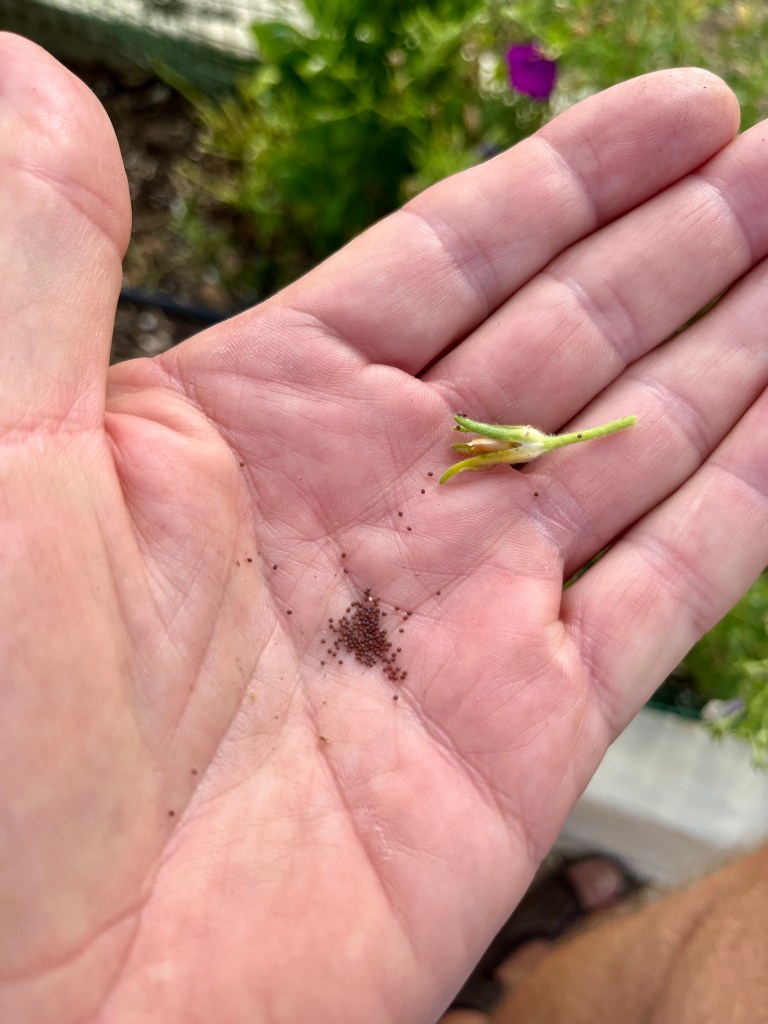


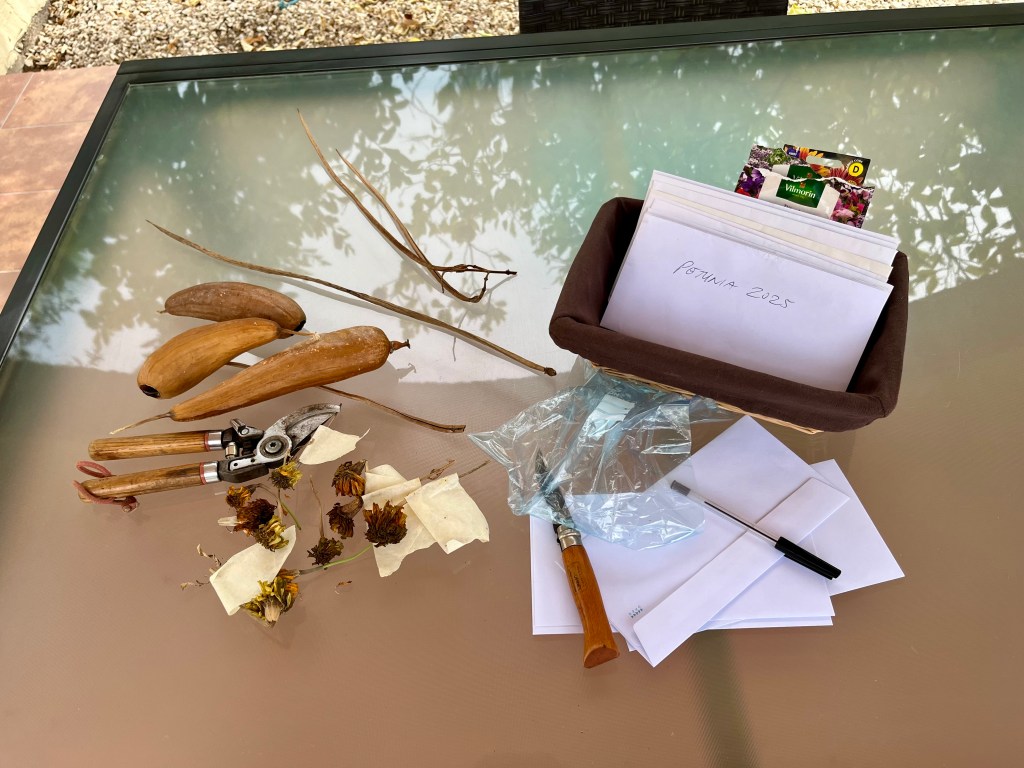


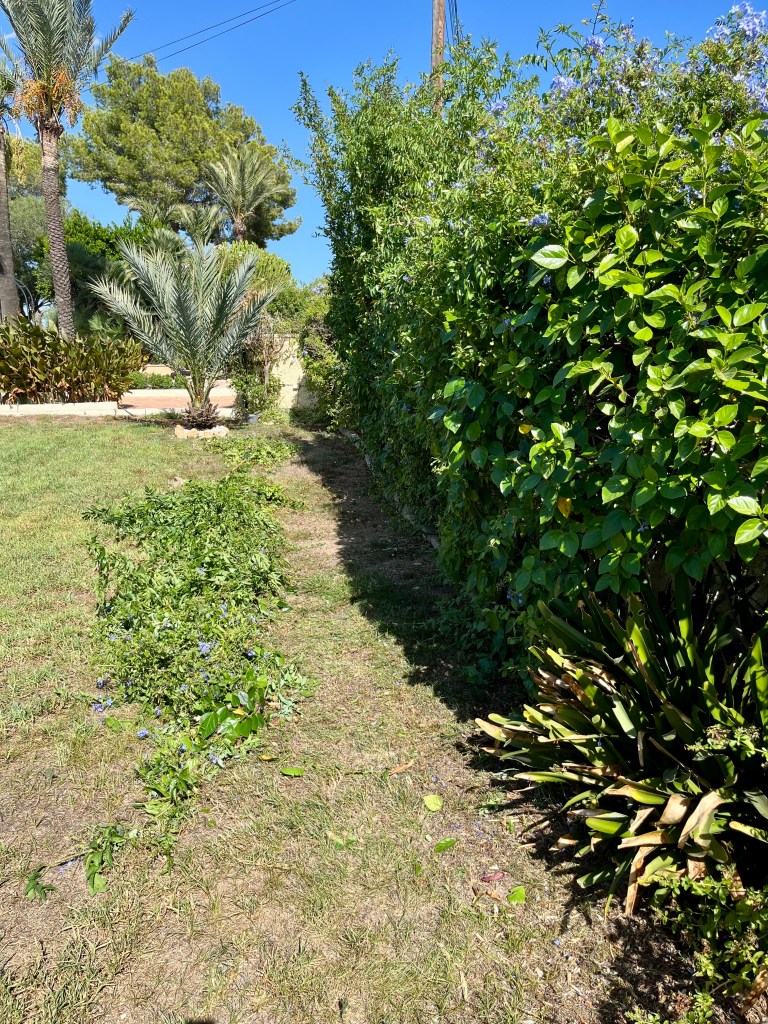
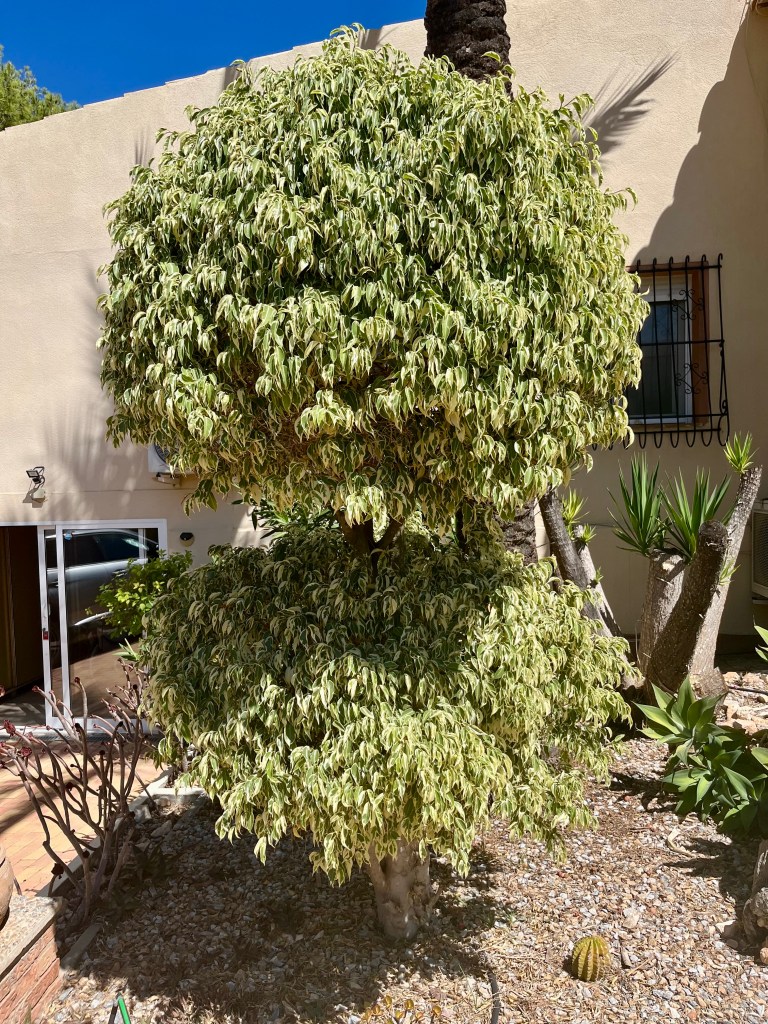

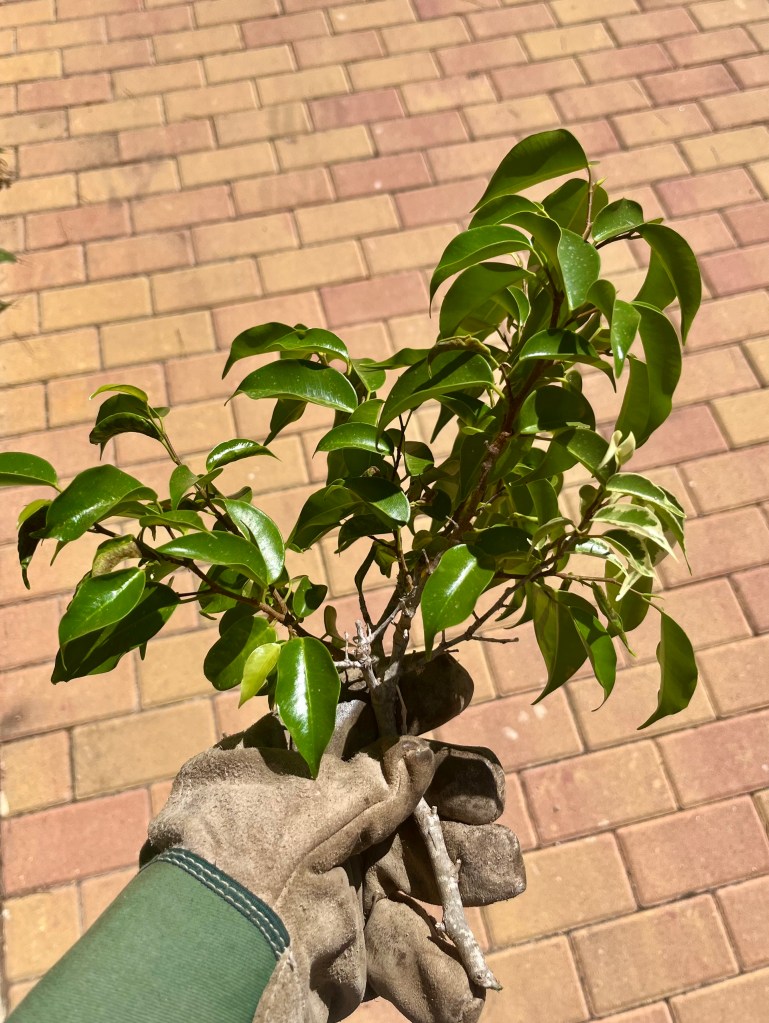
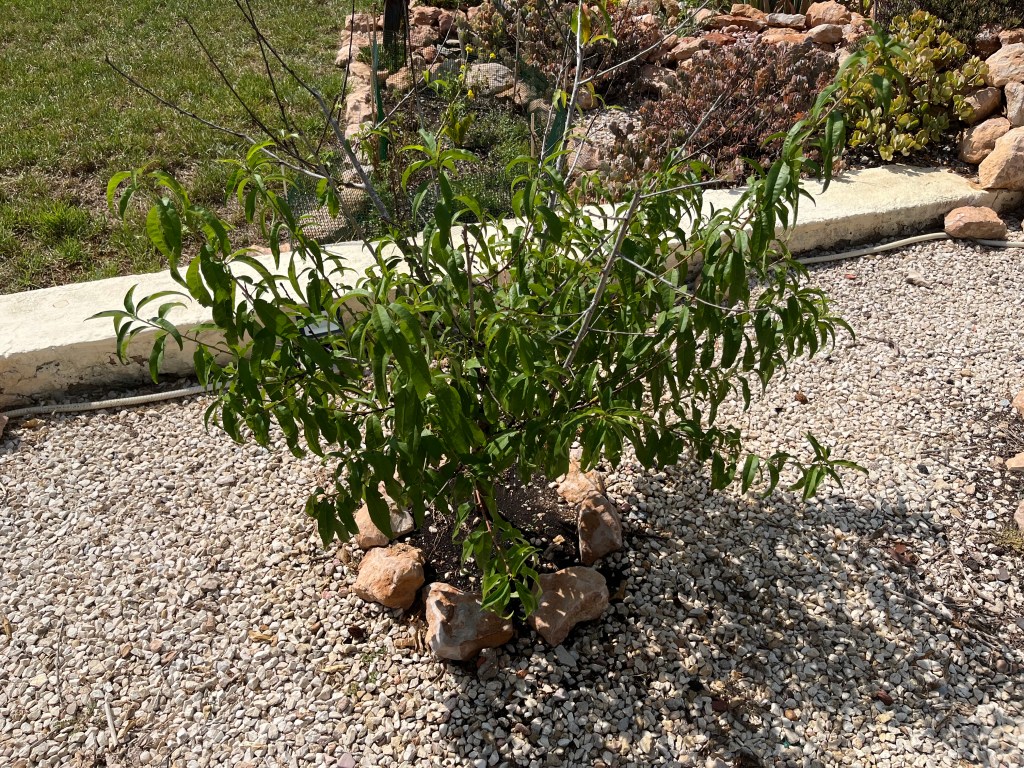
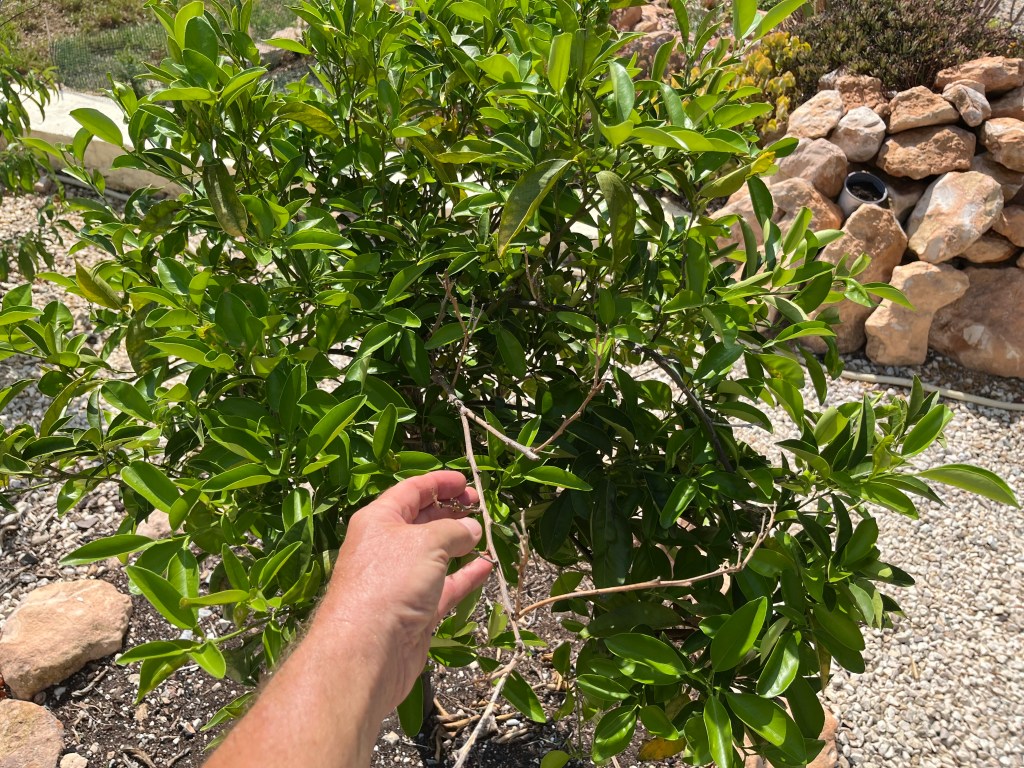
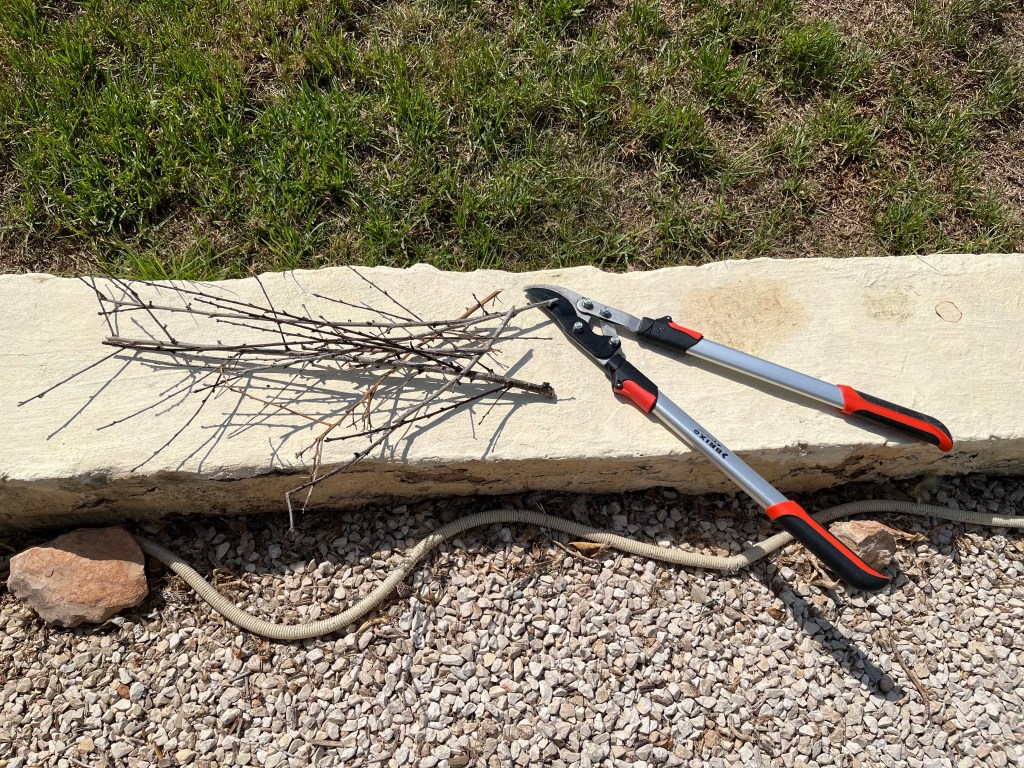


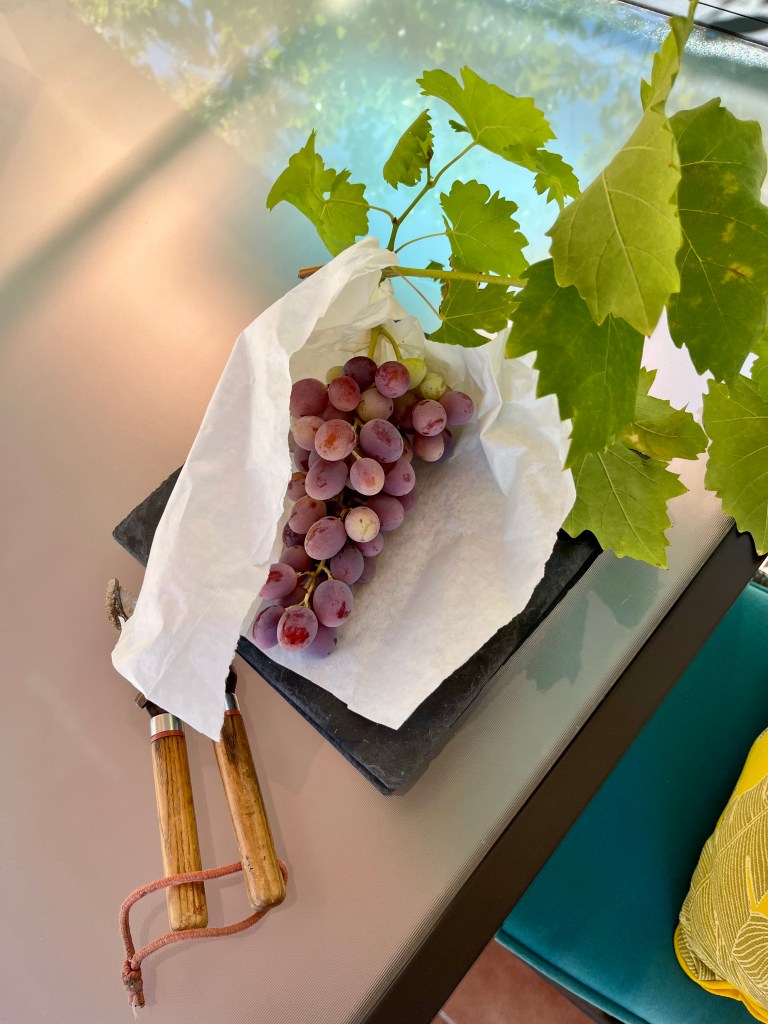
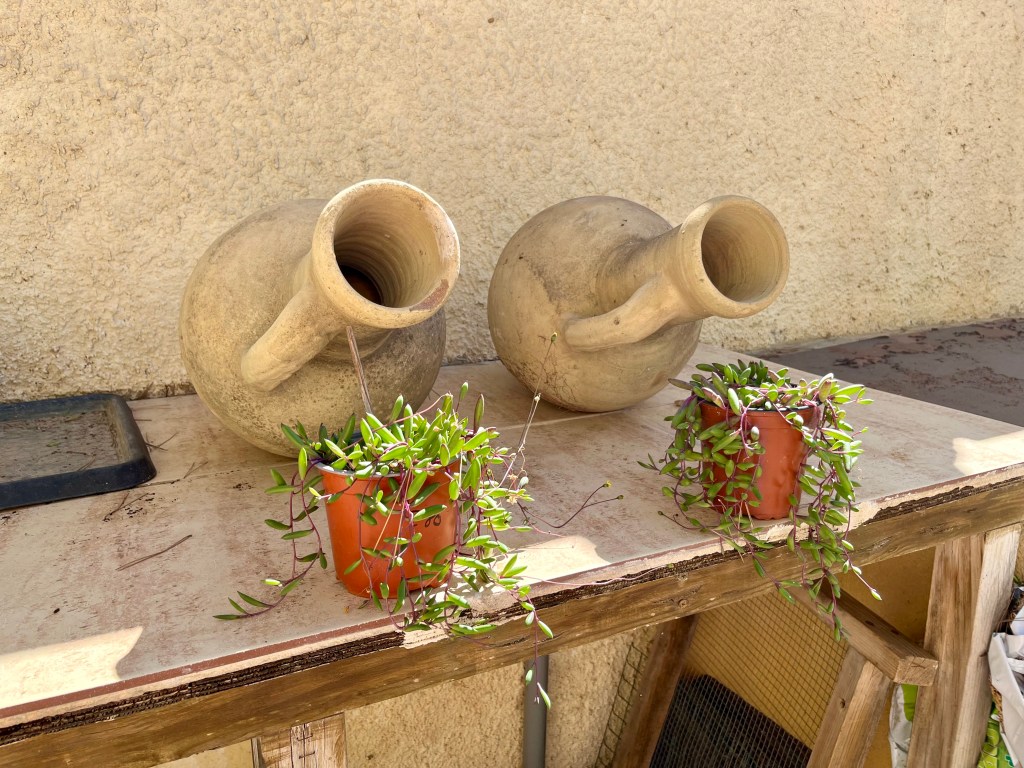
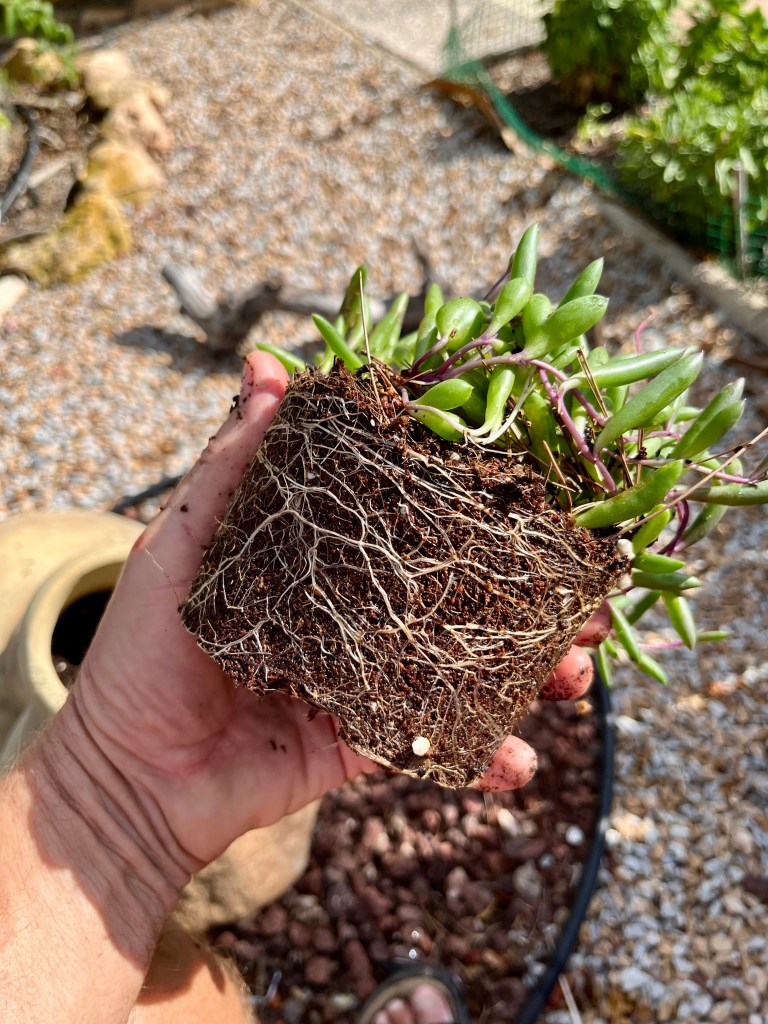

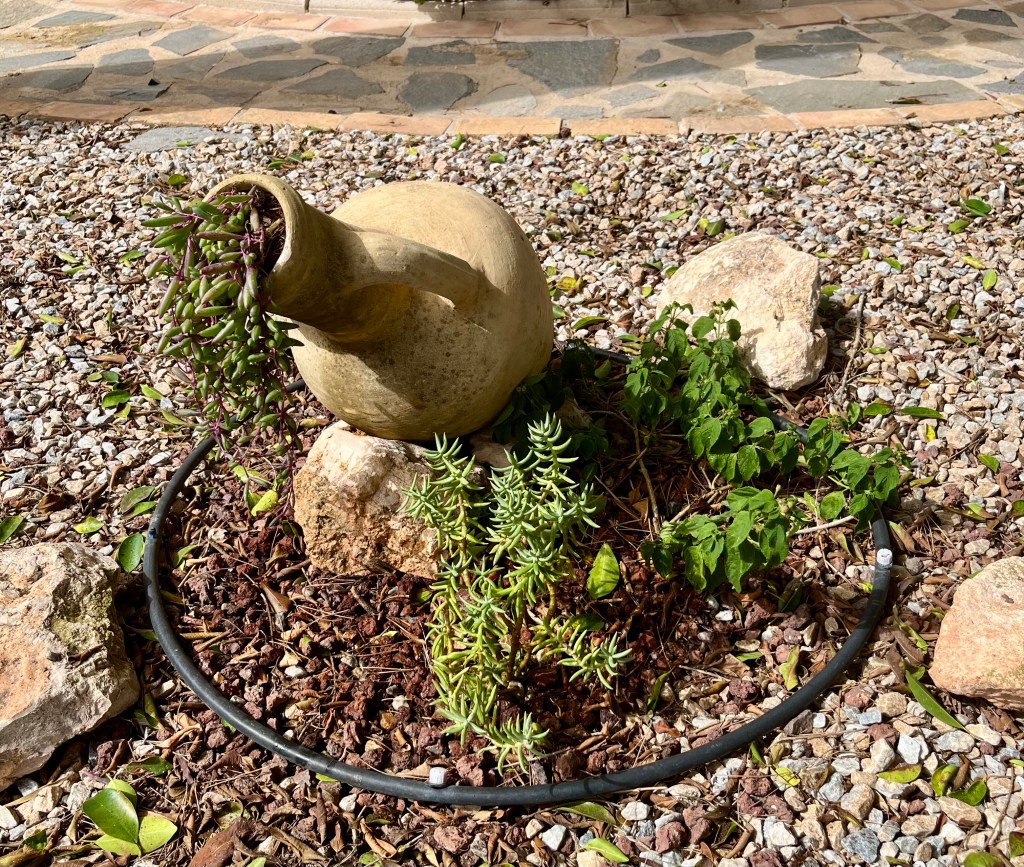


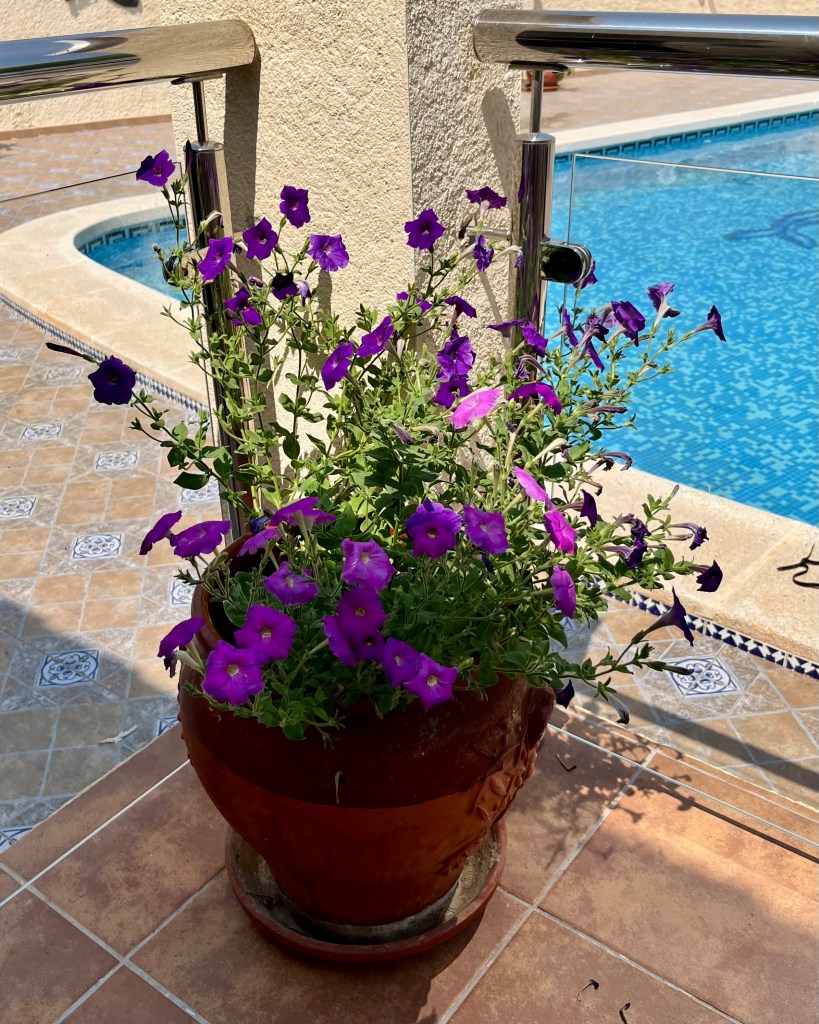
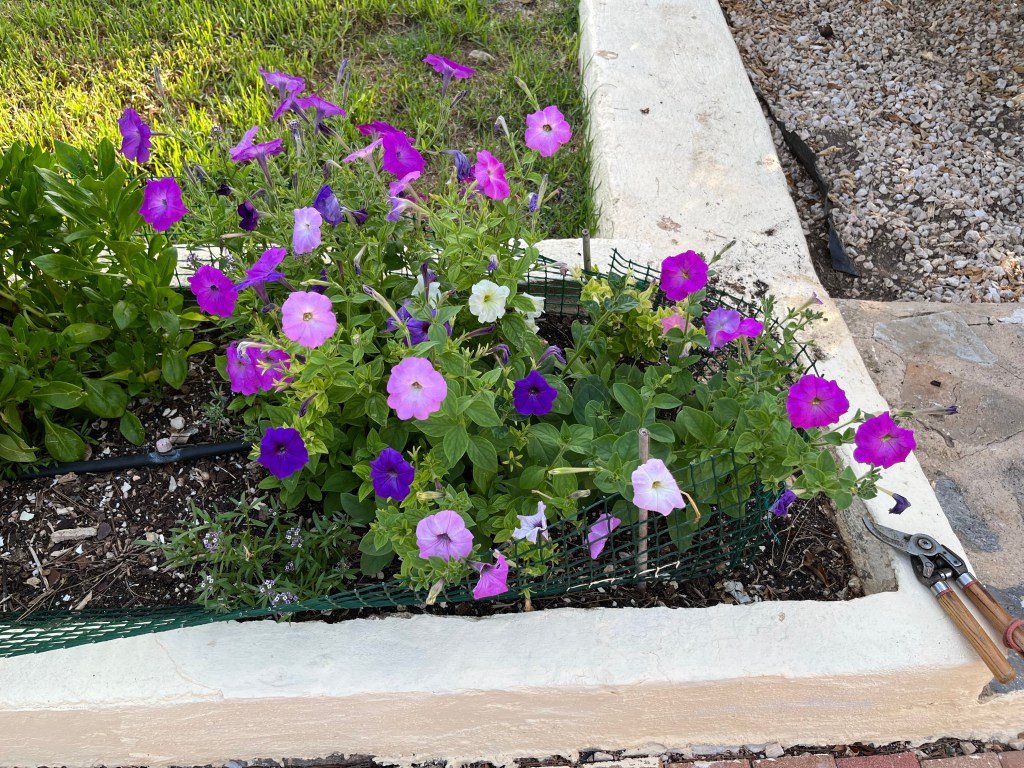


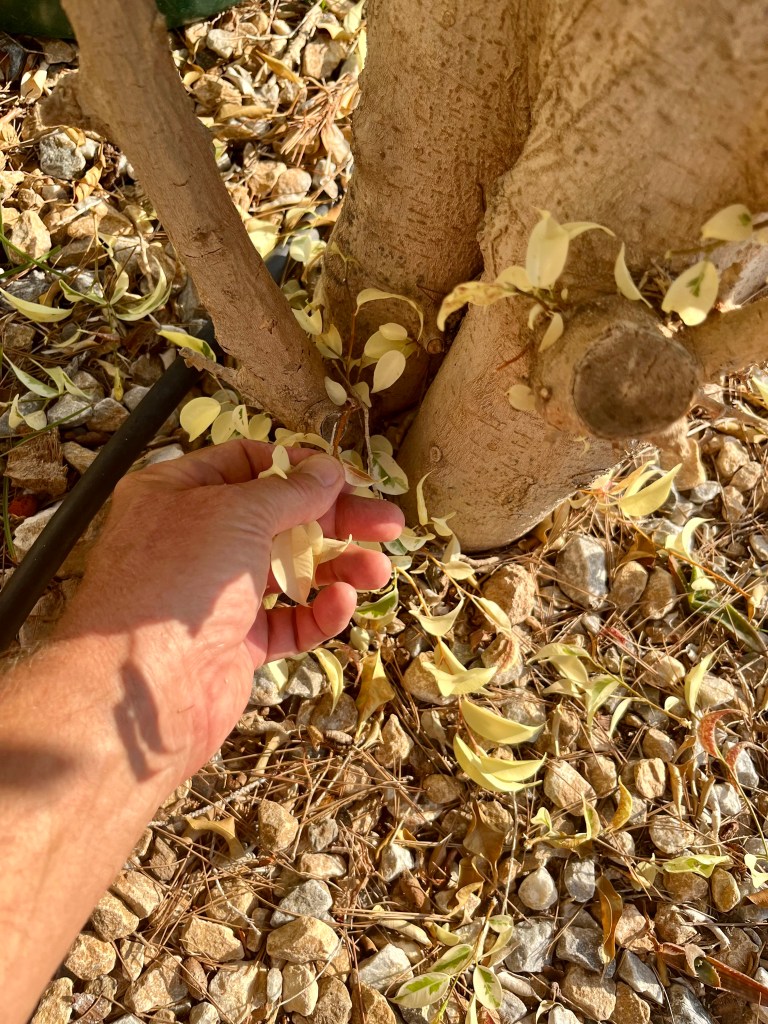


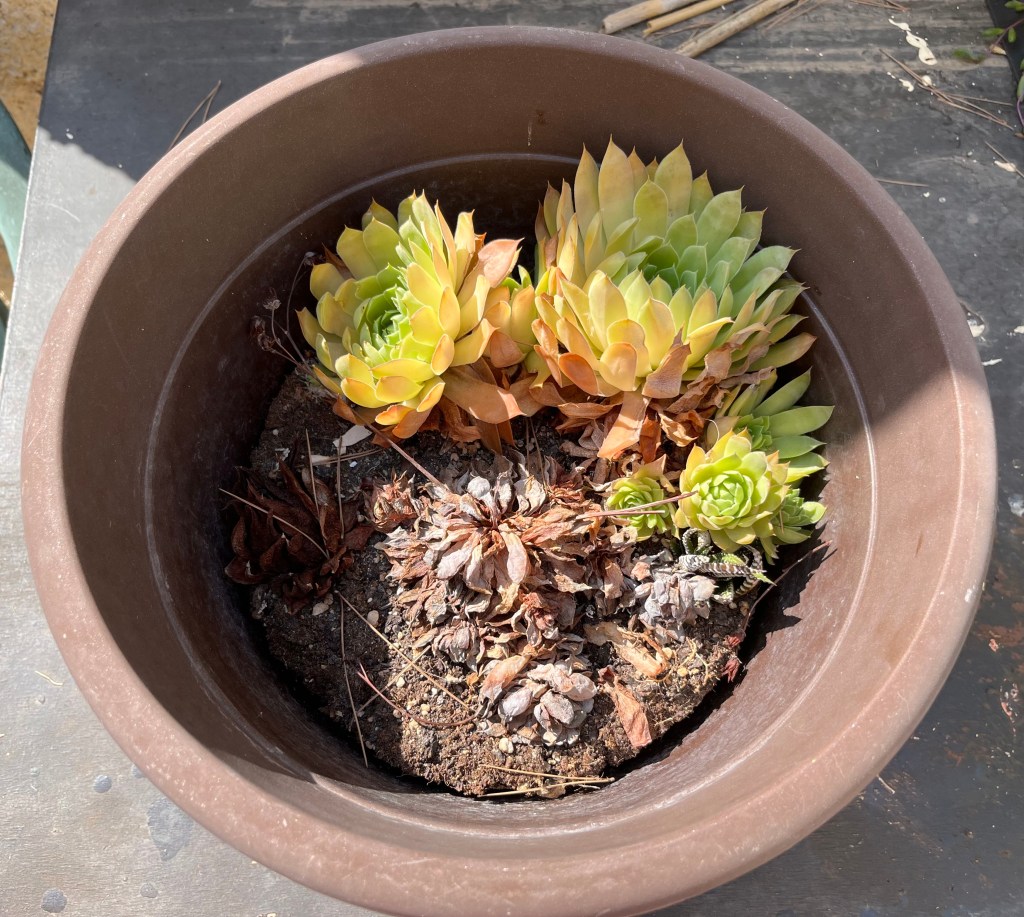
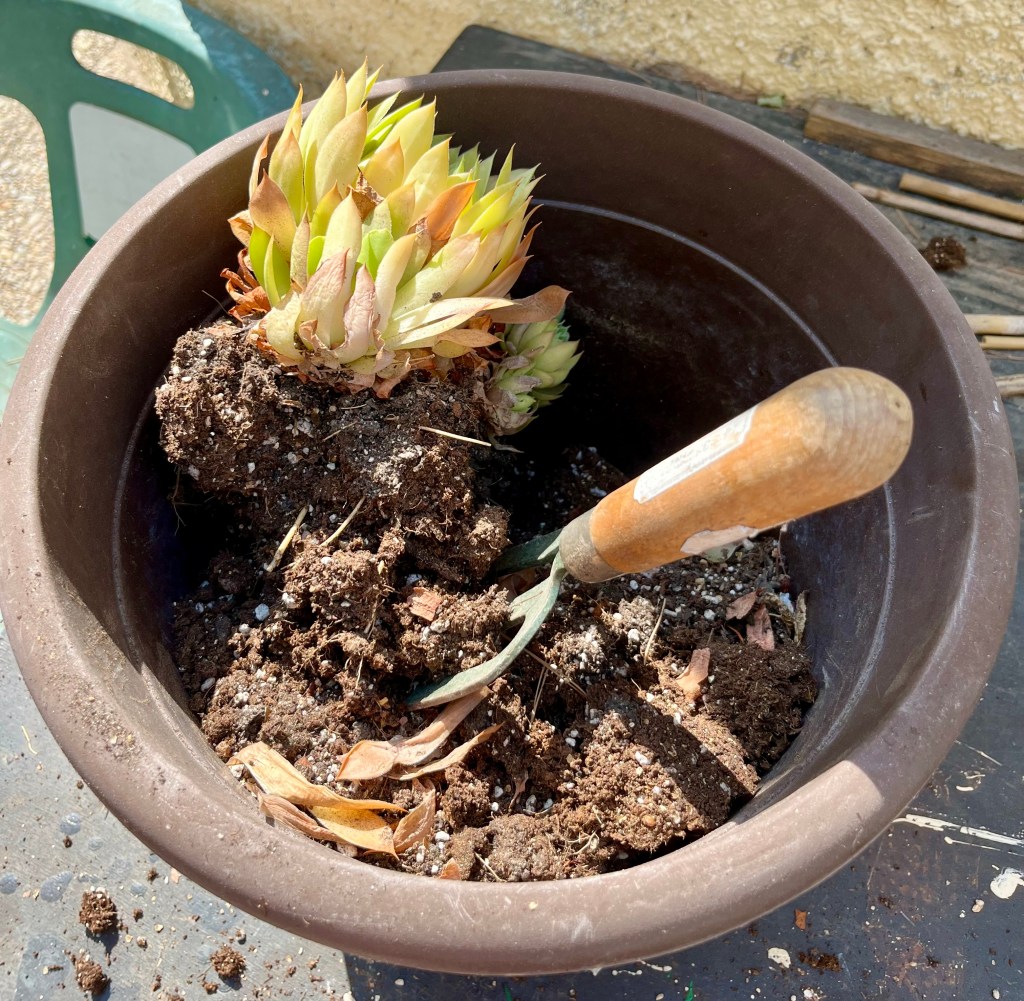
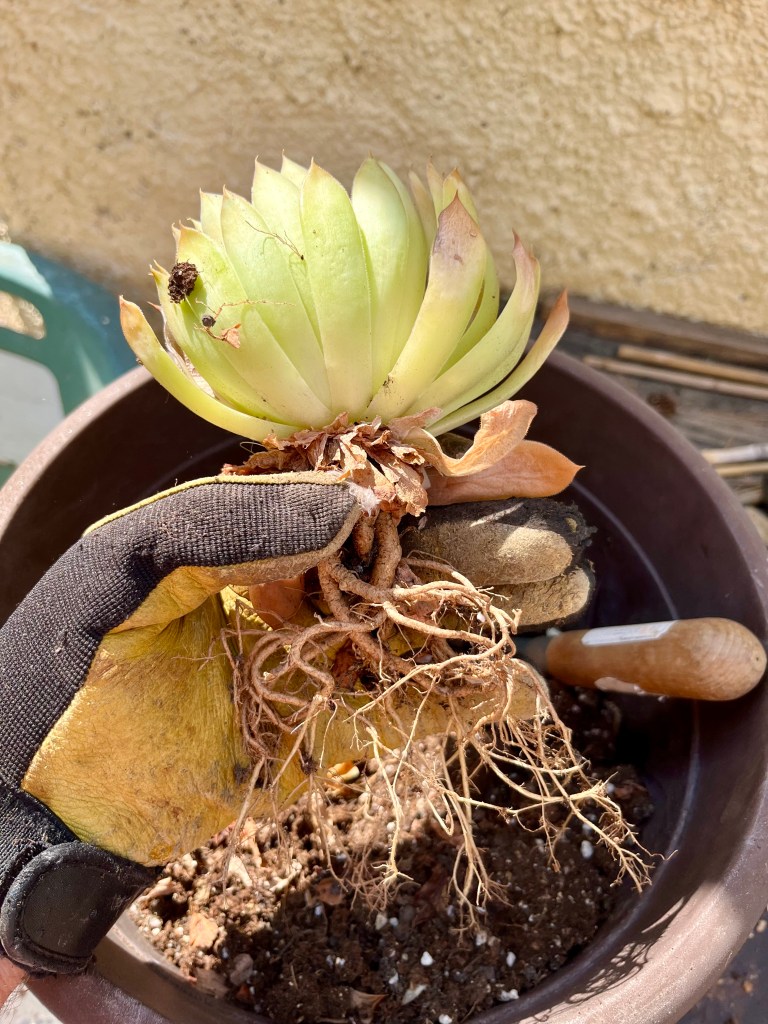


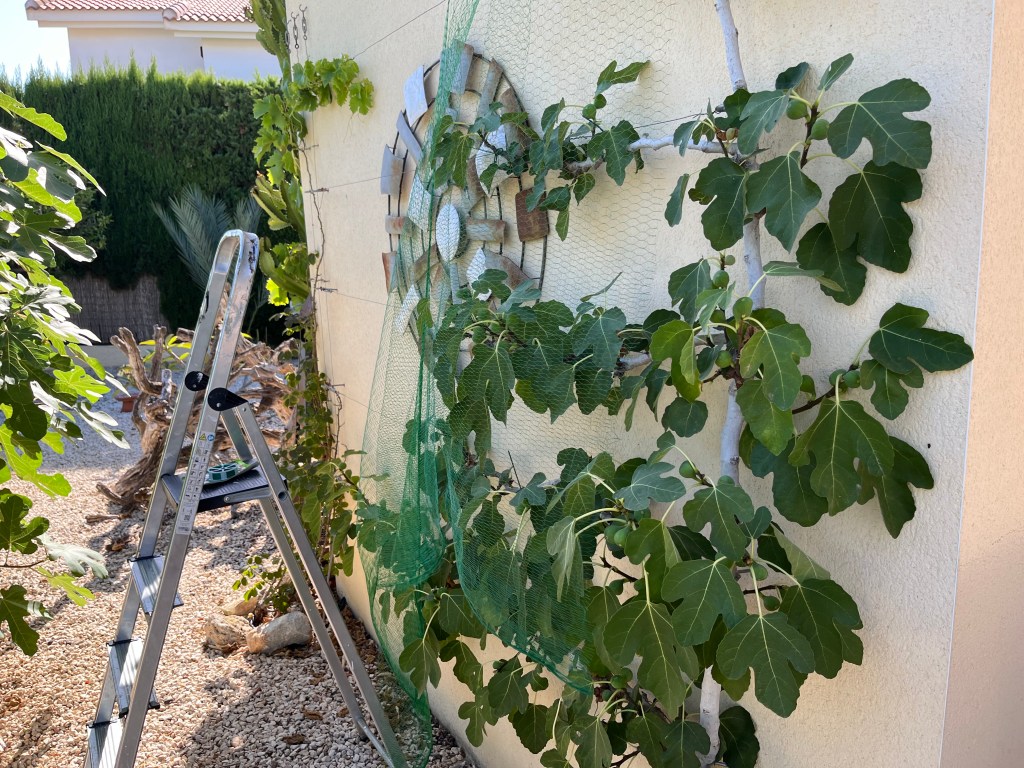


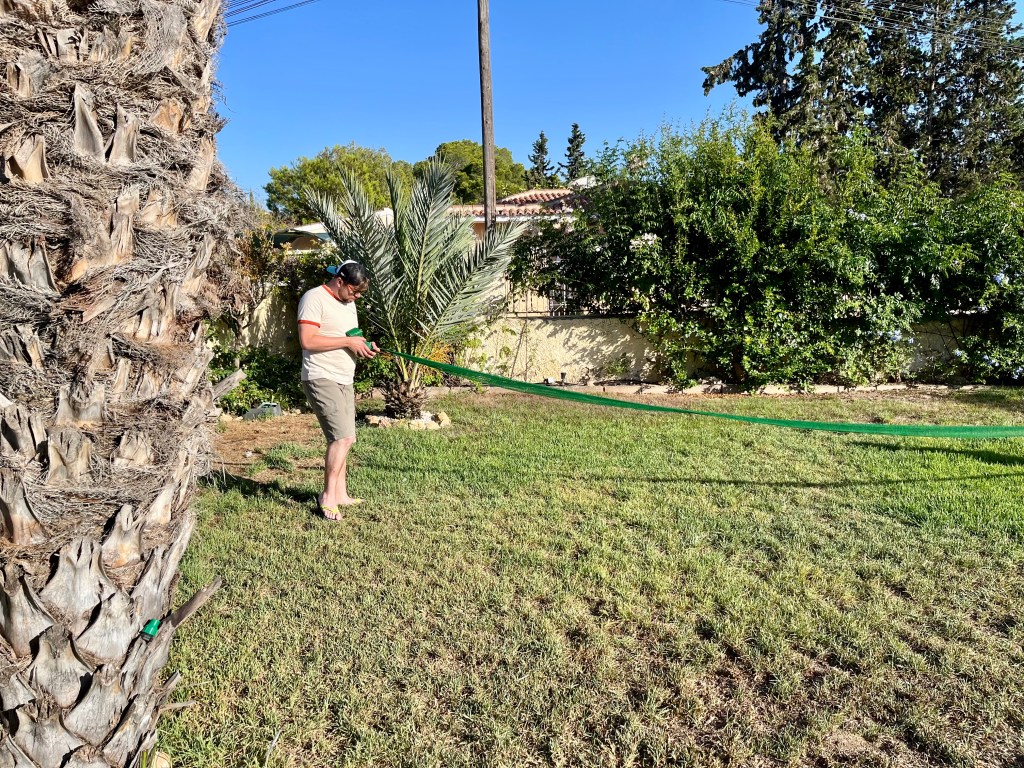


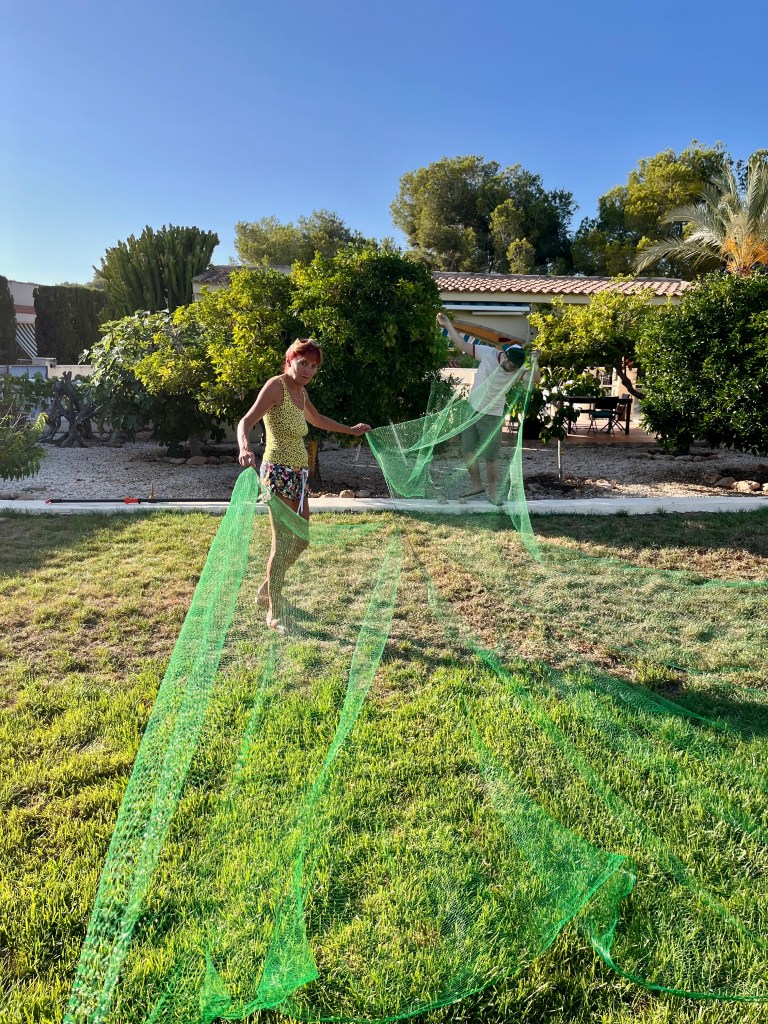

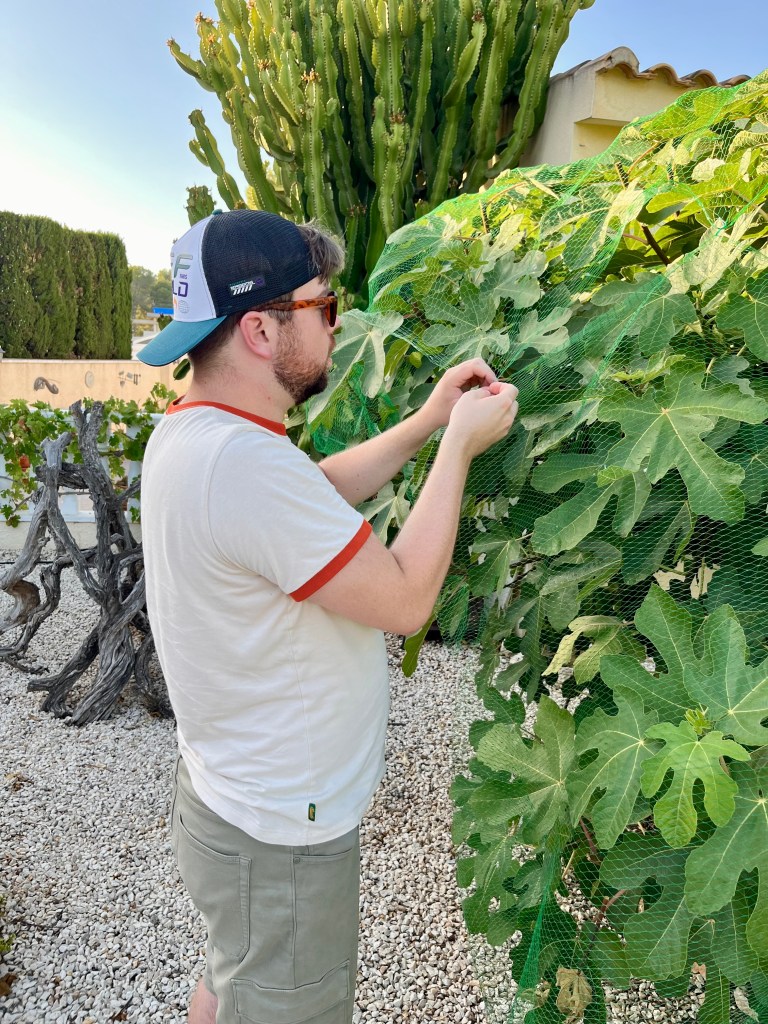


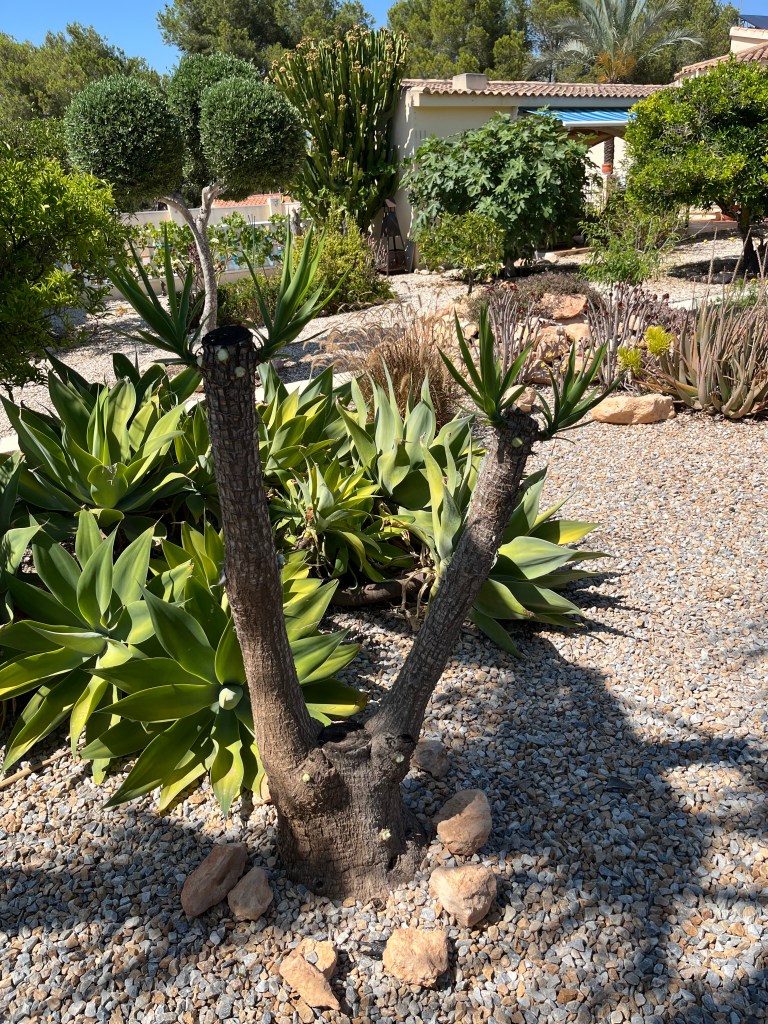

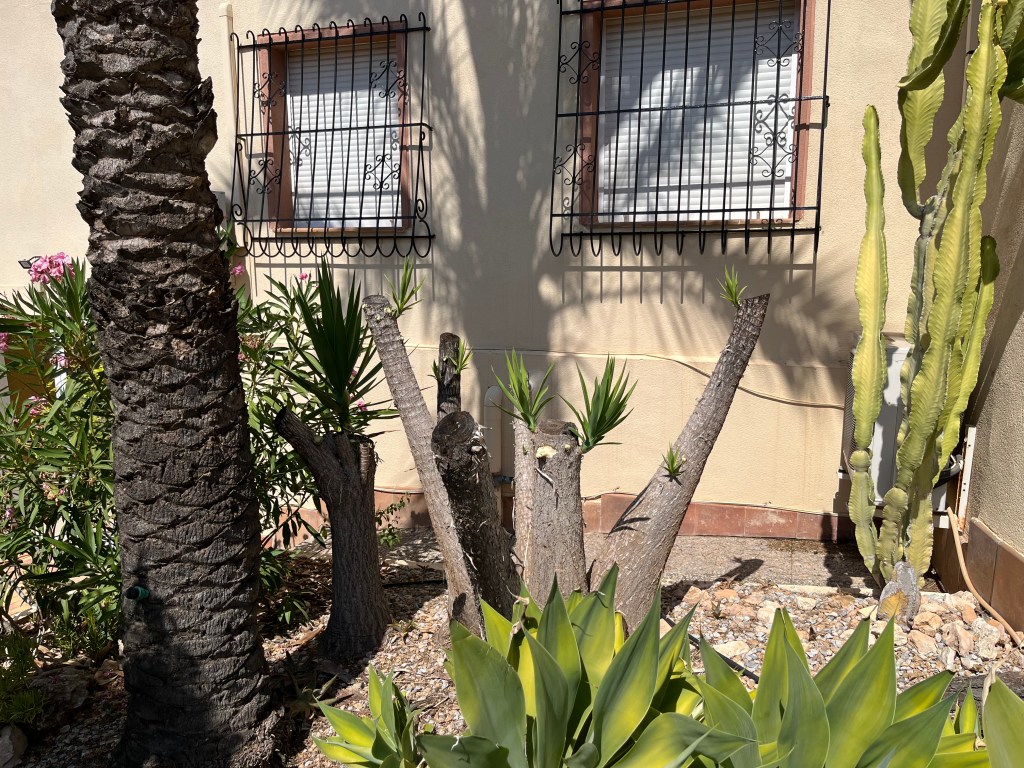
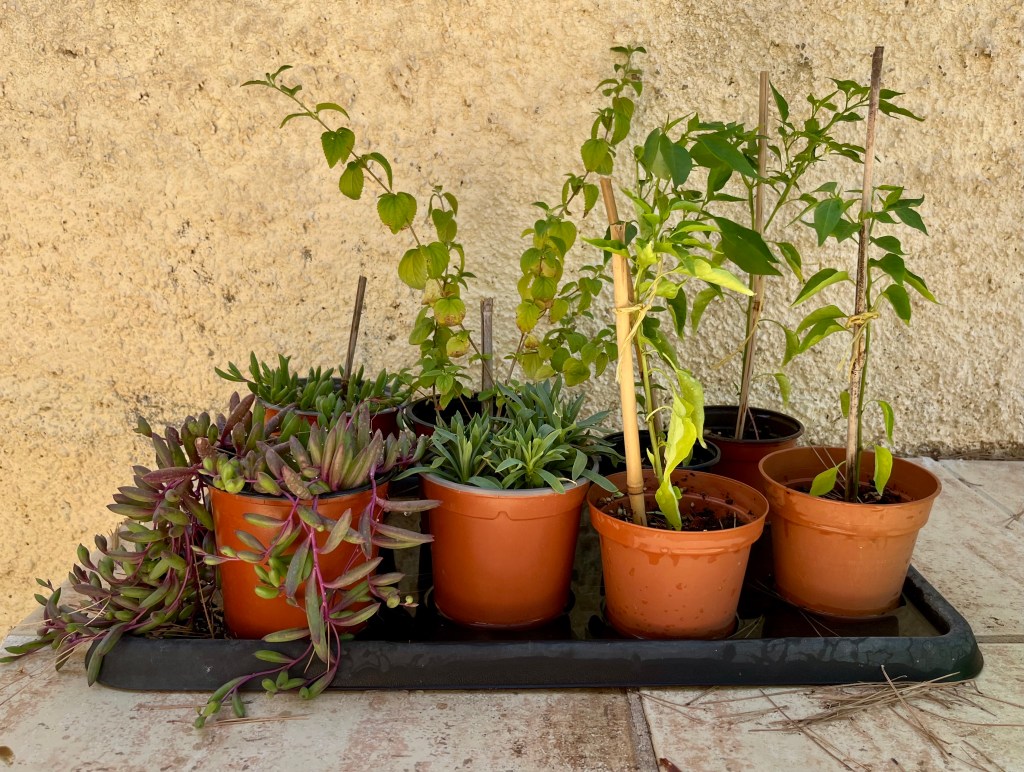


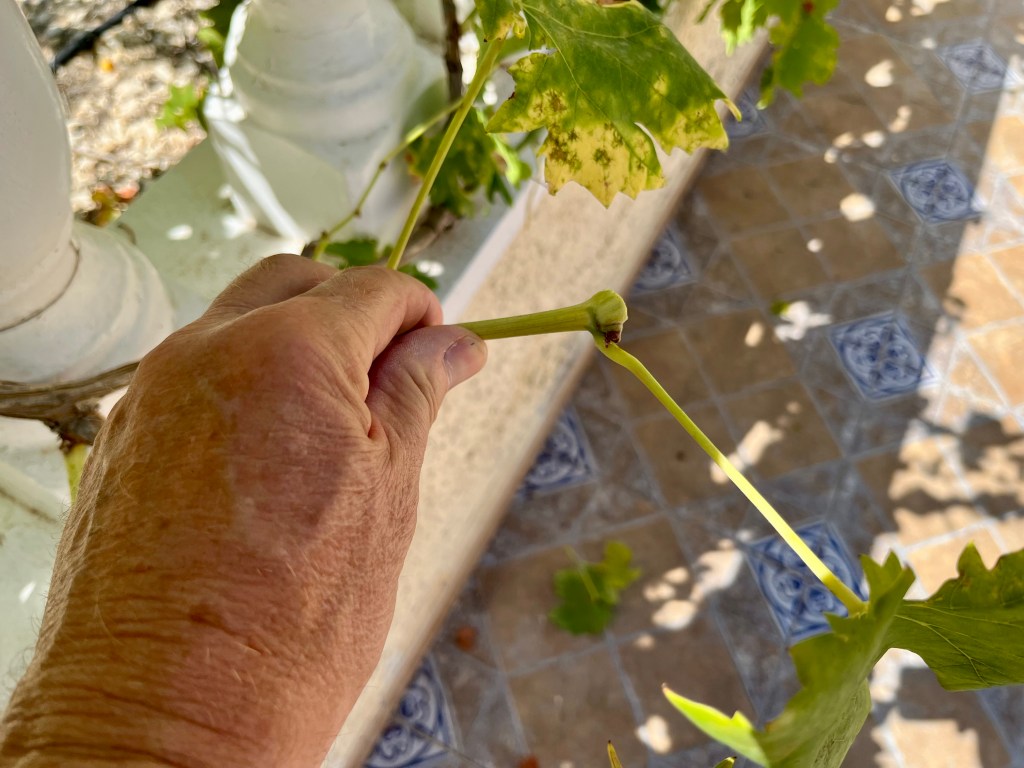
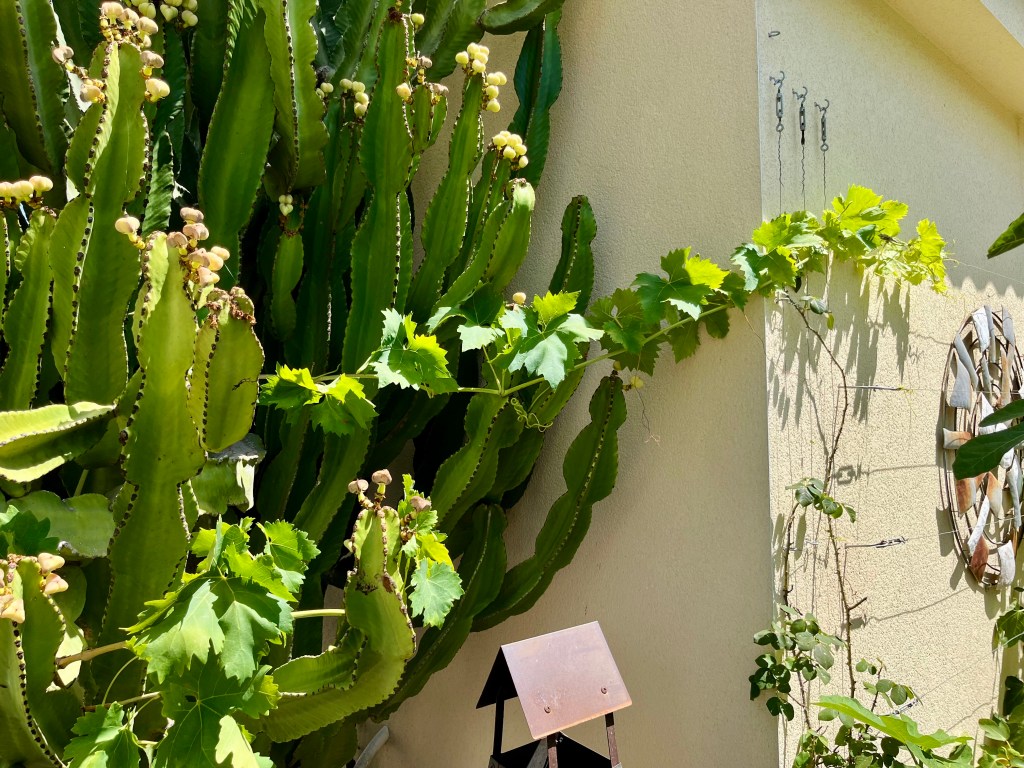


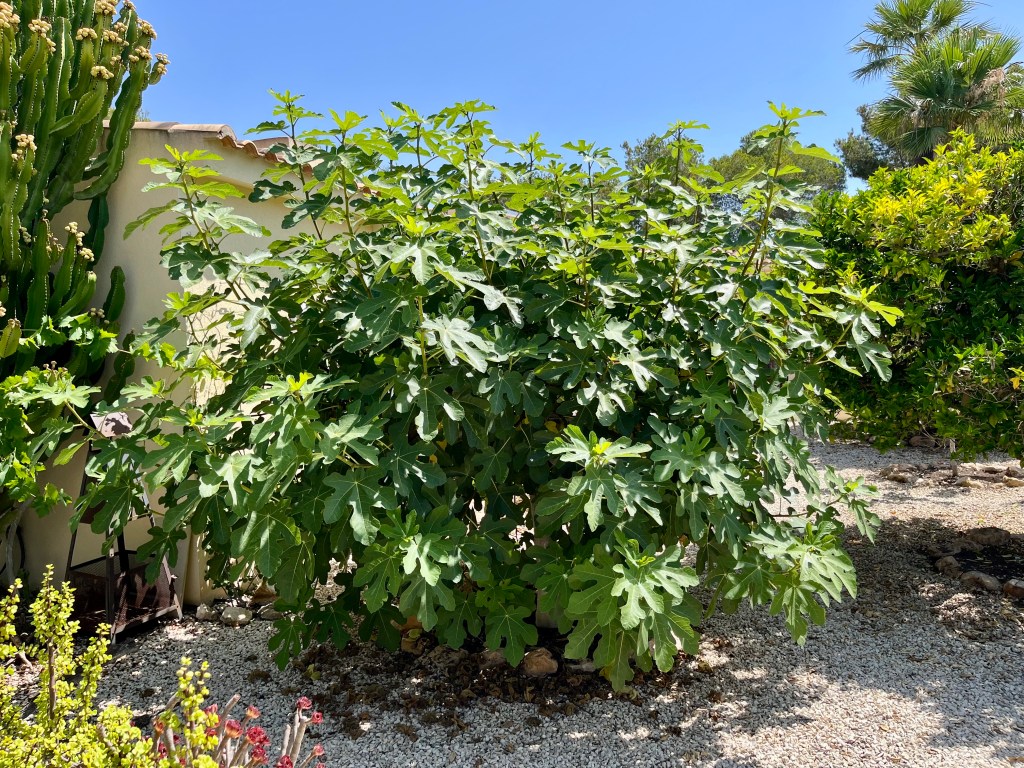

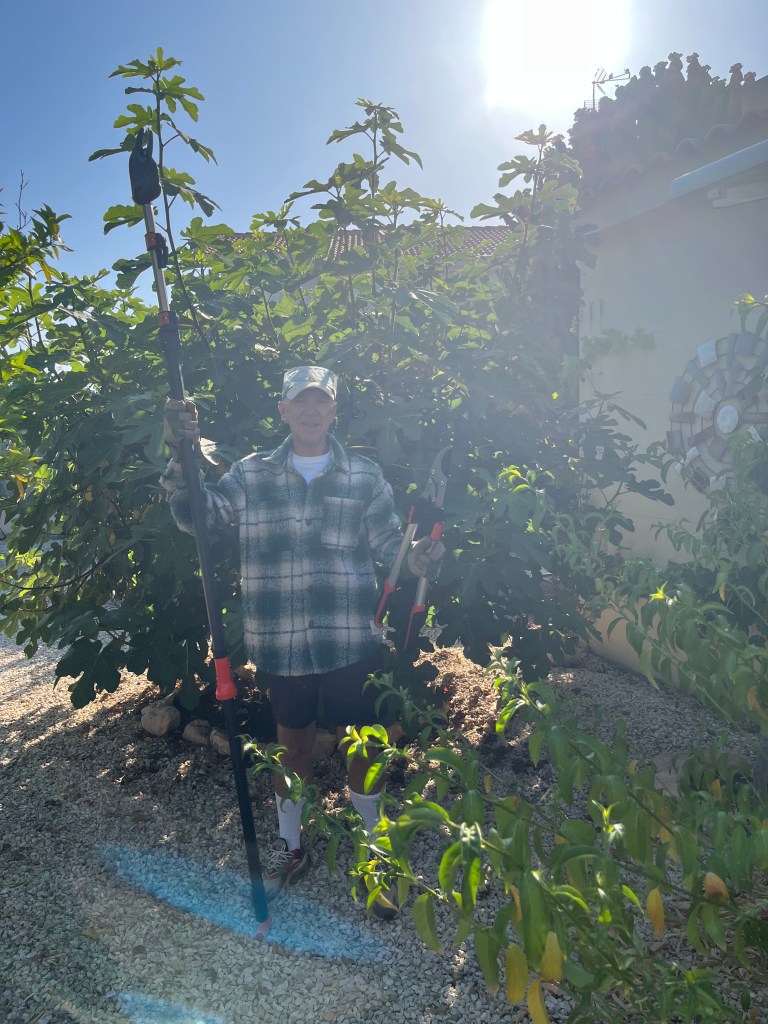

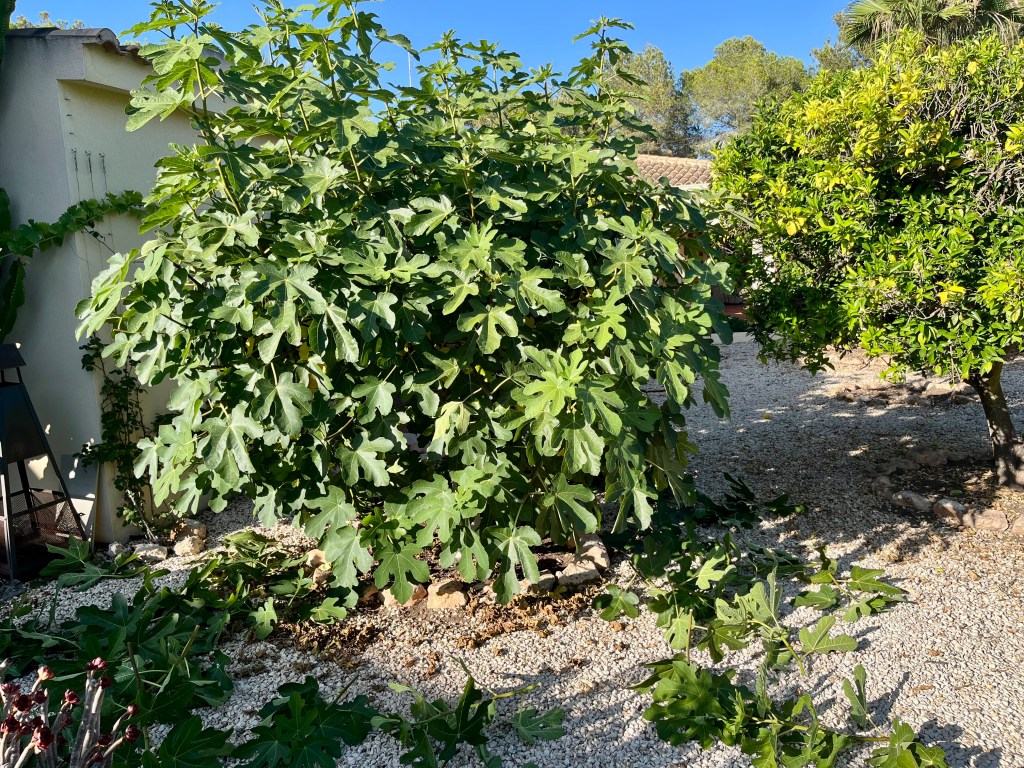


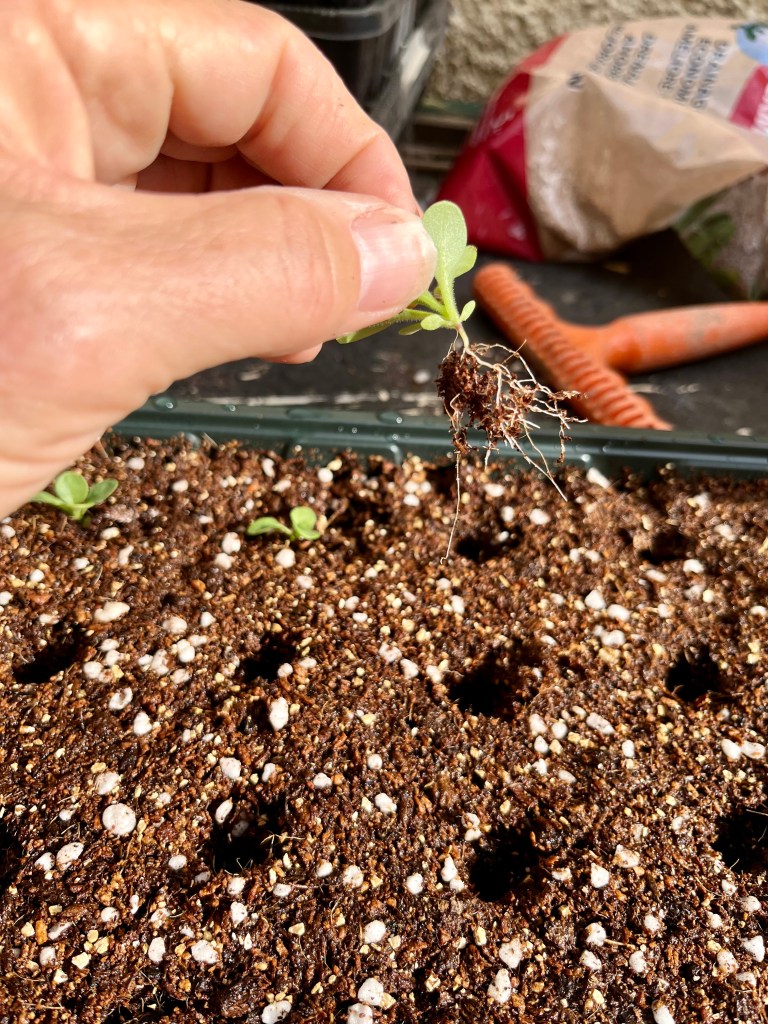

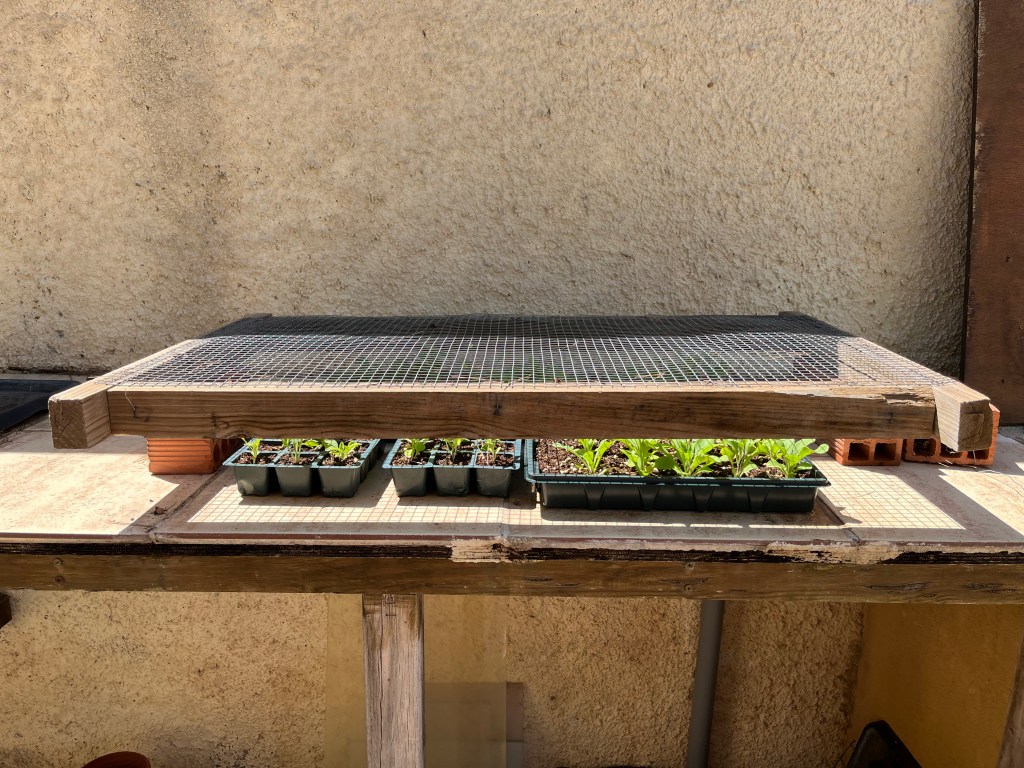


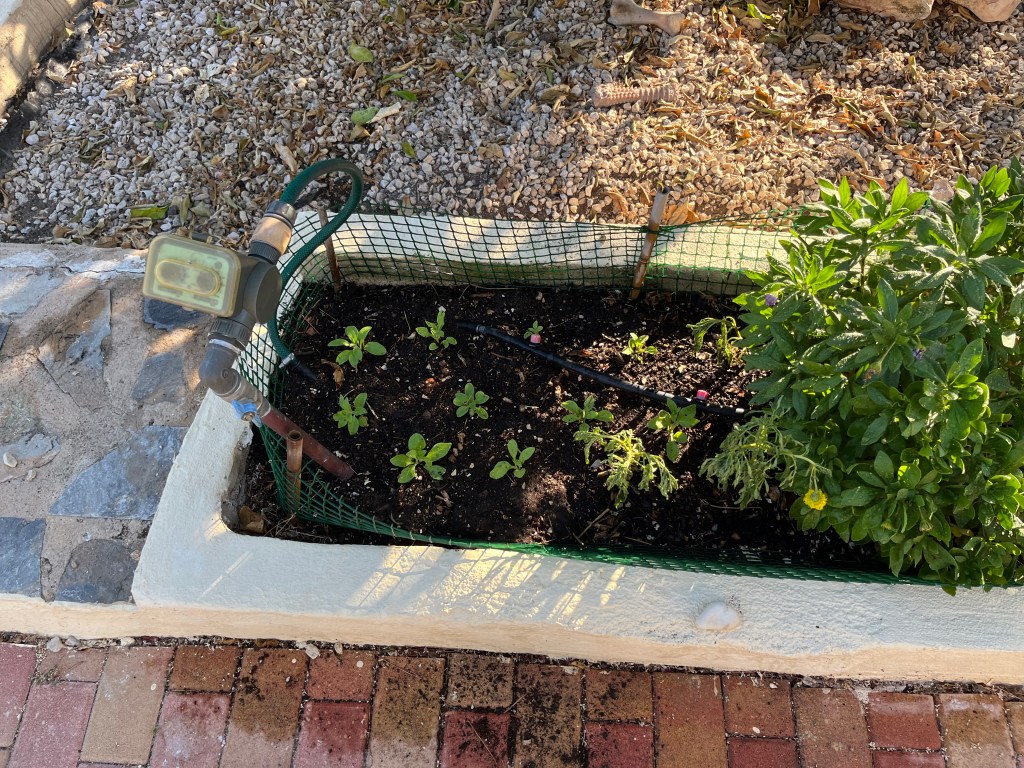


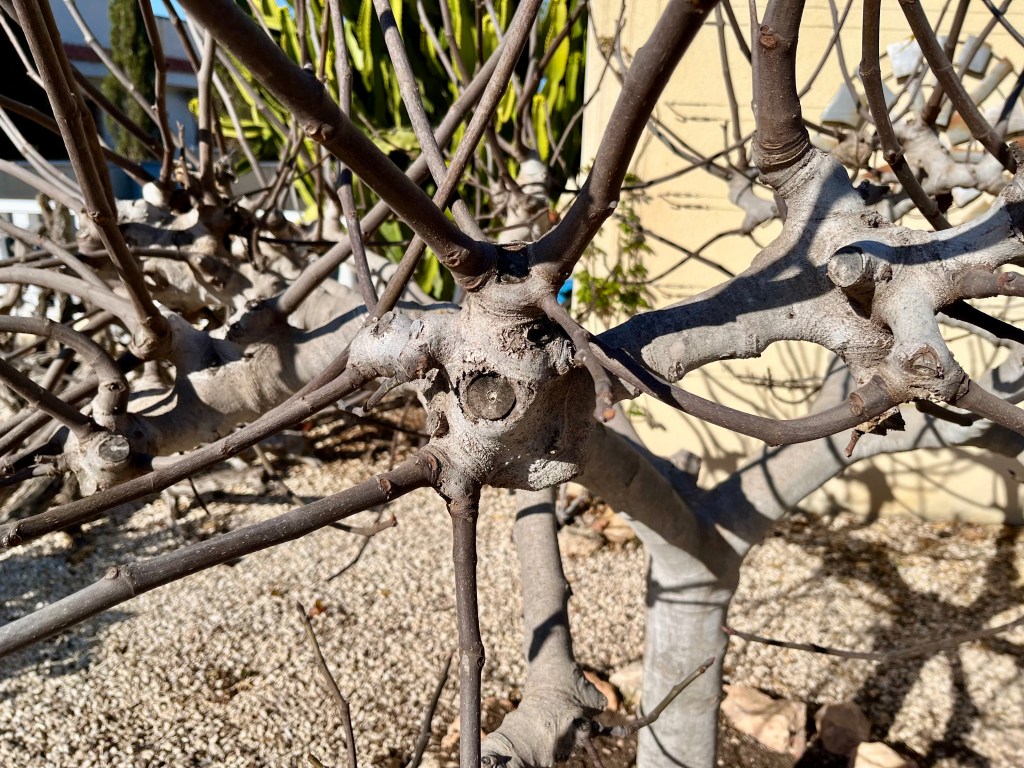


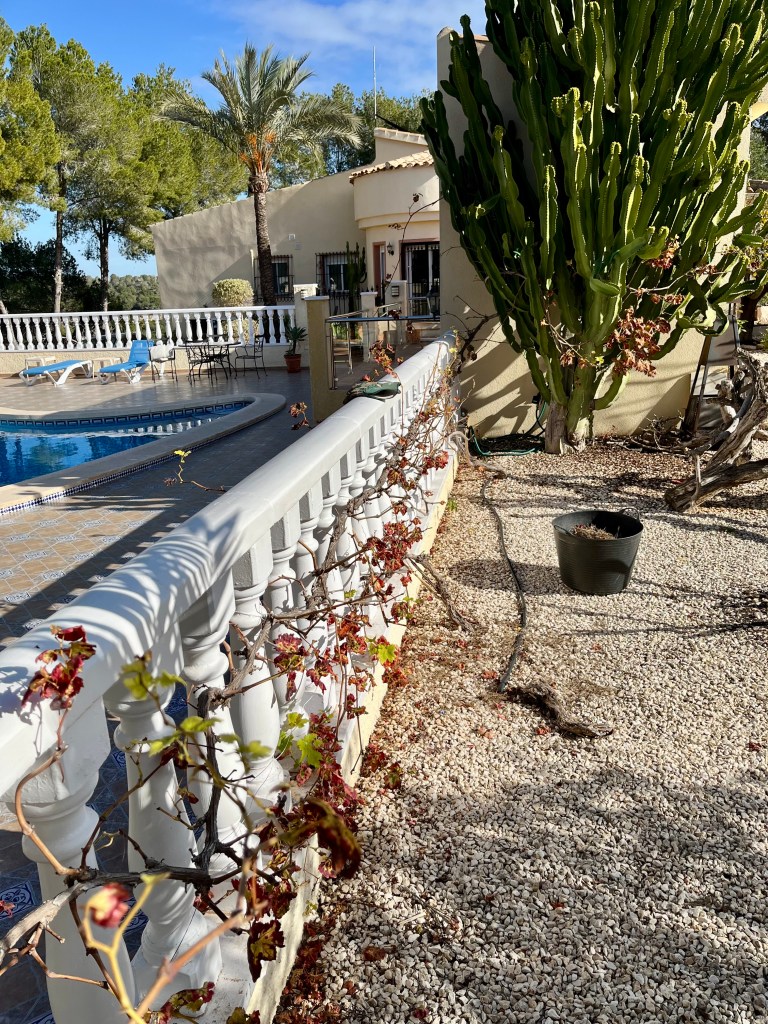


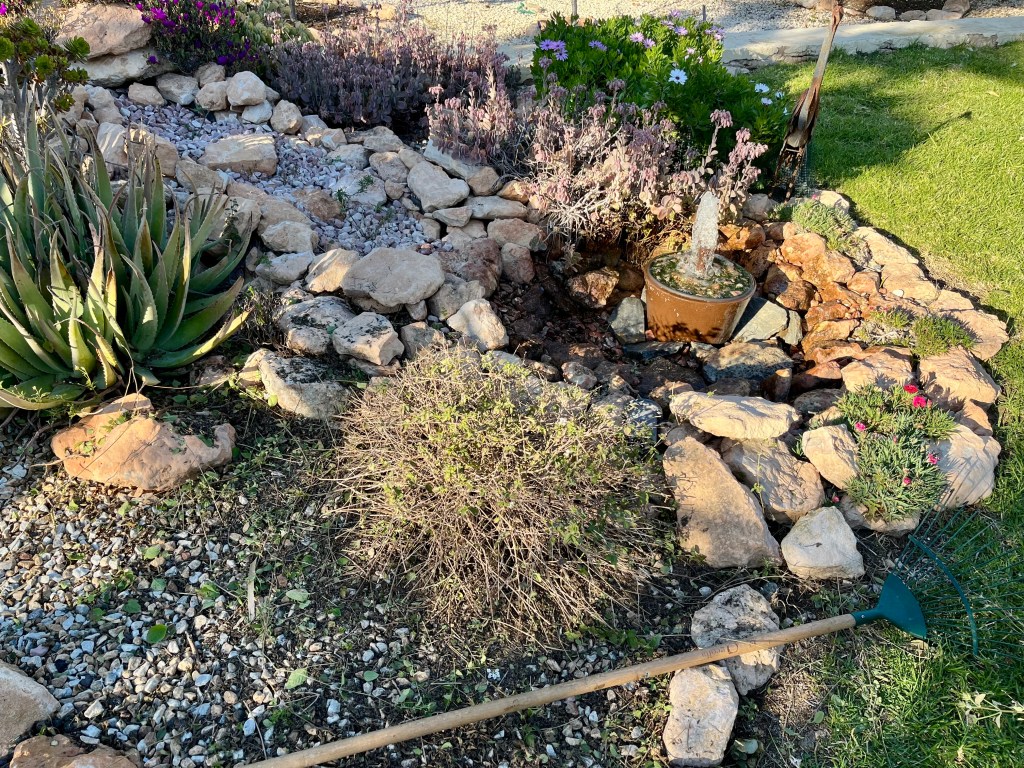


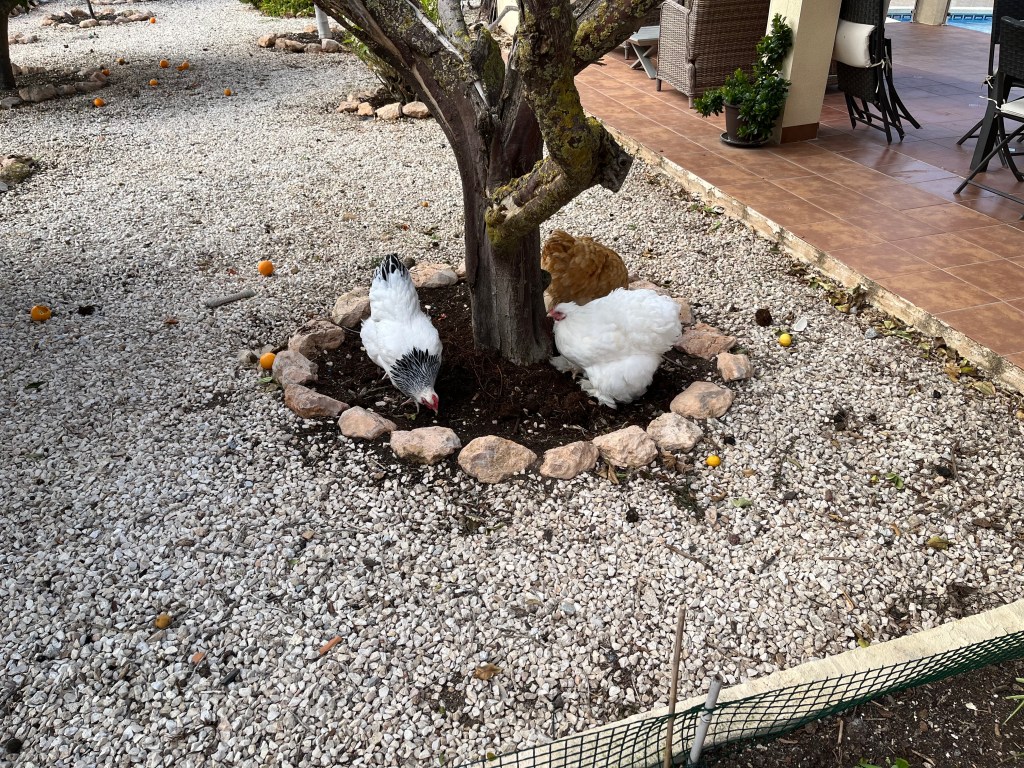


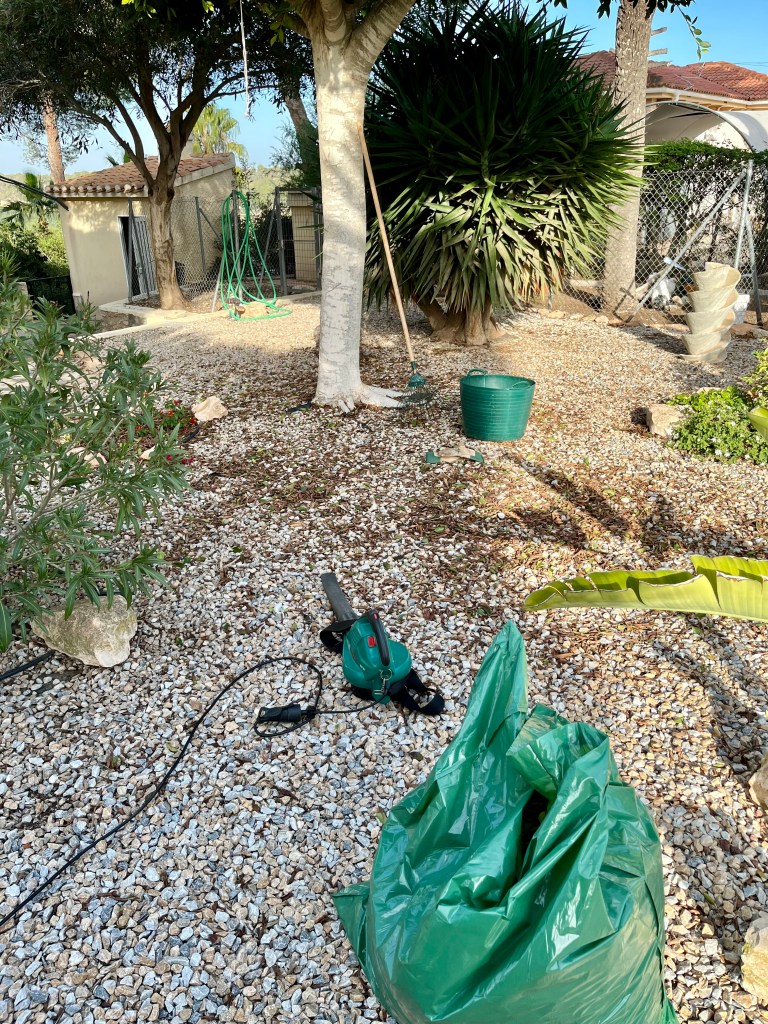
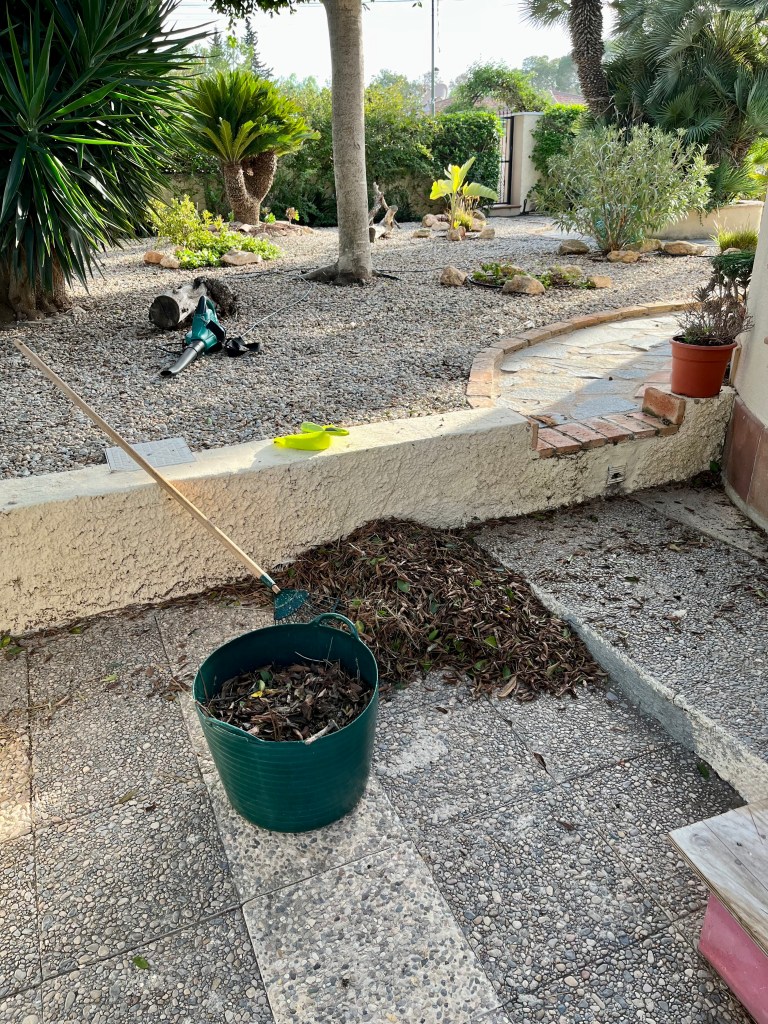


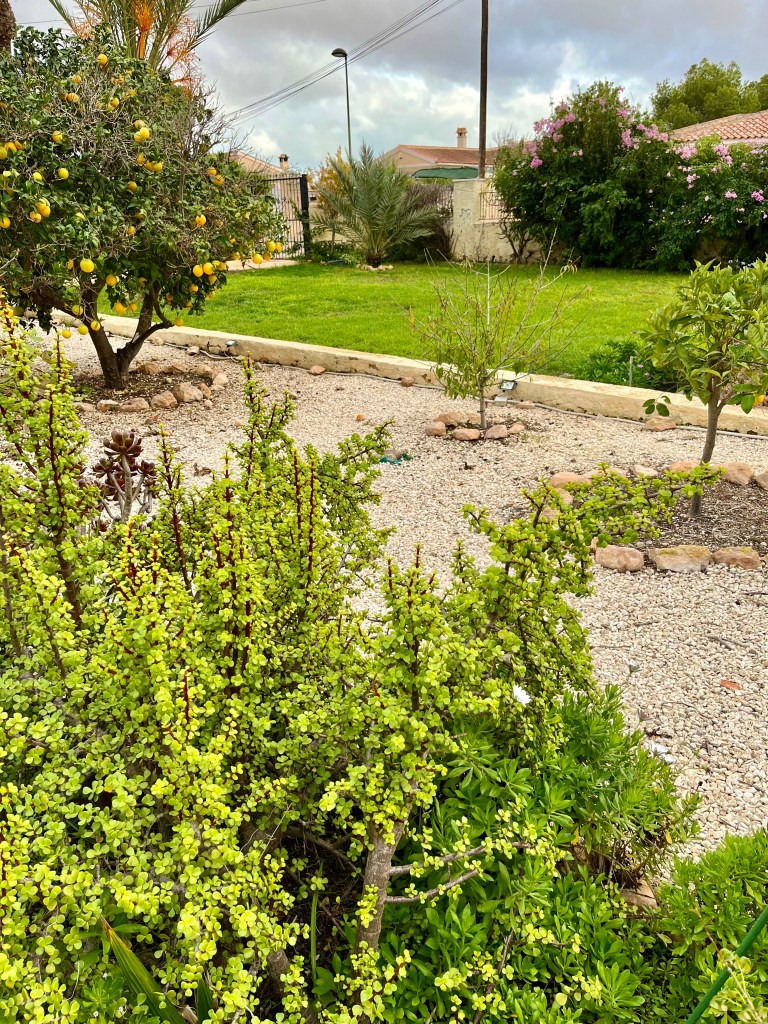
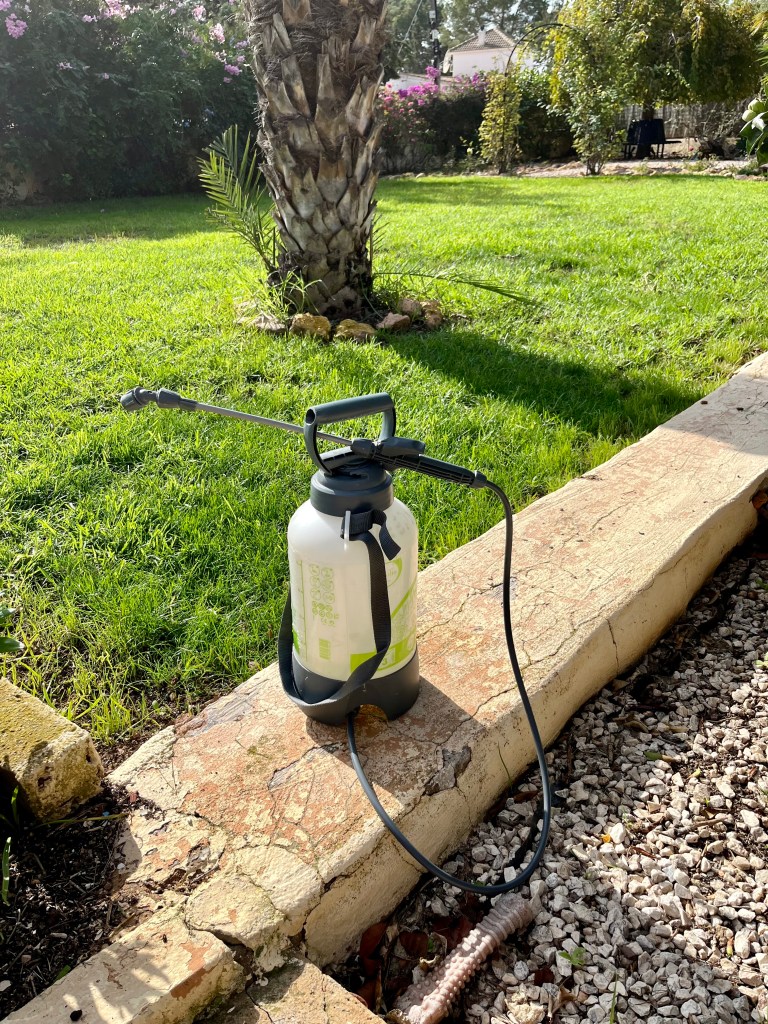


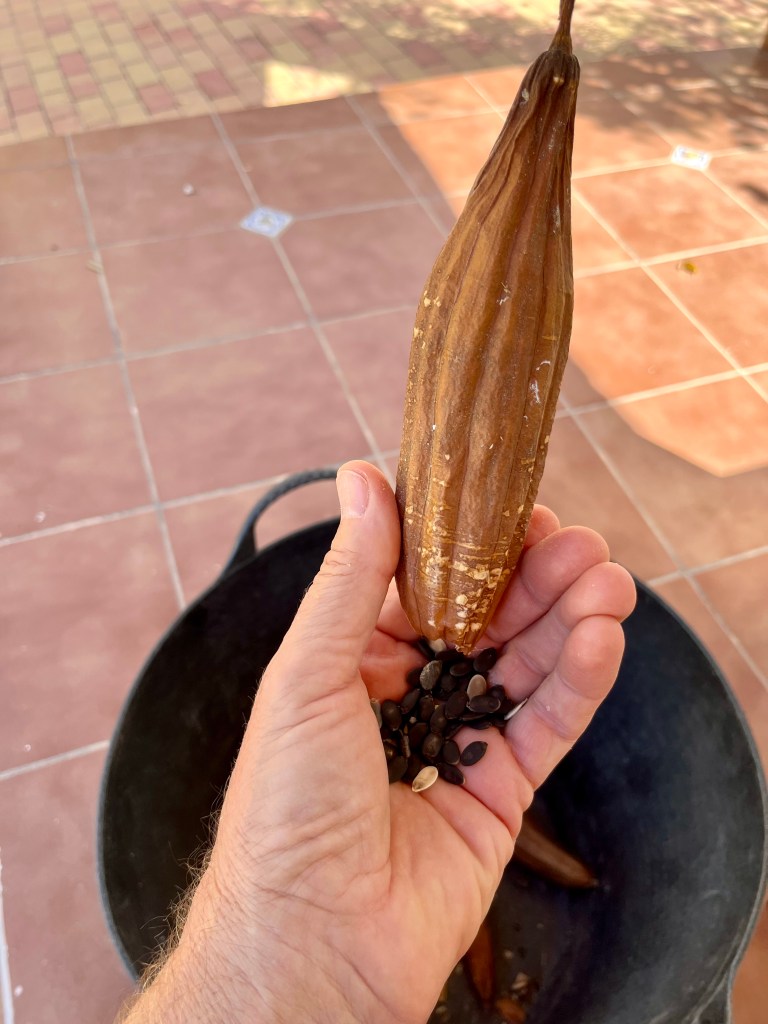


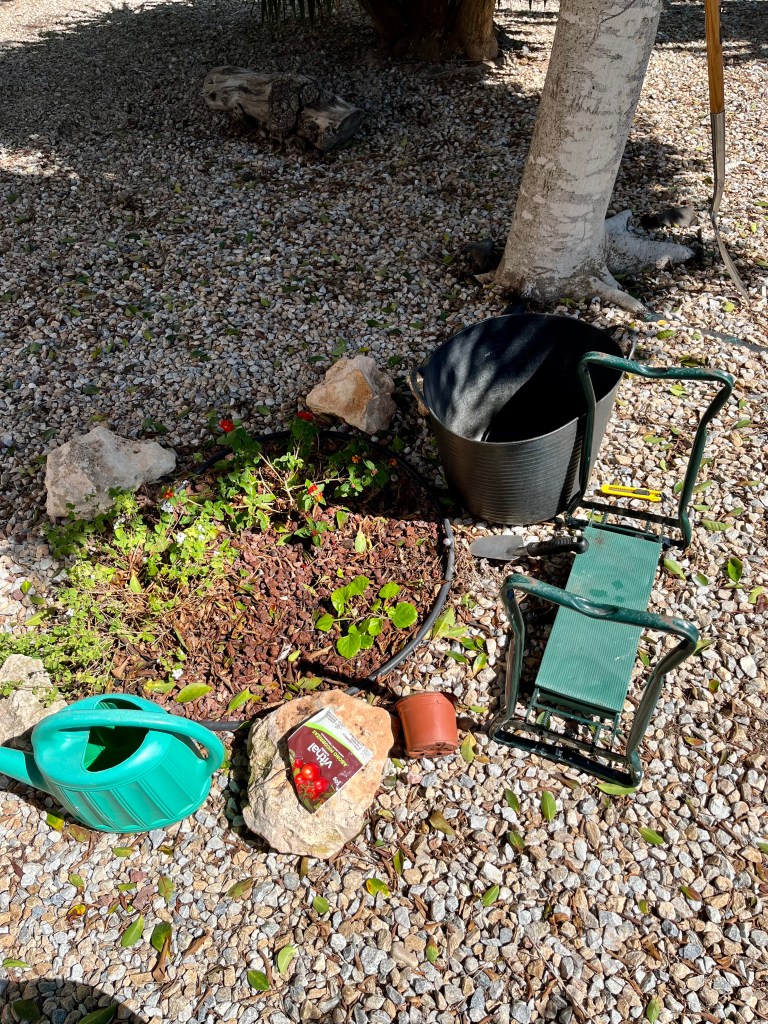


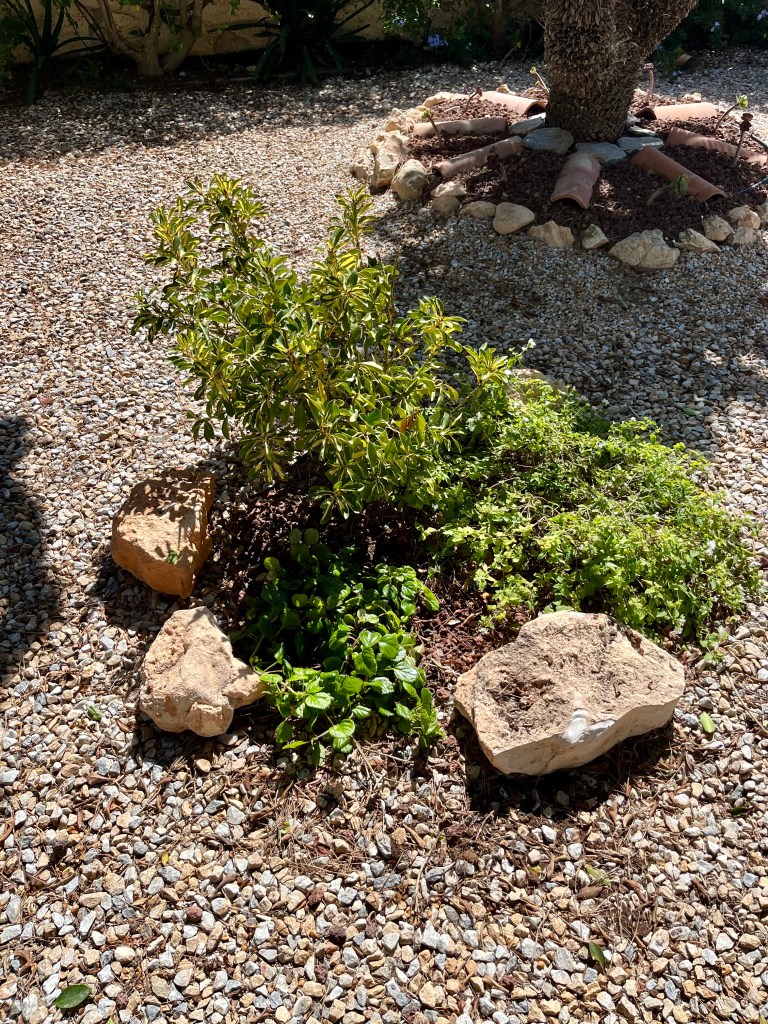
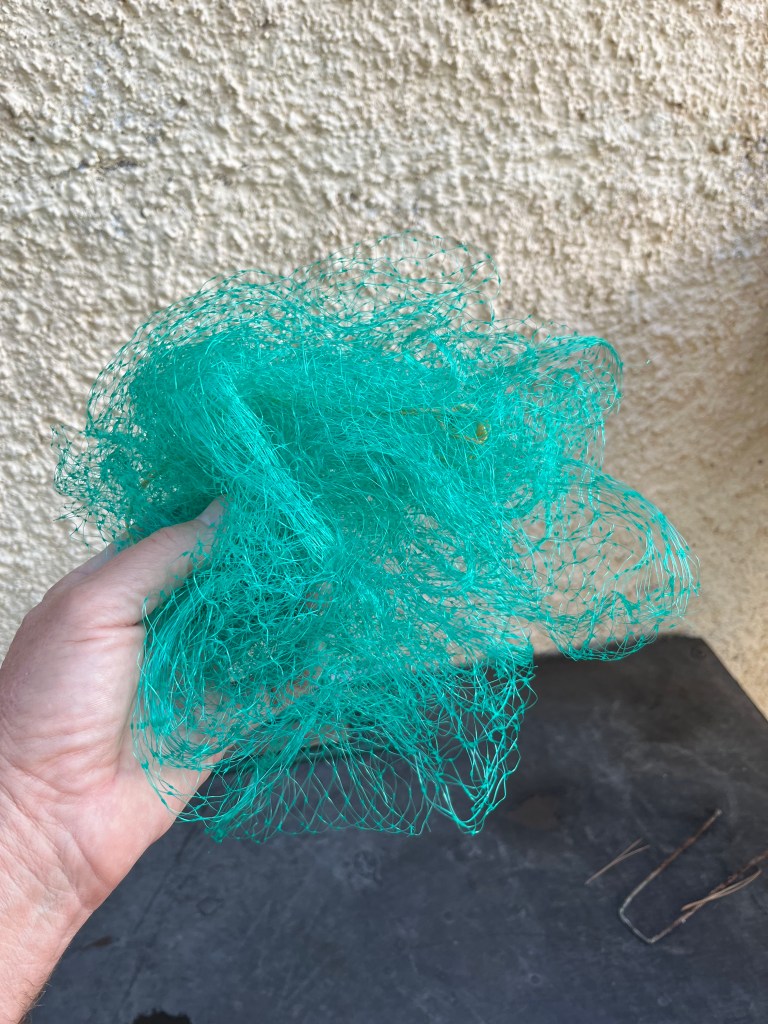


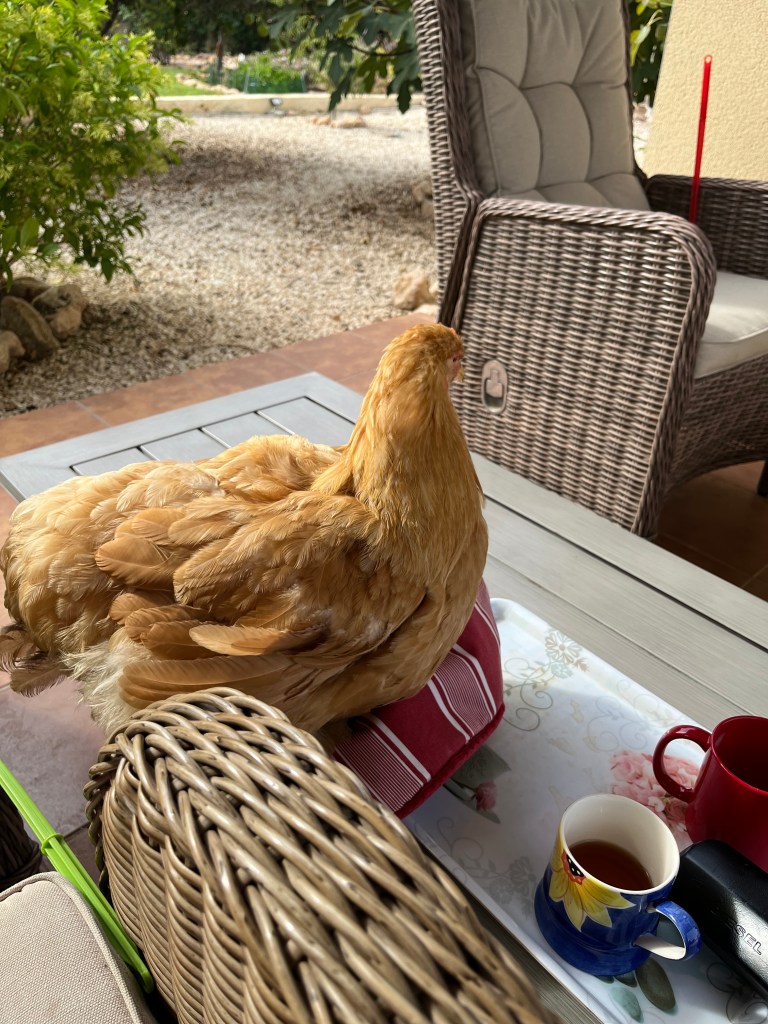
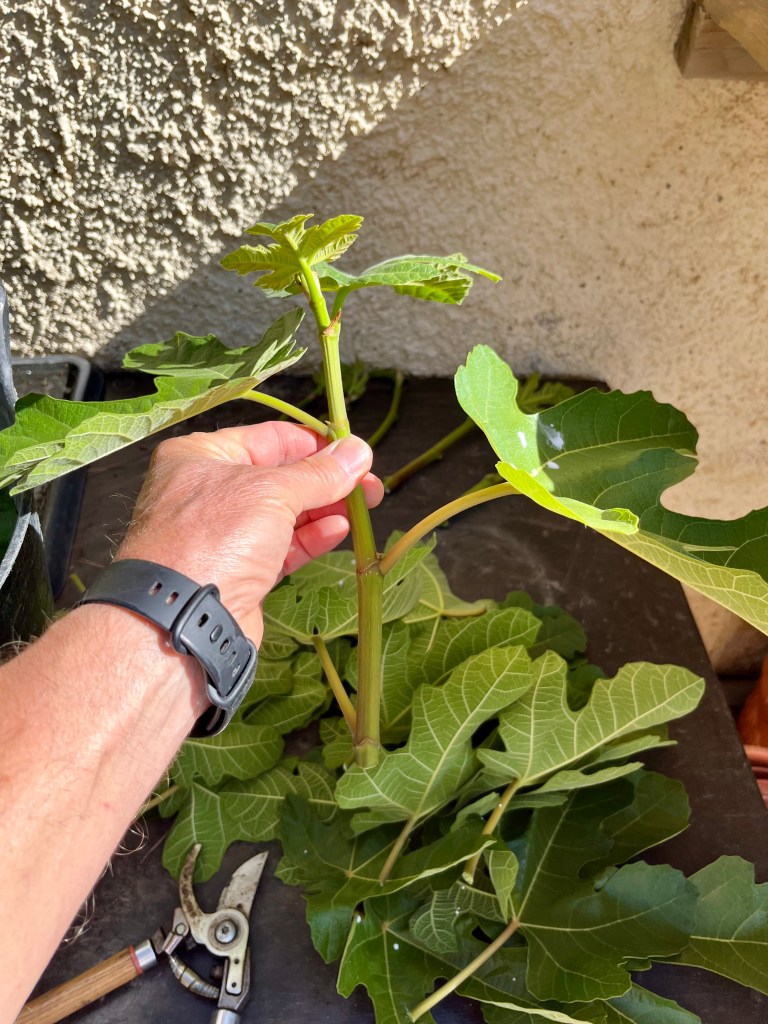
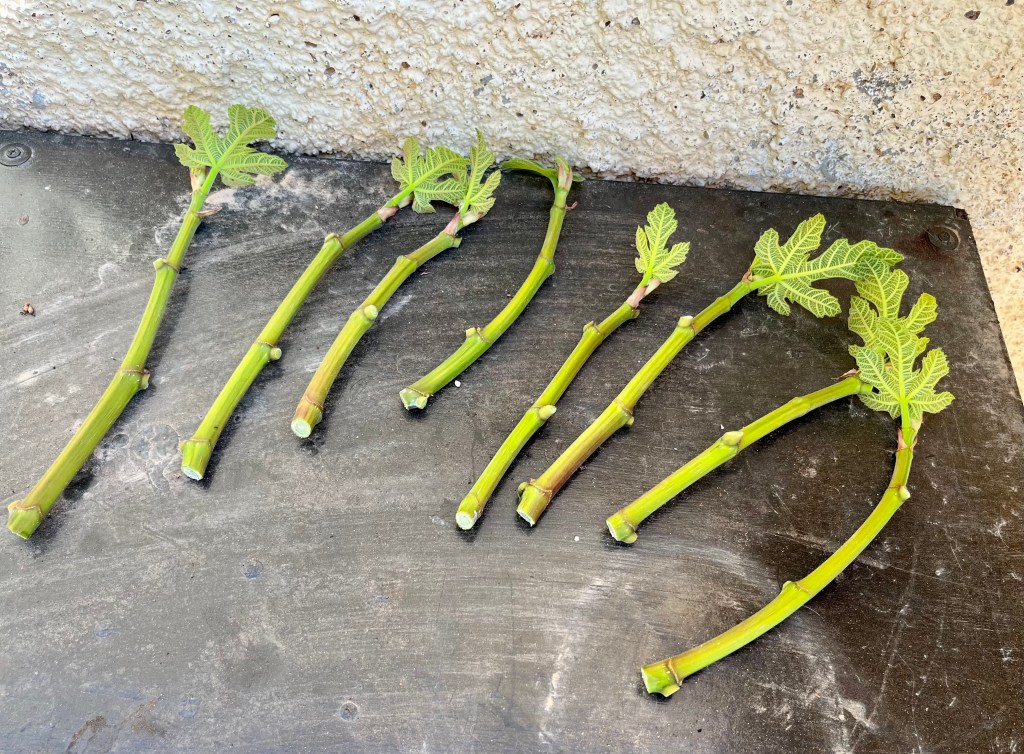
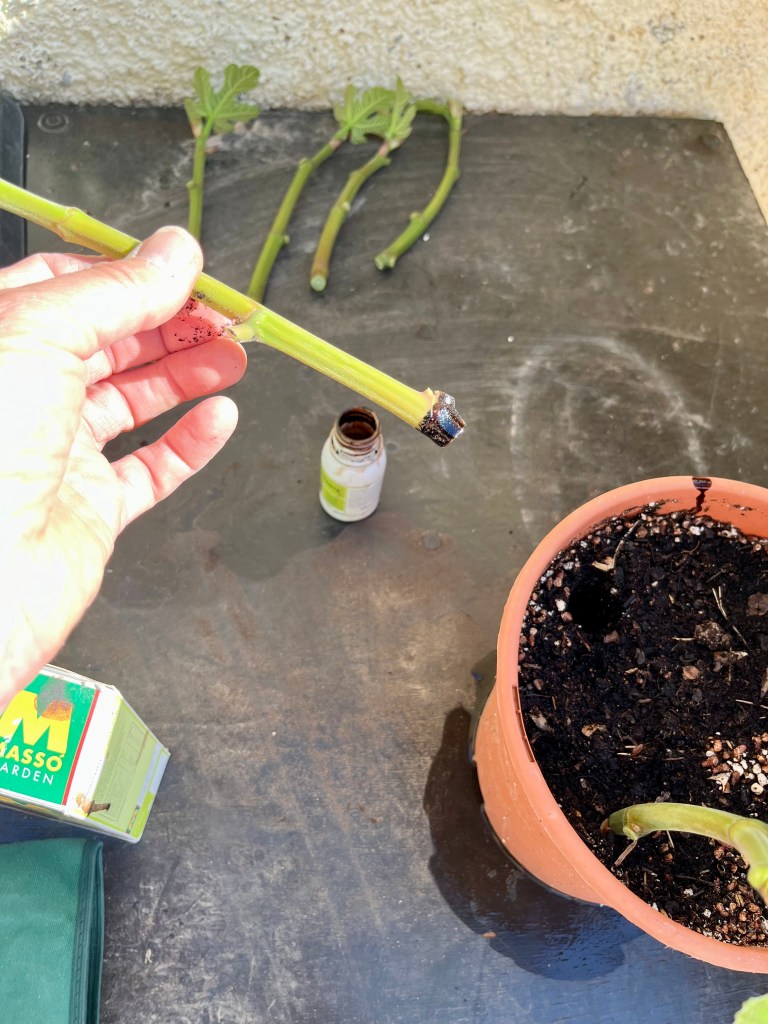

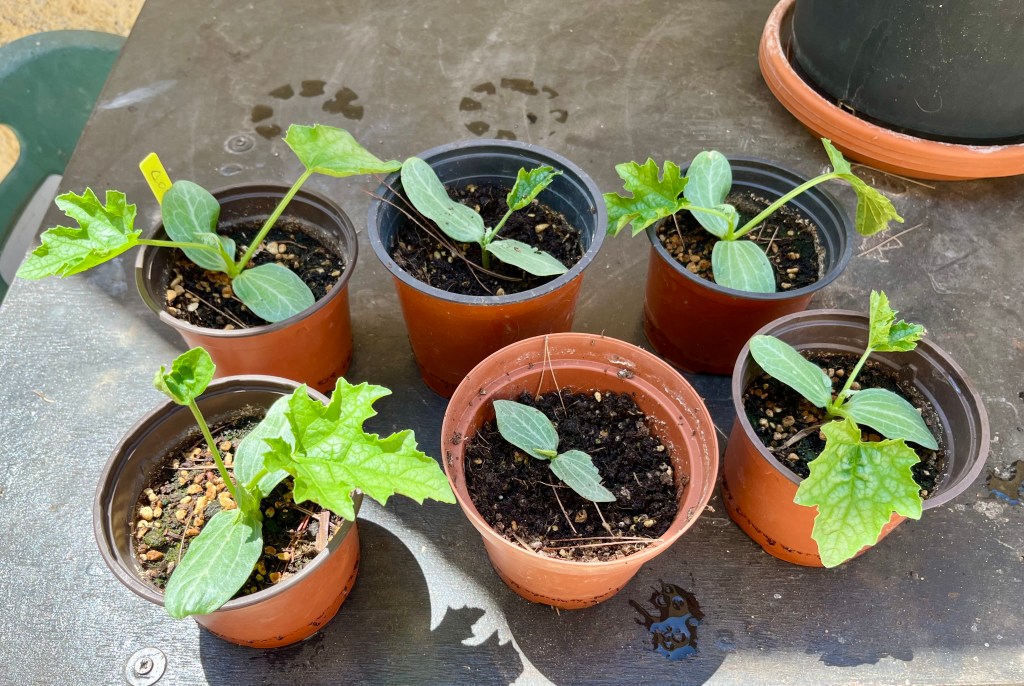


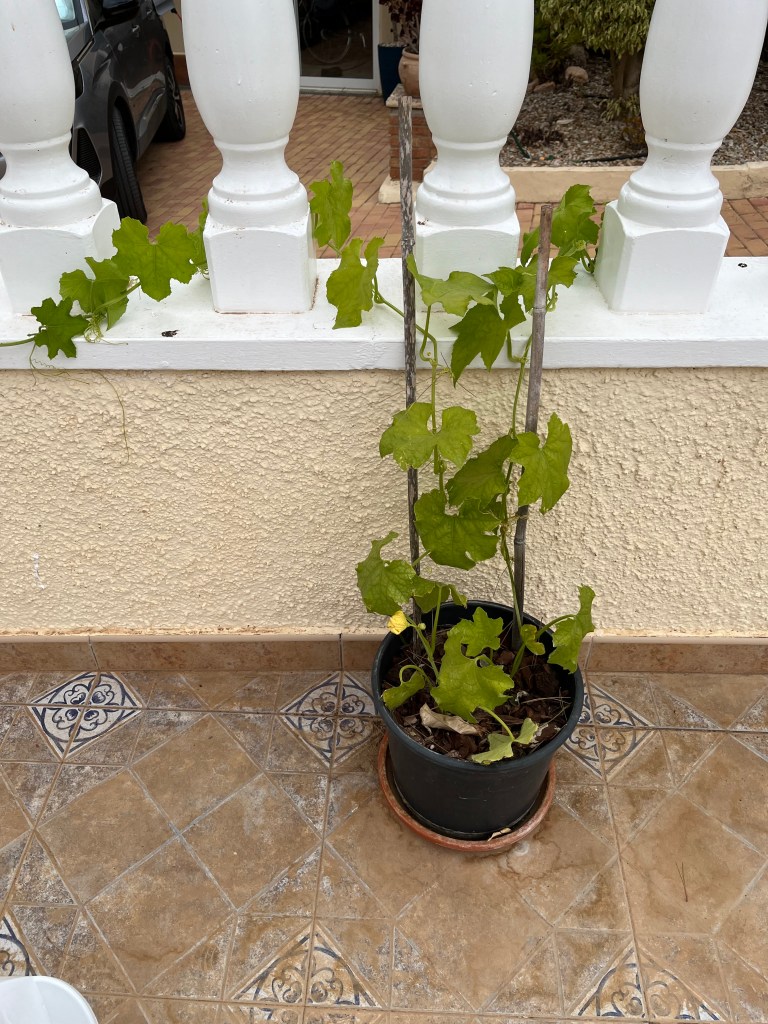


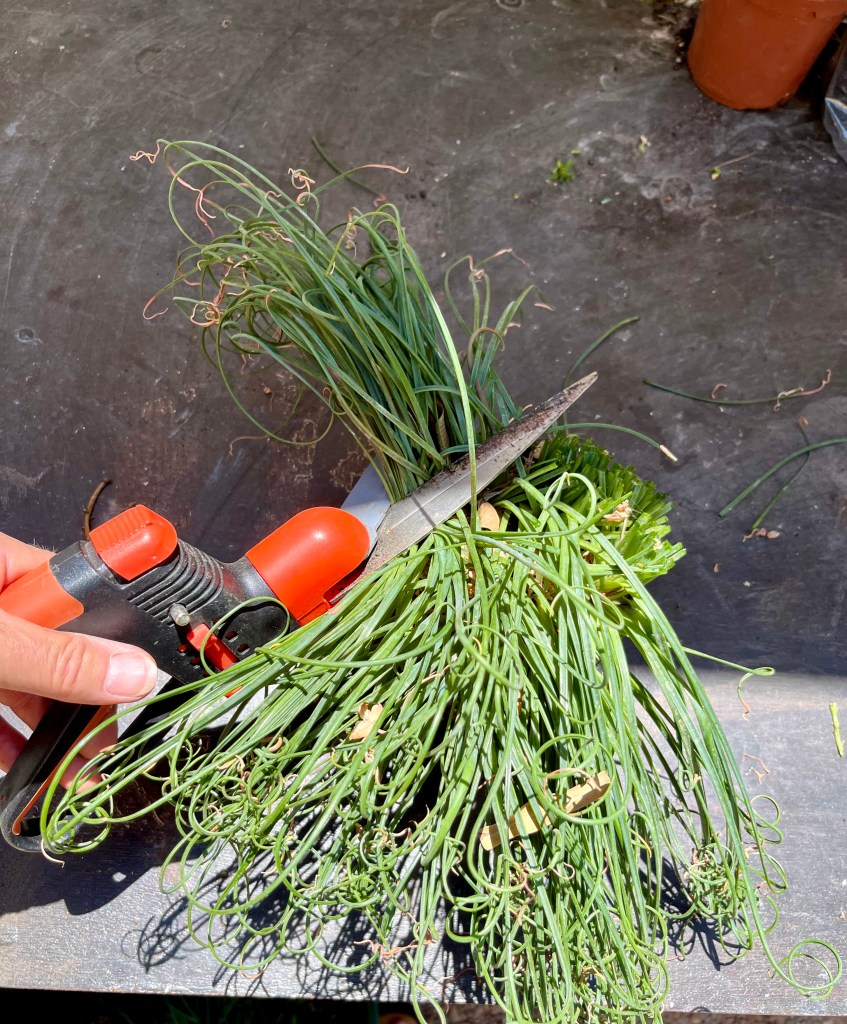


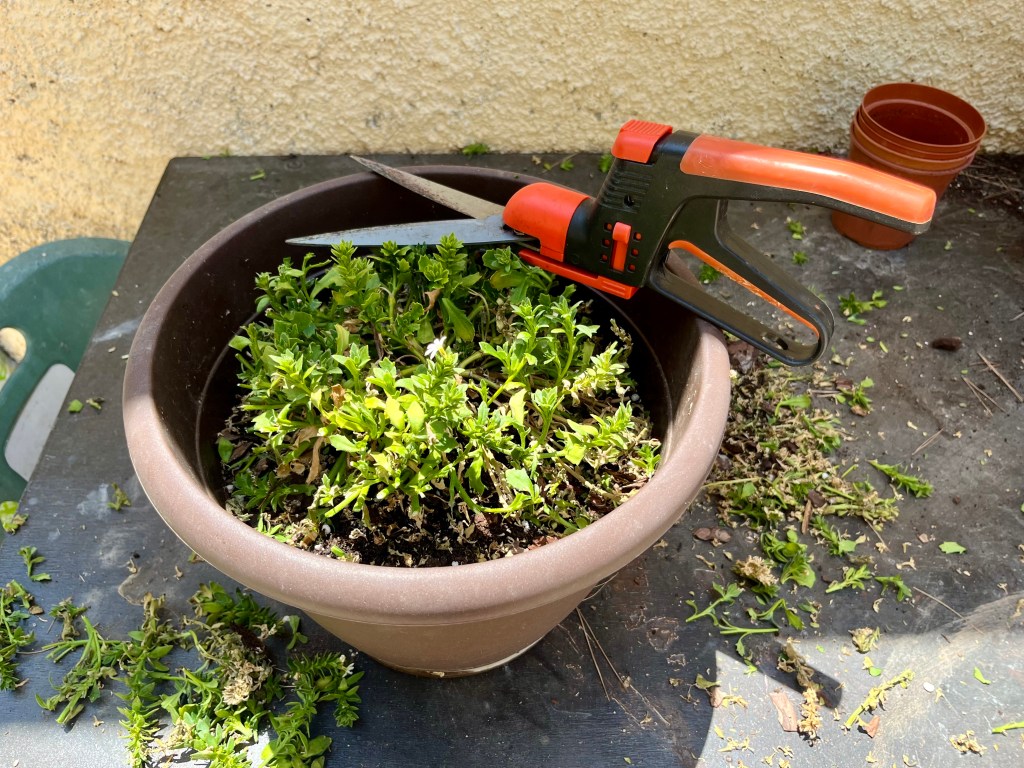
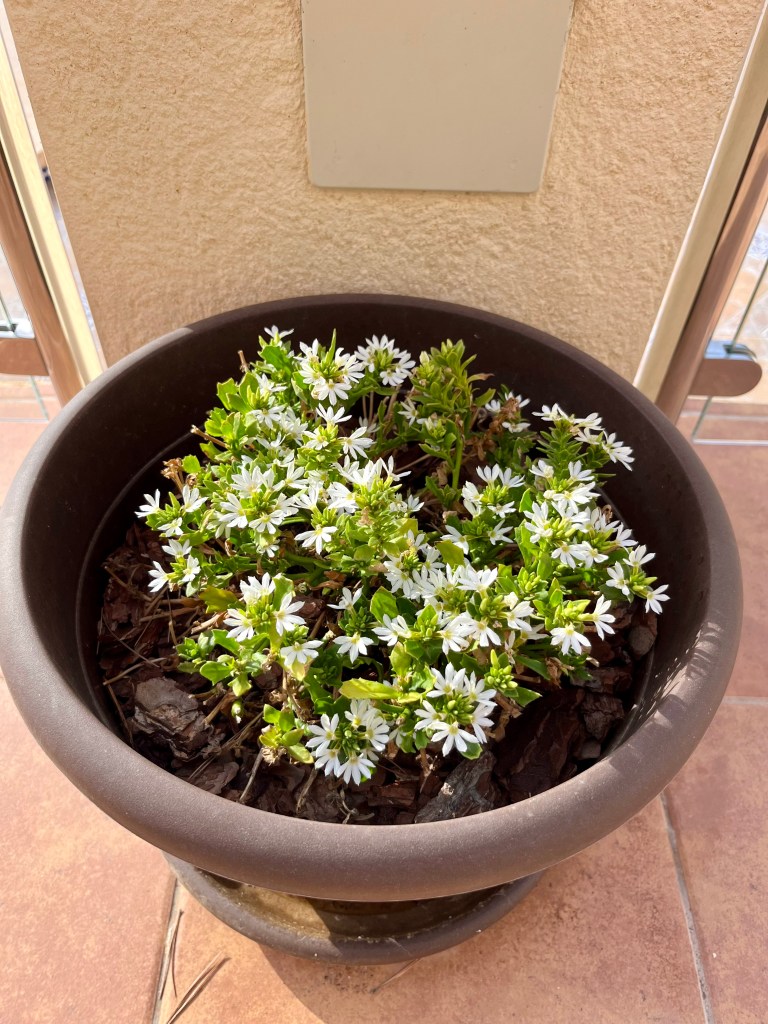
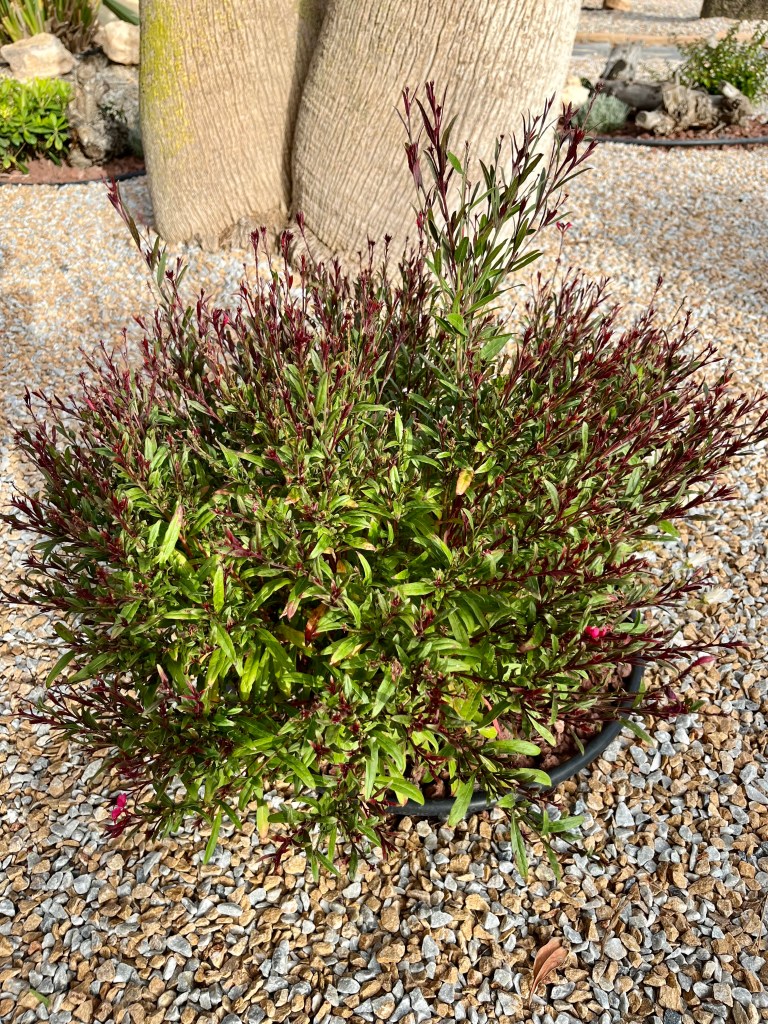
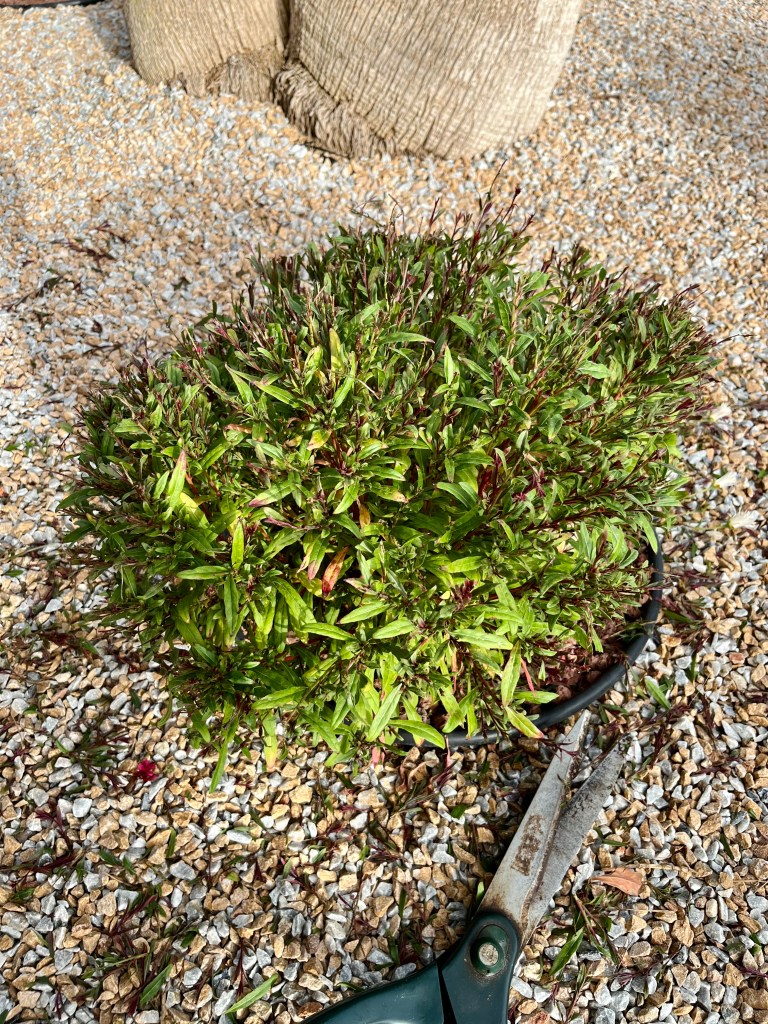

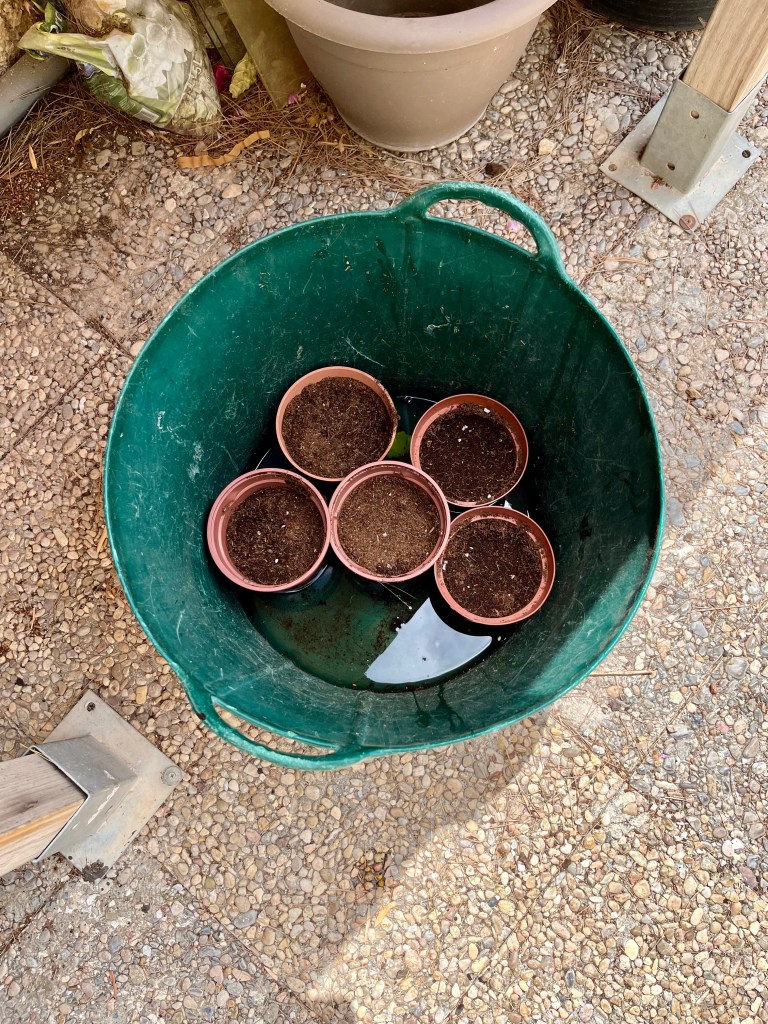

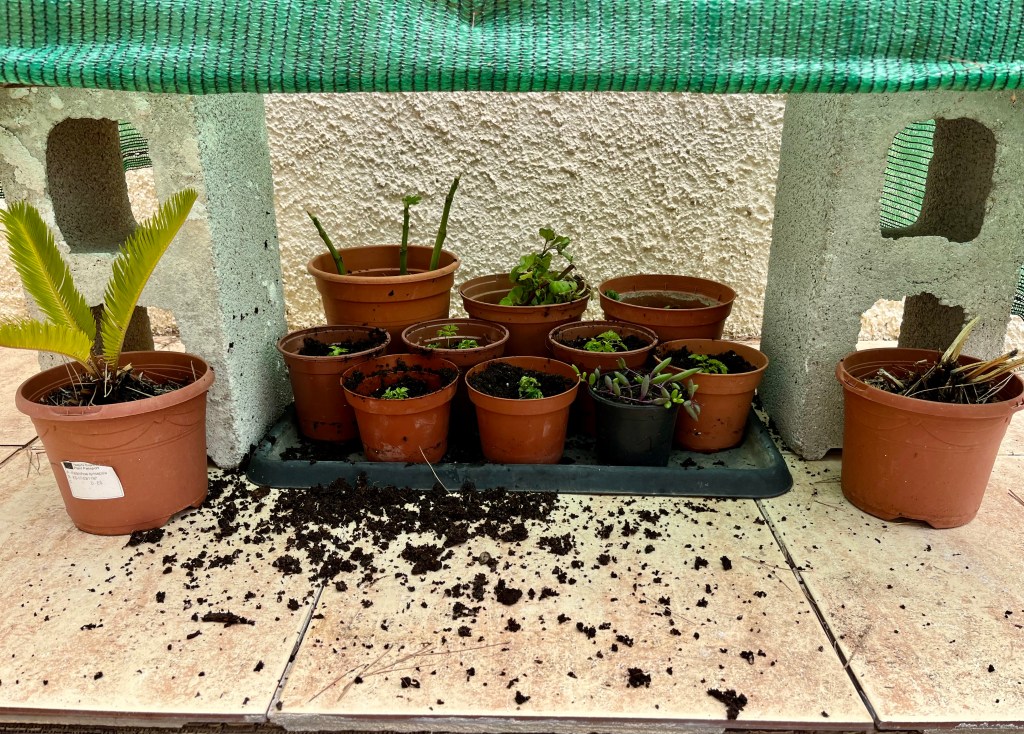
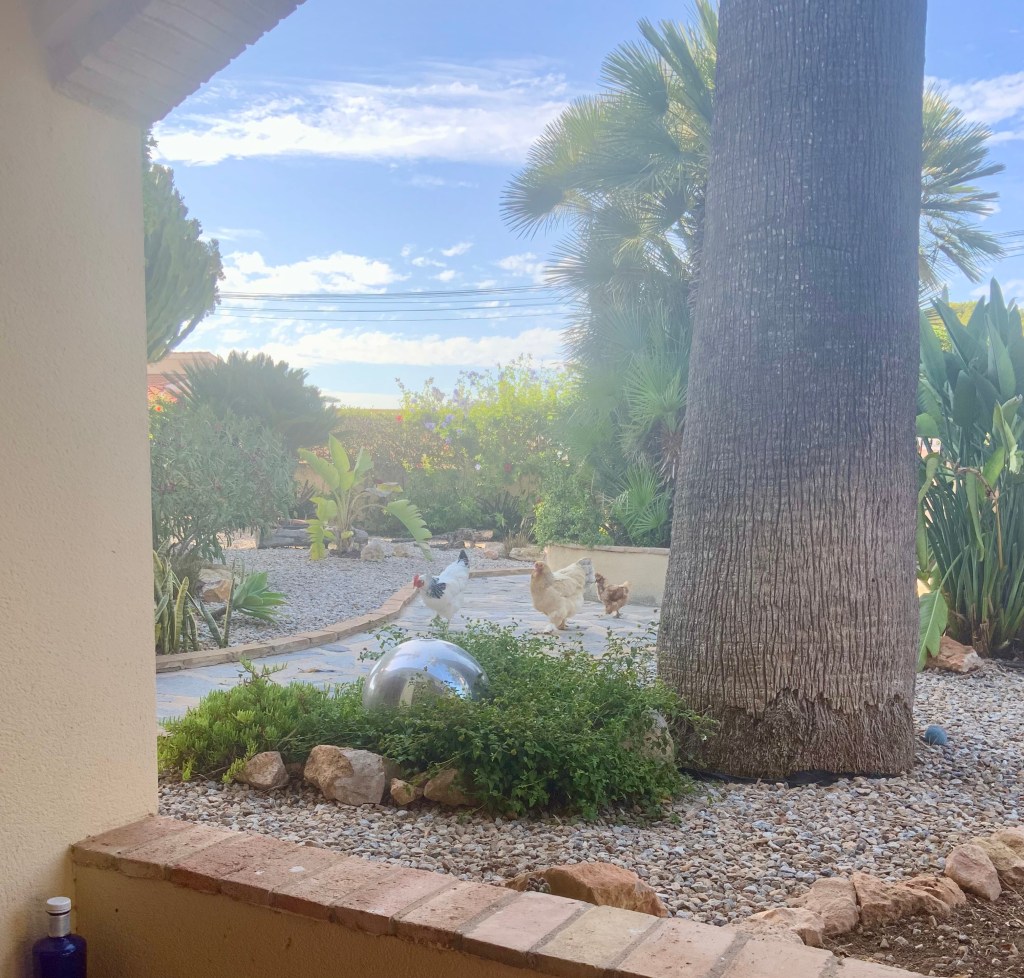

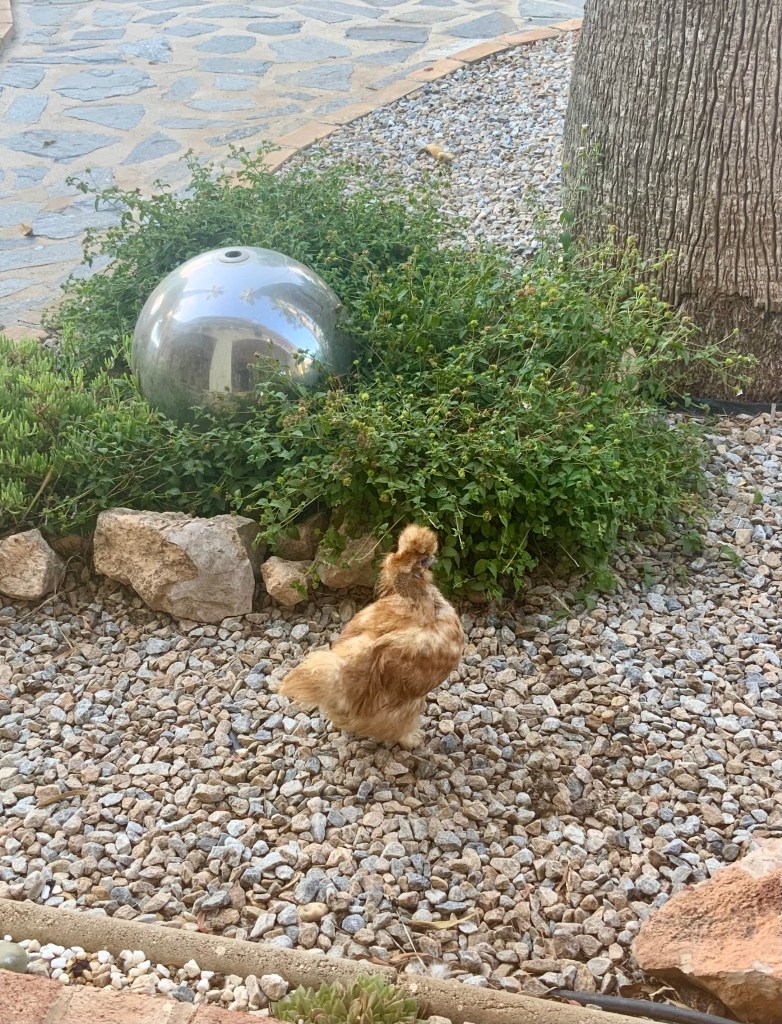


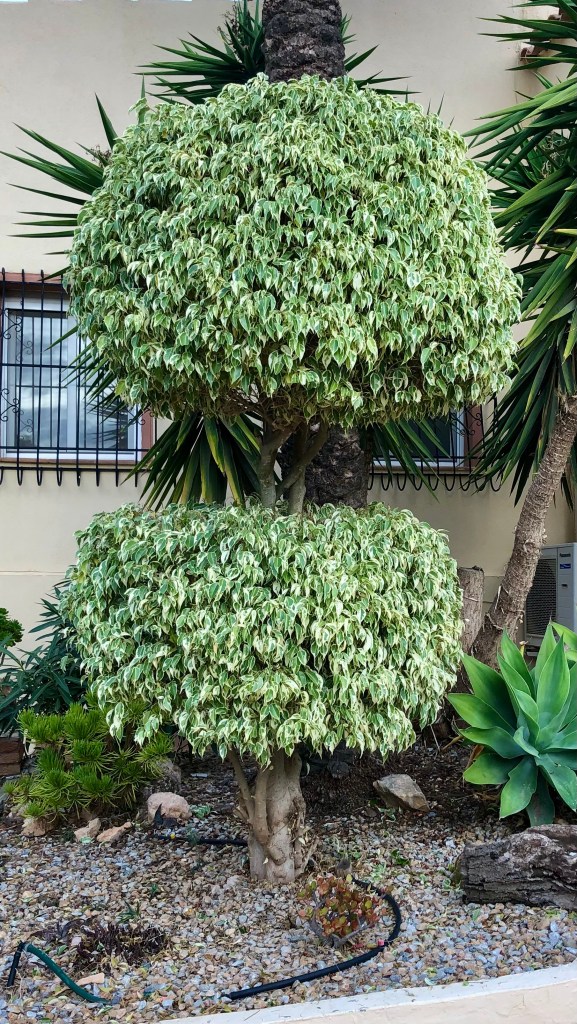


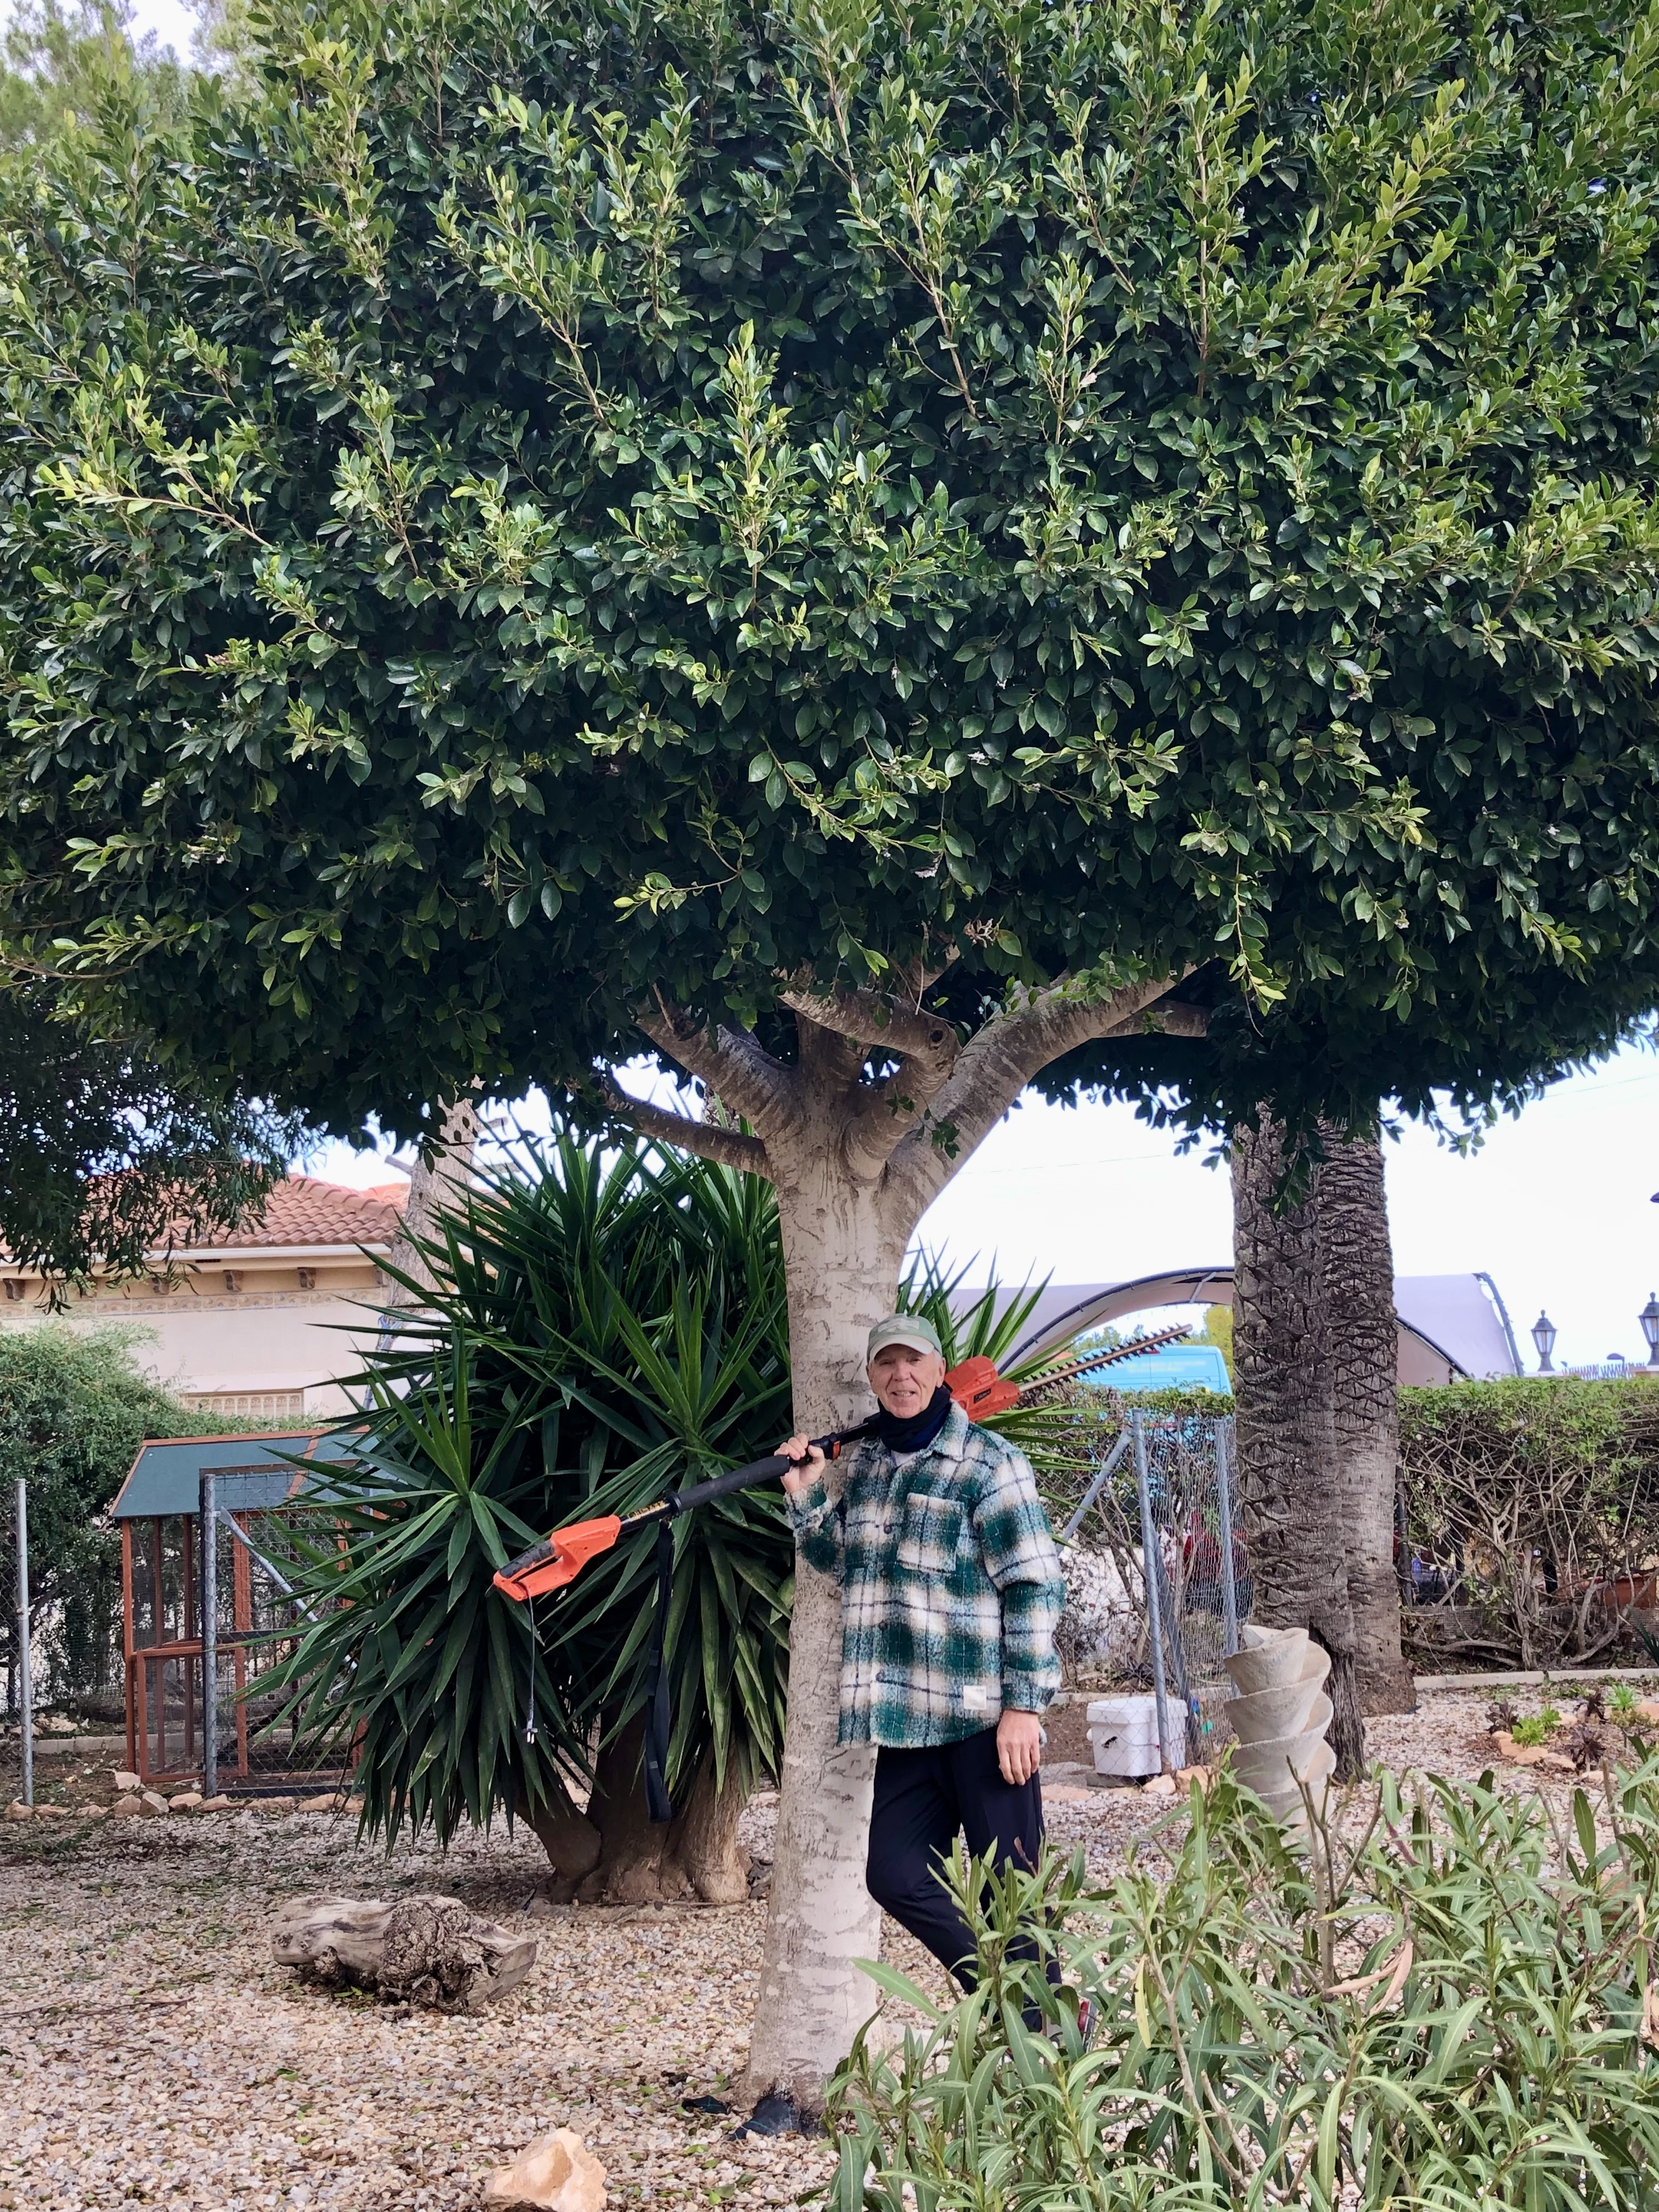
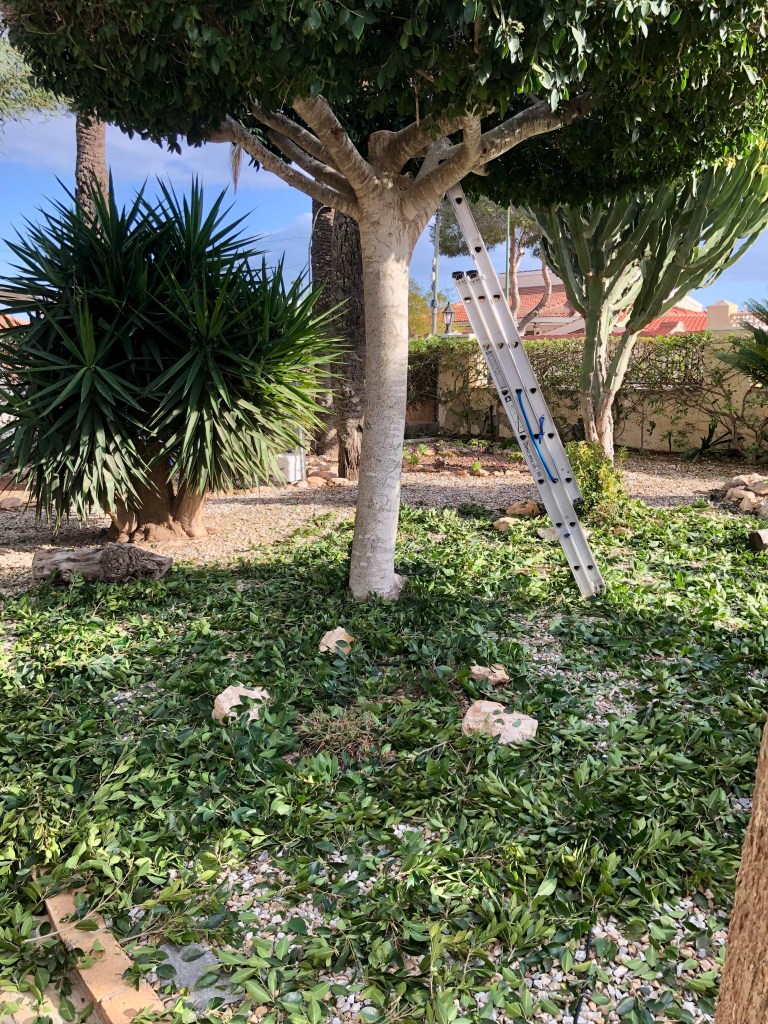
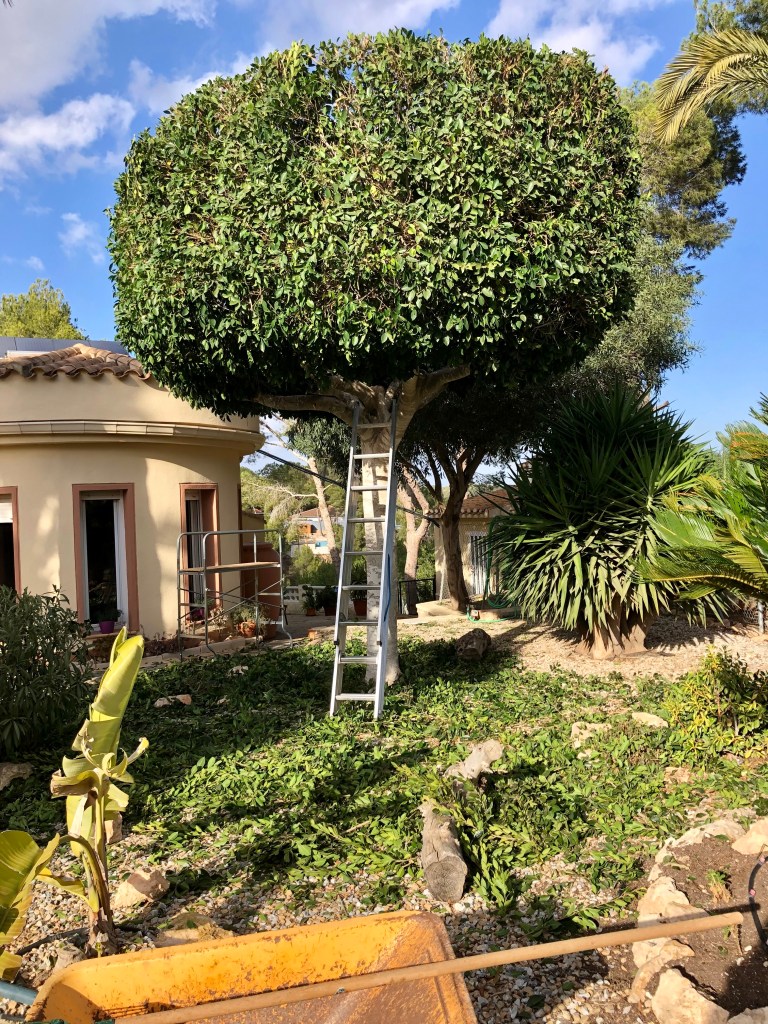


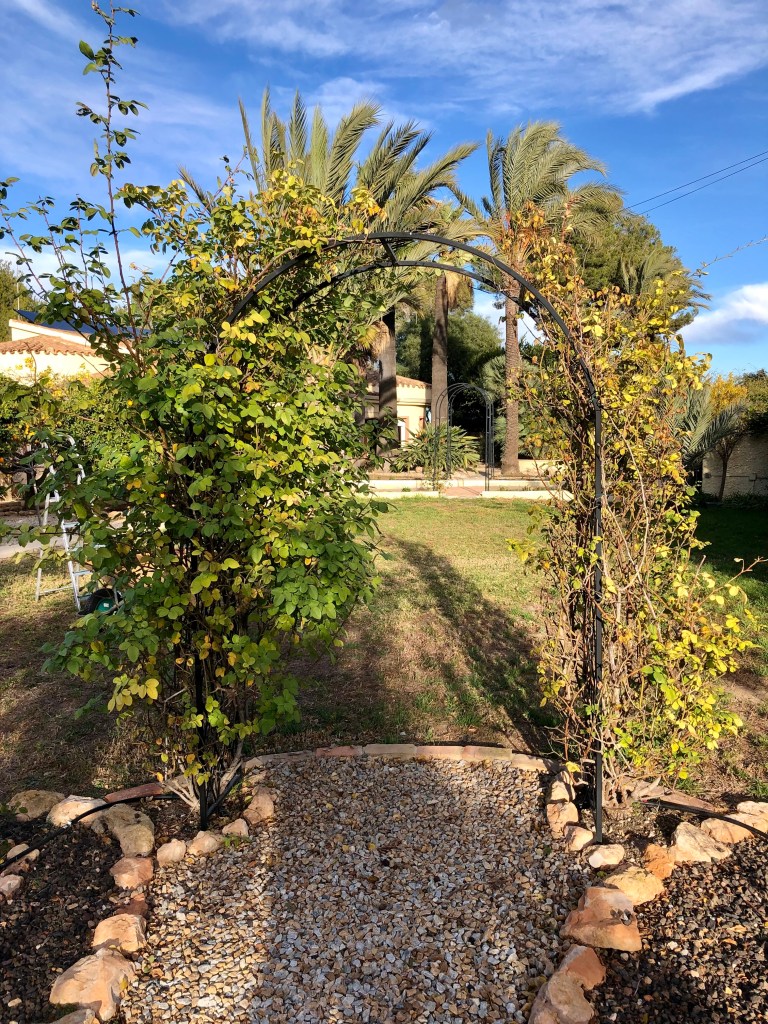


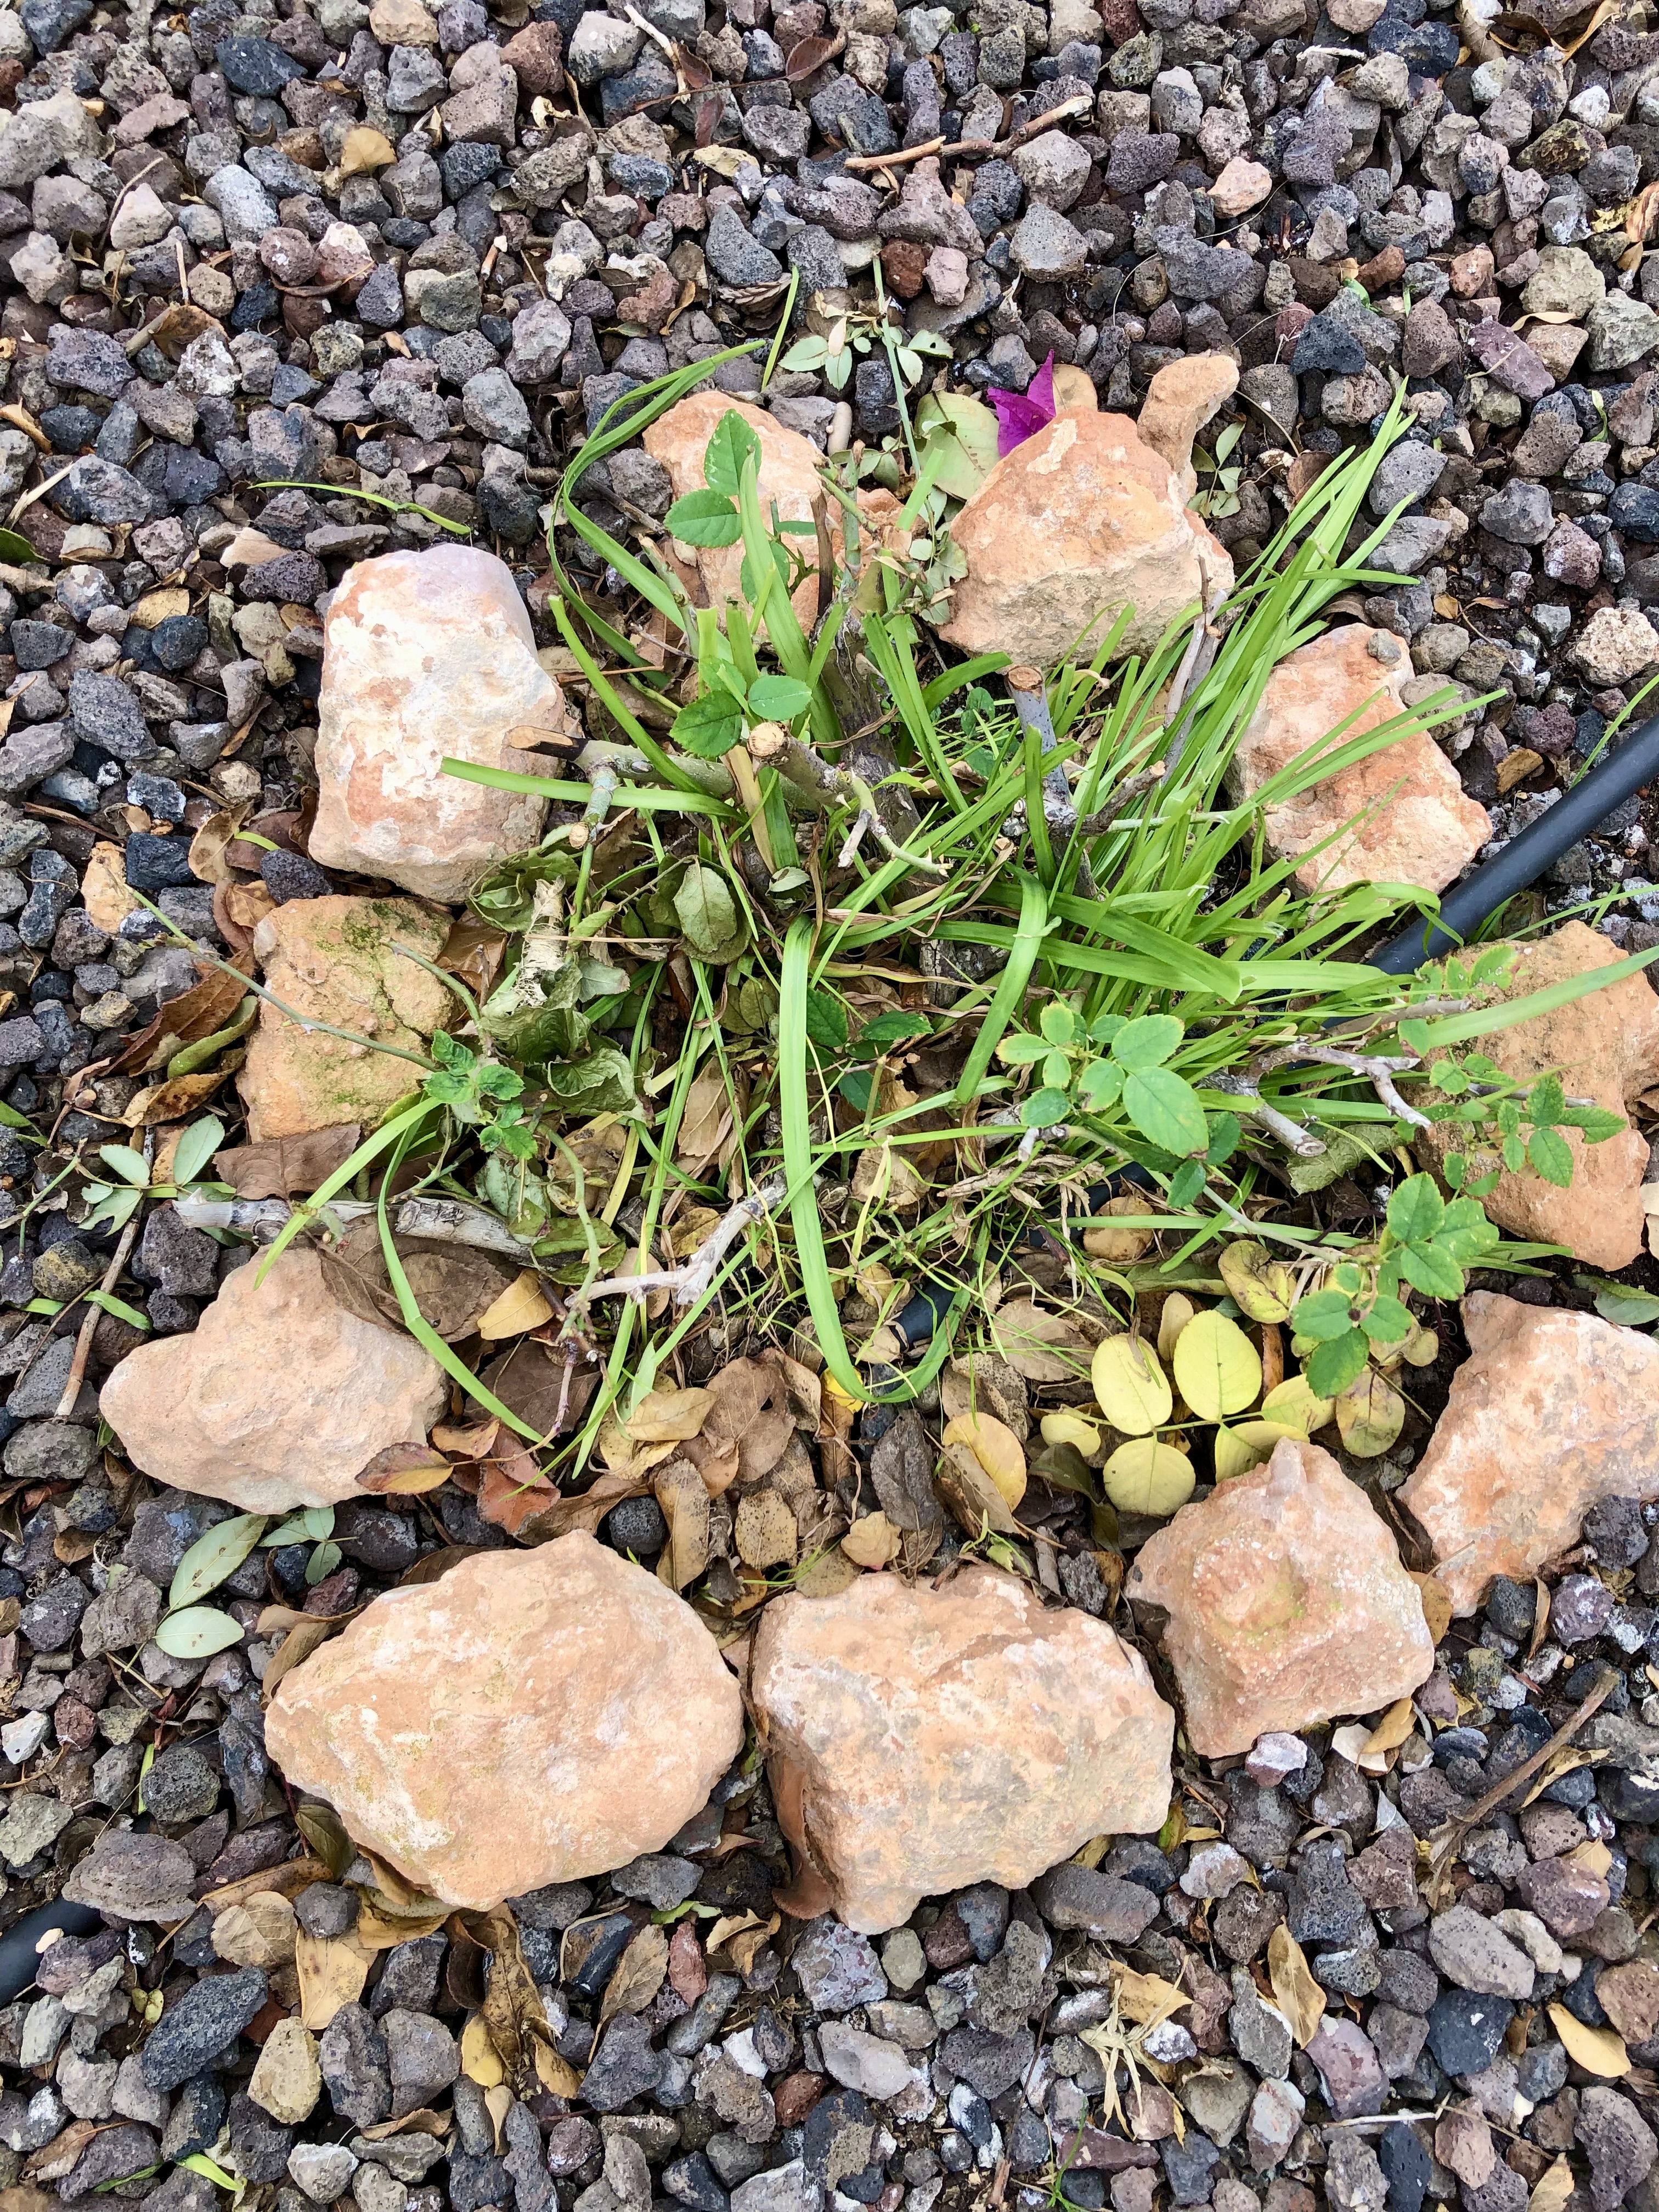


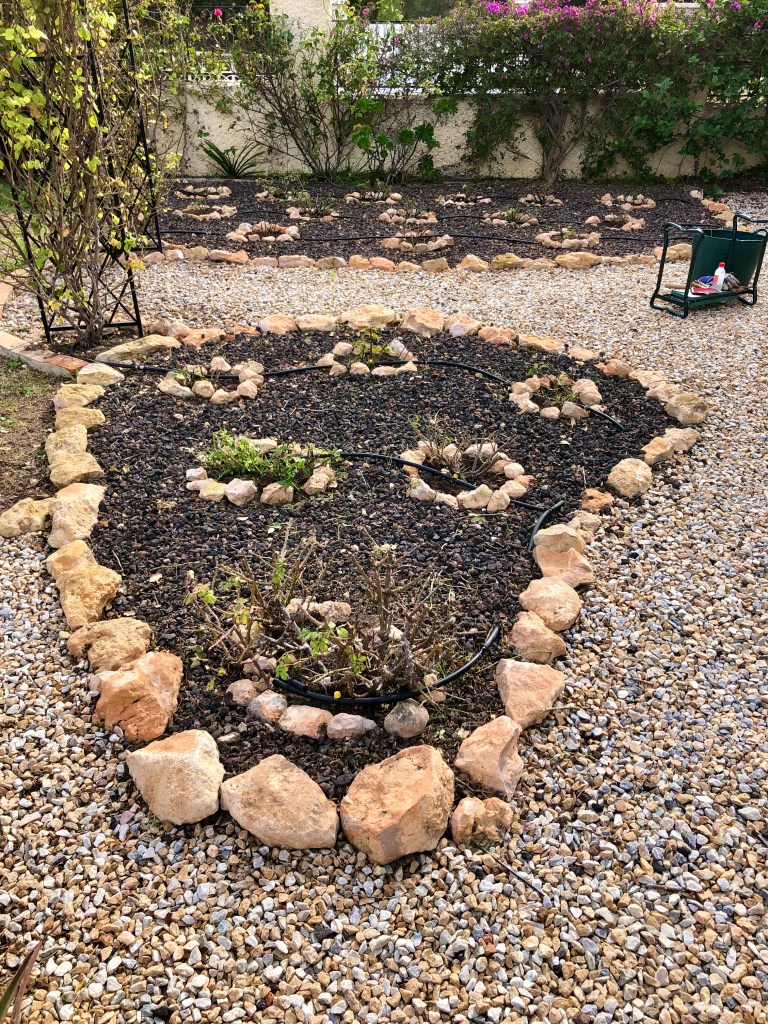


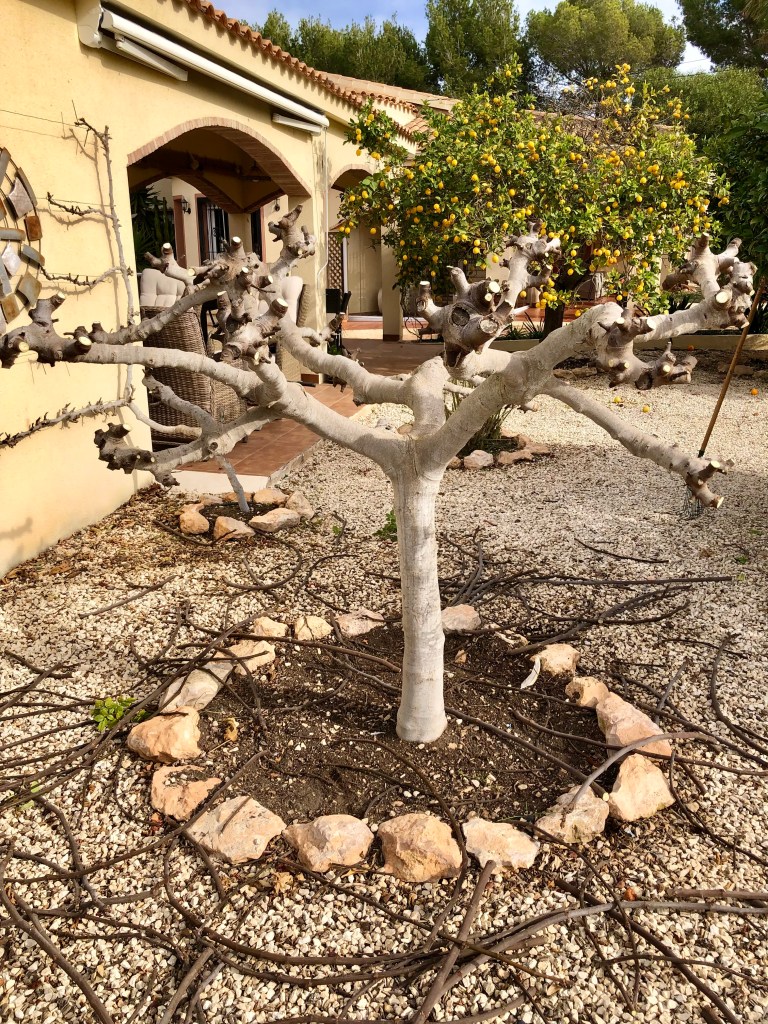


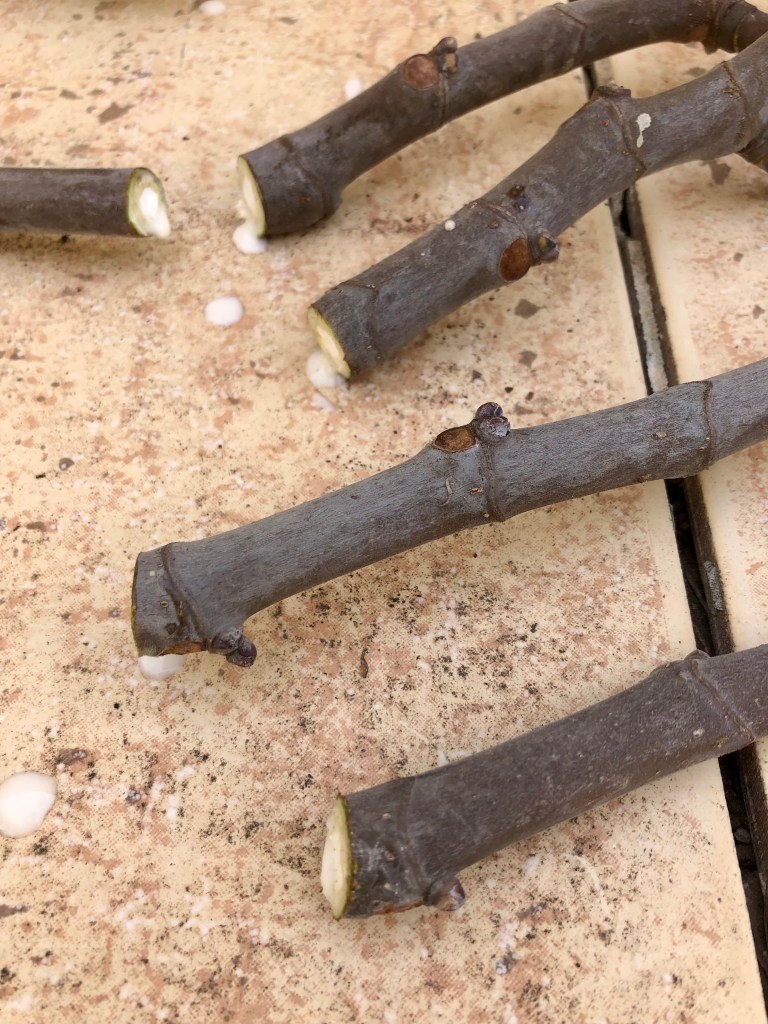


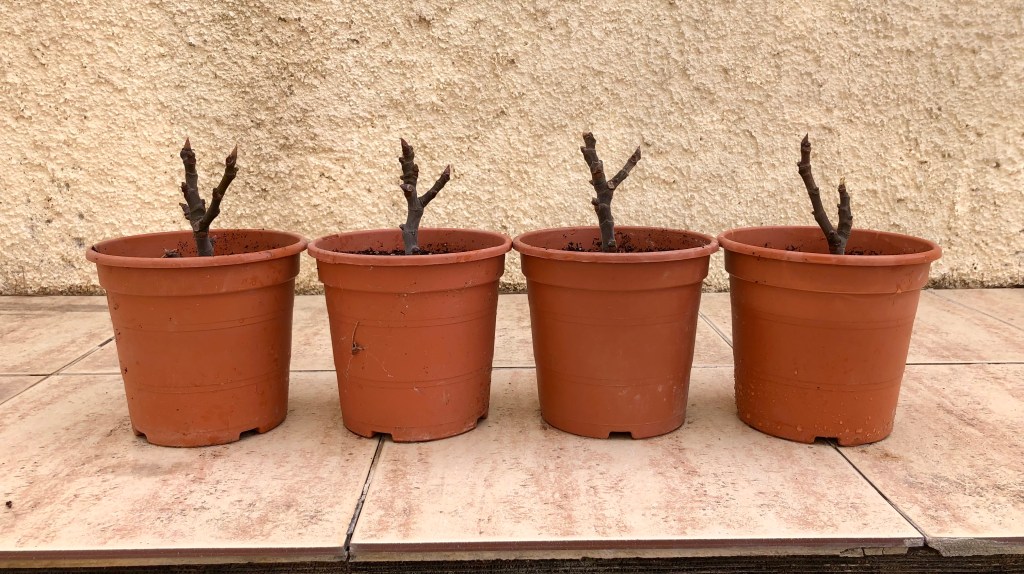


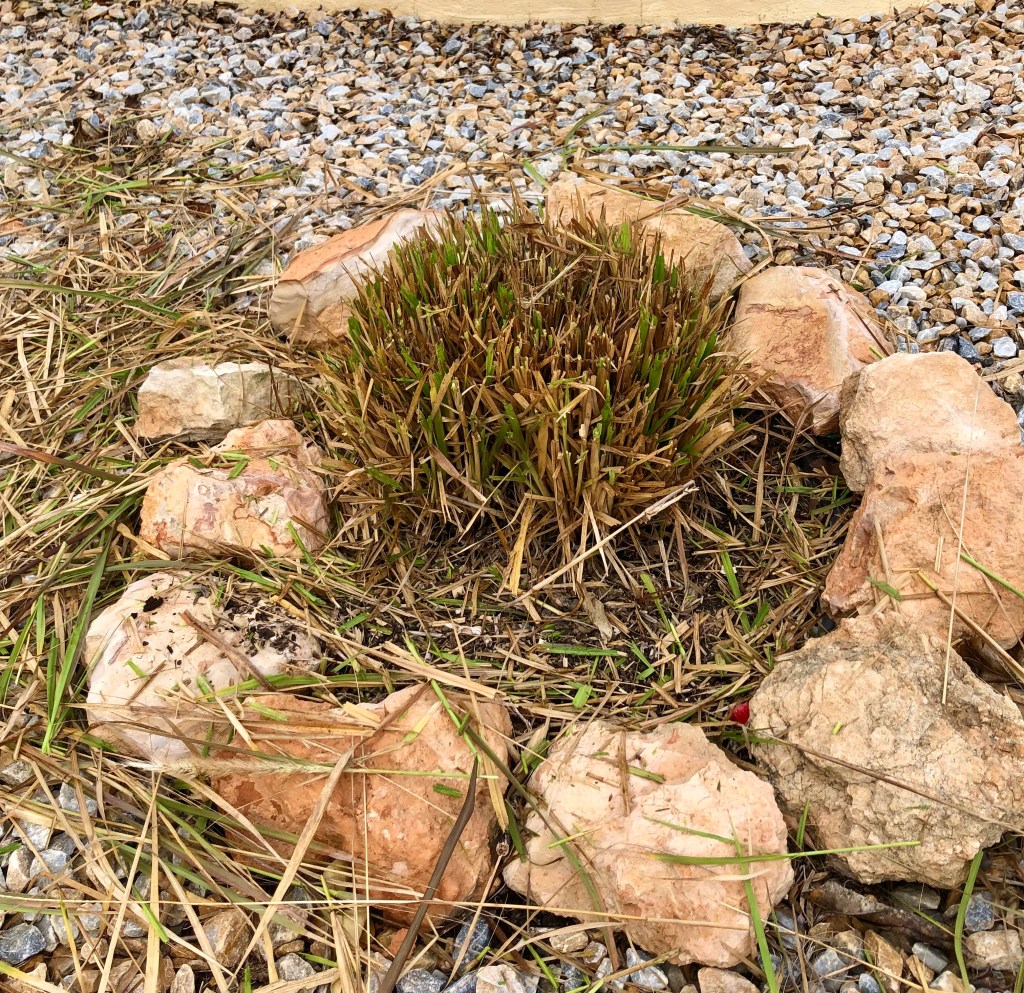

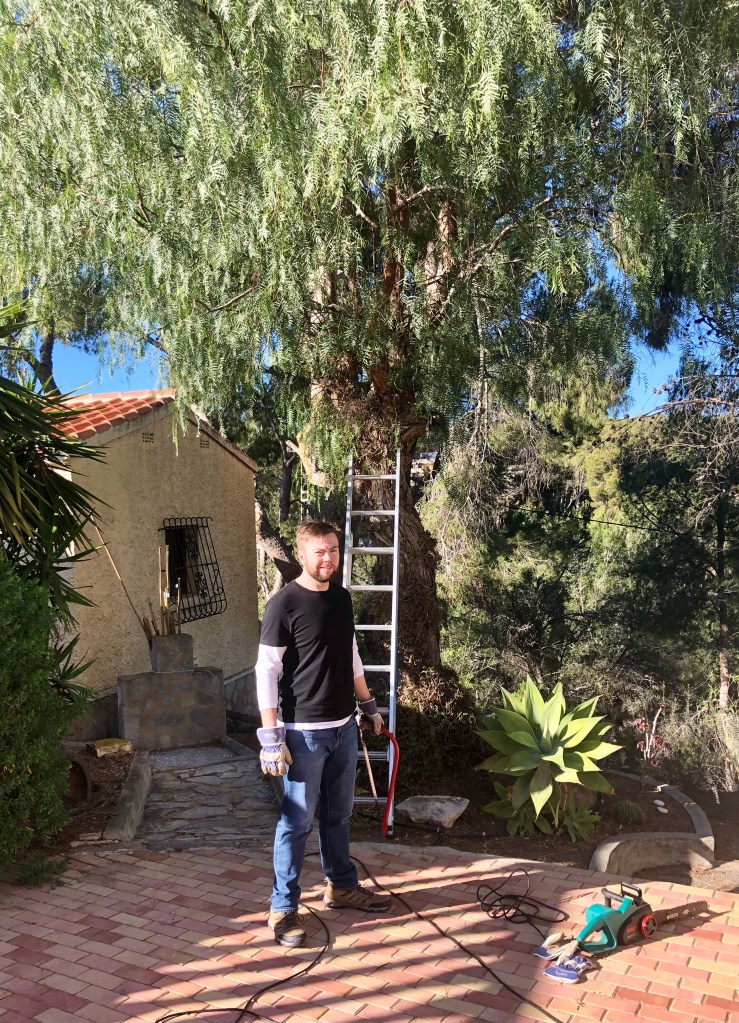

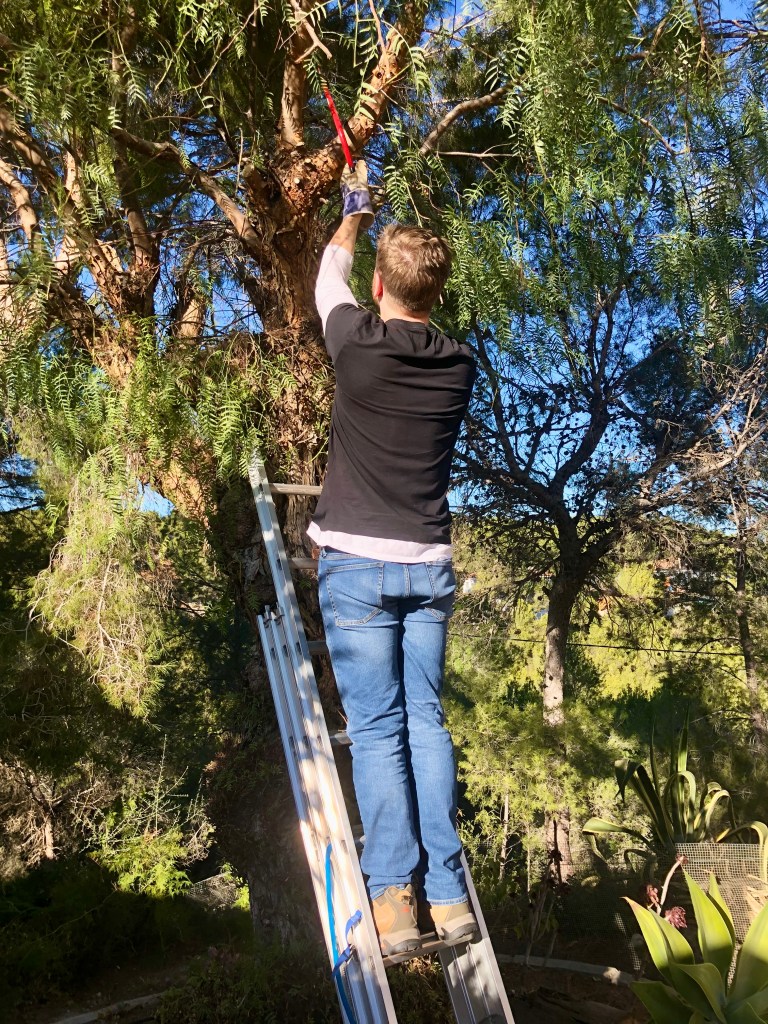
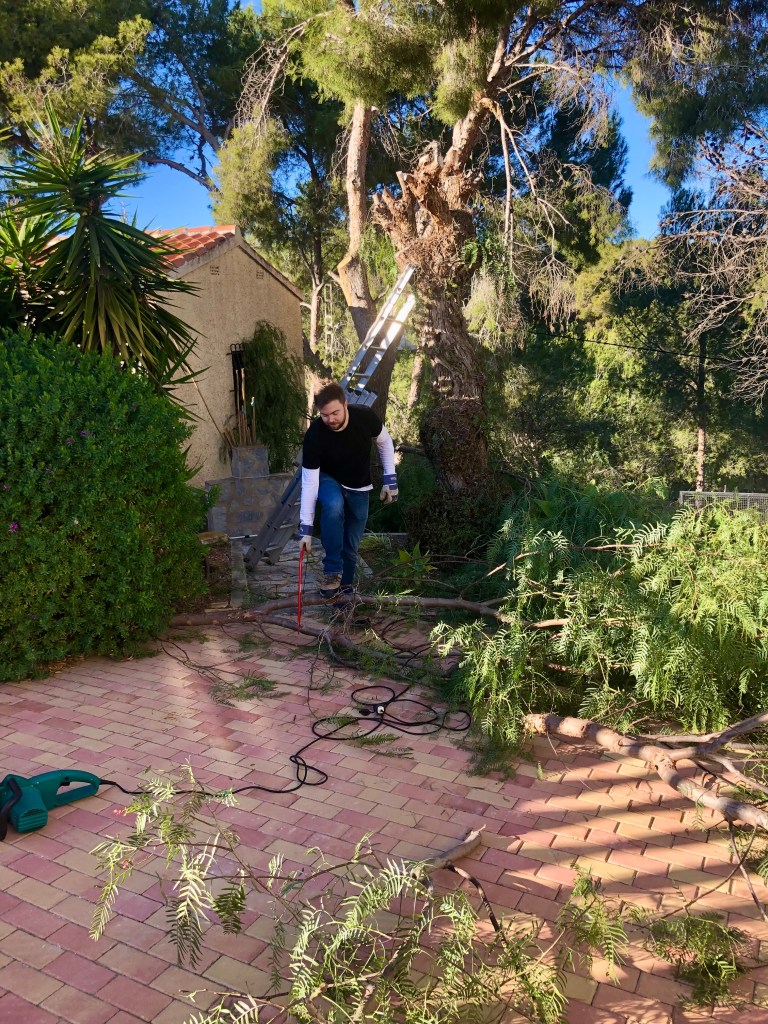


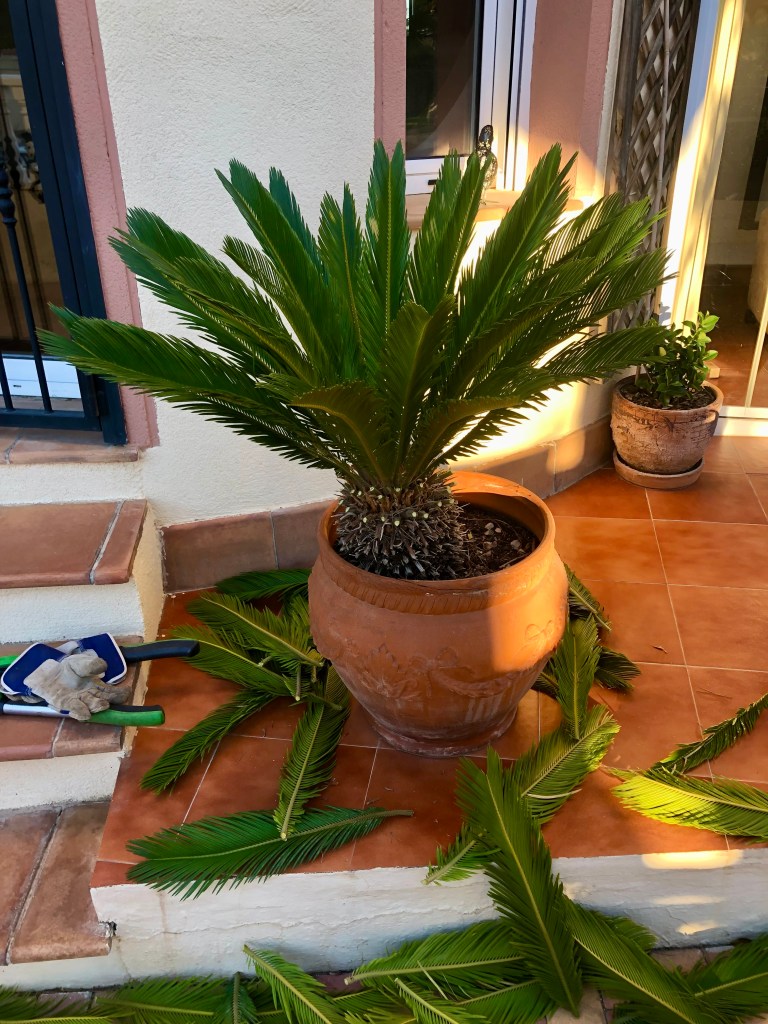

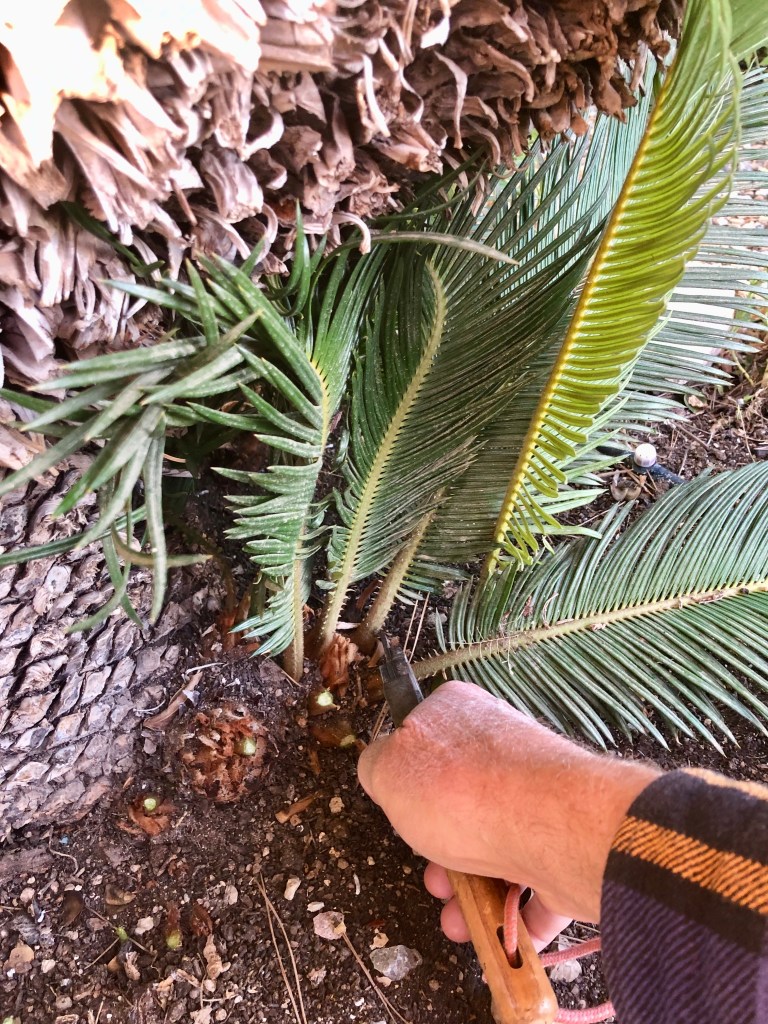
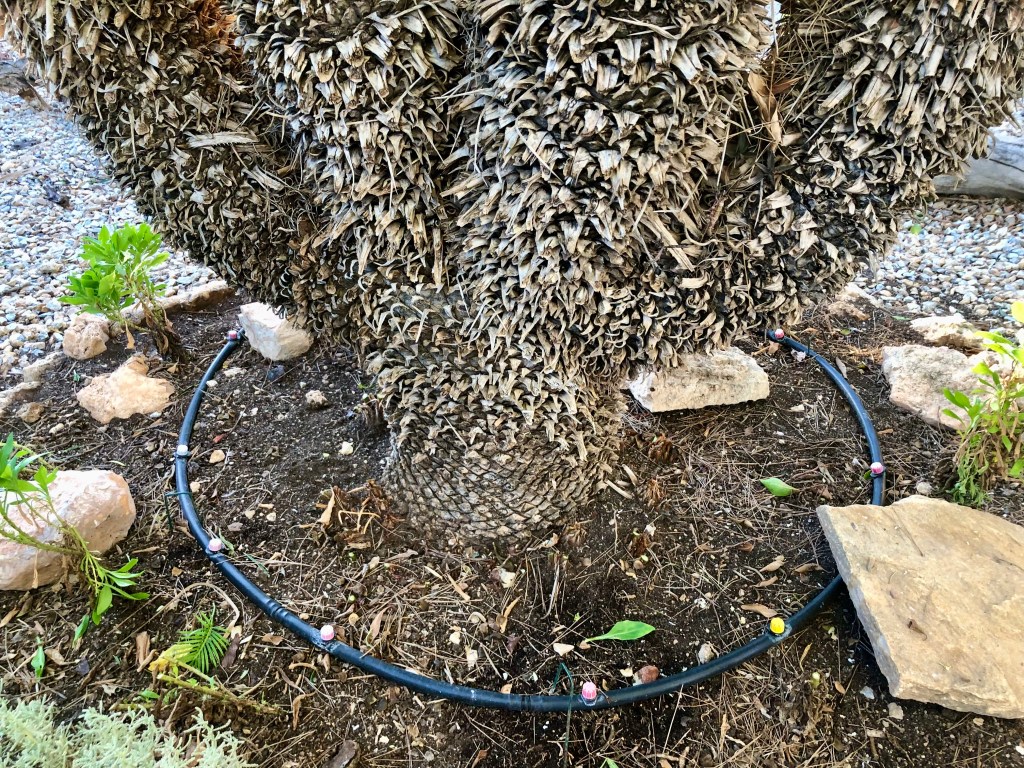
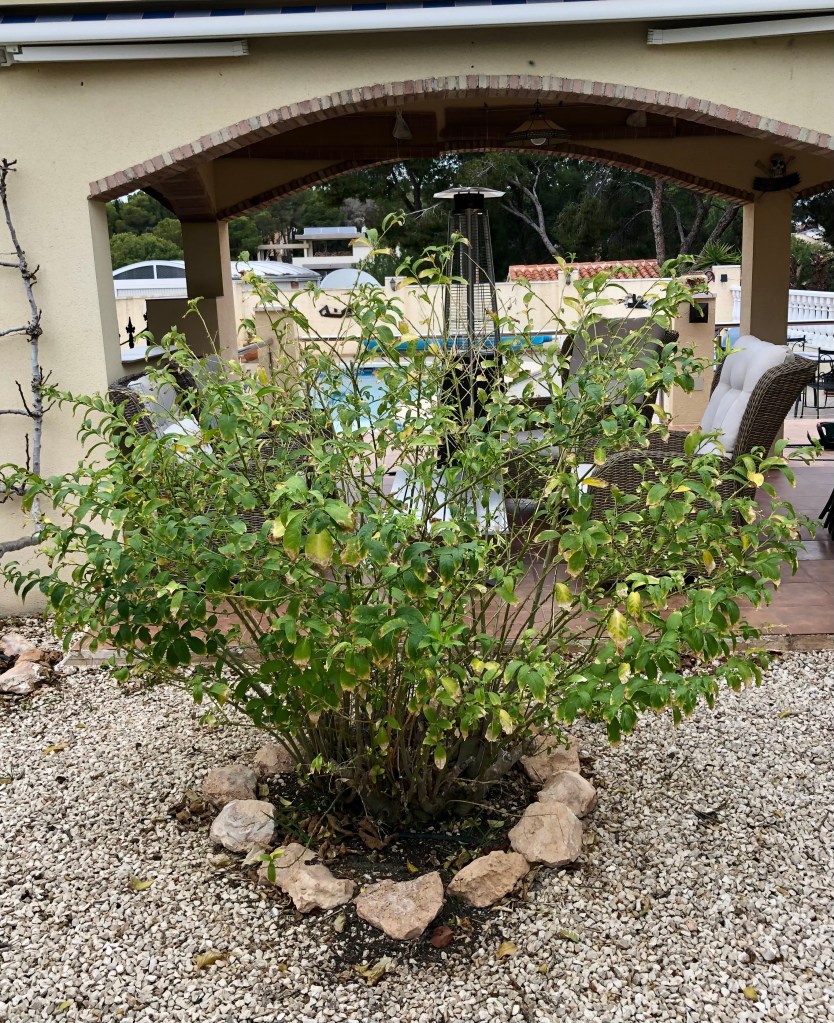


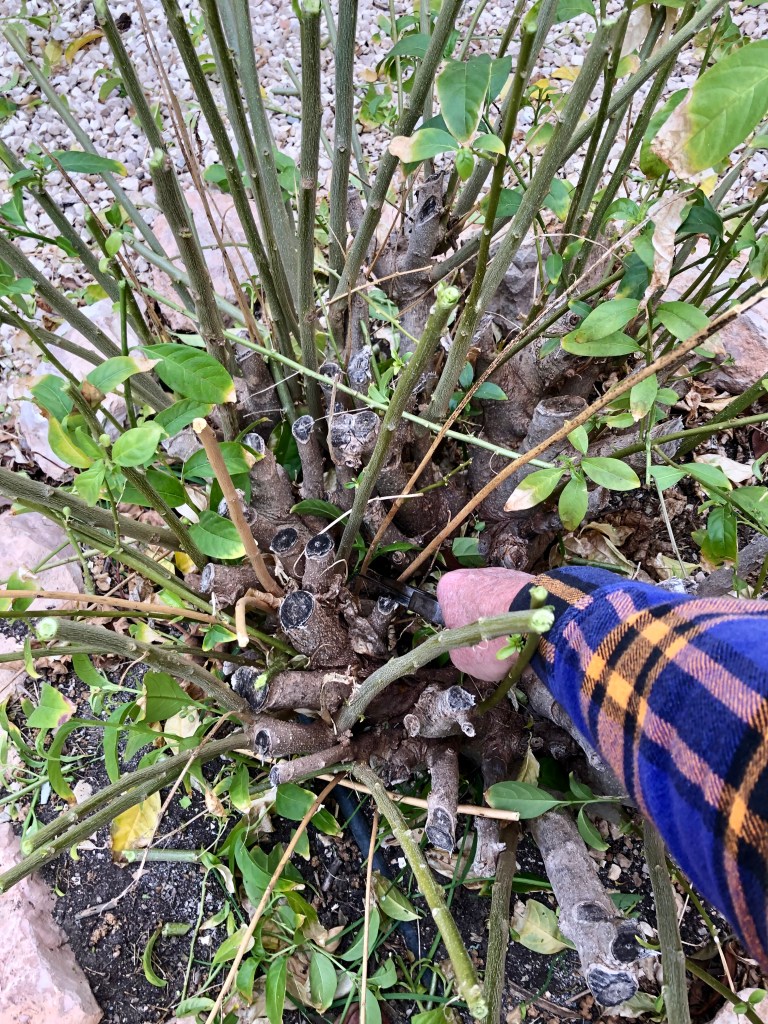


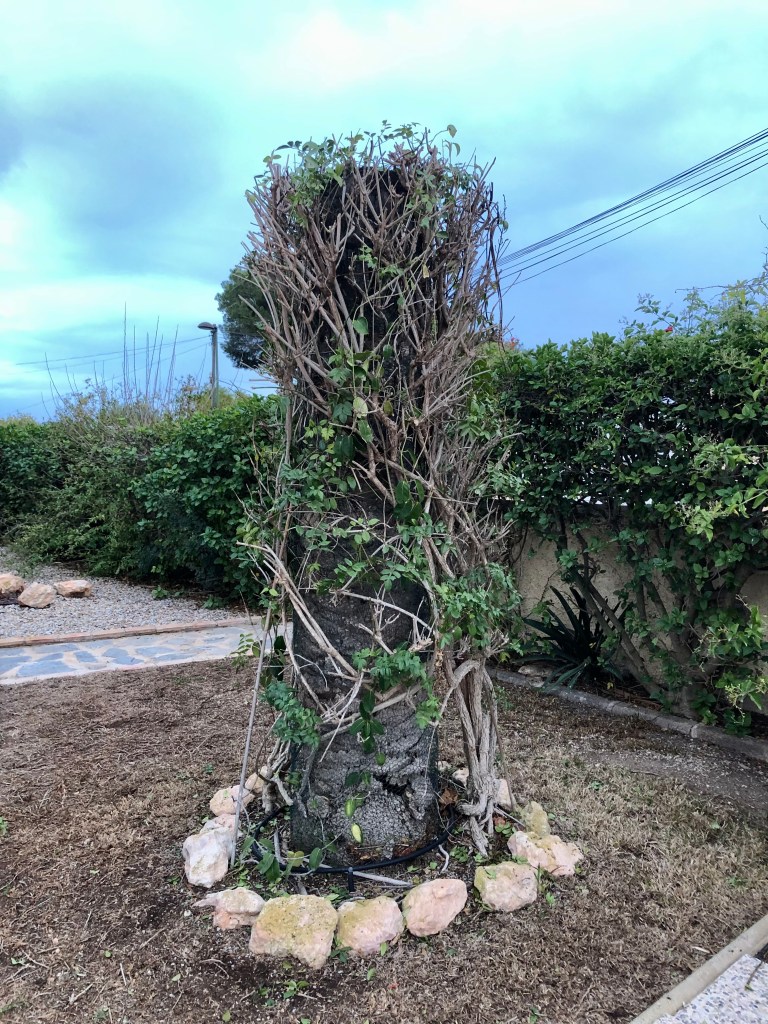


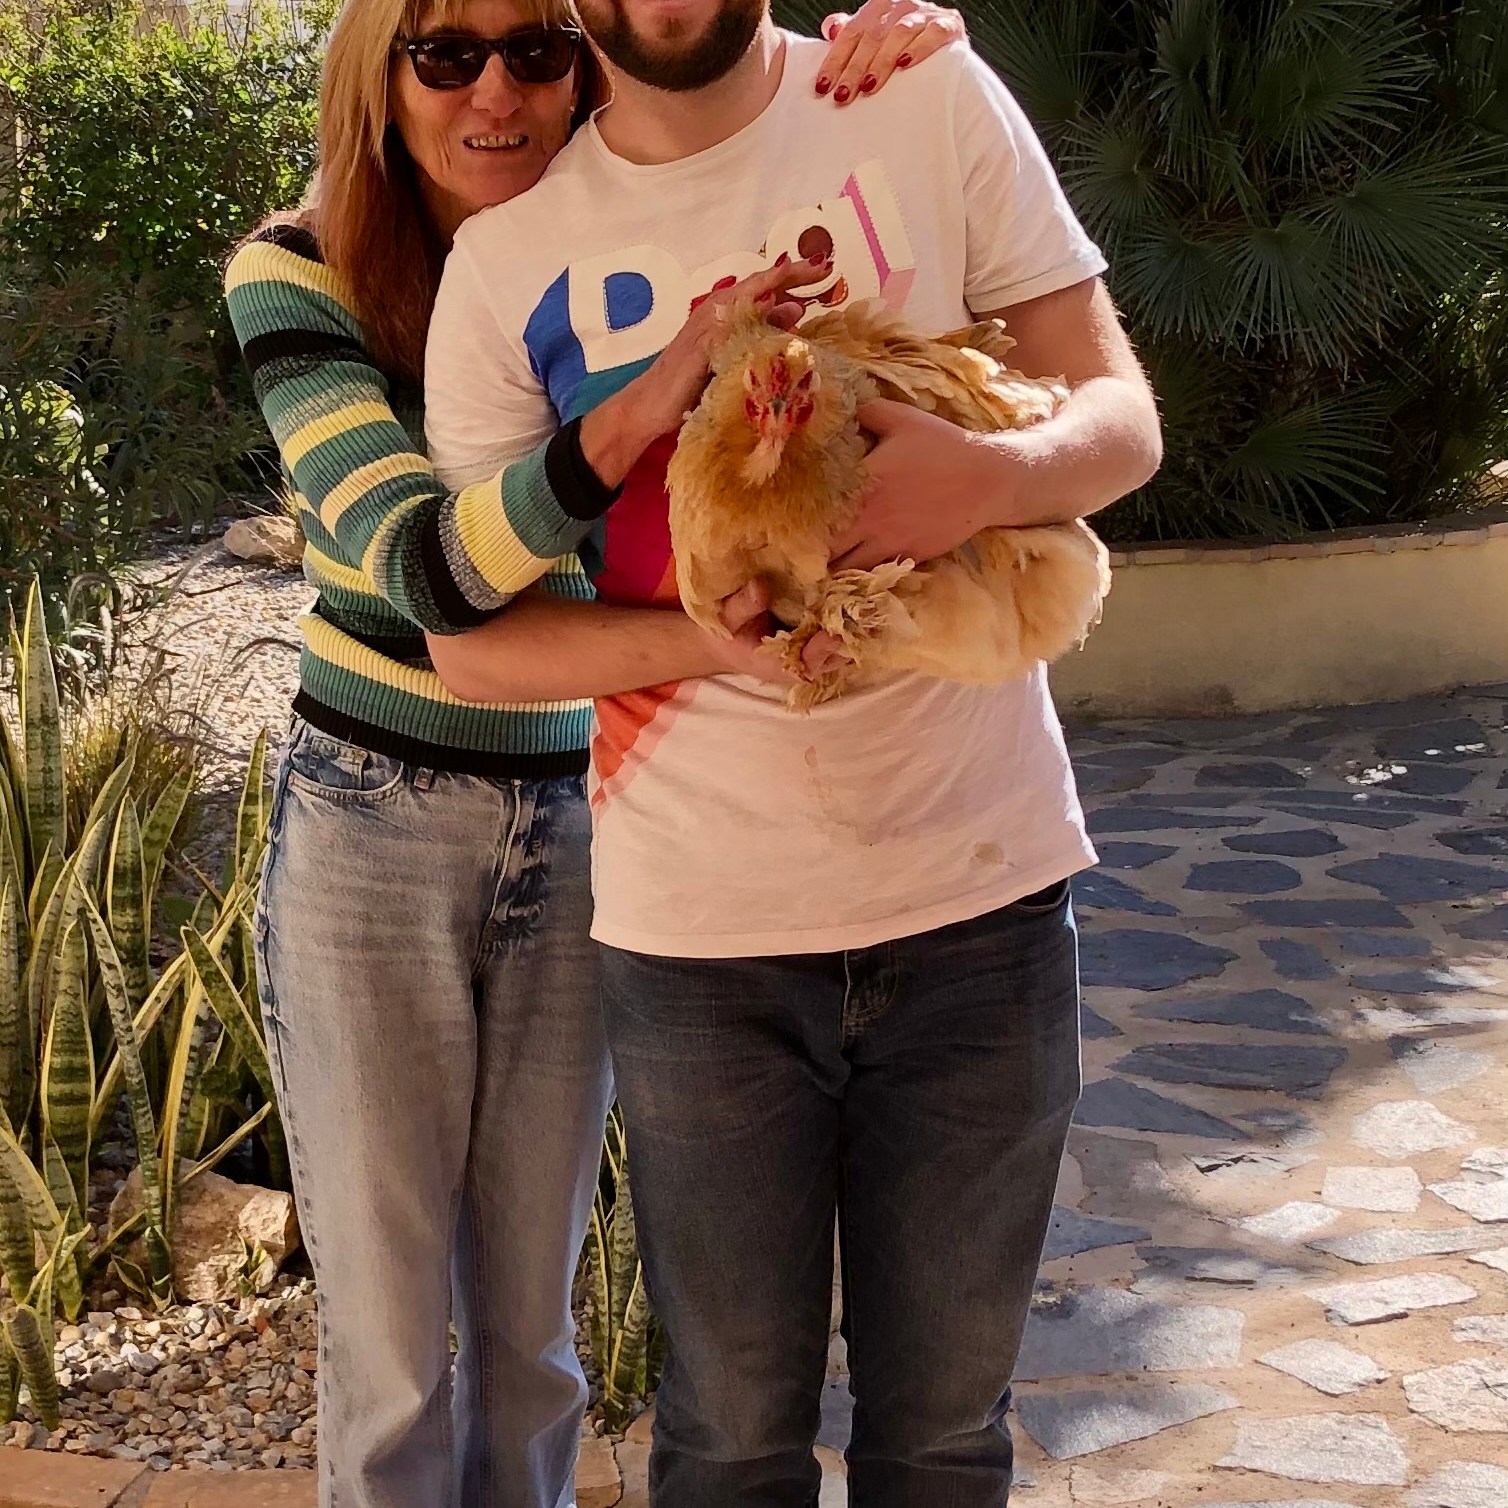

You must be logged in to post a comment.