We are just about to leave Spring and rush into Summer. This means you have to tidy your spring plants to make room for your new summer growth and seedlings. By now all the early bulbs should have gone over and all you are left with is dying foliage and seed heads. Don’t make the mistake of grubbing everything out too early and failing to let growth and goodness go back into the soil and plants.
Whilst I have been busy readying the garden for Summer Cruella (my wife) has insisted her girls should get dancing lessons in case they are invited to Summer Balls. More of this nonsense later, on with the gardening.
28th April 2026. Things I have been doing lately:
Deadheading and tidying early flowerers
Preparing my Chilli’s for summer
Dealing with dancing chicken damage
Deaheading and tidying early flowerers. By now all the early Spring plants have gone over and it’s time to tidy up plants such as Daffodils, Iris, Ice plants and even Mother in Laws Tongues.
Starting with Daffodils. By now you should have completely cut off all the seed heads and your plants will be looking like the ones in the photos below.
The key to success for next year’s bulbs is to let the foliage die completely back and go brown. Do not cut it off and definitely do not tie it in a knot. By doing this you are allowing the plant to transfer the goodness from its foliage back down into the bulb.
With Iris both Spanish and Dutch should now be fully spent and you need to deadhead them to stop them spending their energy making seed. With Iris you need to cut off the spent flower at the point in the stem where you can see a distinct narrowing. In addition to cutting off the seed head, do not be tempted to cut back the mass of foliage. See photos below.
Look for the narrowingDo not cut this off yet
By now your Ice Plants (Aizoaceae) will have flowered freely for two or three months. With Ice Plants it is best not to deadhead individual stems as it will just take too long. Instead wait till they have all flowered and then get out your shears and just shear off all the flowers. Try not to cut too far into the green foliage and with a bit of luck you should get another full flowering this autumn and sometimes before. The photos below show my Ice Plants ready for their annual trim and the final trim back.
Another in the tidying up stakes is Mother in Laws Tongue (Dracaena trifasciata) which is usually ready for a tidy up this time of year. This plant is popular in Spain as it is unfussy and will happily spread through underground runners. The only problem with it is if left to its own it can begin to look a bit scruffy. The photo below shows my plant looking a bit of a scruff.
The first thing to do when clearing this plant is to trying pulling at all the dry brown stems and many will come away easily. For those that don’t you will need to get a good sharp gardening knife and go down to the base of each stem to where it’s attaches to the runner and cut these off at ground level. The photos below show my trusty old gardening knife (over 30 years old), followed by where to cut and finally the cleared plant.
Finally climbing roses need as much dead wood cut out as possible. I find it is almost impossible to find deadwood on climbing roses over winter. I get fed up scraping branch after branch to discover if there is green beneath. Instead, I find it is better to wait until the plant begins to leaf up and blossom and then it is easy to identify the dead branches and these can be cut out. The photos below show the untangling and cutting out of dead branches. Make sure you wear gloves as blood will be spilled.
Preparing Chillis for summer. For those of you who took my advice and cutback and repotted last years Chilli plants, now is the time to repot them to larger pots for their summer growth. All of my Chillis apart from one successfully overwintered and are now read y to burst into life. The photo below shows the healthy survivors in their winter pots.
Like many plants Chillis do not like their roots to be disturbed too much so it is better to use the in-pot filling method shown in the photos below. This approach minimises any root disturbance and shock and ensure the plants will produce fruit more quickly.
The photo below shows my Chillis just a couple of weeks later. As you can see they are already flowering and soon I will be harvesting Chillis.
Dealing with dancing chicken damage. Cruella (my wife) has decided that her girls could have a career in show business, but not in what she calls the “common” shows like Britains Got Talent, but more in the Royal Command Performance type of thing. To this end she has declared that they are forming a dance troupe – I keep spelling it troop and she gets really mad.
To this end they have been having dancing lessons in the garden for the past few weeks. This mainly involves them holding on to a tree or low wall and doing strange knee bending moves by slowly lowering their bums to the ground, then striking out dramatically with one foot. Cruella assures me this is their “barre” exercises and that the knee bending is their Pliès followed by Frappès.
The upshot of all this dancing is that they are digging up the membrane under my gravelled areas as they perform their barre exercises. Some of the damage can be seen in the photos below followed by a typical dance class in action.
I have spent hours wandering round with a rake pulling gravel back into position, but no matter how hard I work the garden is beginning to look like the Somme battlefield. I finally convinced Cruella (my wife) that a classier option would be to teach her girls traditional dancing. Such as dancing round the Maypole etc. I am pleased to say that they now spend their time spinning around in circles under my trees attached to bits of string. The photos below show a typical rehearsal.
I am not actually talking about real thieves who might steal your garden gnomes etc. But instead we need to deal with those pesky plant thieves that will stop your plants thriving through the summer.
As if getting the garden ready for summer wasn’t enough, Cruella (my wife) suddenly declared to me “I have big news, we are going to be grandparents”. Now I know the idiot son is not that stupid, so upon further enquiry she declared that one of her girls “was with chick”! More of this idiocy later, on with the gardening.
13th April 2026. Things I have been doing lately.
Dealing with various types of suckers
Stopping Chlorosis
Freeing in ground sprinklers
Dealing with Isabella’s phantom pregnancy
Dealing with various types of suckers. Most plants – especially older ones – will try and sucker. Suckers are those bright green little baby shoots that pop out on the lower branches of your trees. Suckers are basically the cheats of the plant world they try and pop out below the main growth so that they can get the first lot of food. They won’t kill a tree but they can slightly weaken it, reduce the size of fruit, and if they get really big look unsightly. The photos below shows various suckers.
Never give a sucker an even break
The photos above show various suckers on fruit trees and lastly on a grapevine. To deal with suckers all you have to do is pull down sharply on the suckers and it should tear away from the plant. It is supposed to be best to tear rather than cut.
In addition to suckers on stems, you will occasionally see a root sucker popping up from the base of the plant or even emerging from the ground.. In most cases there is no point in trying to retrieve these and potting them on, as they will just be base rootstock that your plant has been grafted on to.
In the photo below you can see a root sucker emerging from one of my figs. In this case as I grew it from a cutting I know it is true root stock. If you want you can cut these off with a sharp knife, dip it in rooting compound and then grow it on.
Root suckerPossible to replant
Stopping Chlorosis. Another garden thief this time of year is Chlorosis. This can be seen on many plants especially citrus, Stephanotis and roses. The symptoms are yellowing leaves especially along leaf veins. Chlorosis is quite common in the Costa Blanca because of our Alkaline soil. There are other causes but the main one is lack of iron which results in the yellowing. Iron in itself is not a plant food, but instead it is an enabler and aids plants to take up other foods. See photos below.
Orange tree with Chlorosis Standard Solanum with Chlorosis
Most general purpose plant foods will have traces of iron, but when you see yellowing as in the photos it will tend to be a need for more iron. In Spain iron is known as “hierro quelatado”. Normally it comes as granules and you mix these with water to make a “Rosé wine” type colour. Water directly into the roots and not on the leaves. Now is the best time of year to do this. The photo below shows my iron mixture before full dilution. I pour a glug into the watering can and then mix to the right colour.
I keep iron mixed up to a high strength and then dilute
Freeing in ground sprinklers. Many gardens on the Costa Blanca will have in ground sprinklers sometimes on timers that pop up in the lawn or to water selected flower beds. Don’t just assume that these will go on watering correctly forever. As they are in the ground weeds and grasses will gradually choke off their function in two ways.
Firstly, grass and seeds will grow over the pop up sprinkler and stop it popping up thereby only watering the small area close to the sprinkler. Secondly, if they do pop up the exit area for the water can easily get choked with weeds growing into the stem thereby either stopping watering completely or creating an uneven watering pattern.
To overcome all of the above you have to get out there on your hands and knees and clean each sprayer individually. Given their starting point can be deep in the ground this can be difficult. So the simplest way I have found is to turn on your system only slightly till the pop up function works but without any great spray. Then go round each sprinkler pull them fully up, clean them out and then finish by trimming the grass around them so it does not impede. The photos below show my efforts.
First find your pop upClean it outRemove grass and debris
Dealing with Isabella’s phantom pregnancy. Gardening is my solace in a troubled world. I wander round, sowing here, pruning there talking to plants and discussing world affairs with my bees. I don’t ask much, just to be left alone to get on with things. But alas, Cruella (my wife) often has other ideas.
Her latest announcement that we were to become grandparents is just one more example of her chicken idiocy. It seems that Isabella one of her chickens (full name Isabella Ding Dong) has gone broody and has taken to spending the whole day sitting in a flower bed and refusing to move. See photos below.
Isabella with Chick!!If you look closely she is wearing a matinee jacket knitted by Cruella
Cruella has insisted that she must be pregnant and we should prepare for a new arrival. I have told her not to be stupid as we do not have a male chicken (I am not allowed to say c**k in front of her girls). To back up her argument she told me she has consulted the definitive book on the subject: “The Common Sense Book of Chick and Chicken Care” by Dr Benjamin Squawk. I will let you know what happens, but she has already started knitting and planning a chick reveal party.
I know the above title is a bit confusing, but all will become clear later. But in the meantime you need to be continuing to plant seeds and now you can also begin to take cuttings from your strongly growing perennials. Take action now, or you are doomed to continue buying expensive plants from Garden Centres which in many cases die within a few weeks. In the meantime I am getting ready to welcome my bees! and getting on with the gardening.
10th April 2025. Things I have been doing lately:
Treating for Palm Weevil
Finishing patching the lawn
Starting my plant feeding regime
Taking cuttings
Pricking out seedlings
Getting ready for my bees
Treating for Palm Weevils. The dreaded Palm Weevil has started flying now that the weather has got better. This large beetle lays its eggs mainly in Phoenix Palms and the subsequent grubs munch the trees to death. You should not be cutting your palms at this time of year as the beetle can smell a cut palm from a long distance. The photo below shows some of my many palms cut by a professional Palmista before the beetles were flying.
Because my palms are too large to treat at the crown I developed a different method of delivering chemicals to the crown. This involves drilling a hole diagonally half way into your palms trunk. Fill the resultant bore hole with proprietary weevil killing chemicals, and allow the sap to take the chemicals up into the crown and infuse all the fronds with killer chemicals. One nibble of your palm and the beetle is dead.
This is a simple method that once in place will ensure your palms are beetle free. All you need to do is keep topping up the chemicals every month or so, and once a year poke a steel rod in the hole to keep the scar open and stop the tree calcifying it over. The photos below show me in action.
Clear the bore annuallyPour in the chemicalsSeal the hole with stopper
Finish patching the lawn. If you have a lawn then now is the time to do any last minute reseeding on bald patches. I don’t know why I bother really, my lawn is now just a chicken playground. But anyway, if your lawn needs patching up just scratch and scarify the bald part. Add some top dressing. Then sprinkle some grass seed and cover with fleece. Keep the area moist and the warmth of the earth should do the rest. The photos below show my efforts.
Scarify and top dressThe seed I useA patchwork lawn
Start your plant feeding regime. You should have already started your citrus feeding routine, and now is the time to start feeding other fruiting trees and shrubs. Don’t be tempted to think one size fits all, and that you only need a general purpose feed. Yes, a general purpose feed will do no harm, but it will not contain specific nutrients that are targeted at different plant types.
The photo below shows the variety of different types of feed that I use. In addition each watering can gets a “Glug” (old English term) of iron.
Taking cuttings. If you have a favourite plant, or just want to multiply your existing stock of plants for free, then now is the time to take cuttings. The cuttings you take now can be allowed to develop over summer on the potting bench, ready to be planted out in the autumn.
My first cuttings have been taken from Dianthus, Trailing Lantana and Little Pickles. See photos below.
An easy way to take cuttings is to go around with a sealable plastic bag and your pruning knife (never secateurs as they crush stems) and select non flowering stems. Take at least three cuttings from each plant by cutting just below a leaf or growth node. Place your cuttings straight into your bag to stop them drying out as you wander round.
Once you are back at your potting bench, make sure you have the following to hand:
good free draining compost with added vermiculite
a selection of sealable ziploc plastic bags (available in every supermarket)
short pieces of can cut to about six inches
rooting hormone powder or liquid (not essential but helps)
Fill 4 inch pots with your good free draining compost, water them well, and tamp down the compost to remove air pockets. Take your cutting, remove all leaves up till about the top two, holding your cuttings by the leaf, dip them into your rooting compound and then place gently into pre prepared dibber holes around the side of your pot (3 or 4 to each pot).
Push your little cane right into the centre of the pot and then seal the whole pot into your plastic ziploc bag. The cane will stop the plastic bag collapsing onto your cuttings and starting rot. Place your pots in the shade and leave them alone. They will have a mini micro climate so will not need watering till they get some roots and new growth. It is a good idea to open the bags every 3 days or so just to refresh the air, but only for a moment don’t leave them open. I like to breathe into them as I think a dose of Co2 might help! The photos below show the process.
Pricking out seedlings. You will remember in my last post that I have been sowing seeds. This should be a regular feature of every gardeners calendar whether you have a huge plot or a small terrace. The joy of growing seeds and seeing them developing is an essential part of being a gardener. Don’t be lured into huge garden centres to buy, at great expense, plants that you could easily grow yourself. Any way enough of. My ranting.
When seeds have sprouted and have at least two “true leaves”- discount the first two leaves and wait till there at least four or more. Then It is time to “prick out”, cue laughter, stop it. When you prick out seedlings you are basically easing them out of their seed tray and replanting them in individual modular plug trays to give them more growing room.
I use a pencil to gently ease out a group of seedlings, then separate them and holding them by a leaf ( if you hold them by the stem then you may damage the seedling), I carefully transplant them into watered and prepared plug trays. This can be quite an intense process so I tend to do it over a couple of days. Once the seedlings are rehomed, then keep them out of direct sun in a sheltered spot until they settle in and then gradually accustom them to direct sun. The photos below show the process.
Getting ready for my bees. It has been a year in the planning but my bees arrive later this month. I will be setting up two hives which will be a wonderful addition to my garden. I have been taking an online bee course, I have watched numerous YouTube videos and I am as ready as can bee (sorry about the pun). The photo below shows my hives ready for occupation.
Cruella wants to turn our guest cabin (in the background) into a clubhouse for all her 20,oo4 girls
When I told Cruella (my wife) that bees are mainly female she became quite animated and said that her girls would prepare a welcome party to help the bees settle in. I explained that wouldn’t be necessary but she started rambling about girls leaving home and the need to feel welcomed she eventually ended up calling me an unfeeling chauvinist and shouting girl power slogans at me.
Anyway the outcome is that she and her chickens. have been preparing banners and posters to welcome the bees, they have even started knitting little sweaters as gift as for the bees for them all to wear for the welcome barbecue. I will keep you informed of how it goes when 20,000 bees meet 4 chickens and Cruella.
I haven’t been able to blog for a few weeks as I have been locked in negotiations with Cruella (my wife) relating to the establishment of chicken demarcation zones in the garden. To be honest with you I am a mere pale shadow of myself, I have been the subject of constant vilification, I have had garden sit ins by angry chickens, I am not sleeping at night and Cruella has just told me I am to be the subject of an enquiry by the UN chicken rapporteur.
Anyway, let’s talk about some gardening, the chicken stuff I will explain at the end of this post.
30th April 2024. Things I have been doing lately:
Spring deadheading
Cleaning out ornamental grasses
Restructuring my garden with chicken demarcation zones
Spring deadheading. We often associate deadheading with the height of summer, but in fact there is lots you can be getting on with now, but you have to do it the right way or you will not get the best out of your plants next year. The plants you should be looking to deadhead now, include:
Roses
Spring bulbs
Ice plants
Aeoniums
Roses. With roses even at this time of year you should be looking to deadhead on a daily basis. Regular deadheading will reward you with fresh flushes of roses (depending on the type of rose). With roses all you have to do is use sharp secateurs to cut just above the next leaf node on the stem with the spent rose. Don’t be tempted to cut just below the spent flower as you will leave dead stem that not only looks ugly but both hinders repeat flowering and can act as a vector for disease. The photos below show where to deadhead. Click on each photo for a larger view.
Spring bulbs. Most spring bulbs will have finished flowering by now and they need deadheading. With bulbs it is important that you leave the stems and foliage to die back naturally ensuring that they release their last bits of energy back into the bulb for next year.
The first thing you need to do is to cut off the seed head. This consists of the dead flower and the bulge just below it on the stem. When you have cut the flower off then you need to leave the foliage to die back till it goes nicely brown. This can look untidy for a few weeks, but it is worth it to plump up your bulbs. Do not be tempted to tie the foliage into a knot which became fashionable a few years ago. If you do this then you are effectively cutting off the supply to the bulb. In just a few weeks time you can cut the dried foliage off right to soil level and plant over the area.
The first photo below shows some of my Spanish Irises ready for deadheading. The second photo shows where to cut them and the final photo shows how they will be left for a few weeks. Click on each photo for a larger view.
Ice plants. Are a spring favourite here in Spain and their early blossoms brighten up the spring garden. If you want to encourage profuse flowering in your plant next year and possibly be rewarded with a new flush of flowers this year, then you need to deadhead now.
To deadhead Ice plants you preferably need to replace your secateurs with shears or single handed lopers. If you look at the plant you will see that you have hundreds of little round spent flowers. You need to carefully shear these off making sure – if possible – not to damage the foliage or the existing flowers. It is a bit like going to the hairdressers and having a light trim all over.
The first photo below shows some of the ice plants around my water feature ready for their light trim. The second shows the trim in process. Remember try not to cut into the foliage. Click on each photo for a larger view.
Aeoniums. These are plants that provide year round interest in Spain. They are undemanding, and unpretentious yet in a subtle way quite showy. In my garden I have the two basic types the Verdi (green one) and the swartzkopf (chocolate). For most of the year these plants will provide structural interest in your garden, then suddenly they turn from ugly duckling to society beauty by throwing out a lovely yellow flower spike. See photo below.
Once these flower spikes have started to fade you need to cut them off from the stem. This is quite simple, all you need to do is look under the fading flower and you will see that the stem has begun to narrow in some cases quite dramatically. What is happening is the plant is getting ready to shed the flower by starving it of nutrition thereby encouraging it to drop off. All you need to do is cut the stem with your secateurs just below the narrowing part of the stem and that is it. The plant will seal the cut and carry on growing. See photo below.
Ornamental grasses. Ornamental grasses are often chosen by gardeners because they assume that as they are grass they will provide problem free plants. But this is not always the case. Grasses need a lot of water in Spain. They also suffer from dead centres and have to be separated every 5 years or so. Lastly, they need to have last years dead grass cleaned out or it will choke this years growth and look unsightly.
This is a simple process, you just need to put your garden gloves on and pluck away at the dead grass with an upward sharp tug. The properly dead grass will come away and leave you with growing space that lets in light and air for your new growth. The photos below show me happily plucking away at some of my grasses. Click on each photo for a larger view.
Restructuring my garden with chicken demarcation zones. From the introduction to this post you can see that I have been having major problems with Cruella (my wife) and her chickens, all of which have suddenly come to a head. Regular readers of this blog will know that Cruella and her 4 chickens have wreaked havoc on my garden.
This has caused arguments, tears, threats of violence and witchcraft. Cruella has regularly cited international bodies that are on her side, in the past this has included the EU, the UN the ECHR and even NATO. Recently she said that we should be spending at least 2.5% of our income on her chickens she quoted NATO and Rushi Sunak.
The end result of protracted wrangling is that I eventually prevailed upon Cruella and her chickens that we needed clear demarcation zones in the garden where the chickens can peck (destroy). All of this only came about as our previous two smaller lawns had been picked up by NASA satellites as expanding areas of desertification. The photos below are worth a thousand words. Click on each photo for a larger view.
The mesh you can see lying on the ground was my vain attempts to stop them digging holesI didn’t bother on this lawn, I just gave up
I started by marking out the areas that would be returned to gardening and two clear zones where the chickens could peck. To say this was controversial is an understatement. Every time I marked out an area Cruella and the chickens would protest and mark out a much larger area. Further days were lost by lines being marked and then crossed out overnight. Cruella and the chickens even staged sit-ins at various times to stop me getting on. When I tried to move them they all went limp and made me drag them out of the way, and as I moved each one the others rushed back in. The photos below shows some of the chaos. Click on each photo for a larger view.
I am only telling you all this not because I am seeking your sympathy, but rather because there is a good gardening point here. Too often in Spain people cover their garden with acres of unsightly gravel, for the practical purpose that it makes it all easier. However, this turns many gardens in Spain into what looks like giant car parks. You don’t have to do this, and even if your garden is already like this, then why not take the opportunity to brighten and refresh your garden with island planting.
At its simplest island planting means creating beds of greenery within your gravelled areas. The benefits of this are so obvious I am not even going to make the point. Instead, if you want to create islands of greenery then this is how to do it.
There are 6 key stages to creating islands in gravelled areas.
Mark out the overall area with ground spray paint
Apply weed suppressing membrane
Mark where you want your island beds directly onto the membrane
Connect up irrigation if appropriate
Cover with gravel; or push back existing gravel
Cut through membrane to create beds and plant up
Mark out the overall area. Think carefully about the size of area you are going to gravel as you will have to live with it. The photos below show the tools for the job, plus early attempts at agreeing area size. Click on each photo for a larger view.
Apply weed suppressing membrane. It is important that you buy good weed suppressing membrane. You are hopefully only going to do this once so make sure you don’t buy cheap stuff that tears and splits. The photos below show various stages of applying the membrane. If you are planting beds in existing gravelled areas then make sure you pull the gravel much further back than your island beds, so that you can pull it back when you are finished. Click on each photo for a larger view.
Mark where you want your island beds directly onto the membrane. This is an important stage so it is worth not only thinking carefully about it, but marking and then waiting 24 hours to think again. Using the ground paint mark out the shape you would like for your island beds. In my case I wanted different sized circles. It is also useful to place objects where you think you want your beds and then walking around and looking at them from different angles to make sure your happy with your sight lines. The photos below show this process in action. Click on each photo for a larger view.
Connect up irrigation. If you are going to use irrigation then now is the time to set your pipe work in place. If you already have gravel then try and connect up to your existing system. The photos below show my artistic connections. Click on each photo for a larger view.
Cover with gravel; or push back existing gravel. Whatever your choice of gravel you will need to allow for coverage of about two inches. This is necessary to ensure you don’t get bare patches opening up as you walk around. Gravel is exceptionally heavy and is hard work to distribute, so if you can get help or use professionals. I had no help, Cruella and her chickens just sat back eating posh snacks whilst I laboured in the Sun. When I asked them for some help they all started chanting slogans about not taking part in their own oppression. The photos below show the extent of my challenge. Click on each photo for a larger view.
Cut through membrane to create beds and plant up. This is the most enjoyable part as you begin to see the fruits of your efforts. I have covered the issue of planting through membrane before, but just in case your new to this the process is simple.
Start by cutting an X shape in your membrane and fold back the flaps of your X. The soil under gravel will normally be quite impoverished and dry so it is necessary to enrich the planting hole. First dig a planting hole slightly larger than your plant. Fill this with water and let it drain, then enrich the hole with good compost digging around to ensure the existing soil is loose.
Place your plant in its new home and make sure to firm the soil around it before folding back the flaps of membrane and then watering profusely. It is a good idea to fill the area around your plants with a different colour gravel. This gives added interest to your planting scheme and also provides contrast in the winter when your plants have died back. The photos below show my finished effort. Click on each photo for a larger view.
I was just sitting down having a well earned cup of tea when Cruella (my wife), approached me accompanied by her chickens. She began reading from a piece of paper which she said had just arrived from NATO claiming that a military drone had noted that my planting and gravel were in breach of the Geneva Convention. She went on to say that they demand that the land should immediately be returned to its intended use as a Chicken designated zone of special scientific interest.
I told her I didn’t believe her as the back of the piece of paper was headed Church Sunday School. She started crying, the chickens all started cackling in Chickenese and they all stormed off shouting about lawyers. Hey Ho.
What about the above for the headline of a blog post. It has everything alliteration, drama and a hint of menace. However, now that we are swinging into summer there are a number of things you should be doing, and a number of things you should stop doing. So this is what I will be covering in this post.
What you should be doing with your citrus trees and other fruits
Dealing with seedlings
Time to give roses a feed and mulch
Check your irrigation system and timers
The final days of the big Agave Attenuata
I am getting bees
6th April 2024 Things I have been doing lately.
What you should be doing with your citrus trees and other fruits. By now all of your citrus trees should be in full bloom. So it is time to stop messing around with them and just let them get on with it. Don’t cut, don’t prod, don’t replant, just leave them alone. There are however, three exceptions.
Firstly, make sure that you remove any suckers that are growing on the trunk of your trees. Suckers are bright green, pliable small shoots that have a habit of popping out on your tree trunks this time of year (especially on older trees). Suckers take away the goodness from your tree before it gets to the leaves and fruit. Especially deleterious are suckers growing from below the earth at the foot of the trunk as these will often be growing from below the graft and will probably be root stock. The photos below show examples of suckers on my trees. Click on each photo for a larger view.
The simplest way to deal with suckers is to don your gardening gloves and go around pulling sharply down on each sucker. If you catch suckers early they will come away very easily. However, if they have been left for a while they will have hardened to wood, in this case you will need your secateurs, and need to cut as close to the trunk as possible. If you leave a spur it will grow back.
Secondly, go around each of your trees and look for branches that are absolutely dead – no leaves and definitely no blossom. By now these are definitely dead so you can cut them right back. This process lets air and light into the tree; but remember no other cutting. The photo below shows me actively hunting dead branches.
Thirdly, you should have been actively feeding your citrus from January; so if you haven’t been, get on with it. There are a variety of feeds you can use whether pelleted or liquid, but you must always use a citrus feed rather than a general purpose feed. I also find it helps if you can give them a glug of iron. The photo below shows some of the feeds that I use.
In addition to feeding citrus trees you can start feeding other fruiting trees and vines. In this case do not use citrus feed, but another specialist feed for fruiting plants. The feed second from the left in the photo above is the one I use.
Dealing with seedlings. Normally by this time of year I have a potting bench full of seedlings ready for pricking out and potting on. However, this year has been a disaster. Apart from the chicken vandalism; which I mentioned in my last post, whereby the chickens threw over my mini greenhouse and killed all my first seeds. I resowed them all and then inflicted another disaster on myself. Because of the changeable weather I left all my seedling trays in my mini greenhouse for the day whilst I was out, but unfortunately the sun came blazing back and by the time I got home all my seeds had been baked..
The photos below show the various stages of disaster with my mini greenhouse. I have tried to rescue what I can but as you can see very few seeds have germinated. Don’t let this put you off planting seeds, they are normally a fantastic way to stock your garden and improve your gardening skills. You can still plant seeds now, but make sure you do not put them in a mini greenhouse, but instead make sure they are out of the sun for the fiercest part of the day. The one consolation I have is that my cuttings and bare root plants are coming on fine. Click on each photo for a larger view.
My one area of success this year
Time to give roses a feed and mulch. Roses grow surprisingly well in Spain, but it is time now to mulch them and feed them to get the best blooms this summer. Before feeding I highly recommend that you mulch. This is a simple process involving 3 stages.
Hoe all around your roses to remove all weeds, you can do this by hand but it can be a bit prickly.
Water your roses profusely.
Apply a thick mulch of about two inches using either bark or compost.
Once you have mulched then you can start to apply feed. Roses are hungry feeders so I feed once every month. The photos below show the mulching process followed by a photo of the feed that I use (others are available). Click on each photo for a larger view.
Check your irrigation system and timers. Irrigation and timers are essential in the Spanish garden. I know you think you will remember to water your plants, but you will forget and they will start to die. However, irrigation timers are no good to you if they have run out of battery or your irrigation pipes are leaking all over the place.
I have 6 separate irrigation timers in the various parts of my garden and a couple of hundred yards of irrigation pipe. Now is the time to go around and change all the batteries in your timers. Once you have changed your batteries, turn your irrigation on (one at a time) and wander round checking for leaks. The photos below show some of my irrigation issues, including all the various instructions for my many and varied timers and a few leak issues. Click on each photo for a larger view.
The final days of the big Agave Attenuata. Regular readers of this blog will know that one of my large Agave Attenuata has flowered spectacularly and is now dying. As a mark of respect for the dying plant I spend days in quiet contemplation and discussion with the plant as the end comes near. We talk about all the good times when she was a mere pup and laugh about how she kept bending the wrong way when I wanted her to grow in another direction. She is obviously concerned for her pups but I have reassured her and promised I will always look after them.
Sadly the end is here. We always spend the last few hours singing her favourite arias. We have been singing Madame Butterfly with her taking the part of Cio-Cio-San (Madama Butterfly), whilst I reluctantly play the part of Lieutenant Pinkerton. We end with the tragedy of Cio-Cio San’s suicide whilst singing “Con onor muore”. I asked Cruella (my wife) to take some photographs during the aria so that I could keep her memory alive for her pups.
The photos below show us singing. Her final words were “Io muoio con onore”; if you look carefully you can see that I am crying. Cruella just laughed and said she couldn’t hear the plant singing and all the neighbours think I am mad. I told her she can’t hear the plant singing as it requires a soul. Click on each photo for a larger view.
An especially tender momentIt’s over she has gone
I am getting bees. I must confess I was a little bit down for a few days after the Agave death. Even Cruella was worried about me and decided to ask me what I wanted for my birthday, I said no it’s ok. But she insisted, saying go on I will get you anything you want. And that’s how I am getting bees. Watch this space. The photo below shows my hive ready assembled for their arrival at the end of the month. I have even planted them a little flower bed to welcome them.
I am at our English house with the forlorn hope of trying to inculcate some culture into our idiot son; he prefers beer and football. Anyway, Cruella (my wife) has decided to take advantage of my absence by threatening terrorist attacks on my seedlings. To put this into a gardening context. I left Cruella with precise instructions how to deal with the garden and particular the seedlings during my short absence. All gardeners know that failure to successfully prick out and pot on your seedlings can ruin the whole garden year.
Cruella has recognised my vulnerability and I have been receiving a stream of videos where balaclava clad supposed terrorists threaten my seedlings and potting bench with destruction unless I fulfil certain demands. But I know it is her because chickens look ridiculous in balaclavas and all the demands are chicken related. They have even taken to threatening Tango the lonely blind Labrador and have been sending hostage videos showing chickens looming over him whilst he looks distressed. I have informed the police.
The first photos below show my vulnerable seedlings and potting bench whilst the final one shows Tango in a hostage situation. Click on each photo for a larger view.
Note the look of terror on Tango’s little face. They also send me notes signed with his paw prints
26th April 2023. Things I have been doing lately:
Deadhead Iris. By now all your Flag Iris should be ready for deadheading. It is such a pity that they have so short a flowering season as I love to see them in huge clumps waving in the wind. But once the flowers are fully spent then it is time to deadhead them so that the bulbs can plump up for next year. All bulbs should be deadheaded, but never cut off the stem; these should be left to fully die back so that they can enrich and feed the bulb.
With Iris you don’t cut just below the flower, but instead go a little further down the stem to below the flower head where there is a large swelling in the stem. You cut just below this swelling and then leave it alone till all the stems die back. For tidiness you can tie the dying stems together if you wish. The first photo shows one of my stands of Iris waiting for their cut back. The second photo shows where to cut. Click on each photo for a larger view.
Don’t cut them all at the same time but do it on a daily basis when the flowers are fully spentI have just noticed that my gardening gloves are the same colour as the Iris
Dealing with wild garlic. Every so often there is a weed that proliferates strongly and you need to take some remedial action. For the last few years this has been wild garlic. Objectively wild garlic can be quite pretty with its long stem and flush of little white flowers. But it can spread very quickly as it is a prolific self seeder. Left alone it will quickly overwhelm flower beds and lawns within two or three seasons.
I have found that attempting to fully remove wild garlic fully is far too laborious as you would have to dig up every little bulblet, and this can take a long time. Instead, my strategy has been twofold. Firstly, to out compete the garlic in flower beds you need to continually pluck off all flower stems as they appear including taking as many leaves as possible; go as low on the stem as you can. Secondly, where they appear on lawns, mow before the stems have flowers.
Although the plant will attempt to throw up subsequent flower heads, these will become shorter and shorter as you are continually depleting the strength of the plant. If you keep this up over a couple of years you will eradicate or at least severely deplete its ability to reseed. The photo below shows the culprit growing through my Roses.
Spider plants relieve the gloom. If you have a heavily shaded part of your garden where nothing seems to grow, then why not try the ubiquitous spider plant (Chlorophytum comosum). This denizen of the British bathroom is often written off as an untidy house plant that can be happily neglected. But placed in a shady (and slightly damp) area, it can really light up the gloom with its variegated leaves. It will happily proliferate with lots of little spiderlets and become a bit of a shady showstopper. The photo below shows the shady area beside my front gate where I can’t get anything to grow, now happily populated by a growing family of Spider plants.
Plant Loofah seeds. When I told Cruella (my wife) that it was time to plant Loofah seeds her eyes lit up (all of them). The main reason for this is that my Loofahs provide her with a profitable sideline in selling loofahs to her various friends as a means of removing nose warts; a perennial problem in what she terms her community.
Loofahs are a lovely annual climber with beautiful and prolific yellow flowers that turn into, well loofahs! Loofahs are those long abrasive tubes that hang in bathroom showers and are often mistaken for some sort of sponge. But, no, they are plants and more importantly they are excellent for skin defoliation and improving blood flow. Anyway, if you want to grow loofahs then now is the time to plant seeds.
You simply need to soak your loofah seeds in a bowl of warm water for at least 24 hours; just leave a bowl by the sink and keep topping it up with warm, but not boiling water. This process swells the seed and makes them easier to germinate. Once they have been soaked for 24 hours then prepare four inch pots filled with good compost and thoroughly watered. Place one seed at the centre in each pot and then poke it down into the soil by about a finger nail length. These will be ready in about 2 to 3 weeks for planting out. If you would like some Loofah seeds then I have plenty, just let me know.
The photos below are an action based photo montage of the loofah planting process. I have aspirations to become a Hollywood director of action films and these photos now form part of my portfolio that I am sending to studios. Click on each photo for a larger view.
The above photo is available as a slow motion video
The big rat. By the way, If you are interested, the big rat is no more. Needless to say it was a struggle, but I prevailed.
Cruella (my wife) arrived back the other day. I didn’t know she was coming but I got a bit of a clue when the chickens started fussing around with their feathers and grooming each other. Anyway, the sky went dark, there were low threatening clouds and a hint of lightning. The chickens trooped out of their coop and formed a circle on the lawn waving little flags they had made (don’t ask). Cruella spiralled down out of the biggest dark cloud and made a perfect landing in their circle whilst waving enthusiastically at the chickens who all clucked appreciatively in chickenese; I hid in the shed.
As if all of that wasn’t bad enough the big rat is back in the compost heap. Whilst not meaning to conflate Cruella’s return and the appearance of the rat – I am sure it is not just coincidence. Anyway, I knew he was back as I saw his tail disappear into the compost when I opened the bin lid. Of course it is not the same big rat, as his predecessor was duly dealt with as he will be eventually. But don’t let this put you off composting. Ratty’s appearances are very rare, especially if you never compost cooked food. But more about ratty later, on with the gardening.
9th April 2023. Things I have been doing lately:
Pruning back Ice Plants. Ice plants are popular in Spain for their early spring flowers and the fact that they don’t mind a bit of neglect. By now your Ice plants should be flowering profusely, but as you know they soon die back unless you deadhead vigorously. If you want more flowers then try and deadhead them every couple of days. The easiest way to do this is to use a pair of hand scissor shears. The new flowers will start arriving at a level just below the spent flower stems. This gives you an ideal opportunity to shear off the longer spent stems leaving the new flowering stems to grow. If you wait too long then the new stems will be as long as the old stems meaning you will have to prune each stem individually which is very time consuming.
The first photo below shows one of my Ice plants with new and old flowers and ripe for shearing. The second photo shows my shearing technique. With a bit of luck the plant will produce more flowers for a few weeks yet. Click on each photo for a larger view.
Time to take early cuttings. If you see vigorous new growth on your plants then why not try taking some cuttings. The obvious benefit of taking cuttings for your own garden is that you get free plants from something that has already proved itself in your garden.
Taking cuttings is simple. Just go to a vigorously growing non flowering stem and then using a knife (never secateurs as they crush stems) cut just below a leaf node and pop your cutting into a plastic bag to keep it fresh. The photos below show that I have been taking cuttings from Swedish Ivy (creeping Charlie) and Dianthus. You don’t really need to cut Dianthus or carnations, just pull hard on the stem you want and it will come away. Click on each photo for a larger view.
After you have taken a few cuttings you need to prepare a 4 inch pot with either seed compost or your own sifted compost. Now I am a bit fussy with compost for cuttings so I tend to use my own compost and then sift it to get a fine mix that I then add Perlite to for added drainage. The photos below show my patented sifting methods. Click on each photo for a larger view.
When I showed Cruella my compost mix she just rolled her eyes; all three of them.
Fill your 4 inch pots and then gently tamp down to remove any pockets of air. Take each cuttings and remove all the leaves apart from a few at the top; this will stop the cutting losing too much water. If you have rooting hormone powder or liquid, then dip each of your stems into this before placing four of them equally spaced out around the side of the pot very close to the edge. The first photo below shows the pots ready to receive their cuttings after dipping in hormone liquid. The next photo shows the little cuttings under shelter in the shade for a few weeks. Click on each photo for a larger view.
Sowing seeds. If you intend to grow plants from seed this year – and you should. Then you better get on with it. If your garden is based on succession planting; as mine is, then it is important to have a conveyor belt of plants coming through ready to plant out. It is very hot at the moment during the day so it is important to get seedlings underway or they will just fry by the time you come to planting out.
I collect seeds from all my various plants in the Autumn and always have envelopes full ready to sow. In addition I will occasionally buy a packet of seeds as an experiment. This year it is Lupins which I will sow now to hopefully flower next year, but we will see. One innovation I am trying this year is to use all the various plastic containers that I get from the supermarket containing strawberries, blueberries, grapes etc. These are ideal for sowing seeds as they are handily perforated both in the bottom and the top which is good for seeds allowing drainage and good air circulation. So far I have sown the following:
Mini sunflowers
Dutch Marigolds
Marigolds
Trumpet vine
Jasminium
Lupins
Usually I buy a little plastic mini greenhouse each year for seeds, but this year I am just sticking them under a sheet of plastic and using the supermarket containers. The results of my early sowing can be seen in the photos below, we will see how it all develops. Click on each photo for a larger view.
Get ready to feed your plants. Now is the time to stock up on the various plant foods you will need for summer. It is important to use the right food for the right plant. Yes, of course a general purpose feed is ok, but you will get more out of your plants if you feed them with an appropriate targeted food. The photo below shows the array of feeds that I use.
From left to right, they include:
Ericaceous plant food. This is used for acid loving plants who dislike a lime soil. My soil is not acidic but sometimes I have things in pots that need this type of feed. We are very lucky where I live as it is in the middle of a Pine wood so pine needles are good for ericaceous plants.
Iron mixture. Not really a food but enables plants to take up food more efficiently. You can buy packets of Fe in a powder form that you can mix yourself. I remix this to the colour of a Rosé wine and add a Glug to every watering can feed. “Glug” is a precise measure defined as more than a drip, but less than a pour.
General purpose feed. This can be used on more or less any plant and will do some good but definitely no harm.
Orchid feed. I only have one orchid but this is a must if you have orchids.
General purpose granular feed. This is a good general purpose feed that can be sprinkled around between packed plants in the summer. When watered in this will feed for about a month. It says 3 months on the packet but this is an exaggeration.
Grass food. I know that not many of you have lawns in Spain, but if you do, then you must feed them at least 3 times a year starting at the end of April through to about October.
Citrus feed. This is for all you citrus trees and you should have been feeding this for at least the last month or so. This is essential before and during blossom time to ensure a good crop.
Special food for fruiting plants. This encourages healthy and abundant fruit for crops like figs, persimmons, plums, peach, apple, pear, grapes etc.
Geranium feed. I don’t know why I bother as the Geranium moth destroys all my plants before they get the benefit of it. But I have hopefully been developing one that is more or less moth proof. All it has to do is get through this year and it should be immune.
Well there you have it. A lot of plant food, that can be expensive, but most of it will last more than one season. Also it is important that you read the instructions on the bottle. If you enthusiastically overfeed, you won’t necessarily get more flowers or fruit. You are more than likely to get lots of bright green soft growth.
The big rat. I was going to finish with a finale about my battles with the big rat. But I was relying on Tango the lonely blind Labrador to accompany me and show his killer instincts, but, sadly those days are gone. From the photo below you can see that he prefers to sleep in the shade. He dreams of past battles in the bright colours he will never see again. God bless him, the rat can wait.
I am of course speaking of flower beds. You can never have enough flower beds, the sight of a packed floriferous bed is enough to set your heart singing and make you begin to wax poetical. Here in Spain it can be depressing when you see how many people have tiled or completely gravelled their garden turning it into what looks like a car park or a landing strip. Yes, I know all the reasons, easy maintenance, heat of the Sun etc, but such gardens will never make your heart sing. But the good news is that it can all be reversible, whether its gravel, tiles or grass, new beds can be created. And here is how!
30th April 2022. Things I have been doing lately.
Creating a new flower bed. Now is the perfect time to create a new flower bed in your garden and bring life, vibrancy and wild life into your garden. Gardens are living things and you should not be afraid to make changes. With this spirit in mind I decided to create a new flower bed. And here are the stages you need to undertake; and it is the same for tiles, gravel or grass.
Mark out the shape of your bed. You should never just start digging, as that way lies regret. Instead using a hosepipe to provide an outline try various shapes that you might like your bed to be. If you like take photos of each shape and think about it overnight and consult with your partner. I never discuss aspects of the garden with Cruella (my wife) as her point of reference is always a graveyard. The photos below show my two possible main shapes. Click on each photo for a larger view.
I like curves in my garden
Once you have decided on your basic shape, then you need to mark it out using ground marking spray. If you are digging out a grassed area the it is helpful to spray with weed killer and leave a week. The first photo below shows the marker paint that I use. The second photo shows the site ready for digging out. Click on each photo for a larger view.
Digging out. When you are making a new bed, there is no point scraping a bit of soil away and hoping for the best. You have to create a new soil bed that is rich in nutrients and will last for years. In my case this meant digging down at least four inches, and maybe more if you are digging out a previously gravelled area. The first photo below show my digging out stage.Followed by loading all turf squares into the compost bin. Finally, my fully dug out bed. Click on each photo for a larger view.
Filling the bed with compost. If you do not have a compost bin, then shame on you, but all is not lost just fill the bed with bags of compost. The picture below shows me getting ready to fill my wheelbarrow with the first of 8 loads that were required to fill that little bed.
Key things to note in this photo. Cockroach spray at the ready, water bowl on the ground ready to drown Rose Chafer giant maggots, and I am wearing shoes as I am fed up with cockroaches running between my toes.
The first photo below shows the beginning of filling the bed, when you do this it is important that where possible you mix in some of the old soil. The second photo shows the bed filled and finally the last photo shows the boundary stones in place. Click on each photo for a larger view.
Having tea. Stopping and having a pot of tea is one of the most important things a gardener can do. At the end of a tiring task make your self a pot of tea and have one of your favourite biscuits. This not only gives you a well earned rest, it gives the blackbirds time to forage around for insects in your new bed. The first photo shows my Darjeeling leaf tea brewing under my favourite teacosy. The second photo shows my special biscuit warming up over my cup and beautifully melting the syrup in the biscuit. Click on each photo for a larger view.
Finally a picture of Tango the blind lonely Labrador after a hard day watching me work.
Hey, I’ve gone all Biblical on you by quoting Ecclesiastes 3-2 in the above heading. But as a quote it is very apt for this time of year for two reasons. Firstly, Cruella (my wife) is back from her visit to the UK and she is angry because the conflict in the Ukraine meant she had to fly low and consequently her new broom is shredded. This in turn has meant that through fear I have been sleeping with my Bible under my pillow and a string of garlic around my neck; hence the quote. Secondly, it is time to deadhead and tidy up spring plants so that we can encourage new growth. Lets get on with the gardening.
16th April 2022. Things I have been doing lately:
Cutting back early Spring flowers. Now most early spring flowers only really have one flush of flowers, but sometimes with the right encouragement you can coax a second flowering from them. So, if you want some more flowers then you have to be quite ruthless and radically deadhead now.
You can start by deadheading your Euoniums these have flowered spectacularly this year all over our part of Spain because of the heavy rains. But now it is more or less all over. Dont leave the untidy now brown flowerheads on your plant snip them off at the point below the flower where you can see the stem thinning. If you keave the flowerheads on they will either eventually die back and fall off over a period of time, or, the plant will try to grow through the defunct flower. Either way you are left with an untidy plant in your garden for months.
The first photo below shows you where you should prune your dead Euniom flowers. The second photo shows a plant trying to grow through the flower. Click on each photo for a larger view.
Other early Spring flowerers in my garden that need cutting back now include Ice Plants. These come in a variety of colours and add real charm to the garden in early Spring. You now need to trim these using either small hand shears (which I prefer) or if you don’t have these just use ordinary garden shears. The first photo below shows an Ice plant in need of pruning. The second shows me just gently going over the plant trimmimg off only the dead flower heads, try not to cut into foliage. Click on each photo for a larger view.
Feeding plants. Now that the growing season is getting underway it is important that you begin your plant feeding routine. Now there are lots of different plant foods, and I don’t want you to get hung up about it. If you just have a small garden or terrace, then normally a general purpose feed will do most things and not really harm anything. However, if you have a larger garden then where possible specialist feeds can help.
The main feeds I use can be seen in the photo below. From left to right they are: Fruiting non citrus plants, general purpose feed, Citrus feed for oranges and lemons etc. An iron mix which I add a glug to every feed, Rose feed and finally Orchid feed. There are plenty of brands so just choose the ones that suit your garden and pocket.
A plant feast
Removing tree suckers. An important thing to note when feeding your citrus trees is that you must remove all tree suckers. Suckering mainly occurs in older trees, where the tree takes the easy route of not pumping all the goodness up to existing branches and leaves, and instead throws out new soft suckers further down the trunk. You can recognise suckers by their bright green soft whippy growth and tendency to grow straight up. To remove them all you have to do is pull them sharply downwards and they will come away easily. The photos below show suckers and my suckering action. Click on each photo for a larger view.
There is a sucker born every minuteSo long suckers
Encouraging gardeners. It is important that we gardeners encourage the next generation of gardeners, and where possible draw new people into the wonderful world of gardening. For those all over the world who read this blog I am including two ways in which I am currently encouraging gardeners: Open Garden Day and The Sunflower Challenge. Both will raise some funds for the work of our local Church in our community, but just as importantly they will draw people into gardening. Why not replicate these in your area or country. Please feel free to copy and make the world a greener place. Click on each photo for a larger view.
If you would like further information on how to set up either or both these events , then just contact me.
At this wonderful time of year when new life is springing from the earth and we await the resurrection of Christ, I would like to wish all followers of spanish-garden.com a blessed Easter to you and all your family.
The bad weather that Cruella (my wife) cursed me with when she left to visit our idiot son has continued now for almost a month. I was at my wits end as I needed to get seeds going, and then I had a good idea, why not turn our kitchen into a seed factory. I laid out all the seeds I needed to get going and I mixed everything up in the kitchen. The first photo below shows my seeds laid out ready to go. The second photo shows Cruella’s kitchen cabinet, I didn’t dare touch anything on there. Click on each photo for a larger view.
The eyes in the jars follow you
4th April 2022. Things I have been doing lately:
Soaking seeds prior to sowing. Some seeds benefit from soaking prior to sowing and this is mainly for two reasons. Hard seeds such as loofah and sunflower etc benefit from a soaking in warm water to soften the seed casing. Others such as Jasminium and Trumpet Vine that are blown on the wind are given a short soak to mimic the ideal conditions when they hit the ground.
Loofah seeds are best soaked for three days in warm, but not hot water. I just place them in a cereal bowl by the sink, and just keep topping it up with warm water. After three days dry the seeds and then plant them in four inch pots. Place two seeds in each pot with the weaker seedling being removed later. The first photo below shows my loofah seeds happily bathing in warm water. Then being dried off in paper towel before being sown in four inch pots. Click on each photo for a larger view.
Jasminium. This is my first year attempting to grow Jasminium from seed so I am quite excited. I got a few seedpods from my existing plant and they were very large and tactile. See photos below. Click on each photo for a larger view.
The seeds were only soaked over night before being placed in one of Cruella’s colanders for straining, and then planted on the surface of a seed tray before being gently covered with a sprinkling of compost. See photos below. Click on each photo for a larger view.
Chilli seeds. I grew some chillis last year which were a great success with Cruella. She even started looking after them whilst I was away as she said they reminded her of little drops of blood. In a previous post, last Autumn, I explained how you leave a chilli pod on the plant to get wrinkly and give the seeds time to mature. I then dried them on tin foil in the sun and stored them to sow this year. I planted the seeds in fibre pots so as to minimise root disturbance when planting out as they don’t like their roots to be disturbed. I planted two to a pot and sprinkle covered with compost. Again the weaker seedling will be removed. The photos below show the process. Click on each photo for a larger view.
Keeping seeds warm. Most seeds need to be kept at a warm temperature to encourage germination, but the problem is that it is too wet and cold to put them outside. In the UK you could put them on a sunny window ledge indoors, but in Spain houses tend not to have internal window ledges. So instead I have placed them in a little naya that has glass curtains and covered them with a sheet of perspex – don’t tell Cruella. The photo below shows my seeds happily basking in the warm. And the good news is some have sprouted already.
The bell on the table is for Cruella to summon me when she needs more gruel
Accepting failure: Gardening, like life, has its successes and failures, and whilst I never like to give up on a plant, sometimes I just have to accept the inevitable. Regular readers of this blog will know that I planted Golden Photus cuttings in a pot on my Naya about 6 months ago. And at first they seemed to grow well and I even bought a special stake for them to grow up. But no matter what I did they just seemed to wilt. It wouldn’t have mattered so much but this particular plant was a favourite of Tango the lonely blind Labrador. Every day without failure Tango would bump his head on the plant pot as he exited the front door, and then by way of compensation he would always sniff the plant.
I had decided to replace the Photus with a geranium that was thriving on the nearby window ledge. The first photo below shows the dying Photus and the upstart geranium in their respective positions before the the great replacement. The second photo shows the reproachful look that Tango gave me when he discovered what I had done. The final photo shows Tango disdainfully staying away from me that evening. Normally he sits right by me whilst I drink wine and we discuss the days gardening, but he would have nothing to do with me. Luckily he had forgiven me by breakfast time. Click on each photo for a larger view.
He wouldn’t even lie in his bed, and I think his little blind eyes were crying
Now is the time to start taking cuttings from around your garden. The plants are full and juicy with vibrant growth and the cuttings when they are taken are full of optimism with their whole life before them. This combination of vibrant growth and optimism engenders the cuttings chorus.
Once you have taken your cuttings then spend sometime with them at the end of each day. Linger by the potting bench and just listen. Gradually as your ears become attuned you will hear the first faint choruses of joyful songs as the cuttings begin to sing. Some of their favourites include “Walking on sunshine” and “lovely day”, but their all time favourite is “I love to go a wandering” I especially like it when they belt out the chorus
This especially effective when the smaller plants take the soprano parts whilst the older cuttings come in with tenor and bass.
As the cuttings gradually become accustomed to my presence I sit on the potting bench and beat out the time to each song by drumming my feet and clapping my hands. This all goes on till the sun goes down when we all say our prayers before I bid them goodnight and promise to see them in the morning. On occasion Cruella (my wife) will come down and catch me, she of course can’t hear the cuttings singing and asks “why are you making such a noise?”. I never tell her even though she calls me an idiot – I fear she would do something terrible to the little cuttings if she knew they were happy. She has no soul; no I mean it she actually hasn’t.
Anyway let’s get on with making your own cuttings chorus.
27th April 2021. Things I have been doing lately:
🔪 Taking cuttings. By taking cuttings, you get copies of your favourite plants for free. You can either plant these out in your garden to increase or replace existing stock, or, you can give them away to friends and family as presents. Taking cuttings is easy, but I must warn you that not all will survive.
🏗 Preparation. Making appropriate preparations to take cuttings is very important. You should always take cuttings in the morning before noon as that is when the plants will be most hydrated. You will need a sharp knife. Never use secateurs as these will crush the stem. I use an Opinel knife which can be sharpened and always has a good edge. You will also need a plastic bag to place your cuttings in to stop them drying out. The photo below shows my trusty knife that I have used for over 30 years, together with a plastic bag stolen from the kitchen.
Next you need to prepare some pots ready to receive your cuttings. It is best to do this the night before you are going to take your cuttings as this means you will not be delayed whilst your cuttings are in danger of drying out. Try and use good compost mixed with Perlite. You should be aiming for a free draining mix that feels “crunchy” when you squeeze it. It is a good idea to leave your pots watering from the bottom overnight, you can then leave them to drain on the potting bench when you go to take your cuttings.
The first photo below shows my mixed compost ready in a trug. Whilst the second shows the filled pots soaking to absorb water overnight. Click on each photo for a larger view.
🌞 Preparation on the day. On the morning you are going to take your cuttings you need to do a little bit of preparation. You will need the following:
Some plastic bags
A selection of canes cut to about 9 inches
Hormone rooting powder/liquid is helpful but not essential
A dibber to make holes for your cuttings (a pencil will do)
🌿 Solanum cuttings. Solanum are lovely climbing plants which have a long flowering season and enjoy full sun or partial shade. When looking for a potential cutting look for a fresh (whippy) stem that is non flowering. Make a cut just below a leaf node to leave you with about 5 inches of stem. The photo below shows the ideal way.
Once you have the cuttings back at your potting bench, then you need to cut off all the leaves up the stem leaving just a few at the top. Dip the stem into some rooting liquid and then poke it deep into your prepared pot. I put three cuttings in each pot equally spaced around the edge. Cuttings do much better when they are planted close to the edge; don’t ask me why it’s magic.
Once you have all your cuttings in place stick one of your short canes in the middle of the pot and then cover it with a plastic bag which you will need to tape down in a couple of places. The plastic bag will keep the cuttings hydrated for the first week or so till they get some roots. Whilst the cane acts like the centre pole in a circus big top and keeps the bag up stopping it flopping on to the cuttings.
The first photo below shows the bits of equipment you will need. The second shows the cutting after its leaves have been trimmed. The final photo shows the cuttings in their very own big top. Click on each photo for a larger view.
🌸 Dianthus and Carnation cuttings. To take cuttings from Dianthus or Carnations you don’t actually cut. Look for good fresh looking non flowering stems and then instead of cutting pull sharply on the stem and the top two or three inches should come away. Now you need to peel away (don’t use a knife) the lower leaves till again you are left with a few leaves at the top. These can then be planted as before with three cuttings to a pot.
The photos below show the cutting prior to its stripping, and then after and ready for potting. Click on each photo for a larger view.
🌿 Trailing Lantana cuttings. I like trailing Lantana as it is a good ground cover plant and makes interesting islands in gravelled areas. Another important use for trailing Lantana which I mentioned in my last post, is to plant it close to bulbs. Then when the bulbs are finished you just allow the Lantana to creep over what would have been a bare space in your border.
Taking cuttings from Lantana is similar to the process for Solanum. Again you look for a good fresh looking, non flowering stem and cut below a leaf node. This time instead of cutting the lower leaves off with your knife, pinch them off with your thumbnail and forefinger. If you have failed to grow your thumbnails – as I requested you to in an earlier post – then you only have yourself to blame.
The photos below show the cutting prior to its stripping, and then the process of snipping off with your thumbnail. Click on each photo for a larger view.
🎼 Adding to your cuttings chorus. For the next month or so you should be out in your garden taking cuttings. By the end of Summer you should have a veritable choir singing their heads off each night and entertaining you. You will find that gradually their repertoire will increase till eventually they will be trying three part harmony and all the great songs from the musicals. Go ahead, give it a go. All together now…
When I told Cruella (my wife) that I was going out into the garden to cut heads off and tie things up she immediately expressed a sharp interest in being involved. Filled with excitement she ran off to get what she called “her tools” and returned two minutes later with an axe and rope. However, there was a palpable air of disappointment when I told her I was deadheading Iris and tieing them up. She stormed off accusing me of deliberately misleading her; but not before aiming an axe blow at my head which I thankfully ducked.
Anyway, enough of all this non gardening excitement, let’s get on with the really good stuff.
26th April 2021. Things I have been doing lately:
🪓 Dead heading Iris and other bulbs. Here in Alicante province most of the Iris and other bulbs have been in bloom for weeks; and it has been a very good year. However, if you want excellent flowers next year you must dead head as soon as the flower has finished. If you fail to dead head then the plant will direct all its energy into creating seed and this will diminish the bulb and next years potential flower.
A few years ago it became fashionable when bulbs had finished flowering to tie the plant leaves and stems into a tidy knot. This was especially the case with daffodils and tulips. But please don’t do this as it is disastrous for the bulb. For the bulb to be replenished you need the stem and leaves to continue the process of photosynthesis to feed the bulb with energy.
When deadheading Iris go just below the spent flower head and you will see a swelling of the stem, cut just below this swelling for the maximum benefit. The first photos below show various stands of Iris at various stages in the deadheading cycle. It is important that you don’t wait till all the flowers in a particular stand have finished flowering. Treat each plant individually and dead head them as they become ready. The final photo shows exactly where to cut for the best results. Click on each photo for a larger view.
Finally with long stemmed plants like Iris you don’t want them flopping down and shading out other plants as they die. So the easiest thing to do is just tie them up loosely. Also make sure you think of succession planting, a large stand of Iris will leave a big hole in your border, and you will not be able to plant directly into the bulb area. I overcome this by having a ground cover plant such as trailing Lantana which sits beside the Iris stand and then comes into play when I eventually chop down the stems. The photo below shows my loosely tied Iris with the ambitious Lantana waiting to take over.
Another bulb that I dead head is a few pots of spiral grass that I leave sitting on window ledges. After deadheading the flowers I will cut back the stems in about a month or two. These will be left sitting on the potting bench till late Autumn when they show some re growth and then they will be back in action for Winter and Spring. I am replacing them on the window ledges with Geraniums which will be swopped to the potting bench and replaced with the spiral grass in its turn; ah the beauty of seasonality. The photos below show the spiral grass flowers getting the chop and finally finding their way to the potting bench. The final photo shows the upstart geraniums who have taken over. Click on each photo for a larger view.
Finally, before I leave deadheading for a while, don’t forget to deadhead every day on repeat flowering plants such as Roses. The more you dead head the greater will be the repeat flowering. And also, don’t forget to compost all your spent flower heads as you will be adding to the wonderful circle of life in your garden. Oh, and another thing always thank your plants as you deadhead them it pays to show your appreciation, and if you like, say a little prayer and tell them how much you are looking forward to seeing them next year. The photos below show a couple of colourful trugs heading for the compost bins. Click on each photo for a larger view.
Just as everything gets growing in the garden so we start to face the normal onslaught of nature red in tooth and claw. Suddenly, everything wants to chew, chomp, gnaw and generally eat every plant you have lovingly grown all Winter. It can be heartbreaking to see all your hard work being destroyed, sometimes literally overnight by an invasion of Greenfly that you did not notice till it is too late.
Now there tends to be two basic responses to this; either you use chemicals, or you rely on nature to correct the balance. But in my opinion neither of them hold true on all occasions. You can be against chemicals and hope that nature will self correct, and on the rare occasion armies of Ladybirds will fly in and save some of your plants. However, from my experience you will have to sparingly use some chemicals just to keep the overall balance.
Anyway let’s get on with it. Get your glasses on and have a good look at your plants, it’s war out there.
21st April 2021. Things I have been doing lately:
🍃 Dealing with Greenfly. If like me you are getting old and need reading glasses, then it is time to put them on and have a close look at all your plants. I suspect you will find that Greenfly are building vast colonies on most of your plants and sucking the life out of them. Greenfly are one of nature’s greatest camouflagers and can blend expertly with a wide range of plants. When I donned my glasses the other day for a quick check around I was confronted by Greenfly on my Roses and a Dame de Noche. The first photo below shows the heavily infected Dame de Noche and the second shows the start of a colony on a Rose. Click on each photo for a larger view.
Cruella (my wife) denied all knowledge of this plague, but I don’t believe her ever since the frogs of 2020
Now, generally Greenfly won’t kill a plant, but they can greatly weaken it and destroy its shape and looks. If you are going to use chemicals (and I do when necessary), then you need the right tools for the job. For large infestations I suggest that you use a 5 litre pump action sprayer these are very cheap and efficient. You can mix up enough chemicals for the whole garden and get it sprayed all in one go. For smaller infestations, and to make sure they don’t become big ones, then you need a hand held ready mixed proprietary spray. With the smaller spray you can just pop to the shed and fetch it when you see a problem. The photo below shows the chemicals I use and my spray equipment. Other brands are of course available.
Note that the term “Polivalente” on the packaging is important as it ensures it will cover a wide variety of harmful insects
🐚 Planting Marigolds and dealing with snails. By now you should have started planting out all your annuals that you have grown from seed. This year I am planting out lots of Marigolds and Sunflowers. Now Marigolds are an absolute favourite of snails who will travel quite a distance just to chomp on the delicate new stems of young Marigolds. Given that I have planted out over a 130 seedlings this presents a veritable feast for slugs and snails.
The gallery of photos below gives you an idea of my planting marathon. I have included some panorama photos as an experiment. Click on each photo for a larger view.
Unfortunately there is only one way to successfully save your Marigolds from slugs and snails, and that is to use slug pellets. Make sure you use only bird and pet friendly pellets. Water in all your seedlings and then wait about an hour before sprinkling the pellets around each seedling. Do not water the seedlings for about three days as this will give time for all the snails to try and get to the plants. After three days the plants should have hardened up a bit and the snails will have been dealt with.
The photos below show the brand of slug pellet that I use together with my sprinkling method. If you don’t believe in the efficacy of slug and snail pellets then the last photo shows the tsunami of snails that threw themselves against my defensive wall around one seedling. Click on each photo for a larger view.
I have tried using beer traps in the past, but all I got was drunken happy snails
💐 Enjoy your garden. After this tale of the terrors of the garden it is all to easy to think of gardening as a chore. But it is not, gardening is a gift from God, who has allowed us to explore the wonders He has made. The photo below shows a couple of mottos I have attached to my outside kitchen wall just to remind me. Followed finally by my delight in this years Roses.
Both of the above statements are perfectly true and pertinent to the appropriate conduct of this gardening blog. However, Cruella (my wife) is denying the squirrel murder, but we all know she has form when it comes to unexpected deaths. Anyway all will be explained in a moment, let’s turn our minds to less morbid stuff. On with the gardening.
14th April Things I have been doing lately:
💀 Deadheading. By now the garden is gradually getting going and you should have seen lots of early flowers so far. But the key to keeping them coming is to deadhead on a daily basis. If you don’t deadhead, then once the plant has roundabout 50% seeds heads then it will stop flowering and transfer all its energy into producing the seed. To stop this you have to take away it’s seed-heads by deadheading so that is forced to produce more flowers.
At this time of year it is a good idea to grow your thumbnails long as this will provide you with a pair of secateurs at the end of each hand. By pressing your thumb against your forefinger you can neatly deadhead most plants. I do not recommend this method for Roses otherwise you will need a blood transfusion quite quickly.
The first photo below shows my handy secateurs (pun intended) together with Cruella’s for comparison. By the way don’t think that’s nail polish on her thumb it’s not!
The next photos show my various deadheading activities as I wander round the garden. Don’t forget to compost all your deadheads. And remember it is not just flowers that need deadheading; plants such as Mother in Laws Tongue need to have spent stems pulled out. You can detect which stems are ready by gently pulling on them, those that are dead will just pull out. Click on each photo for a larger view
I like the spooky photo of my trug of deadheaded Roses being held by the invisible man
🪡 Tying up plants. Long stemmed plants such as Iris will need to be supported by tying up. With all the rain we have had on the Costa Blanca lately they have been very battered about. Given these flowers are relatively short lived make sure you tie them up to support them and enjoy them a little longer.
Where possible I will grow long stemmed plants through other stronger plants so that they get good natural support. But where this is not possible then it’s out with the canes and string to give some support. The first photo below shows a stand of Iris growing through some Elephant Bush.
There are two clumps of Iris in this bed and both are forced to grow tall to compete with the surrounding plants
The first two photos below show other clumps of Iris before they were battered by the rain. The second two photos show my efforts at holding them up. Click on each photo for a larger view
Note the dogs are waiting for me to turn my back so that they can dig a hole in the lawn
🌱 Hardening off seedlings. If you are growing seeds – and I certainly hope you are – then don’t forget to harden them off before you plant them out. Even here in sunny Spain you must accustomise your plants to the garden by gradually hardening them off. Hardening them off basically means bringing your seedlings out of their sheltered accommodation each day for about five days before you eventually plant them out. The photo below shows the great hardening off process.
When the going gets tough, the tough get going
🪚 Dealing with Yuccas. I have lots of Yucca in various spots in my garden and they range from the small potted variety to large garden giants. Left to their own Yucca will just keep growing to quite a great height and the drawback to this is that at eye level you are just left with a trunk and you miss out on the sword like leaves and the flowering stems. So don’t just leave your Yucca, manage them to your advantage.
I have a stand of Yucca that I have grown between the drive and my potting area. Two of these have been leaning over the path, one left and one right. Although I trim the sharp end of the leaves, I sometimes forget and consequently my scalp gets spiked every time I pass this area. Enough was enough so I cut the main stems of these two back by just over half. They will of course regrow. The photos below show the miscreants before and after surgery. Click on each photo for a larger view
That will save a few pints of blood
In addition to these two I had another large clump of Yucca that needed to be cut back . The central stem in this clump had grown very tall and the flower spike was too far in the air to be appreciated. In addition this was now shading the light from my bathroom. When I mentioned this to Cruella (my wife) she said incredulously “who needs light? I just talk to my mirror and ask it who is the fairest” I explained to her that not everyone has a talking mirror that lies; she hasn’t spoken to me for a week.
After Cruella eventually calmed down I explained that I needed her help to cut this Yucca back. The problem I faced was that I needed to push on the trunk of the Yucca to make sure it fell in the right direction, whilst at the same time wielding my chainsaw. Cruella eventually relented and armed with a swimming pool brush her role was to push on the trunk whilst I cut.
The first photo below shows the problem with the main stem of the Yucca casting shade on the window. The second photo shows Cruella (with her newly dyed hair) pushing with all her might on the trunk. Click on each photo for a larger view
The next photo shows the newly cleared area letting more light into my bathroom. The final photo shows the trunk lying on the driveway ready for disposal. Now this is the bit when it gets spooky. As I moved the trunk I noticed something furry wedged in the very top spike of leaves. On closer inspection it was a dead red squirrel that had either fallen into the Yucca from the nearby palm, or, it had been placed there. When I questioned Cruella about storing dead animals she at first confessed to nothing. Blurting out “I don’t know anything about a dead squirrel” when I pointed out that I hadn’t said which type of animal she stormed off shouting “you never support me in my hobbies”. Click on each photo for a larger view
🤺 Reshaping small Yucca. Regular readers of this blog will remember that I have a range of Yucca and other plants on a terraced area at the rear of my house. Because of high winds in winter, these yucca were regularly blown over, breaking leaves and quite often pots. To overcome this I undertook a drastic cutback to the stem for all of them last January. Once the top growth was cut off the leaves on all the stems were removed. This left bare trunks which I knew would sprout new side growth. The photos below show the initial stage of the cutback. Click on each photo for a larger view
When the new growth starts to come through you need to select how many leaves you want to retain and their position on the trunk. Taking a sharp gardening knife just simply slice out the growth areas you do not want. Try and achieve a pleasing distribution and make sure the new growth is not clumped together. You will need to do this every week for a month or so till the plant recognises the dominant growth you want and then it will stop producing new shoots.
The photos below show my various slicing activities. I do not intend to let these Yucca grow too tall as I don’t want to start over again. Click on each photo for a larger view
I keep this knife under my pillow at night in case Cruella gets through my bedroom door barricades
🇺🇸 Cutting back Agave Americana. If you have Agave Americana, then you will know that it is the brute and assassin of the Agave world. This is a plant not to be messed with its long arching leaves are edged with deadly spikes and it has a dagger like point at the end of each leaf. You should never plant Agave Americana near paths or walkways as they will inevitably spike people or at their worst take out the odd eye or two.
Having said this, planted in the correct place this can be a stunning plant that is a real talking point (no pun intended). I have three very large plants all of which are planted off the pathway at the top of my wild wood. Overall the plants are very easy to take care of, just give them the right dry conditions and then stay well clear. I noticed this year that Lentisco bushes were growing up around the Agave spoiling their look, and that the plants themselves needed a trim to reshape.
The first photo below shows my Agave being overcrowded by the Lentisco and looking a little untidy.
There are three of them in there, but you would not know it
The next photos show the Agave freed from the encircling Lentisco and nicely tidied up. I meanwhile am lacerated from head to toe and have lost at least three pints of blood. Click on each photo for a larger view
When I told Cruella (my wife) that I had to rush out a special Palm weevil post by popular demand, she just curled her lip and scornfully replied “it’s only a bloody beetle get over it”. I hope this conveys some of the pressure I face on a daily basis. I would leave her but she is holding the garden ransom, and on a number of occasions she has threatened to curse the ground so nothing grows. All of this may seem strange especially as she is our local Church Warden, but I think she is working undercover.
7th April. Things I have been doing lately:
🪳 Dealing with Palm weevils. First some background. The red palm weevil first arrived in Spain in 1994 probably in a cargo of trees from Egypt. Since then it has rapidly infested Spanish Phoenix palms. At the moment it appears not to attack Washingtonia palms in Spain but it has been known to do so elsewhere. In the main it will attack trees under 20 years old but not exclusively.
The adults will cause a certain amount of damage by feeding, but the main damage is caused by the larvae. The adult female lays up to 200 eggs at the base of the fronds in the crown of the tree. When these hatch, they merrily munch their way up the inside of the fronds, eventually resulting in the fronds collapsing and the tree dying. In a severe infestation you can put your ear to the trunk of the tree and hear the grubs feeding. The first photo below shows the enemy. The second shows some of my palm trees and explains why I need to be careful.
Note that my trees are neatly trimmed, but only cut in winter when the weevil is not around
🌴 Preventative treatment for palm weevil. When you first arrive in Spain, no matter how good a gardener you are, you are not prepared for the palm weevil as we do not experience it in Northern European. When you lose a palm you are distraught, so it is important to act quickly. If the tree is relatively low, or you can reach the crown with a short ladder, then you can spray the crown and this should act as a preventative.
If the tree is large then you need to either bring in professional sprayers every couple of months, or devise a method that can deliver chemicals directly to the crown of the tree. I have devised and revised a method over the years that works for me, so please feel free to copy the system described below.
🥷 Preparing the palms. At its simplest this process seeks to deliver the chemicals into the trunk of the palm which the rising sap will then take up to the crown of the tree and infuse the fronds with weevil killing chemicals. Over the years I have refined and revised my methods. But at the heart of the process is to drill a hole at a 30 degree angle half way into the trunk round about a metre from the ground. You then need to insert a piece of simple irrigation pipe into the hole. The hole and the tube is at this angle because you don’t want the chemical dribbling out and also you want to keep a gravitational pull on the chemicals so that they constantly feed into the tree. (I hope that doesn’t sound complicated, as it is not).
The first photo below shows my original version. Here, I wrapped tubing around the tree that acted as a reservoir for the chemicals as they were fed into the tree. This could drip feed the chemicals over a period of three months. Cruella (my wife) put an end to this system when she encouraged a pack of rabid red squirrels to eat my weevil tubes.
The next photo shows my anti squirrel revised version whereby I ditched the reservoir and instead had a simple perforated tube inserted into the trunk which could be topped up each month. The final version is my new deluxe minimalist weevil killer (top of the range). This has a short piece of tubing just to fit into the tree. Note that each version has a cap at the end, this is to stop anything else getting into the tree. Make your own one up or just stick a bit of rag in there.
The final photo shows the weevil system in place. I am showing how far to drill into the trunk and you can see the angle from the cap. By the way the holes I appear to be pointing to are nothing to do with weevils, this is where the palmista who cuts the trees sticks his spiked boot into the trunk. Click on each photo for a larger view.
🧪 The equipment. All the equipment is very cheap and can be bought in any local gardening store. The photos below shows the basic equipment and mixing method which is simple. Click on each photo for a larger view.
a proprietary weevil killing chemical that can be diluted
a measuring jug to make sure you get the right amount of water (in my case 1 litre)
a garden syringe to measure out the chemical before adding it to the water
an old Fairy Liquid bottle needed to squirt the chemicals into the tree
🤺 The process. Once you have mixed your chemicals, then how you use them depends on the palm size. The first photo shows my trusty Fairy Liquid bottle being used to squirt liquid into the trunk. This method is used for high trees where you cannot get to the top.
The second photo is the method used for small trees. Just use your Fairy Liquid bottle (other brands are available) to squirt the chemicals on to the base of the palm fronds. This will act as a deterrent to the adult weevils.
The final photo is the process for those trees that are just a bit too big to get at easily. You could get a ladder out, but you can’t be bothered. Just squirt the chemicals up into the base of the fronds. Don’t do this on a windy day and if possible wear a mask. Many a day I have weevil proofed myself and it doesn’t taste nice.
😥 Don’t despair if you lose a palm. I lost two palms when I first arrived in Spain and I was of course upset. The thing to do is don’t just chop the tree down and leave an unsightly trunk shaped root sticking up in your garden. Nor should you try and make a table out of the palm by chopping it back and placing a table top on it. The resulting table will never be in the right place and you will eventually abandon it.
Instead, what I did was to get the palm chopped back to about 12ft. I then wrapped mesh around the trunk and grew climbers up its length. This gives a spectacular display of flowers all summer and is a joy to behold. The photo below shows my dead palm tree brought back to life.
I hope all of this helps. Let me know how you get on.
I know the above heading may seem a little strange for a gardening blog, but bear with me. It all started when I mentioned to Cruella (my wife) that I was going to grow loofahs from seed. She asked me what was the point as you couldn’t really eat them. When I explained that they were wonderful for skin care and worked wonders on exfoliating dead skin, her eyes lit up. She then archly enquired whether they would be good for warts, when I said possibly, she ran off to immediately contact all her friends in the coven.
It turns out that warts are a big problem in her coven as is the issue of dead skin as most of their bodies are made up of dead skin and various calluses. Any way the upshot is that Cruella is setting up an online skin care business for witches. All I’ve got to do is grow the loofahs!
3rd April. Things I have been doing lately:
🧽 Sowing Loofahs. I was given a loofah pod by my friend Eric, and I have extracted lots of seeds; whilst the actual loofah sits proudly in my shower. The starting point for successful loofah growing is to soak the seed for at least 48 hours in warm water (every time the water gets cold just refresh it). After 48 hours the seeds will have plumped up a little and be ready for sowing. Sow each seed in a four inch pot with rich compost by pushing the seed about 2cm into the compost. You then have to keep it warm – they don’t like to get cold. I put my pots into my little mini greenhouse and after two weeks they are beginning to sprout.
I will keep you abreast of events as they unfold. The first photo below shows some of my precious seeds. The next photo shows my soaking seeds. The final photo shows my emerging loofahs; this time next year I will be a skin care millionaire in a specialist market.
If anyone would like some seeds and you live near Pinar de Campoverde then let me know. Click on each photo for a larger view.
⛳️ Taking care of the lawn. I understand that not everyone has a lawn here in Spain. However, if you have, then it is time to start your lawn care programme. Most grasses, but not all, will have started to spring into growth. The first thing to do is to run the mower over the lawn with the blades set high, this will serve just to neaten things up and remove any debris that has accumulated over Winter.
The next thing to do is give the grass its first feed of the year. I tend to use granulated feeds dispensed from my spreader. Make sure you water your feed in unless it is expected to rain. Next you should do some patch repairs where you have bald areas. Both of our marauding Labradors will dig in the lawn given half a chance, so patch repairs are a constant part of my gardening. I do not have a good track record with general or even specialist grass seeds. However, I have found that the mixed seed and feed patch product shown in the photo below works well.
The first photo shows my trusty lawn mower. This is followed by my feeding stuff and then the patch stuff. The final photo is taken as I sit under the Mulberry tree after the work is finished. This is my favourite spot after working on the lawn. Click on each photo for a larger view.
Sometimes I even allow myself a beer
🌻 Growing sunflowers. Regular readers of this blog will know that I suffered the great 2020 seedling disaster last year, when my little mini greenhouse blew over in strong winds and all my seedlings were destroyed. Cruella denied all knowledge of what happened, but I’m not too sure, as for weeks afterwards every time I went out she would mockingly blow me a kiss!
This year, apart from my loofah enterprise, I am growing sunflowers and Marigolds. I love both these plants as they flower all summer and make a good contrast to the early flowering Osteospermums. If you get your sunflowers in over the next few weeks they will gain sufficient height so that the Marigolds or similar can then be used as under planting.
The sunflowers are being planted in those little fibrous pots that you can plant straight into the ground once they are hardened off. The photos below show my little (but soon to be giant) sunflowers ready to be planted out. The next photo shows my mighty array of canes some are designed for the plants to grow up, others are part of my defensive line (It is a bit like the Marginot line in the First World War) to keep the marauding Labradors at bay. Click on each photo for a larger view.
🌼 Pricking out my Marigolds. Those of you who have grown Marigolds before will know how easy they are to grow. However, I haven’t grown Marigolds for a couple of years as I kept using my same seed from the year before and eventually they lost vigour. But this year I am starting afresh with a pack of orange and another of mixed. As usual they have germinated very well and I am now at the stage of pricking them out
I am using using individual cell blocks rather than normal seed trays, as this makes transplanting easier with little root disturbance. Once the seedlings have at least two “true”leaves then they can be pricked out. To prick out successfully I use my trusty pencil which I have had for over 20 years. Ease a clump of seedlings out using a pencil or similar, then use the pencil to gently separate out the roots. Make sure that you do not pick the seedlings up by their stem as this will damage them. Instead hold them gently by a leaf and then lower them into pre dibbed holes in your tray. When you water them afterwards make sure to water from below as you can damage the new seedlings with fierce watering. Once complete put them somewhere sheltered with full light and in a week or so you can begin to harden them off outside for a few hours each day before eventually planting out.
The first photo below shows my successfully germinated seeds ready for pricking out. The second photo shows my pencil pricking out technique. The third photo shows me midst pricking out. And, finally some of my seedlings successfully transplanted. I eventually ended up with 144 plants. Not bad for a couple of packs of seed. Click on each photo for a larger view.
At this wonderful time of year when new life is springing from the earth and we await the resurrection of Christ, I would like to wish all followers of spanish-garden.com a blessed Easter to you and all your family.
I know, I know this is supposed to be a gardening blog. And overall I do try and stick to this, but these are dangerous times; coronavirus is stalking the land, the weather has been terrible and there have been strange and disturbing omens in my garden. To make matters worse Cruella (my wife) is nursing her wrath to keep it warm as she sits in exile in our English house looking after the idiot son. Anyway, more of this later, let’s get some gardening done as there is lots to do in self isolation, or, as I call it “gardening”.
27th April. Things I have been doing lately:
🥀 Dealing with Roses. By now your Roses should be well into their first flowering which should last till the end of May. The second flowering from circa September will depend on how well you treat your Roses now. There are two important things you need to be doing: feeding and deadheading. Those of you who are regular readers of this blog will know that I started off by feeding my Roses in March with a granulated long lasting feed. I am know feeding weekly with a liquid Rose food, but if you can’t get a Rose food, a general purpose food will do.
Whilst feeding is important, daily deadheading is essential if you want to keep your Roses flowering. Some Roses such as “Blythe Spirit” are so profuse that I have to deadhead twice a day. In addition to deadheading, when we have heavy rain go out and shake the Rose heads to empty them of water or they will just rot or drag the stem down; your neighbours may think you are mad, but your Roses will thank you. But remember Roses aren’t all work . There is joy in going out amongst your Roses at about 11 in the morning and smelling the heady scent as you deadhead, don’t forget to listen whilst the Blackbirds sing in the background. The photos below show my Rose beds and a trug with my deadhead bounty that is heading for the compost bin. Click on each photo for a larger view.
✂️ Deadheading bulbs. By now all of your early bulbs should have flowered and should be showing seed heads. You need to cut off the seedheads as soon as possible, whilst at the same time leaving all of the stems. This process will ensure that the plant does not spend energy on trying to reproduce by seed, and instead will put all its energy into the bulb. The means of getting the energy back into the bulb is through the stems, so it is important that you do not cut back the stems till they are fully brown and withered. Nor should you try to tidy the plant up by attempting to tie the stems into a knot. This abomination may look tidier, but the broken stems will not be be able to transfer sunshine back to the bulb. The photos below shows some of my Flag Iris awaiting the chop. Click on each photo for a larger view.
They await the kindest cut of all.
🚑 Saving your cuttings. In recent posts I have been encouraging you to get out there and take as many cuttings as possible in order that you can get free plants. I admit that I am having mixed fortune with cuttings survival rates, but the recent heavy rain has made things worse. You will remember in the last post that I am now placing pots with cuttings into plastic bags to enhance their hydration. However, I soon discovered that the heavy rain battered the bags down and squashed the cuttings. In my quest for inspiration in resolving this I remembered Cruella’s favourite hat style.
By cutting some canes to a set length I was able to place a cane in each pot propping the plastic bag up like a circus centre pole in the big top. The photos below show my cane cutting skills, coupled with my creation of each pots “big top”, the final photo shows the pots on my potting bench clearly showing the influence of Cruella and her normal hat style. Click on each photo for a larger view.
🧟♀️ Dealing with sorcery and witchcraft. Those of you who follow this blog will know that not only do I battle against the elements in my every day gardening, but I also have to deal with the malign influence of Cruella (my wife) and her constant attempts to destroy my work. Now, I will confess that whilst she has been away things have been a little easier. However, I can sense from her attitude when I speak to her on FaceTime (or as she calls it the magic mirror) that she is still seeking to exert power over both me and the garden. To lighten her mood I told her it was my birthday today, but her only reply was to reply in a menacing voice “I know I have left you a present and don’t worry I’m watching you”.
Normally I can manage to shrug off Cruella’s threats in the usual way; you know, wearing a cross made out of garlic and onions, searching for a four leaf clover and moving my bed inside a chalk circle at night. But something didn’t seem right as things kept going wrong in the garden. Remembering her threat of “a present” I searched everywhere and then I found it; she had placed a dead Blackbird into one of my water containers. The bird couldn’t have got in there itself as it had a lid on. To make matters worse I had a sense of foreboding and that I was being watched. Then I saw it a large Peacock sitting on the wall watching me. I don’t know where it has come from but it watches my every move in the garden. Pray for me things don’t look good!
🚜 Mulberry Harvest. To end on a light note the photo below shows Tango mid harvest of Mulberries.
He spends most of the day under the Mulberry tree.
These are definitely strange times we are living through. You will remember the 10 plagues of Egypt: Water turning to blood, frogs, cattle death and the death of the first born etc. Well those Egyptians had it easy, apart from the cattle and the death of the firstborn we gardeners suffer most of the others during the normal gardening year. But nowhere in the Bible does it mention a plague of ants or the death of cuttings which tends to make me think that Cruella (my absent wife) is behind these occurrences. She remains at our English house taking care of our idiot son, and recently in a FaceTime call she asked me if I was missing her? without thinking I said I was too busy to miss her. As soon as the words left my mouth I knew I would live to regret them. Her mood darkened instantly, her eyes turned blood red, the cup of tea sitting in front of me started to boil and I saw a flock of small birds fall from the sky behind her. Despite my protestations of regret she merely muttered something about being made to miss her then suddenly the electricity went off in the house the dogs started howling and I fell off my chair in a dead faint.
Which is basically how I ended up with a plague of ants and all my cuttings dying. Anyway, let’s get on with this after all it’s supposed to be about gardening.
14th April. Things I have been doing lately:
🌱 🐜 Dealing with all things lawn. If you have a lawn then now is the time to get active. By now you should have done at least one cut of the grass and killed off broad leaved weeds by applying weedkiller. If possible you should also have given the lawn it’s first feed. If however, like me you cannot get to any open garden centres, then the feeding will have to wait.
My first task this week was to repair and seed a patch of grass in our afternoon lawn. This was a patch which I had already tried to repair at the end of last year but had failed as ants had carried away all of my expensive grass seed overnight and hidden it underground for food. The photo below shows the state of this patch of lawn and my equipment ready for the big reseeding.
Notice the nice compost and soil mix I had prepared.
Just before I was about to start – and remembering my ant problem from last year – I carefully checked this area of lawn. Sure enough there they were waiting for their annual feed of grass seed. Upon closer inspection some were sporting napkins whilst others were passing out knives and forks. Unfortunately, they had to be dealt with as the grass seed I was using “Kikuyu” is very expensive costing 18€ for a small box. The first photo below shows the remedy to the ant problem. The second photo shows the worlds most expensive grass seed.
Once the ants had been successfully dealt with and the grass seed scattered over an area of lawn raked with a leaf rake. It was possible to get on with the process of reseeding. In order for grass seed to get the best possible start, and to protect it from birds you need to cover it with a thin layer of soil. Once this is completed then you have two options. You can either tread the the soil down to ensure the seed comes into good contact with the soil, or, as I prefer, you can roll the area with a heavy roller. Some people don’t like rollers as they think they will crush the seed, but they don’t. The first photo below shows the start of the process of using a riddle to spread the soil over the seed. The second shows my roller action.
I like these action photos as they give a sense of the pace, drama and thrill of gardening
Once the reseeding was completed it was time to tidy up the path edges. Wherever grass meets a pathway it will attempt to grow over it and given 20 years or so probably would succeed. However, in the meantime you need to get your trowel, lift the edges of the grass where it creeps over the path and then trim the excess off with scissors or one handed shears. The picture below shows my handiwork.
That’s better, now I just need someone to cut my hair; I am beginning to look like Ben Gunn.
Whilst walking back to the shed to celebrate my fascinating morning of grass based activities and my triumph over the ants I glanced sideways whilst passing a climbing Hoya, and there waving back at me were Farmer Ants. The ants were happily farming Aphids for the sweet honeydew substance they produce, whilst the Aphids were being protected by the ants and allowed to suck the life out of my Hoya. A quick glance around the vicinity found them at it on a nearby Oleander. This symbiotic relationship (protection rackets) suits them both, but not me so again the ants had to go. The first photo below shows my poor Hoya. The second photo shows a Farmer ant happily at work (sorry about the quality) the final photo shows the Aphids happily colonising my Oleander. Click on each photo for a larger view.
✂️ Taking cuttings: This is the best time of year to take cuttings and you should be busily going round all your plants and looking for vibrant non flowering shoots to take as cuttings. To be honest normally I have great success with cuttings and by this I mean that I can normally propagate up to half the cuttings I take. However, this year because of the rain, Cruella’s curse and my obvious lack of skill I have lost nearly every cutting. To overcome this dismal record I have now reverted to a process that I haven’t done for a number of years, and is a bit like the processes we are all using to escape the coronavirus, whereby I cover the planted cuttings with a plastic bag.
The starting point when taking cuttings is a bit like the coronavirus advice to keep washing your hands. Though in our case it’s to make sure that your pruning knife or secateurs are sterilised between each cut. To achieve this I have used the alcohol that I usually utilise to cauterise my many bleeding wounds from gardening and I also stole some of Cruella’s heavy duty make up removal pads (industrial strength) to wipe the blade. The photo below shows my reliable old pruning knife that I have had for over 30 years together with my non drinking alcohol.
Once you have suitably sterilised your knife, then you are all set to go a cutting. Look for strong “whippy” stems that are not flowering. As you take each cutting quickly put it into a plastic bag to stop it drying out (this can make a big difference). I take four cuttings at a time. I then rush back to my potting bench, remove all but the top two/four leaves from the cutting and then dip each stem into hormone rooting liquid before planting in a pre prepared and watered pot. Plant four around the rim of a four inch pot. The final stage is to place the pot inside a plastic bag and seal the top with garden twine or wire. Some garden books will tell you to place the plastic bag over the top and seal with an elastic band around the pot. But this is fiddly and often results in you decapitating the cuttings with the elastic band as you try to take it off. Once you have the cuttings sealed within their plastic bag then place them out of direct sunshine for about 2 weeks or until you see some growth. Make sure you open the bag up every so often to check it hasn’t dried out. The photos below show the process in action and the final photo shows my potting bench filling up with cuttings.
What are you waiting for get out there and start taking cuttings.
🏆 A gardening success story. When you are a gardener – like me – who plants from seeds and cuttings, you have to plan ahead as it can sometimes take years to see your work come to fruition. If you prefer to just go out and buy plants and stick them in, then that is fine too, but you are missing out on the real mysteries of gardening. However, there can be drawbacks from my approach, all too often things will fail to flourish, die or be trampled by maurading Labradors and you see your years of work destroyed or just fail to live up to your expectations.
Well not this time baby! Three years ago I cut down an old unproductive orange tree, leaving part of the trunk and some branches as a support for climbers. I planted Jasmine and Pink Trumpet Vine as climbers and under planted with a mixture of Margeurites and Aeoniums with a structural blend of other plants. I also planted two groups of Flag Iris bulbs. Now whilst this area has been interesting over the past three years and has had good interest throughout the seasons. What I was waiting for was the final flowering I had imagined. And it came this year and all the waiting was worthwhile as you can see from the photo below.

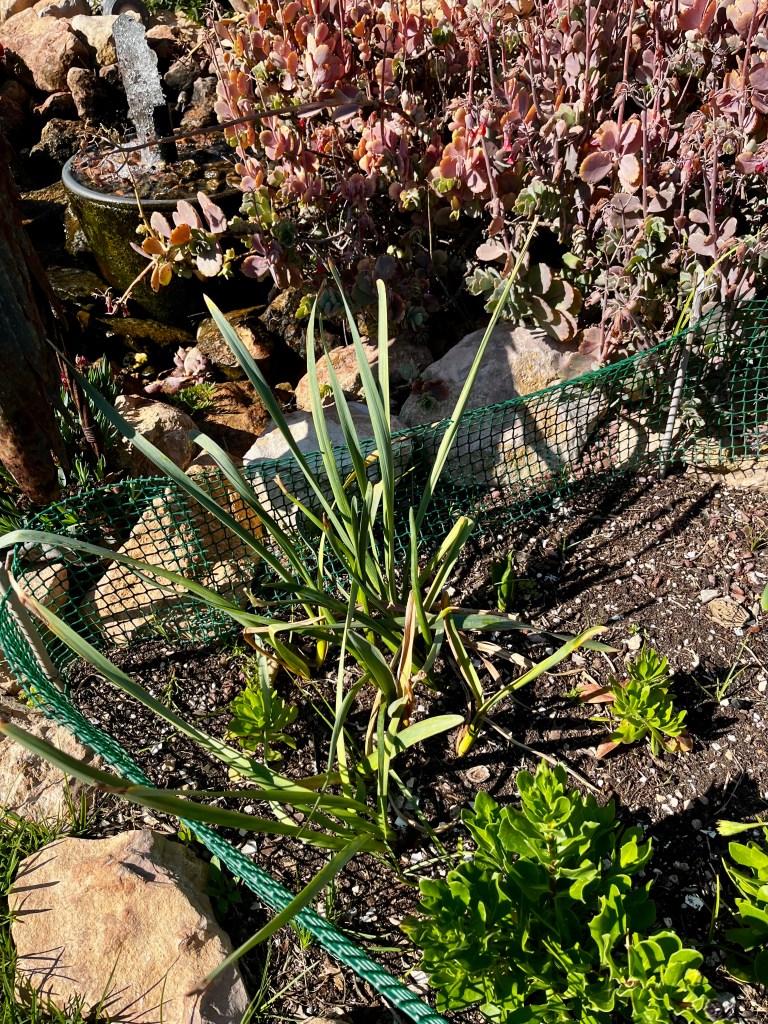
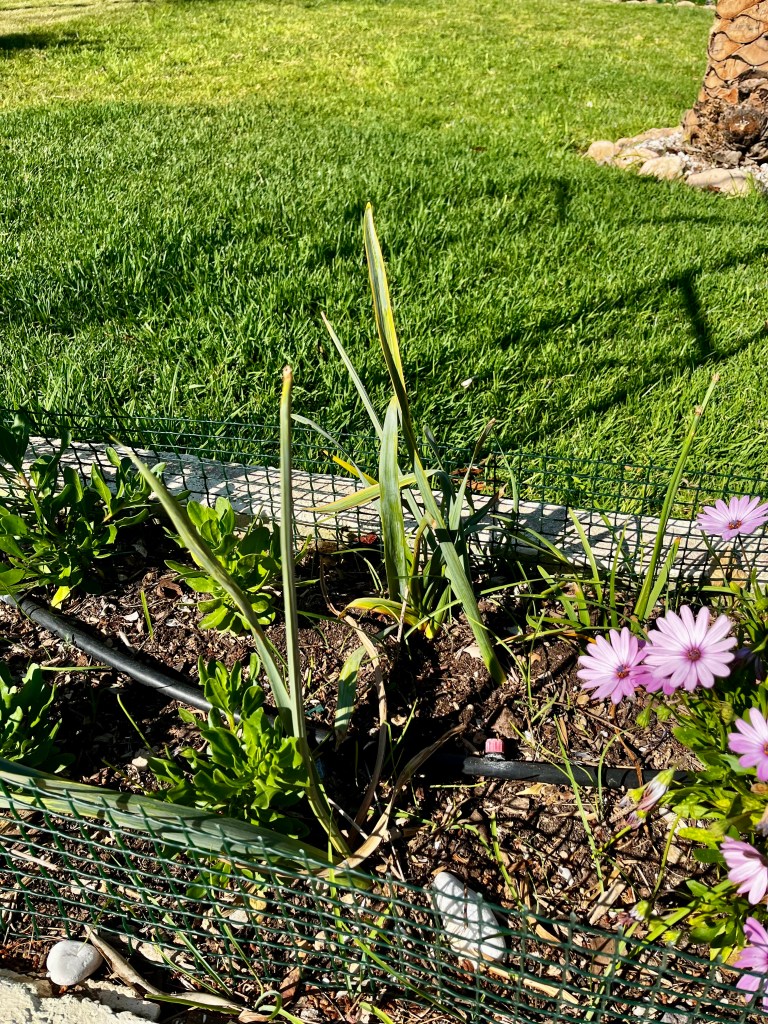
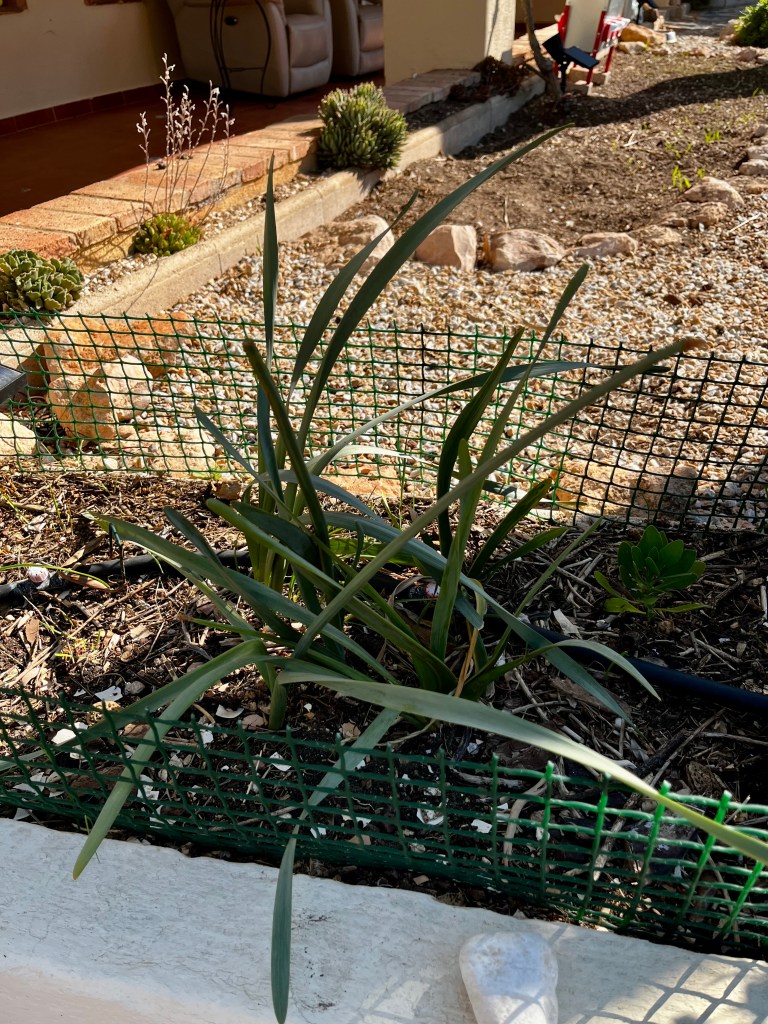
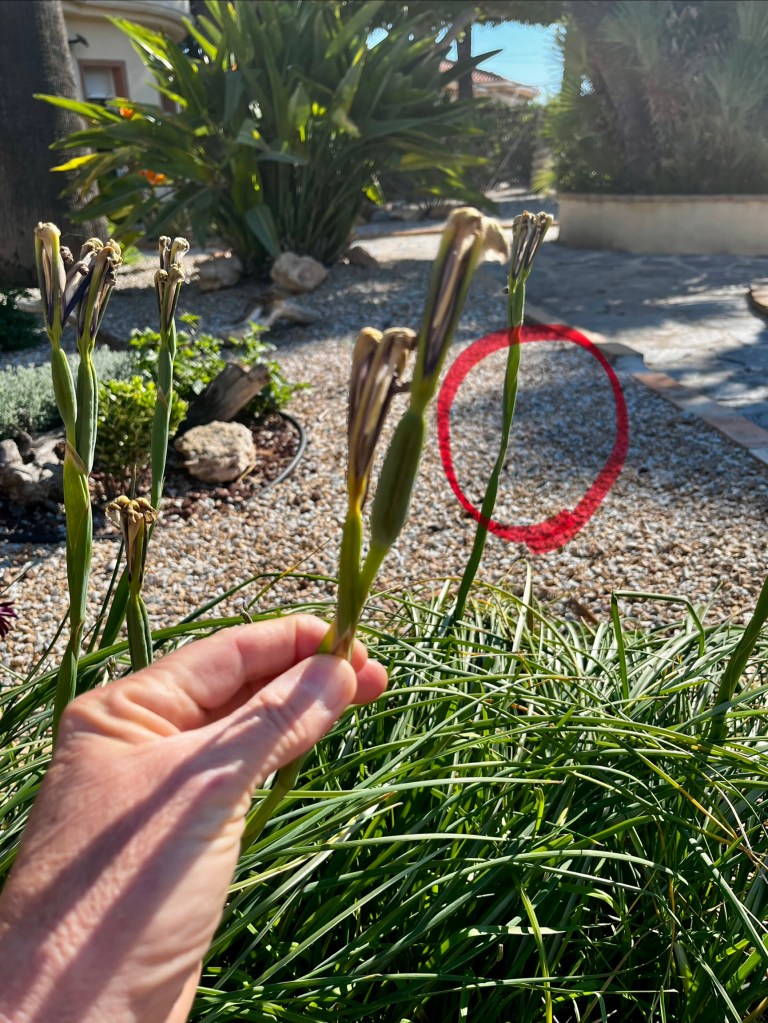
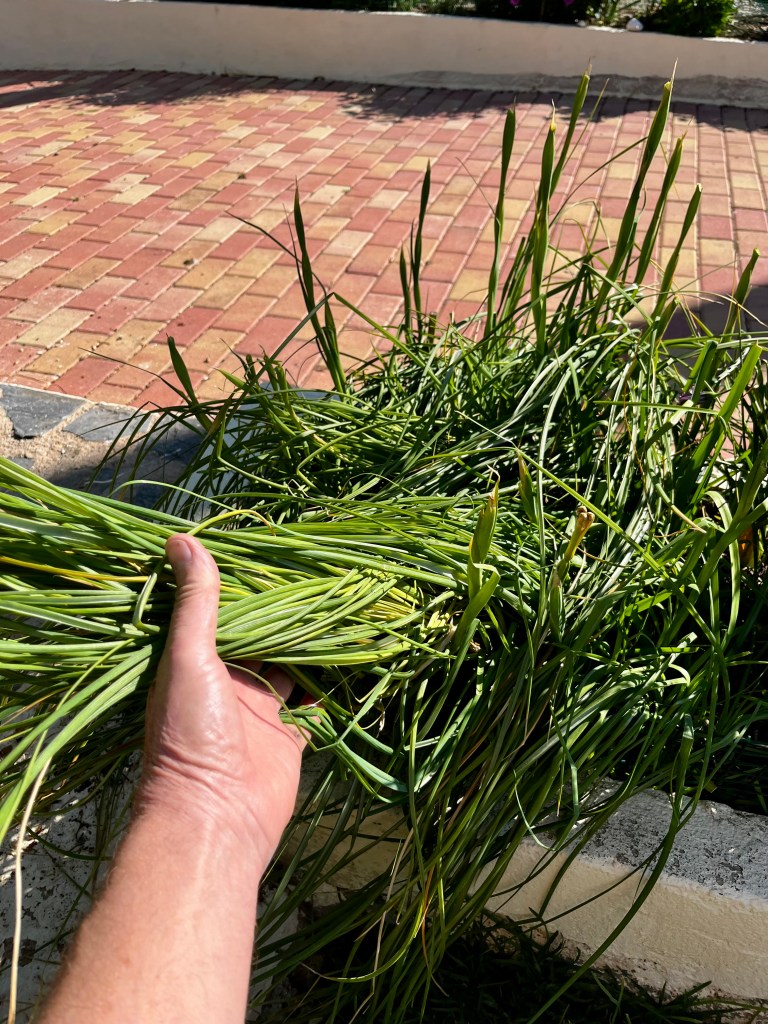
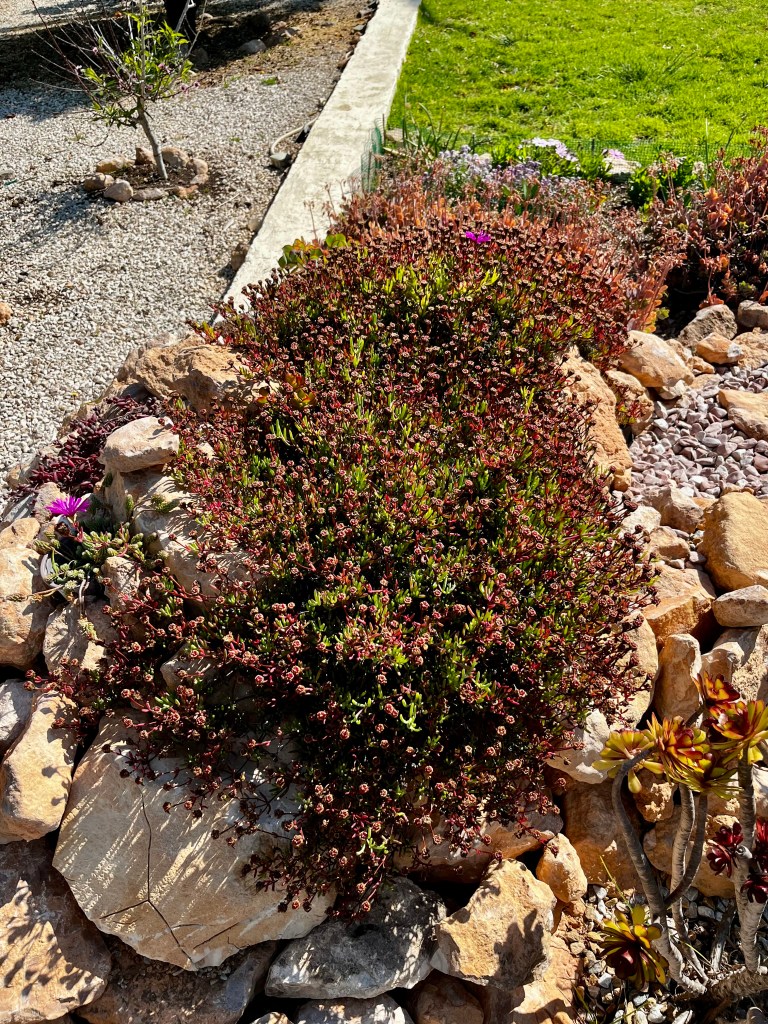
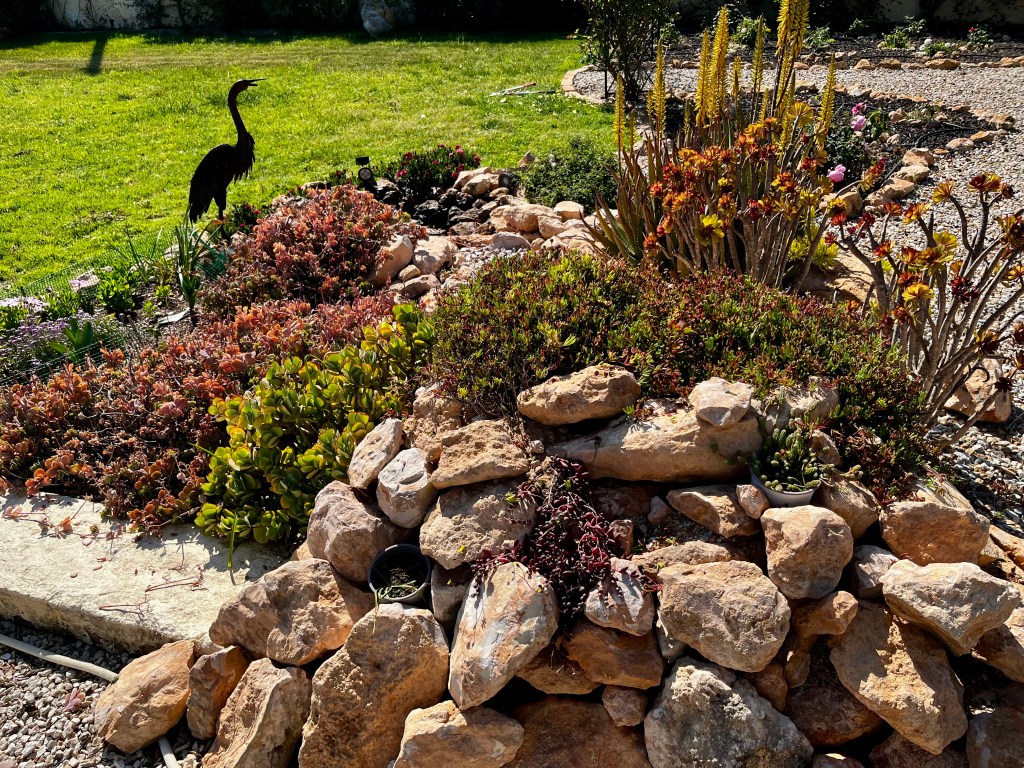
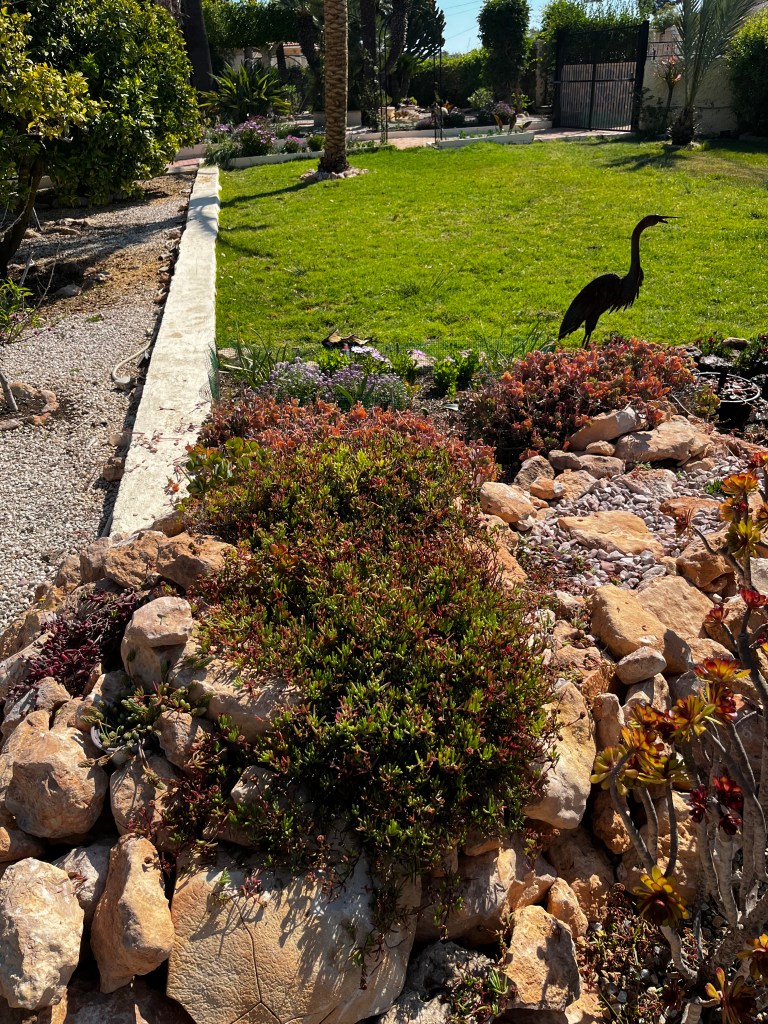
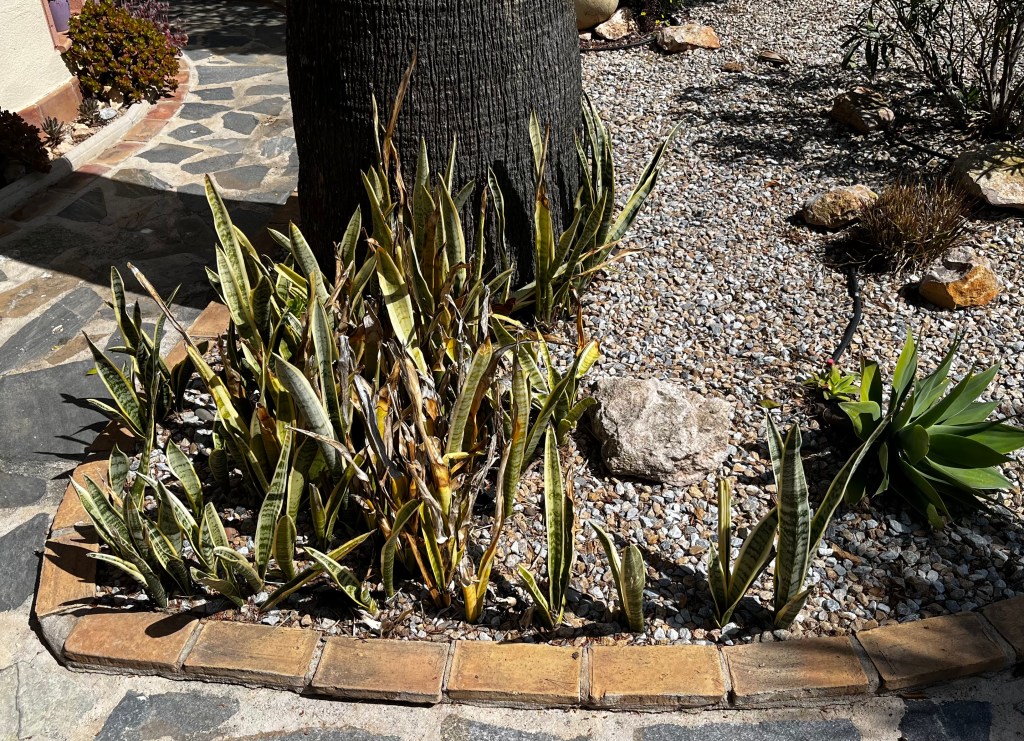
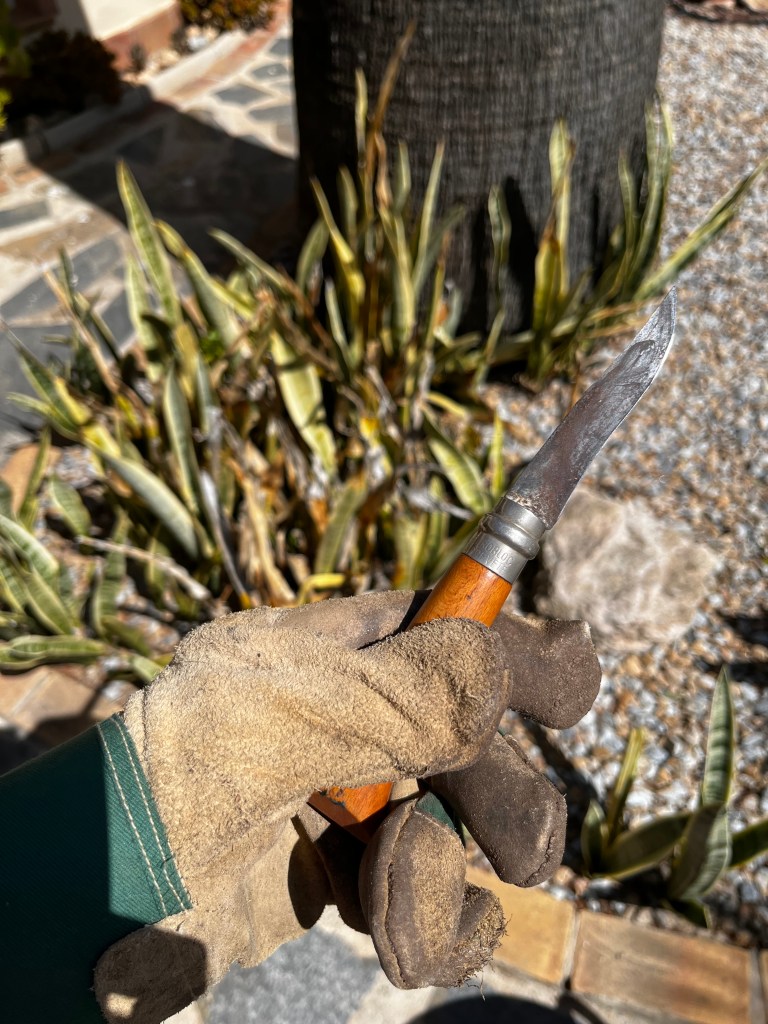
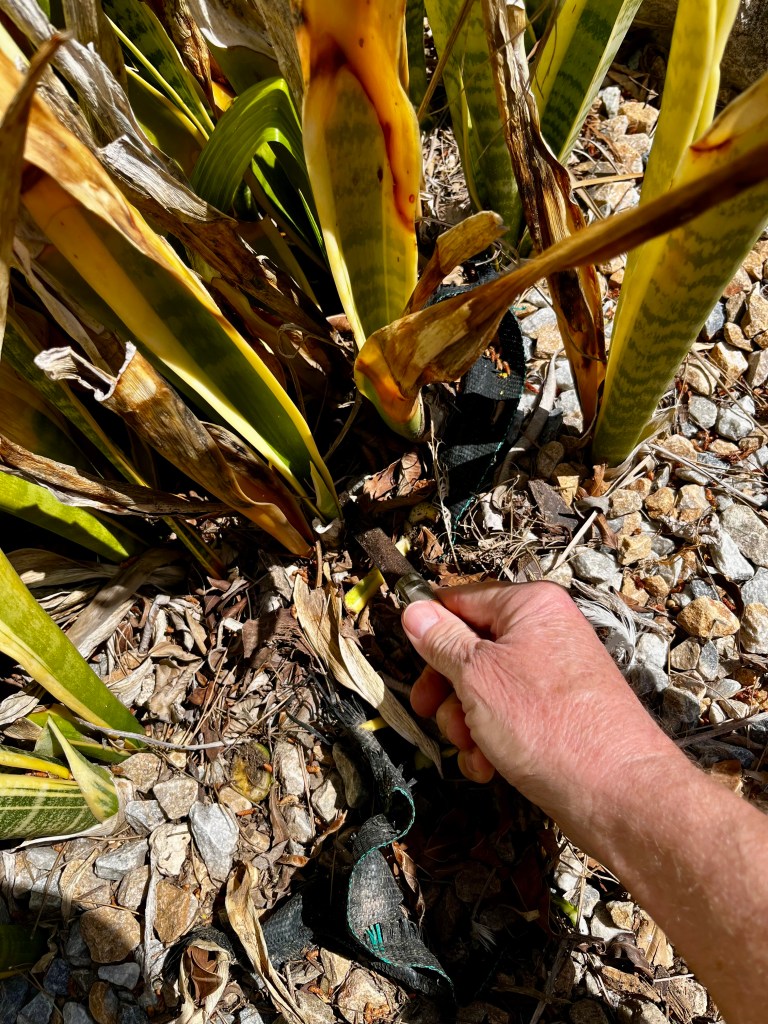
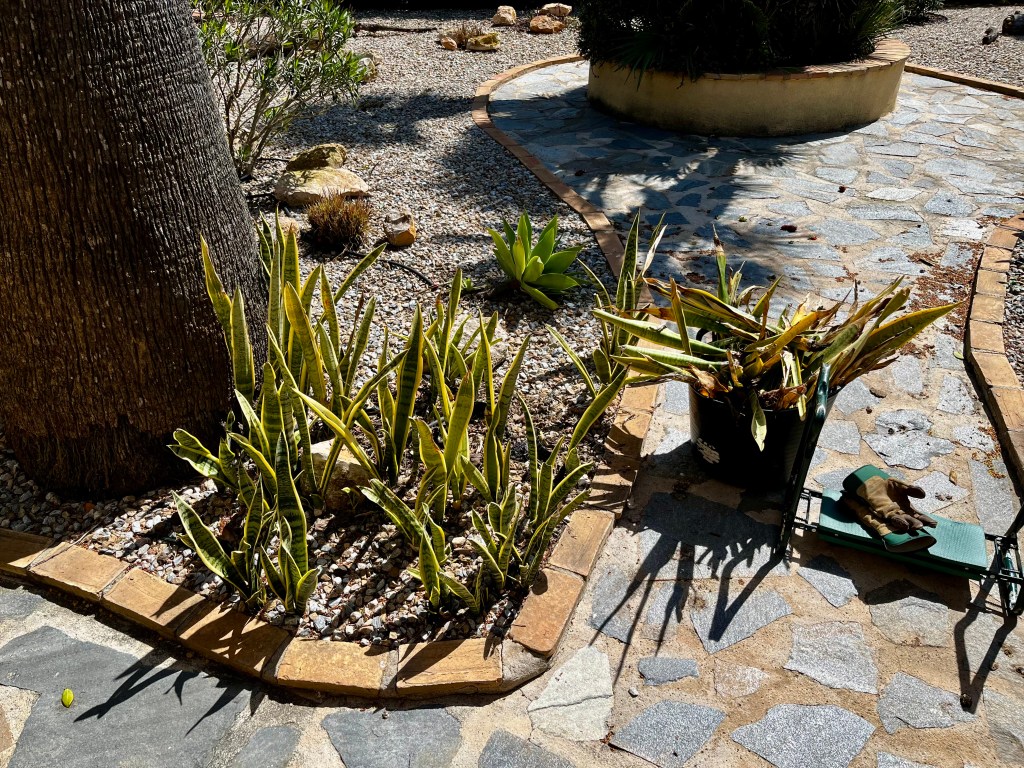
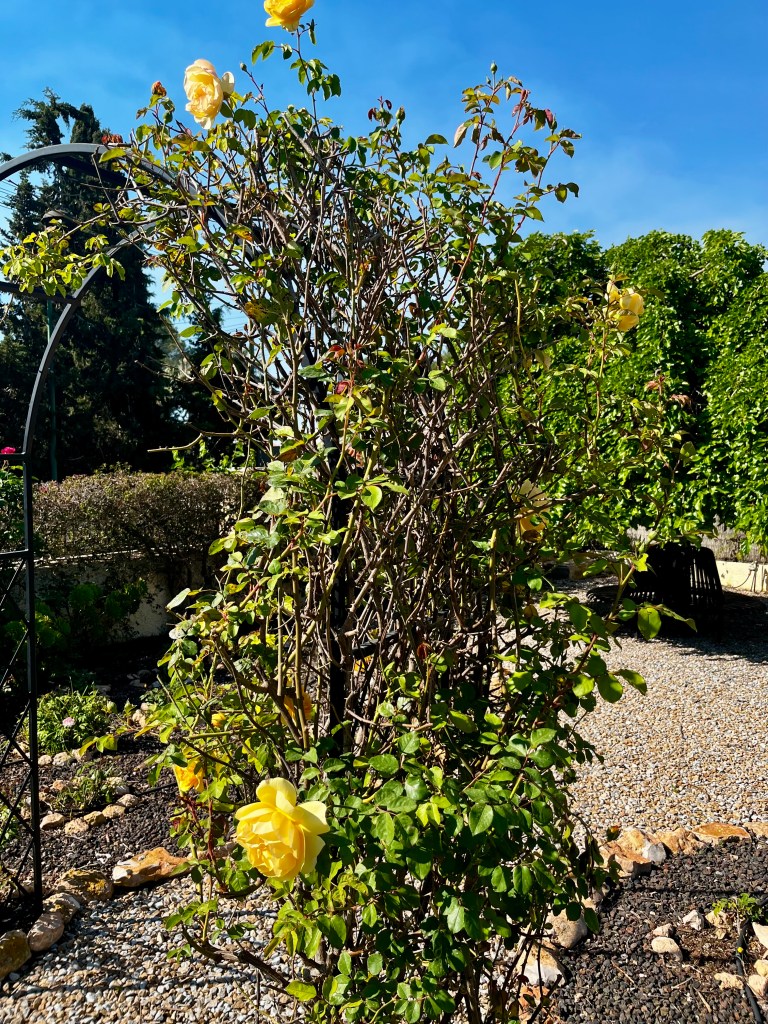
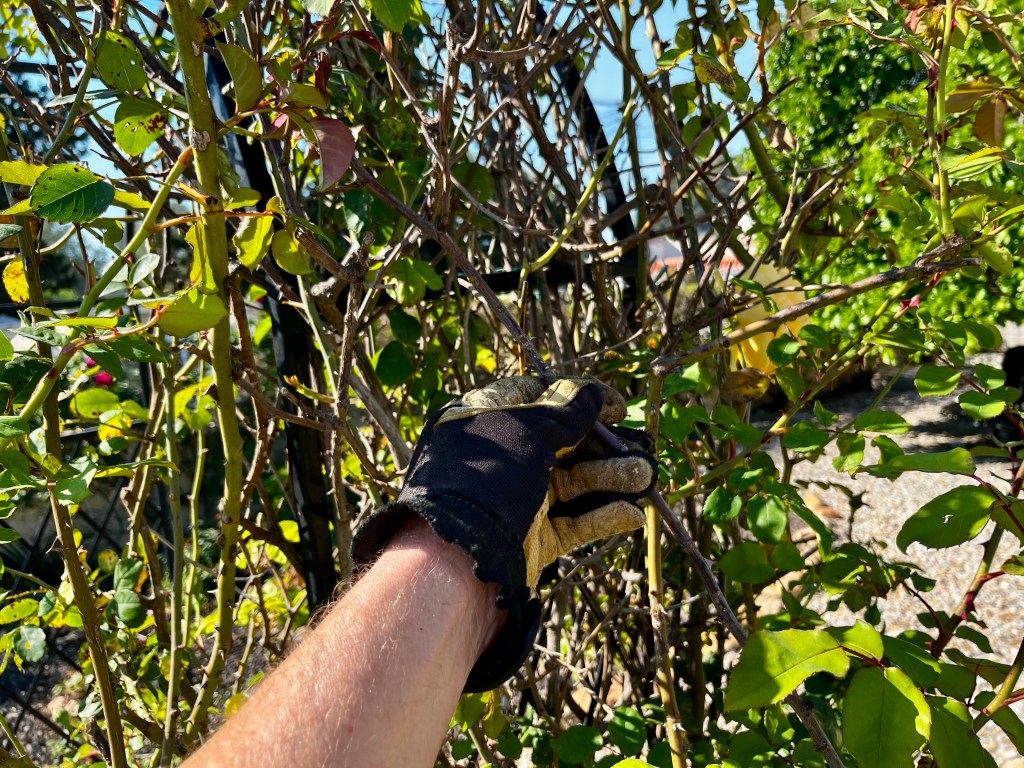
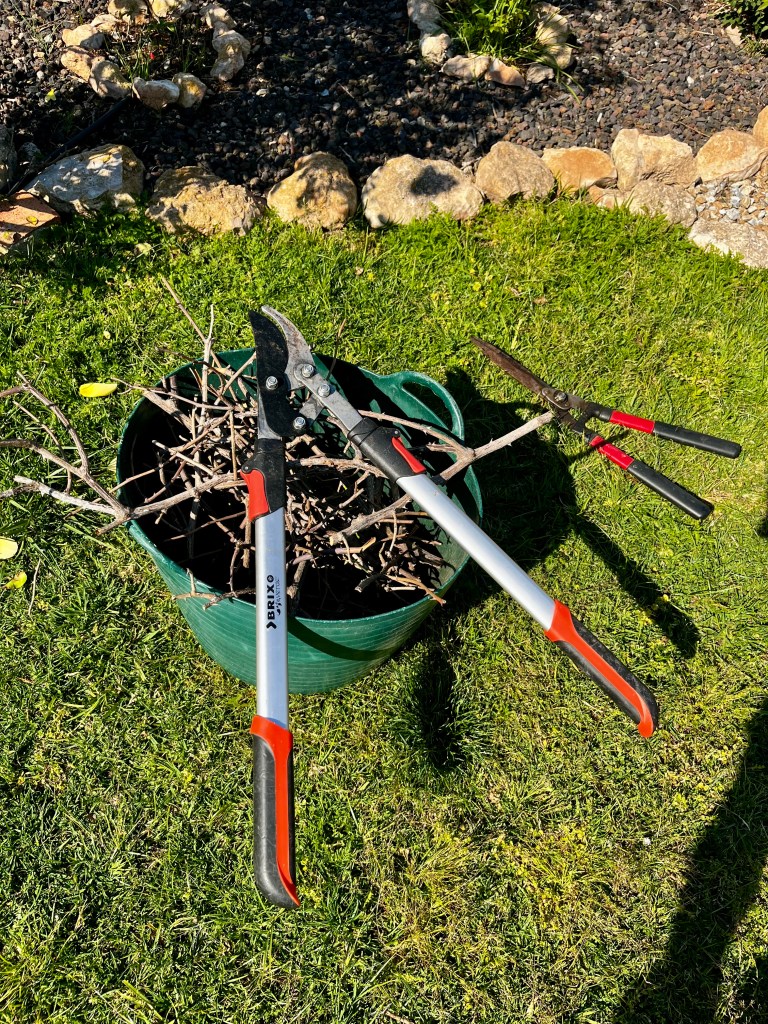
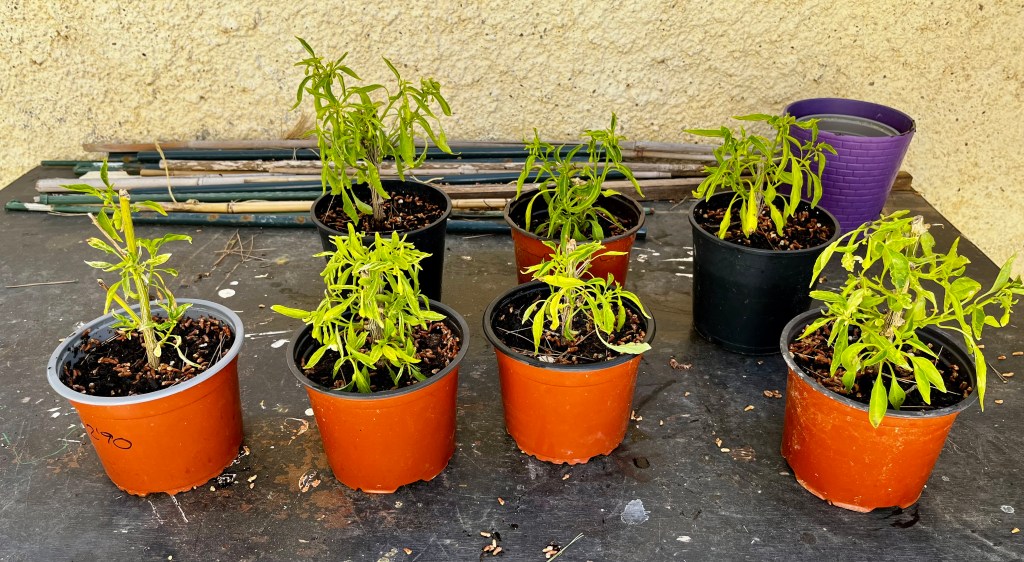
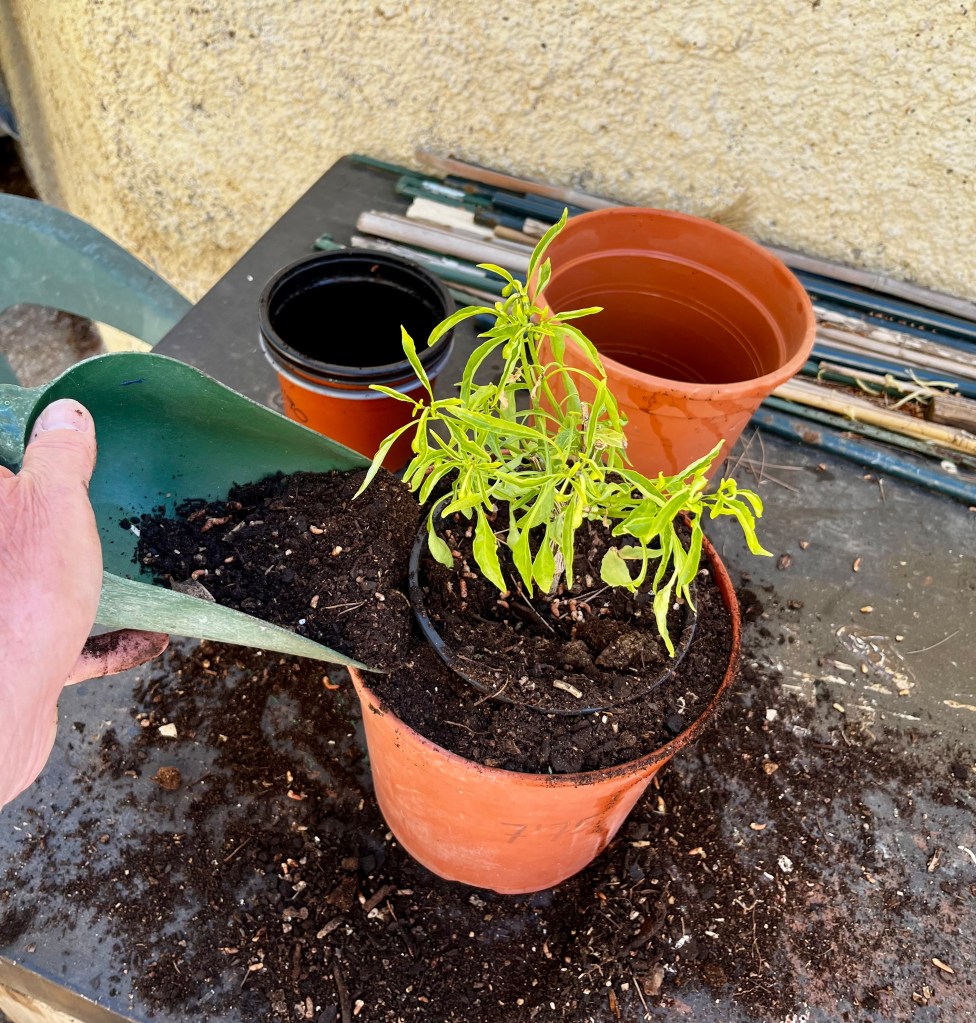
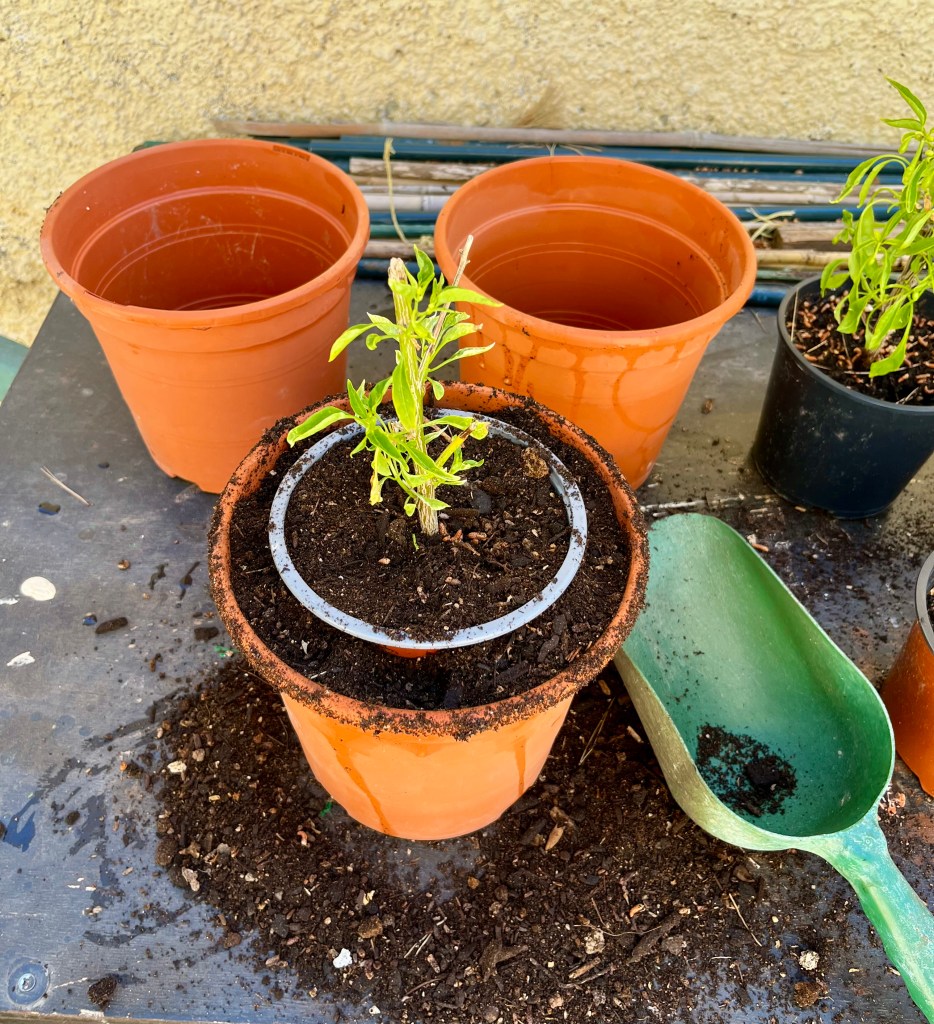
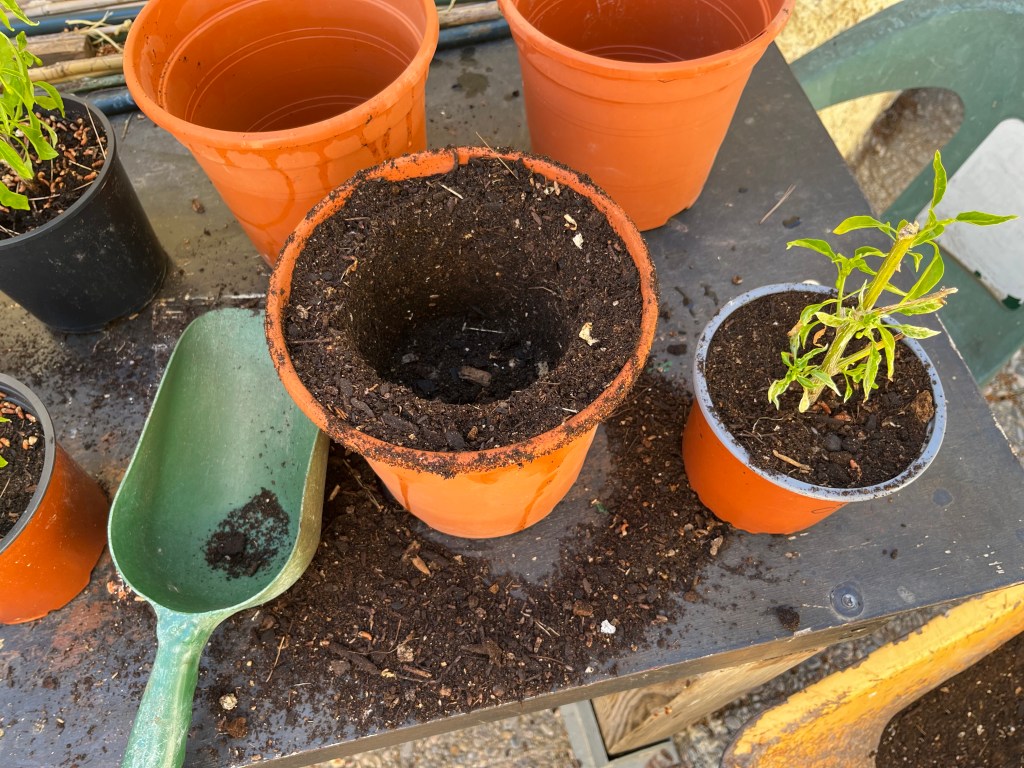
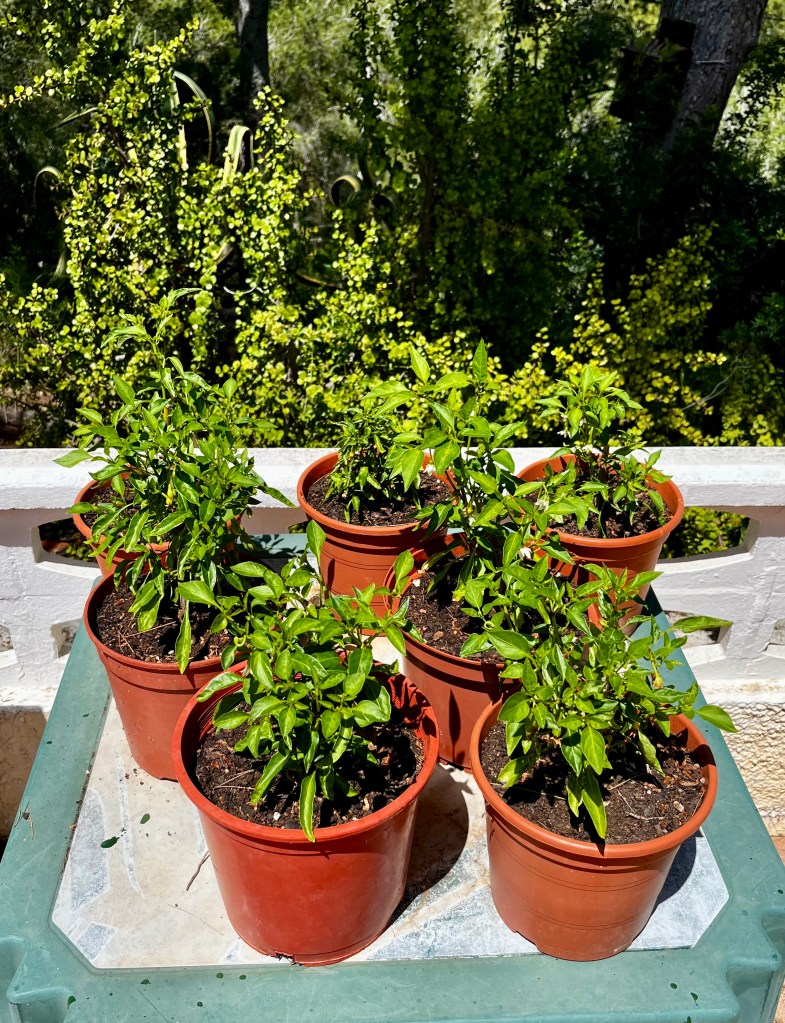
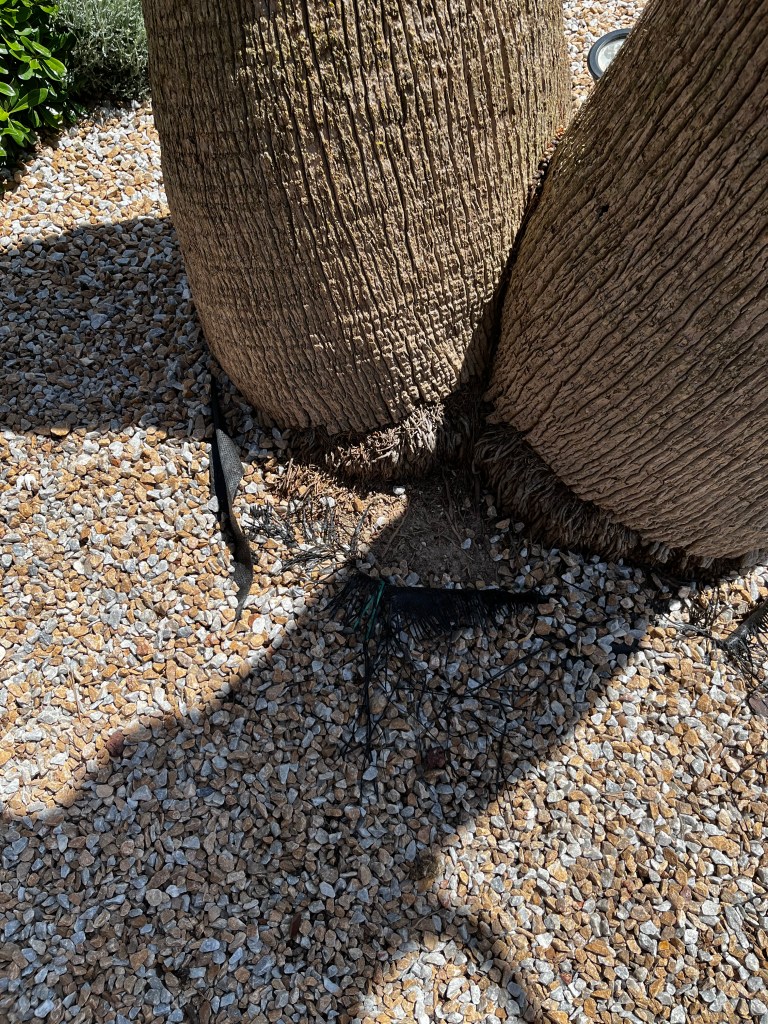
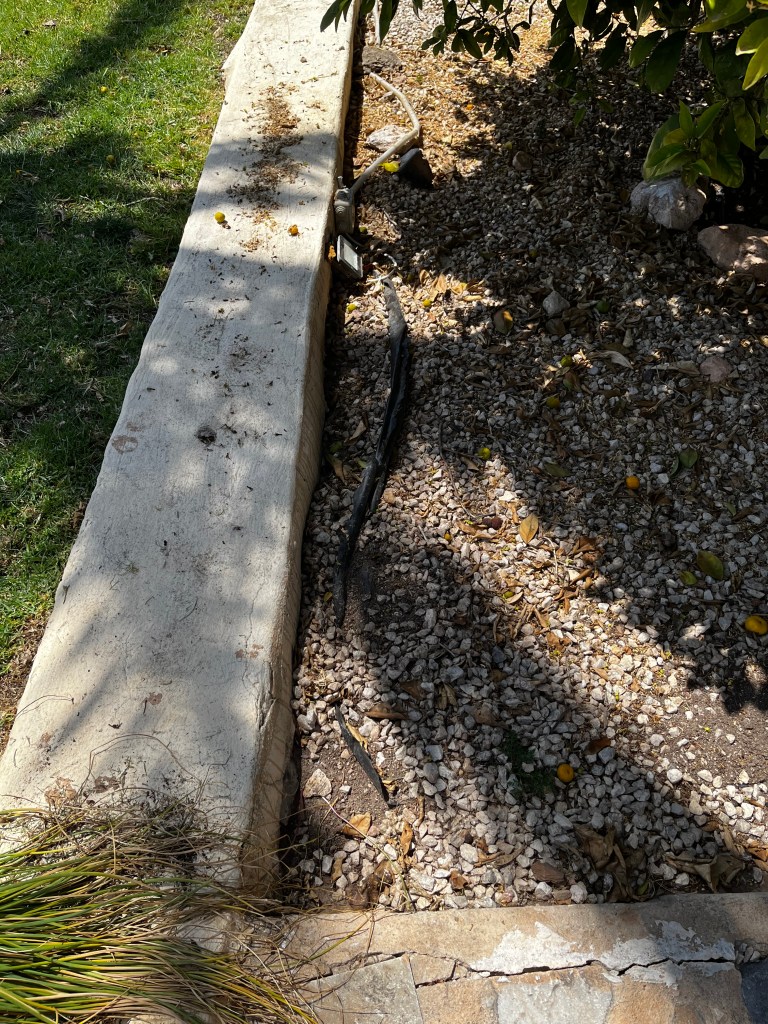
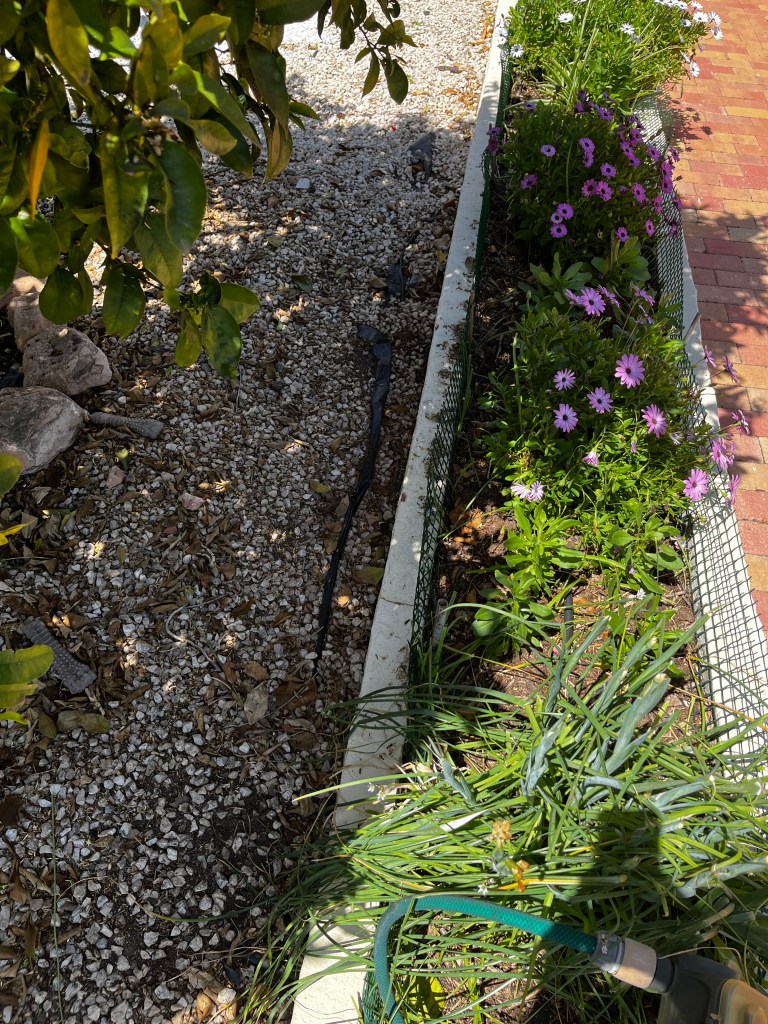
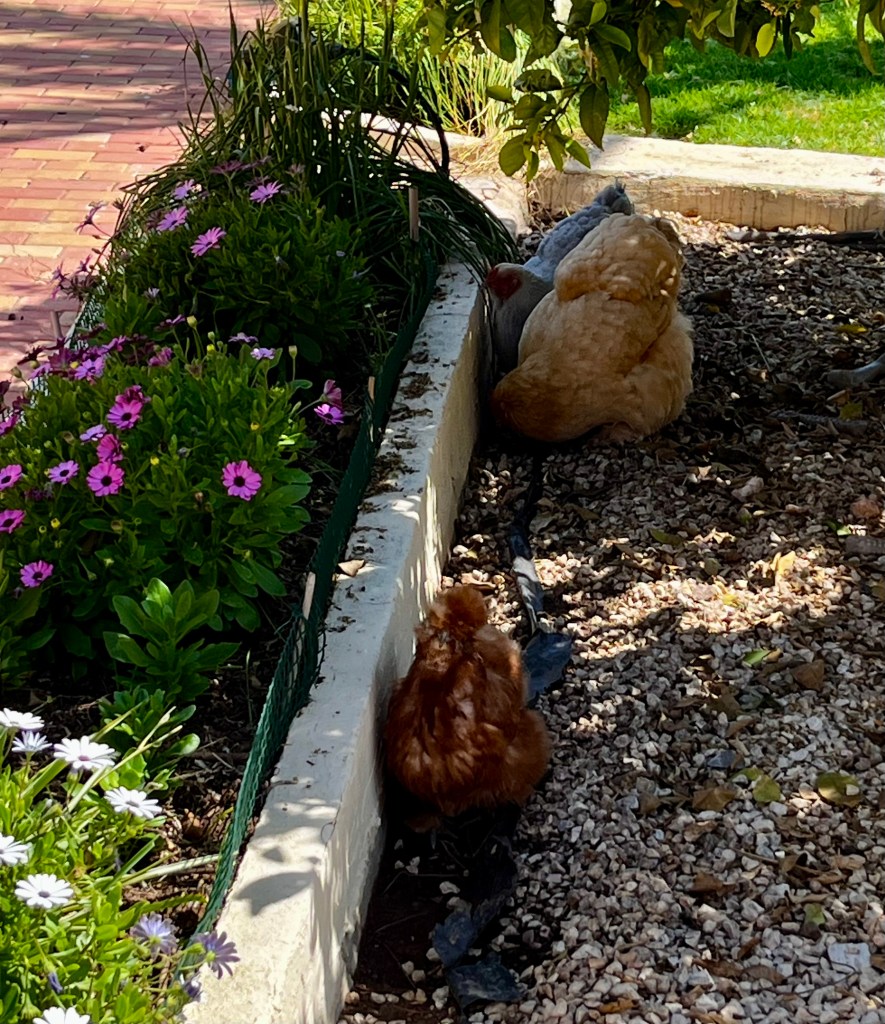
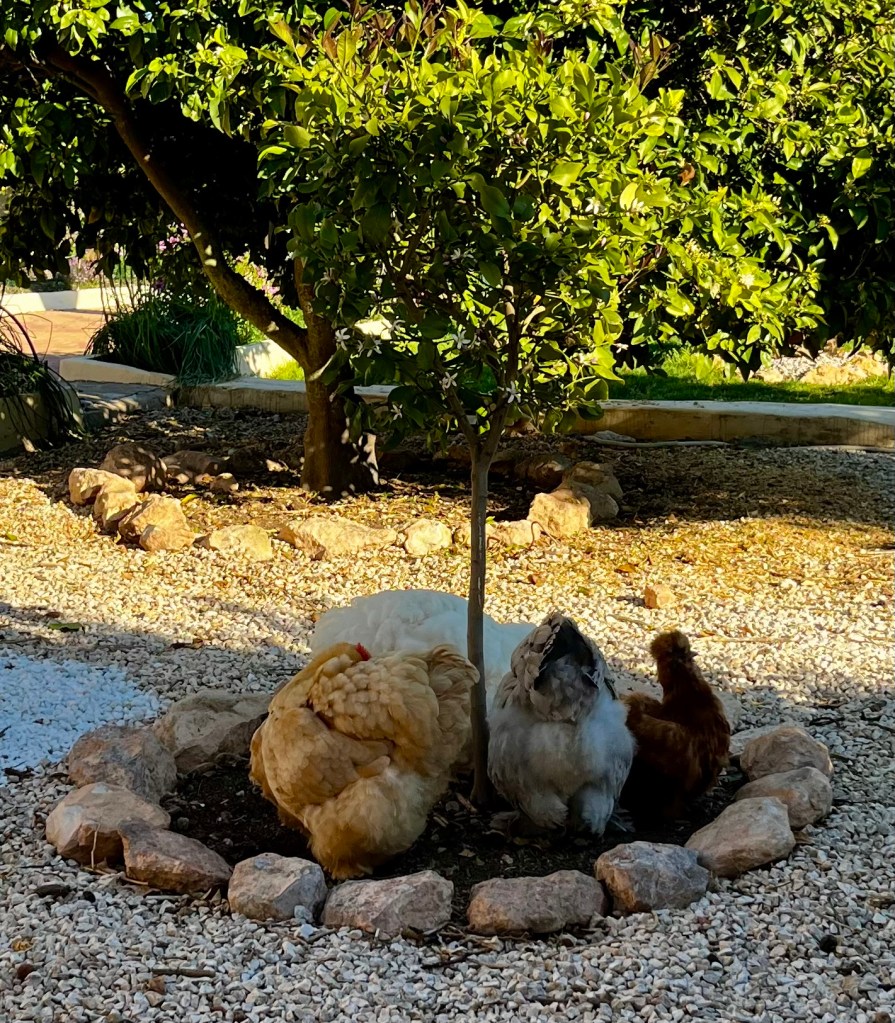
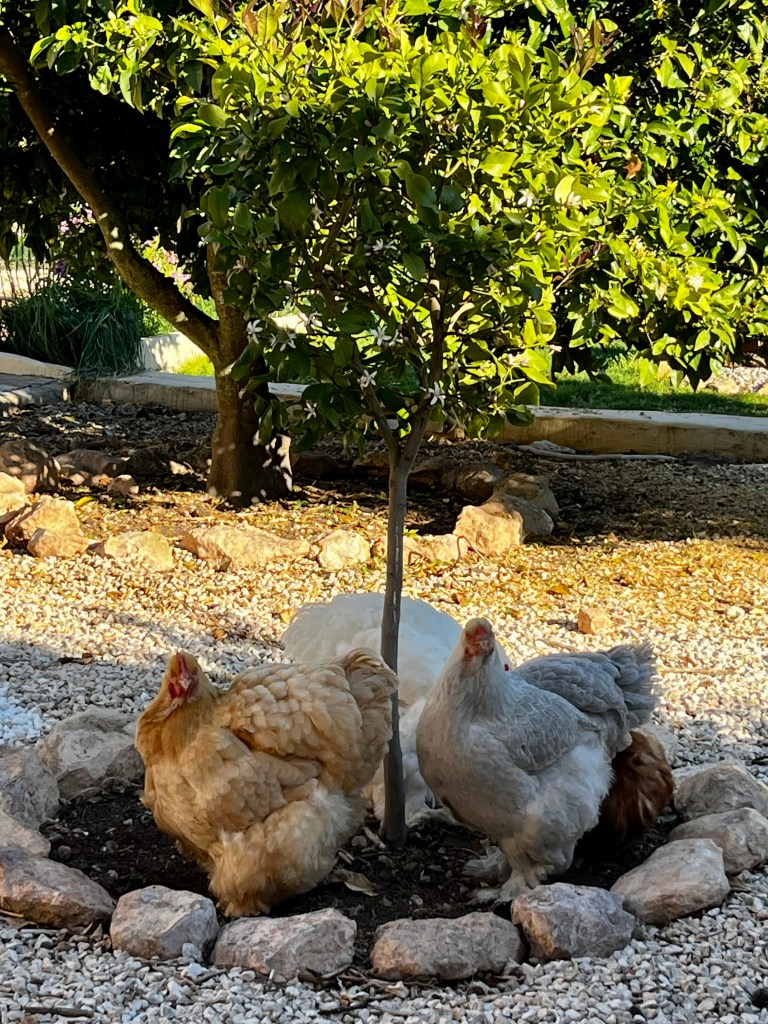
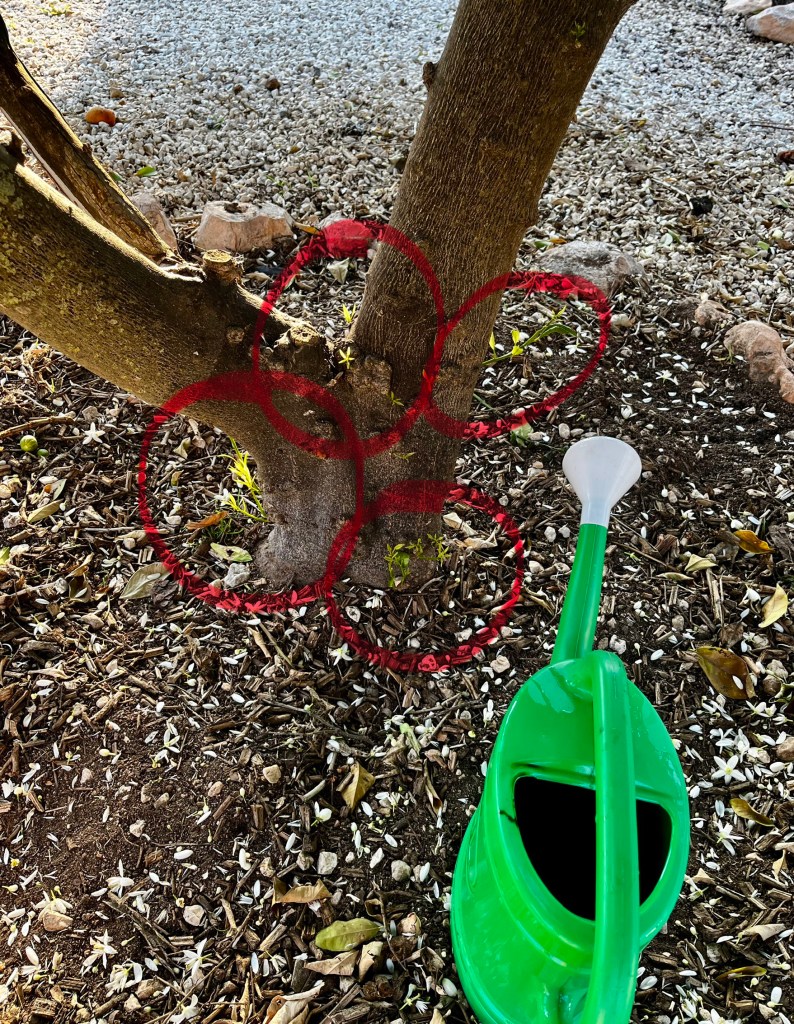
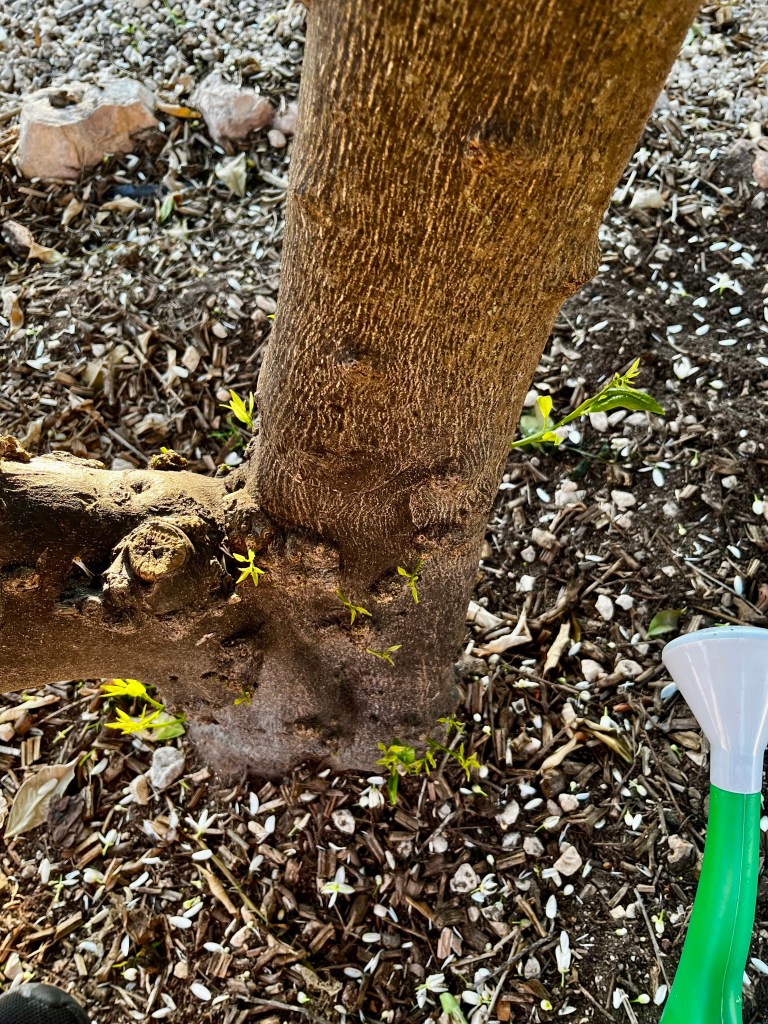
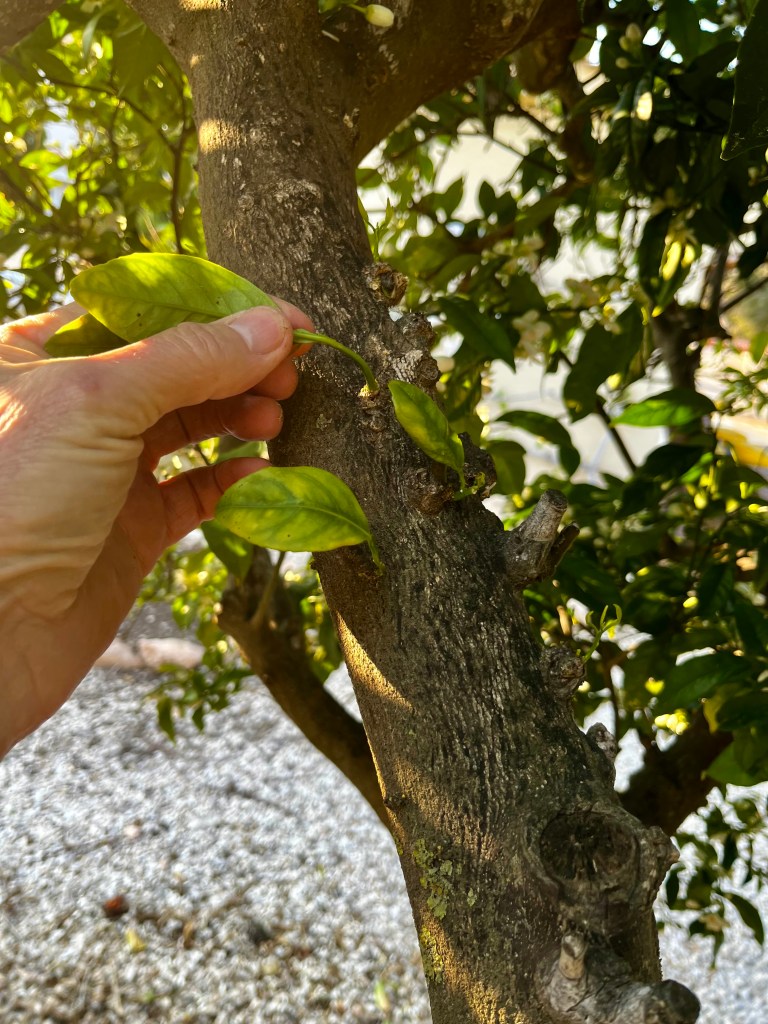
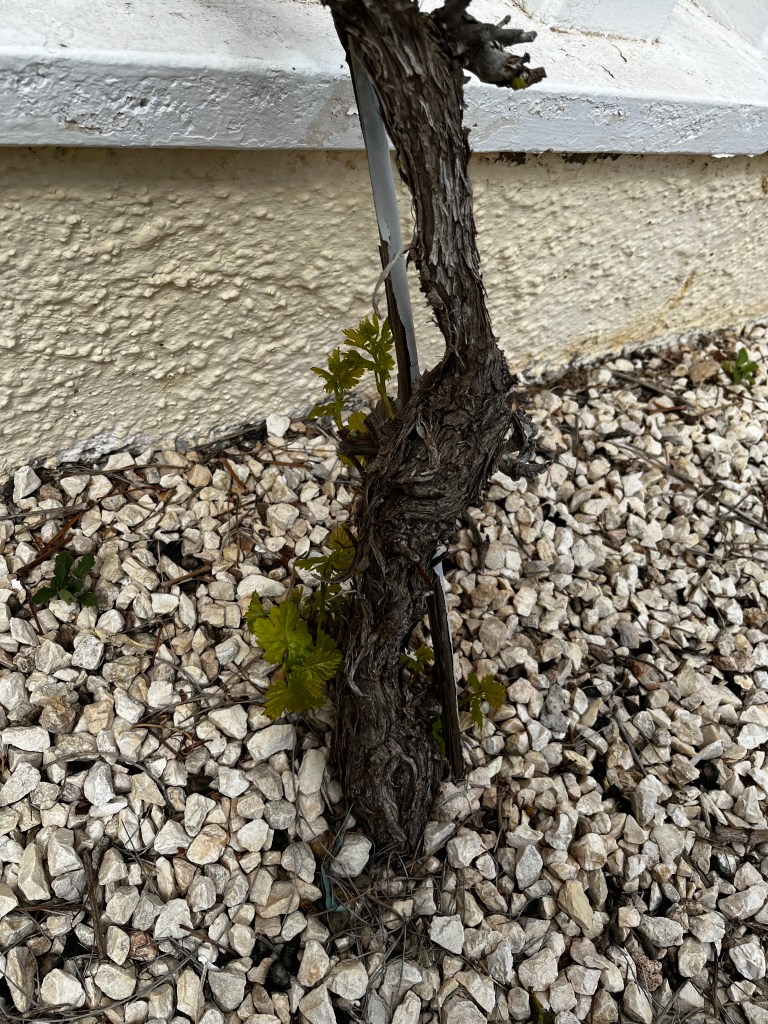
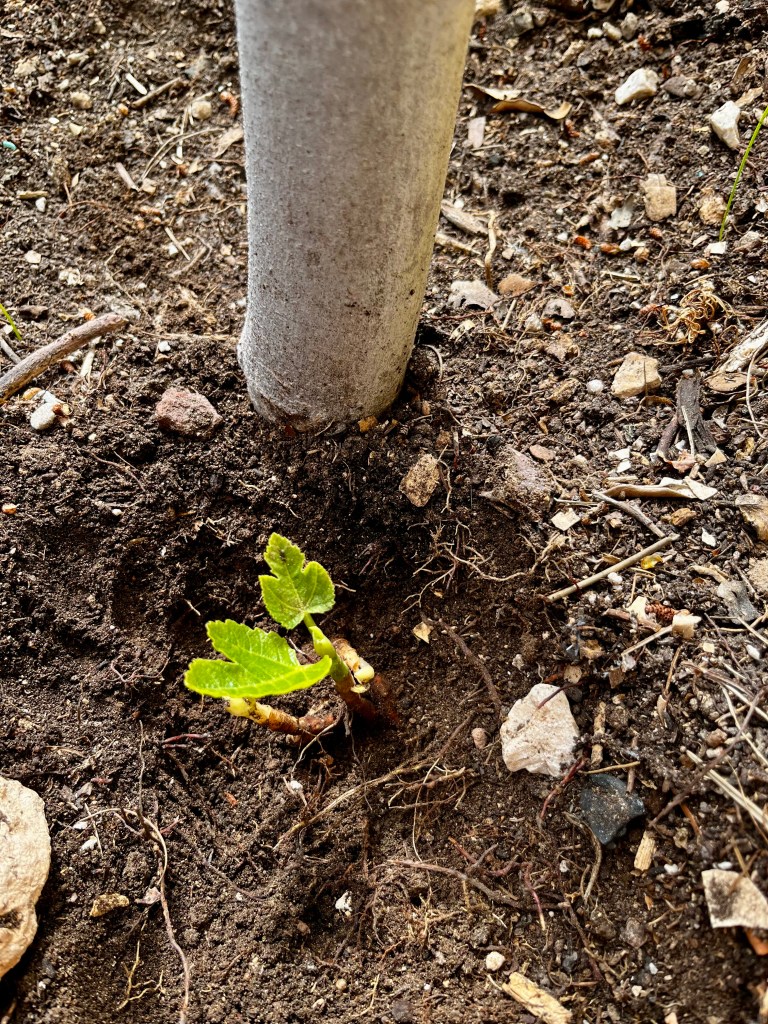
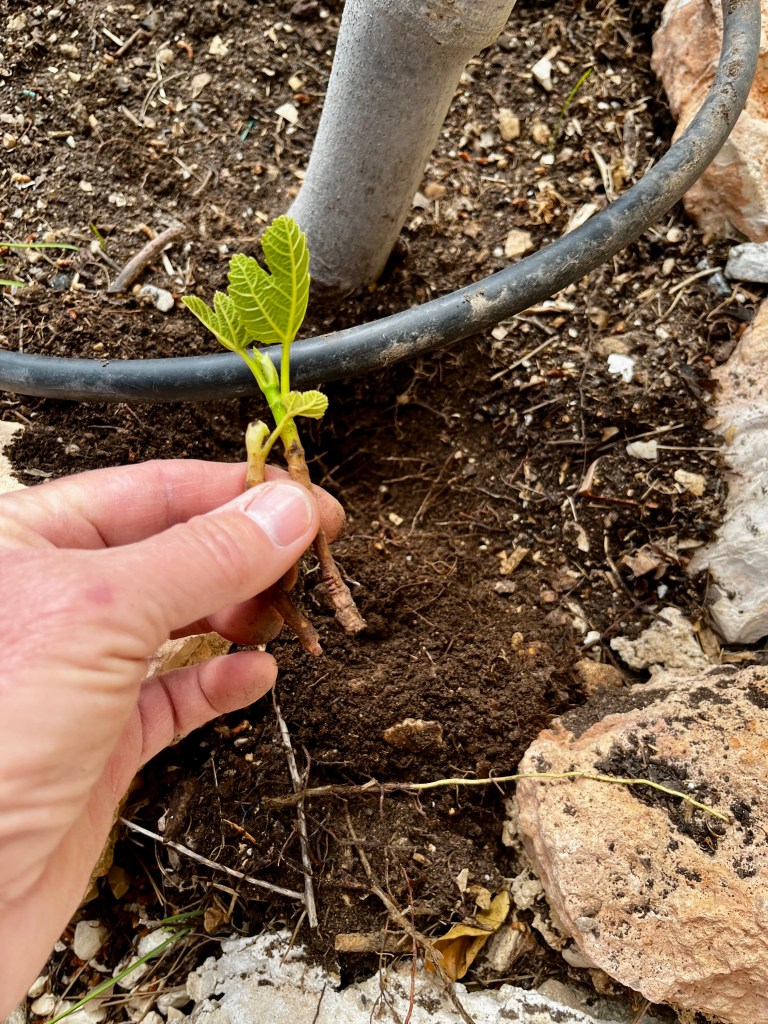
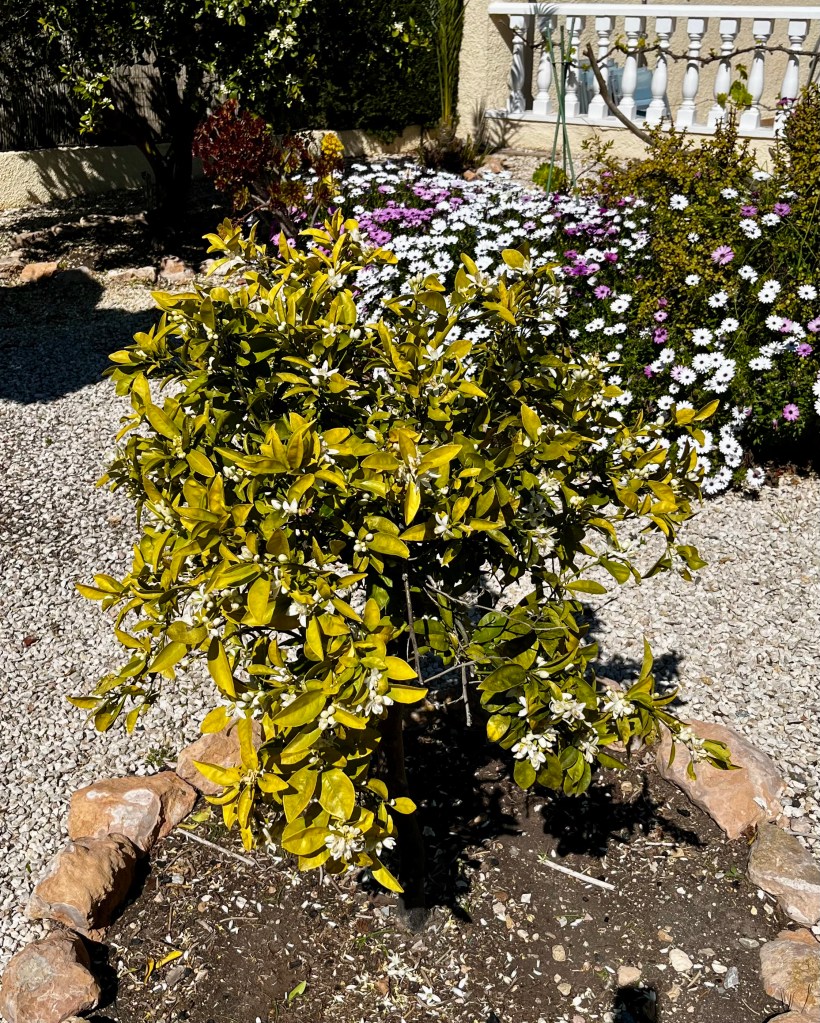
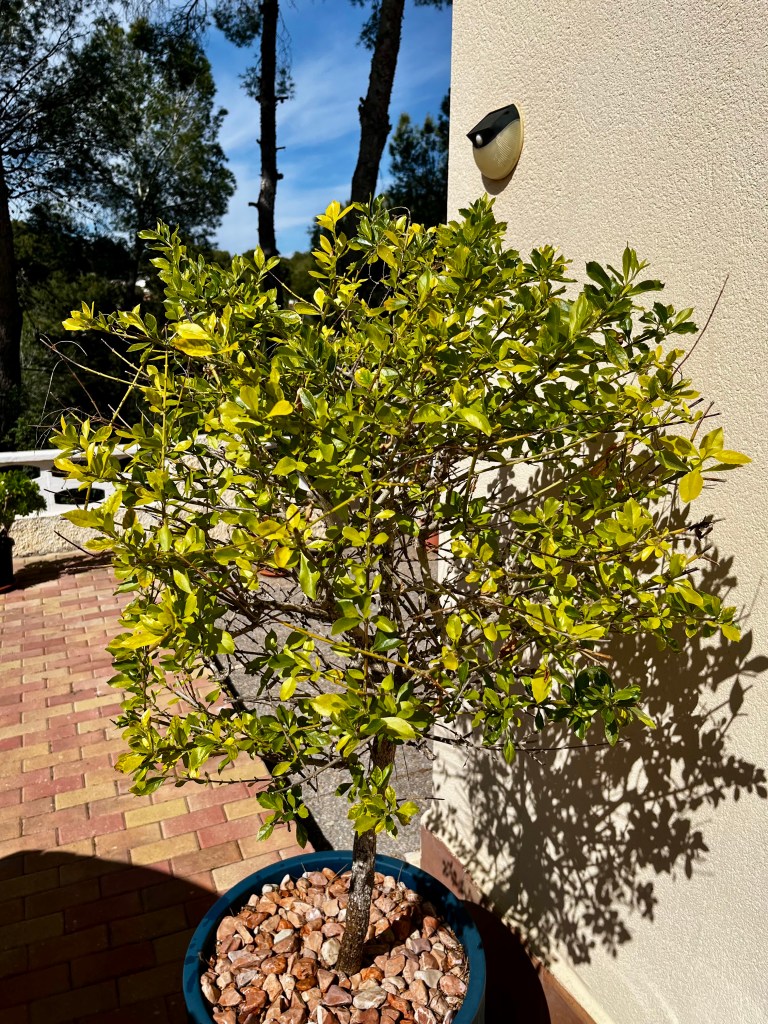
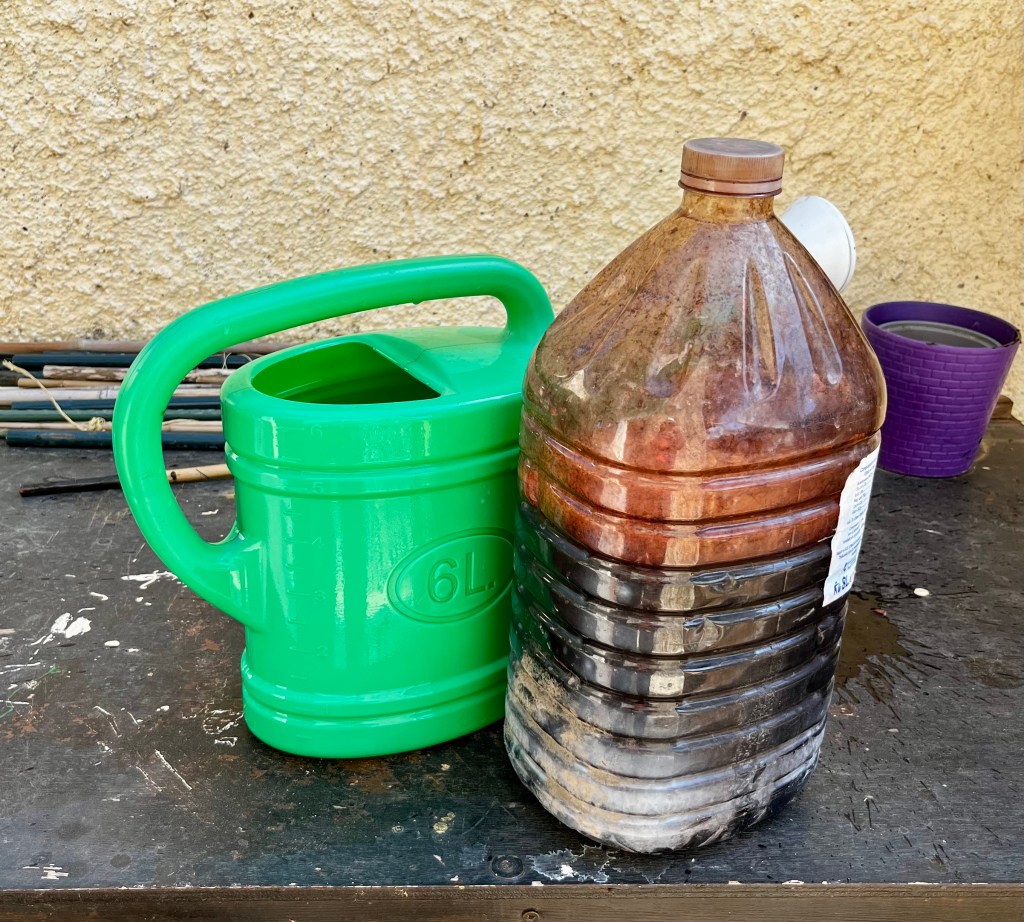
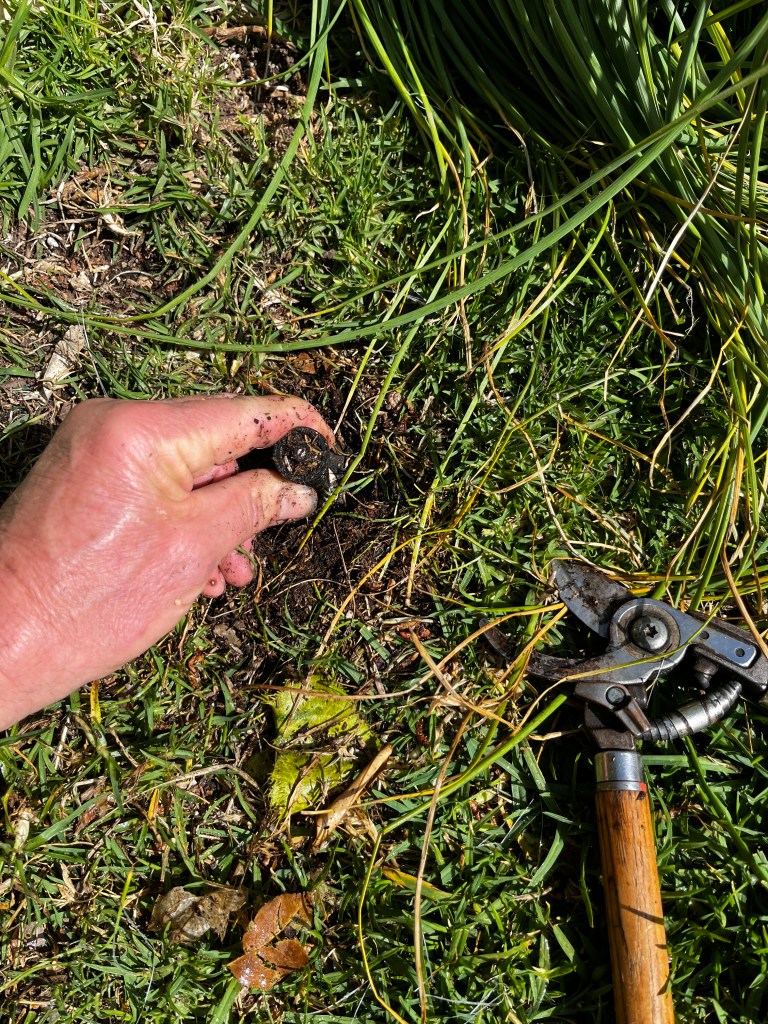
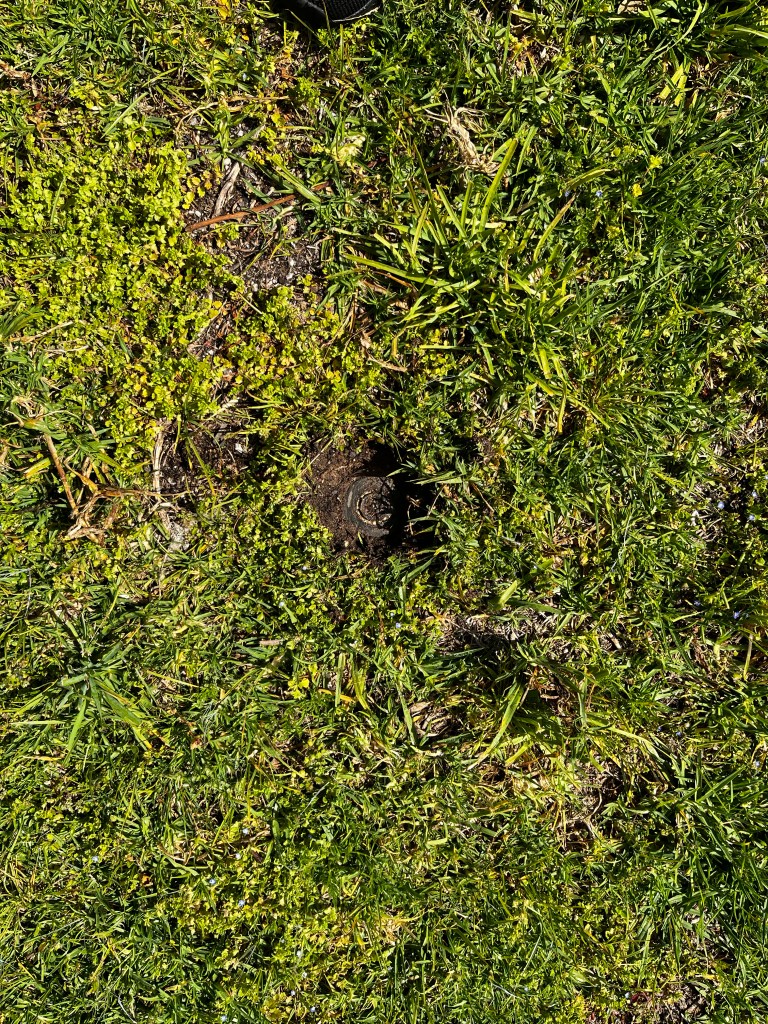
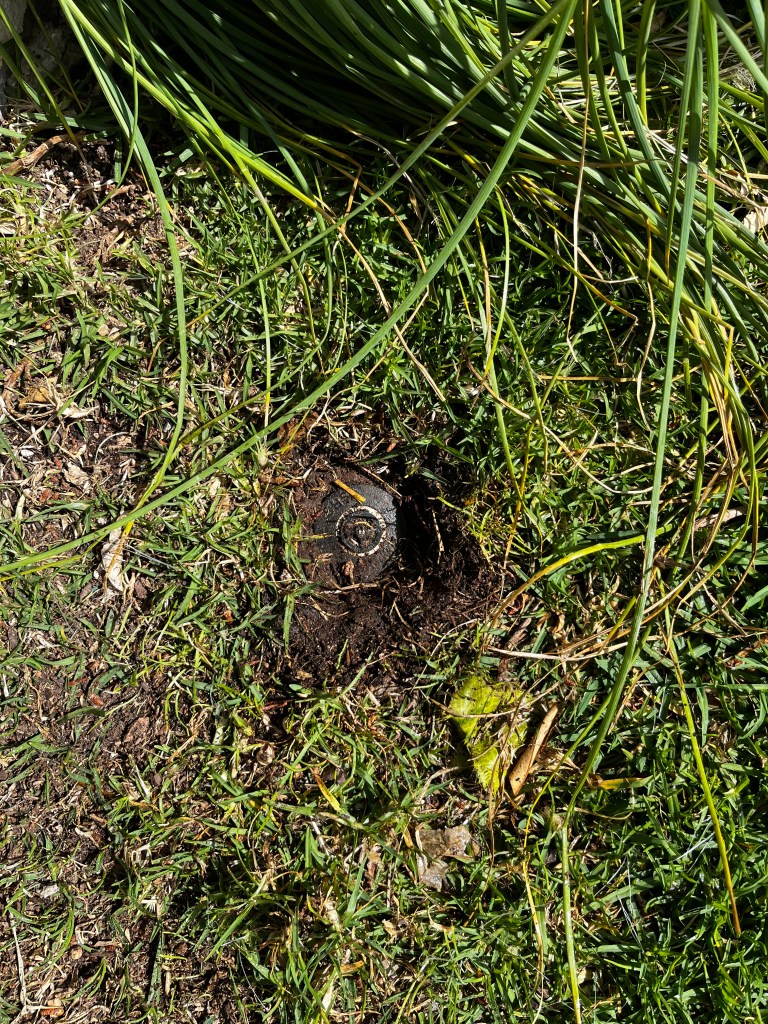
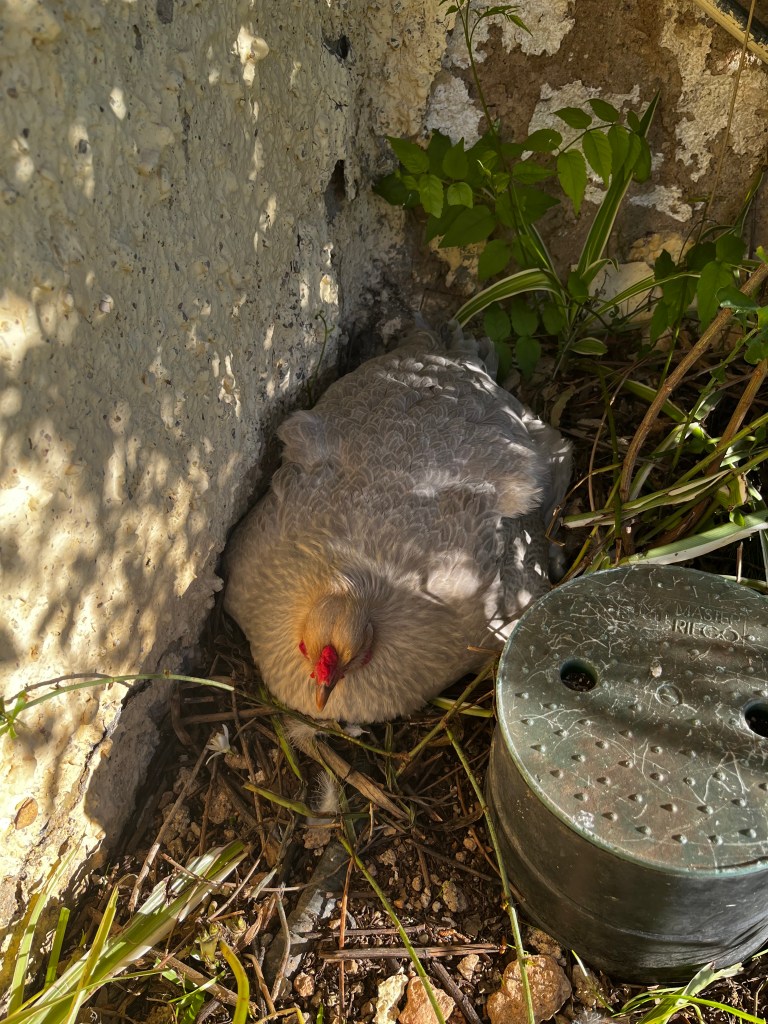
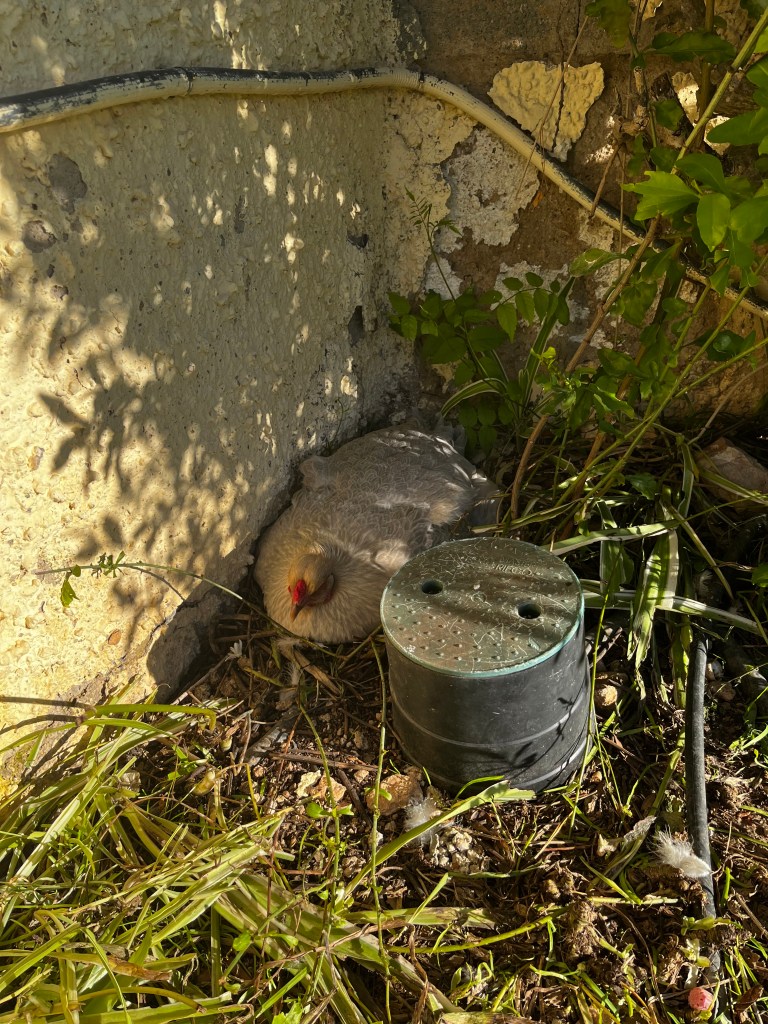


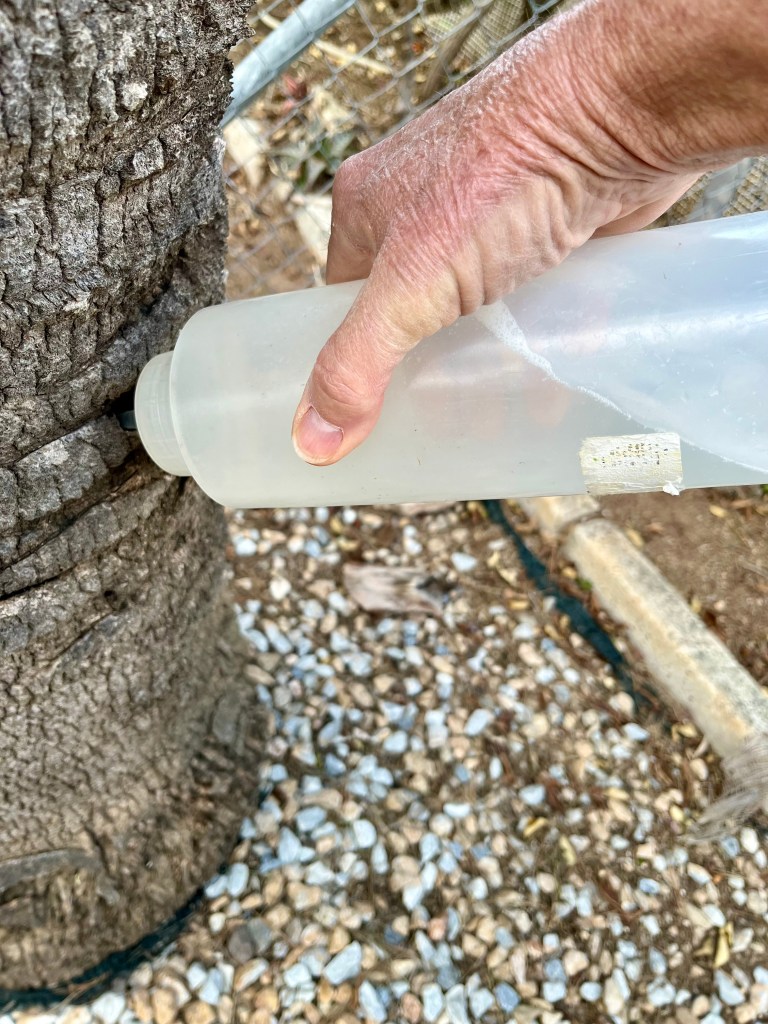


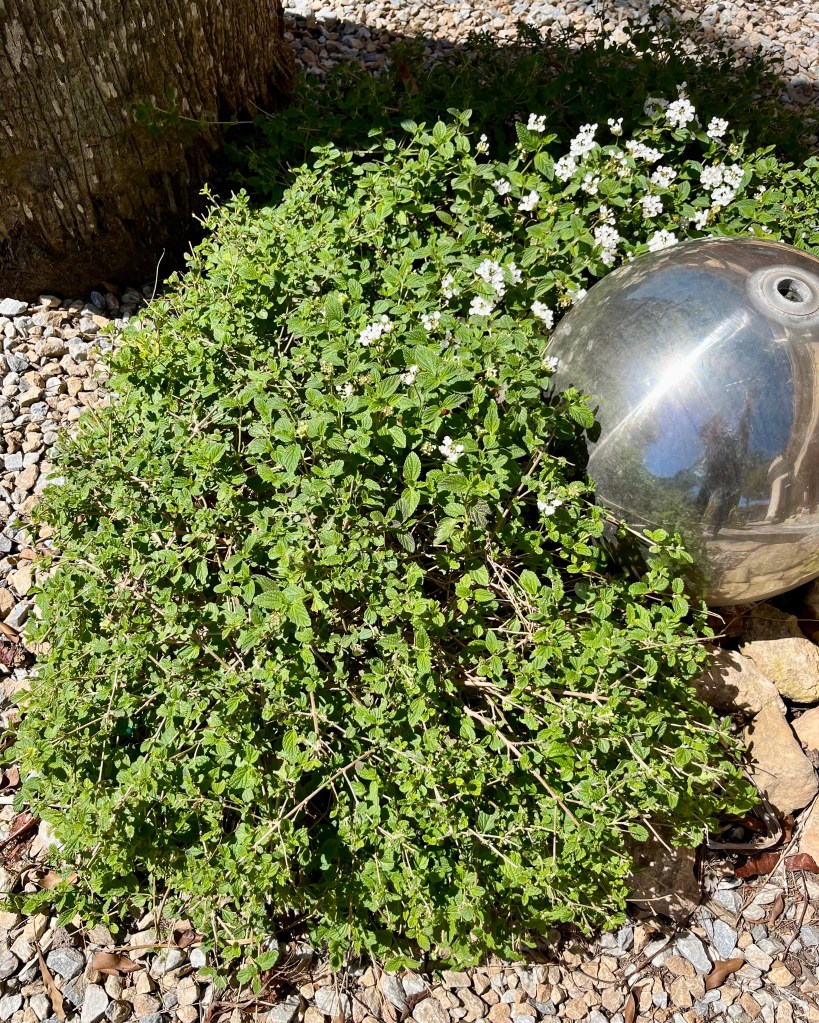
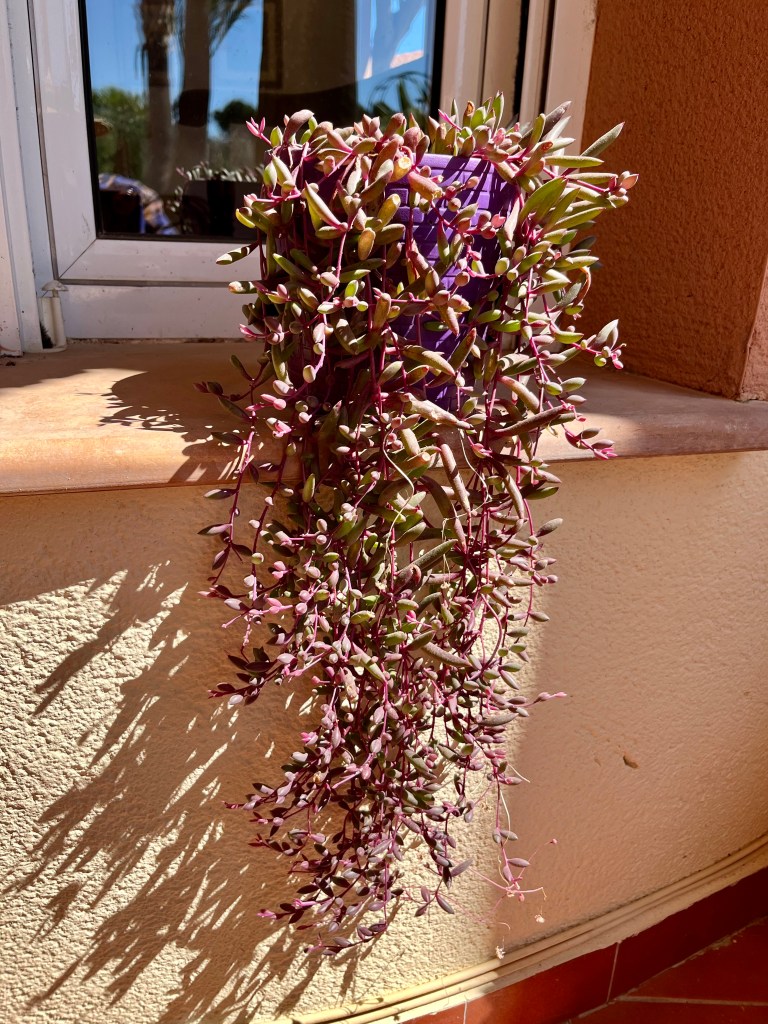
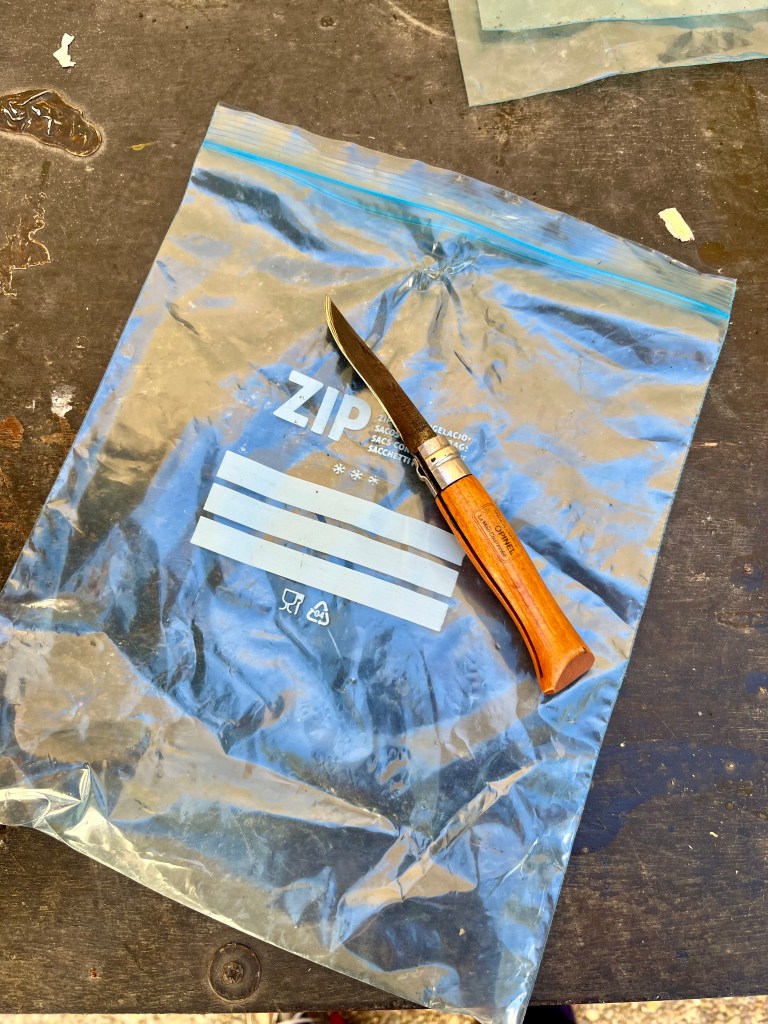

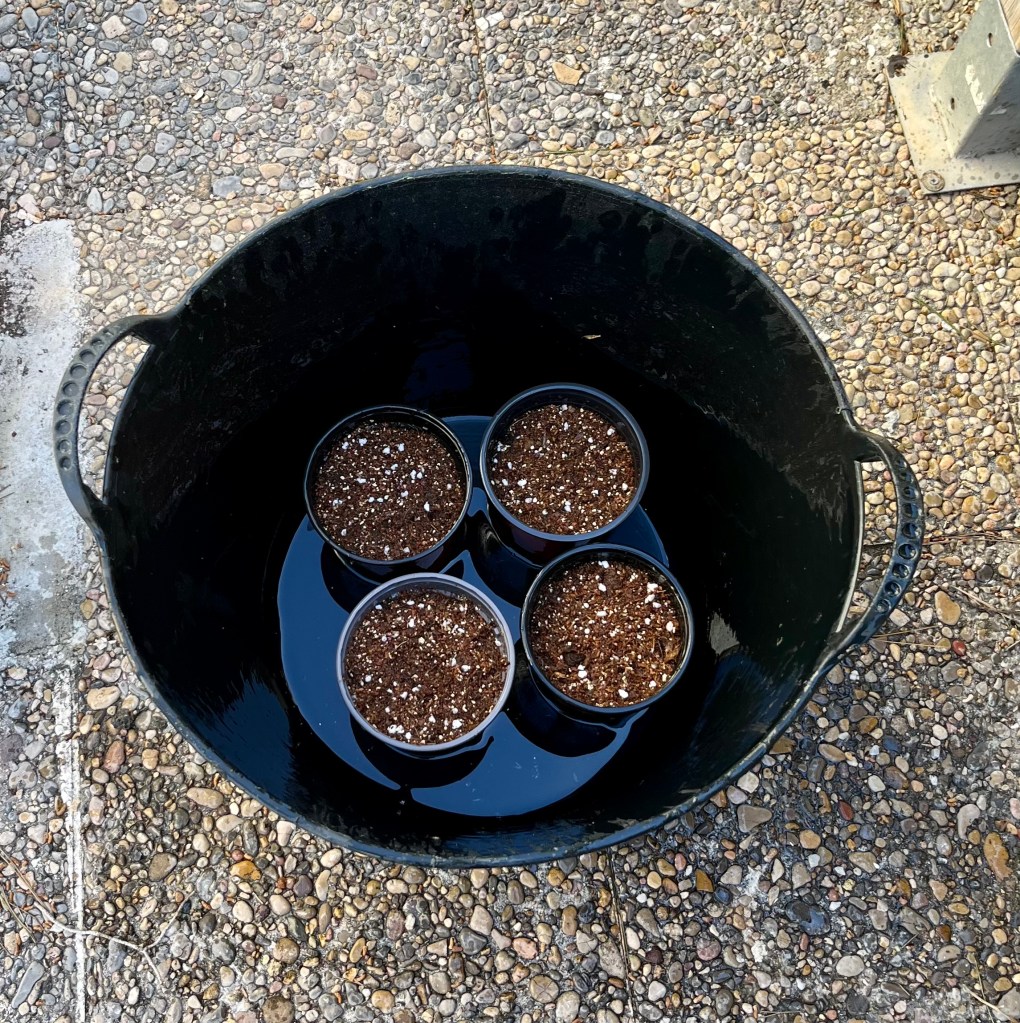


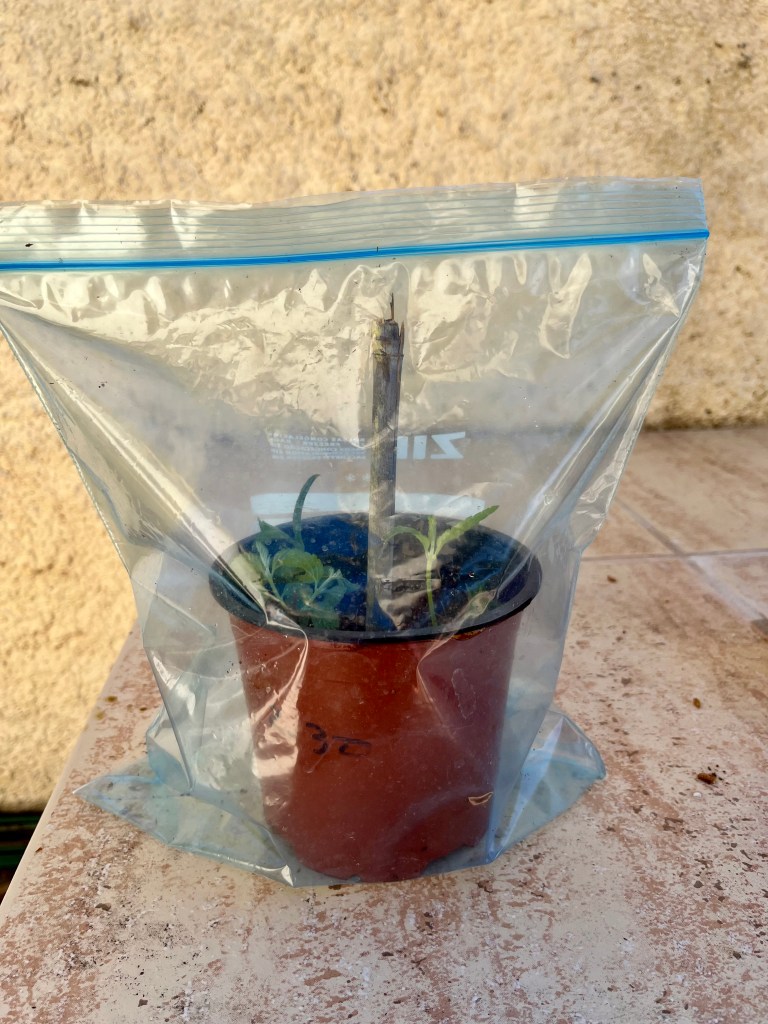
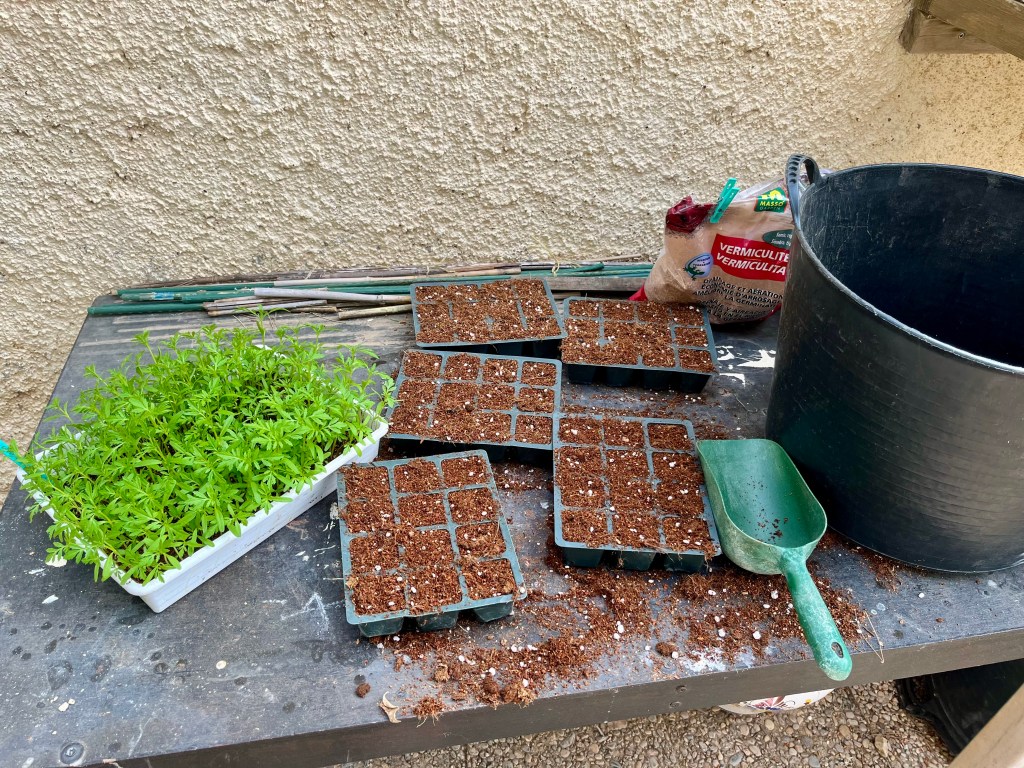


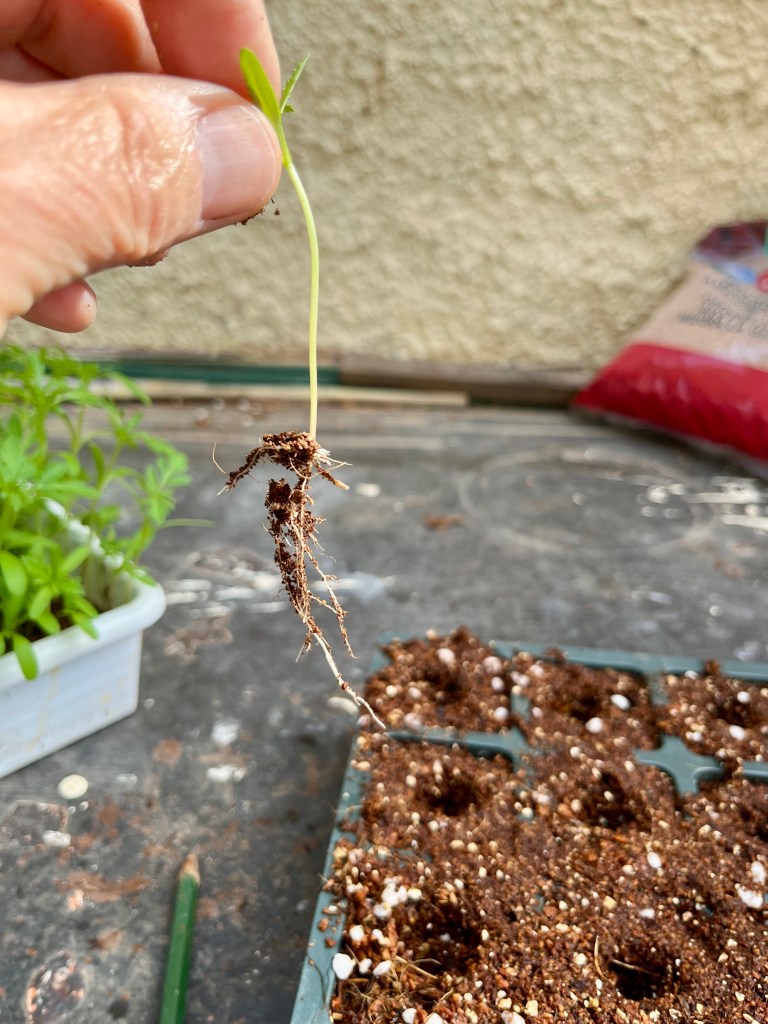
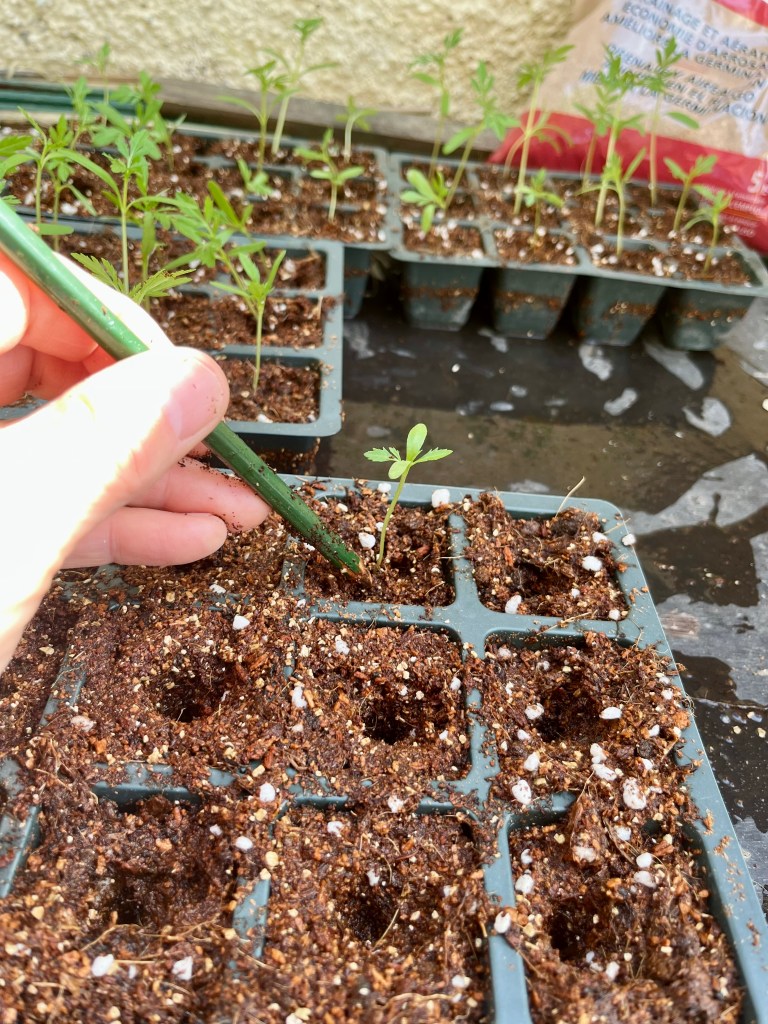

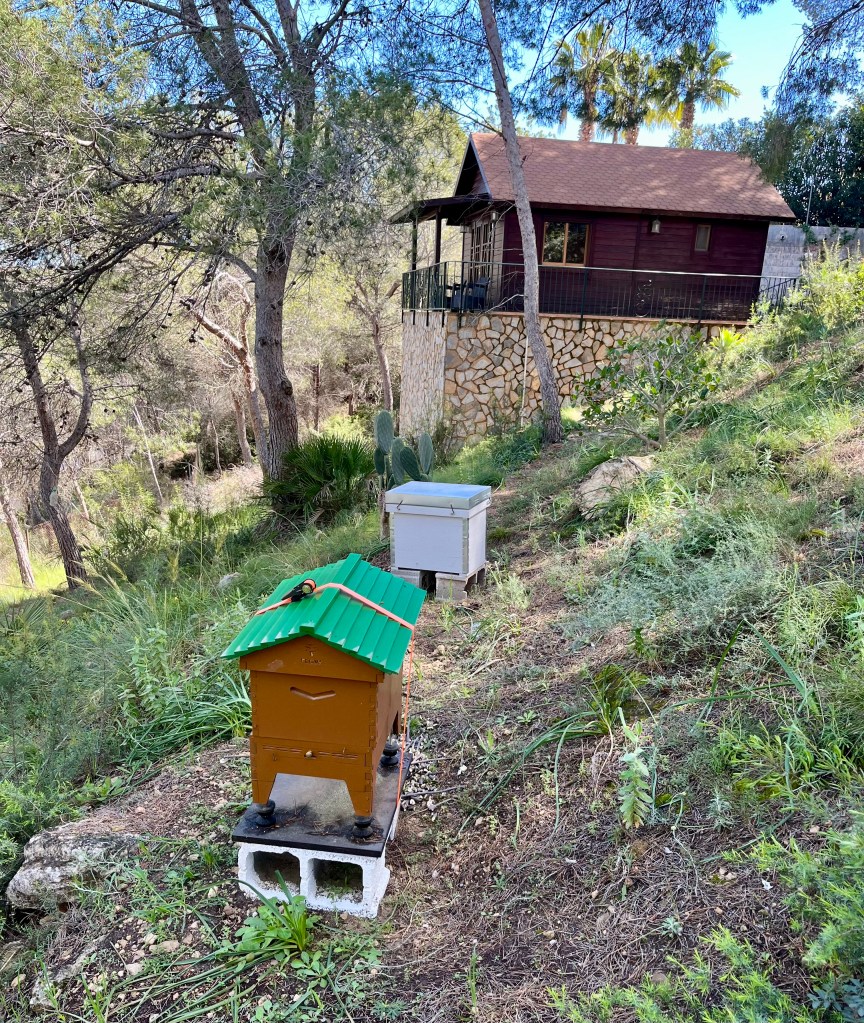

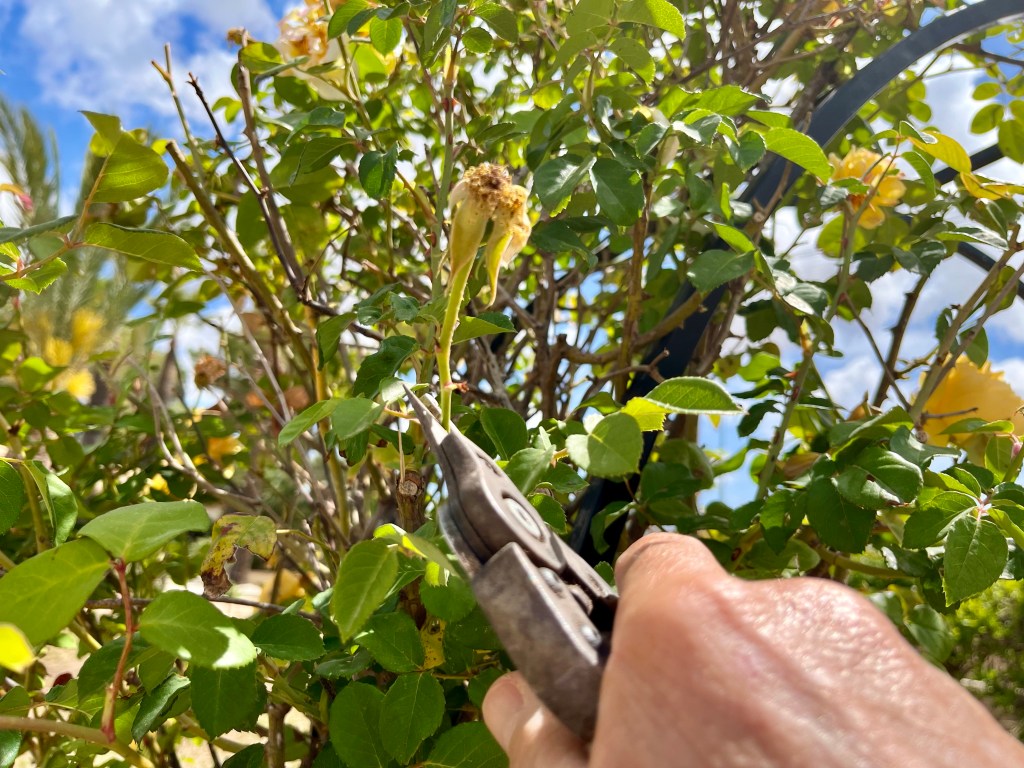
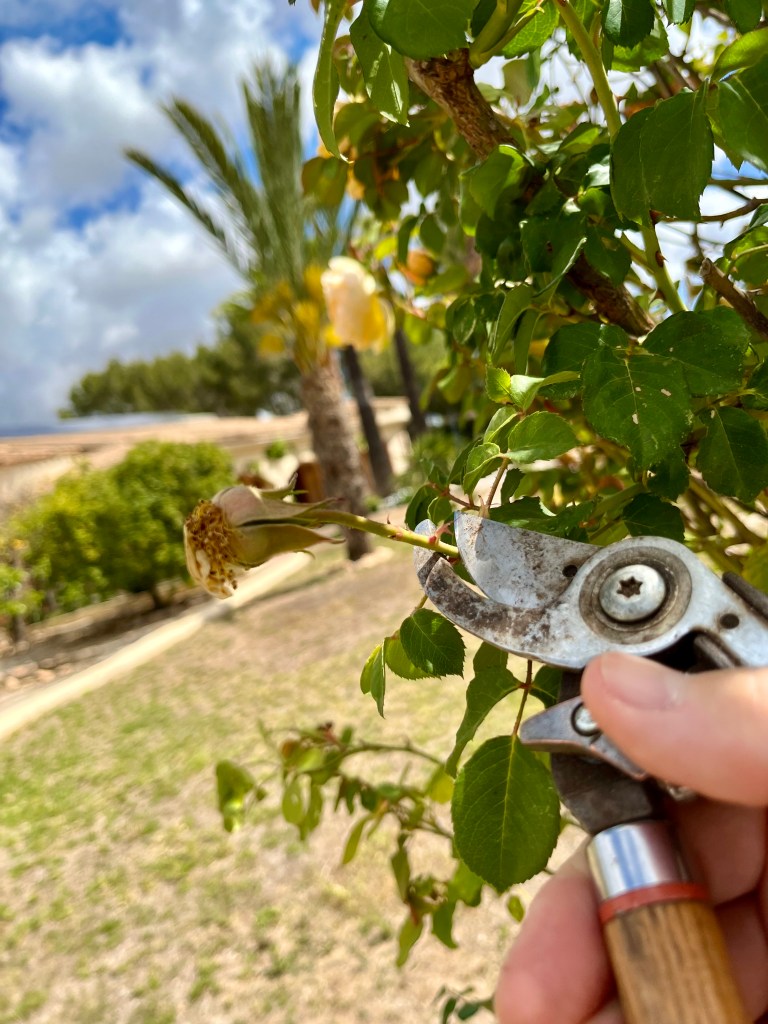
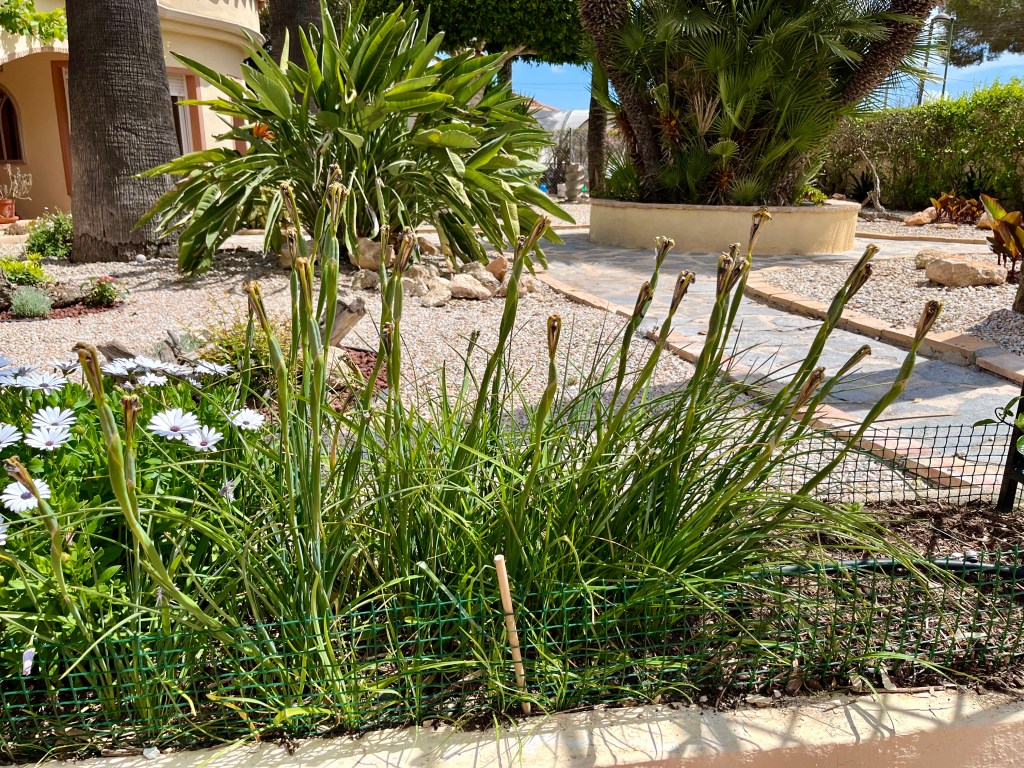
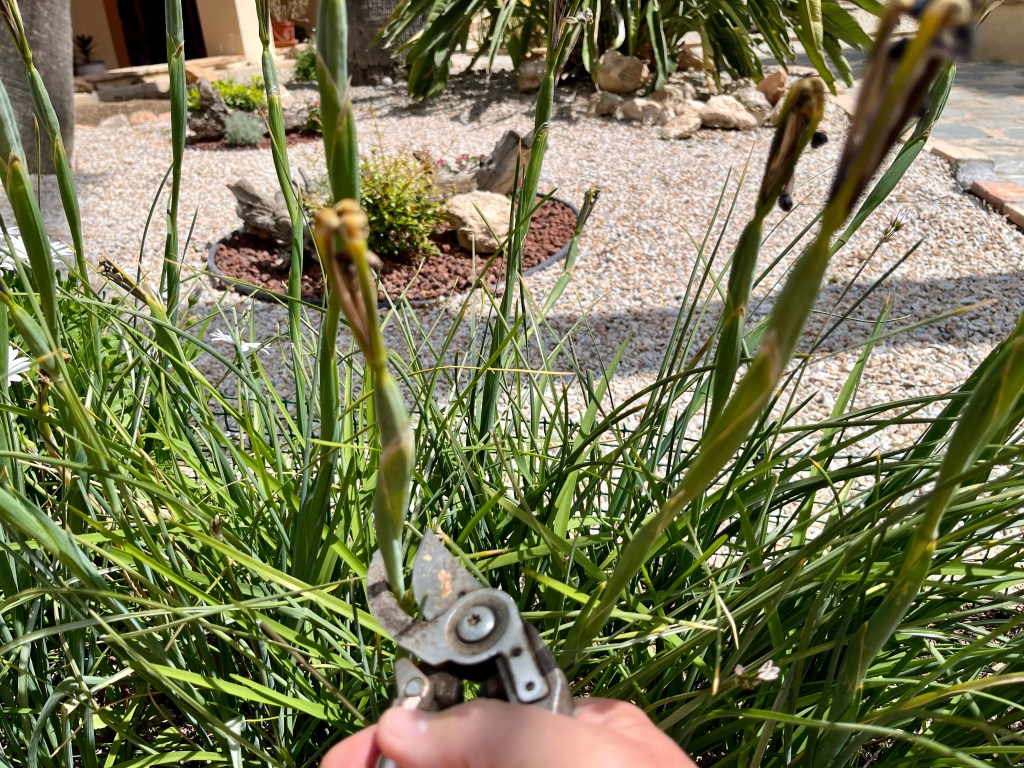
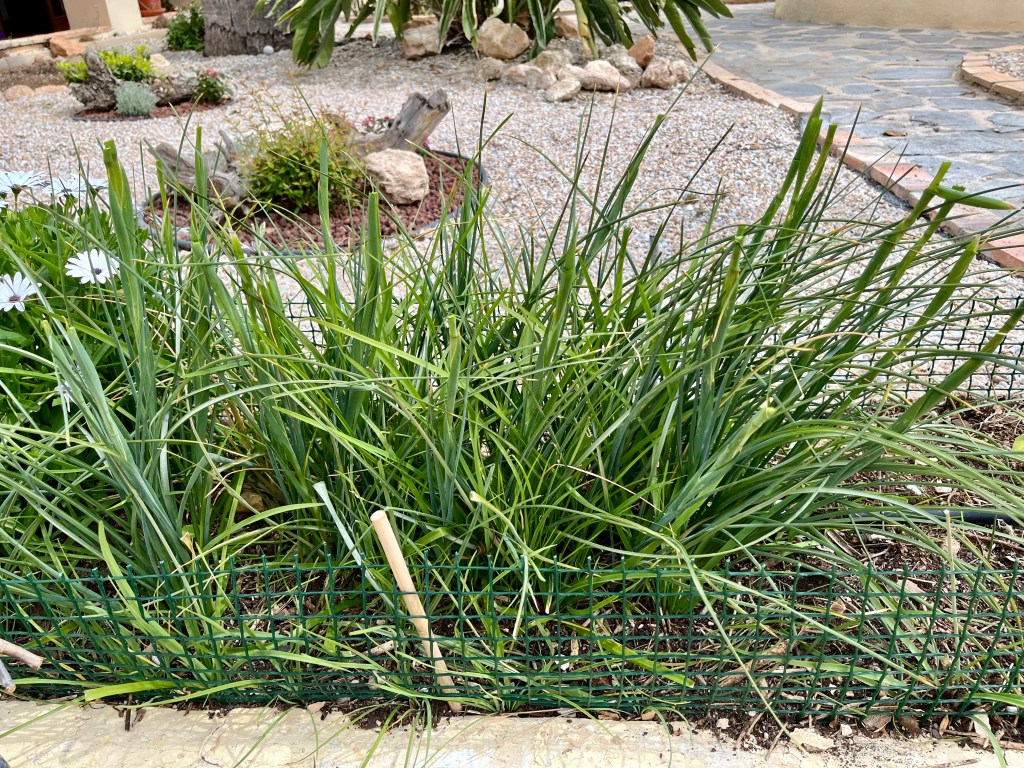


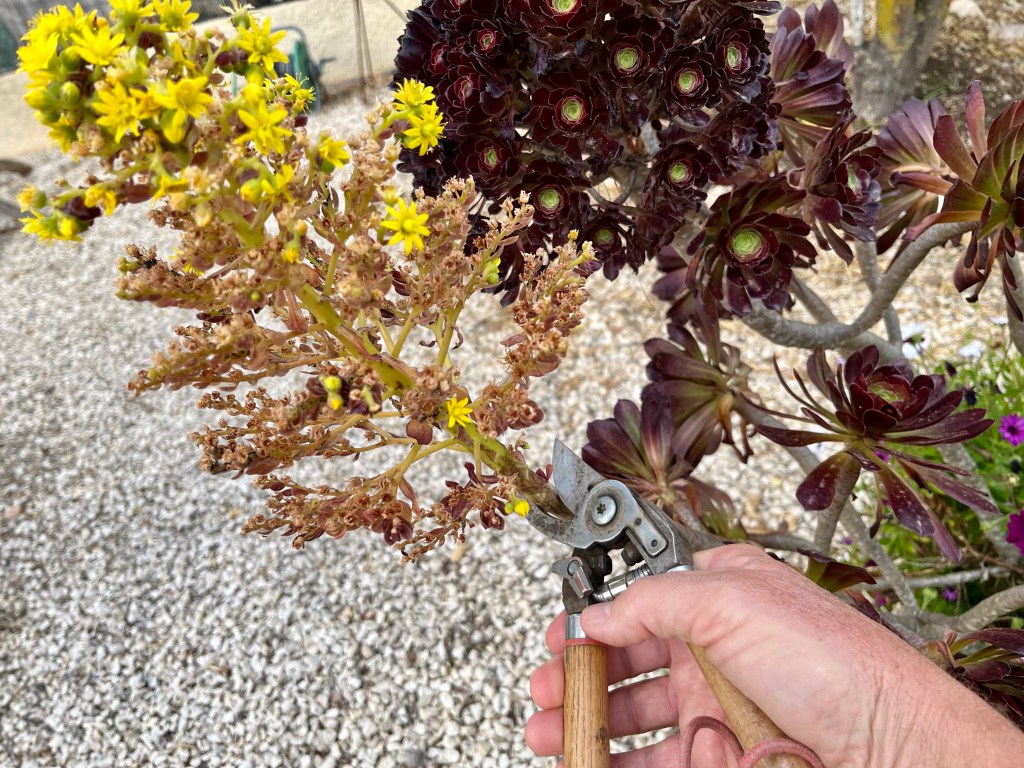


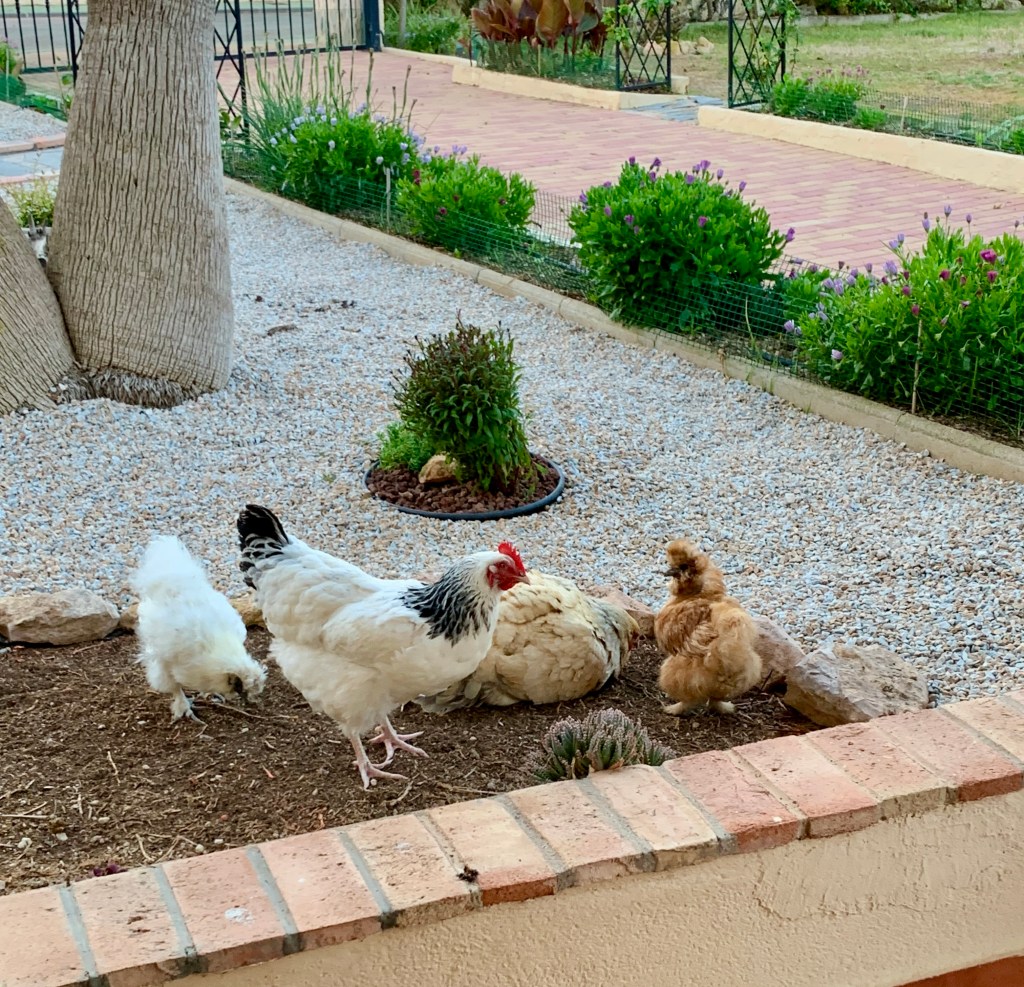


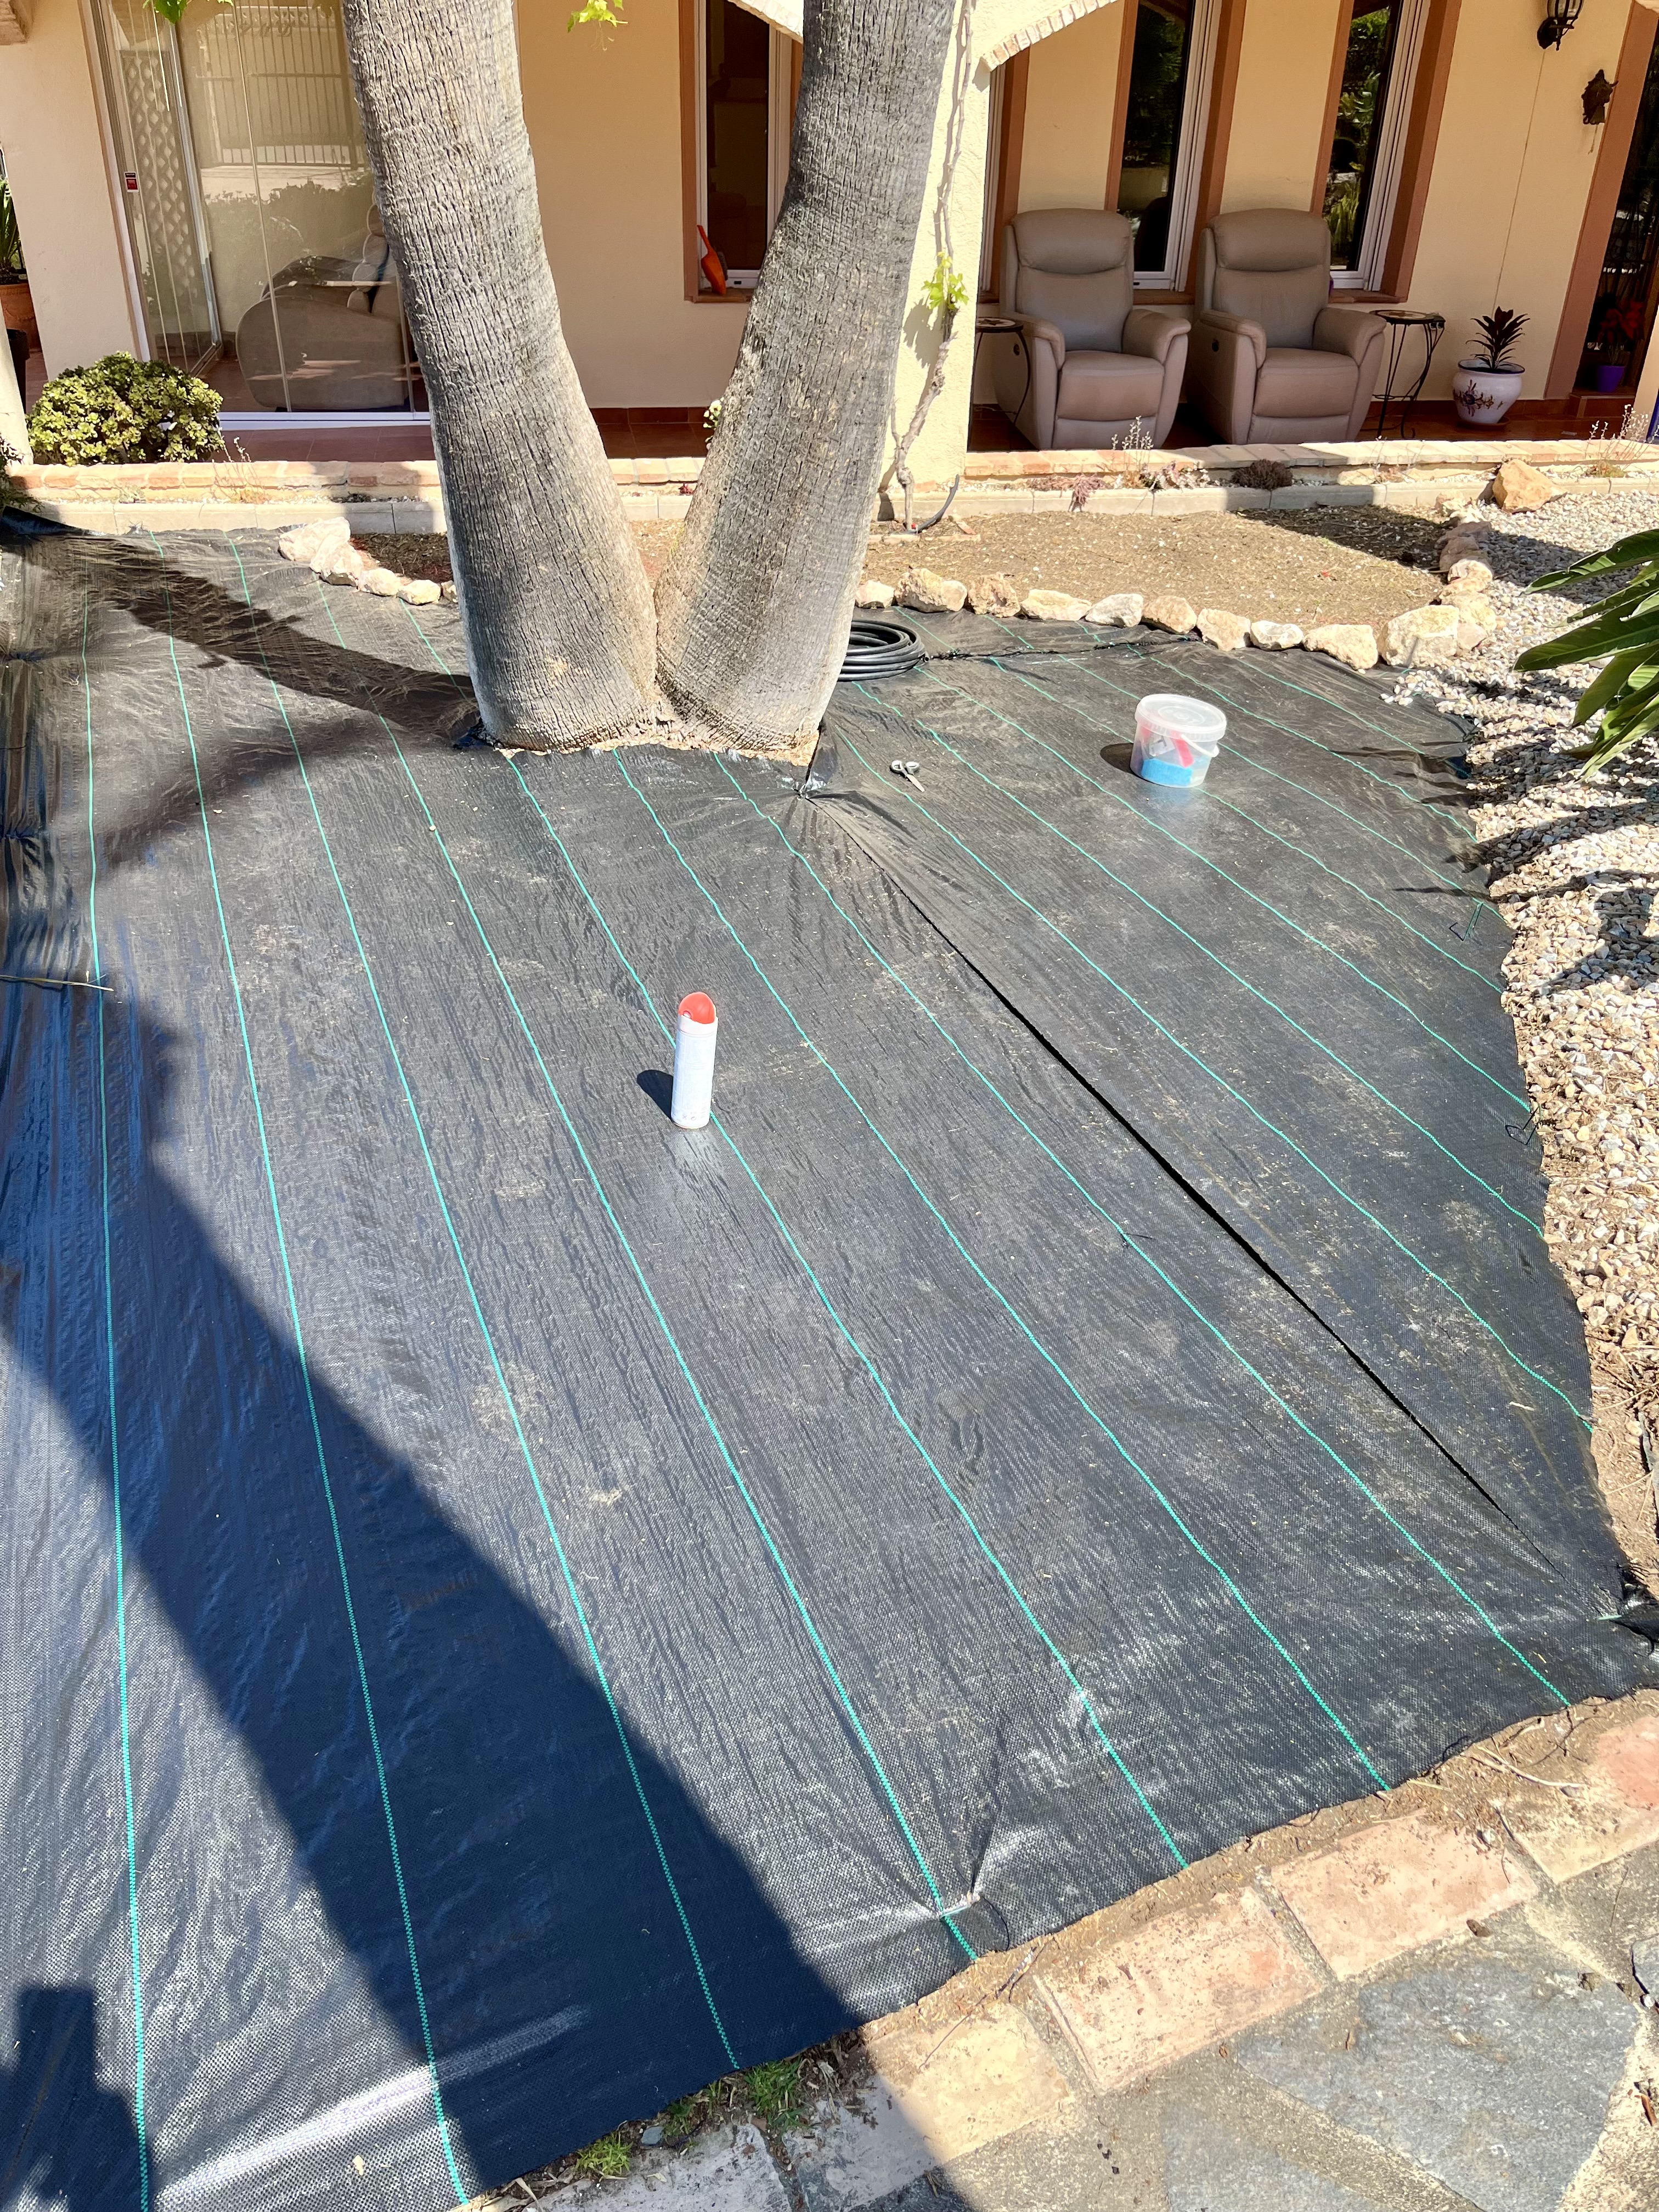

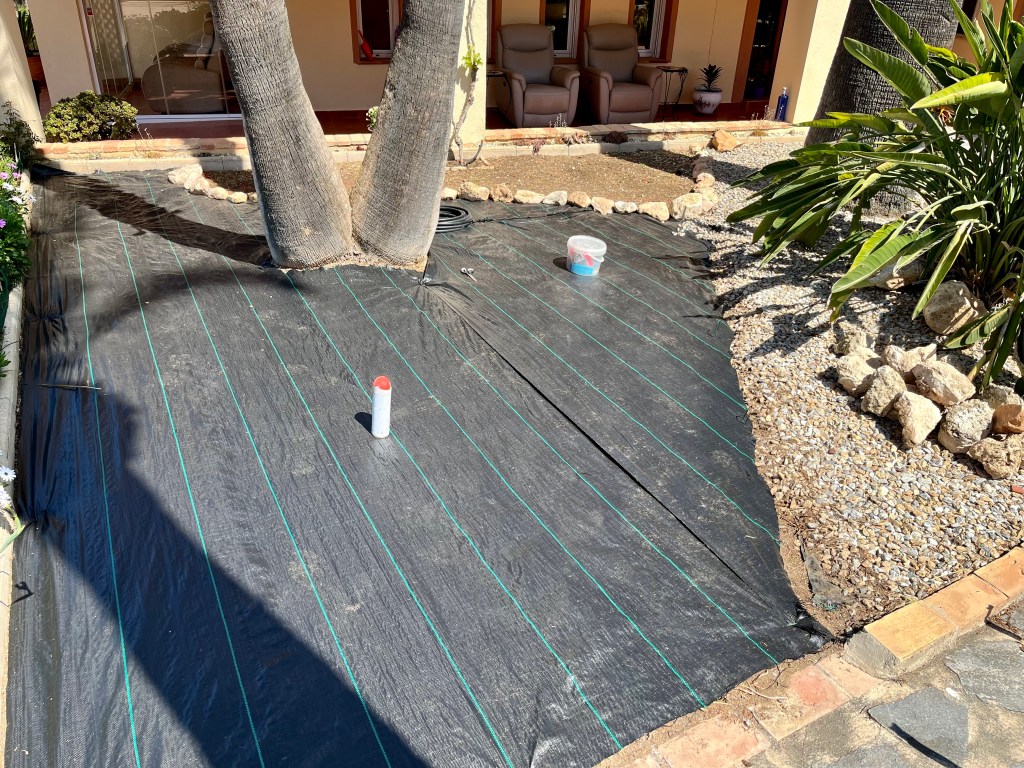

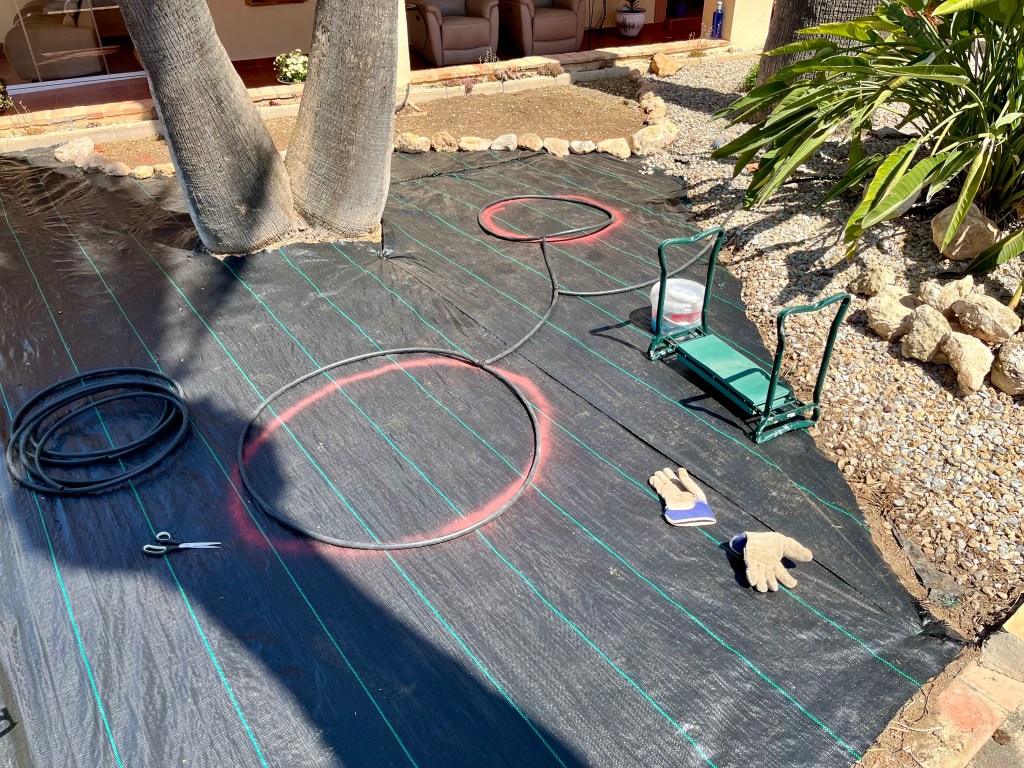
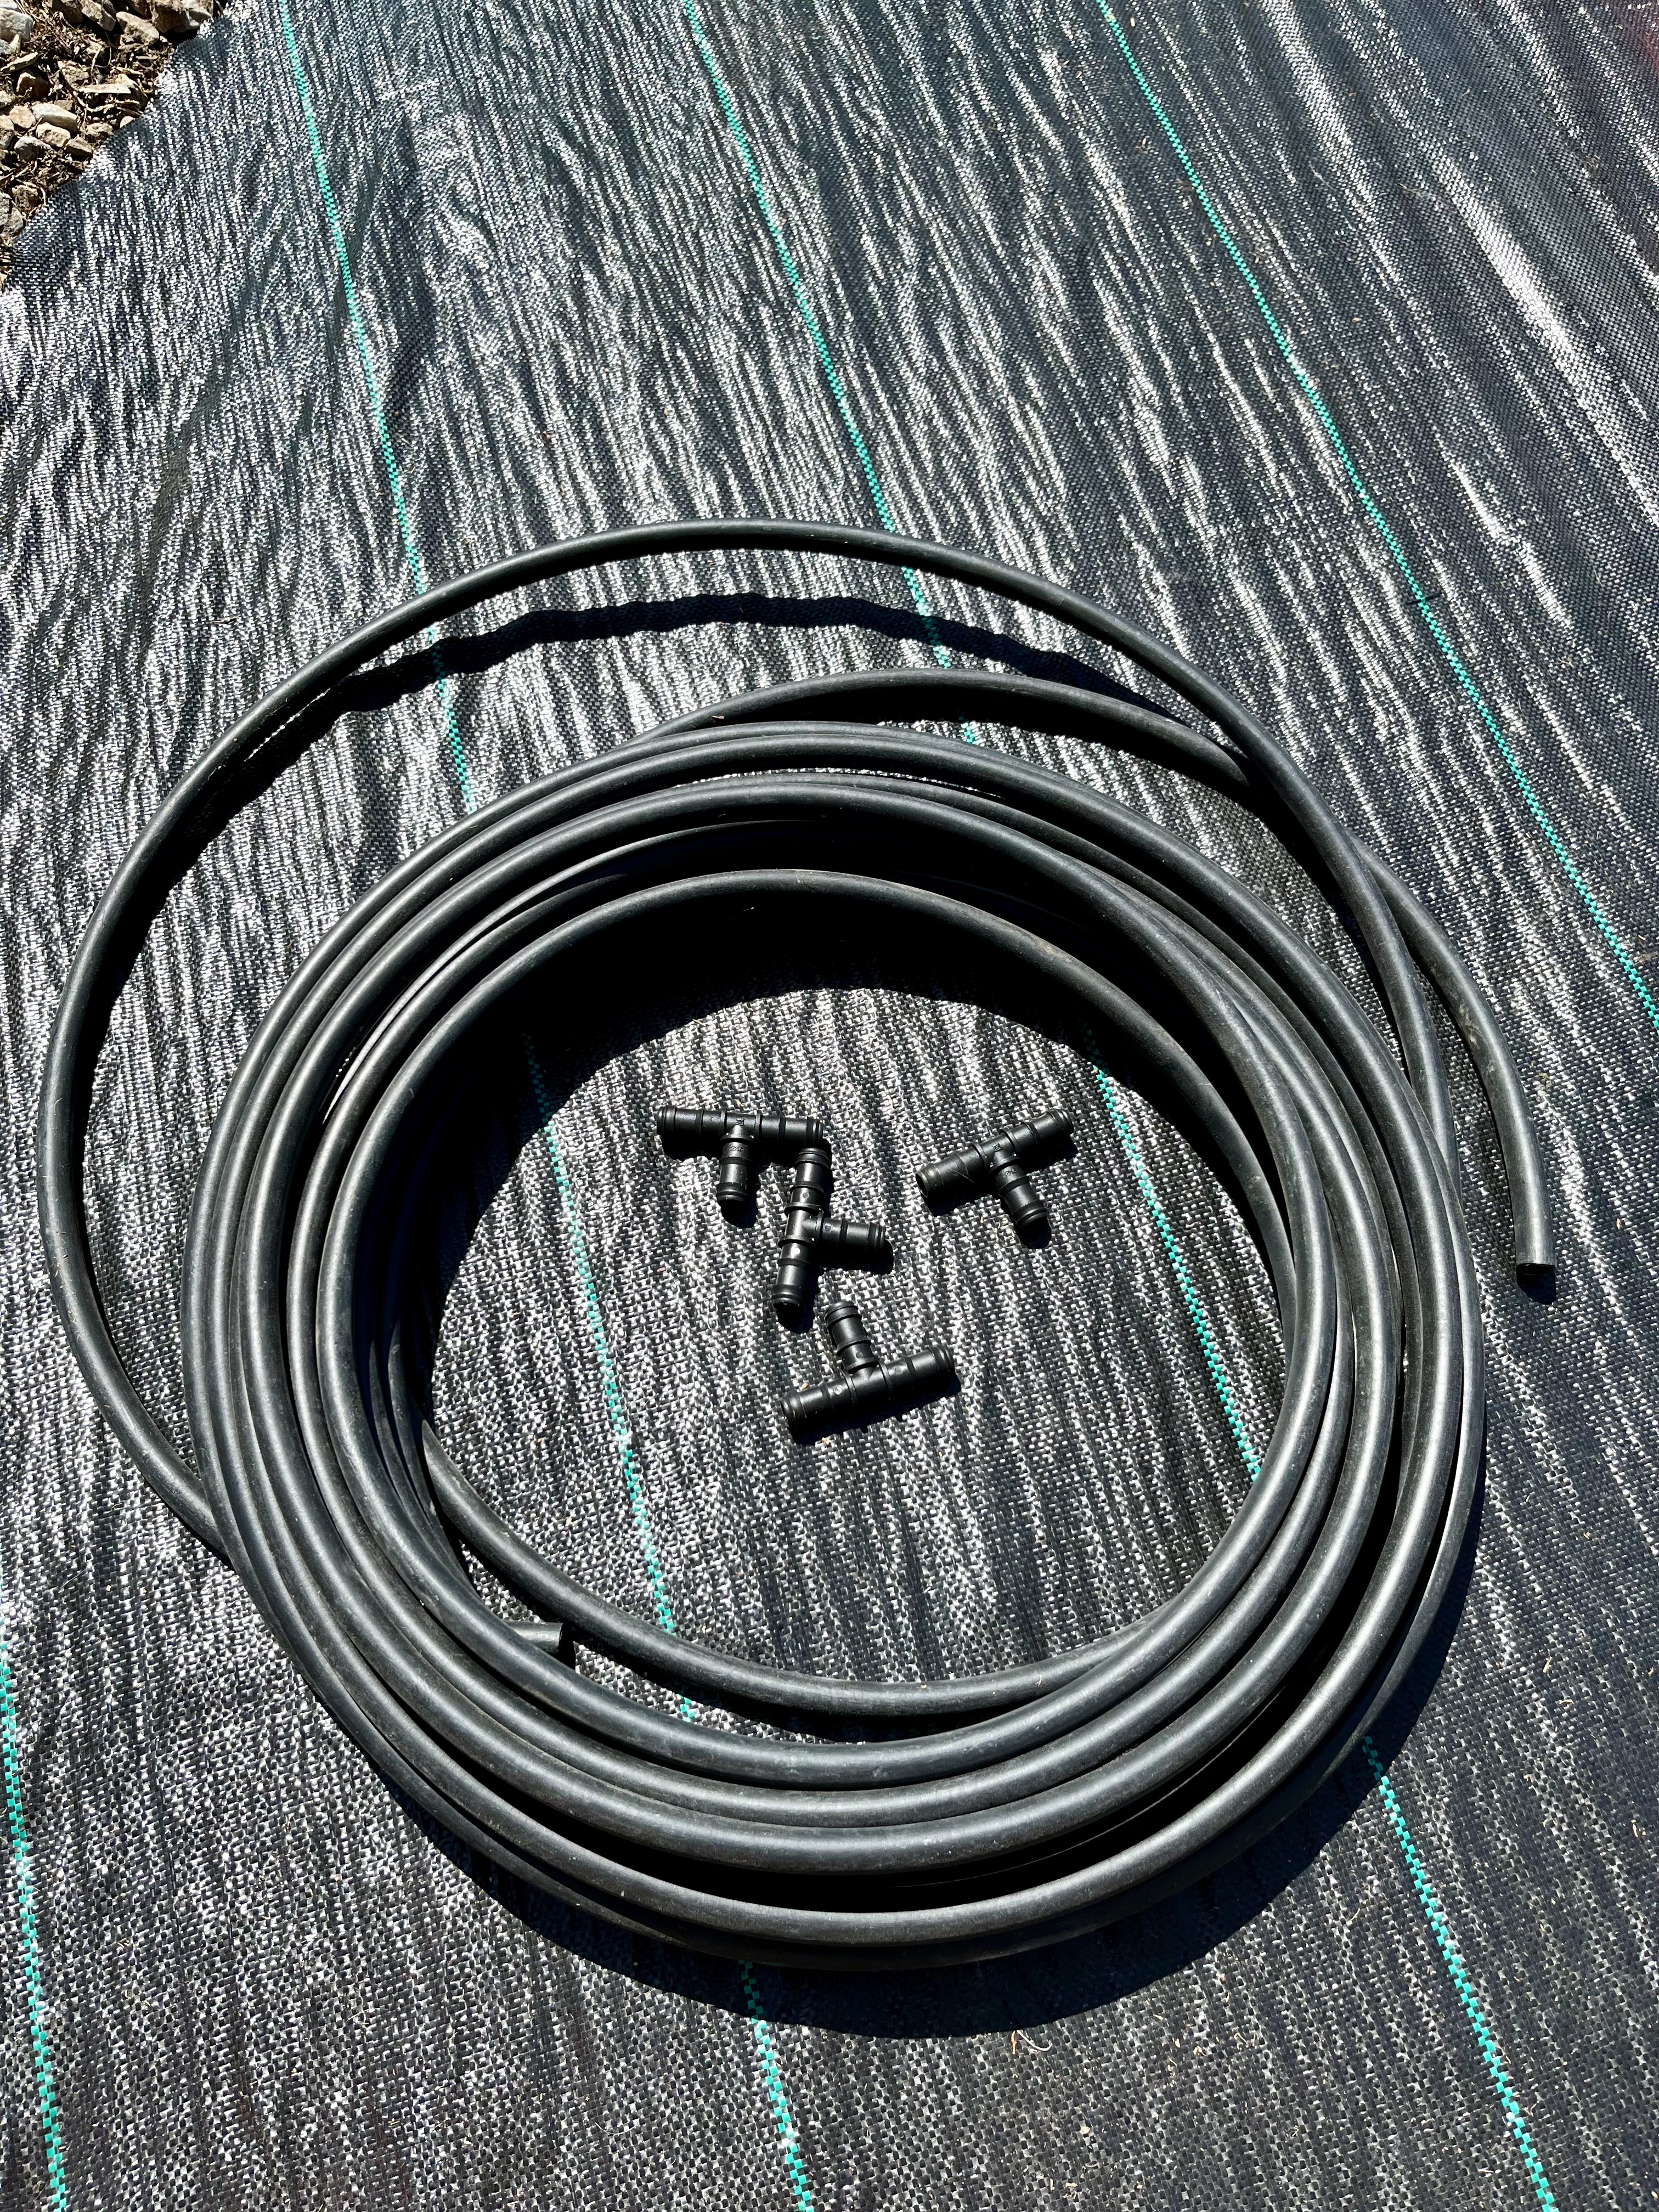


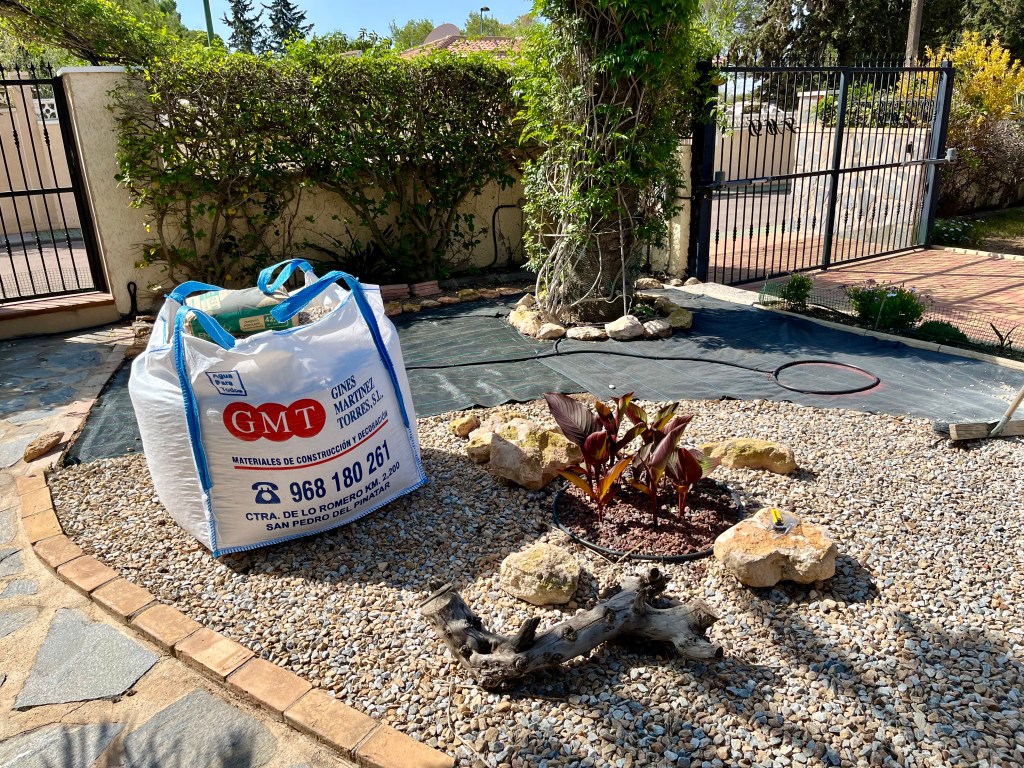


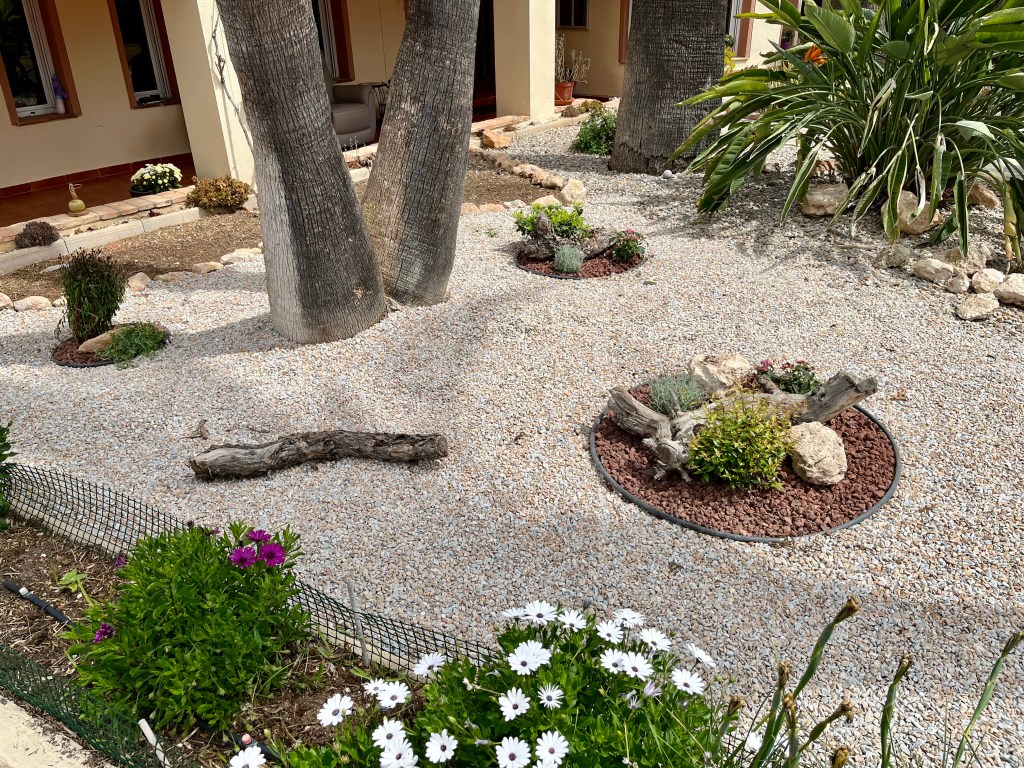


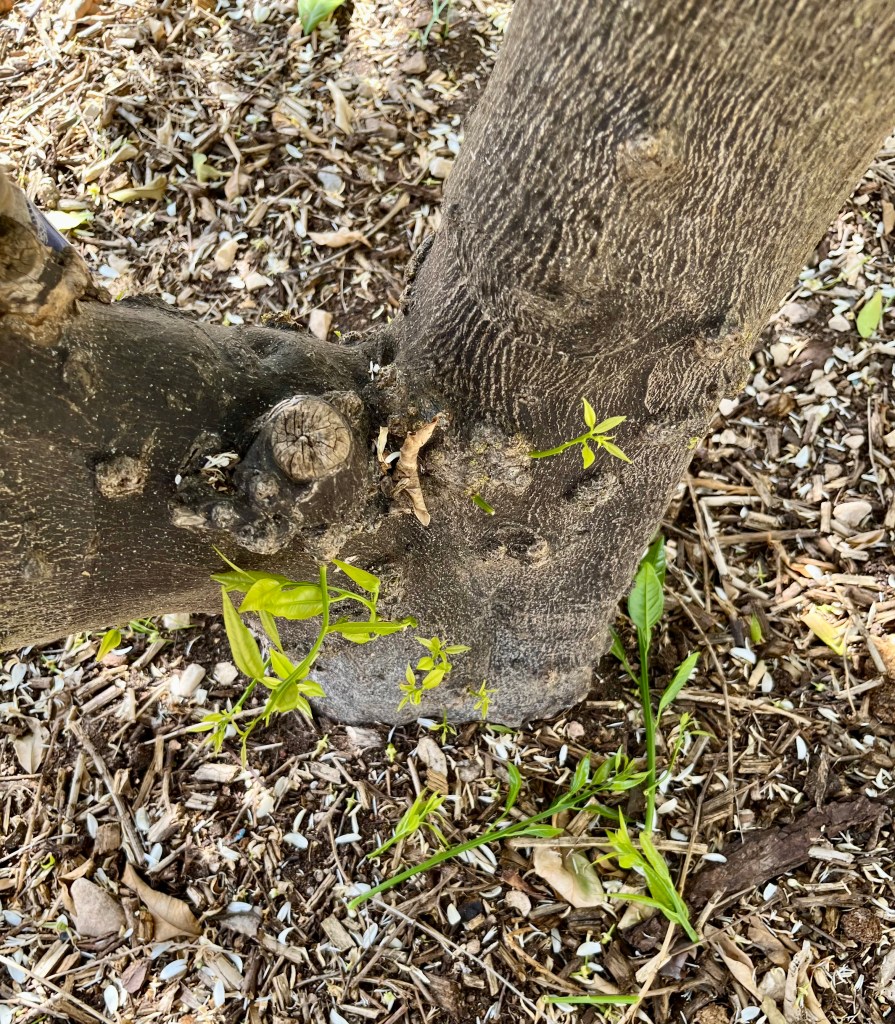


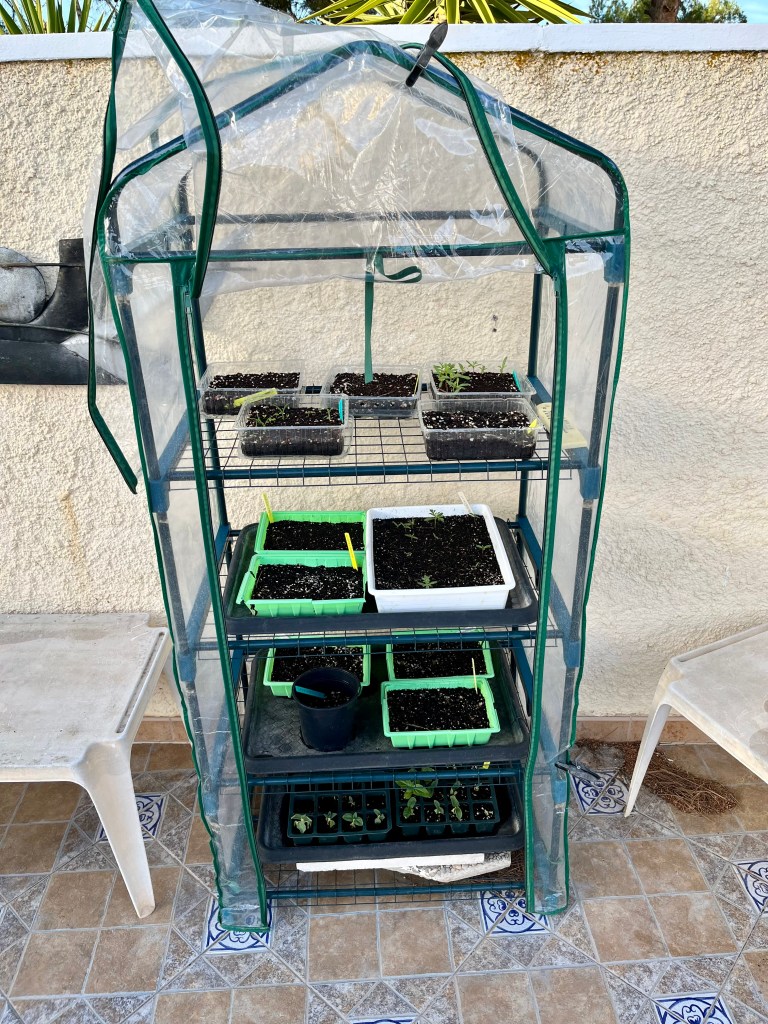

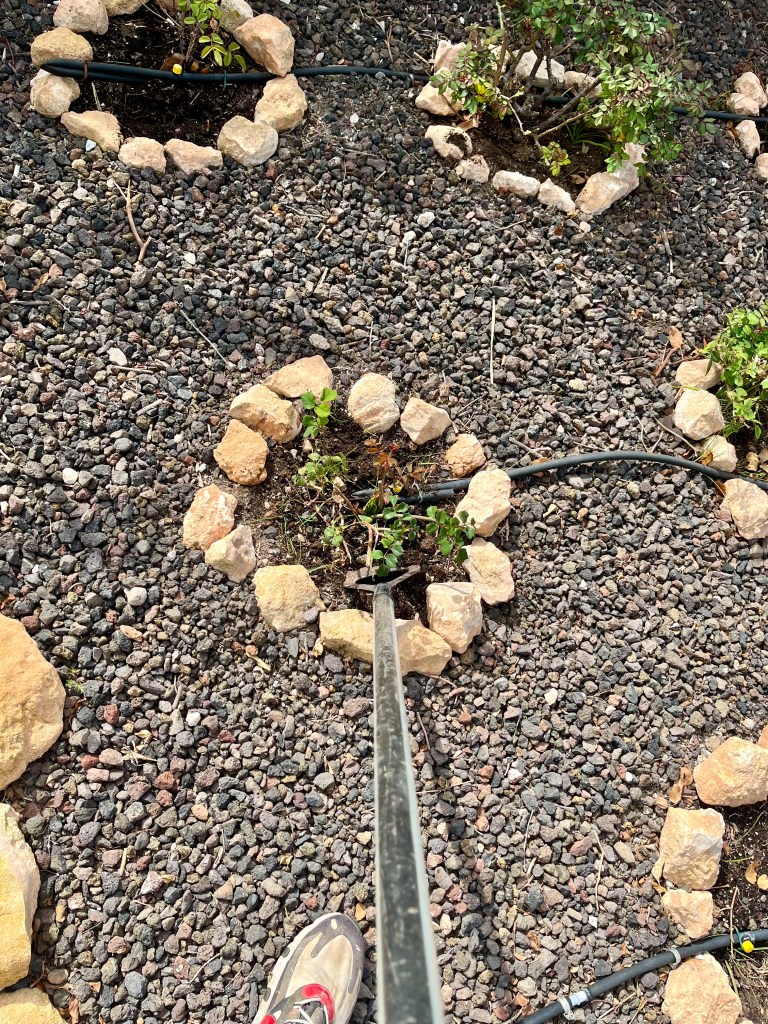
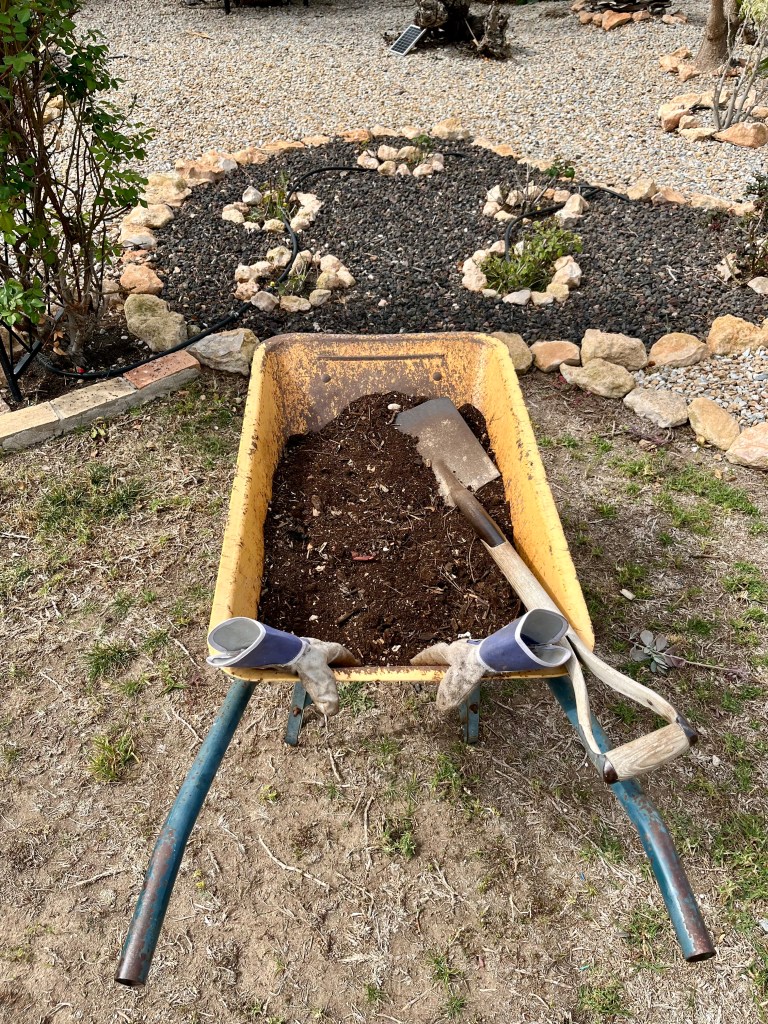
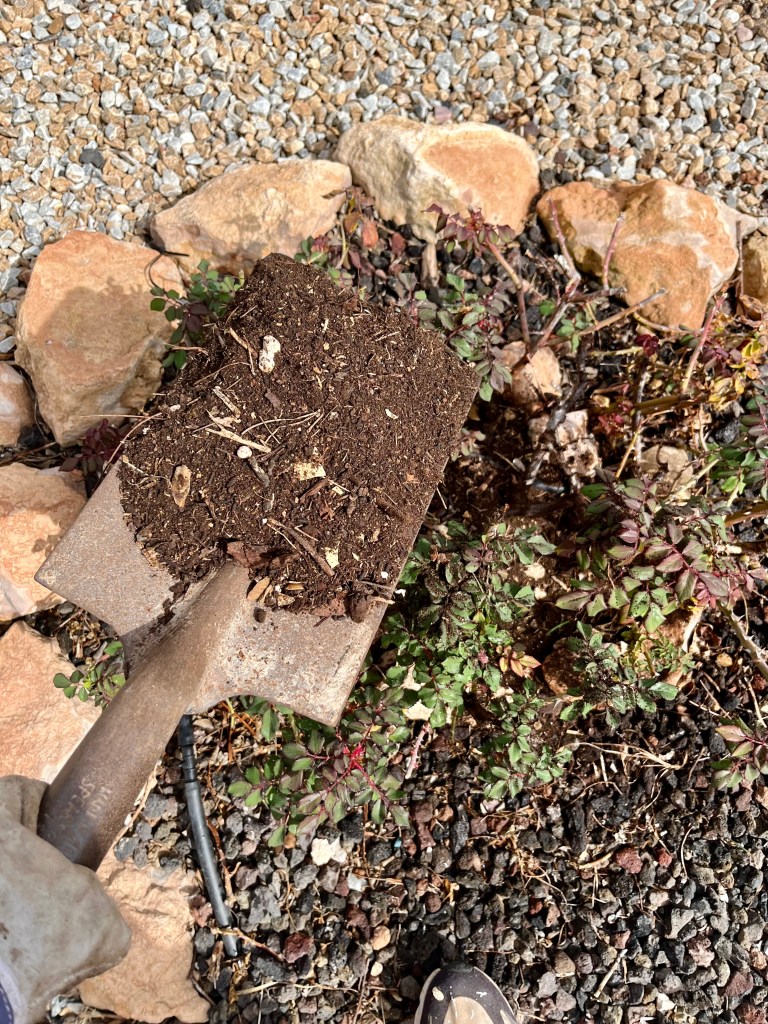

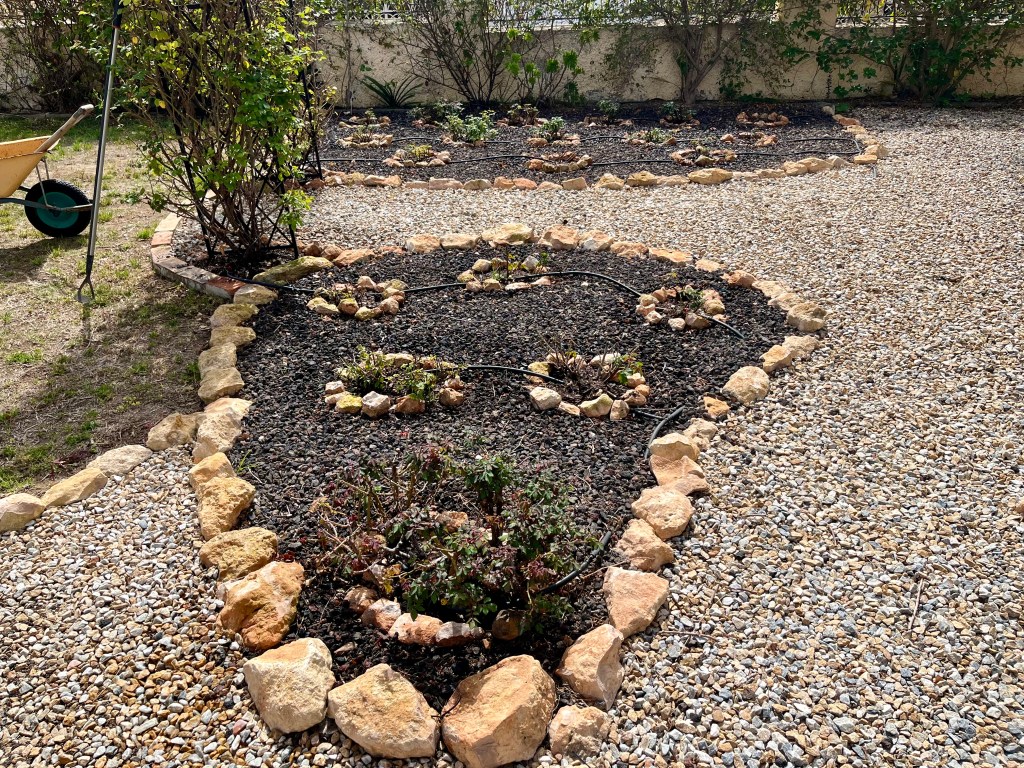


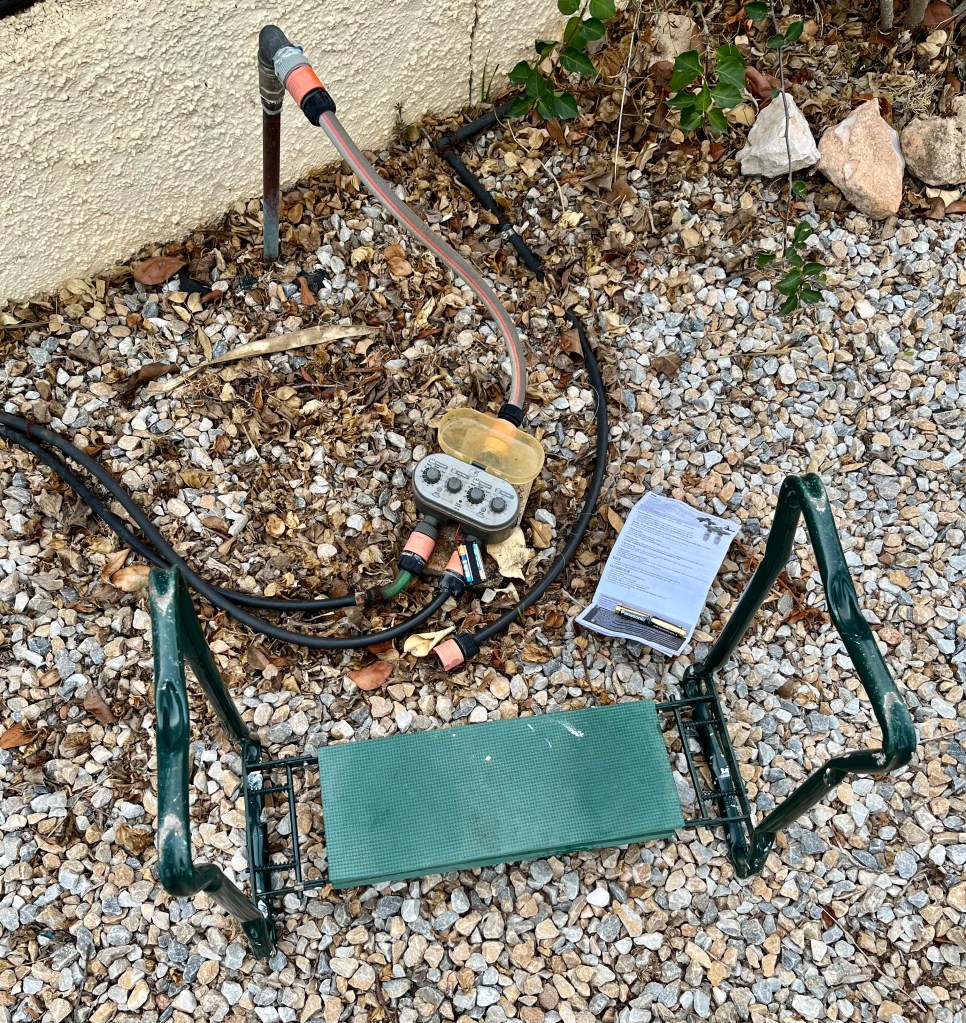
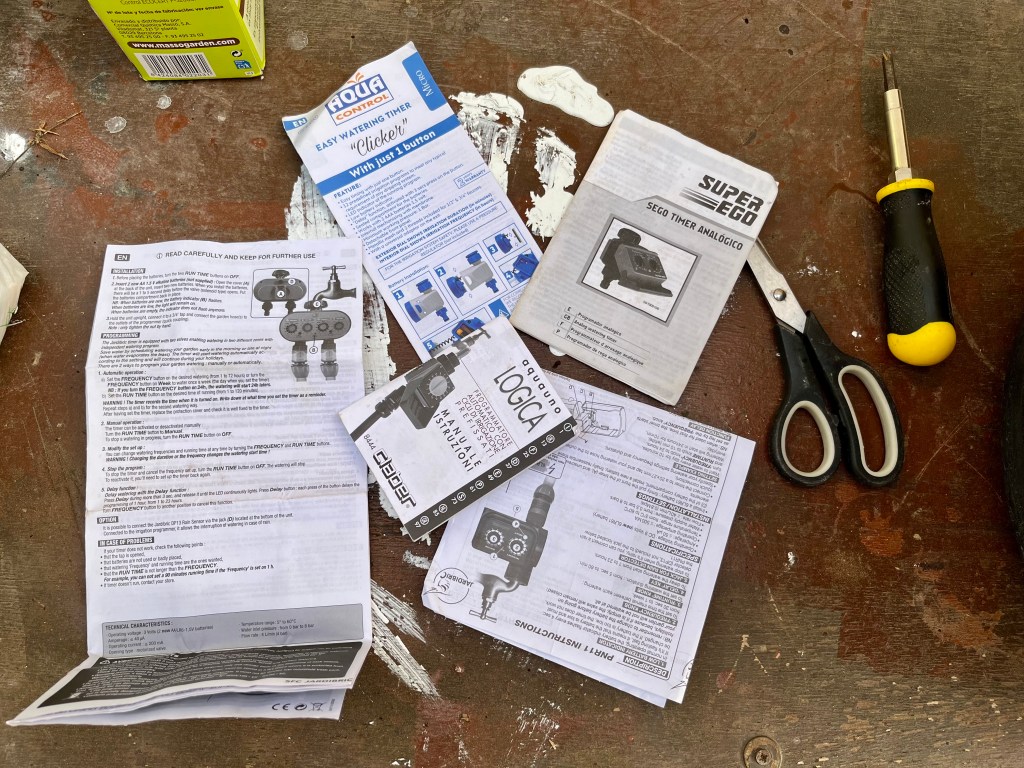

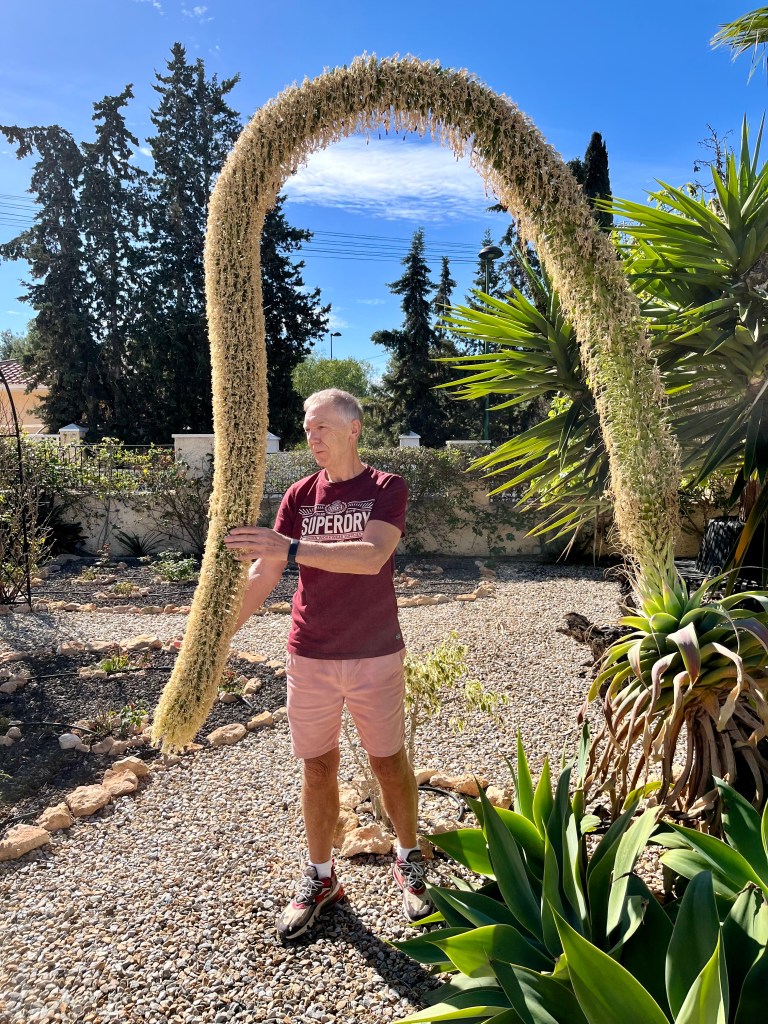

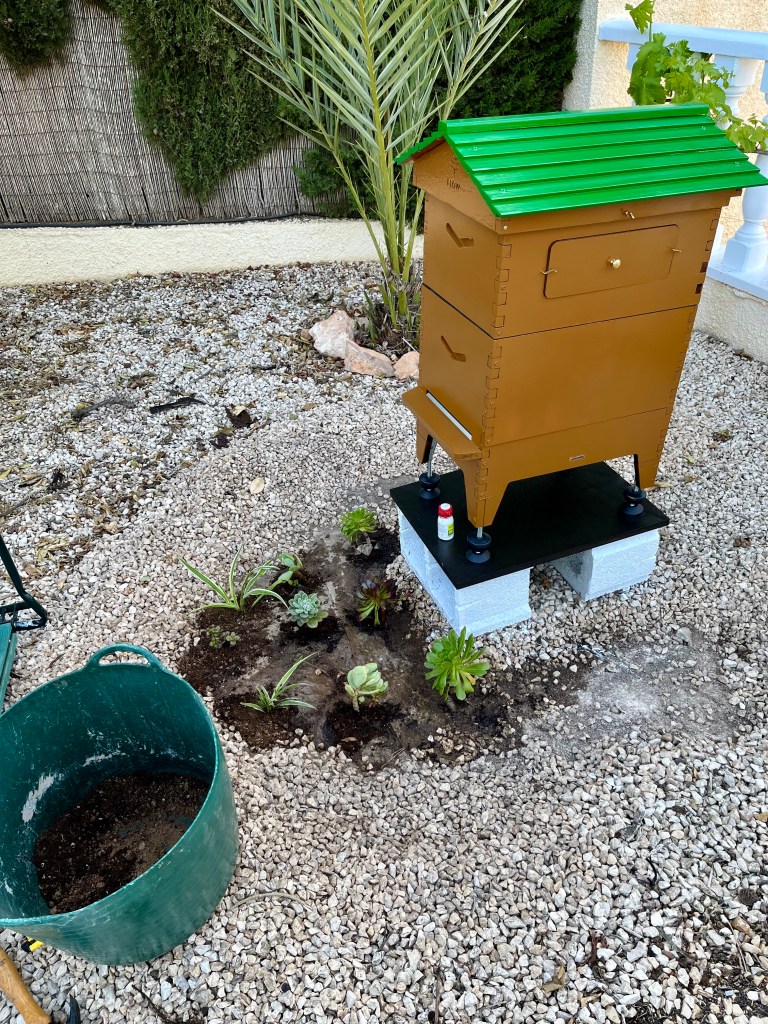


You must be logged in to post a comment.