Tie up, mark up and net up

The above exhortation may seem like the motto of a bondage convention, but no, it’s just August in the garden. The heat is phenomenal and all my plant are suffering heat exhaustion, I am rushing around trying to keep everything alive without selling my soul to the water company. My already exorbitant water bill is so high that I go out to meet the postman and hide the bills from Cruella (my wife).

12th August 2026. Things I have been doing lately.

  • Net and dry figs
  • Tie up flopping plants
  • Mark blooms for next year’s seed
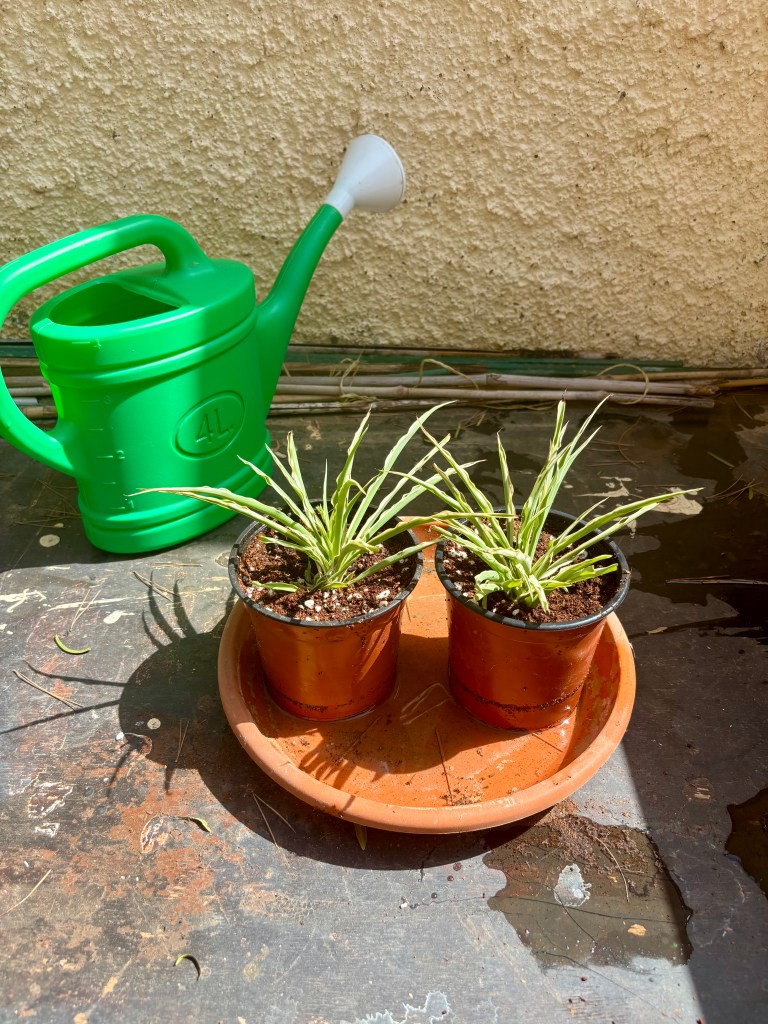
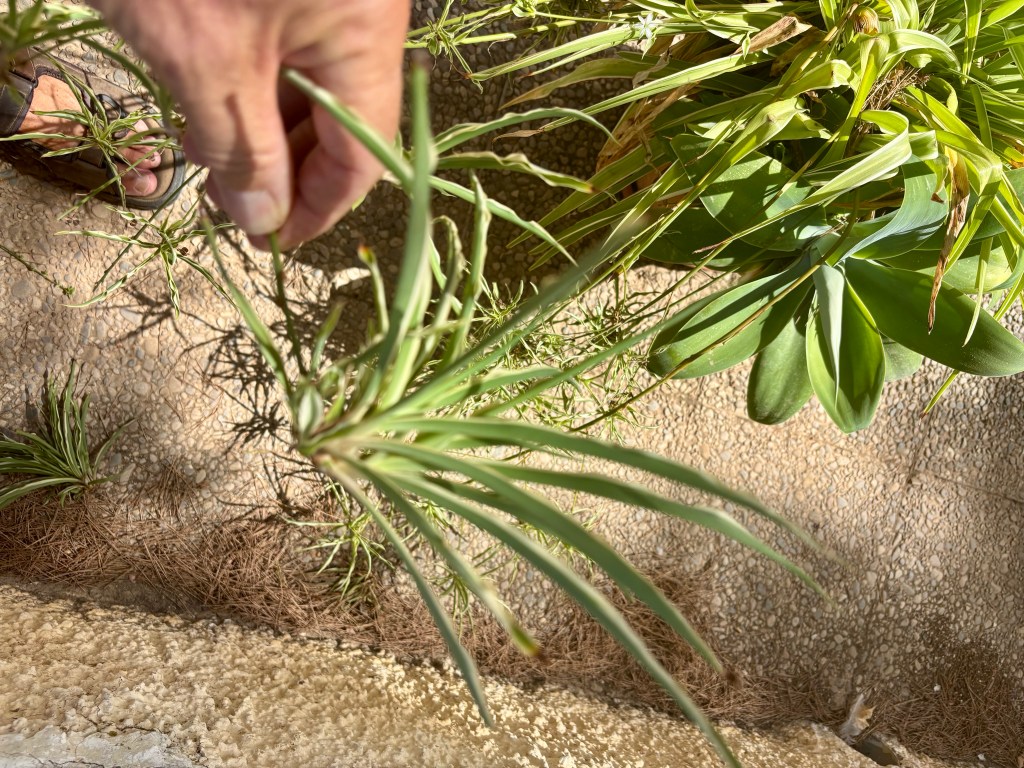
  • Pot up some spider plants

Net and dry figs. I absolutely love figs, but unfortunately so does every bird on the Costa Blanca so it is necessary to net them. The key to netting figs is to get the timing right. If you leave it too long and the fruit gets too ripe, the birds will happily strip the tree in a couple of days.

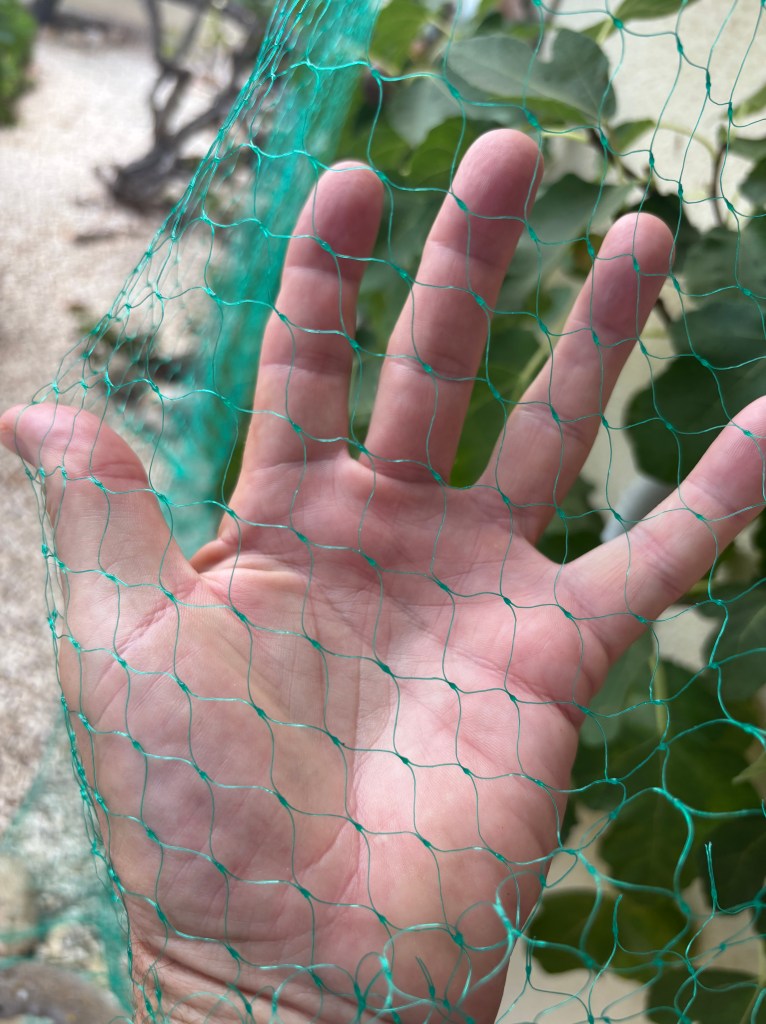
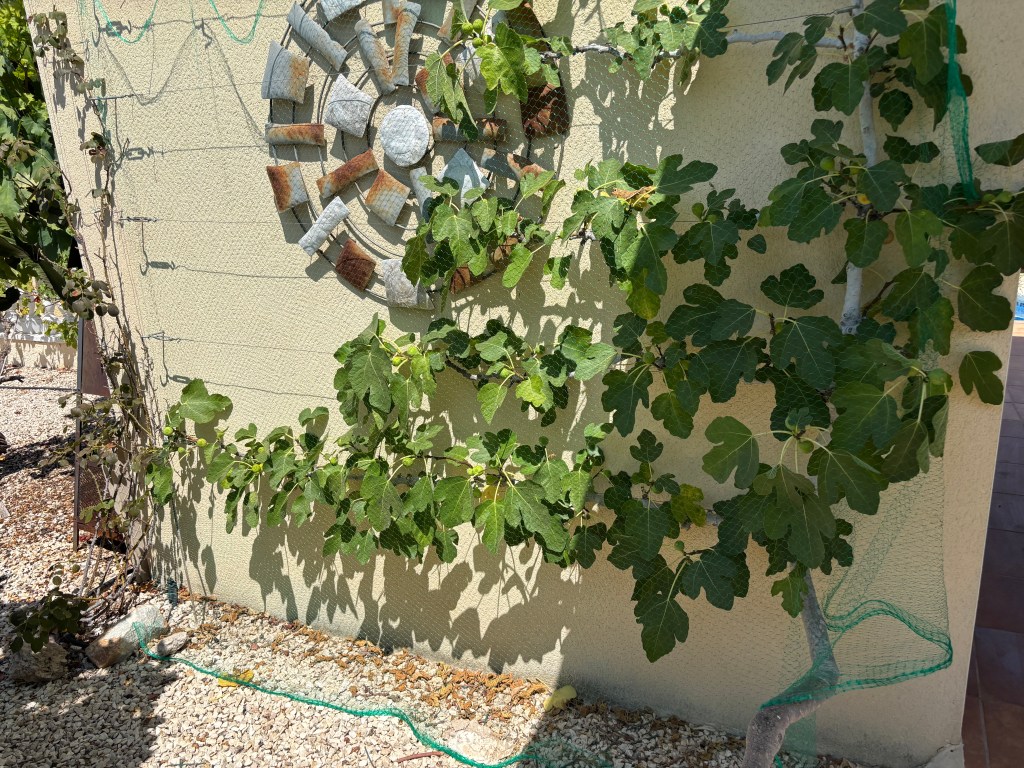
I have two fig trees, one of which I have espalied up the wall of my outside kitchen. As an experiment this year I decided not to net the big tree, but instead pick fruit daily to minimise bird predations. When netting figs or any soft fruit it is important that you use small mesh netting as if you use anything larger you are likely to find perplexed birds hanging upside down in your nets every morning. The photos below shows the correct size net and my espalied fig all netted up.
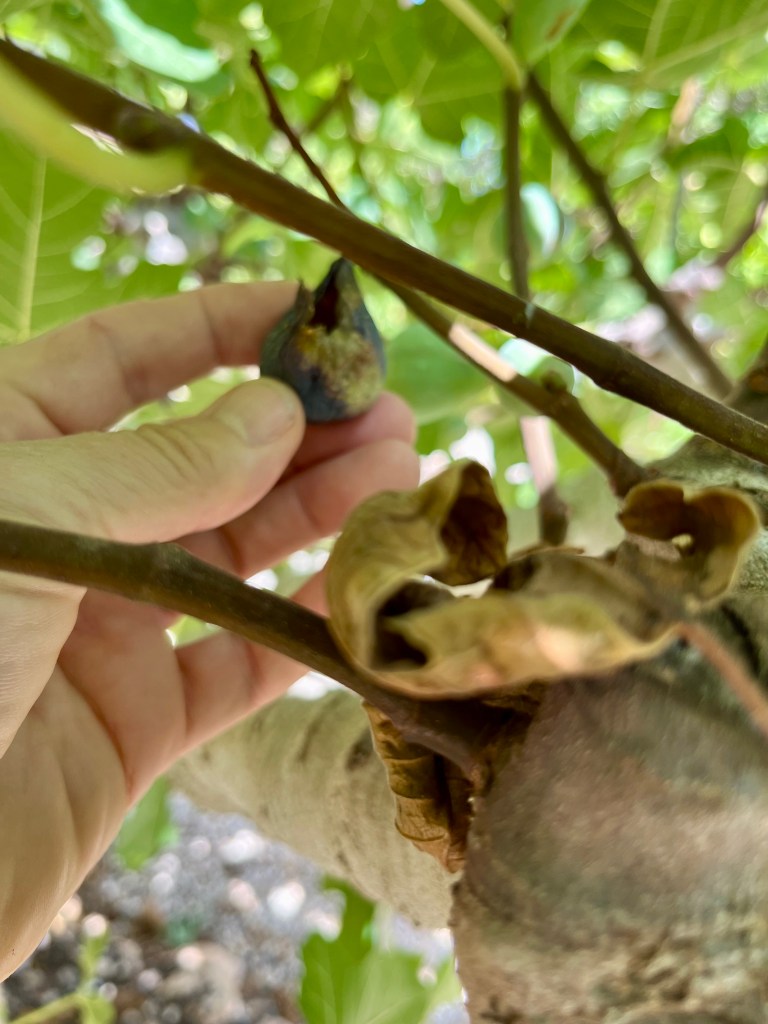
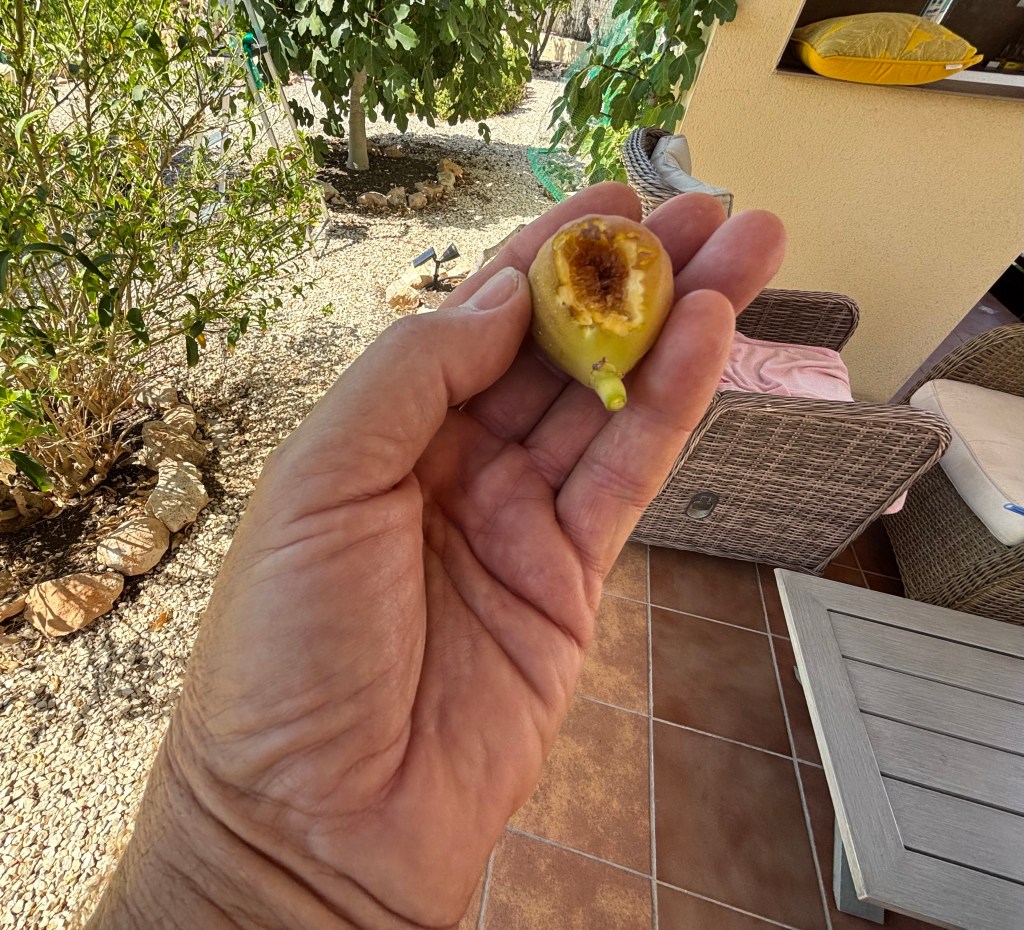
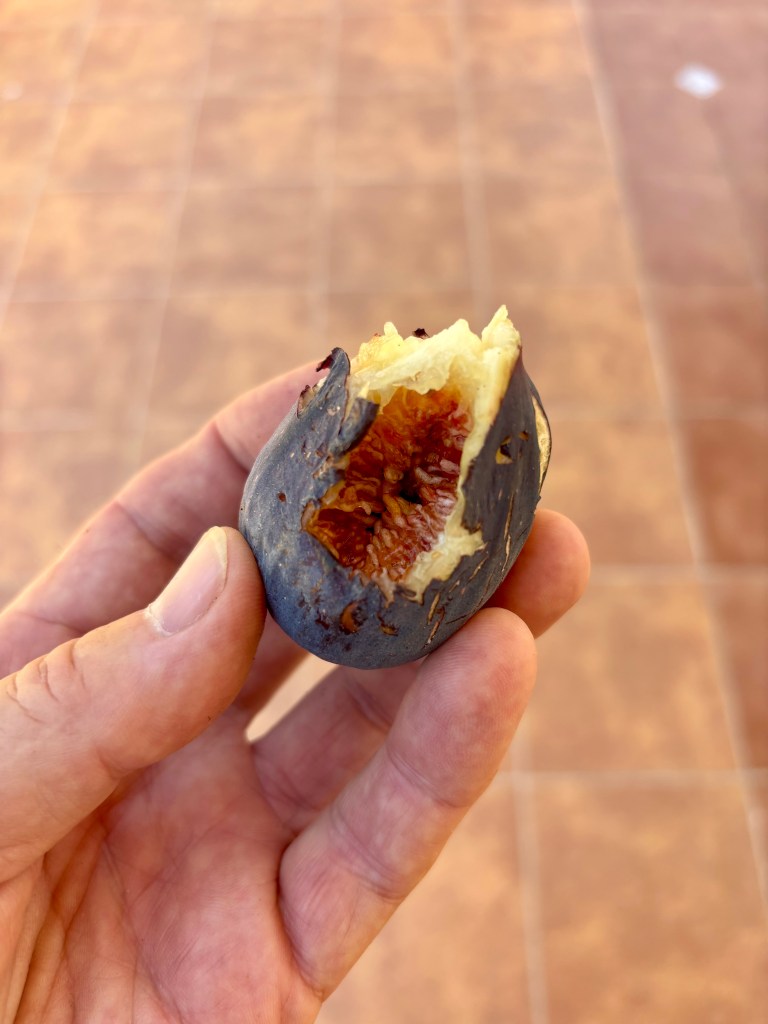
Fortunately I just got netting in time as the birds had already been at the big tree and a bit of the espalied as can be seen from the photos below. I gave these spoiled fruits to the chickens but they got chicken diarrhea and Cruella accused me of poisoning her girls.
Drying figs. If you have heavily cropping fig trees you will never be able to eat them all fresh without upsetting your stomache. So your choices are give them away to friends or dry them for use later. As I love figs, not a fig leaves our premises, all the surplus are dried.

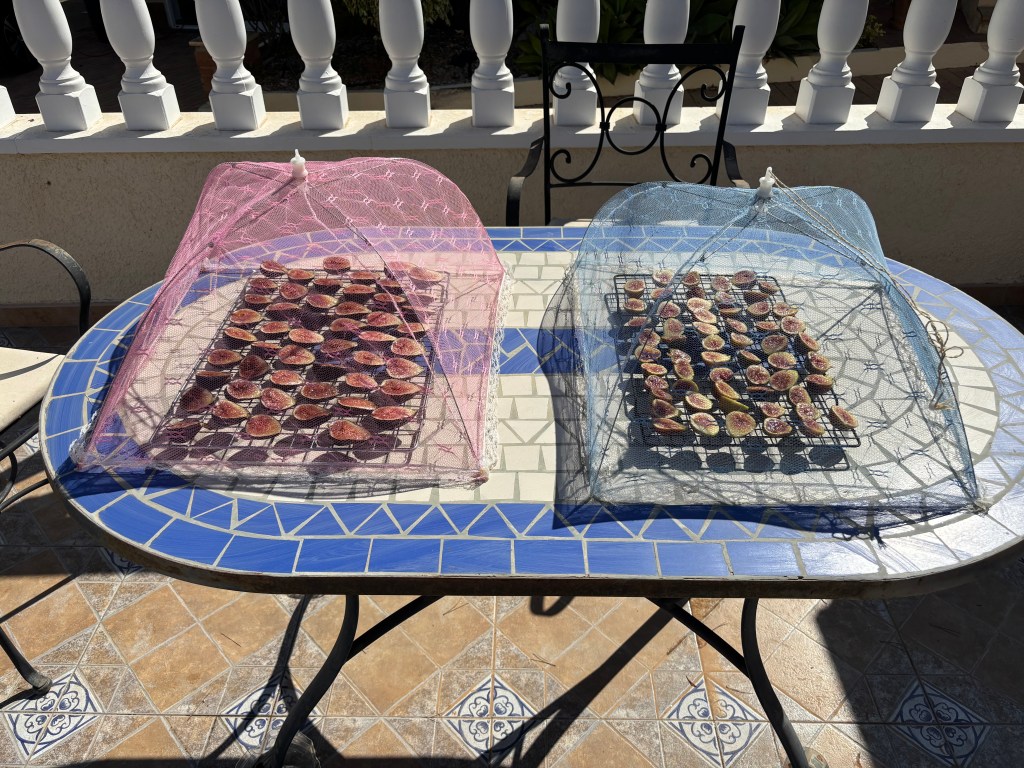
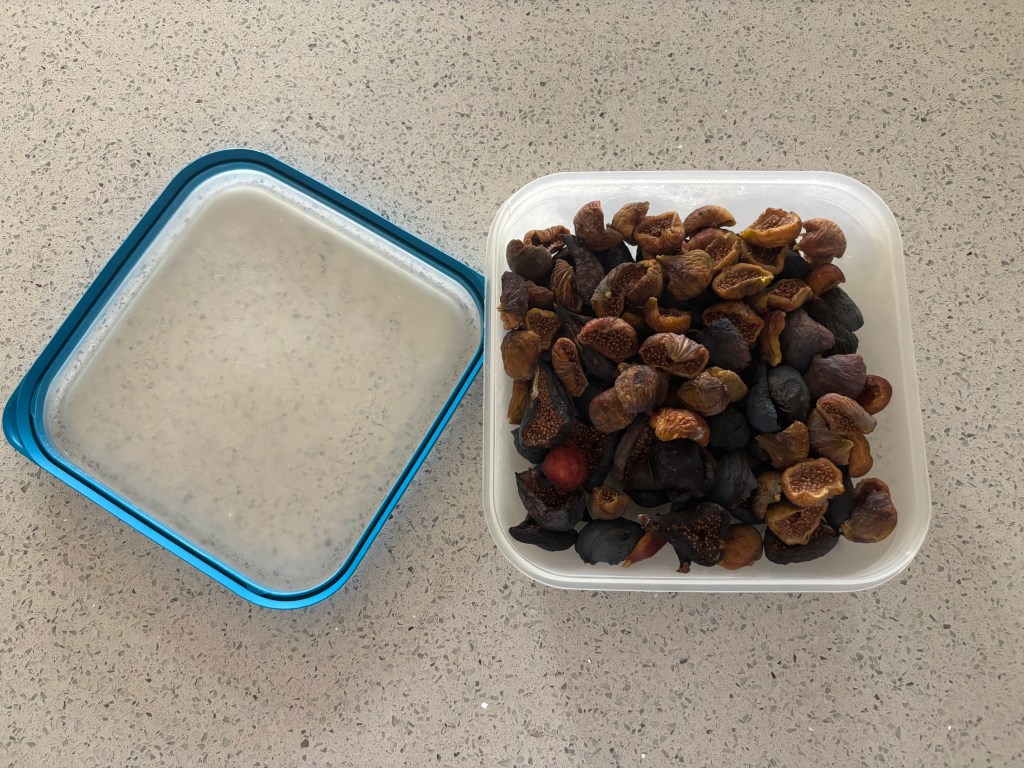
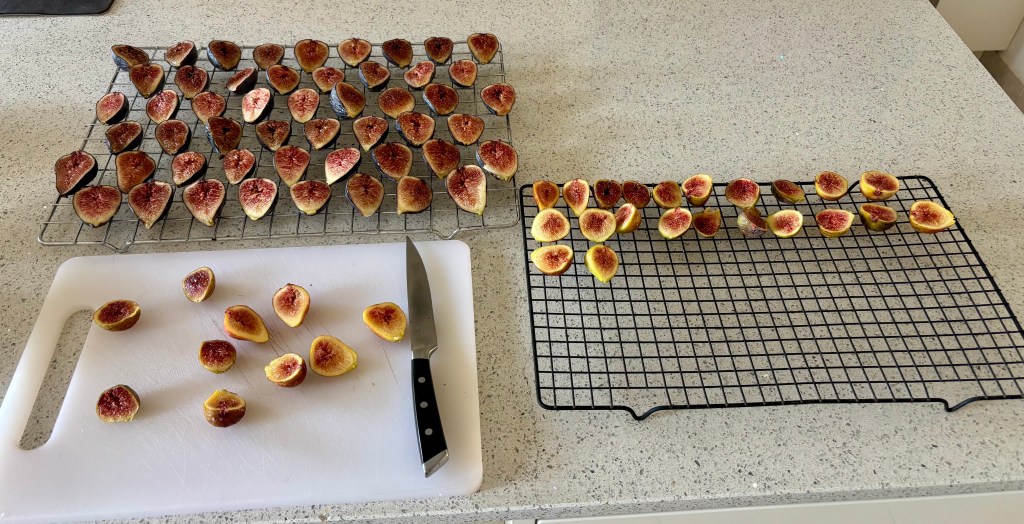
Drying figs in the sun is very simple. First get yourself some mesh trays to place your figs on. Then cut all your figs in half and place them on your trays cut side up (you never need to turn them over). Then place your trays on a table in the sun covered by a mesh protector (otherwise the birds will get them). It should take about two days in this weather to fully dry your figs. Once dry put them in a container in your freezer and use them when you wish.

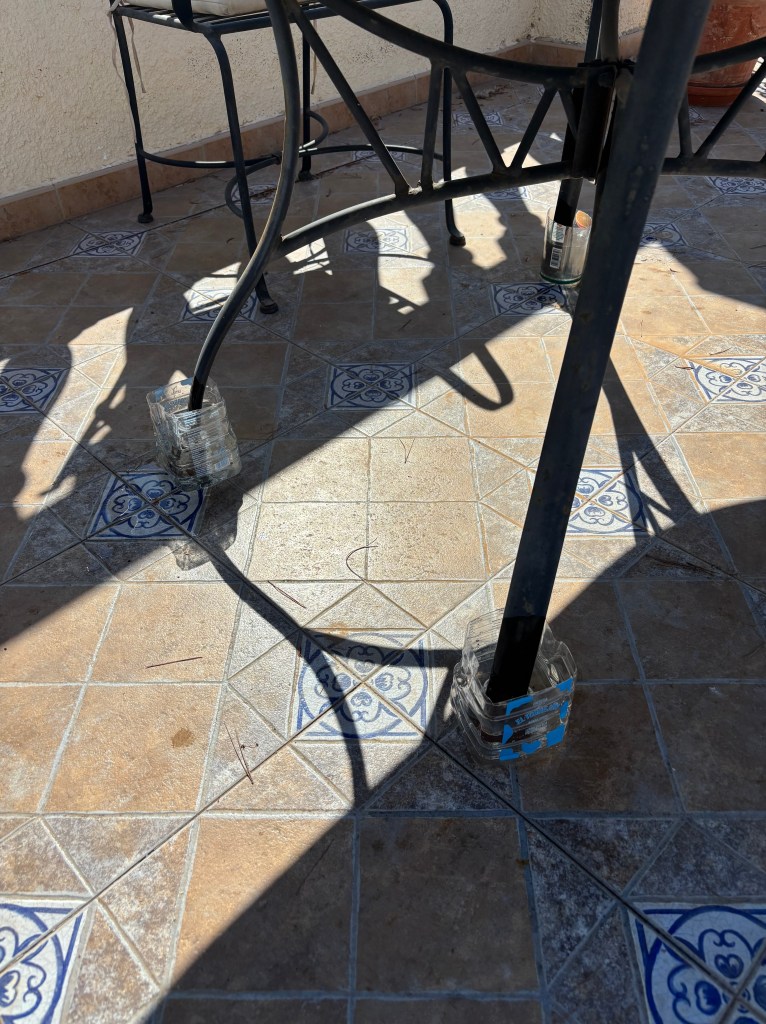
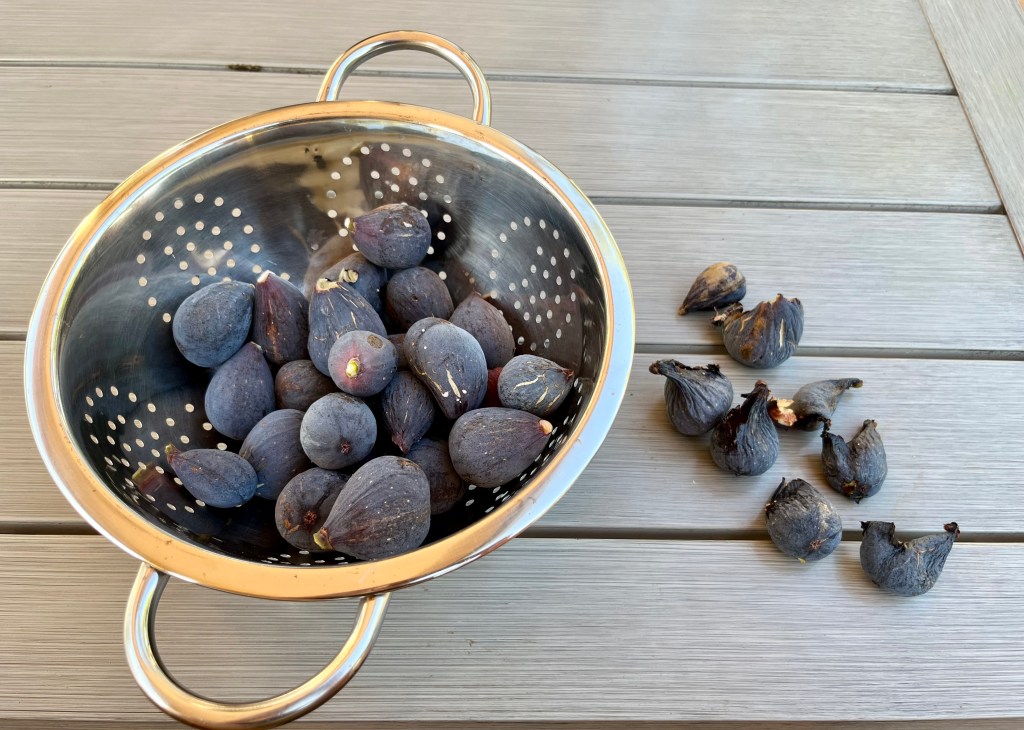
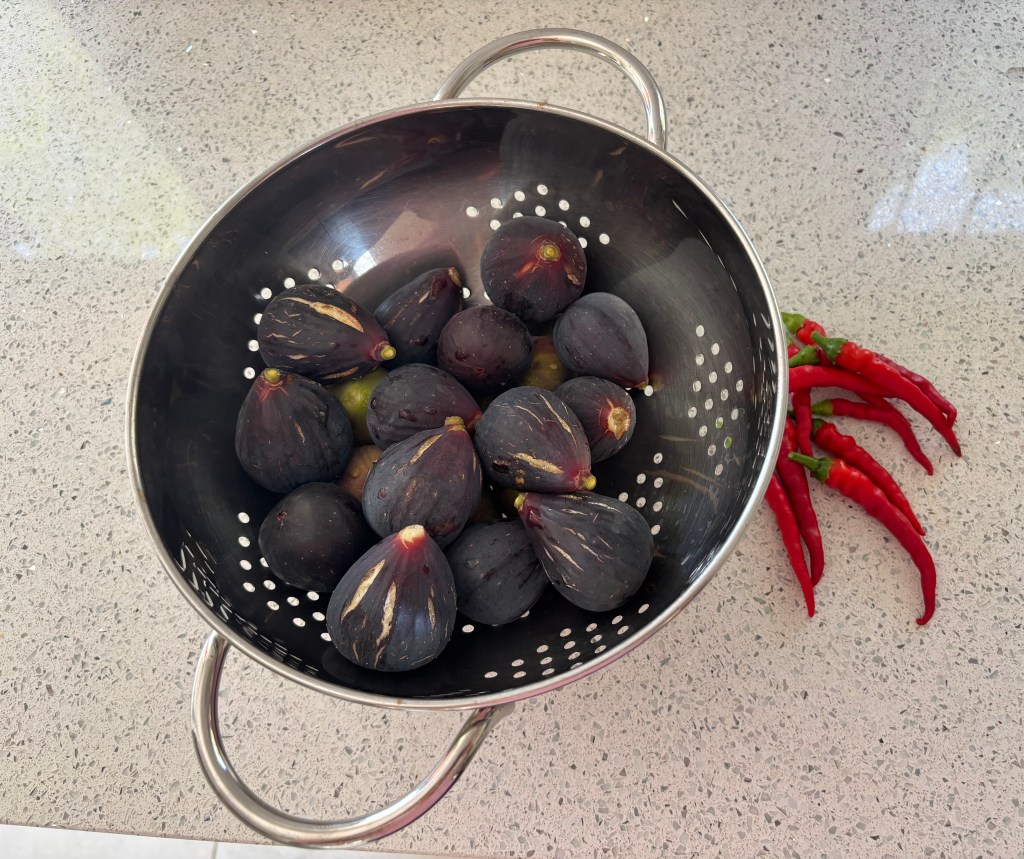
A very important stage in the drying process is to place the bottom of the legs of your drying table in water otherwise ants will quickly find your lovely figs. The water barrier is very effective, I just cut down some milk or orange juice cartons to make my water barrier. The photos below show the full process in action.
Tie up flopping plants. By now all your annuals should more or less be in bloom or very close to doing so. To keep your plants looking their best and healthy you will need to begin the process of staking up floppy plants.

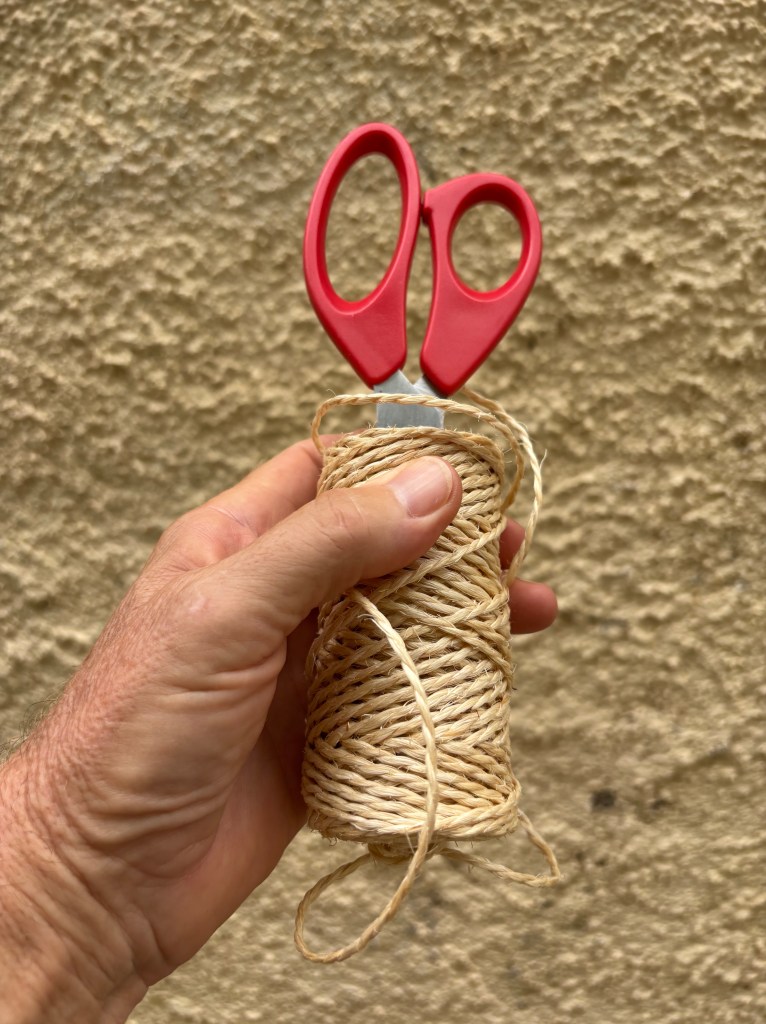
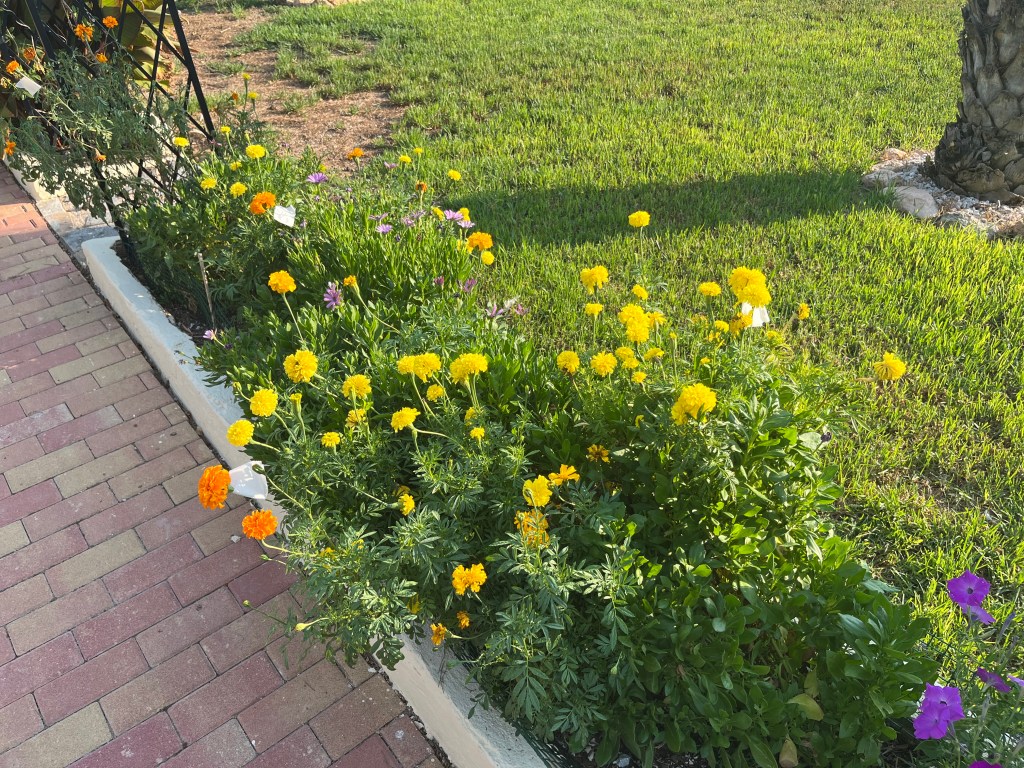
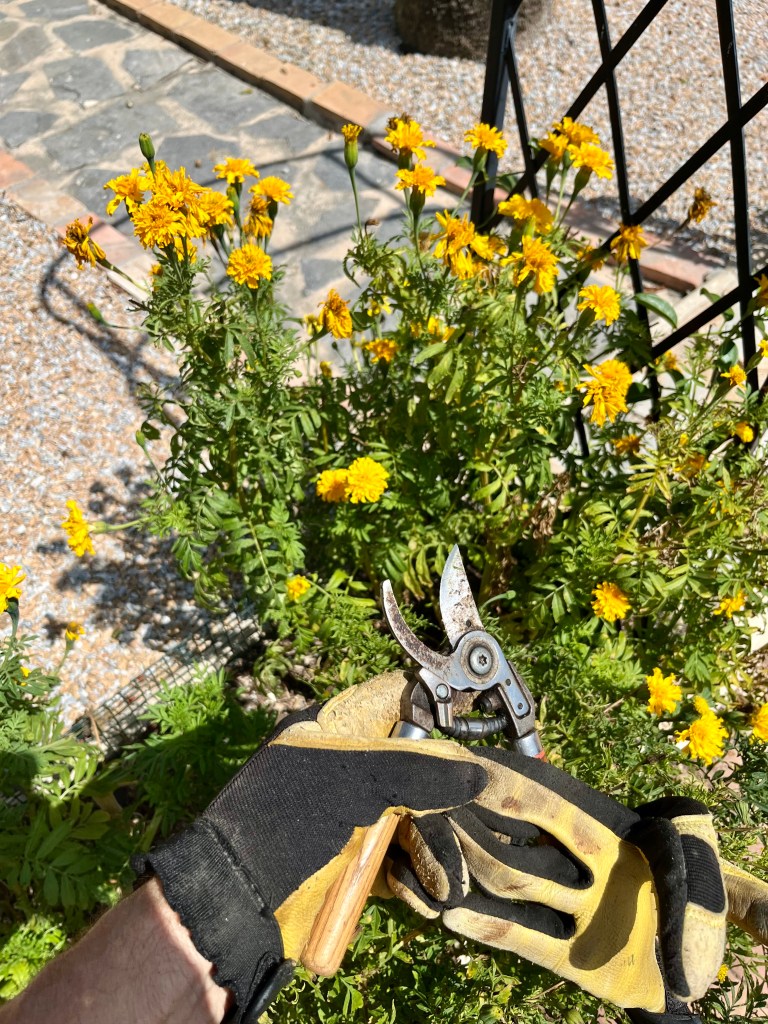
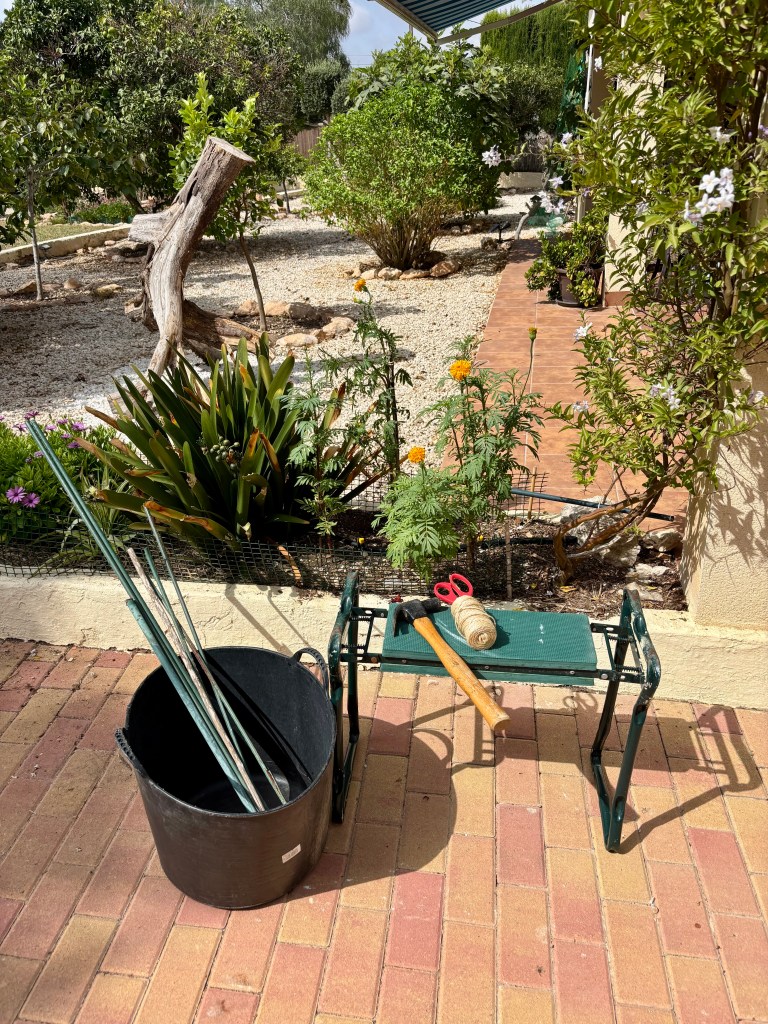
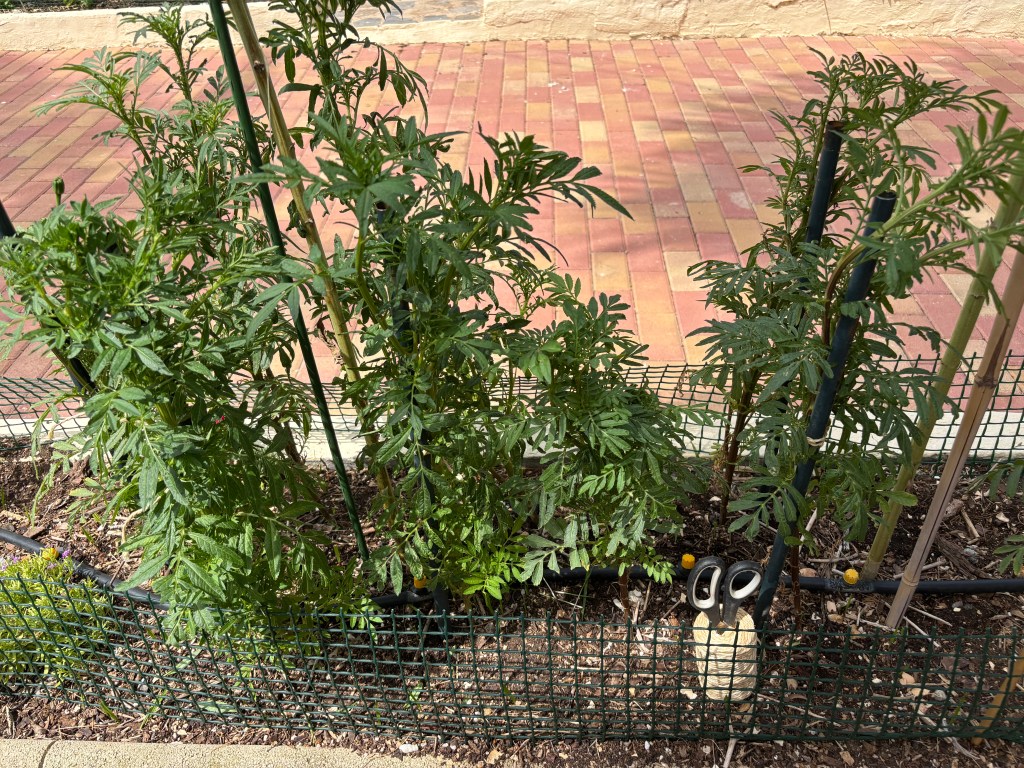
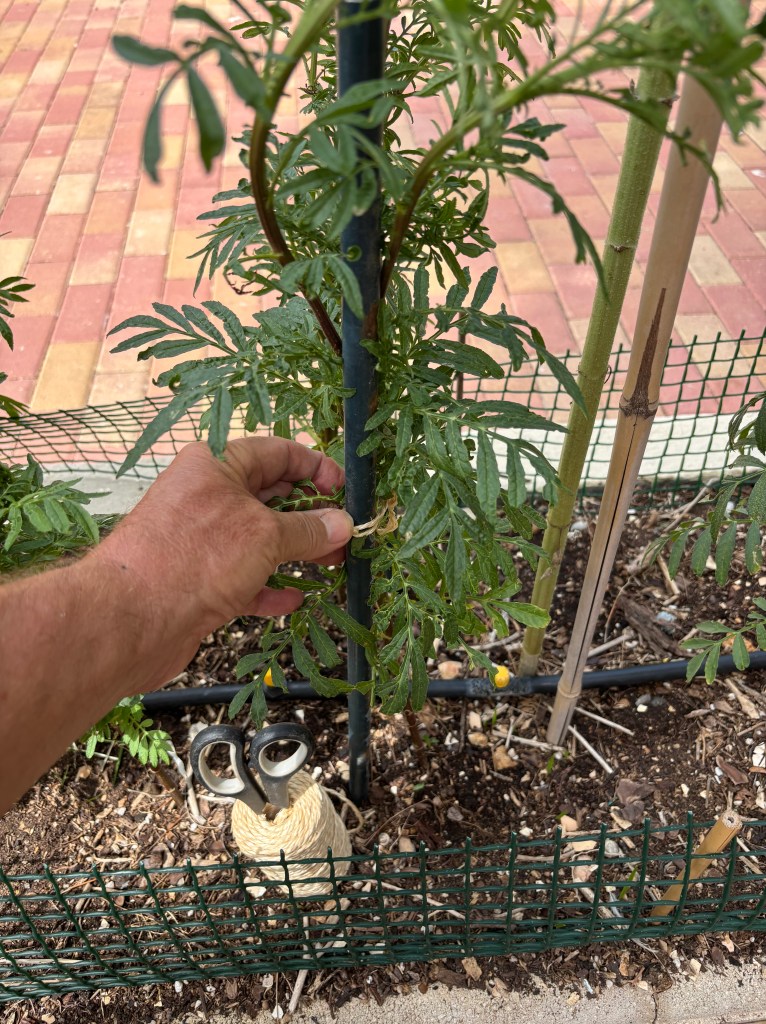
I have been selecting seeds from my Marigolds for over 10 years and now have plants that easily grow over a metre tall. This height means they can get a bit floppy and need staking. When staking always make sure that you tie your string around the stake and then make a figure of eight with the string around the plant stem. In this way you will stop the stem being chafed by the stake in the wind; and if possible use a twine not a smooth string. The photos below show my almost daily staking activity.
Mark blooms for next year’s seed. Growing next years flowers from your own gathered seed is immensely rewarding and will mark you out as a gardener rather than a plant shopper. And it couldn’t be easier I will show you the start of the process now and I will return to collecting seeds later in the year.

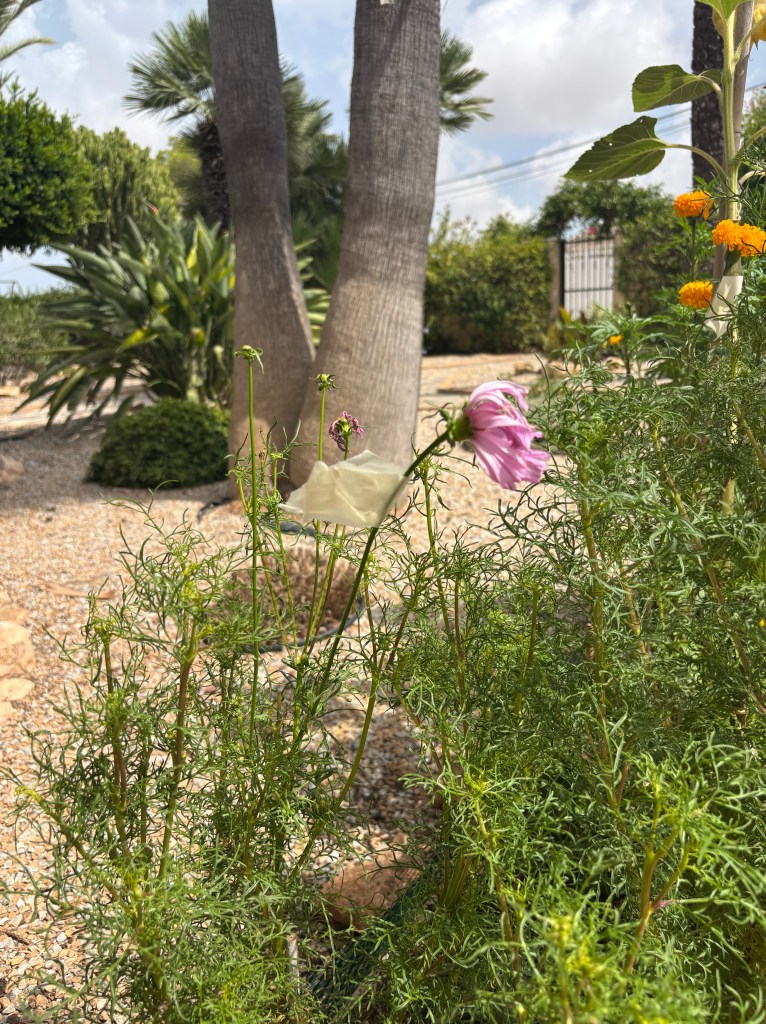
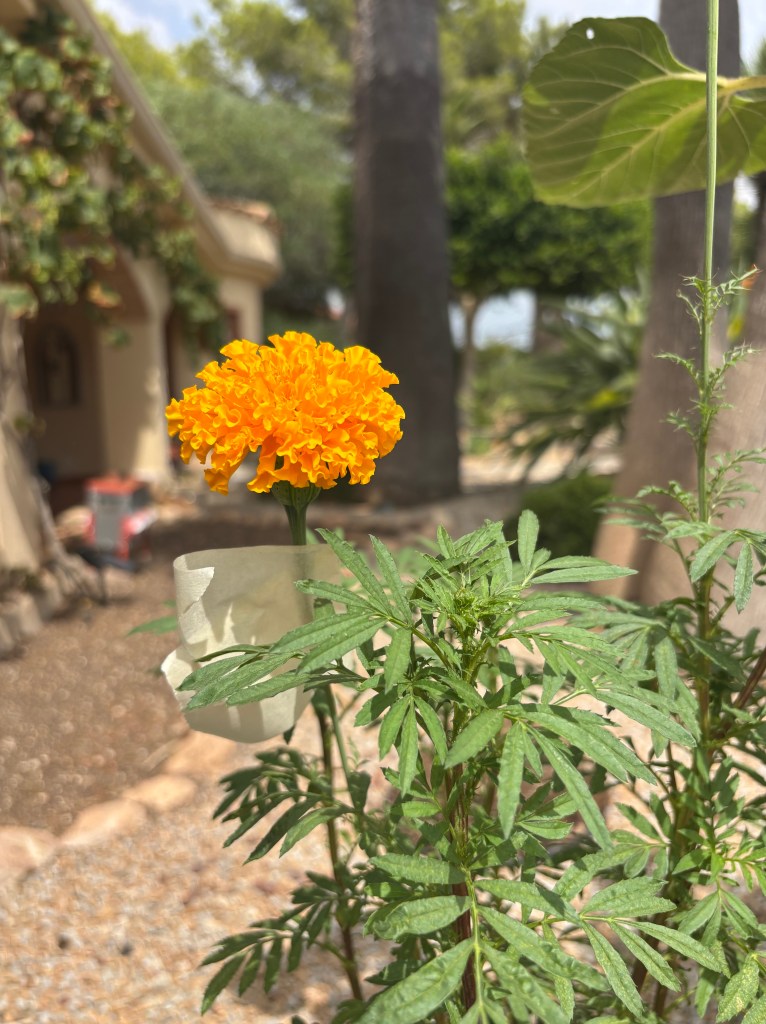
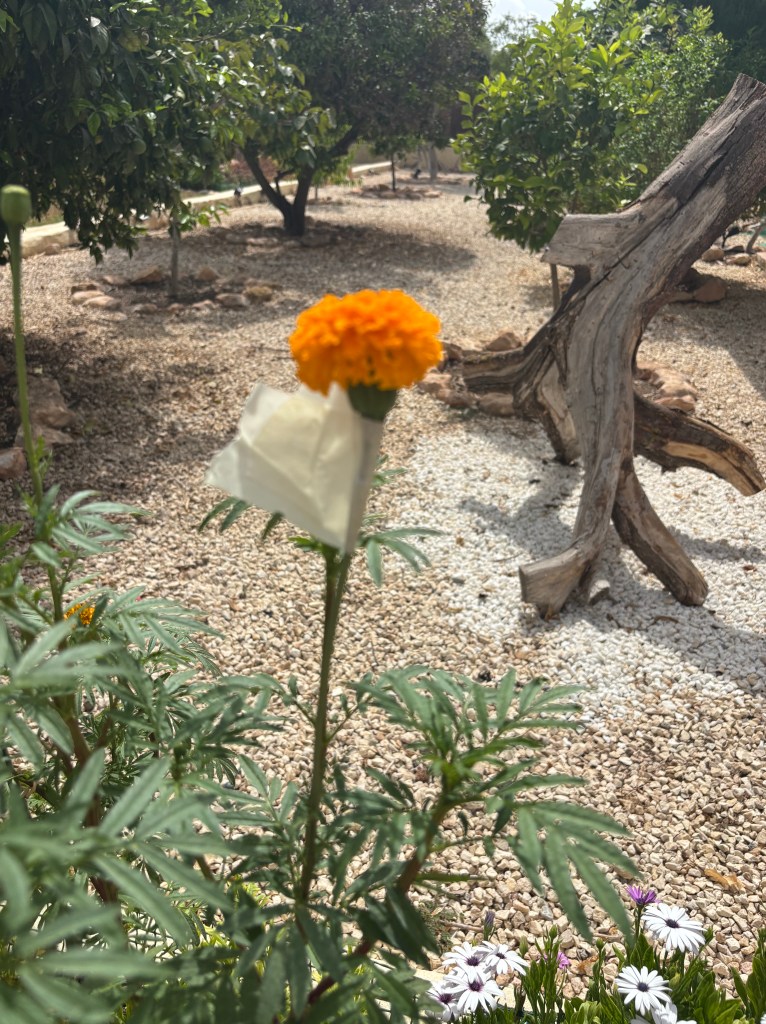
The first step is to mark up those flowers heads that you think are the prettiest, best shaped and from strong looking plants. Once you have decided on your selected blooms then place a strip of masking tape just under the flower. This will serve the purpose of showing you that it was a lovely flower even after it has gone old and shrivelled. The other purpose of the masking tape is to stop you deadheading the spent blooms. The photos below show the start of the process in my garden.
Pot up some Spider plants. Spider plants (Chlorophytum comosum) are an old favourite and are often found hanging neglected in bathrooms etc. But they are an excellent plant for cleaning the air in your home. They became famous after a NASA study found they could remove certain volatile organic compounds (VOCs), such as formaldehyde, from sealed test chambers. Now I am not saying they make a huge difference, but in a bedroom etc they are easy to grow and are fun.

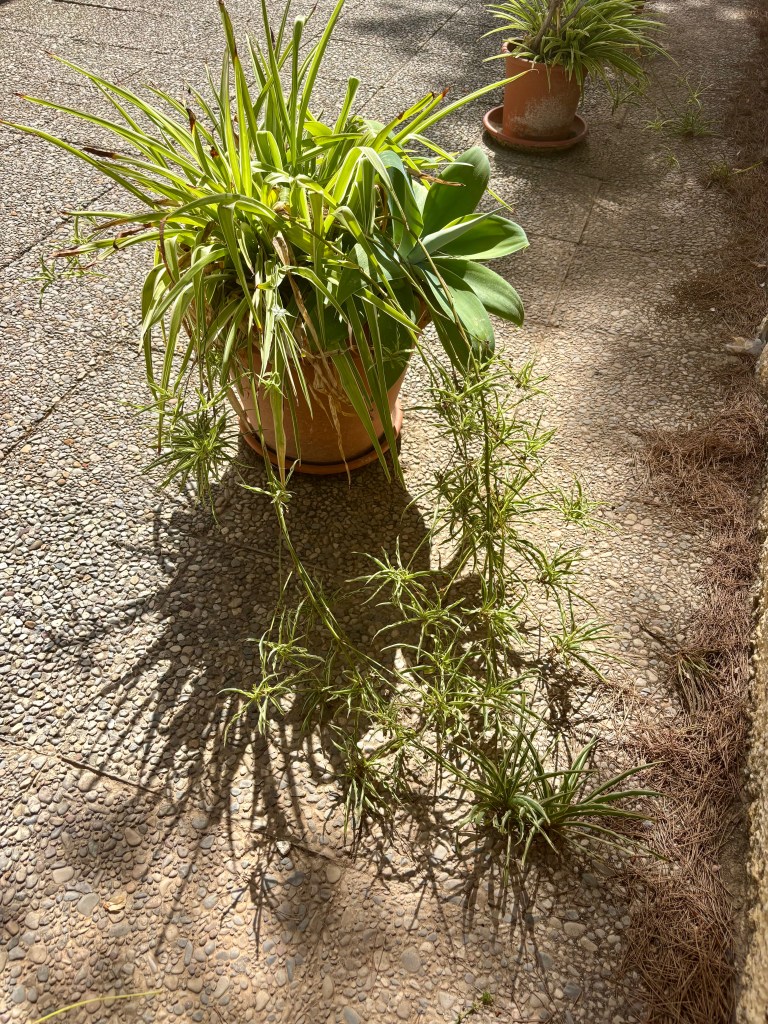
You can easily take cuttings from spider plants as they throw off hundreds of their little pups. Just snip some off and settle them into well drained compost and leave them in bright but sheltered space for a couple of weeks till they root. Once you see growth you can move them into your chosen position. See photos below.
I prepare for autumn and Tango gets an unwelcome visitor

Although we are still in full summer in Spain, your garden will soon start tipping over into autumn and you need to prepare. When you see the shops in Spain laying out their winter clothes then you know it is time.

Besides beginning to collect seeds – which I talked about in my last post – you also need to keep deadheading and start to prepare your soil etc. I will try to cover how to deal with some of the most common plants. But in the meantime Tango the lonely blind Labrador has had to have a visit from the Vet “to make arrangements”!

More of all this later, on with the happy stuff of gardening.

29th August 2025. Things I have been doing lately:

  • Cutting back Osteospermum
  • Tidying up Bird of Paradise
  • Tango has a visitor

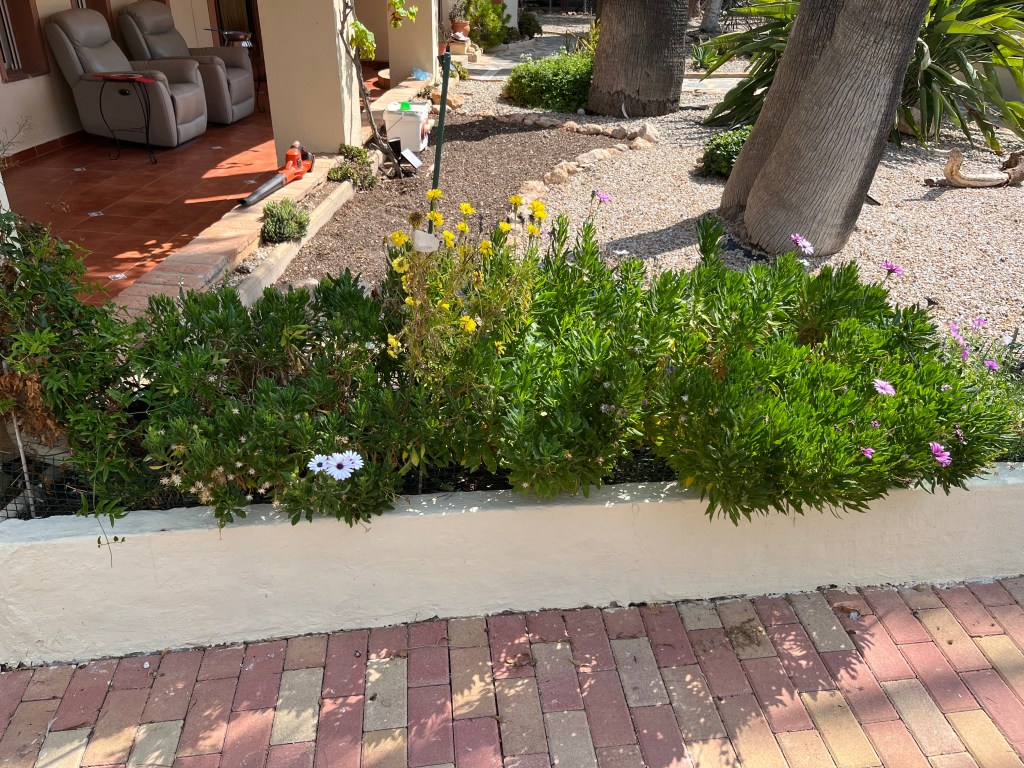
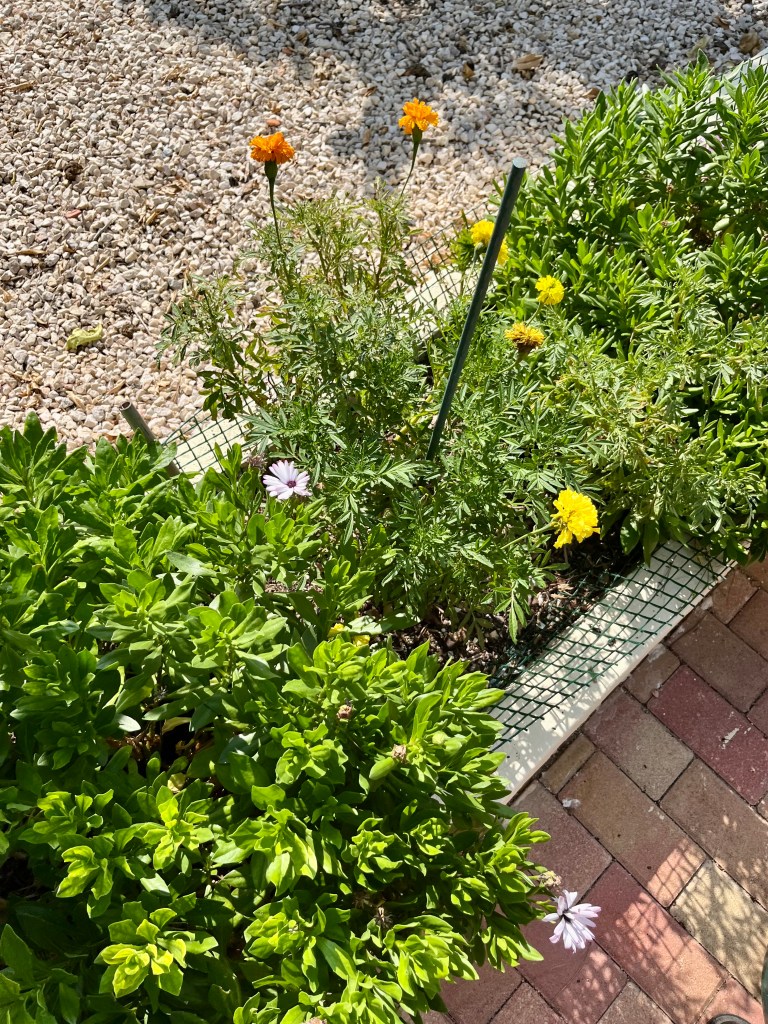
Cutting back Osteospermum. Osteospermum are a common Margeurite Daisy and are a mainstay of my flower beds and many other gardens in Spain. These adaptable perrenials are free flowering from February till December and provide bulk and presence in your borders. The photo below shows some of my borders with Osteospermum and Marigolds, and as you can see it has all become a bit blowsy.

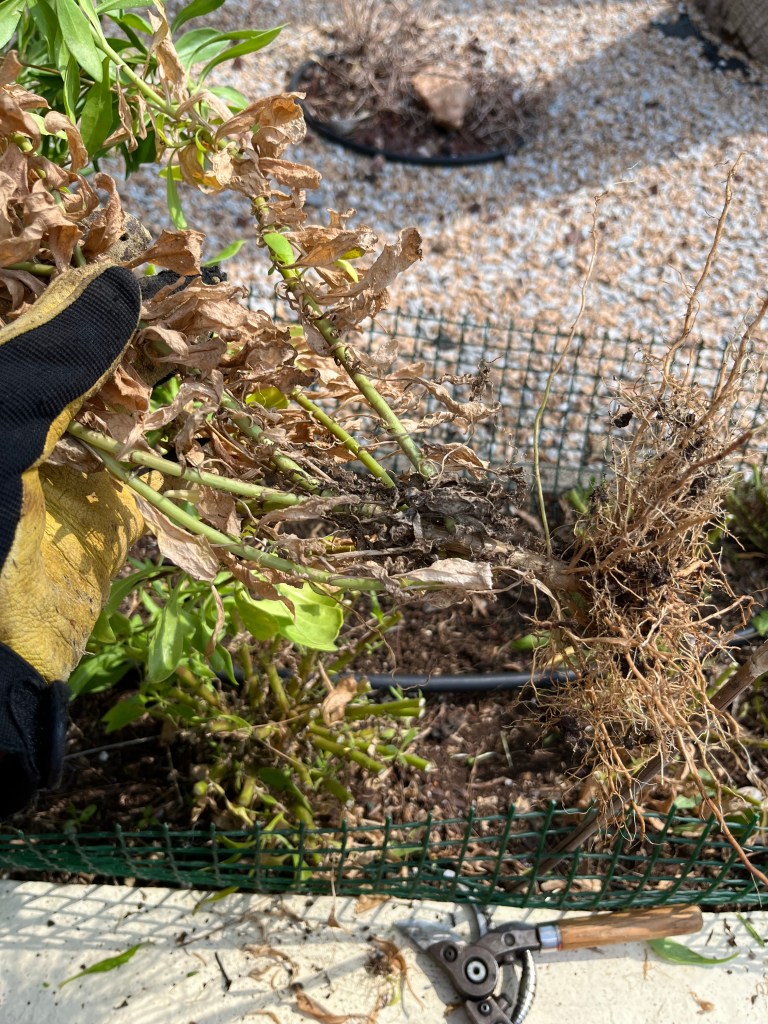
When I cut back Osteospermums I want to do two things. Firstly, if possible to cut the plant right back to the last few leaves to see if it will regrow. But if it looks a bit dead I will take it out. Secondly, and most importantly I want to open to ground up to light so that the fallen Osteospermum seeds can begin to germinate.

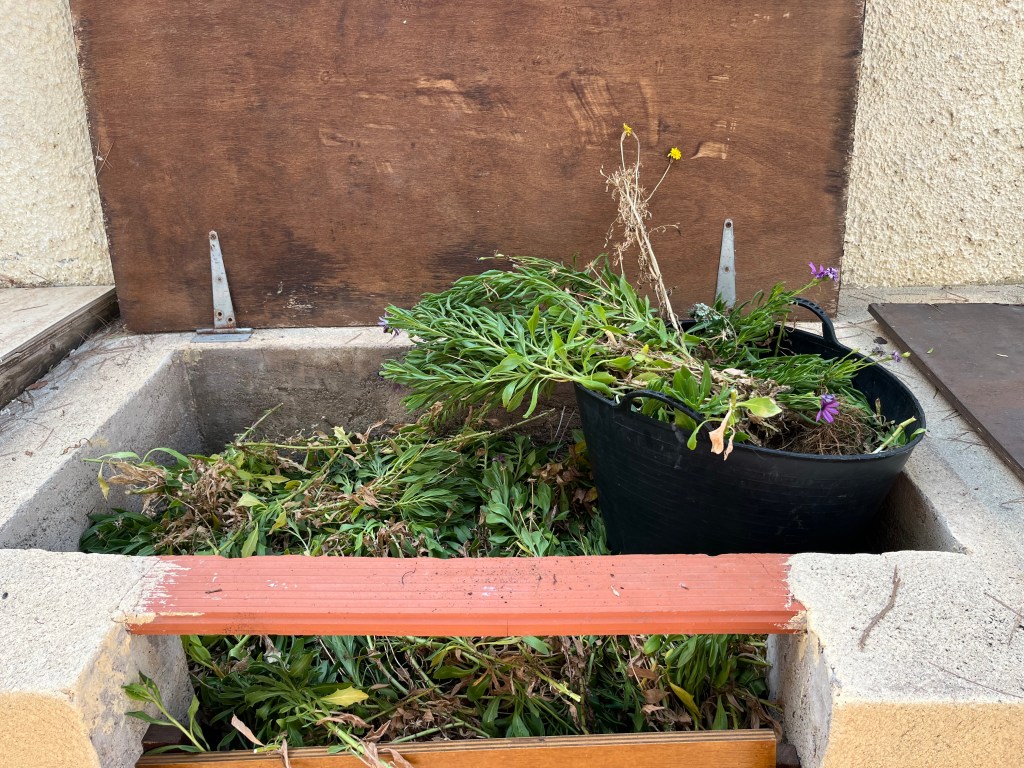
The first photo below shows you the centre of the plants with potential to be cut back, look inside the marked area and you will see lots of new leaf growth.The second photo shows a plant with no future growth potential which I have taken out. The final photo shows where those with no potential end up – so take note.

The final photo shows the flower bed cutback and tidied up. But most importantly note that I have not hoed the ground between the plants. If I did this then I would disturb all the seeds waiting to germinate. Instead, I give the area a good watering both to encourage the cutback plants, and to bring on the seed germination. In a few weeks there will be hundreds of seedlings here.

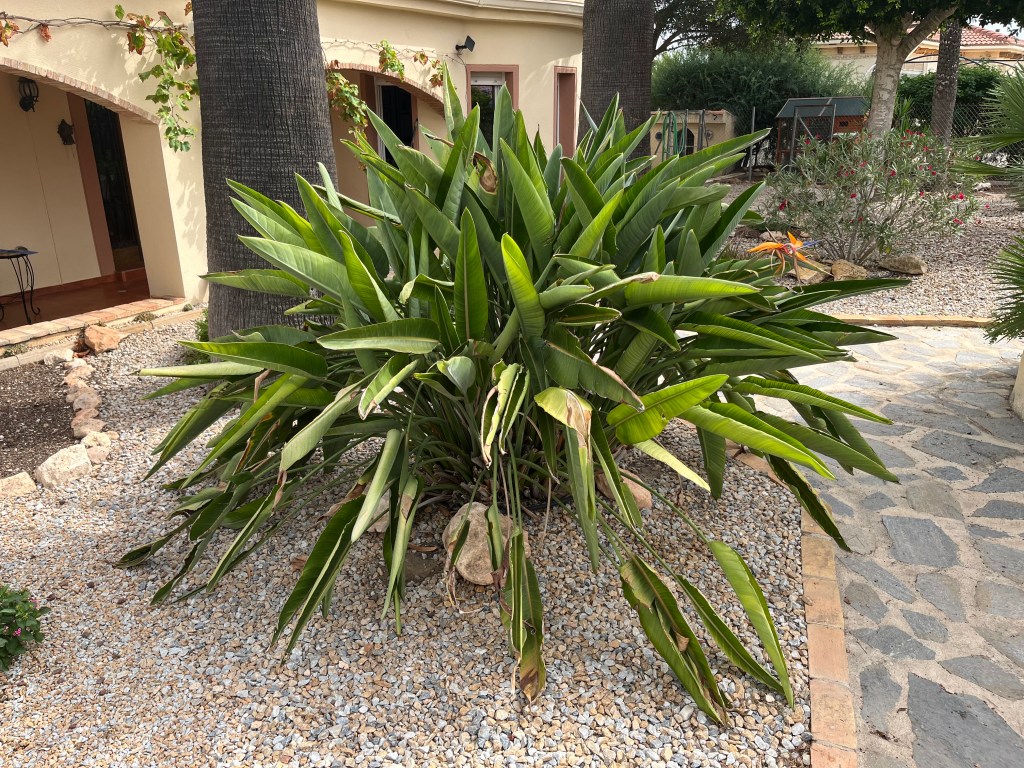
Tidying up Bird of Paradise. Strelitzia Reginae is a much welcomed plant in Spanish gardens for its exotic looks and ability to form large clumps. When in full flower the plant can look stunning, but to keep it that way you have to do some essential work.

The first thing to do is stand back and take a long hard look at your plant before you decide what needs doing and how you a going to do it. The photo below show my Strelitzia and its problems. From this you can see that my cluster is in need of both sharpening up and tidying up.

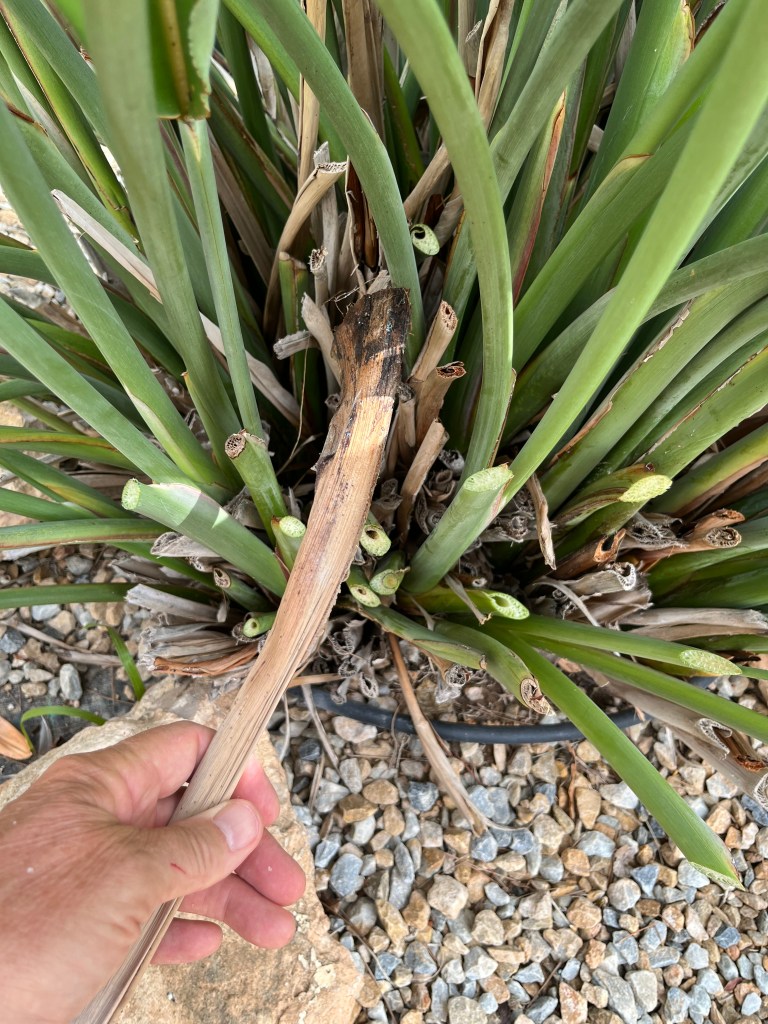
The first thing to deal with is any flowers that have become untidy. Don’t be afraid of cleaning up the flowers by pulling back on dead growth to remove it from the flower. If you are deadheading completely then sometimes you will remove the stem right to the ground, but at other times look down the stem and if you see an angled area of growth, just cut there as it will encourage a new stem. See the photos below.

Next you need to work your way around the plant removing any old cutback stems. Sometimes you will need to cut these back with your secateurs, but at other times you can just pull them out by giving a tug. See photos below.
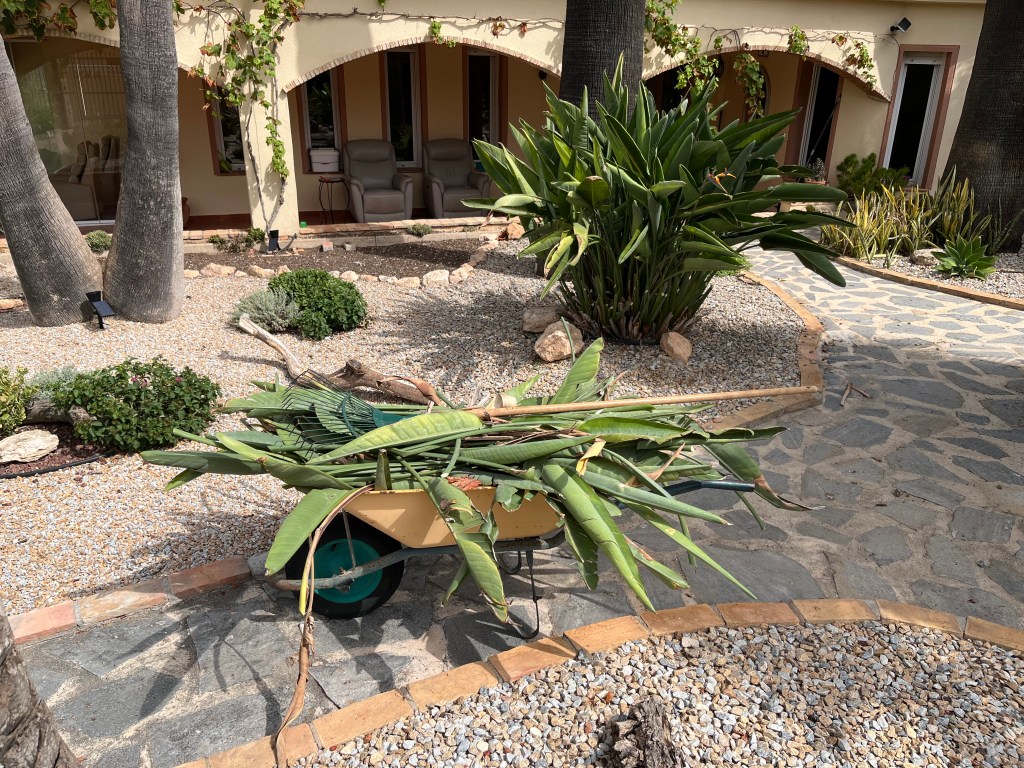
Finally, work your way methodically around the plant in a circle cutting out any growth you no longer require. Keep any eye out for potential new growth spurting from existing stems and cut diagonally just above them to encourage new shoots. See photos.

Finish off by making sure that you compost everything and thereby recycling this lovely plant. Don’t forget to feed. See photos.

Tango has a visitor. Tango the lonely blind Labrador is 17 years old. He is a miracle of determination and perseverance. Cruella (my wife) and I have had many Labradors, most of which have died at about 10-12 years. Despite his many ailments Tango has been a stalwart and has bravely carried on through every setback including being beset by Cruella’s chickens.

Unfortunately, Tango’s time may be coming to an end. We called the vet out to check him over, and it won’t be very long. When the vet had gone I assured Tango it was just a check up and there was nothing to worry about. But somehow he knew. He kept asking me would he be able to see in heaven and would his brother be there. I assured him on both counts. Finally he asked would there be chickens in heaven; I said definitely not – they are all in hell.

I pick seed winners, rescue a Leek and demand that chickens wear nappies

We are now in the dog days of Summer; the heat is intense, plants are wilting, water bills are high and Cruella (my wife) is refusing to fit nappies (diapers for US readers) to her chickens. I know it is all a bit surreal, but you should try living here. Anyway on with the gardening.

20th August 2025. Things I have been doing lately:

  • Selecting the best blooms for seed
  • Cutting back Petunias
  • Dealing with tree suckers
  • Rescuing a common houseleek
  • Petitioning for chicken nappies

Selecting the best blooms for seed. Now is the time to consider which blooms you are not going to deadhead, but instead save for next years seed. As you wander up and down your borders deadheading, look out for the best blooms and mark them for seed. To be honest I should have done this earlier in the summer but I have been just too busy.

The benefit of marking the best flowers for seed, is that you do not accidentally deadhead them. Just get some masking tape, select the blooms you want to save, and wrap a band of masking tape around the stem to remind you not to deadhead this particular flower. I do this because when the flowers shrivel and die they all look alike, but if I mark the best ones I will save them for my next years seed. The photos below show some of my marked blooms.

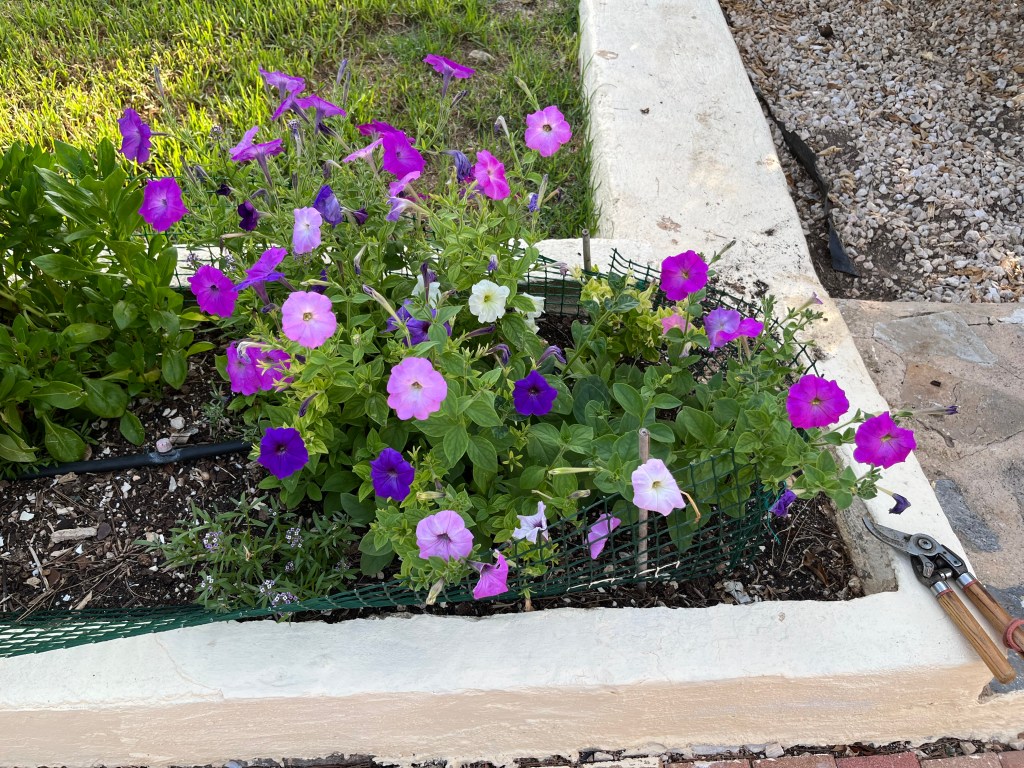
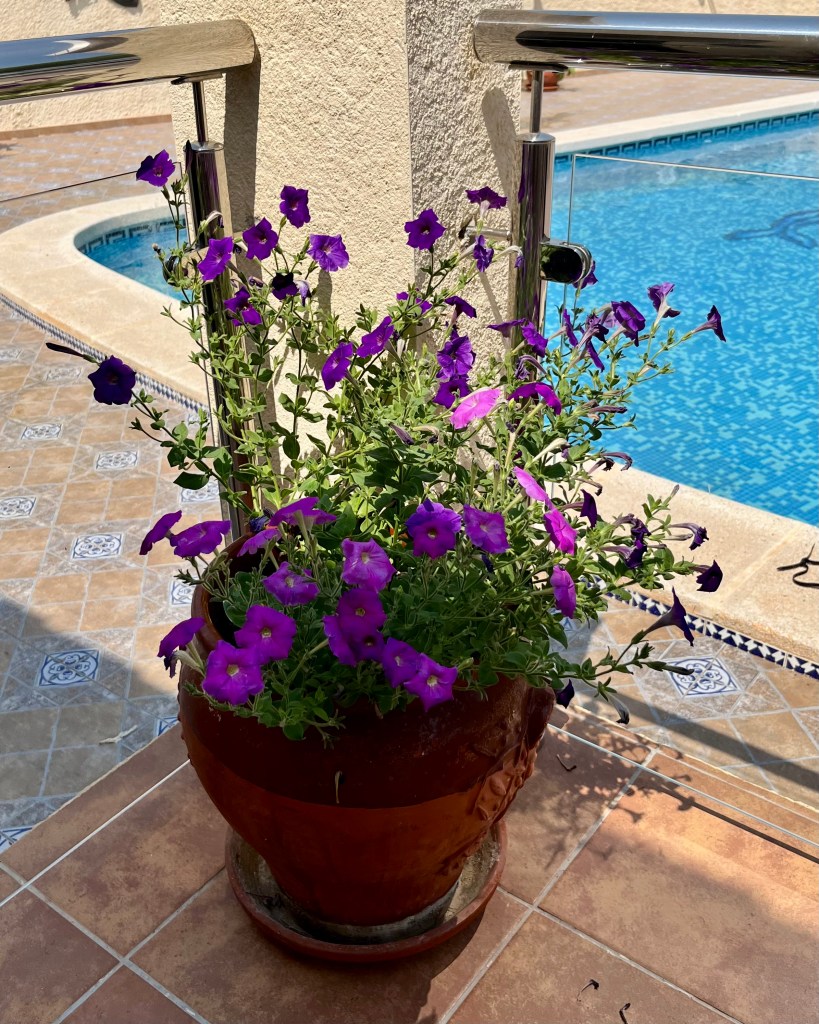
Cutting back Petunias. I have mentioned in recent post that I have been delighted with Petunias this year. They have flowered like crazy and given me much joy. As long as you deadhead them each day – by plucking off spent flowers – they will keep flowering. However, by now they are getting a bit leggy as you can see in the photo below.

For some reason this pot does extremely well

To keep them flowering then you need to cut back the longer stems by a third to half. Don’t do all of them just select a few each week and prune them with secateurs. The photos below show me pruning to ensure flowering all the way to October hopefully.

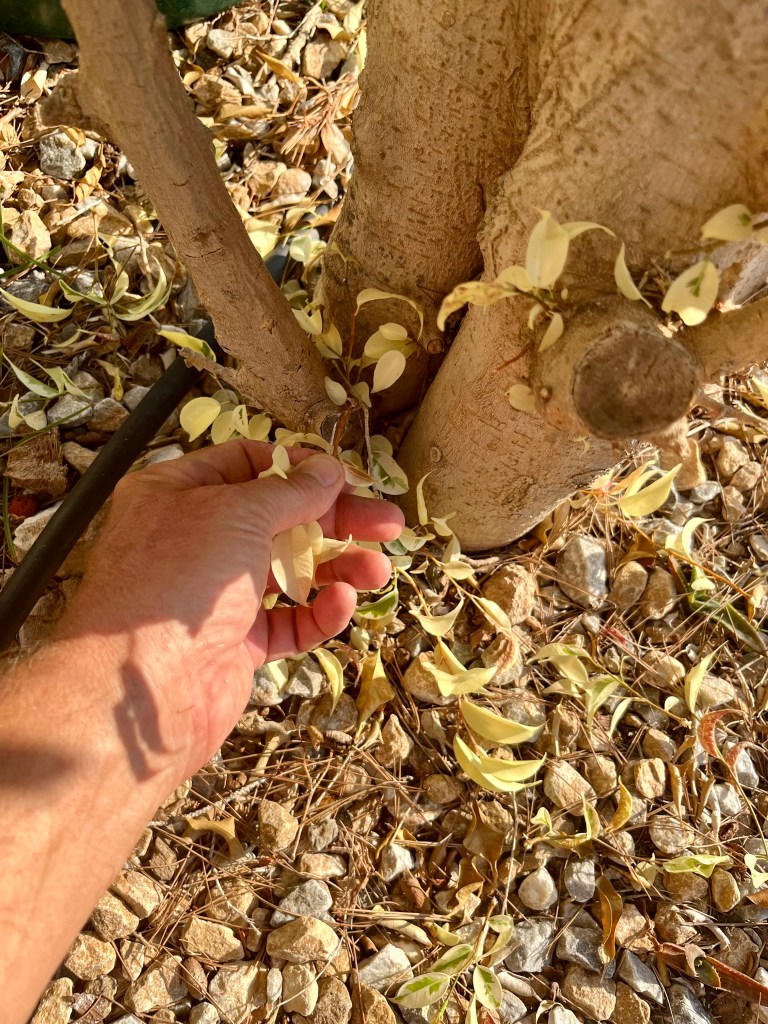
Dealing with tree suckers. Tree suckers are those little bright green shoots that you see sprouting from the bottom of the trunk on your trees. It is important that you remove these as they are in effect sucking the goodness out of your tree before it reaches the leaves and fruit.

Tree suckers are particularly a problem on older trees, especially those suckers that are growing from below the soil as these may be root stock suckers that are no good to anyone. You need to remove suckers on a regular basis. The simplest way is to pull sharply downwards on the sucker and tear it away from the trunk, this method is far better than cutting with secateurs, as it seems to inhibit further growth.

The photos below show a sample of my trees before and after with a variety of types of suckers. Click on each photo for a larger view.

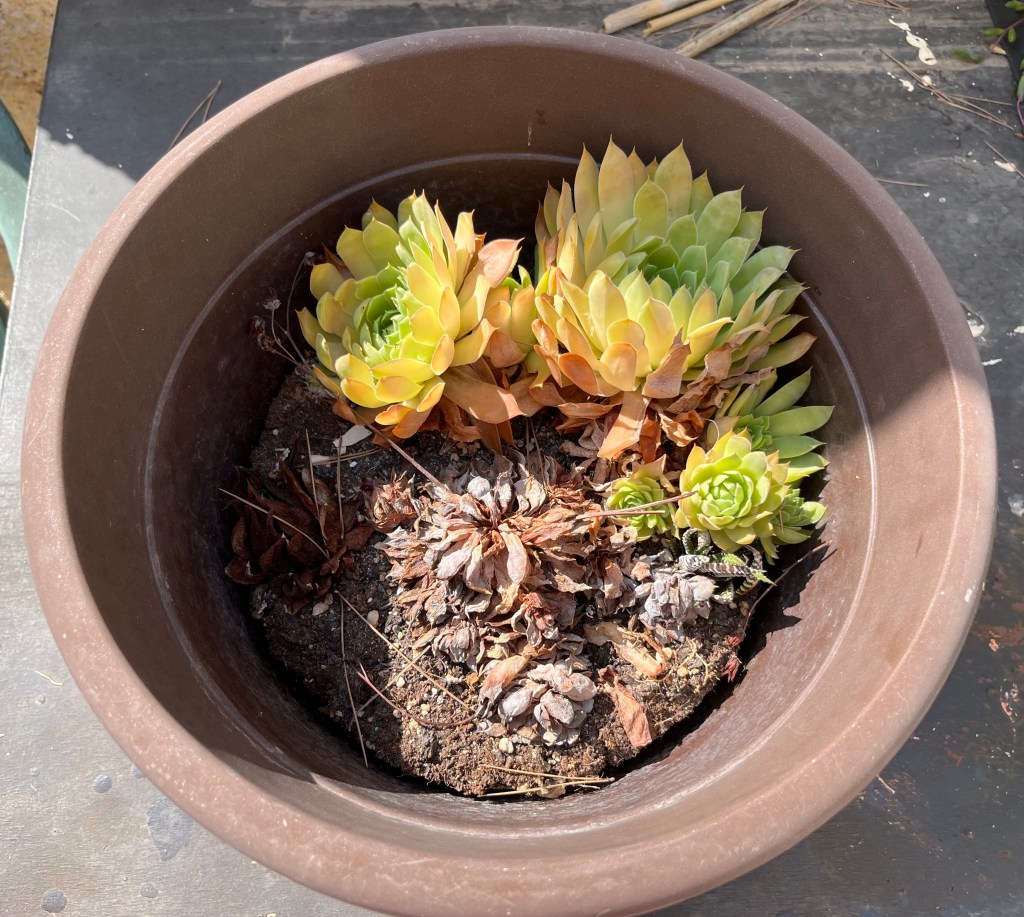
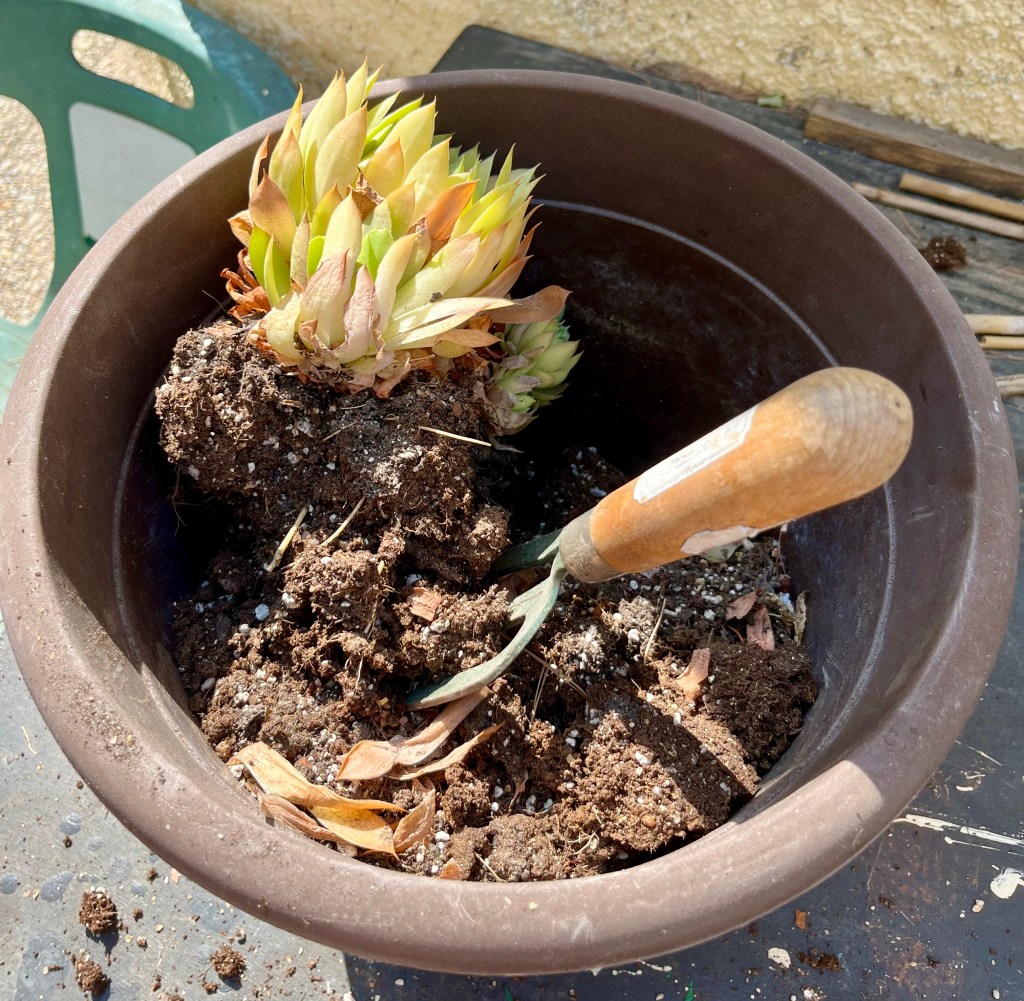
Rescuing a common house leek. I don’t have many succulents in pots, but a while ago I potted up some house leeks with a variety of other succulents and they looked rather nice. Well, they all started to die and rot and it was all my fault. It was simple really, my nice pot of succulents sat between two pots of petunias, and as I watered one pot of petunias and moved across to the next, I would just give the succulents a squirt of water. But never do this, or you will get what I got a pot of rot. See the photo below. Click on each photo for a larger view.

If you catch this in time, then the solution is simple, stop watering! Then you have to dig up the plants, clean them of dead foliage and rot and repot them in a nice free draining compost with added vermiculite. Once settled water them once a month if necessary The photos below show my little succulents being rescued and revived.

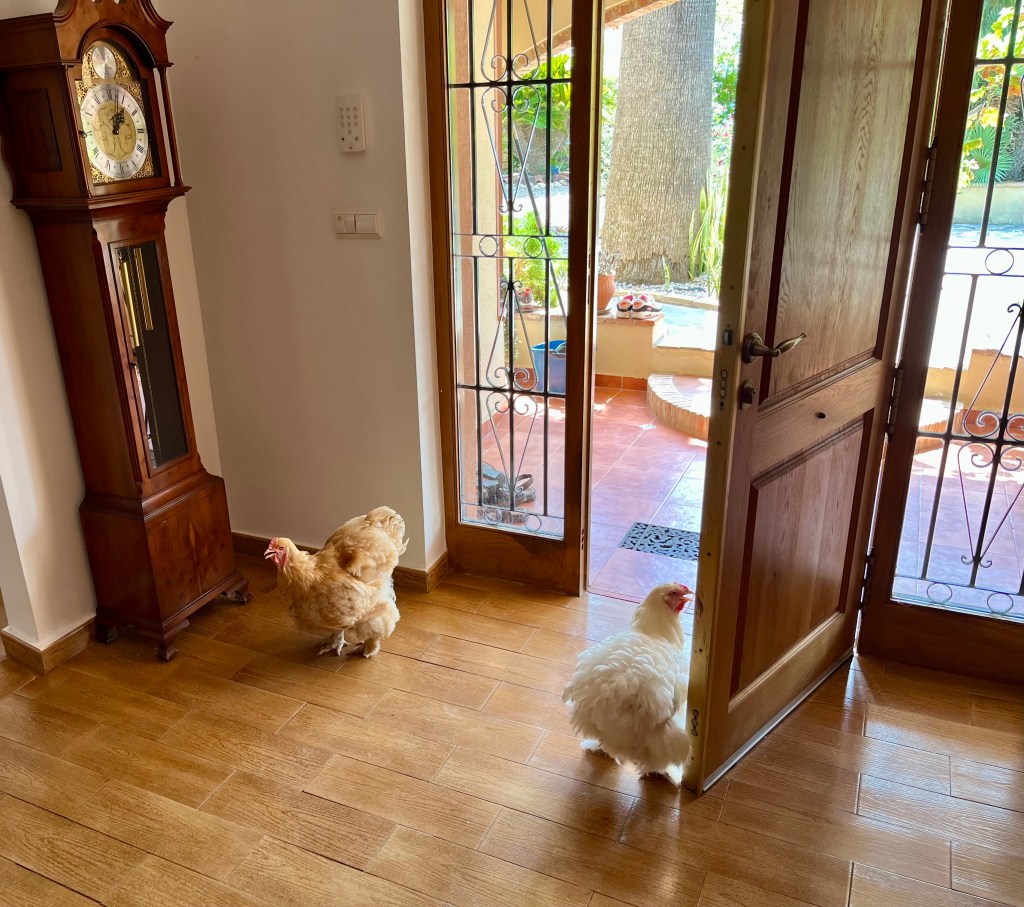
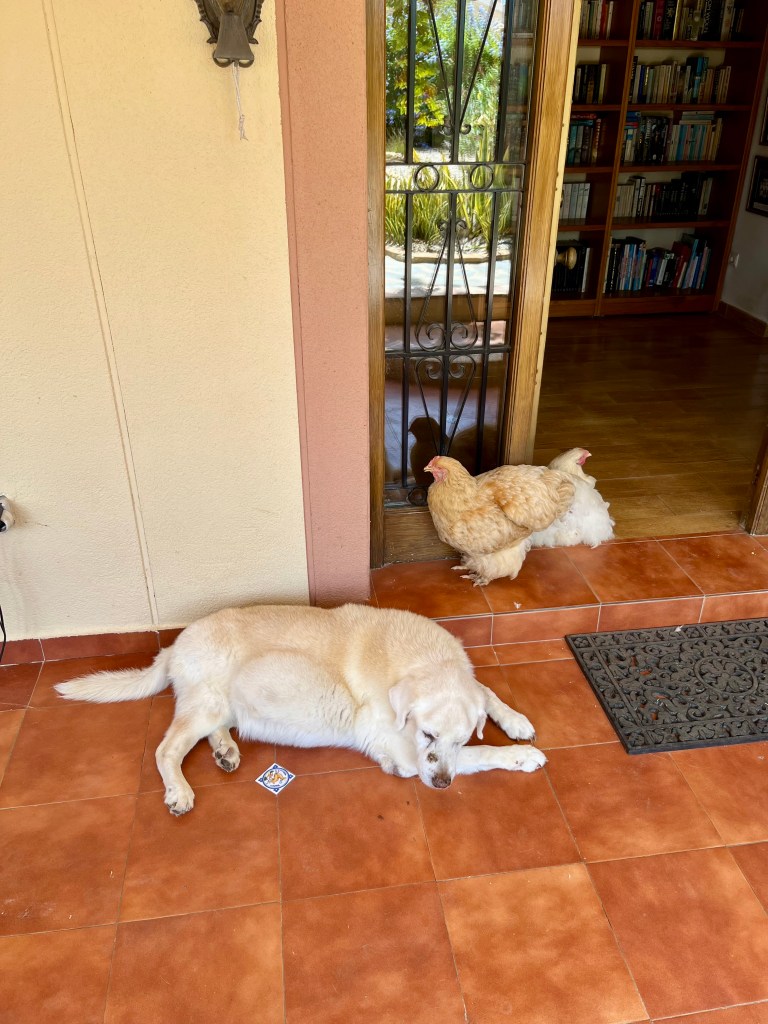
Petitioning for chicken nappies. I don’t know how to put this delicately, but Cruella’s chickens are poohing everywhere they shouldn’t. I expect them to pooh in the garden, in fact I welcome it. But lately they have been congregating on our Naya (veranda), covering it in Pooh and then sneaking into the house to torment Tango the lonely blind Labrador by poohing near him. He then rolls over to ease his many pains and ends up covered in chicken Pooh.

I approached Cruella (my wife) with the problem, but she flat out denied that it was her girls. She began to blush and exclaimed that her girls were too well brought up for such things and were well versed in “toilette”. Anyway I presented her with the photo evidence below. Click on each photo for a larger view.

At first she denied they were real photos and I must have photoshopped her girls in. When I insisted this was not the case she changed her story and said her girls were just popping in to see if Tango the lonely blind Labrador was ok!?

Anyway, she has refused my suggestion of chicken nappies and instead insisted that I should put up an old fly screen over the door. So far poor old Tango has got tangled in the screen and fallen out the door three times; the chickens just stand back and mock him in chickenese as he struggles to free himself. It is a bit like watching Samson being mocked in the temple of Dagon by the Philistines.

I am deadheading night and day, Cruella has a new broom and the chickens are disrespecting Tango

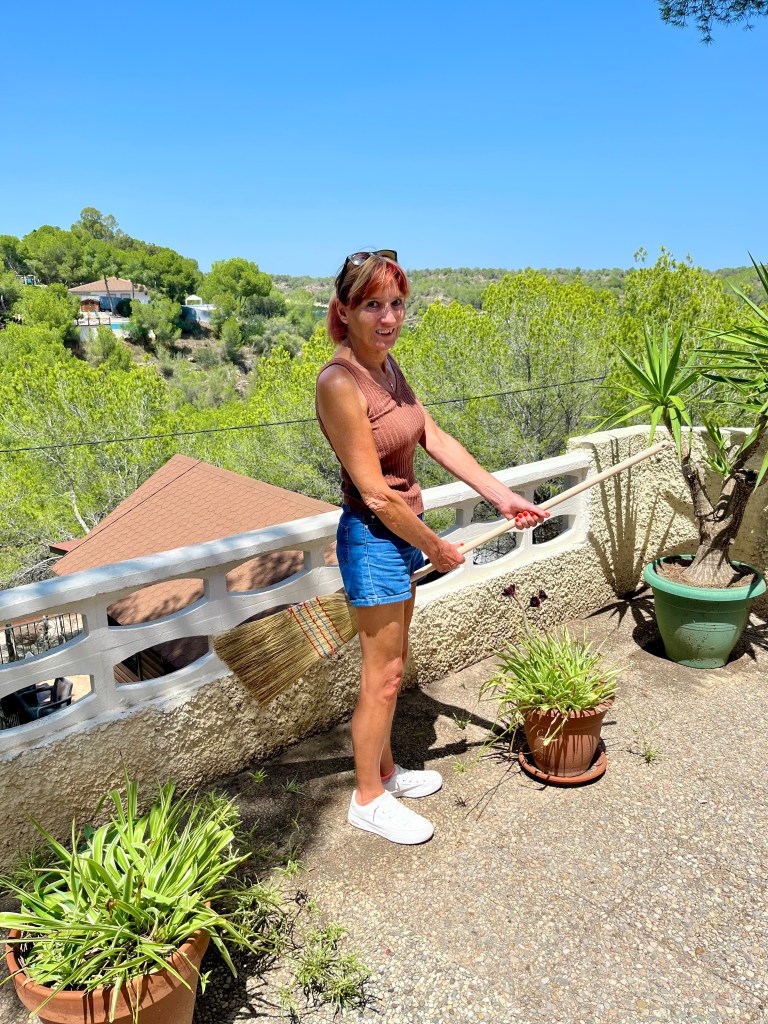
By now your garden should be at its peak, with flowers galore, soft fruits and figs etc coming out of your ears. And yes, I know it’s hot, but when the going gets tough, the tough get gardening. As if all this isn’t enough Cruella has upgraded her broom to a digital model, she says it is the equivalent of the Airfryer of brooms, but I don’t know what she is talking about. The photo below shows a delighted Cruella with her new broom.

If you look closely the handle has a hole in the top, Cruella tells me this is to hang your handbag when flying.

Oh! and the chickens are trying to make Tango the lonely blind Labrador homeless and are disrespecting him. Anyway, on with the gardening.

5th August 2025. Things I have been doing lately:

  • Deadheading
  • Harvesting and preserving figs
  • Dealing with the Chillis disaster
  • The chickens are disrespecting Tango

Deadheading. You have done all the hard work, planting seeds, potting on, planting out etc. And now you can enjoy your lovely summer flowers. Even if you shamefully went out and bought your plants, I can forgive you, as long as you deadhead every day.

Every plant will attempt to flower only once and then put all its energy into setting seed. The plants whole purpose is to fulfill its life cycle by setting the next generation. However, if you let this happen then all you will mainly get is a quick flush of flower then borders full of brownish wilting plant stems.

If you want flowers all summer then you need to deadhead daily. At its simplest this means taking off the spent flowers heads to encourage the plant to continue to flower.

Most deadheading is very simple. Take your secateurs to just under the spent flowers head, but don’t cut there. Instead, slide your secateurs down the stem of the plant till you meet the next flush of leaves, cut here. In this way your cut will be at a growth node and you will not be leaving behind deadwood that could get infected. However, sometimes you have to deadhead certain plants differently so I have outlined some examples below.

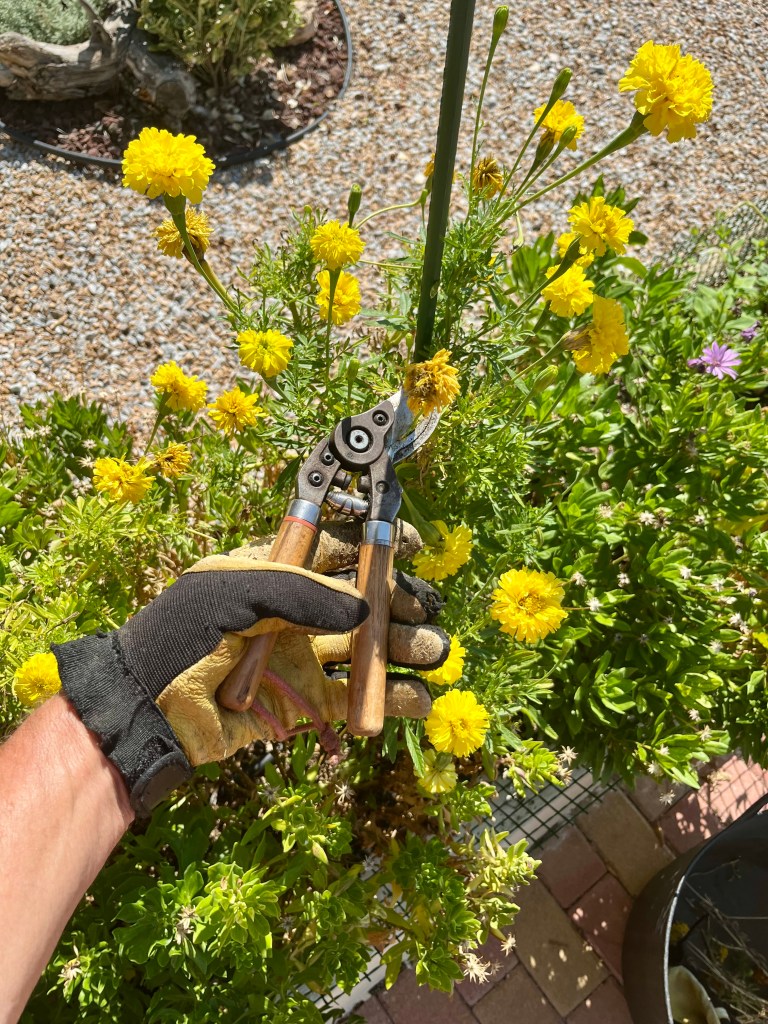
Marigolds. Marigolds are stalwarts in my flower beds and are wonderful flowerers all summer. You deadhead Marigolds in the traditional way by moving your secateurs down the stem. See photos.

Petunias. I have planted Petunias from seed this year and they have been delightful. Once they get going they flower profusely with new flowers every day. To get the best out of Petunias I deadhead them every morning and sometimes twice a day.

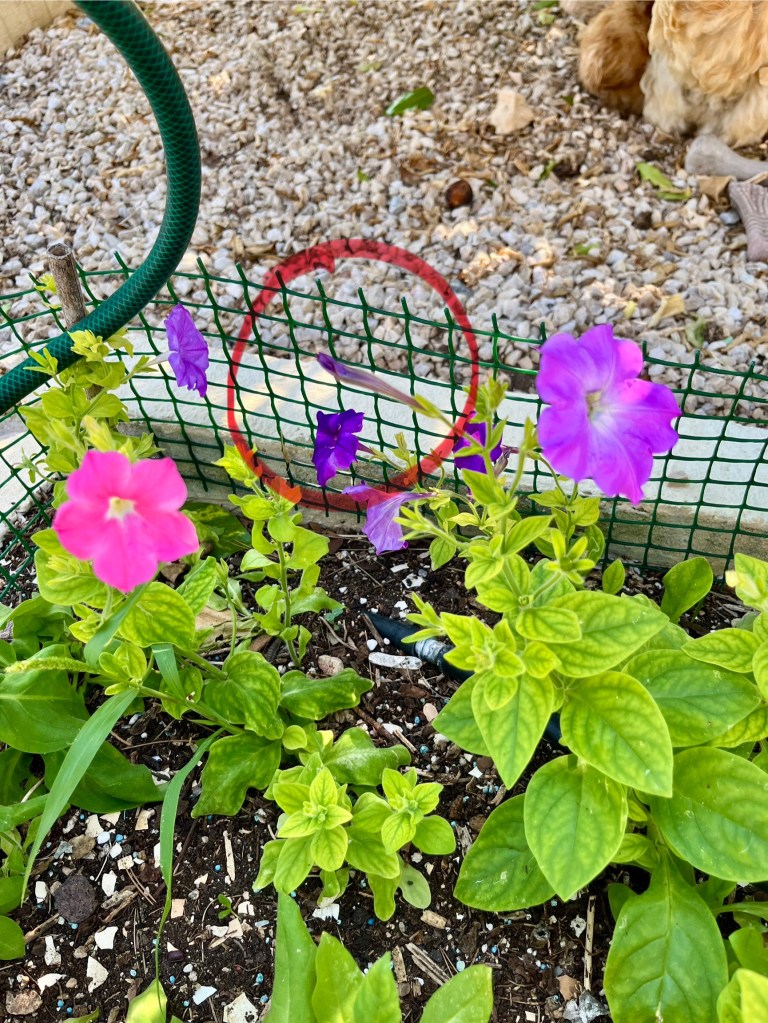
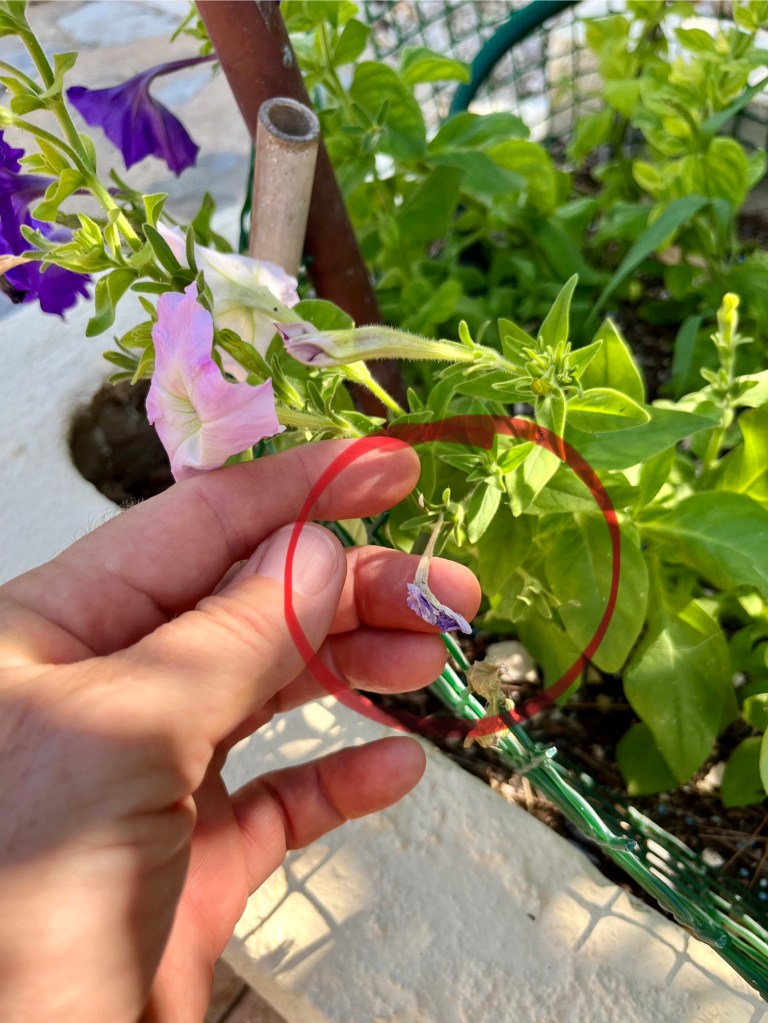
You do not prune Petunias, instead you deftly pluck out the spent flowers. However, it is difficult at first to tell which is a new flower and which is a spent flower. So you have to train your eye to tell the difference. A new unopened flower will come straight out from the stem as a closed funnel (which to be honest can look dead).

A spent flower that has been left and not deadheaded soon enough looks exactly like a new flower with the only difference that it has a slight curl at the end, and if you feel it, it will feel a little bit crusty. The first photo below shows an emerging flower, whilst the second shows a spent flower.

Cruella just looked over my shoulder, read this and said “nobody cares about your bloody flowers”.

Roses. Most of my roses are single bloomers and in the main it is all over by late May with another little flush roundabout now. The one exception is an old standard rose that I planted in a hedge years ago. This thrives on neglect and flowers beautifully all summer. To prune roses, wait until most of the colour has gone out of the individual blooms and then deadhead by sliding your secateurs down the stem as outlined above. The photo below shows my lovely old rose flowering away and how to deadhead.

Rain Lily. By now all of my bulb plants have flowered, been deadheaded and are happily sleeping in the soil till next Spring. The one exception is a lovely little pot of Rain Lily (Zephranthes Carinata). This lovely little plant flowers like crazy, but like all bulbs you just take off the seed head and let the stems die back naturally. It will be cut back to the soil in the autumn, but now it is time to just enjoy. The photos below show the little wonder.

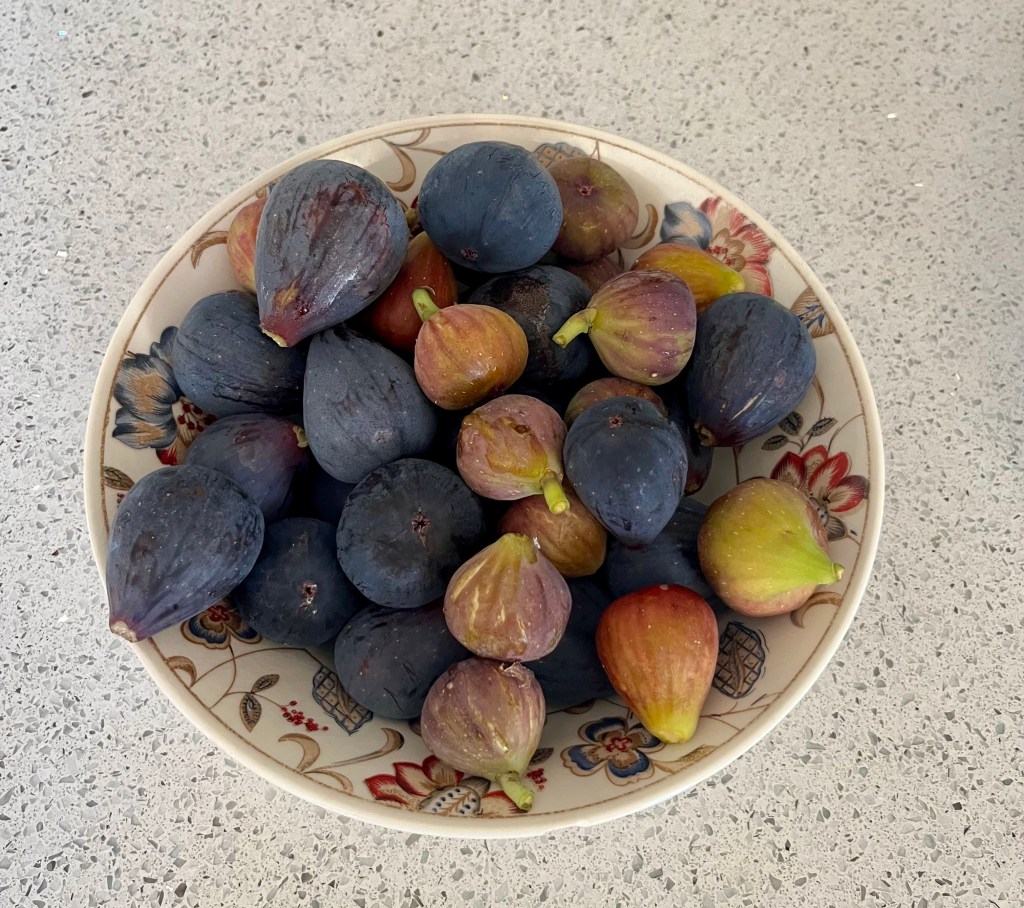
Harvesting and preserving figs. If you pruned your fig tree correctly, then by now you will be awash with figs. Luckily I love figs, but even I can’t keep up with the harvest. The photos below show my daily harvest from two trees.

Now there are lots of things you can make with figs, so just look it up on the internet. But, if you want to preserve that luscious juicy feeling through till the autumn then I recommend drying your figs in the sun and then freezing them for use later.

It is quite simple as long as you remember that your figs will be under attack from ants, flys and birds, so you have to protect them. All you need is a few mesh baking type trays, fly coverings which you can get from most “China” shops (sorry those of you in the US, it is a common term in Spain).

Cut your figs into halves and then space them out in rows on your mesh tray. Put this out into your garden on a table in full sun all day. You must place the legs of your table into pots of water to ensure that ants can’t climb up and destroy your figs. The easiest thing to do is just cut a plastic orange or milk bottle in two and fill the bottom with water.

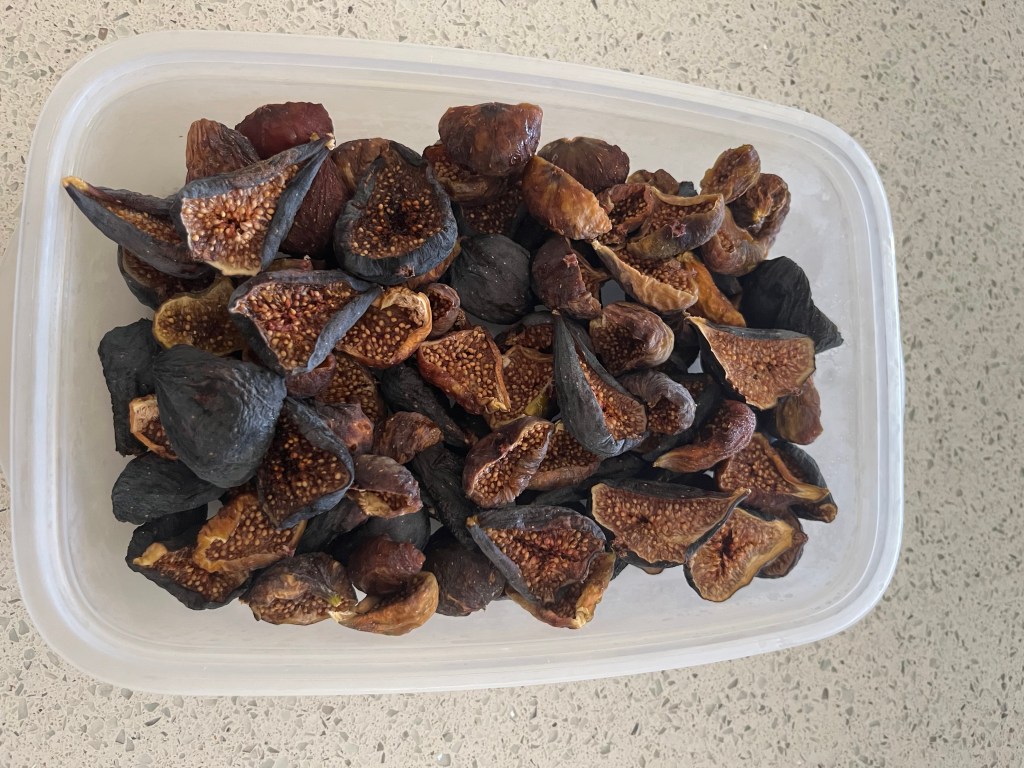
Leave your figs in full sun all day, but take them indoors each night and keep them covered. It takes about two to three days to dry the figs. The first photo below shows my sun drying technique, whilst the second shows some figs ready to freeze. They can be used as a snack or used in cereals and porridge.

Dealing with the Chillis disaster. I have grown lots of Chilli plants from seed this year. I had so many that I kept 8 but have given lots away to friends. All was going well with plenty of flowers and nascent Chillis; that was until the chickens found them. I had placed them in pots at the rear of our house where the chickens seldom go, but I came out one morning to find the plants stripped of all flowers and the little Chillis and most of the leaves.

I was extremely distressed and complained to Cruella (my wife), but she just shrugged her shoulders and said “girls will be girls, you shouldn’t have left the stupid things there anyway”. In the end I put my plants up on tables out of the reach of the chickens, but then we had a terrible storm that blew all the plants off the table and removed all the new little Chillis. I have persevered and at last I have some Chillis. See the photos below for the hapless chilli plants and my little harvest.

The chickens are disrespecting Tango. Tango the lonely blind Labrador was for so many years top dog. Together with his late brother Nero he rampaged around the garden, guarded the house and was generally just lovely. However, lately age and ill health have forced him down the animal pecking order. Now 17, blind, deaf, only three good legs and a gigantic tumour he cuts a sad figure. To me he will always be a puppy, but Cruella and her chickens laugh at him, mock his infirmities and snigger when he can’t get up. He is a bit like Samuel chained to the pillars by the Philistines in the temple of Dagon.

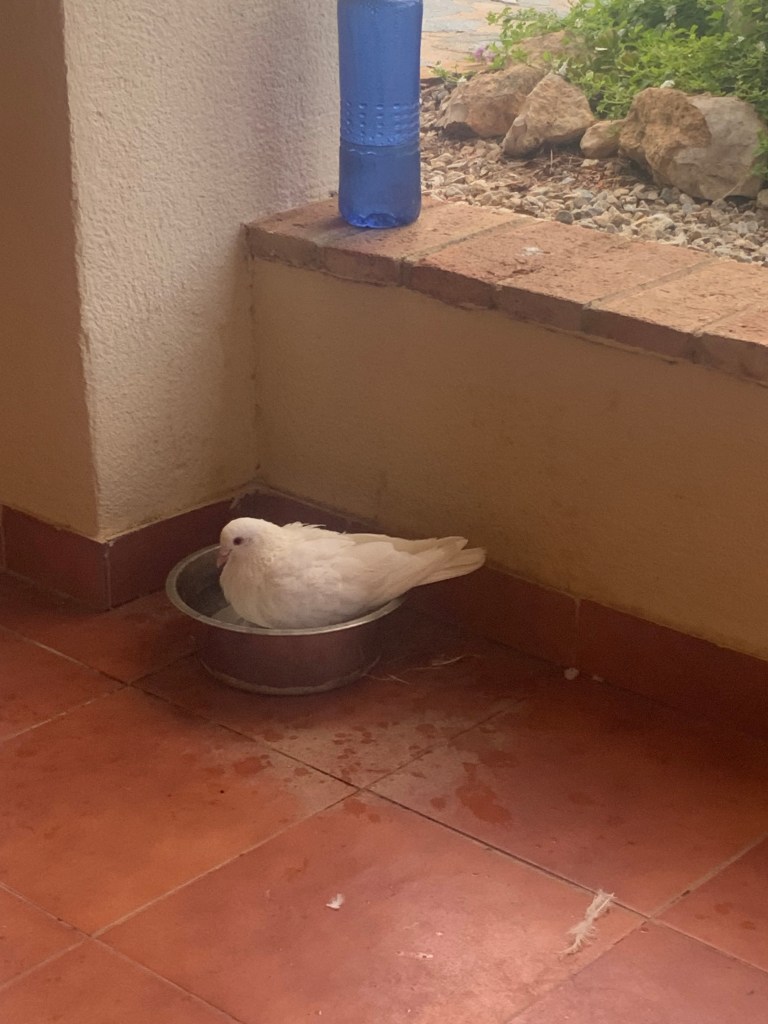
Tango’s situation has been made worse by Cruella’s new broom. She has been distracted with test flights and the chickens and their friend the Dove have started picking on Tango. They turn their backs to him every time he walks past and just snigger. They try and stop him entering the house by blocking the doorway. However, the latest indignity is the worst; the Dove has started bathing in Tango’s drinking bowl.

Tango has started having stress nose bleeds, so we are pulling together a “class action” to prove cruelty to dogs and Chillis. We are still working on the paper work, I will let you know how we get on. The photos below show Cruella starting one of her test flights, followed by various acts of cruelty.

She has already knocked the satellite dish off the roof

The big summer cutback, I forgot to net my figs and I am accused of killing Big Bertha

I suppose I better start with the bad news; Big Bertha my wife’s favourite chicken is dead! The really bad news is that I am being accused of deliberately killing her (the chicken that is). I won’t go in to it all now, we will do the garden stuff first then I will plead my innocence.

11th August 2024. Things I have been doing lately:

  • The late Summer cutback
  • Gathering in the few crops the birds have left me
  • Continuing to deadhead
  • Dealing with the fall out from the death of Big Bertha

The late Summer cutback. As we move towards late summer here in Spain the heat has been building for months and we have had no rain in the Costa Blanca. This has meant that most of us will have lost some plants and the rest of the garden looks very wilted and sorry for itself.

Now is the time to stroll round your garden in the cool of evening and decide whether some areas need cutting back. There are two main reasons for cutting back at this time of the year. Firstly, you may want to redefine the shape of your plants where they have got floppy and overblown. Secondly you may want to cut off old growth to encourage a new flush of flowers or green growth.

The photos below show the bottom of my drive where the large Peruvian false pepper tree and the Myrtle bush normally make for an attractive scenario that draws the eye down the drive. The first photo shows them both slightly out of shape, whilst the second shows them back at their best after trimming. Click on each photo for a larger view.

If you have hedges (and I have a lot), then now is a good time to give them a light trim to bring them back into shape and stop them shadowing lawns and your bedding plants. Don’t be tempted to trim hedges before round about now as you may disturb or even destroy bird nests. But also remember this is not the big winter cutback so don’t cut into wood, unless you really need to, instead just concentrate on taking back leaf. The photos below my various trimming efforts before and after. Click on each photo for a larger view.

If you have arches over gates or other entry points into your garden then tidy these up as well so that cars don’t get scratched and people don’t snag their clothes on overgrown plants. The photos below show some little areas of tidying up. Click on each photo for a larger view.

Gathering in the few crops the birds have left me. Regular readers of this blog will remember that I prepared my fig trees for netting just before I went away for a couple of weeks. Unfortunately, when I got back, I didn’t get around to netting them as I became distracted with other tasks. Then I stupidly decided not to net them this year as an experiment. The results were predictable. A good third of my fig crop is being lost to birds. Each morning I go out and harvest that days ripened figs, but large numbers have been pecked by birds, most annoyingly sometimes just one peck, but enough to spoil the fruit. The photos below show the morning devastation. Click on each photo for a larger view.

The photo below shows a typical morning collection including the spoiled figs that I will never enjoy.

In addition to figs I have been harvesting my grapes. I don’t normally bag or net grapes as it would be too time consuming. The secret with grapes is not to try and harvest them before they are ripe. Grapes do not continue to ripen once they are cut, so you have to be patient.

Keep an eye on your grapes, twice a day if necessary. Taste one each day as they get close to ripening. Then once you are happy take off the ripe bunches straight away. The birds will know exactly when your grapes are at their best so don’t leave them any longer than necessary. The photos below show my grapes waiting to be harvested, and then the daily harvest. Click on each photo for a larger view.

Continuing to deadhead. I know it is hot, and you have cold beer and wine waiting for you. But, if you don’t deadhead daily then you will run out of flowers in late summer. Once most plants have 50% of dead flowers going to seed, then they will stop even trying to put on more flowers. By deadheading daily you are forcing the plant to produce more flowers to reproduce itself. The photo below, shows me on my daily rounds.

Dealing with the fall out from the death of Big Bertha. I started this post by informing you that Big Bertha, my wife (Cruella’s) favourite chicken had died. But let’s start with the facts. Yes Bertha is dead, and yes I may have had something to do with her demise. But I feel I need to explain and get you to understand the sequence of events and extenuating circumstances. But just to remind you of the late great Big Bertha, she is the one on the left in the photo below, in case you hadn’t guessed.

What happened was this. I have a spray irrigation system watering under all of our fruit trees on a timed system. It was a hot evening and Bertha had positioned herself under one of the trees where she seemed to be happily enjoying the irrigation spray. I thought it was funny and even took the photo below to show Cruella.

Anyway, that night when Cruella went to put her to bed and gave her, her normal goodnight cuddle (all I get is goodnight pig), she discovered that Bertha was soaking wet. The next day Cruella came hurtling into the house in hysterics screaming that Bertha was dead and that I had murdered her. It turns out that when Cruella went to let her girls out Bertha didn’t appear, only to be discovered stiff as a board.

I can’t begin to tell you what it has been like in our house since. The recriminations and hysterics are terrible. They all shout and scream at me in chickenese and accuse me of Water Boarding Bertha. Cruella has already reported me to the ICC (International Chicken Court). She gets things mixed up and insists that the ICC is somewhere in Europe overseen by William Hague who she insists will see that justice is done.

We had Bertha’s funeral yesterday down in our wild wood. It wasn’t really a funeral as Cruella insisted that Big Bertha was burned on a funeral pyre. We all stood around, Cruella and her girls all wore black and sang dirges in chickenese. As the flames licked around Big Bertha’s corpse they all burst out into loud wailing. I just stood there, all I could think of was KFC!

Kerry gets a new tree, I do a little propping and cutting whilst the chickens have started JSW as a protest

I know the above heading is long, but there is so much going on it is difficult getting everything in, but just to give you an overview, this post covers the following:

  • Reshaping an olive tree
  • Tying back annuals in your flower beds
  • Lightly trimming back your hedges
  • How to use figs from this years bumper crop
  • The chickens take direct action to thwart me watering the lawn

9th August 2023. Things I have been doing lately:

Reshaping Kerry’s Olive tree. Olive trees are ubiquitous throughout Spain. Most of them are in agricultural production where they produce both olives and olive oil for Spain and much of the world. However, a casual stroll around any Spanish village will find hundreds of great hulking, misshapen behemoths of trees crowding out gardens and lowering over walls and fences and effectively stopping sun getting to other plants.

These trees of course produce olives that fall to the ground and rot making a terrible mess. Whenever I ask people whether they process the olives or use them in anyway? the answer is invariably no! So why have these trees? The Olive is not a particularly pretty tree, and it can be very messy. The answer people normally give me is that it was there already and they don’t know what to do with it. So how about cloud pruning the tree to make it an interesting feature in your garden.

My friend Kerry and her husband Glynn have moved to a house in my village where they inherited the inevitable olive tree. Kerry decided she would like the tree reshaped and I agreed that I would happily start the process and assist her and Glynn. Hopefully we can make this an occasional feature in this blog as we follow the development and reshaping of the tree. The photo below shows Kerry, Glynn and the tree at the start of the process.

You can see they both look a bit apprehensive

The first job was to look at the branches from underneath the tree and select those that were going to form the structure of the reshaped tree. Here we are looking for nicely spaced branches at different levels that would provide for an open canopy ideal for pruning into shapes. The photos below show the early probings. Click on each photo for a larger view.

When you are cutting back a tree it is important to remember that although the branches and foliage don’t look too much when they are on the tree, on the ground they present a real back breaking task to clean up. The photos below show Kerry and Glynn hard at work; as Technical Director I of course couldn’t get involved. Click on each photo for a larger view.

In the end of course it will all be worth it as the tree will eventually be a beautifully shaped and interesting tree that will be a real talking point in the garden. The final photo shows Kerry and Glynn surveying my handiwork. If you look closely you will see that Glynn is saying “whose idea was it to let that demented idiot near our tree”. Updates will follow.

Are you sure he knows what he is doing?

Propping up annuals in your flower beds. By now all of your annuals should be flowering like crazy, and I am sure you are deadheading daily. In a previous post I talked about staking up individual plants to keep them upright, but now you need to begin tying back the whole borders. Failure to do this will mean that plants will fall into each other and gradually make the whole bed a green mess of dying plants. The simplest way to do this is to drive canes into the edge of your flower borders (back and front if necessary) and then tightly pull string between the canes to hold the whole mass of plants back. The photos below show my tying back activity. Click on each photo for a larger view.

Trimming back your hedges. If you have hedges then now is the time to trim them back lightly. We do it now for two reasons. Firstly, all the birds will have nested and the chicks will have flown. Secondly, the hedges may start to flop over other plants or your grass, and effectively kill them off. You don’t need to take much off, this is not the big cutback which should be done in January. The photos below show some of my hedges before and after their trim. Click on each photo for a larger view.

How to use figs from this years bumper crop. It has been a fantastic year for figs, I have had so many from my two trees that I have had difficulty keeping up with the harvesting and eating, but I am trying my best. When you have a bumper crop like this year, you have two options: either give them away, or find ways to preserve them for later. This year I have decided on the latter and I am both drying my figs in the sun and creating fig chutney.

To dry figs in the sun, you first have to design a method to defeat your two big enemies: ants and birds. I have developed my own method which you can of course copy. Simply halve a load of figs and place them onto a mesh tray. Place the tray on a table in full sun for at least two days till the figs shrivel significantly. To protect the figs from the enemies, I stand the legs of the table in cut back plastic bottles filled with water. You need to ensure that the legs of the table do not touch the side of the plastic bottles or you will find ants will happily bridge this to get at your figs. Secondly you need to place a mesh cover over the top of your tray to stop the birds swooping down and feasting on your crop. The mesh needs to be held down with clothes pegs to stop the wind blowing it off and robust birds knocking it off. The photos below show my daily crop and my defences. Click on each photo for a larger view.

To make fig chutney or jam just get yourself an easy to follow recipe from the internet. If I can do it any one can. The photos below show my efforts. I am thinking of starting a cooking blog! Click on each photo for a larger view.

The chickens have stopped me watering the lawn. As if there is not enough trouble in the world with Just Stop Oil and Extinction Rebellion etc, Cruella’s chickens have started a campaign to stop me watering the lawn. Just Stop Watering or JSW as Cruella calls it, started when I complained that her chickens were continually digging holes in the lawn. Cruella sarcastically replied that they were “free range” chickens and that was exactly what they were meant to do.

Initially I said nothing, but secretly I was formulating my revenge. I continued to laboriously repair the lawn, filling in the holes and placing wire mesh over the top to stop the chickens coming back to undo my repairs. If you ever have to repair your lawn, then the simplest thing is to sift some compost from your compost heap and tread it firmly into place, then water well. The photos below show my sifting and repair methodology. Click on each photo for a larger view.

My revenge involved turning on the lawn sprinkler system every time the chickens went near my repairs. At first this proved very effective and led to the chickens fleeing soaking wet. Cruella complained bitterly and said that her girls could get pneumonia and that she would report me to the World Health Organisation chicken division. But, I am certain there is no such thing, although she does keep sending me copies of the emails she has sent.

My tactics were working fine till the other day. As soon as the chickens started moving towards the lawn I went to turn on the sprinkler system when Cruella let out a loud warning cry in chickenese and all the chickens rushed to cover my sprinklers with their bodies. At first it wasn’t a problem as I would pick them up one at a time and remove them. But no sooner were they released than they would rush back and sit on the sprinklers again. This was obviously a tactic that Cruella had been practising in her Chicken Civil Disobedience workshops.

Since the first day of protest it has gradually got worse. They now have T-shirts with JSW on them and they have started glueing themselves to the sprinklers. It has now escalated beyond a joke; my shed has had orange glitter thrown all over the inside and the compost bins have been sprayed with JSW slogans. To be honest I am at my wits end. The photos below show the start of their protests. Click on each photo for a larger view.

It is time for the Costa Blanca Cut and Cruella has started the chicken wars

The above heading may appear confusing but I have to tell you I am having a hard time of it at the moment with Cruella (my wife) and her fancy chickens. But more of this later, it is time to get on with the Costa Blanca Cut (CBC). Yes, that is right CBC! It is a term that I invented last year that denotes the time when you can judiciously trim all your flowering hedges and shrubs to hopefully get a late summer bust of flowering whilst at the same time making your garden look neater.

I have to confess that I stole the idea from “the Chelsea Chop” which is the period just after the Chelsea Flower Show when you can cut back; I think my term is better and the timing is just right for our hot summers. Anyway let’s get on with the gardening.

23rd August 2022. Things I have been doing lately:

Trimming hedges. Regular readers of this blog will remember that I have a range of densely packed hedges along the front of my garden. I packed them together so that they would fight for space and provide a dense flowering wall. Whilst this works very well, at this time of year it is necessary to trim them back just enough to encourage new flowerings and to keep them neat.

The first photos below show some of my hedges inside and outside my garden in all their glory. From this you can see there are still lots of flowering but some are attempting to go to seed. Click on each photo for a larger view.

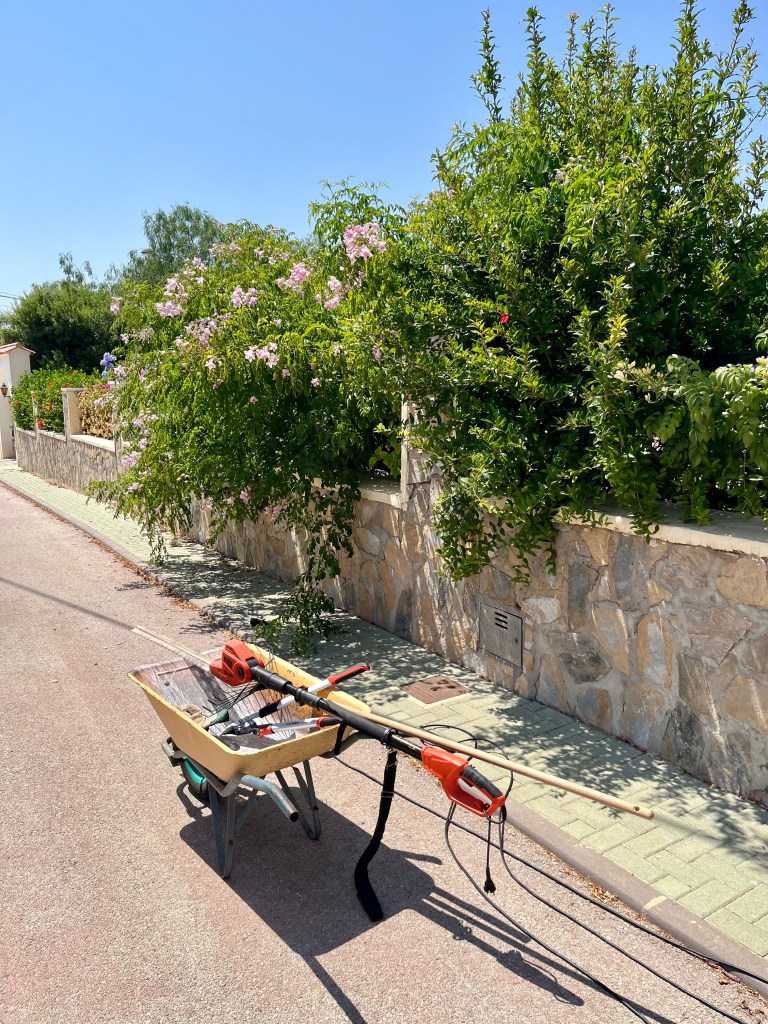
All that is required to bring your garden back into shape and give you more flowers, is that you lightly trim back with a hedge trimmer or shears. Do not over do this, the big cut back is in January, so remember less is more. The photo below shows me manfully using my large extendable trimmer to good effect – mind you I now have a bad back, again! Click on each photo for a larger view.

The photos below show the extent of my cut back, but remember it will all be worth while with masses of new flowers within a month. Click on each photo for a larger view.

Trimming Olive trees. Regular readers will remember that I trimmed my olive tree by cloud pruning it years ago into a series of balls. To keep this shape sharp, you need to prune back 3 or 4 times a year. The before and after effects can be seen in the photos below. Click on each photo for a larger view.

Time to trim standards. If you have flowering standards in your garden it is always difficult to give them a trim as you are torn between the nice neat shape of a standard and their many flowers. Well, you can have both as long as you trim little and often. This approach will keep the plant flowering and the bees will love you, whilst at the same time keeping your nice round ball. The first photos below show my standards floriferous but out of shape whilst the second photos show them reshaped; I am happy to tel you they are already flowering.

Time to cut the lawn. Yes, I know it is madness having a lawn on the Costa Blanca, but there you have it, I’ve got one. Obviously there has not been much mowing going on in our current heatwave. But sometimes you have to clean up general debris from the grass. This means setting your mower blades as high as possible and just running the mower over the garden much like a hoover. The photo below shows the end results of my mowing. I call my lawn Schwarzenegger as it always comes back.

The chicken wars have started. Regular readers of this blog will know that Cruella (my wife) hasn’t been the same since the cat died. The cat and her were very close, the cat happily sat behind her whenever she flew on her broomstick. In addition Cruella would use the cat as a “familiar” by whispering instructions into her ear which the cat happily carried out. As you all know she has now gotten over the loss of the cat by buying herself a flock of fancy chickens; and this is where it has all gone wrong.

Who would have thought that chickens were incompatible with a neat well designed garden. Well let me tell you they are. Despite spending a fortune on a coop and fencing to create what can only be described as a chicken paradise, Cruella has now decided that “her girls” need to be free to roam. The result of this is that chickens have proceeded to take liberties with the garden (have you seen their feet) They mock me and Tango the lonely blind Labrador as they strut around the garden as if they have diplomatic immunity.

The photos below show how they deliberately mock poor old Tangos space. Click on each photo for a larger view.

A raiding party

Well I have had enough me and Tango are fighting back. I have bought myself one of those super soaker water pistols and happily chase them around the garden and squirt them when ever they commit any garden transgressions. Tango is taking a more pacifist route and has written to the Kennel Club and asked for asylum. The photo below shows my trusty pistol ready for action.

I’m locked and loaded

The only problem is that Cruella is fighting back and has started whispering malign instructions into the Chicken’s ears – just as she did with the cat, see photo below. Just the other night I woke up in bed only to find the little white chicken perched on my chest and pecking my nose. That’s it the chicken wars have begun and I am fighting to save the garden.

They both speak chickenese as they know I can’t understand; but I have picked up that three puck pucks followed by a cluck means danger

Tie up, deadhead and cane!

Summary

This episode is also available as a blog post: https://spanish-garden.com/2022/08/08/tie-up-deadhead-and-cane/

Transcription

Tie up, deadhead and cane!

The above heading is reflective of the activities you should now be undertaking in your garden as we move towards the back end of summer. Unfortunately when I mention these activities my garden blog tends to be inundated with requests for rude sexual services which have nothing to do with gardening. Cruella (my wife) accused me of doing this deliberately, but I remained dignified and only replied “honi soit qui mal y pense”, she then accused me of swearing at her in Swedish!

Anyway as summer goes on and things flop over – oh my God, there I go again, I think I have developed Tourette’s syndrome – you need to keep on top of the garden. Enough of this, let’s get on with the gardening .

8th August 2022. Things I have been doing lately:

Tying up various plants. All along your borders and beds your flowers will be at their absolutes best. To keep them this way for as long as possible then you need to deahead every day and use cane and string to keep your plants upright. Now when it comes to string, we gardeners need the right string for the job. To achieve this you need 3 types of string as a minimum. String type 1 (the thinnest) can be used for tying up annuals as it will rot within a year, as will they. String type 2 (referred to as intermediate) can be used for tying in perennials, roses etc as it will last for up to to 5 years and allow the shape you are trying to achieve become set. String type 3 (referred to as heavy) can be used for trees and heavy perennial branches etc as it will last for up to 10 years. The plastic coated wire shown can be used to tie in light stems.

The photo below shows the strings. This photo will form part of my doctoral thesis “String gauges and their uses by type in the twenty first century garden”

Cruella mocked me by saying what type of man has three categories of string. I merely walked away muttering under my breath – a real man

Deadheading. If you want flowers all summer then you need to deadhead daily. But not all flowers are deadheaded in the same way:

Sunflowers. Don’t deadhead sunflowers yet, let the seeds fully form so that you can either use them next year, or let the birds feed on seeds. But you will need to tie them up so that they don’t collapse. Use stout canes to keep them as upright as possible. Keep an eye on the dead flower head and when it has fully died and dried scrape the covering off the top of the flower and underneath will be the seeds packed tightly together. Using your thumb, see if you can remove one or two seeds easily; if you cannot then leave it a week or so until the seeds are loose.

The first photo below shows my mini sunflowers tied up and waiting for their seeds to be ready. The second photo shows that they are not ready yet. Click on each photo for a larger view.

Cannas. Although canna are favoured because of their lovely large colourful leaves, they can also produce nice flower spikes. When deadheading canna be careful not to cut off the coming flower spike. Because the flower spikes come in twos they often dieback at different times, so do not take off the complete flower head but only the one that is dead. The photo below shows me deadheading the correct flower spike.

Marigolds. I could deadhead my marigolds twice a day and that still wouldn’t be enough. They love this hot weather and they are flowering like crazy. To deadhead marigolds you must be careful not to leave any long bits of stem that not only look unattractive, but could let in disease. With your secateurs move down the stem away from the dead flower head until the next stem bifurcation and cut there. The first photo below shows my lovely marigolds, the others show me mid prune. Click on each photo for a larger view.

Other plants you should be deadheading at the moment include: Dipladenia, Bird of Paradise, Kaffir lilies and any flowering agaves or aloes. See photos below: Click on each photo for a larger view.

Shadowman. Gardening can be a lonely job so I have invented a gardening companion who follows me round all day I call him “shadowman”.We chat about various things as we wander round the garden, but he has to go as soon as the sun goes down; which is the exact opposite of Cruella and her friends who have to hide when the sun comes out. I thought you might like to see a photo.

Pretty cool eh!

Cruella hears the death rattle of the Loofah

As Summer moves smoothly towards its decline it is time for us to be harvesting the bounty of our labours. For me this means fruits, seeds, berries and loofahs. My fig trees have supplied a bountiful harvest, whilst this years Marigolds have been astounding especially as they followed a lovely show from the Sunflowers. But to be honest it’s the loofahs that have been the greatest success and caused the greatest consternation to Cruella (my wife).

21st August. Things I have been doing lately:

Harvesting Loofahs. If you haven’t grown loofahs, then you really should. They are a lovely annual climber which produce a profusion of large yellow flowers which the bees love, with the added bonus of loofah gourds which are fantastic for skin care. It was Cruella’s idea that I should grow loofahs as she had heard that it was good for exfoliating the skin in general and the removal of warts on the nose in particular, both of which are perennial problems in Cruella’s coven.

Cruella became impatient for the loofah harvest and would ask me daily when they would be ready. I explained that when the gourds turn completely brown and I can hear the seeds rattle, then they would be ready. In that case she said they are ready. When I asked her how she knew she explained that she could hear their death rattle as she passed them every day. I asked what it sounded like and she said just like a human death rattle; I left it there. The photos below show. Cruella confirming the loofah death rattle.

When your first loofah harvest is ready, all the gourds will be a deep dried brown and you will be able to hear the seeds rattle. If you are lucky you may get a second harvest. The first photo below shows some of my loofahs ready to be harvested. The second photo shows a second harvest coming on. The third photo shows the bag that Cruella gave me to store the harvest in, she thought it very fitting. Click on each photo for a larger view.

Processing loofahs. Processing a loofah gourd could not be easier. First you gather in all the gourds that are ready. The photo below shows part of my harvest.

You start off the process by snapping off the end of the gourd which is opposite to the stem. This presents you with a neat little hole at one end from which you can pour out the plentiful seeds. Once you have all the seeds out you should gently crush the gourd by rolling it in your hands. This process will crack the skin and allow for it to be peeled off very easily. The loofah is then ready for use. The final part of the process is is to gently blow away the seeds paper like coating. The easiest way to do this is to toss the seeds into the air and blow; between you and the wind they will all fly away.

The first photo below shows how easy it is to snap off the end of the gourd (it works every time without fail). The second photo shows the seeds pouring out. The third photo shows my gentle crushing technique. In the next photo you can see the bathroom ready loofah. Finally my award winning gentle seed blowing. Click on each photo for a larger view.

Harvesting Marigold seeds. Regular readers of this blog will remember that I told you to mark the first and best of your Marigold blooms by placing a strip of masking tape around the best blooms. The purpose of this was to mark where the best blooms where and to make sure that you didn’t deadhead them.

The photo below shows some of my saved seed heads just after I harvested them. They are ready for harvest when they are fully brown and dried looking. Never harvest them when they are wet with rain or dew. It is best to harvest late on a hot sunny afternoon as this will stop any rot or mildew setting in whilst the seeds are being stored.

To begin harvesting the seeds, cut off the stem and marker flag. Then holding the seed pod upright gently pull and rub off the remnants of petals and bits of furze on top of the seed pod. Once all this has been removed gently roll and crush the seed pod between your thumb and forefinger. If you keep up a gentle pressure the seeds will gradually flow out into your hand. This process can be seen in the photos below. Click on each photo for a larger view.

Finally the photos below show the saved seeds ready to be stored in a plain white sealable envelope ready for planting next Spring. Isn’t God good. Click on each photo for a larger view.

Finally I have a new friend. Most of the regular readers of this blog will know that I lead a wretched existence as I scurry between the potting bench, compost bins and the safety of my shed. I have a haunted look about me and try to stay in the shadows. All of this is brought about by Cruella (my wife) who seems constantly intent on findings things for me to do other than gardening; she has no sense of priority.

Anyway, a light has entered my darkness. I have made a new friend. It is a baby squirrel that introduced itself to me one morning by running up my leg (I had shorts on at the time). We now meet regularly when I feed him large nuts which he sits bedside me happily chomping away. He is obviously mad as he has no fear and is happy to come a find me wherever I am hiding in the garden. The photo shows my little squirrel chomping a nut.

My greatest fear is that Cruella will sniff him out. She is already sniffing the air and goes around saying fee fi fo fum. She may grind his bones to make her bread!

My breakfast has come back to life in the compost bin

I recognise that this is not the normal heading one would expect to find in a gardening blog, but these are strange times. Cruella (my wife) is missing our idiot son who has returned to London to continue wrecking the banking system after his brief holiday here in Spain. This has left Cruella bereft and with time on her hands, both of which are things that are dangerous for me.

Without things to distract her Cruella notices me and my happy life of gardening all day comes under close scrutiny. Worse still she wants to know what I am doing, how I feel about things and even wants to talk about our relationship. Most of the time I can just mumble platitudes and gradually fade into the background before slipping away. But the other thing that happens is Cruella in her unhappiness can distort nature. Which brings me to the point of my breakfast coming back to life in the compost bin.

8th August 2021. Things I have been doing lately:

Growing Avocados. Every Sunday for breakfast I have poached eggs on a bed of mashed Avocados on toast.; yes I know it’s boring, but I like it. Anyway, since Cruella has distorted nature, I have noticed a sudden profusion of avocados growing in my resting compost bin. These have sprung up from the middle of the compost at a rapid pace. The photo below shows two of the avocados reaching for the light, I now have 6.

It’s alive

I have now potted these up. I left them standing in the shade for a few days, just so that they could get used to the light. They have now been moved to full Sun and I cut one back just to see if I could encourage new and more bushy growth down the stem. This has been a great success and I expect to get them all in the ground next year. The first photo below shows the stem bursting from the avocado stone. The second shows them resting in the shade. The final photo is a bit blurry but you can see the new growth coming from the cutback stem. Click on each photo for a larger view.

Keep up the deadheading. I know I keep on about it, but you must deadhead daily if you want a long flowering season from your plants over the summer. Most plants will turn fully to seed production if about 50% of the plant is not deadheaded. The plant thinks that it has enough seed for its future propagation and will no longer bother with flowers but instead concentrate all its energy on the seeds. By deadheading you are forcing the plant to produce more flowers to make future seed.

Different plants will require different types of deadheading, but the simplest rule is do not leave any dead stem that can look unsightly and potentially become infected. This means you don’t just cut off the flower head, but you slide your secateurs down the stem till you come to a leaf junction and you cut there. The photo below shows me deadheading Marigolds.

Don’t forget – everything goes in the compost to improve your soil next year

If you deadhead daily you will get a wonderful display all Summer. The photo below shows some of the Marigolds which line my drive. These have been in bloom since late April.

Not bad for one packet of seeds

Solving the problem of a shady Naya. Here in Spain Nayas (shaded verandas) are an essential especially in our current exceptionally hot weather. Much as I love my naya, there is one spot just by my front door where plants continually fail to thrive. In the past I have put this down to Cruella going past and looking at them, but she assures me she never flys in by the front door, so it must just be lack of light.

Anyway, I have found the solution, and it was staring me right in the face all the time. The back of my house is North facing and I have brightened this up by growing shade loving plants in trays on the window ledges. Amongst these is “Golden Pothos” a variegated ivy type plant. This grows very well in this area and I suddenly had the thought why no try it on the Naya. Well, it just loves it, it is growing like Topsy, and it’s variegation lights up the shade on the Naya. I have now taken a series of stem cuttings from the mother plant to supplement my original cutting which I am now growing up a stick and hopefully, eventually around a mirror.

The first photo below shows the the Golden Pothos growing in trays on the window ledges at the back of the house. The second shows the newly tied up plant ready to grow up the stick. The third shows my cuttings paraphernalia, with the final photo showing the plant ready to give me a display that will be both vertical and trailing. Wish me luck I will let you know how it gets on. Click on each photo for a larger view.

Garden design – Cruella versus the drone

At this time of year – as we move towards the end of Summer, I like to think about the shape and structure of my garden and whether there are changes I may want to make. I am fortunate in that I have a friend (David) who has a drone and is happy to fly this over my garden giving me excellent video and still shots of the various parts of the garden. I then use these to assist my decision making on any changes I may wish to make throughout the garden.

Unfortunately this year Cruella (my wife) decided that she would like to do this for me as she believes her flying skills may open up new business opportunities for her. The problem with this was that David’s drone takes much better pictures than Cruella. Also, Cruella is in the middle of her annual moult when she changes from her Summer colours and shape to her Winter mode which means she can only really fly at night. Anyway to cut a long story short out of fear of what she would turn me into (most recently a Sloth) I gave in and said she could have a go.

The first photo below shows Cruella in her Summer colours and shape. The second photo shows her in her Winter guise. The third photo shows Cruella’s attempt at garden photography.

This was her best photo attempt, the rest were of bats.


Needless to say I am sticking with David and the drone despite her threats. To be honest with you I made a good Sloth.

31st August. Things I have been doing lately:

🧩 Reassessing my garden. In garden design there is a saying I am fond of “structure is a function of purpose” in effect this means you should be able to look at something and from this know what it is meant to do. This is especially true of gardens. Your garden should be designed and shaped around you and your life. For example my garden is shaped around 5 distinct areas:

  1. morning garden
  2. afternoon garden
  3. orchard
  4. dry garden
  5. wild wood

🌞 The morning garden. This is directly in front of the house and has Three small lawns, a path way leading to the front gate, two small water features and various islands of planting including trees and various plants. The purpose of this area of the garden is more or less ornamental. It is pleasing to the eye presents a nice area to have your morning tea whilst you sit on the Naya and read the paper. It is also the first part of the garden that guests see. This first and second photos give you a good overview of the garden design and planting structure, the the final photo shows you the Cheshire Cat sitting in the middle of my big donut shaped Bay tree. Click on each photo for an enlarged view.

🐕 The afternoon garden. Is a different creature all together as this is dominated by a large lawn where the maurading Labradors used to run around. But since one is now blind and the other can hardly walk their activity on the lawn is more like a crazy fairground dodgem ride as they bump into each other and one or both of them falls over.

in addition to the large lawn, there is hedging, a stream water feature, and a large Mulberry tree with seating underneath. Separating the lawn from the tree area are two beds of old English Roses with various islands of planting in the gravel. The first two photos give you an appreciation of the planting and design, whilst the third shows you the sorry state of the lawn. In case you are wondering what the black things on the lawn are, these are severed burnt heads. Cruella leaves them there to warn off strangers! Only kidding, they are sunflower seed heads left there to feed the birds. Click on each photo for an enlarged view.

🌳 The orchard. This is exactly what it says a collection of fruit trees. These include: Orange, Lemon, Fig, Olive and Persimmon. We use the fruit from all of these trees at various times of the year. The trees are always under review as they are of various ages and you need to plan ahead if you always want fruit.

In addition to the fruit trees I also vent my artistic talent by stacking up branches of pruned trees to make what I call wooden sculptures, but, Cruella calls firewood. The orchard also runs along side and frames the outside kitchen and presents a pleasing aspect as if you are dining in a bower. A large Dame de Noche sits beside the seating area and provides heady evening scents as you sit with your glass of wine. Don’t forget, you only ever need one lemon tree that is plenty. The photo below gives you an idea of where I will be putting a new tree later this year.

The space middle, bottom left has a small old orange tree that will be coming out this year

🐪 The dry garden. This small garden sits at the bottom of the drive on the right and is home to a collection of succulents, cacti, yucca and various other drought resistant plants. A small border of euoniums and an oleander separate the parking area from the garden. Even the smallest gardens in Spain are capable of providing you with an interesting dry garden by using a variety of leaf and stem shapes. The photos below show the dry garden. Click on each photo for an enlarged view.

🌲 The wild wood. This is a large garden that is mainly left to nature. There are all sorts of creatures that inhabit this area and I have tried to encourage a varied eco structure by leaving fallen and cut down trees for insects and animals. In addition where trees have been cut down I have requested that logs be left in piles and these form excellent insect hotels for bees and many other insects. This area also has a Casa de Madera (log cabin) where guest stay when they are visiting. It makes a very pleasant abode and helps them to escape Cruella’s nocturnal howling and screaming. The photo below shows the guest accommodation and an overview of the wild wood.


⚒ Time for you to get stuck in. I hope these photos and descriptions will inspire you to take a fresh look at the design and structure of your own garden. As always if you want any assistance or advice just contact me. Also if you would like my friend David and his mighty drone to take aerial photos or a video of your house and garden then again contact me and I will put you in touch. David’s charges are very reasonable and the end result is always stunning. If you would like to see a video overview of my garden produced by David then go to YouTube and search for the following: “Spanish garden – a tour of a Summer garden in Campoverde”.

It’s time to sing with the orphans – and Cruella is coming back

At this time of the year when the dog days of summer are long and hot, the potting bench turns into an orphanage. The only plants left on the bench are those orphan plants that have been left behind; not chosen, not wanted and even rejected. These consist of poor little badly grown cuttings, or those with misshapen leaves or just those who just aren’t ready to leave the shelter of the potting bench. It can be quite depressing to feel unloved and unwanted, and that is why for the past few years I have instituted a system of nightly sing songs.

Every night, at the end of the gardening day, and before the sun goes down, I wander down to the potting bench and sit myself on top of one of the compost bins to talk to the orphans. We start with me providing an update of how their past friends are doing since they were planted out in the garden. I always keep it upbeat telling the orphans that everyone is thriving and describing their friends new flowers. I never tell them about the losses or those who have just shrivelled in the Sun; there is no point in being depressing.

Anyway, after the daily update it’s straight on to the singing. I am sure it would be no surprise to you that plants prefer songs from the shows and musicals. They despise comic songs and for obvious reasons will never countenance anything from “Frozen”. As you would expect different plants have their favourites: Spider Plants love singing “the ugly duckling” including all the accompanying actions. Trumpet Vine love anything from “Oklahoma” and take great delight in bellowing out that line “…the corn is as high as an Elephant’s eye”. The Gaura that sits at the back of the potting bench is a bit of a Diva and insists on singing power ballads and makes us all cry when she sings “I will survive” We always finish the singing with “the sun will come up tomorrow” from the musical “Annie”, as everyone belts it out I drum my feet against the door of the compost bin to keep up the tempo; we call it the orphan’s anthem.

Our last thing before I go in is our prayer which we all say together:

“Now I lay me down to sleep, I pray the Lord my roots to keep, if I should die before I wake, I pray the Lord to compost make”

What do you mean you have never hard plants sing or pray, you need to listen more carefully. The photo below shows everyone ready for bed.

The Sun always comes up tomorrow

10th August. Things I have been doing lately:

✂️ Cutting back standards. By now your standards should have been in full flower for a while and will have begun to get straggly and untidy. It is time to give them a mid-Summer prune with the hope that you will get a second flush of flowering into September/October. The first photos below show a verbena and two Solanums needing a prune. Click on each photo for a larger view.

The next photos show them all heavily pruned. I know this looks a bit drastic but they are all mature plants and they will all be back in full leaf soon. Click on each photo for a larger view.

🪓 Cutting back a large false pepper tree. Many gardens in Spain have Peruvian/Californian false pepper trees. These are large trees with a resemblance to a weeping willow, and which have long Racine’s which have tiny red berries that look like pepper corns. These are lovely trees but can be messy when the wind blows, especially around swimming pools. What a lot of people don’t realise is that you can be quite brutal in your pruning with these trees especially if you have let them get out of hand. The photos below show my lovely tree being pruned by professionals and the final outcome. Click on each photo for a larger view.

These photos were taken about three months ago, but I haven’t included them in my blog so far because I knew that people seeing the drastic cutback would think I had killed the tree. But the false pepper is very robust and I knew it would come back. The photo below was taken last week and you can see the tree bursting back into life. In its new form I will let it take shape into its weeping format but then I will keep it pruned to shape. So the moral is if you have a false pepper tree then you can keep it nicely shaped as part of your overall garden design.

Notice the poor old Agave Salmianas that were battered with falling branches.

🧟‍♀️ Cruella is coming back. The party is over, the end is near, the nightmare begins. Regular readers of this blog will know that Cruella (my wife) has been at our English house for almost six months casting spells to ensure that our idiot son doesn’t get coronavirus. Well, now she is coming back tonight and the problem is that I tidied her bedroom whilst she was away. I only have a few hours to get it back to how she likes it – she lands on the lawn at midnight.

I spent all last night in the garden trying to replace the things I had changed in her room. So far I’ve only got 23 cockroaches, 11 black beetles, 2 dead mice, 14 worms and a fallen log. She will definitely notice that her snakes are missing and I have found it impossible to catch any bats. My plan is to tell her we were burgled. The photo below shows her room now. As a surprise I’ve put the cockroaches in her bed – she will be thrilled at my thoughtfulness.

I fell off a ladder twice – and Cruella has an evil lamb

Yes I know it’s a gardening blog and the above heading does seem to suggest construction activity mixed with witchcraft and farming. But I can assure you it is about gardening, but just not as you know it. The problems started when Cruella (my wife) and I visited our English house to see our idiot son. Whilst in England, besides meeting the idiot boy, I tend to get stuck into our English garden whilst Cruella spends most of her time reading tea leaves.

Now as I’ve explained before our English garden consists of two parts a small open garden at the front that has Yuccas, a small walled bed and a large Cotoneaster. The back garden is long, narrow, walled and has a variety of climbing flowering shrubs growing up the walls. My work in this garden mainly involves extensive cutting back between visits. This in turn usually involves me in various feats of what I call “laddery” which is defined in the dictionary as “the effective use of ladders and/or steps to effect a task” – I made that up.

31st August: Things I have been doing lately.

🎢 Falling off a ladder in the front garden. The front garden in England needs to be tidied up twice a year. The big cutback is in January when I reduce the height of everything by using a hedge trimmer to reshape it all. But this time of year it is necessary to make some cosmetic cutting just to keep things in shape. In England you should never cutback hedges or trees till late August or September as this ensures all the bird chicks have left their nest. The photos below shows the front garden before it’s cosmetic clip.

Now from the photos above you can see that the big Cotoneaster has begun to obscure the window of the lounge hence the need to trim and the use of ladders. Now ladders and I have a long history of parting company and usually when I am right on the top rung holding a chainsaw or hedge trimmer. And yes dear reader it happened again. I was leaning over right at the top of the Cotoneaster when I over reached and slid down the wall between the tree and the house. Having thrown the hedge trimmer sideways I gracefully and somewhat painfully made my way to the ground. I did intend to show you a photo of the newly trimmed front garden, but instead I have called in a Tree Surgeon who for a very reasonable sum will trim the Cotoneaster etc back to 3 foot and hopefully it will come back, but we shall see.

🎢 Falling off a ladder in the back garden. Having recovered from my front garden mishap I was determined to go on and tackle the back garden. Yes, this does need a bit of ladder work, but it is not so high and therefore less painful when you fall. The back garden is a typical English walled garden, if you keep it trimmed it looks lovely; if you don’t it looks like a scene from “Day of the Triffids”. The key to a late Summer trim is just to tidy and not to try and cut right back. In this way you allow for second flowering and retain things like interesting seed heads and Rose hips, all of which provide excellent Winter food for birds (that’s the second mention of birds my friends Hilary and Jeff will be pleased). The photos below show the back garden midst trim back.

My next ladder incident occurred when I overreached across the wall just behind the brown bin in the second photo. Some long Rose branches were just out of reach and yes you’ve guessed I fell off the ladder on to the top of the wall and into the Rose. Not as spectacular as my front garden fall but just as dangerous. When Cruella (my wife came back from shopping with the idiot Son she berated me for my carelessness. Mainly she was concerned about where she would put me if I had died as we don’t have a compost bin in England. Anyway, the photo below shows the back garden neatly trimmed; but not shorn.

🗿 Garden statuary. I have long been a fan of discreet statues placed carefully around a garden in such a way that a casual visitor would come upon them and be delighted. Well, in cutting back the back garden and reshaping some ground coverage I opened up the vista to one of my favourite statues. This is the head of a female dressed either in classical or medieval garb I’ll let you decide. The photo below shows her in situ.

A thing of beauty is a joy to behold.

Unfortunately, having told you about my statue, Cruella has demanded that I share with everyone her choice of statue. The photo below is what I call “the evil Lamb”. Cruella says this used to belong to her Mother and is therefore an heirloom worthy of a prime position in our garden. Now I don’t know about you but this scares me. If you look at the eyes they are particularly evil looking and what’s more they follow you everywhere. I have woken up at night and it is in my bedroom just staring at me. And the times when I fell off the ladder I am sure I felt the ladder leg being pushed and heard a Lamb like laugh.

See what I mean; I hope I haven’t given you nightmares.

I have taken the Iron Man Challenge

When I told Cruella (my wife) that I was Iron Man her only comment was that I was old, stupid, already had a bad knee and perhaps I should change my name to Rusty Man. Nevertheless she proposed adding Wheatbran to my daily porridge in the hope of increasing my stamina. I must admit she was a little disappointed when I pointed out that I was the gardeners equivalent of Iron Man which involved nothing more strenuous than adding Iron supplement to sickly plants.

21st August: Things I have been doing lately.

🏋️‍♀️ Adding Iron to supplement plants. In the current drought you might have noticed that some of your plants are taking on a “yellowy” hue. Now yellowy hues in plants are difficult to diagnosis. Sometimes it means you are over watering, sometimes it means you are under watering or it could just be a Daffodil. But sometimes it means you plant has a condition called “chlorosis”. The effect of chlorosis is that the leaves on your plant will start to turn yellowish and the veins in the leaves will begin to become pronounced. This means that the plant is not photosynthesising well because it lacks iron. The photos below show one of my Agaves which is in a pot and is turning yellow and also a bamboo that is similarly afflicted.

The answer to this problem is an iron supplement watered in or scattered around the base of the plant, this helps the plant to photosynthesis more efficiently. These supplements can be bought at most good garden centres. The photo below shows the supplement that I use. I mix this with water to eventually form a mixture that is the same colour as Rosé wine. This is then poured into a watering can and the base of the plant soaked. You probably only need to do this once each Summer.

Cruella (my wife) got excited as she thought it was blood

🌴 Cutting Palm fronds. Regular readers of this blog will know that I constantly advise to cut Palms regularly and often. Once Palm fronds are hanging below an angle of 90 degrees in parallel with the ground then they start to toughen up and eventually take on the consistency of iron (iron again, I want to be known as Iron Man). This makes it extremely difficult to cut them and can end up blunting even the sharpest of saws.

Well that’s the theory. Unfortunately, just this once I forgot about my twin Palm trees and only remembered to look up and check the tree when it was too late. From the photo below you can see that a number of the fronds has already turned brown and were like iron. This necessitated my getting a ladder out and proceeding to hack at the fronds; something that should have taken minutes ended up taking almost an hour. The worst part was that Cruella (my wife) offered to hold the bottom of the ladder whilst I was at the top. She does this sort of thing on a regular basis, but only after checking my life insurance policy. To distract her I told her I had seen some children in our wild wood and she ran off cackling hoping to catch one (she has a special net).

And so it begins

🍂 Adding leaves to my compost. I can only assume that everyone followed my advice last Autumn and raked all the dead leaves up and placed them in bags for later. The reason for this is that leaves cannot be added to compost at first, but must go through their own composting process before eventually being added to your compost heap. Well, now is the time. I have 5 green sacks full of leaves that have been happily composting away in the shade beside my compost bins. I will now add these to my compost bins in layers over the next couple of months. Although the leaves are not fully composted down the rest of the process will take place in the bin.

The photo below shows the first sack of leaves tipped into the bin and ready for the big compost. When Cruella (my wife) saw this she thought I had summoned a leaf man from the nether world.

It lives!!!

If you go down to the wood today…

As the old song says “you are sure of a big surprise”! No not the Teddy Bear’s Picnic. I’ve cut back the giant Agave Americana. This Agave is a vicious brute with long fronds over 8ft and each frond carries rows of sharp serrated teeth along its edges. Apart from that it is a lovely plant – but only to view from a distance. Anyway, I have 4 of these brutes at the top of the stairs leading down to my Wild Wood and I’ve been tackling them.

10th August: Things I have been doing lately.

🔪 Cutting back Agave Americana. As mentioned above this vicious but lovely statuesque plant needs to be cut back every 2/3 years otherwise its fronds droop and are in danger of ensnaring passers by. In case you forget what they look like the photo below shows my plants prior to the big cutback.

Cutting back these plants needs to be organised carefully. You need the correct tools and the correct clothing. You can saw through the fronds with a handsaw, but it is much quicker with a chainsaw. You will also need a hedge trimmer to cutback the foliage of other plants that will impede your access to the Agave. Finally you need to cover up every visible part of your body. I wore a track suit tucked into my socks, my long sleeve, padded winter gardening shirt a hat and eye protectors. Yes, I did look ridiculous especially as the temperature was 37 degrees.

The first photo shows my lovely trimmed Agaves, the second shows the assembled tools and finally the spoils of war. I will leave the fronds to dry out for a few days before moving them as they are very heavy.

Now that is what I call lovely…and safe

🌱 Feeding the lawn. Now if you have grass you really need to feed it three times during the Summer: once in Spring, again in high Summer and later at the beginning of Autumn. I use a high nitrogen feed and utilise a spreader which stops me overdosing the lawn. From the photograph below you can see that this particular lawn is somewhat patchy, but I have all my preparations ready for a partial reseed on the worse areas in the Autumn. More later.

The middle of the lawn is beginning to look like the middle of my head

🌞 Drying out Figs. Those of you with Fig trees should by now be in the middle of full harvest. The best thing to do here is to pick the ripening Figs each morning, eat what you can (which in our case is lots) then dry the rest in the Sun (this does not apply to the U.K.).

First take your Figs, half them in two, place them on a mesh grill and then place them out in the Sun under a suitable protective cover. I recommend that you take them in at night as a heavy dew could spoil them or ants could find them. The photos below show my world famous Fig drying process. Overall it should take 3/4 days and they can then be stored in the fridge or freezer.

Still no rain … and I hid the water bill from Cruella

To be honest we did have a tiny bit of rain but not enough to even cover the bottom of a water butt. The end result is that plants are dying due to the excessive heat and lack of the deep watering that can only come from a good deluge. It’s not that I haven’t been watering, I have a huge rota of watering duties that sometimes see me wandering the garden in the moonlight dragging a hose behind me like the Ancient Mariner with his Albatross. Just like him I have become a water bore and “I stoppeth one of three” to discuss the lack of water. The end result is that we have a huge water bill of over €600 for a month, it is normally high at €200, but this is an emergency and needs must. I hid the bill from Cruella (my wife) but due to her powers she found it and currently is threatening to turn me into a Toad.

Anyway enough of this frivolity let’s get on with the serious stuff of gardening.

21st August: Things I have been doing lately

🌼 Gathering seeds from Marigolds. If you have grown Marigolds this summer, now is the time to gather their seeds. Marigolds are perfect for our climate here in Spain, they love sun, flower freely and at the end give you lots of seeds for next year. Because of the extreme heat and the drought, the Marigolds died very quickly after flowering. In most cases this happened before the seed heads were fully ripe meaning that there were fewer mature seed heads this year. The normal process for gathering Marigold seeds is as follows:

– mark the best blooms with tape to that you can identify them later at the seed gathering stage.

– wait until the seed heads go fully black with no hint of green or orange.

– remove the seed heads and roll them between your forefinger and thumb, letting the ripe seeds fall into your other hand.

– remove all the chaff and rubbish by passing the seeds from hand to hand and letting the wind blow all the rubbishy stuff away.

– place the seeds into a plain envelope, mark the year and the type of seeds on the envelope, and you are all set for next Spring.

The first photo below shows this year’s seedheads. From this you can see that although the plant had died many of the seedheads were still not mature. I have circled the only ones that were suitable. The next photo shows the process of removing the seeds from the seed head. The final photo shows next year’s crop of seeds ready to be put to bed.

🌴 Cutting back Palms. The photo below shows a circle of Palms that I have grown in the centre of a pathway. The first photo shows the Palms overgrowing on to a path, which makes them dangerously spikey for children or dogs. The second photo shows my Herculean efforts at cutting them back. If you look carefully in the second photo you will see Cruella sweeping the Naya with one of her old brooms. Once they are no longer useful for flying she recycles them, she thinks it makes her modern and caring, she even has a t-shirt with eco-witch on the front.

🕳 Filling a gap in a hedge. When a plant dies in a hedge it can leave a gap that looks worse than someone with missing front teeth. The problem you then face is that it is difficult to fill the gap especially in a line of mature hedges where it will take years for a new plant to mature and close the gap. Now you can plant the same type of plant and wait the necessary years for nature to work its magic, or you can plant something new and fast growing to plug the gap.

In the first photo below you will see the gap that has occurred in my hedge because of the death of a mature Hibiscus. Now just a word of warning before I continue with this riveting narrative. Hibiscus have a habit of going into a coma sometimes for up to two years. They look dead and lose all their leaves etc, but a quick scrape of their bark will show the green underneath. They in effect are suffering from the plant equivalent of “locked in syndrome”. I know this has now turned into an Edgar Alan Poe blog, but it’s true.

Anyway, my Hibiscus was dead and I had the certificate to prove it; cause of death was old age (natural causes). So it was time to fill the gap. An easy way to fill the gap is to take a cutting from a fast growing climber, and use the framework of the dead plant as scaffolding for your new climber. In my case I have grown Pink Trumpet Vine especially for this purpose. The second photo below shows the new plant settling into its new home and ready to scramble up the frame of the dead Hibiscus.

733A801B-CC6A-46E6-8043-B308576D5BE3
Dead Hibiscus, but note the sneaky Palm trying to take its place

8254D5F5-8440-4EC5-ABA6-5D7D88EA186B

💔 Gardening failures. All gardening lives are riddled with failures, and the results of this blistering Summer have meant that I have many examples. The two photos below show a lovely little trailing Lantana that I took as a cutting from some of my existing plants. I had two of these proudly sitting on the Naya wall just opposite the entrance to my front door. But for some reason this one just started dying, it was just too hot. Despite giving it some shade I was left with giving it the plant equivalent of “extreme unction”. This involves trimming back the plant to bare basics to relieve the stress on the roots and then placing it on the potting bench in the recovery position. The jury is still out, but I believe the last rites have been correctly applied.

My second big failure this Summer is the lack of Butternut Squash. I have had the foliage and lots of flowers, but the end product is missing. Every day I hopefully peek  under the leaves to check that I haven’t missed a little baby squash starting it’s journey. But to date not a thing in sight; I am left like Mr Micawber hoping that “something will turn up”. The photo below is worth a thousand words.

C64A04D5-E85D-40D3-9855-B5A8CA8E834B
We started with such hope, and to think we have come to this.

I am tidying my borders…and I have become a Fig Guru

By now everything is in full bloom and lots of plants have gone over, especially in this heat and drought. So now it’s time to think ahead to late border filling and even plants for next year

10th July: Things I have been doing lately.

✂️ Tidying my borders. No I don’t mean Brexit, though it would be nice to get started. No, now is the time to start getting your flower borders in ship shape by dead heading, cutting back, tieing in and just generally rummaging around. Because of the weather everything has flowered very early and due to the heat is dying back much faster than it normally would. The end result is floppy flower beds that fall over paths and driveways.

The photos below show the state of some of my flower beds. From this you can see there is death decay and dying everywhere and it all needs tidying up and putting in order. The Marigolds in particular have gone over very early this year. But never mind you can see the best flowers which are now just blackened husks have been marked up with white tape so that I can identify them later for seed. If you haven’t done this, it’s your own fault, I told you to.

Anyway let’s get on with this. You can see from the photo below that I am all set to go. When I asked Cruella (my wife) to take this I was under the impression that I looked like a slightly older, but toned George Clooney, she informed me that I looked more like a baggy old looney.

69BA66AE-74E6-4FC4-BEC6-D77AFCF4FB88
George Clooney or baggy old looney?

I wanted to tackle two main plants. Firstly the Margeurites which are past their best and the cause of most of the flopiness. But also I wanted to take cuttings from and plant out some Chlorophytum (Spider Plant). The Spider Plant is the denizen of bathroom window ledges the world over, where it languishes in half light and covered with dust.

Margeurites are best left to sit in their flower bed as long  as you can stand the untidiness. The reason for this is that they will set seed which will appear as seedlings as soon as we get any rain. Margeurites, In my opinion are difficult to grow from cuttings but easy from transplanted seedlings. Sometimes the main plant can be cut back to new growth and it will get going again. The photo below shows the only two plants that I thought were worth just cutting back, the rest are in the compost bin.

55C2C063-DA3E-4F62-865E-5C46FAE27F19
A possible rejuvenated plant; only time will tell

Spider plants which are often overlooked can look quite showy in dappled shade, where their variegated leaves really stand out. I already had some ready to come from the potting bench, but I also wanted to take some of the spiderlets from the plants already in the border. The two photos below show the existing plants ready to be shorn of their little spiderlets and the new little plants sitting proudly on the potting bench. Their day will come in November or December.

🌿 Cutting my grape vine back; yet again. You will remember that this time last year the grapevine that grows along the front of our house got mildew. This necessitated cutting back all the leaves. They come back, but you lose the grapes. Anyway, it’s happened again. As soon as I saw the mildew I sprayed, but alas it was too late. Now I have two other grapevines which grow along the balustrade of the swimming pool and after spraying they were fine. I think the problem here is air flow. Because the grapevine is so close to the wall there is not enough air which in turn encourages mildew spores.
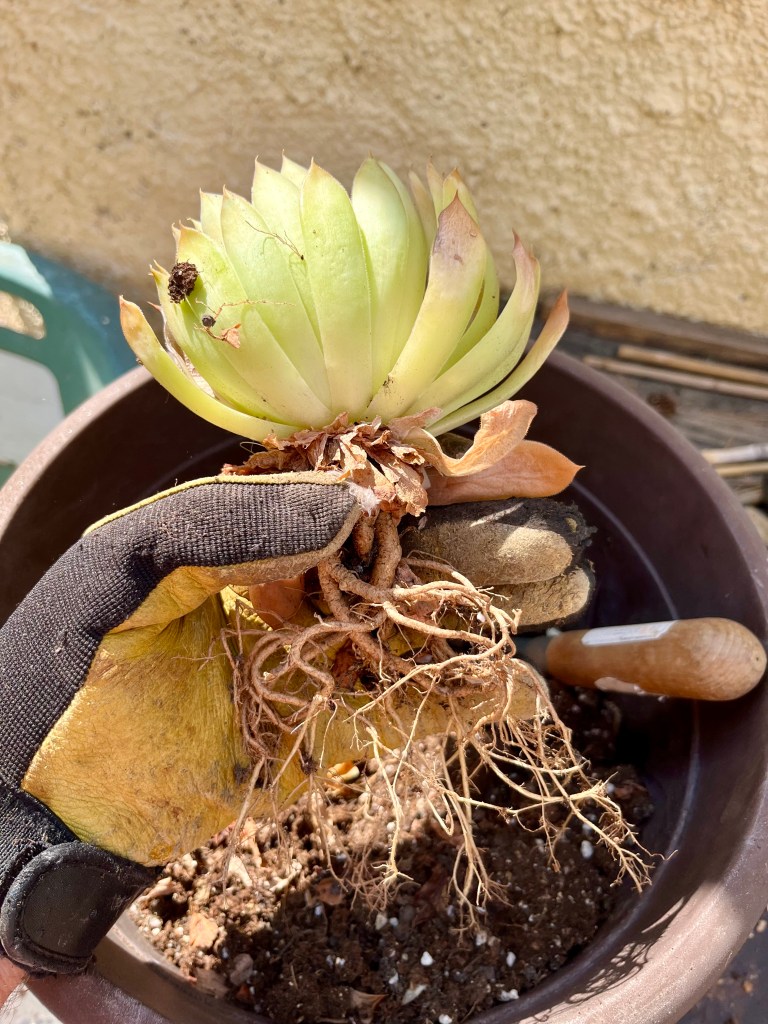
The photos below show the grapevine in its mildewed state and its eventual nudity. In the words of the great Arnie; “it’ll be back”. By the way don’t compost mildewed leaves as you will only leave the pathogen in your compost bin for next year, throw them in the rubbish bin.

🌳 All things Figs. Now those of you who know me will know that I have a passion for Figs and a hatred of Onions. The latter can wait to another day, but the former is the subject of great excitement. We have an excellent crop of figs this year from our two trees, and I am picking 2 kilo of fruit nearly every morning. Cruella and I have been dining on all sorts of Fig meals too numerous to mention and she has been using them in all sorts of “Spells”. When the glut has got too much for us I have been giving them away to friends.

If after scoffing as many figs as you can – and remember the consequences of too many – and giving away some to friends, you still have lots of figs, then why not preserve them. The easiest way to do this is to sun dry them. Just halve the figs in two and place them in the sun on a rack suitably covered to keep flys away. It will take about 4 days and you have to turn them once a day. It is also very important to bring them in at night as Dew will spoil them.

The first photo below shows my daily crop of figs, whilst the send shows some figs drying nicely in the sun. I stole the rack from the kitchen whilst Cruella was out, I also borrowed one of her hats to cover them and some pegs from the clothes line to hold everything in place. Once fully dried I will put them in an airtight container, pop them in the fridge and I will be eating figs this Winter.

But also, and this is the exciting part, my friend Cath has a fig tree and I have been advising her on all things figgy. Well Cath has only come back and called me a “Fig Guru”. I am so pleased with this that I have decided to call myself Figuru. I told Cruella that in light of this I have decided to write an Opera about Figs called “Figuru”, but she just laughed and said it had already been done by somebody called Mozart. But, I don’t believe her and I’m going to look it up in the morning. Anyway, in the meantime I am still working on the script and music. I intend to have a major aria with Figuru singing “Figuru, Figuru, Figuru” good eh!

🐱 I wondered where all the water was going. I just found out that the cat has been stealing water from water feature. I know you have seen photos of the dogs before but here is a rare picture of the cat. She normally only appears with Cruella and not normally in day light.

2D351A6E-9C93-492C-905C-579C1BAAB5AD
You can’t see Cruella in this photo as she has her invisibility cap on, but if you look carefully you will see some of the plants wilting in her presence.

Covering your bald patch with Kikuyu

I am sorry if this heading gives false hope to all middle aged men who are balding prematurely and mistakenly may think I have discovered a new Japanese cure. I am talking about Kikuyu the very tough gama type grass seed which I have decided to deploy against the scratching of my Labradors on the lawn; which if you think about it could have been a Pink Floyd album! At this time of the year all lawns start to suffer from wear and tear and none more so than the lawn where we sit and take our morning tea. It’s not that the dogs dig, they would never dare do that, no, they stretch in ostentatious ways as if they were in the Mr Labrador stretching competition. This involves lying sideways together and then stretching their back and front legs as far out as possible then drawing them back in whilst scratching the lawn. They know it annoys me but they exist under the protection of my wife who says their only stretching and it’s just grass anyway!

The outcome is that I have to repair this particular part of the lawn every year. So if you have over indulged dogs, or, rowdy children who insist on running on your lawn, this is how you repair it.

28th August: Things I have been doing lately. Repairing the lawn.

Stage 1: The first stage in repairing your lawn is to assess the type of damage and the position of the damage. In my case it is simple wear and tear through Labradoragedon. The photos below shows both the damagers and the damage. If you look closely at these photos you will see a metal mesh showing through the grass. This could either mean my grass is a cyborg terminator, or, it could be down to the fact that I developed the technique of adding mesh to reseeds. More about this later.

Stage 2: If you have holes or very deep scratches then these will need to be filled. To do this I use top soil that I have saved in a sack from various planting holes during the year. I sieve this directly into my wheelbarrow and also add some shop bought compost, also sieved, to give it a bit of a boost. It is important that you sieve as grass seed does not thrive in stoney or rubbish littered soil. The photo below shows the equipment you need. Notice the trug beside the wheel barrow, this is to pour the sieved stones etc into for later disposal.

IMG_1030
This looks like the Marie Celeste – only if it was crewed by gardeners

Stage 3: In this stage you need to spread the soil over the area to be patched. This is an important stage so take your time. Spread the soil by spade then rake over carefully with a leaf rake. Once you are happy with your work, roller the whole area. The rollering will quickly reveal the various humps and bumps. You then need to re-spread more soil and rake again. Repeat this process until you are happy that it is more or less level. Whilst in my case I am obviously not trying for a perfect lawn, but just one that does not look like something out of Jurassic Park after the dinosaurs have rampaged across. The photo below shows my efforts at rollering. By way of special pleading I should point out that my roller has a large dent in it, which means “it’s rollering Jim but not as we know it”.

IMG_1032
I know it’s not perfect, but I blame the roller

Stage 4: This stage involves spreading your chosen grass seed. There are hundreds of different grass seeds suitable for areas whether they are shady, dry, wet or sunny – you just have to choose the right one. In this case I have chosen to use Kikuyu. This is an extremely tough Grass from East Africa in an area that is the home of the Gikuyu tribe (I am not making this up). Anyway, I chose Kikuyu because it has lots of virtues: it is hard wearing, drought resistant, regenerates itself and is deadly to Labradors; alright the last bit I made up but don’t tell Nero and Tango. The only real draw back with Kikuyu is that it is very expensive, costing about €26 for a very small packet. This means that unless you are a millionaire you could not seed a large lawn with Kikuyu. A pleasing aspect of Kikuyu that you can see from the photo below is that it looks like “hundreds and thousands”. One last thing, you must roller again once you have spread the grass seed. I know that there is disagreement about raking in or rollering spread grass seed, but with Kikuyu you must roller. If you don’t have a roller, don’t worry just tread it in.

IMG_1033
How cool is that – funky grass seed

Stage 5:  The last stage is to protect the new grass seed so that at least has a chance to grow. As I said earlier I have adopted a technique over a number of Labrador plagued years of placing strips of mesh over reseeded areas. This has two main benefits it stops the soil being eroded by foot traffic or dog scratching, and it disappears once the grass has grown. The first photo below shows the prepared and seeded soil with its mesh overlay. The second photo shows the area covered by garden fleece. Both the mesh and the fleece are secured in place by the type of large garden staples normally used to hold down artificial grass. The overall benefit of the fleece is that it stops you feeding the neighbourhood bird population, whilst at the same time letting light and water through to the seed.
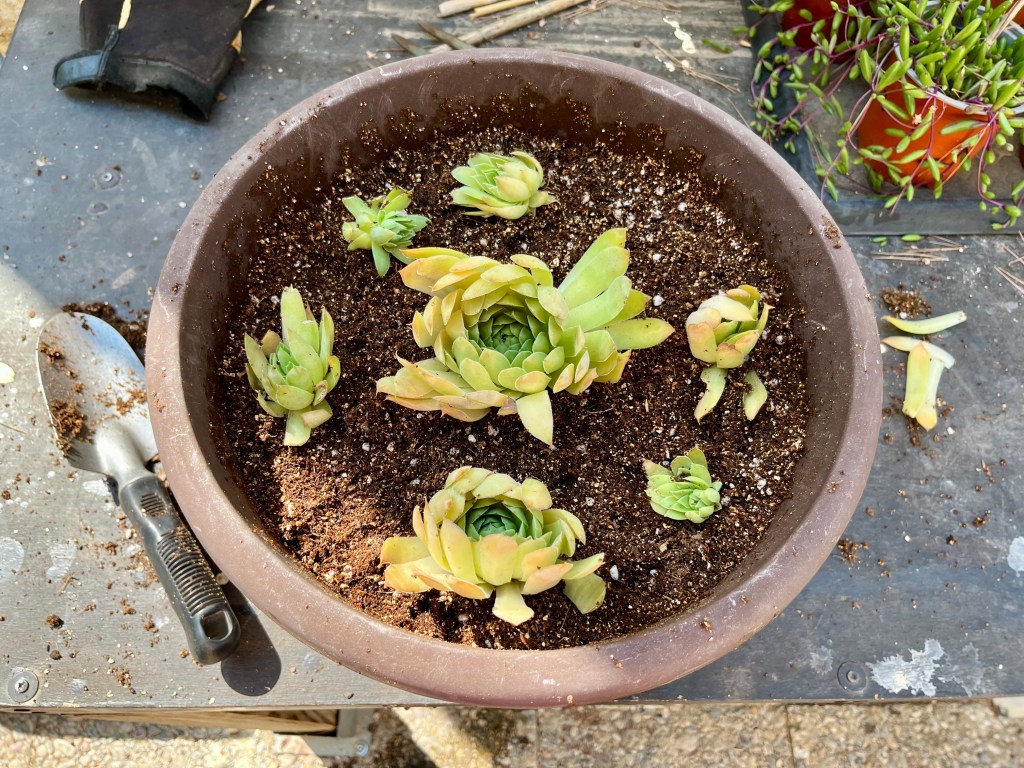
Finally, if you are going to repair grass and reseed then you have a window of opportunity now that lasts roughly till the end of September, after this you will have to wait till next March. I of course couldn’t wait as the dogs would have dug trenches by next March.


My last Fig of Summer has been eaten…but not by me!

I have a love and passion for figs that verges on the compulsive. I have two fig trees and this summer the crop has been astounding as I have been feeding the Butternut Squash below the trees and thereby benefiting the tree, hence lots of figs. Regular followers of this blog know that I netted all the fruit trees a couple of months ago to keep out birds etc. I am happy to report that this has been very successful and we have been gorging on figs for at least two months even to the extent that I have given some away. However, and this is the sad bit. I harvested the figs each morning until the fateful day yesterday, when I was down to the last fig of Summer. I duly photographed this to share with you – the photo not the fig, don’t be stupid what do you think I am some sort of Socialist. Anyway, next morning I went out to enjoy my last mouthful of home grown fig – I had actually dreamt about the moment during the night. When to my horror I was met with a half eaten horror of a semi destroyed fig. At first, I must confess I accused my wife Cruella, as her teeth pattern matched those on the fig. But I let her off when I looked more closely and discovered beak marks; though to be honest she does have a prominent nose.

The first photo below shows the last fig of Summer in all its juicy splendour. The second photo reveals the horror of my unrequited tastebuds.

26th August: Things I have been doing lately.

🍉 Harvesting fruit: Although the great fig disappointment is now behind me I am now looking forward to a bumper olive harvest. The process of feeding Butternut Squash beneath the trees has again benefitted the olives. I only have two trees but the larger is  positively weighted down with olives which I shall be harvesting in a few weeks. You can of course harvest your olives when they are green, but I prefer leaving them till they are black then you can be absolutely sure they are ripe. I will tell you all about the processing system in a few weeks.

The Butternut Squash are also almost ready for harvesting. Where these are concerned you leave the fruit on the plant until the stems and leaves fully die back, then you cut off each Squash leaving at least an inch or more of stem attached to stop rotting’ but I will talk about this more in a few weeks.

The great disappointment of the summer have been the Melons. You will have seen my recent photos of the ants feasting happily on my Melons (no innuendo intended). Anyway, they are all gone apart from one. The ants have triumphed and the photo below shows the last Melon standing (or more accurately lying). This of course has made me melancholy (couldn’t resist it). I may not grow Melons next year, but we shall see time is a great healer and my friend Daphne is working on an ant resistant mat in her secret laboratory so we will see. In case you are interested the photos below show a nice healthy Butternut Squash and the last Melon.

✂️ Cutting the lawn: I hope everyone is assiduously cutting their lawn. I know it is hot but that is no excuse for an untidy lawn. Keep cutting on a medium height and water at night. Next month you will need to do the last feed of summer and begin lawn repairs; especially where stupid Labradors scuff it up and blame each other. The photos below show our main lawn looking lovely after a summer mowing. Whilst the second photo shows one of our smaller lawns looking like the Somme with Nero and Tango blaming each other.