The big Winter cutback part 4 and I am accused of cowardice by a tree

The big winter cutback is now complete. Normally at the completion of the big cutback I stand back and survey the garden with quiet satisfaction, but this year has been marred by controversy.

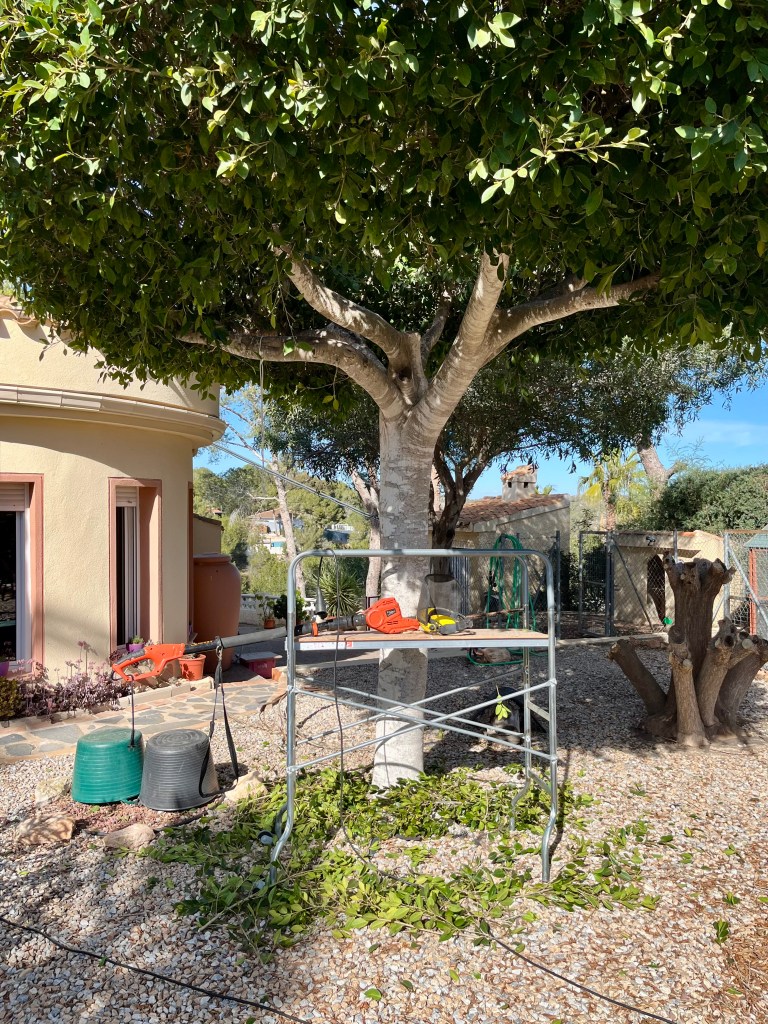
Pruning my big Ficus tree is normally the last item on the cutback, mainly because it is a mammoth struggle between man and tree, resulting in the loss of much blood, severe bruising, sprains and spectacular falls from a great height. However, this year I did it differently resulting in hurtful insults from the tree accusing me of cowardice. To be honest I am a bit ashamed of my actions and don’t really want to talk about it, but more later, for now let’s get on with the gardening.

15th February 2026. Things I have been doing lately:

  • Cutting back ornamental grasses
  • Planting new trees
  • Dealing with the big Ficus and accusations of cowardice

Cutting back ornamental grasses. If you have ornamental grasses then you know how lovely they look in the autumn and winter. Their long floating blades and fronds blowing in the autumn winds add movement and texture to the garden at a time when it can look a bit bereft and boring.

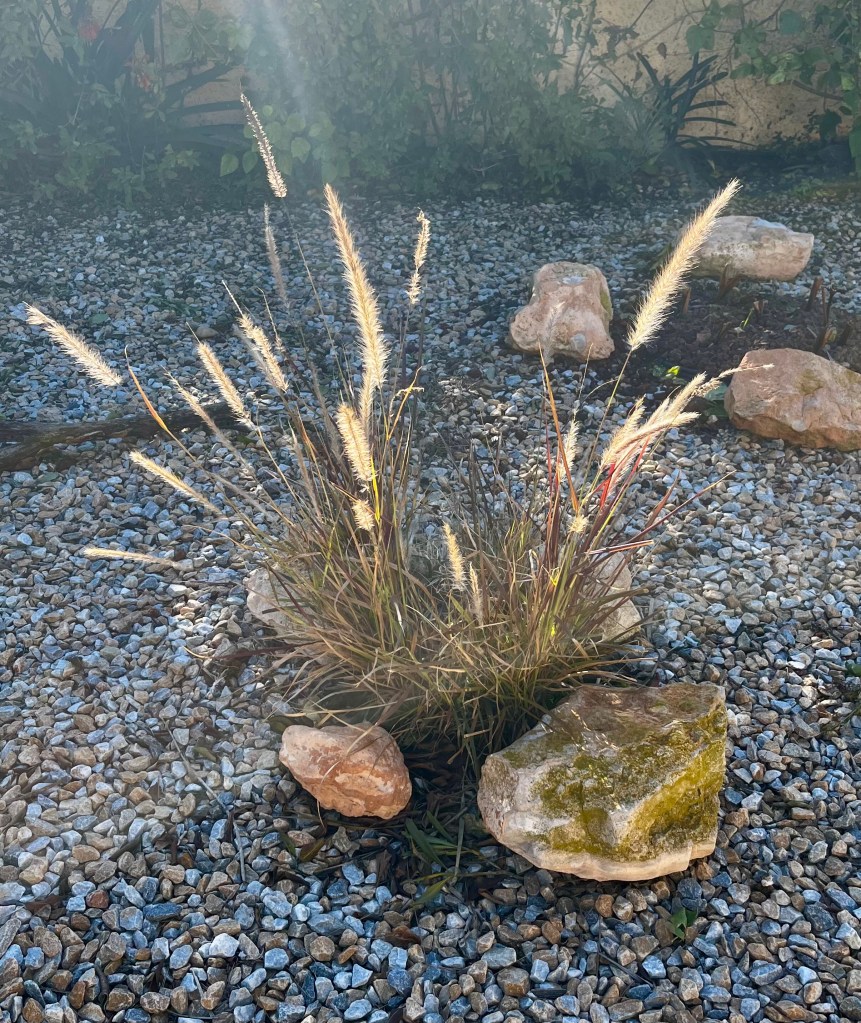
I mainly favour large Fountain grasses for their stately bronzed fronds, although I do have one smaller blue grass which has yet to reach its full potential. The photos below show my grasses before their trim.
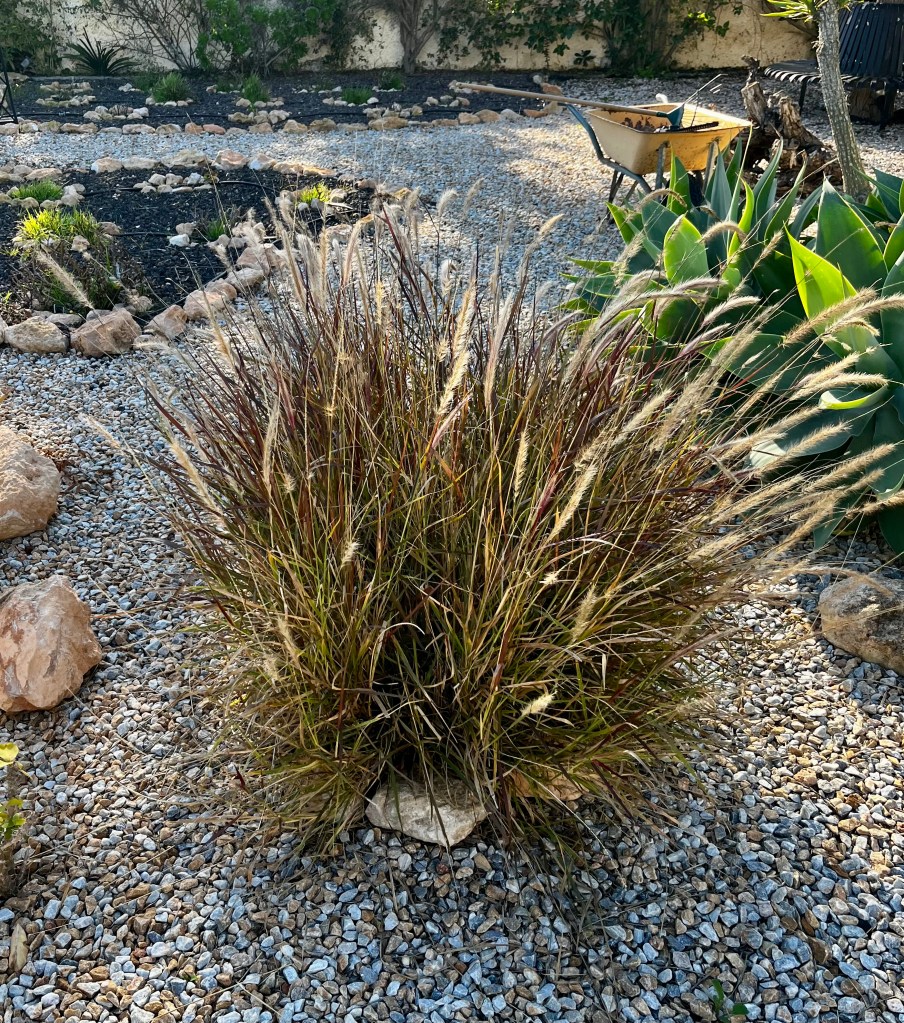
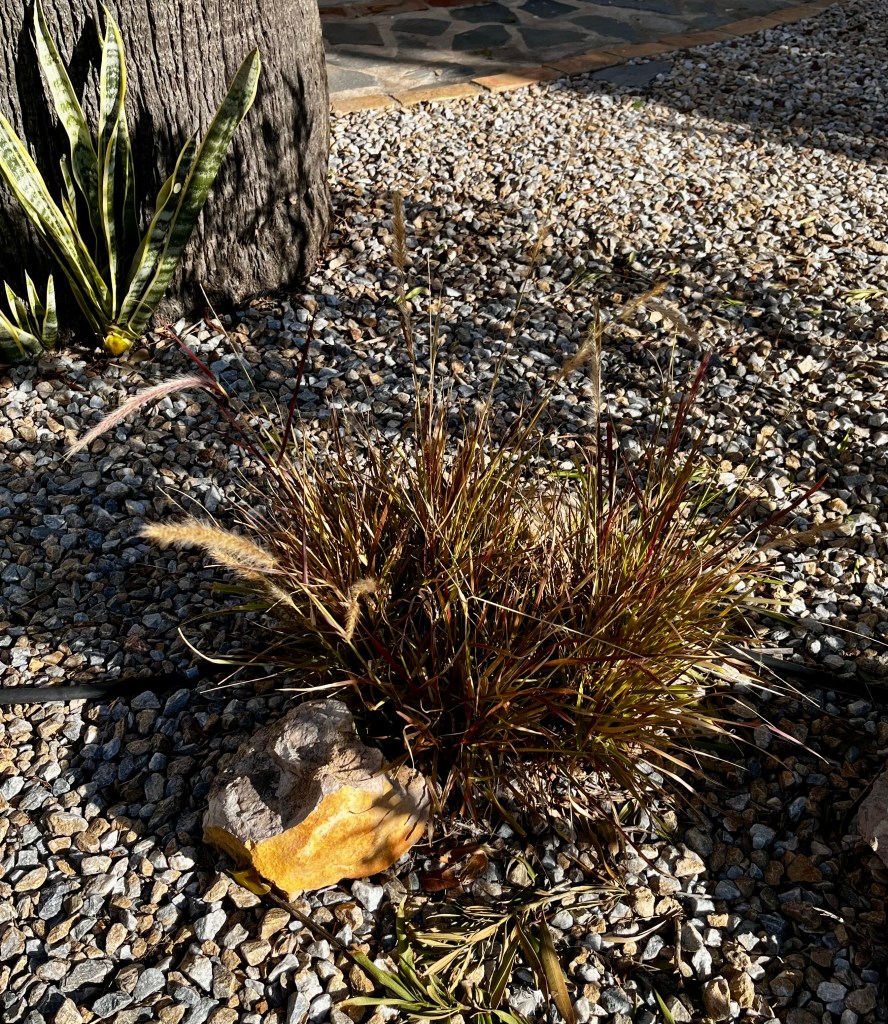
Most of my grasses are transplants from bigger plants that I have separated over the years and in the last few weeks they have looked lovely. However, if you don’t cut your grasses back now then they will become congested with old growth and you will hinder this years growth.

All you have to do is get your hedge trimmers or shears and cut the whole thing back to a small mound. Once you have the grass cut back then get your garden gloves on and pull out any dead grass from the centre of your plant. Gloves are important as grasses can be sharp. The photos below show my efforts at clearing the congestion at the centre of one of my grasses, and the finished and trimmed plant ready for new growth to bust through in about a month.
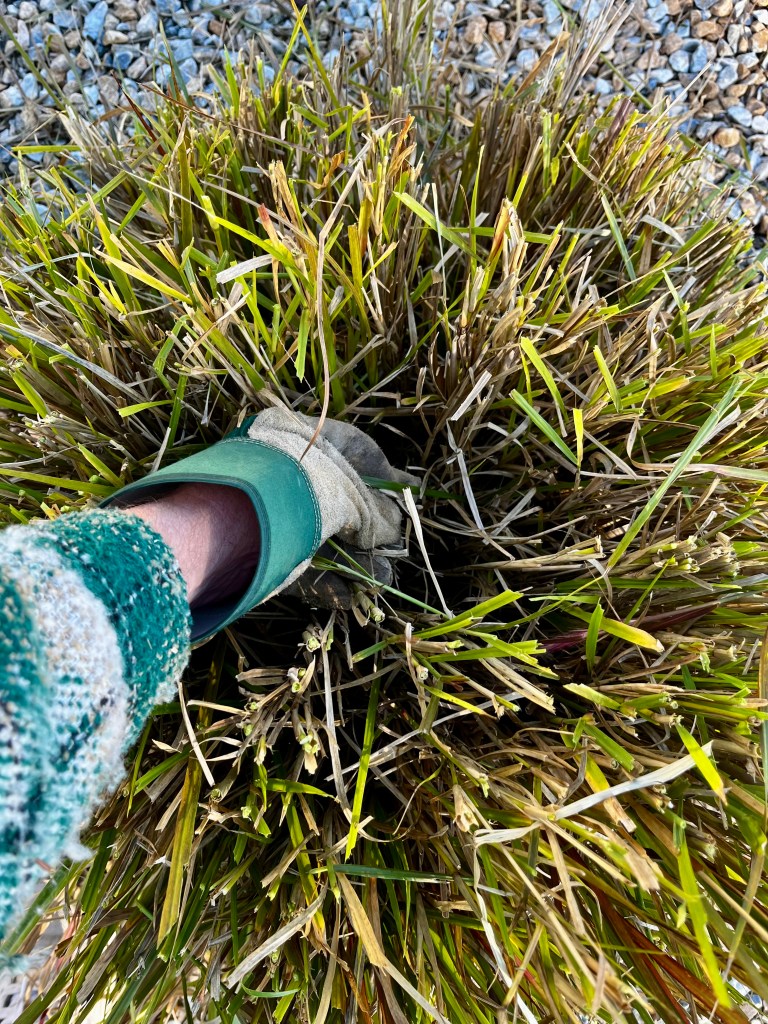
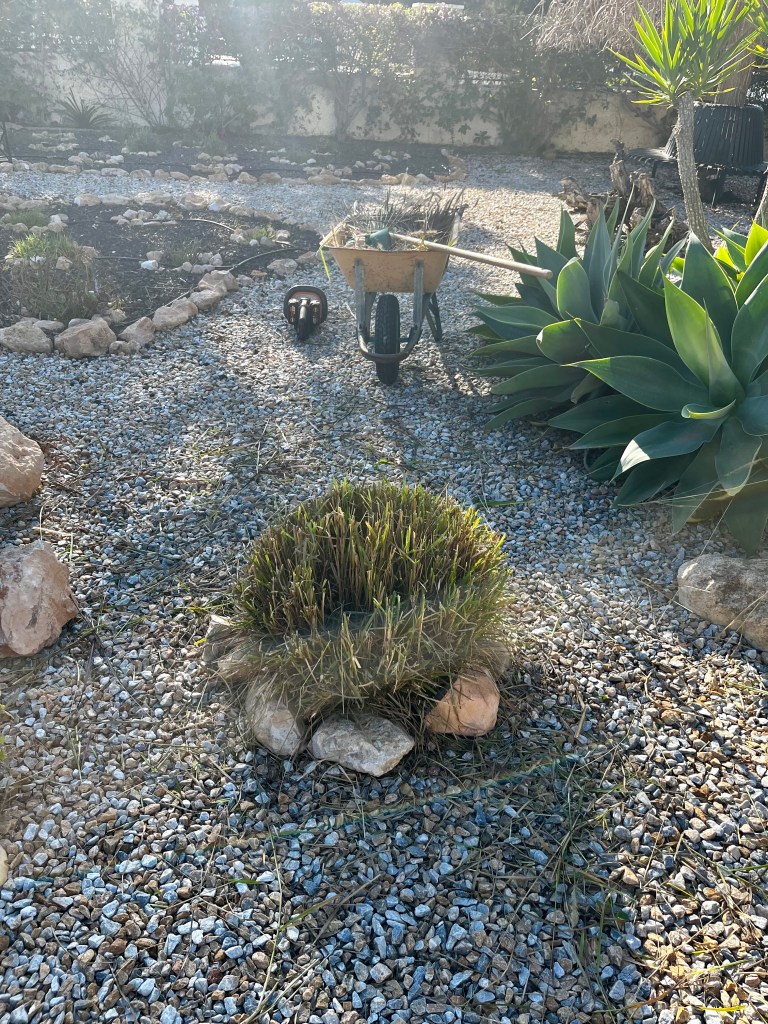
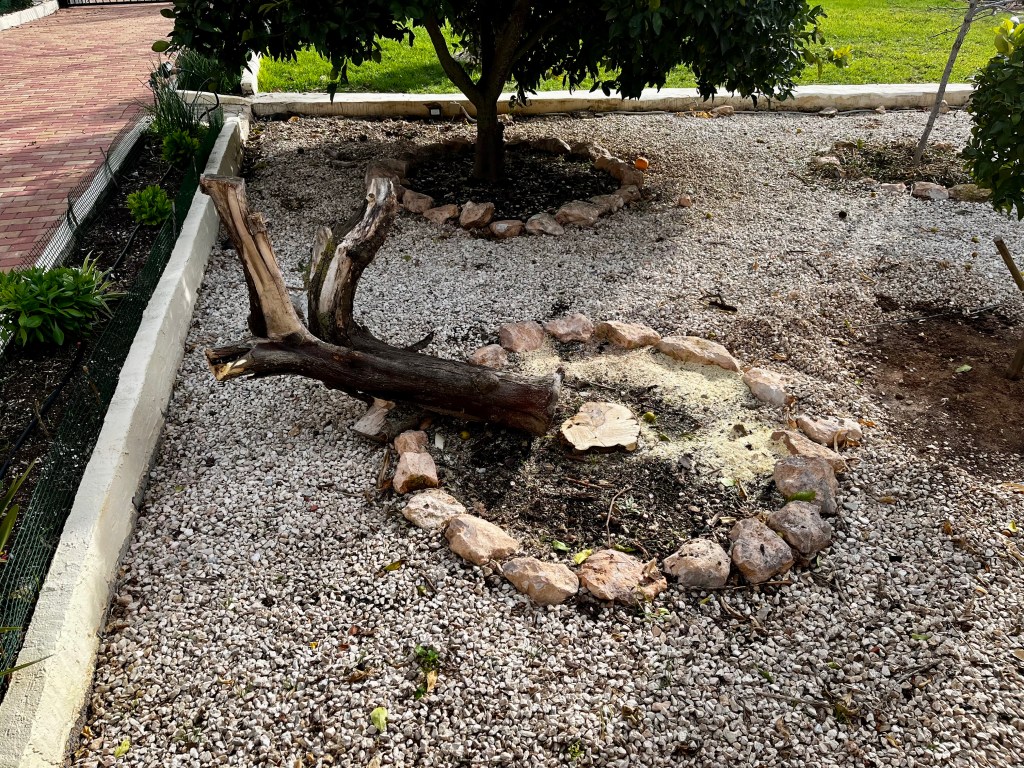
Planting new trees. My only lemon tree has been gracefully dying for about 2 years which has been a cause of great concern to Cruella (my wife) who relies on it for lemons for her gin. It is an old tree, and I have been carefully managing its decline. However, it has reached the end and it had to go, especially if I was to get a new tree in this year. The photos below show my old tree leaving this earth gracefully.
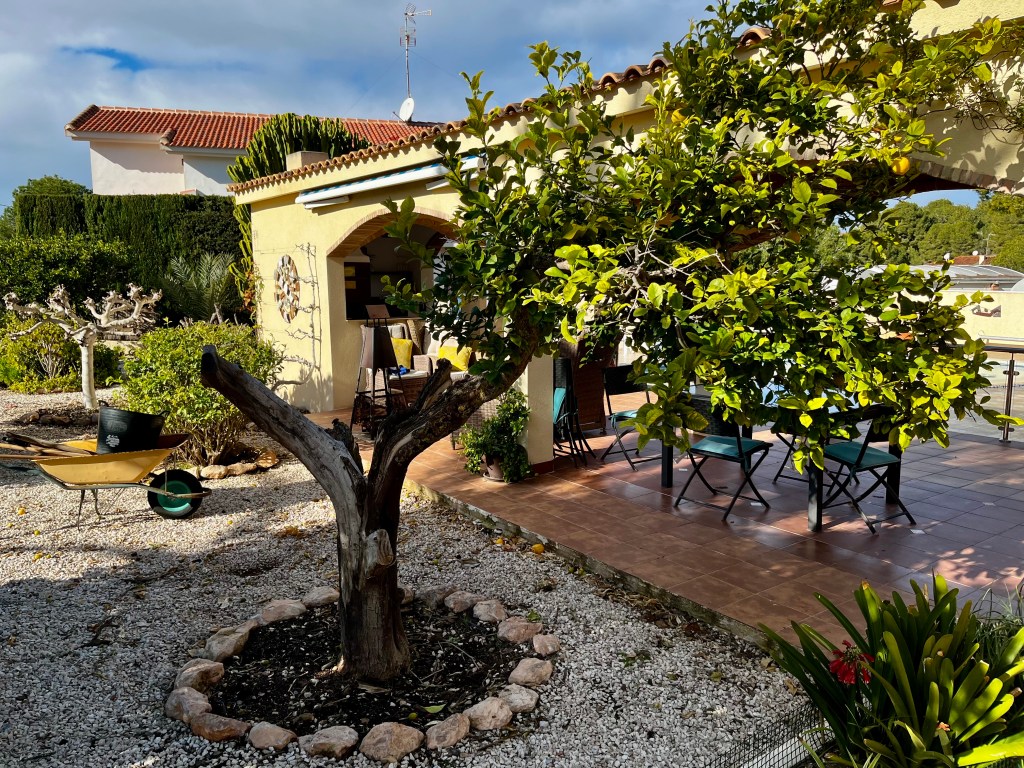
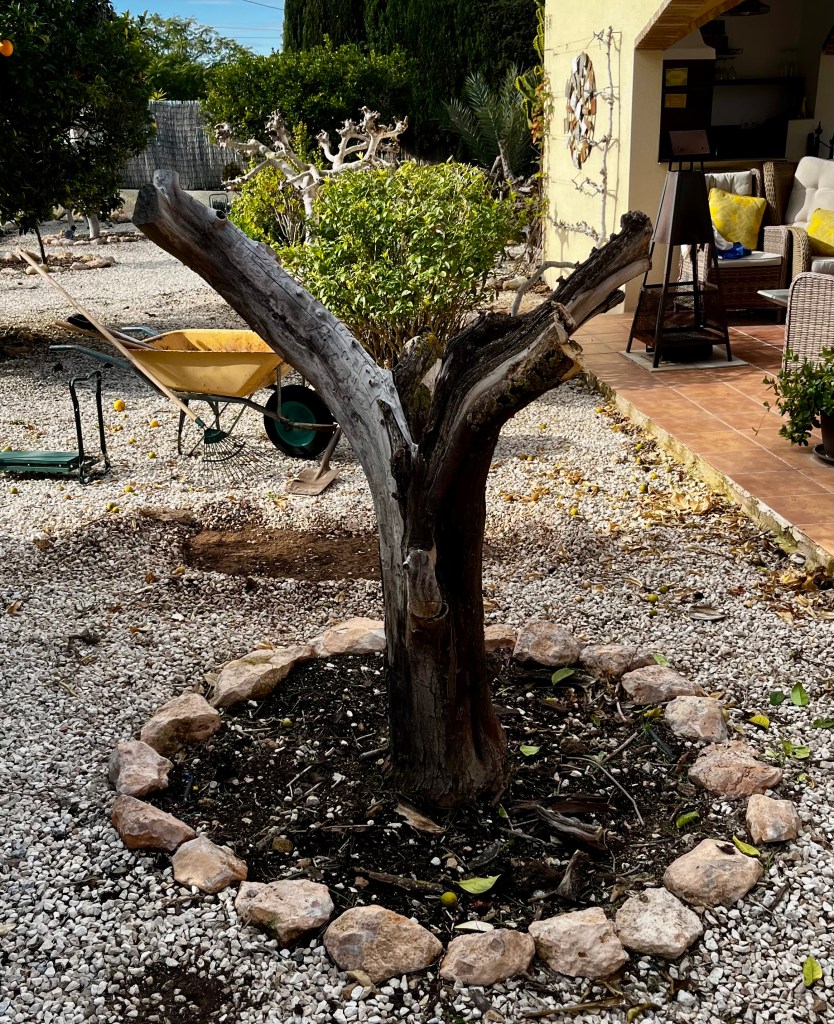
This is not assisted dying, this is loving family care of an old and dear friend

If you are going to plant new trees in the Costa Blanca area, then you only have a planting window between November and March to get your new tree into the ground. Any later than this then your new tree will have difficulty getting going in the heat. By getting it in whilst the soil is beginning to warm and there is some rain around but the sun is not too hot, then your new tree has a chance to set some root before the heat of the summer.

The first thing you have to decide is the position of your new tree. My fruit trees are in two parallel lines in a typical orchard style. In effect this means that my new tree will be in line, but essentially it needs to be at least 3 metres from the trunk of my old tree. The reason for this is simple. The soil around the old tree will be depleted and the roots of the old tree are still in the soil and won’t rot for a few years.

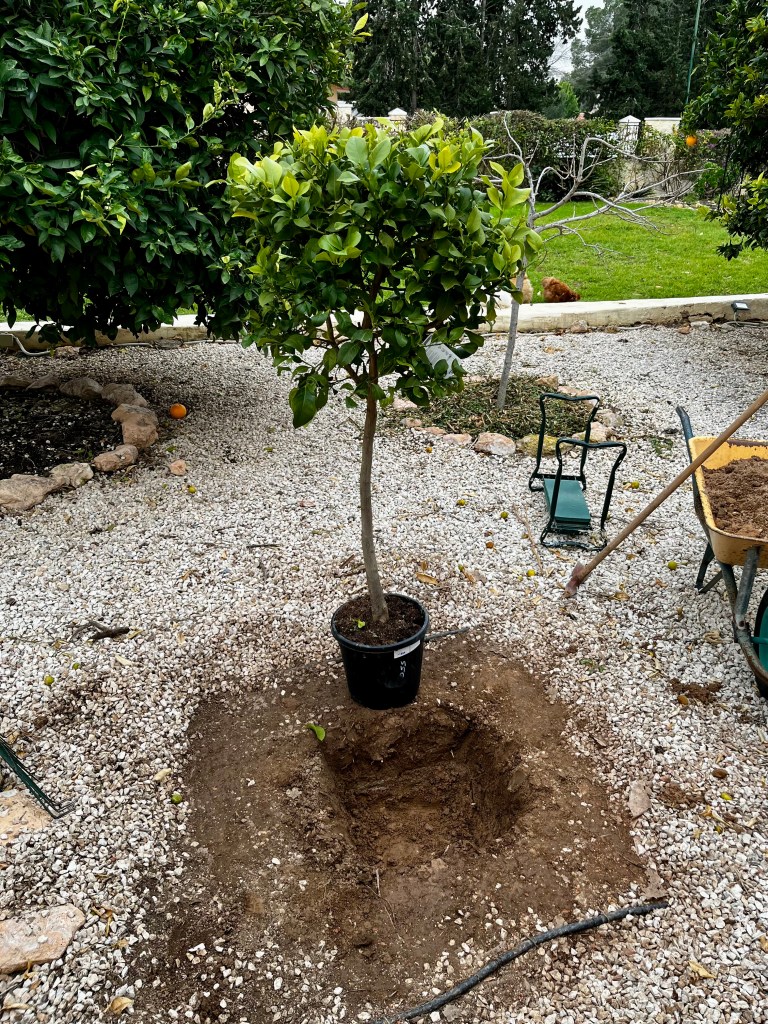
Your next decision is what type of new tree to buy. You can buy spindly things grown from seed, mid size trees grown on grafts, or cut down larger trees. I prefer mid size trees grown on grafts as they are relatively mature, won’t have the frailties of seed grown trees or the potential disease of cut down trees. Anyway, which ever you choose soak it in a bucket for at least three hours before planting. The photo below shows my chosen tree draining after its soak.
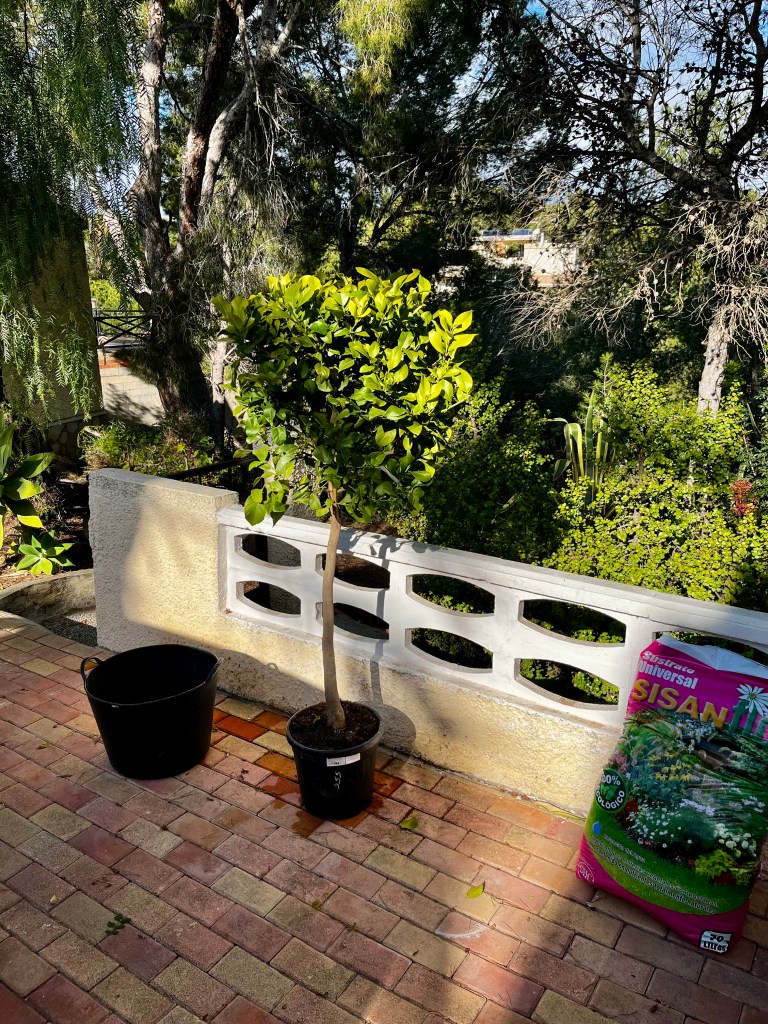
New life, new hope

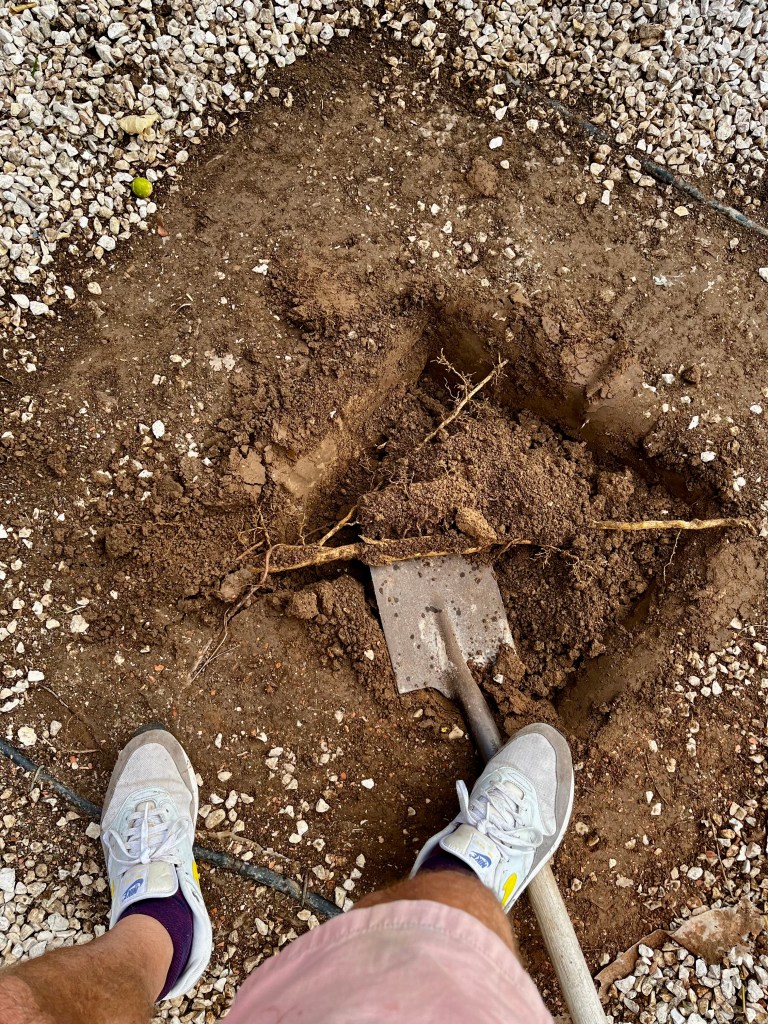
Once you have your tree it is time to get it into the ground. Dig a hole as big as you can, ideally twice the size of the root ball (but to be honest these days I am lucky if I can dig a hole). Chop out any roots you find from the old tree. When you are happy with your hole, fill it with water and let it drain. The photos below show my progress.
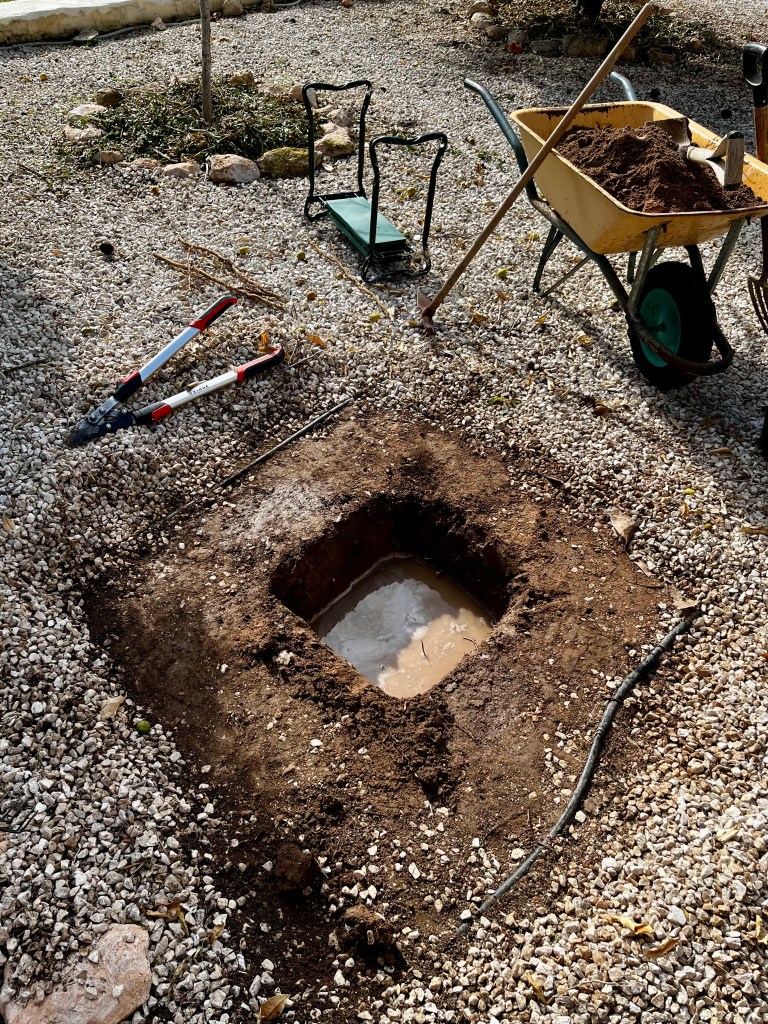
Now to the important part of planting your tree. Your aim is to give your new tree the best chance of survival, and that means careful preparation. First, ease your tree out of its pot and carefully spread the roots out of their pot shape. Next, sprinkle the roots with Mycorrhizal fungi to encourage root growth (you can buy this in most garden centres).

Now plant your tree in a 50/50 mix of really good compost and the existing soil, ensuring that you firm the soil well down by treading it in. It’s really important at this stage that you do not cover the the graft with soil. The graft is the swelling at the bottom of the trunk. If you cover this with soil you may get growth from the graft host. See photos below.
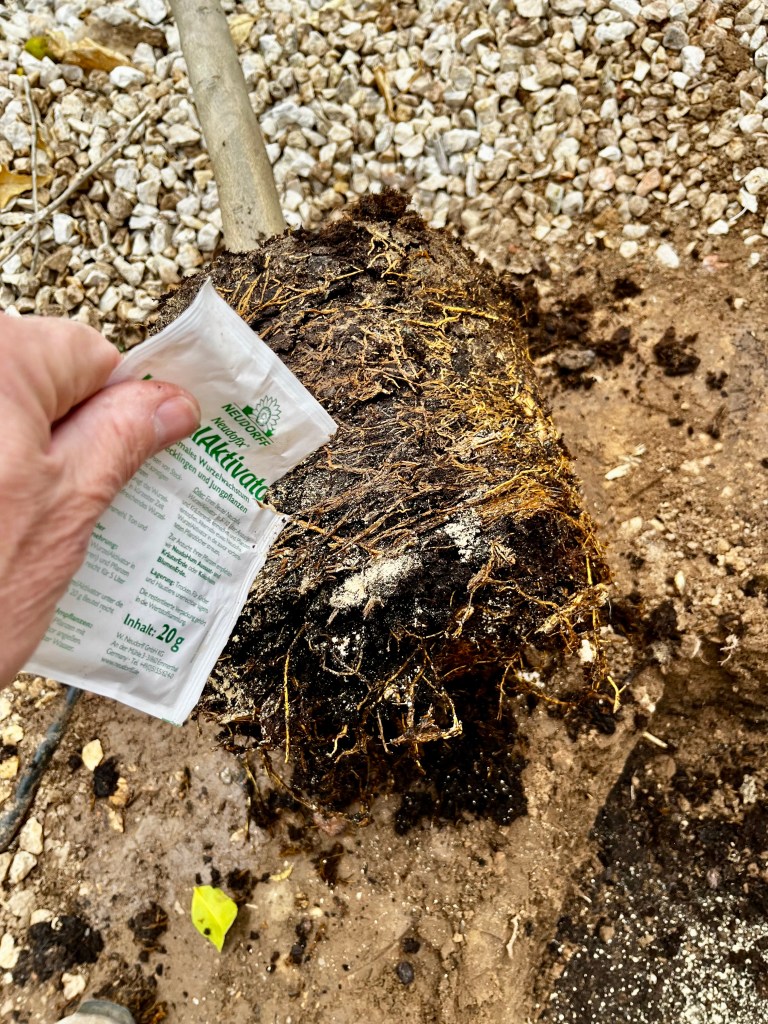
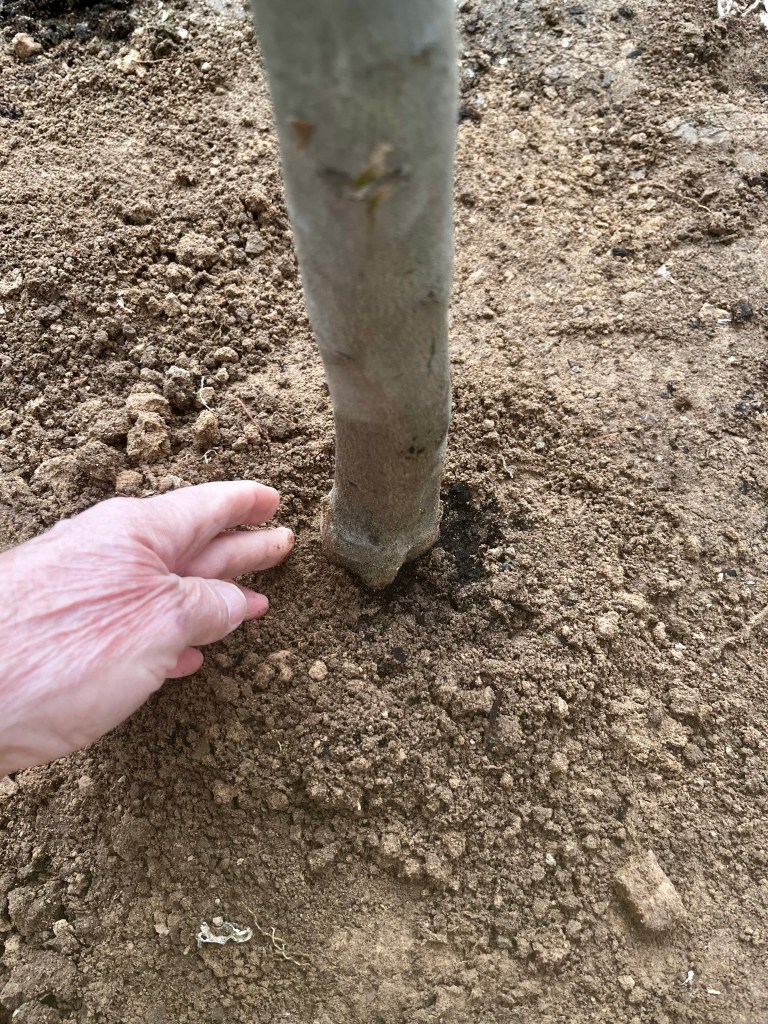
Finally, when you are happy with your little tree, you will need to stake it against “root rock” which can happen in high winds and stop your tree taking. All you have to do then is to water it profusely for the first few weeks and enjoy its first year of growth.
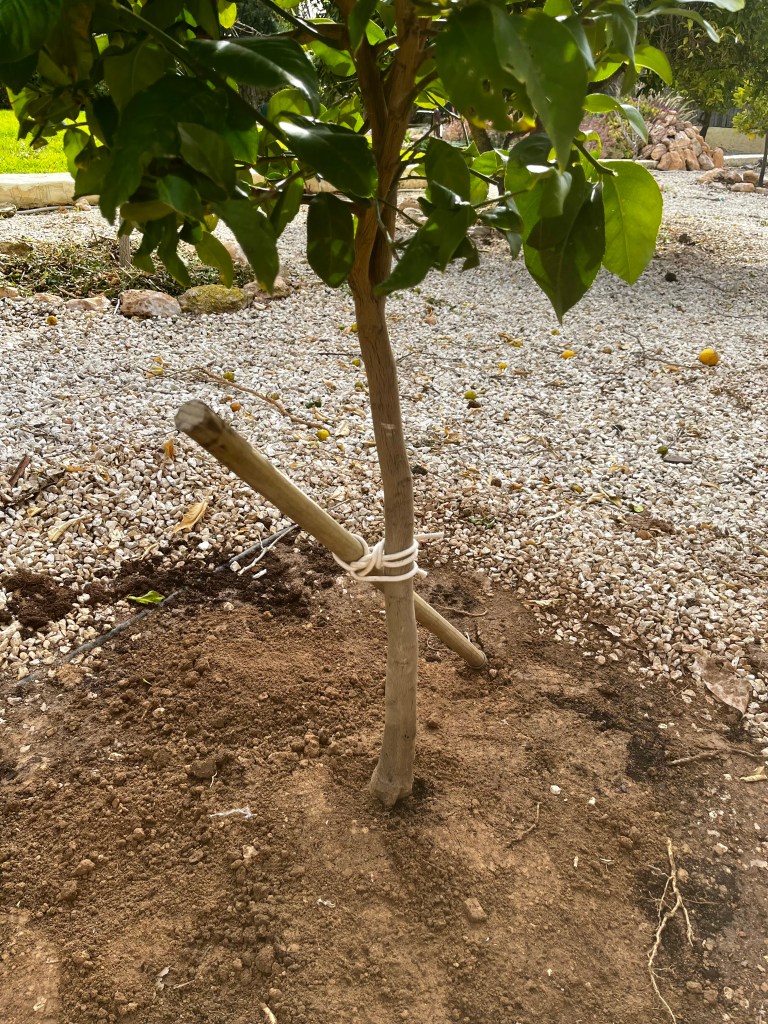
Luckily this was staked before the recent horrendous winds

Dealing with the big Ficus and accusations of cowardice. Regular readers of this blog will know that I finish the big winter cutback by pruning my big ficus tree. Years ago I shaped this tree into a pruned donut shape by cutting out its central trunk. This meant that in the spring each year I had to prune and reshape the tree to retain its donut effect.

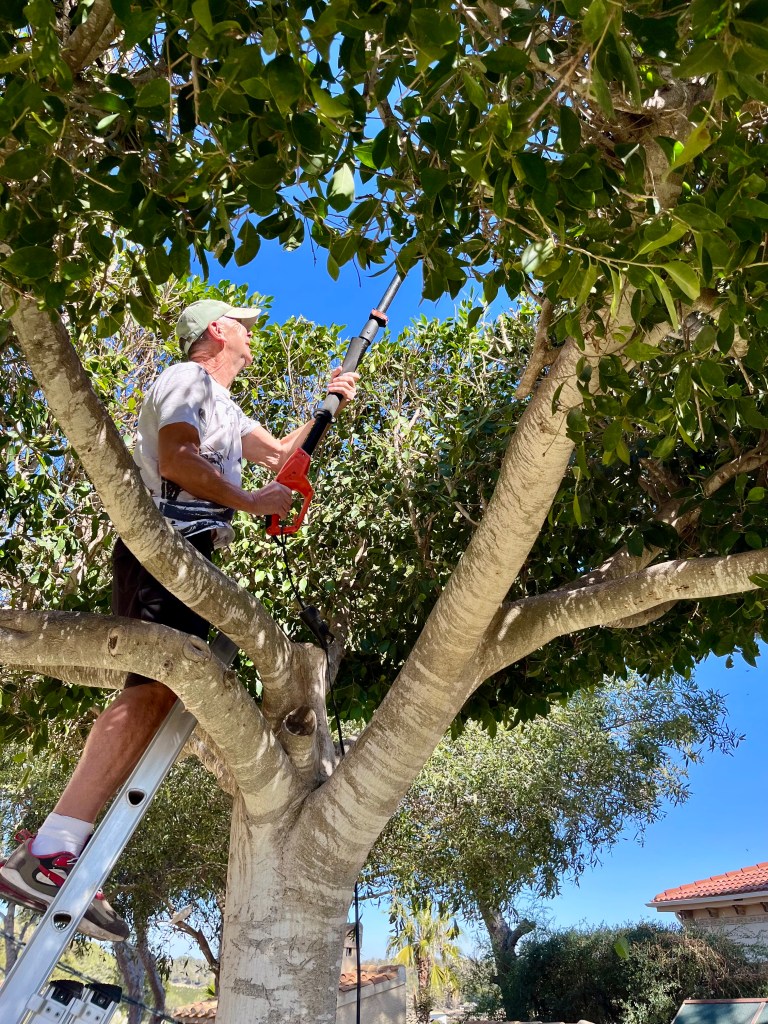
Some of you might envisage that this would seem to be a rather easy task. But no, the ficus is big and tall and has a vicious temper. It has never forgiven me for the original removal of its central trunk, and it takes every opportunity to smash, bash, cut and bruise me in our annual encounters. The photo below shows me mid battle in years gone past.

Happy carefree days; I usually fell out of the tree

Normally I can feel it malevolently watching me as I go about all the tasks in the big winter cutback. Sometimes if the wind is blowing in the right direction I can hear its leaves rustling and whispering vicious threats of what it is going to inflict upon my body. Every year so far I have psyched myself up through a mixture of prayer, character building readings and a little yoga. But this year something just snapped. I couldn’t face it.

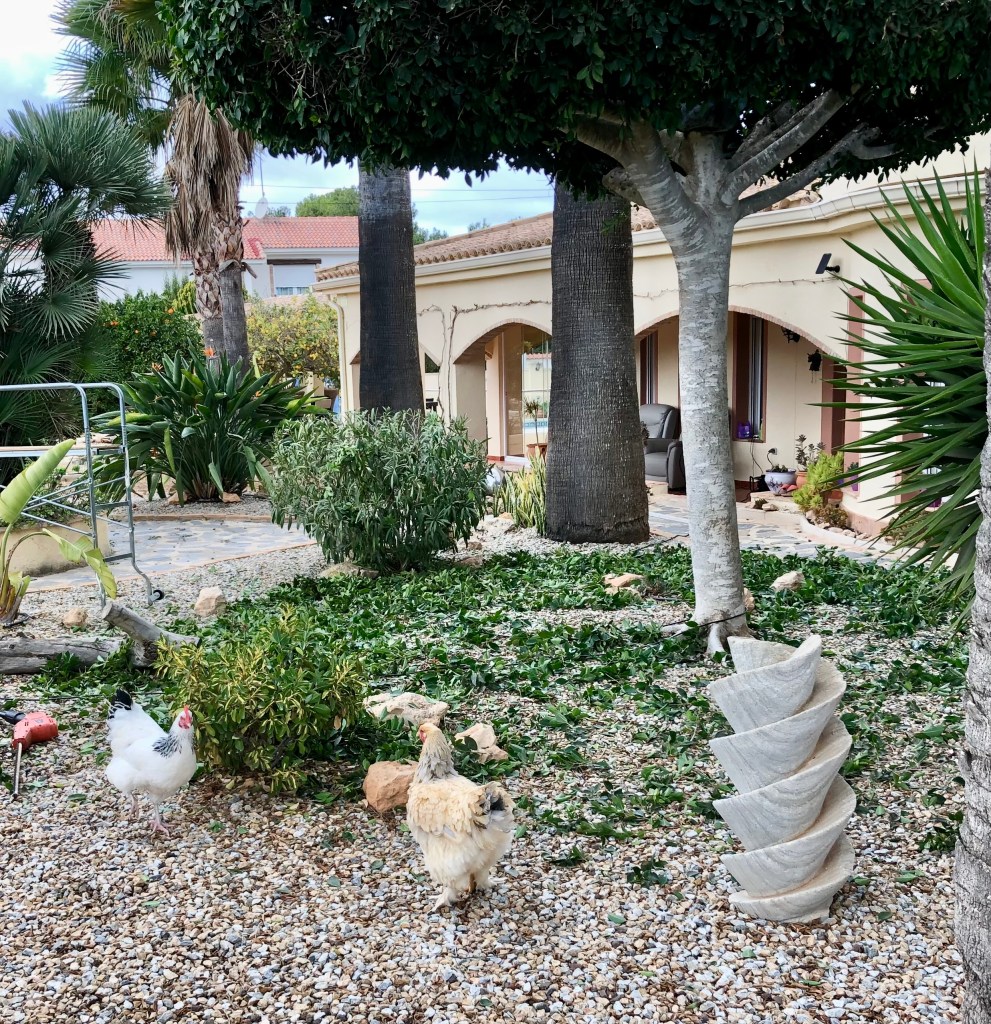
I blame the fact I had been softened up by the rest of the garden before this big encounter. The roses had made me bleed so badly I became anemic. Falls from and through the hedges bruised my body so badly that the police were called in and Cruella (my wife) accused of domestic violence. My back and bones hurt so much from digging that I am now a chiropractor case study. And all of this physical and mental damage whilst being constantly insulted and laughed at by chickens.

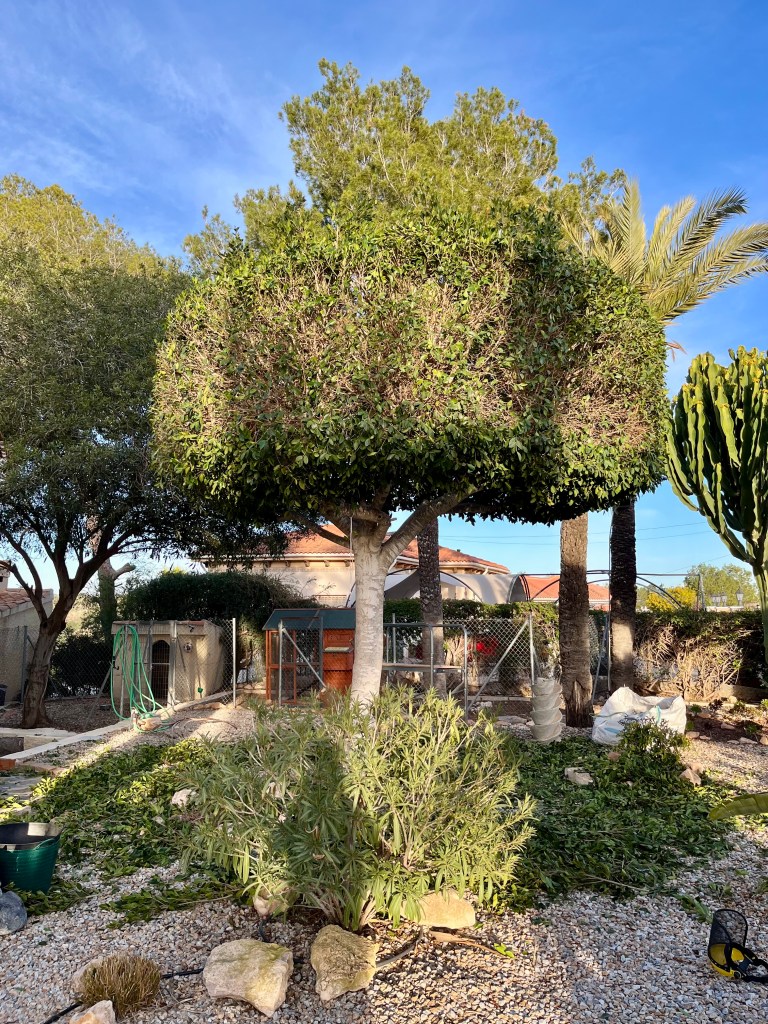
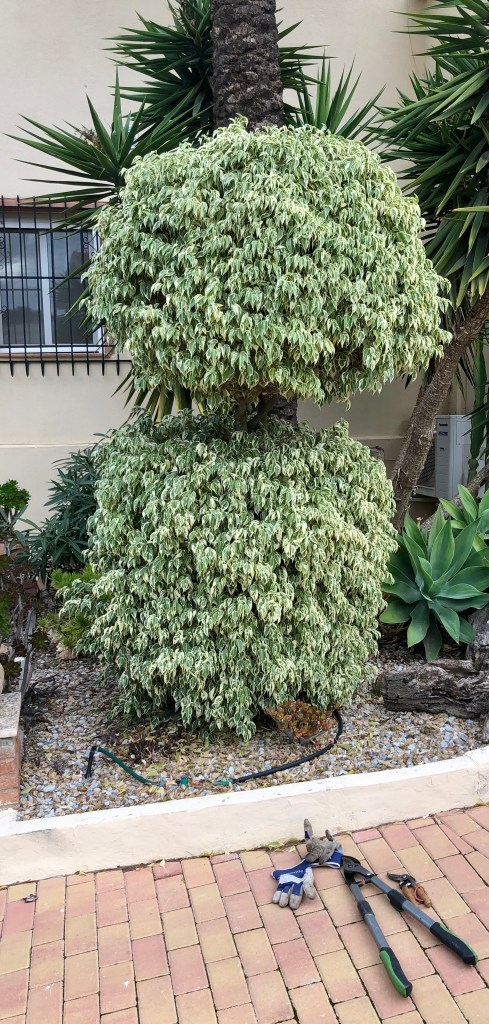
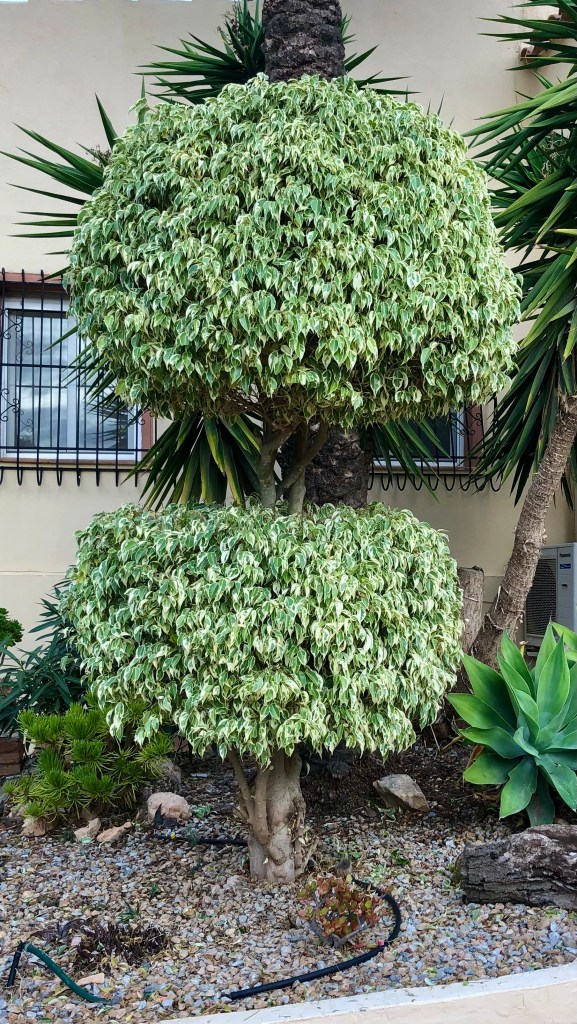
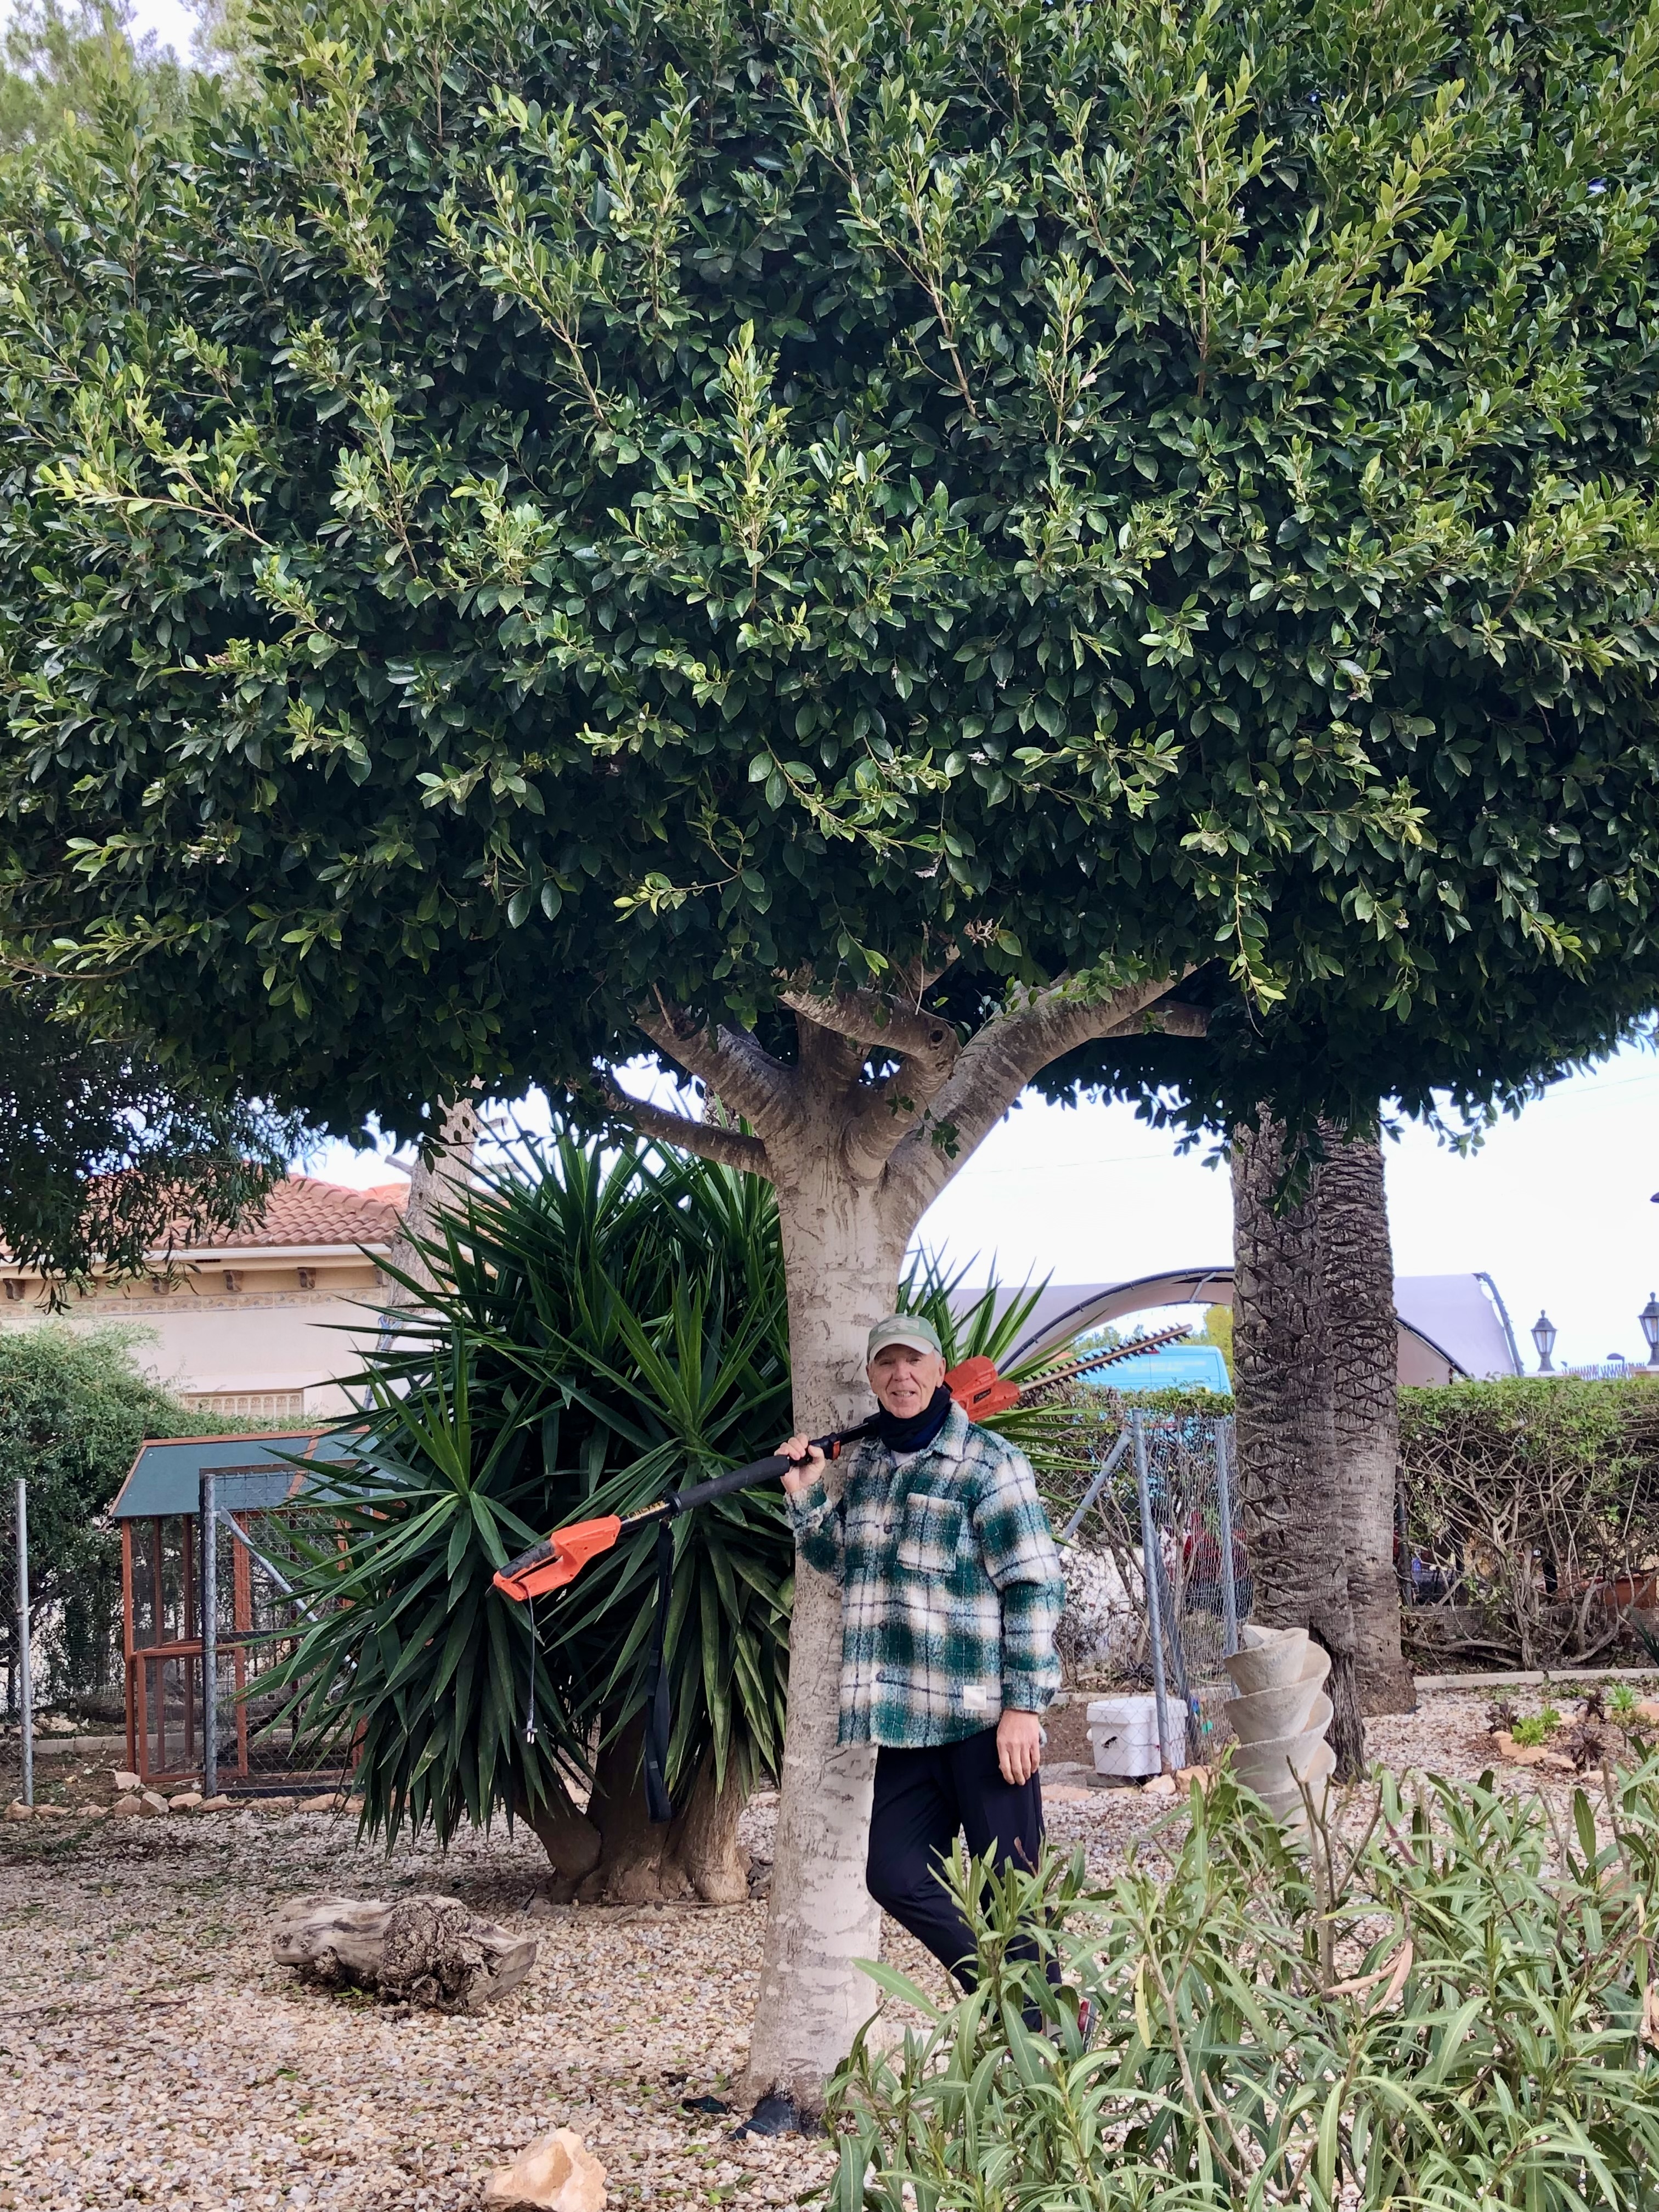
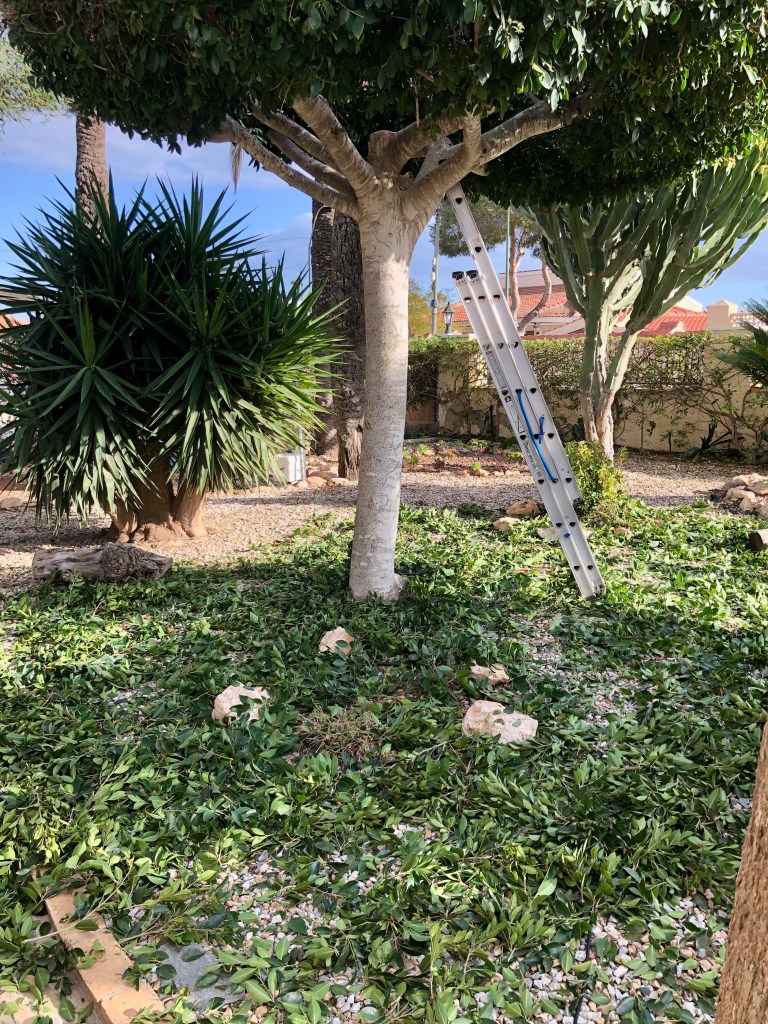
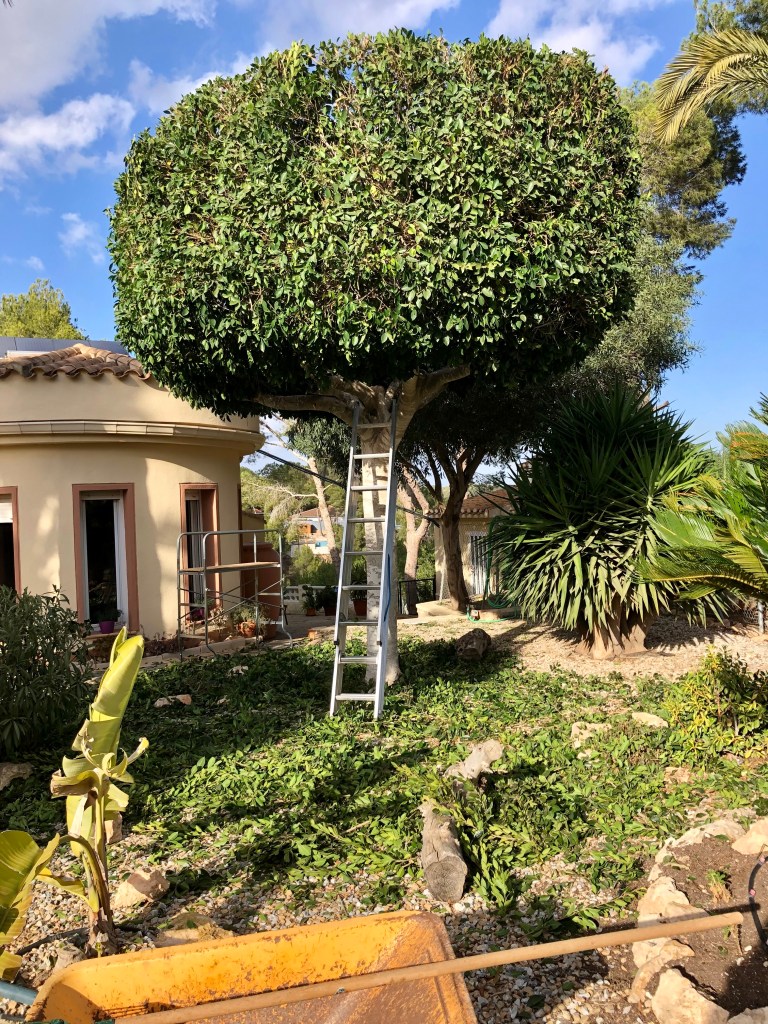
So the obvious happened, I called in tree surgeons to prune and cutback the big ficus. To be honest, they did a lovely job and pruned right back into shape. But that is not the point, since then the ficus has loudly proclaimed that I am a coward to all the plants in the garden. I lost respect amongst the plants and my authority was being questioned even amongst seedlings. I could barely look at the ficus with its knowing sneers and open contempt. The photos below show the big ficus after its professional prune.
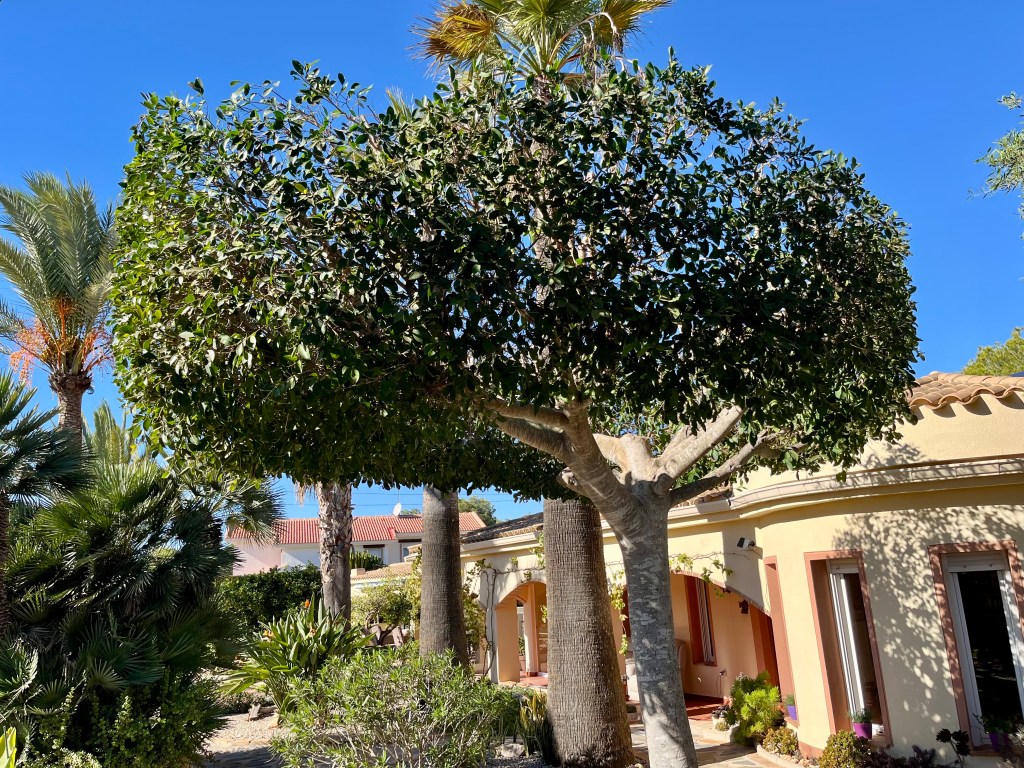
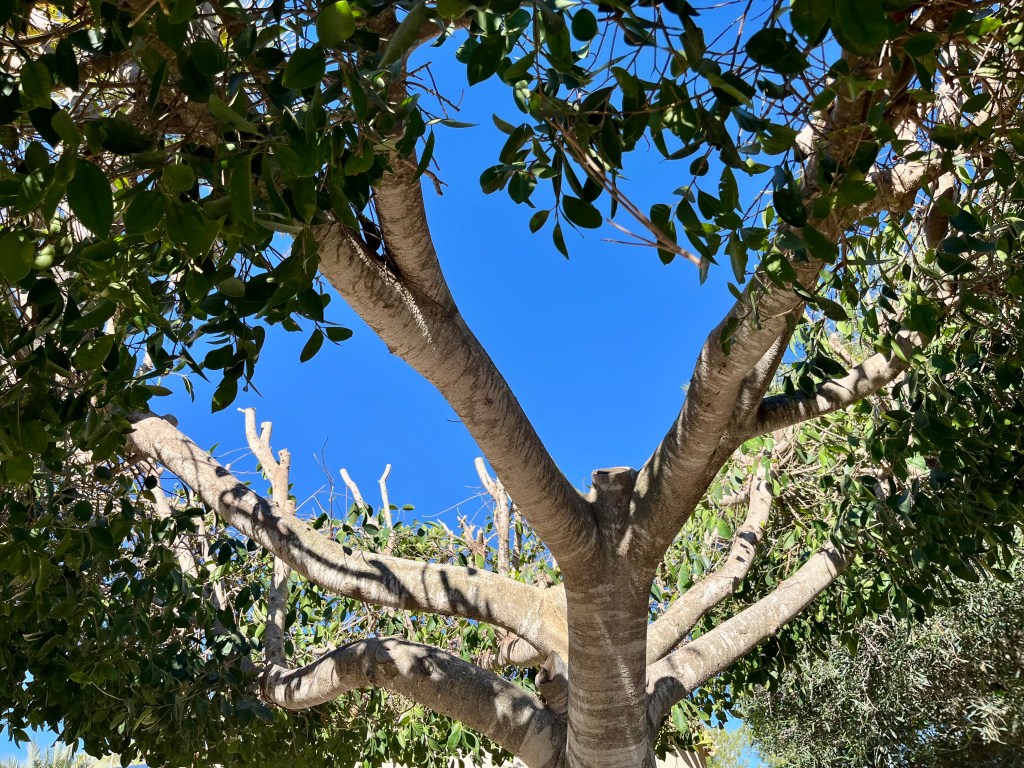
Look carefully what do you see

After days of torment and sleepless nights I knew I had to gain the respect of the garden or it would be all over. Suddenly it came to me. If you look at the first photo of the ficus above you will note that the left hand edge of the tree canopy is slightly higher than the right – the tree was lop sided and looked unbalanced. This was it, my opportunity to regain face and respect in the garden.

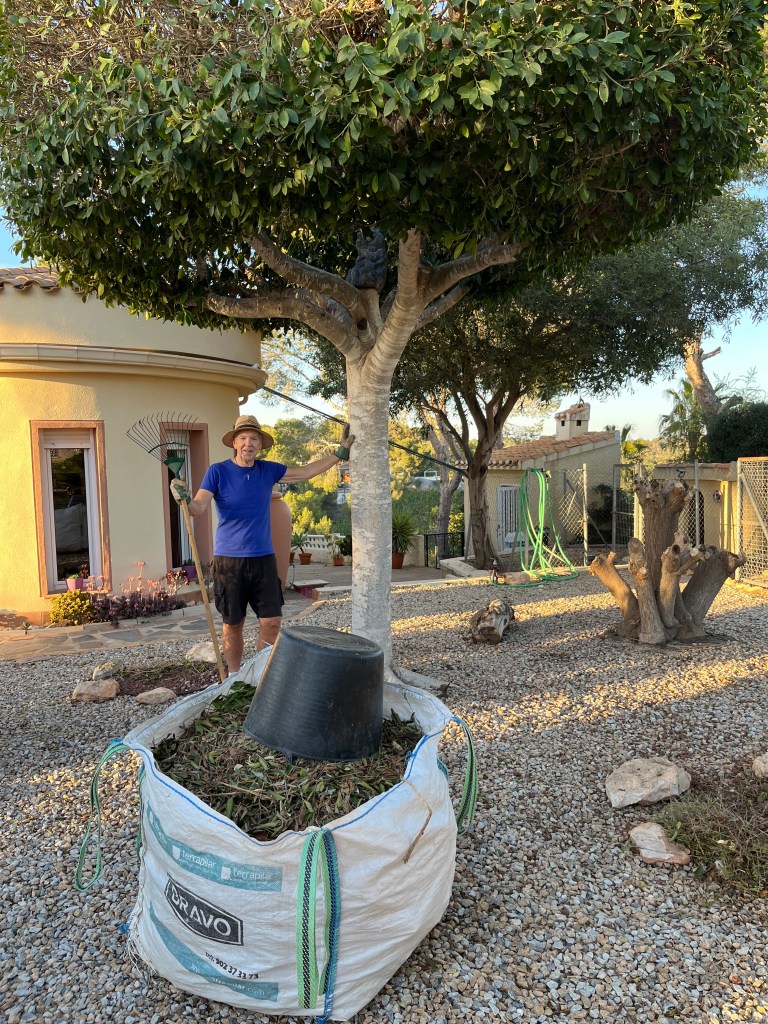
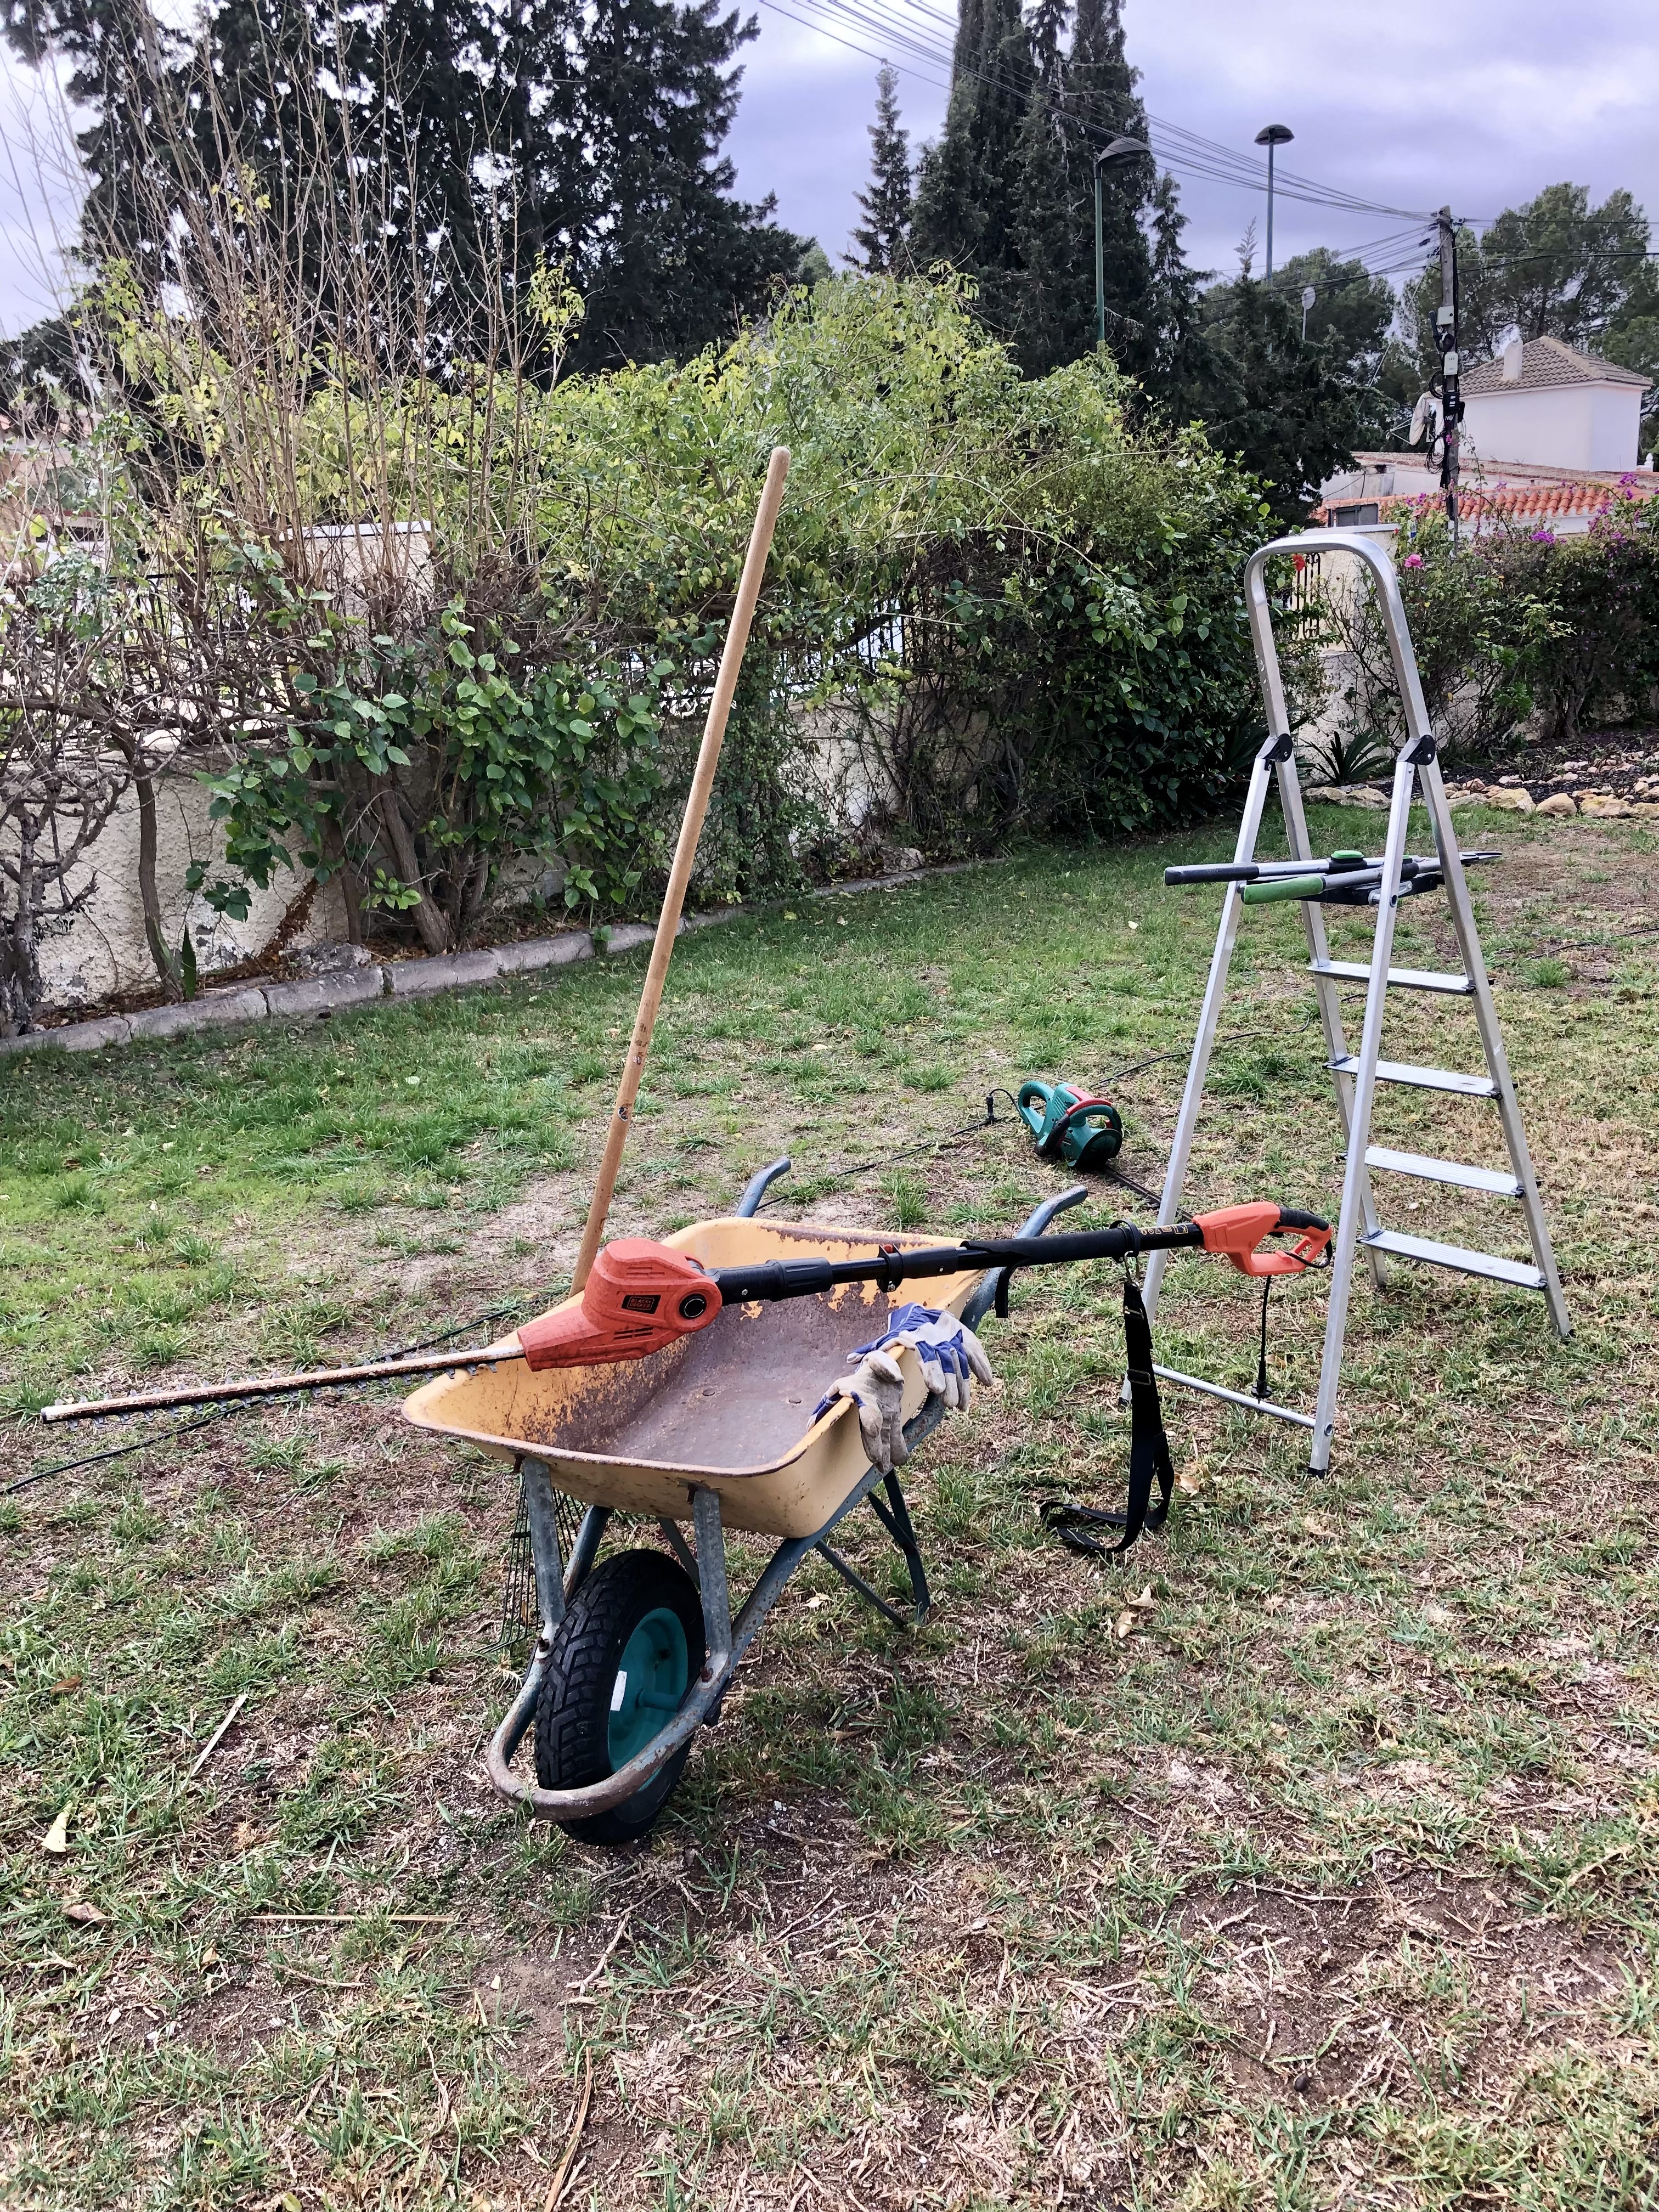
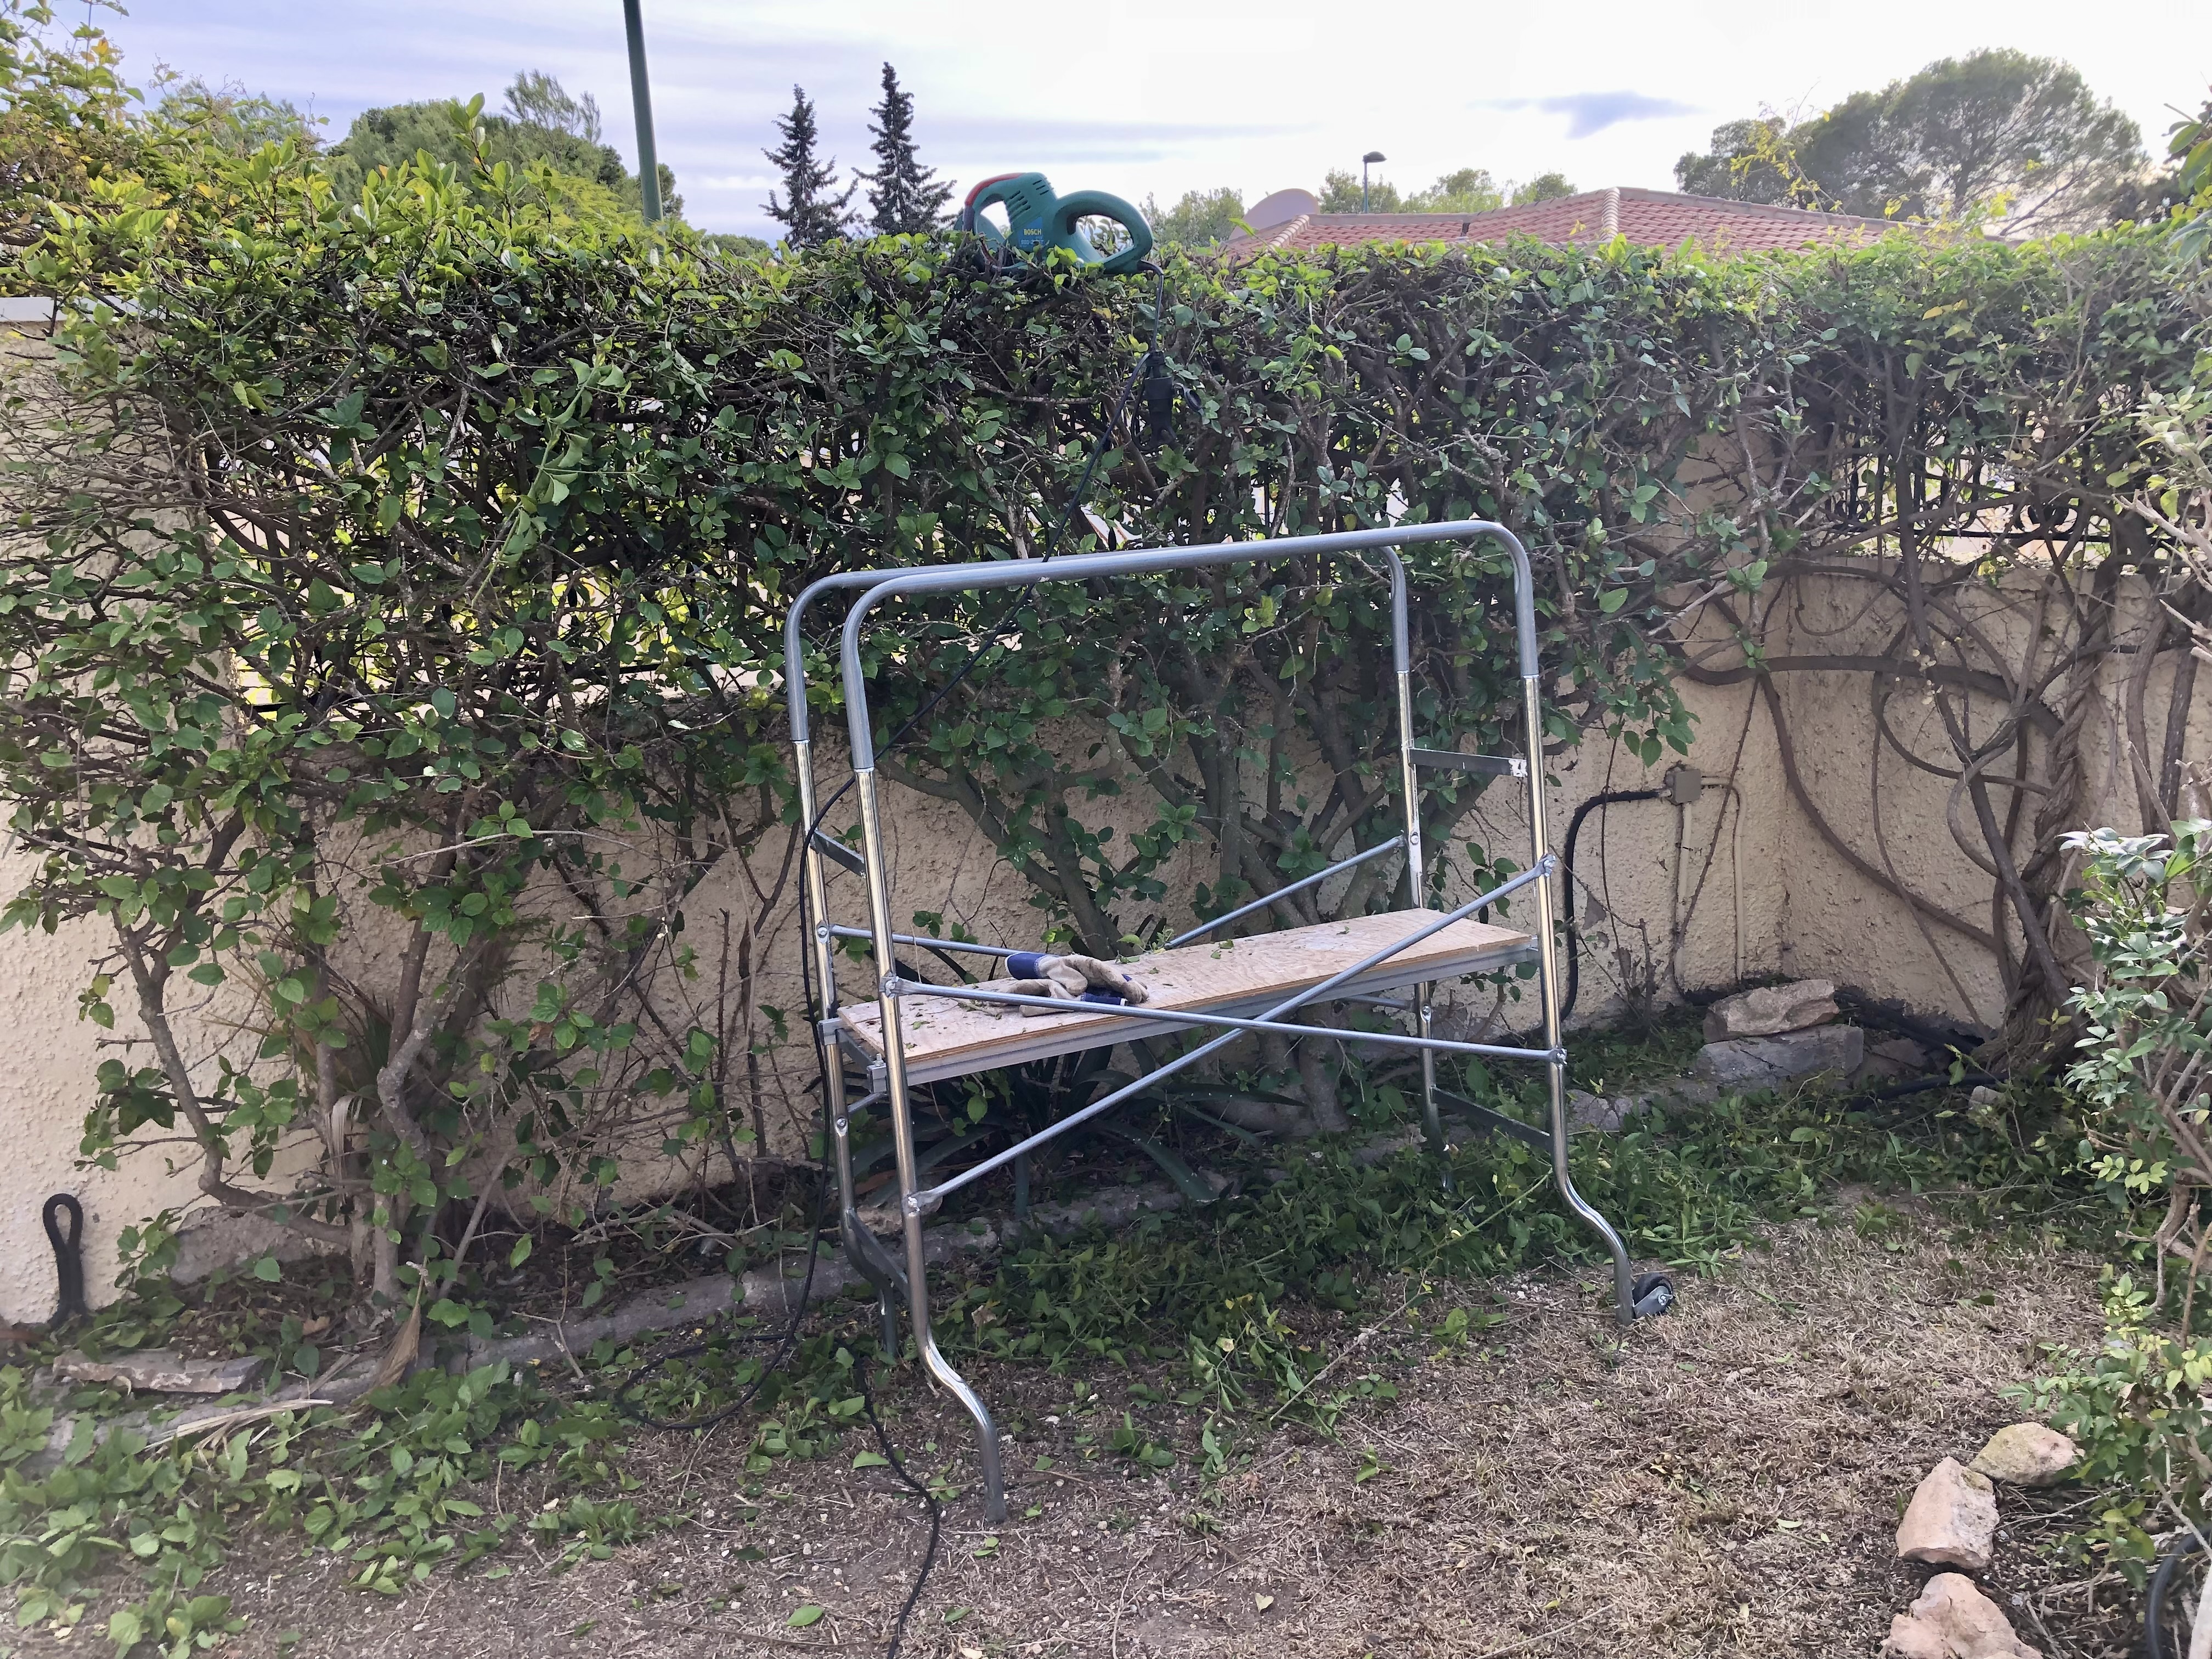
I boldly got out my ladders, platform and tools and with a great deal of ceremony and fuss began to re-trim the tree to give it a semblance of balance. As I worked the tree stayed silent, but I knew it was looking at me; at first with pitying hostility but as I proceeded it eventually melted into looks of understanding, trust and comradeship. The photos below show me at work.
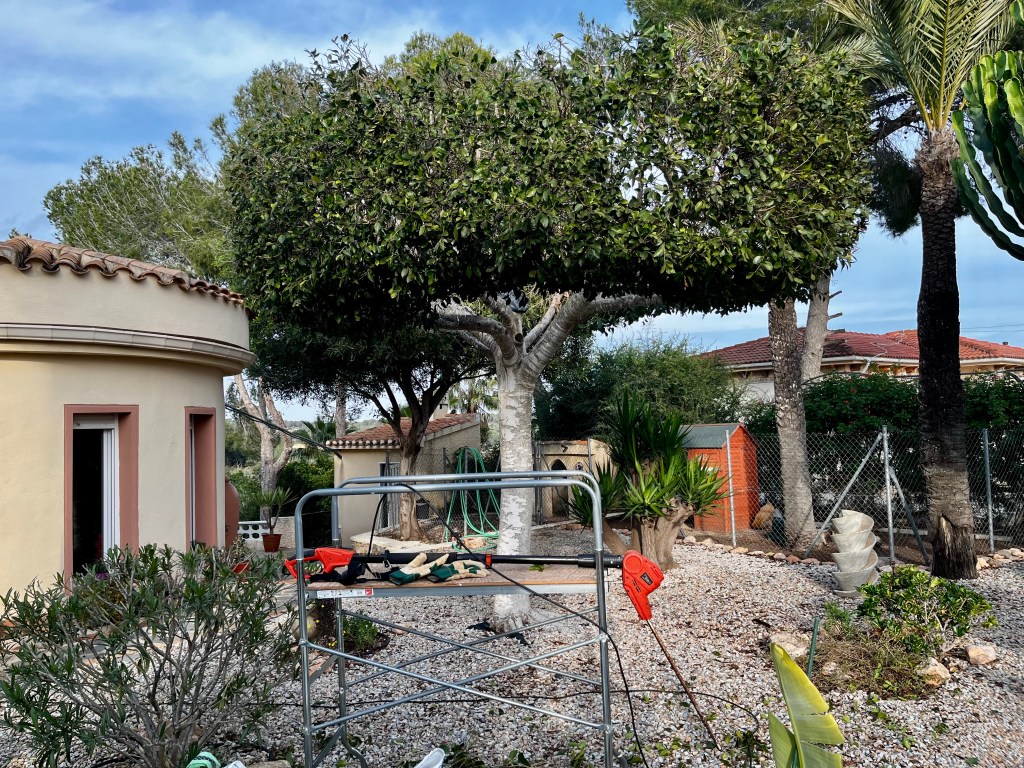
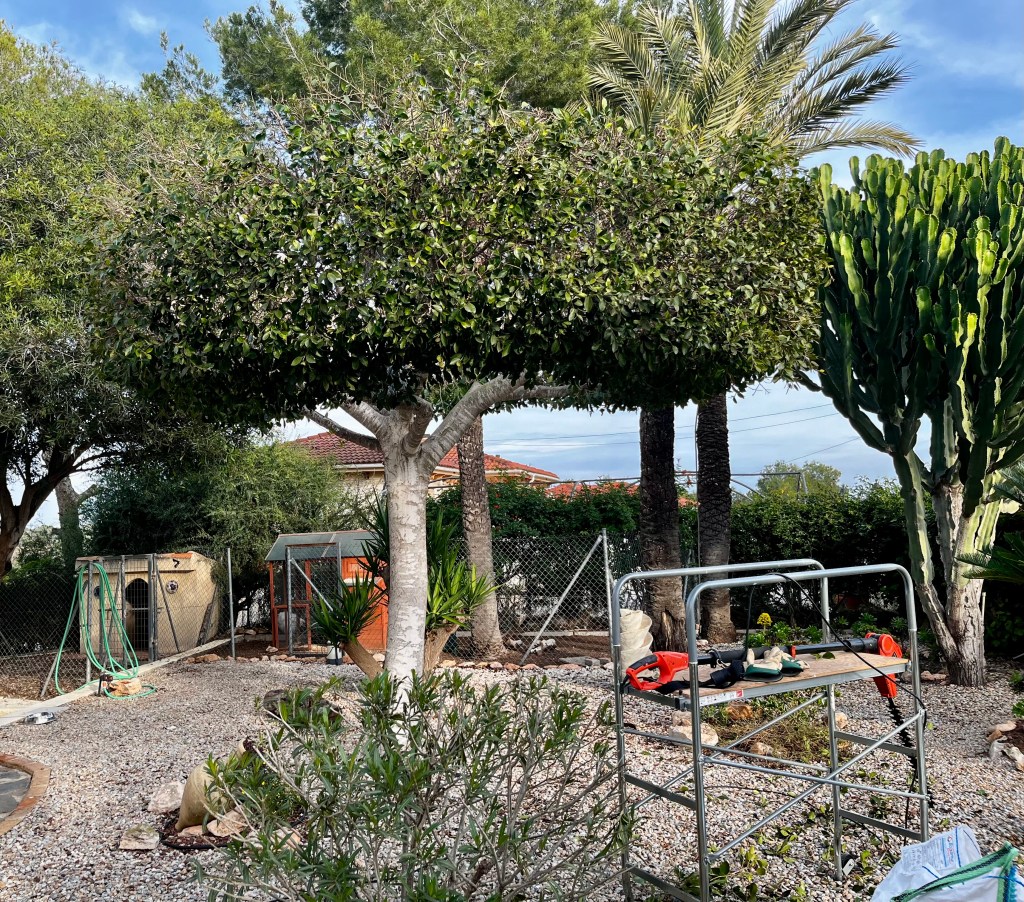
Well I am pleased to tell you that it all ended well. After I had finished I sat in its boughs and we discussed past battles and skirmishes. We laughed and cried about our antics when we were both younger telling each other our favourite parts of our various battles. Eventually it was getting dark so I climbed down. But I am pleased to tell you that it doesn’t end there. We have agreed to collaborate on a book, we have a tentative title; “The Old Man and the Tree” what do you think, it has a sort of ring to it, Hemingway would love it.

The big Winter cutback stage 4. I Tackle the big tree and the chickens try to assassinate me

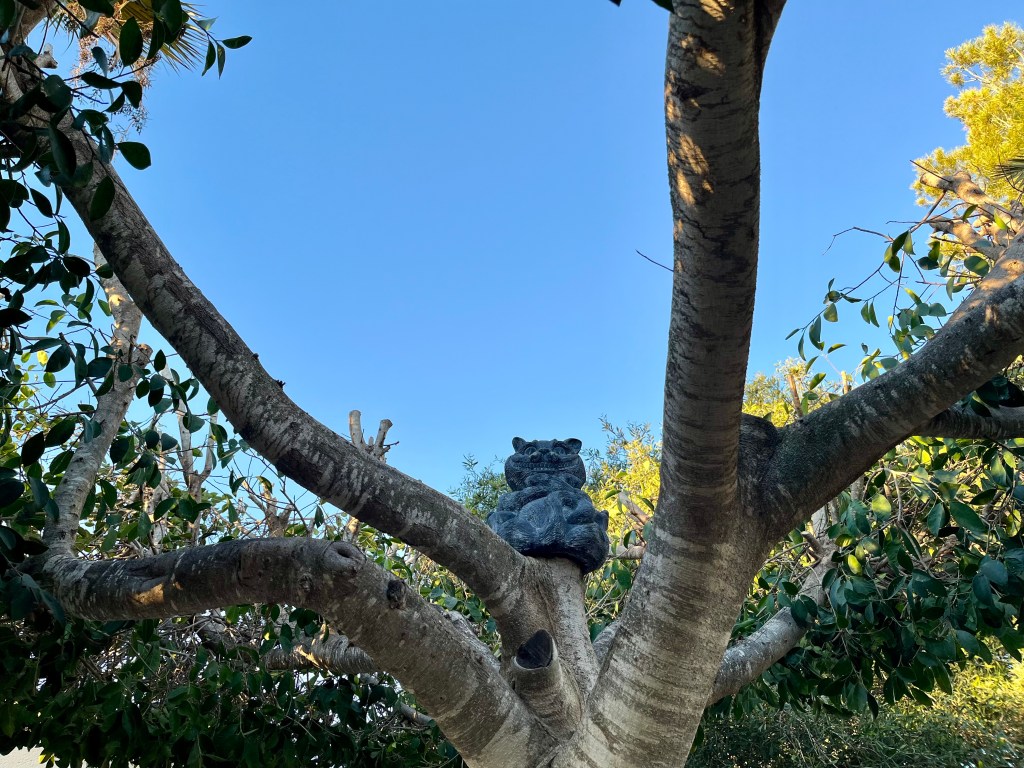
The last thing I tackle in my winter cutback is to prune back my big ficus tree. This sits majestically in a gravelled area on part of my front garden. The pruning is a mammoth task mainly because the ficus gets bigger year by year whilst I get smaller over the same time frame. Those of you who regularly follow this blog will remember that I pruned this tree back to a donut effect over 13 years ago by cutting out the central trunk to create a hole in the middle into which I inserted a statue of the Cheshire Cat from Alice’s Adventure in Wonderland.

The big ficus has always seen this reshaping as an affront to its dignity, and as such has sought to punish me over the years by various means including:

  • Becoming infested with wooly aphids and many other creatures
  • Deliberately dropping its leaves to make the gravel area untidy
  • Tripping me up in its roots
  • Throwing me off my ladder when I am entering the centre of the tree

Anyway let’s get on with the gardening:

24th February 2025. Things I have been doing lately:

  • Pruning the big Ficus
  • Surviving chicken assisination attempts

Pruning the big Ficus.  An important part of my pre-pruning ritual is to build up my courage by pre-prune psyching out. This is a bit like boxers at the weigh in. We stare at each other, I strike postures around the tree and issue a series of blood curdling threats. For its part the tree just waits silently knowing its time is coming. To be honest my pre-prune ritual was hindered by Cruella’s (my wife) chickens constantly mocking me and deliberately making “chicken” sounds. The first two photos below show the terror of the big Ficus, the final photo shows the centre of the tree overgrown and ready for reshaping.

The first stage in pruning is to begin to open up the centre of the tree to let light in. This involves using long reach electric trimmers. The photo below shows the first few trimmings. Note the two trugs at the base of the tree these are to protect existing plants from damage.

I then move on to trimming the sides of the tree.This takes place in two stages.The first stage involves me walking around the tree trimming up the bottom half and underneath before standing on my platform to trim the top half. The photos below show the action.

When the sides are finished the tree begins to take shape. The photos below show the sides trimmed and ready for the top and inside to be cut.

Getting up inside the tree is the bit that I dread most. I have to climb the ladder then stand at the centre of the tree precariously balancing on the main branches whilst reaching out with the long trimmers to get at the farthest branches. This year has been more precarious than most for chicken related reasons that I outline later. The photos below show me in action. Where you can’t see me, I’m in the middle of the tree.

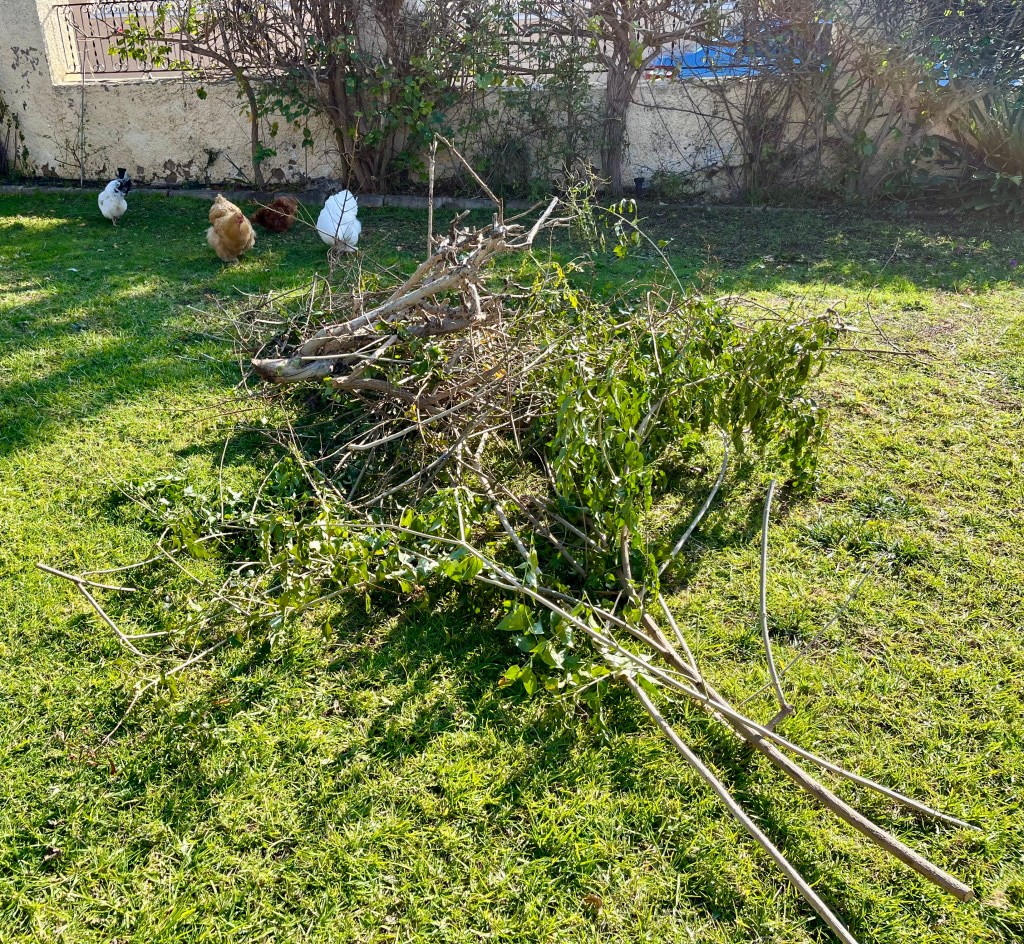
The final act is the big clean up. I do this over a couple of days so that most of the moisture has gone out of the cut leaves making them easier to gather up. The photo below shows the official end of the big cut back and the declaration that Spring has come.

The chickens try to assassinate me. I didn’t like to mention this when I was telling you about the big tree, as I was a bit upset and emotional. It all started about two weeks ago when Cruella (my wife) casually mentioned the British government’s “Assisted Dying Bill”. She enquired. Whether I had given any thought to perhaps not being a burden to her and her girls.

Since then she has asked me to sign various documents, I don’t quite know what they are for, but she has assured me they are just admin and nothing to worry about. Evidently it turns out we might be going to Switzerland for a holiday. I only became suspicious when I found the tickets and I haven’t got a return.

Since signing those documents I have had a few near miss accidents, things have fallen on me, my food has tasted funny and my electric blanket appears to have been rewired. I have started taking precautions and the only place I felt safe was in the garden hiding by the compost bins.

That all changed when I was cutting back the big tree. When I was up the ladder I could see Cruella and her chickens close by in deep conspiratorial discussion. Suddenly without any warning the chickens all charged at the ladder. Screaming in Chickenese “banzai” (I know that’s Japanese, but that’s what it sounded like). I only survived by clinging to the tree as the ladder fell away.

Cruella apologised, and I accepted that accidents happen, and I wouldn’t have minded but it happened twice more. On the last occasions I was left up the tree for 6 hours. When eventually I got down I found Cruella and the chickens had remodelled my bedroom and thrown all my clothes out. I am consulting a solicitor.


The big winter cutback Part 3 and I am chicken free.

I am currently at our English house freezing despite the heating being on very, very high. The days are grey and misty, punctuated by heavy down pours, the only gardening I can do is to look out the window and plan. So when you have romantic longings for gardening in the UK, be careful what you wish for.

Despite the weather I am blessed to be free from Cruella (my wife) and her chickens; but I want to confess I am worried about the last part of my big winter cutback when I reshape the big Ficus tree. Anyway, on with the gardening.

6th February 2025. Things I have been doing lately:

  • Preparing your flower beds and planting seedlings
  • Pruning roses
  • Cutting back palms
  • Cutting back hedges

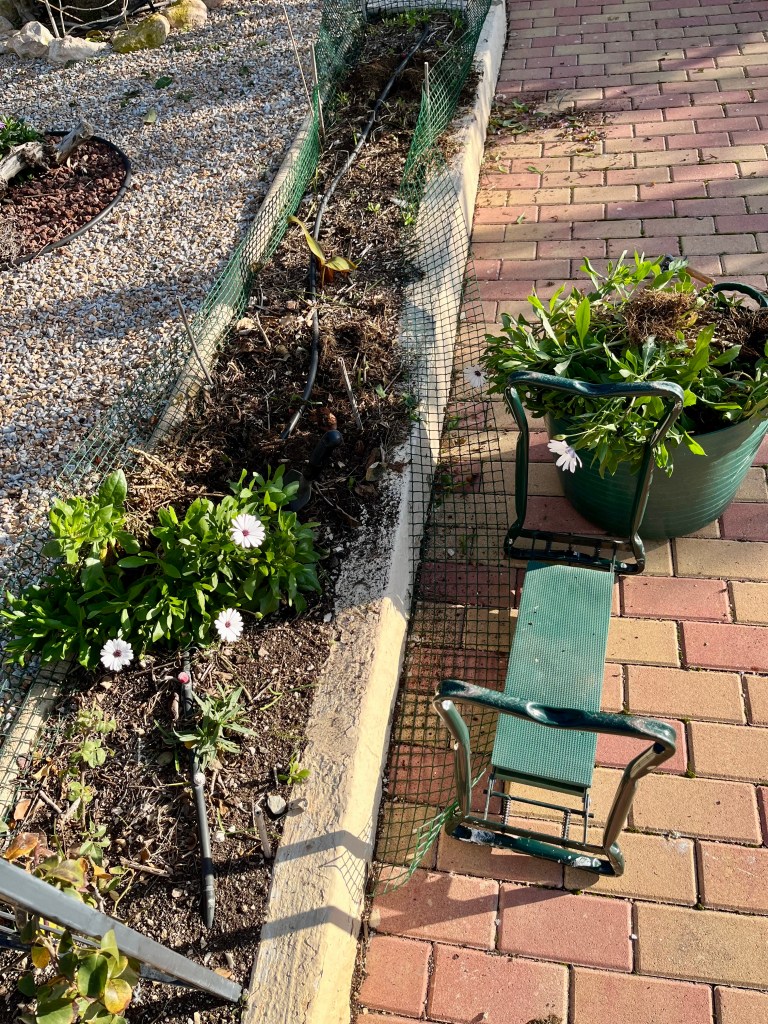
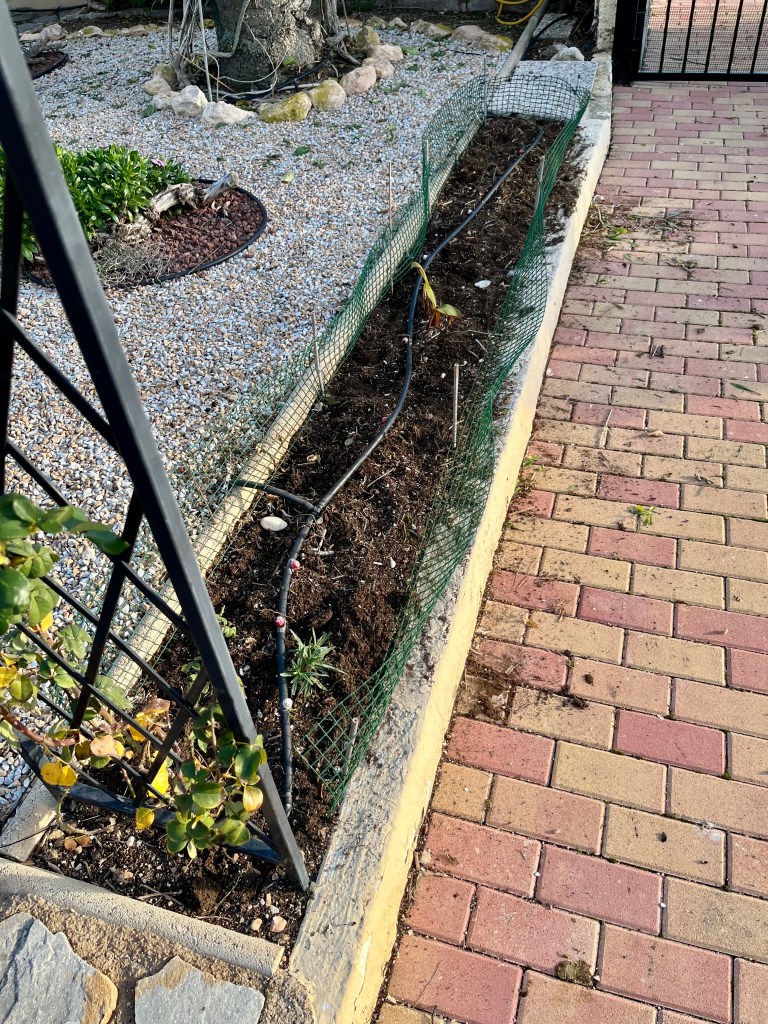
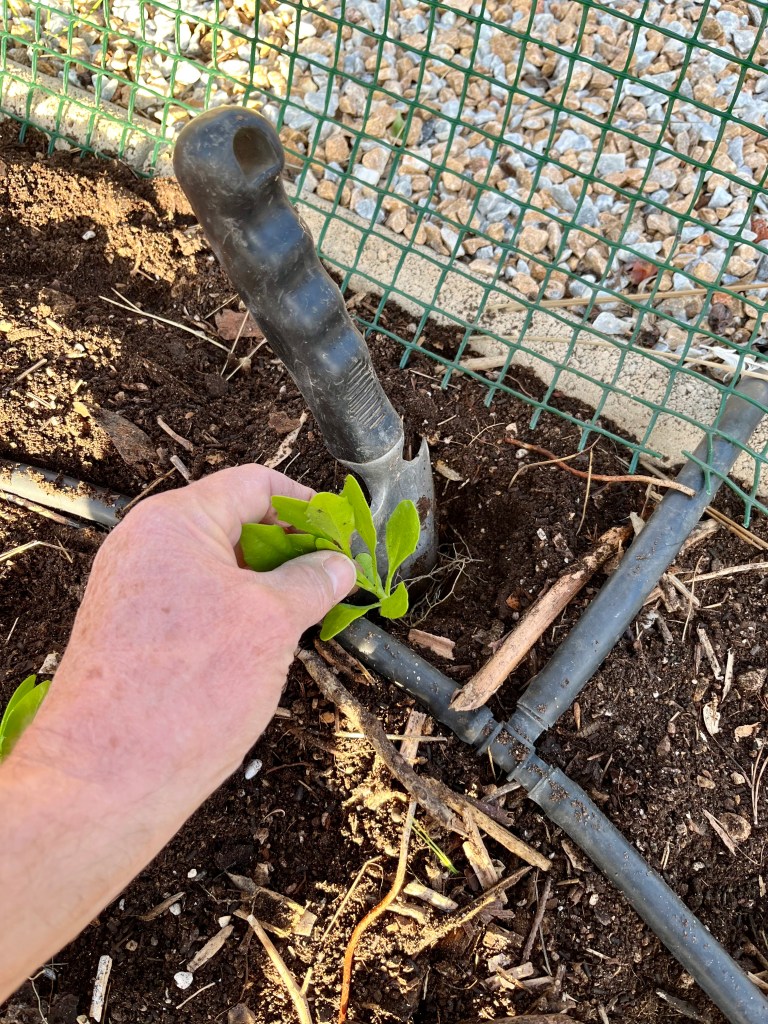
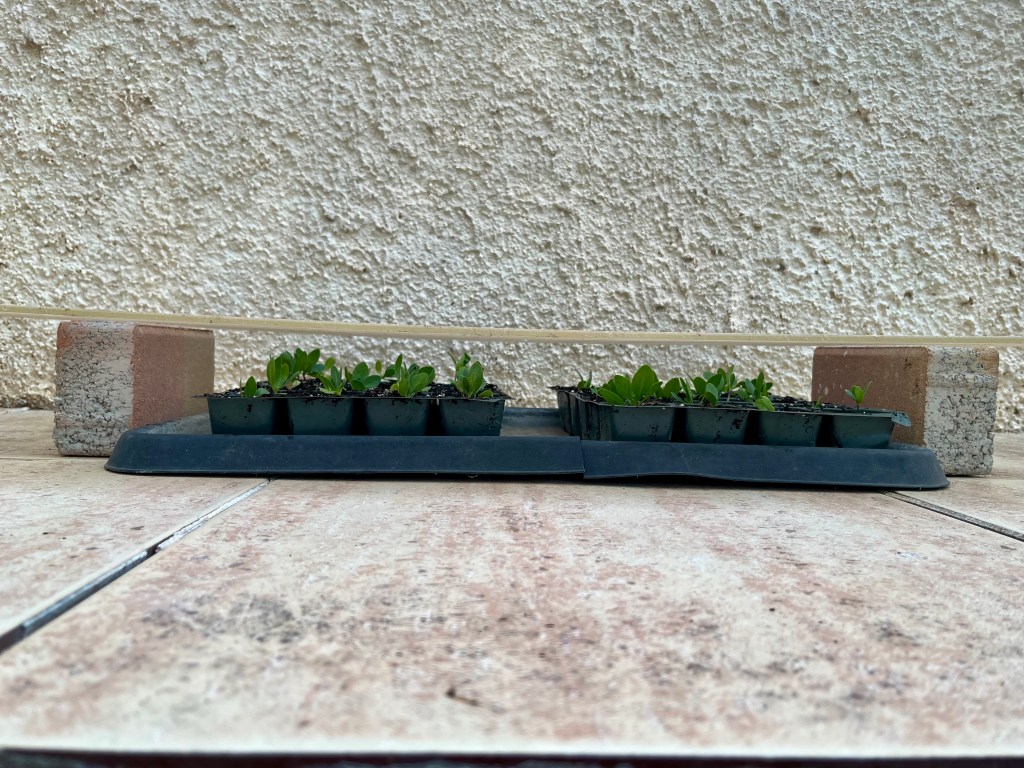
Preparing your flower beds and planting seedlings. Over the past few weeks I have been clearing out my flower beds, weeding them and then mulching with compost. Normally, I remove self seeded plants such as Osteospermum and put them into seed trays to grow on and then plant later. This year I am cutting out the seed tray part and re-siting and replanting the Osteospermum as I go along. The photos below show the flower beds in the process of being cleaned up followed by the seedlings being replanted.

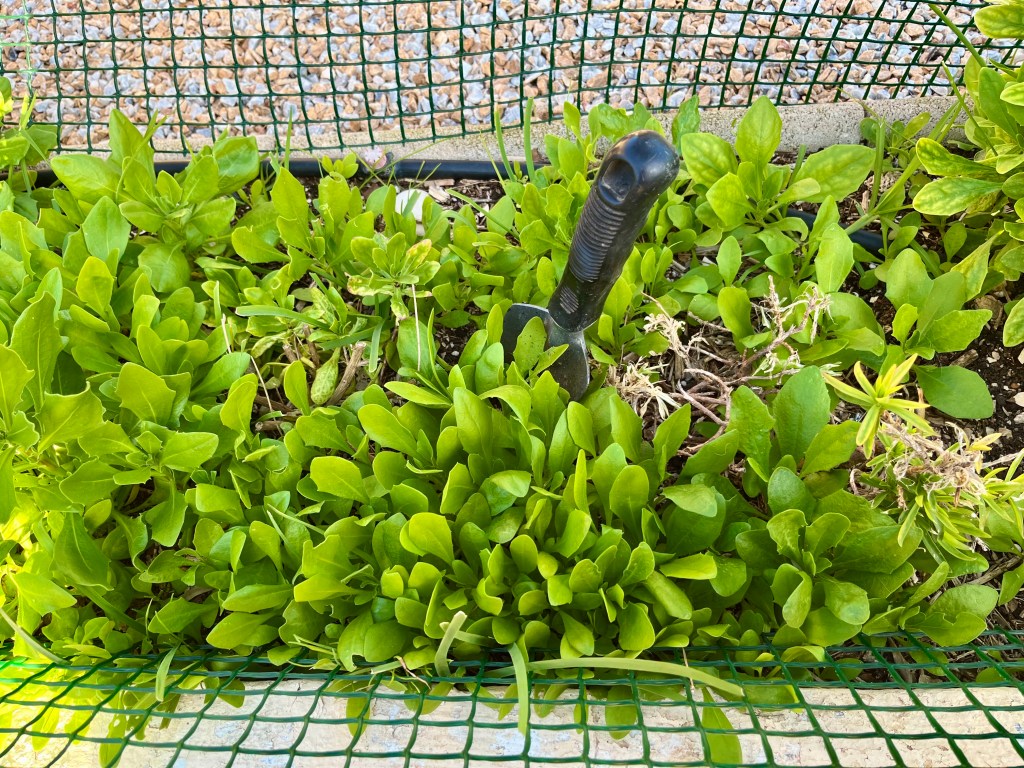
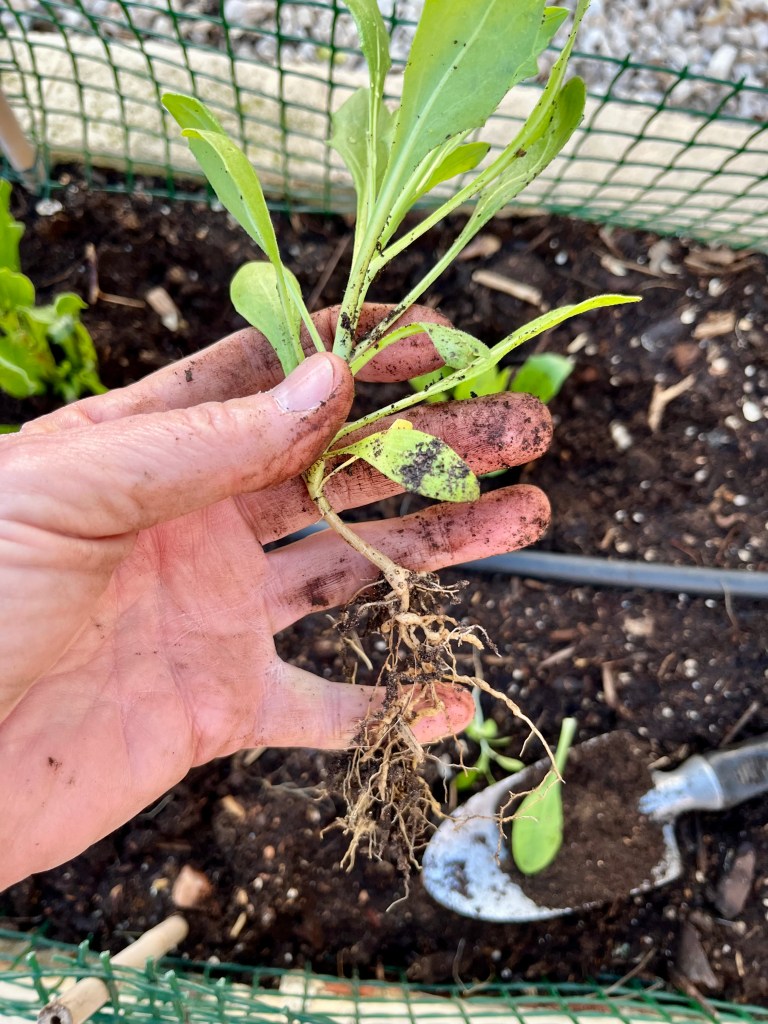
The photos below show the strong seedlings ready for transplanting. You can only do this with strong over winterers like Osteospermum. Do not try and plant new plants now as they will just rot in the ground.

Finally, the beds all set out with their new seedlings. I will interplant these with Marigolds and other spring plants as I grow them from seed.


Pruning roses. Now if you are a rose lover you can fetishise rose pruning. Over the years I have lost gallons of blood as I carefully prune back my roses to exactly just the right bud. I have castigated others who have left their roses unpruned or worse still pruned them badly.

I now have lots of rose bushes and adopt a more cavalier approach. Instead of carefully pruning each stem I get out my hedge trimmers and take everything back to about six inches. If necessary I will go back in a few weeks and trim up any straggly stems with my secateurs. The photos below show below shows pruning in action.

Cutting back palms. Now is the time to cutback all types of palms. The sap has been drawn down into the roots, there is no growth, and most importantly the dreaded palm weevil is not flying. Do not be tempted to cut back in the warmer weather as the palm weevil will smell your cut and soon home in on your tree. For larger palm trees I always use a professional Palmista, do not try and cut back large trees yourself as it is extremely dangerous.

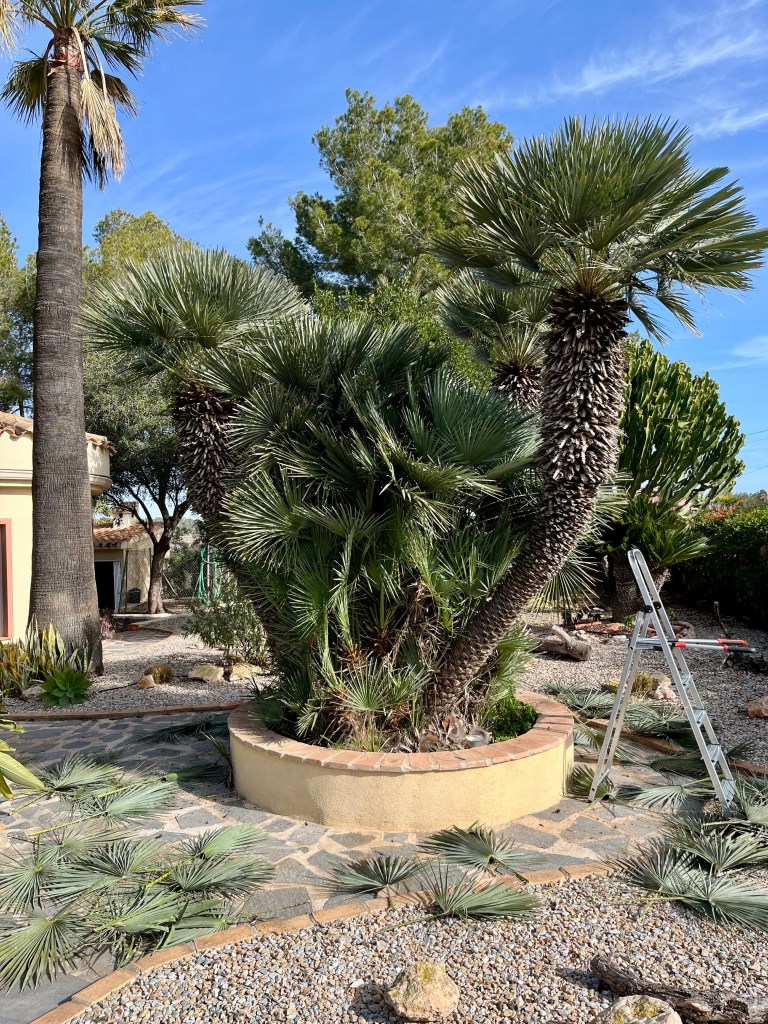
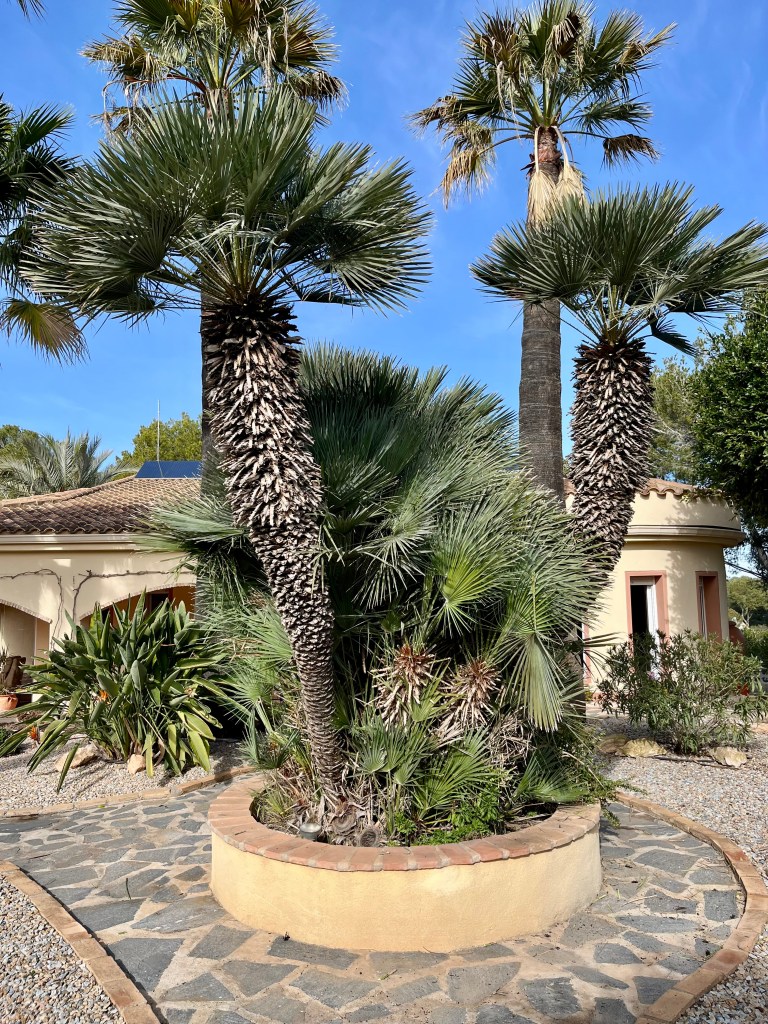
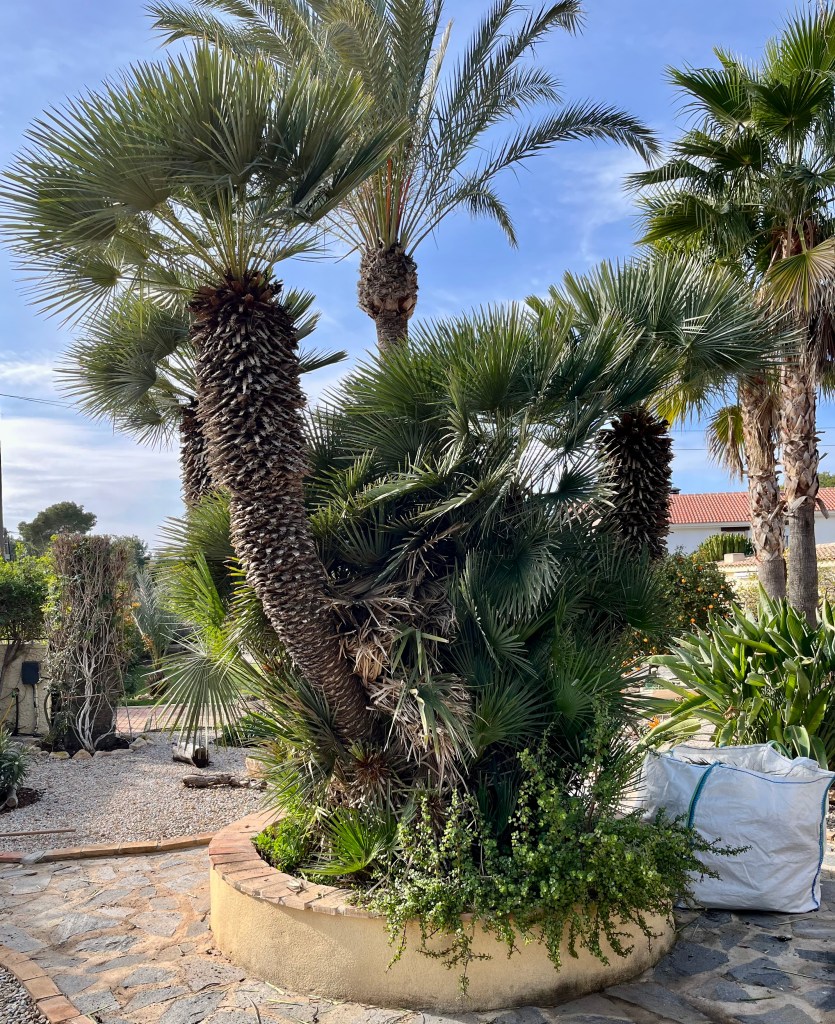
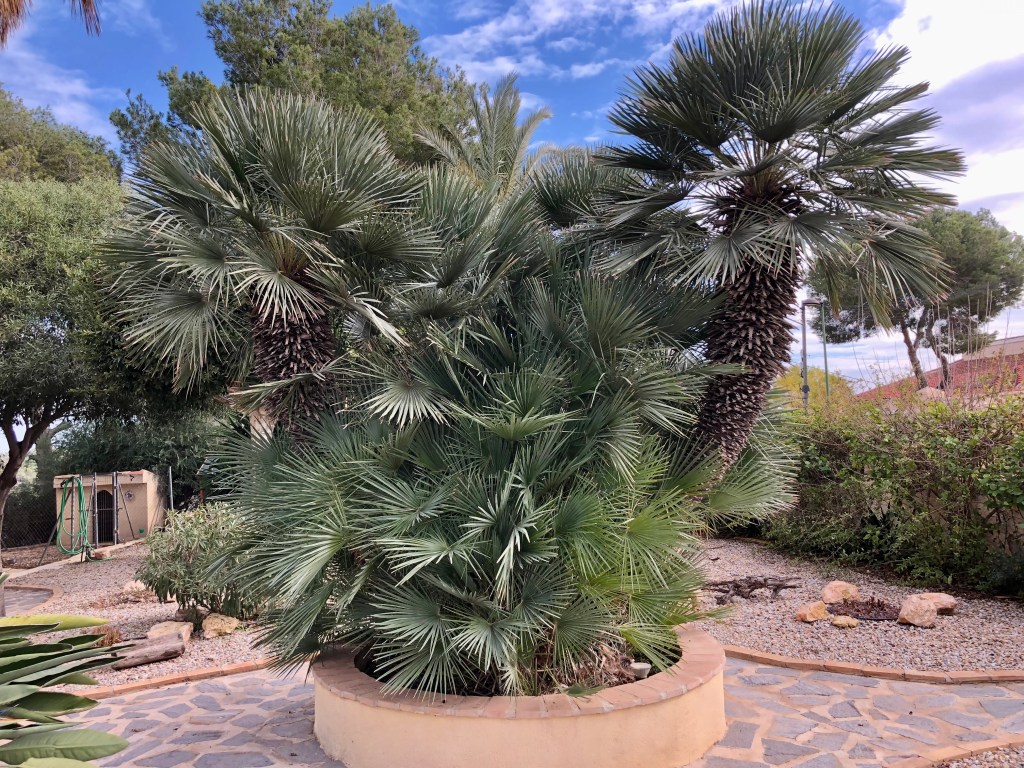
I have a lovely stand of European Fan Palms planted in a rotunda on my front path. These serve to block the view from the street towards the house and need cutting back yearly. To prune palms all you need to do is cutback the old drooping fronds, stopping when you have only fronds that are pointing upwards at about 45 degrees. The photos below show my palms ready for their annual trim.

And finally here they are looking all trim and ready for another years growth.

Bringing hedges back into shape. Hedges are an important part of my garden as they mark boundaries so much better than fences, and they flower, which fences never do. I have about 200 metres or more of hedges all tightly packed and encouraged to fight to earn the right to flower. These include:

  • Bignonia
  • Plumbago
  • Trumpet vine
  • Jasmine
  • Roses
  • Bower vine
  • Bougainvillea 
  • Hibiscus

In addition to all of the above I have two self seeded trees that have found their way in: a white maple and pomegranate both of which add a bit of contrast in height. The rule with hedges is very simple; everything is cut back drastically to the same height, with the edges taken back straight to encourage light into other areas. The photos below show my hedges before, during and after their prune. Click on each photo for a larger view.

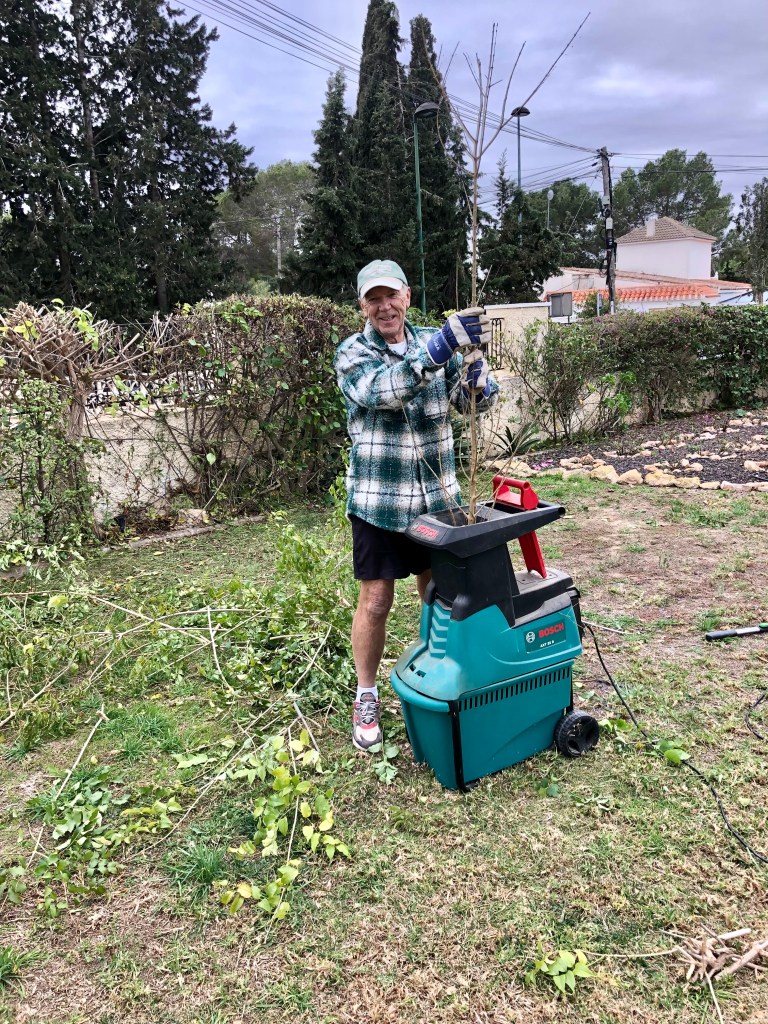
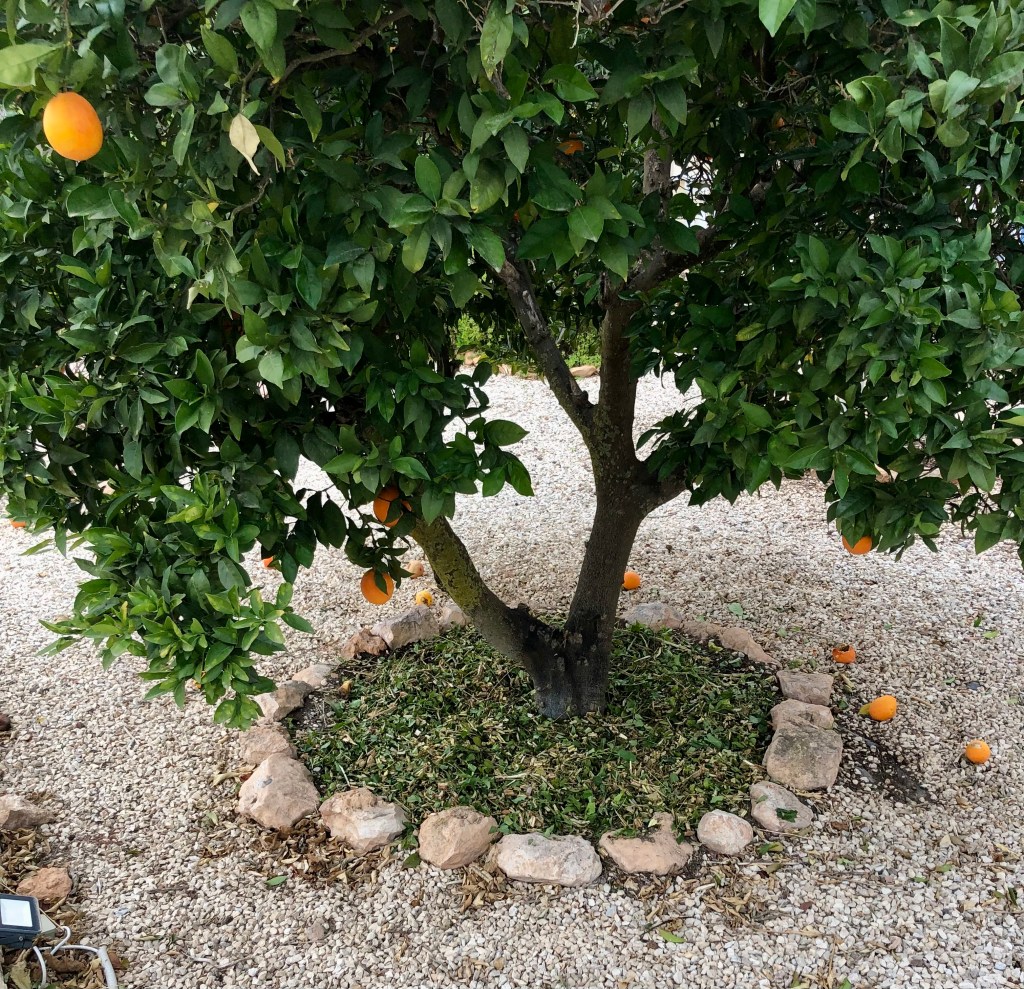
The final act of hedge pruning is to shred the thicker stems from the maple and the pomegranate and use them as mulch under other trees. Click on each photo for a larger view.

It’s time to sow, I sing to the dying Agave and have a bad Valentine’s Day

It’s warming up, there is a hint of buds and we gardeners are waking from our winter torpor, it’s almost Spring, and you know what Spring means – seeds! Yes, it’s time to start thinking about how you will fill your Summer garden with floriferous beauty, and there is no better way than to grow your own garden from seed. I know that lots of you love to rush off to the Garden Centre and stack your trolley high with all sorts of unsuitable plants. But think how much more fulfilling it will be if you can grow your own garden.

Now I am not being a purist, of course you can buy plants, but why not give seeds a chance (start with a couple of easy to grow packets) once you start it is addictive and may I say a lot cheaper. As you can tell from my enthusiasm I have already got things underway. I was so filled with the joys of gardening that I rushed out and got Cruella (my wife) a Valentines Day gift. Sadly it all went wrong as the chickens deliberately sabotage my efforts. Anyway on with the gardening.

24th February 2024. Things I have been doing lately:

  • Harvesting self sown seedlings
  • Sowing the first seeds
  • Harvesting and sowing Chilli seeds
  • Preparing for the death of Agave Attenuata
  • Regretting my Valentines Day purchase

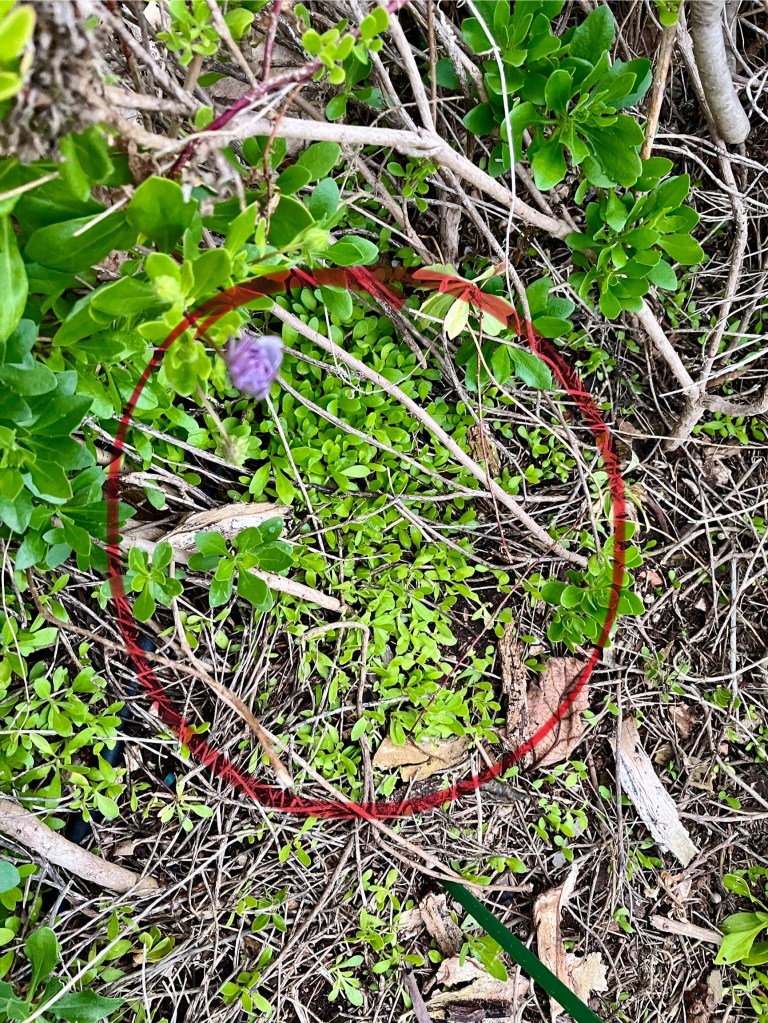
Harvesting self sown seedlings. One of the best way to get your garden going in Spring, is to take a look around your flower beds and check for any self sown seedlings that your summer flowers may have left you as a gift. One of the most prolific self sowers in Spain is the Maragaritte Daisy/Osteospermum. These lovely long flowering Daisies will drop hundreds of seeds which by now will have formed into little seedlings. The photo below shows just one part of my garden with thousands of seedlings.

But the trick is not to leave the seedlings where they have self sown, instead you need to harvest them and pot them up to let them grow on a bit before planting them out where you want them. The photos below show me harvesting the seedlings by gently prising them out of the soil with a trowel before placing each seedling into individual seedling trays. Note the close attention from big Bertha. (she has reverted and is no longer known as Bert, it was something to do with the chest binders that Cruella bought from John Lewis). Click on each photo for a larger view.

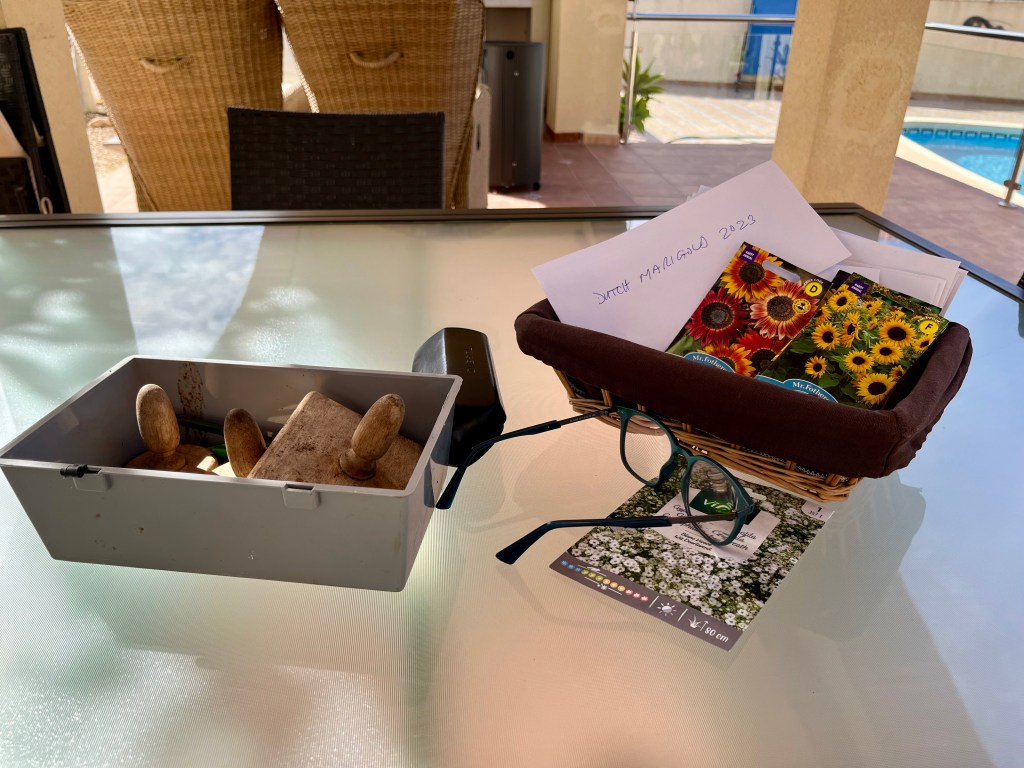
Sowing the first seeds. There is nothing better than contemplating the seeds you harvested from last year and deciding which order you are going to sow them. The photo below shows my preparations and the delight of contemplating things to come. Click on each photo for a larger view.

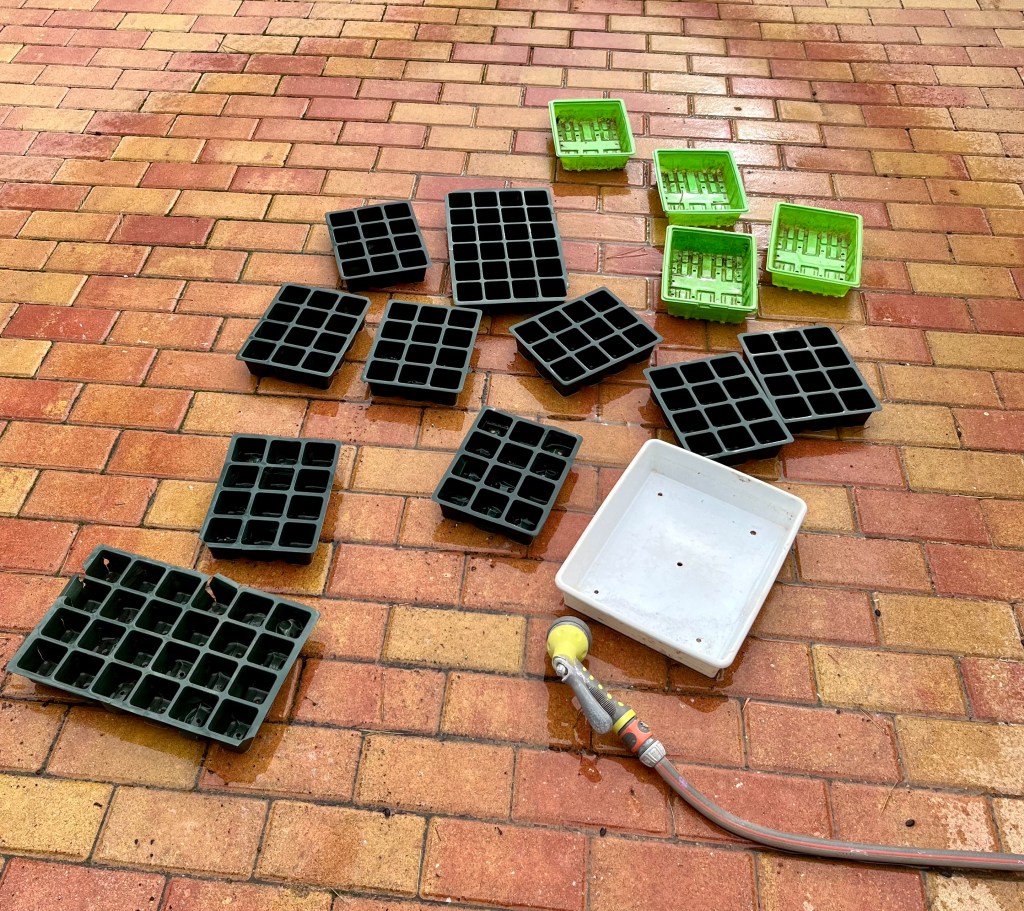
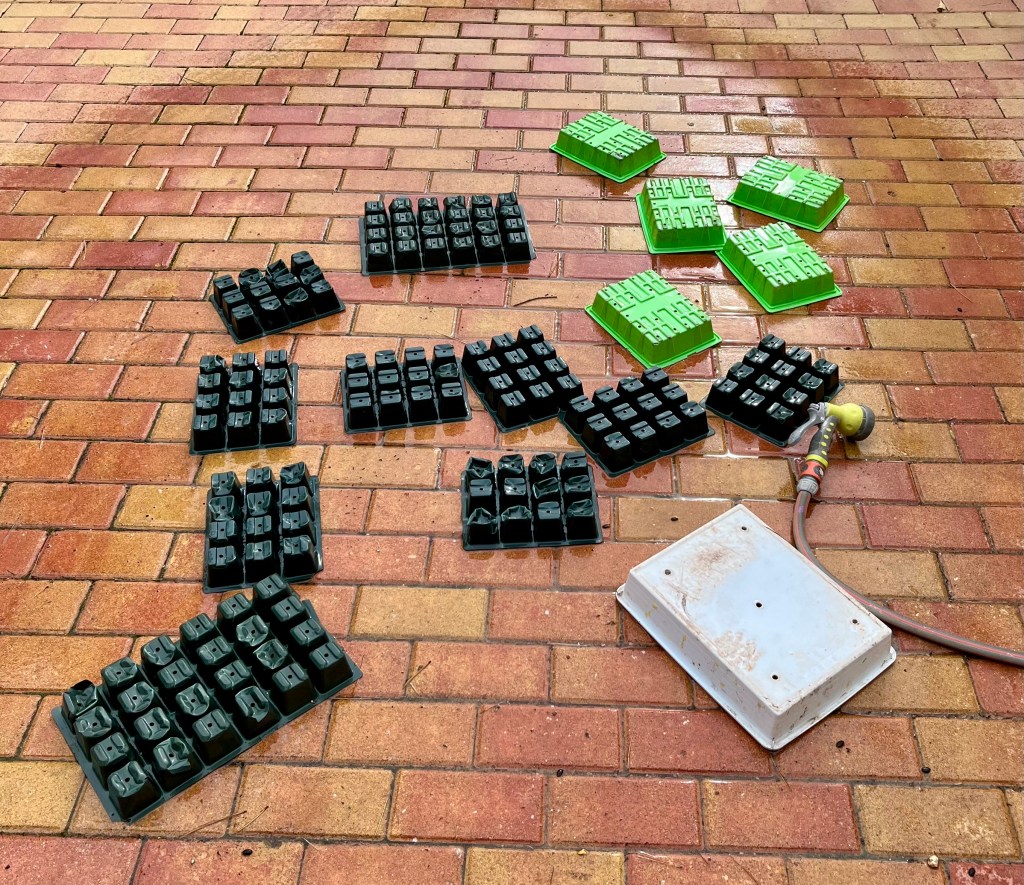
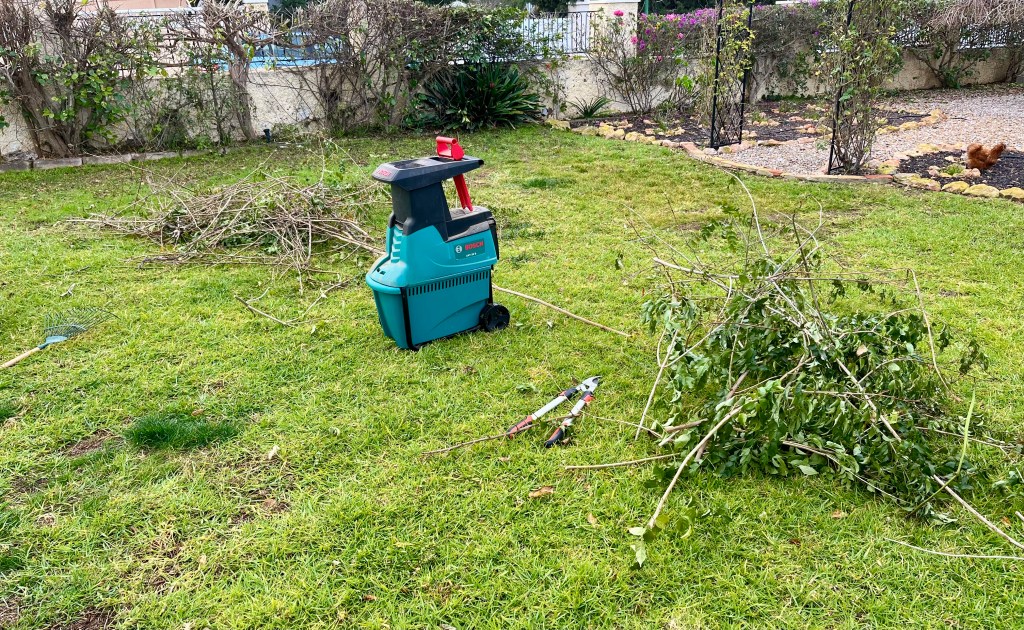
Before you get carried away with sowing seeds there is some basic preparation you need to undertake. If you are sowing into pots or seed trays you have used before, then it is important that you thoroughly wash them inside and outside. The last thing you want to do is carry over viruses and pathogens that are lurking in the residue of last year’s soil. All that is basically required is that you use a powerful hose jet to wash away any soil residue. The photos below show some of my seed trays after their annual ablutions. Click on each photo for a larger view.

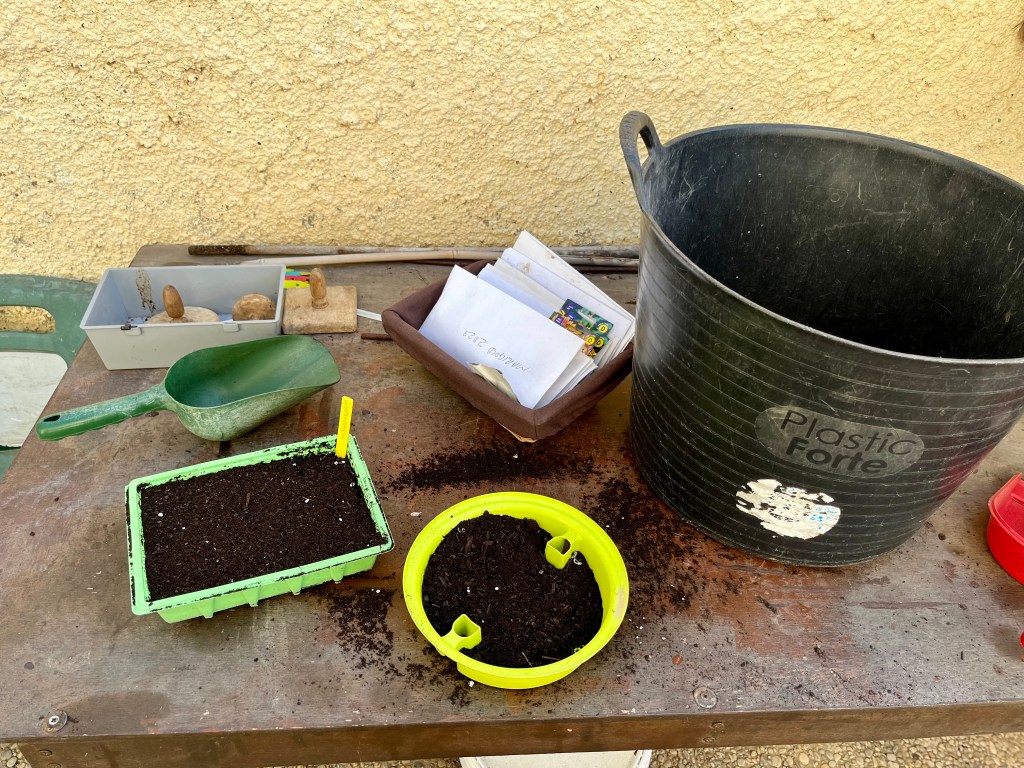
Once you are ready to sow your seeds then you need to mix a good compost (not from China shop) together with Perlite to form a nice free draining medium that will not leave your little seeds waterlogged. Most seeds mainly require sprinkling on the surface of your compost then covering with a light sprinkling of compost.

Once you have lightly tamped down the surface to ensure seed and soil contact, then you need to place your seeds trays in a light warm area such as a window sill, or greenhouse. Be careful of fierce sun as this will dry the compost out to quickly. I buy a cheap little mini green house and use it for 2 or three years and then discard and start again. You will only need it for a couple of months at the most. The photos below show my seed sowing activity followed by my seed trays resting in their new home. Click on each photo for a larger view.

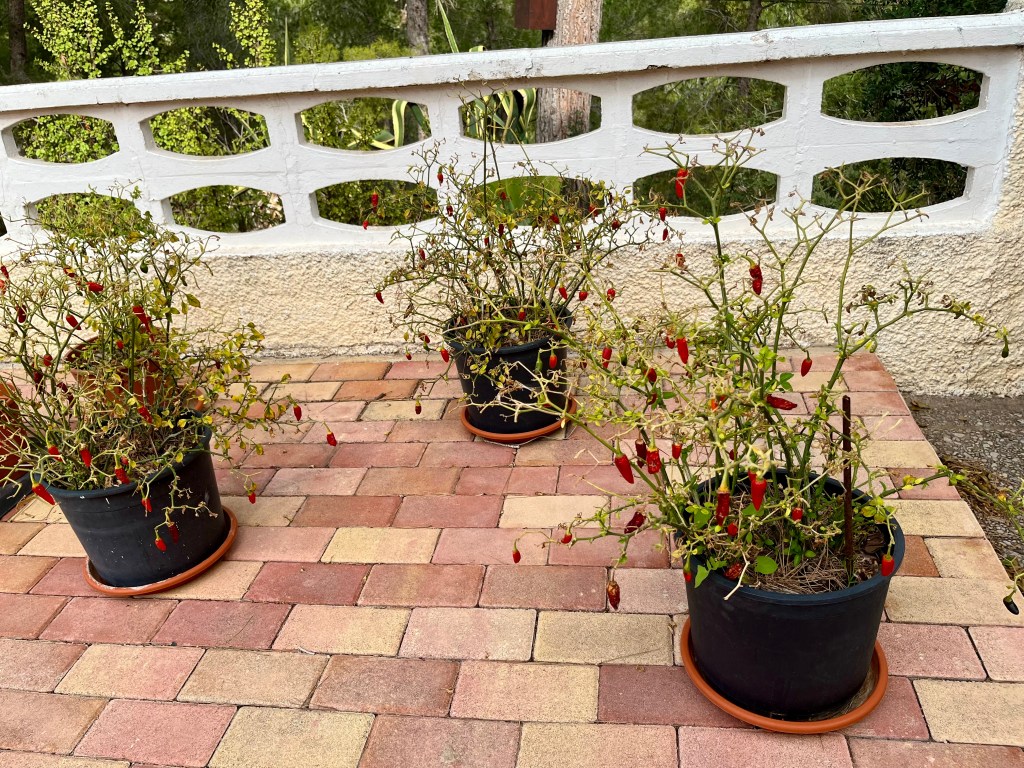
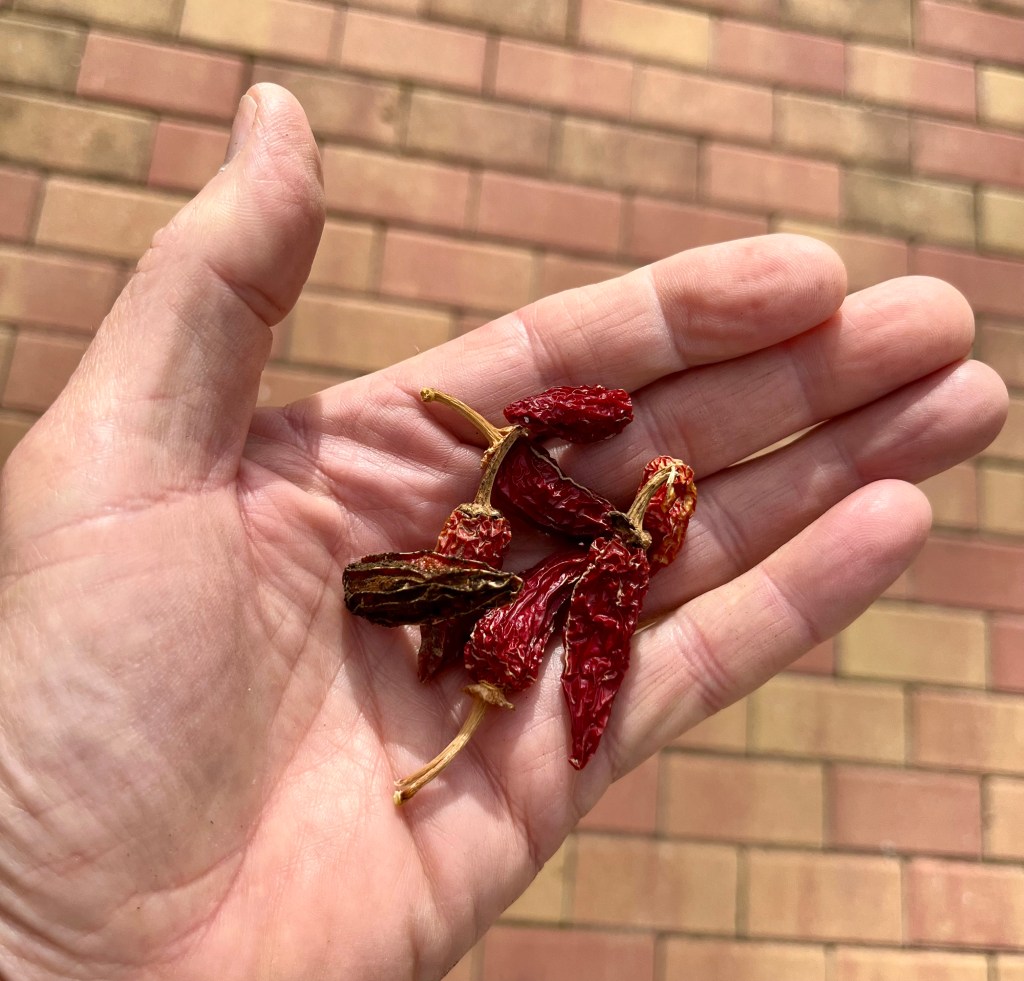
Harvesting and sowing Chilli seeds. Chilli plants are a joy to grow as they are so prolific. I leave my chilli plants to fruit over a two year period with just a chop back at the end of the year. The third year I remove the old plants and sow new seed in lovely fresh compost. By doing this I am getting rid of the old tired compost and creating a whole new generation of plants. The first photo below show my tired old plants heading for the compost heap, followed by the ripe seed pods that I have left on the plants and which will form my next generation.
Click on each photo for a larger view.

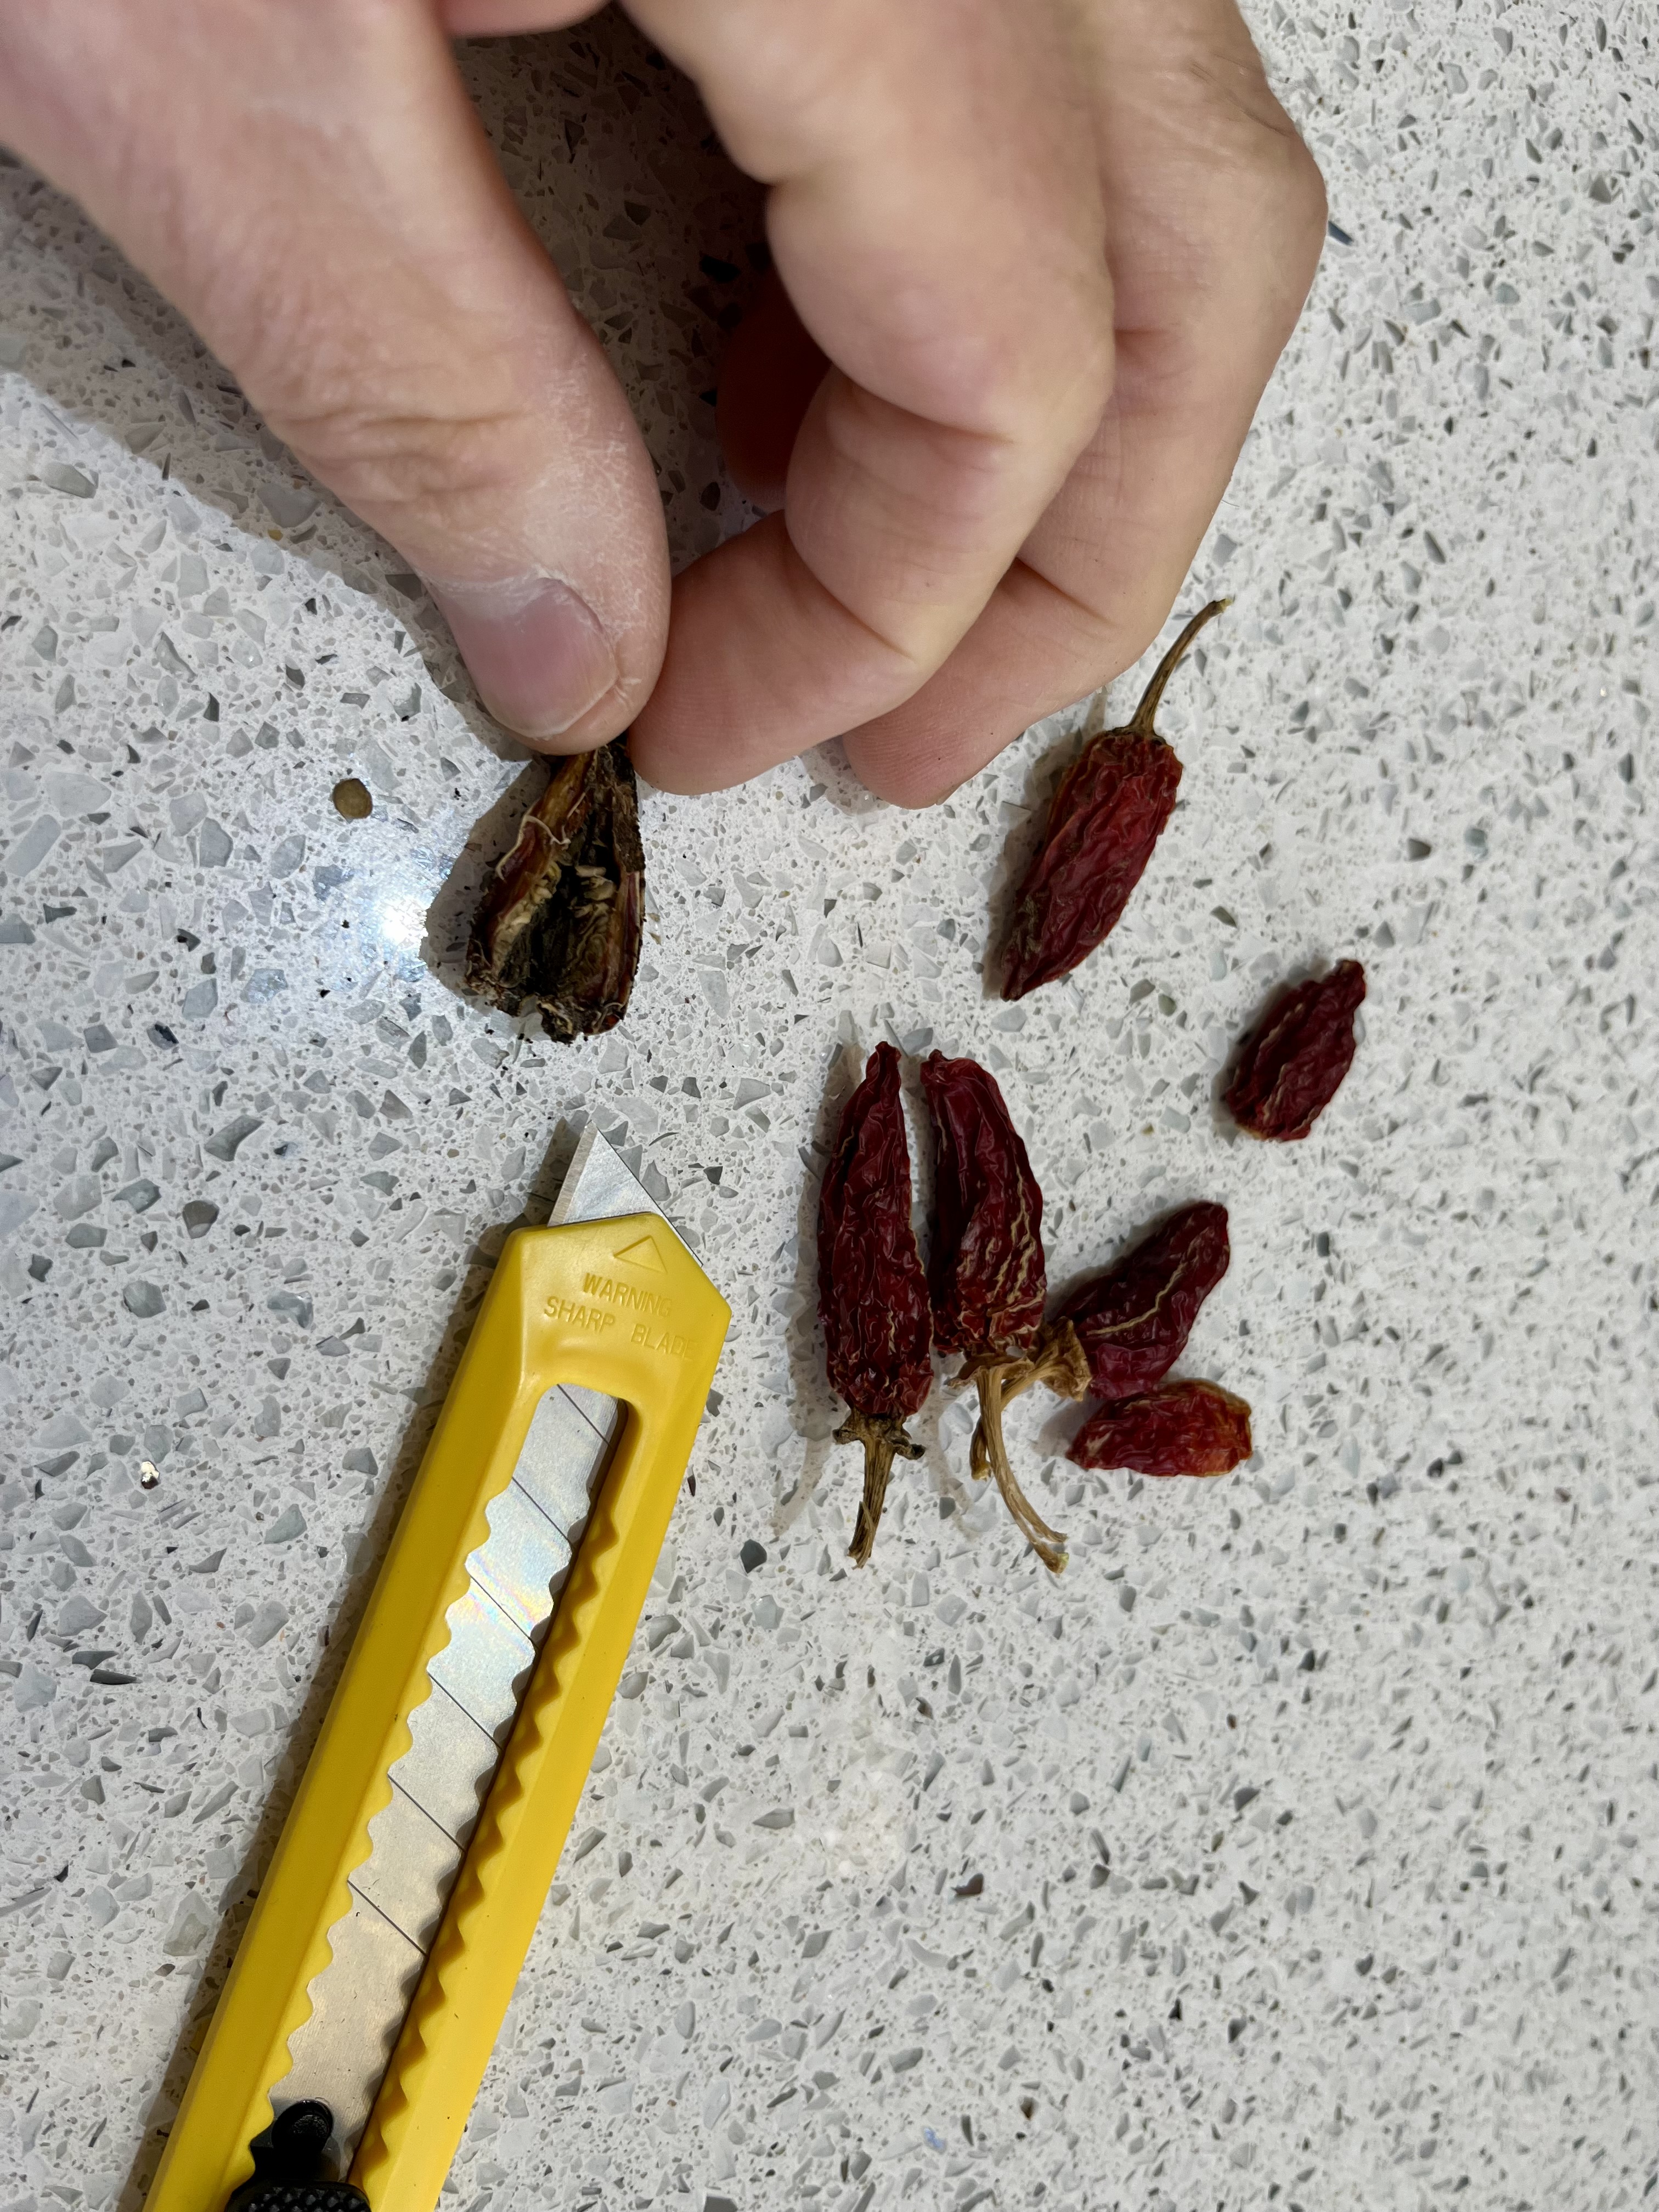
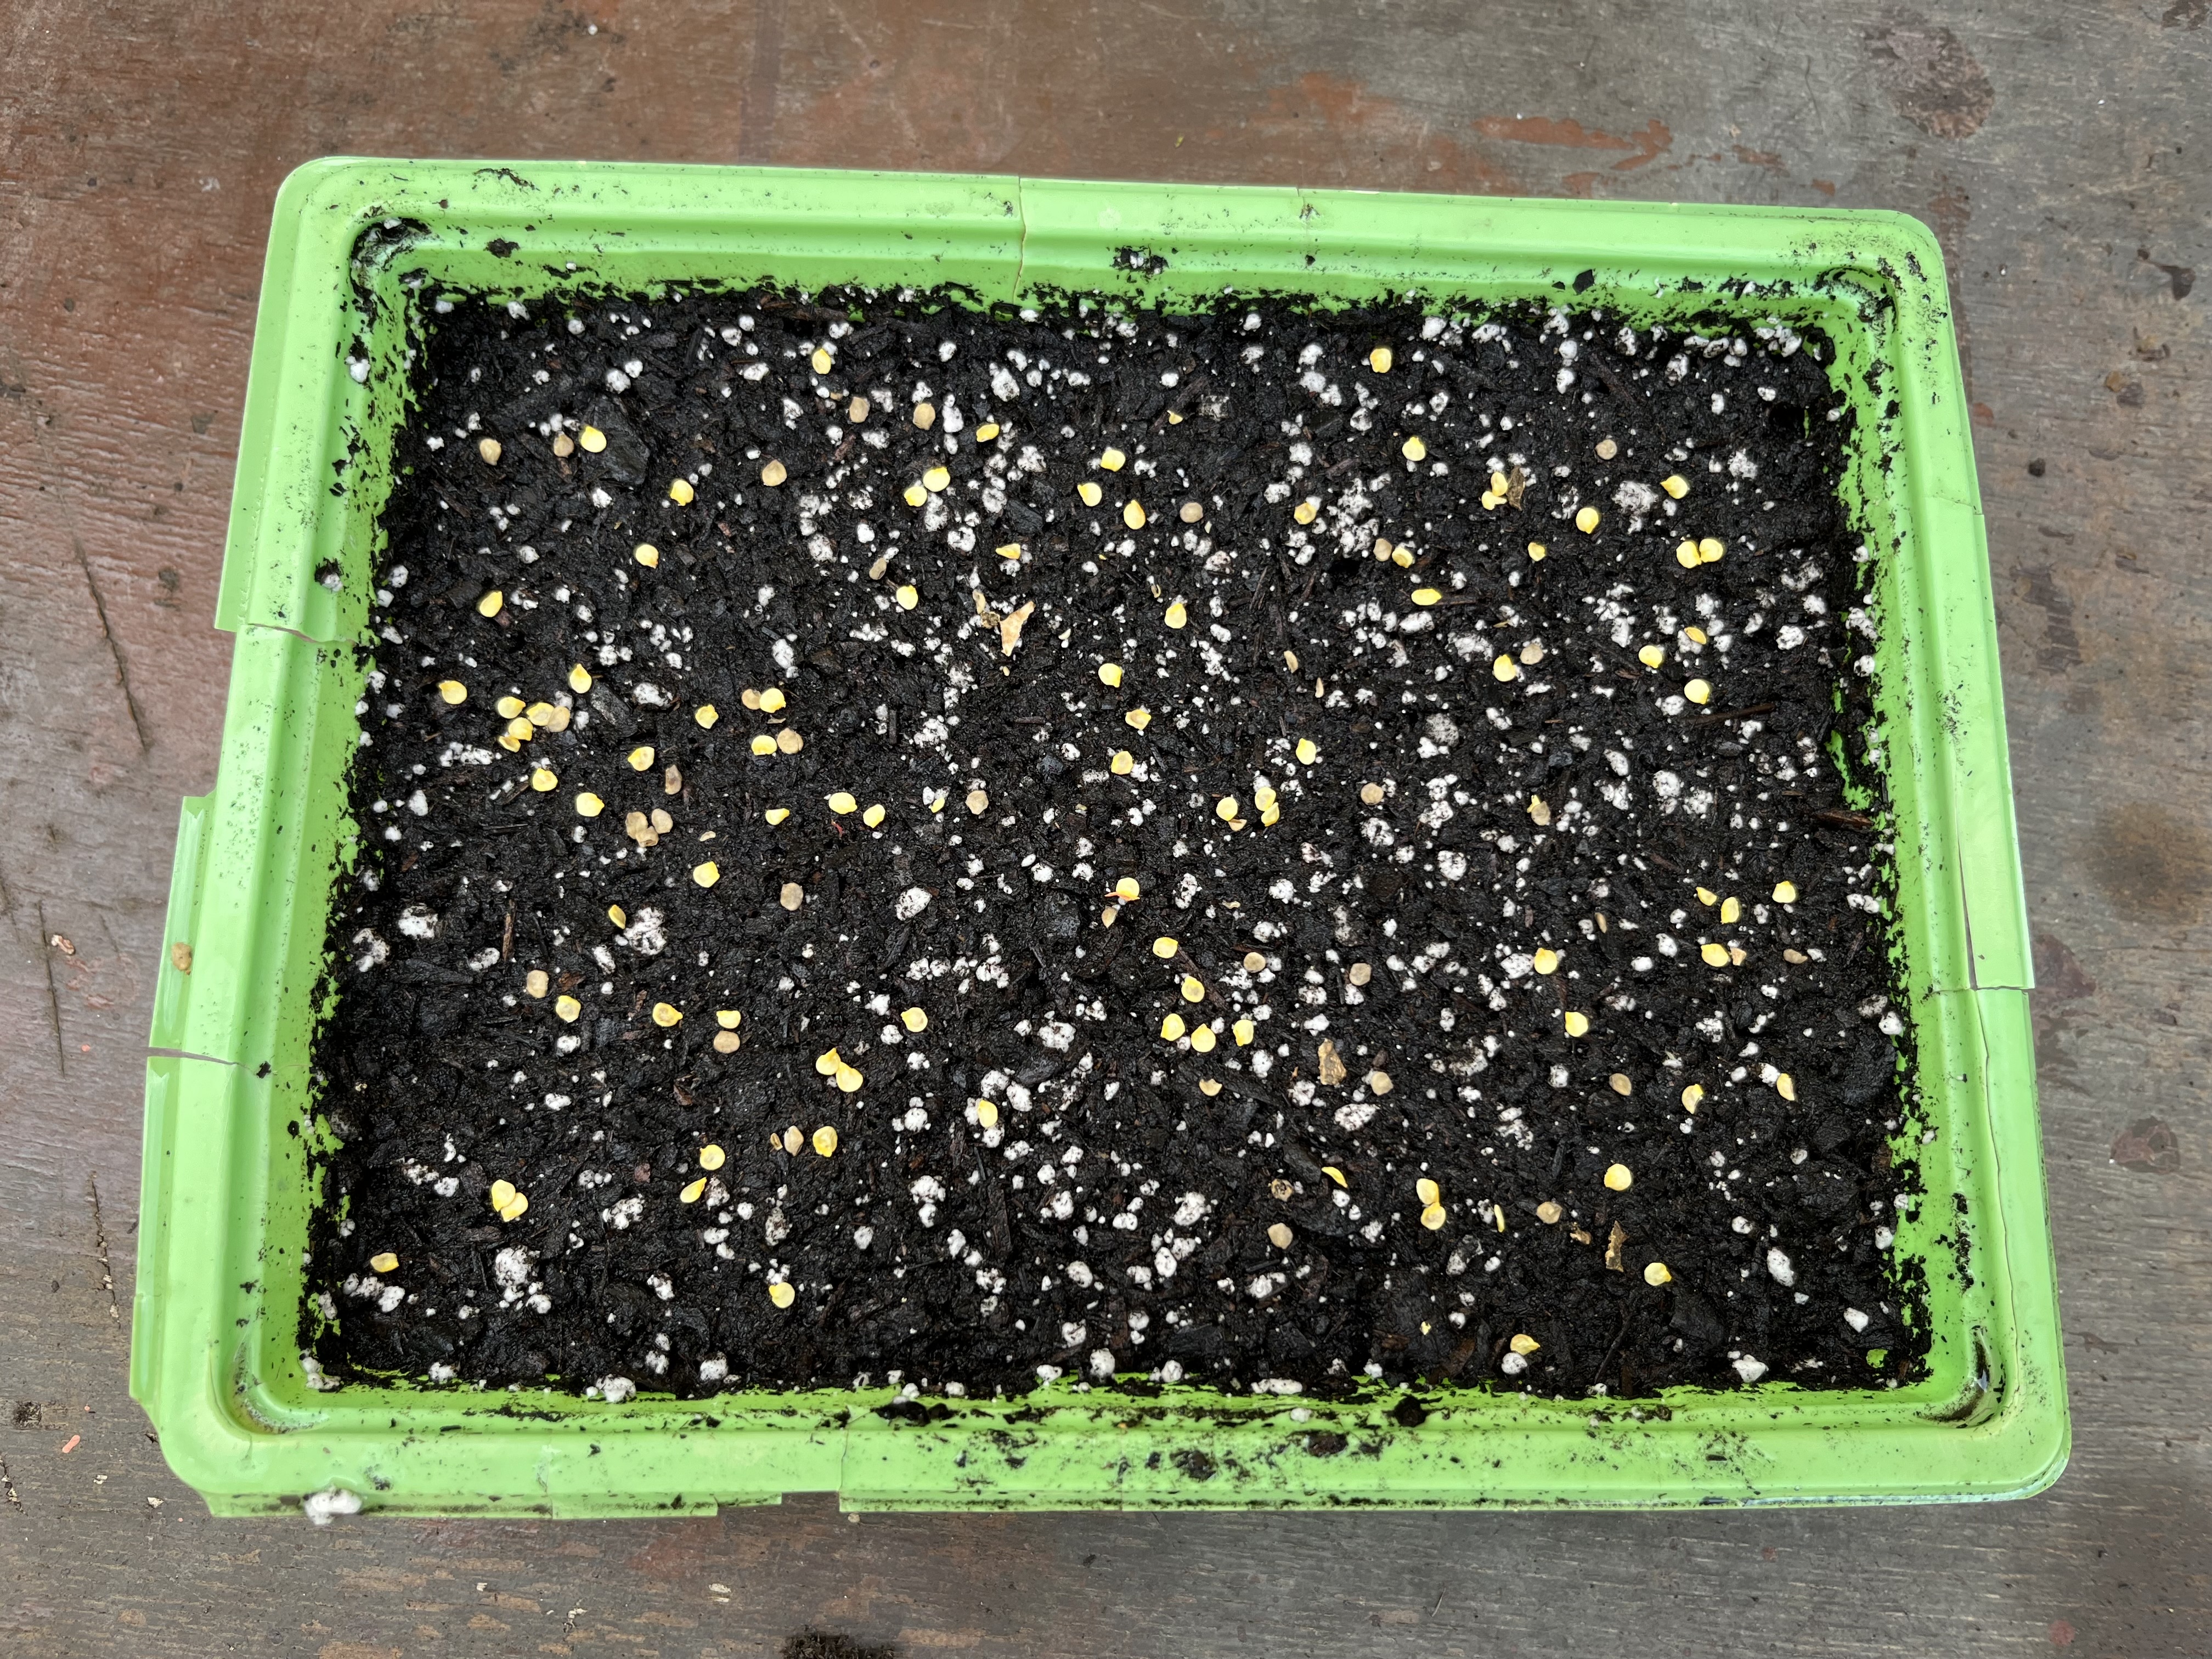
Getting the seeds is very simple. Using a scalpel, or very sharp knife, slice carefully down the side of the dried seed pod and carefully tease out the seeds that will be there waiting for you. The photos below show my scalpel work, together with the gathered seeds. The final photo shows the seeds scattered evenly across a seed tray before being lightly covered with compost. Click on each photo for a larger view.

Preparing for the death of Agave Attenuata. Losing any plant is a dreadful experience for us gardeners. We tend them, nurture them, watch them grow day by day and experience joy when they flower. That makes it all the more poignant when you lose an Agave Attenuata.

These lovely plants are very popular in Spain as they are one of the few “unarmed Agaves”, by this I mean they neither have teeth or spikes so won’t stab or cut you. They also have a charming habit of creating lots of pups which eventually surround them like a loving family. They take a long time to flower (12-20 years) and like lots of Agaves, when they do, they die leaving only their orphaned pups to cope on their own. The photo below shows a family of orphaned pups who lost their Mum about 5 years ago.

Eventually one of the orphans will go on to adopt the role of mother but it can take a long time. I think the one at the back right is shaping up to be Mum.

Regular readers of this blog will know that I have been lucky enough to see a number of my Attenuata flower. It has always been a painful process made much worse by the mockery of Cruella (my wife) who constantly heckles me in my sorrow by shouting “it’s only a plant, get over it”. On one occasion she proposed what she termed “assistant plant dying” and said that both me and the plant should go off to Dignitas!

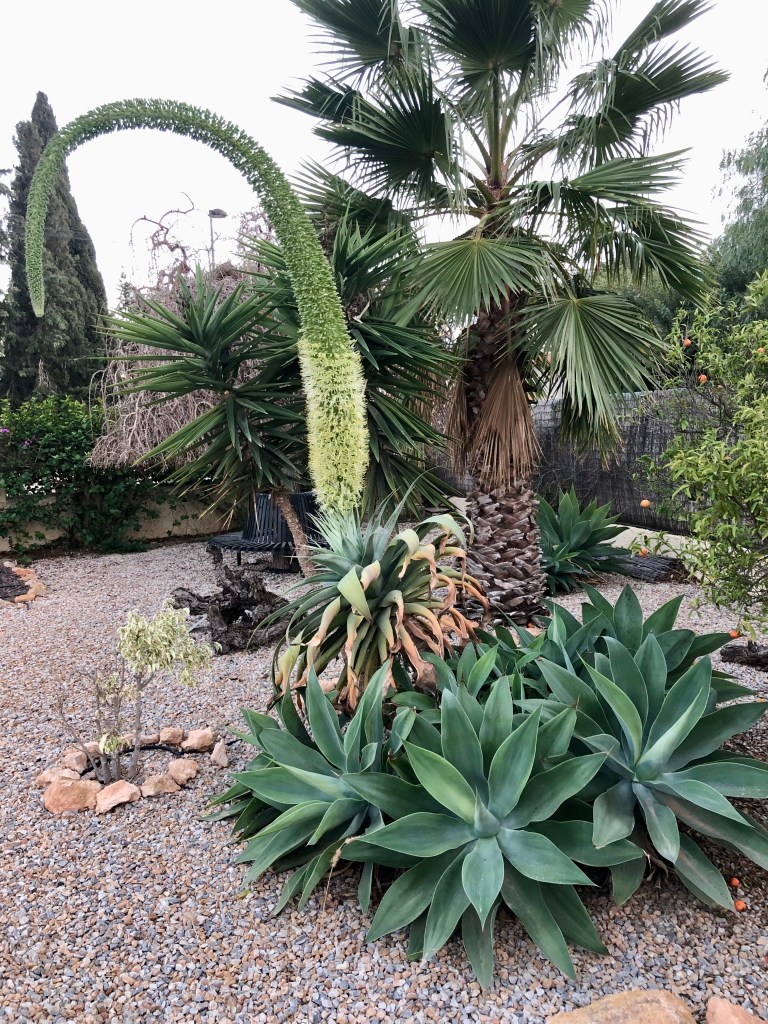
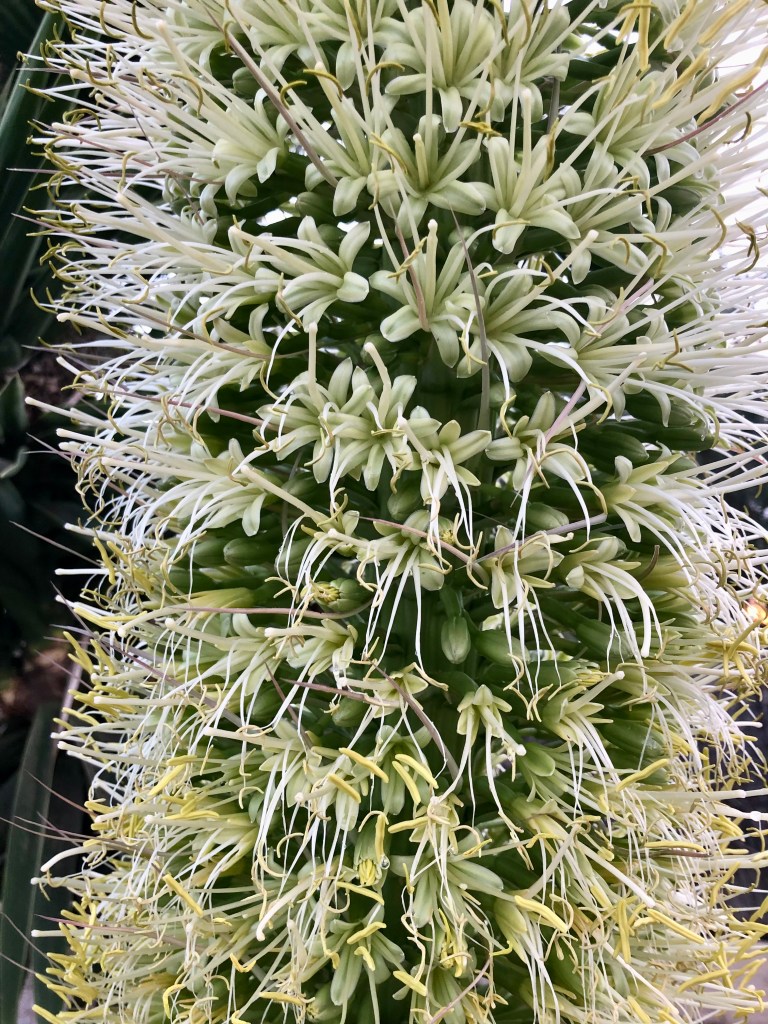
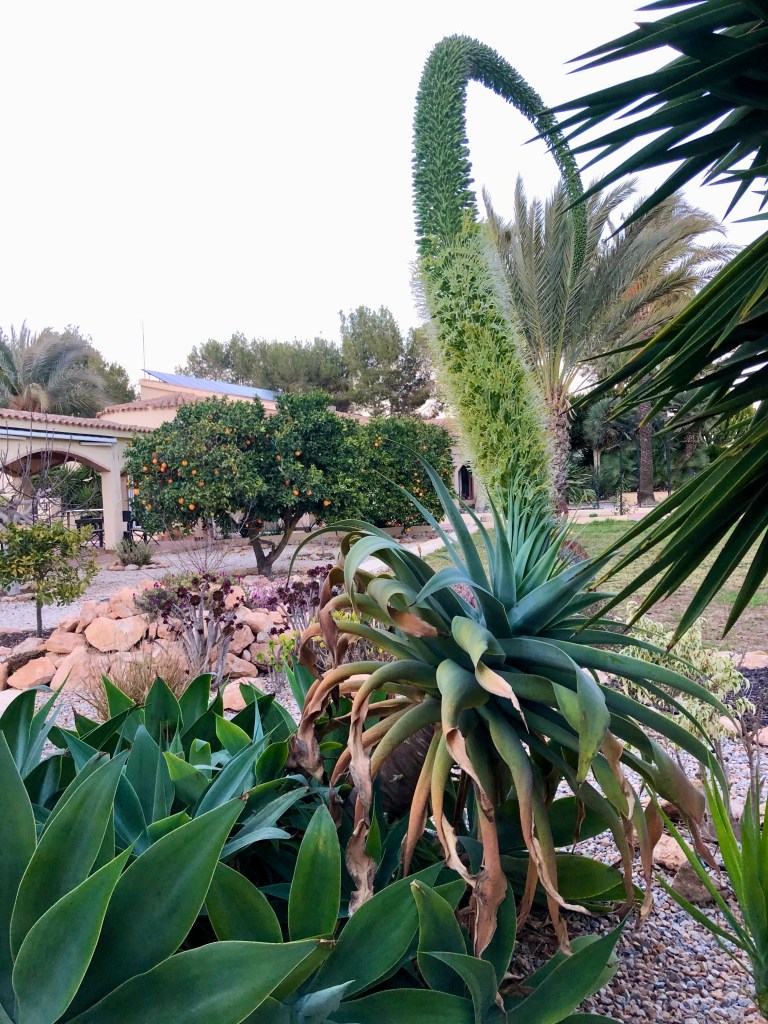
As always on these occasions I conduct myself with dignity and commit my evenings to sitting by the plant as it flowers. We talk over old times, when it was just a little pup and I reassure her that all her pups will be taken care of when she goes. The photos below show my cherished Agave developing her flower spike. The beauty of the flower spike is marred by the tragedy of her oncoming demise. Click on each photo for a larger view.

As her flower spike gets taller so she gets weaker, and this is when I start to sing. All Agaves have a tendency for classical opera, so I tend to sing arias mainly from Puccini and especially La Bohéme.

We start early on when she has accepted she is going. I hold her flower spike and sing “Che gelida manini”. As we progress she takes on the part of Mimi and I Rodolfo as she coquettishly sings “Sì, mi chiamano Mimì”. We both then finish the day with “O Soave faniculla” the pups act as the chorus and as she finishes on the famous high “C” we are all in tears. I am dreading the future. The photos below show us singing the first act, if you look carefully you can see the pups leaning into the chorus whilst visible signs of decay can now be seen on their mum. We shall sing the famous deathbed scene of Act 4 in a couple of weeks, in the meantime I am giving bereavement classes to the pups. Click on each photo for a larger view.

Regretting my Valentines Day purchase. As if things weren’t bad enough with my poor Agave, Cruella (my wife) had demanded that I make an effort for Valentines Day and get her something romantic. I racked my brain for days and eventually came up with the perfect present that was both practical, stylish, and suited to her personality. At great cost I bought her a new titanium based, multi positional short take off and landing broom. The photos below show this wonder of modern technology in both its extended long take off mode and its shortened take off mode.

Given that most of her current brooms are what you would term shoddy, I thought she would be delighted. She took one look at it and proclaimed “I wouldn’t be seen dead on that modern crap”. She stormed off in a huff and spent all of Valentine’s Day with her chickens murmuring darkly in chickenese whilst occasionally giving me black looks. The upside was that I could get on with sowing seeds!

The big winter cutback Part 4: The terror of trees and I am referred to a Tribunal accused of making the sky fall in!

So this is it we have finally reached the end of the big winter cutback. It has taken about a month and I have left the worst till last. Regular readers of this blog will know that I always finish the cutback by tackling my large Ficus tree. I cut out the centre of this tree about 10 years ago to make a pleasing donut shape, but the tree has never forgiven me and takes every opportunity to do me harm. To be honest it comes second only to Cruella (my wife) in threatening my existence. I have fallen out of it, had branches fall on me, it has made me bleed, bashed and concussed me on numerous occasions.

And now you know why I leave this task to the very end. I have to work up my courage through extra physical exercises, primal scream therapy and I channel my inner Robert De Niro every time I look at the tree by shouting loudly “you looking at me…”. But it knows I am afraid despite all my braggadocio, I can see it smirk.

Anyway as if all that wasn’t bad enough Cruella (my wife) confronted me after my struggles with the tree and presented me with what she said was a writ, which she later said was a warrant. Anyway, whatever it was she just flashed this piece of paper in front of me and said it was official. But to be honest all I could see was some gobble-de-gook in her handwriting with a drawing of a chicken in the corner. Hey-ho more later, on with the gardening.

6th February 2004. Things I have been doing lately

Reshaping the little Weeping Fig. By way of warming up before the battle with the big Ficus, I decided to reshape my little weeping fig tree. Lots of people in Spain have these variegated weeping figs in their garden. They are lovely little trees that give colour and interest to even the smallest garden. However, because they are slow growing they can just sit there and be forgotten about.

To make them interesting you should consider cloud pruning them in to various shapes. Remembering that they are slow growing so don’t be too drastic and do it over a few years. The photo below shows the little fig with its trunk exposed (which I did a few years ago).

As it was time for its annual prune and I decided to prune back the lower growth with the eventual aim of having two pom poms of leaf with exposed trunk below and in the middle. The photo below shows the end result. I think it is quite fetching.

The battle with the big Ficus. The trouble with this annual battle is that I am getting older, smaller and weaker, whilst the tree is similarly getting older, but at the same time getting bigger and stronger. How long I can continue I don’t know, but I do know that if you show fear to rabid dogs or large trees then you are finished.

I always start this task the same way; I get Cruella (my wife) to take various picture of me posing in bravura poses in and around the tree. Then I assemble the various tools that I will need and leave them close to the tree to try and psyche it out. The photos below show the big tree in all its malevolence followed by my efforts at psyching it out. Click on each photo for a larger view.

I start the process by using my long reach electric trimmers to walk around the circumference of the tree gradually bringing the sides back into shape. The tree of course responds with ill will by continually dropping things onto my head and into my eyes. I keep my spirits up be singing hymns as I march round and round – onward Christian Soldiers is a favourite. The tree responds by moaning “the trees of the field”. The end of the first phase can be seen in the photos below. Click on each photo for a larger view.

The next, and most dangerous phase, involves climbing up into the tree, pruning the top flat and redefining the central donut. The photos below show me in the tree, this time I’m singing “nearer my God to thee”. The tree was singing “the fall of man how deep and great”. Click on each photo for a larger view.

After it was all over my final act is to place the Cheshire Cat back into the centre of the tree.

The Cheshire Cat smiles for another year.

My appearance before the Tribunal. After all the highs and excitement of conquering the big tree for another year, you can only imagine my disappointment at being confronted by Cruella and her supposed writ/warrant. What it all came down to was that her chickens had complained that my activities in the big tree was making the sky fall in as things kept landing on their heads. To back this up she showed me the photos below as evidence. Click on each photo for a larger view.

When I complained that she had been reading her chickens the bedtime story of Chicken Licken which has exactly the same plot when the sky supposedly falls in on Henny Penny. She drew her self up to her full height thrust her hand out into my face and shouted loudly “always believe the chicken and not the hetro-normative establishment”.

Anyway she insisted there had to be a trial. Her jury consisted of the chickens. I was not allowed to call any witnesses in my own defence. When I tried to call big Bertha her biggest chicken as a witness on my behalf, there was a sudden cacophony of noise from all the chickens (in chickenese of course). Cruella then accused me of dead naming Bertha who now goes by the name Bert. As I looked across at Bertha I knew I had messed up as she was now sporting a waistcoat and smoking a pipe.

Well it was all down hill from there. Cruella called a whole range of witnesses including: Cocky-Locky, Ducky-Lucky, Goosey-Loosey and Turkey-Lurkey all of whom damned me in no uncertain terms. The end result is that I have been found guilty of a hate crime and sent into exile at our English house for a few weeks.

The big winter cutback Part 3: and I am referred to a Tribunal accused of making the sky fall in!

Well by now most of you should have just about completed your big winter cutback and this is my penultimate instalment of my marathon effort. This of course only applies to those of us who don’t have frosts, some of you might not even have started yet – good luck.

This post covers the following areas and plants of my garden:

  • cutting back trailing lantana
  • pruning grape vines
  • cutting palms
  • bringing hedges back into shape

31st January 2024. Things I have been doing lately:

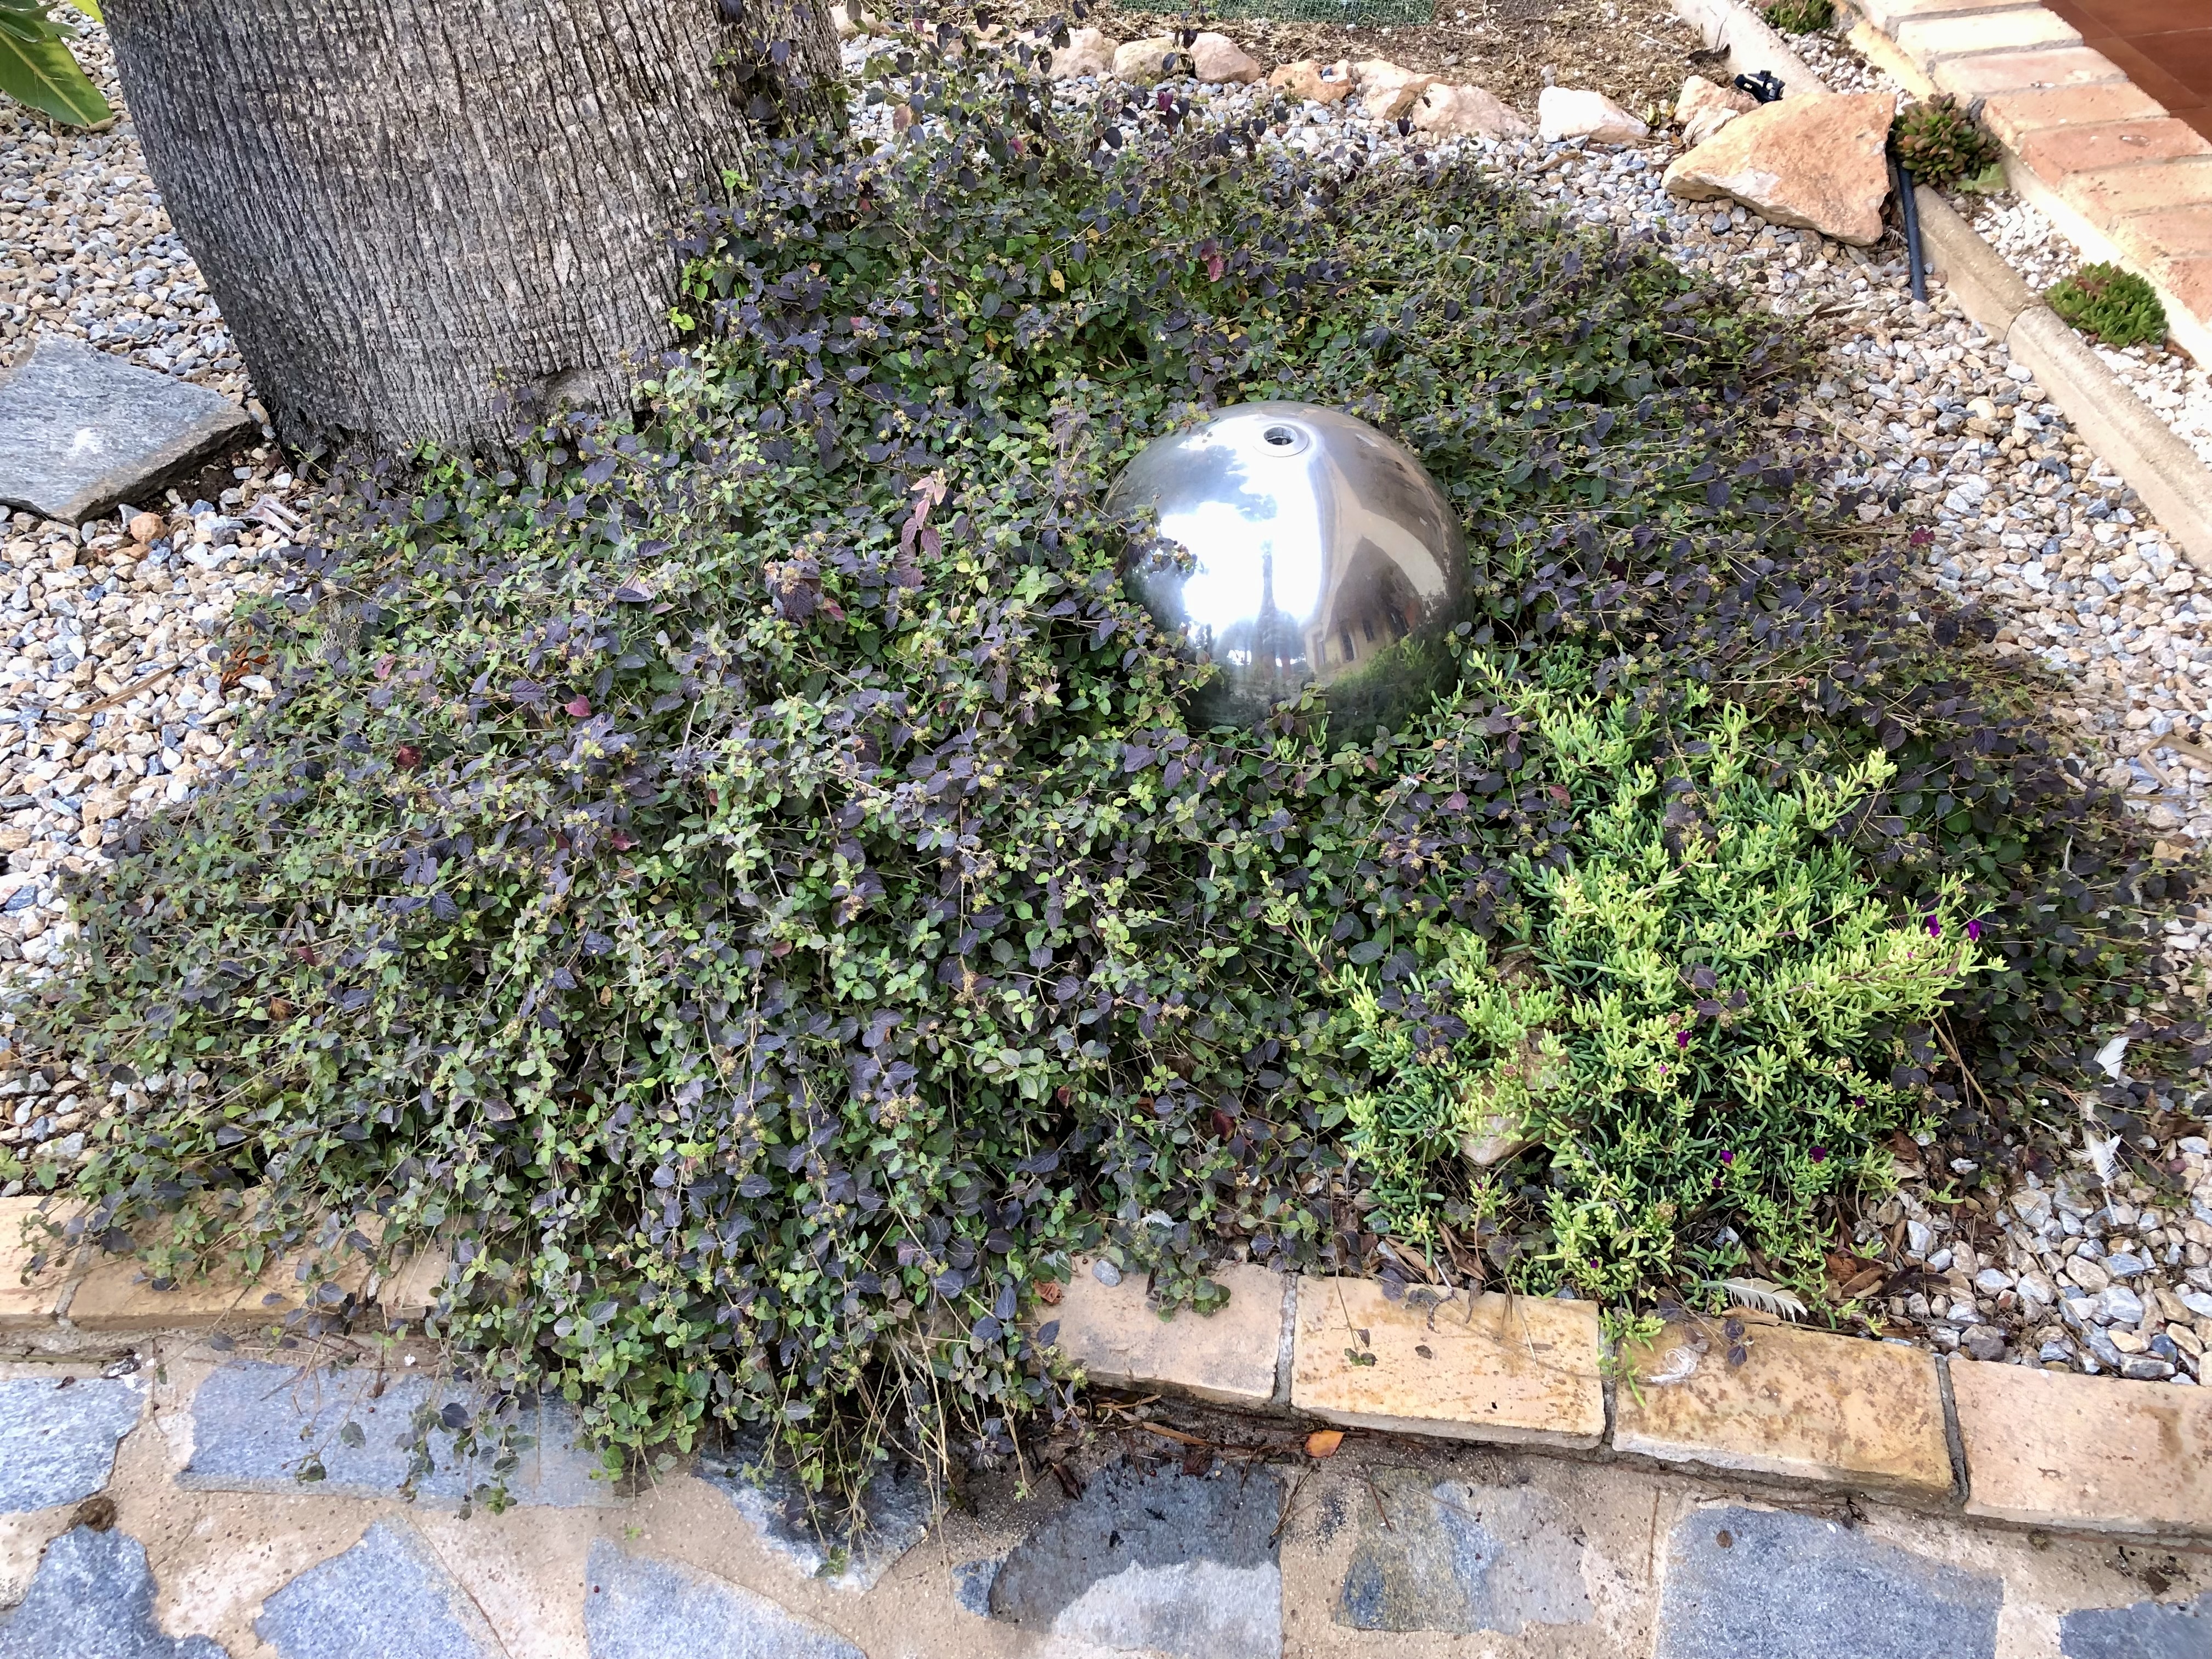
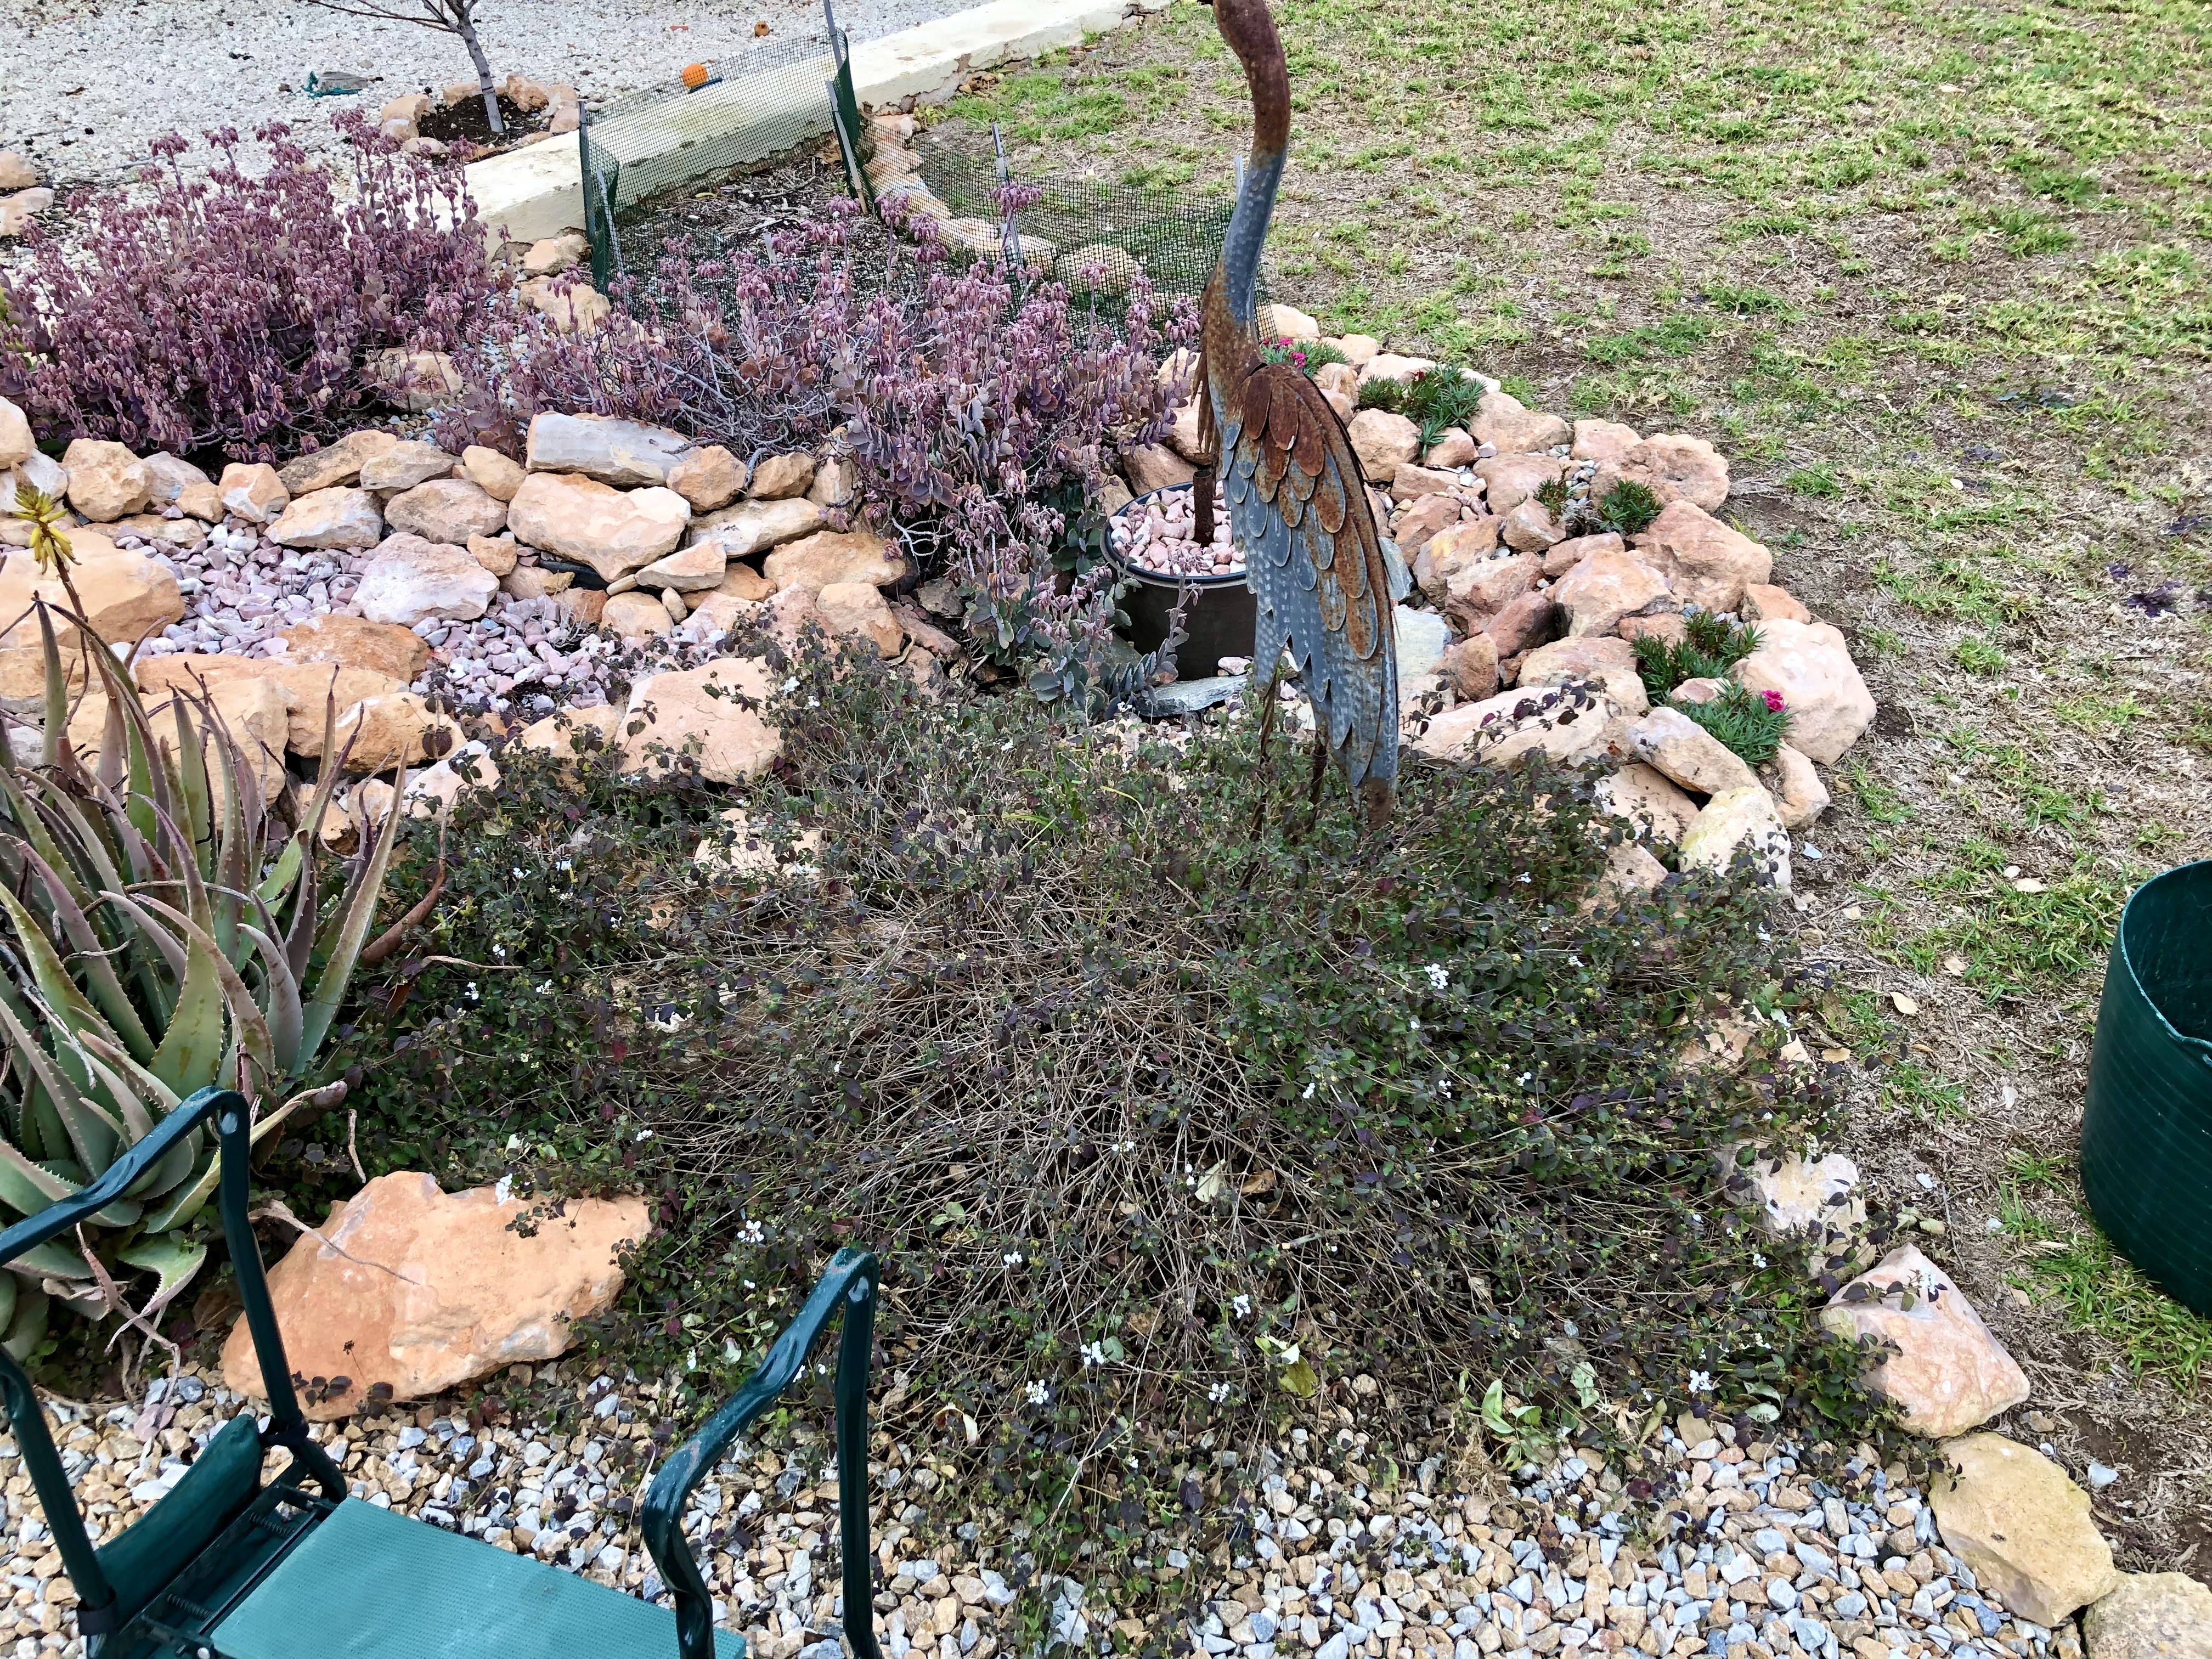
Cutting back trailing lantana. I use trailing lantana and other trailing plants in many areas of my garden as part of island planting which I use to break up and add interest to areas of stones and gravel. The photos below show some of my lantana islands. Click on each photo for a larger view.

When cutting back lantana it pays to be brave. Using your secateurs cut back hard to just above a leaf juncture. By taking it back this far you will be removing most of the old wood and encouraging strong new foliage in just a few weeks. When you do this the plant itself will actually get larger each year as you are cutting it back on much larger root stock.

When cutting back low growth plants at this time of year be sure to wear your garden gloves. Snakes and all sorts can be happily hibernating under your plants and they don’t like being disturbed. The photos below show my lantana happily cutback together with a large toad sleeping away. Click on each photo for a larger view.

Pruning back grape vines. When pruning grape vines you are looking to just take off the side shoots to leave a small stump for the new fruit growth. Do not cut the main stem! the aim is to leave this to thicken and lengthen over the years to act as a superhighway for the sap for the whole vine. The photo below shows the best place to cut.

Don’t be tempted to cut right to the stem as you will lose the fruit.

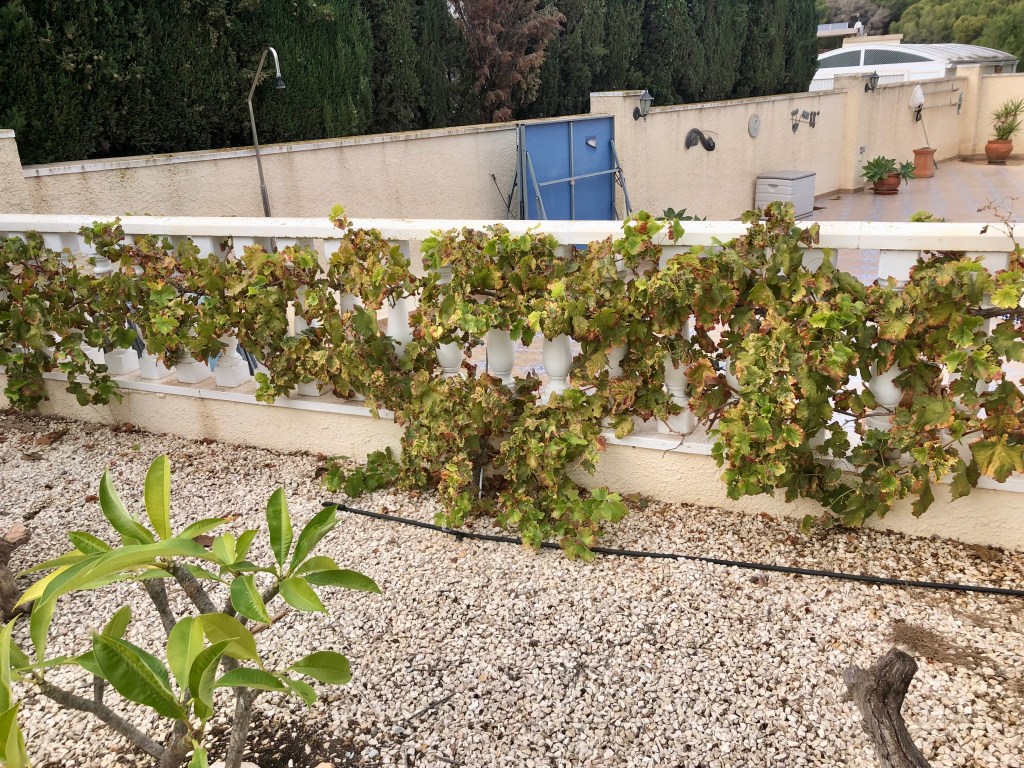
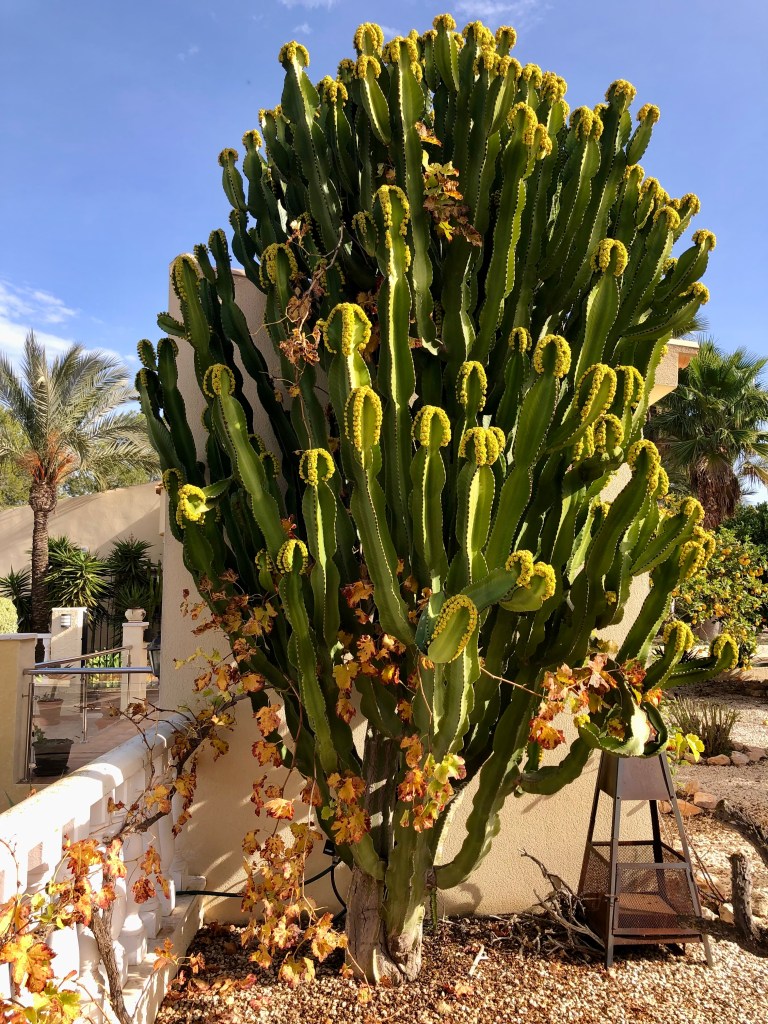
I have three grapevines: one runs along the front of the house and two grow through balustrade at the side of my pool. The photos below show my grapevines prior to pruning, you can also see that I have encouraged one of my vines to grow up and through a Euphorbia. Click on each photo for a larger view.

Finally some of my handiwork. These vines will start sprouting within a month and off we go again. With correct pruning the vine will get stronger each year and eventually before you know it you will be making your own wine. Click on each photo for a larger view.

Cutting palms. Now is the time to prune and tidy up your palms as the sap will be down, the palm weevil will not be flying and most viruses will be dormant. However, do not be tempted to climb large palms and hack at them. You will probably fall off the ladder or cut yourself and bleed profusely. Leave it to the professionals.

The only palms I cut myself are Sago Palms and European Fan Palms, both of which I can reach from the ground with long lopers. I dealt with cutting sago palms earlier in the big cutback so I was left with my stand of fan palms. These consist of four main palms and their multitude of pups which grow in a small redonda we have created in a pathway. The photo below shows the palms prior to their cutback.

From the photo you can see that it is becoming an important feature of the garden. To stop it dominating and overwhelming this part of the garden it is necessary to thin it, reshape it and lift the crown of each palm.

Using long lopers I first go round the edges of the palms cutting out wayward fronds that are ruining the round shape. For the bottom growth I am not so worried about keeping the symmetry of the palm I am more interested in keeping the lower growth within the redonda.

Once I am happy with the lower shape I then use very long extended lopers to take the top growth of each palm back to just two rows of fronds. The two row bit is important as I will always have a spare if something happens to one of them. The photos below show the resultant frond massacre. Click on each photo for a larger view.

Bringing hedges back into shape. Hedges are an important part of my garden as they mark boundaries so much better than fences, and they flower, which fences never do. I have about 200 metres or more of hedges all tightly packed and encouraged to fight to earn the right to flower. These include:

  • Bignonia
  • Plumbago
  • Trumpet vine
  • Jasmine
  • Roses
  • Bower vine
  • Bougainvillea
  • Hibiscus

In addition to all of the above I have two self seeded trees that have found their way in: a white maple and pomegranate both of which add a bit of contrast in height. The rule with hedges is very simple; everything is cut back drastically to the same height, with the edges taken back straight to encourage light into other areas. The photos below show my hedges before, during and after their prune. Click on each photo for a larger view.

The final act of hedge pruning is to shred the thicker stems from the maple and the pomegranate and use them as mulch under other trees. Click on each photo for a larger view.

I am referred to a Tribunal. I am too upset to cover this item in this post, and also I have to prepare my defence against accusations of making the sky fall in. Hopefully, I will be able to talk about it in my next post.

The Wild Wood, chicken pickets and things to do now

Well I’m back! I know I didn’t tell you I was going but it is best if I just slip away and come back when needed. I am trying to cultivate an air of mystery around my gardening, a bit like the Lone Ranger but with secateurs. Anyway I have been at our English house dealing with our garden there and inculcating culture into our idiot son; unfortunately he is inclined to beer and football. But now that I am back it has taken me a while to assess the damage caused by Cruella (my wife) and her marauding chickens. Needless to say there have been tears, mainly mine. Anyway on with the gardening as there are a few jobs you need to get completed before the warm weather gets here.

27th February 2023. Things I have been doing lately:

Cutting back the Wild Wood. Regular readers of this blog will know that part of my garden is dedicated to my Wild Wood area. I try to leave this area as natural as possible without letting it become overgrown or unmanageable. To achieve this I have a local contractor come in once a year to strim and cut back with the aim of achieving the feel and look of a wood land glade.

Once again this has been a tremendous success as I instruct the contractor where to cut back and how much to strim. This has allowed a number of wild flowers to come through and thrive including lovely wild orchids which are spreading throughout the wood. The photos below show various areas of the wood and conclude with the lovely orchids. Click on each photo for a larger view.

When I showed Cruella (my wife) the newly tidied wood she immediately got excited and declared it would make a perfect chicken sanctuary. I told her this would be impossible as they would eat the orchids. She immediately flew into a rage and accused me of having no heart and threatened to contact David Attenborough and other chicken experts. I suggested perhaps Colonel Sanders may have a view, this did not end well. The result is that my front door is under a continuous picket by her girls who immediately rush at me every time I try to go out. I am reduced to using the back door. Even then the whole garden echoes to Cruella and her girls chanting in Chickenese “…what do we want, a chicken sanctuary, when do we want it, now”. The photo below shows the militants in action.

At night Cruella lights a little brazier for them and they stop any visitors coming to see me. I call them the non-flying pickets.

Removing the last of the orange crop. We have been juicing oranges since early December and now it is time to remove the last of the crop. The reason for removing the crop is twofold. Firstly, the blossom will be coming soon and you don’t want the tree to waste its energy on last years crop (the fruit will not get any bigger). Secondly, you will need to prune and open up the tree before the blossom arrives.

In addition to removing the remnants of the old crop it is time to begin feeding your trees ready for the blossom. I feed in two ways, for about a month I feed weekly with a liquid feed which gives a good burst of energy to the tree. Then from about the end of March I add a long lasting granular feed that should keep the tree going for about 3-5 months. The photos below show the last of the old crop and finally my liquid feed. Click on each photo for a larger view.

Time to prune palm trees. Lots of people ask me when is the right time to prune palms. And the answer is right now whilst the sap is not rising and the Palm Weevil is not flying. If you prune later in the year there is a danger of pathogens and disease getting into weeping cuts and that the cuts will in turn attract the Palm Weevil. Where possible I would use professional Palmistas for large trees as anything over about 10 foot can be dangerous.  In addition a professional Palmistas will notice any problems with your trees and will be able to advise accordingly.

Don’t they look lovely. Sorry about the lawn, I blame the chickens

Cutting out Sago Palm Pups. Many people in Spain have Sago Palms, and they can be a lovely exotic addition to any garden. Sago Palms are very slow growing and for this reason they are exceptionally expensive to buy. But you don’t need to buy one because in most cases your Sago Palm will produce nice little pups (plantlets) from their base. The photo below shows one of my sago palms with a few pups emerging from the base.

It is about like assisting in a birth, but obviously with different tools

To remove the pups you will need a trowel, an axe and a sharp spade. The first thing to do is to dig around the pup to expose what looks like a wooden coconut still attached to the mother plant. Once you have exposed the pup then using your axe cut sharply down between the pup and its mother plant. This will probably take 2 or 3 whacks, but will still not completely separate the pup. Using your spade work between the pup and its mother to lever the pup out. Usually this will come out with a sudden pop, so be careful you don’t overbalance.

The photos below show the process in action followed by a successfully delivered pup. Finally, you can see that from this one plant I have retrieved 10 potential new plants. I now need to leave these for a week for the cut scar to heal over. I will show you how to plant them up in my next post. Click on each photo for a larger view.

I don’t know about you, but I think they take after their Mum

The big cutback part 4: The titanic struggle with the big ficus and I invoke help from Wigan!

The last thing I tackle in my winter cutback is my attempts to prune back my big ficus tree. This sits majestically in a gravelled area on part of my front garden. The pruning is a mammoth task mainly because the ficus gets bigger year by year whilst I get smaller over the same time frame. Those of you who regularly follow this blog will remember that I pruned this tree back to a donut effect over 12 years ago by cutting out the central trunk to create a hole in the middle into which I inserted a statue of the Cheshire Cat from Alice’s Adventure in Wonderland.

The big ficus has always seen this reshaping as an affront to its dignity, and as such has sought to punish me over the years by various means including:

  • Becoming infested with wooly aphids and many other creatures
  • Deliberately dropping its leaves to make the gravel area untidy
  • Tripping me up in its roots
  • Throwing me off my ladder when I am entering the centre of the tree

Anyway let’s get on with this.

2nd February 2023. Things I have been doing lately:

Pre-fight psyching out with the big ficus. An important part of my pre-pruning ritual is to build up my courage by pre-prune psyching out. This is a bit like boxers at the weigh in. We stare at each other, I strike postures around the tree and issue a series of blood curdling threats. For its part the tree just waits silently knowing it’s time is coming. The photos below show the big ficus before the fight, followed by the early stages with me striking postures with the tree. The final photo shows my new gardening jacket bought from the sales- I didn’t get a choice of colour. Click on each photo for a larger view.

Big moody and emanating menace
I think I look quite handsome in my new gardening jacket. Note the intimidating power pose I am striking

Day one of the fight. This is the most difficult day as I start by pruning round the sides using my long reach trimmers. But standing on my little platform and wielding the heavy trimmers began to take its toll as the day wore on. The first photo below shows that I wasn’t making much progress. Even with the Cheshire Cat looking on it was very heavy going. Click on each photo for a larger view.

Day 2 I call for assistance. At the end of day 1 I searched the internet for some source of help, and by chance discovered it in the most unlikely of places – Wigan! I didn’t realise that Wigan had a flourishing Pruners and Pie Eaters Guild. Evidently this ancient and honourable society exist solely to assist gardeners in distress and requires no payment other than plentiful pies with lashings of gravy.

The Brother Pruner they sent – which is what they are called in the Guild -insisted that his calling forbade him from revealing his identity, so the only photos I took he insisted that I did not show his face. Anyway, it was fascinating he started the day with what I can only describe as a Haka similar to the New Zealand rugby team, but involving pies. He then liberally smeared himself with gravy and after a few ritual bows to the tree he ascended his scaffolding and began his work attired only in his fading grey cowl. Those of you who are interested in the study of folklore may be interested to know that he sang a series of ancient songs as he worked. To be honest I couldn’t make it out as most words started with th. The series of photos below show him at work. Click on each photo for a larger view.

Upon completion of his work he left without a word or seeking any form of payment, leaving only the faint smell of pies and a few puddles of gravy.

The big clean up. An important part of the big cutback is to make sure you clean up any debris, as if left this will attract snails and slugs. The photos below show the big clean up in progress. The final photo shows Cruella’s (my wife) chickens moving in to hunt down snails and slugs. Click on each photo for a larger view.

And finally, it is all over for another year and the Cheshire Cat is where it belongs back in the centre of the tree.

Note the enigmatic smile

The struggle with the big Ficus a modern day story of heroism

This post has an end of term feel about it as I have at last finished all my jobs before I start planting seeds in a few weeks. But don’t get complacent as this post includes the traditional battle of the big Ficus tree, whereby I try and cut back into shape my big Ficus tree, whilst it tries to generally, cut, maim and impale me. But hey ho its just another gardening adventure.

27th February 2022. Things I have been doing lately:

Dividing Fountain grass. Regular readers will remember that in my last post I told you how Cruella (my wife) had destroyed my Fountain grass seeds whilst I was away. As I explained last time, this left me no choice but to divide the plant as its centre has died. This is quite common in grasses and other clump forming plants like Iris, Agapanthus etc. The photo below shows the grass with its centre that will never grow again.

There’s a hole in my Fountain grass dear Lisa

If you have a plant that looks like this then you need to divide it as the centre will never grow back. There is a good part and a bad part of dividing plants. The good part if that by dividing you get more plants. The bad part is that it can be back breaking digging out an established large plant. Anyway on with how to do it.
Firstly you need to assemble all the tools you will need which will include the following:

  • A large metal lever
  • 2 forks
  • 2 spades
  • A saw
  • A wheelbarrow

The first item on the list, the large lever is a bonus. I don’t have one but my neighbour Bill who is a car mechanic kindly lent me his.

Start be clearing the area around the plant so that you have room to work. Then using your fork work your way around the plant, gently trying to lift the edges. Then using a spade and the large lever begin to attempt to lever the plant out. It is important that you try not to damage the roots; so go as deep under the plant as you can. Once you have the plant out and into your wheelbarrow (I needed Cruella’s help to lift it) then take it to your lawn or a similar area where the falling soil won’t be a nuisance. Next place two forks back to back in the centre of the plant and attempt to lever it apart, if you have a lever then use that as well. Once you have the plant basically divided, then use your saw to cut out the dead parts and to divide the plant into new manageable chunks. Try and make sure that you leave sufficient root on each part to allow the plant to regrow. The photos below tell the story. Click on each photo for a larger view.

Planting a peach tree cutting. If you have any tree cuttings that you have been growing over winter, then now is the time to get them in the ground. You can normally tell when a tree cutting is ready for planting out. Firstly it should have had a good year of growing in a pot and you should have gradually cut off side-shoots to develop a nascent trunk. Next it should be showing some leaf buds that have taken on a slightly “furry” look and feel.

When planting your new tree out, you will need a mixture of 50% compost and 50% soil from the hole you have dug. It is also helpful if you have some Mycorrizhal Fungi which helps stimulate root growth, this can be bought online. Sprinkle some of the fungi into the planting hole and then sprinkle some over the roots before planting. When you plant make sure that you gently, but firmly, tread down the soil around the planting ball. Finish by placing a stake at an angle across the bottom of the trunk to provide support in strong winds.

The photos below show my little peach tree being planted. Click on each photo for a larger view.

The titanic struggle with the big Ficus. To be honest given the damage that this tree has done to me over the years, I am sometimes tempted to misspell Ficus! Anyway if you have not been privy to this annual battle before, let me briefly give you the background. About 10 years ago I cut the central trunk out of this particular tree to create the attractive donut effect you see in some Spanish towns. Since that point I am obliged to prune the tree each year to keep its shape. The main problem is that the tree gets bigger every year, whilst I get smaller. The photo below shows the tree ready for its annual reshape.

It just oozes malevolence

The tree has always resented the indignity inflicted on it all those years ago, and consequently it has sought revenge ever since. I dread the annual reshaping as I know it will be painful. Over the years the tree has inflicted untold damage upon me, including: concussion, broken fingers, dramatic blood loss, and cuts and abrasions too numerous to mention.

I plan my approach carefully each year. I don’t sleep for weeks and when I do I have nightmares about the struggle ahead. I start by cutting underneath the tree to flatten the bottom all the way around. I then spend the rest of the first day reshaping the bottom half of the sides. Day two finds me on my platform reshaping the top part of the sides. By day three I am doing the really dangerous stuff; overreaching on a ladder to cut the top and then climbing into the centre to reshape the middle. The photos below show me in action. Click on each photo for a larger view.

Finally I thought I would treat you to some photos of my finished work. In the photos below you can see the Cheshire Cat safely back on his perch at the centre of the tree. Some avant garde photos taken by me lying under the tree; I have to take these quickly as if I lay there too long Cruella trys to bury me. Finally the tree in all its reshaped glory. Click on each photo for a larger view.

I’m back with gardening and teapots, what’s not to like.

I’m back! I know I didn’t tell you I was going away, but it is for the best. If I tell Cruella (my wife) that I am going away she does terrible things to the garden whilst pretending she is caring for it. That is why I told her that I was just popping out for a moment and walked back through the door on Tuesday three weeks later. She didn’t even notice I was gone.
Anyway, I had a nice time caring for our English garden and seeing our idiot son. I fear however there was a culture clash, I tried to drag him to museums, theatre and gardens, which he manfully resisted. Whilst simultaneously dragging me to bars, restaurants and football matches which my liver and waistline are now both regretting.

Anyway, enough of this folderol on with the gardening.

18th February 2022. Things I have been doing lately:

Dealing with Cruella’s damage. The next few weeks are literally the calm before the Spring descends upon us for real, and you will end up running around your garden trying to keep up with nature as it bursts forth. Before you get set to planting your seeds etc there are some last minute things you need to be doing.

My first job was to repair the damage Cruella had inflicted upon the garden. As I toured the garden on my return I saw various signs of Cruellas neglect. I asked where my tray of fountain grass seeds had gone – Regular readers of this blog will remember I sowed these seeds about 6 weeks ago, kept them inside, and only just placed them outside before going off. Cruella denied all knowledge, but eventually I found them as the photo below shows.
I cried

I will now have to split the parent Fountain grass in the next day or two or it will be too late this year. I will cover this process in my next post.

After getting over the disaster of the fountain grass seeds, I asked her where my orchid had gone. She produced a pot from behind her back and said “is this what you are looking for”. See photo below for the remnants of my orchid. Luckily after clearing all the dead away I found a glimmer of green. It is in intensive care.

Feeding Citrus Trees. People often ask me if, or when they should feed their citrus trees. Well the answer is simple, once you see the first sight of blossoms on your trees, then begin to feed weekly. It doesn’t matter if you still have oranges or lemons on your trees you need to start feeding. You need to use a specialist citrus feed which can either be liquid or granulated, but it needs to be citrus feed. Feeding your trees now will assist the blossom to bring on a good crop of fruit later this year.

The photos below show the tell tale signs that it is time to feed. The second photo shows one of the feeds I use; other feeds are available, but this works for me.

Repairing paths and lawns. By now you will have noticed that weeds are growing like crazy. It is sort of counter intuitive for us Brits as we expect weeds to grow in the summer. But in Spain weeds grow strongly in the winter as it is too hot in the summer and they would just be burnt off.

You will find weeds growing strongly in your paths and gravelled areas, but also on your lawn. Dealing with weeds on paths and gravelled areas is relatively easy, you just spray with your weedkiller of choice. Now I know that lots of you like to take an organic, non-chemical approach to weed killing. But I am old fashioned and prefer to nuke them with chemicals. But, whatever your preference lawns are different to paths and gravel. The photo below shows my drive midst weed spraying.

Begone damned weeds

When dealing with lawns the big problem this time of year is broad leaved weeds and patches or holes in your lawn. Dealing with weeds first. Broad leaved weeds are a group of weeds that send out their leaves in a rosette around their stem thereby shading out all competition and of course your grass. I have found the best way to defeat this class of weed is to first mow your lawn. When you mow you cut off the top section of the weed, but this leaves the root intact. This in turn forces the weeds into a growth spurt and it quickly puts on a lot of leaf growth. You can then happily spray these nice new leaves in a weeks time with a selective weed killer for lawns.

There is no point seeding holes and patches on your lawn at the moment as the grass has not yet really started to grow and all you would be doing is providing a picnic for ants who will happily carry away your grass seed. Instead just mix some good compost with a bit of top soil and fill in your holes and cover your bald patches. Most Spanish grass when it starts to grow will soon grow into your treated areas. If like me you suffer from squirrels and blackbirds, then place a bit of wire mesh over your treated area.

The first photo below shows my trusty mower ready for its first action of the year. The second shows some of my patched areas, and lastly a photo of the selective weed killer I use.

Finally to teapots. What do teapots have to do with gardening I hear you ask?Well, gardening is hard but enjoyable work that gives us gardeners great pleasure. But sometimes we forget to stop, sit back and just look at our gardens in way that allows us to absorb the beauty of nature, appreciate our hard work and God’s hand in our labour. And this is where tea comes in, get yourself a teapot, make some real leaf tea and sit back and enjoy.

Cruella (my wife) insisted that nobody would be interested in the tea and gardening nexus and that everybody would think I was boring, well we will just have to see. I thought you might be interested in my recent visit to the teapot museum. The first photo below shows me luxuriating in the depth of the teapot museum. The seond shows some plant based teapots that will definitely pique your interest. The next photo shows the extent of the collection? followed by a photo of Sue who owns the collection showing me the teapots that got her started. Finally, and I know I am building up to a peak of excitement the next photos show the gardening theme teapot I bought from the museum followed by the gardening themed teacosy knitted by my friend Sara for which I will ever be grateful.

When I proudly showed Cruella (my wife) this post she just scoffed and said nobody would be interested in my stupid teapots. She then ran into her lair and emerged proclaiming this is what I call a teapot; I wouldn’t mind but she only drinks coffee!

This is a life model

Cruella has killed my Solanum just by touching it

We are just at the start of the gardening year here in Spain and already things are warming up nicely with most plants moving into early growth. So if you don’t want to get caught out then there are some things you need to do now.

18th February. Things I have been doing lately:

🍊 Planting a new orange tree. Regular readers of this blog will remember that our idiot son helped me with some tree work when he was over for Christmas. One of his lumberjack tasks was to cut down an old orange tree that had already been heavily pruned back twice and had no more to give. The photo below shows the idiot about to take the chainsaw to the tree.

Since this photograph he has bought himself a check shirt

Now, if you are thinking of planting new citrus trees then you have to get them in the ground within the 3-4 weeks. After this time they won’t have enough time to set some new root before the heat of summer comes along. The important thing about replacing old trees is that you cannot plant back into the same spot as the soil will be depleted and the roots of the old tree will be everywhere in the ground.

The first thing you need to do is find a good replacement tree. Here you have choices. You can buy a tree that has been forced and is basically a lollipop with a very thin trunk and a round ball of new leaves at the top. If you are lucky a tree like this (if it survives) may produce fruit in 5 years. Or, you can buy a tree that is 3-5 years old, has been grafted on to good root stock grown on for a few years and has been pruned back to provide good fresh growth. The first tree will cost you about 20€, the second cost me 95€, but will provide fruit next year. Cruella (my wife) who knows the price of everything and the value of nothing has calculated the cost of oranges and has accused me of gross profligacy. The photo below shows my proud new purchase next to the remnants of its predecessor.

I consider this a mini Stonehenge.

Start by moving your planting site at least 3 metres away from the old tree. In my case it was important that the new tree should be in line with the old tree so that I could pick up on my existing tree irrigation system. You then need to transfer the ground covering stones away from your new site into the old tree site so that it blends into your garden and doesn’t become an eyesore. The photos below show the magical transformation from the old to the new site. Click on each photo for a larger view.

Once you have your site prepared then the really hard work starts. You need to dig a roomy planting hole which ideally should be twice as large as the root ball of the new tree. I have to be truthful with you I seldom manage this here as the soil can be rock hard in my orchard. So I think myself lucky if I can dig it big enough for the root ball. Once you have broken your back digging the new hole get as much good rotted compost in there as possible and top it off with some slow release granulated feed. Finish by planting your new tree, treading it in well to avoid wind root rock, and then place a cross stave low down the trunk to again stop root rock. The photos below show the best planting hole I could manage, together with the new tree in all its glory. Click on each photo for a larger view.

🌱 Killing lawn weeds. I know not a lot of people have lawns in Spain, and technically speaking though I have four of various sizes, they are mainly the play areas for my Labradors to rampage around on a nominal grass surface. Nevertheless, whether your lawn is a bowling green or a prairie, they will all be suffering from broad leaf weed growth which really takes off from February to May. After May it is too hot and their leaves will shrivel, but by then they will have set seed and bequeathed you a whole new generation for next year.

I took a vow last Summer not to use a general weed killer on my lawns after I enjoyed the flowers of the low growing weeds including: Creeping woodsorrel and Asian ponysfoot. Instead I now use a selective weed killer that targets broad leaf weeds. It is important to kill off the broad leafed weeds as they will shade the grass out and leave you with a bare patch of lawn when they die back where their leaf rosette has been. The photo below shows the product and method I use together with one of the culprits.

it’s a dead weed growing.

🧟‍♀️ Cruella has killed my Solanum. Regular readers of this blog will know that my wife Cruella is a practitioner of the dark arts and does everything in her power to undermine my work in the garden. I only ever let her near the garden when I have to go away, and even then I leave her strict instructions. These have not stopped her wreaking havoc over the years including:

  • Killing all the seedlings and cuttings on the potting bench
  • Destroying my one attempt at growing tomatoes
  • Allowing our Labradors to dig holes bigger than WW1 trenches on the lawn
  • Summoning the wind to blow away my little mini green house
  • Encouraging her army of mice to eat the lining of my water feature

I could go on, but it only makes me cry, so I will have to stop there. Anyway, I have had enough, she has killed my Solanum. And it is not just any Solanum, I was given this as a cutting and have nurtured it to become a 9 metre long behemoth which I have trained up wires to cover the walls of our outside kitchen. It flowers profusely all summer and is (was) a joy to behold.

I first noticed a problem after I came back from a trip to Florence where I had taken the idiot son in the hope of inculcating some culture into him. I absorbed the culture, he thought Florence was a great place to play Pokemon Go! Anyway as soon as I came back I noticed there was a problem with the Solanum. It just didn’t look right. Over the next few days the sturdy stems started to blacken, but only at certain points. Sometimes a stem would be a lovely green brown and then at the next stem junction one part would be black.

It turns out that despite my instructions (in writing) to Cruella not to actually touch any plants, she thought she would just stroke the stems. The results can be seen in the photos below. I have also included a photo of Cruella’s hand so you can see the problem. Click on each photo for a larger view.

I wouldn’t mind, but when I insisted on taking this photo, she chose this as her best side.

I am away and Cruella has taken my seedlings hostage – Spanish Garden

  1. I am away and Cruella has taken my seedlings hostage
  2. Cruella is back, and so is the big rat!
  3. The Yucca Lull and I get a nose piercing
  4. Sago pups, Cruella flys off and I receive a chicken delegation
  5. The Wild Wood, chicken pickets and things to do now

As your Mum used to tell you… it’s time to make your beds

Yes, the big winter cutback is over and it’s not quite time for planting seeds. But there is still lots to do, and the first thing is to begin to make your beds ready for the summer. I of course mean your flower beds, this is not the sort of blog that would consider being so outré as to contemplate any other sort.

8th February. Things I have been doing lately.

🌱 Weeding and then thinning self seeders. Normally I would weed with a hoe, (no pun intended). But for the first proper weeding of the year you need to do as Jesus requested and get down on your knees. You need to get close to the soil, and using your trowel selectively dig out all the weeds and grasses that you have allowed to creep into your flower beds.

Whilst you are doing this thorough weed you need to begin the process of thinning out any plants you have allowed to self seed. Marguerites and Osteospermums are wonderful self seeders and I happily let them grow away during the Winter until it is time to do the great thinning. The photos below show my flower beds at the beginning of the the great weed and thin. Click on each photo for a larger view.

After thinning out the self seeders I then plant a few more of the plants that I have set aside. The idea is that I am creating clusters of plants that will provide me with early colour, whilst at the same time leaving spaces where I will plant my new seedlings such as Marigolds and Sunflowers when I sow in a few weeks time. The photos below shows some of my plant clusters. Click on each photo for a larger view.

🚜 Adding a compost mulch. Once I have fully weeded the beds and thinned out all the self seeders I add a thick layer of compost mulch from one of my compost bins. This bin is hopefully timed to be ready for Spring, when I use it for mulching the flower beds and providing a thick layer around my fruit trees. The photo below shows me mid mulch.

How often do you get the opportunity to see an action based mulching shot.

🌿 Dividing plants and planting out cuttings. Once you have prepared the beds you can consider planting out any cuttings that you have ready, and also looking for some of your existing plants to divide. Dividing plants is an easy way of getting free plants. The only thing to remember is that if you have a plant that is thriving and is ready to be divided, then make sure you plant the new divided plants in a similar environment. If it is thriving in shade then plant the new plant in shade, and vice versa if in full sun.

I have lovely Kaffir Lilies that thrive in quite deep semi shade, including the front wall of my garden which faces North. These plants are slow growing, with lovely deep red flowers, but if they like their environment then they will gradually plump up and be ready for dividing after about three years. Simply force your trowel down between the plant and take off a substantial chunk of growth together with a good amount of root. In total I created 5 new Kaffir lilies this year. The first photo below shows some plants that I divided last year now coming into flower. The second photo shows one of my existing plants ready to be divided, followed by some photos of the new plants ready for planting. Click on each photo for a larger view.

The final plant to be put in my shadier bed is the much maligned Chlorophytum Comosum or Spider Plant. This denizen of many a shady bathroom comes into its own when planted out in a shady area as its striped leaves shine through the gloom. I plant out two or three of these every year from cuttings, but remove the mature plants after 1 year as they get too messy. The first photo shows the removal of last years plants as they head to the compost heap. The next photo shows the strong roots you get from cuttings after a few months. The final photo shows the Kaffir Lilies and the Spider plants ready to illuminate a shady bed during summer. Click on each photo for a larger view.

🌻 Planting new purchases and taking cuttings. Sometimes you will have a gap in your planting that you can’t fill from your cuttings or seed. Or, you may have a problematic area of your garden where existing plants have failed. In my case I have failed on a number of occasions to successfully grow anything up an arch which is in full sun. My latest attempt is to try Stephanotis. I have purchased two plants ready for another attempt.

The secret to buying plants, is where possible don’t, just grow your own or take cuttings. But if you do buy plants, then you need to do two things. Firstly, you need to take cuttings from your new purchases so that you get lots of free plants. Secondly, and very importantly, you need to get them in the ground and growing before the end of March. Here on the Costa Blanca, any new plants put into the ground after the end of March stand a high chance of being burnt off by the Sun before they get established, and you will have wasted your money.

The first photo below show my newly purchased plants waiting to be planted. The second photo shows the Stephanotis newly planted and ready to grow. The final photos show the cuttings being taken and ready to hopefully root and provide me with free plants. Click on each photo for a larger view.

The old man and the tree – an epic battle

Regular readers of this blog will know that the last activity in my winter cut back is the reshaping of my big Bay tree. I reshaped the tree in question about 9 years ago by cutting out the main trunk and then trimming the top, bottom and sides to create an open donut effect.

This is a style that can be seen in various town squares in my part of Spain and one that I would recommend to anyone with a big shapeless tree. However, there is one drawback; the tree resents this and will harbour feelings of hatred and revenge for the rest of its growing life. Bay trees are the elephants of the gardening world – they never forget!

Contemplation and preparation. The task of reshaping the big bay is not only physically draining, but it also requires mental stamina and inner fortitude. For weeks both the tree and I know what is coming. I up my daily exercise regime and even employ methods of meditation and prayer. The tree for its part prepares by oozing sap from its leaves and encouraging huge infestations of Wooly Aphids.

The first two photos below show the big bay ready for the coming battle. Click on each photo for an enlarged view.

The photos below show me contemplating the coming battle and with the various equipment needed. The tree hates these photos and has complained in previous years that I look like a big game Hunter being photographed with his prey. Click on each photo for an enlarged view.

Day 1, let battle commence. There was a time when this battle would only take one day. But since I am almost 72 I have recognised the toll on my body so it now takes two days and enough pots of tea to sink a battleship. The main effort in day 1 is to trim underneath the tree to create a nice flat and level base. This is followed by trimming the bottom half of the sides. To achieve theses tasks I work from ladders and also a scaffolding platform using electric hedge trimmers and electric telescopic trimmers. As the tree has grown in height this is becoming progressively more difficult (or maybe I’m shrinking).

For its part the tree does not hesitate to fight back. I am regularly thrown off my ladders and scaffolding by whipping branches. My hands and face are lacerated by twigs, leaves and branches. But it’s worst trick is to drop hundreds of Wooly Aphids directly into my mouth as I look up to trim. In addition Aphids and leaves are dropped down the back of my tee shirt and into my shorts. All of this has the effect that I end day 1 looking like a medieval leper in need of curing.

The first photo below shows me beginning the process of shaping the sides, whilst the second shows the tree at the end of the first day. Click on each photo for an enlarged view.

Day 2 pushing through to victory. The continuing effort in day 2 is to trim the top half of the sides flat, then to angle the telescopic trimmer to get at the top and cut it flat. After the sides and top are complete then it is time to do the really dangerous stuff. This involves going up a ladder and climbing into the middle of the tree and sitting on the stump where the main trunk used to be., whilst at the same time wielding an electric hedge trimmer. The purpose of this exercise is to cut away the inner branches and leaves to redefine the hole that forms the central part of the donut. On numerous occasions I have had to fling the hedge trimmer away from me as I fall ignominiously down the tree and onto the stones below.

The final stages before the big clean up is to use long reach telescopic lopers to trim off those pesky bits of branches that are still sticking up at the top. When you have finished primping the tree, clean up the bulk of the leaves and then leave the residue for about three days. After three days the rest of the fallen leaves will have shrivelled and dried and can easily be cleaned up with a blower or leaf rake. The importance of clearing away all leaves cannot be over stressed as, if left they will break down and form an excellent mulch for weeds in your gravel. Cruella has just looked over my shoulder at the last sentence and said I was pathetic and needed to get a life; I think she meant it kindly!

The first photo below shows me battling with the long lopers as I look for the perfect cut, whilst the second photo shows the tree at the end of day 2. Click on each photo for an enlarged view.

The photos below show the newly redefined hole at the centre of my topiary donut and the tree a few days later after the big clean up. The final photo shows my statue of the Cheshire Cat returned to its pride of place at the centre of the tree. Click on each photo for an enlarged view.

As the Cheshire Cat said to Alice “…we’re all mad here, I’m mad” I have taken this as my gardening motto.

Floods, pestilence and a big hole

It sounds like the Biblical end of days doesn’t it, especially when you take into account the huge plague of locusts currently flying around Africa. Anyway, it’s worse than that, I went to our English house and left Cruella (my wife) in charge of the garden, she didn’t even have to do anything. Not only did our English garden nearly get flooded, but when I returned she had allowed Nero (one of our Labradors) to dig a huge hole in our lawn. When I confronted her, relaying my near death flooding experience, and questioning why she had let Nero dig such a huge hole. Her only reply was “if I had stopped him he would only have done it elsewhere…and it serves you right for going away”.

14th February: Things I have been doing lately.

🌊 Getting flooded. Our English house is right beside the river Medway in Rochester, Kent. The garden itself is walled, paved and is mainly based around climbers covering the walls. The photo below shows how during the recent storms it was nearly turned into a water garden and the house into a house boat.

It was a bit wet.

🌿 Cutting back Lavender and trailing Lantana. Now is the time to trim your Lavender and Lantana plants. With Lavender just trim the flower stalks back to the first leaves, do not cut into the foliage or you will damage the plant. The photos below show the Lavender before and after its trim.

With trailing Lantana take about a third off the plant and try to cut back to just above a fork on each stem. By doing this you will ensure that you get good twin growth on each stem. The photos below show the Lantana before and after its trim.

Replanting and splitting Canna. I love Cannas they are beautiful statuesque and real statement plants. The great benefit of Cannas is that as they grow from a Corm (ugly bulb) they produce babies every year so that your stock grows and you can divide and replant them; although you should only do this every 2/3 years. I grow my Canna inside a circle of irrigation but because of their habit of having babies they occasionally move outside my irrigation. This presents me with two opportunities. Firstly, I can dig up the mature Corms and move them back inside the irrigation circle. But secondly, before I do that I split them by gently pulling them apart to give me nice new plants. These can then be planted into new areas of the garden. The first photo below shows the Canna growing outside the irrigation circle (the culprits are circled in red). The second photo shows a split Canna ready for planting and the final photo shows how many new plants I got from this exercise. (Click on each photo for a larger view).

🏆 Planting seeds. If you want free plants then now is the time to plant seeds. I try not to buy plants, and where possible will grow either from seeds or cuttings. My main reasons for this approach is that I get great pleasure out of making seeds and cuttings grow; but also I think it’s more macho and allows me to look down on those who just buy plants – terrible, and I’m a Christian.

Anyway, most seeds can be sown now if you have some sort of shelter for them. I have a simple little plastic mini greenhouse with three shelves, but a window ledge would be just as good, just don’t let them get scorched. At the moment I am sowing Stephanotis as someone gave me some seeds and I want them to take the place of a climbing Rose that failed to flourish. I am also trying to grow a Norfolk Pine (bit like a Monkey Puzzle tree) to put in my wild wood. And lastly I am sowing Petunias to take the place of my normal Marigolds which have set a virus in the soil which now needs a few years rest without Marigolds.

The first photo below shows the Stephanotis seeds about to be sown. The second and third show the large Norfolk Pine seeds which are shield shaped. If you want to sow Norfolk Pine then you gently push the seeds into potting compost pointed end down but leaving the top of the seed just sticking out of the soil as in photo three.

The final photo below shows my little mini greenhouse. Should you get one of these then make sure you weigh it down with a paving slab on the bottom shelf to stop it blowing away in strong winds.

I used to have a huge greenhouse in the U.K. – look what I am reduced to.

🐾 Repairing holes in the lawn. Those of you who are regular readers of this blog. Will be perfectly familiar with my Sisyphus like task of having to continuously repair our lawns only to have them dug up again by Nero (one of our Labradors). In each case I fill the hole in and complete the repair by placing a wire mesh over the hole to stop him digging there again. The only fault in my logic is that he just goes to another part of the lawn and starts again. Over the years my lawns have had so much wire mesh added to them that I am in danger of distorting Magnetic North and becoming a danger to shipping.

The photos below show the hole, the repair and the culprits. Cruella insists that Nero is more to be pitied than scorned and that his hole digging is “a cry for help”.

Nero is the one on the left.

Marauding Labradors and munching Palm Weevils

In the short space of time we have between Winter’s end and Spring’s promise there are lots of jobs for you to be getting on with in your garden. The next few posts will be looking at all the things you need to get done now before Spring overwhelms you and we are off again on the gardening merry-go-round.

26th February: Things I have been doing lately.

🌾 Lawn repairs. To be honest it is a little bit early to be repairing lawns as the grass really hasn’t started growing. However, if you have dogs and a lawn then you will know that grass presents an irresistible desire in a dog to dig. One of our Labradors “Nero”, named after one of my wife Cruella’s all time heroes. Yes, it’s true the despotic Roman Dictator Emperor who burned Rome is right up there in her book with “Vlad the Impaler”.

Anyway, Nero is in common parlance a “diggy dog” and will take any opportunity to head to Australia via the lawn if given half a chance. Hence, he is put into his kennel and dog run when we are out, where he happily digs huge holes and lies in them. Sometimes when we come home all we can see is the top of his head peeping out; I believe he is half Labrador and half miner.

To repair his lawn wrecking activity I first fill in any holes with a mixture of compost and top soil. I brush this mixture into the hole and tamp it down by walking on it, (for big holes I use a roller). The first photo below shows this process in action. Once Iam happy with the repaired hole, I then cover it with a wire mesh which I hold down with large staples. Normally I would seed this at the same time, but it is still a bit too early for grass seed, so I will do this in 3 or 4 weeks. The second photo below shows the repaired hole waiting for seeding. The final photo shows the culprit hiding his face in shame.

A remorseful diggy dog – till the next time

🌴 Treating Palm trees. Now that the weather has started to warm up you will soon begin to see the dreaded Palm Weevil weaving its way around your Palms. This large Weevil which is about an inch to 3cm long is not a great flyer and makes a noise like a B52 bomber as it lumbers slowly through the sky amongst your Palms. I have been known to chase them around the garden whacking them out of the air with my shoes as weapons which I have removed to pursue them. Now a days I am more sophisticated and use my own method of chemical control.

Because my Phoenix Palms are so tall, I introduce insecticide into the tree through a pipe drilled into the trunk. The first photo below shows my sophisticated equipment. This includes a proprietary insecticide, a simple syringe to measure and an old “fairy liquid” bottle to transfer the liquid into the tube and then into the trunk. As the sap begins to rise this will take the insecticide up into the Palm fronds so that every munch becomes a toxic cocktail for the Weevils. The second picture below shows a Palm with its life saving tube. In case you were wondering what I get so upset about, the final photo shows a close up of a Weevil I took last Summer; you can guess what harm that big proboscis can do to Palm trees. (click on each photo to enlarge).

🥽 Cleaning up Cordyline and Yuccas. Aesthetically it is important to tidy up your Cordylines and Yuccas at this time of year. This means removing all the drooping and untidy lower leaves and leaving the stem nice and clean and handsome. This not only looks better it also reduces the chances of disease and pests getting at the plant. With Cordylines it is very simple just sit down next to the plant and gently pull downwards on the dropping leaves and they will come away in your hand very easily. The photos below show one of my Cordylines before and after its coiffure.

Now Yucca are a completely different kettle of fish. You need to gear up as if you are going to fight a gladiatorial duel with a Roman Dimachaerus gladiator (ancient history and gardening, I am spoiling you here). You need to wear protective glasses, a cap,and gardening gloves. Failure to do this will probably result in multiple lacerations, the loss of an eye and pierced ears.

With Yucca the technique for removing the dead fronds is different from Cordyline. Old dried Yucca fronds have the consistency of iron and a determination only to be removed if you know the correct technique. To successfully remove old Yucca fronds you must find the very lowest dried frond on the stem then pull sharply down and it should come away. You can then work your way up the stem making sure you only pull away the bottom frond every time. Because Yucca fronds overlap in a shield type structure they will only allow the bottom frond to be removed; and any attempt to pull fronds higher up the stem before the one beneath it has been removed will be futile. You have been warned.

The first photo below shows one of my potted Yuccas with its messy dried fronds. The second photo shows it nicely cleaned up and ready for another year of growth.

It’s time to get ready for Spring

Now that the big winter cut down is over its time to get your garden ready for its Spring spurt of growth. In Spain we are having a lovely Winter with lots of sunshine and, unfortunately from a garden perspective, little rain. This can lull you into a false sense of security as you can tend to think your garden will stay like this for a long time, but it won’t! In 3 to 4 weeks time everything will spring to life and unless you have everything ready you will be playing catch up all Summer.

Right, so here we go these are some of the things you should be doing to get the best out of your garden this Summer. Cruella (my wife) has just read this over my shoulder and declared this the most boring thing she has ever read. I protested that it was essential reading for gardeners, she snorted and wine came down her nose. I am worried, I think she is beginning drinking earlier each evening ever since the cat died.

15th February: Things I have been doing lately.

💨 The garden blow job. Everytime I write that this blog gets the wrong sort of traffic. Those of you with a higher moral code will know that I am of course referring to blowing up leaves and other detritus off your gravelled areas, so please stop sending me emails for Russian brides.

You will remember that I reshaped the big Bay tree in my last post. Having left the leaves to dry out on the gravel it is now time to blow them all onto the lawn this serves two purposes: Firstly, it stop the leaves mulching down into the gravel and providing an area for weeds to set seed. Secondly, it’s an economical way of clearing up the leaves. Once blown on to the lawn the leaves can be mown up and then placed on the compost heap to mulch down. The photos below show my trusty blower having done its work and my mower after clearing the lawn.

💦 Checking irrigation. You should try and change your irrigation systems batteries at the same each year. I have 11 different irrigation systems all of which require the batteries to be changed annually. Now is the time to do this. Don’t assume just because your irrigation is working now that it will work all Summer. The batteries will go without warning and your precious plants will die quickly in the Summer heat. The photo below shows one of my many systems that need new batteries. Cruella has just gone by looked at my screen and made a deep moaning noise whilst making a pretend hanging gesture.

I think this looks interesting – and artistic – it could be a gardening still life.

✂️ Taking early cuttings. To be honest it is too early to take cuttings, but as you go round your garden you will find succulents that have broken off in the wind (or been molested by Labradors) either way pick them up and place them in a little bit of water till you are ready to pot them up. Because succulents store water in their leaves and stems they last much longer than normal cuttings which must be potted up straight away.

Before planting your new cuttings take a knife (never secateurs or you will crush stems) and cut just below a leaf node and dip the cutting in hormone rooting powder/liquid. The photos below show some cuttings waiting to be potted up, the preparation process and their final place on the potting bench. Click on each photo to enlarge.

🌾 Getting ready to sow seeds. Now is the ideal time to plant some seeds. Hopefully you saved lots of seeds from last summer’s flowers. If so now it’s time to get plants for free. If not it’s your own fault (I did tell you), now you will have to go out any buy new plants!

I use a small cheap three shelf plastic mini greenhouse to grow all my seeds. This is all you need in Spain, a real greenhouse is not necessary in our temperature. The photo below shows my mini greenhouse waiting in its Winter position beside my shed.

Alone and unloved, but about to come into the Sun again.

Before you start planting seeds you need to make sure that you have washed everything down to ensure you are not passing last year’s pathogens on to this year’s seeds. Thoroughly wash all your seed trays and remove any old compost attached to them. Also wash your greenhouse down inside and out. This will both get rid of pathogens and clean it up to allow maximum light penetration. The photo below show my seed trays sparkling as they dry on the drive.

I call this photo “drying seed trays in balustrade shadows”

🌼 Sowing Marigold seeds. Now different seeds require different techniques. Some require to lie on the soil, some need to have a layer of compost over them and still others need pushing deep into the compost. Cruella has just gone past again holding a bottle she looked at my pictures and pretended that she was being sick. I think we need a new cat!

Marigolds are one of my favourite plants for here in Spain. They are simple to grow from seed and flower all Summer long in full Sun. To sow Marigolds you need to mix up a nice store bought compost with some Perlite to let lots of air into the soil and keep it nicely free draining. The photo below shows one of my trugs with compost and Perlite ready to mix. Also it is important to mention that you should make sure there are no lumps in your compost as these will hinder the seeds germinating.

Once you have the compost ready then just sprinkle lots of seeds over the surface of the compost and lightly cover by sieving a light covering of compost over the top. I use a little sieve from a seaside bucket and spade set. The photos below shows the seeds sprinkled in their seed trays ready for covering with compost. The second picture shows the sieving process that covers the seeds. Remember, just a light coating of compost or the seeds will struggle. Click on each photo to enlarge.

🥔 Sowing Butternut Squash seeds. Growing Butternut Squash is very easy all you need to do is save some seeds from a store bought Squash that you have used in cooking. Make sure the seeds are clean of all vestigial plant matter and have been washed and dried. Then simply place the seeds on top of your prepared compost with about 2 inches between each seed. You finish the process by using your finger to press each seed about half an inch into the compost and closing the compost around the seed. The photo below shows the Squash ready for sowing.

🌸 Sowing Pink Trumpet Vine seeds. I like Trumpet Vine and harvest seeds every year so that if necessary I can fill gaps in my hedges with this robust and colourful climber. Again, the method of sowing this type of seed is different. A little tip, if you look at seeds they normally give you a clue as to how they will germinate and the best way to sow them. Marigold seeds have sharp pointed ends and a slight feathering at one end that makes the seed capable of burrowing into soft soil. On the other hand Butternut Squash seed is heavy and coated with a strong outer coating that will provide sustenance to the seed whilst it lies on the ground waiting to get covered by nature.

Trumpet Vine seeds are completely different they are an air borne seed that is blown off the plant in strong winds and uses its helicopter type seed wings to pilot itself away from the mother plant. The first photo below shows a handful of Trumpet Vine seeds, note how the seed sits in a translucent case in between its two wings (isn’t God wonderful). The second photo shows them sitting in a seed tray where they will barely be covered with compost. Click on each photo to enlarge.

💧 Watering seeds. If you water seeds from the top as a lot of people do, then it is likely that you will damage the seedlings or cause “damping off” where the seeds will succumb to mould. It is far better to place the seed trays into a large tray with water for 10 minutes. The compost will suck up just the right amount of water. Do this every two or three days, depending on where you are storing the seed trays. Finally, place your seed trays into your mini greenhouse or somewhere they can get lots of light but not too hot. The photo below shows my seeds safely tucked up. I will keep you informed of progress.

Everyone likes a happy ending.

The battle of the big Bay tree is over but Cruella is up to no good

Those of you familiar with this blog will know that the last job I undertake in the garden Winter cut back is to reshape my big Bay tree. I shaped this tree into a donut shape some 7 or more years ago and ever since then I have to do battle with it each Winter to bring it back into shape.

The process of fighting with the Bay tree is not for wimps. For weeks before the big day we glare at each other as we look for weaknesses in our respective defences. If you can imagine one of those boxing matches where the contestants belligerently eye each other up at the weigh in then you will have a flavour of what takes place. There are lots of false starts, sometimes as I walk by the tree I will kick the trunk just to show it who is boss. The tree in turn bashes me with its branches in high winds and drops things on my head.

As the day of the big cut back arrives, a deadly hush falls over the garden, all the plants know what is coming as they have seen this battle of the giants play out year after year. Neighbours set up chairs close to my fence and take bets on how many times I will fall out of the tree and how much blood I will lose. I can feel the excitement is getting to you so let’s get on with it.
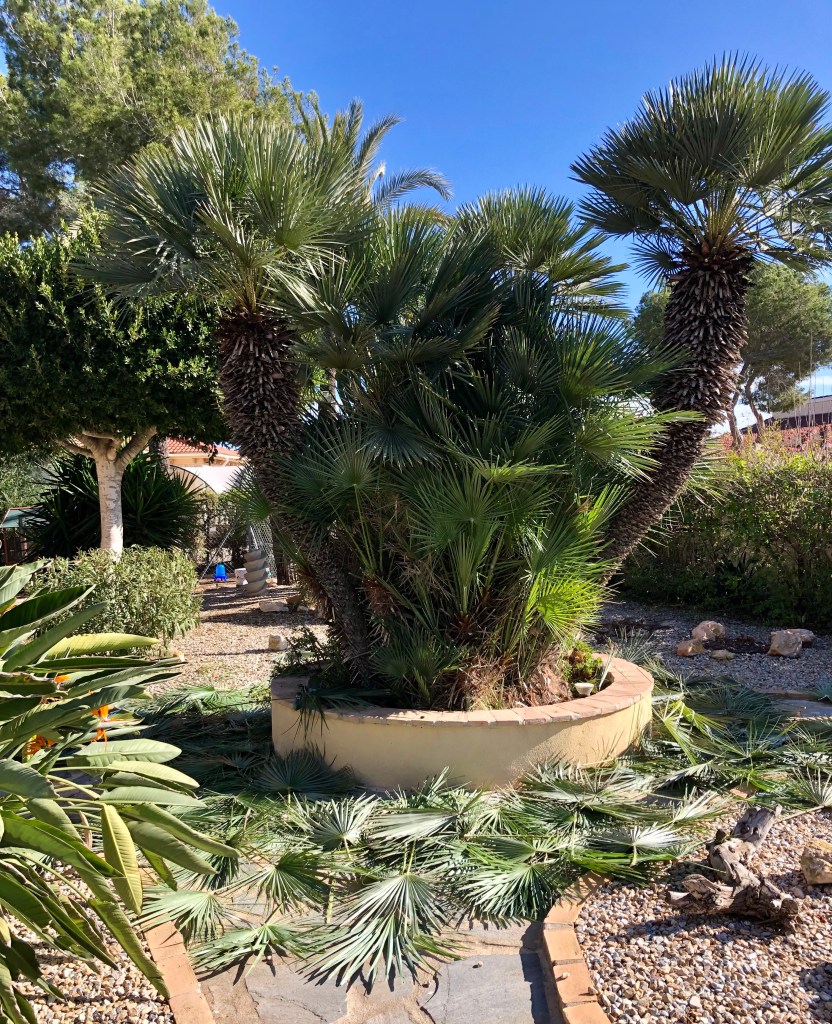
7th February: Things I have been doing lately.

🌳 Reshaping the large Bay tree. Now lots of people in Spain have a Bay tree in their garden, and most of them are just amorphous, shapeless lumps (the trees not the people). Now it needn’t be this way, the Bay tree is an attractive evergreen which complements many Spanish gardens and if shaped correctly it can add focus and texture to your garden as it is a useful foil to Yuccas and Palms etc. The photos below show my large Bay tree prior to its annual reshape (click on each photo to enlarge).

You can if you wish just shape the tree up by running a hedge cutter over it to make a rounded or pointed shape. But in my case I wanted to copy the Spanish style of donut shaped trees that you see in the large towns and cities. To achieve this you first need to get up into the tree (or get a professional) locate what is obviously the central trunk, and then cut this out with a chain saw. Be careful as Bays can have substantial trunks, and make way for the trunk as it falls straight down through the tree to the ground.

Once the main trunk is gone cut back any secondary large branches to leave a supporting “spiders web” of substantial branches supporting an outer structure of foliage. Then climb out of the tree and with a hedge trimmer begin the process of shaping the outside edges of the tree into a nice rounded shape. The photo below shows the array of tools I assemble for this task.

As you shape the outside of the tree you must be careful not to break through this outer ring into the centre of the tree, or you will ruin the effect for this year. The photos below show the initial shaping process half way through, (click on each photo to enlarge).

The final part of the process is to climb back into the tree make sure you are safe in the centre where the trunk used to be (or call in a professional) and with a hedge trimmer begin to open up the centre of the donut. Once you have done this you can flatten the top of the donut foliage and level off the foliage underneath. The end result should be a reshaped Bay tree that is eyecatching and will add interest to your garden. The photo below shows the Bay tree donut in all its glory. I took this whilst lying exhausted under the tree.
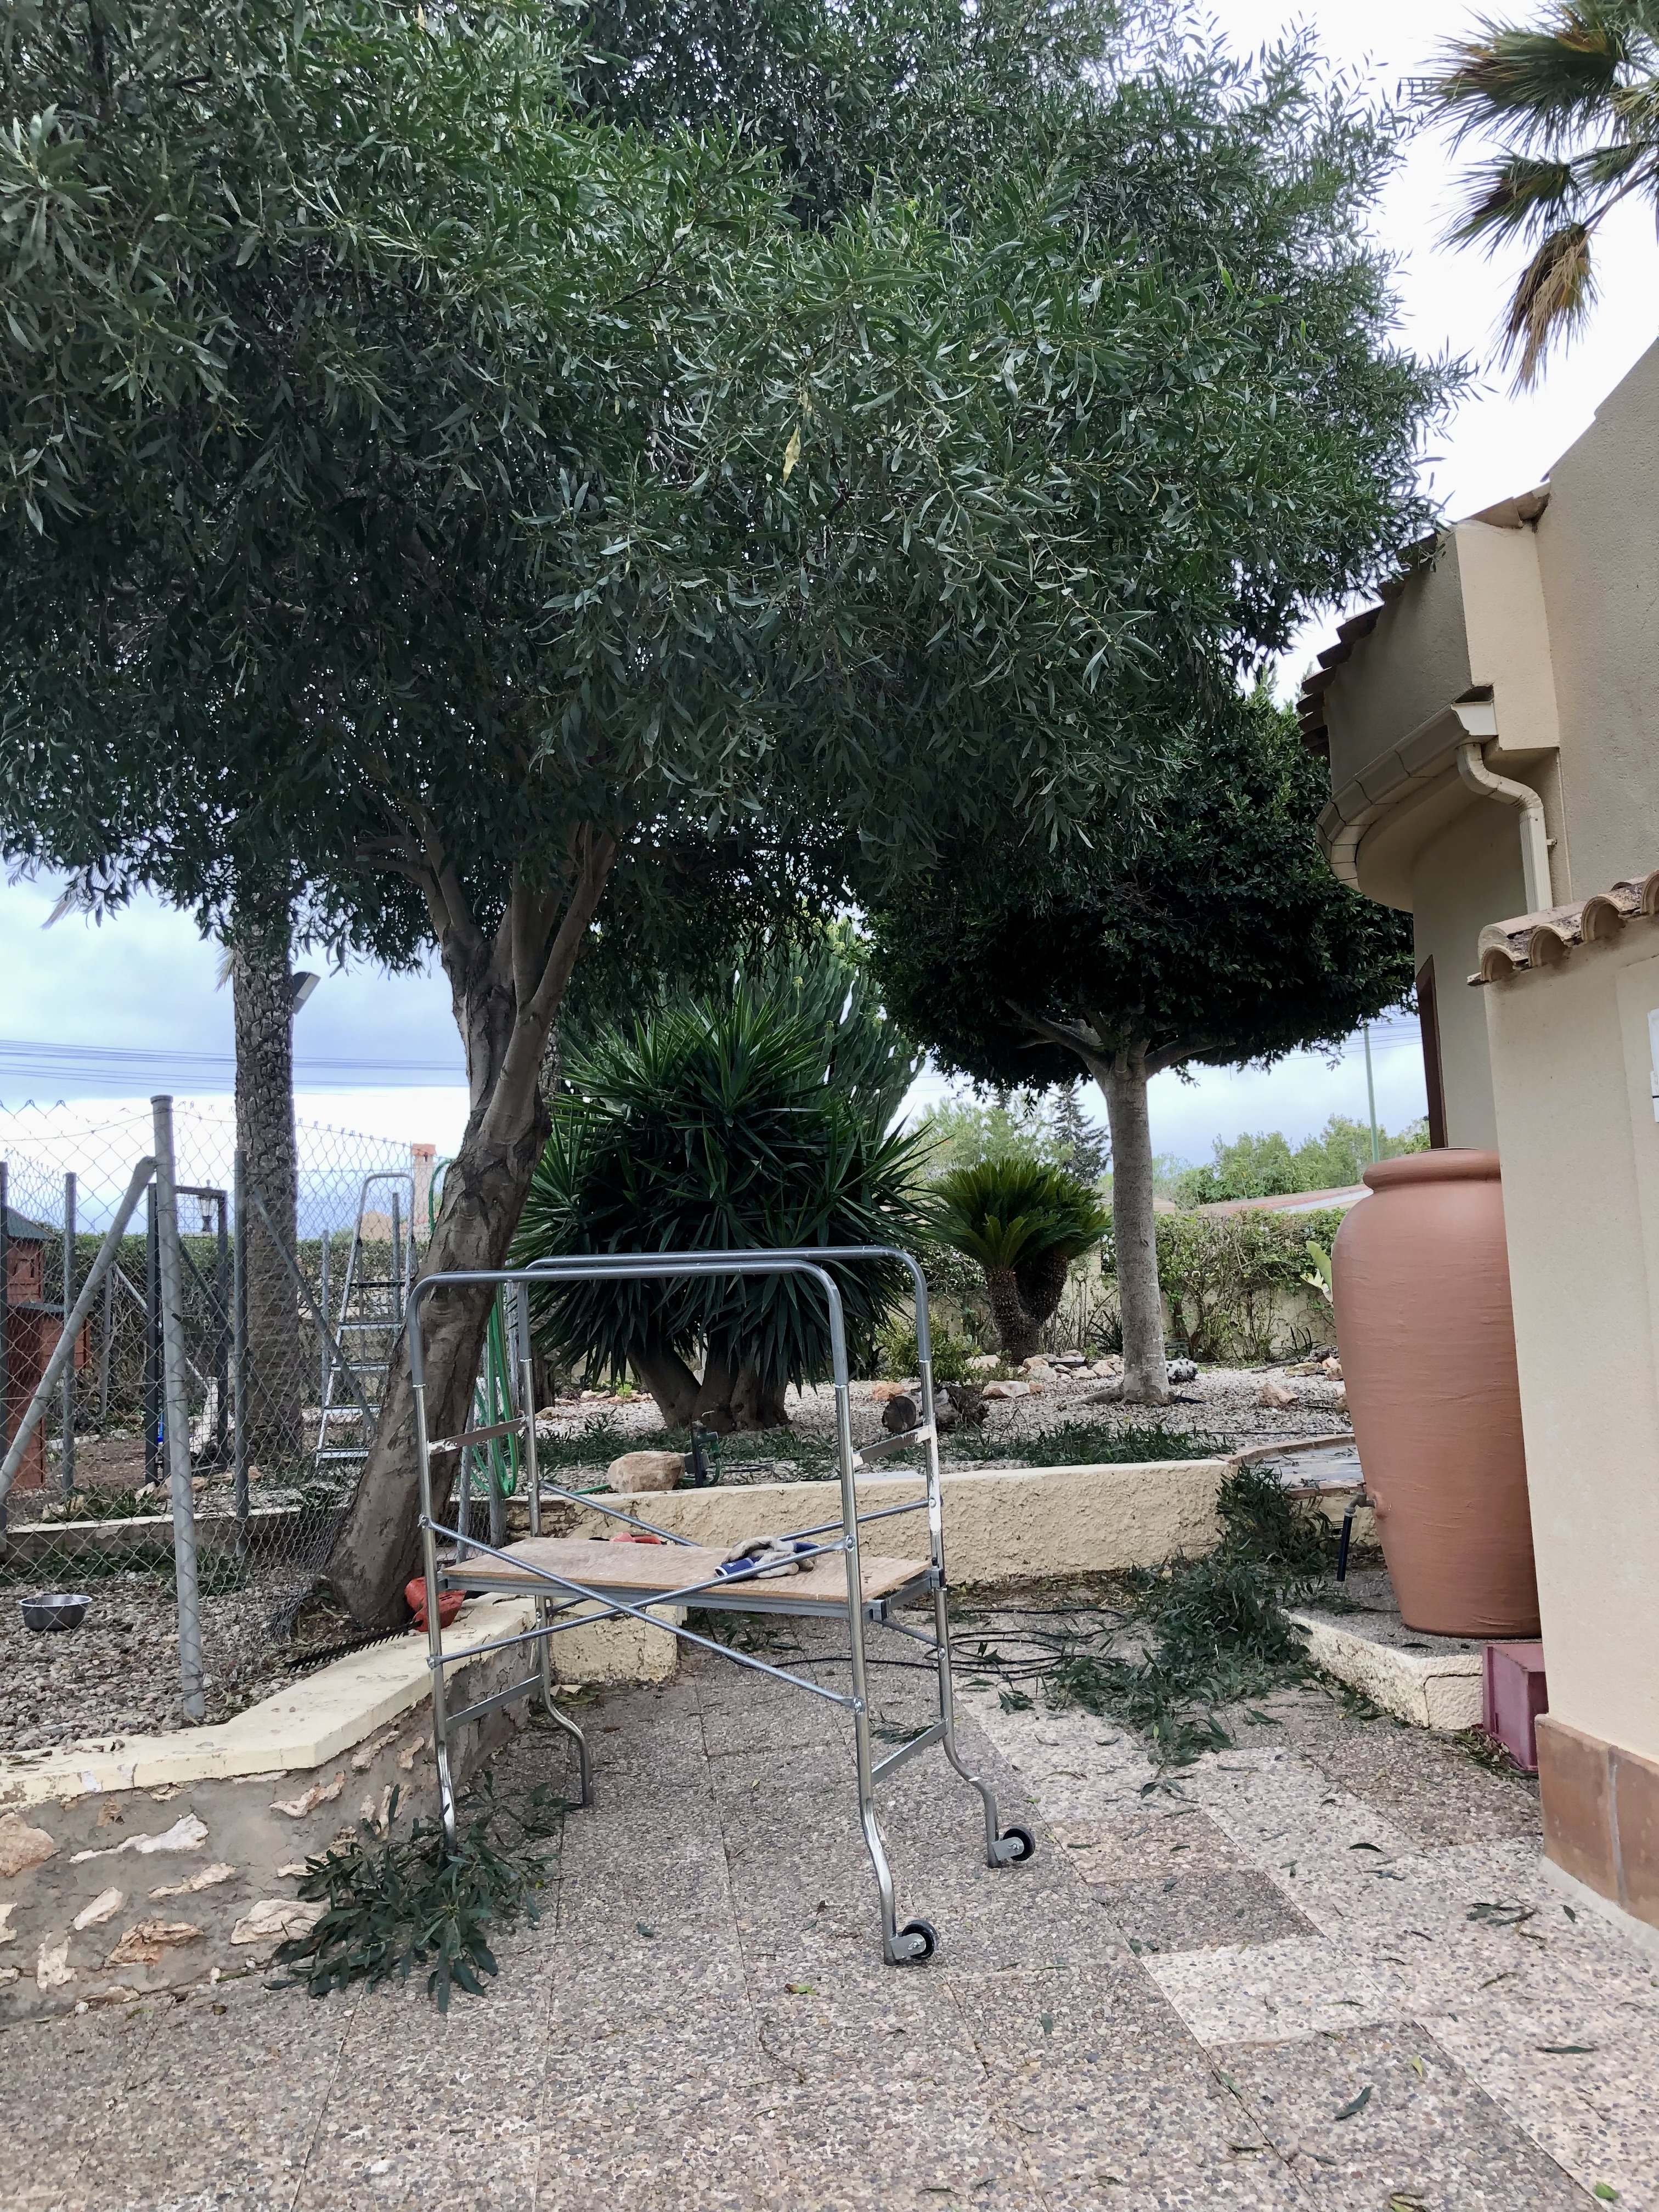
Remember as Mrs Thatcher said ”you may have to fight a battle more than once to win it”

☠️ Being attacked by a Yucca. After the battle of the Bay tree I was sauntering past Cruella (my wife) when I mentioned my triumph, she mumbled something about sacred trees and retribution. I paid her no heed as she is always mumbling incantations. Anyway, as I wondered round to the compost bins a large gust of wind suddenly sprang up and a huge Yucca that grows close by suddenly bent forward and smashed 10 or more of its spikes into my scalp. Now I will let you into a little tip. Yuccas that are irrigated will have long green, but ultimately pliable spikes that will bend at the point. Unirrigated Yuccas will have hard brittle spikes with black ends that become like daggers.

Yes, you have guessed it, this Yucca was unirrigated and therefore delivered 10 or more stab wounds to my scalp all of which became imbedded. I was forced to approach Cruella for help to try and remove them. She offered her help with alacrity, which in itself should have been suspicious. But anyway, using a needle, tweezers and medical alcohol she pulled, stabbed and tortured me as she removed most of them. She left only one that was so imbedded it was impossible to remove.

Three days later I could stand the pain no longer and decided to shave part of my head to get at the last spike. Well. I managed to get it out after a struggle, but the photo below shows what Cruella has done to my skull. I confronted her, but she says it’s just a way of remembering her lottery number and not to worry; what do you think?


The last job of Winter is done

I returned from my sojourn at our English house with what can only be described as Bubonic Flu/Ebola virus. Or as my wife Cruella called it “a cold”. I of course shrugged off her indifference and continued stoically. Her only attempt to in anyway medicate me was to make Chicken soup; but it had feathers in it, probably because the Chicken tried to climb out of the pot three times.

Anyway enough of this self pity, there was one last job to do before we can call it the end of Winter in Spain. Those who have followed this blog closely will know we have already had two stages of our Winter work: “the big Winter Chop Down”, followed by “the big blow job” and now finally we come to the last stage “shredding and chopping”.

21st February: Things I have been doing lately.

The shredding and chopping stage of the your Winter work starts with a period of patience. If you try to begin this stage whilst the cuttings are still green and the wood freshly cut then all that will happen is that your shredder will become constantly blocked by tree leaves, whilst your chainsaw will only cut slowly through “sappy” branches.

So you need to cut everything down and then leave it stored somewhere for at least a month. This will allow the leaves to become brown and crispy and the branches to dry out. The photos below show some of my mountainous piles of cuttings.

D6C9824C-A512-4307-8D91-D3E845CCA66F
Crisp brown and ready to shred

First Stage: Loping and shredding.

The first stage of the process requires you to use lopers to cut out those branches and stems that can be usefully put through your shredder. Anything that is to thick to be put though your shredder should be put to one side ready for the next stage with the chainsaw. I use shreddings in two ways. Firstly , I add a couple of buckets to my compost heap. These will mix nicely with the first mowing of the grass and give wonderful compost in 6-9 months. Secondly, I use the shreddings to line the paths in our wood. This is a cheap and cost effective way to make your paths look interesting and they supress weeds very well.

The photo below shows me in action, having cut the branches off with lopers and running them through the shredder. I have then put the thicker branches to one side for chainsawing later.

152D0EC0-847B-47B0-B28A-42C75D9589C5
Shredding – the poor man’s mindfulness

Second Stage: Chainsawing.

I know I don’t have to tell you all how dangerous chainsaws are. It only takes a second for you to be minus a finger, hand or leg. So make sure the area is clear of any obstacles; don’t try and chainsaw in the middle of a tangle of branches and never do it on your own; always make sure someone else is around. I have two chainsaws; one electric and the other petrol. I prefer the electric one as it delivers constant power, plus the fact I can never get the petrol one started. If using an electric chainsaw then make sure the cable is over your shoulder and away from any possibility of dangling into the blade.

The photo below shows my work area and all the tools you need for this stage.

0BAA1A5B-6E50-4233-96F1-DFC5FDCBA661
A modern montage; worthy of placing in a gallery

Third stage: Clean up

The last stage is the clean up after everything useful has been cut or shredded. As you can see in the photo below I have ended up with piles of small logs cut to size to fit in our outside burner. These are ideal as it allows us to have barbecues outside before we get to the heat of summer.

F797C733-6C32-4555-A1F5-2E656881E6E0
A job well done. I now declare Winter is finally over.

I wish to point out all of the above stages were carried out against the advice of the World Health Organisation (WHO). Who informed me that a lesser man would have buckled under the strain of my disease. If you look closely in the photos you can see the fortitude and perserverance in my eyes; Cruella says they just look baggy and red.

The big blow job is over!

My wife Cruella has just explained to me that the above heading could be misconstrued. I informed her that she was being puerile and that I was talking about the second big winter job of blowing all the dead leaves away after the big Winter Chop Down. I further explained that gardeners eyes and minds are set on higher things than the gutter. I reminded her that Oscar Wilde said “we are all in the gutter, but some of us are looking up at the stars”. She asked if this was Kim Wilde’s dad and if Lady Windermere was her greatest fan. Honestly, what more could you ask for in a blog, great literature and gardening. Mind you there has been a huge increase in clicks on this post and I have been invited to lots of parties.

3rd January, Things I have been doing lately:

💨 The big Winter Blow Job.

Anyway, let us turn to other things. I am in England at the moment looking at our English garden and pondering what needs doing. But before I left Spain I did complete the big BJ – I can’t even say it anymore Cruella has ruined it for me.

Those of you who have completed your big Winter Chop Down will know that no matter how well you have cleaned up you will have left leaf detritus behind on both your stoned areas and lawns. It is imperative that you fully clear this away, for if you don’t it will break down to a fine tilth on the stones and encourage weed growth later in the year. Whilst if left on grass the leaves will become wet and rotten and kill patches of grass. If you are lucky enough to have a leaf blower – and every man should – then just use this to blow across the stones and if possible onto the lawn.

The photo below shows me manfully showing those leaves who is boss. As a fashion note I am wearing my cap with the title “head gardener”. Cruella bought me this for me and I got her one that says “kitten murderer”; she wears it with pride.

EA90EC94-B528-4811-A9EB-07D42F997492
I am saying no more – I have had enough of smut

Once you have successfully blown all your leaves onto the lawn then the best thing to do is to mow them up with your mower. This has two clear benefits. Firstly, it saves you the job of having to rake up and bag all the leaves. Secondly, the resultant leaf mould, which has been chopped to a fine tilth can now be placed on to your compost heap. Normally leaves should be composted separately but the chopping of the mower renders them suitable for compost. Don’t worry if you don’t have a lawn just blow or rake the leaves on to a path or drive and then run the mower over them.

The photo below shows me in the final stages of mowing the last remnants of the leaves.

43BBCEFF-0540-4EA7-9C79-1AE5C9C82C5A
I am wearing my matching lawn mower t-shirt

🌳 Cutting back a tree in England

This next bit is intended for tree specialists and mainly for my fellow garden blogger Tony Tomeo (tonytomeo@wordpress.com). The tree shown in the photo below grows outside one of the windows in our English house. As you can see from the photo it has a propensity to try and grow over the window. This means that every year I have to perch precariously on a ladder and try and reach over to trim it with a hedge trimmer. Ideally what I would like to do next year is to cut it back to about 5ft leaving just bare branches. It has an excellent structure of thick branches which can just be seen in the photo. I assume it would then releaf in the Spring and I would then be able to keep it trimmed at a correct hight to suit me. Comments please.

4DFDD175-763A-4B69-9D77-3719DADA6F5B

Taking care of my English garden

We are currently at our home in Kent taking care of our English garden. Now this is something completely different from Spain; everything is still dormant and will be for at least a couple of months. We return to Spain soon and then the real work starts – get ready for March the month when the Spanish gardener’s summer work takes off.