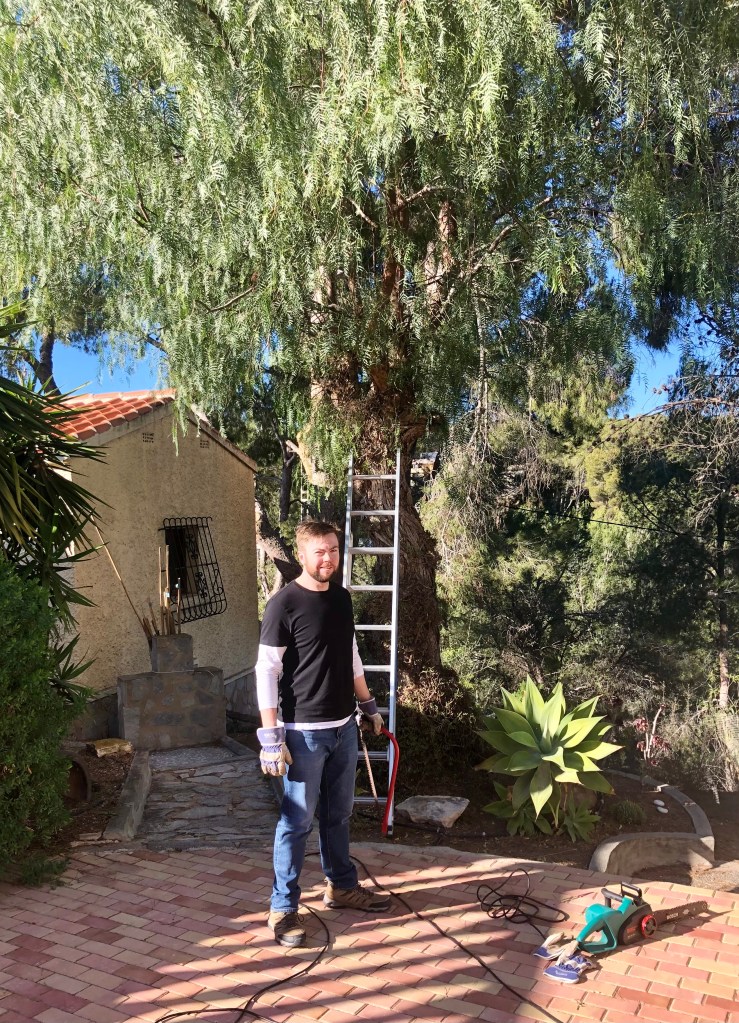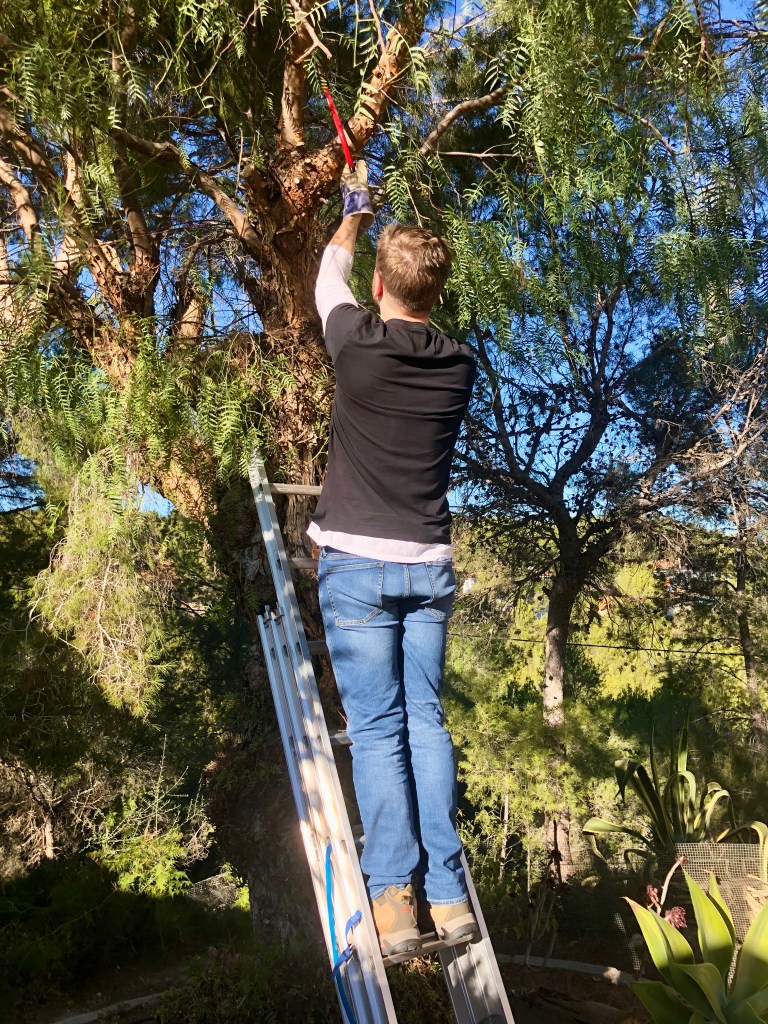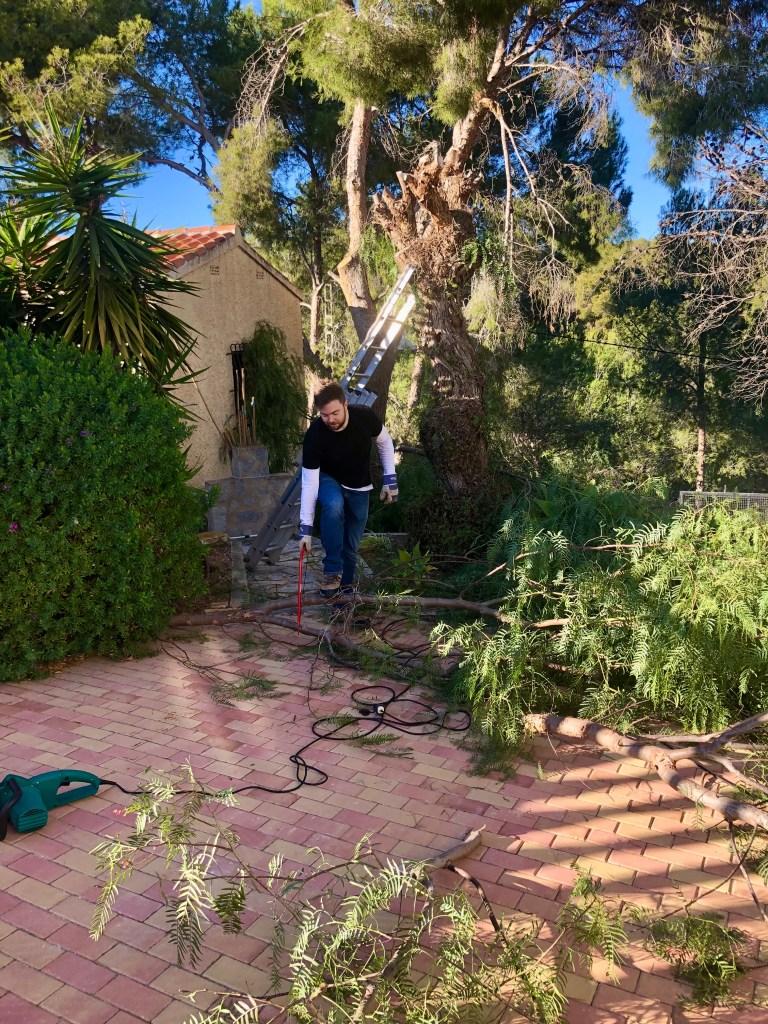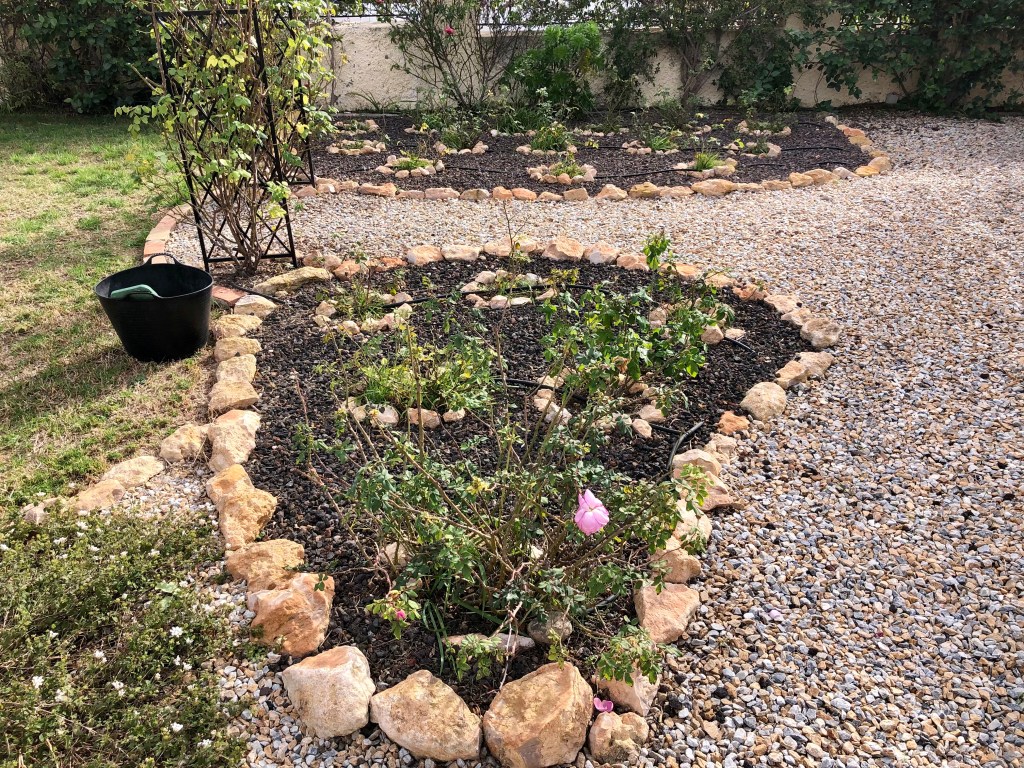
The big Winter cutback Part 3 and the chickens get a soft play area

On we go with the big winter cutback, part 3. You should be more than half way through the systematic cutback of your garden, your back is aching, your compost bins are filling up, the cold and wet days haven’t stopped you and the end is in sight.

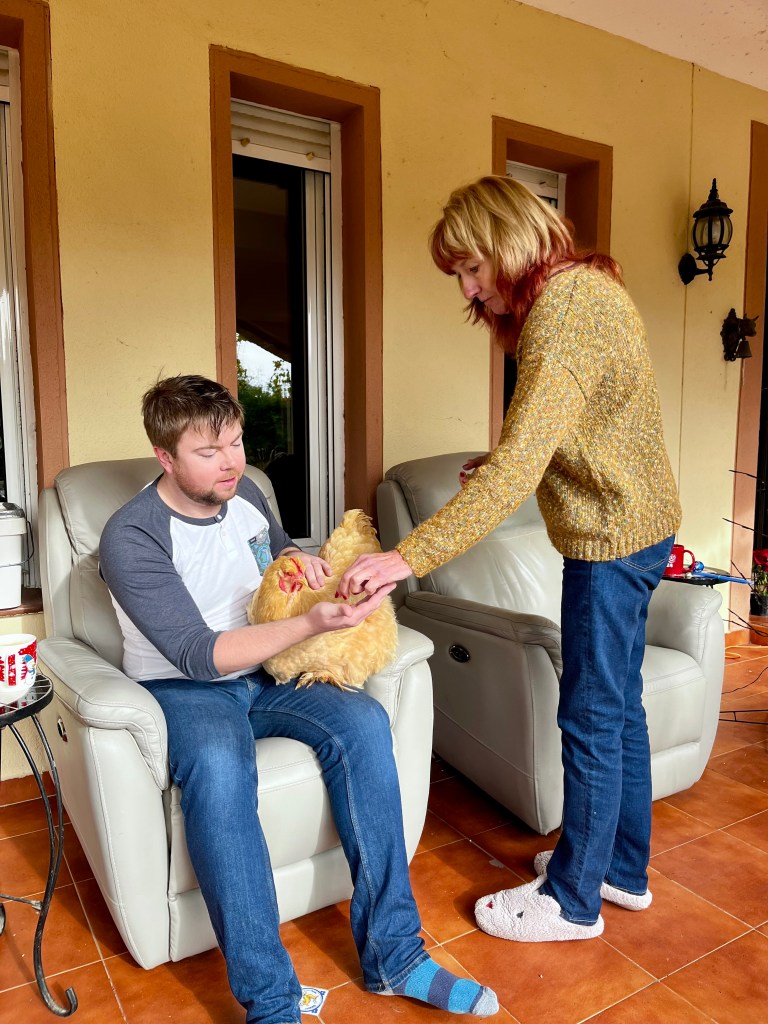
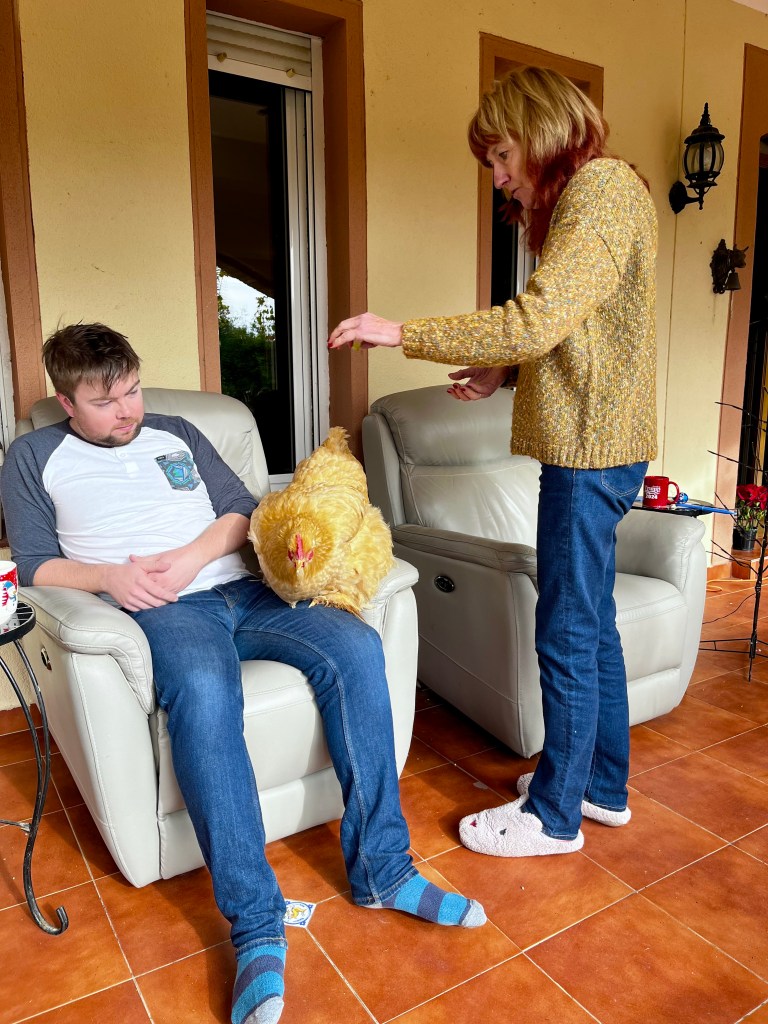
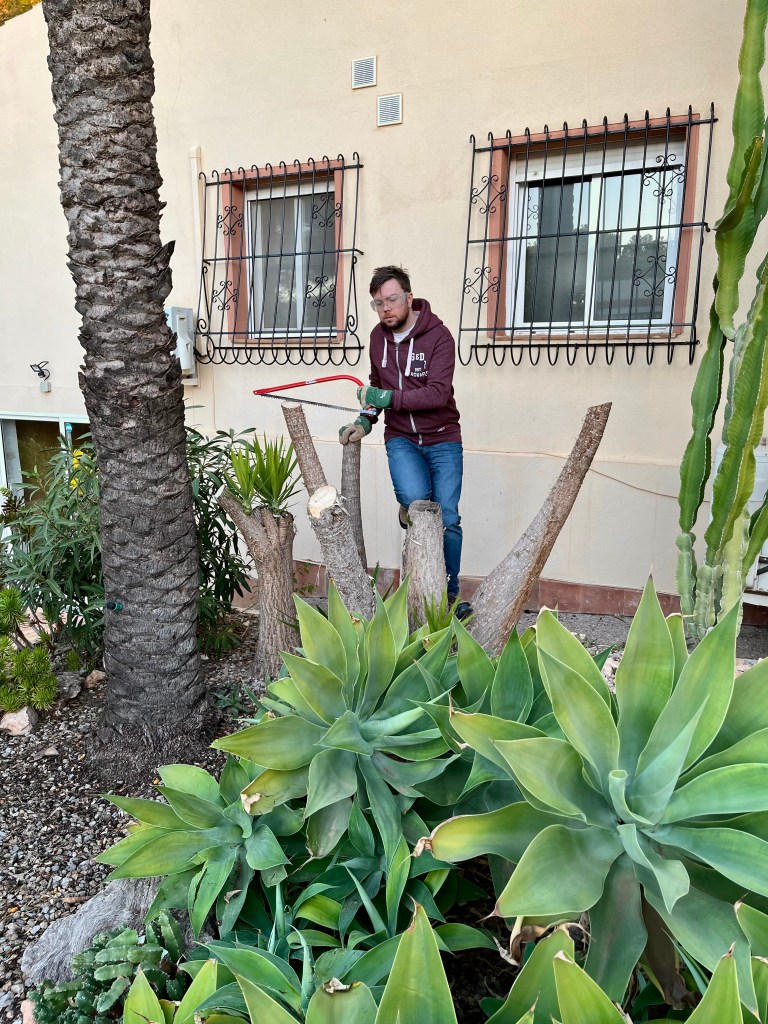
All was going well until Cruella (my wife) demanded that I stop messing around gardening and create a new soft play area for her girls. I explained how essential the winter cutback was but she refused to be moved insisting it was a human right as covered under the UN Charter and the ECHR. I explained that her chickens were not human and therefore not covered under this legislation. She has now hired human rights lawyers and is seeking a judicial review. Anyway enough of this nonsense on with the gardening.

24th January 2026. Things I have been doing lately:

  • Pruning fig trees
  • Dealing with broad leafed weeds in grass
  • Cleaning up and composting leaves
  • Cutting back hedges
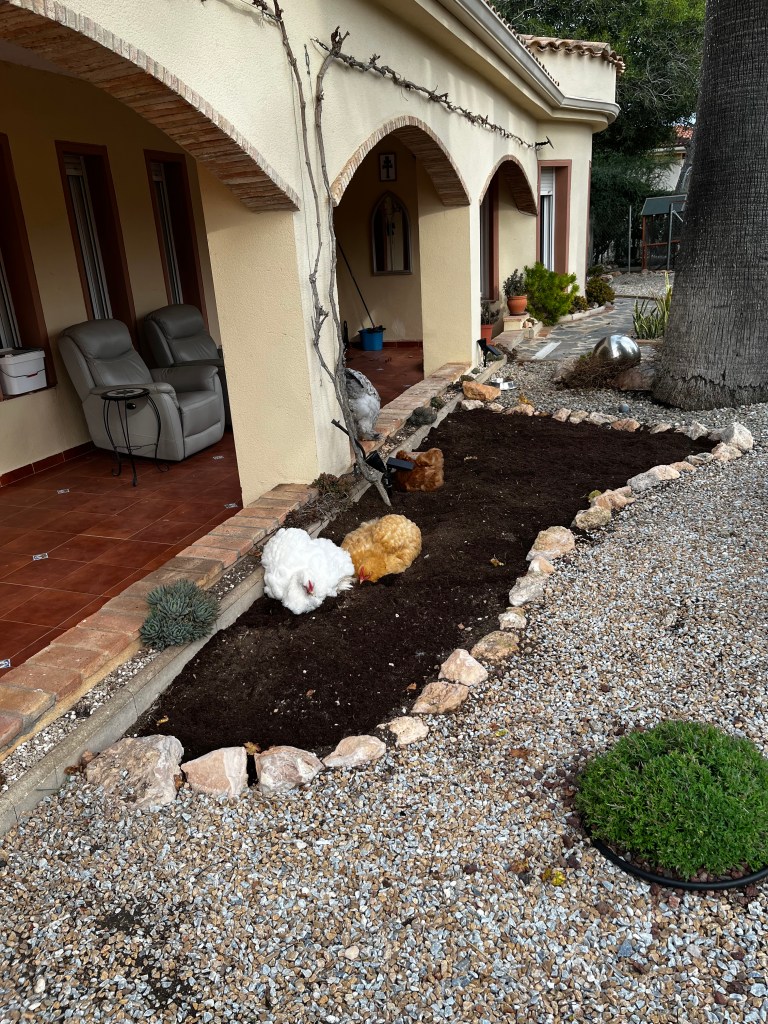
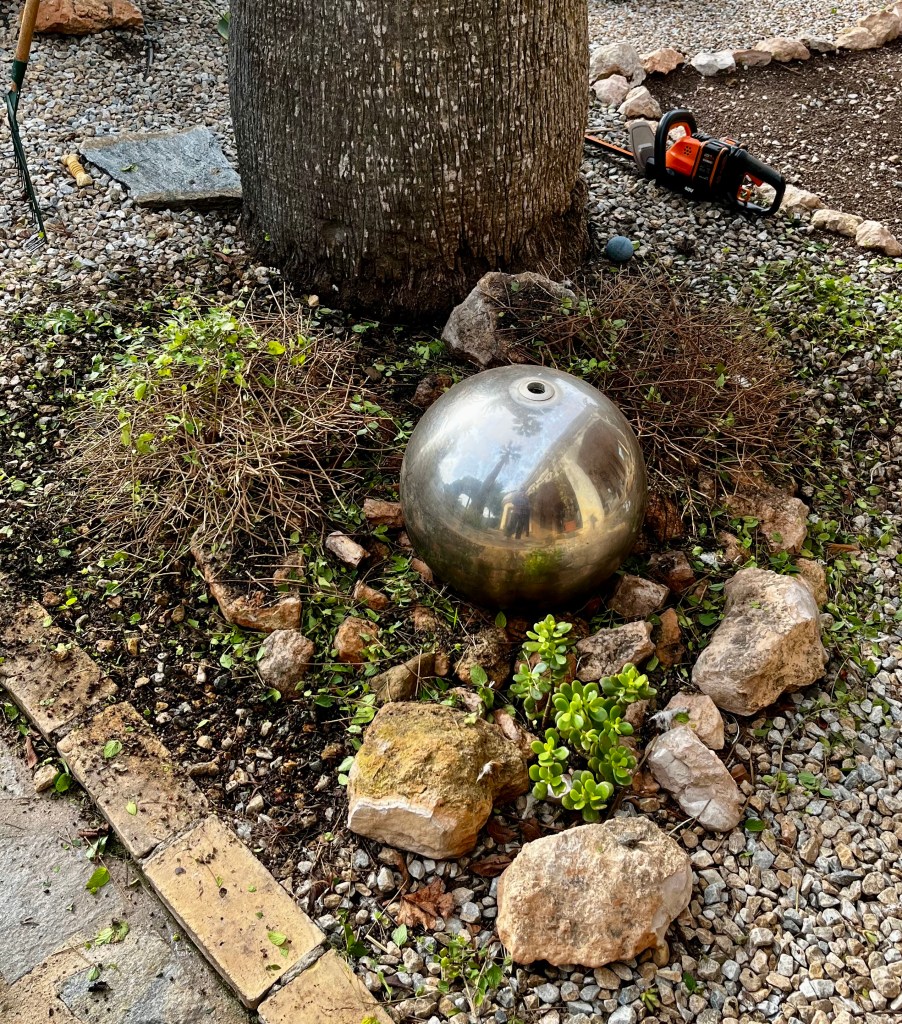
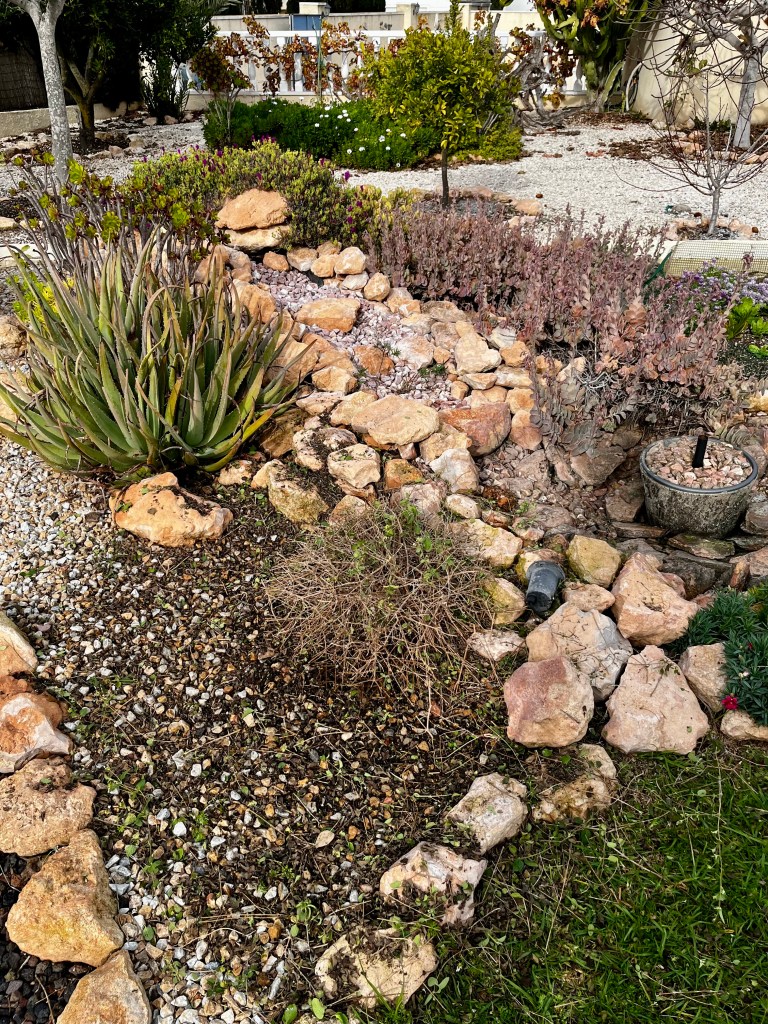
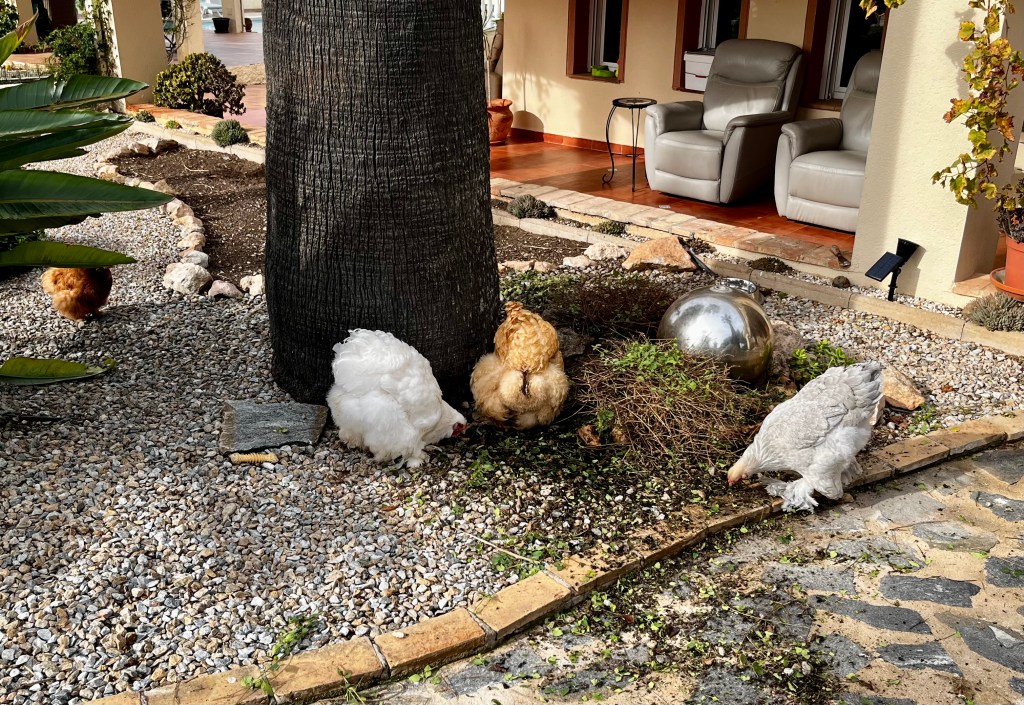
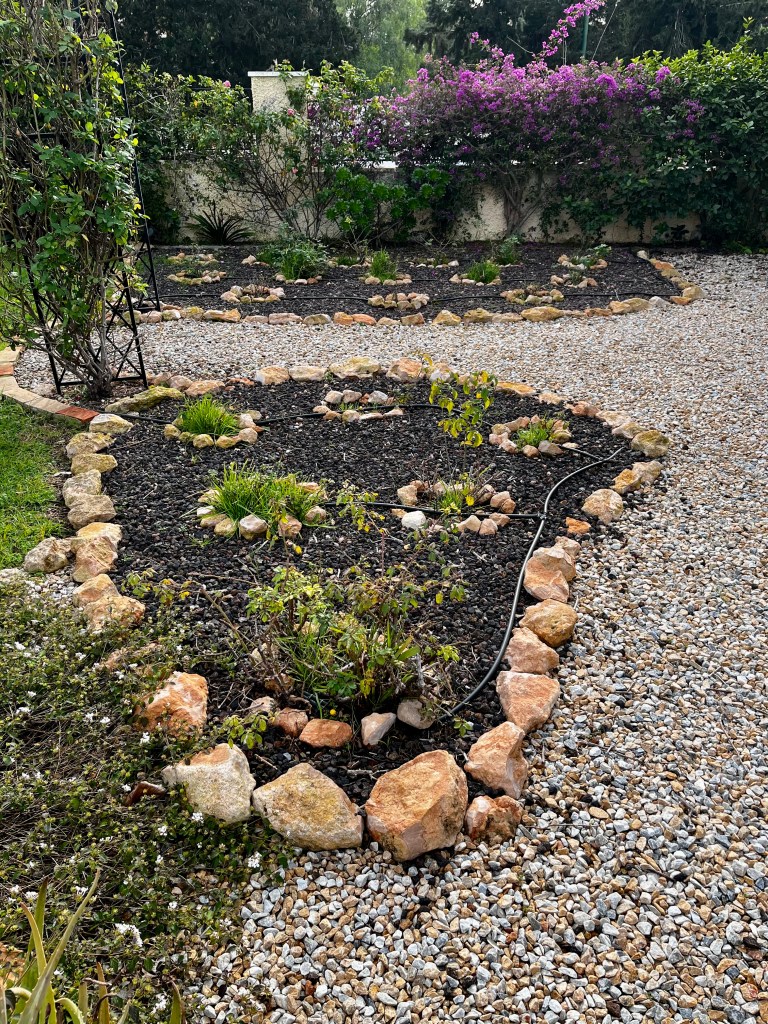
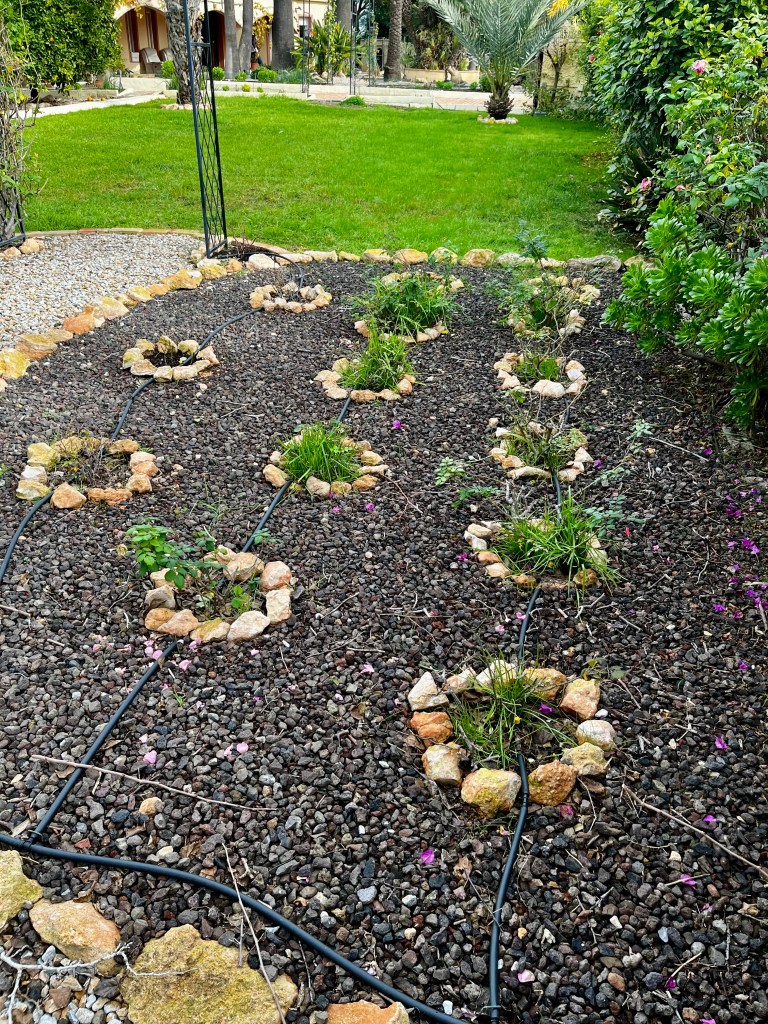
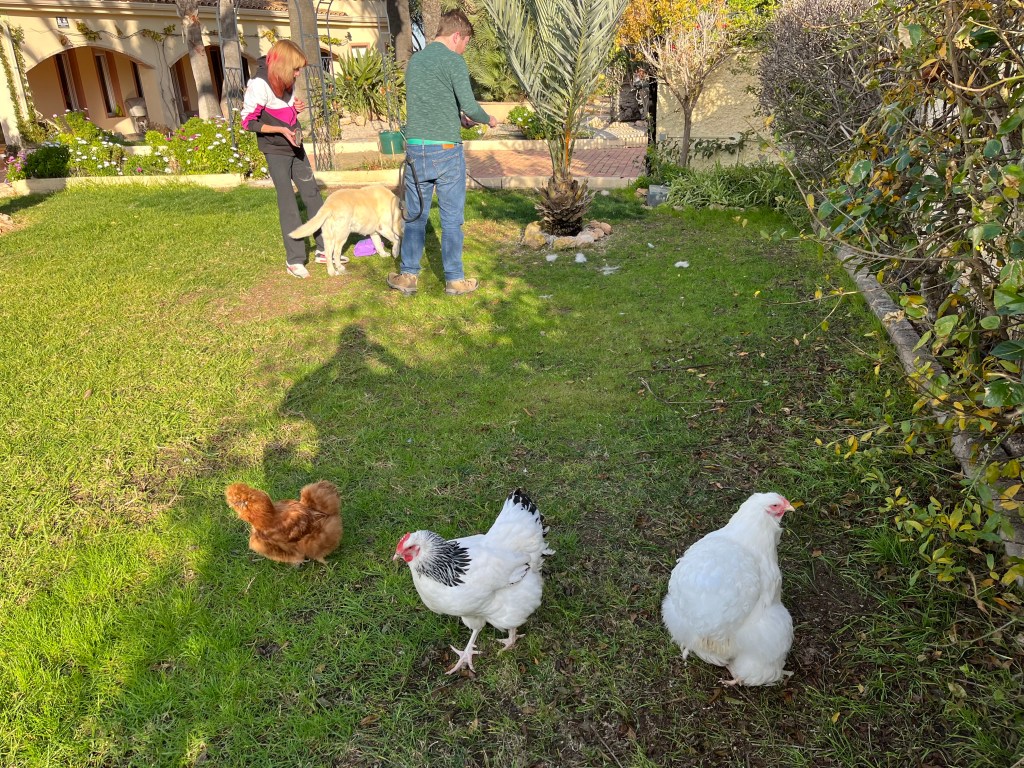
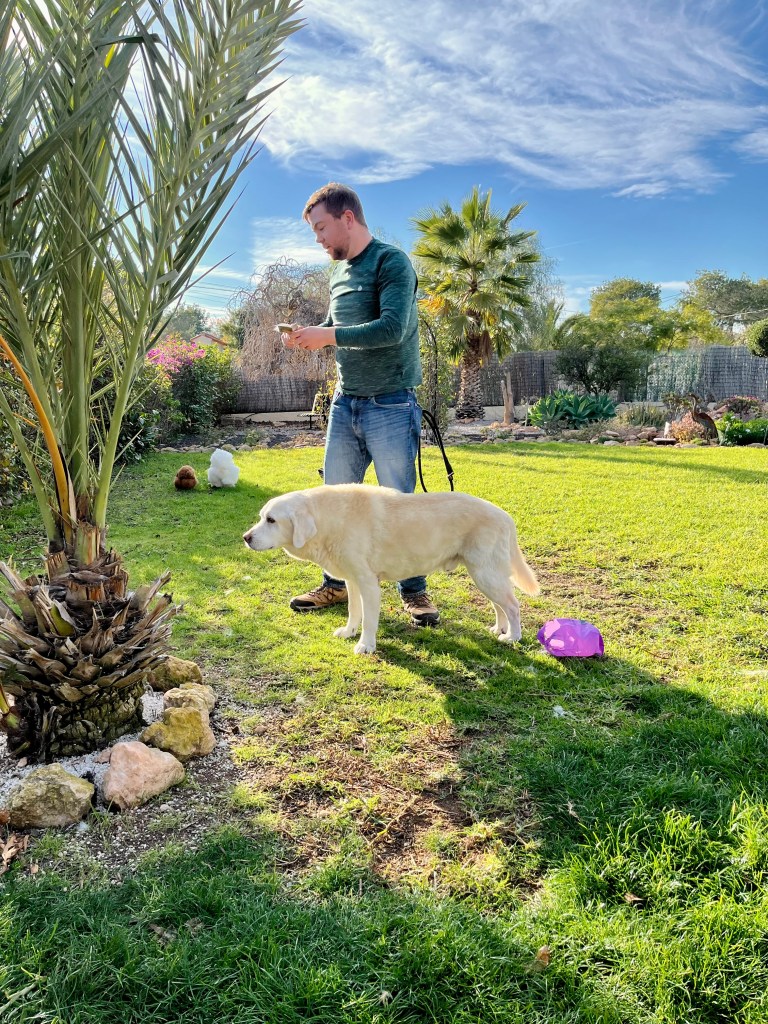
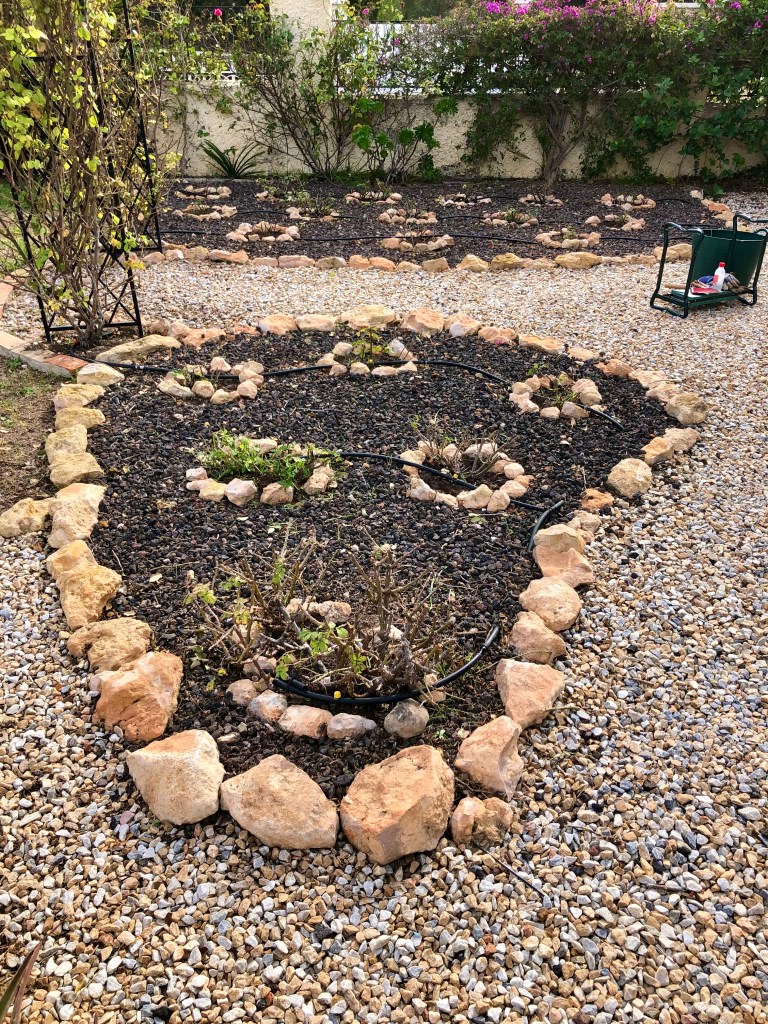
  • Refurbishing the chicken soft play area

Pruning fig trees. Most fig trees in Spain are left to grow into huge towering hulks that lower over gardens in threatening sprawls. All too often their fruit is too high to pick and when it falls it makes a sticky mess all around the trunk mixed in with bird poo that creates a dead zone under the tree.

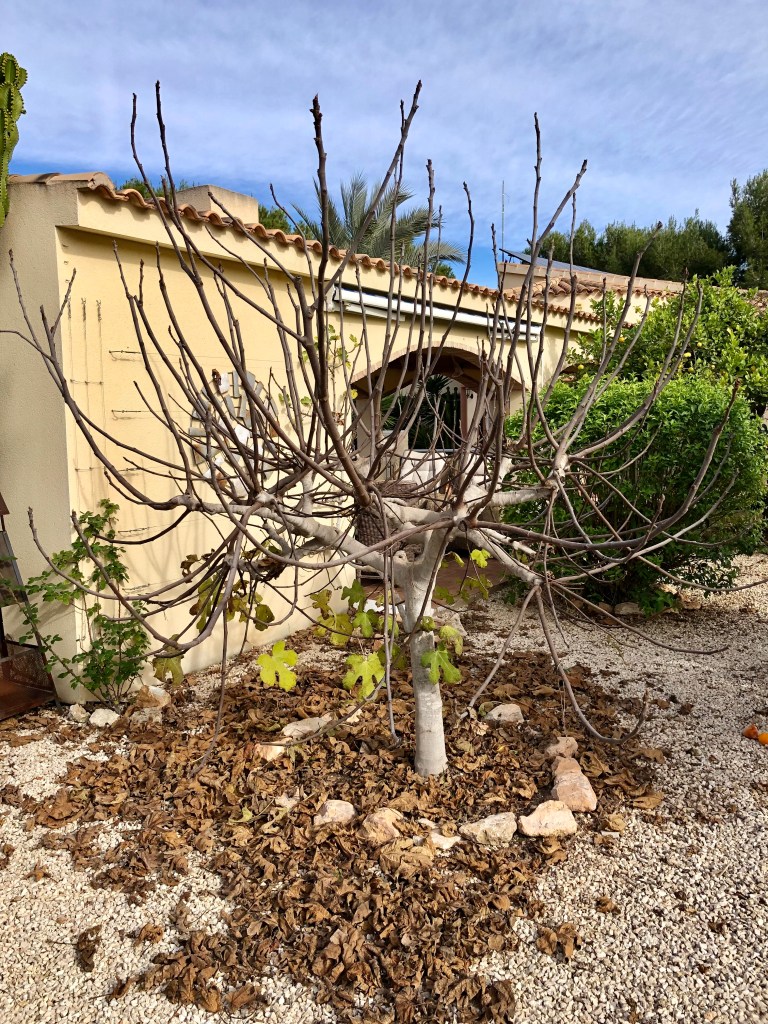
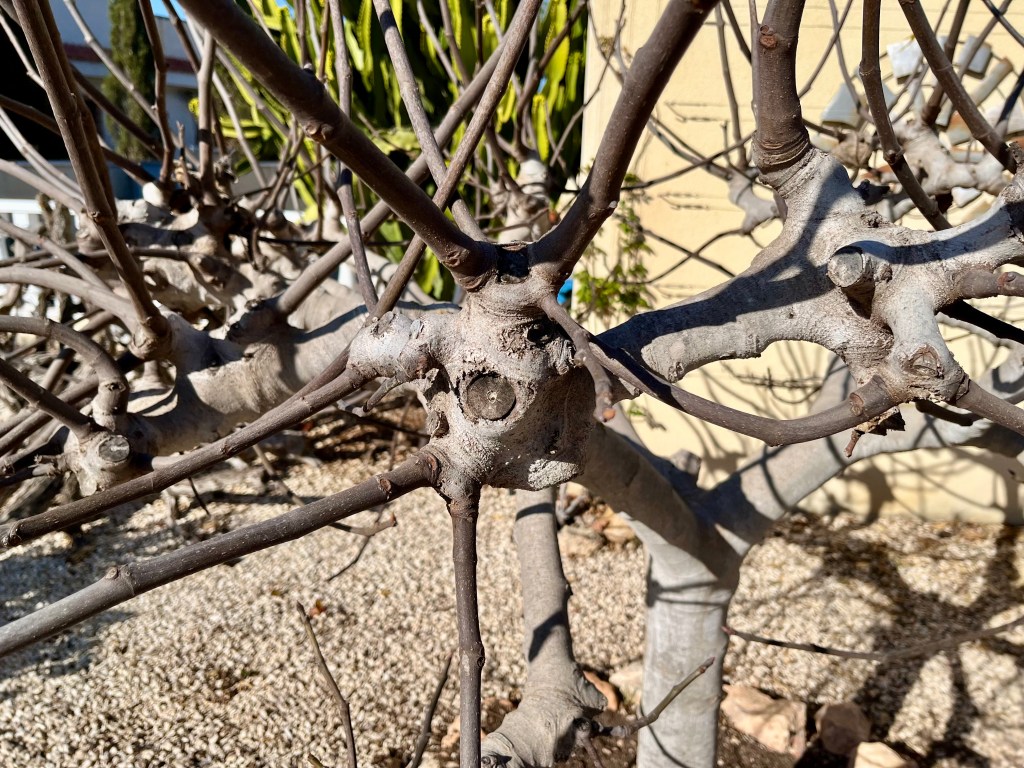
It needn’t be this way you can carefully train your fig to be a fruitful adornment to your garden. The starting point is radical pruning. Now this can be scary as you have to prune back to a few strategic branches spaced around the trunk of the tree. Once you have pruned your tree back to these strategic branches, then all you have to do is cut back to these branches at the end of each growing season. The photo below shows one of my trees ready for its annual cutback.
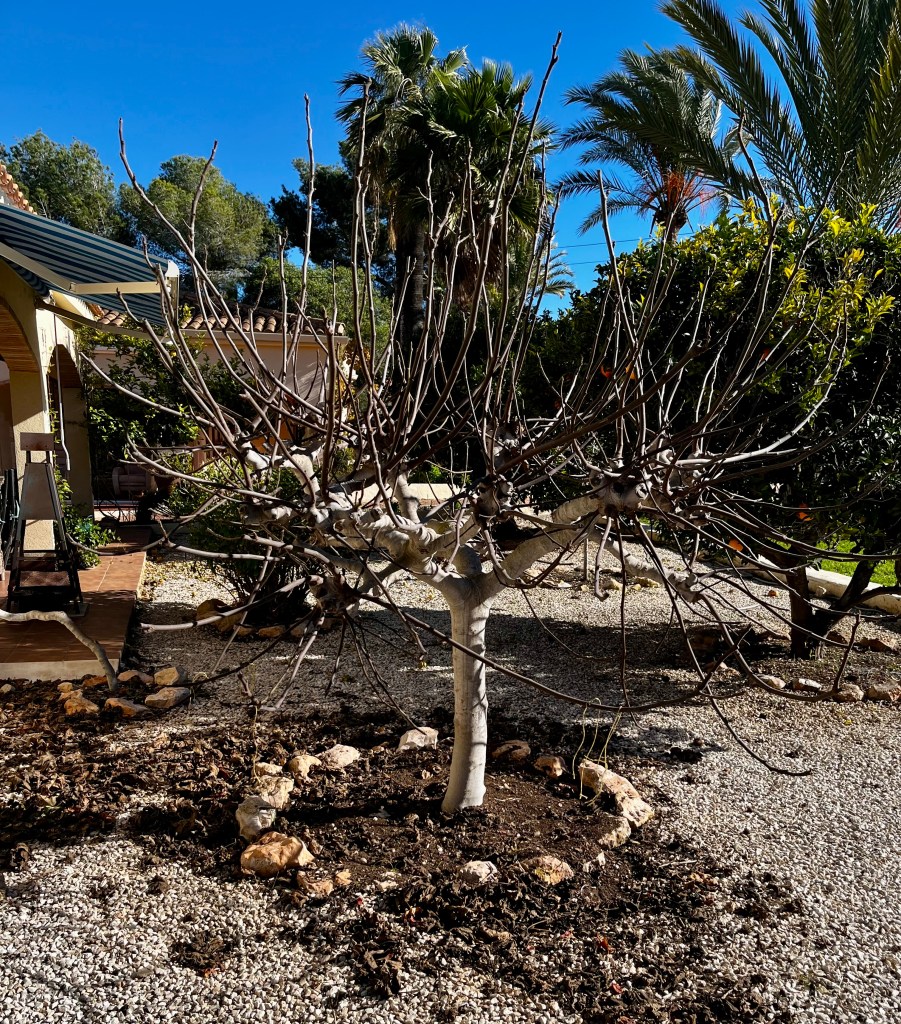
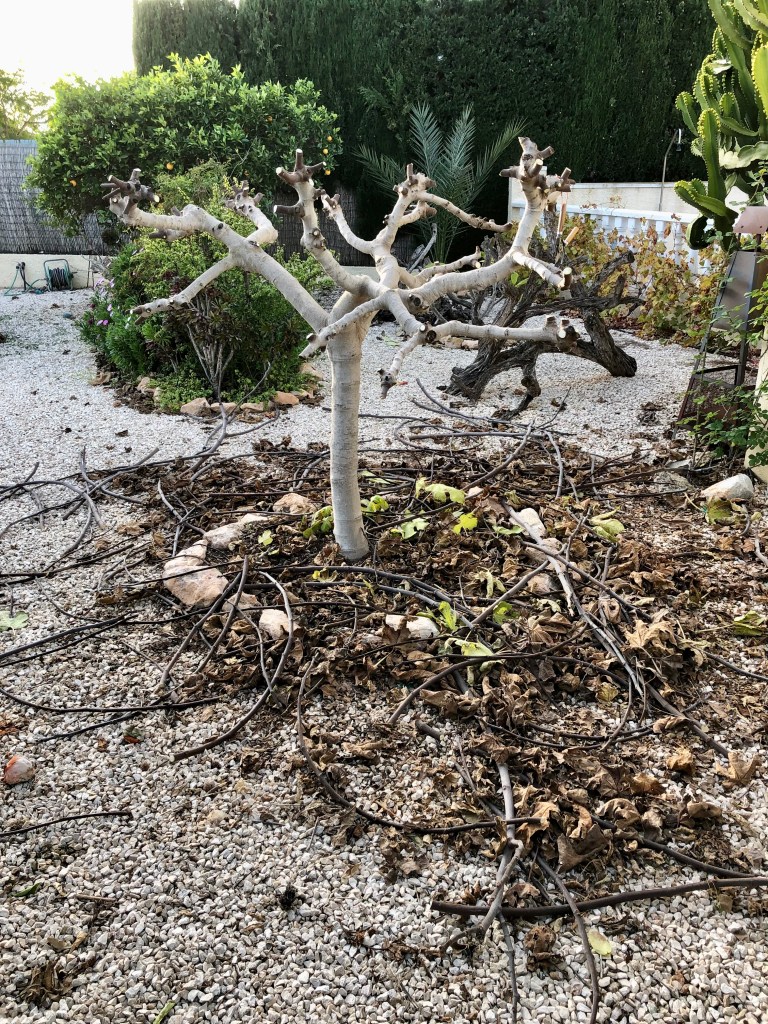
From this photo you can see that the tree has been pollarded back to selected branches and the long “whippy” growth is the only part that will be pruned. Before you begin pruning ensure that all the leaves are off the tree as this will mean that the caustic sap has drained back to the roots and you are in no danger of being burnt.

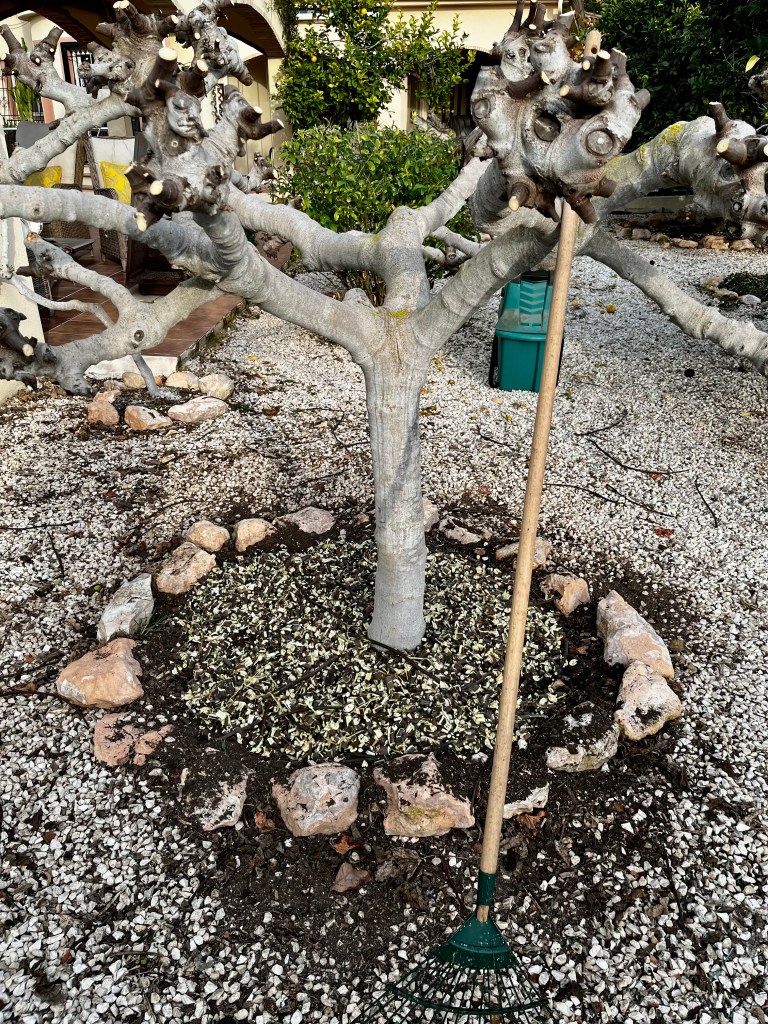
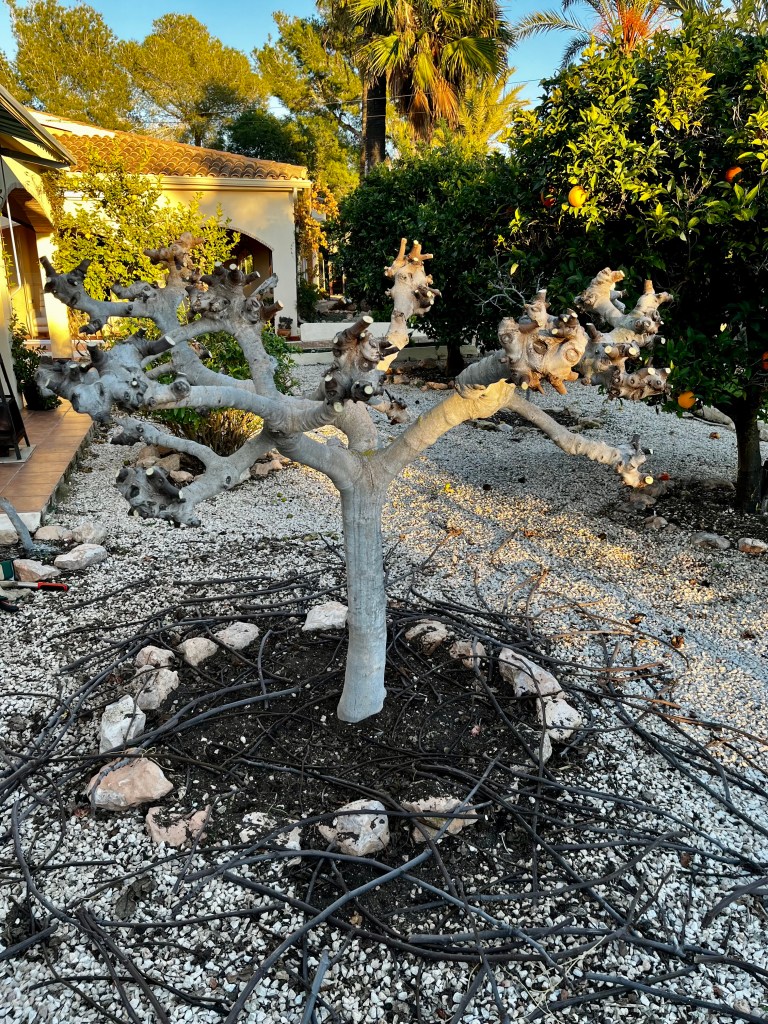
All you need to do then is snip all the new growth off using your long handled lopers. Just take them back to the knuckle at the end of the branch and the new growth will grow from this point. The photo below shows the tree ready for the new growth.
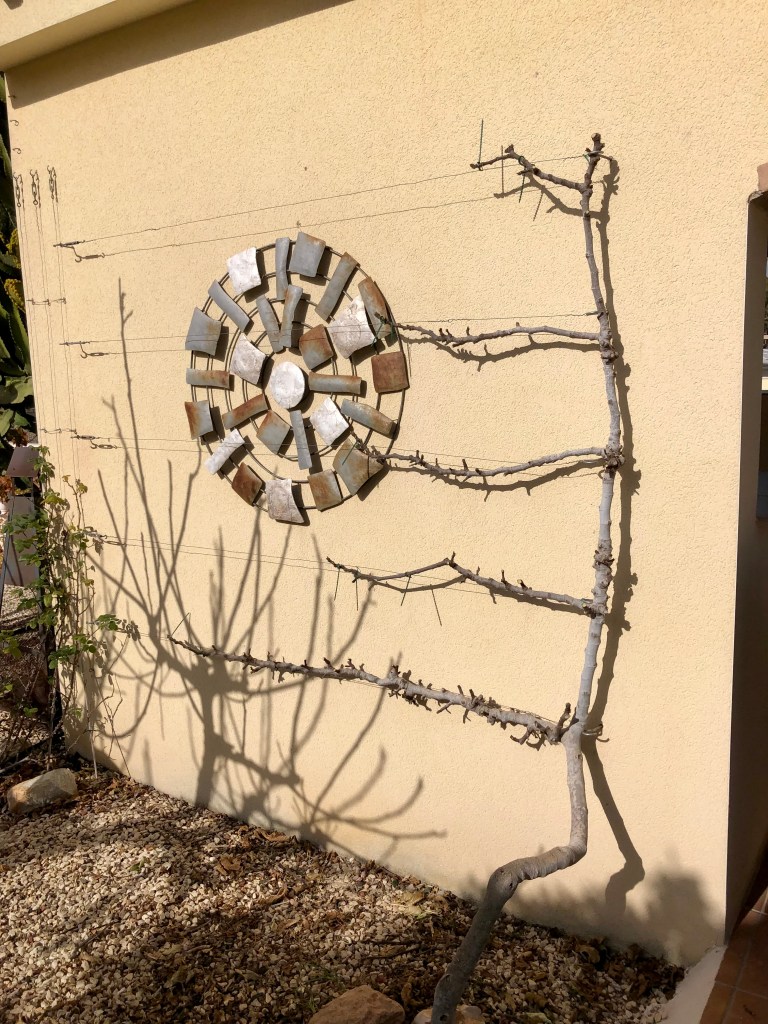
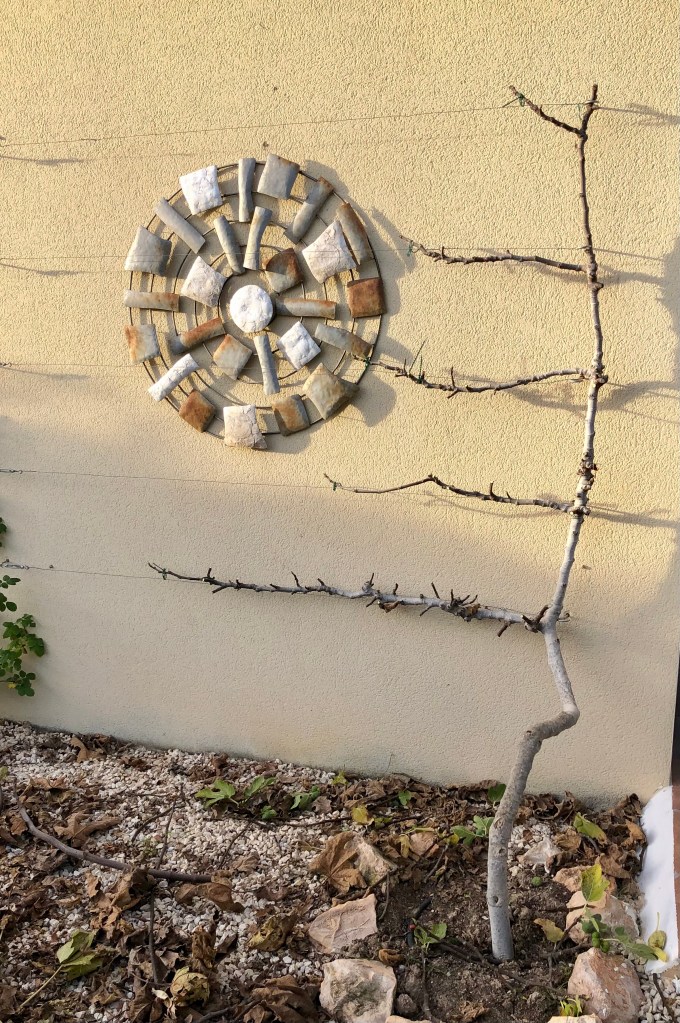
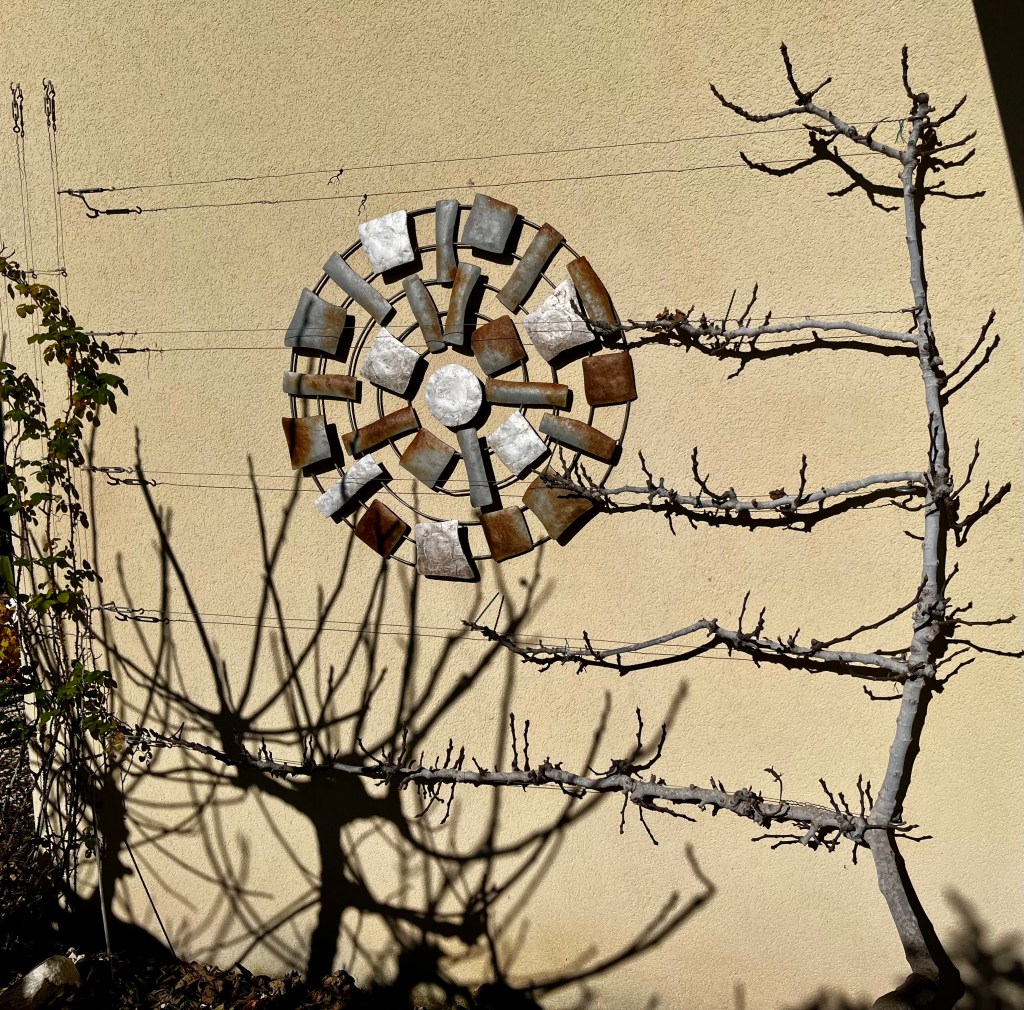
In addition to my standard fig I also have an espalied fig that I have trained along a wall over a number of years. The process is the same; just take off the side shoots and leave the main branch. The photos below show the espalied fig before and after.
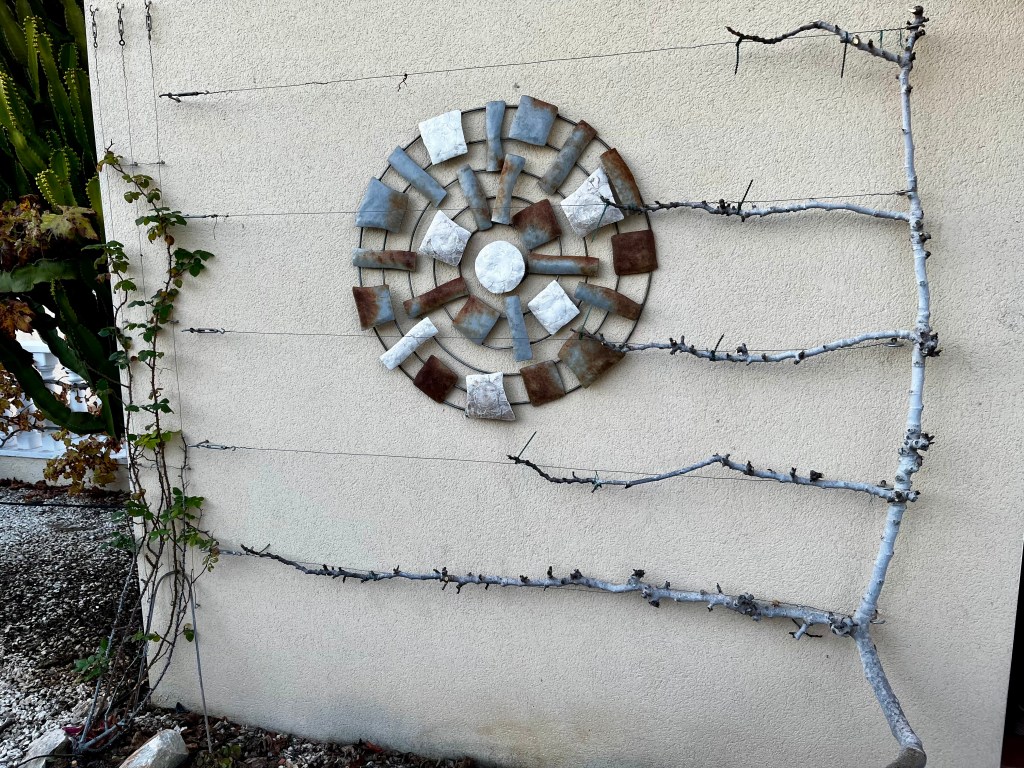
Dealing with broad leaf weeds in grass. Now I know not many of you have lawns in Spain, and that is perfectly understandable. However, for those of you that have, now is the time to treat for broad leaved weeds.

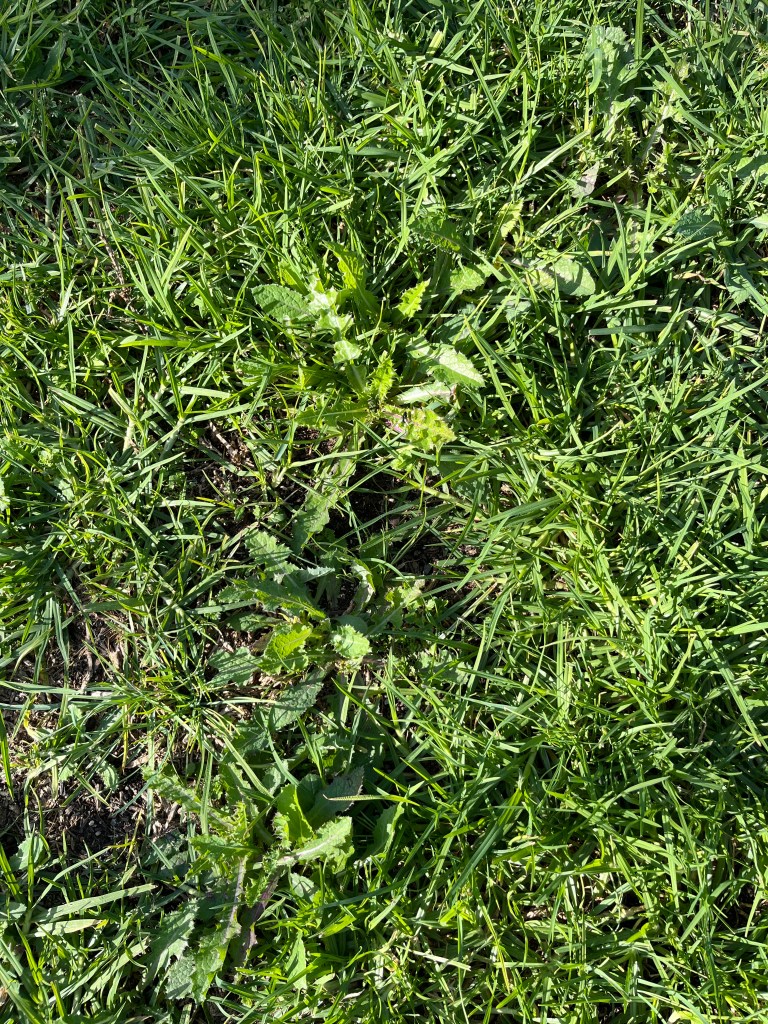
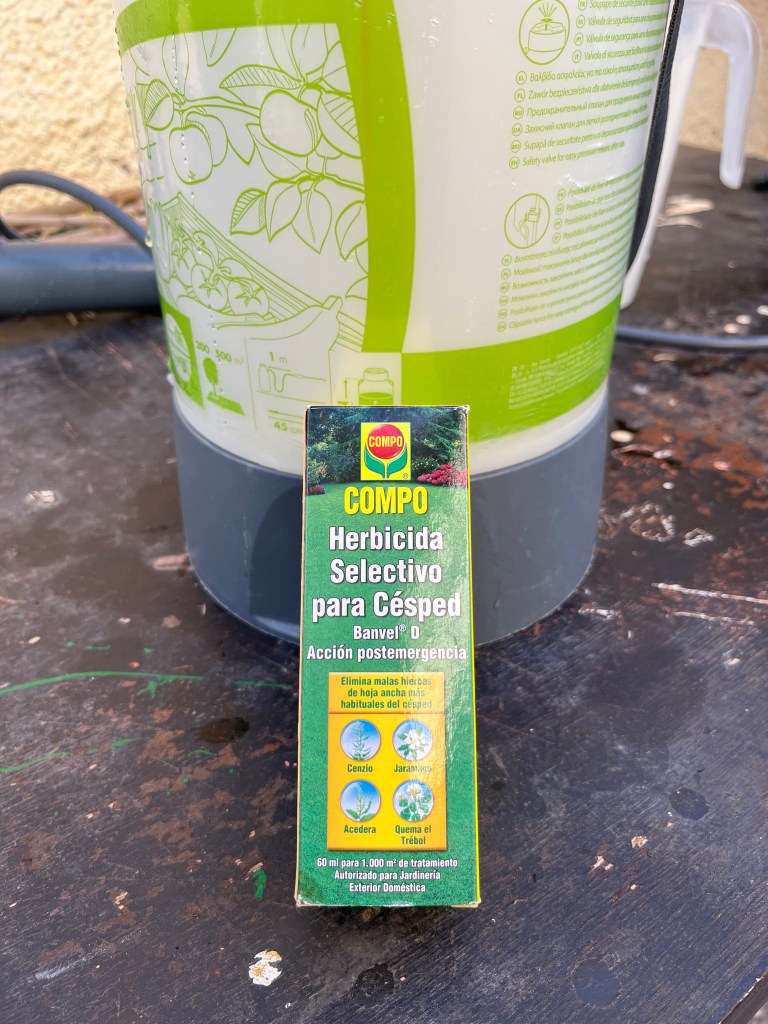
Broad leaf weeds such as Dandelion etc are growing ferociously at this time of the year. They, spread their leaves out, kill the grass underneath and then set seed to give you another generation. You can if you wish, go round and remove all of these weeds by hand, but it is a time consuming and difficult process. Instead use a selective weed killer. This can be sprayed on to the offending weeds without harming the grass. The photos below show the problem and the solution.
Cleaning up and composting leaves. An integral part of the big cut back process is that you will create lot of fallen leaves, which taken together with the normal winter leaf fall will have left you with various piles blown all over your garden. The temptation is to just leave them and let them blow around. But the danger with this approach is that the leaves will gradually breakdown into a fine tilth on your gravelled areas and on paths creating a lovely medium for weeds. In addition they provide a perfect environment for slugs and snails to foray forth and eat your new plants. The photo below shows a perfect slug and weed environment.
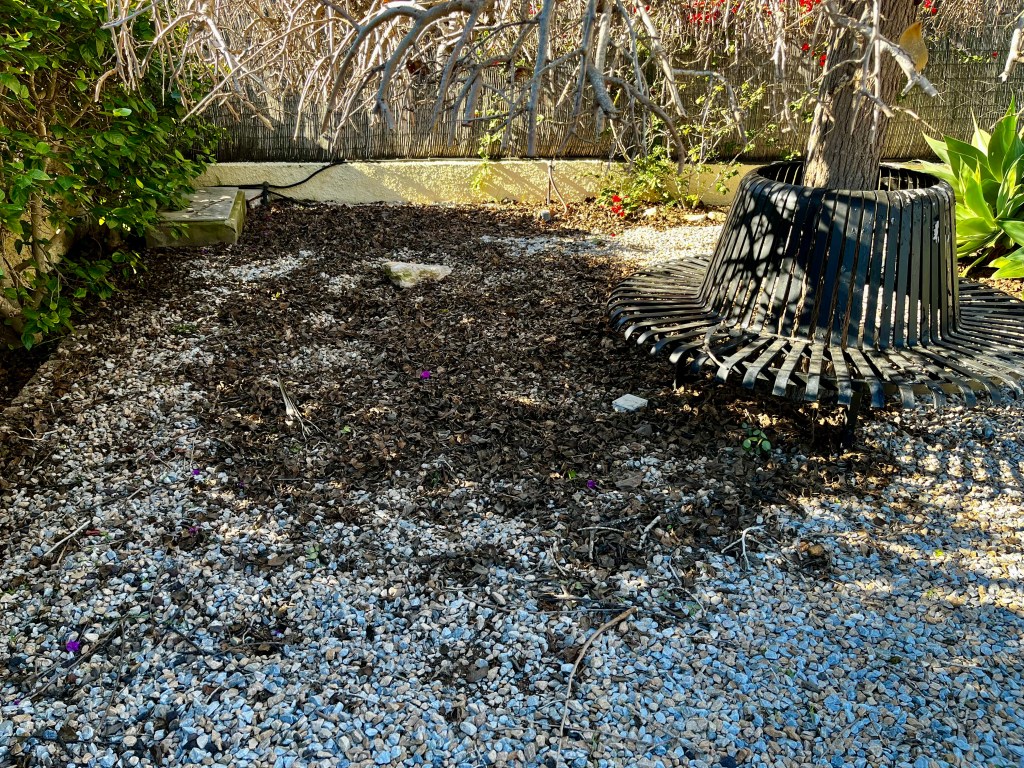
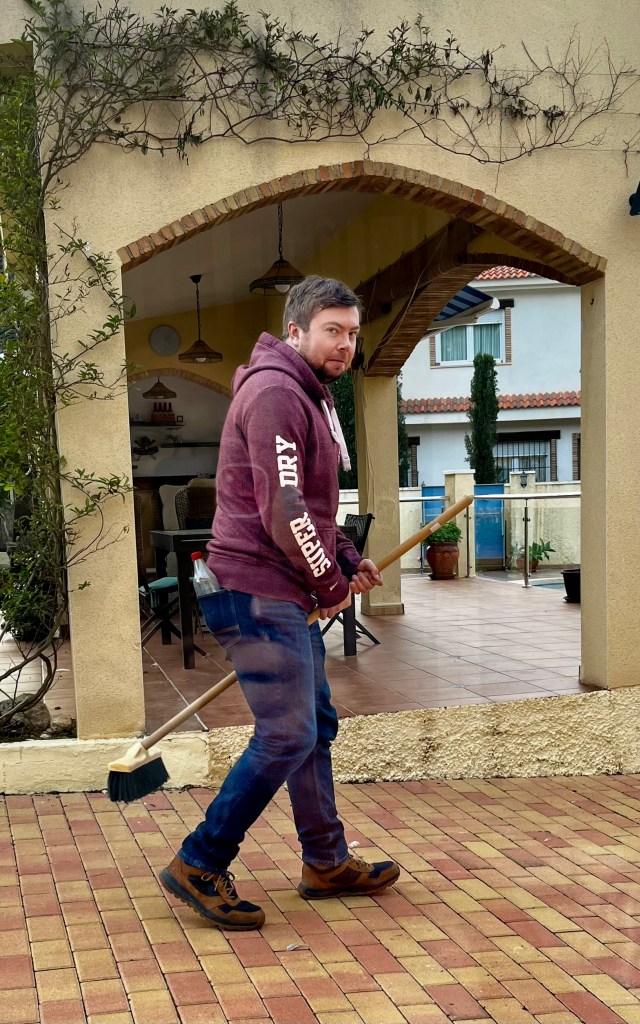
You have to clean them up, but don’t do it grudgingly, and don’t just throw them away. Instead compost your leaves to make a lovely top dressing mulch for next autumn. The first thing to do is to sweep or blow your leaves into heaps. Then load them into plastic sacks, making sure to crunch them down as you go. Once you have filled your sacks, puncture them with a garden fork in a few places to encourage air circulation. Once you are ready store them in a shady corner of your garden and just forget about them for 6 months. After this time they will make a nice mulch for top dressing. The photos below show my world famous sack pricking technique and my leaves shady corner.
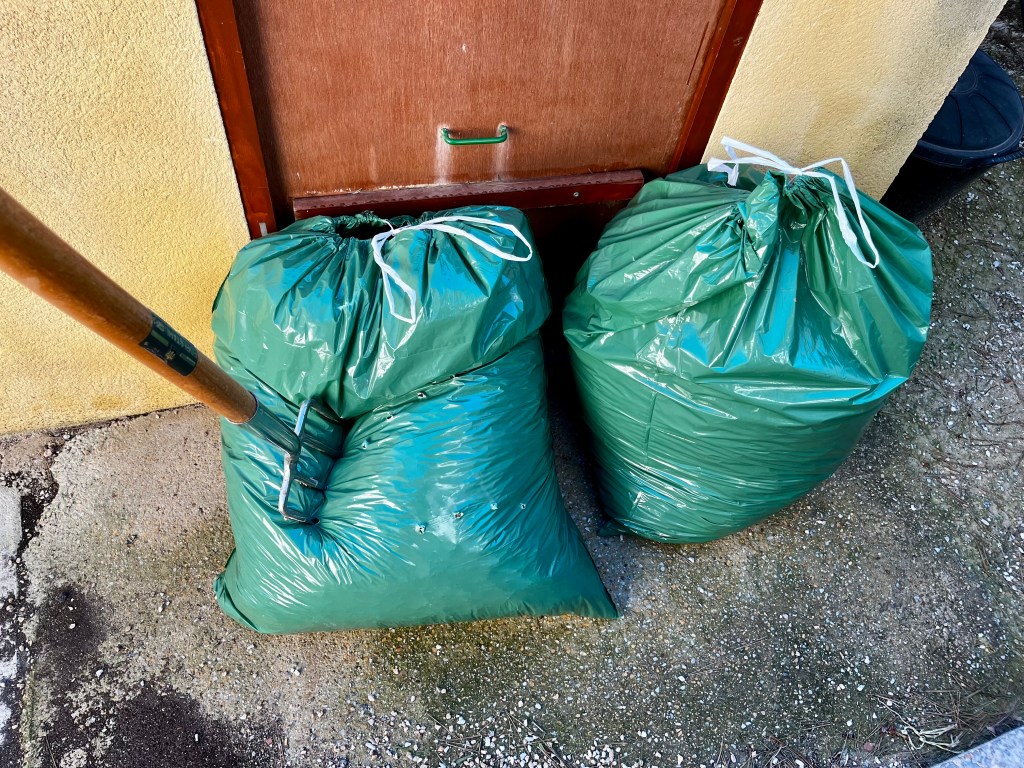
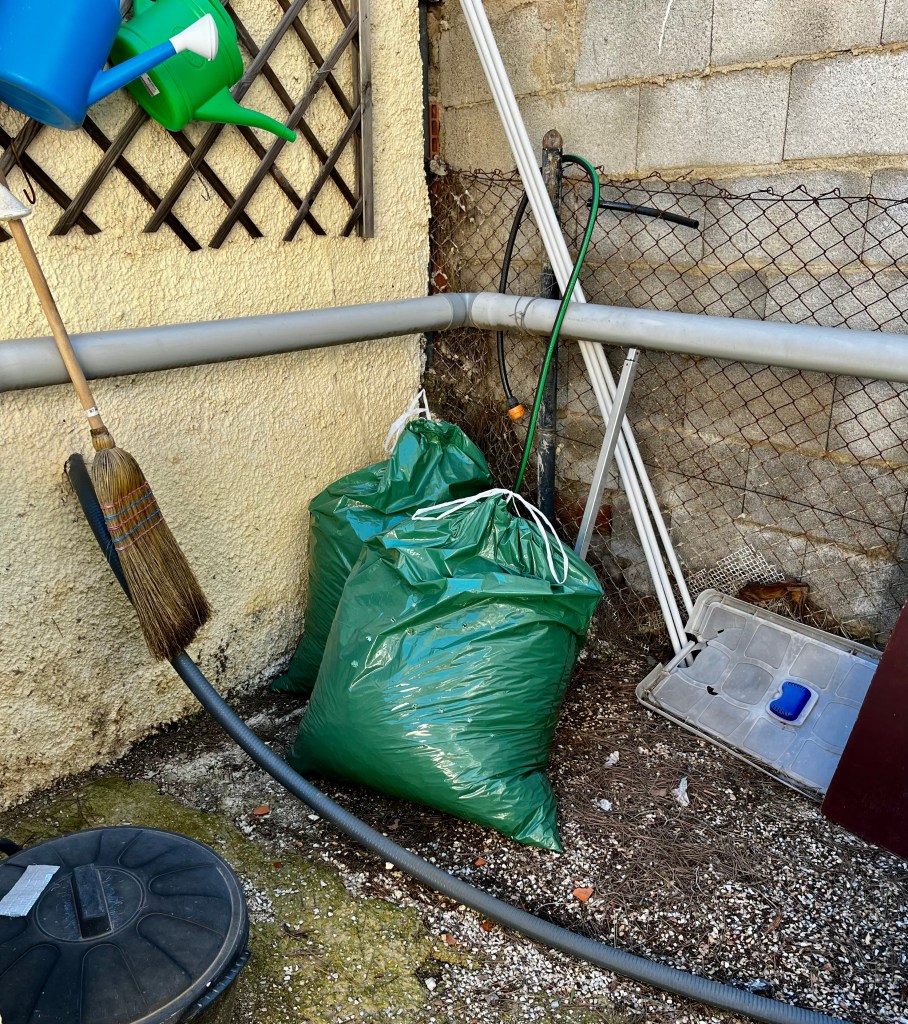
Cutting back hedges. I take joy in hedges as they provide a floriferous back drop to the garden and a wonderful home for lots of wildlife. As I wander around I see thousands of houses with 2 metre high walls all around their garden. A good well planted mixed hedge will give you all the security and privacy of a wall but with the added bonus of an ever changing backdrop throughout the seasons.

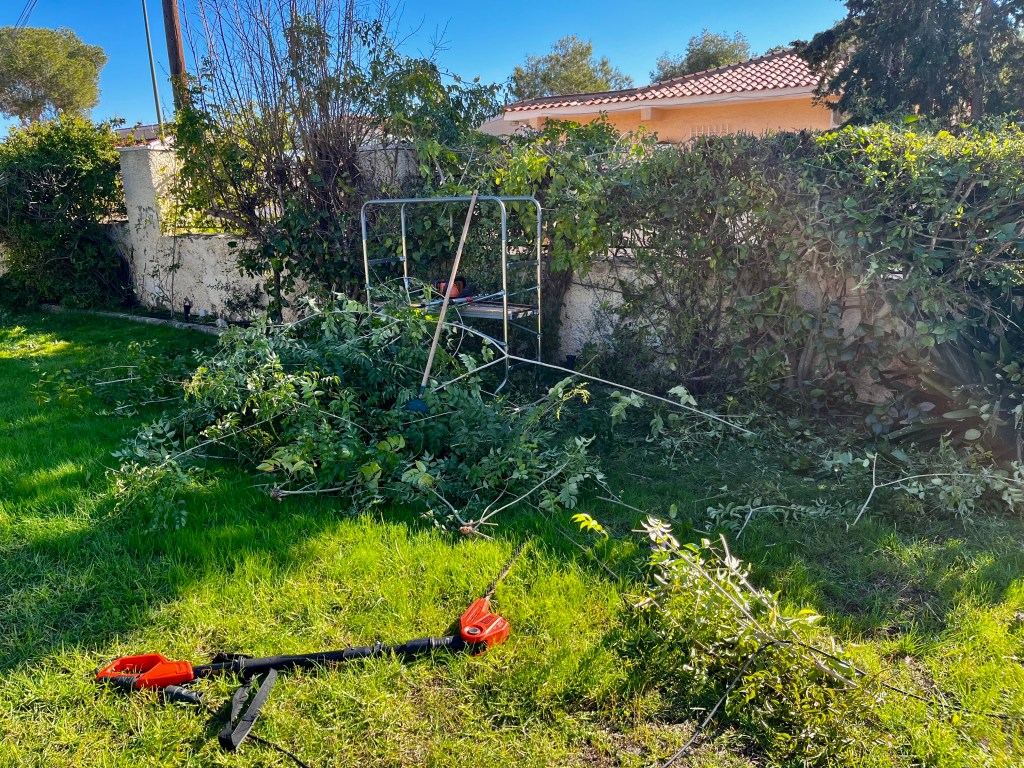
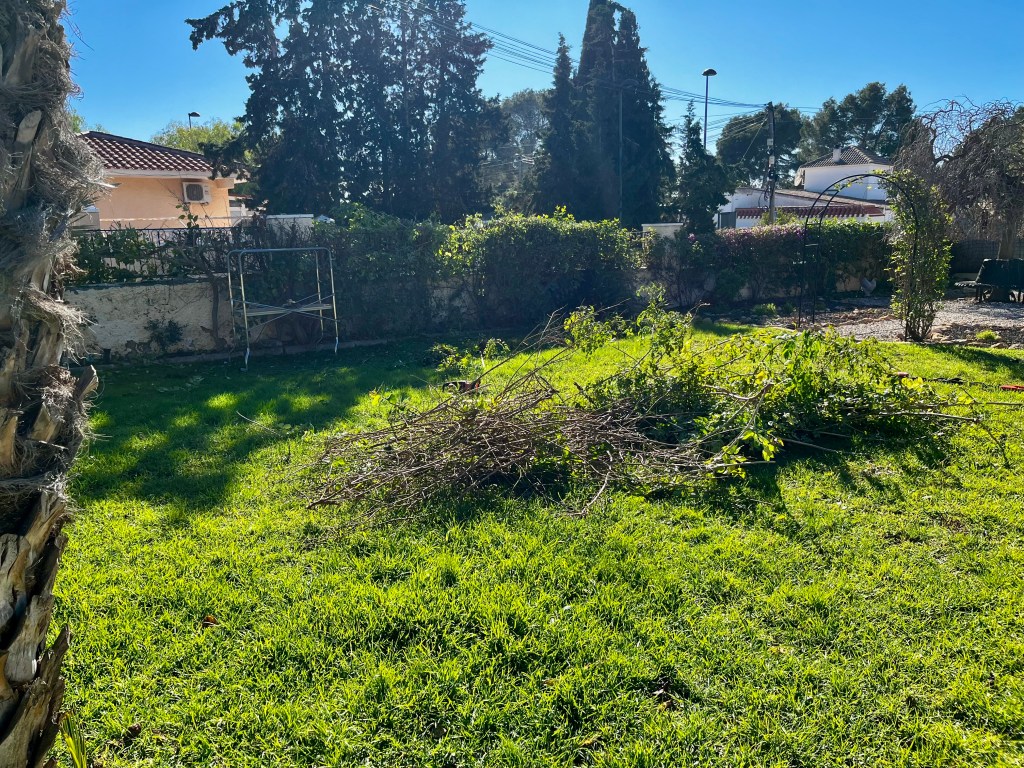
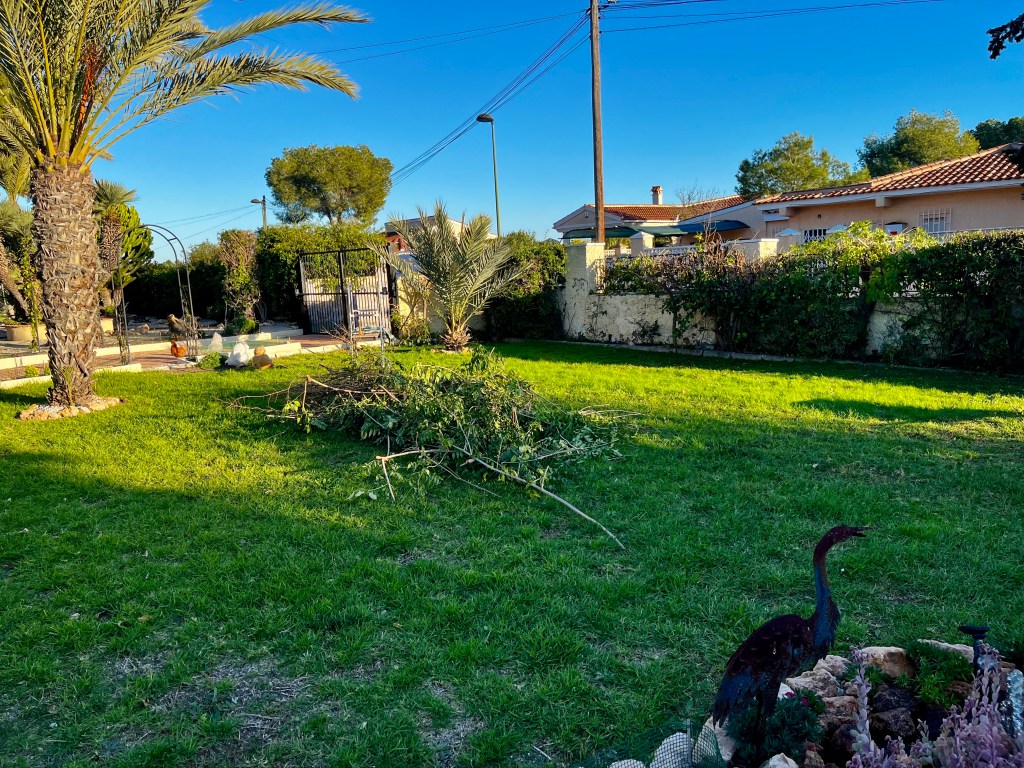
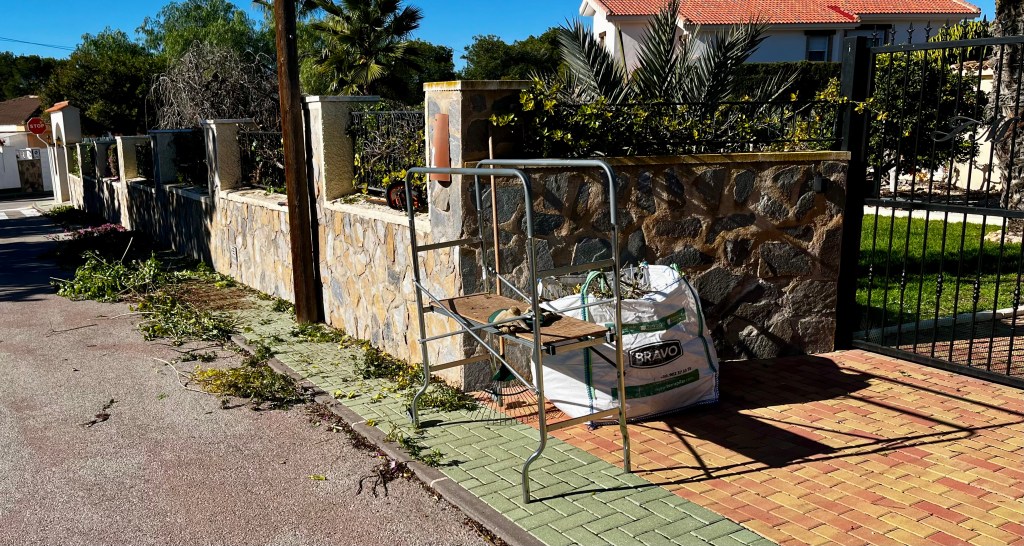
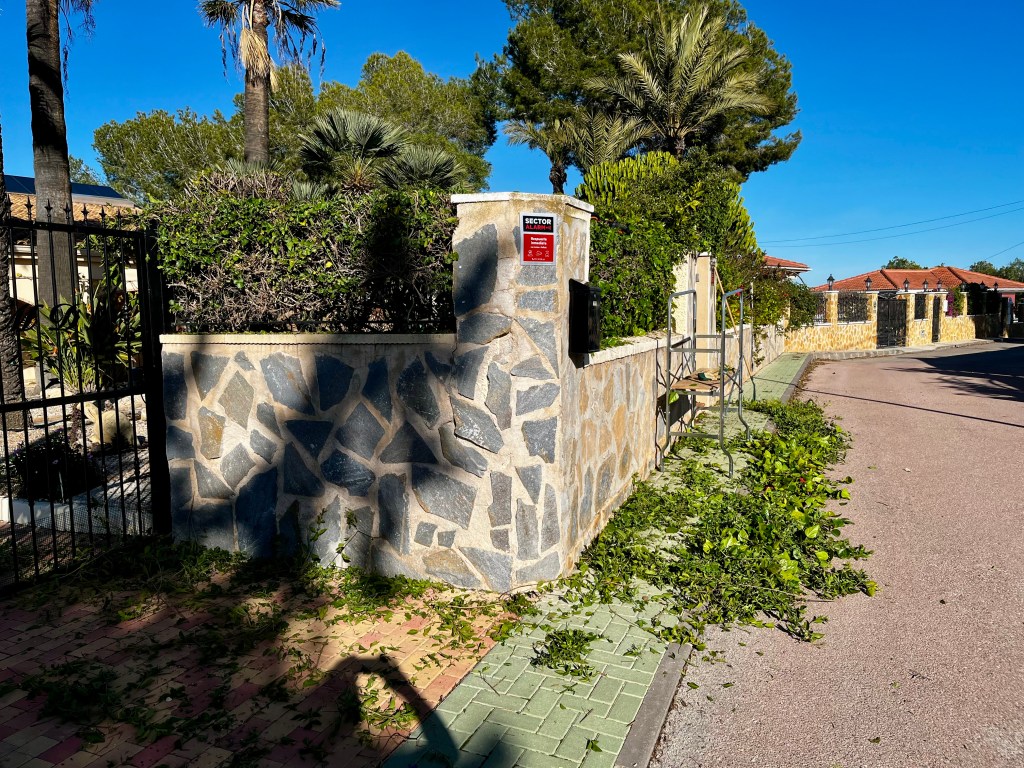
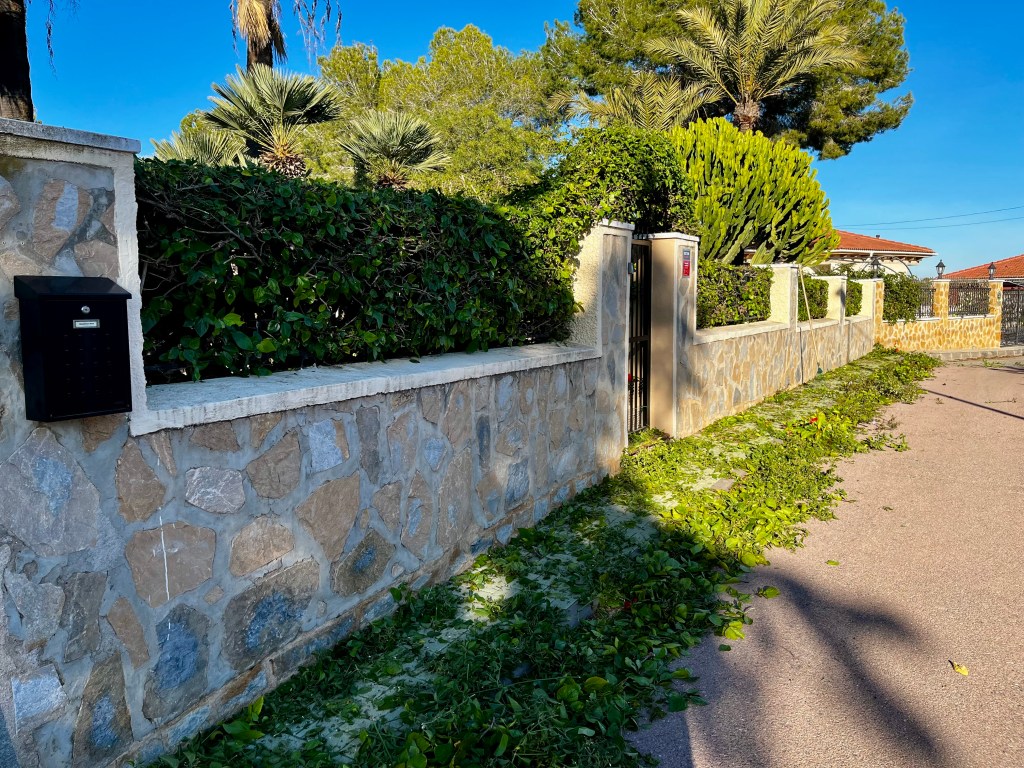
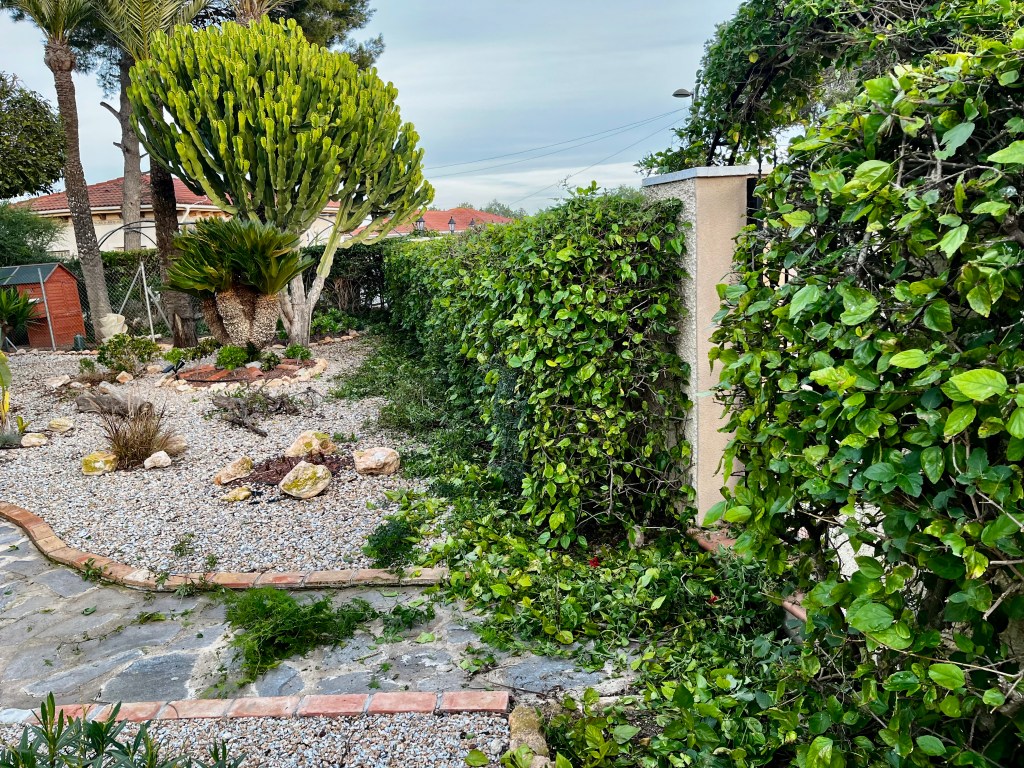
But as hedges are living things you have to cut them back once a year. Over the years I have developed a technique of planting hedging plants quite close together and making them fight for air, light and space. This technique encourages prolific flowering and is a joy to behold. The photos below shows some of my hedges and the battle of the big cutback. Click on each photo for a larger view.
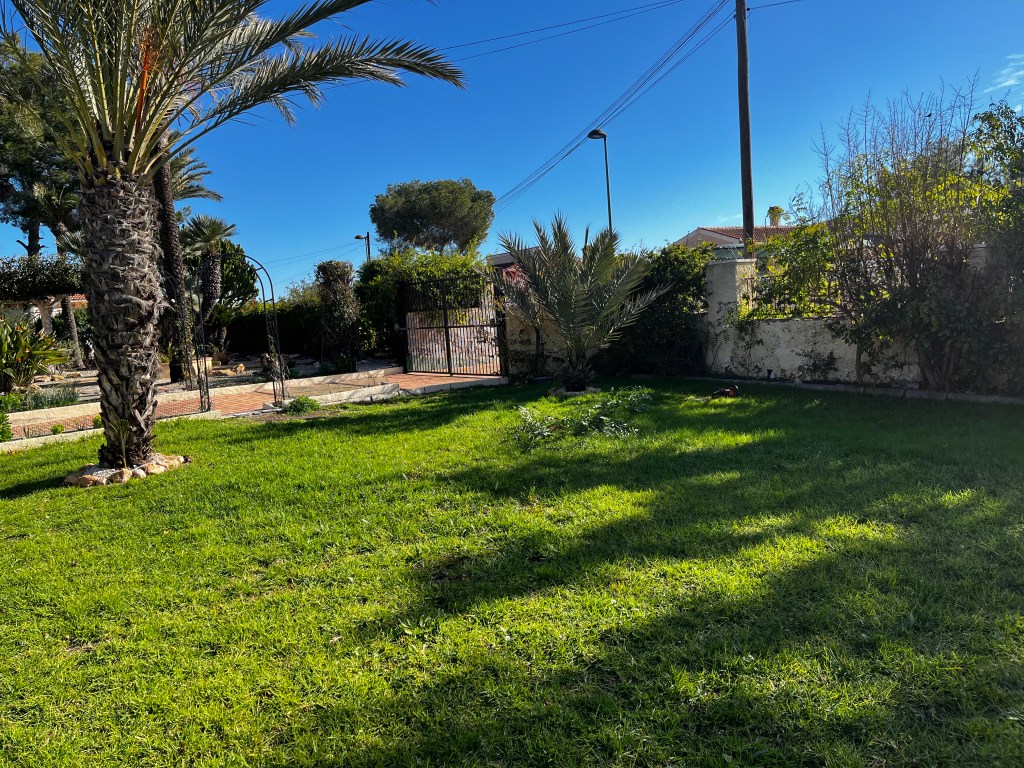
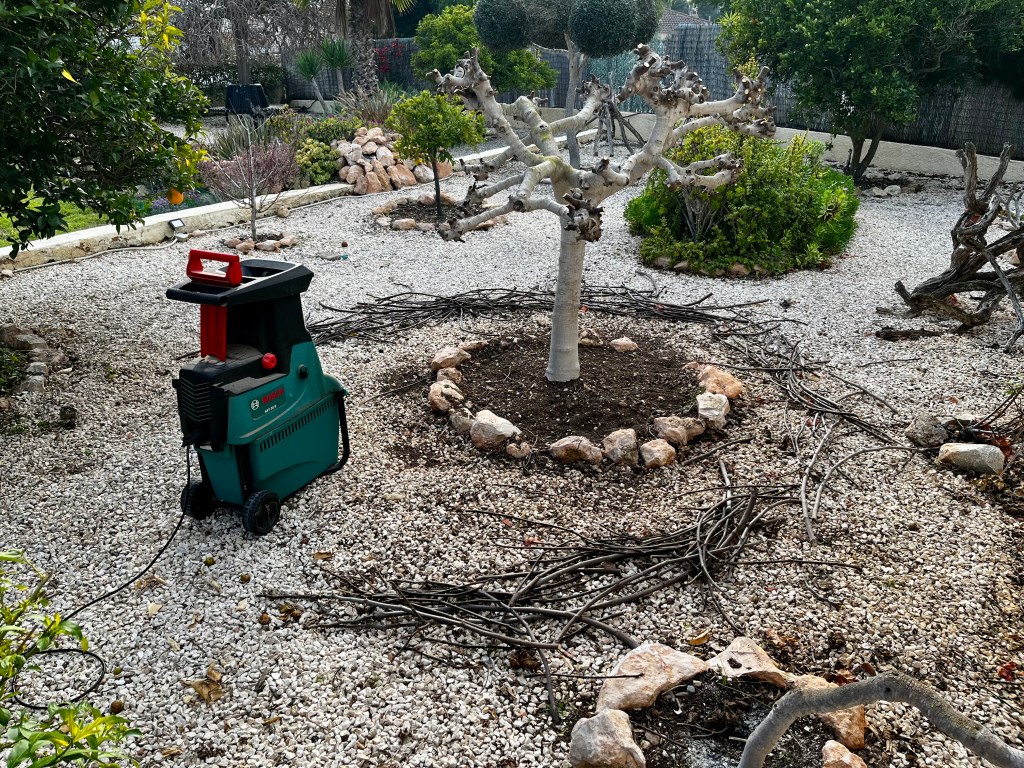
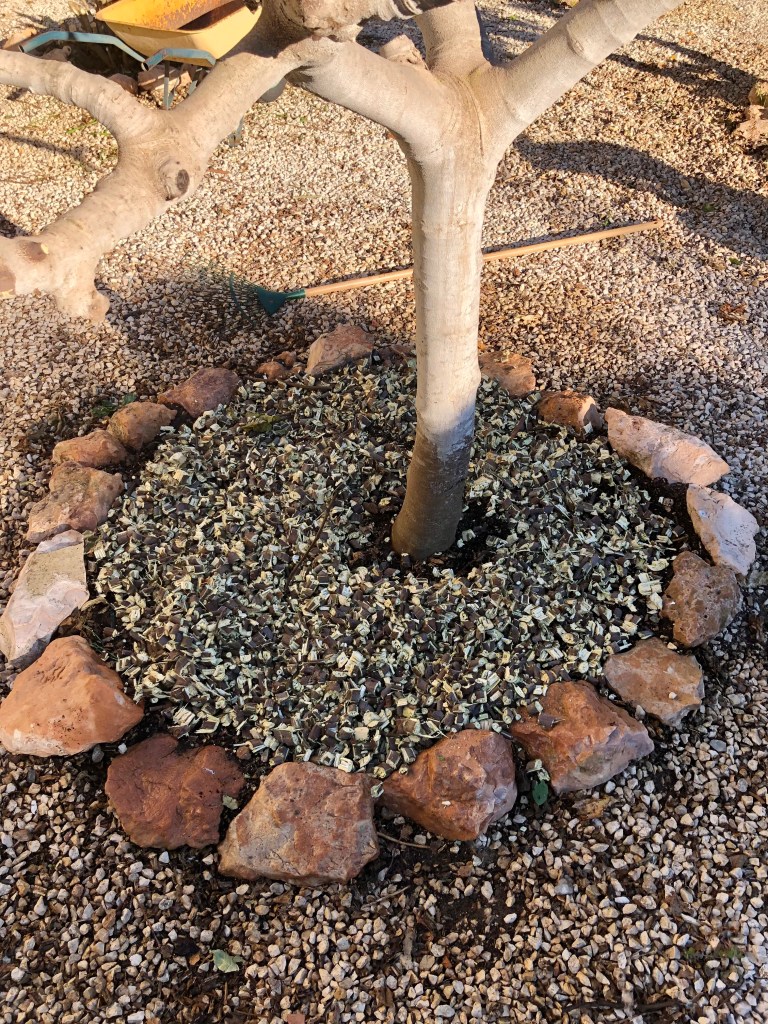
At the end of the cutback process don’t just throw everything away, instead shred what you can and then either compost the material, or where appropriate spread it as a mulch under your trees. See the photos below.

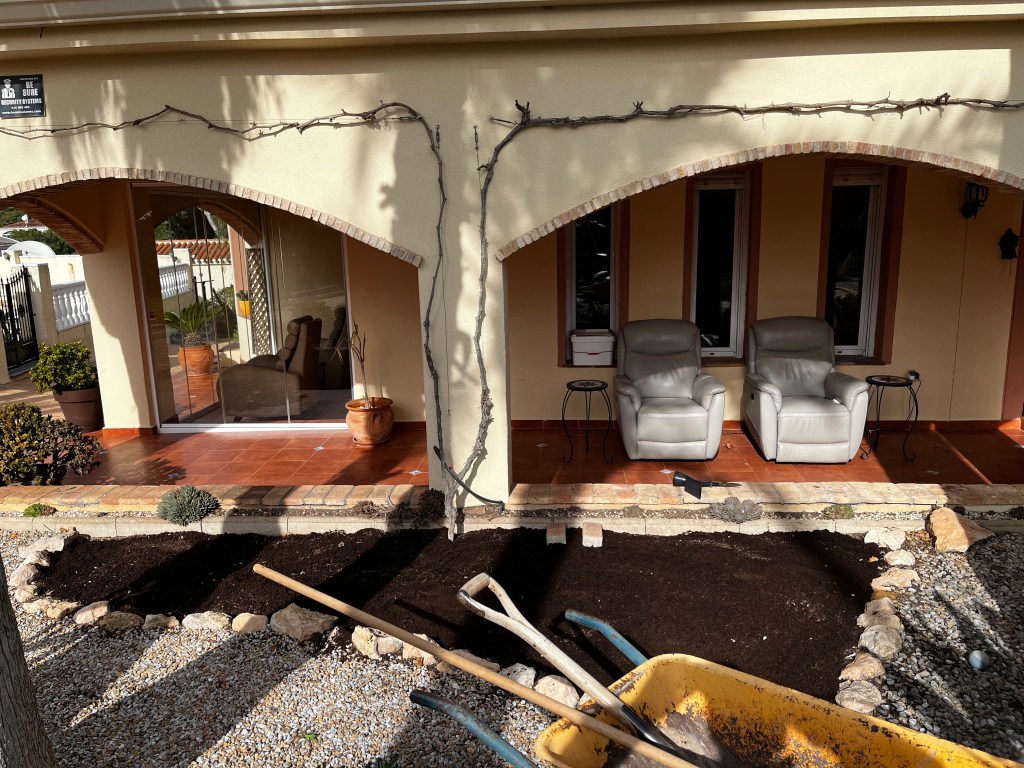
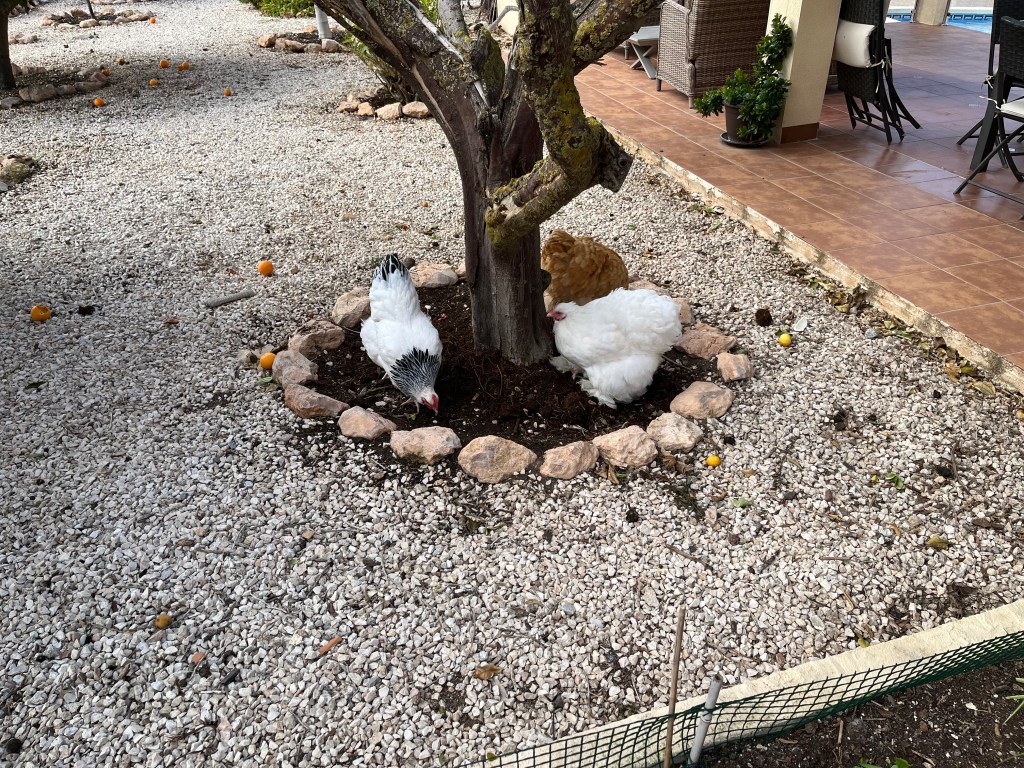
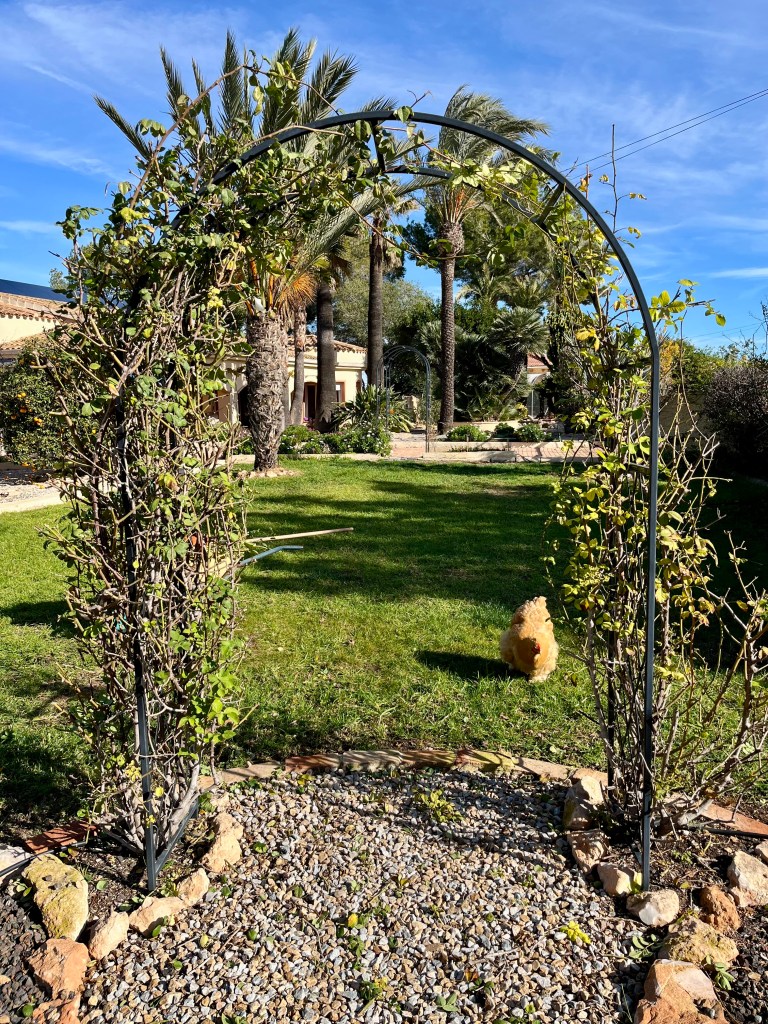
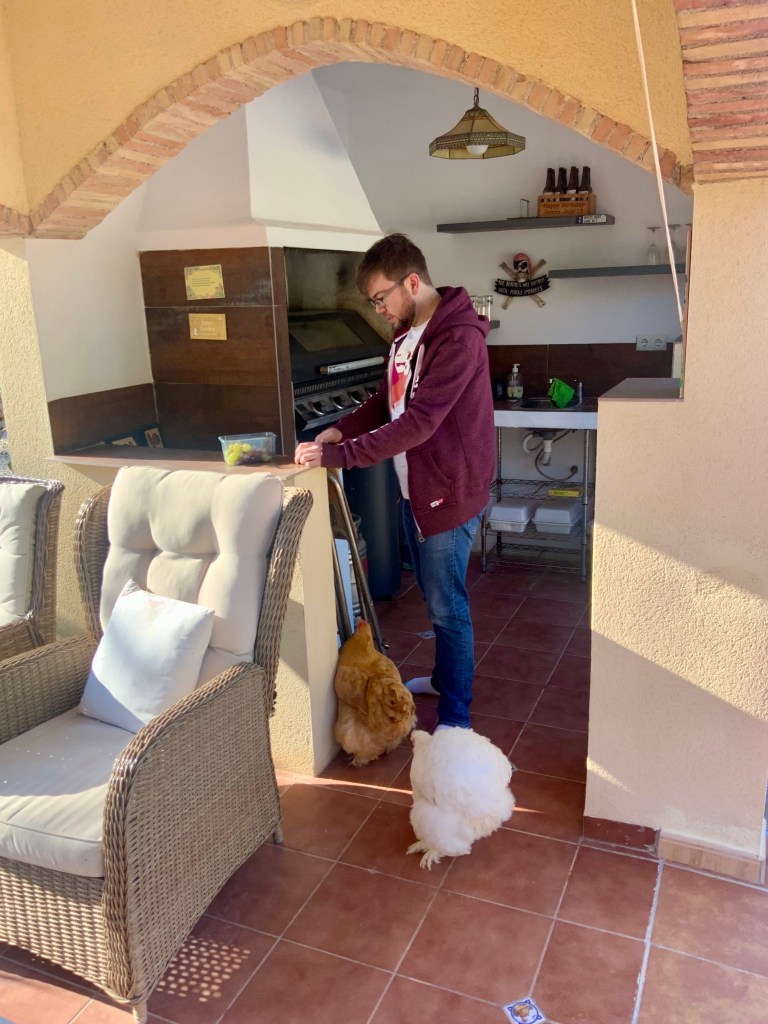
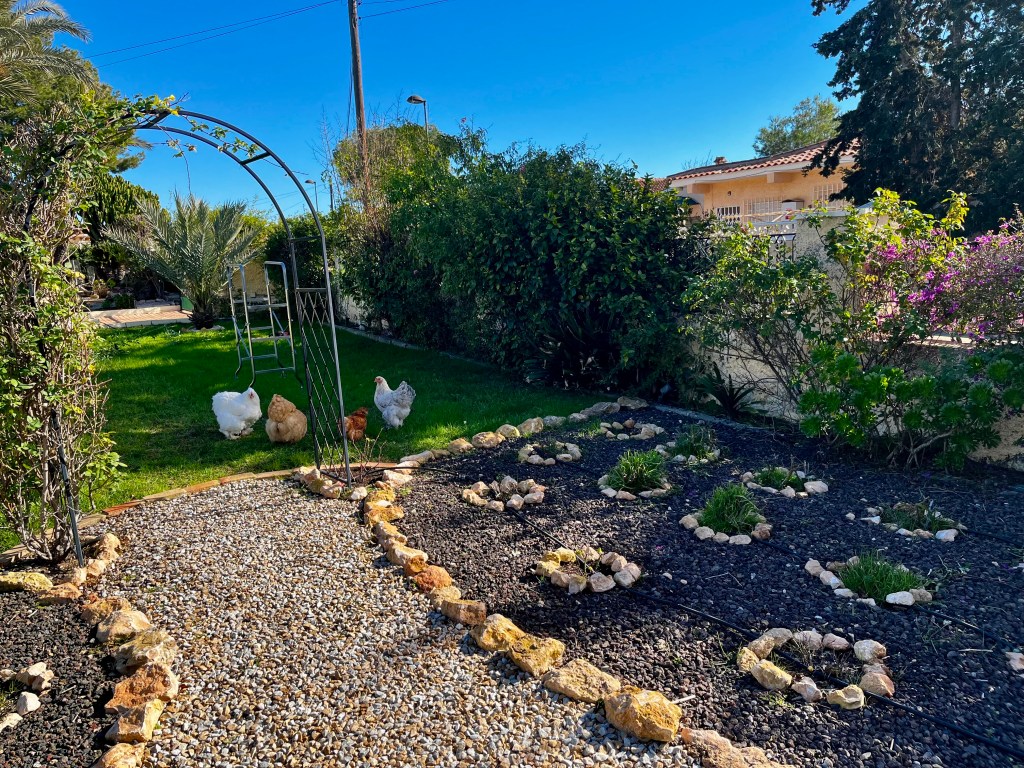
Refurbishing the chicken soft play area. I am ashamed to admit that I have a chicken soft play area in my garden. Basically it’s an area that once was lawn. It is located right in front of our Naya (Verandha) where Cruella and I sit and take our morning tea. I took out the grass and replaced it with cheap compost, this then allows Cruella’s girls to disport themselves first thing in the morning whilst Cruella feeds them sliced grapes and gives them their instructions for the day.

All of this activity takes place in Chickenese so I have no understanding of what’s going on. Over the years I have picked up key words in Chickenese, but not much, mainly I only understand when she points at me; so I now know the chickenese word for “pig”.

Anyway, I had to stop the big winter cutback to refurbish the soft play area with new compost. She also wants me to install a swing and a slide, but I have refused . Hence my being referred to various international bodies for chicken human rights abuses. I know she is talking nonsense, but I am beginning to worry as I have received several threatening legal letters. She tells me a date is set for hearings so I am thinking of Lawyering up.

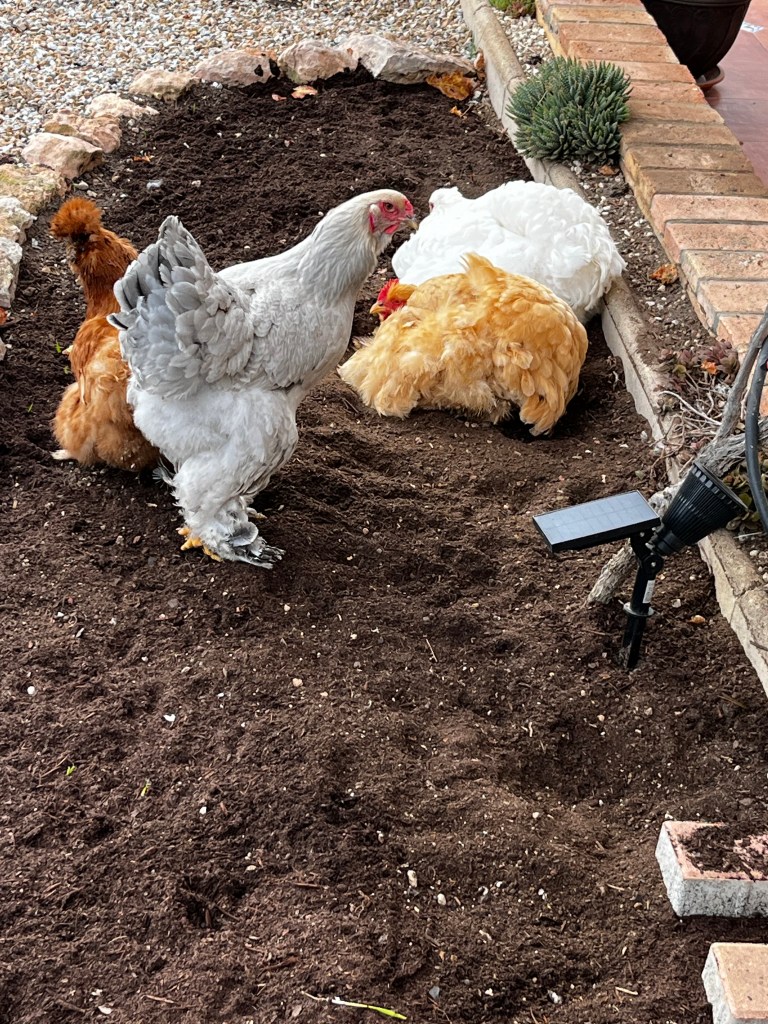
The photos below show the start of the refurbishment of the soft play area. Then just when I get the surface all nice and neat they dig it up again.

The big Winter cutback Part 2. The idiot son passes chicken care but fails his flying test

Well after all the fun and festivities of Christmas it is time to get on with the big Winter cutback. If you get out into your garden now you will not only lose a few pounds and feel better, but your garden will thank you this summer with lovely refreshed growth.

If you have a large garden then you need to plan your winter cutback over a number of weeks. If you have no other plan, then the simplest way is to start with your smallest plants and work your way up to the really big ones. If you follow what I am doing over the 4 or so stages of my winter cutback then we will cover most common plants in Spain.

I have to admit that my annual winter cutback has been much disrupted by the visit of my idiot son. Cruella (my wife) has been beside herself for weeks preparing for his visit, especially since he will be taking his advanced certificate in chicken care. Under Cruella’s supervision he has been taking exams from The University of Applied Chicken Care – motto: “Sapientia ab Ovo”.

Anyway enough of this nonsense let’s get on with the big winter cutback.

8th January 2026. Things I have been doing lately:

  • Reshaping Yucca to improve garden design
  • Trimming Sago Palms
  • Pruning Solanum
  • Reshaping trailing Lantana
  • Pruning roses
  • Invigilating chicken exams

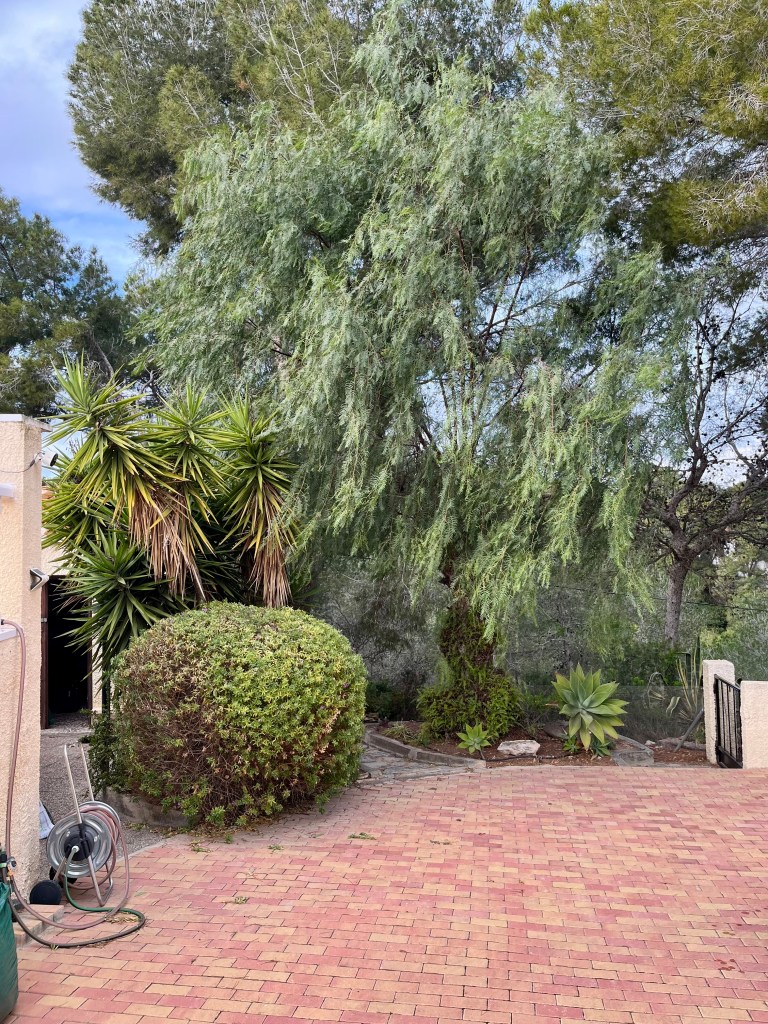
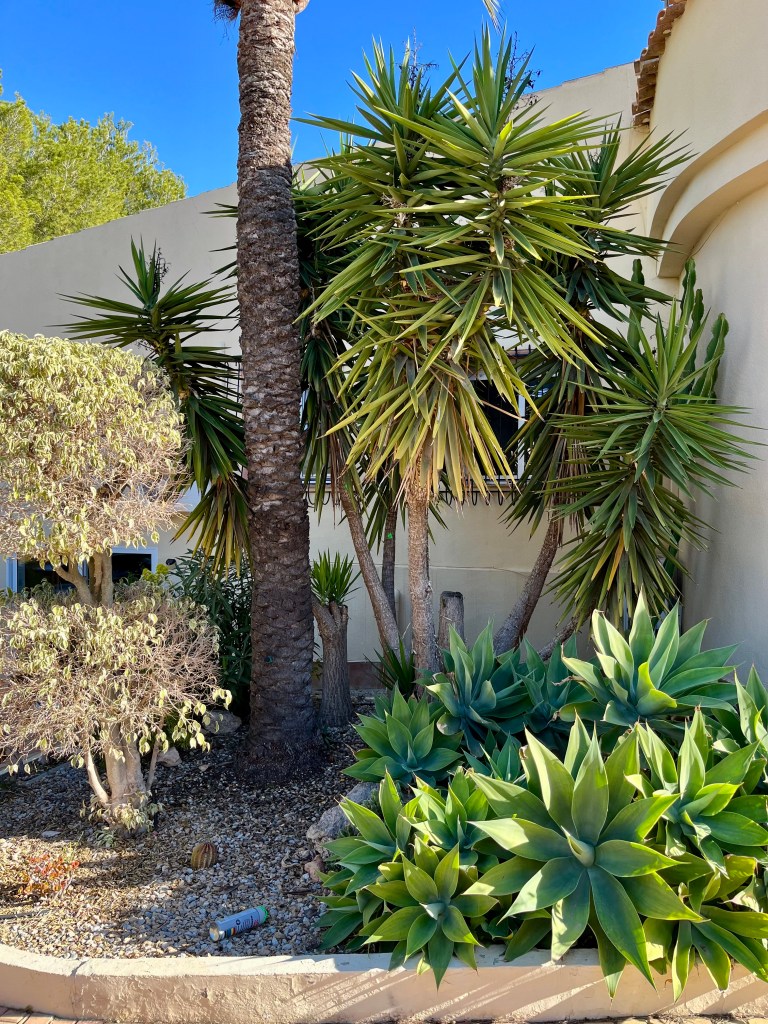
Reshaping Yucca to improve garden design. If you follow this blog then you will remember that I posted a short while ago about cutting and reshaping Yucca. However, I left one large stand of Yucca out of my last pruning round as I wanted to give more thought to reshaping it.

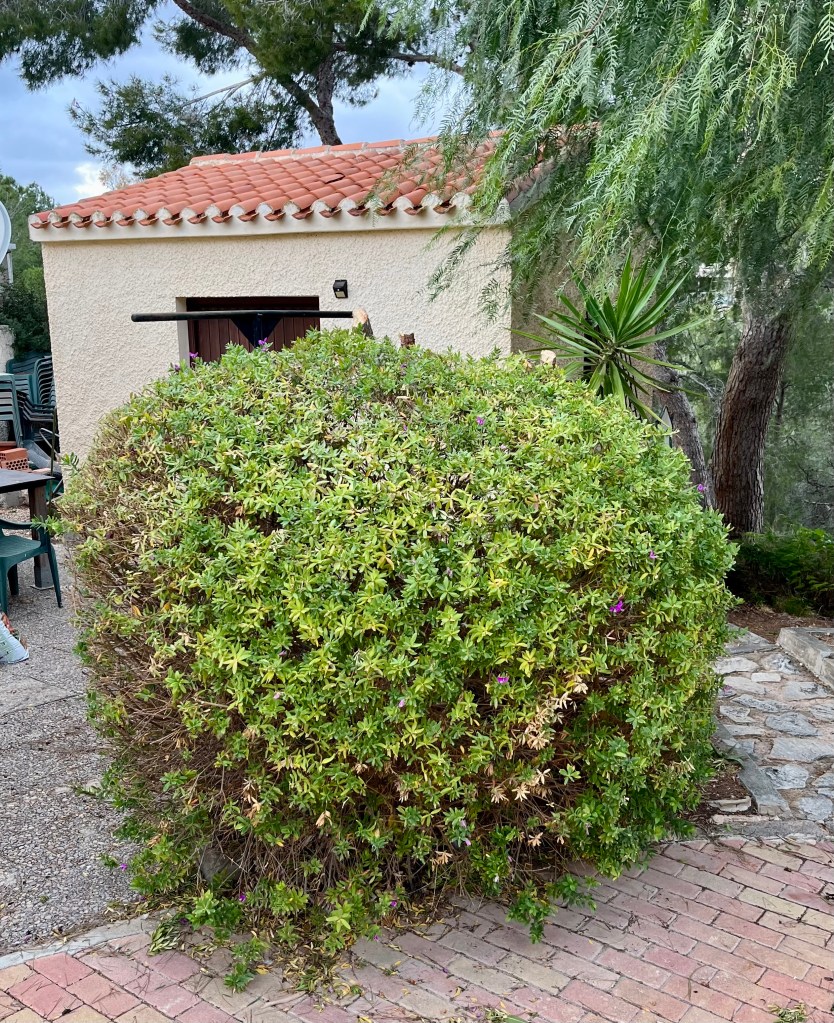
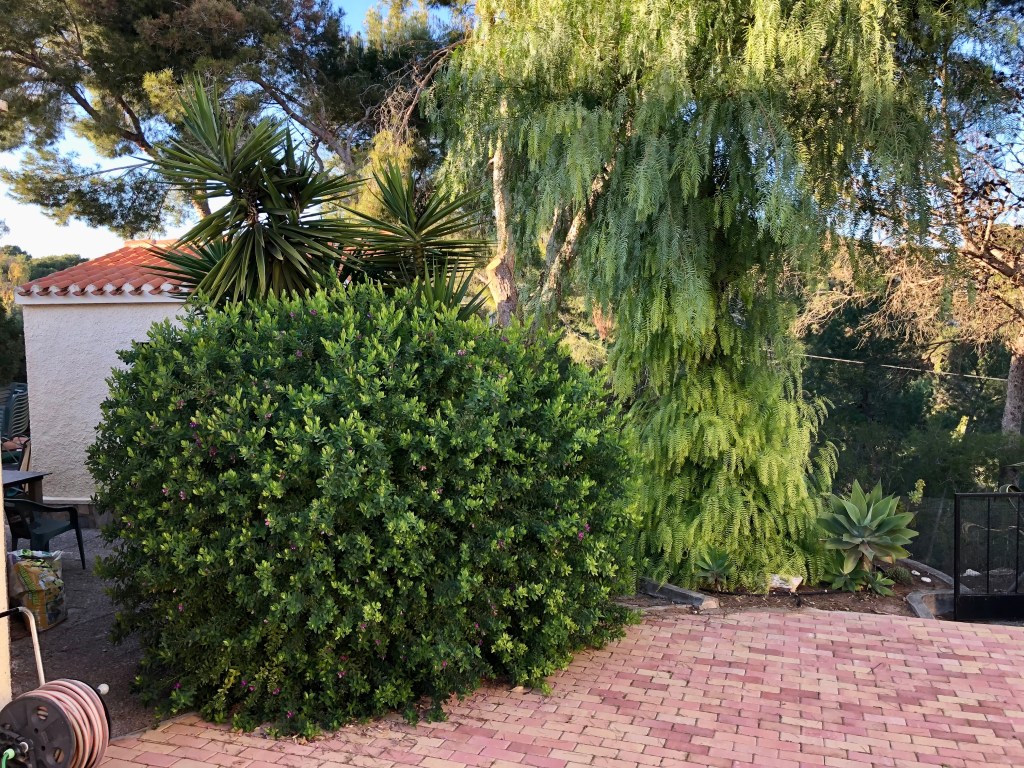
The area I was contemplating stands at the bottom of my drive and over the years I have created a pleasing combination of: Yucca, Californian False Pepper tree and a large bush Myrtle. Together these present a pleasing vista at the end of the drive. However, they had all become rather ill defined and needed to be brought back into harmony. The photo below shows the problem.

Although I had reshaped the Myrtle, the Yucca and the tree were still too entangled

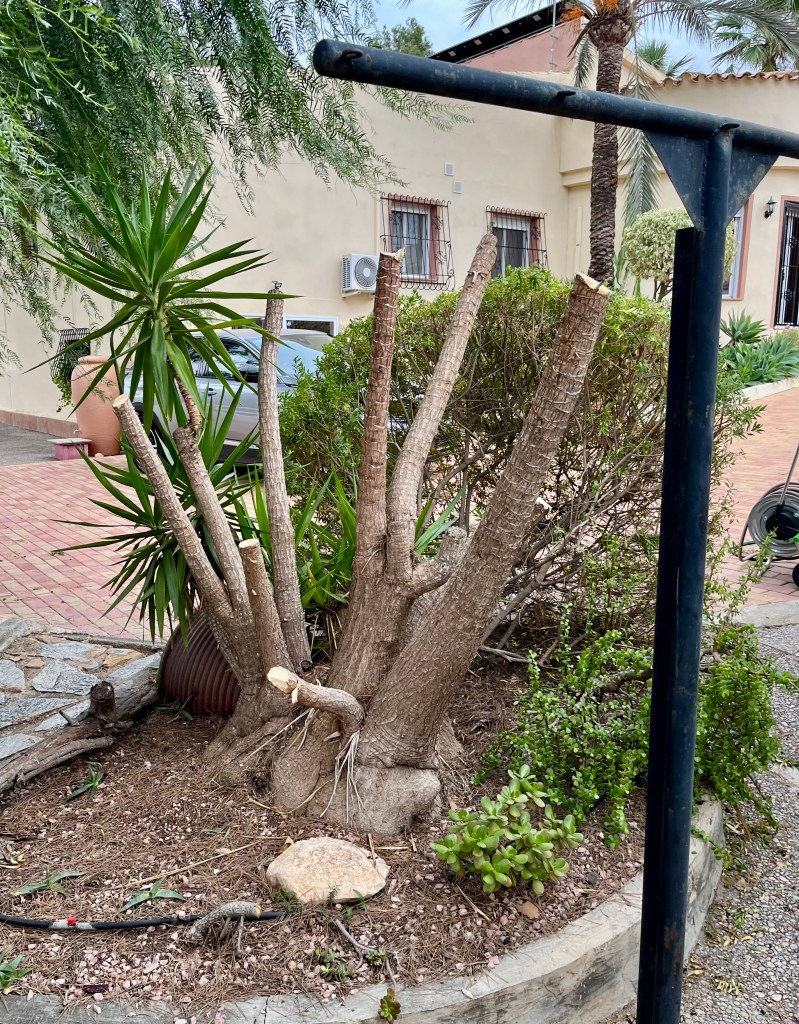
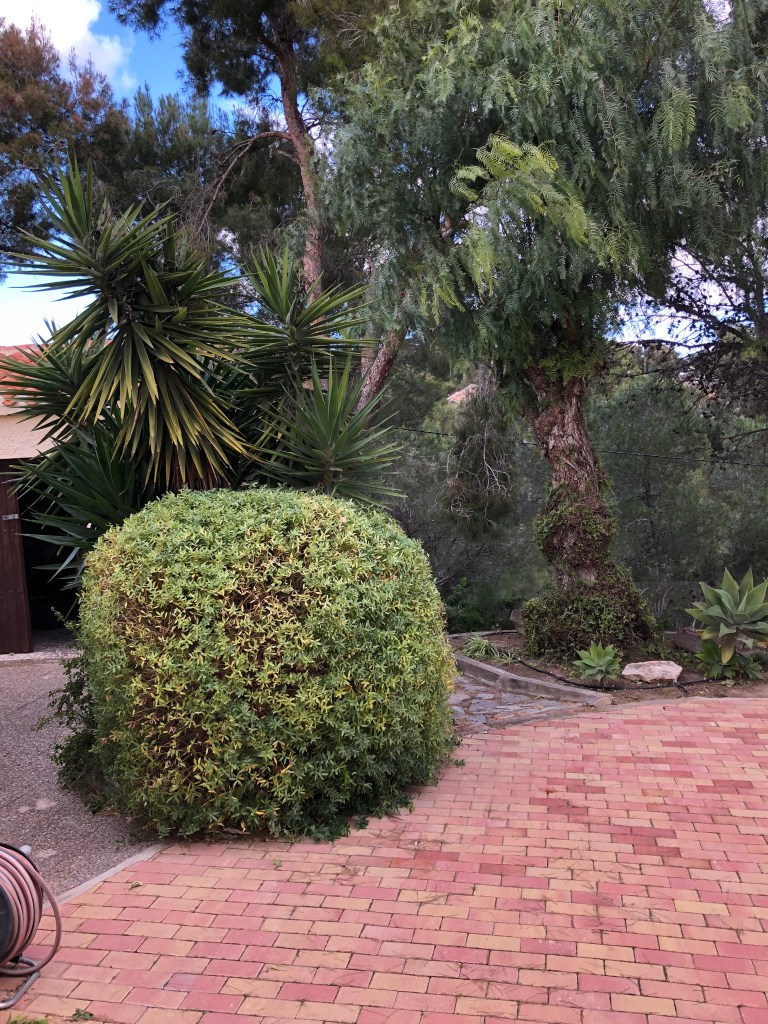
The solution was to reshape the Yucca by cutting it back to different levels. When this regrows – as it will within 6 months it will once more present an attractive integrated perspective. The False Pepper tree will be refreshed by being completely pollarded in about a year. The resultant cutback can be seen in the photos below. Remember, gardening is all about planning for the future – whether you will see it or not. A real gardener plants trees, he will never sit in the shade of.

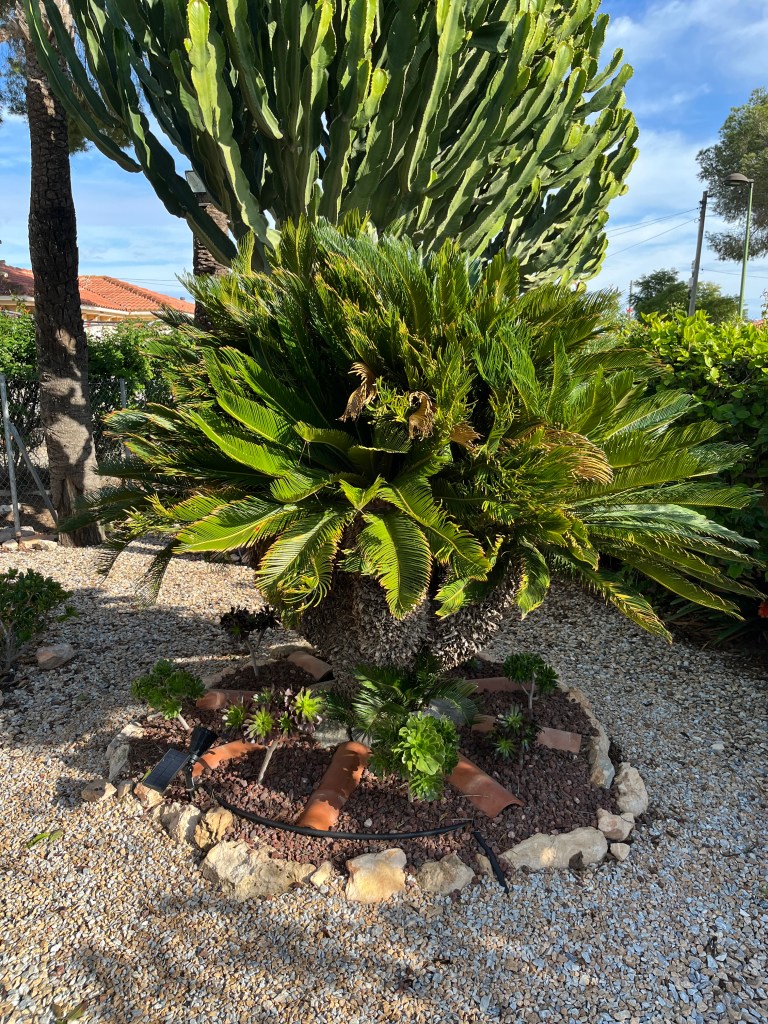
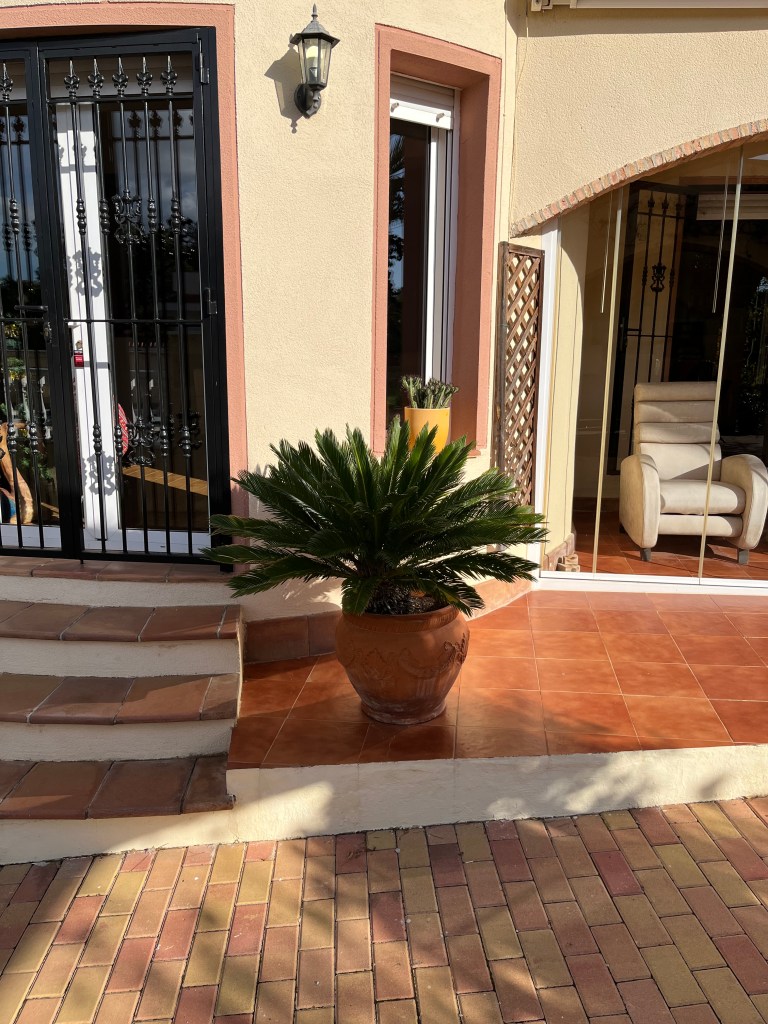
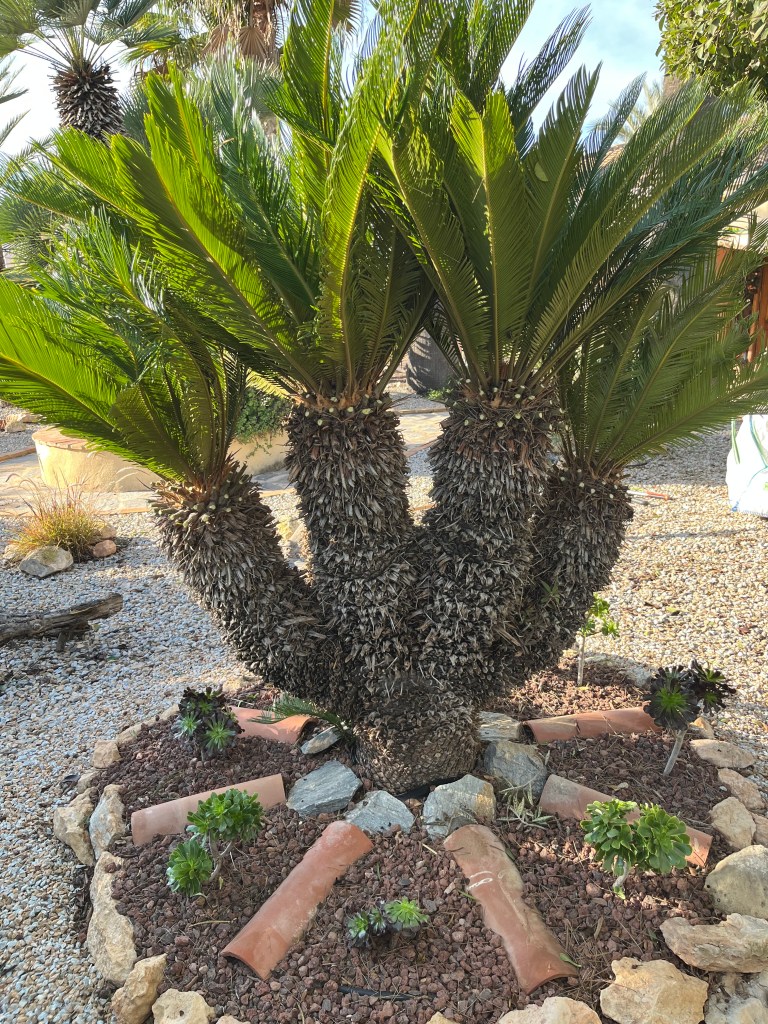
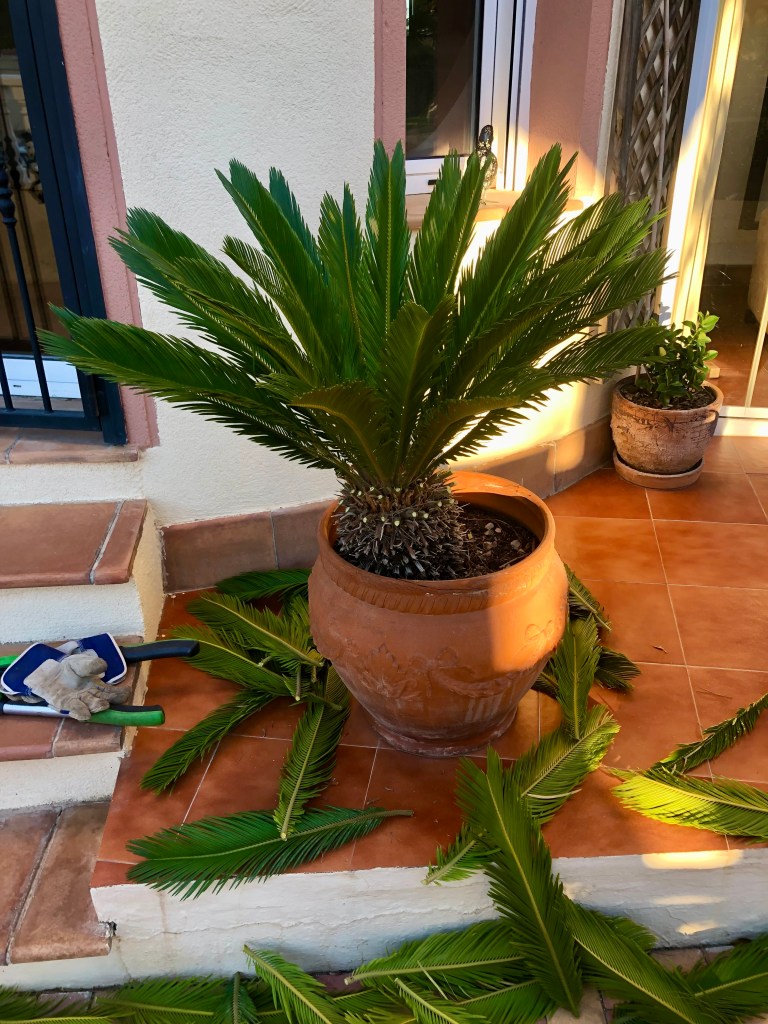
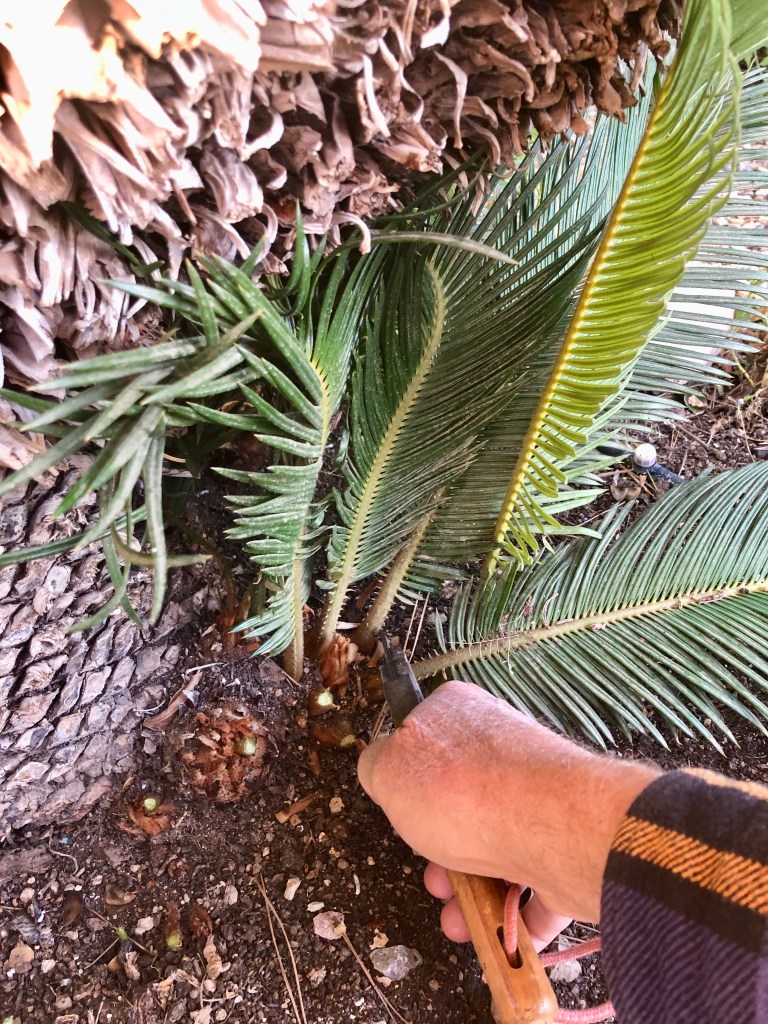
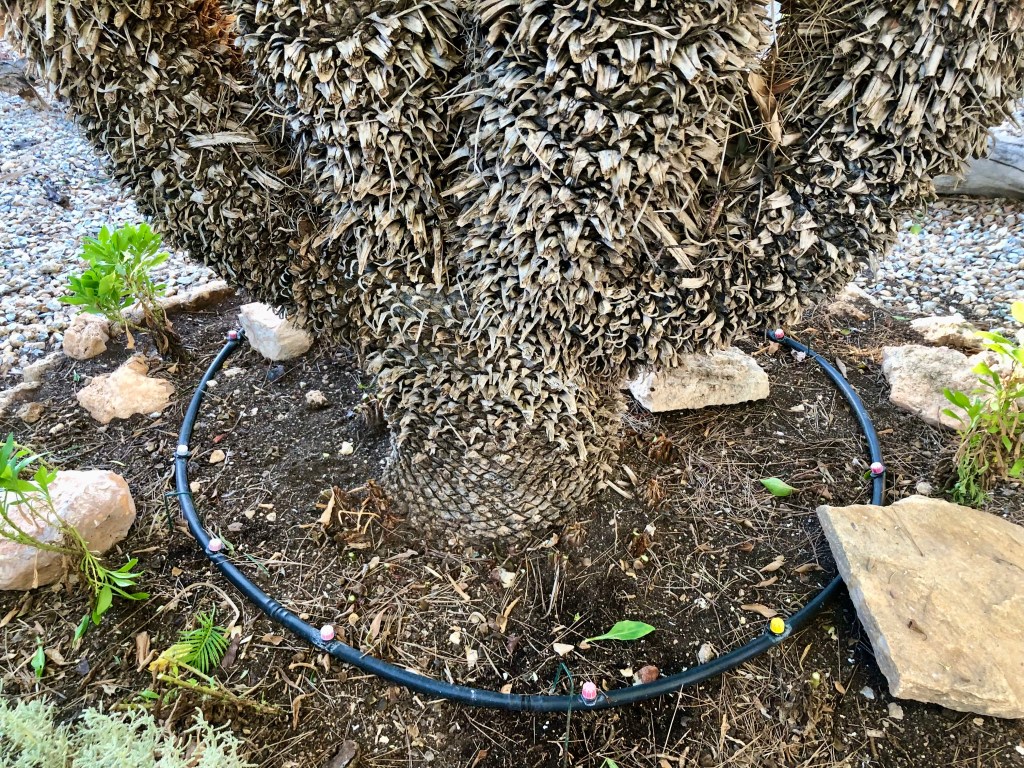
Trimming Sago Palms. Sago Palms are prized plants in many Spanish gardens. They provide structure, but are slow growing and because of this are very expensive. So if you have one you need to take care of it. I have a number of Sago Palms of various sizes, but the two that need attention are a large multi branch plant in my front garden and a smaller version in a pot. Photos below.

I like to keep these plants relatively tidy, which mainly involves taking off all the fronds apart from the top two rows. It is important that you leave at least two rows to continue nourishing the plant. Also two rows should guarantee that if you lose one, you still have a back up.

To trim Sago Palms I use long handled lopers to get right into the base of the fronds. You also need to wear eye protection and gloves as they can be very spikey. The photos below show my newly trimmed plants.

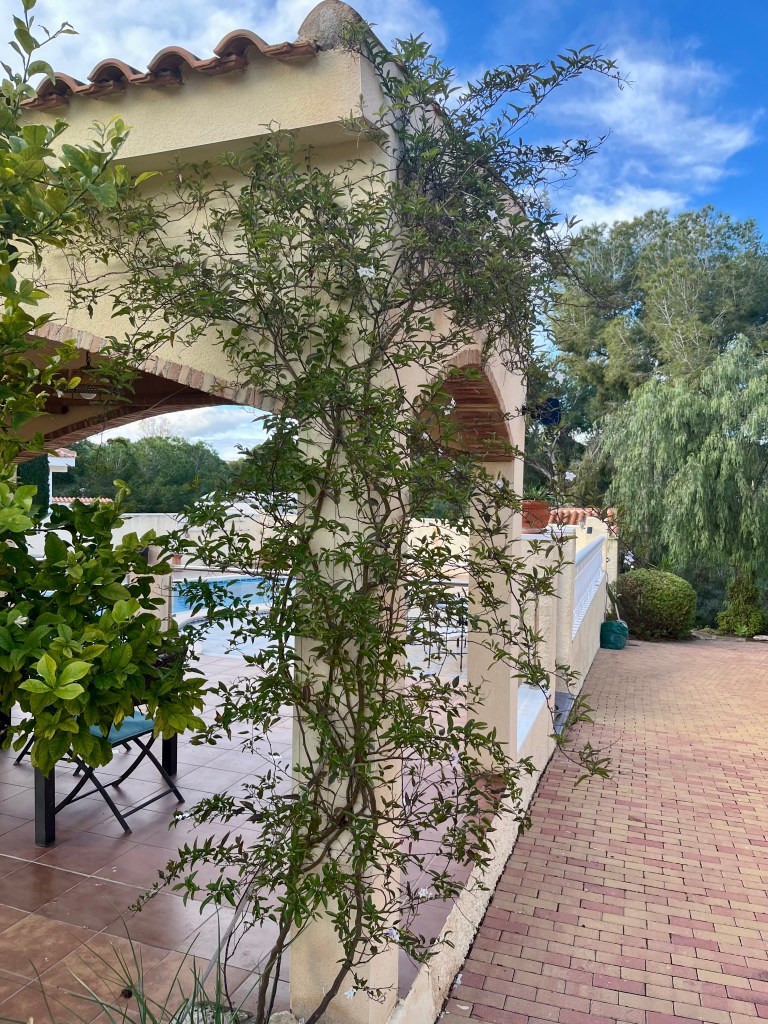
Pruning Solanum. I have Solanum in many variations in my garden. Some free standing, others are either growing through hedges or climbing up walls. In this case I needed to prune my climber to keep it in shape. At its simplest this involves just getting your hedge trimmer or shears out and trimming the plant back to the wall, whilst at the same time being careful not to cut off any long sinewy runners (it is best to tuck all these in before you start to cut). The photos below show the before and after.

Reshaping trailing Lantana. I love trailing Lantana as its spreading habit provides the perfect setting for island planting into gravelled areas. In Spain too many people turn their gardens into gravel or tiled plant deserts. I understand this as the effort of watering unsuitable plants under a sometimes fierce sun can be disheartening as your garden turns to desert each summer and all your plants die.

Trailing Lantana provides the perfect antidote as they are fully climatised to Spain, need little watering, yet flower profusely all summer providing a green oasis in gravelled areas. I have lots of Lantana in all its forms throughout my garden so when it comes to the big winter cutback they are a relatively easy candidate. The photos below show some of the Lantana that are due a haircut.

You do not need to be fussy when cutting back Lantana. Get your hedge trimmers out and give them a good short back and sides. Once they have been trimmed back, you will start to see re growth within a month and off they go again. The photos below show my newly reshaped Lantana. Note that once I expose the area underneath the plants the chickens quickly move in to mop up any slugs, snails etc. Cruella accused me of exploiting her girls.

Pruning roses. At my house in England I prune roses in the usual way using secateurs and carefully cutting back to an outward facing bud etc. But in Spain I have lots of roses, and over the years have discovered that I do not need to be so delicate. Out come the hedge trimmers again, everything is cut back drastically.

I then leave everything for a week or so before I clear up the dried cuttings and only then do I go around with my secateurs checking for too much dead wood above buds and trimming back. The photos below show some of my roses before and after. And yes, I know that grass is growing under my roses and I am ashamed, but I have lost so much blood over the years trying to remove it that I have now reached a compromise.

Invigilating chicken exams. As I mentioned at the start of this post the idiot son will be taking his advanced certificate in chicken care. Under Cruella’s supervision he has been taking exams from The University of Applied Chicken Care. Cruella has decided that I should be the invigilator for his exams. The photos below show some of his efforts.

Cruella was euphoric at his pass and insisted that he was now ready for basic broom flying lessons. I warned her that this was just too much and should be postponed. But she insisted and the subsequent failure can be seen in the photos below.

He didn’t have the right equipment and he never really got off the ground. He landed on top of my compost bins and broke the lids; I am thinking of suing for damages.

The big winter cutback part 2. Cruella demands chicken workers rights

The big winter cutback continues, and this post covers the main jobs you should be doing in your garden right now. Remember, don’t delay as growth will start in late February and you will have missed the window to prepare your garden for summer.

All is going well with my cutback and I have managed to find a use for the chickens in the garden; Cruella (my wife) is not impressed. Anyway, this is what I have been up to:

19th January. Things I have been doing lately:

  • Pruning figs safely
  • Pruning grapevines
  • Cutting back ornamental grasses
  • Pruning figs safely
  • Mulching with chickens

A well maintained fig tree is a joy: it not only looks good, but it provides you with hundreds of juicy figs. Unfortunately the majority of figs trees in gardens in Spain are large bulky behemoths that are far too big with fruit that is impossible to reach. Maintaining your fig tree is simple. If you have a young fig tree (less than 7 years old), then just prune to keep the tree trim and with an open centre. If however you have a large tree, or one that you want to keep manageable then I would recommend pruning to a “pollard”. When pollarding you take the tree right back to a few key branches then let it grow annually from these knuckles. Unfortunately you may lose fruit for the first year, but thereafter it will be much better.

I have two fig trees one that is pollarded and one that is espalied. The photos below show both trees when they are in full leaf. Click on each photo for a larger view.
The important point to remember when you are pruning figs is that they will weep a very caustic sap from their pruning wounds so you must not attempt to prune until January or February when the sap will have returned to the roots. Even then it is best to wear a long sleeve shirt, gloves and eye protectors.

The photos below show both of my figs with their leaves off and safe to prune.

The large free standing tree was pollarded a few years ago so all that I need to do is to take back this year’s growth to the knuckles. Using lopers, and secateurs I cut everything right back to knuckle, but be careful not to take it right back or you will breech the “collar” of the branch where the next growth comes from. Leave a centimetre or two.

The first photo below shows the structure of the knuckle, the second shows a knuckle pruned, and finally the tree cutback for another year and ready to burst into leaf in about a month.

Pruning the espalier tree is different. I want this to grow along the wall on the wires that I have trained it. So the main stem I have stopped growing and want no more upward growth. Neither do I want growth at the back against the wall, or any growth that goes to the right, as I am espaling to the left. In this case I trim all the side shoots back to the lead branches. The end result is shown in the photo below.

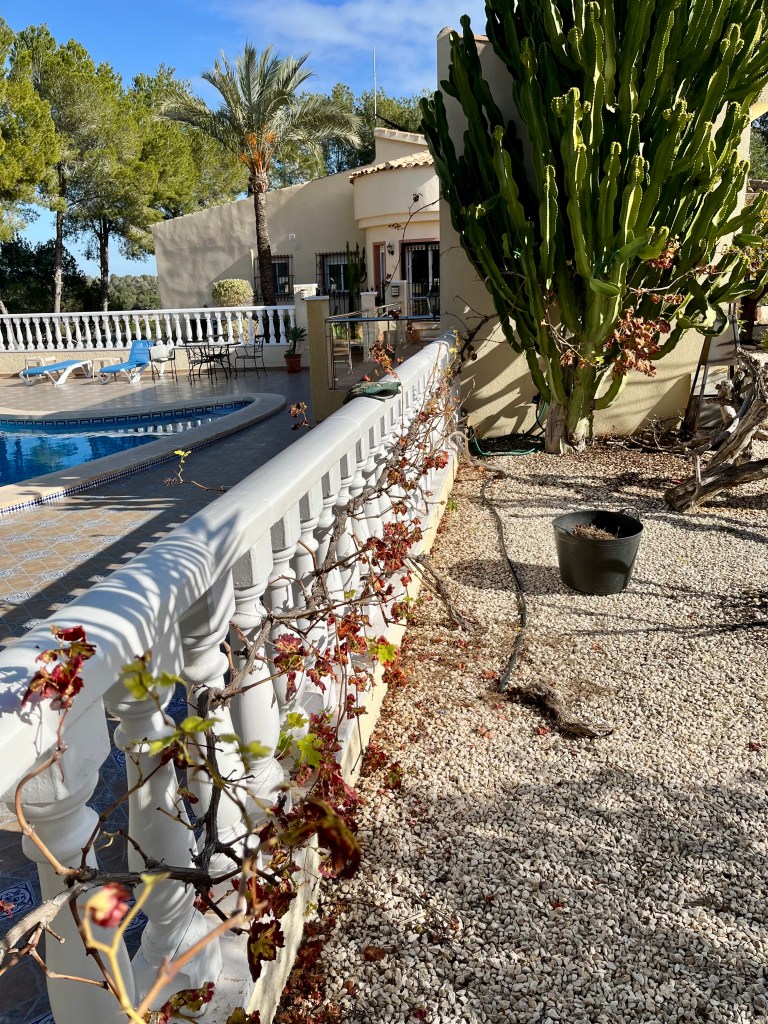
Pruning grapevines. Pruning grapevines is very similar to pruning espalied figs. You need to take all the side shoots away and take everything back to the main vine. I have three grapevines. One grows along the front of the house and is mainly ornamental as it gets mildew each year because of its position against the wall. The others grow along wires attached to balustrades and therefore have lots of air flow and ventilation. See photos below. Click on each photo for a larger view.
In each case I just move along the main stem taking out any side shoots and taking everything back to the one strong vine. The photos below show the vines pruned. You may be interested to note that I am using the large Euphorbia at the end to grow the vine through, hopefully this will be a nice feature in a couple of years.

Cutting back ornamental grasses. You have to be determined when cutting back ornamental grasses. You might think “well they don’t look too bad let’s leave it this year”. But if you are lenient then this years growth will soon fallback into a matted mess, that will not only look untidy, but will hinder this years new growth.

Cutting back grasses is simple, just use your hedge trimmer or shears to cut right back to a small mound shape. The photos below show one of my my grasses before and after its trim. Click on each photo for a larger view.
Shearing Lantana. Lantana are a perennial favourite in Spanish gardens. It is a reliable and hardy shrub that produces a continuous flow of lovely little flowers all summer. I prefer trailing Lantana and these do not need much pruning, but to keep them in shape you should shear around the outside to keep them neat. The first photos below show my main Lantanas ready for a trim, whilst the second shows them brought back into shape. Click on each photo for a larger view.
Mulching with chickens. If you have a compost bin, (and if not, why not?), then now is the time to start mulching your flower borders and under trees with your compost. If you don’t have your own compost then buy some from a garden centre. The benefits of mulching is that you replenish the micro organisms in your soil and generally enrich and enhance your growing medium. The photo below shows my composting area with a full bin and one in the process of being emptied.

This is a gardening gold mine

Normally I spread mulch under all my fruit trees, only to see the bloody chickens kick it all over the place. This year I had a great idea, instead of spreading the mulch I left it piled around the tree trunks and just as I hoped the chickens then spread it for me. The photos below show the chickens in action. Click on each photo for a larger view.
When I rushed in to tell Cruella (my wife) about my great idea, she said “you are exploiting my girls” and demanded reparations for slavery. I explained that they were enjoying it. Despite my explanation she stormed off furiously and called all the chickens together. Since then she has given all the chickens what she calls “slave names” and keeps muttering about the underground railway and heading north. As if all this wasn’t bad enough they have started chanting in chickenese what sounds like work songs. So far I can make out “Go Down Moses” and “Nobody Knows the Troubles I’ve Seen”.

Anyway the upshot of all this is that she demands I pay them a living wage. I agreed that they should benefit from their labour and promptly produced a plate of maggots from the compost. Cruella ran away screaming, but the chickens seemed pleased, if a little perplexed.

They are not singing now

The big winter cutback Part 1. Cruella hails the idiot son as the Chicken Prince

Well it has finally arrived, it is time for the big winter cutback. Depending where you are in Spain you have a maximum of two months (January and February) to get you garden in shape and to guarantee a healthy floriferous garden this summer.

The basic idea of cutting back is that you take out all last summers old growth, you take the opportunity to reshape plants that have become ungainly and you allow light to get into plants that have become congested. If you don’t cutback then you will not get the best out of your plants and your garden can end up as a brown messy jungle with no definition and few flowers.

But don’t worry, even if you don’t quite know what you are doing, as most plants apart from spring bulbs are dormant and you can’t do too much damage. So get out there, take your time, do it in weeks rather than days your reward will come in Summer.

13th January 2025. Things I have been doing lately:

  • Reshaping Yucca
  • Bringing climbing plants back into shape
  • Cutting back Canna
  • Pruning Dame de Noche
  • Trimming grasses
  • Dealing with the Chicken Prince

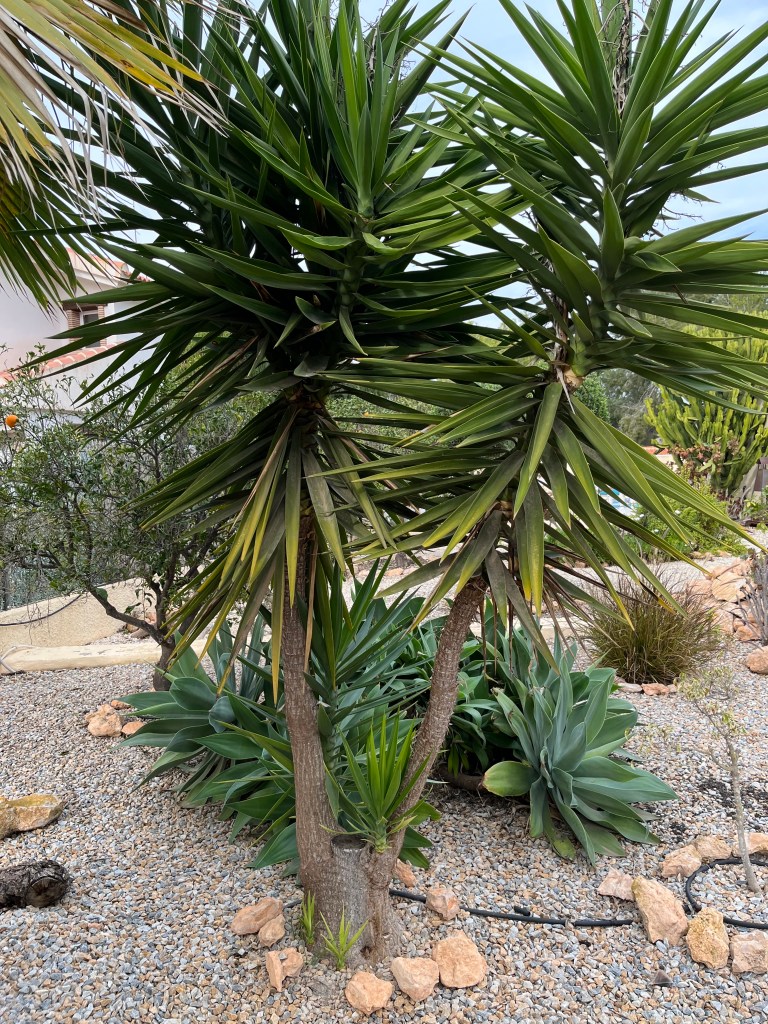
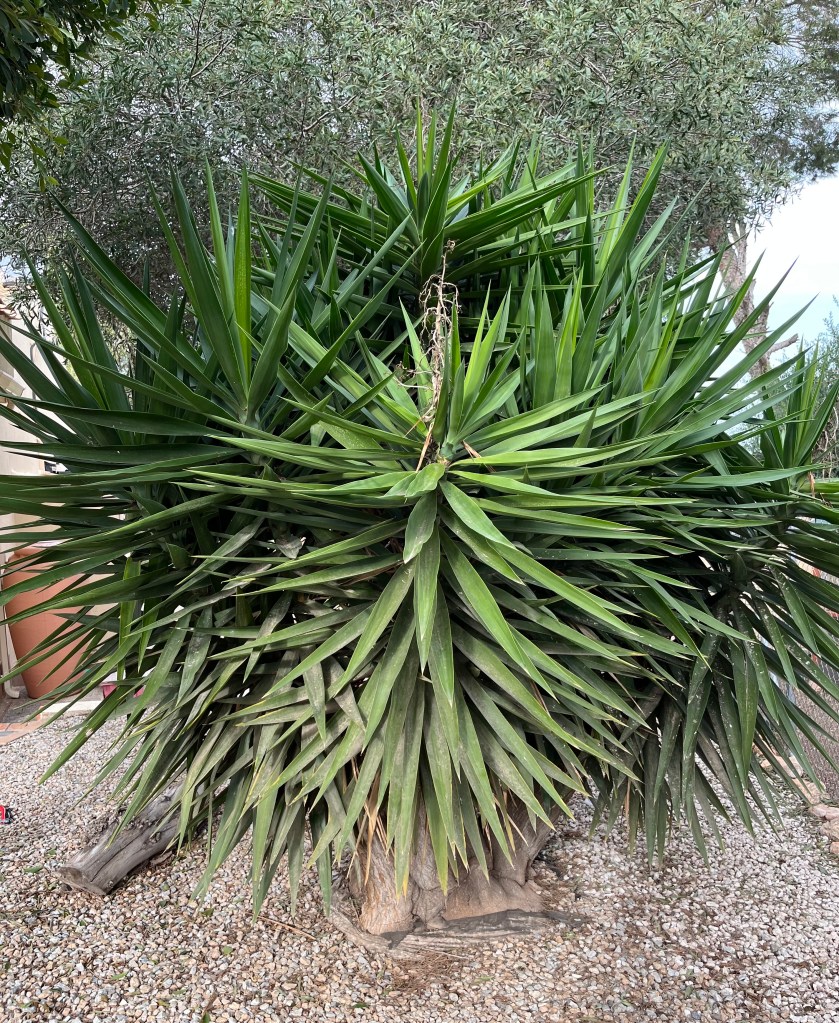
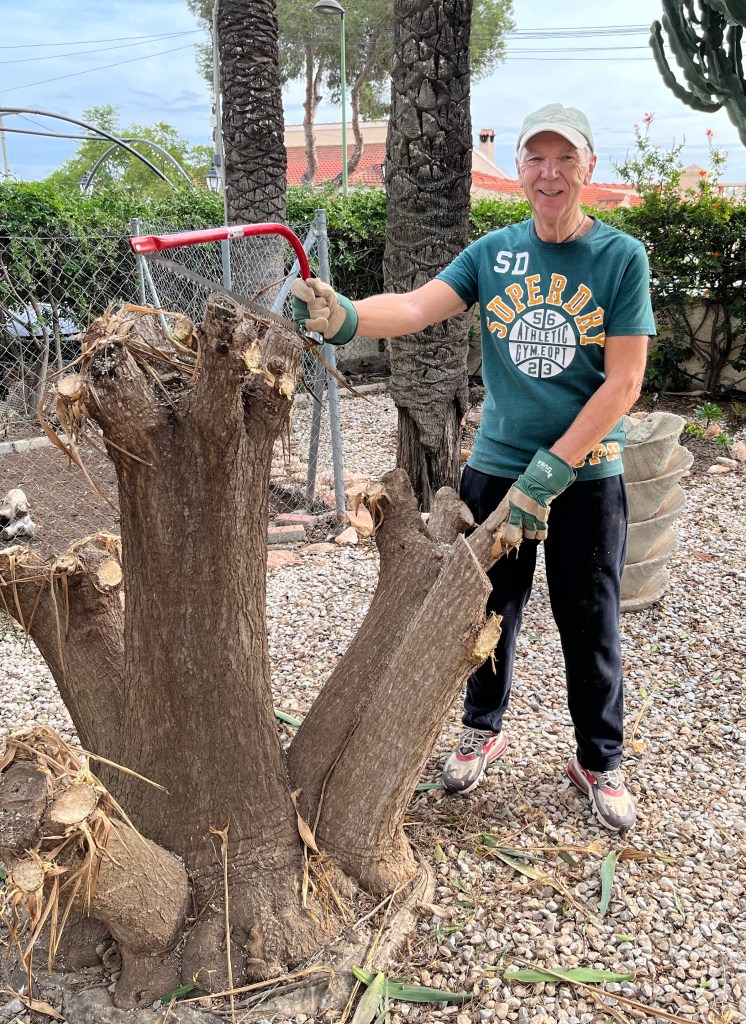
Reshaping Yucca. You may remember in my last post I talked about the need to bring Yuccas under control and cut back to a size where you can appreciate the flower spikes. I have now taken a month or so to look at my yucca and decide where I want to cut. So aided by the idiot son I set out to resize all my yucca.

Yucca are a cane and not a tree as they are sometimes mistakenly called. In effect this means that you can cut the trunk back to almost any point, and the plant will regrow from there. You can use either a chainsaw, or more flexibly, a bow saw. Most plants will cut relatively easily, but you must wear eye protection and gloves or you will get a nasty spiking. In addition large yuccas will be very heavy, and just because they look light and spindly in the air, they are extremely heavy and will cause you serious damage if they fall on you. The photos below show my yuccas before their prune. Click on each photo for a larger view.
The photos below show the pruned yucca in the same order as above with the addition of the head gardener and idiot assistant.


Bringing climbing plants back into shape. Most climbing plants will climb for two basic reasons:

1. To escape competition at ground level from other plants.
2. To out compete other plants for sun by throwing out flowering side shoots.

Because of this growing habit most climbing plants will require pruning at the end of every summer. Failure to do this will result in the plant becoming congested and normally flopping over itself and thereby killing off the growth underneath. The simplest and easiest way to prune most climbers is just take a hedge trimmer or shears and skim up the face up the plant shearing off last summers extended side shoots. This will keep your plants tidy and ready for next summer. The photos below show examples of climbers I have started to cutback. Click on each photo for a larger view.
The photos below show an old palm tree trunk with various climbers growing up it. This includes: Trumpet Vine, Jasmine, Stephanotis and Bower Vine. I just run the hedge trimmers over it to tidy it up and it is ready for another year. The photos below show you before and after.

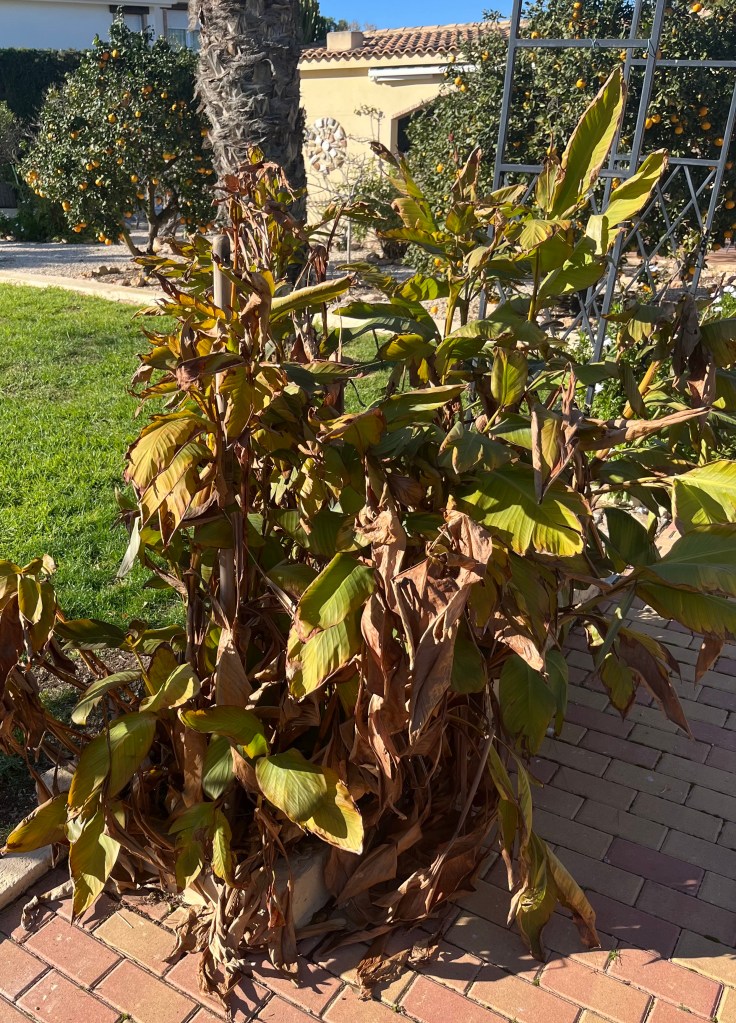
Cutting back Canna. Normally Canna are beautiful showy plants with exotic foliage and stunning flower spikes. However, this year has been a bit of a disaster. Because of a lack of early rain the rhizomes did not swell enough and most plants were half size.

I have left my plants to die right back before cutting them down to just about 3 or 4 inches from the ground. By cutting back to this level you are telling the plant that there is no point trying to regrow this year and it might as well wait till the spring. Also, by leaving a small stalk you will stop rain water seeping into the rhizome and rotting it. The photos below show some of my disappointing cannas, followed by the correct level of stalk to leave. Click on each photo for a larger view.
Pruning Dame de Noche. Now is the time to give your Dame de Noche their big winter cutback. If your plant is more than three years old then you can drastically cut back if you wish. Last year was not a great year for my plant so instead of taking it right back to 50cm or so, I am going to leave it a little bigger so that it gets a jump start in the Spring. The simplest way to prune Dame de Noche is by running hedge trimmers over them and shaping them into a mound. The photos below show my plant before and after its trim. Click on each photo for a larger view.

Dealing with the Chicken Prince. The idiot son duly arrived for Christmas and Cruella (my wife) immediately went into a frenzy of mothering. In many ways this suited me as I could start the big winter cutback without interruption. But it only lasted a day or two before she confronted me with a wide eyed manic look declaring “he is the one”, I knew the answer, but I had to ask who? “It’s him”she declared our son is the Chicken Prince.

Anyway it turned out that she had decided that the idiot was a natural with chickens and therefore was now her rightful heir to the chickens. She hoped I wouldn’t be too upset at being usurped, but to be honest I didn’t know what she was on about. She then proceeded to regale me with tales of his expert chicken handling; as seen in the photos below. Click on each photo for a larger view.

I explained if he fed me bloody grapes every day (see first photo) then I would sit on his knee. She ignored my protestations at the price of grapes and informed me he was now on an advanced course of Chickenese and grooming. As far as I know this involves lessons every day where they sit in a circle on the lawn and chat away in Chickenese. I think he is still at an early stage but it sounds a bit like this:

“Cluck!” “Cluck-cluck!” “Ba-kawk!” “Squawk!” “Brrr-cluck!”“Bawk-bawk!”

I insisted that if the chickens were to be groomed, then Tango the lonely blind Labrador should be involved. After much arguing she agreed. The photos below show them all lined up on the lawn for grooming. I insisted that Tango should be first.

They tried to rush Tango through but I insisted that as he was “special needs” they needed to spend extra time on him. The photos below show Tango being pampered. The sad thing was he gave little squeaks when they brushed him on his many bruises from bumping into things.

They spent twice as long on the chickens as they did on Tango, and to make matters worse they awarded a prize to Helga as the best groomed animal. The photos below show shows the awards ceremony.

Tango and I boycotted the ceremony and sat in the shed. I held a mirror up to him – even though he can’t see -and assured him how lovely he looked, but tears still fell from his little milky eyes. I didn’t tell him he came fifth!

The big winter cutback Part 2: Figs and Roses + Grass

Who knew that gardening could be so Rock and Roll; I always thought Guns and Roses was a stupid name anyway. If you have roses and figs, then now is the time to get them pruned back. Add a little bit of grass for you old hippies and we are really rocking. To think that Cruella (my wife) thinks that gardening is boring. Without further ado, let’s get on with the big cutback .

17th January. Things I have been doing lately:

Pruning Roses. People sometimes make out that there is a lot of mystique about the timing and methods of pruning back roses. But roses are very hardy and can take quite a lot of rough handling. The photos below show some of my roses ready for their annual prune. Click on each photo for a larger view.

It is important to remember that climbing roses are pruned differently to bush roses. With climbing roses I recommend running hedge trimmers lightly up the length of the plant just removing excess side growth without cutting the upward stems. In this way you will maintain height but get rid of bulk. The photos below show my climbing roses before and after their trim. Click on each photo for a larger view.

Now if like me you have lots of roses (I have 30) then pruning can be quite a time consuming process, so I recommend that you do it in two linked stages. First, be brave and get out your hedge trimmer or shears and just prune back all your roses to the required height – I recommend taking off at least two thirds of the height.

Second, get on your knees and prune each individual plant as follows. With bush roses the simplest method is to prune back by about two thirds to the nearest outward facing bud joint. As part of this process take out any crossing or diseased stems to leave a nice open centre to the plant a bit like a wine glass. The photos below show my roses pruned. Click on each photo for a larger view.

The more perceptive amongst you will note that the final photograph shows that you can barely see the pruned rose from the leaf debris and grasses growing through. I am sorry to tell you that this is when it gets difficult and when the real hard work starts. Oh and unfortunately you will lose a lot of blood. Using a pointed trowel you need to get under each rose and remove all the leaf debris and dig out the weeds and grasses. The rose thorns will get you no matter how good your gardening gloves and you will bleed quite a lot.

This is the important part so please pay attention. Sepsis though rare affects a number of gardeners each year. If you cut yourself – and you will – then it is important that at the end of your pruning blood bath you wash your hands and then bathe your cuts with an alcohol solution to ward off infection. The photos below show my lovely rose beds all restored and ready for this year’s growth. The final photo shows the all important alcohol to sterilise your many cuts. Click on each photo for a larger view.

Pruning fig trees. Most fig trees in Spain are allowed to grow into giant behemoths sprawling over gardens like something conjured up by Gandalf. Their fruit is often too high to harvest and they shade out other plants nearby. I have two fig trees: an espalier and a free standing tree. As a lover of figs both of my trees are cosseted. They are fed, netted and pruned at exactly the correct time, and in return they provide me with abundant fruit. My trees are shown below in their unpruned state. Click on each photo for a larger view.

You should only prune figs when you are sure the sap has returned to the roots as figs have a caustic sap which can inflict quite severe burns if you foolishly cut any branches during the growing season. There are many ways to prune figs, but whatever your chosen method there are two key elements.First, ensure that you have trained your tree so that you can easily reach the fruit at the height of the growing season. Second, prune to achieve an open aspect at the centre of the tree to let in maximum light and air.

The pruning method I have chosen for my free standing tree is to pollard it back to six main branches each of which have numerous stems during the growing season. For the espalier fig, I just remove perpendicular side shoots to encourage lateral growth along wires. The photos below show you both trees after their prune. Click on each photo for a larger view.

If you want to propagate your trees either to have more, or to give to friends, then this is the ideal time. Many of the branches you have pruned off will have buds just waiting to spring into growth. Choose some of the best of these; I always look for healthy strong branches with multiple buds at the end. Cut them back to about 30cm just below a growth node then dip the ends into growth rooting hormone (don’t worry if you don’t have this it probably will still work). Pot them up in free draining compost and leave them in the winter sun. With a bit of luck you will have some new trees in the late springtime.

The first photo below shows my choice of potential cuttings. This is followed by an indication of where to cut. Then the process of dipping into hormone rooting liquid. My free draining mixture one part compost to four parts soil is shown as an action photo of a trug. Finally my little cuttings ready to get going. Click on each photo for a larger view.

Cutting back Fountain grass. I have one large Fountain grass which unfortunately had died in the middle as most grasses will do over time. I split it just over a year ago and replanted 3 into my own garden and gave some to my friend Camilla who is making a new wonderful garden. Anyway, now is the time to cut back grasses. The simplest way to cut back grasses is just to use your hedge trimmers to gently trim around the plant to make a small mound shape. Do not be tempted to square the grass off (as Ayuntamientos have a habit of doing) this guarantees a short life before the centre dies back. By creating a mound you maximise the light and air to the plant.

The photos below show my little transplants before their cut back and finally how it should look after cutting. Each mound will get bigger each year until eventually the splitting process takes place again. Click on each photo for a larger view.

It’s time for the big winter cutback Part 1, and the chicken whisperer returns

Yes, it is that time of year when we gardeners have to get out there and cut everything back. Failure to take action now will mean that your garden will not fulfil its potential this Summer. Over the next few weeks I will be pruning, cutting back and generally getting my garden into shape for the coming summer. I will be working with the types of plants you have in your Spanish gardens, so just follow what I do over the next few posts and we can guarantee a lovely garden this summer.

Unlike most of you I have certain hindrances whilst doing my garden, namely: Cruella (my wife), her brood of chickens from hell, and as a special treat the idiot son has come home for a holiday and Cruella has declared him a chicken whisperer. Anyway, let’s get on with the gardening.

10th January 2024. Things I have been doing lately:

Over the next few posts I will keep you up to date with the big winter cutback, but this particular post will cover the following:

  • Pollarding Peruvian False Pepper trees
  • Pruning Sago Palms
  • Cutting back Dame de Noche
  • Pruning climbers
  • Dealing with the chicken whisperer

Pollarding Peruvian False Pepper trees: This tree can be found in many Spanish gardens. Its weeping willow type foliage and lovely little red peppercorn fruits provide an attractive tree that can grow up to 15 metres tall. However, too often the false pepper is allowed to grow into a huge behemoth that whips around in the wind and covers you terraces in discarded foliage and blocks your swimming pool skimmers. The photo below shows my tree before pollarding.

Left to grow this tree canopy would double in size over the next few years.

The secret to keeping the false pepper as a useful part of your garden landscape is to ensure that you pollard it every 5 years or so. Pollarding involves radically pruning back the main branches which reshapes the tree and encourages secondary growth that will stay manageable for a few years. When pollarding you need to use a chain saw or bow saw to cut each of the main branches about 6 inches from the base of the branch. By keeping the correct distance from the base of the branch you will not damage the branch “collar” which contains the growth instructions for the branch.

Luckily the idiot son was visiting so I persuaded him to help me pollard the tree. I had to promise him copious quantities of beer and Cruella insisted that I held the bottom of the ladder at all times. The photos below show the idiot in action with the final photo showing the finished pollard. Click on each photo for a larger view.

The final pollard will last at least five years

Pruning Sago Palms: The slow growing sago palm is another perrenial favourite in most Spanish gardens. These can be majestic if pruned correctly, but if just left to their own devices, they are just another green lump in your garden. There are two schools of thought on pruning sago palms. The first says that you must leave the fading yellowing fronds on the plant as they provide nutrients. The other says keep it pruned and tidy and if necessary give it a feed. I support the latter process and always prune mine back to two rows of fronds from the top. Two rows is important as if you left just one row and then these became diseased then you could lose the plant. I have two main sago palms; one is in the ground and the other in a pot. Both are shown below. Click on each photo for a larger view.

From the photos above you can see that both are due a trim. Using long handled lopers I gradually move round the trunks taking off rows of fronds until I am left with just two rows on each stem. The photos below show my handiwork.

The final stage in pruning the sago palm is to remove any pups it has thrown from the base of its trunk. These look like mini sago palms that are emerging, and you can pot these up, but that is for another days post. Today we just need to take them off to tidy up the plant. The first photo below indicates the pups circled in red. You just need to remove these with your secateurs or lopers and then the plant is left nice and tidy for the summer.

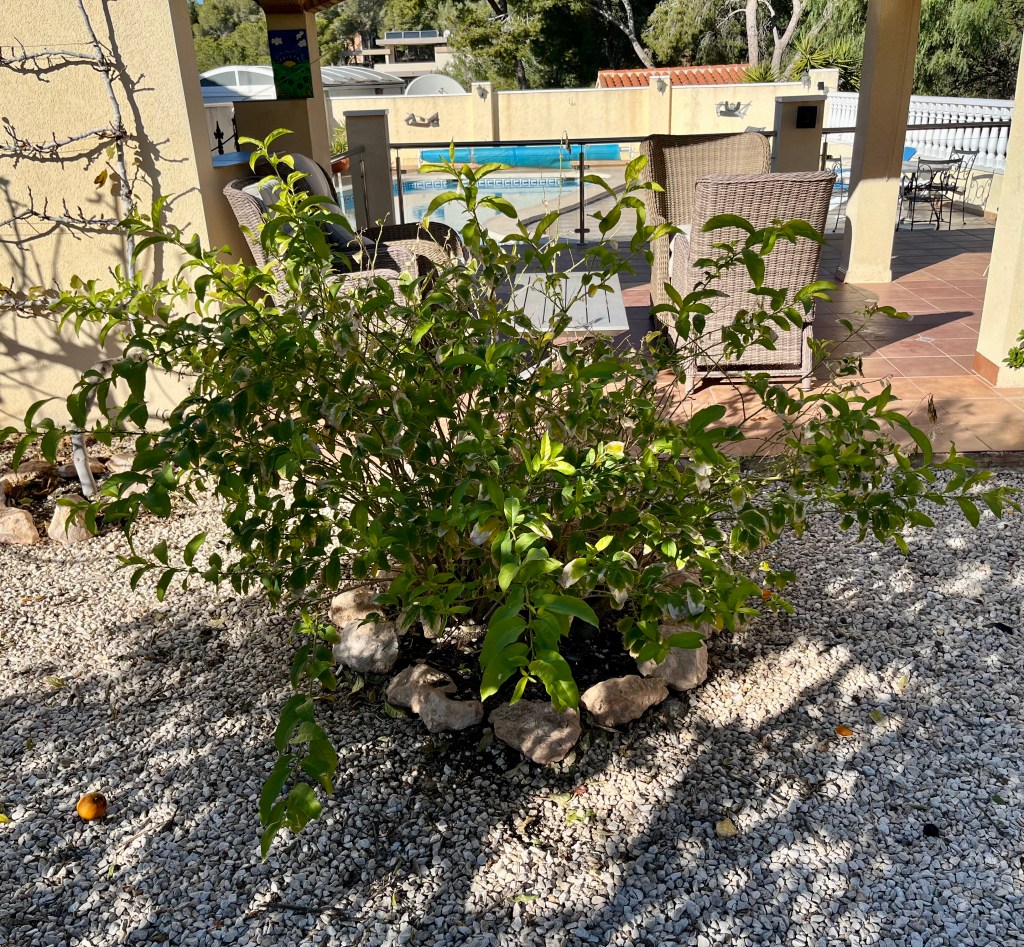
Cutting back Dame de Noche. The lady of the night which is a night scented Jasmine needs to have its final cut back now if you are to enjoy its lovely scent in the summer. You should have already cut the plant back by a third after its first flowering to allow a second flush of flowers. This final cutback can be quite drastic to encourage a healthy shapely growth. Depending on the age of your plant you can take it back to 6 inches.

The first two photos below show my dame de Noche looking straggly and ready for its cutback. Notice that I have planted my dame de Noche close to our outside seating and eating area so that we can benefit from the beautiful night scent. Click on each photo for a larger view.

The next photos show the plant cutback and ready for its final pruning. To finish the prune use your secateurs to open up the centre of the plant to take out crossing stems and let light and air in.

Pruning climbers: The trick with pruning climbers is that you do not want to lose height but you do want to reduce bulk so that you can let light into the plant. So in effect what you need to do is remove side shoots. The simplest way to do this is to run your electric hedge trimmers up the front of the plant aiming to stay away from the upward growth. Lacking hedge trimmers just use garden shears to achieve the same effect.

So far I have cut back the Solanum that grows up the side of my outside kitchen and dining area and also my column of plants that I trained up a palm trunk. The photos below show that all that is needed is to just take away bulk and bring back shape. Click on each photo for a larger view.

Finally, don’t be tempted to feed or overwater the plants you have pruned. Wait a couple of months till you see new leaf growth and then give a light feed.

Dealing with the chicken whisperer. Whilst I have been dealing with the start of the big Winter cutback, Cruella (my wife) has been training the idiot son in the art of chicken whispering. She is trying to convince him to leave the world of Finance and become her rightful heir, or as she calls him “Prince of Chickens”. So far he is holding out, but she is making him follow a strict curriculum of chicken studies. This includes lessons in Chickenese every morning followed by hands on work with the chickens in the afternoon. Early evening is spent in the so called art of chicken whispering. The later evening is spent in the rites and mysteries of putting the chickens to bed, but I can’t tell you anything about this as I am not allowed to see what goes on.

The photos below give you an idea of what they get up to, I did have some others but Cruella made me delete them! I am only allowed to show you these ones as Cruella is using them in his graduation album. Click on each photo for a larger view.

The big cutback part 3: and Cruella becomes a “feeder”

I am now heading for the final push on the big winter cutback, ideally everything should be cut back in your garden before the end of January. If you leaving cutting back much later then you are likely to be cutting off this years growth. This last bit is always heavy going for me as I leave the big heavy stuff to the last so that I can build up my courage and stamina. The very last thing I do is reshape my big Ficus tree which is a bloody painful experience each year.

As if dealing with the most stressful part of the big cutback was not enough, I spend most of my evenings preparing my defence against the summons served on me by the Chief Diversity and Inclusion Officer of the National Chicken Council on account of my alleged slander of calling Cruella (my wife) chickens fat. Anyway more of this later, on with the big cutback part 3.

27th January 2023. Things I have been doing lately:

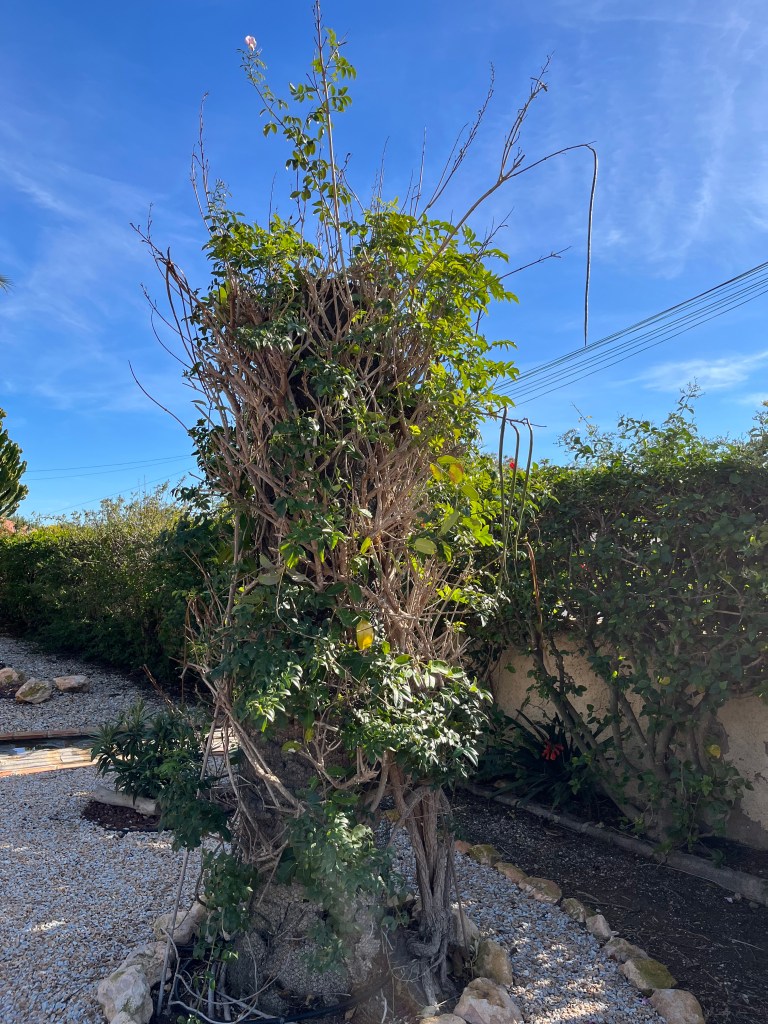
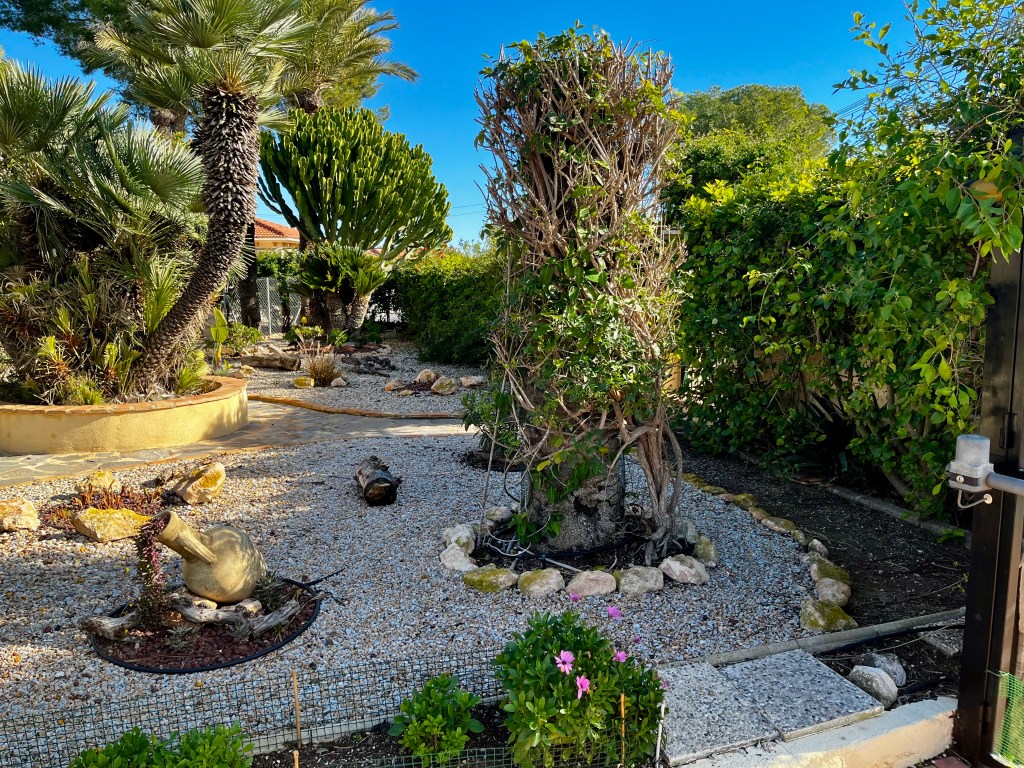
Cutting back my tower of flowers. Regular readers of this blog will know that years ago I cut back a palm that had fallen victim to the Palm Weevil. Instead of completely taking the Palm out I instead wrapped it’s shortened trunk in mesh and have happily grown a variety of climbers up the truncated trunk. This provides me with a lovely tower of flowers all summer, but needs to be cut back every winter to encourage new growth.

In case you are interested the plants I used to clamber up the trunk include:

  • Pink Trumpet Vine
  • Solanum
  • Jasmine
  • Stephanotis

All of the above flourish beautifully. The first photo below shows the flowering tower at the end of Summer. The next two photos show the tower before and after it’s annual cutback. Click on each photo for a larger view.

Pruning a variegated ficus. I have two variegated ficus one is quite small, whilst the other is larger and I have subjected it to cloud pruning. The secret with any variegated plant is to make sure that the moment you see a fully green leaf you instantly pluck it out. You can quite easily lose variegation as the green leaves can prove very dominant and will soon take over. Spain’s gardens are full of variegated ficus that have lost their variegation and are now common or garden old ficus – you have been warned, don’t come crying to me.

Ficus are relatively slow growing and are very forgiving if you prune them a little badly. My poor old ficus can be seen in the photos below before and after being subjected to my artistic pruning. My aim is to produce an inchoate, but interesting shape whilst exposing the stark white of the bark – good eh! Click on each photo for a larger view.

Maintaining the sight lines for my European Fan Palms. If you read my last post, and I am sure that you did, then you will remember that I wrote about the importance of sight lines in your garden. Sight lines are views or vistas in your garden that perform the function of providing a special view or focal point integral to a particular part of your garden. My European fan palms perform a dual function they give a privacy from my front gate and present a dramatic entrance for guests, whilst at the same time presenting a stunning sight line from the house.

These palms are lovely, but they grow like crazy and happily self seed around themselves. This means that get very top heavy with abundant new fronds whilst at the same time becoming overcrowded at the base. The first photo below shows the unpruned plant viewed from the gate towards the house and secondly from the house to the gate. From these photos you can see the problem. Click on each photo for a larger view.

After much vigorous pruning shown in the two photos below, the sight line can be seen fully restored in the final photo. It is important to note that when pruning any large palm you must wear eye protection or you can easily be damaged by their spiked stems. It is bad enough that they shred your clothes without losing an eye. Click on each photo for a larger view.

Pruning Sago Palms. Sago palms are one of the most popular plants in Spanish gardens. They can be found planted in the ground or happily growing in pots as their slow growing nature ensures they are happy in pots. To be honest these plants do not need that much pruning especially if you grow them in the way that I do with an exposed trunk. I think that exposing the trunk gets you the best out of the plant; you see the ruggedness of the trunk whilst at the same time appreciating the architectural shape of the fronds. To achieve this look, just get out your lopers and take off all the circles of fronds just leaving the top two circles. This is important as if you ever lose one circle to disease or damage, then you have a reserve. The photo below shows my multi-stem sago palm before and after its trim. Click on each photo for a larger view.

An interesting and rewarding part of sago palms is that they will throw off “pups” at their base. These in effect are mini sago palms that can be removed and cultivated. I am not doing this at the moment as I am too busy, but this is the process if you fancy having a go.

  • Clear the earth away from the pup to expose a hard coco nut shaped growth
  • You need to separate this growth from the trunk by cutting down with a sharp spade or similar
  • Once you have removed the pup cut off all the fronds attached to it
  • Place the now frondless pup in a shaded dry area for two weeks to allow the scar where you have cut time to scale over
  • After two weeks place the pup in a compost mixture of 60/40 compost to sand and place it into a very tight pot and place in bright but not full sun
  • Water once then leave it till the soil is completely dry and then water sparingly
  • If you are lucky, in about a month you should see some growth

The photos below show some photos of my ready to harvest pups. I have cut one side of the fronds off so you can get a better look. Click on each photo for a larger view.

Cutting back hedges. I consider a good mixed hedge to be one of the delights of living in Spain. Far too many people surround their property with high sterile walls that stop any meaningful growth in their shade. Planted correctly hedges can give you all the security of a wall, but at the same time can delight you with different foliage and flowers not to mention abundant wild life.

I have a rather unorthodox approach to hedge planting. I have over two hundred metres of a variety of mixed hedges all of which are planted closer than normally recommended so that they eventually form a thick impenetrable wall of living colour with each hedge flowering like crazy as it fights for its space. This means that all I have to do is get my hedge trimmers out and trim it all back to the desired height each year and leave it to get on with it again.

When I say all I have to do, to be honest it is like a military operation assembling all the ladders, platforms and tools needed to do this job. The first picture below shows me beginning to gear up for the task in hand. Whilst the subsequent three pictures show parts of the actual task in hand. Click on each photo for a larger view.

Finally below you can see the finished hedges in all their glory.

Preparing my defence. Unfortunately, as I mentioned earlier I have to spend most of my evenings locked in my room preparing my defence against the summons served on me by the Chief Diversity and Inclusion Officer of the National Chicken Council on account of my alleged slander of calling Cruella (my wife’s) chickens fat. The nub of Cruella’s case rest on the fact that she has sworn an affidavit saying that her chickens are only fed normal chicken food and therefore cannot be deemed fat.

I on the other hand have mounted a defence that no ordinary chickens could be as fat as these unless they were getting extra food. To assist my defence I have been secretly monitoring Cruella and her chicken feeding habits. The first thing I noticed was that some of the chickens gather inside Tango the blind Labradors old kennel every time he is fed (10am and 3pm). The photo below shows the assembly starting. This spot is just beside where Tango’s food is kept and where he is fed.

The assembly of the fatsos

By mounting a hidden camera I now have proof that Cruella is illicitly feeding her chickens with high calorie insect treats that obviously encourage obesity in chickens. The photos below are legal dynamite as they not only show excess feeding taking place, but I have also included a photo of the illicit feed. Click on each photo for a larger view.

Obesity in a bag

Confronted by my portfolio of evidence Cruella has admitted that she may have acted hastily and has subsequently written to the Chief Diversity and Inclusion Officer of the National Chicken Council withdrawing all allegations against me. Unfortunately, all of this has drained me and I am not currently up to battling with the big Ficus tree so there will be a Part 4 of the big cutback.

The big cutback Part 2: My new garden kneeler and accusations of chicken discrimination

It all started when I was explaining to Cruella (my wife) how my new garden kneeler works. I had just finished explaining the kneeling element and was going on to outline the workings of the seat part, when she suddenly blurted out “you are so boring”. Obviously, I was taken aback, but I quickly countered with “well your chickens are fat”. I probably went too far as she burst into tears and accused me of body shaming her girls. Any way it all went down hill from there and it now appears she is threatening to report me to the Chief Diversity and Inclusion Officer of the National Chicken Council. I think she made this up so I am just going to get on with Part 2 of the big winter cutback.

I don’t want to make you choose sides, but just look at my new garden kneeler in the photos below and compare that with the fat chickens. Eh! Who is boring now. Click on each photo for a larger view.

This isn’t all of them, the others were so fat they couldn’t get out of their coop

19th January 2023. Things I have been doing lately:

Pruning fig trees. Now is the time to prune your fig trees, as all the leaves should be off by now and the sap should have stopped rising. I have two fig trees; one of which is espalied. The photos below show my figs waiting their annual prune. Click on each photo for a larger view.

Fig pruning is a multi year event, you must first let the tree grow to the size that you want it, and which fits in with your garden. Once you are happy with the size then cut back hard to an open structure of branches and then leave it alone for a year. It will grow a whole new set of fruit bearing branches from this main structure, and it is these that you will prune back each year, and by this method you will keep the tree in shape and stop it becoming a behemoth which dominates your garden. It is important to note that the branches of the espalier fig are not cutback, as I am training it along wires, only the side shoots are taken out. The photos below show my trees after their annual prune. Click on each photo for a larger view.

A useful adjunct to your pruning is to leave the cut stems on the ground for a few days to let them fully dry out, and then shred them and lay them as a mulch under your trees. The photos below show the final mulch laid around the tree.

Pruning grapevines. In a similar way to the fig, grapevines should now have lost most of their leaves and the sap should no longer be rising. I have three grapevines which are basically ornamental, but look lovely in summer. The main grapevine grows along the front of our Naya and it’s stems hang down to form a lovely fringe along the front of the house. The other two grow along balustrade at the side of our pool and provide a barrier to table tennis balls going out of the pool area (don’t ask). The vines can be seen in their uncut state in the photos below. Click on each photo for a larger view.

Many people in Spain just leave their grapevines to become a big shapeless, tangled, amorphous mass. But this is not fair to the plant and it will not give of its best when left like this. You need to leave the main stem alone, but cut back all the side shoots to the nearest bud node, and then tie it all in to stop wind rock tearing at the main stem.

The vine along the front of the house is tied back to wires, but will more or less stay in shape as the vine stem thickens and it gets older. The ones around the swimming pool needed to be rehung for the best display. Note that it is important not to tie up vines with a single strand of wire, as this will dig into the stem and allow pathogens and pests in. Instead form a loop of wire as shown in the photo below like a little hammock for the vine stem to rest in.

The photos below show my vines pruned back, and finally you can see the wire hammock to hold the stem. Click on each photo for a larger view.

Cutting back Dame de Noche. Many of you will have a Dame de Noche plant in your garden for the beautiful night scent they give off in the summer. This plant is especially useful near outside seating areas or close to the house where an open window will allow the scent to flood the house.

Dame de Noche in itself is not an intrinsically beautiful plant, but it makes up for this by its scent. However, to maintain the shape of the plant and its scent you need to prune in a specific way. Right now you need to cut back the plant by two thirds using your electric trimmer or lopers. Normally this will suffice and allow the plant to grow quickly by the summer, and back to at least it’s original size. However, sometimes the centre of the plant will become congested as mine has, then you need to get your chainsaw out and cutback lower to main branches.

The photo below shows my Dame de Noche ready for pruning, and if you look at the centre of the plant you can see that it is congested.

The first photo below shows the level you would normally cutback each year. However, I have to cutback further because of the congestion at the centre of the plant, and the second photo shows the drastically pruned plant. Click on each photo for a larger view.

Cutting back Oleander. Oleander is another of those Spanish plants which you can only cutback in the winter after the sap has withdrawn from its stems. Failure to obey this simple rule of thumb will probably leave you with badly burned hands and arms from the caustic sap.

Cutting back Oleander is simple. First stand back and assess what you want out of the plant; do you want it to be large and dominant, or in a hedge, or like me do you want it to play its part in a sympathetic blending of plants. If you decide to prune then it is very simple just go down the stems to the height you want the plant to be, then cut just above a pair of leaves on each stem. Try and leave as little stem as possible above your cut, as this is dead and will only attract pathogens and pests if left too long.

The first photo below shows the Oleander I want to cutback to stop it dominating this part of my small “dry garden”. Often it is best to cutback Oleander via its back door from behind as you get a better view of the stems and where you need to cutback, as in the second photo. The third photo shows where to cut on each stem, and finally the newly pruned plant. Click on each photo for a larger view.

Creating sight lines in your garden. Unfortunately, I have to finish this post now as I have received a court summons from Chief Diversity and Inclusion Officer of the National Chicken Council, evidently they do exist, and I have to prepare my defence. But before I go I want to tell you about the importance of sight lines in your garden.

Sight lines are views or viewpoints that exist within any garden large or small that display either the whole garden to best advantage or a particular area. In this case it is the view at the end of my drive. I have planted the end of the drive in various ways but the dominant plants are a Californian False Pepper tree and a Myrtle-leaf milkwort bush. Unless both these plants are kept in shape with regular pruning then the sight line at the end of the drive becomes messy and confused. This is an important sight line for my garden as it is the first thing visitors see as they come down the drive.

The first photo below shows the end of the drive with the plants overgrown and not providing the sharpness that I want in this sight line. The next photo shows the two main plants pruned back and the sight line restored.

For this sight line to work you have to see through to the Wild Wood behind
What do you mean you can’t tell the difference!

Hooray! It’s time for the big Winter cutback and Cruella holds a farewell party for the idiot son

Christmas is over, a new year has begun, the idiot son has gone back to London to ruin the financial system, Cruella (my wife) has sunk into the abyss of despair and grief at the departure of the idiot, even though we had a great party before he left. She has spent days in his bed sleeping with his clothes on, sometimes accompanied by a chicken. However, I am about to start the first stage of the big winter cutback; what’s not to like.

January 12th 2023. Things I have been doing lately:

The big winter cutback Part 1. Your garden this summer will be defined by your actions over the next few weeks. Now is the time to cutback your plants fiercely, in order that they will be reinvigorated for the summer. Failure to cutback now will leave your plants weak, leggy and prone to disease. The cutback is also an opportunity to redefine the sight lines and paths in your garden and to freshen and renew your whole plot, whether it is a terrace or a plantation.

The winter cutback is not for wimps, you can’t be too precious with your plants so cutback hard, don’t worry they will survive and reward you with vigorous new growth. Most general plants, bushes and trees will benefit from being cutback hard, but do not cutback succulents and cactus. It is best to cutback your garden in a set order, my preference is as follows:

  • Roses both to plant new ones and prune existing
  • Ornamental grasses
  • Perrenials
  • Small bushes
  • Large bushes such as Oleander and Ficus
  • General mixed hedges
  • Trees (but not citrus at this stage)

Planting bare root Roses. Now is the time to plant new bare root roses, don’t plant container bought roses yet as the ground will be too cold, this is best left till the end of February. I stupidly killed some of my roses this summer as I turned off their irrigation after days of heavy rain and then forgot to turn it back on; by the time I noticed it was too late. This meant I had to buy in some old English bare root replacements from David Austin.

The secret to planting bare root roses is to keep them in a cool dark room until you are ready to plant them, then before planting soak them for at least 24 hours. The first photo below show my new bare roots roses resting in my shed, whilst the second shows them soaking before planting. Click on each photo for a larger view.

When you are ready to plant out, prepare the hole before removing the roses from their soaking. Also, and if possible, sprinkle the roots with Myrrcohirzal Fungi which will stimulate the roots to promote rapid growth. When you plant any roses you must make sure to bury the bud union (where the stems join the root) below the surface as this will be where the new shoots come from. Where possible back fill with well rotted compost and firm the soil all around the new plant as this will stop root rock in the wind.

The first photo below shows my new roses being lovingly coated in fungus. The next shows the depth the new rose bud union should be planted to (if possible 3 inches). Finally, a photographic triumph of me firming around the new plants. Click on each photo for a larger view.

Pruning roses. Now is the time to prune your roses. If you have lots of Roses – and I do – then sometimes to save yourself a lot of time you can prune in two stages. Firstly, get out your hedge trimmer and cut all your roses back by about two thirds;this can be scary, but I assure you it works. Wait a few days and then go back and do a traditional prune by opening up the centre of the plant to create a “wine glass” open shape. This will save you lots of time, and lessen your blood loss as you try to get into the centre of the plant. Do not use this method for climbing roses, they need only have their side shoots trimmed back.

The photos below show my rose beds before and after the massacre, followed by my climbing roses pruned more prudently. Click on each photo for a larger view.

Pruning back Chillis. Normally I grow chillis afresh every year from saved seed, but this year I have decided to cutback my existing plants and see how they grow this summer. I have plenty of seeds in reserve if I feel that the cutback plants are not performing, so it should be fun. If you want to try this, then just cutback quite low on the plant to an outward facing leaf node. Top dress with some nice fresh compost, water profusely and then leave in the shade for about three days before returning to full sun. The first photo below shows my chilli plants ready for pruning, the next shows the trimmed back plants and finally their lovely compost top dressing. Click on each photo for a larger view.

Cutting back Cannas. Cannas are one of my favourite plants, they are tall, majestic, colourful and with lovely foliage. But, perhaps more importantly they keep on multiplying so every 3 or 4 years you dig up the rhizomes (ugly bulbs) and get a whole new bunch of plants. If you have Cannas, then now is the time to cut them down, their foliage should have gone fully brown and shrivelled and all the goodness from the foliage will be stored in the rhizome.

Using your secateurs cut each stem back to about 4 inches from the ground. The length is important as it just enough to convince the plant that this stem is no longer viable and it will not try to regrow. Also the 4 inch stem will ensure that water from the ground cannot seep into the cut stem and rot the rhizome. The cut stems will not regrow, instead the rhizome will send up a completely new stem from an eye on the rhizome. By the end of the summer you will be able to pluck out the old stems from within the new growth.

The first photo below shows one of my stands of Canna ready for their winter cutback. The second photo shows them cutback to the regulation 4 inches. Finally, a canna rhizome with its old stem cut back, but I have marked the eye in the rhizome where the next stem will emerge; isn’t God wonderful. Click on each photo for a larger view.

Cut ornamental grasses back hard. Most ornamental grasses will benefit from a really hard cutback at this time of the year. Last year I divided a large Fountain grass as it had started to die back in the middle. I discarded the middle and split it into 8 parts, replanted four and gave the rest away to friends. I am pleased to say that all the new plants have taken and had a good first summer.

Now is the time for their first big cutback. Using a hedge trimmer or shears cut the whole plant back so that it forms a small mound. Then water it and leave it alone, it will come back this summer bigger and stronger. The photos below show some of my grasses before their cutback, and what they look like now after their trim. Click on each photo for a larger view.

The idiots sons leaving party. There is so much more of the big winter cutback to tell you about, but Cruella insists that I tell you about the idiot sons leaving party. To be honest, it wasn’t much of a party, there was just the three of us, together with the chickens and Tango the lonely blind Labrador.

The day started quietly with the idiot rehearsing the chickens for a big dance routine that Cruella had devised. But the little white chicken was too shy to get involved so was designated a stage hand. The first photo below shows the start of rehearsals, whilst the second shows the little white chicken shyly refusing to get involved. Click on each photo for a larger view.

Everyone was made to dress up, and I was forced to have a bath. The worst of all was Tango the lonely blind Labrador who was forcefully brushed by Cruella and the idiot boy whilst the chickens looked on mockingly. To be fair to Tango he can’t see and he thought he was being mugged, especially as the little black chicken had stolen his plastic bone earlier. The first photo below shows Tango being forcefully brushed, whilst the second shows the mugger with his bone. Click on each photo for a larger view.

The day progressed relatively slowly with Cruella insisting that we all sit through what she called her “fashion show”. This consisted of her sashaying up and down our drive (or chicken walk) as she called it, carrying a different chicken for each change of clothes. To be honest I was shocked to find that she had persuaded Nike to produce a range of what she calls “chicken couture”. The photo below shows her parading part of her sports range.

After each sashay Cruella pirouetted at the end of the drive, bowed and then went into the shed to change into her next outfit; the chickens were in the shed already waiting to be matched with her next outfit.

The evening ended in a raucous manner with a themed country and western event by the swimming pool. We all had to wear cowboy outfits, which greatly perplexed Tango as although he can’t see, he could hear my leather Chaps rubbing. The finale was the idiot boy insisting on wrestling with Tango which resulted in the poor dog thinking he was being mugged again. The first photo shows the idiot son dressed as a cowboy, much to Tango’s bewilderment, whilst the second shows part of the end of day wrestling. Click on each photo for a larger view.
I have become a hedge fund manager – without the fund

I am continuing with the big winter cutback, and the end is almost in sight. The really big job over the last week or so has been cutting back my hedges. I have about 150 metres of hedges that consist of a wide variety of plants. If you don’t have a hedge, then you really should consider planting one, they are a joy to behold for a number of reasons:

  • they present continuous flowering for about 9 months of the year
  • provide shelter and nesting for birds
  • they are a larder for bees and other pollinators
  • they are easily maintained, just requiring a winter cutback
  • they provide a living alternative to walls

I am thinking about writing a novella entitled “in praise of hedges”. Anyway on with the gardening.

24th January 2022. Things I have been doing lately:

Cutting back hedges. The annual cutback of hedges needs to be done before the end of January as most hedge plants have a very short dormant period before they are back in bud again. If you want a hedge then be brave and pack it out with all your favourites. Don’t be tempted to go for one type of plant, as you should be aiming for a floriferous wall of planting rather than monoculture greenery.

I pack my hedge plants relatively close together and encourage them to fight for light. I have to act as the referee to stop any one plant taking over, but they all grow strong and flower like crazy. Just for information, in case you are thinking of planting a hedge, my hedge includes the following:

  • Hibiscus
  • Plumbago
  • Bignonia
  • Pink Trumpet Vine
  • Jasmine
  • Jasmine variegated
  • Roses
  • Bougainvillea
  • White Mulberry (self seeded)
  • Pomegranate (self seeded)
  • Callestimon

The photos below show the hedge from various angles prior to me beginning the big cutback. Click on each photo for a larger view.

This is not even the whole hedge. I need a wide angle lense or something

The cut back process is simple. First you need to trim the sides of the hedge; but don’t trim them straight, instead try to angle your cut so that the bottom of the hedge is slightly wider than the top. By doing this you will stop the top shading the bottom and leading to sparse growth at the bottom. Next, you need to square off the top. The ideal tool is electric hedge trimmers to create a nice even level that lets every plant get some light. I use a small platform for this work as it saves me bobbing up and down steps. I also have long handled lopers ready for the particularly tough stems.

The photos below show the big cutback in action. I think I look particularly dashing as I sweep all before me. The final photo shows my annual cuttings victory dance. Click on each photo for a larger view.

I could be mistaken for a giant in a sack race

And finally some photos of my hedges cutback for another year. They will start growing again within a month, and then off we go again. Isn’t God wonderful to provide us with such joy. Click on each photo for a larger view.

Pruning Sago Palms. Many gardens have sago palms in my part of Spain. They provide a bit of the exotic mixed with Jurrasic Park. You can if you like just leave them to themselves and let them grow into a big spikey ball, or, you can trim them back to give shape and interest. My preference is to do the latter.

When pruning sago palms my method is to use long handled lopers to prune up from the bottom towards the top but leaving at least two rows of stems at the top. By leaving two rows you are providing yourself with an insurance policy in case anything happens to one of them. Also if you prune from the top you are cutting out the growth part of the plant and will probably damage it. You can prune sagos this way whether they are in the ground or in a pot.

The photos below show my large sago before and after its prune followed by a smaller plant in a pot. Click on each photo for a larger view.

I am facing the final battle. Apart from trimming up a few ground cover lantanas etc that is more or less the big cutback completed. There is only one final obstacle that stands in my way. And it is a big one. Yes, the giant Ficus awaits our annual battle. Regular readers of this blog will remember that I pruned and shaped this tree about 10 years ago to leave it with a doughnut type hole in its centre. For its part the tree has never forgiven me and viciously protests against its annual cutback. I have fallen out of this tree more times than I care to forget. It has given me vicious lacerations on my skull. Broken my fingers and hurt my back so much that sometimes I look like Quasimodo.

To date I have always eventually triumphed in our annual battle, but to be honest I think I might just be too old for another beating. I am thinking of bringing in a contractor; I will let you know what I decide. In the meantime here is a photo of my opponent; he gets bigger every year, whilst I shrink.

He exudes an air of menace, I cant sleep at night

Cruella has designed clothing for blind dogs, whilst I have lost a gallon of blood and turned to alcohol

Cruella is still fragile concerning the departure of the idiot son, I have only to mention him and she flees to his room and dives into his bed. I know what you are thinking this must be making it very hard for me to get on with the big winter cut back, and you are right, but Cruella fails to see my point. Anyway I managed to get her out of the house for a few hours whilst I got on with the important things.

I suggested to her that she should make one of her favourite meals, “Witches pie”, see photo below. If you don’t know this particular dish, the main ingredients are: Eye of newt, and toe of frog, wool of bat, and tongue of dog, Adder’s fork, and blind worm’s sting, Lizard’s leg, and owlet’s wing. Anyway I cleverly threw away all her Lizard’s legs and she had to go shopping. The things we gardeners have to do.

It tastes better than it sounds

13th January 2022. Things I have been doing lately:

Pruning Roses. You need to start pruning your roses now as they will have already started to bud and you don’t want them to waste their energy just for you to prune it off.

Now I am going to start this section with a health warning . Pruning roses always results in considerable blood loss, no matter how careful you are. And if you are an old idiot like me who also takes aspirin to thin his blood, then you are going to bleed like a stuck pig. And this is where alcohol comes in. You need to get yourself some antiseptic alcohol from your local Farmacia and be ready to apply this to the many cuts you will receive from your roses. I don’t want to overly alarm you, but 11 million people die of sepsis each year, and we gardeners are prime candidates with all our cuts and hands in the soil etc. So why not take precautions. The first photo below shows some of the rose inflicted cuts to my legs and arms, I daren’t show you my hands as they are X rated. The second photo shows my alcohol, go get some. Click on each photo for a larger view.

Pruning climbing roses. You prune climbing and standard roses in different ways. With climbing roses you are aiming to keep height and main stem length. This means you do not cut back the main upward growth, instead you should aim to prune back side shoots (to an upward facing bud) by as much as two thirds. This will push all the initial growth into the main stem and the side stems will soon grow out as summer progresses and give you lots of flowers.

When pruning all roses start by cutting out any diseased, weak or crossing growth. Then, in the case of climbers, stand back and tuck in to your trellis or support all the stems you want to retain. After this prune back all the side shoots by two thirds and finish by tying in any long loose upward stems to stop them being wrecked by strong winds. Finally check for suckers that may be coming from below the soil just by the roots, remove these by twisting them rather than using secateurs. That’s it, done for another year.

The first photos below show my climbing roses before their annual prune, followed by the pruning and tying in process in action, and then finally the finished plants. If you cant see any difference, then I despair as it took me two hours to prune these four roses. Click on each photo for a larger view.

Pruning standard roses. When pruning standard roses the process is completely different to climbing roses. The overall aim is to reduce the size of the whole plant by at least a third, but you can take it back by two thirds, and even in extremis right back almost to the soil. However, you would only cut a rose right back if you were aiming to regenerate an old plant or one that has been severely weakened by a pest or disease.

Just as with climbing roses, start by pruning out all diseased, weak or crossing stems. You are aiming to leave an open space at the centre of the plant much like a wine glass shape. The pruning cut is the same for all roses. Go to the stem you are going to prune and then follow it down to the nearest outward facing bud that is roughly at the height you wish to prune. Cut a sloping cut with your secateurs just above the bud. The rose will grow from this point and the outward facing bud will ensure it does not grow towards the centre.

The first photos below show my main rose beds prior to pruning, whilst the last photo show some of my my pruned beds. Click on each photo for a larger view.

If you look carefully you will see grass growing under my roses. I find this shameful, but I have laboured every year to remove it , and lost countless pints of blood in my pursuit of rose perfection.

Cutting back grasses and bamboo. Many gardens in Spain have a variety of grasses and bamboos and these are prime candidates to cut back now. If you leave them then they will just become big lumps of green that will look like an explosion in a cushion factory. Instead, if you cut back now you will get fresh invigorated growth and it also gives you the opportunity to rake out unsightly dead growth.

There is no great science or skill to cutting back grasses. Just get your shears or better still a hedge trimmer and cut them back to a low mound. Once you have cut them back, put on your gardening gloves and rake your fingers in and out of the mound to remove any old growth. The first photo shows my grass ready for its annual trim. The next photo shows my inimitable grass raking technique; don’t be afraid to get right in there and rake all the dead stuff out (who cares about snakes – only kidding). Finally you can see my grass reduced to a mound. The hole in the middle tells me that it is time to subdivide the plant, but I am too tired today. Click on each photo for a larger view.

When dealing with bamboo you can be much more radical and cut it back almost to the ground. I only have one bamboo plant that I have encased within four sunken tiles to stop potential spreading. To be honest I envisaged its tall stems waving in the wind beside my water feature, and that as a side benefit I would get lots of canes for the garden. But instead it has failed to thrive and I still lack canes for the garden. The photos below show my puny bamboo before and after its radical prune. Click on each photo for a larger view.

Trimming Myrtle. If you do not have Myrtle-leaf Milkwort in your garden then you are missing a treat. This long flowering shrub, thrives in full sun and needs very little water. Put it in the right place in your garden and you will have a show stopper. I have grown mine at the entrance to what I call my “technical area”, where I have my potting benches and compost bins. Cruella calls it “the dump”. I grow this plant so that it obscures the entrance to the technical area, and I can hide from Cruella. It also forms a magnificent backdrop when I have concerts with the plants on the potting bench. I swear that the Myrtle sways as we all belt out “…riding along on a crest of a wave and the sun is shining bright”. The photos below show Myrtle before and after her styling (real ladies get styled not pruned). Click on each photo for a larger view.

Cruella has designed clothing to help Tango see. Regular readers of this blog will know that we have one maurading Labrador left. The untimely death of his brother has left Tango as the lonely blind Labrador. In an effort to help Tango see her better Cruella has made a costume that she swears will enable him to follow her around. From the photo below you can see that things are not going well so far.

She’s behind you!

The idiot son has gone, Cruella has taken to his bed and I am in winter cutback heaven

The above heading says it all. Yes, the idiot son has gone back to ruin the UK banking system (move your savings). Cruella (my wife) has in the meantime sunk into the abyss of despair at losing someone she can mother and has taken to his bed wearing his hoodie and refuses to come out of his room. I meanwhile have been prioritising and getting on with the big winter cutback.

The only slight drawback is that the evil Peacock is still here, but at least he is patrolling outside the gate. The first picture shows Cruella (my wife) in her moment of despair (I will have to hide when she sees that I have posted this). The second picture shows the evil Peacock patrolling outside our gates, whilst Tango the lonely blind Labrador looks the wrong way. Click on each photo for a larger view.

Let’s get on with the gardening there is so much to do.

6th January 2022. Things I have been doing lately:

The big winter cutback. Your garden this summer will be defined by your actions over the next few weeks. Now is the time to cutback your plants fiercely, in order that they will be reinvigorated for the summer. Failure to cutback now will leave your plants weak, leggy and prone to disease. The cutback is also an opportunity to redefine the sight lines and paths in your garden and to freshen and renew your whole plot, whether it is a terrace or a plantation.

There are two main approaches to the big winter cutback.

  1. You can take a plant based approach, where you cutback your garden by plant type over a few weeks.
  2. You can take an area based approach where you cutback all the plants in a particular area of your garden at the same time.

Normally I favour the former but I will cover an area based approach in my next post.

Pollarding Californian False Pepper. The false pepper is a common site in our part of Spain with its weeping willow looks and its strings of small red berries. However, if left it can be unsightly and messy, growing to a huge size and discarding its berries into your pool and over your terrace in strong winds.

The secret to getting the best out of this tree is to pollard it hard every couple of years. It will soon grow back and provide you with its weeeping willow look, but this time in a manageable shape. The photos below show my false pepper, before, during and after its pollard. Click on each photo for a larger view.

Cutting back and dividing Cannas. If you have followed my advice (and I am sure you have), then you will have left your Cannas to go fully brown and withered to allow the goodness to go back down to the corm. I know this can look unsightly for a few weeks, but it is worth it as your Cannas will be refreshed and bursting with vigour for the summer. The photos below show my Cannas ready for cutting back. Click on each photo for a larger view.

The secret to cutting back cannas is to cut them off about 3 to 4 inches from the ground. By doing this you are ensuring that the plant will not think it can start sprouting again, and also by leaving a stalk of 3-4 inches you will stop ground water from seeping down and rotting the corm. The photos below show my cutting technique together with examples of what the finished cutback should look like. Click on each photo for a larger view.

The good thing about Canna is that they multiply under the soil and provide you with lots of new Cannas either to plant elsewhere in your garden or to pass on to friends. All you have to do is carefully dig up the clumps of corms every two to three years, divide them, and then replant them about 4 inches deep with the eyes on the corms facing upwards. The first photo below shows my gentle, but efficacious digging process, followed by my bounty of new corms ready to replant. Click on each photo for a larger view.

Trimming Weeping Ficus. Variegated Weeping Ficus are a common sight in the gardens of the Costa Blanca where they bring colour and interest. However, they can become shapeless lumps, so I think it is a good idea to do a little cloud pruning to bring some shape and expose their lovely white bark. The photo below shows my annual efforts before and afterwards. Click on each photo for a larger view.

Cutting back my flowering column. Regular readers of this blog will know that, some years ago, I created a flowering column of climbers around the trunk of a cut down palm. This is stunning in the summer and simply needs to be trimmed back with a hedge trimmer this time of year to keep it in shape. Cruella insisted that I involve the idiot son in some of my garden work as she accuses me of not spending enough time with him. Anyway, the photo below shows him helping; I insisted that he put his hat round the right way before starting but he still seems to be failing to follow the instructions on his belt.

Cruella insisted that he was not to go up ladders or do anything dangerous. She is standing just behind him out of picture with a safety net and I had to nail the step ladder to the ground.

Cutting back Dame de Noche. Night scented Jasmine is a lovely plant to have near a seating or dining area outdoors. It gives off a heavenly perfume that once smelled is unforgettable. However, like many Spanish plants, to get the best out of them you have to be cruel to be kind and cutback hard. You need to cutback your Dame de Noche by at least two thirds at this time of year. If you do it now then you are guaranteed that intoxicating scent in mid summer.

The first photo below shows my Dame de Noche in its uncut state standing at some 9 foot. The second photo shows it cut back to about 3 foot, but next year I will go lower. Click on each photo for a larger view.

The big cutback continues and Cruella has become a fugitive from the law

Thanks to Cruella’s (my wife) run in with the law this gardening blog is in danger of becoming a true crime drama. Like all descents into criminality this all happened so swiftly. You will remember from a couple of posts ago that the idiot son and I cut down a large Yucca and duly laid the cuttings on the pavement beside our garden wall. The procedure in our village is that you put out prunings and cuttings and then telephone the town hall’s contractor. They in turn will then come along and take it all away.

Having made the requisite call to the contractor twice, I assumed all was in hand. Unfortunately my confidence was misplaced as the Police duly turned up at my door and enquired why I was littering the street. I explained all, and they left quite happy. The next day two more different Police turned up and asked the same questions. Again I professed my innocence and they left only to turn up later when I was out to leave a fine of €50 in my post box.

Now the fine was bad enough, but the worst thing was that they had named Cruella on the fine documents and not me! The eruption of fury from Cruella was galactic. She called down all sorts of damnation on the town hall and insisted on going straight out to where the cuttings where lying and proceeded to do one of her ritualistic dances weaving in and out of the cuttings whilst casting spells on the town hall and the police.

The photo below shows Cruella as she finishes her dance with a final ritualistic flourish which involved spinning around on one leg before pointing at the object of her spell.

I hope the Police are ok the last time she did this dance our postman was turned into a frog.


26th January. Things I have been doing lately:

🪚 Cutting back hedges. As I move towards the end of the big Winter cutback there are only a few major jobs to do, one of which is to cut back all of my hedges. I love hedges and I have planted them so that they all fight for the space to flower and survive. Over the Summer they knit together into a tight interwoven group of floriferous mayhem along the borders of my house. Currently I have the following fighting it out in my hedges:

  • Plumbago
  • Bignonia
  • Bouganvillia
  • Roses
  • Mulberry
  • Pomegranate
  • Jasmine
  • Solanum
  • Lantana
  • Pink Trumpet
  • Hibiscus

The photos below show various aspects of my hedges after all the flowering has finished and just before I began the cutback. Click on each photo for a larger view.

The hedge cutting process is very simple. None of the plants are treated as individuals, instead they are all cut back to the same height and width so that they align with the railings on top of my garden wall and also with the edge of the lawn. Using a hedge trimmer I first square off the sides. Then using a chainsaw or long handled loper I cut the thick stemmed plants down to size. Finally using the hedge trimmer I square off the top and the outside edge facing the road. The photos below show the outcome. The hedge will quickly grow again to be up to 10 feet high and be flowering again in a month or so. Click on each photo for a larger view.

🌴 Cutting back Palms. I leave all the really big Palms to be cutback by a professional Palmista; It is important to know when to use professionals in your garden. However, there are a number of smaller palms that I will happily keep in shape. Amongst these is a stand of European Fan Palms that we have planted in a round bed in the middle of the path that leads from our front door to the front gate.

These Palms are ferocious self sowers so I start the cutback by taking away all the low eye poking projecting fronds using long handled lopers. Once this has been achieved I use an extendable long reach loper to cutback the fronds at the crown of the palm. Given Cruella’s recent run in with the law I decided that I would get her to separate the fronds from the stems and then neatly stack them in a large sack for disposal. At first she refused to take part as she does not like coming out during the day, but I explained to her that as well as being fined she has to do 36 hours of Community Sentence. I have not yet told her that her appeal against the fine has been upheld and she has been cleared.

The photos below show the Palms prior to their trim and after the cutback. The final photo shows Cruella serving her Community Sentence. Click on each photo for a larger view.

Wait till she finds out that she is an innocent woman! There may be trouble ahead.


🌳 Pruning Sago Palms. Lots of gardens in Spain have these slow growing and expensive Palms. I have two, a large multi trunk specimen, and a smaller version in a pot. For these Palms to look there best you need to prune them once a year to expose their interesting trunk. However, because these are so expensive you need to be careful that you don’t over prune. You should prune back the lowest fronds until you leave at least two rows of fronds at the crown. In this way you should guarantee that if anything like frost or wind damage happens then at least one row of fronds should survive.

The first photo below show the sago palm before its trim. The second shows me reaching in carefully with long handled lopers to trim off the unwanted fronds. The final photo shows the newly trimmed and neat plant. Click on each photo for a larger view.


🪓 Preparing for the battle with the big Bay Tree. The last job of the Winter cutback each year is my annual battle with the big Bay tree. I am already in training for this grudge match and I am also practicing meditation so that I can psyche it out. A full battle front report will be contained in my next post. In the meantime here is a photo of my adversary.

Bring it on … I’m ready; we’ll nearly.

Alcohol is the gardeners best friend when it comes to pruning Roses

No, I’m not talking about the huge quantities of wine that Cruella (my wife) and I are consuming during the almost continuous lockdowns imposed on us all. What I am taking about is medicinal alcohol that you will need to cauterise and anesthetise your various cuts, wounds and general abrasions that your Roses will inflict upon you during the annual prune.

It is an interesting but disturbing fact that a number of gardeners die each year from sepsis of the blood caused by cuts whilst gardening. Now I don’t want to scare you but it is better to be safe than sorry. The photo below shows my little bottle of medicinal alcohol together with some heavy duty make up removal pads that I stole from Cruella. Before you start pruning give your secateurs a good clean with the alcohol to stop cross infection then keep the others for cleaning up the blood and gore inflicted by the Roses.

Better safe than sorry …especially if you take aspirin; it usually ends up a blood bath.

14th January. Things I have been doing lately:

🌺 Pruning climbing Roses. I have six climbing Roses, two are doing very well, two are doing middling, and two I had to move last Summer as they were getting too much sun. Pruning climbers is different to pruning standard Roses. With climbers you want to keep the height but lose the bulk. To do this you should start with about 6 strong stems growing from the roots (if you have more it looks messy). Let these grow year on year until you are happy with the height. Each year start by pruning out any diseased, dead or crossing side shoots. Once you are satisfied with the result then prune about a third off each side shoot. This process will encourage growth and flowering.

The photos below show my climbers before and after their annual prune. The last two photos show my most successful ones. You may not be able to tell the difference, but I assure you the plants know. Click on each photo for a larger view.


🚑 Pruning standard and shrub Roses. I have two beds of 20 mixed Roses. With standard Roses you can be much more severe. Do the normal stuff like cutting out dead, diseased and crossing stems then, depending on how long the plant has been in the ground you treat it in different ways. For the first couple of years just cut the plant back by one third. But thereafter you can more or less take it to the ground if you like. With many Roses the greater the cutback the stronger the growth.

The photos below show my Rose beds before I started with the annual prune and then after its completion. You can tell the difference if you look closely, as you will see my blood spattered throughout the beds. Click on each photo for a larger view.


🌱 Pruning Trailing Lantana. Most people in Spain have Lantana in all its various varieties. But, I particularly like trailing Lantana, especially when it is planted in parts of the garden that are gravelled. It’s long trailing stems stretch out over the stones providing island beds of planting, whilst it’s long flowering season gives long term interest. When pruning trailing Lantana take it back by about two thirds. Ideally you should cut it back to forked stems, but there is no need for perfection, just go for it.

The photos below show one of my many Lantana in its overgrown and sprawling Winter state. The second photo shows the plant pruned back and ready for a spurt of Spring growth. Click on each photo for a larger view.


🌵 Drastic pruning of Yucca. I have a number of Yucca in pots that are placed along with other plants along the back and side of my house. The recent high winds have caused chaos with these plants as they are continually blown over and end up damaging the other plants close by. Up until now I have just been picking them up on a daily basis and cleaning up around them. But to be honest this is a continual problem that I have tried to solve in the past by tying the plants to the balustrade close by.

it is now time for some drastic action. I have decided to lower the levels of all these Yuccas to stop them being so prominent a target for the wind. To achieve this I have sawn the top two thirds off each plant leaving them looking rather comical. But do not despair. As Yucca are canes they will begin sprouting new leaf spikes growth from each side of the sawn stem. I will then keep these at a reasonable hight to stop the problem happening again.
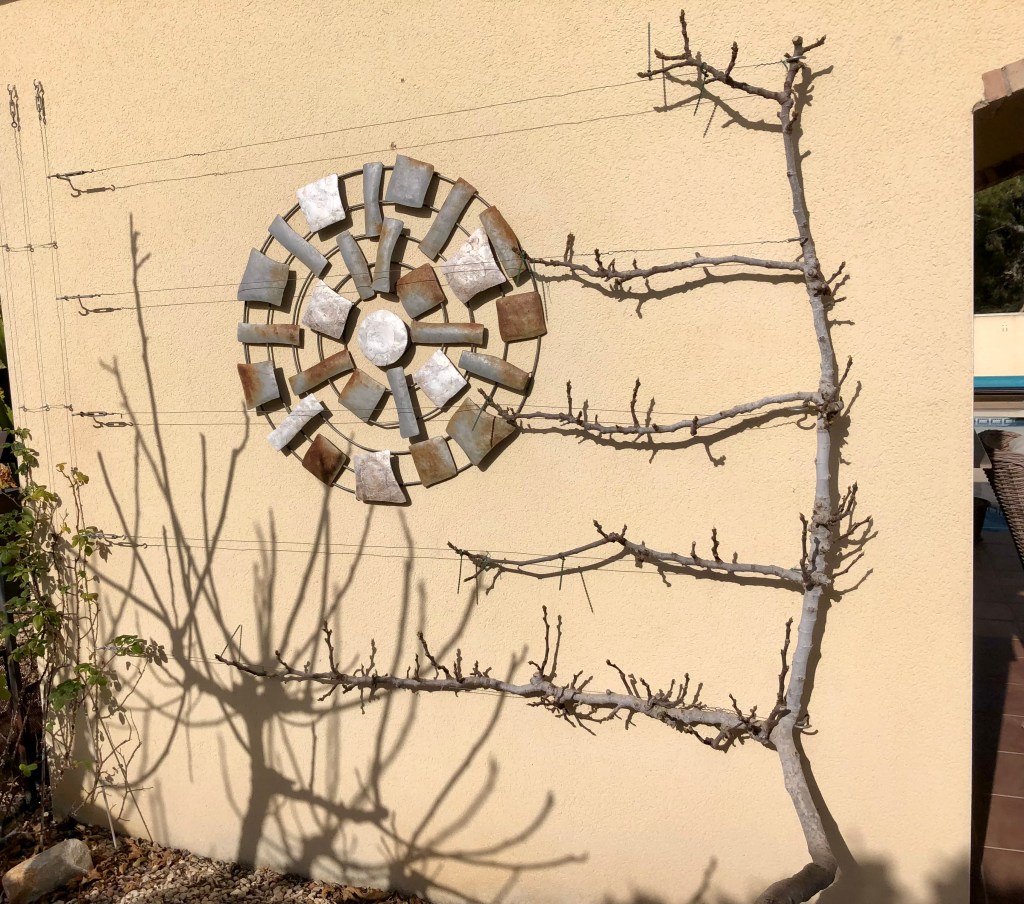
The photos below show some of the carnage that had to take place. I pretended that it was an episode of “Game of Thrones” and I told each plant Winter was coming! Click on each photo for a larger view.

🍁 Making leaf mould. By now you should have cleared up all your fallen deciduous leaves; especially if they are lying on your lawn as they will kill the grass. Don’t just throw your leaves away as they will eventually breakdown into lovely rich leaf mould which you can use as compost. The simplest way to do this is just gather up all your leaves and put them into plastic sacks. Tie the sacks at the top then using a fork pierce the bag a number of times to encourage air circulation. The sacks should be placed out of the way in a shady corner of your garden and left for about a year. You can then use them as a compost mulch or place them on your compost heap to break down further. The photo below shows my leaves bagged up and waiting for nature’s miracle to take place.

It may look an unloved corner of my garden, but it is a very important one.

The big cutback continues and the idiot son joins in

By now you should be at least half way through your big annual garden cutback. You should have firstly shaped up the overall structure of your garden, this should have been followed by pruning grasses and shrubs etc, then small trees, bushes and vines. We are now heading towards pruning Roses, hedges and the inevitable battle with trees, especially my large Bay tree. If you get all this done before any growth starts then your garden will burst back to life in the Spring with renewed vigour.

The next stage of my annual cutback has been given added piquancy by the supposed help from our idiot son who has been home for Christmas. Cruella (my wife) has been in mothering ecstasy since his return; she has fed him night and day like a giant cuckoo chick and has allowed him to drink all my best wine. Every morning we have to watch videos of him as a baby interspersed with old episodes of “Bewitched” (Cruella was the witchcraft and spells coordinator on the show).

Let’s get on with the gardening!

4th January. Things I have been doing lately:

🥭 Pruning figs. I have two fig trees. One standard that is now about 12 years old, and one which is an espalier I have been growing up a wall for about 6 years. The secret with fig tree pruning is to do it regularly otherwise the tree will just get away from you and produce its best fruits 20 feet in the air. Figs are produced on old wood so you need to be building a structure of branches that remain within easy reach.

Start off by cutting back any diseased or crossing branches. Next reduce the overall size to keep the fruit within your reach. You should be aiming for a wide but open structure that lets light into the centre of the tree. Pruning my espalier is different. Here I first take off all the stems facing into the wall. I then aim to train one stem along each of my espalier wires. The eventual aim with this fig is to cover the entire wall with trained branches bearing fruit.

The photos below show the figs before and after their annual prune. Don’t worry they will grow back vigorously and will be sprouting leaves in a few weeks. Click on each photo for a larger view.


🍊 Chopping down old fruit trees. Most Spanish homes have one or more fruit trees. Orange and Lemon are the most common. Often these trees are just left to themselves, never pruned, never fed and seldom watered. The end result is old, gnarled and unproductive trees that look messy and produce a few undersize fruits. If you want good productive trees then you have to do some work. I won’t dwell on this at the moment but will cover this subject in a month or so after all my fruit is off the trees.

However, one thing you should be doing now is looking to replace old and unproductive trees. I have one orange tree that needs to come out. I have pruned it hard in the past and got a few more years out of it, but now it has to go. In my efforts to remove the tree I was assisted by my idiot son who insisted on being in charge of the chainsaw. With old trees the first job is to take them down to a stump. Once the stump has been left I will drill into it in a few weeks and add “root out” to kill off any growth. In the autumn I will use an axe to remove the by then rotted stump. You can get the stump ground out but it is difficult to find people in Spain to do this.

It is not possible to plant a new tree into the same area as the old tree as the soil will be depleted and the roots will be everywhere in the soil. In this case I will move the tree planting area a few metres to the left of the existing tree, in this way I will keep the same linear structure in my orchard and utilise existing irrigation pipes. The new tree needs to be in the ground within a month before everything begins to heat up. The photos below show the idiot son playing out the role of lumberjack. Click on each photo for a larger view.

At one point he was holding it by the wrong end.


🪵 Cutting back the giant Yucca. I have a giant Yucca that needs cutting back every five years or so. When I originally cut it back it was over 30 feet tall, and, since it’s last cut back it is now almost 20 feet again. When you cut yuccas back you can be quite brutal as they are canes and will grow again relatively quickly. One of the benefits of keeping your yuccas a manageable size is that the lovely flower spikes will once again be at eye level as opposed to 20 foot in the air.

If you are cutting back a multi-stem yucca as this one is, then it is important not to cut all the trunks to the same level. Instead you should cut them at different levels as this will stop the new growth crowding each other and will create a more rounded pleasing plant. The photos below show the big yucca before its prune and then afterwards. The idiot son arrived after I had done all the work and insisted on posing with the pruned plant; for some reason Cruella (my wife) is convinced that he should give up banking and instead become a lumberjack model! Click on each photo for a larger view.

🌳 Pruning standards. If you have grown any plants as long stem standards then you will know by now that they are in danger of blowing over in the current high winds. The big problem with standards in pots is always the dilemma of whether you put them in plastic or ceramic pots. Of course ceramic is much better, but if the pot is not big and weighty enough then it will blow over and smash, which can be expensive. Plastic meanwhile is cheap, but, does not look as nice and can lead to roots overheating.

The solution is big weighty ceramic pots whilst keeping the flowering ball relatively small and tight. By this method you will stop wind rock on the pots. My two standards are either side of a side swimming pool gate, this area is both hot and can be windy. The photos below show the untrimmed standards and then in their final state. To keep them safe I prune 2 or 3 times during the growing season. Click on each photo for a larger view.

The old man and the tree

Yes, the literate amongst you (and this means all of you) will have seen that I have cleverly paraphrased Ernest Hemingway’s book title “The Old Man and the Sea” to convey the titanic battle that takes place annually between me and a large Bay tree at pruning time. Whilst the old man in Hemingway’s book is engaged in a struggle with a large Marlin at sea which comes to symbolise man’s struggle against the forces of nature. So, similarly I have been engaged in my annual struggle with a particularly large and vicious tree; but not at sea. Unfortunately Hemingway’s “old man” dies in the struggle, but I am pleased to say that I have survived this year.

Don’t get me wrong, I wouldn’t like to give you the impression that my survival is a foregone conclusion. This annual battle started weeks ago right at the start of the big annual cutback. As I walked around the garden the tree knew, and I knew, what was coming. We were like two boxers before a big fight eyeing each other up. I insult the tree and shout rude things at it, sometimes accompanied by a kick to its trunk. The tree for its part drops leaves and branches on me and encourages the birds in its branches to do their worst. So that is how we ended up with the stage set for yet another return fight. Right here we go: as the referee always says at the start of every fight “…protect yourself at all times” ding, ding.

17th January: Things I have been doing lately

✂️ Pruning trees. The last job you have to do to complete the annual cutback in Spain is prune back any trees that have become overgrown, unshapely or are cutting out light. I do not include fruit trees as they are not cutback at this stage. In my garden there are only two big trees that I include in the annual cutback.

🌼 Mimosa. The first tree is a Mimosa (Acacia) which is used to provide shade for our dog’s kennel and run. The Mimosa is not a long lived tree (10-20 years) but its beautiful yellow flowers make up for this. Mimosa is a Spring flowerer so you have to be quick pruning it or you could end up pruning the whole year’s blooms out. The only job I have to do with the Mimosa is to raise its canopy as it has the tendency to droop and cause more shade than we want to an adjacent lawn and on occasion when I am not looking it will creep into the house roof guttering. The photo below shows the Mimosa before pruning.

You can see that it is heading for the guttering, and also appears to be attacking our washing line.

To prune a Mimosa you need to work on a bi-annual pruning cycle (this is not a mode of transport). In the first year, prune back branches with lopers and/or chainsaw. In the second year you should just need to use a long handled electric hedge trimmer and a ladder to raise the canopy. The photo below shows the Mimosa brought back under control.

Who’s a prett boy?

🌳 Trimming the big Bay tree. Bay trees are everywhere in Spain as they love the climate. However, the majority of Bays that you see are overgrown unshapely lumps. To overcome the Bay’s untidiness the Spanish came up with the idea of cutting out the centre of the tree to leave an open donut of light at its centre. This fantastic innovation makes the tree shapely, lets in light to any underplanting and makes for a fascinating conversation piece. I did this some 10 years ago to this Bay tree and it has never forgiven me, hence the grudge.

The first photo below shows you just how unshapely the tree becomes over a year. From this photo you can see the challenge that I faced – which I believe would have daunted a lesser gardener. The second photo below shows me ready to begin the annual battle equipped with all the necessary armaments. (Click on each photo for an enlarged view).

Cruella (my wife) documented the battle in photographs; it was a bit disconcerting as she wore a complete camouflage outfit and kept asking me to call her “Kate Aidie”. At the time she told me it was a photo-shoot and that she was working for an agency seeking “mature” models; she said I had the potential to be a male model. It was only later that she confessed I wouldn’t be getting a lucrative contract and there was no Agency. It turns out that all she really wanted was some interesting photos for my memorial service if I died by falling out of the tree, or at least some shots for “you’ve been framed”. If you have a Bay tree and you wish to shape it in this way, then this is the process:

  • cut out the central trunk down to where it joins with the network of lower branches.
  • trim around the open space left by the trunk to make a clear round open space at the centre of the tree.
  • trim the sides, top and bottom of the tree to form flat sides
  • repeat the trimming process every year in January. Don’t worry you will never have to cut the trunk again

The tools you will need include:

  • chain saw
  • long blade electric hedge trimmer
  • long handled lopers
  • ladders and if possible platform

You may decide that it is better just to get in a professional tree surgeon as it can be both dangerous and tiring. If you decide to use a professional then make sure you get someone who is fully trained and accredited as they will have all the necessary skills and insurance.

Finally, God willing the Bay tree and I will fight it out next year in the annual return match. In the meantime here are some of the photos of me and the tree that Cruella (my wife) took for my forthcoming modelling career. (Click on each photo for an enlarged view).

🌾 Cutting back grasses. Sorry I misled you when I said that trees were the last part of the big annual cut back. As I wandered around the garden recovering from the battle with the Bay tree I discovered that I had missed cutting back my ornamental grass. Lots of you have ornamental grasses such as my Fountain Grass. These need to be cut back quite severely now. If you don’t do this now, then the grass will not flourish as it will become congested and also unsightly. Using a hedge trimmer just cut it back to a small mound. It will soon recover its former glory. The photos below show my Fountain Grass before and after its trim. (Click on each photo for an enlarged view).

The big Winter cut back continues

This is the second instalment of the big winter cut back posts. The big Winter cut back is an essential thing for all Spanish gardeners to do in January; failure to do this will result in your garden looking, tired, untidy and generally unloved. If you are following this blog closely – and I know you are – then you will remember that the first Winter cut back post covered mainly Roses. This post deals with climbers, hedges and statement plants. The final post will deal with trees, and this is the stage I dread, as it involves chainsaws, ladders, great heights and generally falls and spilled blood. But hey, we gardeners are made of tough stuff and the local hospital keeps special blood plasma for me. Talking of blood did you see “Dracula” on the BBC over Christmas? Cruella (my wife) was enthralled as she thought it was a documentary and kept telling me it reminded her of her childhood. Right, are you ready? let’s get on with it.

9th January: Things I have been doing lately

🏡 Recreating views. If you look at your garden there are certain vantage points that creat views and vistas within your garden. These are the positions in the garden that look at their best viewed from a certain standpoint. I have a number of these in my garden but the one I want to deal with is the view as you move down our drive. This is probably the least important, but sets the tone of the garden for those arriving by car.

The end of our drive has been composed (this is a fancy term for lots of plants working together) to present a nice view whilst at the same time hiding the garden shed from direct view. The first photo below shows this view before it is pruned back. The second photo shows that I have cut back the hedge, trimmed the trunk of the Peruvian False Pepper tree and reduced its hanging branches (this tree is common in Spain and looks a bit like a weeping willow). (Click on each photo for an enlarged view).

You can see my battery leaf blower in the second photo. This is a Black and Decker model (others are available). I have included this because it is one of the most useful tools you can have here in Campoverde. Because we are surrounded by Pine trees, pine needles are a constant clean up problem. This light weight battery model will not do the job on heavy leaf clearance but it is ideal for this type of work and saves you getting out your big blower (no pun intended).

🥔 Cutting back Solanum. The Solanum is a climbing plant that is a member of the potato family. This is a prolific flowerer a great climber and easy to maintain. I grew this plant from a cutting and have grown it up the side of our outside kitchen. It happily grows all Summer (can grow to about 25ft) and flowers like crazy. In the Winter all you have to do is use a hedge trimmer to trim it back close to the wall by taking off all the side shoots. This first photo shows the Solanum before it’s trim back, whilst the second shows it newly pruned. (Click on each photo for an enlarged view). At the risk of making this blog into a “tool blog” the small platform you see in the photos is a great aid to trimming hedges etc as unlike a ladder you don’t have to move along so often.

🌱 Trimming back Jasmine. Jasmine is one of those plants which is every where in Spain, but all too often it is a sulky heap of leaves hanging off a trellis which it is doing its best to pull off the wall. The reason for the Jasmine looking so sad is that it has grown up and then flopped over. By flopping over it kills the growth beneath and leaves you with what looks like a healthy plant but really it is just disguising decay. If you look at the first photo below the Jasmine looks healthy but only because the new growth is hanging over the old growth.

You can also see that Jasmine will get into your guttering if you are not careful.

The second photo shows the Jasmine trimmed back ready to get flowering across the whole plant. If your Jasmine has just gone too far and a lot of it has died back, then be brave and cut it right down to the ground. You won’t get flowers this year, but the reinvigorated plant will grow like crazy and flower next year.

There seems to be a Labrador growing out of my Jasmine

🌴 Trimming climbers around an old Palm tree trunk. In Spain it is often necessary to cut down old Palm trees or those damaged by the Palm Weevil. Most people when faced with an unwanted Palm just have it cut down leaving an ugly stump in the ground; or, even worse try to cut the trunk down to about 3ft and then plonk a table top onto it and pretend it is a garden table. The latter approach never works because it is always in the wrong place and you end up sitting around this makeshift table in obscure corners of your garden.

If you have to get rid of a Palm cut the trunk to about 12ft, cover it in mesh and then grow climbers up it; it can look spectacular in the Summer. But like everything else you need to cut it back in January. The first photo below shows my old Palm tree at the height of Summer covered in climbers including Pink Trumpet Vine. The second photo shows it ready for a trim. The third photo shows it newly trimmed with a hedge trimmer. (Click on each photo for an enlarged view).

👩🏿‍🦳 Cutting back Dame de Noche. Everyone in Spain should have at least one Dame de Noche (night scented Jasmine). This plant is not what you would call “a looker” but what it lacks in looks it makes up for in scent. If treated properly and pruned at the correct times this plant will produce an intoxicating scent throughout long Summer evenings and is especially valuable if planted close to where you sit out in the evening.

Dame de Noche is pruned twice a year but in different ways. After it’s first flowering in late May/June cut it back by one third and it will flower again from August into the early Autumn. In the January cut back you need to take away two thirds of the plant; be brave it will come back just as vigorously. The first photo below shows my Dame de Noche prior to its second prune. The second photo shows the shorn plant ready to spring into action by mid February. (Click on each photo for an enlarged view).

🌳 Trimming hedges. This is the second biggest job in the annual cut back as I have lots of mixed flowering hedges. As I walk around our village of Campoverde I see many hedges spilling over walls and fences. This not only gives an untidy look to your garden, but also, it reduces flowering potential as often the hedges are exhausted by flowering on over extended branches. How much you cut back is up to you, but try to trim to a natural boundary like a wall or fence. In addition it is important that you do not trim the sides square as this will just shade the lower branches and lead to die back. Instead try to bevel the trim so that it is wider at the bottom and narrows towards the top.

The photos below give an overall impression of the mammoth task I undertake in hedge trimming – I’m not seeking sympathy only understanding. (Click on each photo for an enlarged view).

Cruella has a bowl full of maggots

It all started when I told Cruella (my wife) that I hadn’t slept very well because I was worried about emptying the compost bin to mulch under the fruit trees. She told me not to be so stupid and find more important things to worry about. I explained to her that emptying a compost bin is like entering a marriage; both must be planned carefully, weighing up all the pros and cons and both can end badly if care isn’t taken. For some reason this made her angry and she called me an “unromantic pig” and said she didn’t like the metaphor I had used to compare compost and marriage. I pointed out that it was a simile not a metaphor; and that basically is how I ended up sleeping in the shed.

31st January: Things I have been doing lately.

🍊 Mulching under fruit trees. Nearly everyone in Spain has fruit trees in their garden: Oranges, Lemons, Persimmon, Fig etc are all common features. But often people will ask me why I have so much fruit when they have only 5 or 6 Lemons on a tree or that they have no Oranges at all. The key is to replenish the soil. Most citrus trees are tough with deep roots and can thrive in poor soil. But even the toughest tree will benefit from a little replenishment now and then.

The problem is that soil under trees becomes compacted which means that water runs off rather than getting through to roots. Similarly, years of fruiting takes it out of a tree and it needs a boost to revive it and get it going again. A good mulch will benefit your tree whether it is in the ground or in a pot. The photo below shows my fruit trees in fruit but waiting for their annual boost.
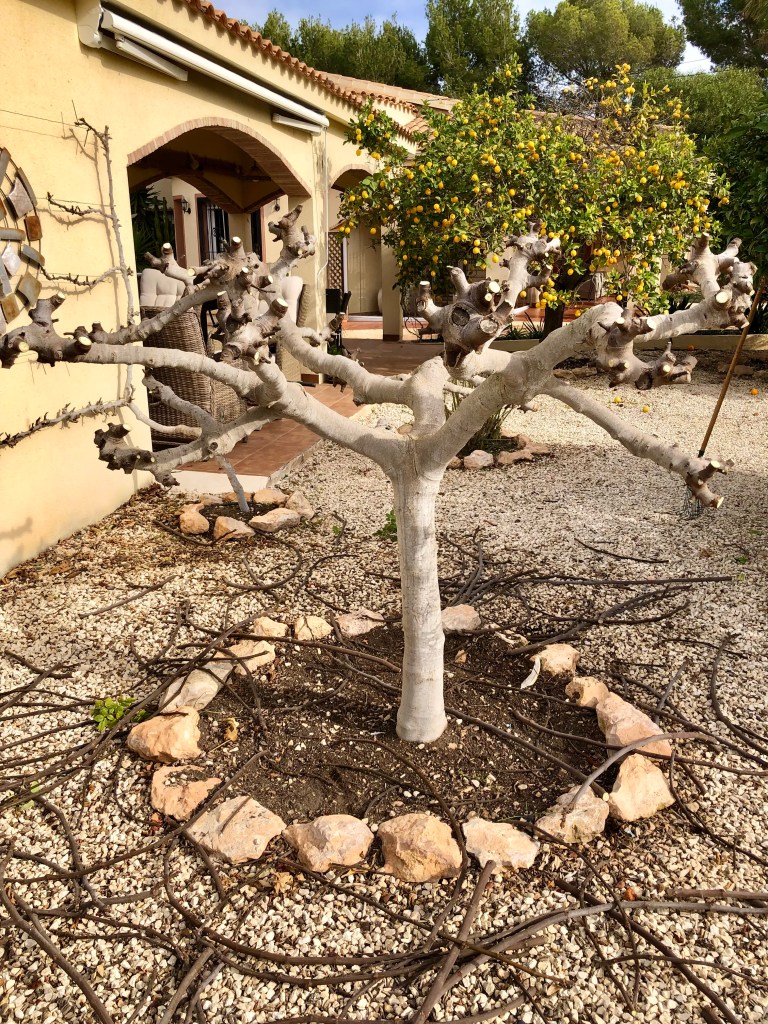
The benefits of mulching with good compost is that it adds micro nutrients back into the soil and it seals in moisture helping the tree to cope with hot summers. But you can’t just throw a bit of mulch on the soil and that is it. No, you have to prepare the soil, and your two biggest aids in doing this are the hoe to skim off weeds and the three pronged rake to plough the earth up and break impacted soil. Both these virtuous tools are shown in the photo below. Even if your tree is in a pot, still use a trowel or similar to break the soil up before mulching.

Before we move on to the excitement of emptying the compost bin, it is very important that after breaking up the soil and before applying the mulch that you water the soil copiously. Once placed over well watered soil, the mulch will seal the moisture in.

🐛 Emptying the compost bin. When you empty a compost bin it is the culmination of a long process involving 6 months to a year of applying garden waste etc to the bin accompanied by careful watering and usually adding a compost “accelerator”; which now I look at this sentence again it could be misunderstood as a laxative. Anyway, the idea is to get good rich compost to use for a range of activities in your garden including, sowing, potting and mulching.
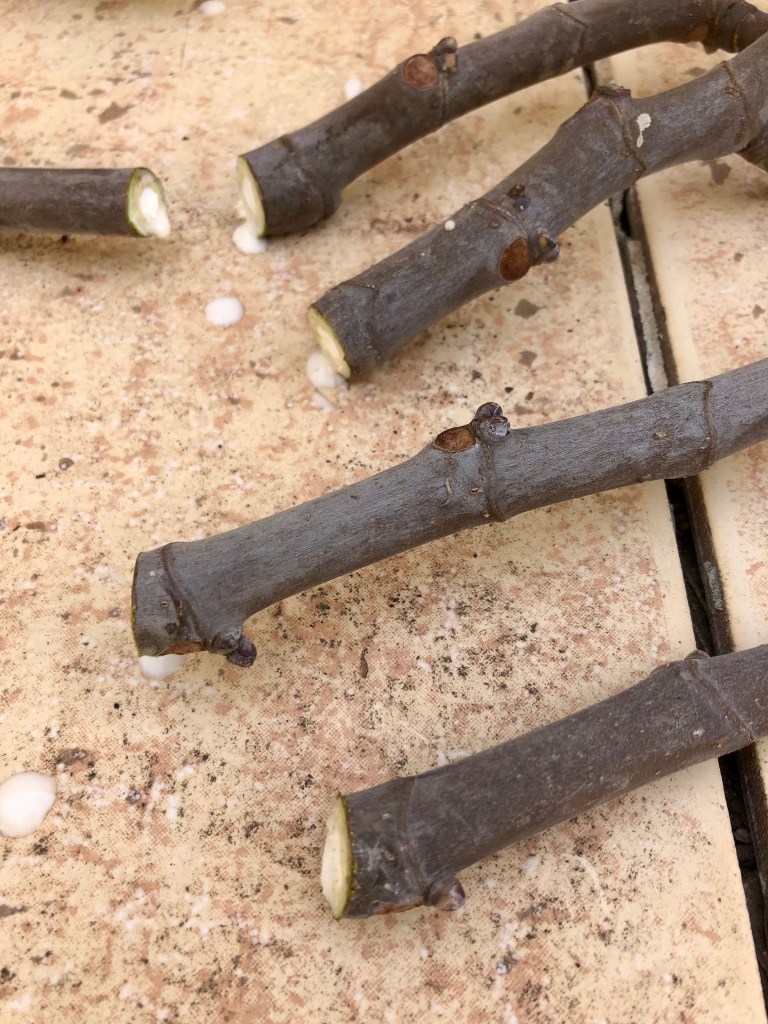
The photo below shows my compost bins. The one on the left is full whilst the one on the right (which is due to be emptied) has had 9 months to compost down. Note how much the bin has been reduced by the chomping of insects and actions of beneficial microbes.

If you look closely you will see the giant maggots

One of the byproducts of emptying out the compost bin is the giant blood oozing maggots which are a frightening but important part of my compost heap. This year the compost is exceptionally rich and friable which must be accounted for by the over 300 large maggots I removed from the heap and by our very hot summer. Normally, the maggots meet a watery end before being added back into the developing compost bin as giant maggot corpses. But this year, given the predicament of my upsetting Cruella, I decided that, as a love token, I would present her with a bowlful for use in her spells. From the photo below you can see her obvious delight.

🎍 Repotting plants into larger pots. Sometimes you need to repot a plant or growing cutting into a larger pot. Here is a little tip that will save you time and stop you over or underfilling with compost. First stand the plant in its old pot in its proposed new pot half filled with compost raising the plant to the level you want it to be at, photo 1. Then with the pot standing inside the new pot, fill around the pot with compost up to the top of the new pot, photo 2. Tamp the compost down around the pot and then swivel the old pot inside the compost, the aim is to be able to remove the old pot with the plant still inside it but leaving a hole the exact size of the plants roots, photo 3. Then pop the plant out of its old pot and place it directly into the hole in the compost that has been custom made for it, photo 4. Lastly, it is a good habit in Spain to mulch the plant with some light gravel to seal in water, especially in full sun plants, photo 5.

It’s now or never to cut back Lantana

Sorry about the dramatic heading, but I am trying to make Lantana (Spanish Flag) that most quintessential of all Spanish flowers sound dangerous and edgy. I was hoping to take this post in a Scandi Noire direction to hold your attention, or at least stop you playing Candy Crush long enough to appreciate this little versatile plant, but, obviously this has failed. Anyway, at least you now know I’m going to talk about Lantana.

27th January: Things I have been doing lately.

✂️ Cutting back Standard Lantana. Nearly every garden in Spain will have some form of Lantana; whether in large bush form, smaller shrub or the trailing ground cover type. I don’t want to boast, but I’ve got all of them. But that is not the point, the point is that if you want to get the best flowers and growth out of your Lantana, now is the time to trim them. In case you have forgotten what Lantana looks like, the photo below will remind you.

By now all of your Lantana will be looking “woody” but still with some leaves and even flowers hanging on in there. But don’t be deceived if you leave it like this you will never see it’s true potential this Summer. What you have to do now is put on your glasses and get down close to the plant. When you do this you will see little rows of potential leaves just peeping out all the way up each stem.

You need to tidy and reshape each stem by going as far down each one as you prefer and cut just above a leaf node. Depending on the type of Lantana, I am happy to take off a half to two thirds of each plant. The Photos below shows a standard size shrub before and after its prune. (click on each photo for a larger view).

🌿 Cutting back Trailing Lantana. Trailing/ground cover Lantana can be treated in a similar way, but in their case I tend to cut by at least three quarters. The reason for this is that they tend to have lots of dead leaves and other garden detritus trapped underneath their stems and cutting them back gives you an opportunity to have a general clean out and deny slugs and snails a hiding place let alone “puppy dogs tails”. The photos below show some trailing Lantana before and after its prune. (click on each photo for a larger view).

🛢 Cutting back Lantana in pots. To be honest I don’t recommend growing Lantana in pots unless it’s a large pot and the shrub type. Last Summer I took some cuttings from my trailing Lantana. Most of them I planted back into the ground, but one I put in a pot by our front door as it was flowering so nicely. The photo below shows this little plant at the end of the year.

And from this you can see the obvious shortcomings of planting trailing Lantana in pots. That’s right, the long trailing stems are quite stiff and rely on lying on the ground for support, it will not trail over the edge of the pot liking a plant in a hanging basket, and instead the stems will just break. The second photo shows this little plant cut back and it is now planted in the ground where it will be in its natural element.

Dogs in the Sun playing with a shrunken head. Now I recognise that this post has been a bit dry and Lantana focused, so to lighten the mood here is a photo of the dogs playing with one of Cruella’s (my wife) old shrunken head experiments. You may have noticed that they are lying just beside where Cruella buried that giantess with just her legs sticking out of the ground.

The big cut down stage 3

The big Winter cut back is continuing and it is all go here. Whilst Cruella (my wife) was away I avoided the more dangerous stuff on account of the fact that the local hospital is low on my blood type. So mainly this has just been the big hedges and some Palms. But now Cruella is back from England (flew the usual way knees bent, leaning forward and holding on tight to the broomstick) I will be tackling the big Bay tree in my next post. Anyway, that excitement is for next time, let’s get going those Palms don’t cut themselves.

19th January: Things I have been doing lately

✂️ Cutting the big hedges. Along the front of our house we have planted a wide variety of hedging plants. These include Bignonia, Bougainvillea, Plumbago, standard Roses, Pink Trumpet Vine, Hibiscus, Lantana, Callestimon and a self seeded Pomegranate. I encourage all of these to grow in a riot of colour as they try to out compete each other for light and space. This means by the end of the summer I have a huge hedge that is massively overgrown and entangled. The photos below show parts of the hedge ready for cutting back. (Click on each photo for enlarged picture).

Now you can be pernickety about this and trim each plant individually, but this means you will still be doing it in June. Or, you can trim the sides uninformly then cut back all the tops to the same height. By doing this you create the illusion of a single hedge as opposed to individual plants. The only exception to this is the self seeded Pomegranate. As this fruits on old wood I leave it a little bit higher than the overall hedge to encourage more Pomegranate fruit. The picture below shows the trimmed hedge waiting to burst into glory in the Spring. (Click on each photo for enlarged picture).

🌴 Cutting back Palms. If you live in Spain you should know how to cut back Palms. But just to reiterate, try to keep your Palm fronds growing at a 45 degree angle. When they start to drop below this each branch will get very woody and become much harder to cut; you have been warned. The photos below show a section of my Palms ready to be cut back. (Click on each photo for enlarged picture).

You will note that the common denominator in each of these Palms is they are relatively reachable. Once you extend the ladder beyond one section you are in dangerous territory and more than likely in your local hospital casualty ward. The photo below shows some of my large Palms; these are over 40 foot high so definitely not to be tackled by the amateur but left to a professional Palmista.

The photos below show the newly trimmed Palms. If you can’t see the difference then I’m not speaking to you, it took ages. (Click on each photo for enlarged picture).