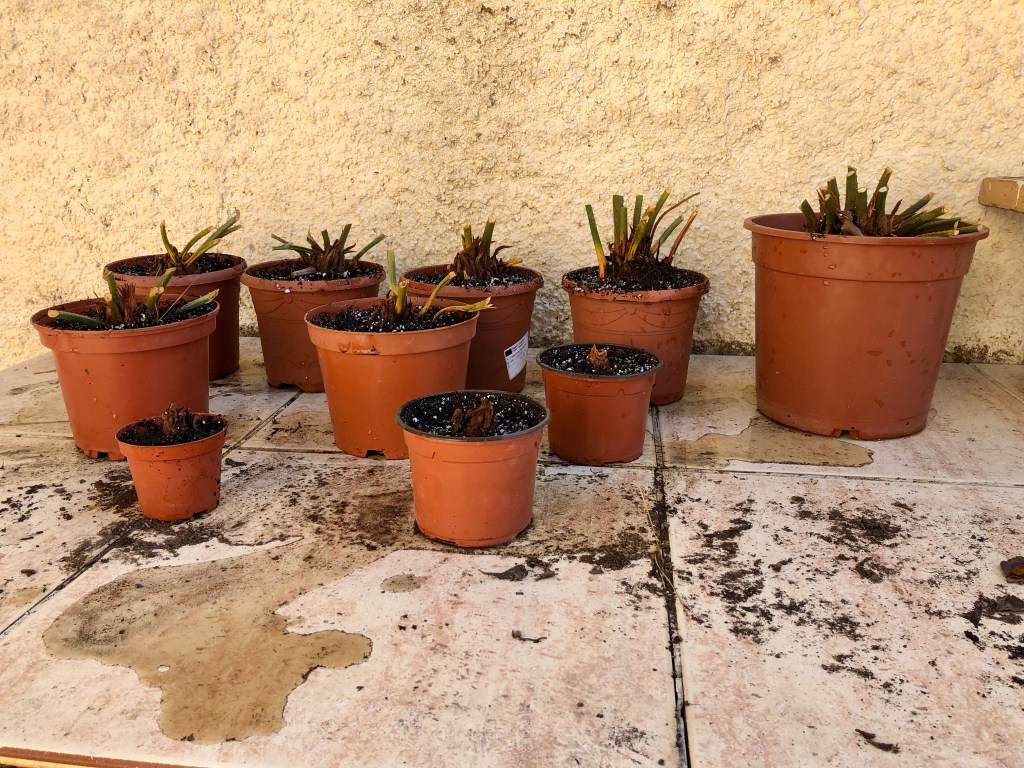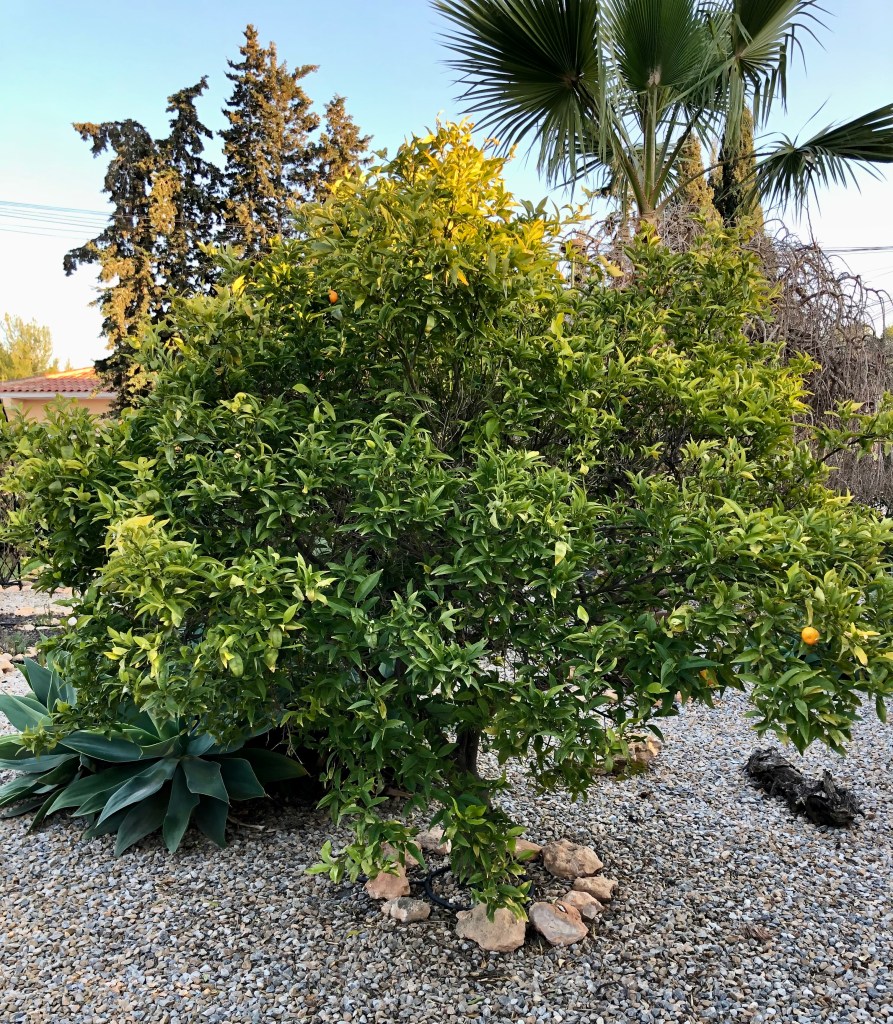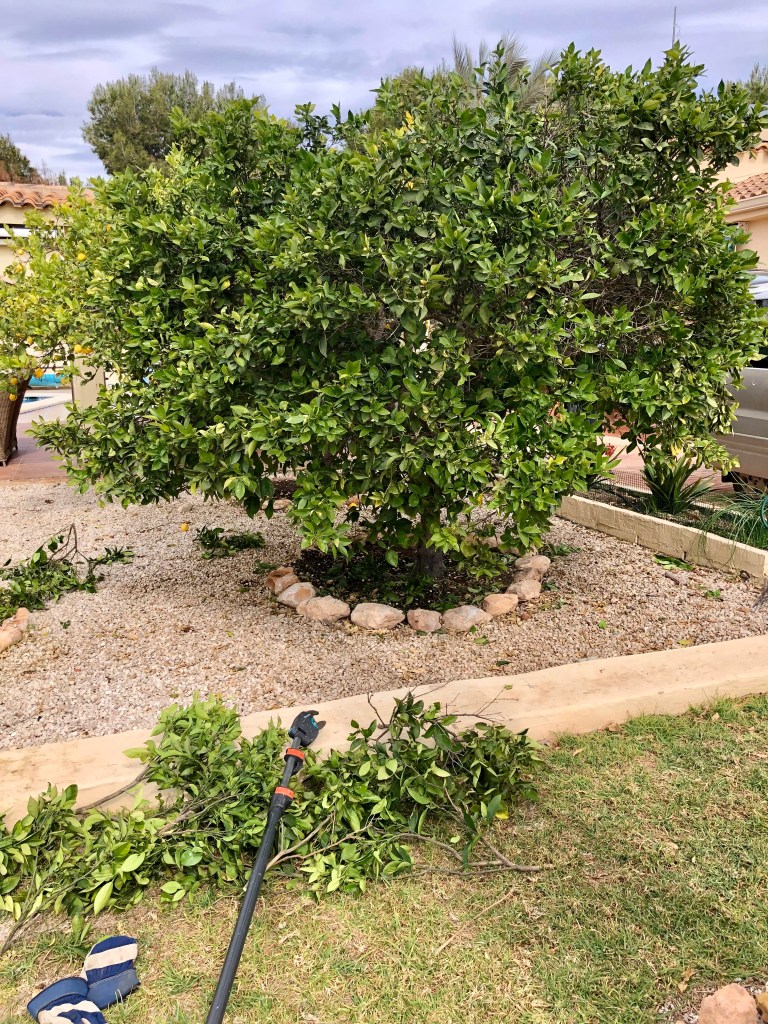
Cut your Palms properly

I don’t know normally dedicate a post to one subject as there is too much gardening to do. But I decided to dedicate this post to discussing cutting Palm trees properly because I am fed up seeing palm trees butchered by men with chainsaws.

Now any idiot can buy a chainsaw and claim that they are a professional. And no doubt it will definitely be cheaper than the real professional. But the end result is ugly butchered trees that have been hacked to pieces and are now ripe for a visit from the Palm Weevil.

Now whether you take my advice or carry on butchering your trees it is up to you but here we go.

16th March 2026. Things I have been doing lately.

Well to be honest, it’s not things I have been doing, it’s things I have been getting done. Cutting Palms is the only thing that I do not do myself in my garden. There are four reasons for this:

  1. The aforementioned I cannot stand seeing butchered palms
  2. I have twelve palm trees some of which are 40ft high
  3. I am old and wish to preserve my bones
  4. The idiot son has made me promise not to climb ladders as I often fall off

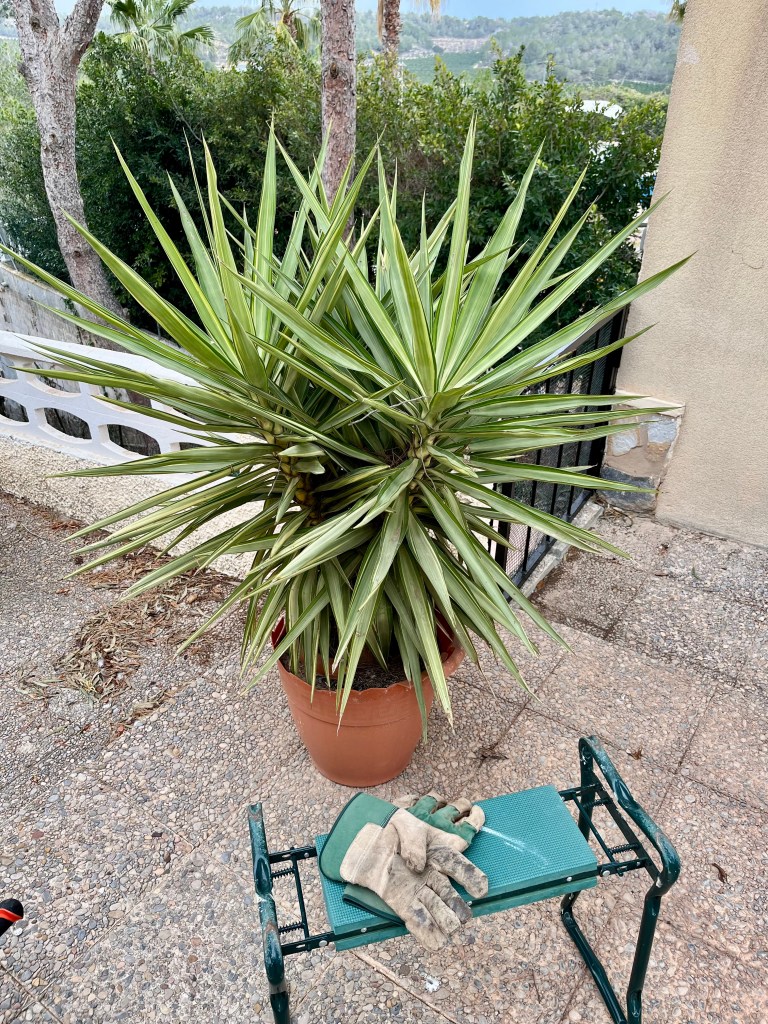
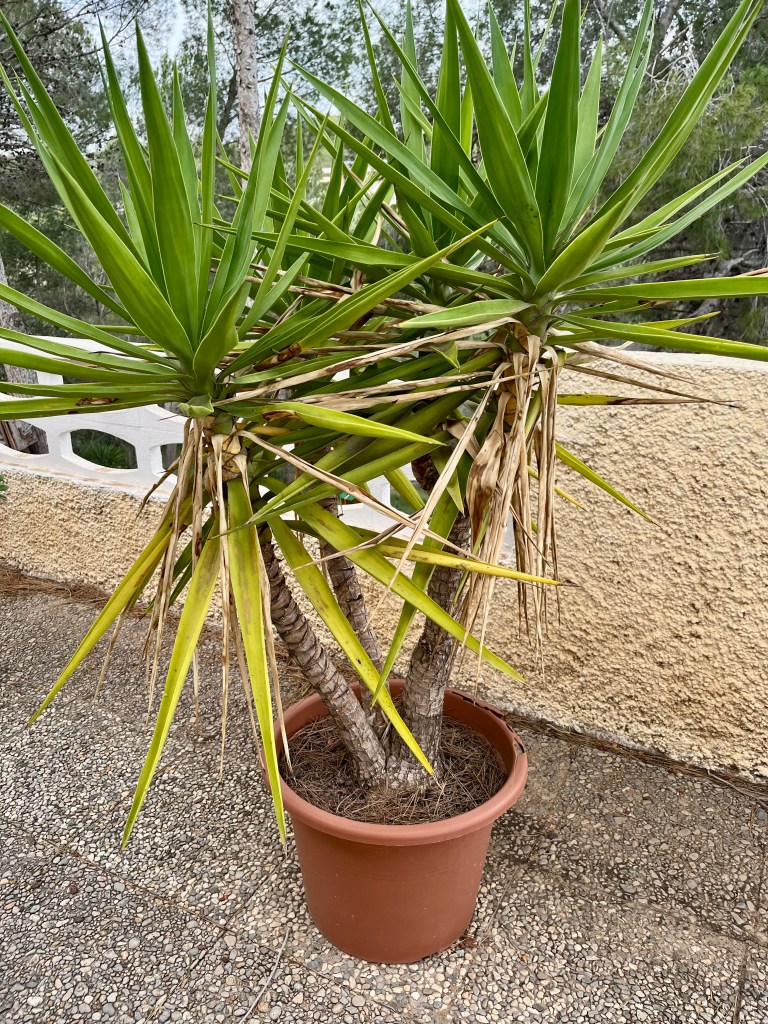
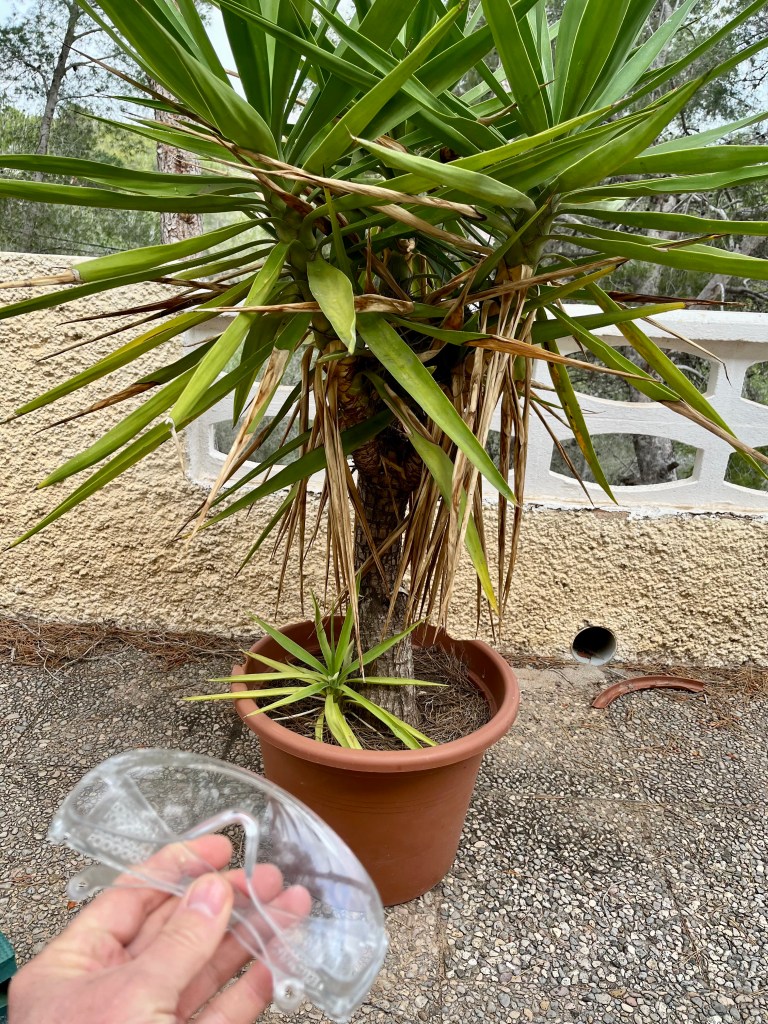
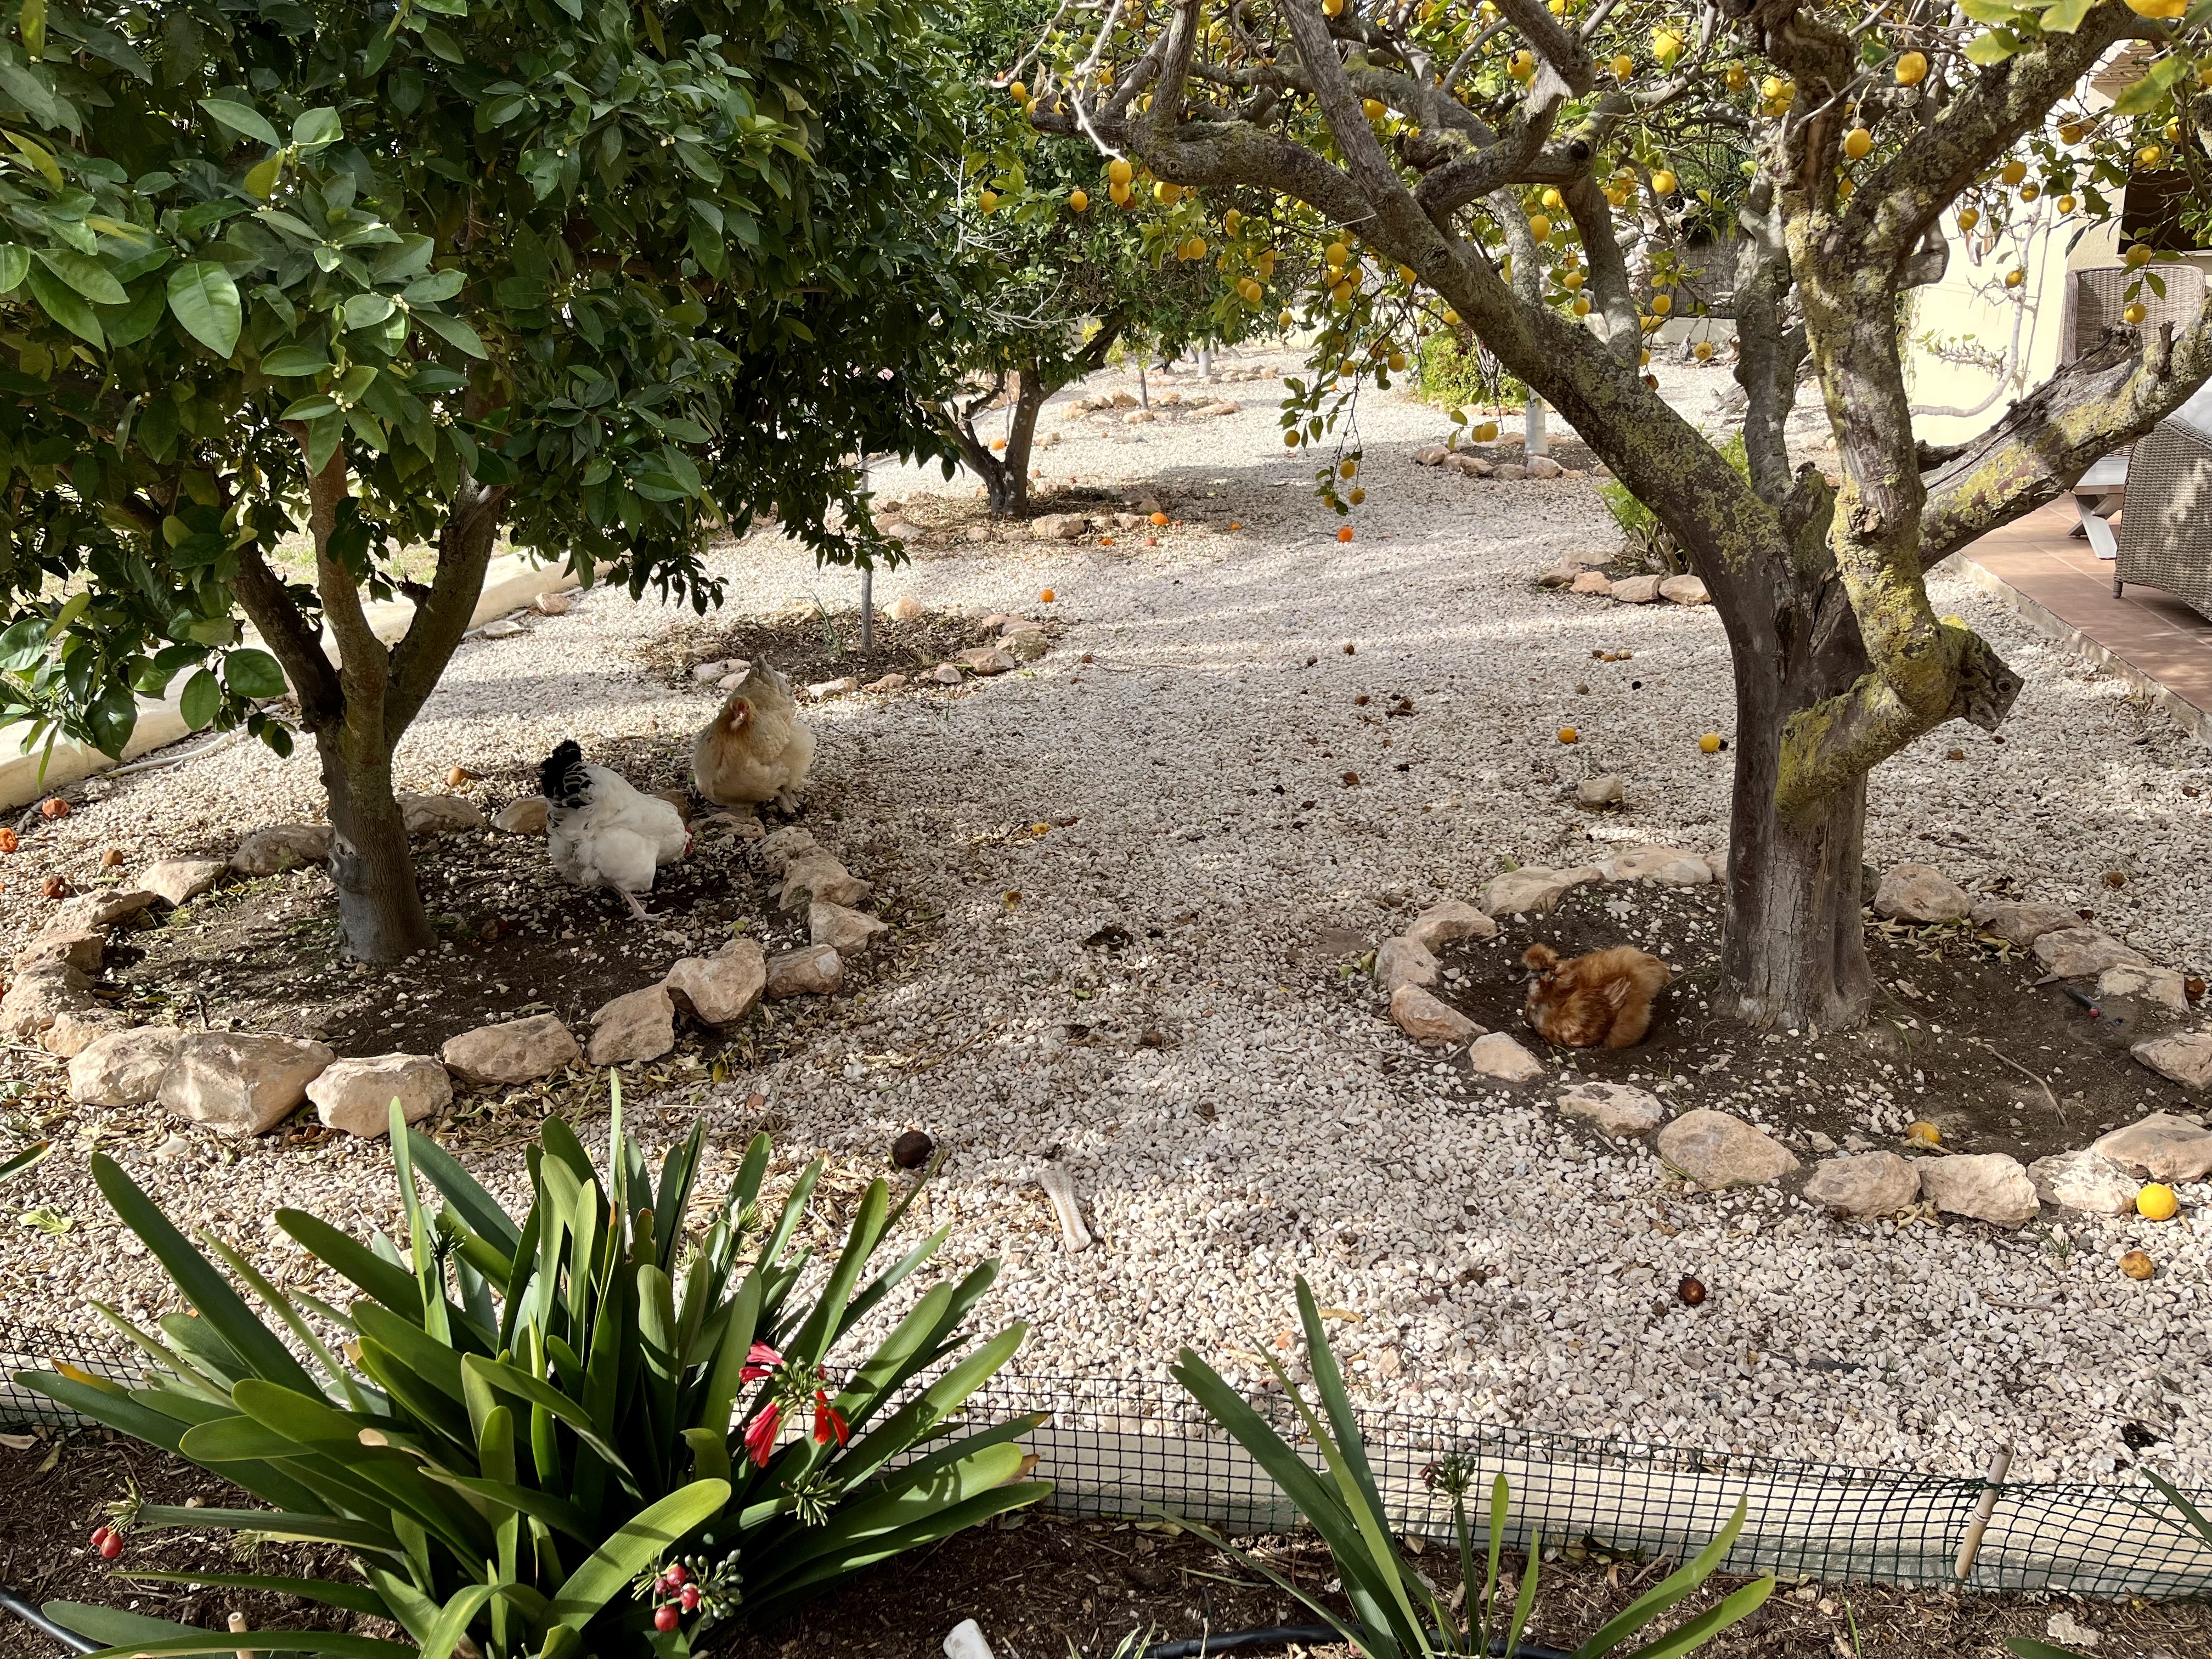
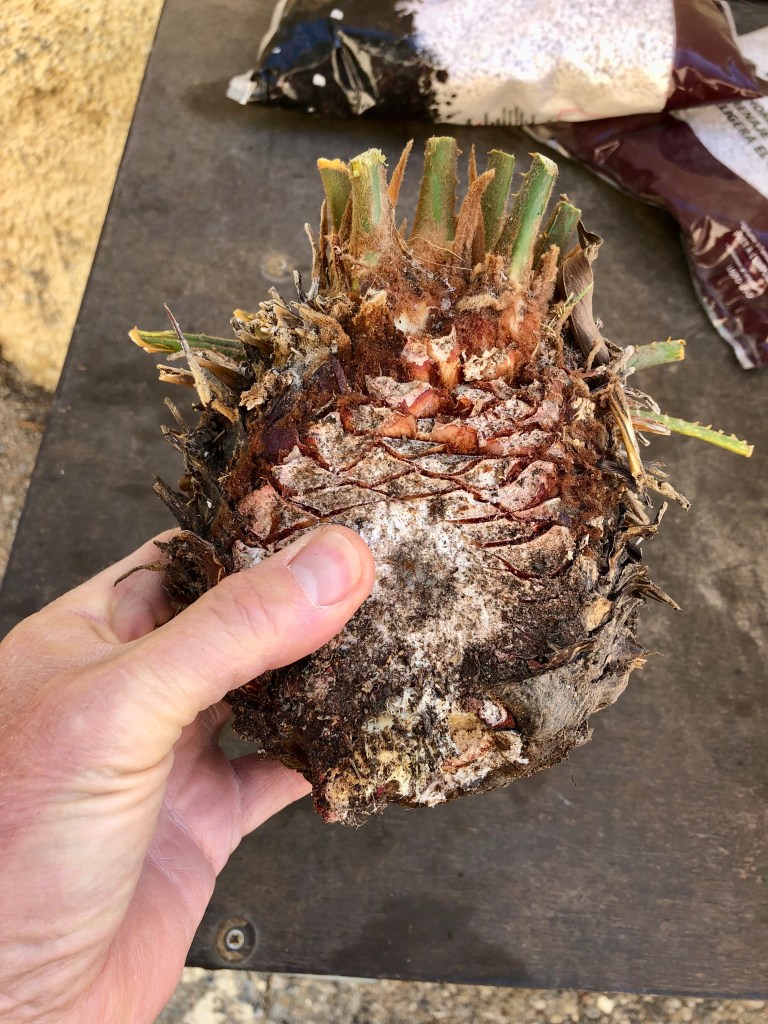
Why cut your palms? There are lots of good aesthetic reasons for cutting your palms. Probably one of the least important is that they look messy, unsightly and blight your garden. The photo below shows a typical example.
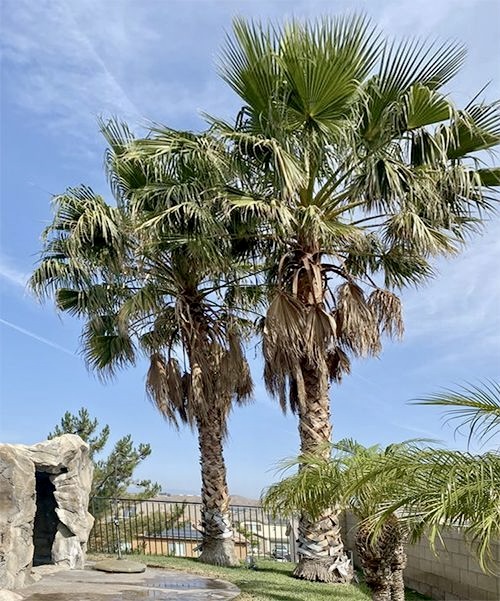
Not only unsightly but also dangerous

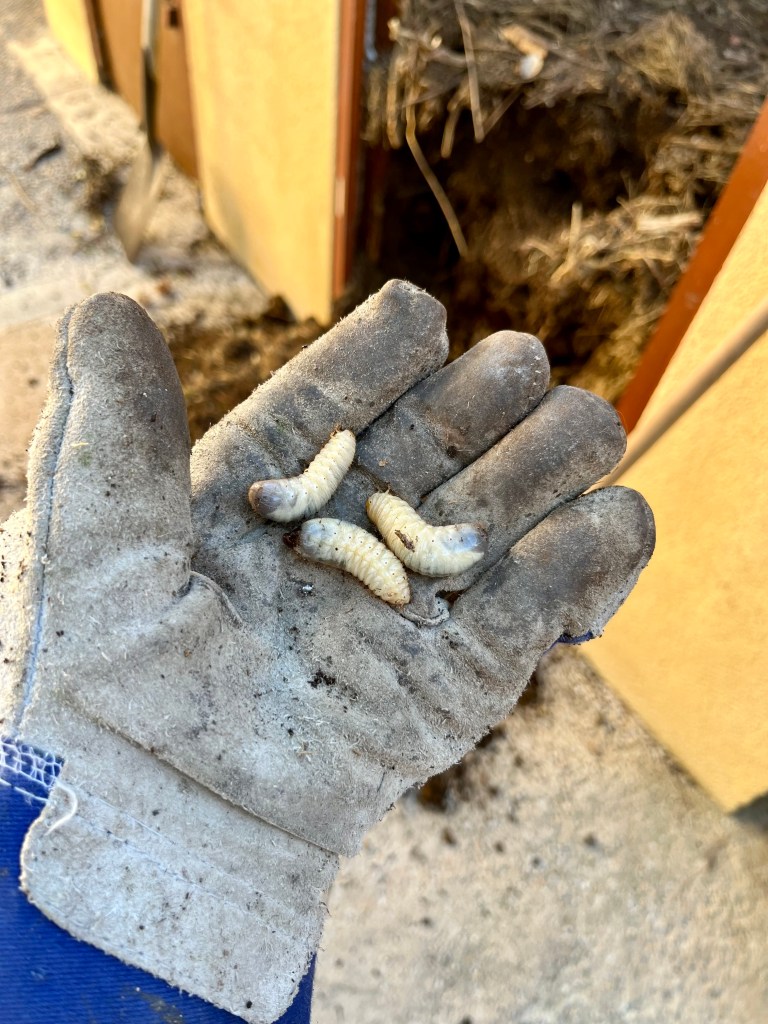
The thing is not only does this look unsightly it also dangerous as the added wind resistance can make the tree susceptible to wind rock and eventually falling. In addition all that dead vegetation hanging down is an ideal home for virus and of course the dreaded Palm Weevil shown in the photo below.
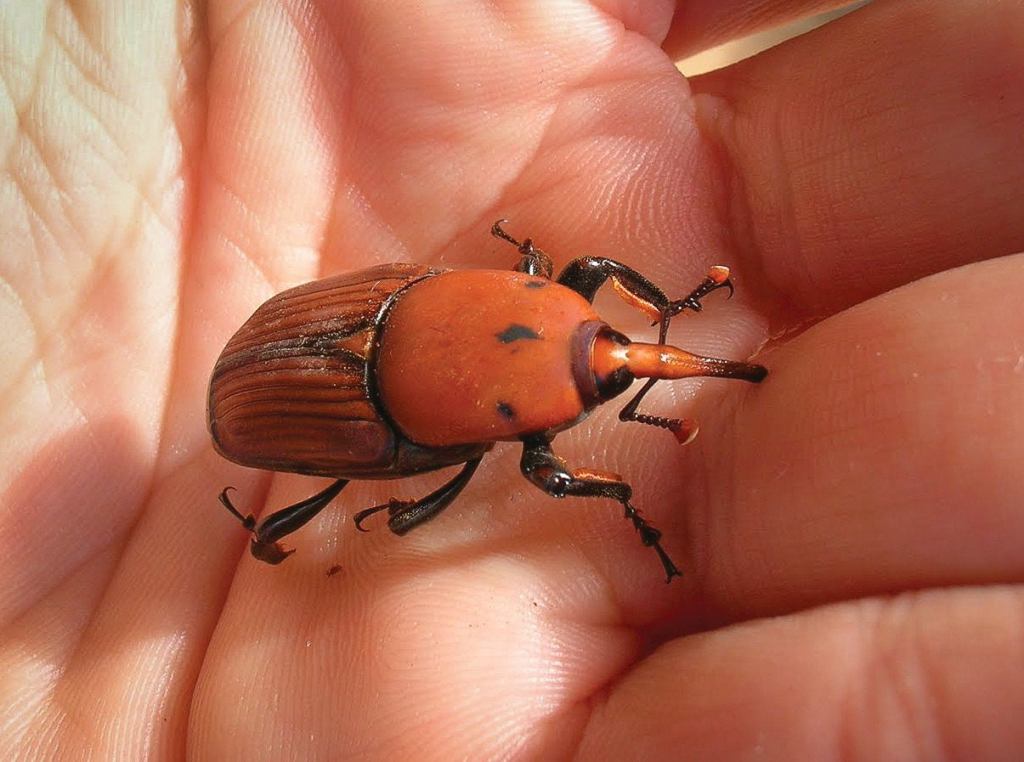
Here is one I caught last Summer

Whilst the Red Palm Weevil mainly attacks Phoenix Palms, there have been instances of it attacking Washingtonia and other species.

I have dealt with treating against Palm Weevil in other posts so if you have a problem just use the search button and you will find the relevant post.

When to cut your Palms. The best time to cut your Palms is between January and March. This is the period when most of your trees growth is over for the season and is also the time when the Palm Weevil will not normally be flying.

If you cut your Palms at any other time, especially during the hight of summer, then you are inviting the Palm Weevil to come and lay its eggs in your tree. When Palm trees are cut in the summer they will ooze sap. This sap can be smelled by the Palm Weevil which I am told has an amazing smell and a highly developed olfactory glans. Research has shown that the weevil can smell a damaged or cut tree from over 1 kilometre away.

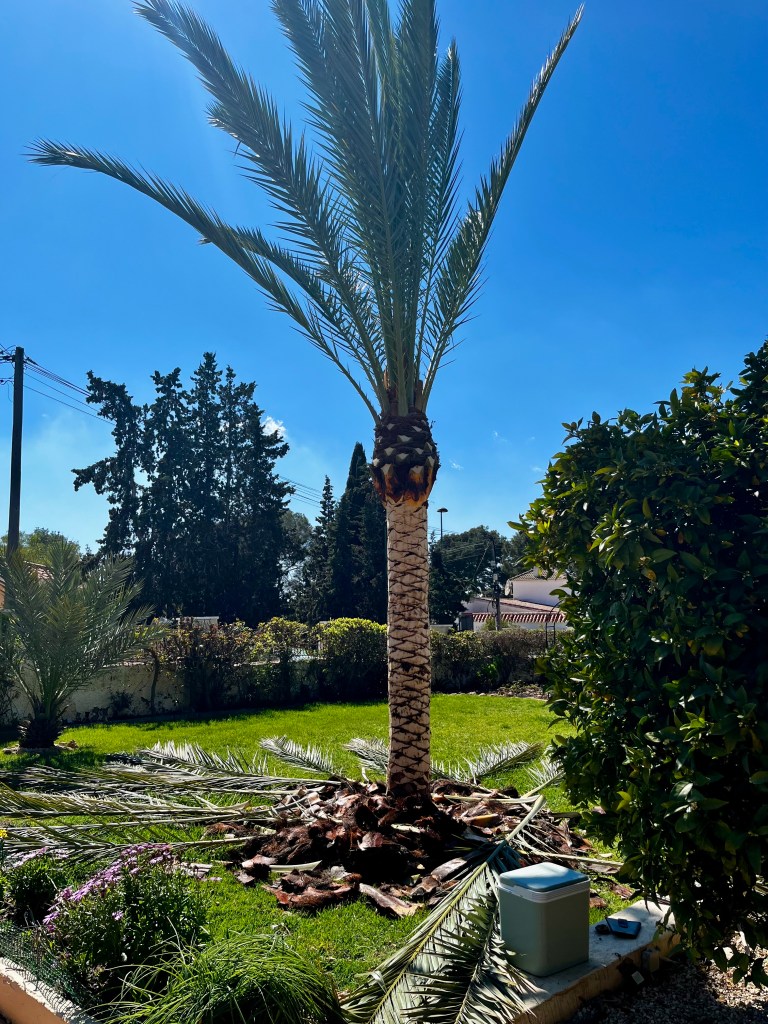
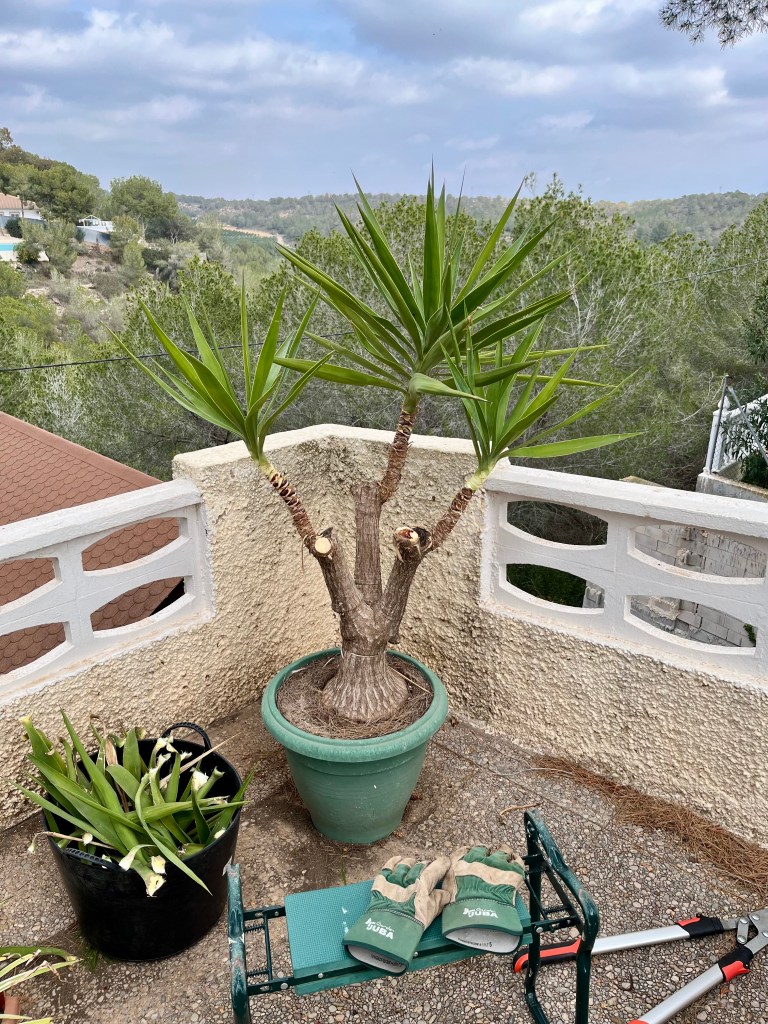
How to cut your palm trees. At its simplest you should aim to have your tree cutback so that the remaining fronds are more or less upright. The photo below shows some of my newly cutback palms.
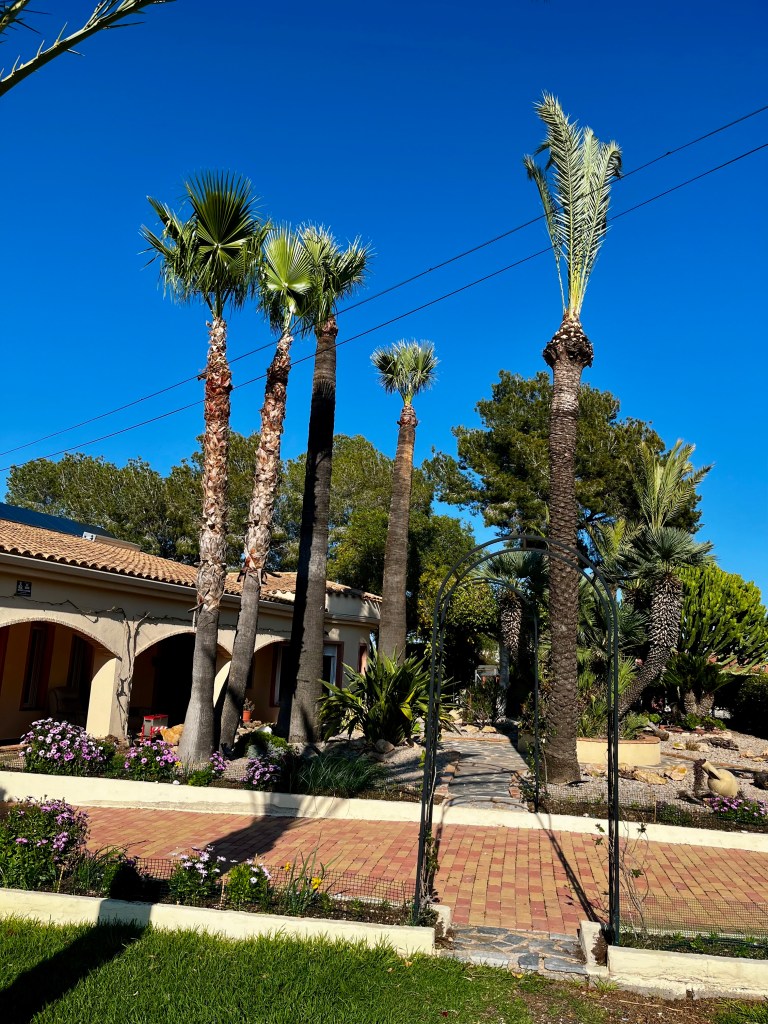
Don’t they look lovely, unfortunately they don’t stay that way

Why use a professional Palmerero. The title Palmerero is commonly used to refer to a professional palm tree cutter in Spain. These are highly trained and skilled individuals who know everything about palm trees and how to prune them. As I said at the start of this post you will find lots of men with ladders and chainsaws who will cut your trees back a lot cheaper, but may well end up damaging your trees and leaving them unsightly.

Palmereros do not use any machinery. Instead they use a specialised knife called a corbellote or in different parts of Spain a corvellot  to prune and trim the trees. Because they do not use ladders Palmereros will use a climbing technique that involves specialist boots and a harness to scale even the highest trees. This means they are not hacking at your palms from the top of a short ladder and instead can get right up to the crown to inspect for damage.

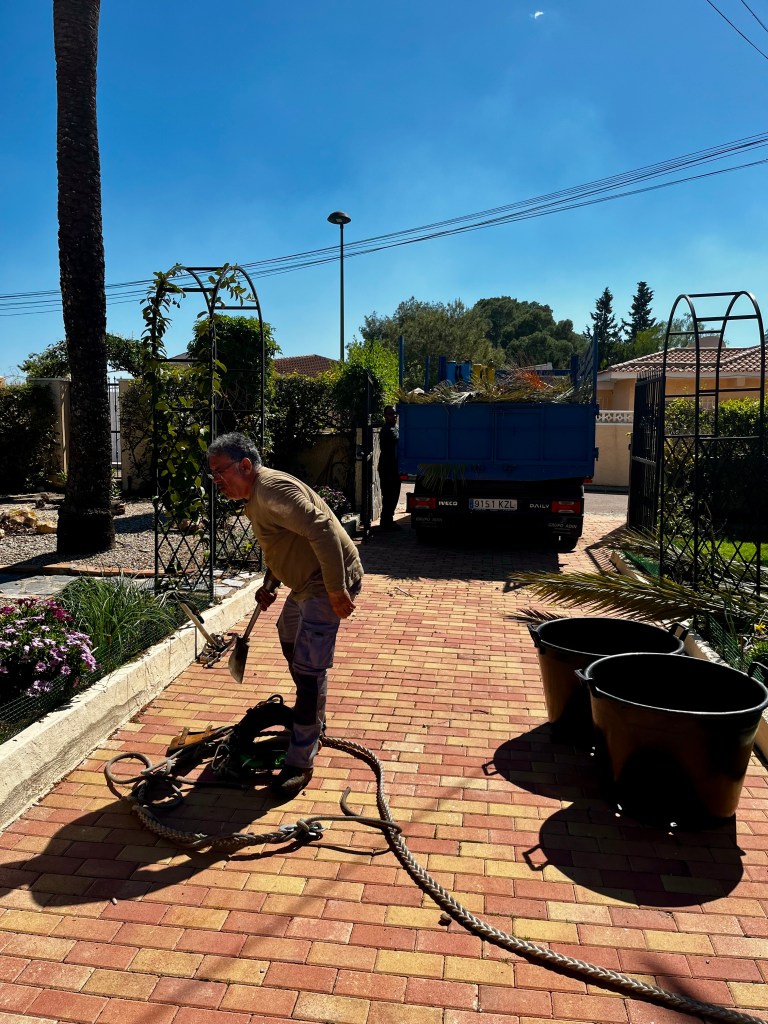
I have used the same Palmerero, Antonio for over 15 years and have always been satisfied with his work. He and his son arrive and graft away all day and then clean everything up and take it away. I have included some photos of Antonio at work.
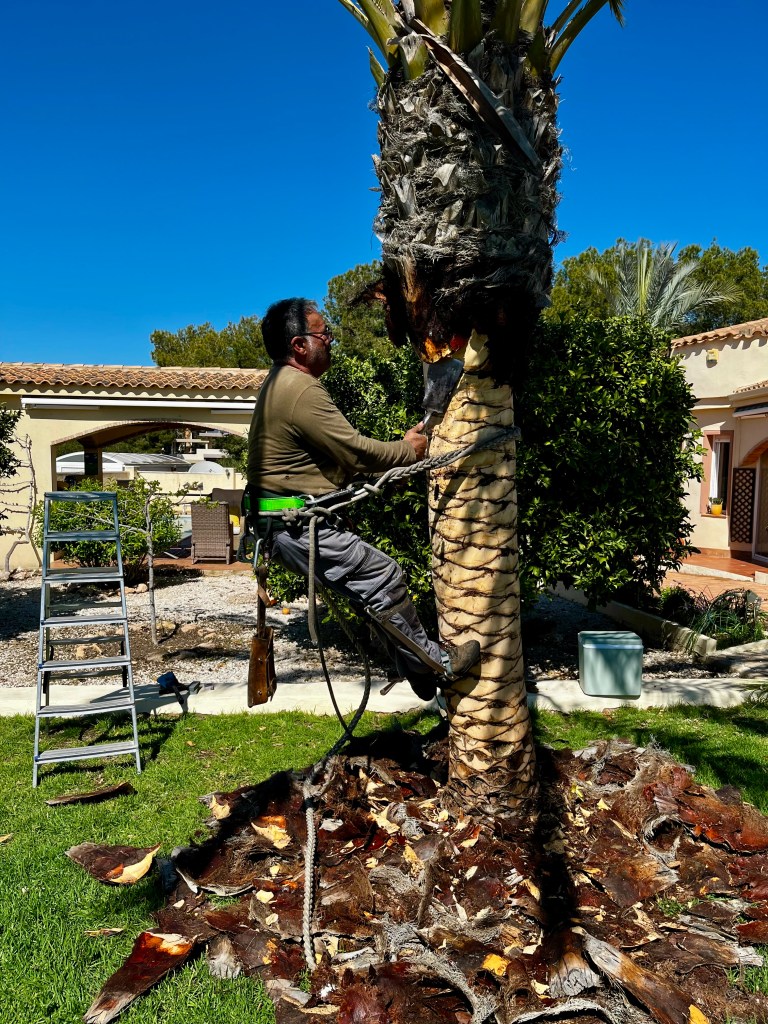
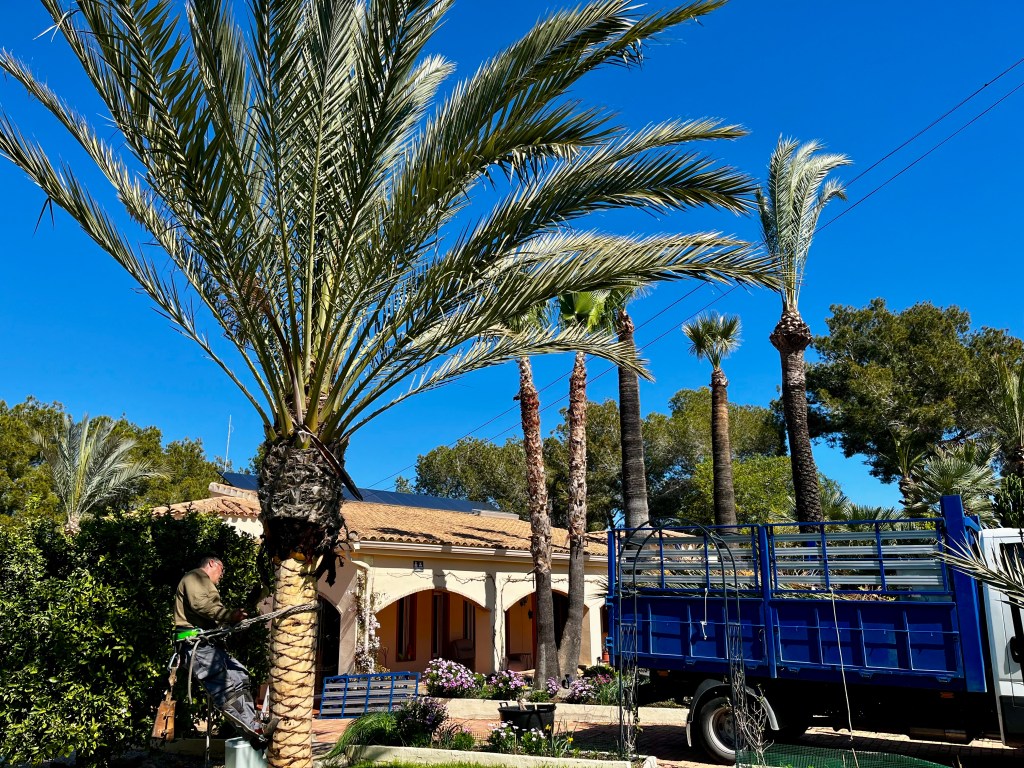
Here is Antonio at work shaving one of my small palms. I am showing you a photo with a small palm as you can see the specialist boots, harness and cutting tool

That’s it for another year, everything packed up and off they go. Unfortunately there will always be a little bit of collateral damage from 15ft palm fronds falling 40ft.
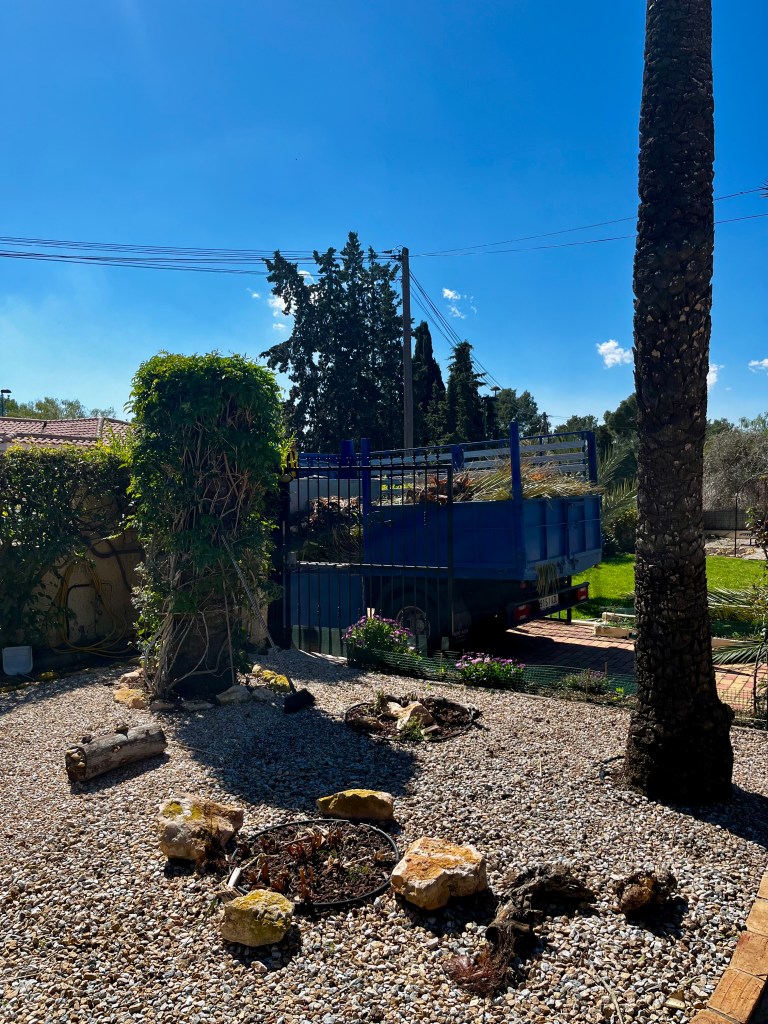
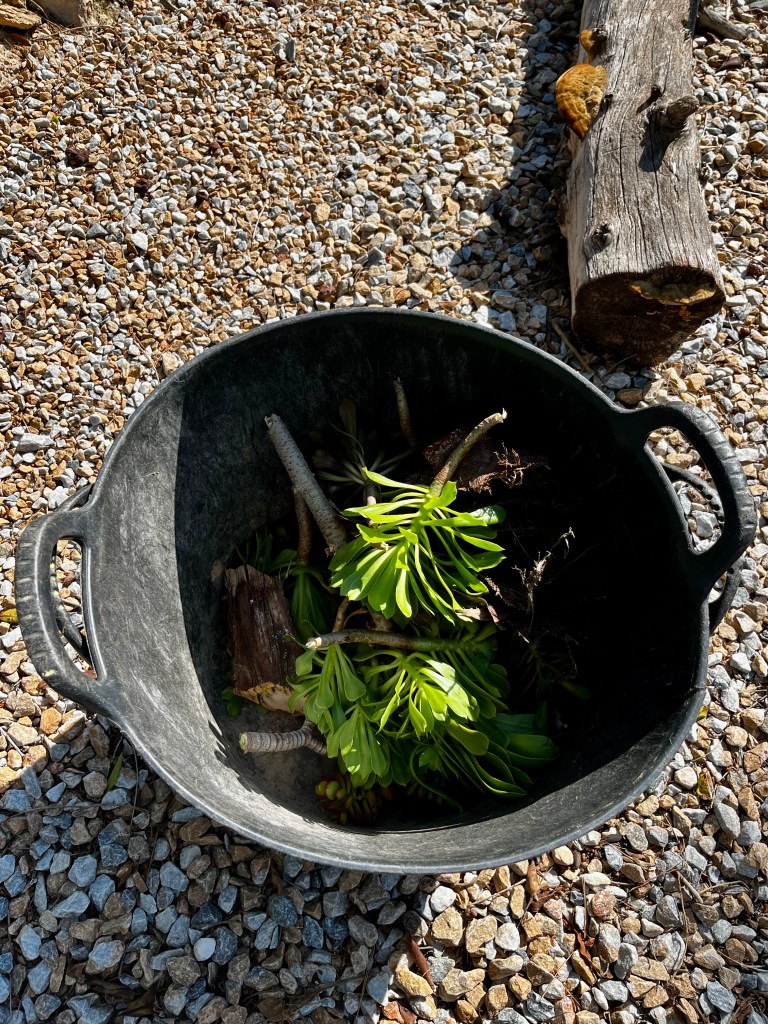
I am sure there are many other Palmereros available but I am happy to recommend Antonio. He covers most of the Costa Blanca as far as Benidorm so het tells me. This is totally unsolicited but here is Antonio’s number 630389536.
It’s Spring and I’ve lost a dove and gained a rabbit

Cruella (my wife) is at our English house assisting our idiot son to move house and I am in sole charge of everything here. I am having a great time, I garden all day and hang around the compost bin and potting bench talking to the cuttings. At night when the chickens won’t go to bed I stuff them up through the coop entrance one after the other and they all end up like those Russian dolls forming one giant chicken.

But more worryingly the little white Dove has disappeared, but by way of compensation God has sent me a little blue rabbit. I will explain everything later but we need to get on with the gardening as it’s Spring and we don’t have a moment to lose.

12th March 2026. Things I have been doing lately.

  • Preparing and revitalising you borders
  • Planting out winter seedlings
  • Planting annual seeds
  • Feeding and mulching roses
  • Tidying and feeding Bird of Paradise
  • Cutting back Allysium
  • Feeding grass
  • Dealing with the loss of the little white dove and the arrival of the rabbit

Preparing and revitalising your borders. Spring is a fantastic time for gardeners, the soil is warming up and nature is poised to leap forward. Your job as a gardener is to get ahead of the game and make all the necessary preparations to ensure a good summer.

One of the first things you need to do is to weed, water and mulch your flowerbeds and borders. You can’t just keep sticking plants into the same soil every year without making an attempt to replenish it. Replenished soil is revitalised soil that will reward you with stronger plants and bigger flowers.

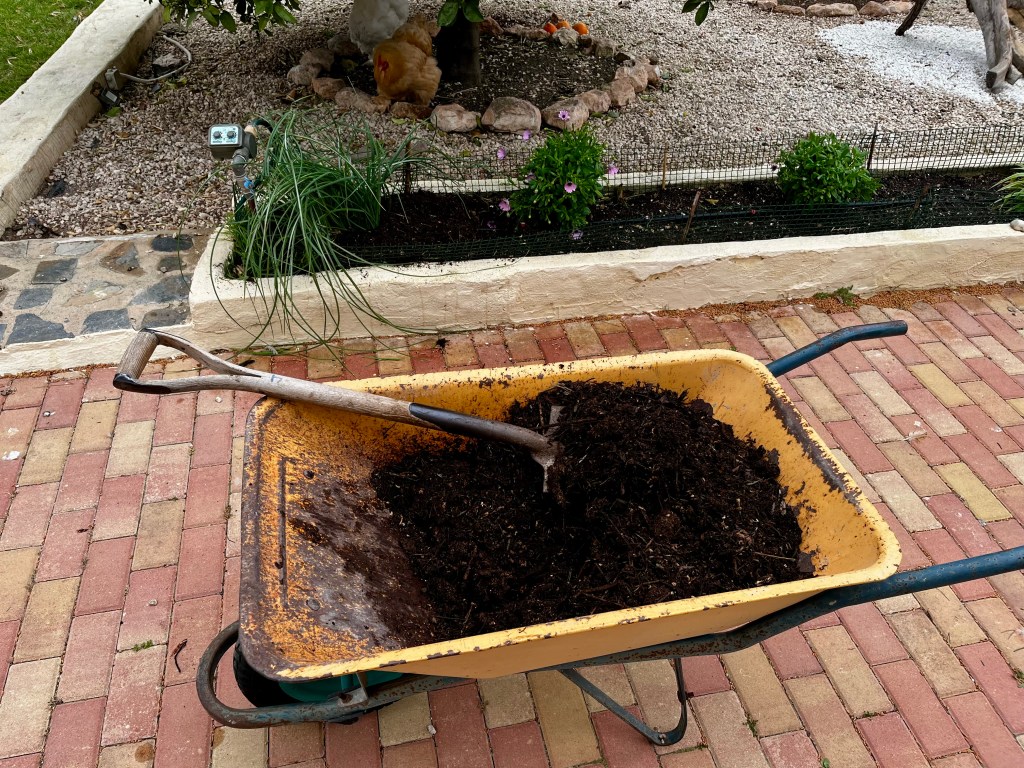
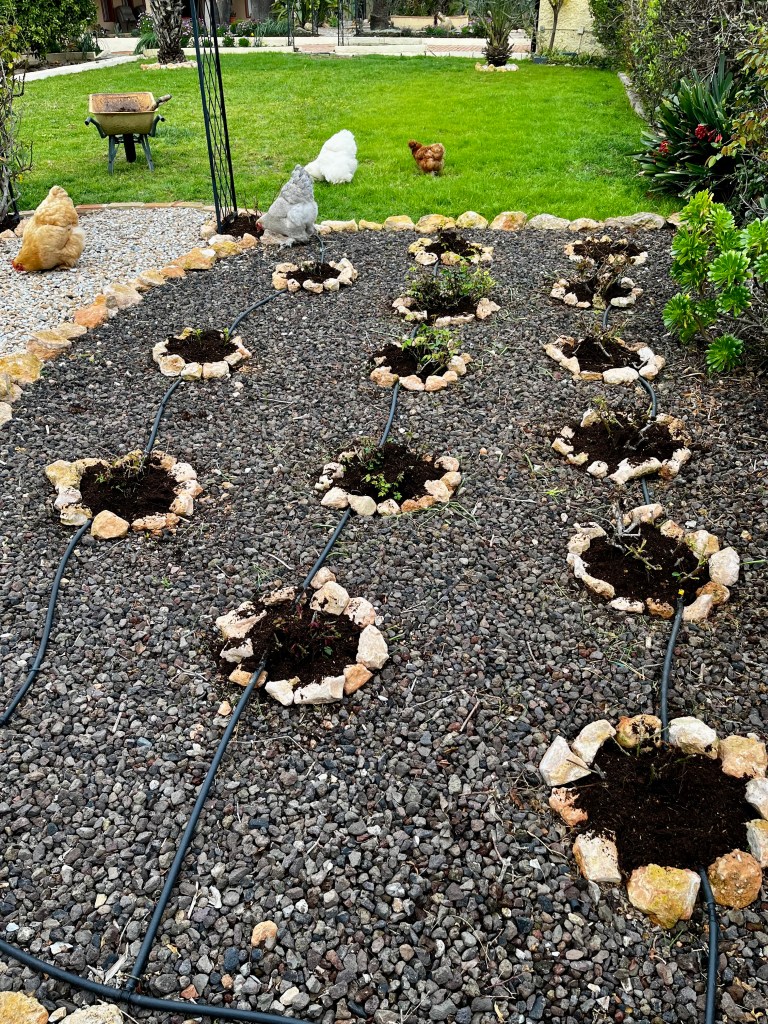
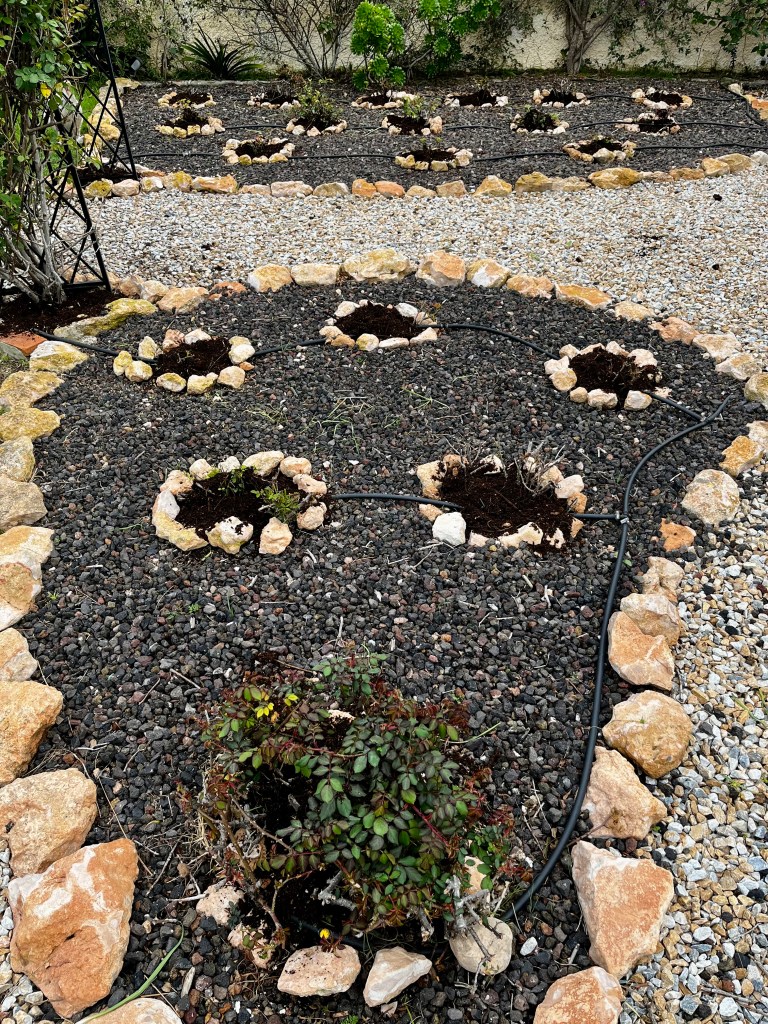
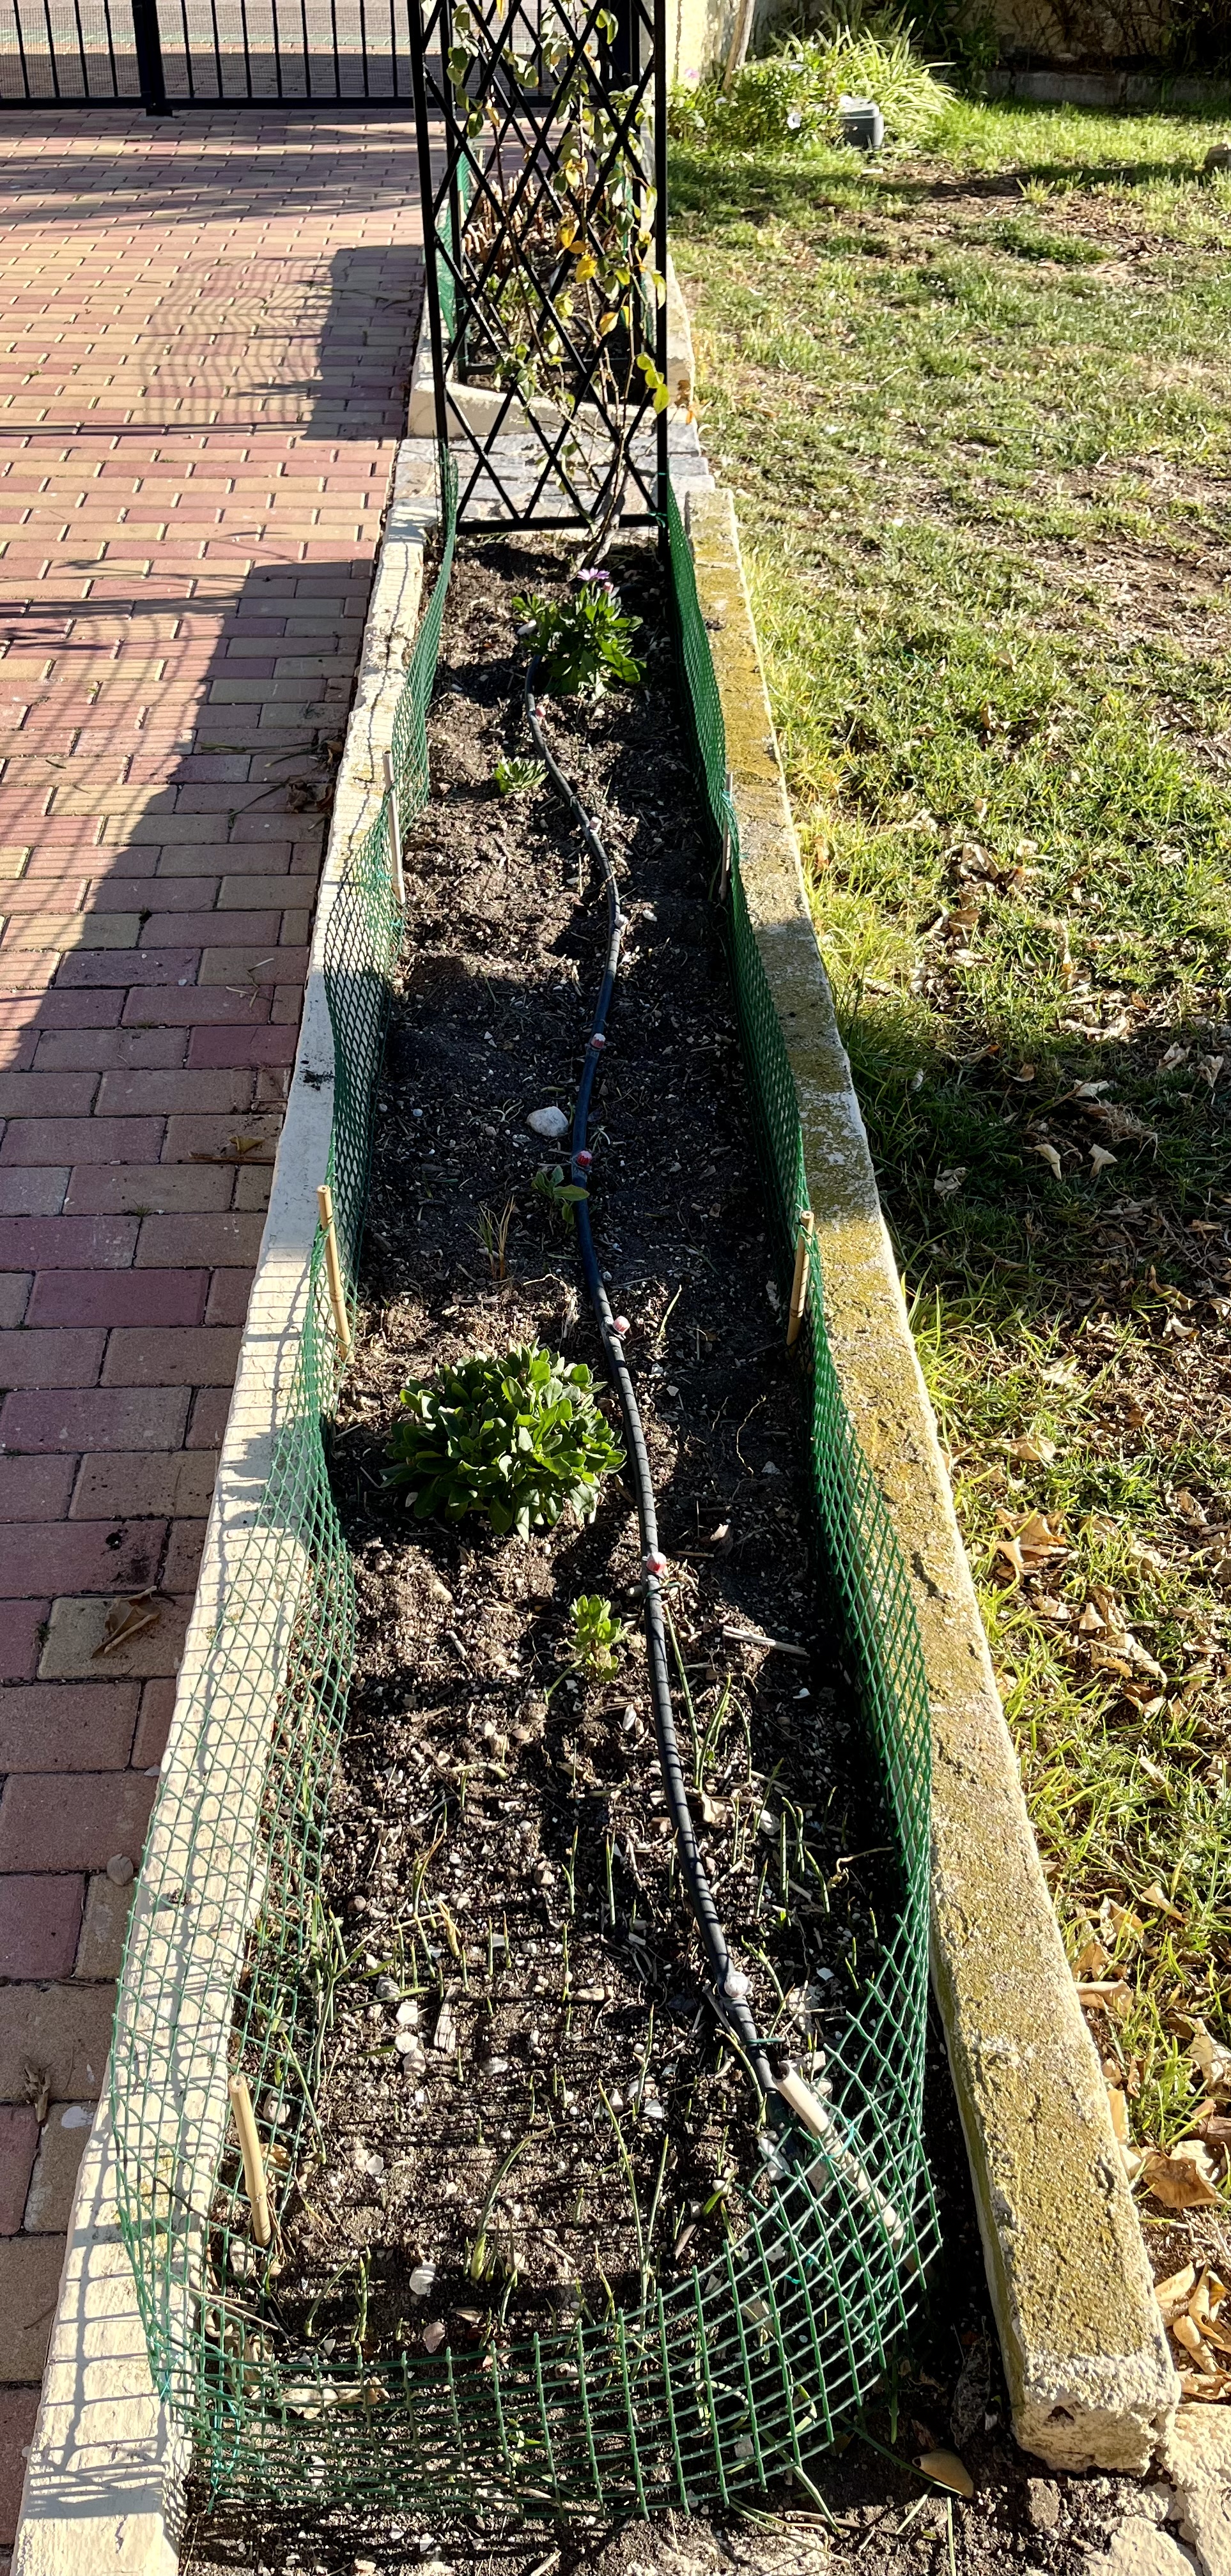
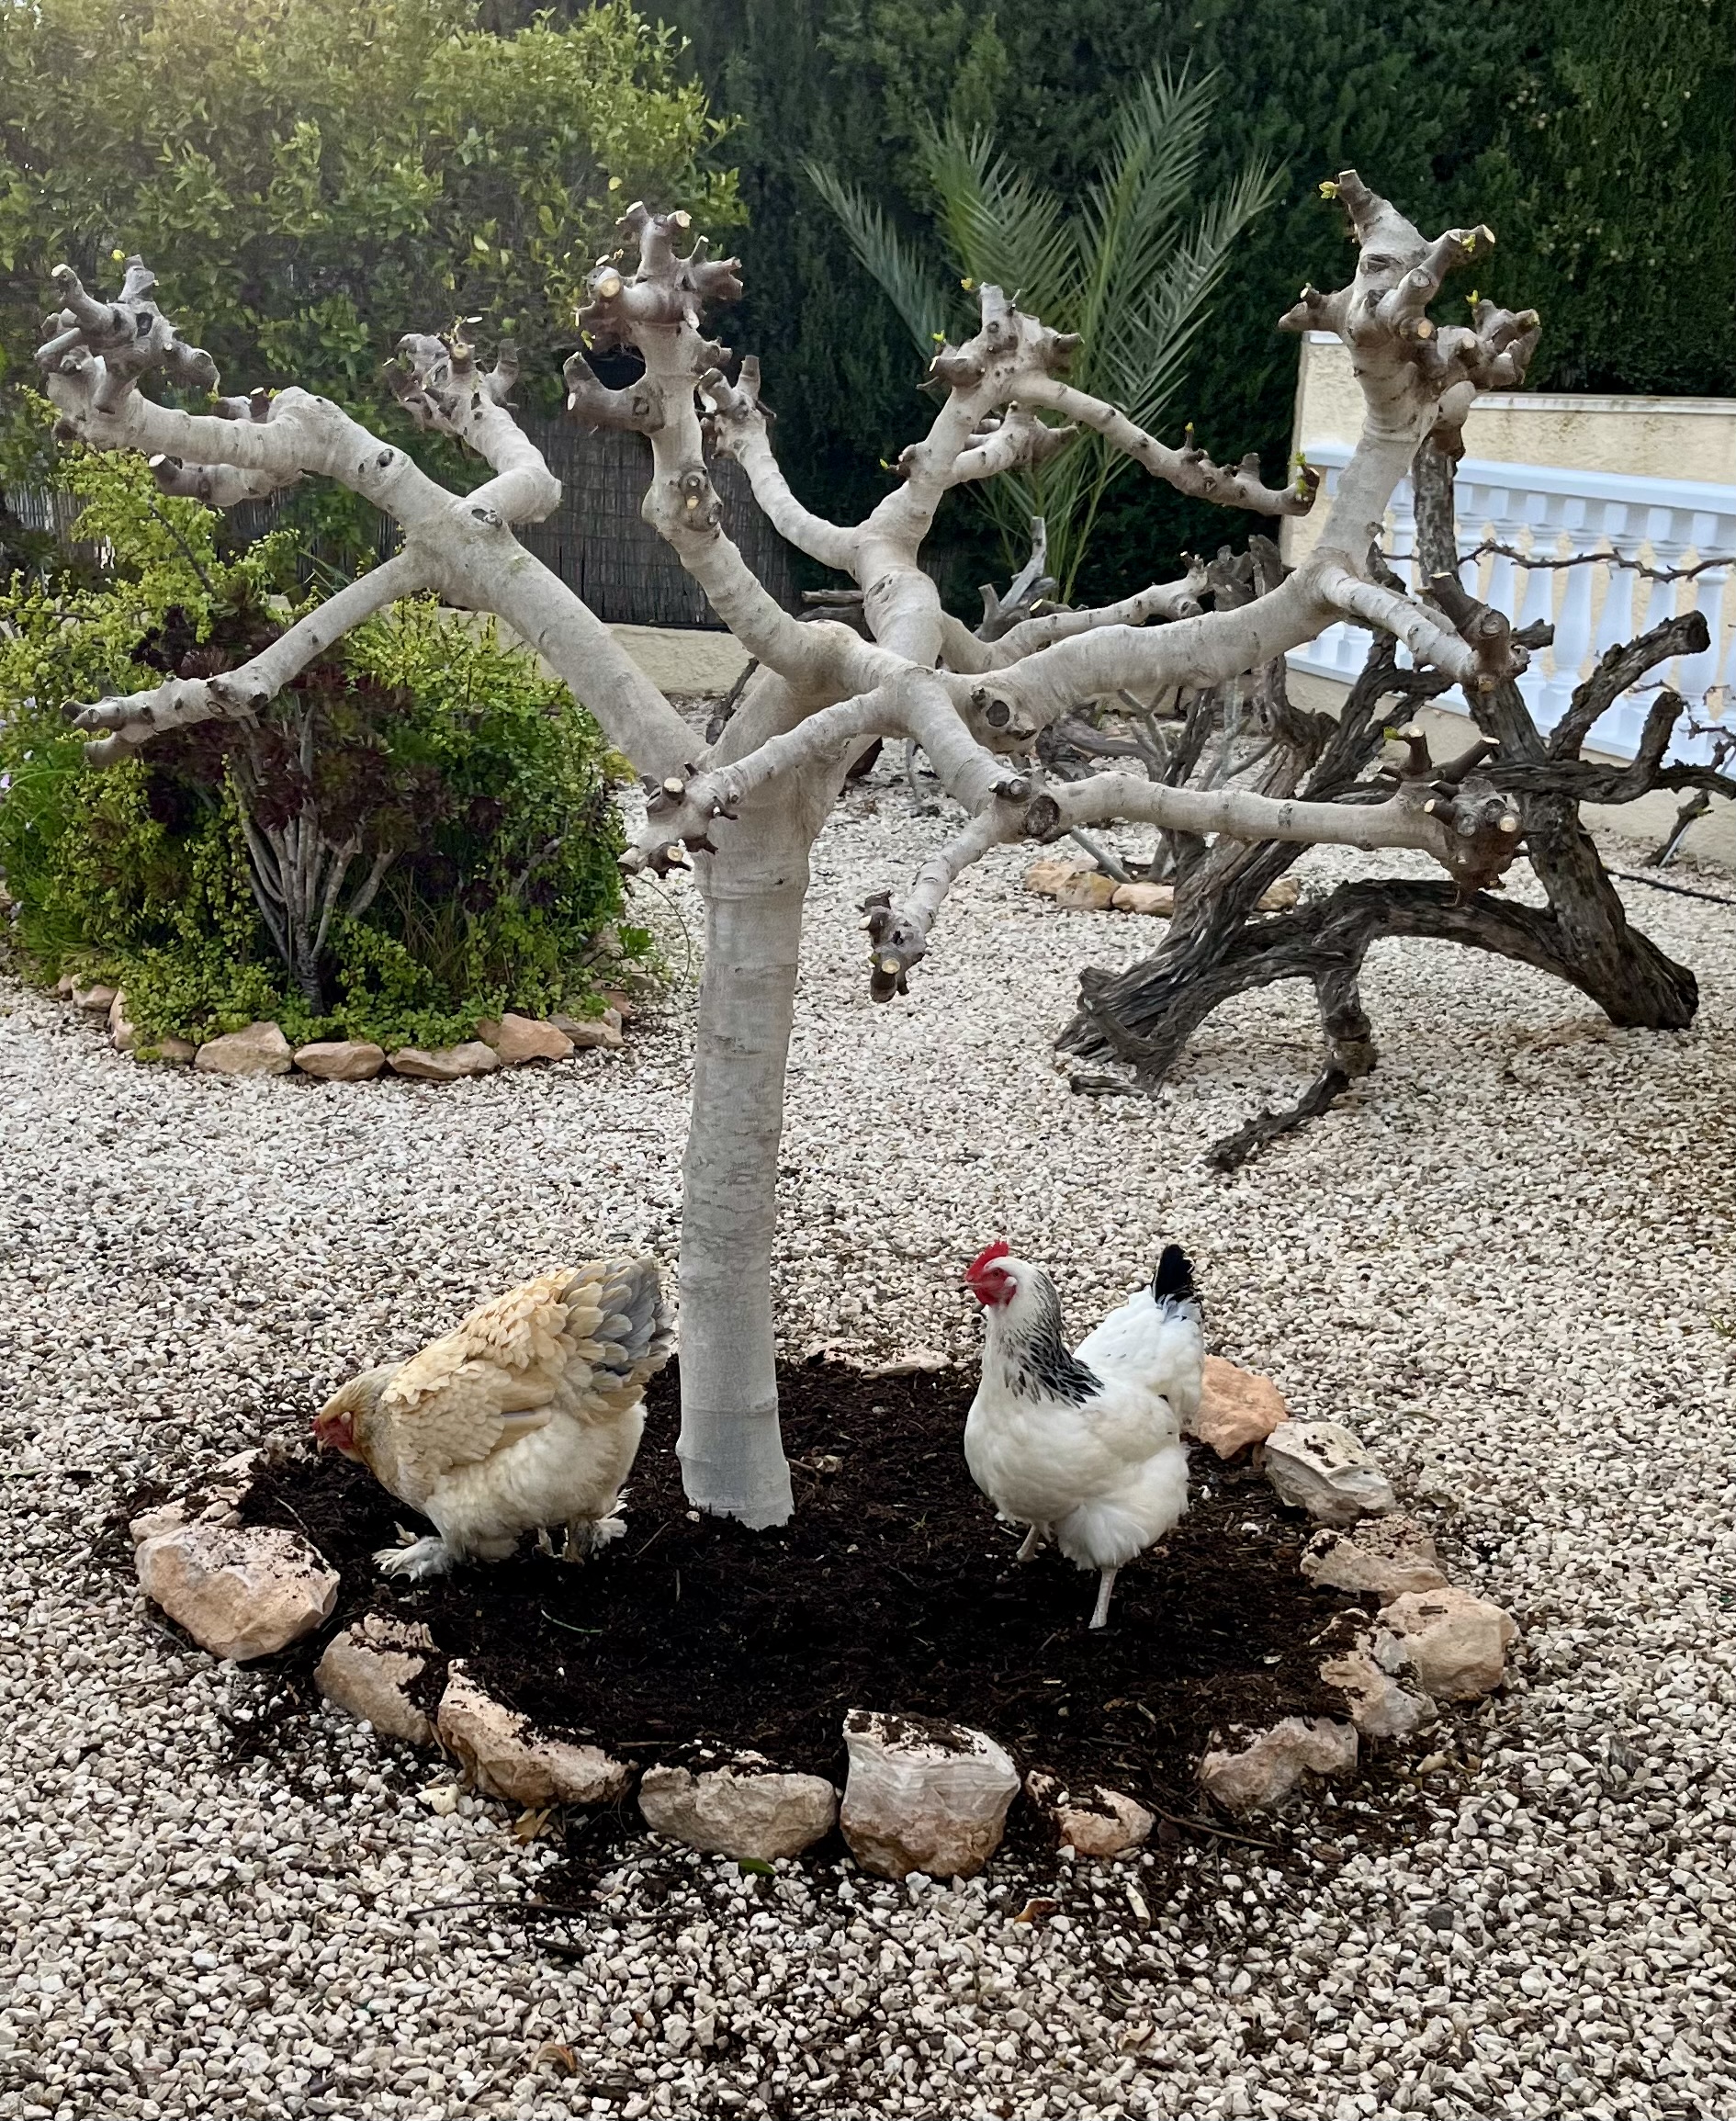
Ideally use mulch from your compost heap, but if you have still failed to start composting, then just buy a few bags of cheap compost from a China shop. Hoe the beds thoroughly first to remove any weeds and clear any leaf debris. Once you have done this deeply water the borders and then apply a thick mulch of compost; ideally at least 2 inches thick. Don’t worry about digging it in the worms will do that for you. The photos below show my mulching efforts accompanied by the chickens who like the maggots from the compost.

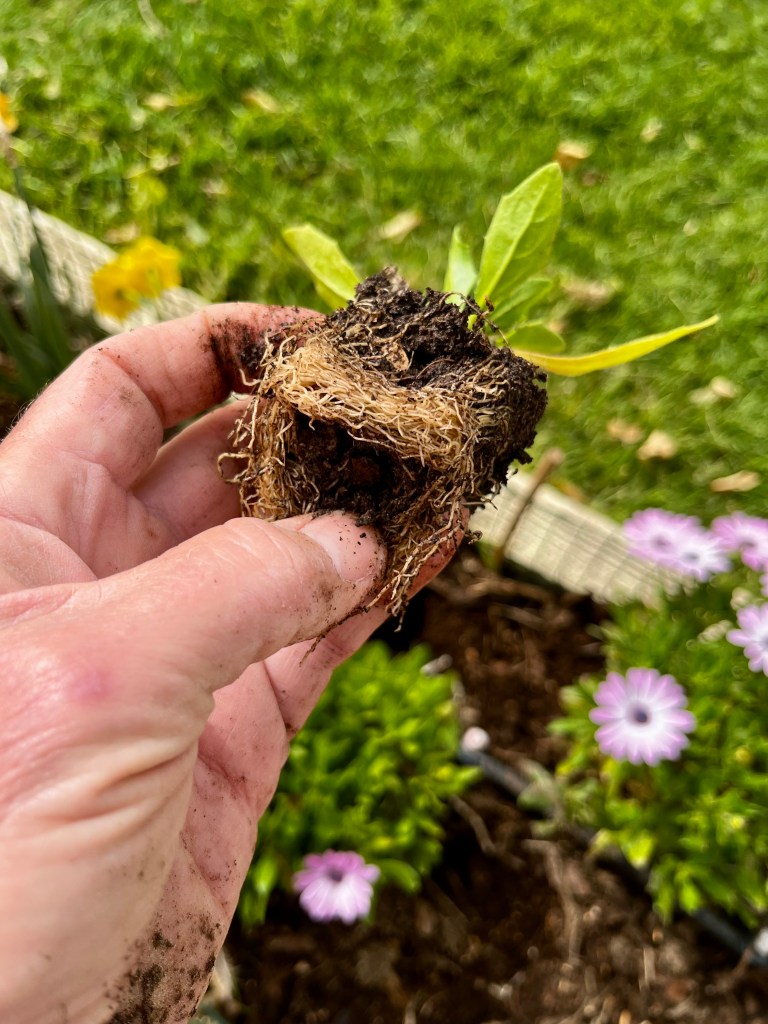
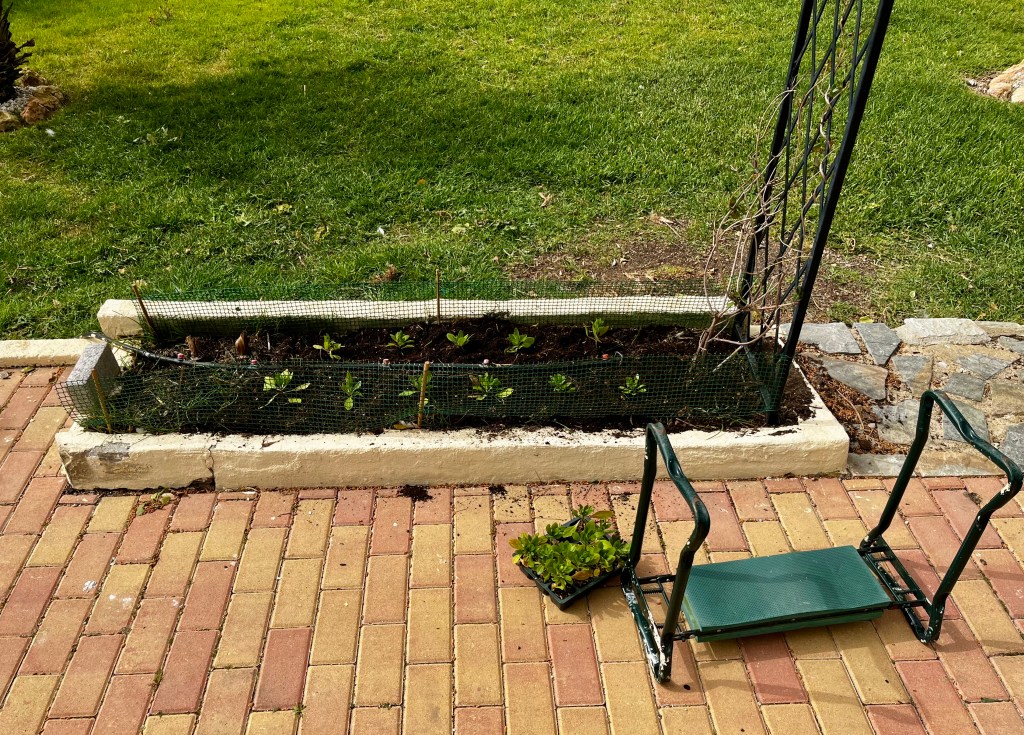
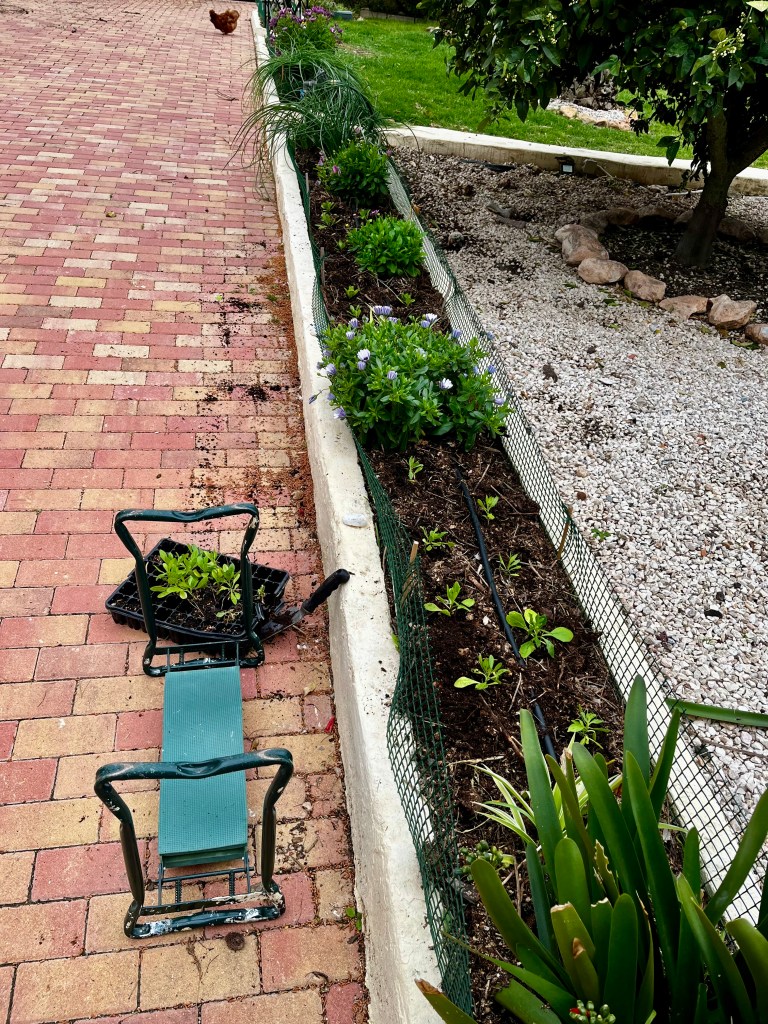
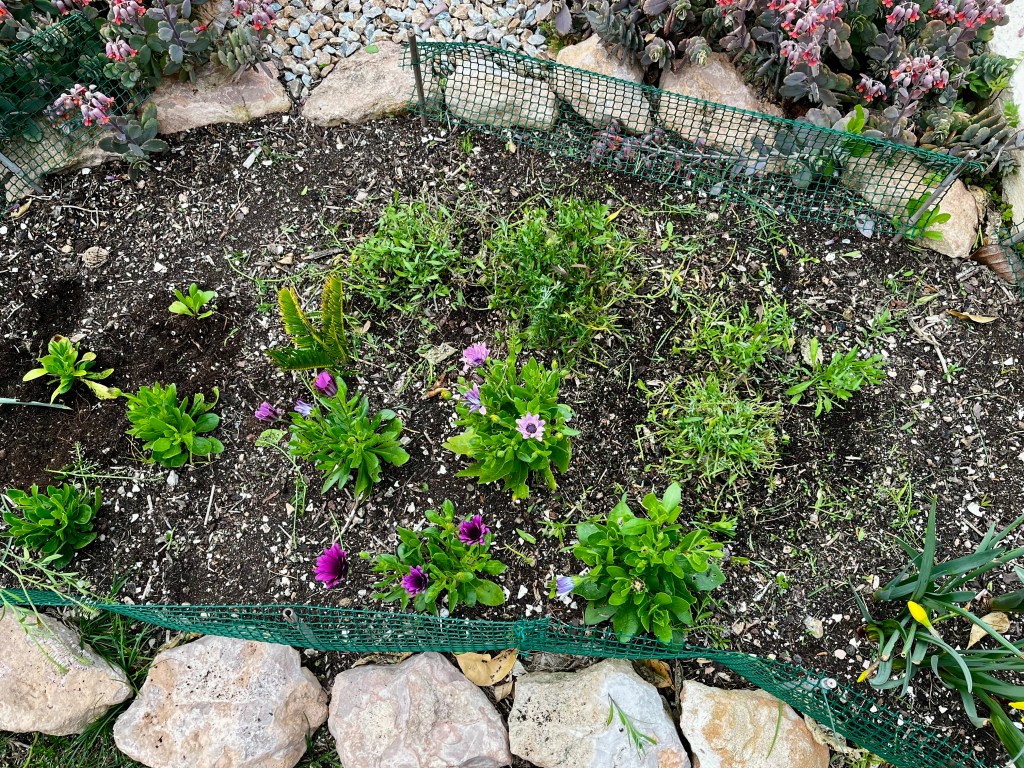
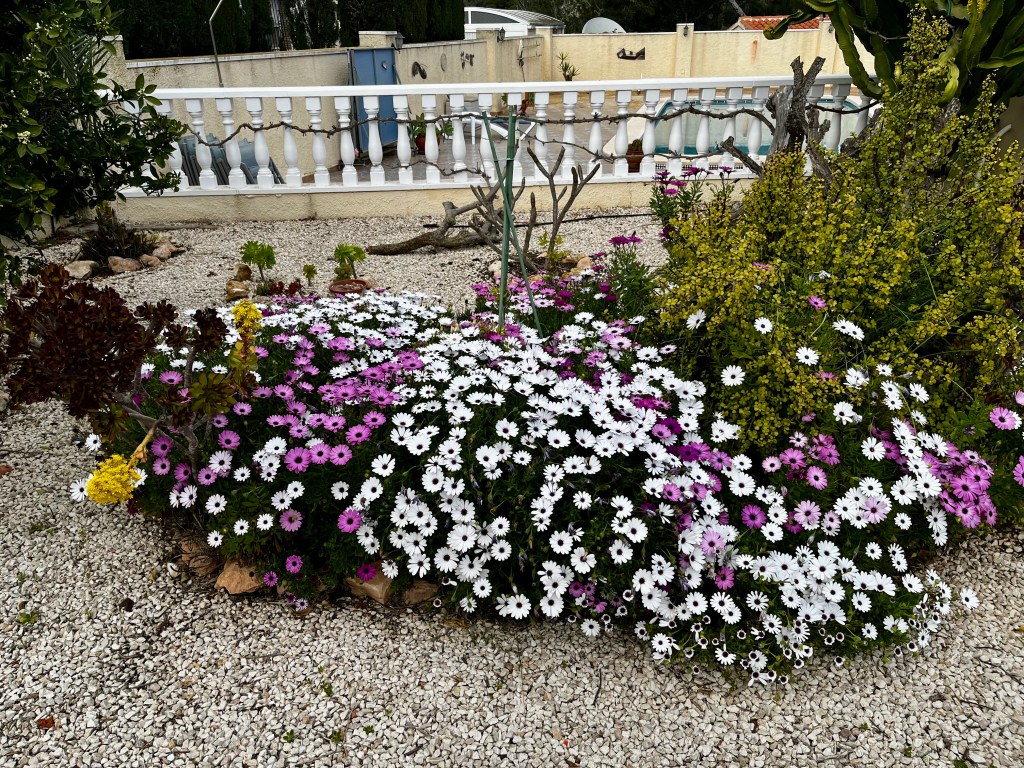
Planting out winter seedlings. In the autumn I pricked out lots of self seeded Osteospermums and planted these up in trays to grow on during the winter. Now is the time to plant out any seedlings you have been growing on as they will have become quite root bound. The photos below show my planting into the newly mulched borders.

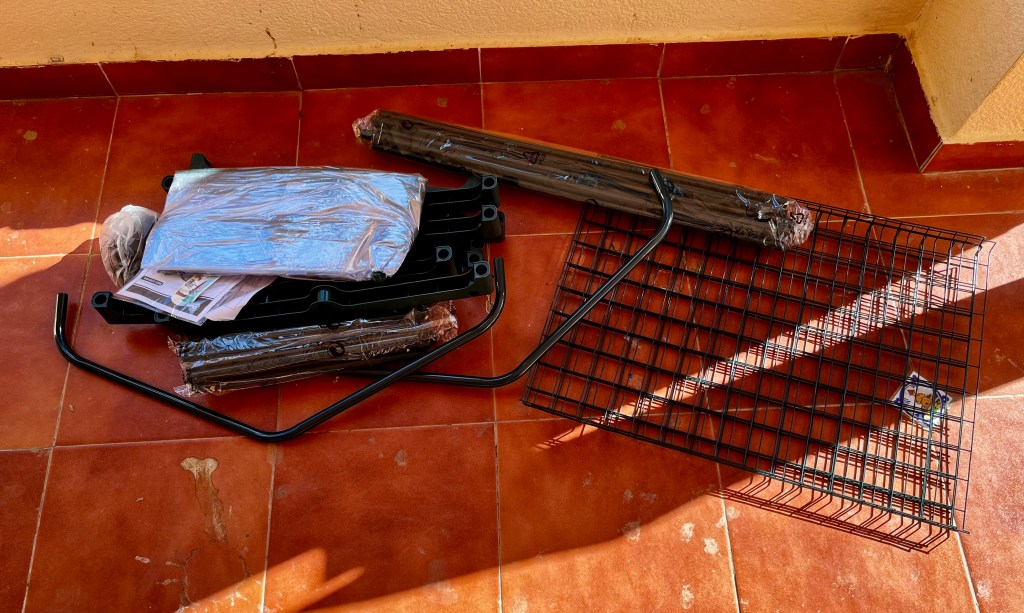
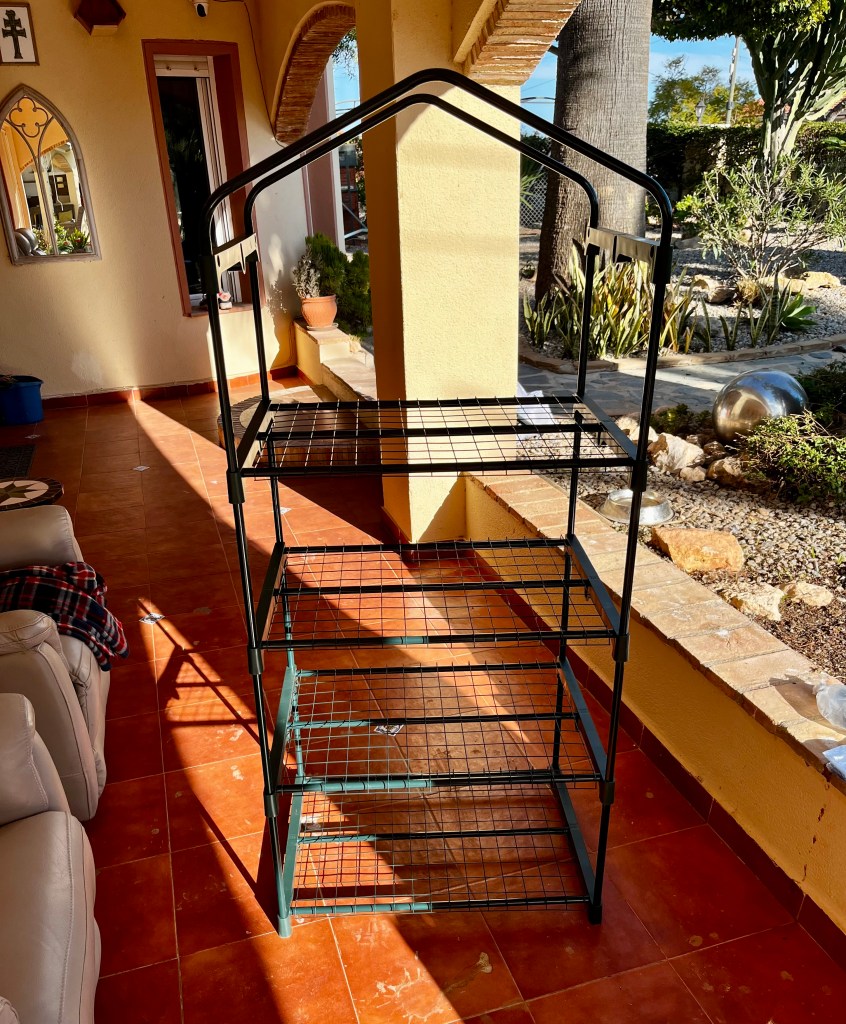
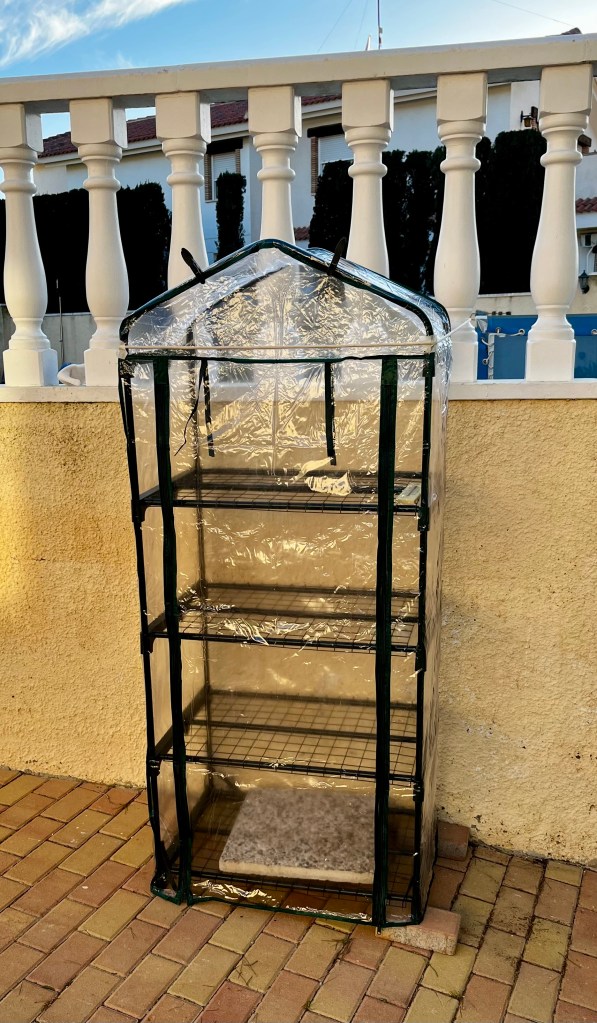
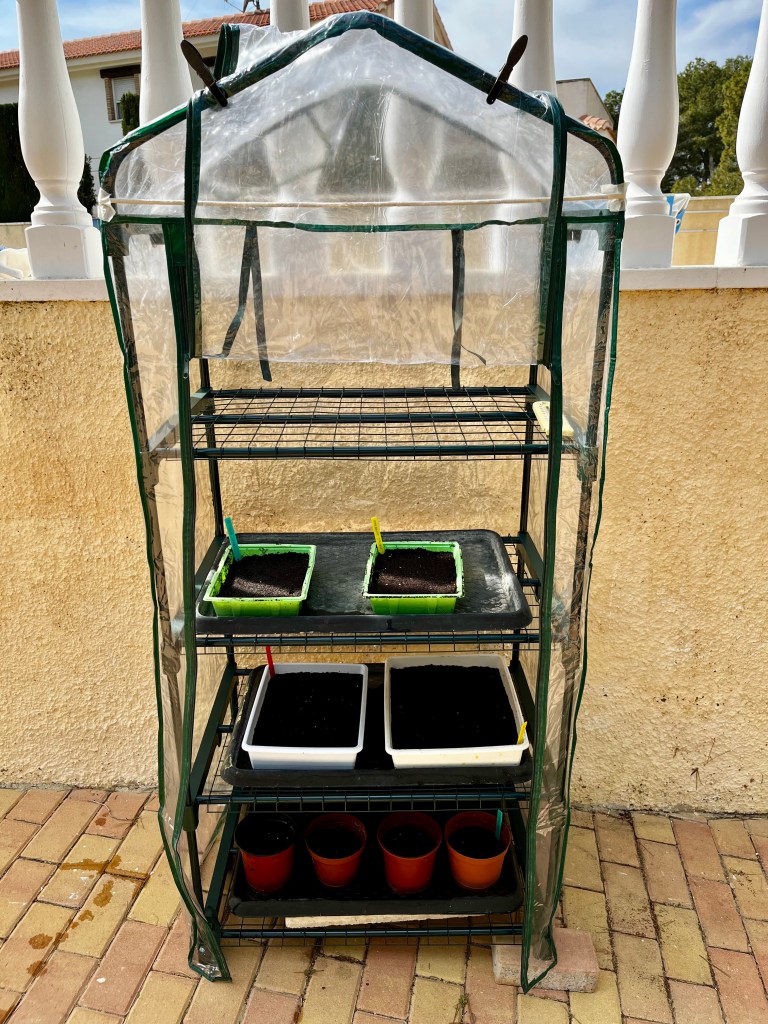
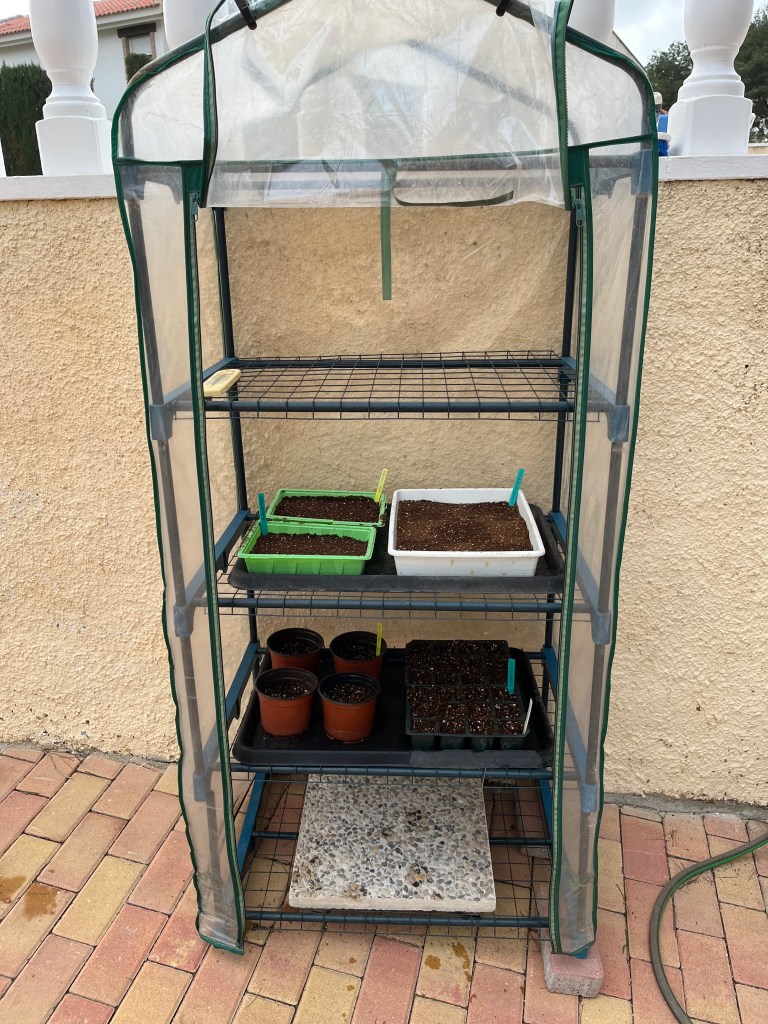
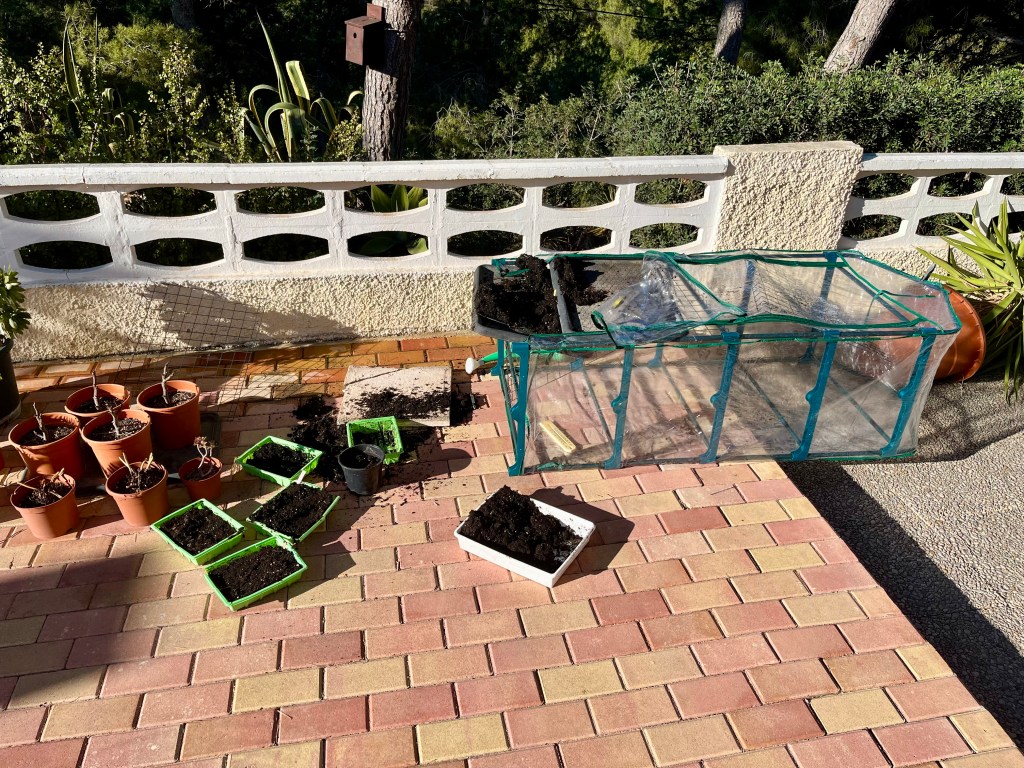
Planting annual seeds. Don’t rush out and buy lots of plants from garden centres. Instead grow your own from seed. It is easy and very cost effective. If you haven’t got nice warm window ledges in your home, then buy a cheap little plastic greenhouse either on line or from Leroy Merlin. You will only need a little greenhouse for a month or two but it gives you a lovely start to Spring. The photos below show my little greenhouse being assembled. I need a new one every 2-3 years as the sun perishes the plastic.

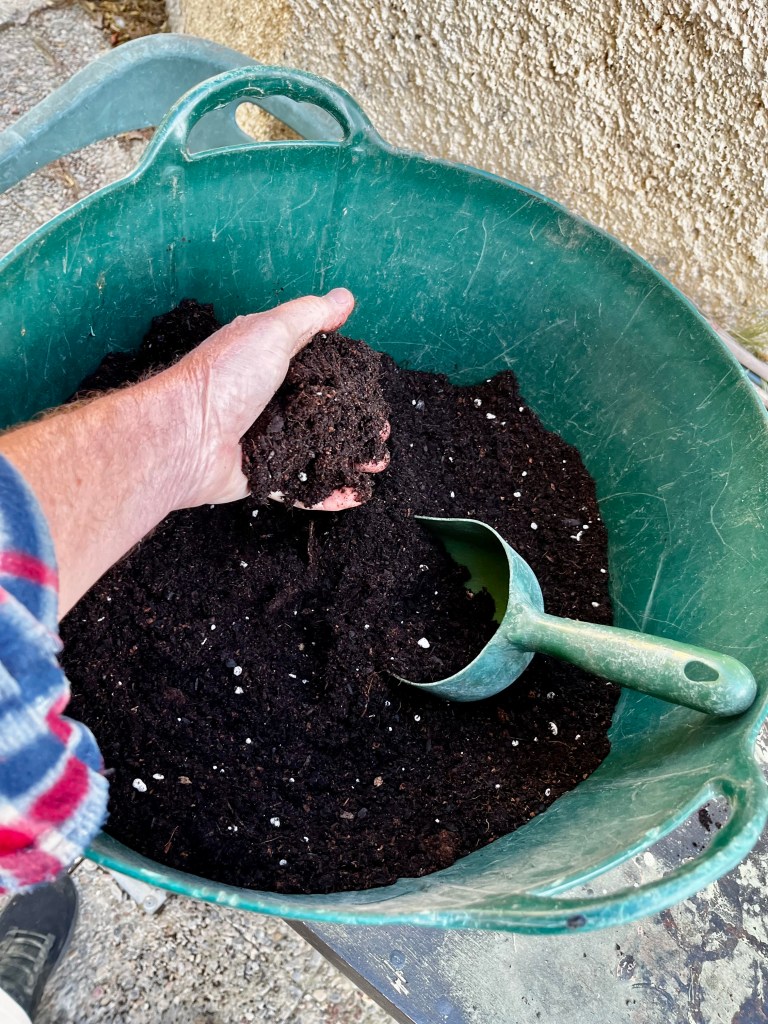
Once you have your little greenhouse then mix up or buy a suitable seed compost. You need a free draining fine compost for the little seed roots to work through. I mix some of my own compost, together with a premium bought compost and then add Vermiculite for drainage. You can see the result below.

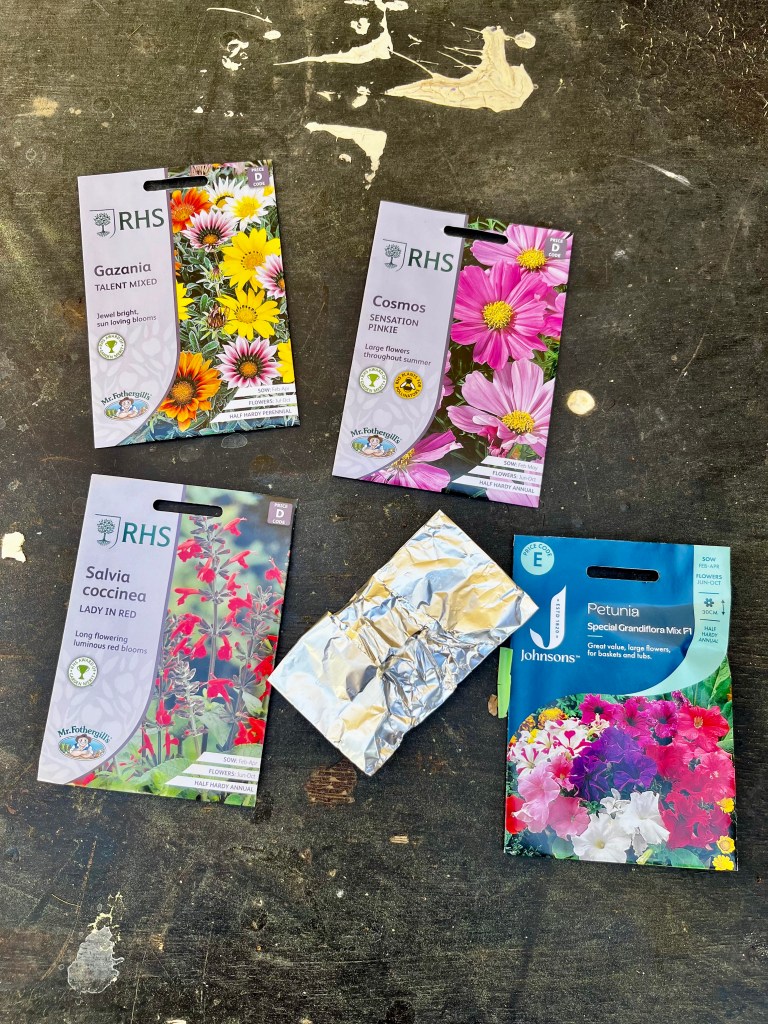
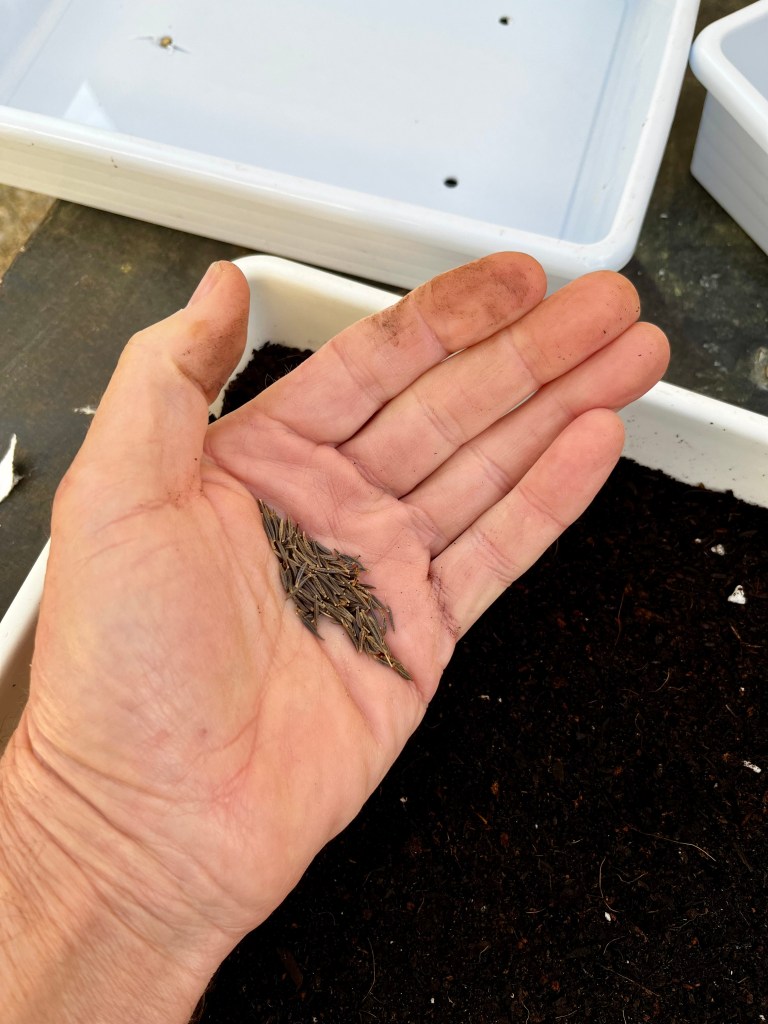
Once you have your compost ready then it is time to get your seeds out. I usually save seeds and these form the majority of my planting. But this year I am changing the main flowers in my borders to a mixture of Gazania, Cosmos, Salvia and Petunia. It is important to change every 5 or so years as continually planting the same can lead to virus building up in the soil. The photos below show shows the new choice.

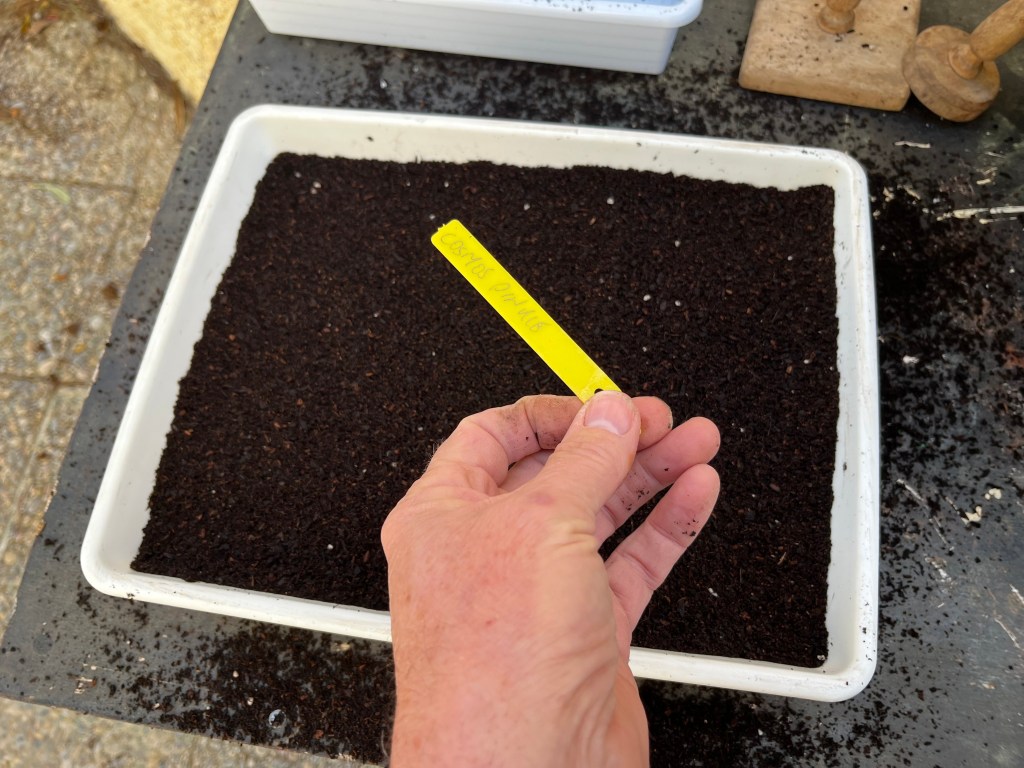
Finally, on seeds, sow them thinly and make sure you label them as you will surely forget what you have planted in each seed tray. When sowing them thinly, the simplest and most effective way that I have found is to pour the seeds into the palm of one hand. Let them form a basic line in the crease of your palm, and then tap gently on the side of your hand with your other hand whilst moving your palm across the surface of the compost. Go ahead try it, it works magnificently.

Feeding and mulching roses. Roses are greedy feeders and if you want to get them off to a good start then now is the time for the first feed. To my shame every winter grass grows up beside my roses and I hate it, but just can’t get rid of it. See shameful photo below.

I am mortified and mightily ashamed

Before I can feed my roses I need to get down on my hand and knees, and over a two day period remove the grass once more. I do it over two days as the blood loss I sustain from working under the roses is horrendous. By the end of the two days I normally need a blood transfusion and have used a few bottles of antiseptic formula.

Once the grass is gone I apply the rose food in great handfuls and then completely top up with good compost from my bins. I heap the compost up around the roses as this will soon be taken into the earth. I complete the whole process with deep watering (which always guarantees it will rain the next day). The photos below show the outcome, and I am proud of my roses once more till next winter.

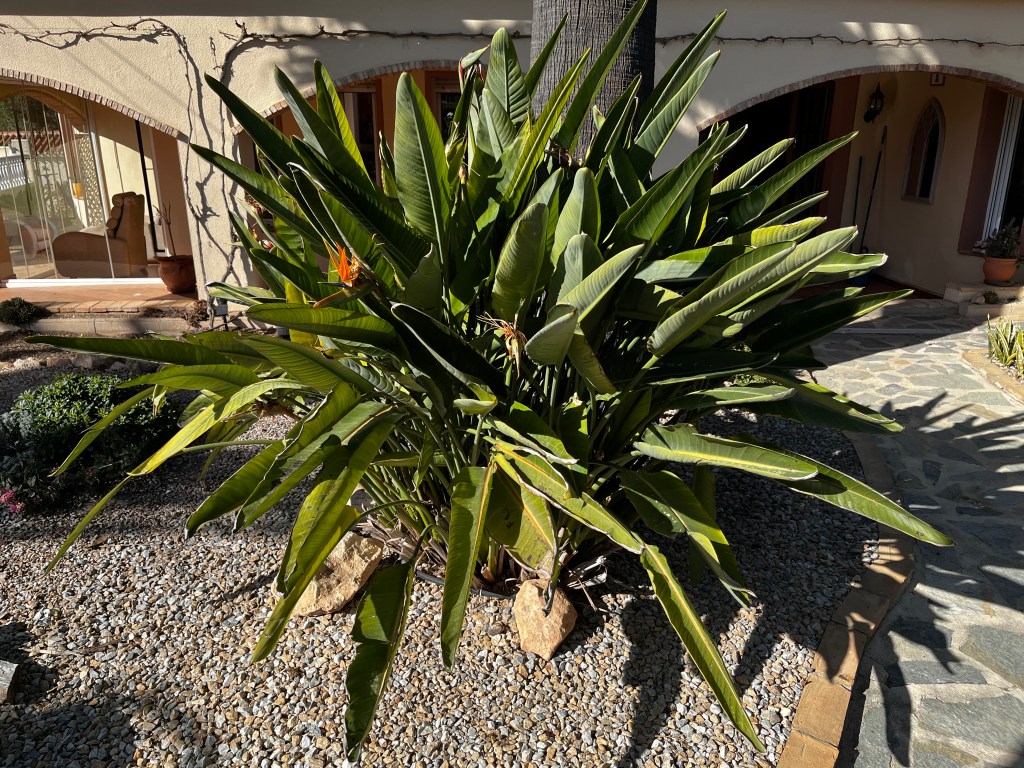
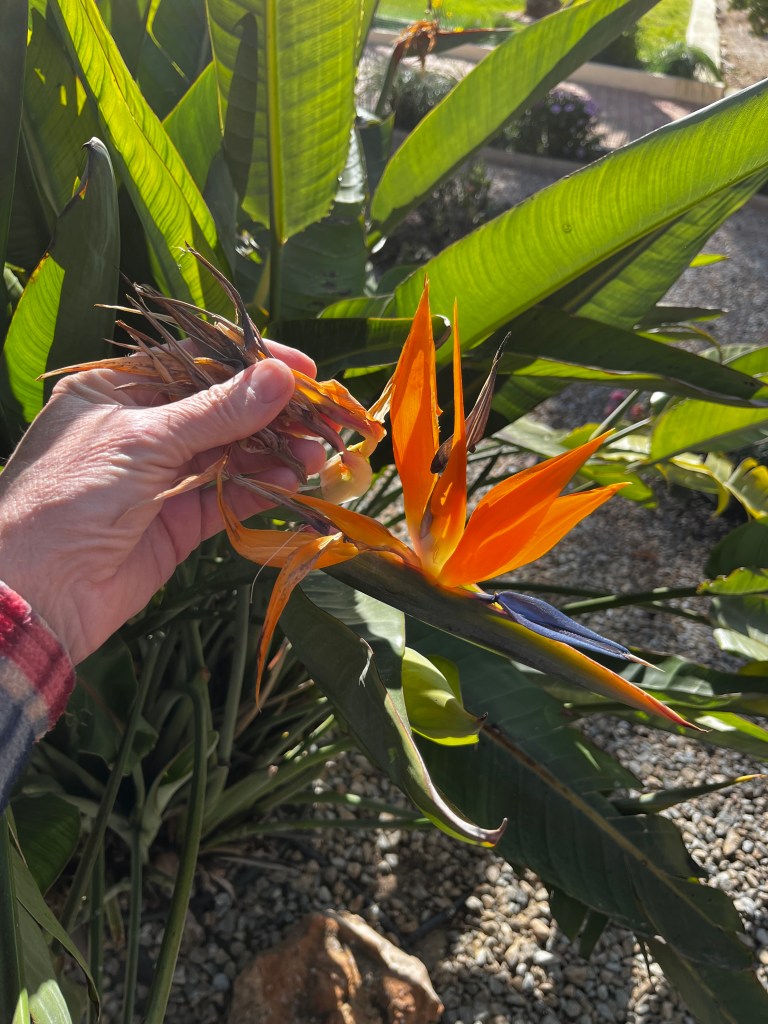
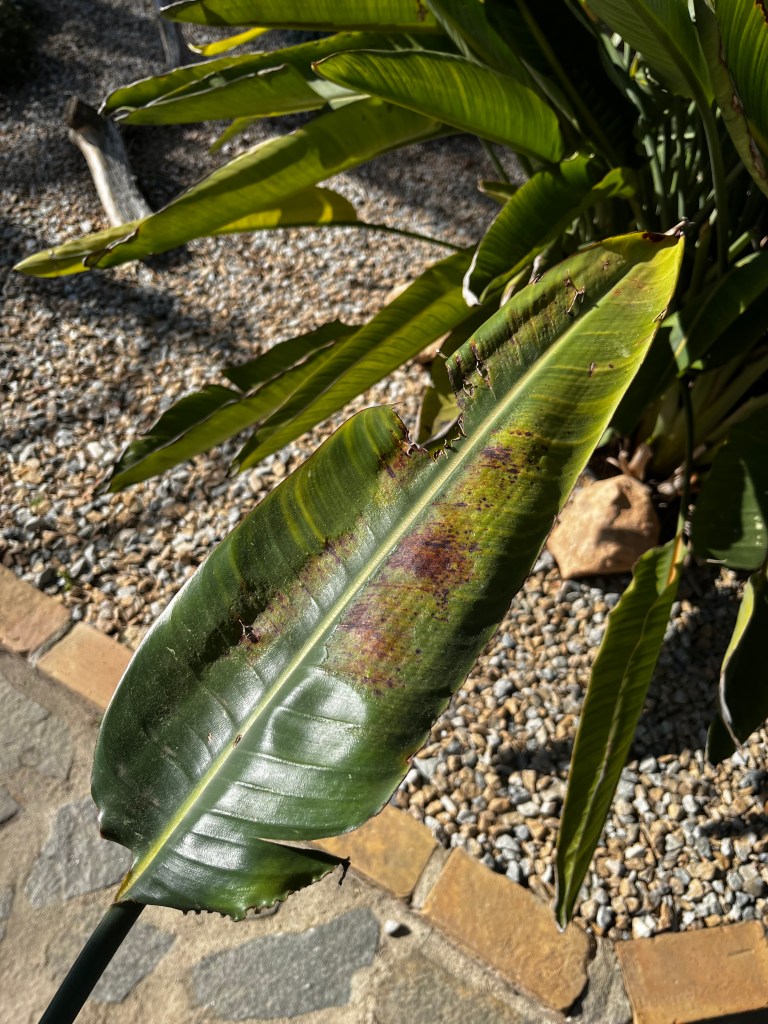
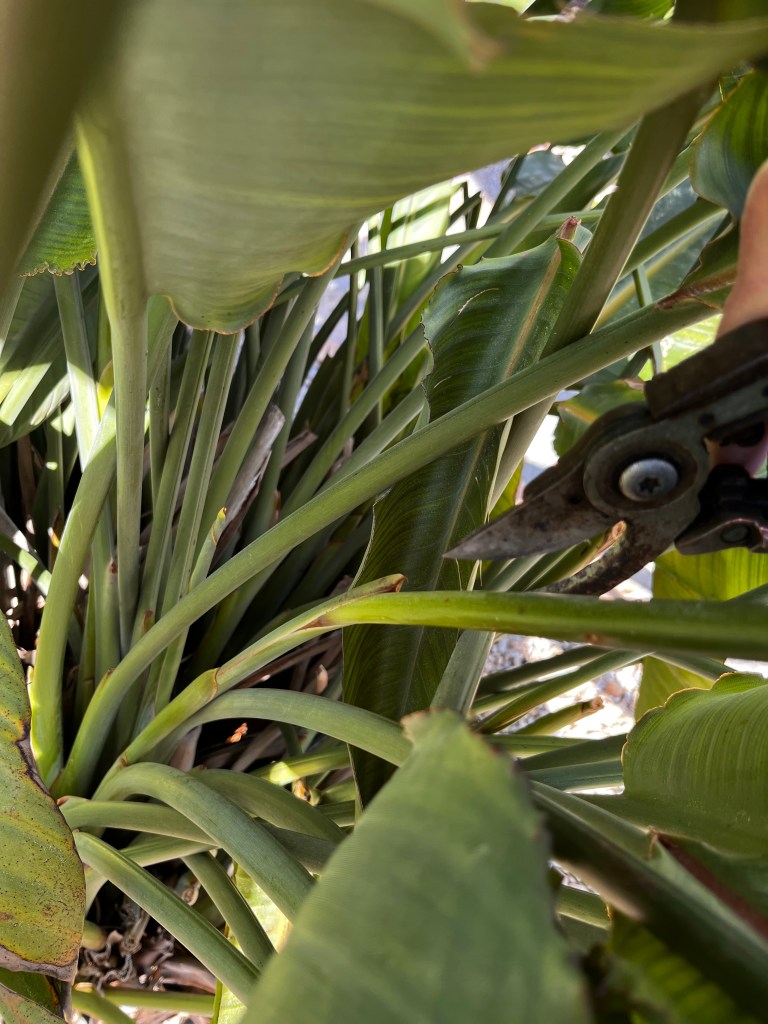
Tidying and feeding Bird of Paradise. The winter months will have taken a toll upon your Bird of Paradise (Strelitzia). So if you want to get the best out of it this summer, you need to do two things. First, cut back any old flowered stems, tidy up the flowers and cut out diseased stems. Secondly, you need to give it a good feed now and every month during the summer.

When cutting back flowering stems you can usually get at least one more flowering stem by cutting back to the diagonal joints shown in the photos below. Also don’t be afraid to peel dead petals out of flowers to make them cleaner and less likely to get insect attacks. See photos below.

My plant looking a bit tired and unfed after the winter


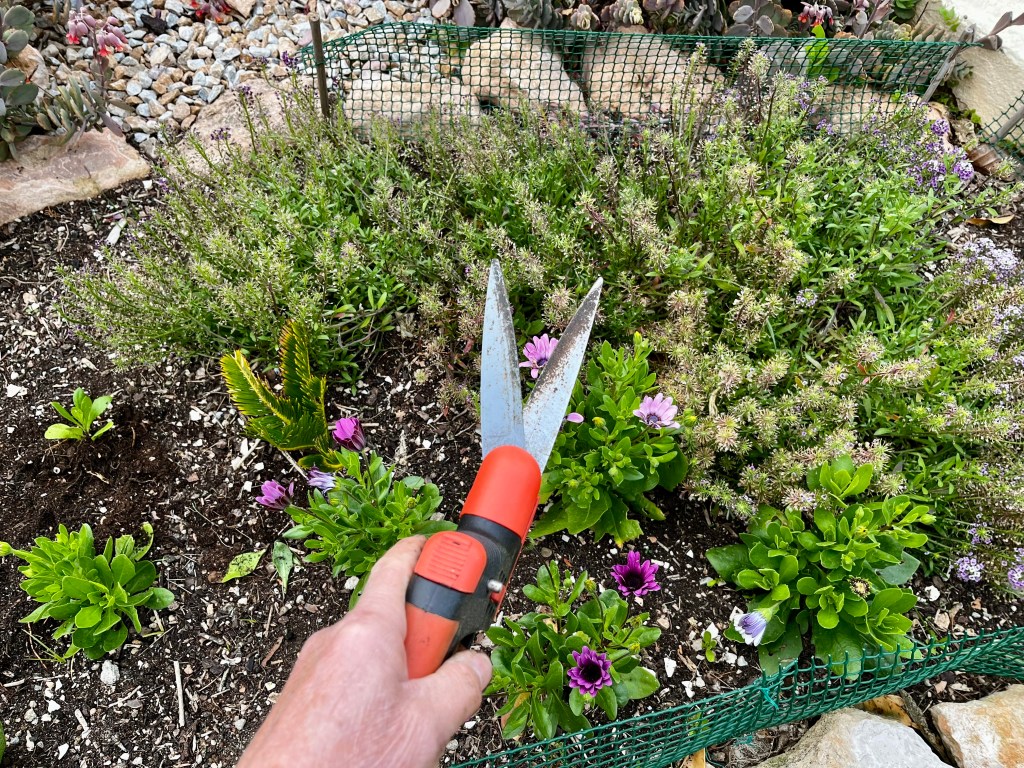
Cutting back Alyssum. These lovely plants were a star in my garden last summer and have now flowered all winter. I grew them from seed and they have given me great joy with their constant flowering. To keep them going all the time, all I need to do is occasionally shear off all their flowers and off they go again. See photo below.

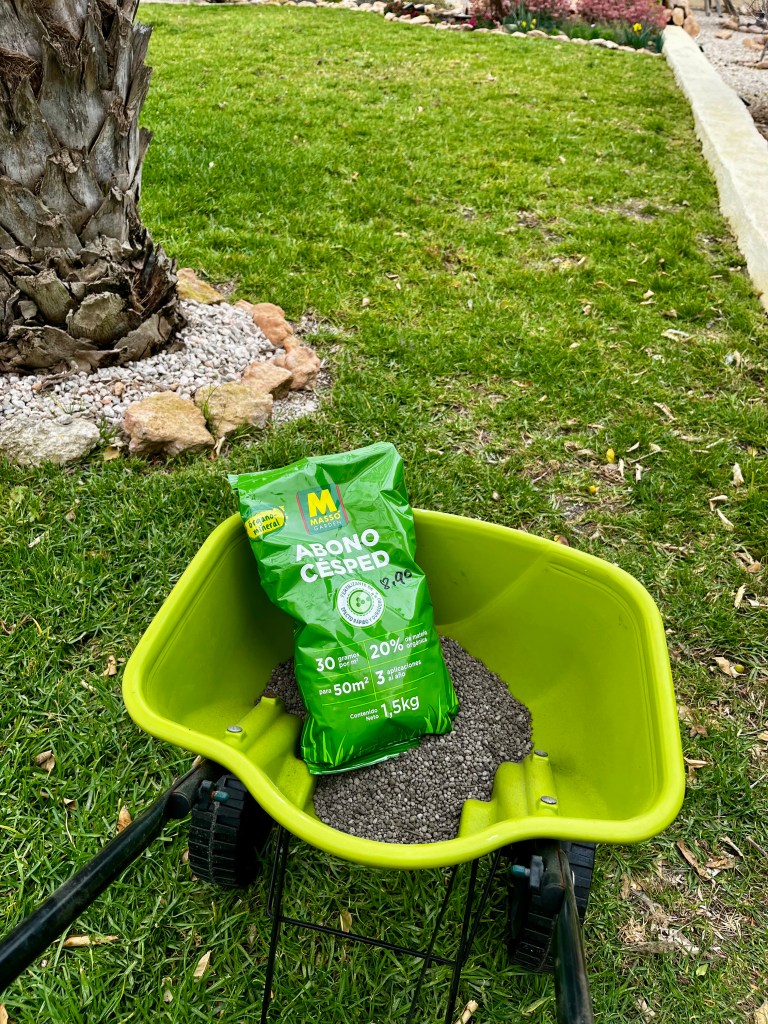
Feeding grass. If you have a lawn (and yes I know not many of you sane people have). Feed it now, this will be the first of four feeds over the growing season.

Dealing with the loss of the little white dove and the arrival of the rabbit. Regular readers of this blog will know that a little white dove arrived in our garden about a year ago, and since then has had accommodation built specially for her, she was fed special food, and has joined in Chickenese classes with Cruella (my wife) and her girls.

Well sadly I have to report that the little white dove has been missing for a few weeks. Cruella has been fretting from day one and insisted that I contact the police. I told her not to be so stupid. She then insisted that we contact the Bureau for Dove Investigations (BDI), to my surprise it appears there is such a thing. They have said that as it is spring the little white dove may have gone off to mate. Cruella is dismayed about not having an engagement party, but has calmed down a lot now that she has started knitting onesies for the future chicks when they visit. Myself, I think it was probably a cat.

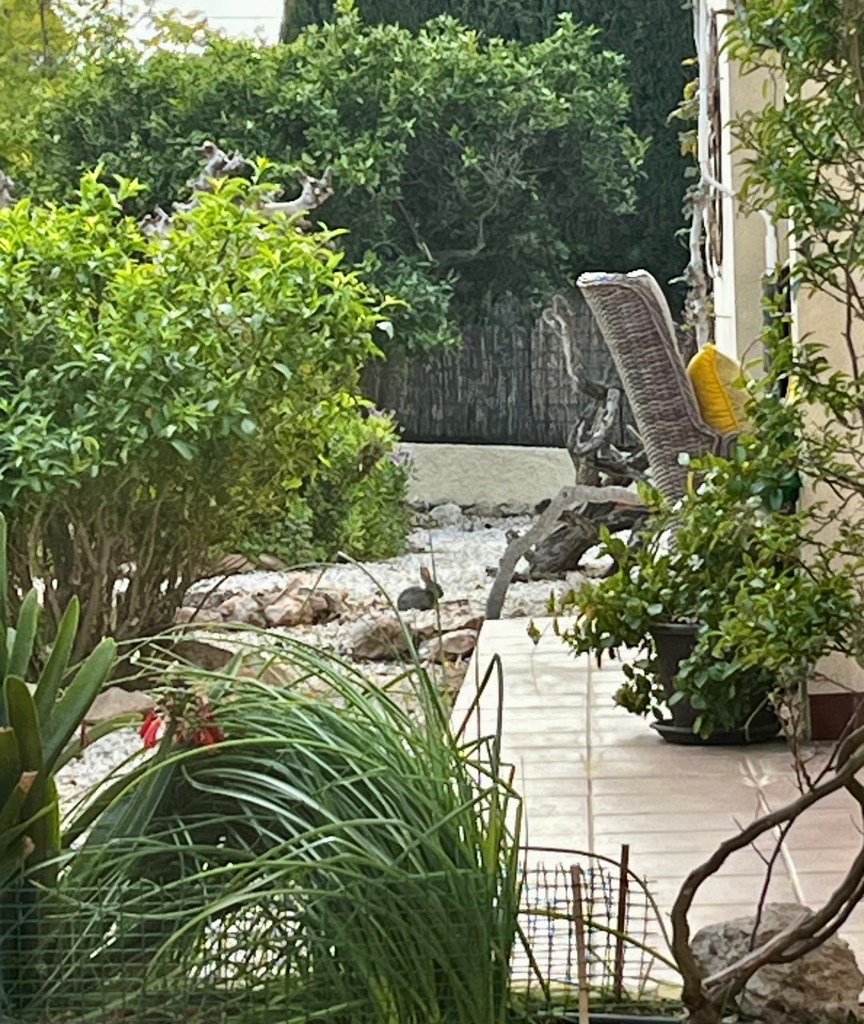
Well you can imagine my surprise when no sooner had the little white dove disappeared than a little blue rabbit appeared in the garden. It sleeps in a bed of Osteospermum and comes out during the day to frolic with the chickens on the lawn.

Cruella claims it is an answer to her prayers as she has always wanted a boy. This upset the idiot son, but he got over it. Anyway Cruella and her girls have named him Peter. I thought after the Apostle and founder of the Church, but no it seems after the Beatrix Potter character.

Spring has sprung and I have been dobbed in by a Dove

Cruella (my wife) is at our English house ruining the life of our idiot son. I am in charge of everything here: the house, the car, Tango the lonely blind Labrador and the bloody chickens. I just ignore everything and garden all day, the chickens don’t get fed unless they ask directly, and I don’t understand chickenese. It was all going so well until Cruella somehow found out. There were consequences, but more of that later.

Spring is such an exciting time for us gardeners and there is so many things that we need to be getting on with.

15th March 2025. Things I have been doing lately.

  • Deadheading Aeoniums
  • Refreshing plants in pots
  • Reviving your lawn
  • Planting seeds
  • Dealing with a traitor pigeon

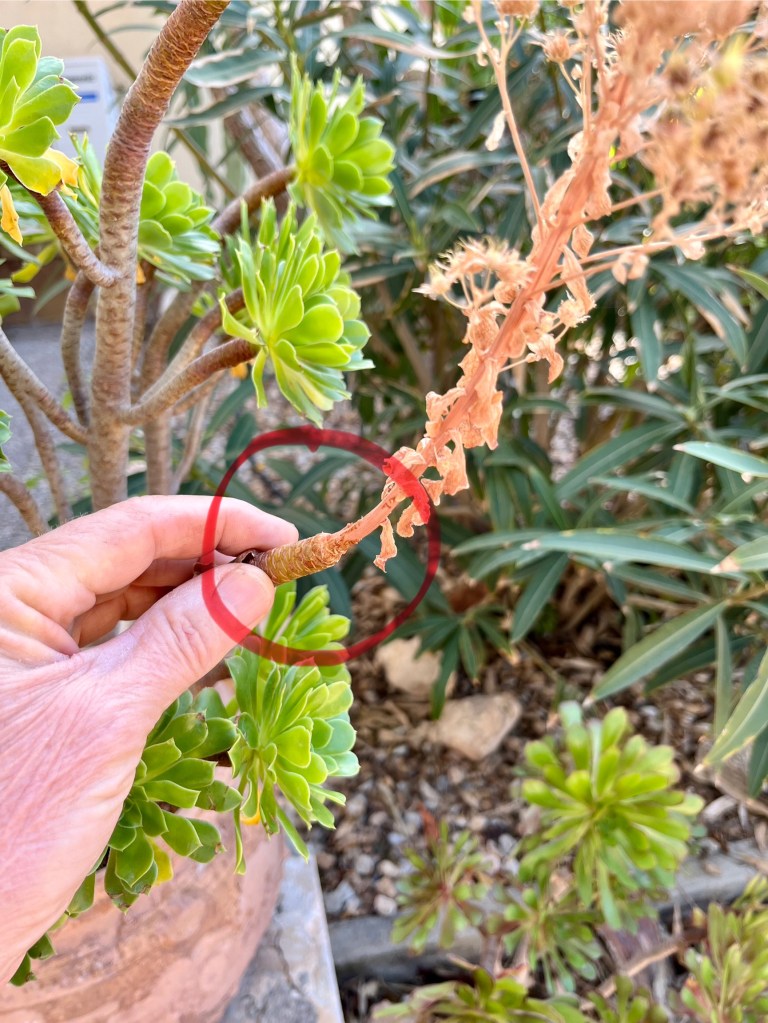
Deadheading Aeoniums. By now most of your Aeoniums should have finished flowering and it is time to tidy them up by a bit of judicious deadheading. The process is simple. Look just below the spent flower and you will see that the plant stem has started to thin and is noticeably thinner. The plant is naturally cutting off the flower as it no longer needs it. All you have to do is help it along, using your secateurs cut the stem at the thinnest point below the flower. The photos below show the process. Click on each photo for a larger view.

Refreshing plants in pots. If you have plants in pots then now is the time to refresh them. Over time plants can become untidy, pot bound and in need of fresh compost. Walk around and have a good look at all your plants in pots. The first thing to do is sit down and pull out all the debris, dead leaves and detritus that has built up.

Next, prune back any dead or dying stems and reshape the plant. Finally, most plants can only thrive for a couple of years in the same compost. Tease the plant out of its pot being careful of the roots then fill with fresh compost and gently ease the plant back into its pot. The photos below show a number of my potted plants all looking a bit bedraggled, overcrowded and in need of attention.

It is important to note that if you are tidying up Yucca and other spikey or spiny plants, then it is essential that you wear eye and hand protection. The photos below show what a difference a tidy up makes in restoring each plants self esteem!

Reviving your lawn. I know that not many of you have lawns in Spain, but those of you in the US and other parts of Europe are in love with your grass. But like love, if neglected it soon dies. And so it is with your lawn, Spring is the time to revive the love affair with your lawn. There are a number of things you should be doing:

  • rake out areas that are dead or dying
  • apply a selective weed killer
  • top dress with a specialist compost
  • feed with a specialist feed
  • reseed when the weather is warm enough in your area

The photos below show all of this activity going on in my lawn, with the final photo showing the lawn after its first cut of the season.

I have to admit photos from this angle do flatter the lawn, there are a few bareish patches

Planting seeds. Oh the joy and delight in planting seeds and creating your own plants. Not only is it cost effective; as you get hundreds of plants for a few Euros, but also you will really be gardening rather than just shopping for plants.

If you have never planted seeds before then don’t panic, it is so simple. Go out to the local Garden Centre or supermarket check out the packets of seeds and buy a few packets of the ones you like. Try and pick ones that are easy to grow and suitable for your local climate and garden. But better still, why not gather seeds from your garden this summer and start your own seed collection. The photo below shows some of my collection.

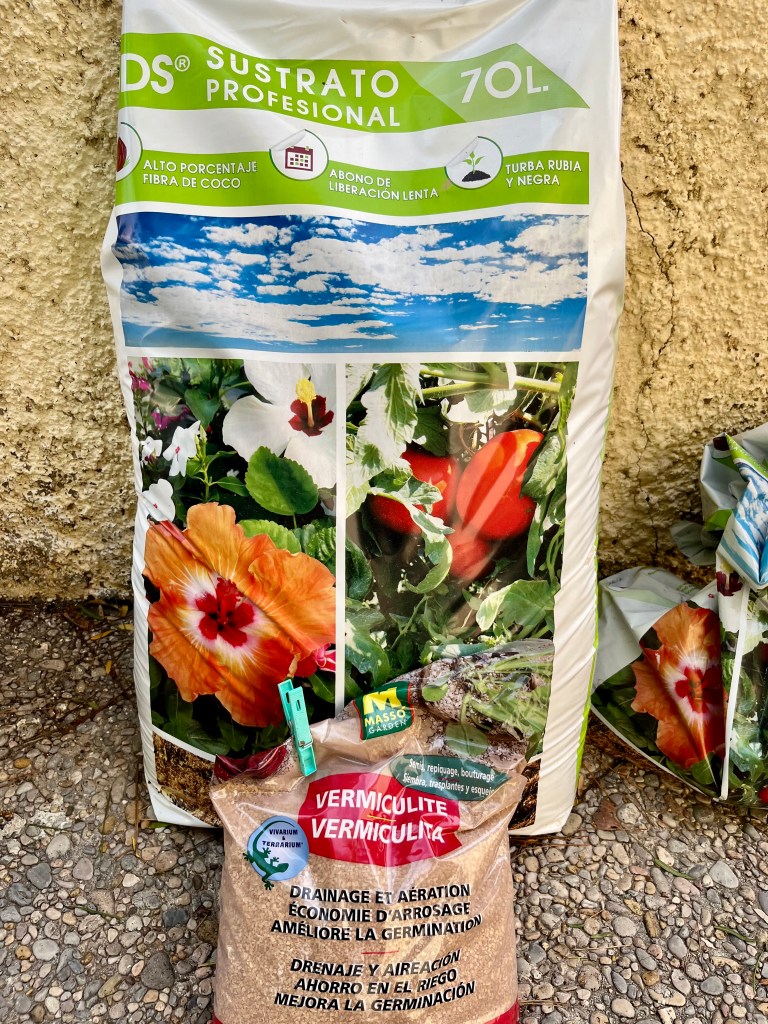
The key to success in seed growing is the growing medium you use. Pick the best compost you can afford, and make sure it is for seedlings. You can help your compost by making it as free draining as possible, so buy some vermiculite to mix in with your compost. The photo below shows the stuff I use.

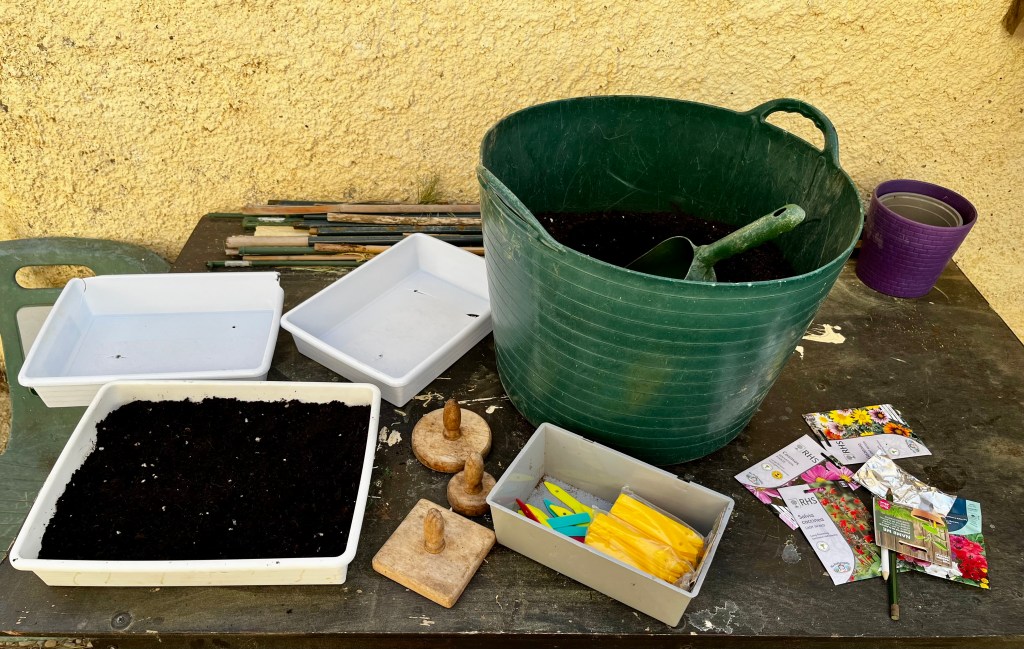
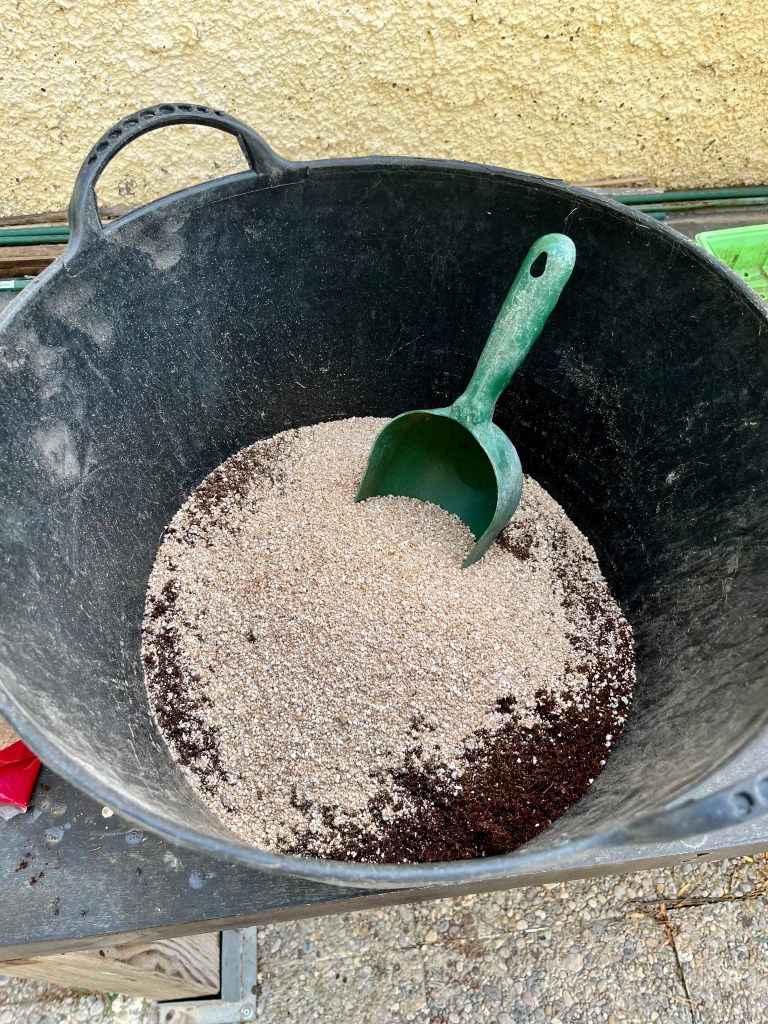
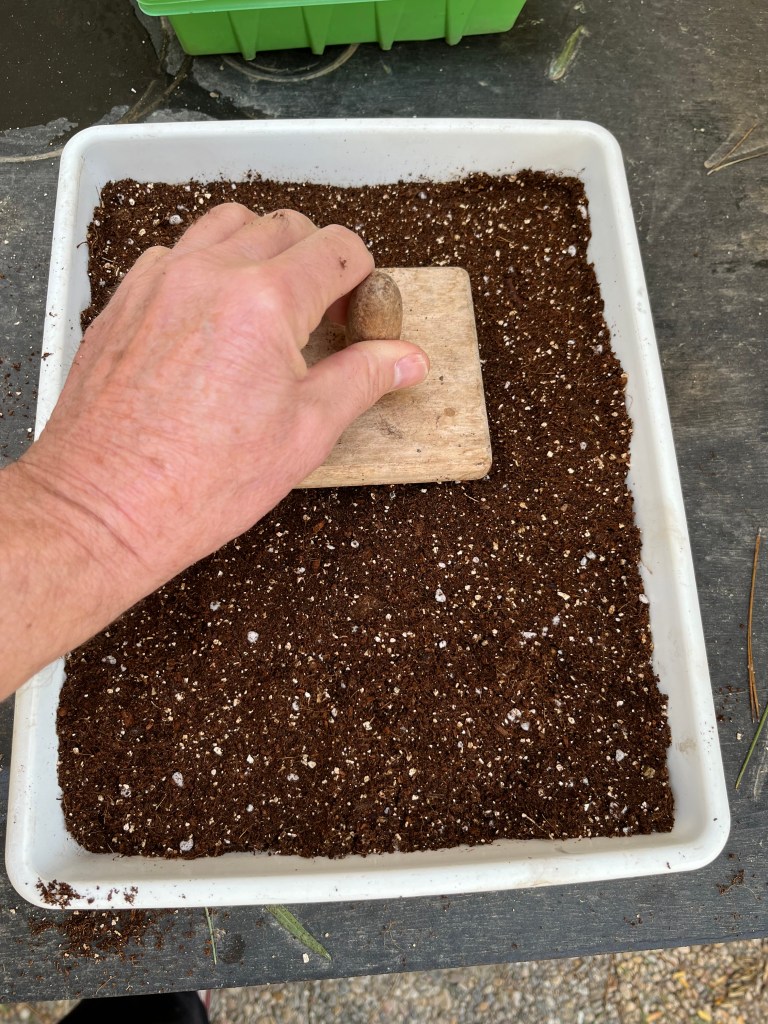
Mix your compost and couple of handfuls of Vermiculite in a trug. Make sure there are no lumps in your mixture then fill up some seed trays. Finish by tamping down the compost in the seed tray to get rid of any air pockets. The photos below show the process.

When you have your seeds trays ready, then just follow the instructions on the packet. Most seeds are sprinkled on the surface of the compost then lightly covered with compost. The photos below show this process.

With larger seeds the process is slightly different. Most larger seeds need to be sown individually in 4 inch pots or cellular seed trays. Just fill the pots or cells with compost, water lightly. Then using a pencil or dibber make a hole about half and inch deep pop your seed in and pinch the top of the hole closed. The photos below show this process.

The final,part of the whole process is to put your new seeds somewhere warm to allow them time to germinate. This need not be expensive you can use a window ledge indoors or just buy a real cheap mini greenhouse, you will only need it for a few weeks. The photos below shows my first seeds planted and in my mini greenhouse. The final photo is four days later and God has worked his magic and I have lovely new plants.

Dealing with a traitor pigeon. Whilst Cruella is away I take the opportunity to show the chickens whose boss. This means no special treats, early bed times, and restricted exercise periods. As you would expect this has engendered lots of discontent. In the past the chickens have somehow got a message to Cruella (my wife) and I have been made to reverse my restrictions including having to publicly apologise to the chickens whilst they smirk at me.

Anyway, this time I had taken the necessary precautions to stop them communicating. All chickens had been frisked for phones, I changed the Wi-Fi password and taped over the ChickenCam Cruella had insisted on; I told her there was an electrical problem.

I had to put up with all their squeaking and frantic gesticulations, but I just point to my ear and shout “me no speak chickenese” it drives them mad. They have held meetings, protest marches and even sent Elsa to plead their case. The photos below show their attempts to protest.

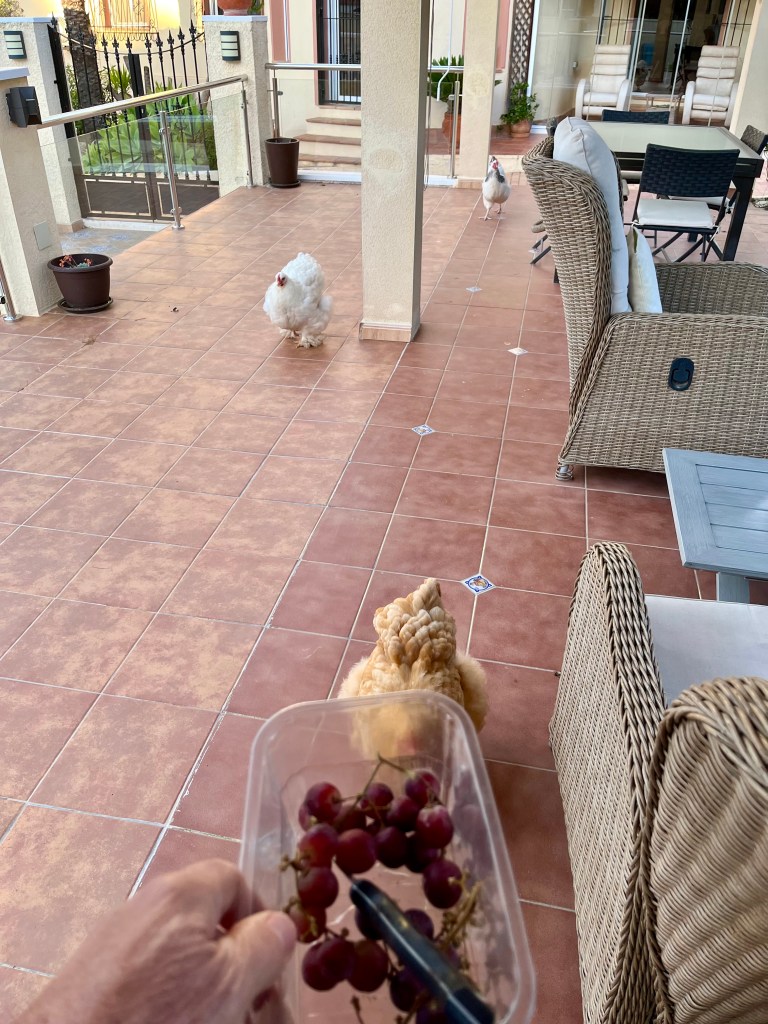
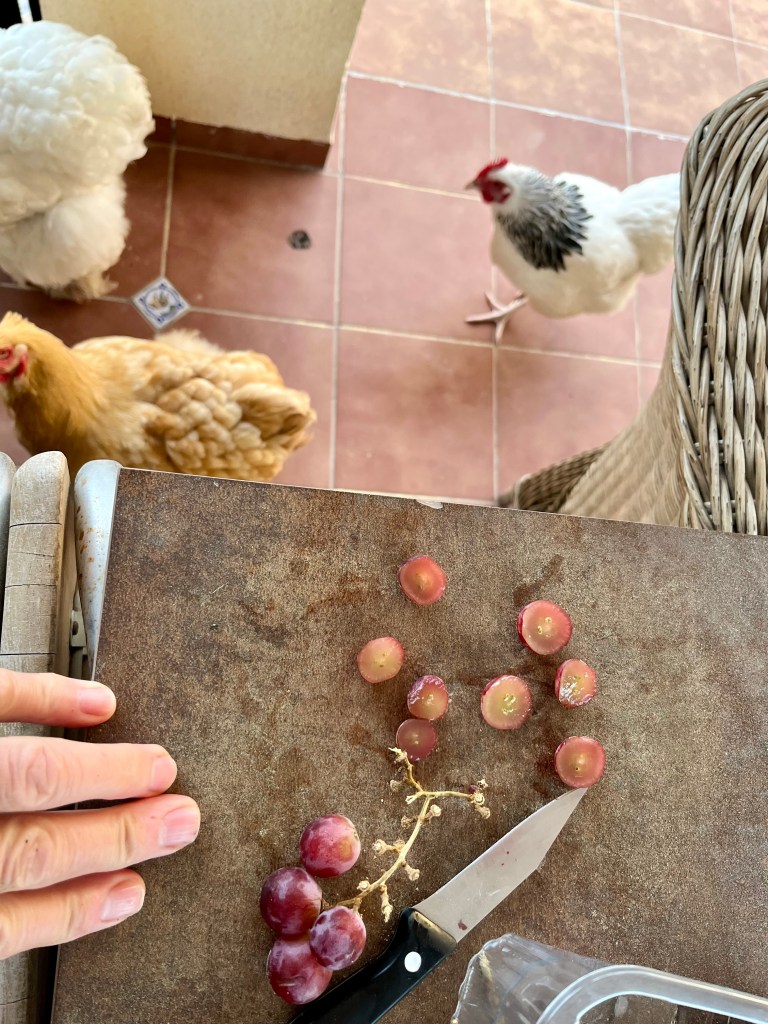
But I held out and was really pleased with myself until a furious phone call from Cruella. She was literally screaming at me “what have you done to my girls” I pleaded ignorance, but it was no good, she knew everything. I tried to blame Tango the lonely blind Labrador, but to no end. The end result was that she insisted that I make it up to the girls. I had to put Elsa on the phone, they chatted away in chickense, in what sounded a very animated call. The end result was that the chickens had demanded reparations and I have been forced to give them grapes every day. The photos below show the humiliation.

I couldn’t understand how Cruella had found out about my neglect of the chickens, especially after all my precautions. Then it came to me, I had covered everything apart from the bloody Dove that Cruella has adopted. It seems I thought it was an innocent Dove, when all along it was a stool pigeon! Photo of the traitor below – I didn’t give it any grapes!

It’s mulch wars and I am forced to pay a maggot ransom

Hooray it’s Spring, Cruella (my wife) has flown off to our English house and I am free to merrily prepare the garden for summer unhindered. I started going about my tasks with joy in my heart a spring in my step and a glint in my eye, but unfortunately things soon took a dark turn and I have become a victim of serious garden chicken crime. Anyway more of that later, on with the gardening.

11th March 2024. Things I have been doing lately:

There are a number of jobs we need to be getting on with in Spring.

  • Lift and separate Cannas
  • Guarding against Palm Weevils
  • Applying mulch to flower beds
  • Fighting and losing the mulch wars

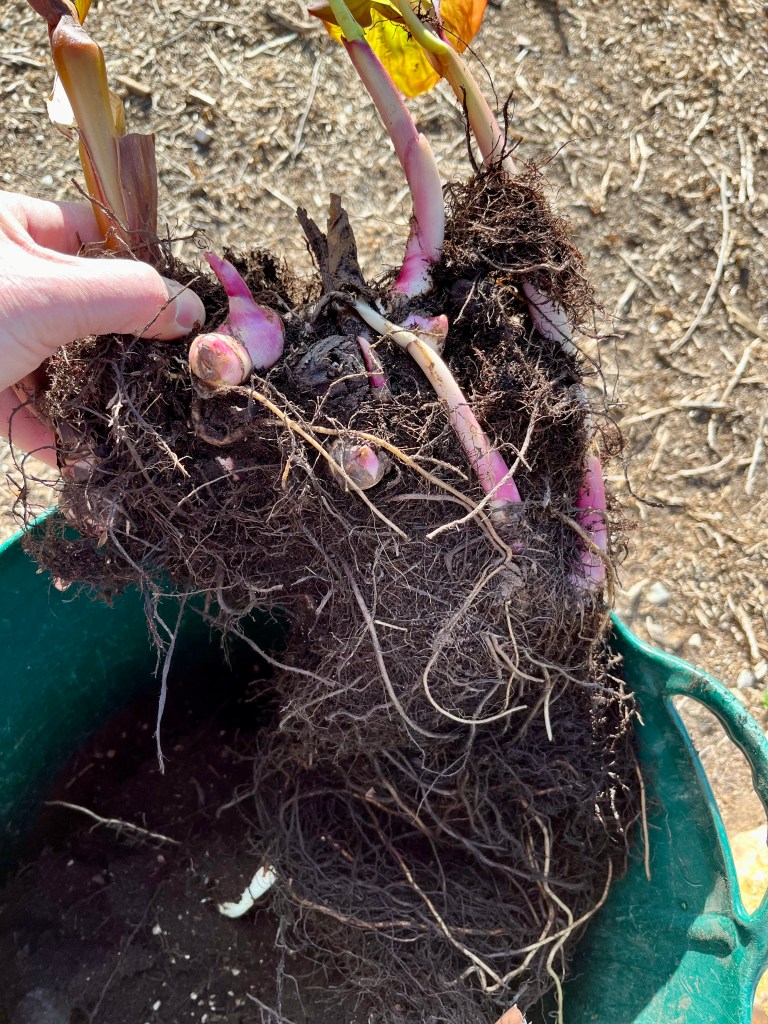
Lift and separate Cannas. I call this the Wonderbra treatment – I recognise this is both accurate and sexist. If you grow cannas then you will know that they are delightful plants that provide wonderful flower spikes that add height and drama to any garden. Unfortunately here in Spain drought is taking a toll on canna rhizomes (ugly bulbs) as they are drying up and failing to thrive. Normally you can happily leave cannas in the soil and the rhizomes will gradually multiply and provide you with more plants.

However, by this time of year I should have been seeing the first shoots of my cannas poking through, but when they failed to reveal themselves I have had to dig them up, separate them and give them a good drink before replanting them. Luckily my friend Pip has regifted back to me some cannas I had previously given to her, so I was able to replenish my stock. The first photo shows my cannas ready for some work followed by them having a drink by soaking for 24 hours in a trug before replanting. Click on each photo for a larger view.

When replanting canna, they need to be planted shallowly in rich but free draining compost. Where there are shoots from the rhizomes these need to be left poking from the soil. The photos below show the planting process. Click on each photo for a larger view.

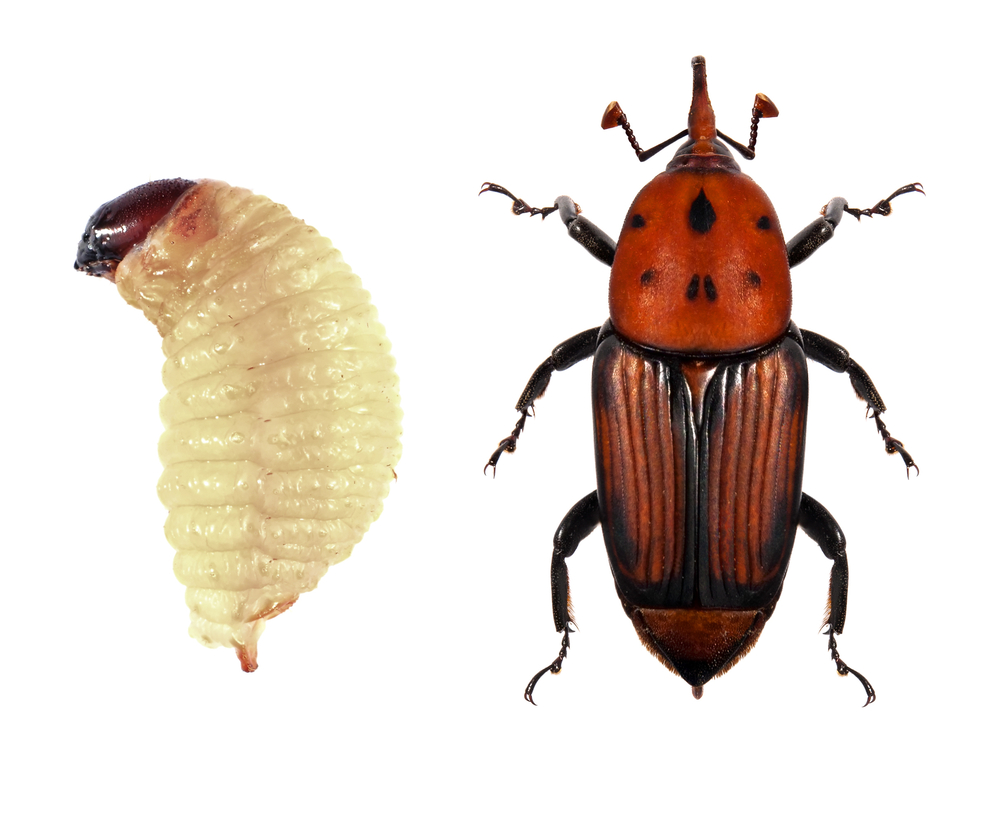
Guarding against Palm Weevils. The problem of Palm weevils won’t really mean that much to those of you who don’t live in Spain. But, if you live in Spain and you have Phoenix palms, then you dread the advent of palm weevil season. For those of you who are mere disinterested bystanders the photo below shows the culprit together with its malignant grub.

The modus operandi of this weevil is to lay its eggs at the base of Phoenix palm fronds. When hatched into grubs, they merrily chomp their way up inside the fronds and in most cases destroying the tree. The weevil can be treated by spraying the crown of the palm with a proprietary chemical, but there are two main problems with this. Firstly, unless you know what you are looking for, the weevil grubs can remain undetected until it is too late. Secondly, many palm trees are much to tall for the normal gardener to reach the crown and therefore require specialist contractors.

You can guard against Palm weevils. The easiest way is not to cut your palms between the end of March and October. The adult weevil flys only in the hot months, and I am assured by experts that it can smell a cut palm frond from a very long distance.

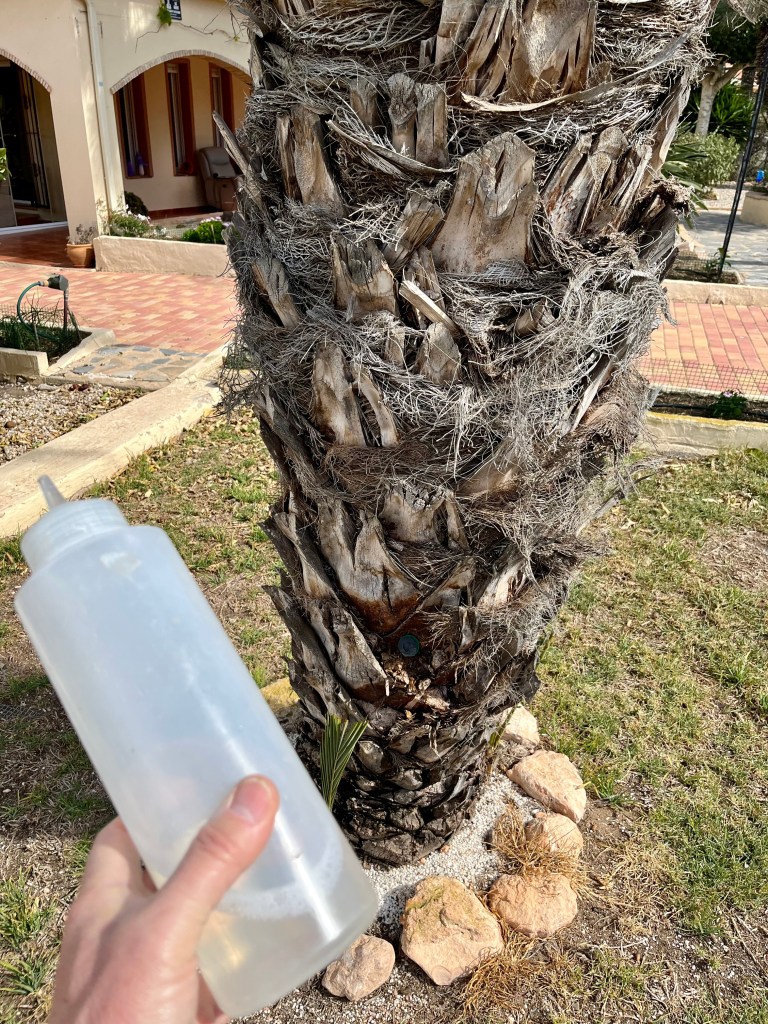
In addition to not cutting my palms at certain times, I have drilled holes into the centre of my very large palms into which I drip a chemical during the summer months which allows the sap to take the chemical to the palm crown making it a poisonous environment for Palm weevils. If you want to find out more about this method then just use the search bar on this blog to search for Palm weevils as I have covered this in detail in past posts. The photos below show my poisoning technique in action, followed by some photos of some of my newly cut palms. Click on each photo for a larger view.

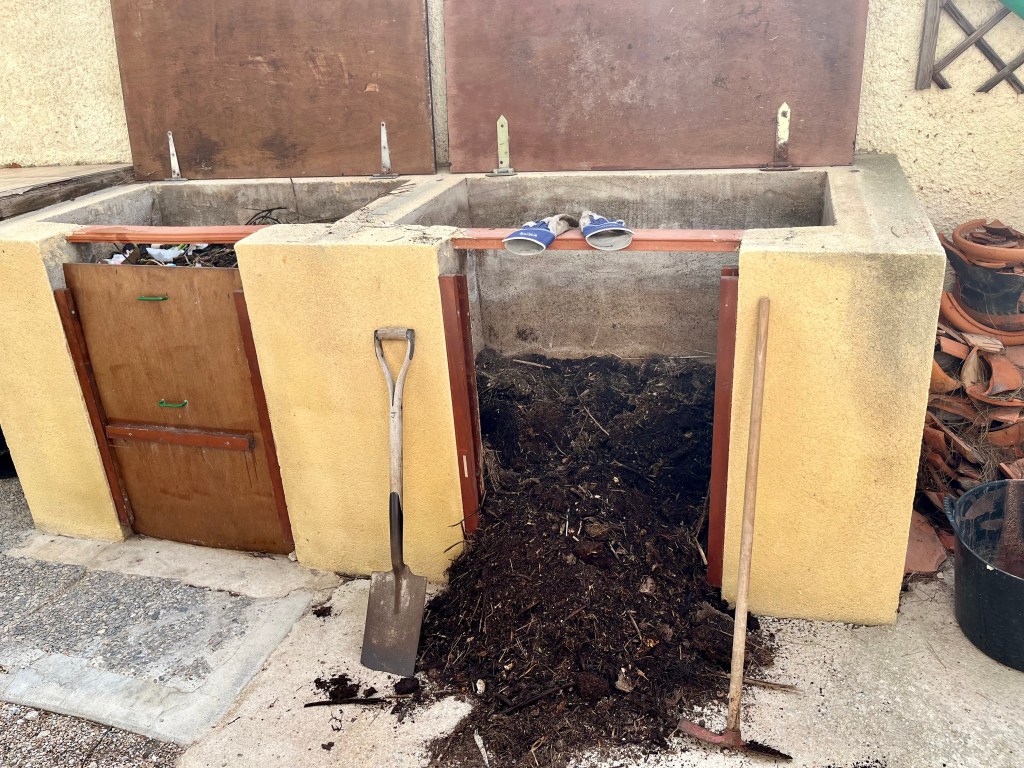
Applying mulch to flower beds. I have waxed lyrical in the past about the importance of compost to the soil of all Gardens. A good friable soil rich in nutrients and natural enzymes is the perfect medium in which all plants will thrive. Compost bought from garden centres will have been violently heat treated to kill off weed seeds, which in turn can damage or destroy the micro nutrients. So if you possibly can set yourself up a compost bin or two. The photo below shows my compost bins in action.

Applying a deep mulch to your flower beds at this time of the year will remarkably improve even the most depleted of soils. There are three basic stages to mulching:

  1. Hoe the flower beds to remove all weeds
  2. Water profusely
  3. Apply a thick mulch of compost at least 2 inches thick

If you haven’t got your own compost then buy a good one from a garden centre, or if you prefer use shredded bark (though this will not instantly improve the soil). The photos below show my flower beds in the process of being mulched. Notice in the last photo some of the big fat worms from my compost making their way into the soil, you only get this benefit by making your own compost. Click on each photo for a larger view.

Fighting and losing the mulch wars. Who would have thought that an innocent activity such as mulching could be the cause of so much grief. I mentioned earlier that Cruella (my wife) had flown off to our English house to continue her nurturing of our idiot son. I had been left in charge of Tango the lonely blind Labrador and the bloody chickens.

As you can imagine this caused immense resentment by the chickens who refused to accept my authority, wouldn’t go to bed at night, ate junk food and continually swore at me in Chickenese (or at least I think they were). Cruella also insisted that I left my IPad in their coop on FaceTime so that she could could converse with them at all times.

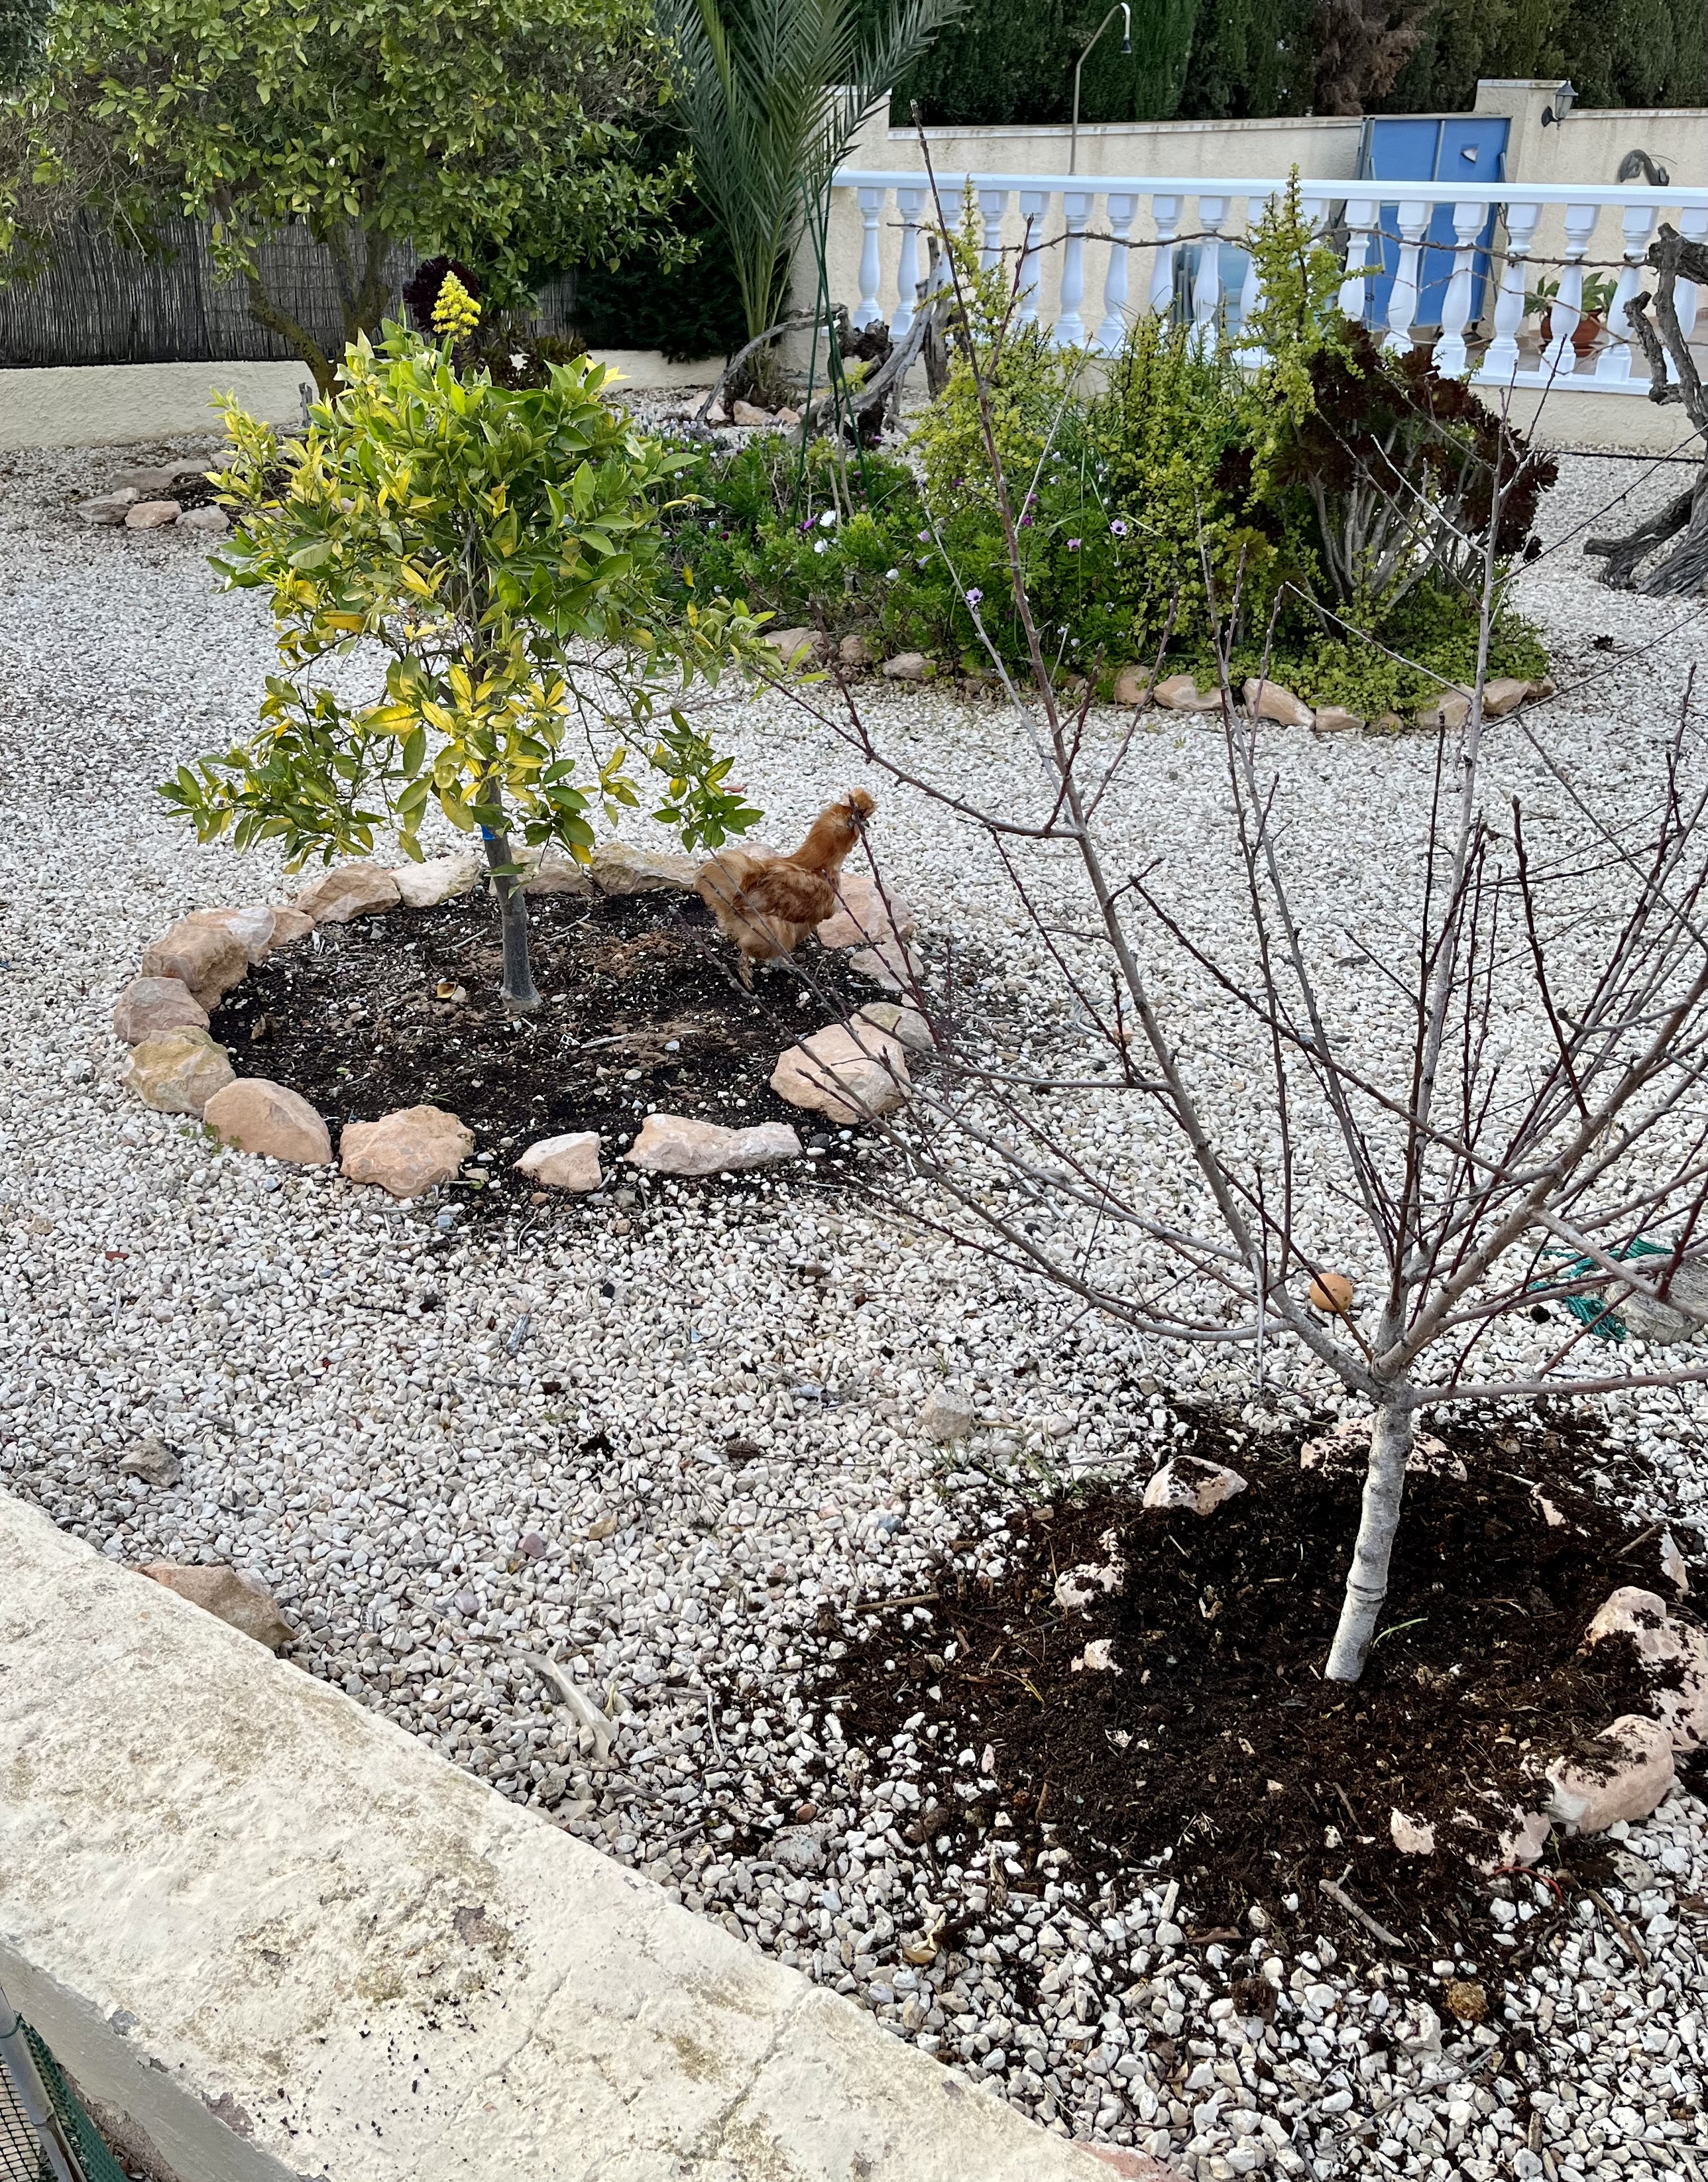
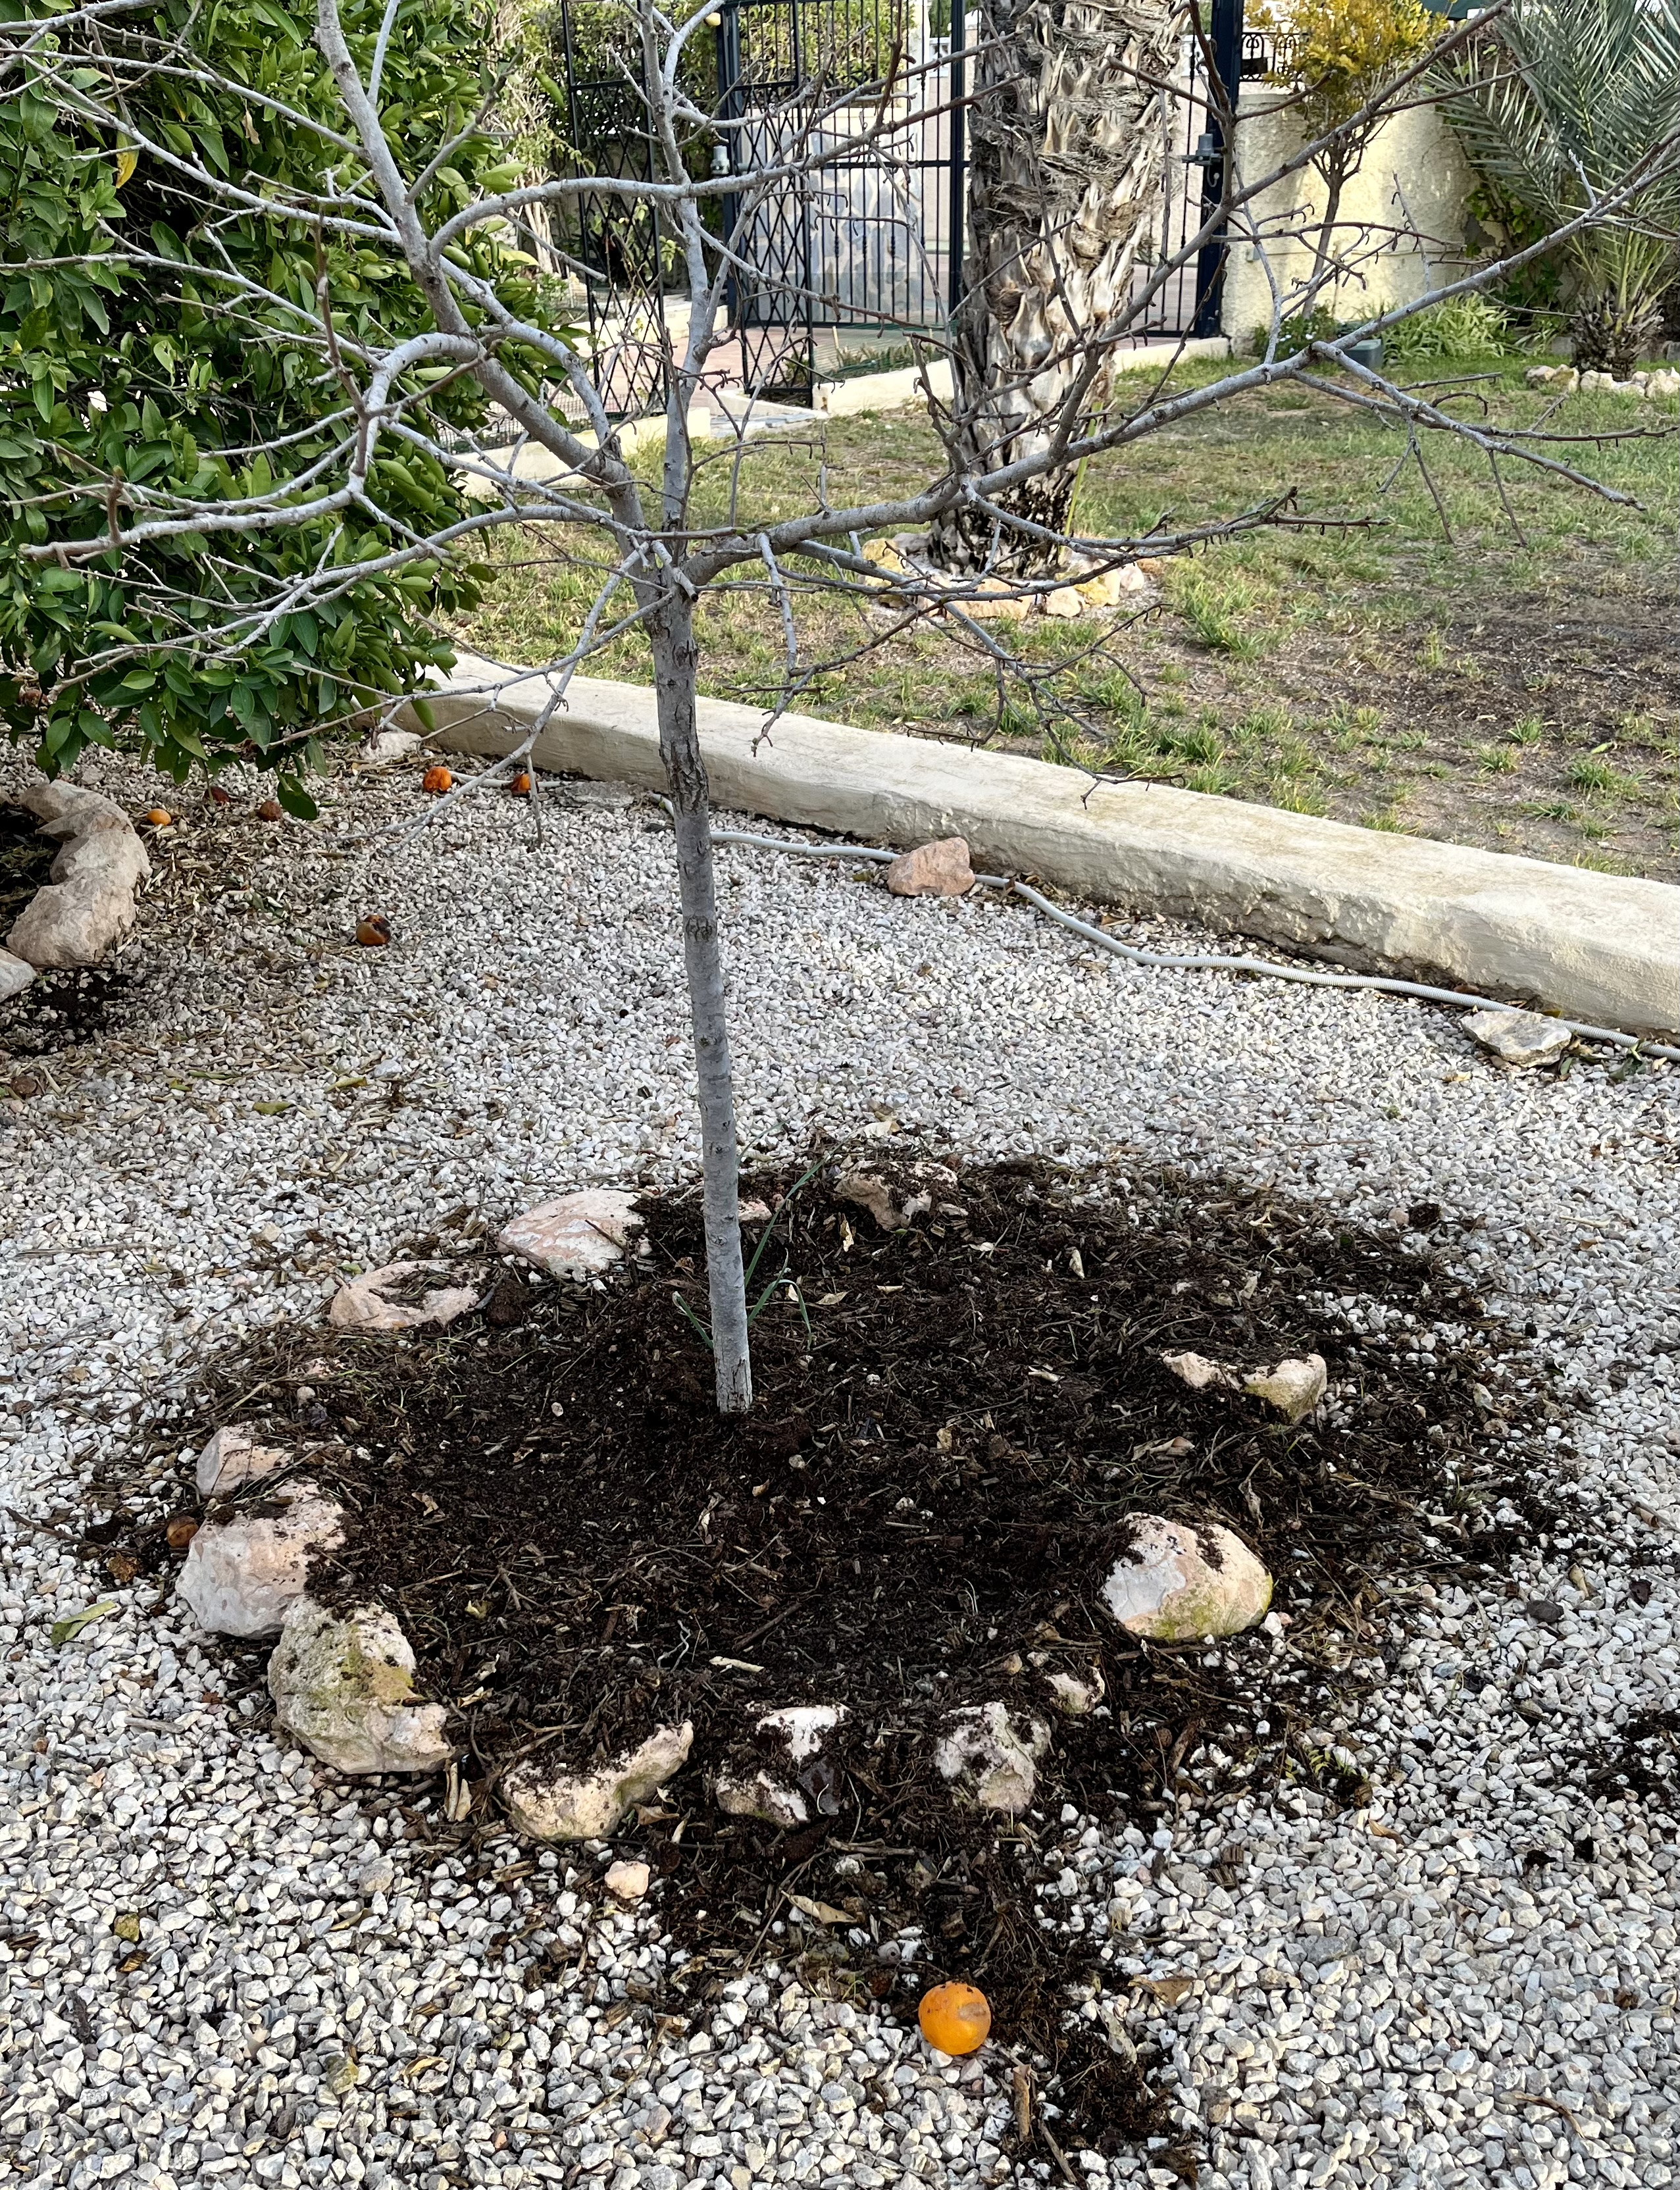
At first this didn’t bother me I happily got on with mulching around all my fruit trees accompanied by Tango the lonely blind Labrador. The photo below shows all my trees lovingly mulched.

However, no sooner had I completed the mulching and retired indoors for a nice cup of tea, when I heard loud chicken squawking. I emerged to the terrible sight of the chickens frolicking under the trees and kicking my newly completed mulch all over the place. The photos below show the extent of the venal criminality. Click on each photo for a larger view.

I managed to scare them off with my water pistol (which is in breach of the restraining order Cruella took out against me) I was assisted by Tango the lonely blind Labrador who did his best running around barking and banging into trees. I could see the seething resentment in the chickens little eyes and I knew this wouldn’t be the end of it.

What happened next is like something from a horror film. The next morning I emerged to find that my mini greenhouse had been knocked over and all my lovingly planted seedlings had been destroyed. The photo below fails to convey the anguish and sense of loss; it was so bad that I even mentioned it in Church at the end of a sermon. Anyway I knew it was them as there were feathers everywhere.

I phoned Cruella (my wife) straight away to confront her but she completely refuted any suggestion that her girls were involved. She then asked for privacy so that she could have a FaceTime conversation with her girls. They all trooped off to the coop and emerged smirking 10 minutes later (I’ve told you before chickens really can smirk). A few minutes later the phone rang and it was Cruella (my wife) she told me that her girls had denied any involvement, but they had said that if I would supply them with maggots from the compost bins then they would keep an eye on my mini greenhouse to ensure nothing happens in the future. I complained that this was blackmail but she merely replied that this was “mulch ado about nothing” which she thought was hilarious.

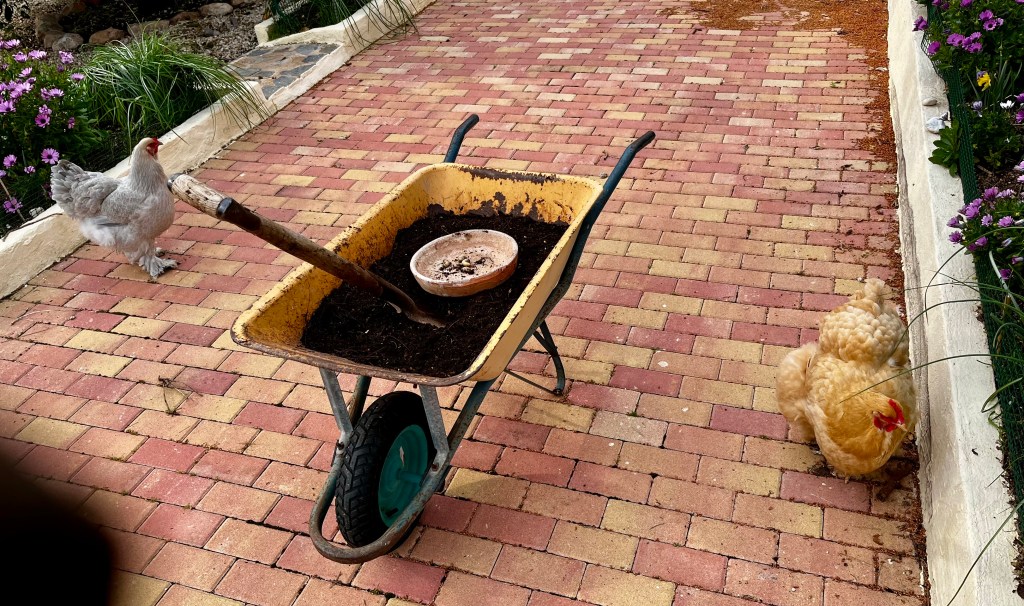
The upshot of all this is that I have been paying a ransom of maggots every day since. If ever I forget to give them some, then one of them goes up and makes a big show of just bumping into the mini greenhouse ‘by accident’. The photos below show me paying the daily ransom. Click on each photo for a larger view.

The Yucca Lull and I get a nose piercing

Cruella (my wife) is still away I haven’t really heard from her yet but she FaceTimes the chickens on a daily basis and they tell her how I am getting on. They pass on her orders, but I just ignore them as they are in Chickenese and I refuse to learn it. Mainly I am just getting ready to gear up for the Summer. I have decided to name the period in gardening between Spring and Summer the Yucca Lull.

The Yucca Lull is that period when nothing has really started growing to any great extent, and you are looking round for things to do. This is the ideal time to look at those plants and areas of your garden that you tend to overlook as you are concentrating on the other prettier and more interesting areas. Yuccas are a prime example of a plant that is a structural staple throughout Spain, but in most cases is left to become a tangled dangerous mess. Anyway, on with the gardening.

27th March 2023. Things I have been doing lately:

Tidying up Yuccas. A tidy open Yucca provides architectural structure in a garden and allow other plants to be shown at their best. However, left to their own devices they will become a huge tangled, dark mess of interlocking blades that can easily take out an eye. Why not use this period to get out there and reshape your Yuccas so that they are better integrated into your garden. I have a number of Yuccas throughout the garden from medium sized to very big. The two photos below show the worst examples of my untidy Yuccas. Click on each photo for a larger view.

From these photos you can see that there are two main problems. Firstly, I have left the dead leaves on the plants for a number of years and they have died, dried and gone brown giving a horrible look to the plant. Secondly, you can see lots of over crowding where stems have grown willy nilly (to my US readers this is an old English saying for higgledy piggledy; I believe in plain language!). The first thing you need to do before tackling your Yucca, is to get protected. Yuccas can be very vicious, so you will need a hat, gloves and eye protection. The photo below shows me ready for action.

Tom Cruises applied for this role but I just pipped him; I think I won on height.

Start by peeling back all the dead leaves. As these grow in a rotational pattern you need to start at the bottom of the stem and work up systematically peeling each leaf off in turn by pulling it sharply downwards. The photo below shows the action, followed by a photo of one of the over 20 trugs I filled. Click on each photo for a larger view.

Once you have cleared the stems of dead leaves, then it is time to cut out unwanted branches. You are aiming for an open structure you can see through with the removal of all cross branches. The best tool for this is a simple bow saw as this soon rips through the Yucca stems. The photo below shows my trusty saw ready for action followed by the results of vigorous thinning out. Click on each photo for a larger view.

Finally here are some photos of my new freshly reinvigorated Yuccas once more being a source of pride within the garden. Click on each photo for a larger view.

I am afraid to say that despite my best efforts at self protection the vicious Yuccas gave me a painful nose piercing. When I telephoned Cruella (my wife) to tell her about this disaster she suggested I put a ring through it and make myself look modern. However, I refused as I suspect she would try and lead me around with it. The photo below shows the damage.

I did get a quote from a plastic surgeon, but they insisted I needed my whole head doing.

Sago pups, Cruella flys off and I receive a chicken delegation

I know the above heading is a lot to take in, but there is a lot going on. Firstly, Cruella (my wife) flew back to the UK (the usual way, holding tight to the broom handle, head down with chin straps on her hat and black gown flowing menacingly behind). She was rushing back to welcome the idiot son home from Japan. She was so excited at his arrival that she wanted to fly out and meet his plane. I advised against it and reminded her that they shoot down white balloons, so God knows what they would make of a fast moving black streak.

Anyway, the minute she flew off all the chickens went into a huff, mainly because I refused to give them all the treats that Cruella stuffs them with. Every morning I received a delegation standing and staring at me in silent disdain as I drank my morning tea. Eventually I relented and let them have a FaceTime call with Cruella. They all jabbered away in chickenese and I heard my name come up a few times followed by Cruella shouting “he did what”. The outcome is that they negotiated all their treats back and I have been instructed to give them extra when Tango the lonely blind Labrador is fed. I feel that Tango is incensed and he has taken to howling the blues hit “is there anybody lonely”. The photos below show the pressure I was under. Click on each photo for a larger view.

Tango being fed and humiliated as the fat chickens look on expectantly

Anyway on with the gardening.

10th March 2023. Things I have been doing lately:

Potting up my Sago Palm pups. If you are following this blog closely, and I know you are, then you will remember that in my last post I removed pups from below my Sago Palm and left them for the cut scar to dry off. Well round about a week should do it, so if you cut some off now is the time to plant them up. The first thing you need to check is that the scar where you cut the pup off is completely dry. If it is then you are good to go. The photos below show the nicely dry scar and the pups excitedly waiting on the potting bench. Click on each photo for a larger view.

Like most Spanish plants, Sago Palms need a good free draining compost and this is especially the case when you are starting the pups off. In the past I have used a mixture of sand and compost with variable results, so this time I am using Perlite to make the compost nicely free draining. Mix up about 25% Perlite to 75% good compost (not China shop compost). If you have some of your own well rotted compost then chuck a bit of that in as well. Mix it really well till the Perlite is fully integrated into the compost. The photos below show my mixing processes. Click on each photo for a larger view.

It is important when potting up too chose the right size pot for the pup. Don’t pick too big a pot as this will leave too much soil that can become a bit rancid and attract pathogens. Instead keep them nice and tight. Firstly put a layer of compost at the bottom of the pot. Then gently place your pup on top pushing it down firmly to ensure good contact with the compost mix. Next fill around the sides of the pup firming down as you go. Don’t bury the pup just take the soil up to about three quarters of the pup and leave the rest sticking out. Finally water well and leave to stand in the shade. From on then let the pup dry out a bit between watering. Do not be tempted to take the pups out into the sun until they are well established. In a month or two you should see growth. The first photo below shows the planting process whilst the second shows the pups proudly in their right size pots. Click on each photo for a larger view.

Pruning my orange trees. Now is the time to prune orange trees before the blossom arrives. I do this in three linked stages. First, I cut back any branches that are crossing, diseased or growing vertically. Second, I cut out a space at the centre of the tree that allows light to penetrate right to the heart of the tree. This is often likened to creating a wine glass shaped tree with the bowl of the glass represented by the space at the centre of the tree. Third, and last, using long reach lopers I cut back any branches that are too high to be practicable to pick fruit. If you undertake this process annually, it should take you no more than about 15 minutes per tree.

The work should begin with a quick survey of your trees so that you know what you are facing. I have 5 orange trees all of which require a customised approach. The photos below give an overview of some of my trees. Click on each photo for a larger view.

Next you need to move on to cutting out the centre of the tree to let light in. For this you will need lopers, secateurs, and possibly a saw. The photos below shows some of my trees with the cut out centre branches lying at the foot of the tree. The final photo shows the space at the centre you should be aiming for. Click on each photo for a larger view.

Finally using long reach lopers cut off the highest unreachable branches. If you don’t have long reach lopers then get the step ladder out and go through the centre of the tree. The photos below show my final trimming. Click on each photo for a larger view.

Repotting Agave Attenuata. These Agaves are quite popular in Spain as they are easy growing and tend to take care of themselves. I have a number of them in large groups around my garden with a few odd ones planted in pots. They have an endearing habit, in that over time they will bend towards the dominant position of the Sun. This is fine when they are planted in the ground, but in a pot it renders them unstable and liable to be blown over by the wind resulting in leaf damage.

To overcome this setback you can rotate the pot occasionally but eventually you will need to repot the plant into an upright position. However, let me pass on my secret of years of repotting them. Don’t attempt to dig the plant out of its pot roots and all. Instead, take a sharp saw and cut through the stem as close as possible to the soil. Throw away the old root and refill the pot with fresh free draining compost. Then peel off a few layers of the lower leaves, and if possible coat the stem with rooting hormone liquid (not absolutely necessary so don’t panic). When you are ready just pop the cut stem into its fresh compost in an upright position and you have a smart new upright Agave.

The first photo below shows the Agave had begun to lean so badly I had to prop it against a wall. The second shows the cut stem ready for replanting. The next shows the cut coated with hormone rooting liquid. And finally, the newly planted and refreshed plant. Click on each photo for a larger view.

Cruella curses the weather and I thwart a bamboo escape

Cruella (my wife) flew off to England the other day to visit our idiot son. She was a bit worried about the Russians but I explained they would never pick up her broomstick on their radar as she flies so low. But as a precaution she insisted on carrying a cage full of bats to decoy any incoming missiles.

She asked me to do some decorating whilst she was gone, but I refused as I said I would be too busy in the garden. She snorted “I think you will find that you won’t be”; and that dear reader is how we have ended up with days of endless rain – I can only apologise.

24th March 2022. Things I have been doing lately.

Wandering around disconsolate in the rain. The weather has been atrocious – and yes, I know we needed it, but just not this much. This has meant that all the stuff we should be doing now in the garden is delayed. Seeds have not been planted, lawns have not been cut, cuttings are drowning, citrus blossom is being damaged and that is just the start. The photos below sum up my gardening at the moment.

The first photo shows one of my two large water butts overflowing, The next shows what I now call my canal. Followed by my water storage area. Then some of my poor cuttings drowning. Finally, poor old Tango the lonely blind Labrador finding his dinner by the splashing sound in his bowl.

Things you should not be doing in your garden. I know its counter intuitive for a gardening blog to be telling you not to garden, but I am afraid at the moment, that’s how it has to be.

Lawns. don’t attempt to cut your grass whilst it is this wet you will only damage the grass and probably your mower. Similarly, don’t feed your grass, I know it is growing like Topsy, but any feed you try and put into it now will just be washed through before it can do any good. The photo below shows one of my lawns sulking in the rain.

Yes, I know it looks rough, and I am ashamed

Fruit trees. All of your citrus fruit trees will be in full blossom and they were looking and smelling lovely. However, whilst this rain will be good for growth, it may unfortunately damage our future crops for two reasons. Firstly, the force of the rain will have stripped off quite a lot of blossom which will lower yield. Secondly, most of the pollinators cannot fly in this weather so the opportunity to pollinate may be lost. Lastly, you should be feeding your citrus trees weekly whilst they are in blossom, but stop at the moment as the rain will just wash your feed straight through. Wait for a dry day before feeding again. The photo below shows one of my orange trees waiting forlornly for a pollinator.

All dressed up and her date has stood her up… see you later pollinator

Thwarting a bamboo escape. Tango the lonely blind Labrador and I wandered disconsolately round the garden today; me in full wet weather gear and Tango gamely following and painfully banging his head on every tree. Suddenly I saw that my green bamboo was setting up to make a jail break. Now bamboo are lovely, but they are notorious for invasive spreading. This means that if you decide to grow them, then you need to plant a barrier to stop them escaping. I had planted this particular plant inside a square of large tiles that I has inserted into the ground to act as a barrier to possible spreading. I had left the tiles sticking out of the ground by about an inch, as bamboo spread by ground runners which I would see as they tried to leap the tiles.

The crafty bamboo had opened up one side of my tile square and has just started sending out a runner. If I had not caught this then it would have rapidly sent out its runner, which in turn would have sent up a bamboo cane every six inches or so. I was nearly the owner of Campoverde’s first rain forest theme park. Anyway, I have caught it (hopefully) pulled it up out of the soil and will deal with it when it stops raining (if ever).

The first photo shows my discovery and preparation to dig up the escape tunnel. The second shows where it was off to. The third shows the extent of the escape I thwarted.

Each of the nodes you see on the root stem are a potential bamboo cane. I am thinking of putting up searchlights

Thinking of better days to come. By now we should have been planting seeds, but the weather has just been too bad. The photo below shows the promise of happier days to come – I cant wait, and I still haven’t done that decorating.

Little packets of potential, we will be singing round the potting bench soon

Cruella creates a marsh and I sing laments with the Agave Attenuata

I know the above heading doesn’t fill you with optimism, but it has been a very trying time. Cruella (my wife) has flooded part of the garden and destroyed my Lavender and on top of all this I caught her trying to poison me again! As if this is not bad enough I have two Agave Attenuata passing on to Gods garden in heaven. Anyway lets get on with the gardening, or whats left of it.

13th March 2022. Things I have been doing lately.

Removing Lavender. I knew there was something wrong with the Lavender around my water feature. It should have been starting to flower by now but it has remained stubbornly grey and dull. When I checked the stems there was no sign of green but more importantly the ground around the water feature was soggy and water logged. As I am sure you all know Lavender requires very dry soil with very little watering.

I remembered that I had asked Cruella to keep the water feature topped up when I was away. When I confronted her she admitted that she had forgotten to turn off the hose and had left it running over night. I told her enough was enough and that I was going to tell everyone what she had done in my blog. she just smiled at me malignly and said I might regret that. Anyway to cut a long story short, when I came in 10 minutes later I found her about to poison my teapot. The photo below could probably be used in a criminal prosecution.

I took the concoction off her and threw it into the sink; we now need a new sink as it melted

The first photo shows the lavender looking suspiciously dead, whilst the second shows it heading towards the compost heap. Click on each photo for a larger view.

It is time to cut your palms: If you have palms trees, especially Phoenix Palms, then now is the time to get them pruned back. The Palm Weevil will be emerging soon as the weather begins to warm and they like nothing better than a nice freshly cut palm frond. Depending on the weather you probably have till the end of April before they fully emerge, so you better get cracking. If you have large Palms then you will need the services of a Palmista, don’t try and climb up long ladders wielding a chain saw, leave it to the professionals unless you have excellent health insurance.

The photos below show some of my 13 large palms freshly cut and looking neat and trim. The final photo shows the enemy. Click on each photo for a larger view.

Planting Aeonium cuttings. When large Palm tree are cut back there are certain disadvantages. Those large palm fronds that look so light and airy 40 feet up in the air are actually 15/20 foot long branches that are spiky and extremely heavy as they thud to the ground. Despite my best efforts to protect plants there are always casualties.

The easiest plant to deal with after destruction is the Aeonium. Just simply make up a nice free draining compost mix, go round and pick up the stems that have been knocked off the plant. Cut the stem With a sharp knife, leaving it roughly half its length. Fill the requisite number of 4 inch pots with your compost and then water them whilst they stand in a trug. This is my tip of the day, by watering them in a trug you allow the pots to sit in the water for a few minutes before taking them out to drain. The residual water in your trug can be poured over your compost heap or over some deserving plants. Your cuttings will soon take and can be planted out in about 3 months .The photos below show this process in action. Click on each photo for a larger view.

Preparing to plant seeds. You may be tempted to begin planting your seeds, but depending where you are in Spain, it may be too early. Even in the lovely sunny Costa Blanca night time temperatures are still too low for good germination. Leave it a few weeks and things will begin to warm up nicely. This doesn’t mean you can’t do anything. There are a couple of practical things you can be doing now that will get you off to a good start.

Firstly you can get out all your seed trays and check them over for damage; cracks and splits in trays mean you will lose water. Also it is very important that you thoroughly clean your trays of any trace of last years soil as it may harbour viruses and pathogens that could destroy this years seedlings.

Secondly, you can prepare your planting medium. For seeds you need a very free draining compost. I find the ideal mixture is two parts of a good store bought compost together with one part Perlite to give you that nice free drainage that seedlings prefer.

The first photo below shows some my seeds trays drying in the sun, the second shows the start of the mixing process, the following shows what the final compost mix should look like, and finally, the compost I am using. Other composts are available, but please do not buy a cheap one as it will be inferior and lead to poor germination. Click on each photo for a larger view.

Singing to my plants. Regular readers of this blog will know that I am a firm exponent of singing and talking to plants; and on occasions poetry can be efficacious. However it is important to match your output to the appropriate stage of the plants life. Seedlings and cuttings like jolly songs and nursery rhymes. Whilst mature plants are happy with show songs mixed in with a bit of country music; in my experience very few plants like rock music.

Anyway, the whole point of this is that I currently have two Agave Attenuata coming to the end of their flowering life, which in effect means death. I wouldn’t mind, but for a plant that usually only flowers after 10 or more years and then only once, I have had three in a year. Cruella thinks this signals the “end of days” and the second coming, I think its just good gardening.

With end of life plants your songs and poetry are obviously different to those you would sing or read to say, bulbs, because you know they are coming back. Both the Attenuata and I know we are talking end of life care. This involves a lot of tears, late night talks about when they were young, and often I will bring out old photos of when they were seedlings. We sing mainly opera and a few requiems. My aria of choice for these situations is always “Che gelida manina” from La Boheme with me singing the part of Rudolfo and the Attenuata as Mimi.

The end is near and we have started singing “Sona Anadati” so she knows we are at the end stage. I am dreading the death scene when I have to sing and sob “Mimi…Mimi” if you haven’t heard this then listen to it and cry. The first photos below show my Attenuata at the beginning of their flowering. The final photo shows me and the large Attenuata singing the aria “Che gelida manina”; you will notice I am holding her hand as the role demanda. Cruella took the final photo at my request, but she kept mockingly saying “I can’t hear the plant sing”; I replied “of course not, for that you need a Soul”. Click on each photo for a larger view.

Note the sadness, gravitas and poise I bring to this role

Spring is in the air but I am singing death duets with my Attenuata

Yes, it is that time of year when everything starts to grow; buds are bursting, flowers are opening and seeds are being sown; what’s not to like. But, and I’m sorry there is always a “but” in gardening. Death is in the air and my Attenuata is nearing the end. I don’t want to dwell on things or become all maudlin so let’s get on with it.

18th March. Things I have been doing lately:

🍟 Refreshing pot compost. One of the most common questions I get asked in Spain is “why is my potted plant not flourishing ”? And the answer invariably is, “because you have left it sitting in the same old compost for five years you bloody idiot!” Think about it, if you leave plants in the same old depleted, virus ridden compost for years at a time, it is bound to make them sad. It is a bit like me giving you one meal that is expected to last for years – you would be sad.

You need to refresh the compost in your potted plants every year and it is a very simple process. There are two ways you can do this. Firstly some plants will have outgrown their pot and it is time to move them on to a larger pot. That is fine you just replenish all of the compost. But, the majority of plants are not due for repotting, but still need new compost, so you need to do it now or it will be too late in a few weeks.

You need to start by removing any stones or other mulches that you have put on top of the soil to stop the plant from drying out. Then using a trowel dig down into the pot compost as far as you can and begin to remove as much of the old compost as possible. Now, when you do this you will invariably cut into some of the small feeder roots, but that is not a problem as these will soon regrow. But try to be careful not to damage main roots and especially try not to skin the roots as this can let in a virus.

The photo below shows one of my potted standards ready for its annual refresh. The three trug system shown in the photo was invented by me. Trug 1 to take the stone mulch. Trug 2 to take the depleted old compost. Trug 3 for the new compost. The little pot is full of granulated feed and the stool is for me because I am old. When I excitedly told Cruella (my wife) about the three trug system, she said it was the stupidest thing she had ever heard and that I was a moron.

The 3 trug system in action

Once you have removed as much of the old compost as you can safely do, then add in a couple of handfuls of granular long lasting feed (the blue stuff). You can then top up with some nice new compost. Try and buy the best compost you can afford and do not be tempted by cheap shop alternatives. A little tip for the house proud gardener. Once you have topped up your compost don’t be tempted to just throw your stones or mulch straight back on top. Instead sieve the stones to remove all the small bit of debris that inevitably lurk there and may harbour diseases. The first photo below shows the pot ready to be refilled, whilst the second shows my patented wheel barrow sieving process (patent applied for). Just so you know Cruella wasn’t impressed by my wheel barrow sieving system either. When I ran in to tell her she just groaned and held her head in her hands. I told her even Bill Gates had to start somewhere she said yes, but he wasn’t an idiot.

Once you are finished, stand back and enjoy your handiwork. If you listen carefully you will hear your plant sighing contentedly as it get ready to reward you with renewed vigour. The photo below shows one very contented plant.

If you look carefully you can see that the leaves are smiling

🌱 Beginning to sow seeds. I try to grow everything from seeds or cuttings with only the occasional purchase, and even then I always take cuttings from any plant I purchase. Anyway, it is time to get going with your seed sowing. If you haven’t grown from seed before then it is very simple here in Spain. You don’t need a large greenhouse or heating etc. All you need is a simple little plastic 3 or 4 shelf greenhouse that will cost between 20-30€. Your seeds won’t be in there very long as nearly everything will need to be outside by mid to end of May.

To start you need to buy yourself a sack of good compost and some Perlite or Vermiculite. Mix the compost with the Perlite to create a nice airy free draining compost mix. Once you have your compost mix fill as many seed trays as you need. Tamp the surface down lightly and then water and leave to drain for 10 minutes. The photos below show the compost mixing process and the array of things you need to sow your seeds.

If you are using shop bought seeds then read the instructions on the packet carefully. In some cases seeds may need to be put in the freezer for a couple of nights to mimic the conditions that starts their germination in the wild. In other cases you may be advised to soak the seeds in water for 24/48 hours. But don’t get freaked out as growing from seed can be fun.

Once you have the seed trays ready then you are all set to sow your seeds using the seed sowing tool that God made specially for you. Yes, that’s right if you curl your hand palm facing upwards you will see a nice long groove down the middle of your palm. Pour your seeds into this groove and form them into a line along your palm. Then, holding your palm over the seed tray, begin moving the hand with the seeds in whilst at the same time tapping with your other hand on the outside edge of your palm. As you tap the seeds will all begin to move along your palm in a uniform line till they gradually begin to fall on the compost.

Once you have sown all your seeds then you need to cover them with compost to the depth recommended on your packet. I use a simple method to do this using a small sieve that was purchased as part of child’s beach bucket and spade set. Filling the sieve with compost I just lightly shake it over the seeds till they are covered. The last thing to do is to place your seeds in your mini greenhouse or similar. But don’t forget to open this up during the day or your seeds will bake. The first photo below shows God’s seed sowing tool in action. The second shows my little sieve. The final photo shows the mini greenhouse which will be gradually filled over the next couple of weeks. Click on each photo for a larger view.

🧹 General garden maintenance. All good gardens need a certain amount of ongoing low level maintenance. The first and probably most important is weeding. Most weeding can be effectively carried out by regularly hoeing between plants. If you hoe every couple of days you will never have weeds as you will be denying them the chance to set seed. The only exception is weeding between growing bulbs. To weed between bulbs you need to get down on your knees and get your fingers in the bulb foliage to pull out the inevitable grass that grows in between. You can usually easily distinguish between the bulb foliage and grass just by feeling as the grass will have flat blades whilst the bulb foliage will have a more rounded feel. If you don’t believe me get out there now and try it.

The second most important low level maintenance is only necessary for those of you who have gravelled areas in your garden. I am sure you have put membrane down before applying your gravel and although weeds will seldom grow through your membrane, they will certainly grow on top of your membrane if you let them. Leaves and other general garden detritus will lie as a thin layer of debris on top of your gravel and gradually mulch down to a fine tilth that is an ideal medium for weeds to grow in. To overcome this you have to regularly use a garden blower or rake to remove this layer before it gets nicely settled.

The first photo below shows my intrepid bulb weeding activity whilst the second shows my gardening equipment ready to tackle the gravel. Click on each photo for a larger view.

⚰️ Preparing for the death of the Agave Attenuata. Regular readers of this blog will know that I am currently enjoying the flowering of one of my Agave Attenuatas. Like the Swan that only sings when it is dying, the Attenuata only flowers after 20 years to promptly die. The flower stem of the Attenuata is a spectacular concoction that flowers from the base and gradually reaches to its tip over a period of a couple of months. The bees are attracted to this plant like no other. It actually drips nectar that runs down and drips off its stem. The only problem being that it then promptly dies.

I have been preparing myself for this death and have even sought grief counselling. In addition I am writing an opera to memorialise the Attenuata. I have always been a lover of Puccini so I am basing my opera on La Boheme and in particular the aria “Che Gelida Manina”. I of course play the part of Rudolfo with the Attenuata being Mimi. We duet most evenings just as the Sun is going down and I hold the Attenuata stem just as Rudolfo holds Mimi’s hand. I am proud to say there is not a dry eye in the garden. The whole garden weeps copiously at the Attenuata’s Mimi and when she enters into the coughing fits I sometimes break down and am unable to come back on for my encore.

it saddens me to say this, but when Cruella hears our singing she shouts out abuse such as “is that weed not dead yet” and on one occasion accused the Attenuata of being a hypochondriac saying “she’s just putting it on, there is nothing wrong with her…drama queen”. Sometimes I cry myself to sleep at night and dream of the Attenuata going to heaven. The photo below shows me and my lovely Attenuata midst duet.

If you look carefully at the ground you can see the nectar stain caused by the consumptive coughing of the Attenuata on the high notes

The black hand of Cruella and her mice army is ruining my garden

I didn’t want to start this post with such a downbeat heading, and I don’t want to be writing a misery memoir, but to be honest I think that Cruella (my wife) is beginning to grind me down. Despite my best efforts at cheery gardening her wilful destruction of all my efforts is taking its toll. I outline below some of my recent efforts to mitigate her malicious activities, but to make things worse she is now manipulating the weather against me. I mentioned to Cruella last night that the garden was somewhat dry and I wish we could have a bit of rain. I should have known better, she instantly retorted “if it’s rain you want I am sure we can arrange that”.

Anyway, the results of my careless wish were visited upon me this morning. We are in the midst of a biblical deluge that would have swamped Noah and his family. The whole garden appears to be floating on a tidal wave. It’s so bad that even the Labradors are refusing to go out and dig up the lawn. When I complained about the rain to Cruella she mockingly replied that I should be careful what I wish for next time. The photos below give you a small picture of what’s going on. Click on each photo for a larger view.

7th March. Things I have been doing lately:

🚜 Turning my water feature into a rockery. Long term readers of this blog will remember that I created a stream like water feature a couple of years ago. This involved much back breaking work collecting large rocks from fields in the local area, transporting them home and then hauling them into place. Cruella never liked this feature as she claims it was a desecration of an ancient burial site of her ancestors. When I pointed out she came from Wales she huffily said there was a Spanish branch of the family El Jones; but I think she made that up.

Anyway the upshot was that when I was away recently she conjured up an army of mice to eat the water proof membrane of my water feature. Despite my best efforts at patching up the mice returned every night to feast, even eating my patches. The photo below shows my water feature just after I had finished construction.

I envisaged a burbling stream, Cruella turned it into a Miceopolis.

Having given up the battle with Cruella’s mice army I set out to creat a rockery in my destroyed water feature by planting up the stream bed and cutting off the stream thereby just having a water spout. The photos below show my construction efforts. Click on each photo for a larger view.

The photos below show the final outcome. To be honest I am rather pleased with it as the new plants complement the existing plants that have matured since first construction. Click on each photo for a larger view.

🧟‍♀️ Cutting back the Solanum that Cruella touched. Regular readers will remember in my last post I told you how Cruella had touched my much loved Solanum and made many of the stems go black. I was then faced with the dilemma whether to wait and see if it could be revived in any way, or, to cut it right back to the ground hoping for new growth.

In the end we took the decision together (the plant and me). I sat beside her (all Solanum are ladies) for most of last Wednesday evening and we talked over the choices. She said she had dreams about a white light drawing her towards the compost heap. But, I pleaded with her not to go into the light. I said there was hope and if I just took out the blackened stems then she may recover. “No”, she said “I’m too far gone, there will be other plants and other days and you will soon forget me…you go on and enjoy your life”.

Sadly the decision was taken out of my hands. Despite an all night vigil she passed away about 4 in the morning. When Cruella asked why I was crying I told her I had lost the Solanum. She mockingly pretended not to know what I was talking about saying “oh, I didn’t know it was ill you must let me know if there is anything I can do to help” As she walked away I saw her rubbing her thumb and forefinger together, and black dust was falling on the floor. The photo below shows my lovely Solanum 3 years ago.


The photos below show the big cutback, whilst the final photo shows my hope for the future; she looks just like her Mum. Click on each photo for a larger view.


🍊 Tidying up citrus trees. Now on to some more positive stuff. By now your citrus trees should be starting into blossom, so it is time for you to do your annual round of tidying up to ensure you maximise your fruit crop. By removing suckers and opening up the tree to light and air you will get a bigger more healthy crop next year.

The first thing you need to do is to cut back any branches that are going to be too high for you to reach fruit. I use an extendable long reach loper, but you could use ladders and medium lopers. Just cut back anything that is just too high.

Next you need to get into the heart of the tree and cut back any suckers. Suckers are those bright green new shoots that will either come off the bottom of the trunk, or shoot up from branches at the heart of the tree. In most cases they are growing straight up. You need to remove these as they suck energy from your growth. Suckers are mainly a problem on old trees, but they can be seen on some young trees with a compromised graft at the base of the trunk. If you catch suckers early they can just be removed by pulling down on them sharply. Once you have removed the suckers open up the canopy so that you can see a good amount of sky through it. The photos below show suckers and their removal followed by the open sky letting in air and light to the centre of the tree. Click on each photo for a larger view.

🍔 Beginning to feed plants. Over the next few weeks you will need to start feeding your plants as they begin to burst into growth. It is important to remember that plants are like people, they don’t all like the same food, and some have real preferences. Over a year I will use a wide variety of feeds including long-term Rose feeds, but my mainstays are shown in the photo below. From left to right:

  • General purpose liquid feed to perk up potted plants
  • Specialist feed for fruiting plants
  • Specialist citrus feed for orange and lemon trees
  • Specialist orchid feed for potted plants
  • Specialist feed for acid loving plants
  • General purpose slow release granulated food that can just be scattered around
To my plants this looks like a fancy restaurant.

It is time for the big composting special

Hooray its that time of year again when I regale you with advice on the merits of composting. Remember that Coca Cola advert that appears on the television every Christmas, where a large truck with a picture of Santa Claus on the side goes through towns accompanied by the sound track singing “holidays are coming…holidays are coming”. Well that has been me for the past few weeks I have been singing “compost special is coming…compost special is coming”. To say this has annoyed Cruella (my wife) would be an understatement, so much so that I now mumble it under my breath, and when she says what did you just say, I reply “nothing”. I know it’s not much, but I count that as a small victory.

Anyway, on with the show let’s keep the excitement bubbling.

1st March: Things I have been doing lately

🧠 Why compost. All garden soil gets depleted over time and lose micro nutrients either they just get washed away by the rain or the plants take them up and the soil needs replenishing. Composting can help improve soil by adding back these nutrients and encouraging helpful bacteria that will break down and improve your soil. When added to your garden compost will help suppress weeds, lessen the need for chemical fertilisers, retain moisture and give you a warm feeling that you are doing a “green thing”. So no matter what your motivation, by composting you will be improving your garden.

👨‍🎓 How to compost. You don’t have to make a big deal out of composting and anyone can do it. Whether you have a large garden or just a little patio garden with pots adding compost will improve your garden. The basic need is to have a compost bin, or compost heap where you can store your compost. This can be very basic such as a little patch of your garden where you tip excess produce and cuttings etc. You could just have a heap in the corner covered by an old carpet, or if you like make a basic container out of chicken wire.  It might be easier just to buy a compost bin from a store and there are thousands of them, from basic one simple bin, right up to multi-bin purpose built composting systems.

As you would expect, I have a purpose built composting system consisting of two large bins with lid for easy access and doors that can be raised to allow me to get at the compost from the bottom. The photo below shows my composting system.

974E5825-BFE7-4A21-88D4-5694E402B8B8
Pretty cool eh!

Now, I don’t want you getting compost bin envy, that’s not the idea. I designed these and had them built when we first moved to this house because this size garden calls for this amount of compost. There are fruit trees to be mulched, lots of beds that need seasonal replenishing, lawns that need some topping and all the planting and stuff on the potting bench.

🌿 What to compost. Now you can compost most organic material. Examples would be:

– all plant cuttings and mown grass

– vegetable trimmings etc from your kitchen

– old newspapers and cardboard

– hair and fur from your dog, cat, hamster or velociraptor

– twigs and branches up to about an inch thick

– eggshells, coffee grounds and filters, tea bags

– fruit, but not too many lemons or oranges as they will make the heap acidic

☠️ What not to compost. You must be careful not to compost the following:

– cooked food of any sort (this will encourage rats and cockroaches). This includes: meat, bones, fish, fat or dairy

– leaves or cuttings from plants that have been infected with disease or pathogens such as rust on Roses or mildew. If you compost these then you will infect the heap.

– dog or cat poo; and don’t even think of human poo.

🔐 The key ingredients of compost. Quite simply good composting requires four things:

1. Green items: that add nitrogen (grass, leaves etc)

2. Brown items: that add carbon (twigs, branches, newspapers etc)

3. Water: to keep the heap moist but not wet (don’t let it dry out, but don’t over soak it)

4. Air: oxygen is needed to encourage the composting process, so once a month you need to stir your compost with a fork or spade to keep the air circulating.

There is one other vital ingredient that you can choose to add to your compost heap, and that is “compost accelerator”. This is normally added as a powder which encourages the development of microbes in your compost heap and speeds up the composting process. The photo below shows all the key ingredients apart from air; but I assure you it is there. In the photo you will also see a special compost turning tool that I bought some 20 years ago. You just push this into your compost heap then the two little wings at the bottom of the rod come out as you pull up and the whole heap is lifted and turned. If you can find one, buy it.

2A335C51-F6E9-4091-BD87-1A1C547C75E5
Note the shaft of sunshine – God smiles on composters

🔭 What should  compost look like? A question I am always asked (I lead an interesting life). The photos below show the recent state of my compost bins. The first photo is the bin currently in use, and you can see all the ingredients I talked about above. The second photo shows the resting bin that I have just emptied. You can see from this photo that the bin is half empty, and this is because all the insects and beneficial microbes will have eaten stuff whilst making the compost. The final photo shows the finished compost; or as I call it black gold. Each of these bins will on average give me 20 wheel barrow loads of compost each year.

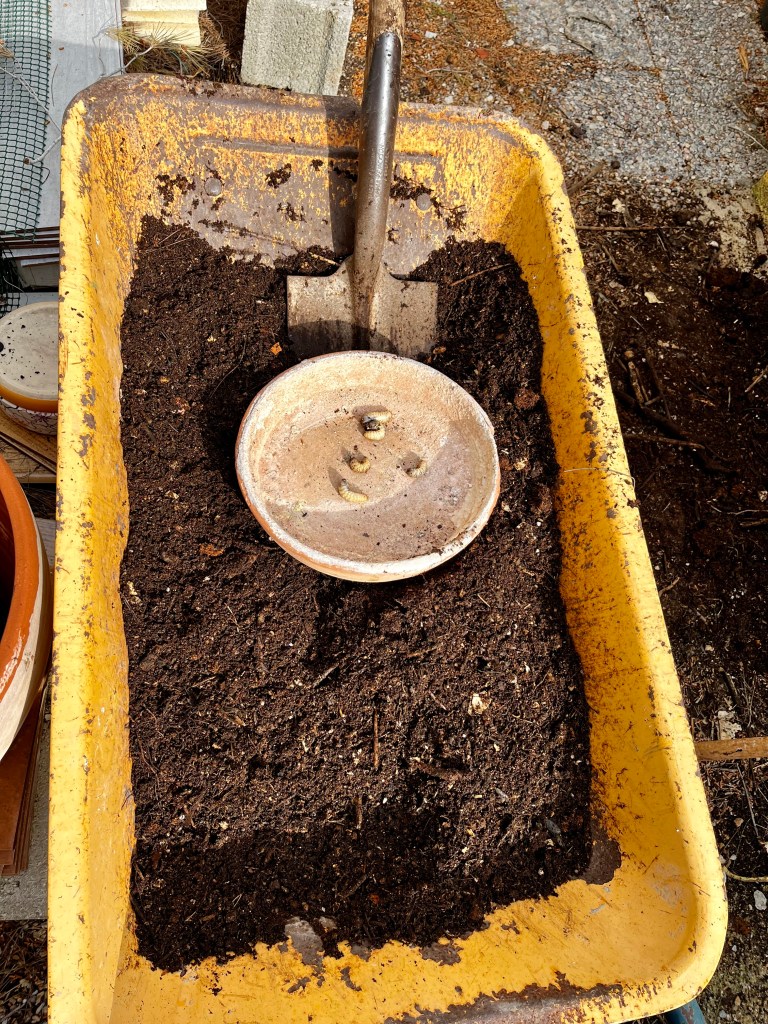
🏎 Restarting an empty bin. Once you have emptied a bin then you need to begin the process of getting it going again. The first thing you need to do is to line the bottom with a layer of twigs retrieved from the live bin. This will give you a nice airy base to build upon. Now the gory part, when emptying your bin you should have unearthed a large number of Rose Chafer beetle maggots, which out of necessity you will have drowned at least half. Retrieve these poor mites from their watery grave and sprinkle them liberally over the bottom of your bin to provide a bit of an organic starter, (not forgetting to say a short prayer). The last thing is to sprinkle a little bit of compost accelerator just to get things going.

The first photo below shows the exciting potential of an empty bin. The second photo shows the twig prepared bottom of the bin. The final photo shows the drowned maggots about to make the ultimate sacrifice.

Getting in the compost bin. One of the great joys at the end of a hard days gardening of trimming and cutting is to get in the compost bin and tread it all down. What do you mean you’ve never done this, just me then. The photo below shows me (last summer) happily stomping up and down in one of my bins. Just after she took this photo, Cruella slammed the lid down and I was in there for two days. I must say they where the happiest two days of my life. She only got me out because the dishwasher needed emptying.

08F278DD-06C3-4048-B009-323B8497FAA6
I wear the sunglasses because I want no publicity

I’m self isolating, I call it gardening

The whole of the world is in crisis but the garden is still there happily growing away and requiring our attention. We gardeners are quite used to self isolation as we wander around in our own world digging, weeding, sowing, pruning and generally just enjoying the joys of nature.

Right, that’s enough of that philosophical stuff, let me tell you the good news. Cruella (my wife) has decided to remain at our English house in case our idiot son becomes ill. She is applying all of her considerable powers to keeping him healthy. She has draped a garland of garlic round his neck, and topped it off with a large wooden cross. Not satisfied with that his personal space is enveloped in a series of spells and hexes and she has drawn a large pentangle in chalk around the whole perimeter of his apartment block. In addition she spends each night flying around his tower in a menacing and malevolent circle that keeps everything away. She has been picked up on London City Airport radar and most flights have been grounded.

When I queried what sort of protection I could expect from her she merely laughed and recommended I get some Paracetemol.

20th March. Things I have been doing lately:

🍴 Feeding and composting citrus trees. I mentioned the importance of this in my last post, but I thought I would return to it because people are constantly asking me how I have so much fruit and they haven’t got any. If you feed and compost your trees you are more or less guaranteed a good crop of fruit. This should provide you with the impetus to get a compost bin, or start a compost heap.

There are four key stages to feeding your trees:

Weed – The first thing you need to do is to hoe under each of your trees making sure you remove all weeds.

Feed – Scatter under each tree the appropriate amount of a good quality granulated, slow release fertilising citrus food. I generally find that about two handfuls are appropriate for a mature tree. Remember you will also be using liquid feed later in the season.

Water – Using your hose pipe drench the soil under each tree. This has two purposes. Firstly, you are washing the feed into the soil and making sure it makes good contact with the soil. Secondly, you are preparing to seal in the moisture before applying compost.

Compost – Apply a thick layer of compost, at least two inches thick, under each tree. When you apply compost under a tree you are adding the magic ingredient and creating a number of benefits. You are suppressing weeds, feeding the tree with micro nutrients, and encouraging worms to pull the compost down into the soil which will stop soil compaction under your trees.

The photos below show each stage of the process: Click on each photo for a larger view.

One word of warning. Most fruit trees are grafted on to a strong root stock which will usually not be of the same species as your tree. This is not normally a problem and makes for a strong tree. However, it is important that you do not cover over the graft with compost as this may encourage the root stock to start growing in its own right. The graft is normally right at the bottom of the trunk and can be recognised as a bulge in the trunk. When you apply compost make sure you clear a space around the graft. See photo below.

This photo shows my graft being cleared by a friendly three toed sloth.

🧟‍♀️ Undoing Cruella’s handiwork. Whenever Cruella goes away she leaves a series of deadly traps to keep me on my toes. Usually these consist of her normal everyday antics: ladders sawn through, grease on stairs, bare electric wires linked to door handles. I never know where they are, or when they will happen, so it came as no surprise to me that a water pipe in the garden suddenly erupted into a geyser of water 20ft high. Luckily, there is a stopcock for this particular pipe and it does not affect the house supply.

At the time I assumed that as this was an old pipe it had just rusted and given way. However, on closer inspection the base of the pipe showed the unmistakable marks of a hacksaw that had successfully weakened the pipe. As if this was not conclusive enough, I found Cruella’s trademark offerings of a dead animal skull and maggots at the base of the pipe. My problem now is that as everything is closed and I can’t mend the pipe. When I confronted Cruella with this fact she denied all responsibility and said it could have been anyone. When I showed her the dead animal she merely smiled and muttered something about corona virus affecting animals.

The first photo below show the devastation caused by you know who and the cut pipe that I now cannot repair. The second and third photos have all the hallmarks of Cruella. Click on each photo for a larger view.

Time to give your plants a snack

Cruella (my wife) is still at our English house so things are relatively quiet round here. I have been happily gardening away in the lovely weather we are having at the moment and I am pleased to say that no major accidents have befallen me yet. However, I write from a locked down village where everything has been closed due to the coronavirus and we are not allowed to fraternise. I am even wearing a mask and my gardening gloves to bed. I feel Cruella may have had a hand in all of this.

12th March. Things I have been doing lately:

Beginning to feed plants. Now is the time when you can selectively begin to feed some plants. However, it is important that you do not over feed or you will just get soft leafy weak foliage. Instead, now is the time for an initial plant snack. Remember, like people you need to give the right food to the right plant. You wouldn’t give a baby steak, nor would you give an adult baby food; and the same applies for plants they need the right food at the right time. The photo below shows some of the range of plant foods that I use.

The one on the end is mine; Cruella didn’t leave me any food.

From the left:

  • A general universal feed, don’t feed this till plants are growing strongly roundabout the end of April.
  • A liquid citrus feed this should be a follow on top up food for Orange and Lemon trees a month or so after the granulated food.
  • A slow release granulated citrus feed; you should give your trees a generous handful of this now whilst the trees are in blossom.
  • A slow release granulated feed for non citrus fruit trees you should feed this to now to Figs, Persimmon etc.
  • A liquid feed for non citrus fruit trees this should be given a month or so from now after the granulated food.
  • Rose feed give each of your Rose bushes a generous handful now.
  • Baked beans best eaten cold from the tin whilst standing around at night in your pants and vest.

When giving the granulated feeds make sure you water them in straight away. When feeding your citrus trees water in the granulated slow release food then cover the surface under the tree with compost from your compost bin, or, if necessary buy some from a shop.

Overseeing Palm pruning. Now is the time to get your palms trimmed so that the pruning cut can heal before the dreaded Palm Weevil is about. Note that I say overseeing. Please don’t try to prune or cut Palms yourself, it is a professional and dangerous job so make sure that you get a qualified professional. Don’t employ amateurs with chain saws, this is not how you prune Palms. The photo below shows some of my Palm trees nicely and professionally trimmed.

Note how large these trees are, some are over 40 feet.

Taking cuttings. A side benefit of my annual palm tree pruning is that as the fronds are cut and thrown to the ground so they occasionally bash bits off plants. This can’t be helped, and I am quite forgiving. But, it does leave you with a number of potential succulent cuttings. All you have to do is collect them up, trim the stem neatly with a knife, then pull all the leaves off the stem apart from a few at the top. Then just pop them in prepared pots with a good free draining compost. In a month or so you will have a new selection of succulents for your garden, or to give to friends. Only do this with succulents at the moment as it is too early for general cuttings. The first photo below shows my cuttings production line in action. Whilst the second shows all my new little plants. Click on each photo for a larger view.

Undertaking some general maintenance. Whilst plants are obviously the most important part of your garden, don’t forget that walls, paths, water features and other hard landscaping forms the framework for you to display your plants. Now is the best time to undertake any maintenance and repainting. Most plants will not have started vigorous growth and you can get access to everything. The photo below shows some of my handiwork painting the top of my front wall.

I must confess that quite a lot of foliage gets painted; it’s a bit like Alice in Wonderland and the Roses.

I am disconsolate

The day started with such promise. Cruella (my wife) was going to our English house to welcome back our idiot son from Japan. She left early as she was unsure of her new broomstick. But after a few spills she took off from the front lawn without any great problems; circled a few times, did a victory roll, cackled a bit and then disappeared in a cloud of black smoke.

I had my whole day planned. First a saunter round the garden to check on everything and then off to various shops and garden centres to indulge in a spending splurge before Cruella landed in England and checked our bank balance. All seemed set fair, but how wrong I was. When I left in the morning a stiff wind was blowing, but hadn’t yet reached the gale force that it would become before I got home.

I arrived back with various purchases and accoutrements only to find disaster. The wind had not only blown over and wrecked pots – that I could stand – but more disastrously it had whipped the cover off my little mini greenhouse and blown all the seed trays over. To put this in context, this post was going to be all about how the seeds were just sprouting and the start of another great gardening year. This comes on top of the great disaster of 2019 (Which of course you all remember) when all my seedlings got roasted in the Sun. I have tried my best to recover what was possible, but when you garden from seed it is a terrible blow as it means only cuttings stand between you and a disastrous year.

I have wandered round the garden reciting Rudyard Kipling’s great poem “if” especially the lines: “If you can meet with Triumph and Disaster and treat those two impostors just the same” – it doesn’t help; I may seek counselling. The photos below only give a hint of what I was faced with.

Anyway, on with the show.

2nd March. Things I have been doing lately:

☠️ Killing broadleaved weeds on the lawn. If you have a lawn; and I do recognise it is a luxury in Spain, then now is the time to selectively kill broad leaved weeds. I mention broad leaved weeds in particular because these are the ones that will gradually shade out grass. As I have become older I am far more tolerant of general lawn weeds as I recognise their role in sustaining pollinators. However, now is the time to apply a selective weedkiller (one that does not kills grass) to your lawn. If you apply it now before the weeds flower then you will save yourself heartache later. The photo below shows the weedkiller I use (others are available) which works very well.

Although it looks like my weed sprayer belongs to someone called Ed, I can assure you it is mine!

🐣 Pruning Bird of Paradise. Strelitzia which is more commonly known as “bird of paradise” grows very well in Spain and provides many gardens with an exotic look. To prune bird of paradise you need to differentiate between flowering stems ie those with flowers at the end, and leaf stems which do not have a flower. Leaf stems that are bending over and touching the ground can be cut right back to the ground without causing the plant any problems. However, flowering stems can be treated in one of two ways. You can, if you just want to tidy up the plant, cut a flowering stem right back to the ground. However, you can cut a flowering stem back to a fold about half way down the stem and it will flower again from that point by growing a new stem. When you cut, cut at an angle along the fold in the stem and it will regrow. You can only do this trick once before the stem will then wither.

The first photo shows the non flowering stems being cut back. The second photo shows where to cut for a second flowering. And the last photo shows the stems happily being recycled in the compost bin. Click on each photo for a larger view.

🍊 Pruning Orange trees. Yes it’s that time again. If you want lots of lovely oranges on your tree later this year, then you need to prune them now. It is always difficult to get the time of pruning right. Ideally, after the last orange is off the tree and before the blossom starts is the perfect time for pruning. However, who ever said gardening was perfect. If like me you have a number of orange trees then you will still have fruit on the trees when the blossom comes along. Well, nobody said it wasn’t tough being a gardener.

You should start pruning your orange trees by removing any suckers that are coming out of the branches. Suckers are soft, bright green growth that can easily be removed by just tugging them down and they will come off easily. Next, you need to cut out any branches that are growing straight up. Then you should cut out any crossing branches, or branches that are rubbing against each other. You should be aiming to have an open structure that leaves the centre of the tree open to air and Sun. Finally, you should lightly trim the outside of the tree and its height to ensure that fruit remains within reach. Yes, you will lose some blossom, but don’t worry as not every flowers turns into a successful fruit.

The photos below shows one of my trees at the start of the pruning process. You can see from this that the tree is in blossom, it has lost shape, and has some branches that are too high. Note that the tools needed include: secateurs, long handled lopers and finally an extendable trimmer for the top of the tree (if you are freakishly tall you won’t need these).

The photos below shows suckers and an upward growing stem that needs cutting out.

Lastly, I present you with the nicely pruned and trimmed tree ready to go forth and be fruitful.

Don’t pretend you can’t see the difference. It’s obvious to those with an artistic eye.

It’s Spring and Cruella has a new cauldron

We are at our English home for a week or so but before we left there were some important jobs to get on with. I didn’t really want to come back at the moment as Spring is a crucial time in the garden but we had to be here to welcome our idiot son back from Japan. At least Cruella told me that was the reason, but I have since found out she wanted to buy the latest indoor cauldron – more later – let’s get on with the gardening.

19th March: Things I have been doing lately:

🌱 Pricking our seedlings. If you have sown annual seedlings then now is the time to start pricking them out before they get too overcrowded. Now I know the term “pricking out” has those of you with the more puerile minds sniggering, but the process is simply one of moving seeds from their first seed tray and planting them more spaciously in a second. The photo below shows my trays of Marigolds waiting to be pricked out – stop it, it’s not funny and makes you look childish.

It’s getting a bit overcrowded

It is very important that you do not prick out seedlings until they have “true” leaves. The first leaves that come through are just forerunners of real or “true” leaves. Once you have 6/8 true leaves then you can prick out the seedlings. You should use a pencil to gently lever the seedlings out, then always holding them by their leaves, never the stem, gently probe amongst the seedlings to find those with the best roots. Be ruthless, 90% of the seedlings will be heading for the compost heap so you want only the best. The photos below show the process in action.

Once you have selected a good strong seedling replant it into its new seed tray by gently lowering it into a pre dibbered hole. Push the seedlings roots right into the hole using the tip of the pencil. It is important that all the roots are pushed into the hole. The photo below shows a seedling being rehomed.

Finally place the new seed trays on the potting bench for a couple of hours out of the Sun. They will need to be put back into my mini greenhouse for a week or so before gradually being acclimatised to the outside. The photo below shows my new seedlings which will be ready to plant out in about two weeks. The seed tray that you can see in this photo that has not been pricked out is my reserves. Despite my best efforts snails will get some of them so you needs reserves to fill gaps.

🍊 Pruning Citrus trees. Orange and Lemon trees in particular need to be pruned and thinned every third year. The timing of this is always tricky as you need to undertake the process before the new blossom gets going or you are pruning off next year’s crop. The difficulty is that in heavy cropping trees such as our we are still picking and “juicing” oranges every day. The way I get around this is to concentrate on one tree each year. I prioritise the tree and pick all of its fruit first before picking from any other tree.

When pruning citrus you have to be brutal. Start in the inside of the tree and cut out any branches that are growing straight up. Then cut out any diseased and crossing branches. Then create a large gap at the centre of the tree that is open to the sky. Finish the whole thing off by using your hedge trimmers to just gently bring the tree back into a tidy rounded shape. The Spanish say that the end result should be a tree that a pigeon can fly straight through. The first photo below shows one of our trees with its congested overgrown centre that is stopping light and air getting to the centre of the tree. The second photo shows the treeafter its centre has been opened up.

🦔 Weeding and feeding Roses and bleeding to death. If you have Roses (and if not why not, they love the Spanish climate) now is the time to weed underneath them before they start into real growth and get too big. Using your trowel get right underneath each Rose clear all the dead leaves etc so that there is no homes for snails and slugs. Once you have cleared the debris then start to dig out the weeds, making sure you get all of them.

In Spain we have a particularly pernicious grass that loves getting right underneath Roses and has long roots that end in a clump of pearl like bulblets. It is important that you get every part of this grass out including the pearl bulblets which is difficult as they deliberately break away when tugged. When you eventually get the weed out, do not put this particular grass on your compost heap as it can withstand the heat of the compost heap and come back to haunt you next year. The photo below shows the weed with its deadly little bulblets.

Devil weeds

Once you have cleared under the Roses then now is the time to give them their first feed. Use a specialist Rose food (granulated is best as it is longer lasting) and distribute a small handful under each plant. Once you have completed this top up the soil under each plant with good compost. Now I have to confess that I used store bought compost this year as last year I used my own and this resulted in too many weeds. Commercial compost will be “cooked” at a much higher temperature which will kill all weed seeds. Under the Roses is the only place I use commercial compost as it is impossible to hoe underneath when they are in bloom. Everywhere, else I use my own compost and hoe like a murderous Jack Ketch – history and gardening; look it up. Complete the whole process by profusely watering each Rose.

The first photo below shows one of my climbing Roses receiving a well deserved meal, other Rose foods are available. The second photo shows the process of topping up with good compost.

🚑 Gardening health and safety. Now I am going to depart from gardening blog to cover health and safety issues. Weeding under Roses can be a very bloody job as Rose thorns will tenaciously rip at your arms despite the strongest gardening gloves. This will leave you covered in scratches and bleeding profusely. Now we gardeners are a hardy bunch so we normally carry on then give our wounds a perfunctory wash later. However, Sepsis (blood poisoning) can be a real problem for gardeners and there are many deaths every year. Nowadays I have strong medicinal alcohol that I apply to my many gardening wounds at the end of a day of doing bloody battle with Roses. I steal Cruella’s (my wife) make up removal pads (industrial strength) apply the alcohol and vigorously rub this into all cuts and scratches. The downside of this is that it stings like crazy. The upside is I have invented new dance moves.

The photos below show my bloodied and bruised arm together with my anti sepsis saviour.

🍔 Feeding the lawn. Unlike feeding the Roses, feeding the lawn is extremely pleasurable. Using a wheeled hopper feeder I just stroll up and down the lawn scattering my largesse to the grateful adoring grass. Now that the ground temperature has warmed up you will soon find that your grass will leap into growth. Feeding will ensure that each blade of grass gets a good start after the depredations of Winter. When feeding grass you must be careful not to overdose as you can “burn” the lawn and end up with unsightly black patches.

My lawn is in particular need of tender loving care as I have been wheeling large rocks etc across it as I built my water feature. The end result is that lots of the lawn has compacted and I will need to do some work in aerating when we get some rain (if ever). The photo below shows my trusty wheeled feeder and my unsightly compacted lawn.

The Feeder and the wheel barrow looking at each other in a gardening Mexican stand-off

🧙‍♀️ Cruella has a new high tech Cauldron. Cruella (my wife) has always prided herself in staying at the cutting edge of witchcraft. You can imagine my surprise when I returned home only to find that she has equipped our English home with in an indoor electric cauldron. This she assures me will be the envy of everyone else in her coven as she can now perform her spells no matter what the weather outside.

If you look carefully at the picture below you can see that she has already been experimenting with indoor spells. She has melted the clock, made the Hare bookends start boxing and seems to have created a round circle in our carpet.

She tells me it works from the Sun; but that looks suspiciously like a wire coming out the back.

I’ve built a water feature and it only took 5 months

I haven’t told you this so far because I have been working on it in secret. I started in October and I just finished this week. Yes, I know that is five months! but it’s not just digging you know, there has been lots of thinking time and restless nights worrying about making the wrong decision. Also, and probably most importantly I had to disguise my activity to Cruella (my wife) as I needed her involvement. Anyway it’s done; and if I can do it so can you. So here it is an idiots guide to building a water feature stream in your garden.

October 2018 to February 2019: Things I have been doing.

Building a water feature. There are 4 basic stages to building a water feature:

  1. Deciding position and type of water feature
  2. Design and laying out
  3. Gathering materials and building
  4. Planting out

There are lots of mini stages in between when you will change your mind, but that is fine that’s why you should take your time. Things that seem a good idea will turn out to be stupid, whilst things that you discounted will suddenly make perfect sense. Right here we go.

Deciding position. Ideally a water feature should be near where you sit or close to where you will hear the running water. I decided to break this rule straight away. Instead I chose an area of my lawn that was in full sun all day and just would not sustain grass. Last year I planted this area with bulbs and it was quite successful; but not really good enough. See the photo below. The type of water feature I decided on was a naturalistic stream, instead of a fountain or pond. Also, and quite Importantly, I needed the water to disappear when I didn’t want it, so that Mosquitos could not breed in it.

A dingy corner of the lawn made lovely last Summer

Design and laying out. Once you have decided on the type of waterfeature you want and where you want it, then you can begin to lay out the “footprint” on the ground. The best way to do this is to use your garden hose pipe laid on the ground and moved into the various shapes you might think you would like. You can then use this as a guide to mark out the ground. I was going for a stream effect so I moved the hosepipe around into various positions to see which worked best.

The next step is to mark out the design on the ground. I didn’t have any ground marking spray so I had to ask Cruella to borrow some of hers. The first photo below shows my first markings (but I did change this later). The second photo shows some of Cruella’s work (I never ask where she goes at night; but her dry cleaning bill is enormous).

Gathering materials and building. The building part consists of both getting materials and digging. You can go to a local garden centre and pay a fortune for rocks, or you can convince Cruella to go with you to the local fields and gather tons of local rocks and then carry them home in your car. I chose the latter and told Cruella I was building a Temple somewhat similar to Stonehenge but smaller. She believed me and is already planning sacrifices.

The first photo below shows how I began to use local rocks to follow the marked out design. The second photo shows how I needed to build up one end of the water feature to ensure the water would flow. You can use anything to gain hight. In my case I just used spare bricks and other things topped off by large tiles to give me an even platform. If you want to hear the water cascading down then you need to allow at least 2 inches of a drop. Click on each photo for a larger view.

The square shape inside the circle of rocks was where I was going to dig out the water sump. You will notice that I started with a smaller sump and then decided to mark out a larger one. The reason for this was I needed the sump not to run dry whilst the water was being pumped along and around the stream bed.

Once the basic outline was in place I began to dig out a trench for the return water feed. The basic idea is that there is a pump at the bottom of the water sump. This then pumps the water up the return pipe to the top of the stream, it then flows down into the sump only to be pumped back up again in a continuous stream. The photo below shows you how things were shaping up but I kept being flexible with the design.

This looks like the gardening equivalent of the Marie Celeste

In the first photo below we can see start of the sump being dug out with the return water feed in place and note the electrical conduit on the left this was to supply the power for the pump and a light to illuminate the water feature. You can also see the start of the membrane to cover the soil ready for a covering of stones. The next photo shows the ground covering stones in place and you will note that I have bought some bricks to provide the walls for retaining the water. You will also see that the water sump is getting deeper it took me about two weeks to dig the sump as the ground was like iron. Each day I would dig about two inches then fill the hole with water to soften the soil for the next days digging. I did try and convince Cruella that I was digging for treasure in the hope that she would join in, but she is not that stupid!

Once I was happy with the basic shape I began to prepare the stream bed. This involved making sure that I had an actual flow from top to bottom and I would not end up with a big puddle in the middle. I then laid a bed of fine sand all the way down the stream. This was then covered with an underlay that is specially woven to stop stones penetrating and puncturing the membrane. I was lucky at this stage as Cruella keeps a large role of “shroud” that she uses for her various activities she assured me it would be ok as she commented that “blood never leaks out so it should be fine”. The photo below shows everything duly shrouded (Cruella is entering this for a photo competition, she has entitled it “shroud for a giant”).

Sometimes I would go out late at night to look at the water feature only to find Cruella lying in the big shroud – she says it was comforting.

The next stage was to fit the membrane. This could not be done all in one go, so I fitted the sump out and then ran a continuous membrane all the way down the stream bed. I then overlapped these by about 10 inches and sealed the joint with glue made specially for this purpose. Note the gravel in the stream bed; this was one of my many mistakes as it was too small and would be washed down by the water. My friend David who very kindly did the electrics for me pointed this error out to me. This was on the same day that we discovered that the hose pipe I had lovingly dug into the ground for the return feed was too small and had to be completely replaced with a much larger diameter hose. The photo below shows the membrane in place.

The water feature during its bondage stage.

Planting out. For the planting out stage I needed plants that could withstand full sun nearly all day. I had already allowed for this and months ago had take numerous interesting succulent cuttings ready to plant out. The various photos below show the finished water feature. On the right hand side are the succulents which are barely visible but will soon become mature. The plants on the left hand side and around the water feature are still ok for full sun. Note the classy touch of the Copper Heron (bourgeois eh). Click on each photo for a larger view.

Blythe Spirit is dead, but at least I’ve got Gertrude!

Yes, I know it’s been a while between posts, but I have other things in my life; sort of. Actually I just said that to look interesting. But my wife Cruella says it’s pathetic and that everyone knows all I have is gardening. She can talk, all she does is Church administration stuff and torture small furry animals. Anyway, enough of our life of domestic bliss, let’s get on with the show.

Now I know I should be telling you all about Spring planting and getting the garden up and running, but I will have to postpone that for a couple of weeks because I am going skiing. Yup, that’s what I said skiing, we are off to Austria; who said I wasn’t interesting. Cruella and I have been convinced by our son James (of course he is called James) that a skiing adventure is just the thing for us old people. Mind you He does keep asking about our life insurance policies. So the outcome is Spring stuff will be in a couple of weeks.

14th March: Things I have been doing lately.

🌹Planting a new Rose. I hate to lose any plant, but somehow I lost one of my favourite Roses. Blythe Spirit is/was a lovely yellow flowering old English Rose from David Austin. I had 5 of them planted in my Rose beds, but one just up and died on me, and I don’t know why. I was spraying some weeds close to it a while ago, but I am always very careful. Basically what has happened is that it just did not come out the other side of Winter pruning and did not put on new leaves in the Spring.

The first photo below shows Blythe Spirit in its denuded state. It was still showing some green under the bark so I have decided to remove it from the Rose bed and put it in a pot to see what happens. The second photo shows poor Blythe Spirit in its intensive care pot. I am hoping it just has the plant equivalent of “locked in syndrome” and that I will come out one day and it will have sprouted new leaves.

There is no room for sentimentality in gardening, I tell all my plants life has to go on and we must be brave. Anyway, I have always fancied Gertrude Jekyll but I could never find a place for her in my life. I of course mean Gertrude Jekyll the lovely Pink award winning Rose. Well we are together now, we are a love match and we intend to spend the rest of our lives together. She will never quite replace Blythe Spirit but time is a great healer. The first photo below shows me and Gertrude getting to know each other, whilst the second shows her in bed (no pun intended).

I will keep you informed of Gertrude’s progress, and of course I will let you know if Blythe Spirit makes a come back.

🖼 Removing thatch from the lawn. Grass will start growing very soon, so it is important that you begin your lawn remedial work now. The first thing to do is rake out all the dead grass thatch that has accumulated over Winter. Now there is no really easy way to do this. You can try an electric scarifier that will claw and rake up most of the thatch. I did have one of these in England when I had really large lawns, but I can’t quite justify here. So it’s the hard way, using a lawn rake. To do this properly you have to rake first one way then the other. Don’t rake too hard or you could damage the grass, but hard enough to remove most of the dead thatch. Failure to do this will result in dead areas of grass and yellowing patches. The subsequent raked thatch can be used either to line hanging baskets, or, it can go straight on to the compost heap.

The photo below shows  me in my invisible costume about to pick up a Trug full of grass thatch.

536987EA-9B7A-44EE-85A7-C7BDF3120C88
Spot the gardener

🌴 Treating Palm trees for Palm Weevil. Living in Spain we suffer from the depravations of the terrible Palm Weevil. This terrible creature was brought to Spain  in a batch of Palm trees from Egypt, and has been gaily munching its way through Spanish Palms ever since. It only really affects the Phoenix Palm, but it has been responsible for destroying thousands of Spanish Palms. So much so that historic cities like Elche with its ancient Palm groves is terrified of the Weevil getting through their defences.

The only real treatment is to spray the tops of the Palms with a special chemical that kills the Weevils as they try to munch through the Palm branches. However, if your Palm trees are very high – and most of mine are over 40 feet – then you either need to bring in professionals or come up with another idea. Being a skinflint I opted for another idea. I drilled half way into each of my Palm tree at an angle of about 25 degrees and then fed in section of tubing which I had previously drilled with holes. This forms a reservoir into which I pour the Weevil killing chemical and then let the rising tree sap take this up and feed it into the branches, which means when the Weevils start to try and feed they get a proboscis full of chemicals and die. Clever eh? The photo below shows how the reservoir works.

2DCB628F-2A03-47E1-BC58-B2E5320C8C08
As they used to say when I was a child and went for shoe fittings with my Mother…”stylish but practical”

For all of this clever stuff to work I have to make sure that the tubing is clear at the start of each Spring (this is when the Weevils start to fly), and also that the drilled hole has not scabbed over thereby stopping the uptake of the chemical. To do this I remove each tube, clear the blocked up holes with a nail, and then scrape a metal bar into the tree to create a fresh wound to ensure the take-up of the chemical. The photo below shows the tubing removed and the nail pushed through one of the drilled holes. The green rod is the metal bar that I use to create the fresh wound. There you are that’s what you need to do; but hurry up the Weevils are coming.

2582D8DC-322E-4A99-A746-41B695673CFF
This looks like something used by Tomas Torquemada – look it up

🚀 Watching the Solanum grow like Topsy. I know The “Uncle Tom’s Cabin” literally allusion will not be lost on you my erudite readers. But you will remember that Solanum cutting that Cruella and my friend Karl tried to kill. Well look at the photo below it is growing like crazy. I have now placed horizontal wires to send its growth along the outside kitchen. Pretty cool eh? It’s a great addition. The bad news is that Karl is coming to house sit whilst we are away. I have set up cameras!

8FFE856D-8CEF-4FAA-8785-F08811D33078
Look at that baby go!