It’s time for seedlings and bulbs and I deal with a housing crisis

There is never a quiet time in gardening, there are just less busy times – and this is one. Summer is over, everything has gone into a slow growth stage or completely dormant and it is not yet time for the big winter cutback.

However, and it is a big however, there are still things you need to be getting on with. I have so much on, but right in the middle of everything just when I was planning my seedlings and bulb strategy I was approached by a hysterical Cruella (my wife) telling me we have a housing crisis involving the little white dove.

But, more of that later let’s get on with the gardening…crisis what crisis!

26th November 2025. Things I have been doing lately:

  • Preparing my flower beds for next year
  • Potting up seedlings
  • Preparing the soil
  • Planting bulbs
  • Dealing with a housing crisis

Preparing my flower beds for next year. It is time to show your flower beds a little loving care. The soil has worked hard all year, produced lovely flowers, fought off weeds and chickens, and now it is exhausted. If you don’t replenish and reward it now then it will not be so abundant next year.

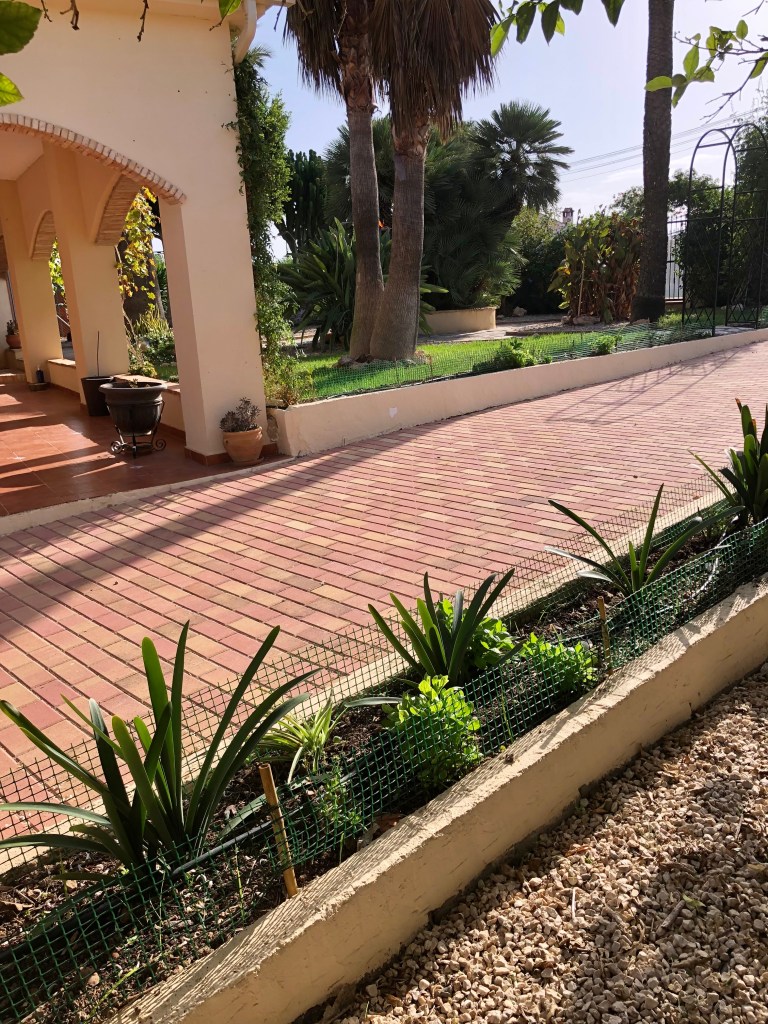
The first thing you need to do is thoroughly weed your beds. You can use a hoe for the first stage, but really you need to get down and hand weed for the final stage. The benefits of hand weeding is that it stops you hoeing out emerging bulbs. By hand weeding you can tell that rounded stems mean bulbs whilst blades mean grass, everything else should be self evident.

The photos below show my hoeing and hand weeding strategy in progress, it doesn’t take too long and it’s very therapeutic.

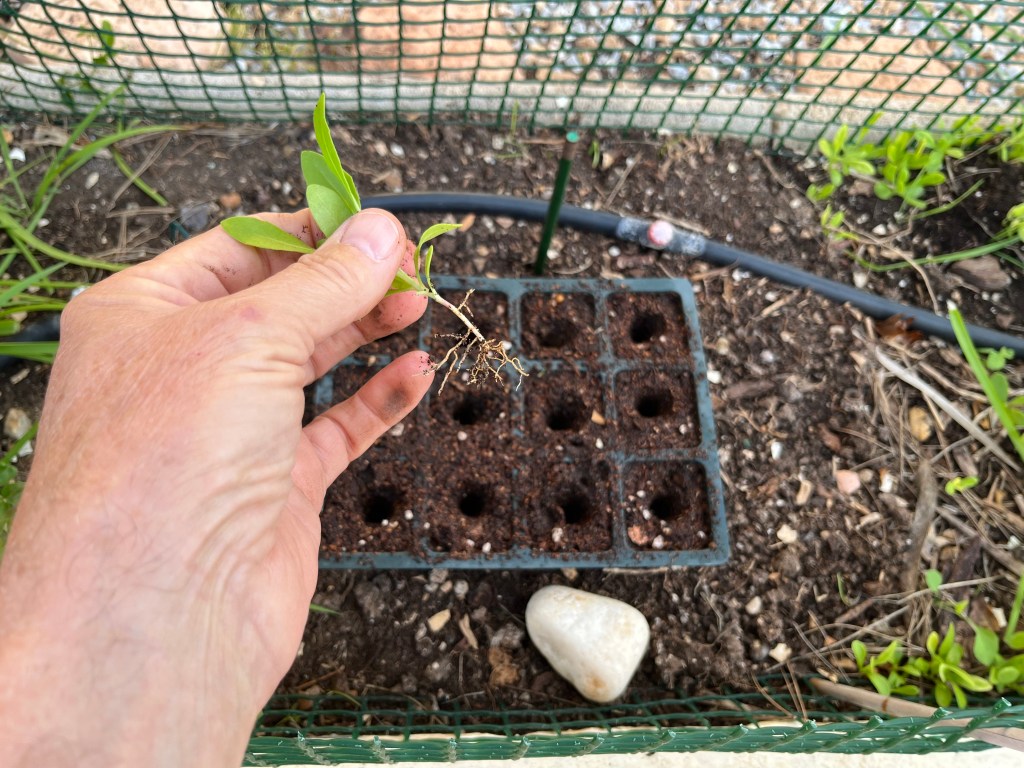
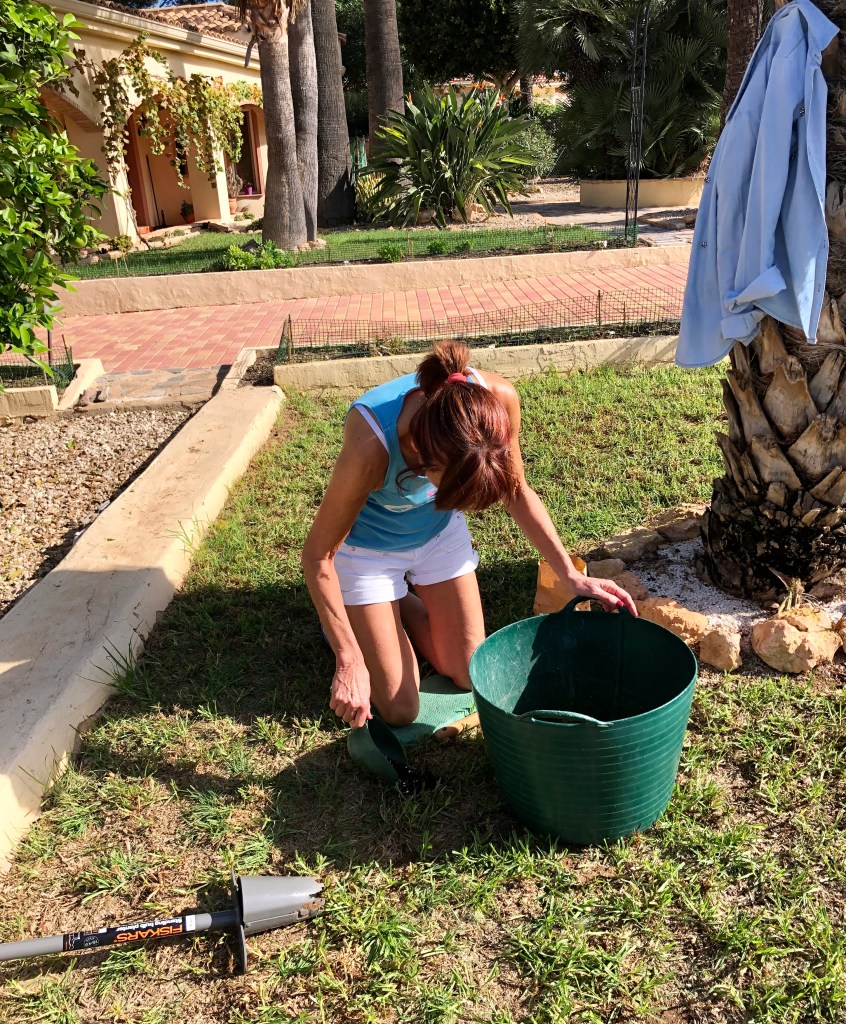
Potting up seedlings. An important part of hand weeding is to keep your eye out for self seeded seedlings. Osteospermums (type of daisy) are an important part of my summer garden , they flower more or less all year and self seed like crazy. What I tend to do is leave some mature plants for a bit of winter cover, but the seedlings I pot up to provide me with fresh plants for the spring. Once I have all I need then I ruthlessly hoe out the rest.

The photos below show the abundance of seedlings and the process of potting them up for next year.
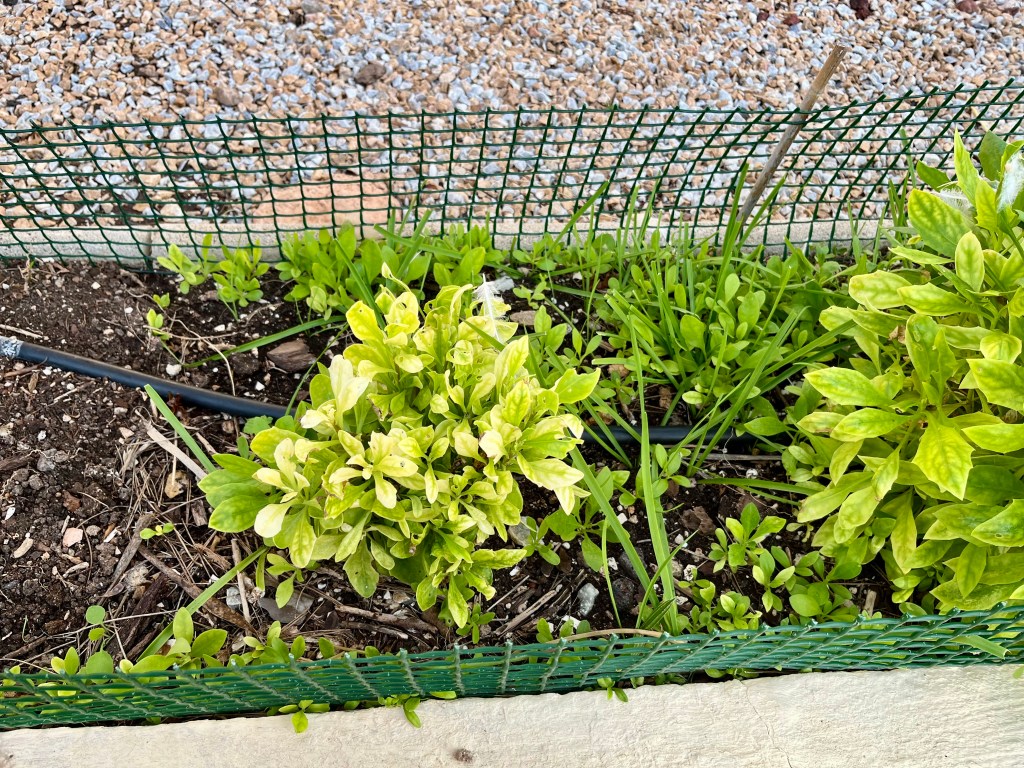
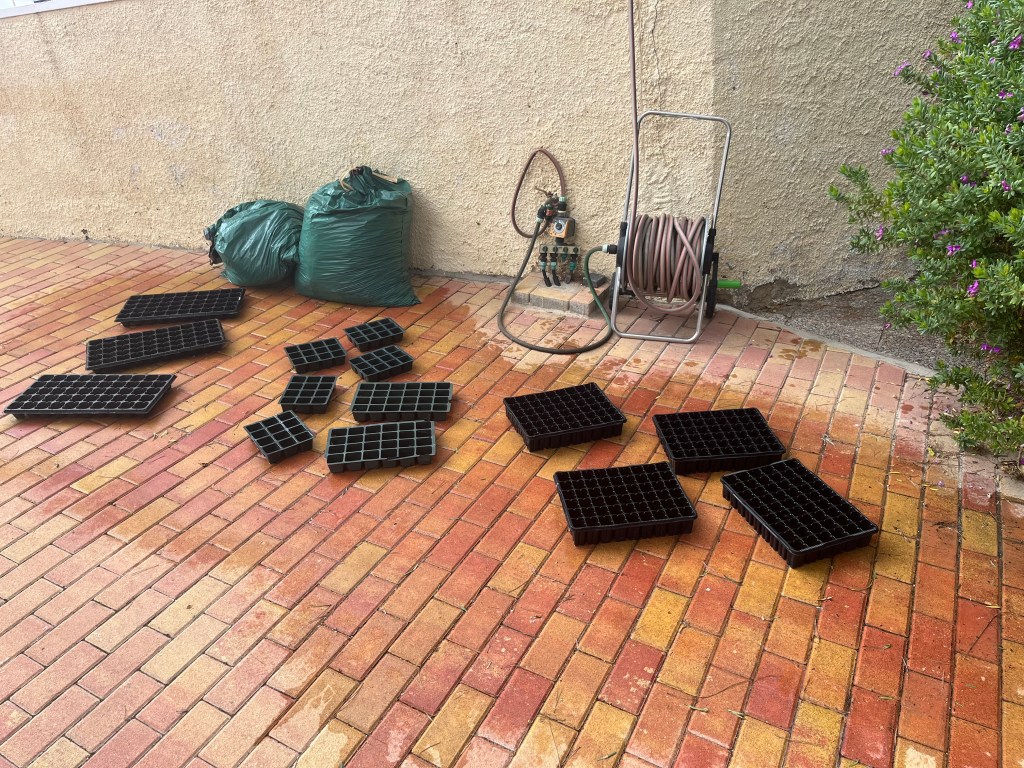
Hundreds of free plants

Preparing the soil. Once the beds are weeded and I have recovered all the seedlings I require, then it is time to replenish the soil with a good top dressing of compost. Now, you can buy compost from a Garden Centre. But is cheaper, more efficacious and rewarding to have a compost bin. I won’t go on about it, but see my recent post on composting.

With two compost bins I can ensure that I always have one ready for winter top dressing and the other for summer mulching. I simply empty the relevant bin and sift the compost to get rid of stones and other rubbish. I then top dress all of my flower beds with about 2 inches of fresh compost. This is full of nutrients and will replenish the soil for next year.

The photos below show the bin being emptied of its black gold and then sifted in my own design riddler (patent applied for) over the wheel barrow. Each compost bin gives me about 20 wheel barrows of compost. Assuming that each wheel barrow holds about 80kg that’s a lot of compost, but never enough.

Planting bulbs. The other important task at this time of year is to plant bulbs. Over the year I have planted many bulbs and I love to see them come back year after year. Even if you have a holiday home in Spain and are an itinerant visitor bulbs are an ideal addition to your garden.

With very little work you can have lovely flowers year after year. This year I am giving daffodils another go as they have let me down in the past. In addition I am planting a few big Aliums to give me some hight at the back of a bed of osteospermum and daffodils.

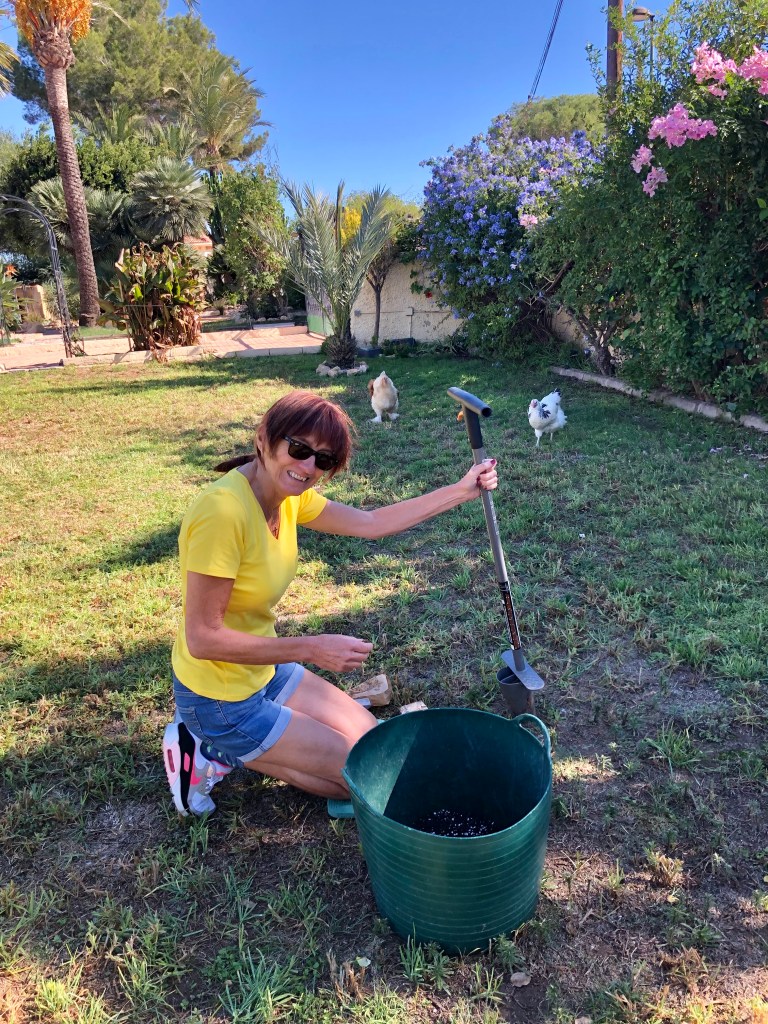
The key to success with bulbs is two things. Firstly, plant them at the correct depth. One depth does not suit all, just follow the instructions. Secondly, and I know it sounds simple, but plant them pointy side up. Bulbs planted with their root side up will either fail or not thrive.

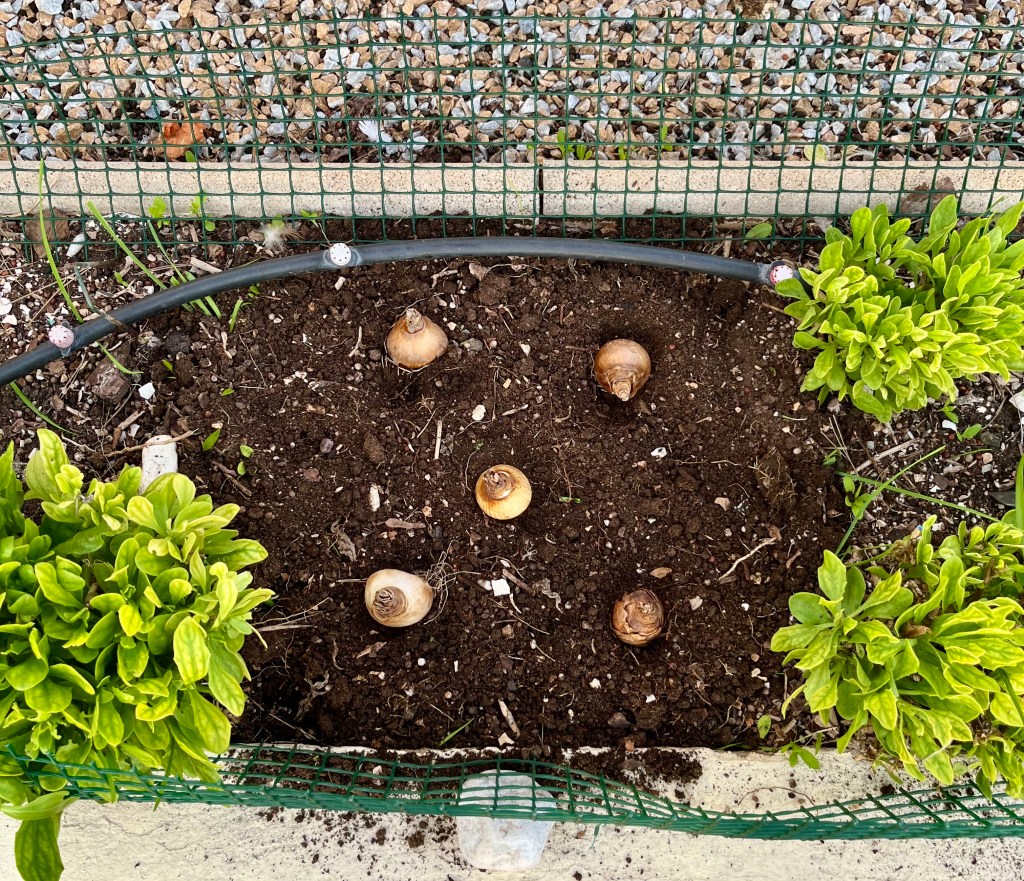
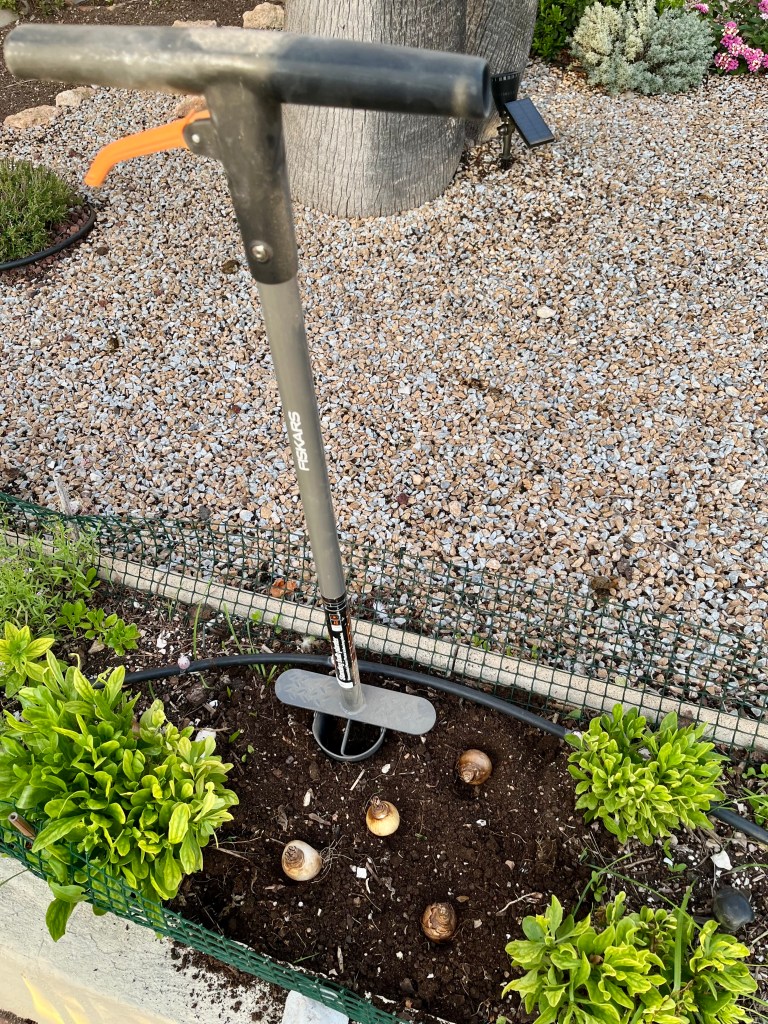
The first photo below shows my bulbs ready to be planted. A useful tip is to lay your bulbs out where you are going to plant so that you can imagine how they will display. I use a planting tool that makes it easier to get your bulbs to the correct depth. Finally, after I have planted bulbs I place a white stone adjacent to the planting area as this alerts me to new shoots and stops me hoeing them off as weeds.
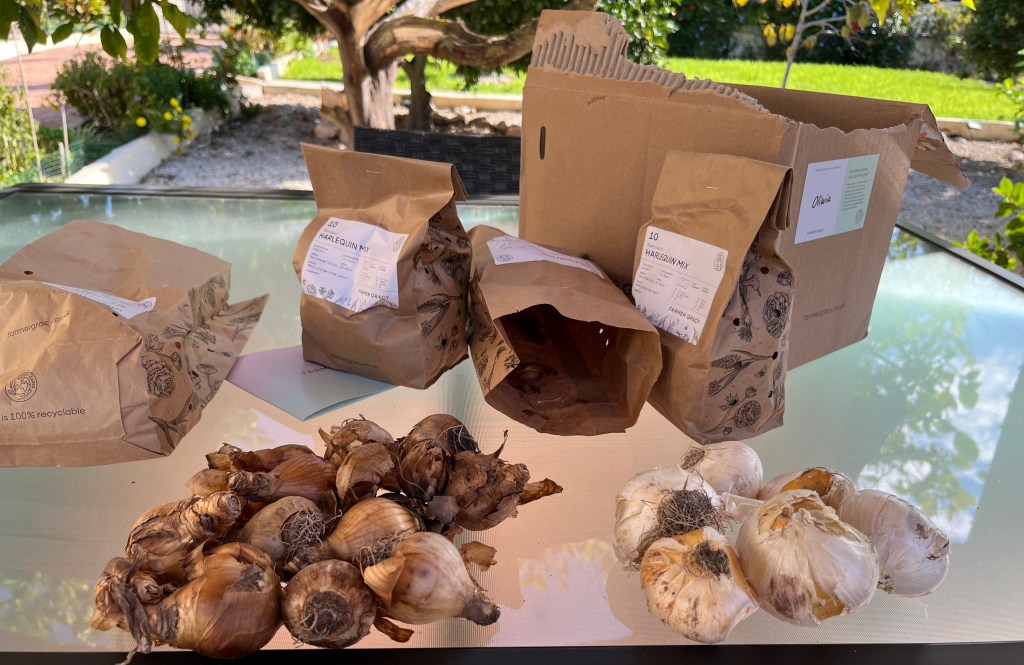
Get online and order your bulbs

Dealing with a housing crisis. Those of you who follow this blog will know that a little white dove arrived at our house about a year ago and ever since then has been treated by Cruella (my wife) as an honorary chicken. She eats chicken food, she roams around with the chickens and takes part in Cruella’s general chicken meetings. She is even being taught Chickenese by Cruella and Helga the cleverest chicken.

Everything was fine until it started getting cold. The problem is that the little white dove cannot go into the chicken coop and instead spends her nights perched on one of our security cameras. Cruella’s first solution was to knit her a little cardigan, but when she wore it she couldn’t fly and kept tripping over. She next suggested a heater fitted over the top of the security camera to keep her cosy. I pointed out this could end up with flambé dove. The photo below shows the problem.
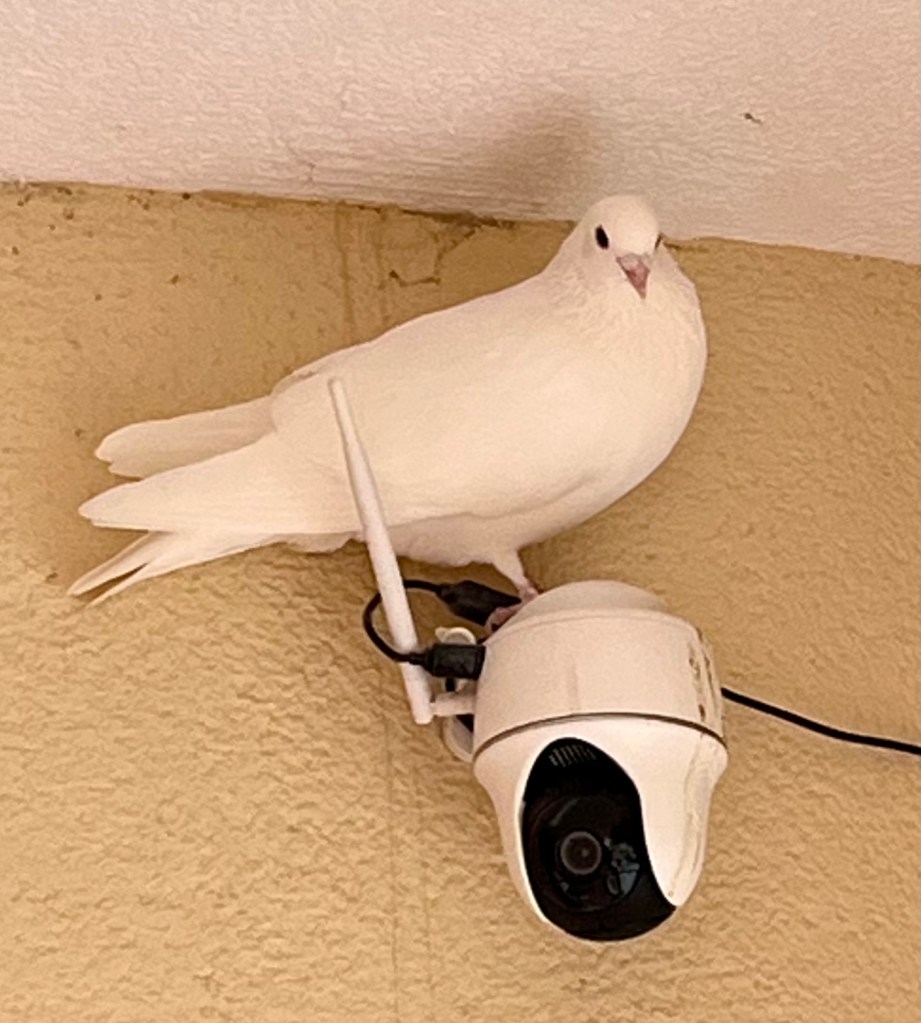
I wondered why all the intruders we caught on camera had a Pooh mark on their face.

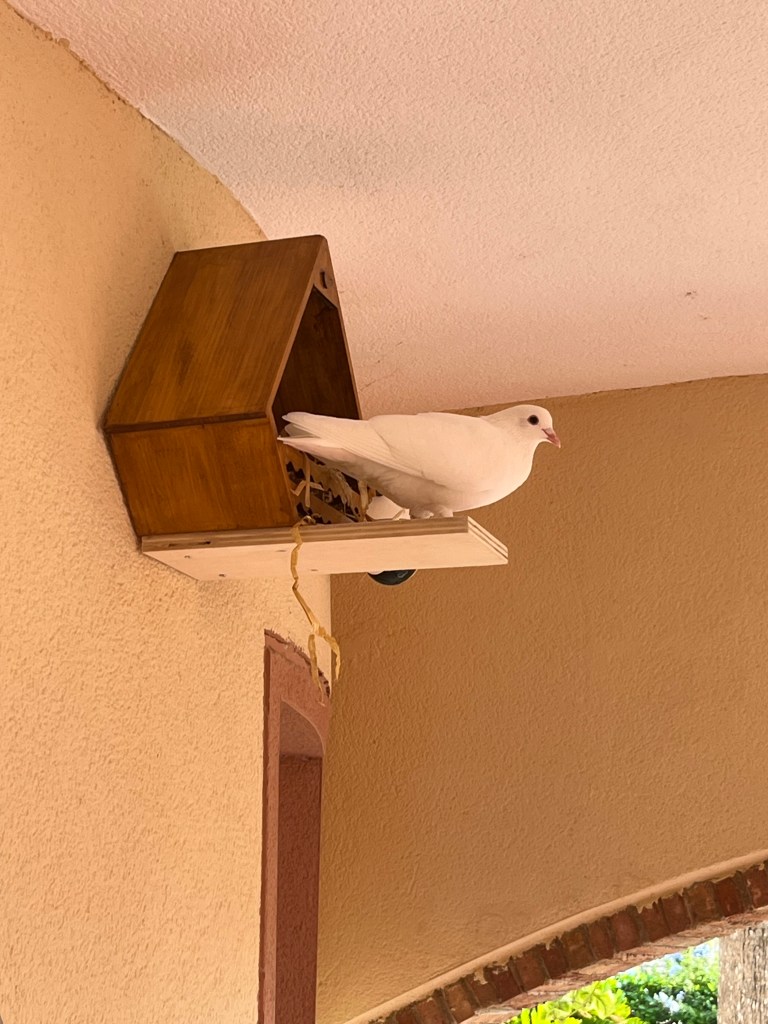
Eventually Cruella insisted that the little white dove should have a little house. I was forced to buy and fit a suitable dove cote for one. Cruella was so excited that she insisted on a grand opening with speeches and a buffet and she cut a little cord and pronounced the dove cote “open”. The photos below show the big day.

Unfortunately the little white dove refused to go into the dove cote and still spent her nights on the security cameras. Cruella blamed me accusing me of providing inadequate housing and threatening to denounce me to the local housing authority. In the end I had to fit a shelf like runway for her to land on (the dove not Cruella). The photos below show her gradual acceptance of her new home, it took two weeks.
The big composting special

Hooray it’s that time of year again when I regale you with advice on the merits of composting. For weeks I have been excited about this but unfortunately I mentioned my excitement to Cruella (my wife). Since then she has mercilessly mocked me saying that compost is smelly and that I am an idiot for getting excited about dirt. To make matters worse her chickens have taken to following me around pretending to hold their beaks and shouting smelly in chickenese (at least I think that’s what they are shouting.

But I’ve got my own back. Remember that Coca Cola advert that appears on the television every Christmas, where a large truck with a picture of Santa Claus on the side goes through towns accompanied by the sound track singing “holidays are coming…holidays are coming”. Well that has been me for the past few weeks I have been singing “compost special is coming…compost special is coming”. To say this has annoyed Cruella (my wife) would be an understatement, so much so that I now mumble it under my breath, and when she says what did you just say, I reply “nothing”. I know it’s not much, but I count that as a small victory.

Anyway, on with the show let’s keep the excitement bubbling.

1st November 2025. Things I have been doing lately:

  • Why compost
  • How to compost
  • What to compost
  • What not to compost
  • The key ingredients of compost
  • what should compost look like

Why compost. All garden soil gets depleted over time and lose micro nutrients either they just get washed away by the rain or the plants take them up and the soil needs replenishing. Composting can help improve soil by adding back these nutrients and encouraging helpful bacteria that will break down and improve your soil. When added to your garden compost will help suppress weeds, lessen the need for chemical fertilisers, retain moisture and give you a warm feeling that you are doing a “green thing”. So no matter what your motivation, by composting you will be improving your garden and it will make you a better person.

How to compost. You don’t have to make a big deal out of composting and any one can do it. Whether you have a large garden or just a little patio garden with pots, adding compost will improve your garden. The basic need is to have a compost bin, or compost heap where you can store your compost. This can be very basic such as a little patch of your garden where you tip excess produce and cuttings etc. You could just have a heap in the corner covered by an old carpet, or if you like make a basic container out of chicken wire.  It might be easier just to buy a compost bin from a store and there are thousands of them, from basic one simple bin, right up to multi-bin purpose built composting systems.

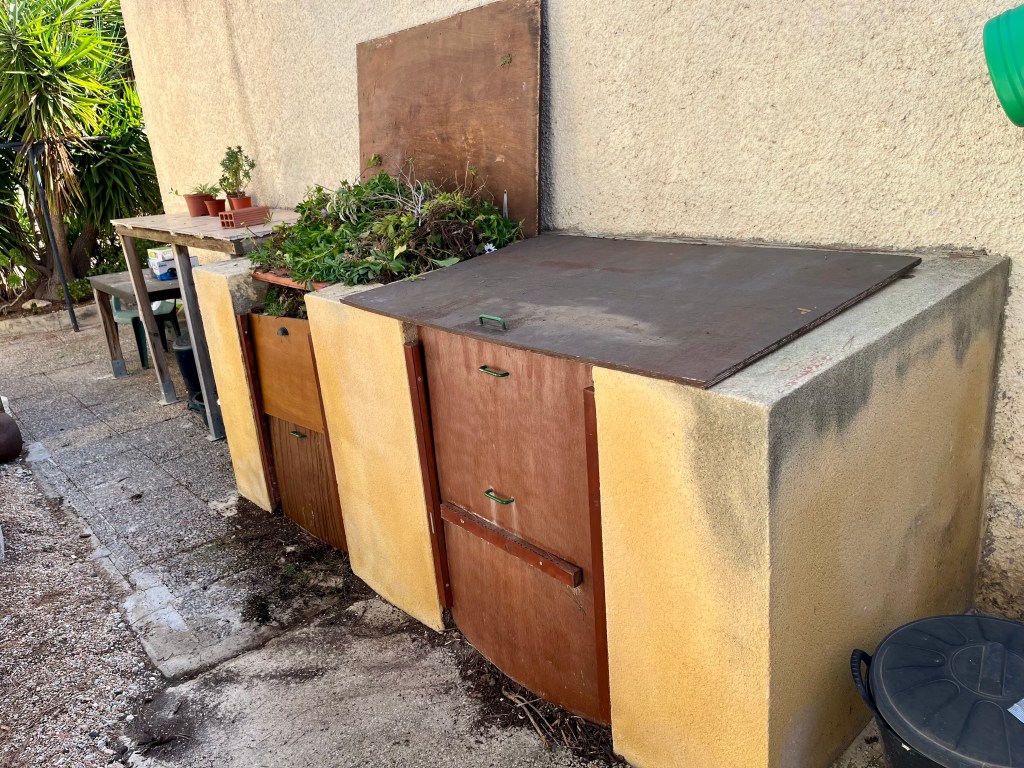
As you would expect, I have a purpose built composting system consisting of two large bins with lid for easy access and doors that can be raised to allow me to get at the compost from the bottom. The photo below shows my composting system.

Now, I don’t want you getting compost bin envy, that’s not the idea. I designed these and had them built when we first moved to this house because this size garden calls for this amount of compost. There are fruit trees to be mulched, lots of beds that need seasonal replenishing, lawns that need some topping and all the planting and stuff on the potting bench.

What to compost. Now you can compost most organic material. Examples would be:

  • all plant cuttings and mown grass
  • vegetable trimmings etc from your kitchen
  • old newspapers and cardboard
  • hair and fur from your dog, cat, hamster; even chicken feathers
  • twigs and branches up to about an inch thick
  • eggshells, coffee grounds and filters, tea bags
  • fruit, but not too many lemons or oranges as they will make the heap acidic

What not to compost. You must be careful not to compost the following:

  • cooked food of any sort (this will encourage rats and cockroaches). This includes: meat, bones, fish, fat or dairy
  • leaves or cuttings from plants that have been infected with disease or pathogens such as rust on Roses or mildew. If you compost these then you will infect the heap.
  • dog or cat poo; and don’t even think of human poo.

The key ingredients of compost. Quite simply good composting requires four things:

1. Green items: that add nitrogen (grass, leaves etc)

2. Brown items: that add carbon (twigs, branches, newspapers etc)

3. Water: to keep the heap moist but not wet (don’t let it dry out, but don’t over soak it)

4. Air: oxygen is needed to encourage the composting process, so once a month you need to stir your compost with a fork or spade to keep the air circulating.

There is one other vital ingredient that you can choose to add to your compost heap, and that is “compost accelerator”. This is normally added as a powder which encourages the development of microbes in your compost heap and speeds up the composting process.

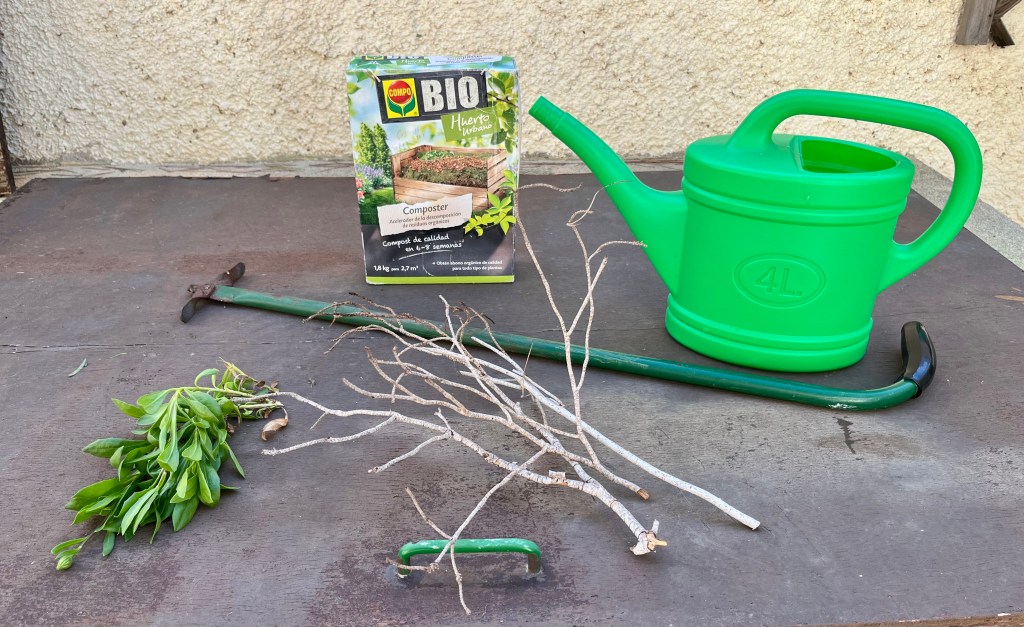
The photo below shows all the key ingredients apart from air; but I assure you it is there. In the photo you will also see a special compost turning tool that I bought some 20 years ago. You just push this into your compost heap then the two little wings at the bottom of the rod come out as you pull up and the whole heap is lifted and turned. If you can find one, buy it.

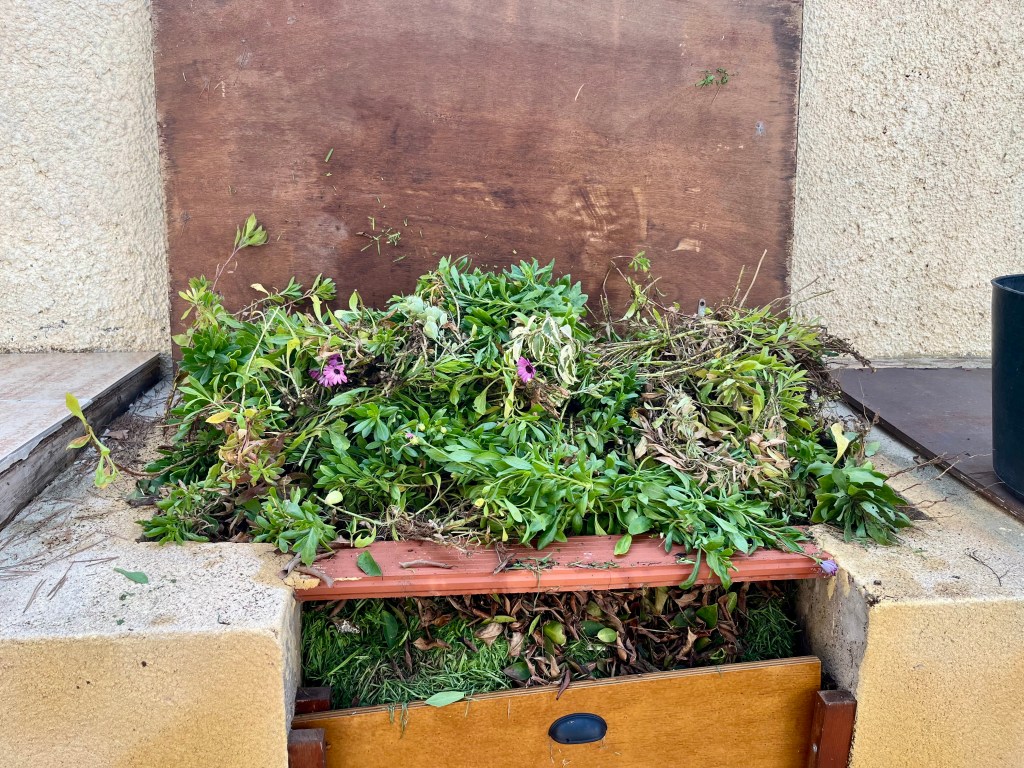
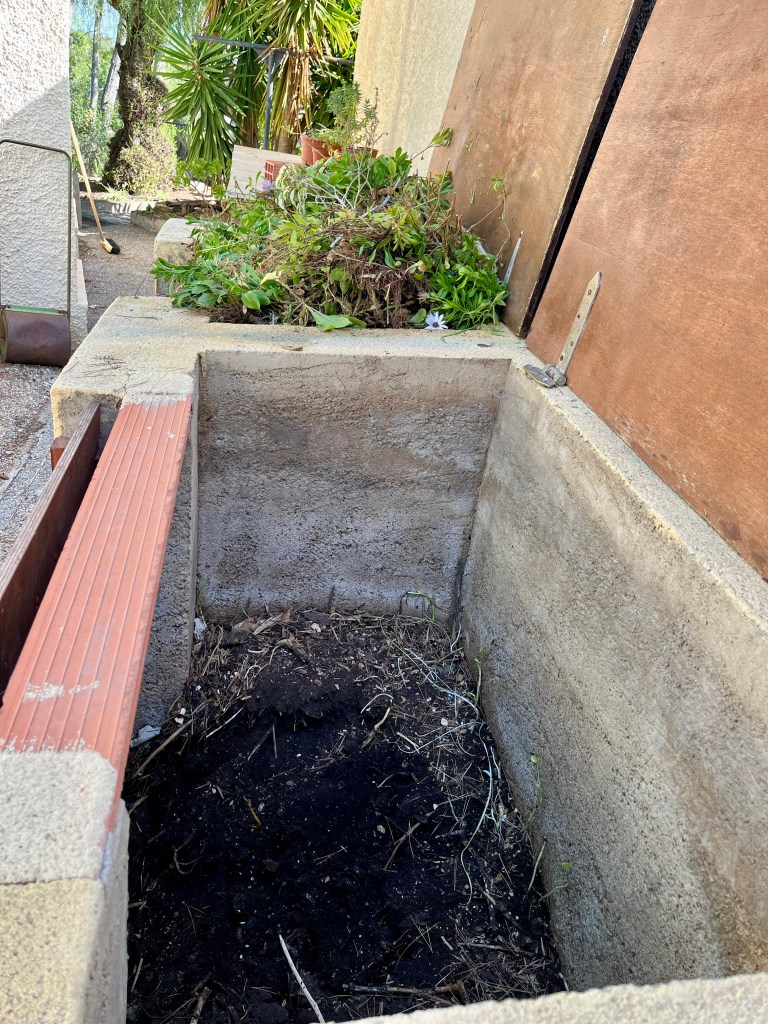
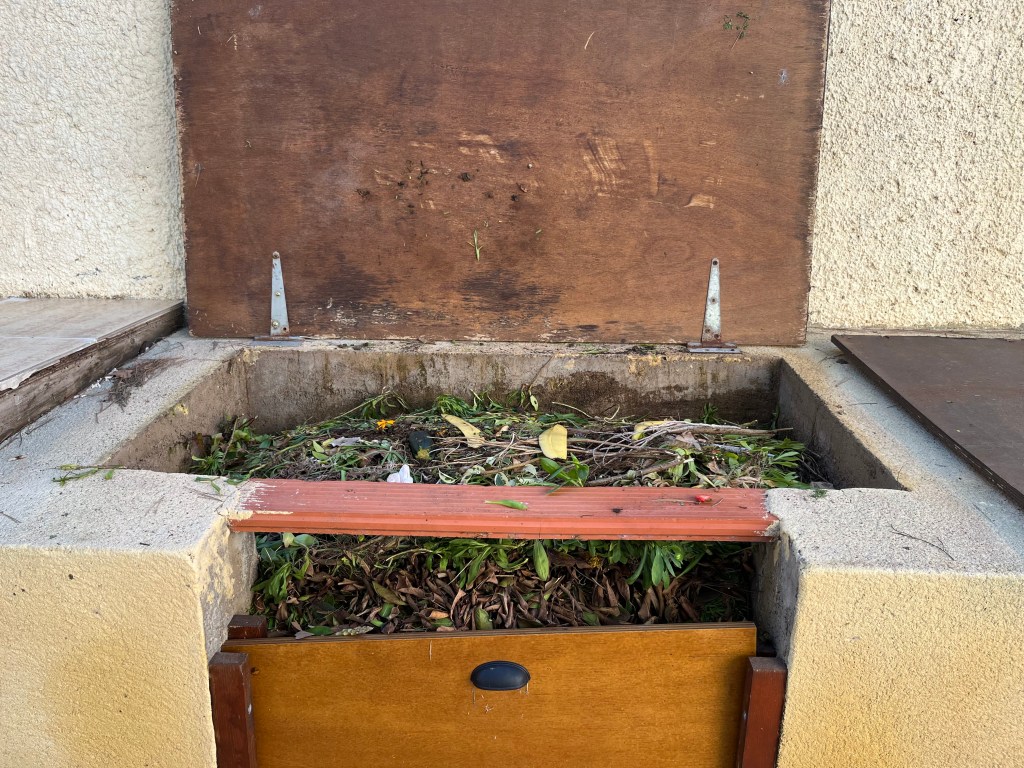
What should  compost look like? A question I am always asked (I lead an interesting life). The photos below show the current state of my compost bins. The first photo is the bin currently in use, and you can see all the ingredients I talked about above. The second photo shows the resting bin this has been in use for a few weeks that and has already had lots of compost removed. You can see from this photo that the bin is half empty, and this is because all the insects and beneficial microbes will have eaten stuff whilst making the compost. The final photo shows the finished compost; or as I call it black gold. Each of these bins will on average give me 20 wheel barrow loads of compost each year.

Gettting in the compost bin. One of the great joys at the end of a hard days gardening of trimming and cutting is to get in the compost bin and tread it all down. What do you mean you’ve never done this, just me then. One of the drawbacks of getting in the bin and stomping your compost down is that quite often you have cockroaches run up your legs which can be disquieting. To overcome this I have cut a board exactly the size of my bin which I fit into the top and then jump up and down on (patent applied for).

The photos below show my bin with the board in place, followed by a view of a reduced bin. Finally, I had to take a selfie of me in the bin as Cruella (my wife) refused to,come near because of cockroaches. Just after she took this photo, Cruella slammed the lid down and I was in there for two days. I must say they were the happiest two days of my life. She only got me out because the dishwasher needed emptying.

Don’t cutback yet! Just tidy up and get ready. Cruella meanwhile has left me for the farmers

Now that we are into autumn and most flowering plants have died back and everything else is looking scraggly and scruffy, don’t be tempted to start cutting back. The recent much needed rain and the very warm autumn have meant that everything is having one last little burst of life.

If you cutback now you will stop all of God’s goodness being drawn back into the roots, bulbs, corms and rhizomes of your various plants. Your plants strength and growth next summer all depends on it drawing every last bit of goodness from its sap and leaves etc down into itself. Cut now and your plants will not fulfill their full, potential next year.

Instead of cutting back spend your time wandering round your garden tidying everything up and planning for next year. I have been happily pottering round the garden as Cruella (my wife) has flown off to support the British Farmers (Chicken Section) more of this later. But here is some of the stuff I have been doing.

25th November 2024. Things I have been doing lately:

  • Continue to clear up leaves
  • Remove suckers from your citrus trees
  • Trim standards
  • Tie back Canna and any other floppy plants
  • Get ready to cut yucca
  • Finish your lawn tasks
  • Cruella has left me for the farmers

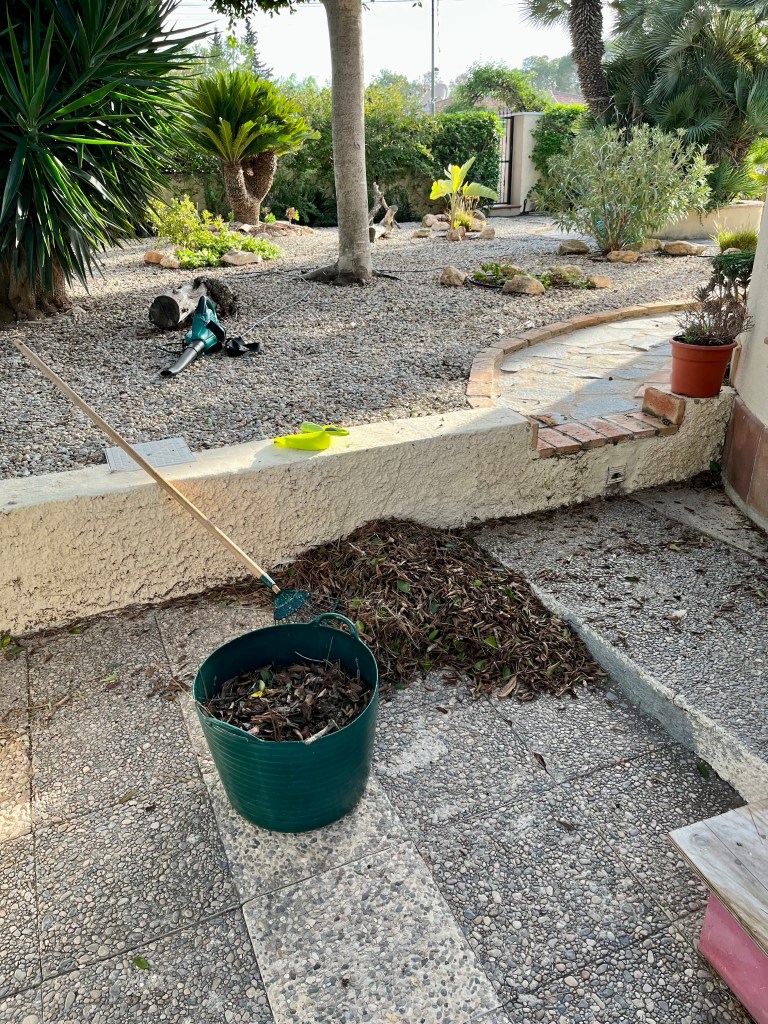
Continue to clear up leaves. I know it sounds obvious and I keep telling you to do it, but it is important. If you leave leaves and let them settle in the gravelled areas of your garden, then they break down and present a perfect mulch for pernicious weeds. Don’t say I didn’t warn you! The photos below show my regular clean up efforts. Click on each photo for a larger view.

Remove suckers from your citrus trees. Nearly all of you have citrus trees, and people constantly ask me how to improve their crop. The best ways are correct pruning – but I will discuss that in the Spring, the next best way is to feed regularly during the blossom season, and last but not least remove all suckers on a regular basis. Suckers are those little bright green stems you find poking out of the trunk of your citrus trees, especially at this time of year. Suckers will divert your trees growth potential away from the main trunk and thereby weaken your tree.

You need to remove these by simply pulling straight down on the sucker stem as close to the trunk of your tree as possible. They will come away easily, but if you are not careful others will pop up, so you need to look at your trees weekly. The photos below show you examples of suckers on my trees and how to get rid of them. Click on each photo for a larger view.

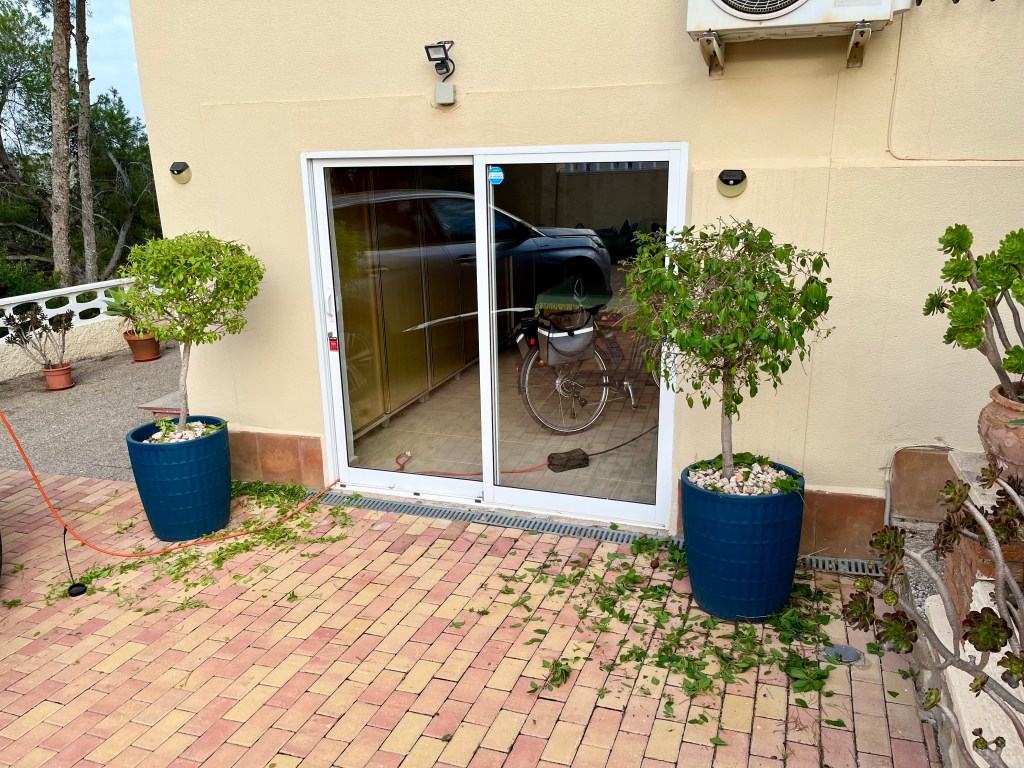
Trim standards. If you have standards, then now is the time to give them the last trim of the year. The overall aim is to leave them in their basic shape so that they suddenly don’t get away from you next Spring. The photos below show my standards before and after their last trim. Click on each photo for a larger view.

Just a light trim nothing drastic.

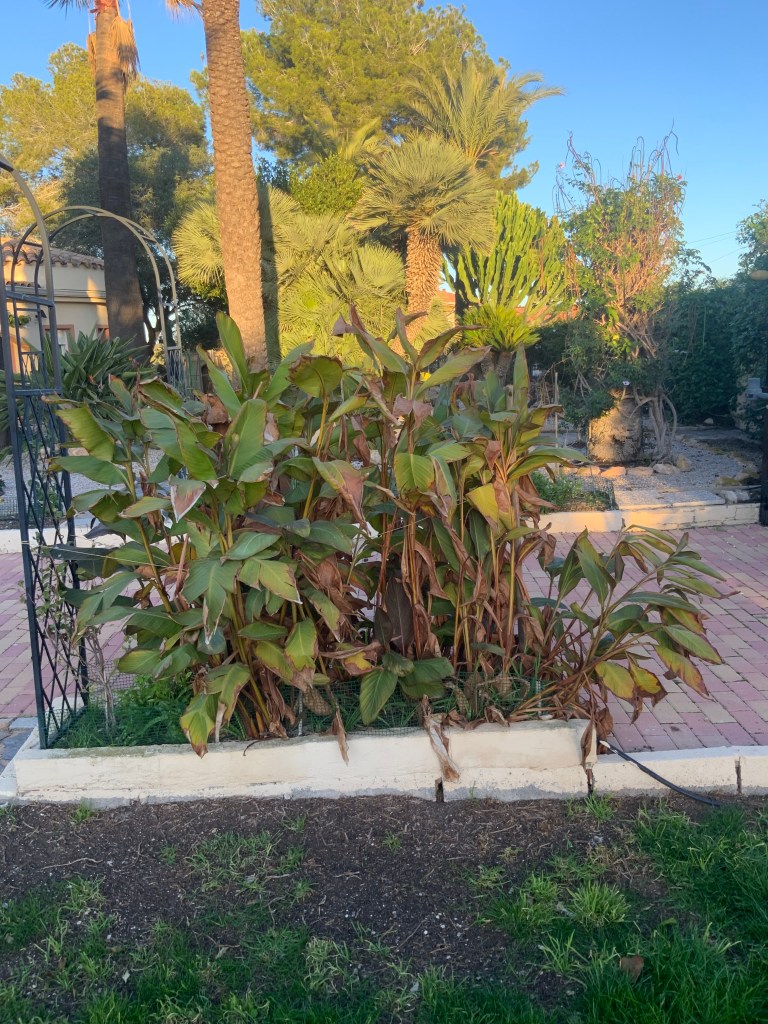
Tie back Canna and any other floppy plants. It hasn’t been a good year for Cannas. The lack of early rain meant that their rhizomes (ugly bulbs) did not swell or develop new growth nodes. Most of my Cannas have been quite weedy and stunted. Just because your Cannas look all floppy and unsightly, don’t cut them back.

Instead you need to roughly tie them up and keep them in place until they have fully withered and gone completely brown. This will allow the last bits of goodness to be extracted down into the rhizomes ready for a better effort next year. The photos below show my Cannas tied up and ready for the chop, probably in January. Notice the lurking chickens, they have been tasked with spying on me. Click on each photo for a larger view.

They will get messy and embarrassing, but hang on in there no cutting till January.

Get ready to cut yucca. Everyone in Spain has Yucca, and sometimes they let them get so out of hand that they begin to resemble a large tree. Yucca are a good addition to any Spanish garden as they give shape, structure and sometimes drama. But if you want to get the best out of your yucca then you need to keep it appropriately proportioned to your garden, and a size where the flower spikes are not 20ft in the air where nobody can see them.

Don’t cut your Yucca yet, just think about it. What I mean by this is, it is a good idea to wander round envisioning what you want your yucca to look like. If you just cut before planning you will undoubtedly live to regret it. Yucca can sometimes be quite slow growing so you will have to live with your mistake for about a year.

I will be cutting my Yucca over the Christmas holiday when I can press gang my idiot son to help me. But as a preview the photos below show the yuccas I am currently thinking about. Click on each photo for a larger view.

These will be cut back at various levels to give added interest.

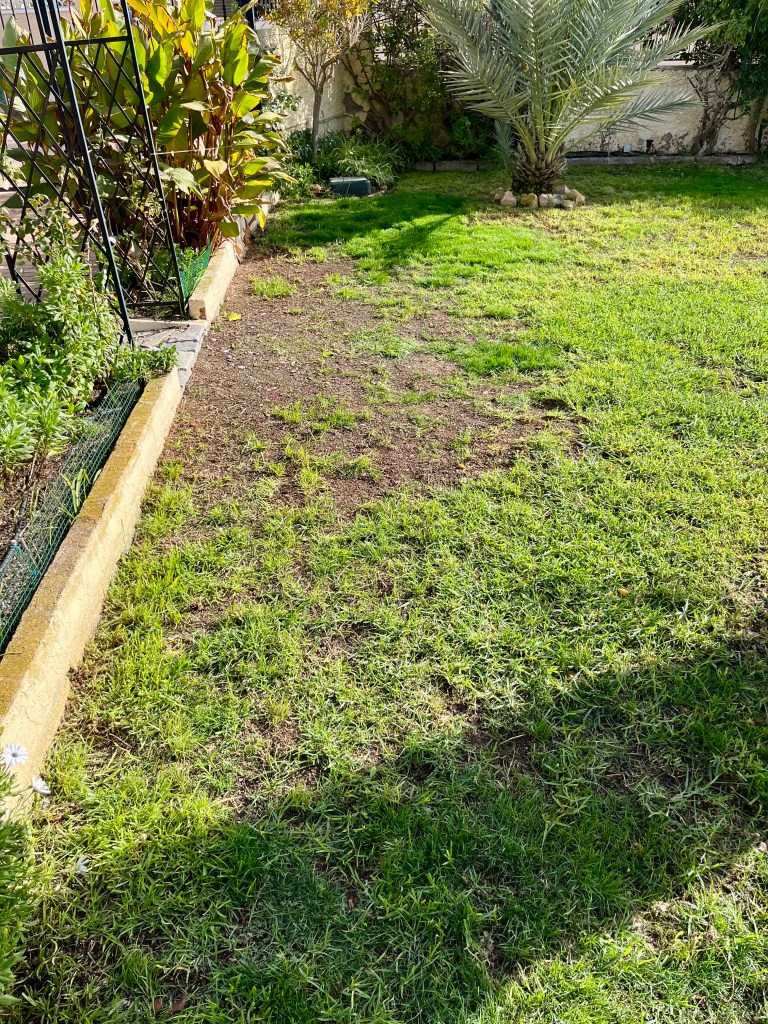
Finish your lawn tasks. I know not many of you have lawns. And yes, I know I am stupid having a lawn in Spain. But I can’t help it, it’s a man thing. My lawn suffered terrible depredations in our long summer drought and was reduced to desert. I even thought about abandoning a lawn all together and had begun designing other options.
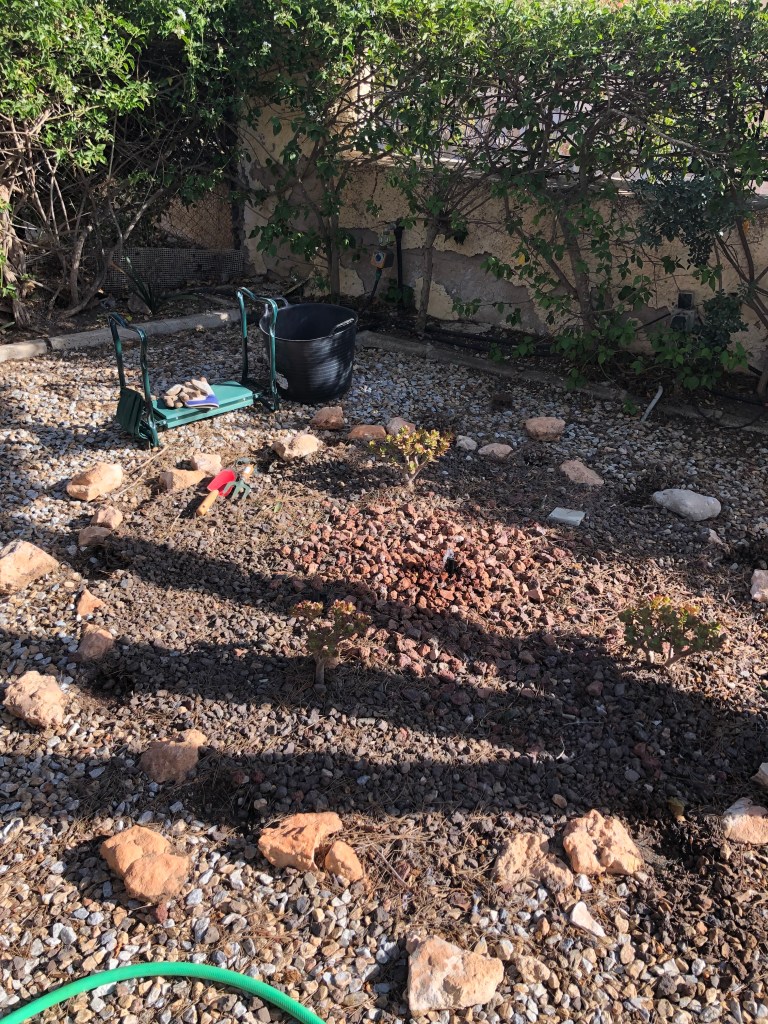
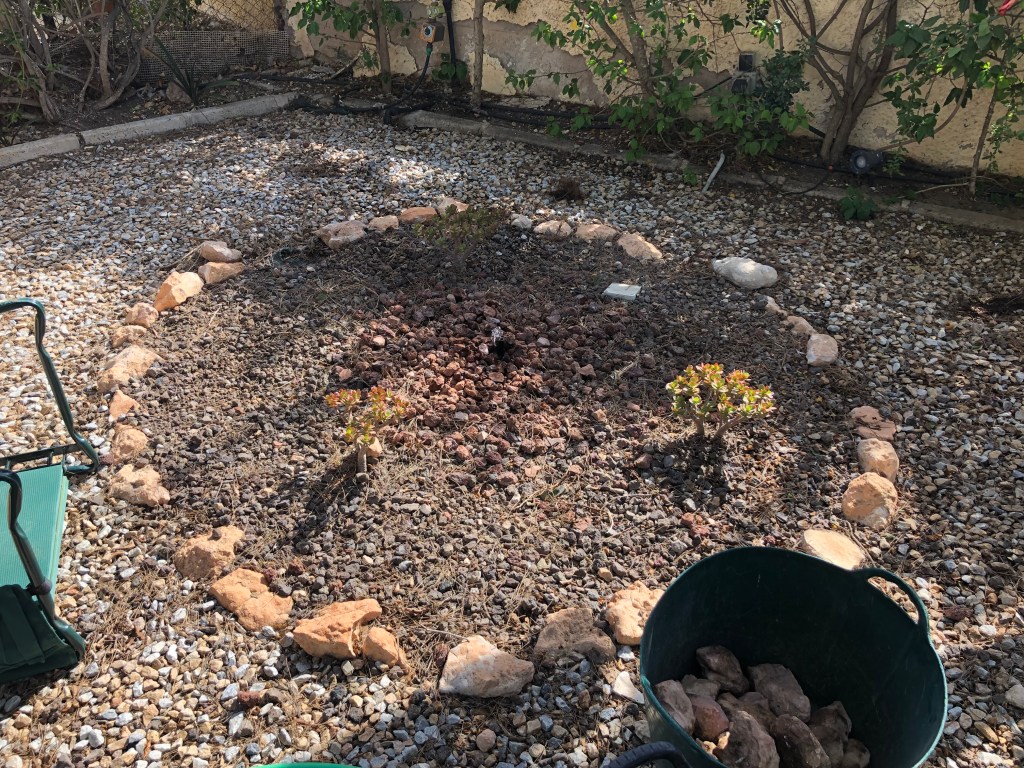
However, the lawn has stayed, I top dressed the whole thing, fed it copiously and selectively weeded it. It is not perfect, I still have one largish bare patch, but I will do some more work in the spring, but at least I now don’t cry myself to sleep at night. The photos below show the current condition of the lawn. Click on each photo for a larger view.

Cruella has left me for the farmers. Last week Cruella (my wife) suprised me by suddenly announcing “the farmers need me, I have to go back”, normally I don’t really listen to what she says so at first I thought she said “Fur-murs”. I was wracking my brain for what a furry Mur would look like and why it would need Cruella, when she noticed my blank look of incomprehension.

Mistaking my look for concern – when really my heart was singing at my planned hours of undisturbed gardening – she said “farmers you idiot”, but don’t worry, I have asked the girls to keep an eye on you. Instantly my heart sank because I knew that what she really meant was “don’t try anything because the chickens will be watching you”. It is a little known fact that the East German Stasi used chickens to spy on their population.

Anyway, the upshot is that Cruella (my wife) flew off the other day dressed in a full chicken suit to take part in the national farmers demonstration in the UK. She assures me that she will be leading the Chicken Section on the protest march. She carried with her a load of placards that she and her girls had made with lots of protest slogans including:

  • “Our lives aren’t cheep
  • “Fowl play must end”
  • “We egg-spect better”

In the meantime I have been left with the chickens. They follow me everywhere, watch everything I do, and I think they have bugged the house. Even when I stop for a cup of tea, they silently sit and watch. To be honest I am finding it a bit unnerving. The photo below shows the problem.

It’s time for winter projects. Cruella gets a cockerel and the chickens get sex lessons

It is that time of year again when you are clearing out the last of the summer flowerers, but is not yet time for the big winter cutback. Gardeners often complain to me that they have little to do during this period, but I scoff at their ennui and lament their lack of enterprise; on the contrary this is the time for enterprise, imagination and gardening brio. Yes, it is time to look around your garden and start working on your winter projects.

No matter how good your garden is, and how well planned, there is always room for improvement. This is especially the case in Spain. Too many gardens are covered in acres of unrelenting gravel and paving, to the extent that they look more like car parks than gardens, what Americans would term “a yard”, no offence to my USA readers. When I ask people why they have gardens like this they always come up with the same two reasons: 1. it was like this when I bought the house. 2. It makes it easy for upkeep. Now if you are happy with that fine, but if not now is the time to take action.

The starting point for winter projects is to stroll around your garden with a critical eye and ask yourself what can I do to change, improve and alter my garden so that it will bring me more joy and be pleasing to the eye. To assist you in your endeavours I have included in this post some ideas from my own garden and ongoing projects.

Unfortunately this blog cannot just be about gardening as Cruella and her chickens are intent on inflicting more damage to my garden and my psyche. But, more about that later, let’s get on with the joy of winter projects.

6th November 2023. Things I have been doing lately:

  • redesigning my little water feature
  • constructing planting islands in gravel
  • cloud pruning and making trees interesting
  • chicken sex lessons

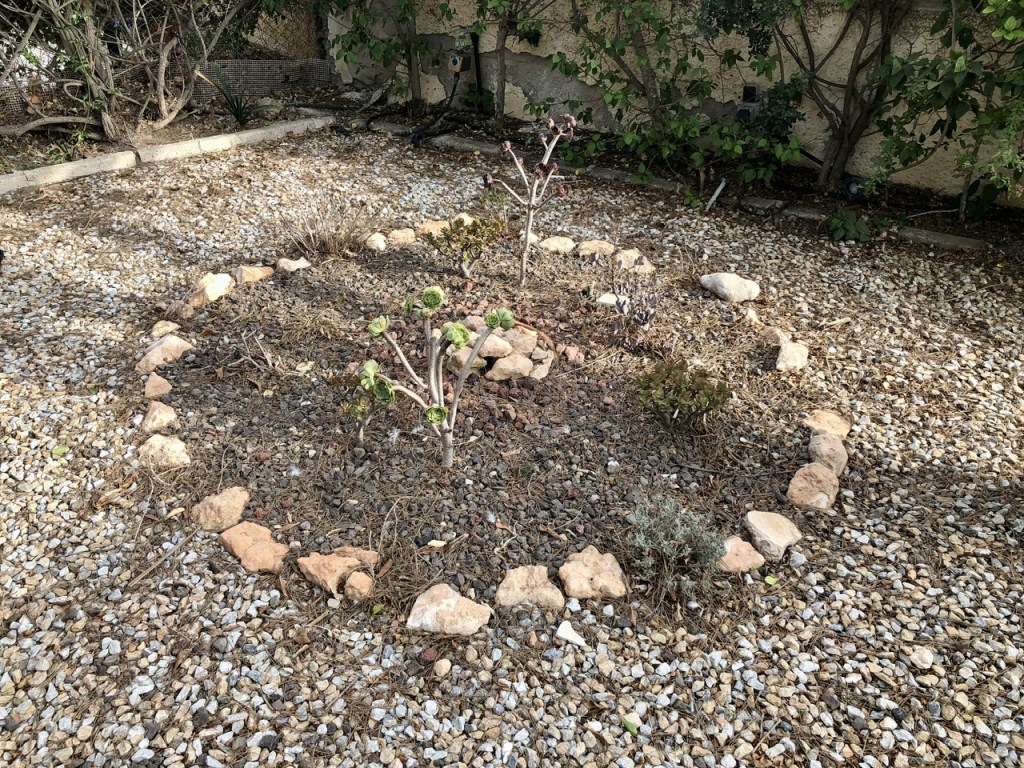
    Redesigning my little water feature. A number of years ago I designed and built a little water feature that would burble away whilst I swung backwards and forwards in my adjacent hammock slung between two palm trees. It also served to alleviate the sameness of gravel, by introducing planting and different colour gravel. Unfortunately, this was BC3 (before chickens). Since then my hammock has been removed a fenced area installed and a chicken coop erected in my previous paradise. This has meant that my little water feature has been neglected, and anyway the previous lavender plants never worked out. The photo below shows the state of neglect.
I know it looks pathetic but the lavender never quite took and pine needles kept getting stuck between the plants.

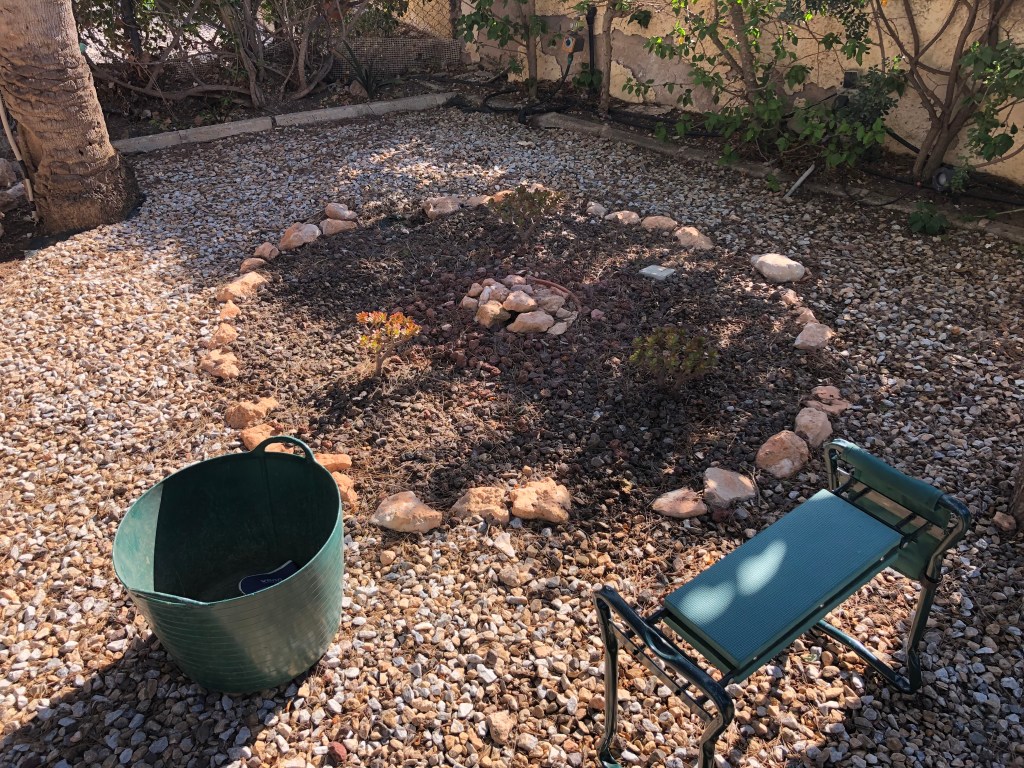
There were a number of stages in reviving this area. First, I had to take out and bin all the existing plants. Then I decided to rework the water feature element to make it simpler and more pleasing to the eye. I then had to decide on the type of planting I wanted around the water feature. I was looking for long stems that would not trap the pine needles and a no nonsense plant that would add interest without being needy.

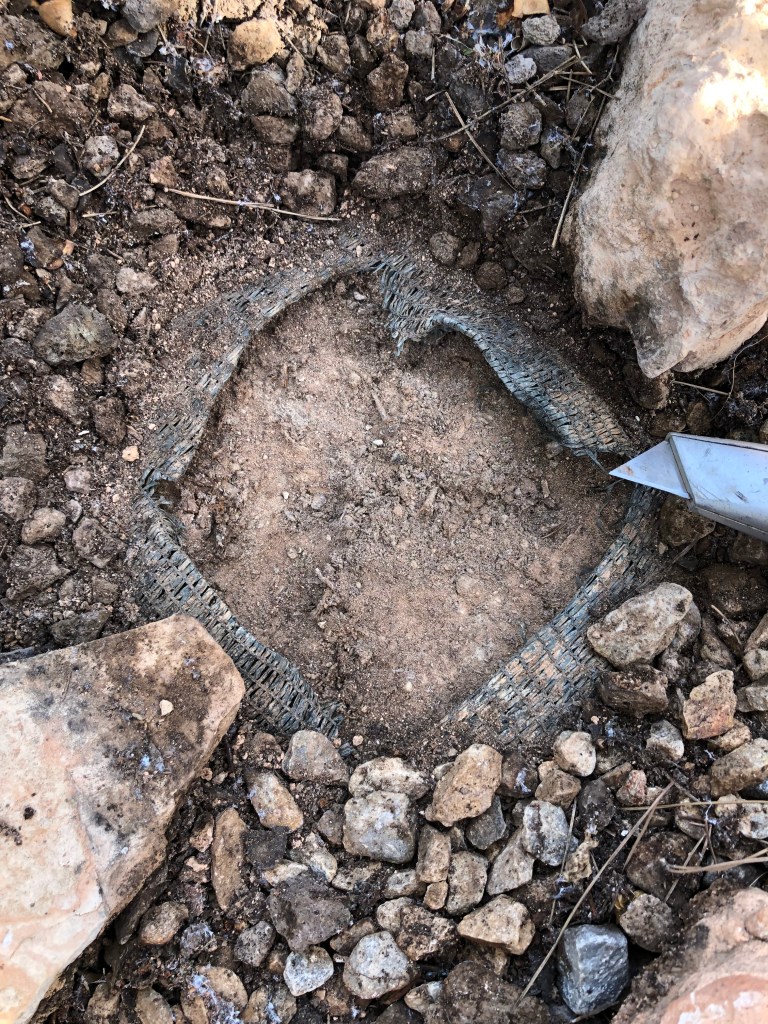
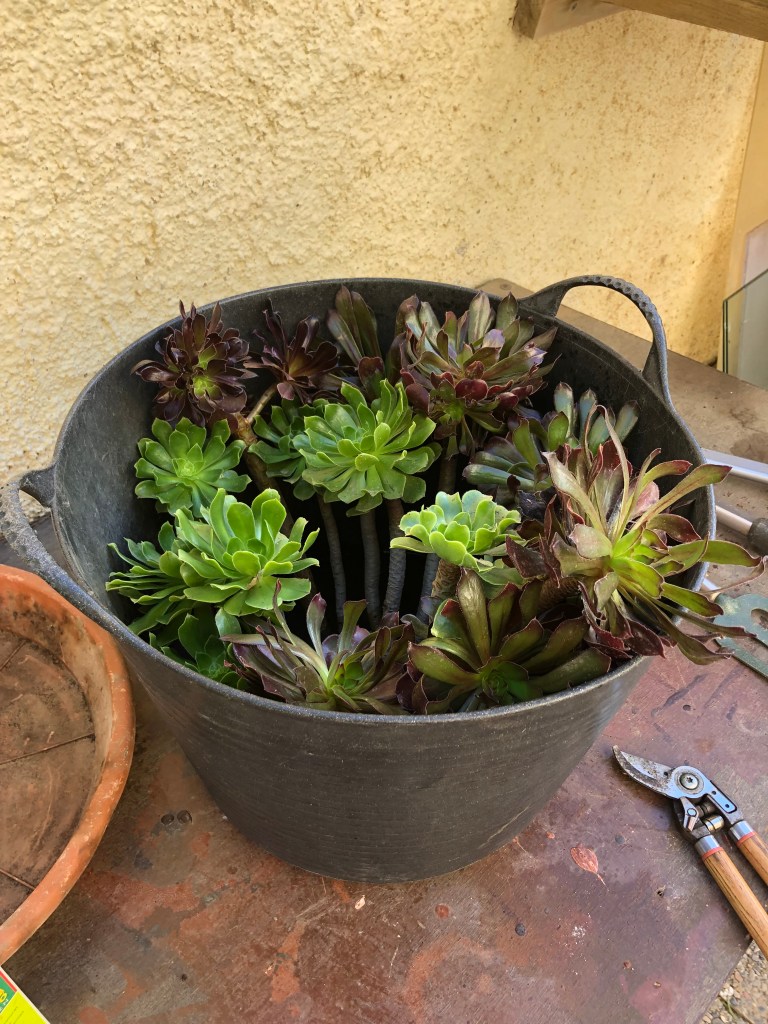
Looking around my garden it had to be Aeonium of which I had plenty from which to take cuttings. The next stage was to cut through the existing membrane to plant, but only after dipping in hormone rooting liquid to give them a better chance of rooting. Finally I planted alternative Aeonium Schwartzkopf (black head) and Verdi the (green head) to give interest. The photos below show the various stages, I will let you know how it develops in future posts. Click on each photo for a larger view.

I think this will look lovely when mature.

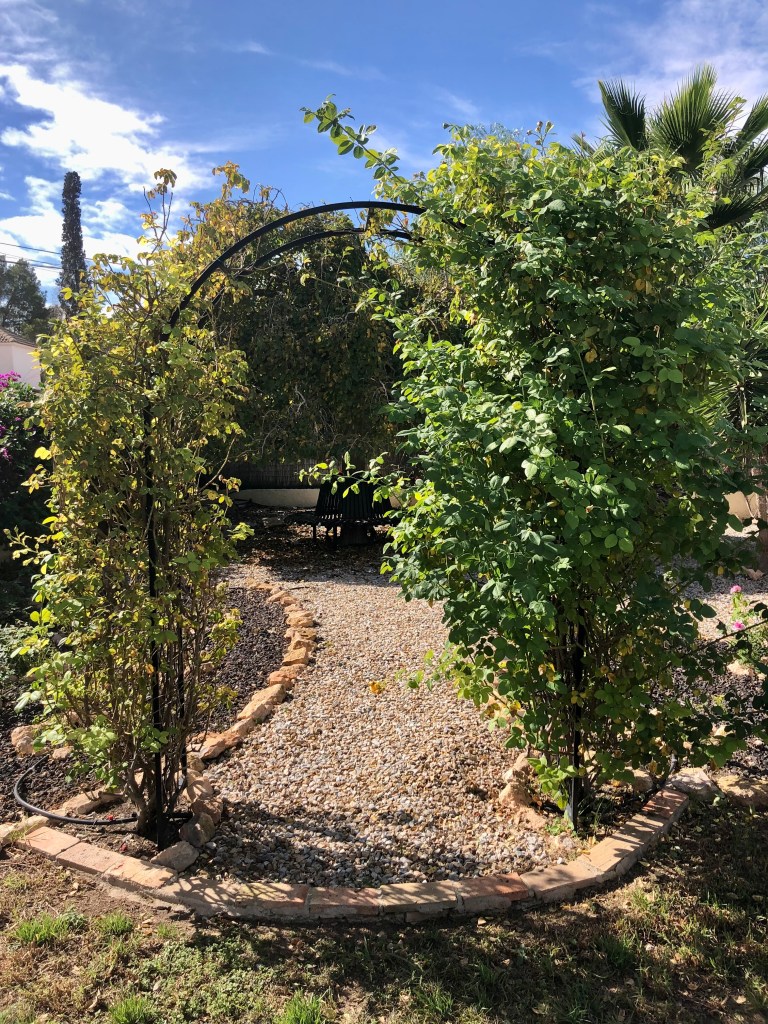
Constructing planting islands in gravel. By introducing some plants and different types/colours of gravel you can begin to alleviate the sameness of acres of gravel and paving. I have followed this strategy over a number of years in areas where grass or similar is unsustainable. The photos below, which are all taken from my garden, show how a bit of island planting can enliven gravelled areas.

The photo below shows my rose beds which are planted in different coloured gravel which ensures differentiation even during winter. Click on each photo for a larger view.

The examples below show other areas of island planting that bring greenery into gravelled areas. Don’t be afraid to follow the same strategy in paved areas. You just need to lift a few paving slabs in strategic areas and you will alter the whole feel of your garden. If you are worried or don’t have the skills just get a builder in and it will take about half an hour. The final photo shows my larger water feature which fulfills the same function of being a focal point in an area of the garden. Click on each photo for a larger view.

From all of the above you can see how little projects done over a longer period of time can begin to bring life to gravelled areas.

Cloud pruning and making trees interesting. Trees like gravelled areas, are aspects of Spanish gardens that are often left as uninteresting lumps punctuating uninteresting gardens. But you don’t have to settle for this. Just because you inherited this behemoth of a tree, or, you just let it get out of control doesn’t mean you have to leave it like that. Cloud pruning and shaping your trees will bring amazing levels of interest to your garden. If you are worried about getting up a ladder then just call in the professionals and tell them your ideas.

The photos below show some examples of my various trees that I have shaped or cloud pruned to bring interest. Click on each photo for a larger view.

Chicken sex lessons.This section of the post could easily degenerate into smuttiness, so it will require everyone to be adult. It all started when Cruella said she thought her girls were growing up and they might have unmet needs. When I asked her what she meant she said she needed a “Cock”!. Putting aside the double entendres that the less educated of you may have reached for, she explained that her girls where no longer girls and where young woman with normal urges.

Anyway, it turns out that she was going to start a programme of sex lessons for her girls to gradually introduce them to the facts of life. Aware of her girls sheltered upbringing, she pointed out that they had never seen a male apart from me and Tango the lonely blind Labrador, he is neutered, and she has often expressed the wish that I was. She said she was going to start gradually and purchased a painting of a Cock – stop it! Using the painting of the Cock she has been holding a series of closed women only sessions in the Chicken coop where she is explaining the “facts of life” in chickenese to her girls. The photo of the Cock is shown below.

I have crept up and listened in a number of times, but obviously I don’t speak chickenese, but the clucks, pucks and shrieks, speak volumes. At the end of the 6th session which covered foreplay and the actual mating, a vote was taken. It turns out they have all voted against the Cockerel and have decided to remain “old maids”. Cruella is overjoyed and says it’s for the best as she feels that as well brought up young ladies her girls should not be sullied by brute male company. However, I have noticed her browsing “adopt a chick” on the internet. The photo below shows the end of the 6th session when all the chickens turned away in horror.

You can’t see the little brown chicken as it is hiding in the coop with its wings over its ears.

Disease, pestilence and the start of the first great chicken war

I agree that the title of this post does have an apocalyptic feel about it, and that is because this is how I feel. I am battling to make sure that various garden pests don’t overwinter on some large plants, bushes and trees in the garden, whilst at the same time Cruella (my wife) has opened a “second front” in the chicken wars which means I am now fighting on two fronts. Let’s start with the garden pests before getting on to the chicken pests.

5th November 2022. Things I have been doing lately:

Dealing with garden pests. As the cold weather comes along so sap begins to drop in all your plants. This in turn means that most sap sucking pests will either die off or worse try and overwinter on your plants. I have two particular insect problems I am dealing with at the moment.

I was walking past my weeping Ficus tree the other day when I noticed lots of dried up leaves lying under the tree. If there are no watering problems (which there aren’t) then it is obviously an insect infestation. After looking very carefully at the tree I could see nothing. But this is where gardening guile comes in, if you can see nothing then stand back and run your hand roughly and rapidly through the leaves, then watch very carefully. In my case clouds of whitefly emerged all of which are particularly difficult to see on variegated plants. The solution is to spray daily for three days with an appropriate insecticide.

The first photo below shows my ficus looking very sorry for itself. The second shows the fallen leaves which are the clue to the problem. I am very proud of the next photo which shows me manfully diagnosing the problem. And finally the solution. Click on each photo for a larger view.

My other main insect problem was on my large Indian Laurel tree which is another ficus. This time the problem is with an infestation of Wooly aphids. Unlike white fly, Wooly aphids are easy to spot as they form cotton wool type clusters on branches and leaves which are there to protect them and their eggs. Most garden chemicals are ineffective because of their wooly protection. The simplest thing is to wash them off with a high pressure hose. You will have to do this every day for a few weeks until you decimate enough of the colony.

The first photos below show you the nature of a woolly aphid problem. The final photo shows me administering watery retribution. Click on each photo for a larger view.

Dealing with rogue bamboo. Regular readers of this blog will remember that some years ago I foolishly planted bamboo close to one of my water features. I diligently caged it within a square of large tiles and took many other precautions to stop it escaping and proliferating. Unfortunately about six months ago I noticed that it had begun to make a run for freedom. I instantly executed it with a strong weed killer and have instituted a vigorous daily watch of the dead plant for any signs of life. At one point it did come back with some little signs of green, but again I destroyed these.

Once you are sure that bamboo is dead, then as an extra precaution set it on fire. The fire will burn down through wire like roots and destroy any chance of a comeback. But the real solution is do not plant bamboo unless it is in a pot or a specially dug protected trench. The first photo below shows me preparing to take out the bamboo roots and the tile box that was supposed to contain it. Secondly you can see my fires of righteousness delivering vengeance. Lastly, the newly retrieved spot as the bamboo is no more. Click on each photo for a larger view.

Cutting back Cruella damaged plants. Most of you will know that Cruella (my wife) is not allowed anywhere near the garden. For whilst she has green fingers they are the wrong type, every plant she touches dies, as can be seen in the photo below.

It is the nails that do the damage

The problem this time was that she touched a lovely Solanum and a Hoya both of which had been growing gloriously all summer and climbing decoratively up the side of our outside kitchen.

From the first photo below you can see the blackened stem where Cruella has touched it. The second photo shows the damaged plant in its entirety, whilst the third shows my remedial work which will hopefully save the plant. If you have a climbing plant that has been damaged then be brave and cut some of the stems right to the ground leaving the undamaged stems to hopefully recover. Click on each photo for a larger view.

Cruella (my wife) damaged the Hoya in a different way. I explained to her that Hoya (especially in pots) need very little water. When I returned to find the obviously overwatered plant she said she hadn’t overwatered it, but admitted to giving it what she called her special plant food.

Again the remedy is to cut it right back and do not water till it is fully dry in the first top 3 centimetres of the soil. The problem and solutions can be seen in the following photos. When I asked Cruella what was in her plant food she showed me the label exclaiming proudly “it is all natural”. Click on each photo for a larger view.

Cruella’s secret all natural ingredient

Remove citrus suckers. At this time of the year you need to go round all your citrus trees and pull off any suckers that are growing from the trunk or just below the soil. Suckers can be easily identified, they are bright green and generally grow straight up. Suckers are non fruiting stems that will take the goodness from the tree in non productive growth. If you remove them regularly then they come away very easily. Just put your gardening gloves on and grip the sucker at its base and pull sharply down, it’s as easy as that so get out there now – never give a sucker and even break. The photos below show some suckers that I am about to remove. Click on each photo for a larger view.

The start of the first great chicken war. Regular readers of this blog will know that Cruella (my wife) is now the proud owner of 5 fancy chickens who she insists are allowed to roam freely in the garden. This has forced me into erecting a line of defences similar to the Siegfried Line to keep the destructive chickens at bay. The photo below shows some of my defences.

My first lines of defence. I am thinking of electrifying them

The fact that I have had the temerity to erect defences has only engendered a militarist mindset in Cruella and she has taken to marching on manoeuvres every day with “her girls”. Most mornings at about 10.30 she assembles her chickens for inspection and then marches them round the garden in a line singing what she has entitled her regimental song. She tells me it is based on the “Battle Hymn of the Republic”. But as she is singing in Chickenese it just sounds like this: puck pa puck pa puck pa puck.

Anyway whilst I was erecting my latest line of defences around the base of a vine. I suddenly became aware of the fact that Cruella was advancing with her chickens and attacking my defences on two fronts. At each point the chickens succeeded on jumping over my defences and clawing where my newly planted bulbs where. Even though I had recruited Tango the lonely blind Labrador as a guard dog, there was an obvious flaw in my plan, namely he can’t see.

The first photo below show my work site where I was preparing the defences and you can just see the chickens assembling in the background for the charge.

The start of the skirmish

The first photo below show a scouting party that was sent out to reconnoiter my defences. The following photos show the first stages of the attack when Cruella and her chickens emerged from behind foliage singing their song and attempting to rush me. Click on each photo for a larger view.

At first I rushed to defend the vine, but it turned out it was only a diversionary attack the real attack was taking place on the flower borders which I had left Tango the lonely blind Labrador to defend; but he was overwhelmed by superior numbers and hampered by the fact he couldn’t see them and was facing the wrong way. The photo below shows the battle of the borders beginning.

I don’t blame Tango he was outnumbered

When I confronted Cruella she claimed it was all a misunderstanding, whilst the chickens said they were just following orders. By way of compensation she agreed to help me plant all the bulbs on the lawn, see photos below. But I still don’t trust her, she started off ok and worked diligently, but gradually her chickens kept creeping nearer. The funny thing is she kept feigning interest in the garden and asking me questions but I knew she was just trying to find where I kept my bulb plan. But don’t worry it’s safely locked up.

This looks suspicious

Birds and small animals return in Cruella’s absence and we clear the Wild Wood

Since Cruella (my wife) has been away at our English house visiting the idiot son, the garden is gradually returning to normal. Small animals and birds have started tentatively appearing again, admittedly they were very fearful at first bearing in mind many of their compatriots have been turned into soup, patés and table lamps by Cruella. But for the moment at least they are back and this means that I sit and have my morning pot of tea like St Francis of Assisi surrounded by small creatures and birds all gratefully twittering, mewing and growling with delight.

However, Cruella’s absence has been noted in our village and I have had to explain to people that she has gone to England to celebrate her birthday with her coven. I explained that it is a special birthday, as it is not every day you are 603. Anyway I have had to issue the photo below of Cruella to show that she is ok. The photo shows her outside coven HQ in her ceremonial evening regalia about to start the evening chant.

Cruella’s room is at the top of the right hand tower, the one without windows.

Anyway that’s enough about Cruella, let’s get on with the gardening.

27th November 2021. Things I have been doing lately:

Clearing the Wild Wood. Regular readers of this blog will know that there are many different parts to my garden all of which serve different purposes. The Wild Wood is an area that I keep as natural as possible, it mainly consists of pine trees, and Lentisco with all sorts of grasses and wild plants together with some odds and ends that I transplant down there. The Wild Wood also contains our guest accomodation which we had built specially so that guests could enjoy this area. In addition the Wild Wood is the graveyard of past pets and dare I say future ones; (don’t tell Tango the lonely blind Labrador). However, every 10 years or so it is necessary to undertake a general tidy up of the wood to ensure that general shrubs do not get to big and crowd out everything else. I call it managed diversity and Cruella calls it a mess. The photos below show the wood in its overgrown state. Click on each photo for a larger view.

Now of course I am too old to tackle this on my own, so I called for specialist help from a local contractor in my village. Dean, together with his son Lee have been chainsawing, strimming and generally cutting back for days. The photos below show them manfully getting stuck in. I am in charge of overall strategy and tea making. Click on each photo for a larger view.

And finally some photos of the Wild Wood cut back, but still wild and ready for a new lease of life in the Spring. Click on each photo for a larger view.

Cleaning up leaves for leaf mold. Whilst Dean and Lee have been doing the hard work in the Wild Wood, I have been been undertaking the first clean up of leaves ready to make leaf mould. There are only really two types of tree in my garden that offer the potential for leaf mold. These are my Fig trees and the big Mulberry. Leaf mold is in effect a side benefit of the necessary task of cleaning up fallen leaves. If you don’t clear up fallen leaves then they will smother your lawn and create a weed growing medium in your gravelled areas. I like to clear up fallen leaves in two stages. The first removes the bulk of leaves , whilst the second about a month later fully clears the area under the trees. The photos below show the Fig and Mulberry ready for the first clear up. Click on each photo for a larger view.

To make leaf mold you must rake up the leaves and place them into a plastic bag. It is important that you crush the leaves down into the bag, this not only gets you more leaves in each bag, but it helps the composting process. You will need to prick holes into your plastic bag to allow for air circulation and also make sure they are kept slightly moist. On e you have your bags filled, then place them in a shaded area well out of the Sun.

Now normally it can take 2 or more years to fully compost leaves, but, in my case I just add them to the general compost bin after about six months. The leaf clearing photos below include: a pile of leaves under the Mulberry tree, my leg in a plastic bag and plastic bags being pricked by a fork. I am beside myself with joy at my chances of winning the world’s most boring photograph category in the gardening section. Click on each photo for a larger view.

Planting garlic. Now that you have cleared all that space under your trees, then why not put it to good use by underplanting with garlic. Garlic is easy to grow and does not in any way harm the tree. Take a normal shop bought garlic bulb, split it up and select the fattest cloves. Strip off the papery outer coating from each clove and remember that you need to plant them with the flat part of the clove down. Stick your finger into the soil, using the full length of your finger, then pop a clove into each hole you make. Try and plant in some sort of pattern so that you will recognise the first shoots as they emerge and don’t hoe them off. I always plant in a cross pattern around the tree as I am a Christian, but also because it annoys Cruella as most of her friends hate the thought of crosses and garlic.

The first photo below shows my shop bought garlic bulb ready for splitting. The second shows the separation of the fat and thin cloves (one of Jesus’s lesser known miracles). The third photo shows the correct way up to plant the bulbs, and finally a man with his finger stuck in the soil. And to think that Cruella says I am boring, well this will show her. Click on each photo for a larger view.

I am thinking of having this reproduced as a print for sale in poster shops

Cruella has flown to England but she still misses the cat

Cruella (my wife) has flown off to our English house to visit our idiot son; but I must admit it has all been a bit traumatic. The problem was that ever since the cat died she has not been able to balance her broom properly. Normally the cat would sit at the back providing appropriate ballast and balance. But since Cruella, in her grief, mummified her, she just can’t get the weight right and our late cat keeps falling off the back. The end result is that she had to do a series of trial flights up and down the lawn before leaving which resulted in multiple mishaps as she toppled forward and over the handle. I was really worried that some real damage would be done, but thankfully all the plants are ok.

16th November. Things I have been doing lately:

Taking hardwood cuttings. Continuing the theme of how to get plants for free, it is time to take as many hardwood cuttings as possible. I am sure you are used to taking softwood cuttings in the Spring. Well, it is more or less the same technique, but the cuttings will be from wood that has hardened off rather than the nice green whippy stems you take in Spring. I have taken three types of hardwood cuttings this week.

Myrtle. The Myrtle bush is one of my favourites as it is very hardy, needs little water and trys to flower all year. I have an excellent specimen beside the path that leads to my potting area. I wanted to take some cuttings as friends often admire this plant and it will give me an opportunity to pass it on. The photo below shows my Myrtle still in flower.

Myrtle is such a lovely name for a girl, I am going to re-popularise it through the power of cuttings

When taking hardwood cuttings you have to find a non flowering stem and using your knife (never secateurs as they can crush) cut it about six inches long. Whilst you do not have to rush hardwood cuttings straight into a plastic bag to stop them drying out – as you do with soft wood cuttings. You should still try and get them potted up as soon as possible. Strip off all the leaves from your stem apart from a few at the top and then pop up to 4 cuttings around the edge of a six inch pot. The first photo below shows my cuttings ready for potting, whilst the second shows them happily bedded down for Winter. Click on each photo for a larger view.

Roses. Are ideal for hardwood cuttings, so if you have a favourite rose, then why not try and replicate it now. With roses you need to take the cuttings from this years growth, which means the stem should be green and not brown. You need to cut a stem that is about as thick as a pencil and which has no sign of disease. The photos below show my choice of stem and the eventual cuttings. Click on each photo for a larger view.

With rose cuttings you need to cut off all the leaves which will leave you with a bare twig. I know it sounds stupid but you must not mix up the top and bottom of the cuttings as roses do not grow upside down; though they may possibly pop out in Australia! Other good tips are to slightly nick the leaf nodes on the stem with a knife to encourage them all to root. Also, cut the bottom of the stem at a 45 degree angle to give you more rooting potential. When you are ready pop them into a 6/8inch pot and leave them at the back of the potting bench well out of the sun. If all goes well you can pot them on individually in late spring, and then, plant them out next autumn (God willing). The photo below shows my cuttings ready for planting followed by them bedding down for the winter. Click on each photo for a larger view.

Mulberry. The last hardwood cutting I have been taking this week has been Mulberry. Now Mulberry is a tree and I shouldn’t really take cuttings this time of year as the sap has stopped rising and the leaves are falling. However, a nice old Spanish lady who admires my tree has asked for a cutting for her daughter. I have told her it may not take and asked if she could wait till the spring, but it appears time is of the essence, so I am at least trying.

Same routine as before find your best non flowering stem, cut it about 6 inches long, trim it back and then pot it up. I think the Mulberry will do better in a very free draining compost, so I have mixed in lots of Perlite. The photos below show the cuttings process, the compost mix and the eventual pot. One last thing before we leave hardwood cuttings; make sure that you label all your pots as one hardwood cutting looks much like another. Click on each photo for a larger view.

Taking seeds from Fountain Grass. Lots of gardens in Spain have Fountain Grass and it is a fantastic showy plant. I have a lovely specimen which I have had for about 10 years and it never fails to impress. Just cut it back hard in January and it will start growing almost immediately, and by Summer will be back to its stunning best. The photo below shows my grass.

If you want to propagate your fountain grass then you have two options. You can take seed now just by running your cupped hand up any stalk that has promising looking seeds. Another option is to wait till January, and after the plant has been cut back, you can lift it and divide it. I am going to do both if necessary. I have taken a selection of seeds and sown them in free draining compost with Perlite added. I have then lightly covered them with soil. I await the outcome, but if all else fails, then it is dig and divide time. The photos below show the seed collection and sowing process. Click on each photo for a larger view.

The last of the Chillis. This sounds a bit like an eskimo version of the “last of the Mohicans”. But no, nothing so prosaic, my two Chilli plants are now exhausted and are ready for the compost bin. I have to say they have been a great hit, especially with Cruella who loved the fact that they looked like drops of blood. But all good things come to an end. Over the past month I have kept one fully ripe Chilli hanging on the plant so that it fully matures and its seeds ripen. So whilst the rest of the plant goes on the compost this little Chilli will be father/mother to a whole new generation. By the way don’t forget to say thank you to your plant as you place it gently in the compost.

To harvest Chilli seeds you just need one good ripe Chilli. Cut the top and bottom off, and then with a sharp knife split the Chilli lengthwise. Over a plate tease out the seeds, removing as much detritus as possible. Then take you plate and put it somewhere in full sun for about an hour. You are best to do this on a window sill indoors otherwise the dried seeds will blow away. Once the seeds are nicely dried out place the seeds in an envelope in a cool dark place till you are ready to plant out next spring.

The first photo below shows my old Chilli ready for the great compost bin. The second photo shows my seed Chilli together with the last of its unripe brethren. The final photo shows my seeds ready for drying off. Click on each photo for a larger view.

Hand weeding around bulbs. Some people pay a fortune for psychotherapy, others attend Mindfulness classes, still others lie on psychiatrists couches telling them about their dreams, whilst a pitiful few take psychotropic drugs. Whereas, if you follow my advice you just need to do a bit of close concentration hand weeding. Now I know Cruella isn’t here, but I can just hear her saying … ”you are just soooo boring”. But we will see who gets the last laugh when I start advertising my classes. Close hand-weeding is positively therapeutic as you concentrate and focus on a simple but beneficial task. Anyway, enough of my money making schemes.

A problem we gardeners face this time of year is that just as bulbs are starting to pop through the soil, so are perennial grass weeds. Now if you are not careful, it is easy to carelessly hoe off the tops of all your bulbs which can ruin your whole early spring flowering. So, the answer is to set aside your hoe, cast aside your gardening gloves, get down on your knees … and pray! No I’m only kidding I am sure you pray anyway. But at the moment get down on your knees and get your hands into the soil and remove the blades of grass by hand weeding. Although blades of grass and bulb shoots may superficially look the same, if you feel them with your ungloved hand you will see that bulb shoots are rounded whilst grass blades are; well blades. This easy distinction means that you can pluck out the grass blades weekly, until such time as the growing bulbs will shade them out.

The first photo below shows my zen and the art of hand-weeding technique, whilst the second shows the fruits of my labour. If you are interested I am thinking of holding weekly classes. All together now Ohm, Ohm. Click on each photo for a larger view.

Cruella has sent me a plague of wooly aphids and a vulture!

Now that Autumn is upon us, the days are shorter and we gardeners are having to pack as much as possible into our days before we lose the light. All of this would be bad enough is it wasn’t for the fact that Cruella (my wife) has cursed me again. Regular readers of this blog will know that this is a regular occurrence, but this time it is not the usual stuff like a plague of boils, or being struck dumb, or having to hop on one leg for a week. This time it is serious she has cursed the garden. All will become clear below.

4th November 2021. Things I have been doing lately:

Dealing with Wooly Aphids. The first sign of Cruella’s curse appeared the very next morning as I did my morning patrol of the garden. Passing under my large Ficus tree, to my horror I found it totally festooned with Wooly Aphids. To those of you not familiar with Wooly Aphids, they are like normal Aphids only with a white fur coat. Wooly Aphids secrete a wooly wax white coat around their colony whilst they use their mouth parts to suck the life out of your plant. If you see evidence of wooly aphids on your plants then you need to deal with them.

Now I don’t want to exaggerate or make a drama out of a crisis, they usually wont kill your plant (especially a tree), but they can be a vector that allows other diseases into your plant. In most cases your first port of call should be to use a high pressure hose to wash the nests away. I have been doing this every morning for a week, and I am confident of victory. The first photos below show the scale of the infestation. whilst the final photo shows my heroic hose work. Click on each photo for a larger view.

Take that you pesky aphids

Mulching your flower beds. Readers of recent posts will remember that I have finished mulching my fruit trees with compost from my bins. Now is the time to mulch your flower beds to get your soil ready for Spring sowing. Mulching has a number of benefits. Firstly, it introduces worms and beneficial nutrients into your soil, secondly it increases moisture retention and lastly it inhibits weed growth. What’s not to like! However, to mulch properly you need to undertake the following stages.

  1. Hoe your flower beds every night for a week, this will ensure that you get rid of any weeds and it also breaks the soil surface up to enable it to engage with the mulch
  2. After you have finished your thorough weeding, water the newly hoed beds to thoroughly soak the soil
  3. Apply a layer of mulch as thick as you reasonably can
  4. Gently use your hoe to mix the soil and the mulch together

The first photo below shows the start of my nightly hoe. The second photo shows the watering and mulch spreading stages. You also get a bonus appearance by Tango the blind lonely Labrador as he gobbles up the fallen dates from under a palm. The final photo shows my gentle hoe/mix methodology. Click on each photo for a larger view.

Pruning standards. Standards are those plants which have a bare stem topped off with a small round canopy, a bit like a lollipop. Standards are quite often grown in pots and if they are, as in my case, then now is the time to prune them to make sure they do not suffer wind damage. The first photos below show my standards very top heavy and ripe for wind damage. Click on each photo for a larger view.

From the photos below you can see that I have been very radical and taken them right back. But don’t worry they will be back with re-growth starting quite quickly. You may think you do not have to do this as your standards are in heavy pots – as mine are- however, stems can still snap even when the pot doesn’t fall over. Click on each photo for a larger view.

Cloud prune Olives. Regular readers will know that I cloud pruned an Olive tree some years ago and this needs to be reshaped two or three times a year. The whole point of cloud pruning is that you keep the shape sharp, otherwise in my case you get odd shaped balls. When I informed Cruella (my wife) that my balls were an odd shape and needed pruning, she collapsed with laughter. Personally I find this low level sea side humour demeaning. Anyway ignoring this vulgarity the first photo below shows my misshaped balls – for goodness sake, not you as well! Followed by my reshaped balls. That’s it “Honi soit que mal y pense”. Click on each photo for a larger view.

My perfectly shaped balls

Keep scarifying lawn patches. You will remember in my last post that I scarified my lawn with my scary machine. If there are still patches of stubborn thatch on your lawn then you need to remove them by using a leaf/lawn rake as below.

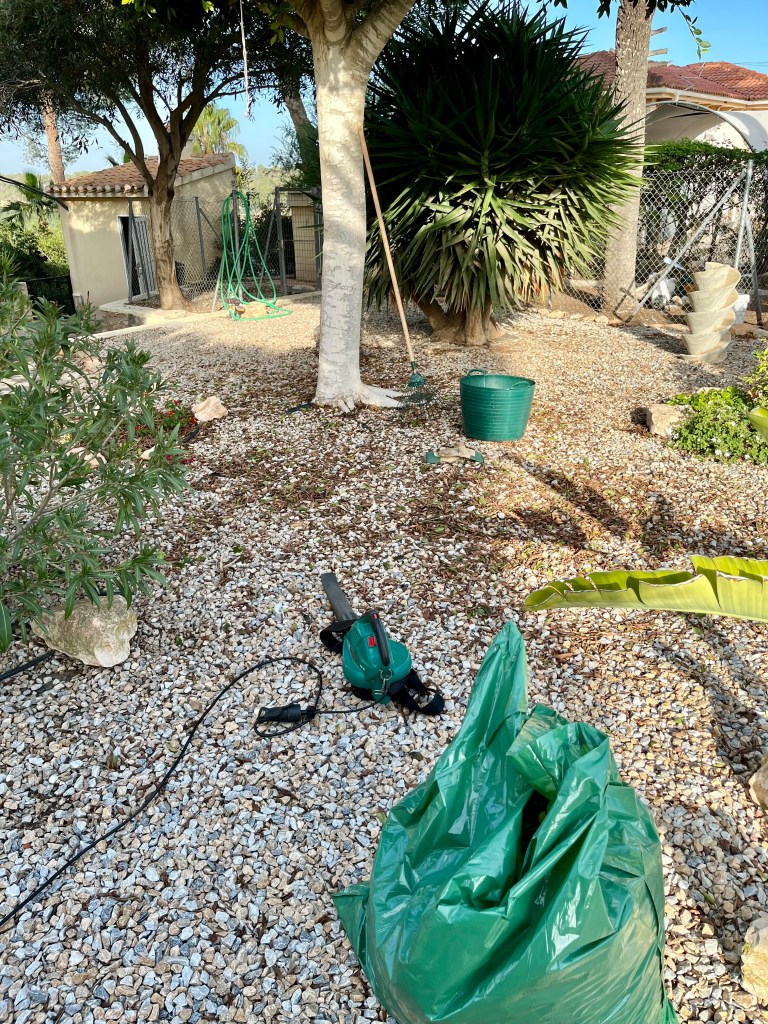
Clean up fallen leaves on gravel. This is a continuous job during autumn and winter. If you leave fallen leaves on your gravel, then they will mulch down to form an excellent medium for weeds. It is far better to pick them up now by using a blower and leaf rake than waiting till spring when your gravelled areas will be a sea of weeds. The photo below shows my tried and trusted technique of leaf wrangling.

Cruella has sent a Vulture. As if wooly aphids weren’t enough a Vulture has appeared in our village. People keep wondering how it got here and what it wants, but I had a shrewd idea that Cruella was behind this. When I asked Cruella if she had seen it, she said “of course, it is just here to do a little job”. Since then I keep moving in the garden, and never lie down. It is circling overhead as I write this post and I think it is looking at me in a funny way. The photos below shows it sitting on a roof nearby watching me.

Cruella has fled and I am concentrating on structure

Those of you who read my last post will know that Cruella (my wife) had failed to take care of the garden in my absence. The resulting row resulted in her staying in her room all night and refusing to come out. In the morning when I took in her normal morning cup of bone gruel she was gone. I knew she hadn’t been gone long because her perch was still slightly warm. Once I saw her favourite purple broomstick was missing I knew she had fled to England to seek consolation with our idiot son. This was confirmed later in the day when the booby trap she had left for me went off in the shed and covered me in dead rats and bat excrement, but at least there was a lovely note attached.

Moving on and putting aside Cruella’s antics it’s time to discuss one of the most important periods in the gardening calendar. During November and December you should be reshaping and bringing back structure to your garden before you begin the big January cutback. This means cutting back all that lush Summer growth that has now gone floppy and brown. It also means clearing the lines in your garden to give it shape, structure and order. In November you should concentrate on shrubs, perennials, paths and sight lines and you should also start to clear up leaves. Next month we will be looking at Roses, borders and splitting plants; but let’s not get ahead of ourselves.

19th November. Things I have been doing lately:

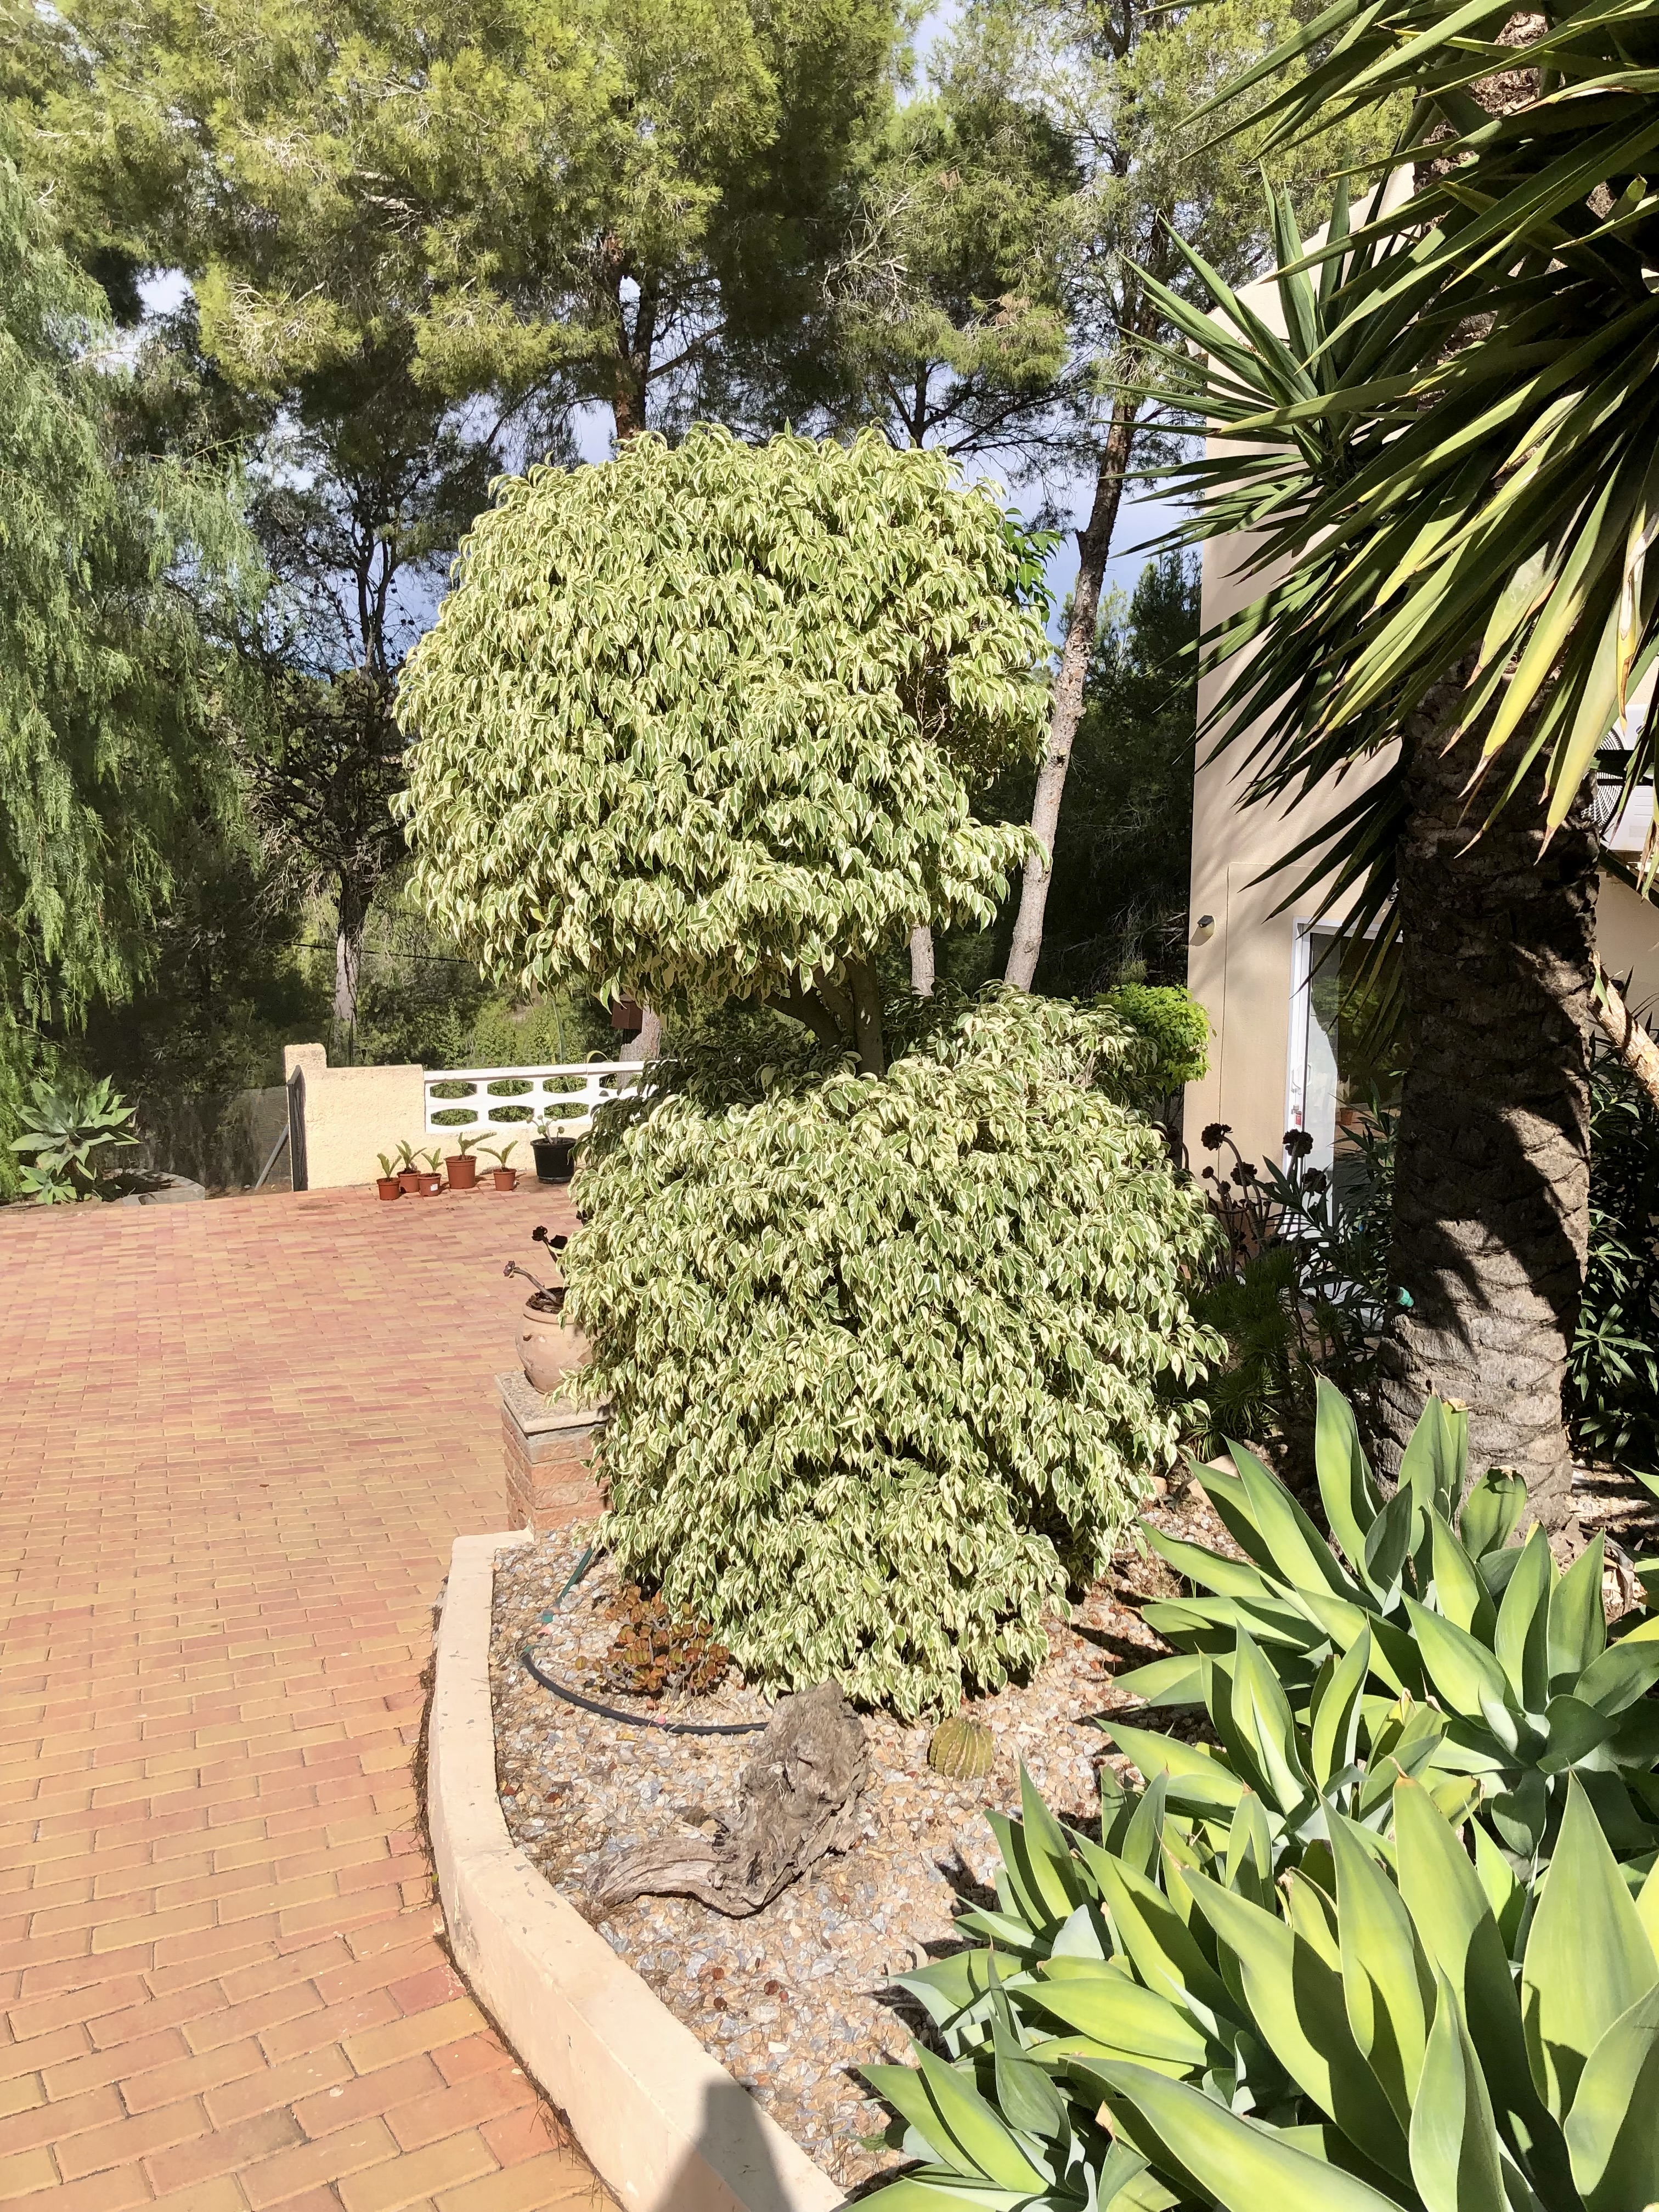
⛅️ Cloud pruning Ficus. I have a number of cloud pruned plants in my garden. I do this because they give otherwise clumpy plants an eye catching structure that gives form to the garden and adds a point of interest. The Ficus in question sits at the edge of the drive in my dry garden and over the year will gradually get out of shape. As Ficus is relatively slow growing this once a year haircut keeps it in shape.

The first photo below shows the Ficus in its overgrown state. The second shows it newly reshaped. Don’t ask me what the shape is, I call it “Venus at rest” Cruella calls it fat lady with a big bosom. I deliberately expose some of the trunk as it is a lovely white colour and it glares out in the Sun. Click on each photo for an enlarged view.

🦜 Tidying up Bird of Paradise (Strelitzia). This plant is a Spanish garden favourite and can be found in most gardens growing in a large clump. To keep this plant looking its best you need to periodically remove outer stems and dead growth. This along with regular deadheading will give you a plant with year round interest that adds real structure to your garden. The first photo below shows the Streletzia in its overgrown, floppy and generally untidy state. The second shows it mid prune, and the final photo shows it standing upright as a real garden statement. Click on each photo for an enlarged view.

🛏 Putting Canna to bed. Now is the time to cutback your Canna to ensure the rhizomes (ugly bulbs) can begin to swell during the Winter ready to burst with growth in a couple of months. Apart from a bit of mistreatment by Cruella the Canna are basically left to die back so that all the goodness from the leaves can be drawn back down into the rhizome. Once this has been achieved they should look like the photos below. Click on each photo for an enlarged view.

Once they are in this state the trick is to cut them back to the correct size. If you cut them back too short right to the ground then heavy rain would mean they get waterlogged and rot. If you cut them back but leave the stems too long, then they will still think they can grow this year and will try to put on foliage which in turn will deplete the rhizome for next years flowering . The correct “Goldilocks” length is about 4-6 inches. Which will tell the plant flowering is over for this year and still leave the stems long enough to stop water logging. The photos below show the correct lengths. Click on each photo for an enlarged view.

🐲 Dealing with brutish Oleander. Although Oleander is one of my favourite plants, left to itself it just becomes an unshapely brute which adds no real structure or form to your garden. Here in our village of Campoverde in Spain most of the gardens have clumps of Oleander. But they never see the best of the plant as it is just left to grow into an amorphous shapeless lump that only gets noticed when it flowers. Kept shapely the Oleander will provide form and structure to your garden even when it is not flowering.

I have two Oleander in different areas of my garden. I planted both of them about 8 years ago and they have been sitting there slowly but surely growing and flowering. Then suddenly over the last year one of them turned into a brute overwhelming a small border of Aeonium Schwarzkopf, whilst the other proceeded to flop in an unsightly manner. The first photo below shows the brute overwhelming the poor Aeonium, whilst the second shows the Fosbury Flop. Click on each photo for an enlarged view.

The photos below show both plants cut back. I know this looks cruel, but by doing this at this time of year you will allow for new growth and subsequent flowering next year. Click on each photo for an enlarged view.

🌳 Reshaping the Californian False Pepper. There are not many trees that you reshape at this time of the year, but the false pepper is one. This is another plant which is quite common in our village. In my garden the false pepper provides a real statement as it draws your eye down the drive as you enter our property. In most gardens these can be allowed to grow into what looks like a Weeping Willow. But in my case it is too close to the swimming pool and it’s long tendril like stems get whipped about by wind and cover my swimming pool area in thousands of tiny leaflets.

To overcome this problem I had the tree professionally pollarded last year and now intend to maintain it in an attractive weeping form, but without all the attendant mess. The first photo shows the tree getting ready to get away from me and become a messy giant once again. The second photo shows it pruned back. I know it doesn’t look quite right, but give it a couple of weeks and it will be lovely again. Click on each photo for an enlarged view.

🌿 Adding to the compost bin. As I walk around our village I see numerous bags of garden waste left out for the local Ayuntiemiento to collect and recycle. Yet strangely the same people who leave garden waste out for recycling will happily drive 5 miles to a garden centre to buy bags of compost for their garden. By getting yourself a cheap compost bin you can recycle most of your garden waste and turn it into lovely compost that you won’t need to buy. I am not going to go on about composting here as it is almost time for my annual composting special post and I don’t want to spoil your excitement. The photo below shows one of my compost bins filling up with the all the prunings and cuttings from today.

I like the way the rays of Sun shine down on the compost; it’s as if God is telling you something!

I’m back and Cruella has laid waste to the garden

What do you mean you didn’t know I had been away! I have been touring Italy with our idiot son. I visited all the famous sites in antiquity and I have seen more museums and cathedrals than would have been thought humanly possible. The idiot son seemed to be enjoying himself as well until I found out that all the time he was playing Pokemon Go, he told me “Pickachu” was Italian for lovely and I believed him until I looked it up.

Anyway leaving aside the splendour that is Italy, let’s talk gardening. I’m afraid it is bad news all round. I foolishly left Cruella (my wife) in charge of the garden whilst I was away for about a month. I left her implicit written instructions for every day of the week and we had a practice tour of the garden before I left. To be honest I blame myself and I should have learnt from her previous efforts . Who could forget the great tomato tragedy of 2018, or the desiccated plant debacle of 2019. The outcome from my absence is that Cruella has managed to destroy swathes of the garden. I have decided to detail just a few of her malfeasance below.

☠️ A possibly dead Solanum. Regular readers of this blog will know that I have grown this solanum from a donated cutting. I have trained it to majestically entwine around our outside kitchen and over the last few years it has been a plant superstar. The first photo below shows what I returned to find.

Cruella says it was it was ok last time she looked at it. You have to bear in mind she only comes out at night.

I have checked the stems and I think there is still life locked in there so I have cut back the branching tendrils. If nothing happens by Spring then I will cut it back to the ground to see if we can coax it back. The photo below shows my first cutback .


🗿 The potting bench massacre. When I left I begged Cruella to carefully nurture the cuttings on the potting bench. In particular I was proud of a Hoya that was coming on well along with a special Rose and a Plumbago. When I came back half the plants had disappeared. Cruella said there was a strong wind one night and they must have blown away! The first photo shows the potting bench before I went away, whilst the second shows the remnants moved into the Sun to recuperate after their period of neglect. Click on each photo for a larger view.

🐛 White fly encrusted Ficus. Variegated Ficus as most of you will know is very slow growing so any set back means it takes a long time to recover. When I left this little Ficus which is about 10 years old was resplendent in its variegated foliage. When I returned I found the worst case of “Ficus neglect” I have ever seen. If it was a child you would have reported its parents to the NSPCC. The photo below shows the plants sorry state after being feasted on by a plague of white fly.

When I saw the Ficus it was pleading to be put out of its misery.

🧟‍♂️ Seriously unwell Canna. Normally at this time of year Canna are dying back and all the goodness from the leaves is being drawn back down into the rhizomes (ugly bulbs). This is a managed process whereby you need to give them just enough water to see this process through. Too much water and they will rot. Too little and the leaves will dry up before they can impart their goodness to the rhizomes. The photos below show how well Cruella managed this process. Click on each photo for a larger view.

🐕‍🦺 Nero has dug up the lawn. Regular readers will know that we have two marauding Labradors who if left to themselves will happily take the garden apart. Nero the black Labrador has a penchant for digging which he is only allowed to practice in his kennel. I watch both dogs carefully and at the slightest attempt to dig I shout and everything stops. Cruella told me she didn’t notice him digging but did wonder why half the lawn was in his bed every night. The pictures below show only a bit of the damage marked in red. The wire mesh on the lawn is my feeble attempt to stop him digging elsewhere on the lawn. This cannot now be repaired till the Spring.

I’ve been assaulted by a cactus- and it hurt!

Cruella (my wife) has gone to our English house for her birthday (101 in Witch years). She flew the usual way: broomstick class, but, before she left she cautioned me to be careful in the garden, mainly because she worries about my habit of injuring myself whilst she is away. Highlights of my injuries during her previous absences include: split skull, lacerated fingers, numerous falls off ladders, and dislocated fingers.

However, this time there was something different about her warning, it was a curious mixture of menace and malice mixed with false concern for my health. Anyway the upshot was that I was reworking a water feature when without warning the large cactus that I was working under reached down and assaulted me by whacking me on the head with a spine filled branch. This resulted in a scalp full of small painful spines that have all managed to travel under my skin and will take weeks to come out. The photo below shows the culprit; I think it is smirking in a cactus type way.

The big branch on the left looks like it’s raising its arms in triumph!

28th November: Things I have been doing lately.

🌿 Repairing the lawn. Regular readers of this post will know that I spend an inordinate amount of my time repairing various lawns as Nero (one of our Labradors) proceeds to dig them up at every opportunity. To stop him digging in the same place I repair the lawn by infilling with a mixture of soil and compost and then place wire mesh over the damaged spot and pinning it down with large lawn staples. The photos below show the culprit at the scene of the crime and my remedial work. My lawn now has so much metal in it that there is a danger that it will come alive like Frankenstein during the next thunder storm. (Click on each photo for a larger view).

✂️ Tidying up unruly plants. Often you will find yourself with a plant that has gone “ugly”. Either it has grown lopsided or it has been damaged by the weather. If this is the case, then now is the time of year to tidy it up and take some cuttings. Most plants have stopped growing for the Winter, but are still capable of below ground growth at their roots. The plant below sits on the edge of my veranda and is in need of sorting out. The first photo below shows it before tidying up, whilst the second shows it cutback and ready to grow.

The benefit of this process is that you should get some nice cuttings to plant. The photo below shows some viable cuttings. These are then trimmed back to a leaf node, dipped in hormone rooting liquid and planted up. With a bit of luck some or all will survive and give me more free plants.

🧺 Saving soil. In Spain it is extremely difficult to get good top soil – I don’t know why – but it just is. Any soil I have ever bought in was either clay which was useless in the Sun as it turns to concrete, or, so full of rocks and stones as to be worthless. The best way to secure a good planting medium for your garden is to save the soil you dig up when planting trees or shrubs etc. The benefit of this approach is that your soil will be fully acclimatised to your garden and likely to be more friendly to your plants then anything you buy in. But before you use this soil you need to first use a sieve or similar to remove stones and rubbish, and then add some store bought compost to enrich it for the future. Once you have completed this process then just store the finished soil in an old compost bag for future use.

The first picture below shows my patented self built “over wheel barrow soil sieve” (catchy little title, it should sell well). The second photo shows the effectiveness of my invention.

💡 Installing lighting in my orchard. I am a big fan of having an interestingly lit night garden. By using lights in your garden you extend the usefulness and beauty of your garden. Lights are particularly spectacular if they are used to pick out trees as under lighting. The photos below show some of my newly installed lights. I fitted them, but was ably assisted by technical consultancy from my friend David. If you have not yet seen the tour of my night garden then look it up on YouTube, just search for the following “Spanish Garden – a night tour of an illuminated garden in Campoverde”.

The sap is dropping and the corms are fattening

I honestly believe if the above title was set to music we may just have a shot at winning the Eurovision Song Contest. Be that as it may I will have to set aside my song writing ambitions as there is so much to do in the garden and “Winter is coming” as they tended to say in that well known gardening programme “Game of Thorns”.

16th November: Things I have been doing lately.

⛓ Tying up my Cannas. If you have Cannas then it is important that you tie them up as the current strong cold winds will blow the stems over. In about a months time we can cut the stems off, but at the moment we need all the goodness from the plant to retreat down through the foliage and into the Corms (ugly fat bulbs). This process will ensure that the corms are fattened up ready to burst forth in the Spring with strong new foliage. The first two photos shows my Cannas being battered by the wind, whilst the third shows them nicely tied up. Cruella (my wife) helped with this; first she stilled the wind and then she tied the knots in the string. She is actually in the third picture but you won’t see her as she casts an invisibility spell on herself especially if she hasn’t got her make up on. (click on each photo for a larger view)

🔪 Pruning Fig trees. Fig trees have a habit of getting very large which makes it impossible to get the fruit right at the top. All over Spain you can see giant overgrown Figs trees in gardens that now require a chainsaw if you wanted to prune them. But it needn’t be like this. You need to prune your Fig tree every year to bring it down to the same size as your height. Normally Fig trees fruit on new wood, so by bringing the tree down to your height you are bringing the fruit within reach. You will need a saw, lopers and secateurs, and make sure they are sharp before you begin.

I have two Fig trees, a standard one and an espalier that I have been training for about 5 years. For a standard Fig tree, start by cutting out the following:

  • Diseased branches
  • Branches growing down towards the ground
  • Branches that cross over
  • Branches that are closer than 45 degrees to another branch

Once you have done all of the above then take the leading branches back to a viable bud. At first this can all look scary, but don’t worry the tree will soon burst into leaf and hopefully next years fruit will be bigger and better.

If you have an espalier then take off all the back branches that are against the wall then cut off any branches and stems that do not conform to your espalier wires. The first two pictures below show my trees prior to their pruning.

The next two photos show the trees now neatly shorn and ready for another growing season.

🌱 Weeding around bulbs. By now bulbs should be showing through in your flower beds, but unfortunately mixed in with the bulb stems will be grass shoots. Now the danger here is that you will hoe out the bulbs thinking they are grass. To ensure you don’t make this mistake you need to indulge in some wild gardening; yeah that’s right you’ve got to take off your gardening gloves and get down on your knees. Get amongst the bulbs and feel each stem. Bulb stems will normally be round and taper quite rapidly. Grass on the other hand is thin and blade like and does not taper so rapidly. All you need to do is break off the grass stems; and keep doing this once a week until such time as the bulb stems shade them out. The photo below shows me wild gardening amongst bulbs.

What you can’t see is that I am actually in the nude! I take wild gardening seriously

✂️ Cutting back hedges. If you have hedges that have stopped flowering then now is the time to tidy them up; especially if they are overshadowing borders or lawns. Now, I am not talking about the big January cut back you need to leave this till later so that the birds and insects can have their last feed. Just trim things back into shape. The first photo below shows part of my flowering hedges that grow over and shadows the lawn. I don’t mind this when they are full of flowers, but now that flowering has stopped they need to be trimmed or the lawn will die. The first photo shows the overgrown hedge, whilst the second shows it cut back and letting light get to the lawn.

The last cut is the sweetest

Which of course is what PP Arnold should have sung way back in 1967 instead of all that “deepest” stuff. What sort of gardener sings about deepest when really it is the Winter lawn song. Yep, it’s true as I perambulated around my lawn making the final cut for this year I belted out our Winter anthem “the last cut is the sweetest”.

6th November: Things I have been doing lately

✂️ Making the final cut of the lawn. If you have a lawn, and I hope you do, (because too many people in Spain turn their garden into a tiled car park) then now is the time for the final cut of the year. Speaking personally I leave the last lawn cut as long as possible in order for pollinating insects to get their final fix of nectar and for the birds to get their last feast of pollinating insects (the circle of life). When you make this final cut, it is important that you raise your lawn mower cutting blades as high as you can. The reason for this is that the grass will now stop growing, or grow only slightly. This means that any wear and tear of the lawn will not be replaced by new growth, and if your not careful you could end up with a threadbare lawn by next Spring. This is especially the case if you have marauding Labradors as we do.

The first photo below show me strimming the lawn edges prior to the final cut. Cruella (my wife) said that we should dress up a bit to try and revitalise our relationship. At least I made an effort; I asked if she was happy with my outfit, but she said she was expecting a “Fireman”. The second photo shows my lawn mower resplendent in the finished lawn but minus me and emulating the “Mary Celeste”.

🍁 Clearing up Fig leaves. Now I know it is normal to clear up leaves after they have all fallen. However, the exception is Fig leaves which tend to fall over an extended period of time. Because they are so large these leaves can blanket and suffocate new seedlings and dormant plants. This is especially the case if there is any rain and they become sodden. Ideally you should try and rake them up each week. The easiest thing to do is to leave a plastic bag near to the tree and just fill it up as you go. At the end of all this we are going to compost the leaves, but that is for another post. The photo below shows one of my Fig trees half way through shedding its leaves.

See you next year dear sweet Figs

🌱 Planting out seedlings. If you have gathered and grown on self seeded seedlings, then now is the time to plant them out so that they can get established in the warm soil before the ground cools down. This will give them some growth and a good head start in the Spring. I gather lots of seeds which will be started off in the Spring but the self sown seedlings of Marguerites and Osteospermums, (I mention both because my eagle eyed friend Jackie told me off for just saying Marguerites last time) if grown on should be ready for planting now.

I have gathered and grown on over 100 of these; and remember these are all free plants. The two photos below show some of my beds being planted out ready for next year. When planting seedlings it is important to remember the size of the final adult plant. All too often people plant seedlings too close together and end up with overcrowded planting where each plant cannot express itself or reach its full potential (sounds like an election manifesto promise)!

☁️ Cloud pruning Ficus. In recent posts I have talked about the necesssity of reshaping some plants before the big Winter cutback. This ensures that they will keep a good pleasing shape throughout the Winter months. Where I find that plants/trees are turning into large shapeless lumps then I always consider cloud pruning them to give them all year interest. Ficus is a good candidate for cloud pruning. It is slow growing and the variegated variety looks stunning when cloud pruned.

The first photo below shows my large variegated Ficus before it’s annual reshaping.

Someone needs a haircut

The second photo shows the Ficus after I have unleashed my artistic talents on it. Cruella (my wife) often asks me what shape I have pruned it in to. I adopt a far away look in my eyes and say that “Art is an expression that transcends religion, culture, country, people and time.”. Her only response was to call me a prat.

I call it “moonlight over Campoverde”

Gardening with frostbite and trench foot!

Yes, you’ve guessed it, we are at our English house at the moment and the weather is appalling. It rains every day, there are freezing cold winds and it is dark by 4pm in the afternoon. This wouldn’t be too bad, but my body is programmed to automatically seek wine once it gets dark. If we have many more cloudy dark days I will be an alcoholic.

Our reason for being here, apart from drinking too much wine, was twofold. Firstly to welcome home from Japan the idiot son, where he has been single handedly saving the Japanese economy – at least that’s how he tells it. But also to see the mighty Tottenham Hotspur beat Inter Milan in the Champions league.

Now in between all this excitement I couldn’t wait to get out into the garden. Despite the cold and the wet, gardening must be done. I asked Cruella (my wife) if she wanted to come out to help, but she refused saying she would rather remain hanging upside down from the ceiling as it was warm up there. To be honest she prefers this time of year as it gives her so much more time without daylight.

28th November: Things I have been doing lately

✂️ Tidying up the front garden. If you have followed previous posts about the English house, you will remember that I try to keep things simple here. The front garden is mainly shrubs and trees set amongst pebbles with a low stone walled bed to the front with a smal hedge and other plantings. Meanwhile the backgarden is walled with flagstones and various climbers covering the walls.

Both gardens are small and easily maintained. In effect this is the ideal way to garden when you split your time between houses. The Spanish house has the large garden and takes a lot of love and maintenance. Whilst the English garden requires only a big winter cut back and a mid summer tidy up.

Anyway, I digress. From the photos below you can see that the front garden was becoming a bit overgrown and needed a cutback and tidy up.

From the photos above you can see there are a number of things that need tidying.

– The hedge in the raised walled bed needs trimming back. When doing this you should aim for a square top but make sure you camber the sides out slightly so that the lower edges of the hedge still get sun and there is no die back.

– The Yucca flowering spikes need trimming off. When handling Yucca always wear eye protection and gloves. Push long handled croppers right to the base of the spike and cut it back cleanly. Only leave flower spikes that that still have flowers. As soon as the flowering is over take off the spike.

– The small Yew by the front door (Taxus Media) is beginning to lose shape. It backs on to a wall and not enough sun is getting to the rear and one side. You have to trim these very carefully and make sure you do not cut into the brown, otherwise the plant may not grow back in these areas. As this plant grows it is becoming less shapely, despite my best efforts. It may have to go in the next year or two.

– Trimming back the large trees that are attempting to climb through the lounge window is the big job. This requires me to stand precariously on my small stepladder placed on unstable pebbles and wield an electric hedge trimmer at the full extent of my reach. I do not recommend this to those of you at home. I did promise myself that     I would get into the centre of the tree and trim back the branches to make a new lower and more manageable shape. But it was freezing out there so I gave up.

The photos below show the newly cutback and re-shaped front garden. What do you mean “you can’t see any difference”. Cruella said that when she eventually ventured out to pick poisonous mushrooms. If you look carefully at the second photo you can just see her foot sticking out of the ground; the ground was too hard to dig deeper. Three bloody hours that took me – no difference indeed!!

Things to do in Winter that do not involve skiing!

Those of you who are assiduous in your attention to this blog will remember the great skiing disaster of earlier this year, when Cruella (my wife) and I were persuaded to trying skiing in Austria by our idiot son. The outcome could have been disastrous to people of our advanced years, but luckily we had the good sense to quit attempting to try and ski after just one day and instead became professionals at Apré  Ski.

Anyway the whole point of this introduction is to offer you a host of things you could be doing in your garden rather than attempting skiing, or other extreme sports.

7th November: Things I have been doing lately.

💨 Rescuing wind damaged Cannas. Given that we live in lovely temperate Spain, there seems to be a lot of extreme weather about. Following the great drought, we had floods, then following the floods we had high winds. All we need now is a plague of locusts and I will be convinced that it is “the end of days”.

The winds have damaged a lot of tall plants including my lovely Cannas. Now the big problem here is that Cannas need time for all the goodness from their leaves to go back down into their Corm (ugly bulb). If this doesn’t happen then next years leaves and flowers will be much reduced. So you can’t cut the leaves off just to tidy the plant up. Instead you have to tie up the plant so that the leaves can fulfill the function that God intended for them.You can cut them down in January.

The first two photos below show my poor damaged Cannas. The third photo shows the Cannas tied up with one of Cruella’s old broomsticks. The shed is full of them, when they lose their twigs she puts them in there and I have to spend most of my time in there avoiding their erratic attempts at flight.

🗡 De-spiking Yucca. Tidying Yucca is similar to a military exercise. You first need to get fully kitted out. If you fail to do this, then prepare to bleed, because you most certainly will, or at the extremes get ready to lose an eye. The spikey leaves of Yucca are one of the most vicious weapons in the plant kingdom so you must be prepared. You will need, thick gardening gloves, good eye protection, sharp secateurs and a lot of luck. The easiest way to remove old Yucca leaves is to get below the plant and pull sharply down on each leaf one at a time. Given a good yank they should come away, those that don’t can be cut by your secateurs.

The first photo below show an untidy little Yucca that I have grown from a cutting. The second photo shows the same plant tidied up and looking rather handsome.

🛏 Tidying my Winter borders ready for Spring growth. I tend to leave my borders after the heady heights of Summer, so that I can let all the plants that self seed deliver some nice new little plants for me – and it never fails. Margeurites are great self seeders, yet I find it difficult to grow them from seed, so the solution is let them do the hard work. The photo below shows my untidy beds after Summer; to think Tracey Emin was shortlisted for the Turner Prize for her unmade bed, there’s no justice.

6E604E83-67D1-454C-B4AB-22BA6A83A703
This is being entered for the Turner Prize next year.

From this photo you can see that there are thousands of self seeded Margeurites of various sizes. Now the trick here is to weed and clear the bed at the same time as you are sowing the largest and most mature seedlings. When you dig the seedlings up you must ensure that you do not handle them by the stem, instead hold them by the leaves (it’s a bit like someone picking you up by the throat as opposed to holding your arm). Stems are easily damaged, you might not notice it, but the plant will not perform if it is damaged.

The first photo below shows the lovely root structure that the seedlings have grown. The second photo shows how to hold them as you gently ease them into their new home. The final photo shows my lovely “made” bed. (Click on each photo for a larger view).


🎖 Extreme weeding around bulbs. Welcome to the world of extreme weeding. I tend to liken it to the “Special Forces” area of gardening and actually consider myself more or less in the SAS, our motto is “who dares weeds”. Anyway, what I am trying to say that as bulbs start to show themselves by popping up at this time of year, you must be careful not to carelessly remove their growing tips by just hoeing over the top of them. Extreme weeding calls for the abandonment of the hoe and foresaking the trowel; yes, I mean hand-to-hand combat.

When bulb tips first appear they can look just like a blade of grass, and as they are usually surrounded by grass and weeds, this is an easy mistake to make. However, what you must do is get your hands in there, no gloves, and feel each stalk. Bulbs will have a more rounded and robust feel in as much as they will not bend very much. Grass on the other hand is thin and blade like and bends easily. You need to pull up all the grass blades growing around and between your bulbs so that they are not competing for nutrients. You will probably need to do this two or three times, until the stems of the bulbs are big enough to shade out the grass.

The photo below shows an area of bulbs that has benefited from “special forces” action. I wear my uniform when I am doing this and I have even awarded myself a medal; Cruella refused to attend the award ceremony, but both dogs and the cat were there.

C7774C42-4950-43DC-B6F5-DA74EA6CD3D2
Sometimes I wear night vision goggles.


Pruning things and avoiding scary caterpillars

Right that’s it there is no time to mess around, it is time to get amongst those plants and trees and get pruning. I have pruned and cut so much lately that I am now officially known as the Sweeney Todd of Campoverde. Cruella my wife calls me the Demon Gardener; but that is only when she is being kind.

23rd November: Things I have been doing lately.

🍇 Pruning grapevines. In our climate the beginning of winter is the time to prune grapevines. By now all the leaves should be in a shrivelled state and will have already started to fall off. Because grapevines start to regrow in very early spring, if you leave it much later you will be cutting off new growth and they will weep sap and may be liable to infections

I have three grapevines, one is quite big and is on wires at the front of the house, whilst the two others are growing along balustrade by the swimming pool. Cruella and my friend Karl attempted to kill all my vines this summer in the worst case of plant cruelty seen by the RHS. Both are slated to appear before the International Court for the Prevention of Cruelty to Plants; I will let you know what happens, but it will probably be on television. The photos below show my grapevines in their unpruned state. Click on each photo for a larger view.

The aim when pruning grapevines is to end up with one or two main stems. You need to cut all last year’s growth off each stem leaving just two potential buds. If you get scared leave three; I do sometimes. Once you have trimmed the stems up and cut them back, then you need to tie them into the wires. It is important that you tie them in, or the wind will thrash the stem around and bash your two little buds to death. The photos below show the grapevines in their new neatly trimmed state. Click on each photo for a larger view.

🍈 Pruning an olive tree. I only have one olive tree and it is about 5 years old. This basically means that it is old enough for its first big prune. Now, I was just going to trim it up to keep it fruiting as I have enjoyed processing the olives and then storing them in jars for future use. When I mentioned this to Cruella, she called me an idiot and reminded me that we still had jars of olives from years ago. To be honest I could corner the market in antique olives; if there were such a thing. I am thinking of opening and EBay shop!

Anyway, the outcome of the great olive debate was that I decided to go for a radical topiary type prune. If you are going to radically prune any tree it is important that you study the tree shape over a number of days and think about how it might look when completed. The olive tree and I have been warily watching each other for days. Like boxers circling in the ring we have been weighing each other up and making feints towards each other. Occasionally as I passed I would stick my head under the canopy to check out the branch structure (I cannot think of an appropriate methaphor for this that doesn’t sound rude). The photo below shows the unpruned olive tree ready for the battle.

25BF28DB-7152-46D6-A5CE-E9EE1243BBB2
The calm before the storm

Well, the outcome is that we finally went at it today. It wasn’t easy, there was no quarter given and none asked for. We both new this was a fight that could only end one way. I was armed with secateurs, long armed lopers and a pruning saw. The olive tree had five years of pent up wrath and energy, slashing branches, and knotted areas that made the saw bounce and get blunt. I lost blood and the tree lost branches. At the end we both stood panting, leaning against each other and covered in tree debris. The photo below shows the final pruned version. I will admit it will take time to look it’s best; Cruella cried when she saw it, but only because that is where she normally buries kittens and little rabbits.

F0D07752-0AF0-40F8-BC83-5C4439B84D56
Oh dear, I think my fellow garden blogger and tree specialist Tony Tomeo.wordpress.com  may want a word with me

✂️ Pruning Canna. You will remember that early this summer I removed two large Pampas grasses and replaced them with lovely Cannas. Well the Cannas have been a great success, they have grown quickly to be large ornamental statement plants. Whilst they are not quite finished flowering yet, they start to suffer from browning leaves at this time of the year. This is perfectly normal and is part of the process whereby the plant returns all its goodness to the underground rhizomes. I will eventually cut the top growth down in January (I think, but I will see how they turn out). But in the meantime you need to cut out all the dead brown leaves so that the plant does not become unsightly. The photo below shows one of the newly tidied Cannas. It wouldn’t let me do anything at first, I think it had seen the olive tree and was scared!

F682C8B7-5D97-4297-964F-29AF2D41DD02
Whose a pretty boy?

🕷 Replanting Spiderwort. Those of you who follow this blog avidly will no doubt have followed the great Spiderwort Experiment of a few Posts ago. At that time I was experimenting with taking and growing cuttings from Spiderwort (Tradescantia). Anyway, at the risk of boring you I have suffered another Spiderwort event. Something has been eating one of my Spiderwort and making it look very moth eaten see first photo below.

EEE9A89E-143B-4FFB-AB78-686AD9F57510
Who has been eating my Spiderwort?

After close inspection all I could find was the bright green caterpillar shown in the first photo below. However, and perhaps coincidentally, lurking nearby was the much larger ferocious looking caterpillar, second photo below. After a swift trial where I was both judge and jury, I found the green caterpillar guilty and he duly suffered the ultimate penalty. The big ferocious looking one was found not guilty; mainly on the basis that he intimidated the jury. Nevertheless he was banished by being launched into the farthest reaches of the wild part of our garden. What do you mean you didn’t know we had a wild part to our garden. Right then I shall dedicate a future Post to this exciting topic.

The final photo below shows the replanted Spiderwort. I had to use cuttings from other plants as the original was too far gone. I also removed the top 20cm of soil from the pot and renewed it with fresh compost, just in case something was lurking in the soil.

AF6DE631-D1E9-4F23-B941-51908AC5E35D
All new and ready to grow

Weeding your garden with Lewis Carroll

I am a fan of the works of Lewis Carroll, and have been since I was a small boy. What I like about the “Alice” books is their topsy turveyness, things happen when they are not supposed to happen. And so it is with weeds here in Spain. In the normal organised world weeds grow in Summer and die in Winter; but not here in Spain, weeds grow in Winter and die in Summer. The end result of all this is that it is time to get weeding.

15th November: Things I have been doing lately.

Weeding borders with bulbs: The secret to successful border weeding is “hoe, hoe, hoe”, that’s my seasonal joke. But it’s true, if you hoe beds at least once a week with a sharp hoe then they will remain weed free. However, there is one exception, and that is where you have bulbs planted. When they first emerge, most bulbs look exactly like a blade of grass. If you happily continue to hoe, you will successfully behead all your bulbs (see the Queen of Hearts – Alice’s Adventures in Wonderland). It is important that you mark where you have placed bulbs so that you remember year to year where they are. I mark where I have planted bulbs with white stones (see Lewis Carroll diaries) – great literature and gardening, I hope I am not casting pearls before swine here.

The photo below shows an area of border where bulbs are planted, but as you can see it is difficult to tell which is the bulb stem and which is weed grass. You can’t hoe because you would kill friend and foe; what to do.

8E339591-006D-4784-A528-3932E9B166FD
Never mind “find Wally”, find the bulbs.

What you need to do, is what you should always do in life when you have problems – get on your knees. Not just for praying – though that is important – but to weed by hand. And I mean weed by hand, no gloves and no trowel, just good old fingers. Get your hands in amongst the grass and the bulbs, and by feeling the stems you will be able to differentiate between each. The grass will have thin flat blades which bend easily, whilst the bulb growth will be slightly rounded and more unyielding. Using your fingers get amongst them and tease out the grass, don’t try and get roots out, just pull out the top growth. You will have to do this weekly, to keep the grass in check, but after a few weeks the bulbs will out compete the grass for light and they will win the race for space and you can stop. The photo below shows the bulbs newly released from their weed hell. I explained to my wife Cruella that it is a bit like a hostage situation with me as the negotiator, she just rolled her eyes and called me an idiot. Personally I think I am the Jack Reacher of gardening; but not the Tom Cruise version, the bigger one you see in your imagination.

6B8154E7-4242-423A-B82B-24E17574A02C
There they are – another hostage situation resolved.

Weeding rose beds: Now weeding rose beds is my least favourite type of weeding (everyone has their favourite don’t they – oh well, just me then). The predicament I face is that my main rose beds are only 2/3years old, and therefore still quite close to the ground, see the photo below. This means that weeds get underneath them and get especially close to the stems. To get at the weeds normally involves a bloodbath, where I lose pints of blood trying to get the weeds out from under the stems. The rose thorns shred my hands and arms as I try valiantly to save them from weeds. As I take a daily aspirin, I then bleed profusely and end up changing the colour of the roses with my blood; a bit like the gardeners in Alice’s Adventures In wonderland – I bet you didn’t see that coming eh!

F13A4781-67A6-421D-8120-CAB387B2FC15
It’s a jungle out there.

My new solution, which involves slightly less blood loss is to paint neat weed killer directly onto the weeds with a small brush. I did try and use an empty roller deodorant filled with weed killer (which I planned to patent) but the bloody thing didn’t work, it just wouldn’t roll. Anyway, the photo below shows me applying the weed killer. Cruella took the photograph, she kept telling me I had a stupid look on my face and that I should look down, but she was just trying to let everyone know my hair is thinning.

F4314090-523D-47FD-AB22-81F5CBE76346
A thorn between a few roses

I don’t want to boast, but I am big in the waterworks department

Unfortunately the above statement, if said to a female researcher in a lift in the House of Commons, and in the current climate, could have ruined my Parliamentary career; but as gardeners you know I am talking irrigation – what else! Anyway we are well into Autumn and you should be both capturing water and adjusting your irrigation systems. So following our big “compost special” of a few weeks ago; we now have the excitement of an irrigation special issue – what fun!

13th November: Things I have been doing lately

💧 Capturing rain water. Here in Spain water is a precious commodity for us gardeners. So when it rains we need to capture as much rain water as possible. In the past, at the first sign of rain, I have been known to run around the garden frantically opening the compost bin lids and filling trugs with water. But those days are gone, I now have NASA level “state of the art” water capture facilities, I am even thinking of selling water back to the government.

If you’re not capturing rain water at the moment, then the basics are simple. Get guttering fitted to the roof of your house and then capture water in rain butts as it comes off the roof. This need not be expensive, you can even use a dustbin bought from the China shop and then drill a hole and attach a tap. Remember all that water is free and you will need it during the summer so the expense of the guttering etc will eventually pay for itself.

The first photo below shows one of my two large “Ali Baba” type water butts that are attached to the house roof guttering down pipe. Each water butt holds 500 litres of water and I drain them off into boxes as I need the water, this allows me to use them as dipping troughs for watering cans.

The second photo below shows my large 1,000 litre water tank. These are very commonly used in agriculture in Spain to hold all sorts of fertilisers and chemicals. They can be bought for about €50. Though if you do buy them and they have been pre-used, make sure you flush them out thoroughly with water. In my case, the water tank is below the level of a large tiled pool area. When it rains the tiled area around the pool provides a huge quantity of water which is then channeled by a large pipe into the water tank. Note the dust bins beside the water tank. I siphon off the overflow water from the tank into a series of linked dustbins which I then use as dipping troughs for watering cans. I can often be found out there during thunderstorms cackling like Professor Frankenstein shouting “it’s alive” as I adjust the various valves to move water around.

⏲ Adjust your irrigation. It is now time to adjust your irrigation systems for winter. We have been having nice weather lately, and the strong winds in the last few days mean that plants will dry out quickly, but even so, you need to adjust things now or you are in danger of rotting plants. When the weather is cold enough to stop growth, overwatering will mean that plants will sit in water as they do not need to draw it up. This means their roots will rot and turn to mush; by the time you notice this it will be too late. For lawns I would recommend 10 minutes every 3 days. For orchards I would recommend 15 minutes every 5/7 days. And, for plant beds 5 minutes every 3 days. If it rains heavily turn off your irrigation system for about 3 days.

In total I have 11 metred watering timing points around my garden. All of them need to be adjusted and reconfigured for the changing season. Most importantly they need to have their batteries changed on an annual cycle (sometimes less than annually). You must make sure that you diarise this; if you fail to change the batteries, one of two things will happen depending on the type of timer. Some types will just open up and water night and day for ever; and if you are away this can be expensive. Others will just stop watering and the first you will notice is when all your plants start dying.

The photo below shows one of my many complicated irrigation points. It is a real Heath Robinson contraption but such fun to mess around with. It drives my wife Cruella mad I spent a whole day this week just adjusting all the timers for Winter. She locked me out, but I have built a tunnel back into the house under the compost bins, she only discovered I was back in from the smell!

A395F33F-7DDB-4DD4-9620-53AA6EE63607
This is both functional and entered for the Turner Prize


I’m back in Spain and Cruella hasn’t killed my cuttings – but the cat is missing!

Regular followers of this blog will know that I went back to England for a week to visit our son and daughter, tidy up our English garden, and see the mighty Tottenham Hotspur – the football team I support – beat Real Madrid. But forget all that, the big news is that whilst I was away I left my wife Cruella in charge of a few precious cuttings. Normally this is the equivalent of leaving a fox to babysit your chickens; the end result is normally death. But in this case they survived and look reasonably healthy; mind you I haven’t seen the cat and Cruella does have new fur gloves.

7th November: Things I have been doing lately

🌱 Creating more Yuccas. You can never have too many Yuccas. These versatile canes are easy to grow from pruned cuttings and provide you with some lovely greenery without the need for constant watering; what’s not to like. OK they can poke you in the eye if your not careful, but that’s your fault – health and safety gone mad. Anyway, I have lots of Yuccas of various sizes, and I love their flower spikes. But once they get too high, you end up with a flower spike that can only be appreciated by passing aeroplanes, or my friend David’s drone. It is at this point that you need to cut them back and then use the cuttings to propagate more. The picture below shows a Yucca that I have chosen to cut back, from this you can see that the plant is about 3.5 metres high which means the flower spike is more or less invisible from the ground.

FA42D38A-6A62-4742-8CA3-D7A5BADD77B0.jpeg

When you prune a Yucca you should be thinking of reshaping the plant and where you want new growth. New spikes will grow from around the edge of your pruning cut, and will in effect become branches of the Yucca. Once you have cut the plant back, each of the pruned stems has the potential to become a completely new plant. If you want to plant these then firstly you need to trim back any brown dead leaves on the stem, then trim back the green leaves until only a few are left at the top. The easiest way to do this is to put on your gardening gloves (Yucca leaves are very sharp) and holding the stem in one hand, pull the leaves down sharply with the other. Do this all around the stem until you have the required growth left. See the first picture below. If you have not decided where to plant your cuttings, you can leave them for up to a week in a trug filled with water. See second picture below.

I decided to plant my cuttings in pots in a terrace at the back of my house which I have only just noticed looks a bit bare. I have decided to enliven this terrace in a number of ways as it is North facing and can look a bit dull. The picture below shows the Yuccas in their new home.

25863F32-98A9-4ED4-A628-878EBC18F780
I call it the Yucca Terrace

Oh by the way the cats back, the picture below shows her drinking thirstily out of a water feature. Cruella denies everything, but I think we are looking at a potential kidnap situation here. I suspect, but can’t prove it yet, that the cat has been kept captive as a means of putting psychological pressure on me. Cruella wants a new kitchen and I did receive a weird telephone call from someone demanding a new kitchen or the cat “gets it” I think that explains everything.

54DBB2F8-5C83-47F9-93E6-1F7A059D244D
Pussy cat, pussy cat, where have you been?


Bulbs, seedlings and the answer to the Spiderwort Question

I am in England at the moment tending to our English garden, but due to the wonders of technology I can regale you with my activities in Spain. Because I have been so busy with the garden and other things I just haven’t had time to post any material on this site. I know you will be disappointed and thousands of you are currently standing in your gardens holding your trowel with vacant looks on your faces and waiting for my next instruction, but fear not here we go.

1st November: Things I have been doing lately

 😀 Planting bulbs. This is the time for planting bulbs in Spain. A lot of the heat will have gone from the soil and there will be a bit of rain around to help them on their way. I have decided to plant some flag irises that I saved from this year, and to place them in a bald corner of my lawn. The most natural way to plant bulbs is to scatter them and let them fall where they will. The temptation is to start to rearrange them because you don’t like where they have fallen, but this is a mistake and the plants when they grow will look too “staged”.

I did think I would make things easier for myself by using a bulb planter. But save your money, they just bend, especially if you are planting on hardish soil or in my case lawn. Just use your trowel, you don’t need to dig a hole, force your trowel into the soil then push hard one way to open up a gap in the soil and pop yourbulb in at the appropriate depth.

The photos below show my trug of bulbs that I cleaned and stored from last year, the bare corner of the lawn, and my scattered bulbs ready to be planted – but not by the useless bulb planter. Just click on each photo for a larger image.

🌿 Replanting seedlings. As we go into Autumn all of the plants in your border will have set seedlings by now. If you haven’t already taken cuttings or seeds, then this is your last chance to get plants for free. My favourite for this is Margeurites. This daisy which is ubiquitous in Spain has a long flowering season and loves full sun. Not only that you can cut them back after flowering and off they go again.

Now the problem with self set seedlings is that they are clustered around where the mother plant was, and not necessarily where you want them. This means you have to transplant them to where you wish them to be. To be successful in this endeavour there are a few rules:

– Prepare the soil where you intend to plant the seedlings by weeding, feeding and watering.

– Only transplant seedlings either early in the morning, late afternoon or on overcast days. Never attempt to do this in full sun as they will wither before their little roots start working.

– Wait till the seedlings are 7-10cm high before attempting to transplant. If they are too small there rootsystem will not be well enough developed.

The first photo below shows the seedlings where their mummy left them, and where I don’t want them. The second photo shows them transplanted where they will be happy. The canes crossed over the seedlings are to stop rampaging Labradors.

🕷 The answer to the Spiderwort Question. Keen followers of this blog will know that a while ago I engaged in cutting edge scientific experimentation, the results of which are being eagerly awaited by the scientific and gardening communities. The aim of the experiment was to decide what was the best process for propagating Trascedentia (Spiderwort). Was it by taking cuttings and planting them in pots? Was it by planting directly into the soil? Or was it by placing cuttings in a glass of water.

Well, (drum roll) the wait is over. My findings are as follows:

– the cuttings in pots grew the fastest and put on more leaf, but they were planted in compost.

– the cuttings in the soil all survived and are slowly growing.

– the cuttings in a glass of water quickly grew a profusion of spidery fine roots and where easily replanted in pots with just a quick dibber to make a hole.

In effect each method was successful. But my recommendation would be the method to be used should depend on where you intend to place the final plants. If you intend to plant in the soil and your soil is prepared then plant straight out directly. Again if you intend to plant directly in the soil, but you want to make sure of success, then plant first in pots before replanting in the soil. If however you just want to add some bulk to plants that are already in a pot, but which are getting a bit sparse, then you can’t beat the glass of water, it is quick and relatively easy. Make sure you use rainwater and change every week if possible.

I am exhausted after all that experimentation and my white coat needs laundering. My next experiment was going to be the “chicken and the egg”, but my wife won’t let me have a chicken.

The pictures below show the final outcomes of the experiment. Just click on each one for a larger image.