I prepare for Winter and Cruella worries that Helga has anorexia

Although the garden is still full of flowers it is time to begin the long process of preparing for winter. Whilst winter on the Costa Blanca is nothing like as severe as in other parts of Europe, you still need to get on with it or before you know it winter will be here.

I have been hampered as usual by Cruella (my wife) and her chicken related problems, but I have persevered.

20th October 2026. Things I have been doing lately in the garden:

  • Protecting plants for over wintering
  • Harvesting the last of the summer fruit
  • Overwintering my Chillis
  • Admiring my hedges
  • Dealing with chicken eating disorders

Protecting plants for overwintering. Although we don’t have the destruction of frosts on the Costa Blanca (or rarely), we do have strong winds and sometimes heavy rain, both of which can be very destructive to plants. Because I have a large garden I need to start this process quite early in the autumn. In particular I have been dealing with the following plants.

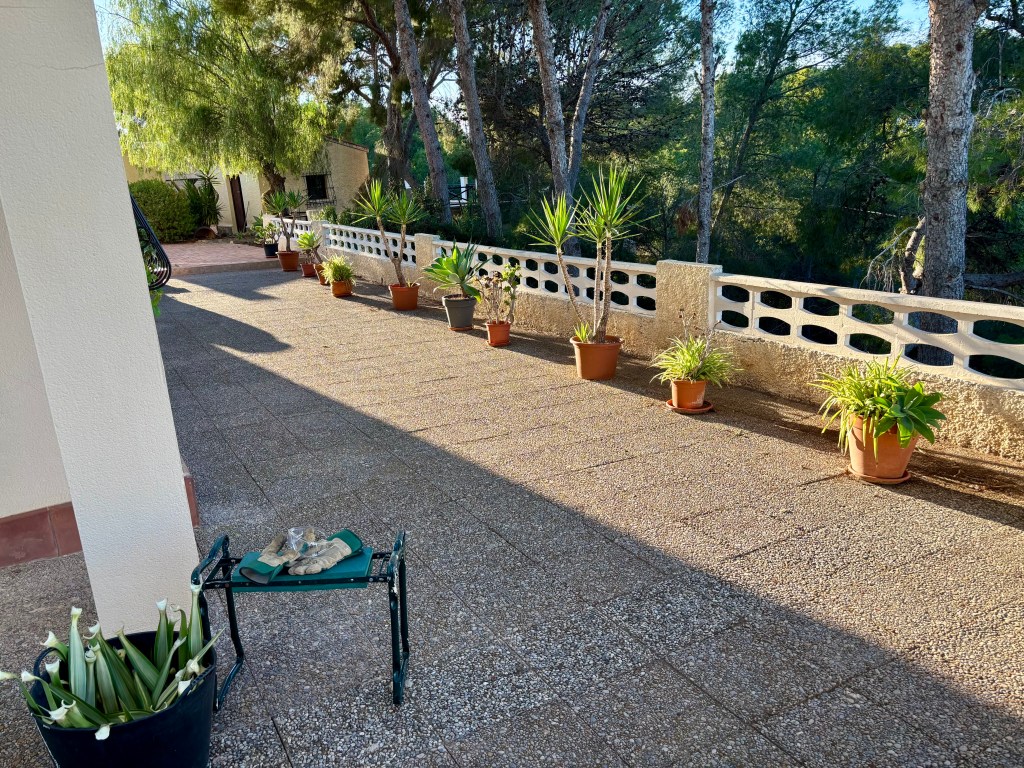
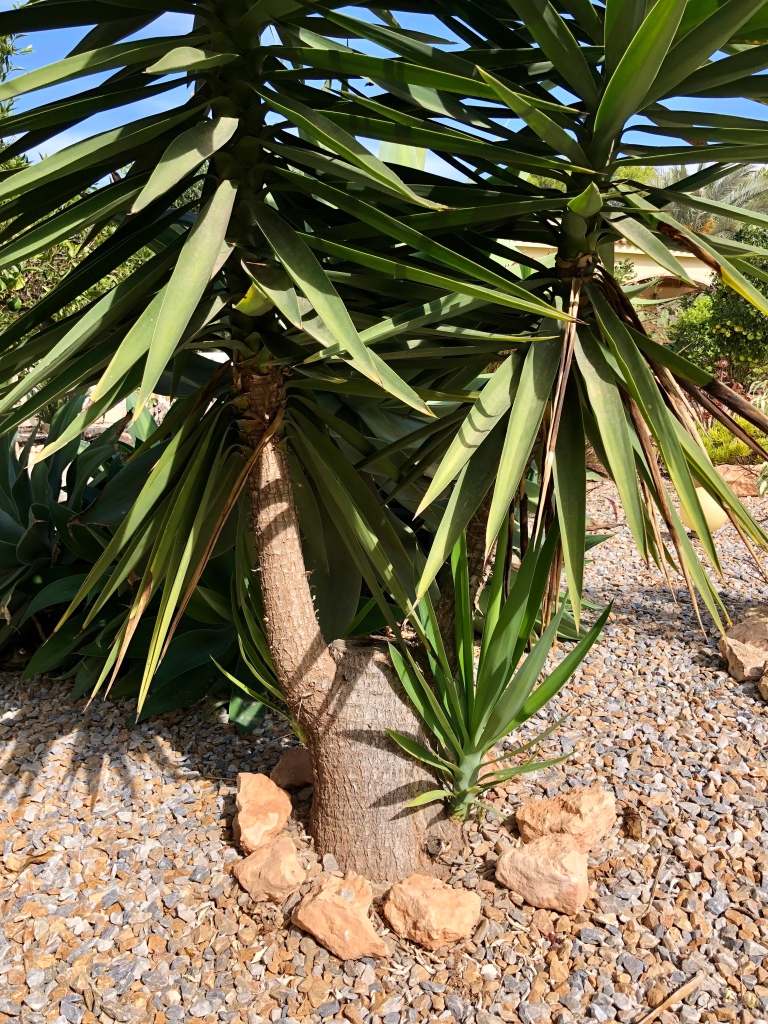
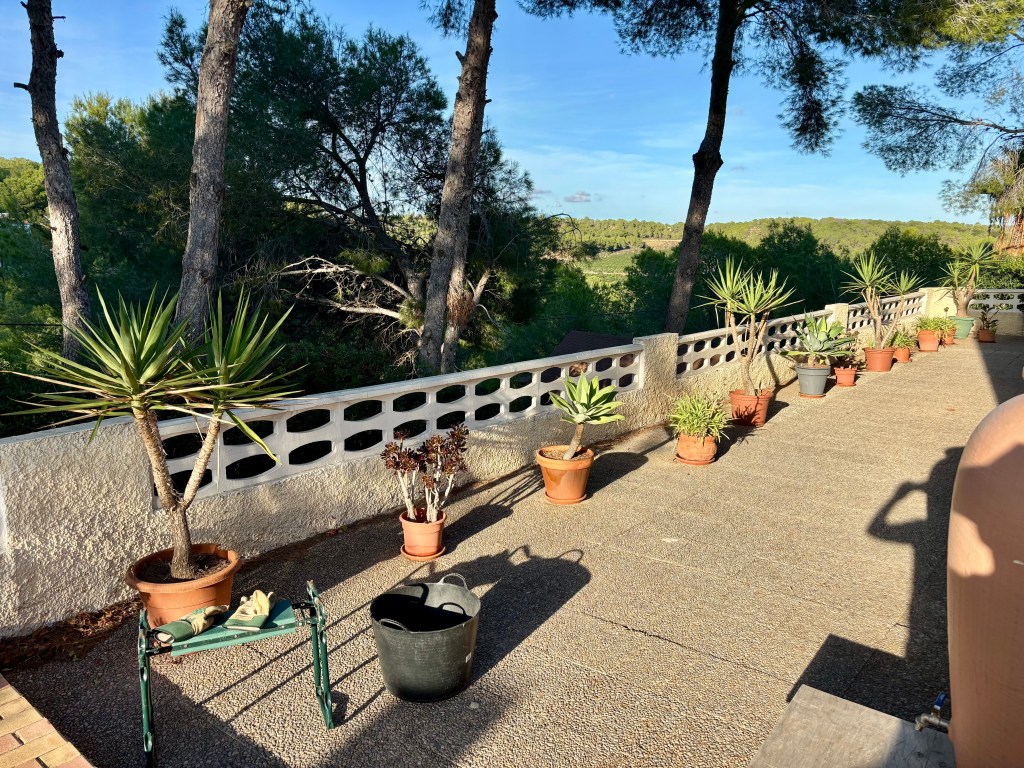
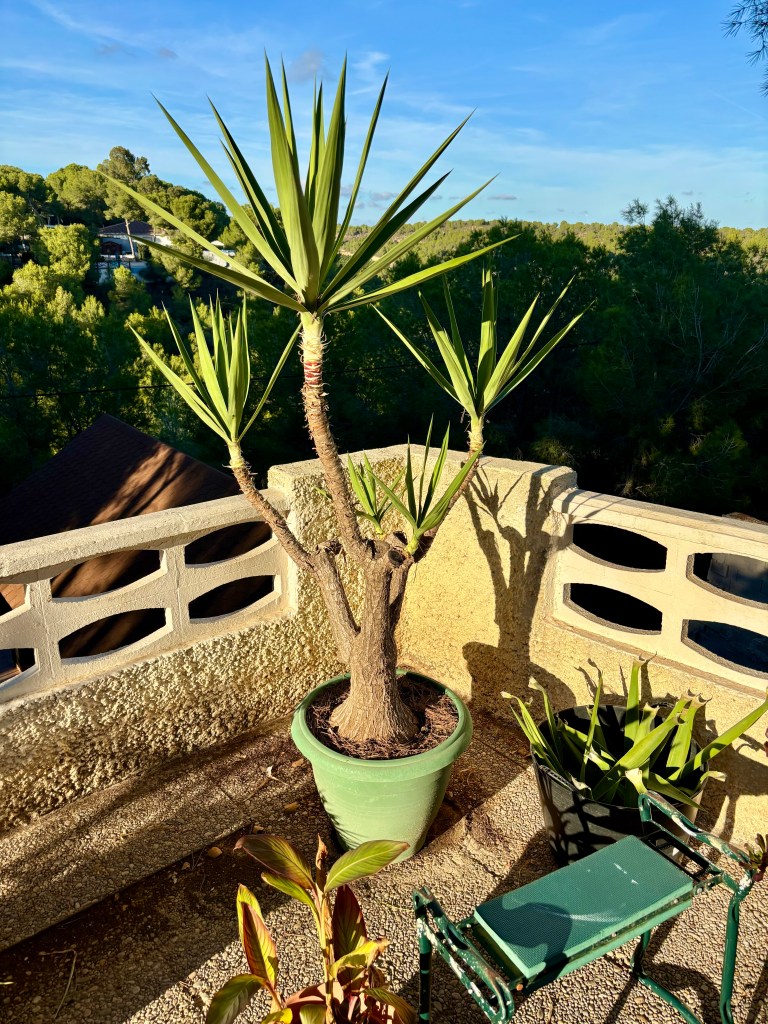
Succulents and Yuccas. At the back of my house I have a number of succulents which can be substantially damaged by winds. These need to be cut back and thinned. The easiest way to do this is don your gardening gloves and wear eye protection. Then just sit down by each plant and pull down on each frond consecutively around the plant till you are happy that it has an upright look and is suitably tidy. Photos below show my progress.
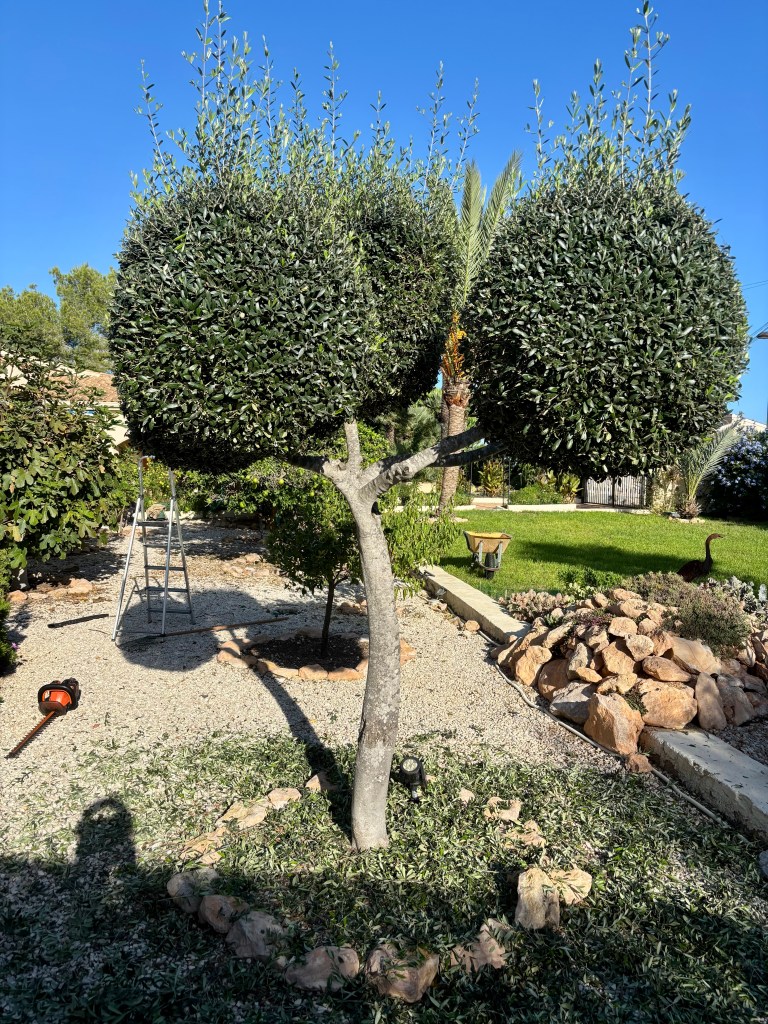
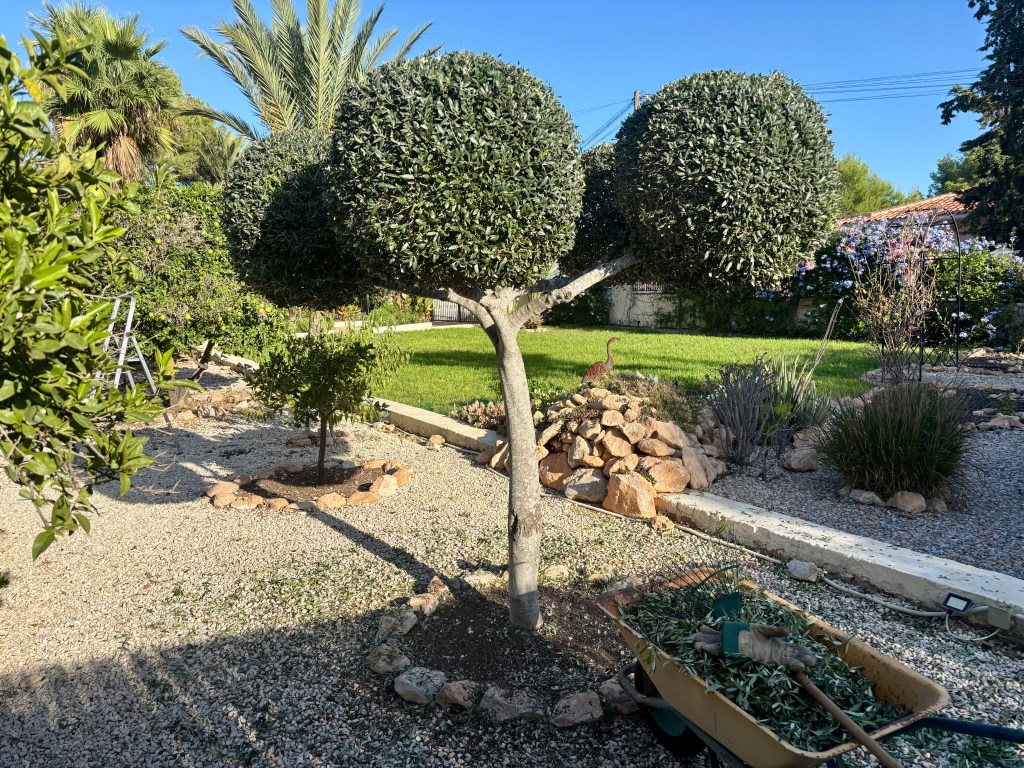
Cloud pruning my Olive tree. If you have a cloud pruned or just shaped Olive tree then now is a good time to give it a tidy up. I need to trim my Olive about three times a year but it only takes half an hour or so with electric hedge trimmers. Before and after photos below.
Stripping back Strelitzia. If your bird of paradise plant is looking a bit the worse for wear after our very hot summer, then now is the time to give it a trim to get it ready for the coming rains. Once the leaves of your plant have bowed over and are touching the ground, then they are not coming back to the perpendicular no matter how much water or feed they receive. Instead it is time to go round your plant taking out all the bowing, crossing or diseased stems. The photos below show my activities.
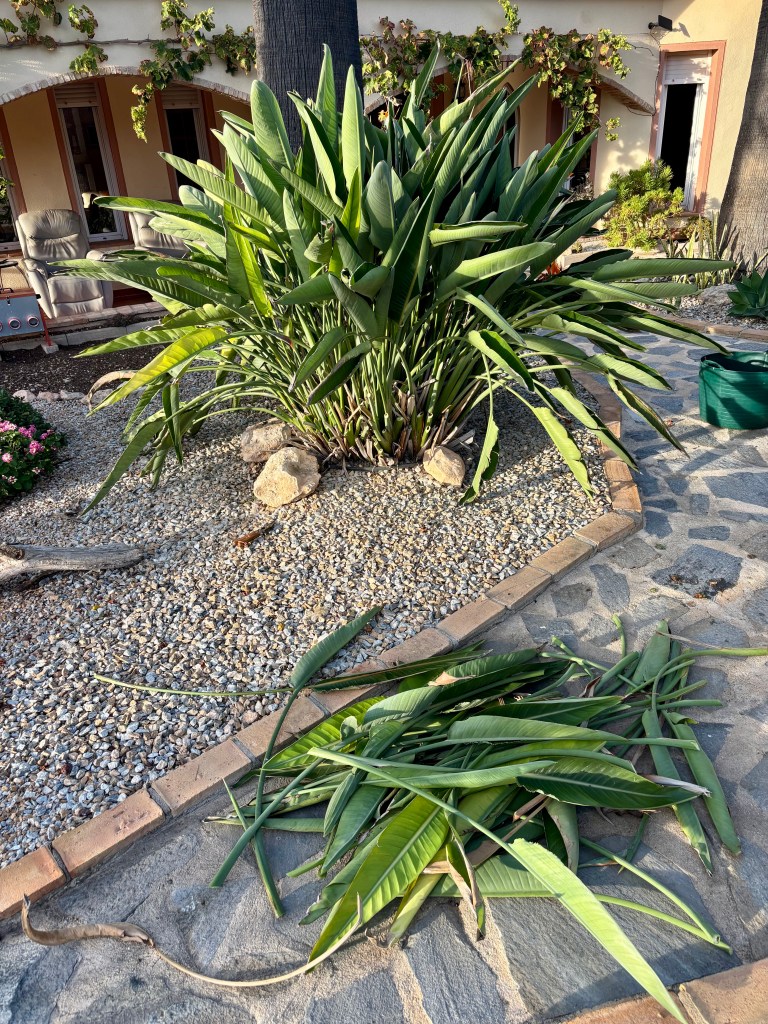
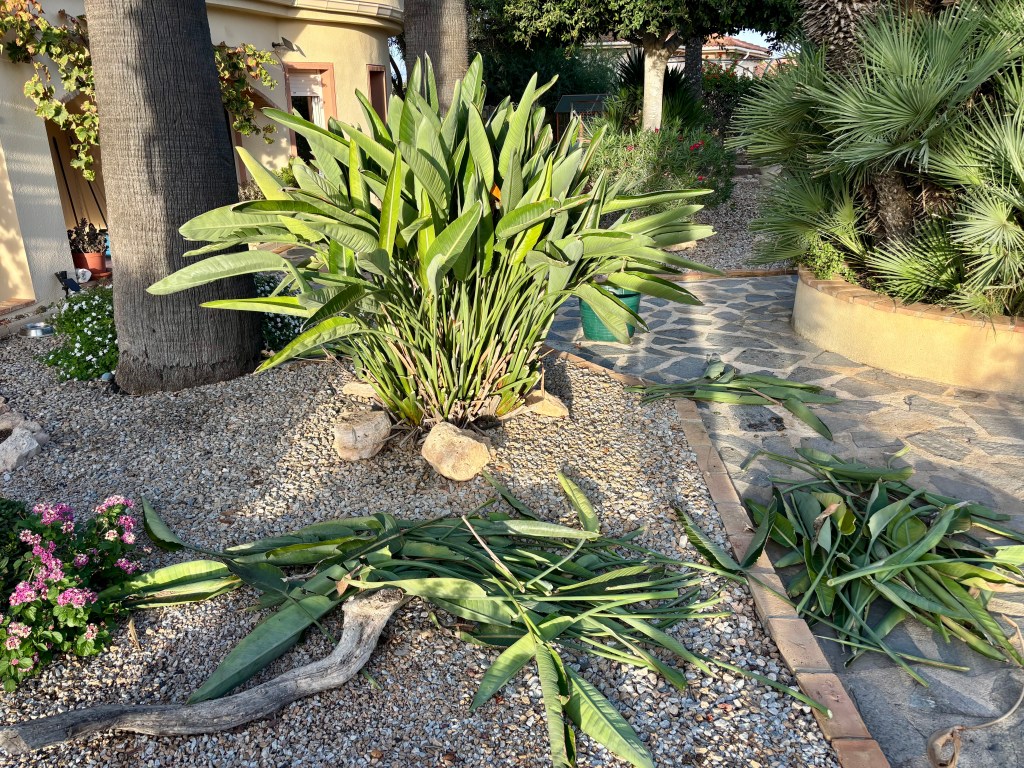
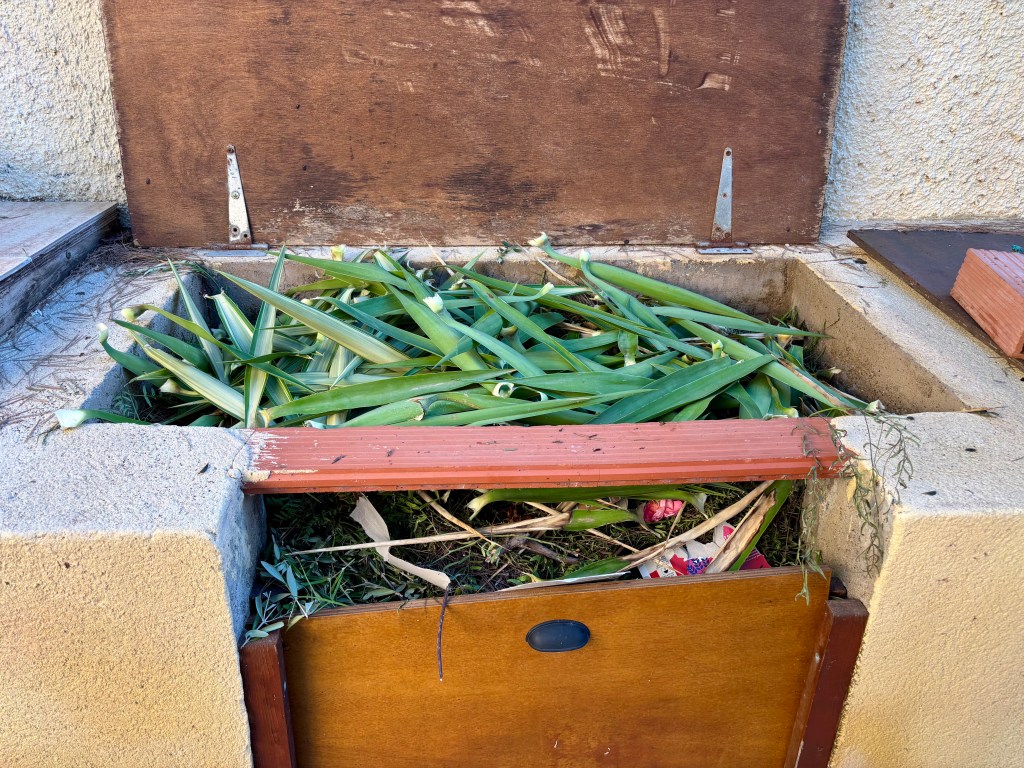
Don’t forget to compost the results of your cutback. If you haven’t got a compost bin then go out now and buy one.

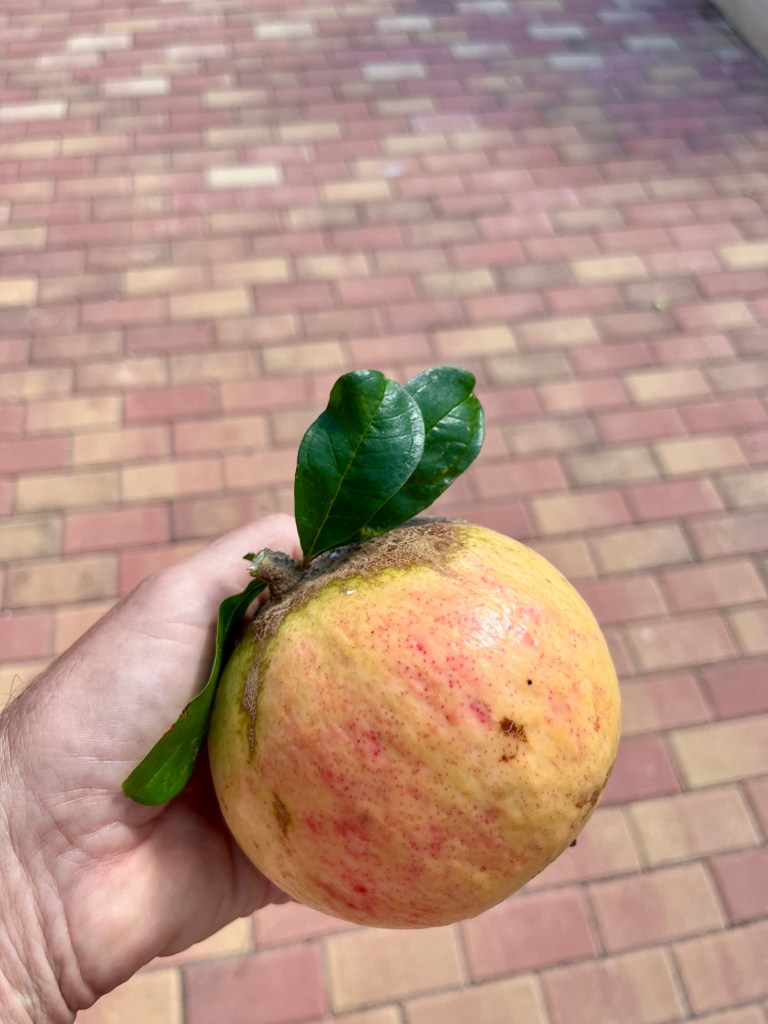
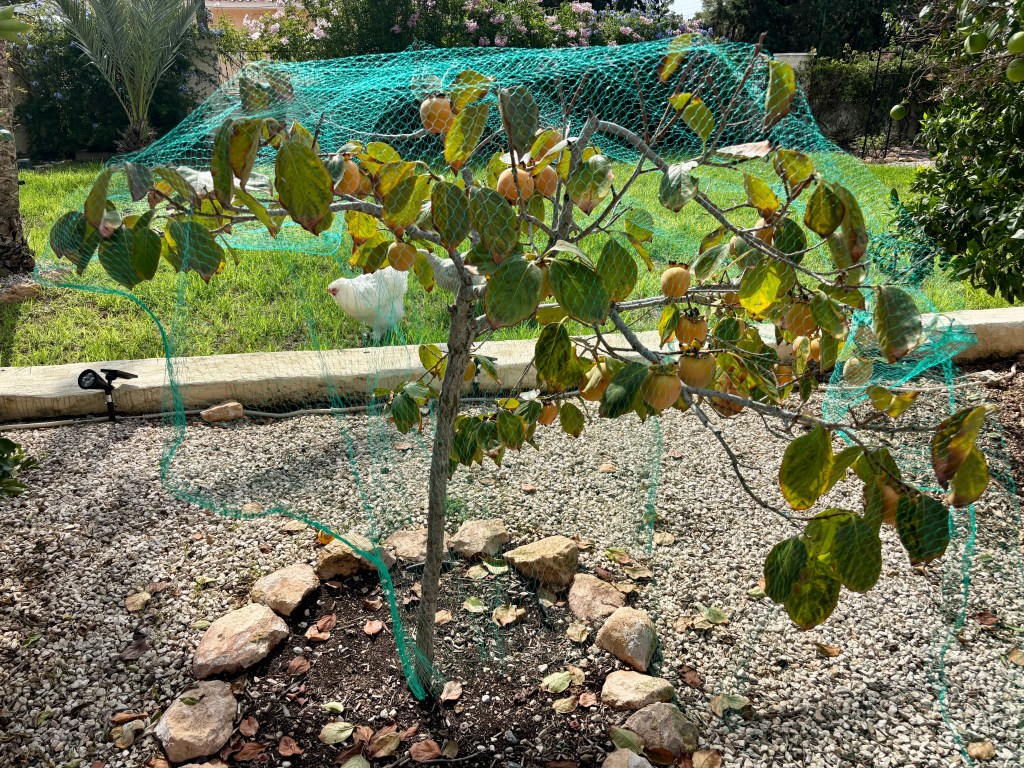
Harvesting the last of the summer fruit. Persimmon or “Kaka” as the Spanish so unromantically call them, are lovely sweet tasting fruits that taste heavenly. If you only have a little bit of space for just one tree, then I would recommend Persimmon. It is perfectly suited to the Spanish climate and its fruit is ready just as summer turns to Autumn, and before we start getting citrus.

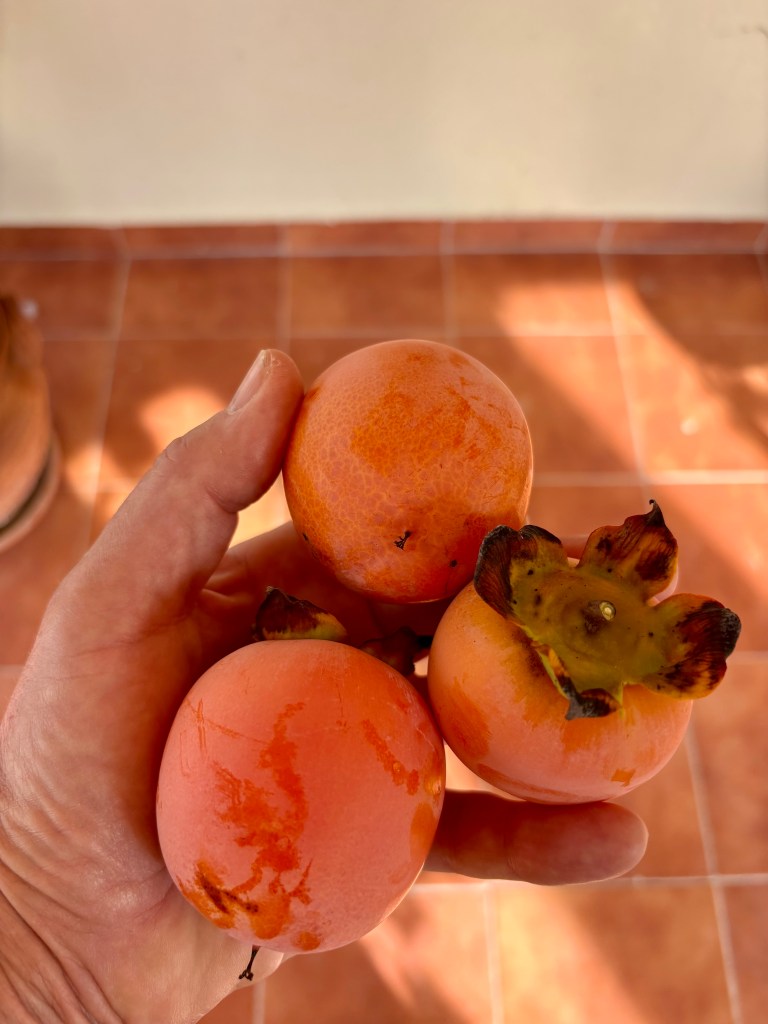
I have just the one Persimmon tree and it gives me about 30-50 or so fruits each year, each of which is about the size of a small apple. To harvest Persimmon you need to net it when the fruit is hard and yellow otherwise the birds will beat you to it. As the fruit begins to ripen and turn yellow you need to begin daily harvesting before the fruits turn fully red. This simply involves wandering around the tree each day seeing which fruits are the reddest and then giving them a gentle little squeeze to see if they have started going soft.

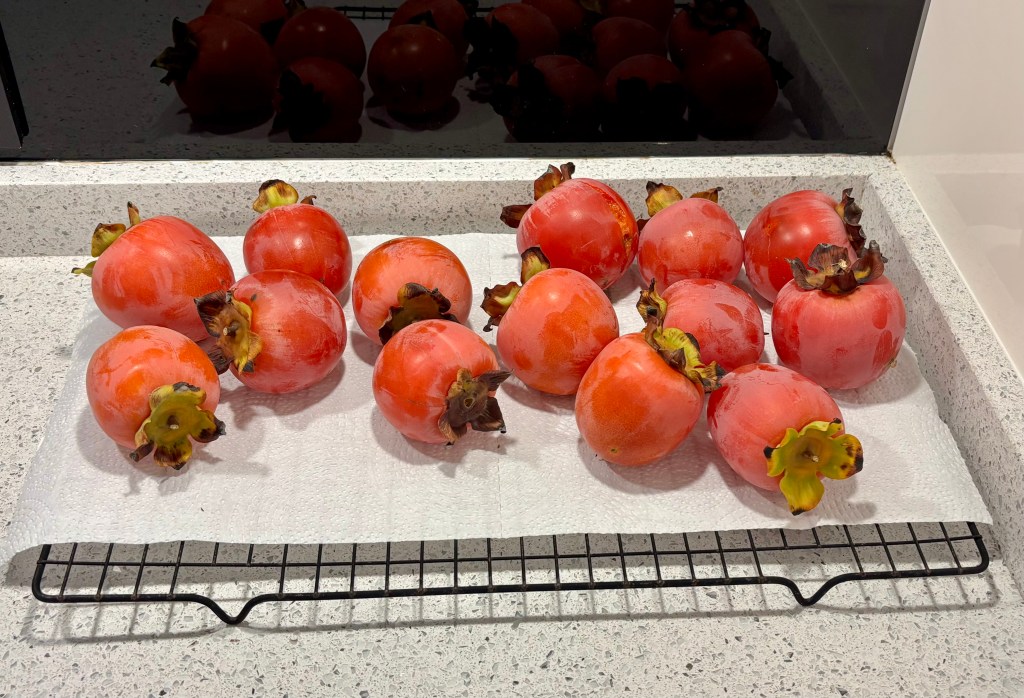
Once you have decided which fruits are ready then use your secateurs to cut just above the fruit but making sure you leave the top attachment. Once off the tree then stand them on a mesh tray in your kitchen and they will happily ripen off the tree. If possible eat them in order of softness. Cruella and I enjoy two each day with our porridge (Cruella accompanies hers with centipedes and spider legs, I just have other fruits) The photos below tell the Persimmon story.
Netting is essential

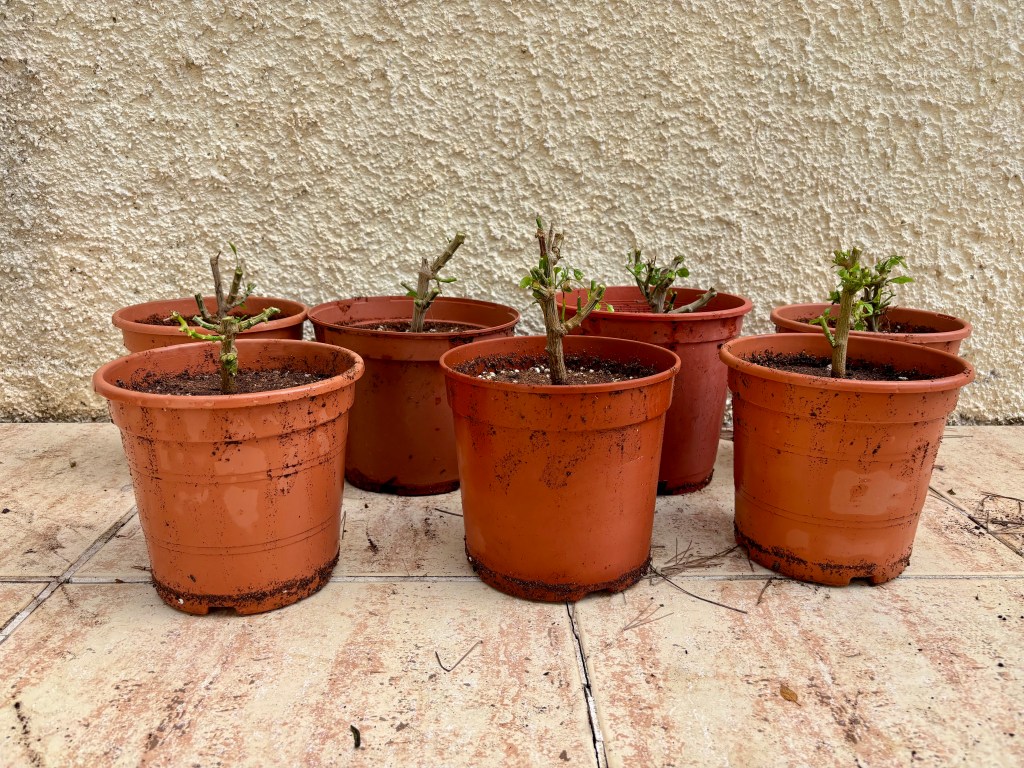
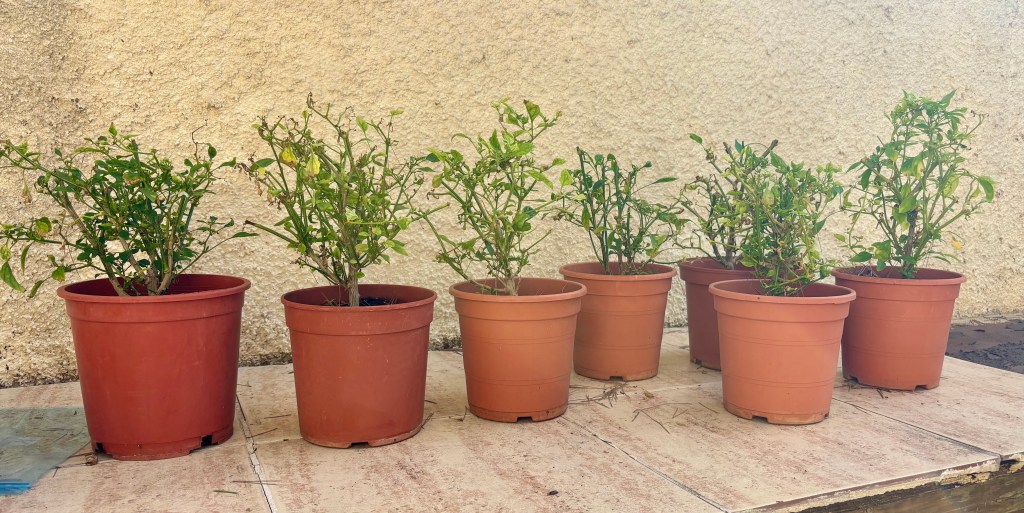
Overwintering my Chillis. Although this sounds like a Benny Hill innuendo, I am being serious. If you have successfully grown chilli plants this year then you do not need to discard the plants at the end of the summer. In my last post I showed you that I cut the foliage back on my Chillis by about half and placed them on my potting bench. After a summer of producing hundreds of lovely Chillis, their summer is over and I would only get little distorted fruits.

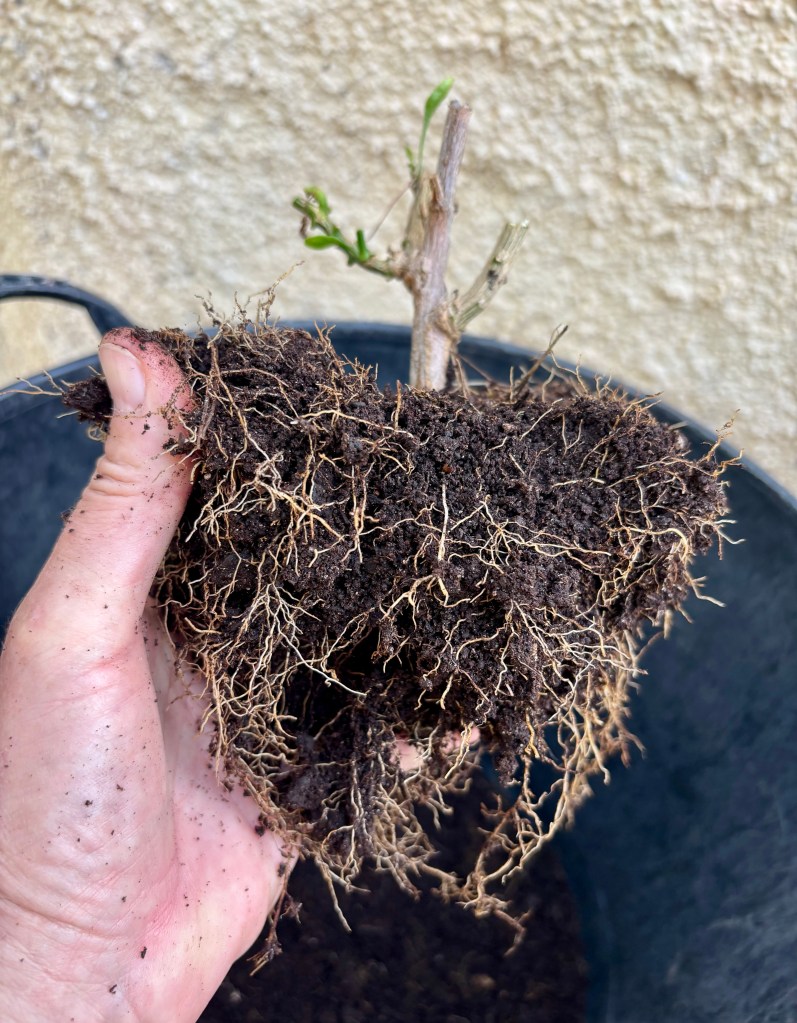
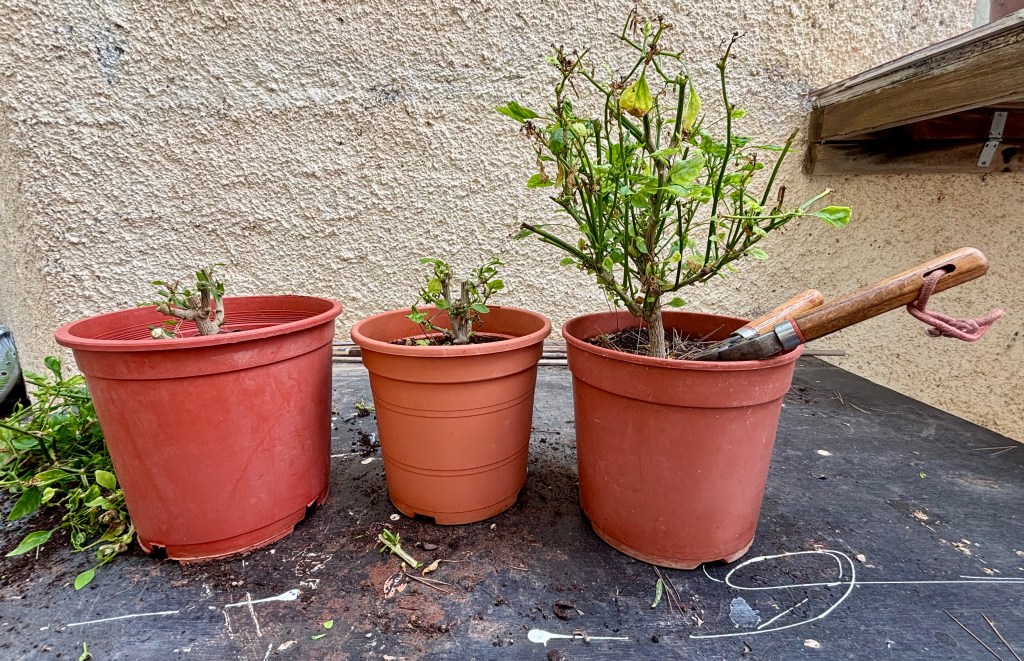
Now that they have rested for about a month I now cut them back drastically and repot them in fresh compost. The process is simple, just take them back close to the stem leaving one or two leaves. Then ease them from their pot and loosen all the old compost from between the roots (be gentle and don’t damage the roots). Sometimes you may need to trim the roots if they have become a bit excessive, but I didn’t need to this year.

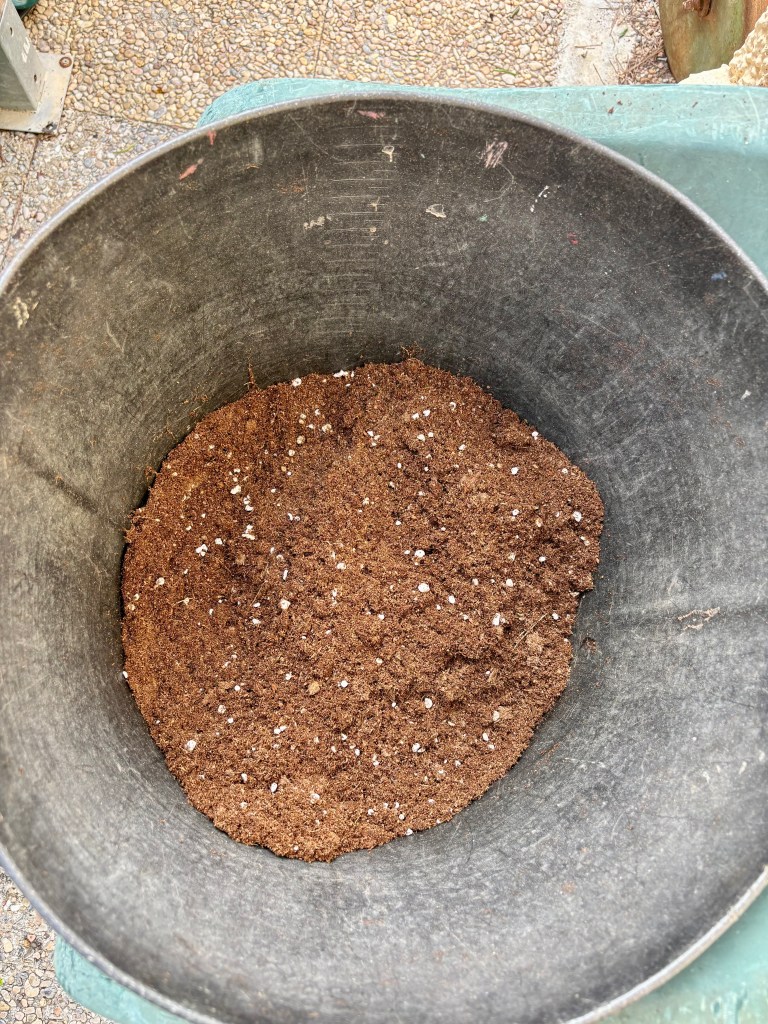
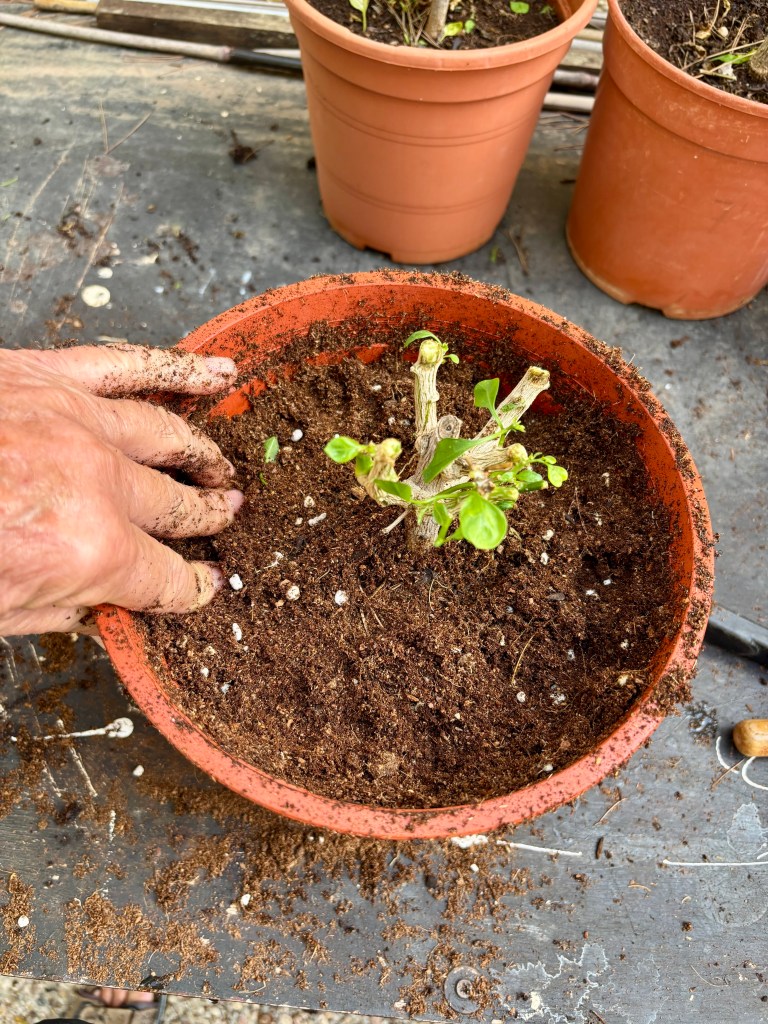
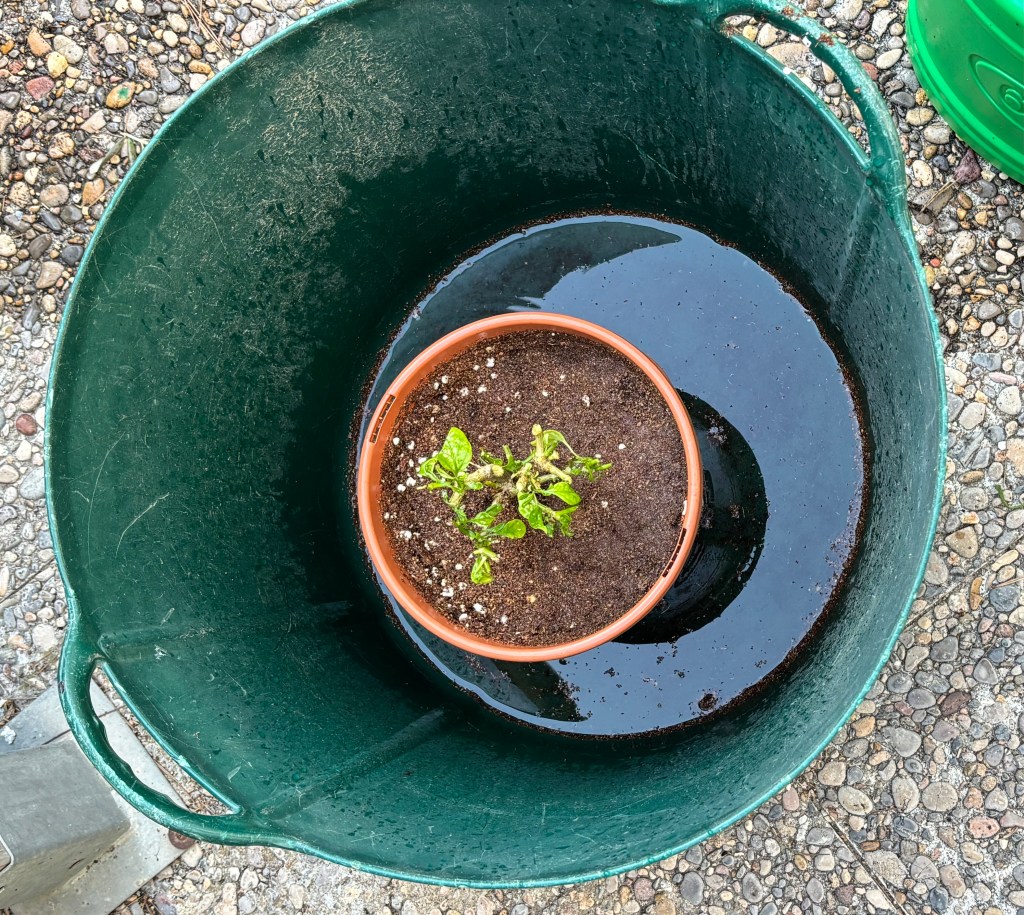
Fill a clean pot with good high quality potting compost, ease your plant back into its new home and make sure the compost is firmed down around the plant. The final stage is to water it whilst it stands in a trug. Leave it in there for no more than five minutes, take it out and stand it on your potting bench. Water very sparingly over winter and wait for fresh leaves in the spring before moving it back into the sun. The photos below show all the stages.
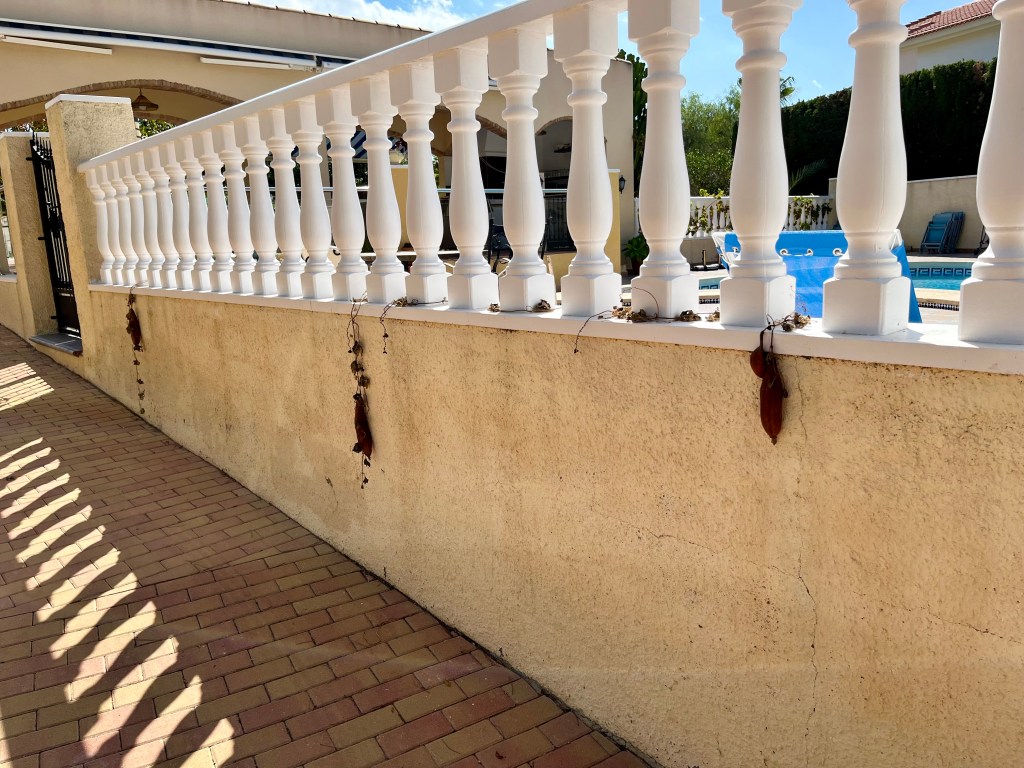
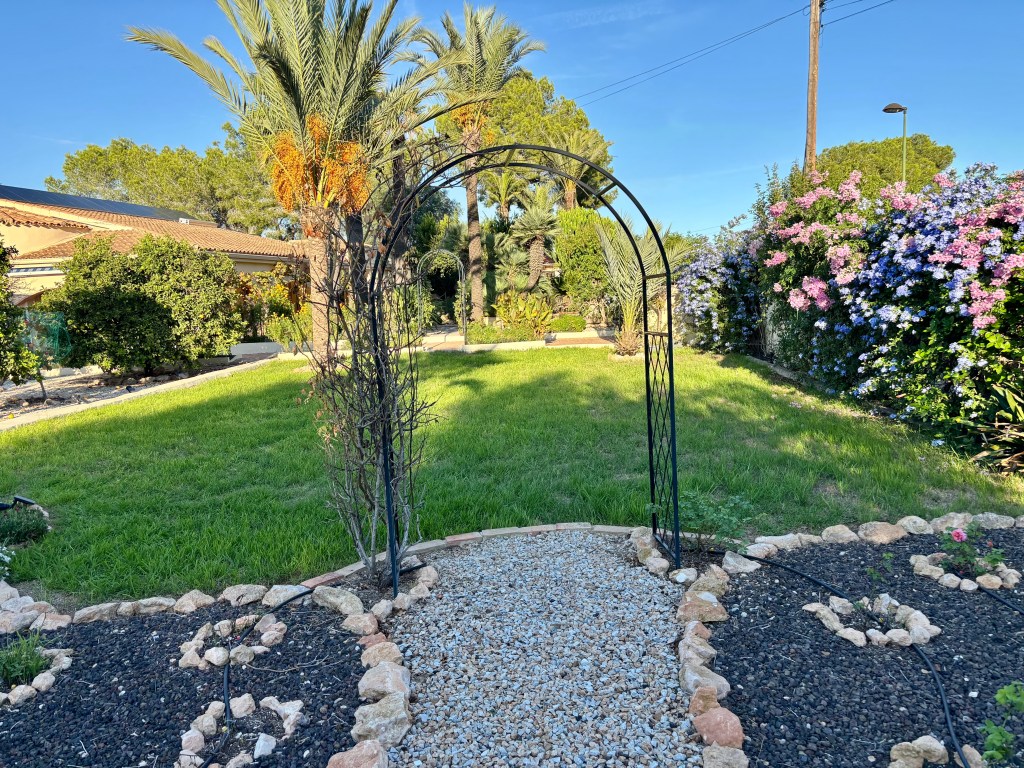
Admiring my hedges. Regular readers of this blog will know that I am a big admirer of hedges in Spain. A diverse, closely planted hedge provides a lovely floriferous boundary to any property. Unlike fences or balustrades they offer privacy, security and a flowering wall that will provide sustenance to thousands of pollinators and provide homes for little birds.

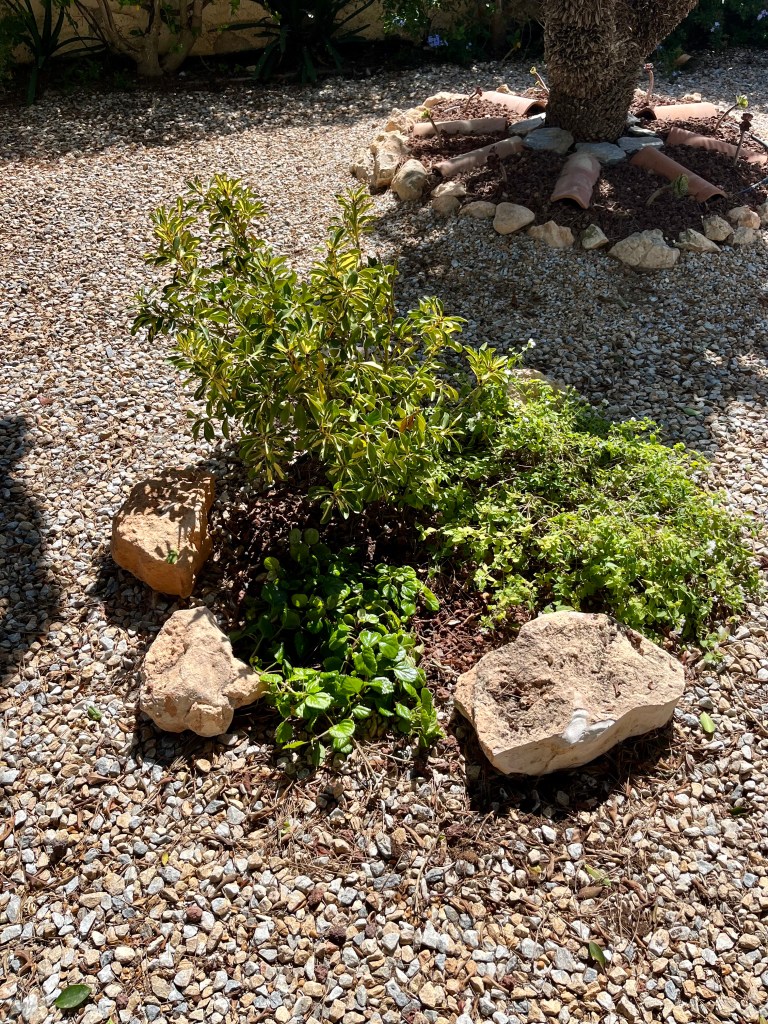
I thought I would show you a photo of only part of my many hedges. They provide a beautiful backdrop to the garden. Sometimes it is just nice to stand back and enjoy them.
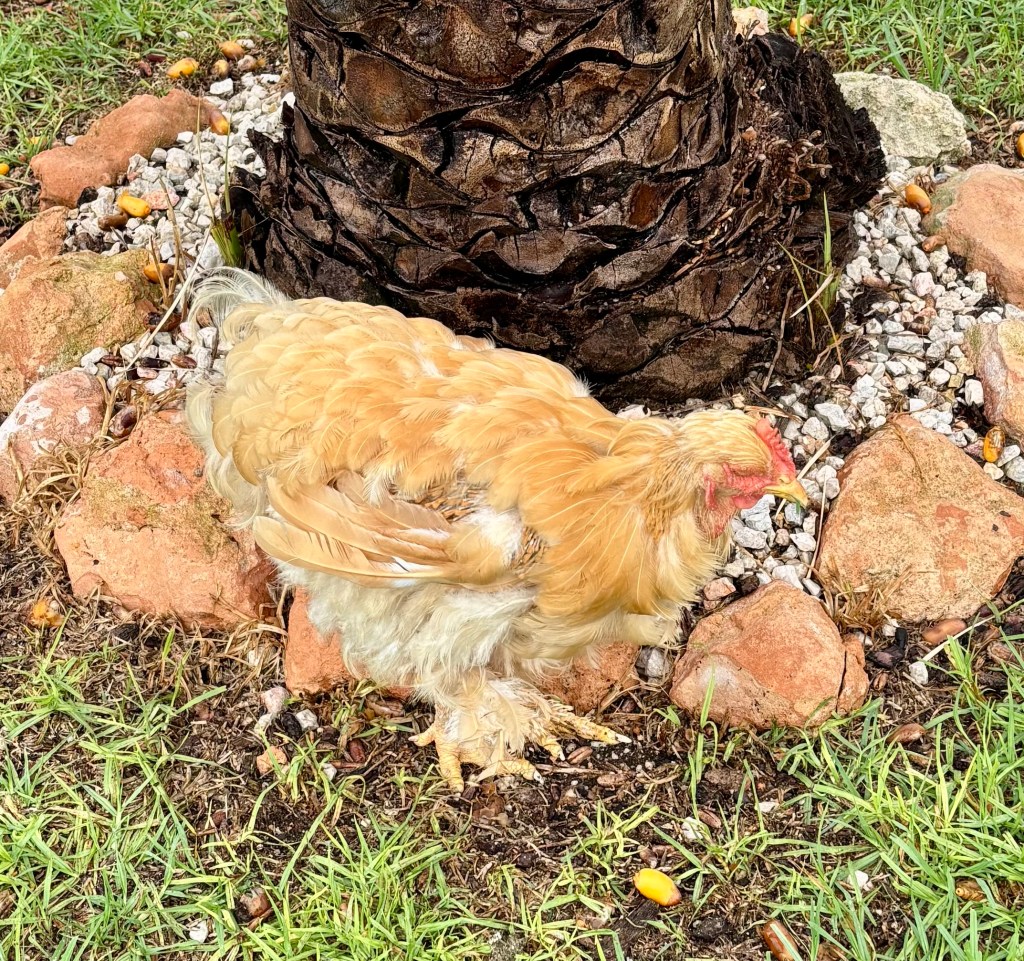
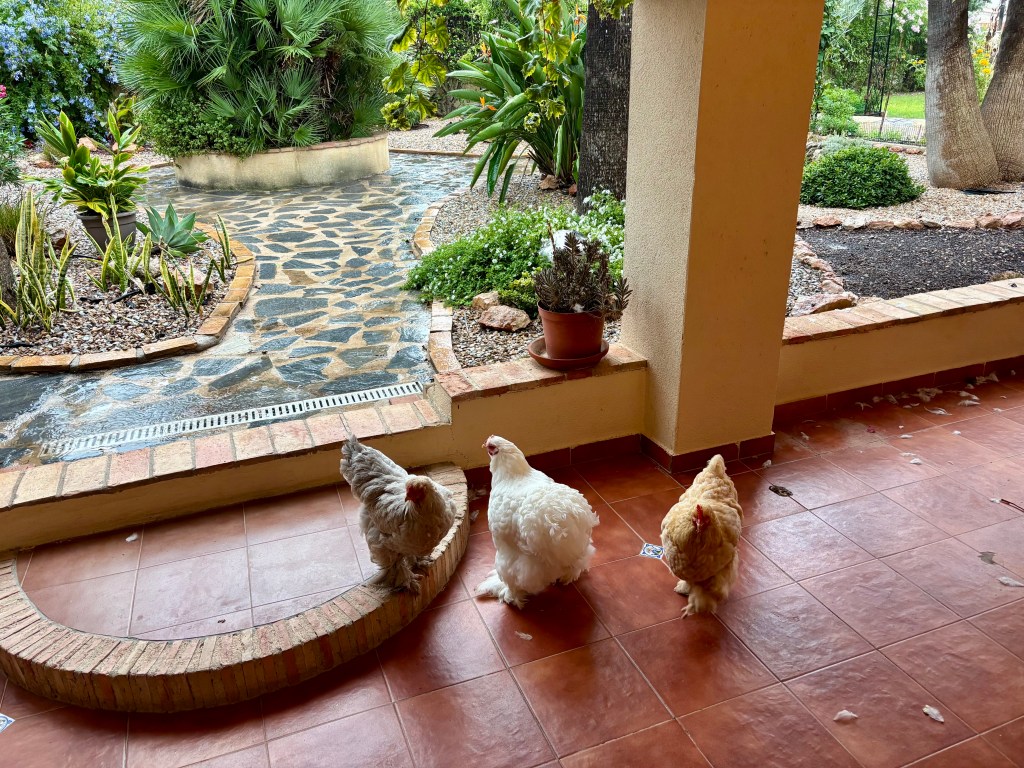
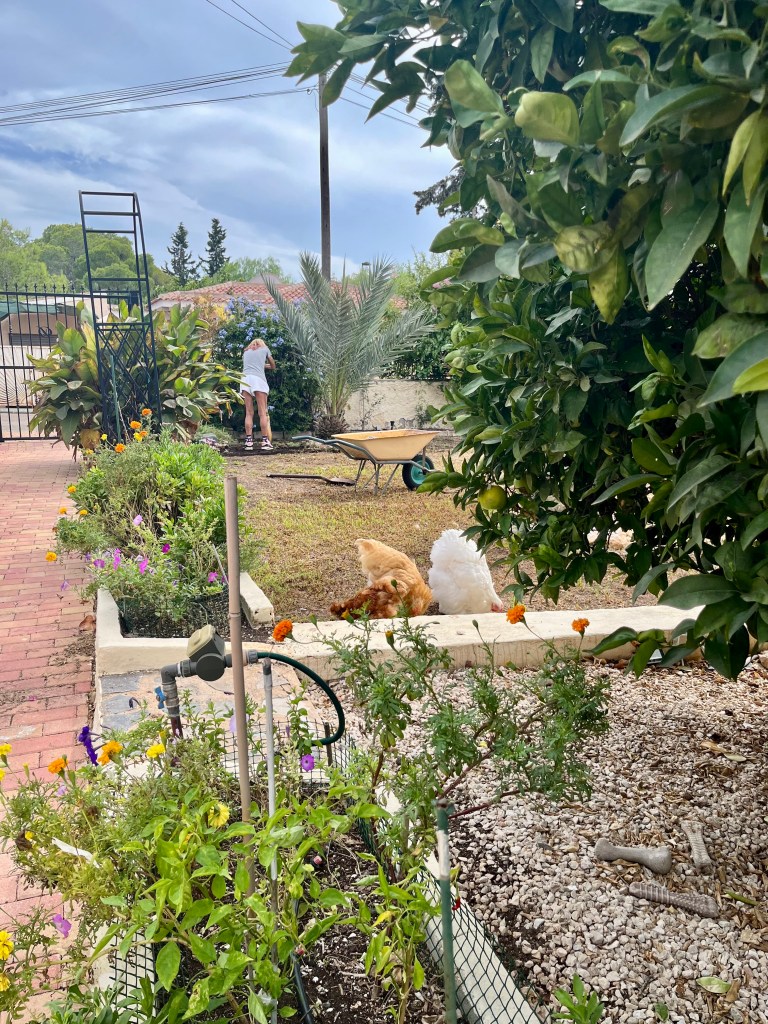
Helga’s modelling career is over and Cruella suspects she has anorexia. Those of you familiar with Cruella (my wife) and her girls. Will know that Helga is her favourite chicken and graduated top out of Cruella’s Chicken modelling class.

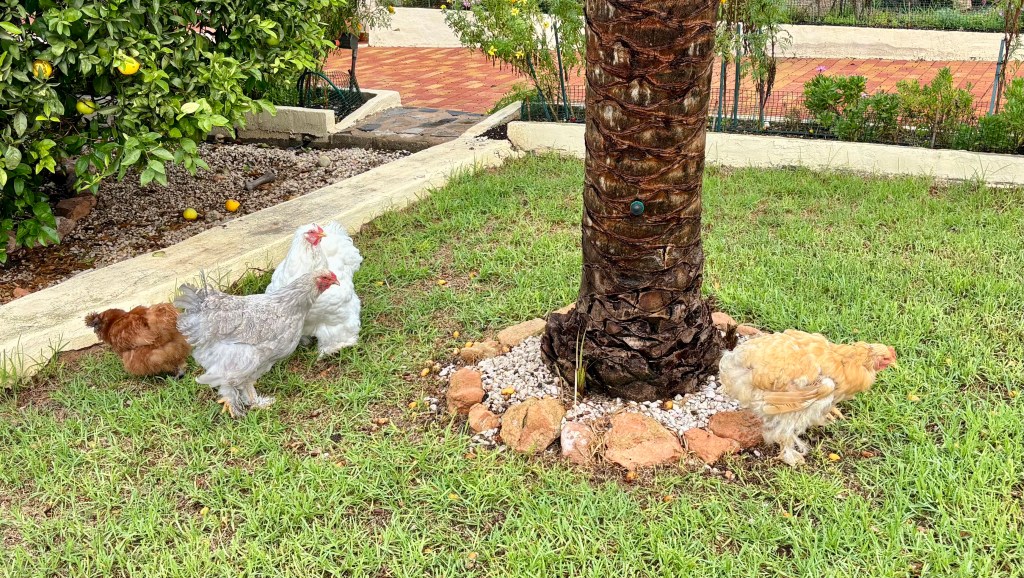
All of her chickens have been following strict diets to keep them thin (Cruella constantly harangues them by saying “nobody loves a fat chicken”) – I tend to disagree that but that’s another matter. This has been coupled with hours and hours spent balancing books on their heads as they sashayed up and down the garden, doing exaggerated twirls.

Well, I warned her, the end result is that Helga has become neurotic. She thinks she is fat, but she’s not, she pretends to be eating but really she just hides it away in dark corners of the coop. Worse than all this she is losing all her feathers and now looks a bit like a chicken made out of wicker.

Cruella is beside herself and keeps saying she has been a bad mother to her girls. It is now costing me a fortune in high calorie fancy chicken food that Helga still doesn’t eat. The outcome is that I now have flocks of fat sparrows who are eating all this expensive food and making a mess everywhere.

Cruella confronted me today and insisted that we pay for Helga to have therapy at the Chicken Priory. It appears she has to be there a month. I have now spent all the money I was saving for a battery chainsaw! The photos below tell their own story.
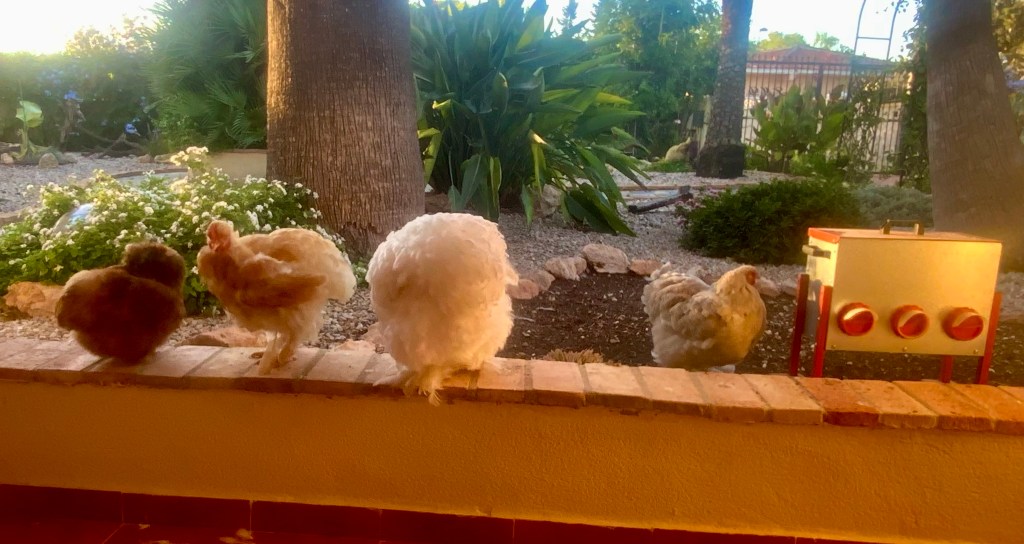
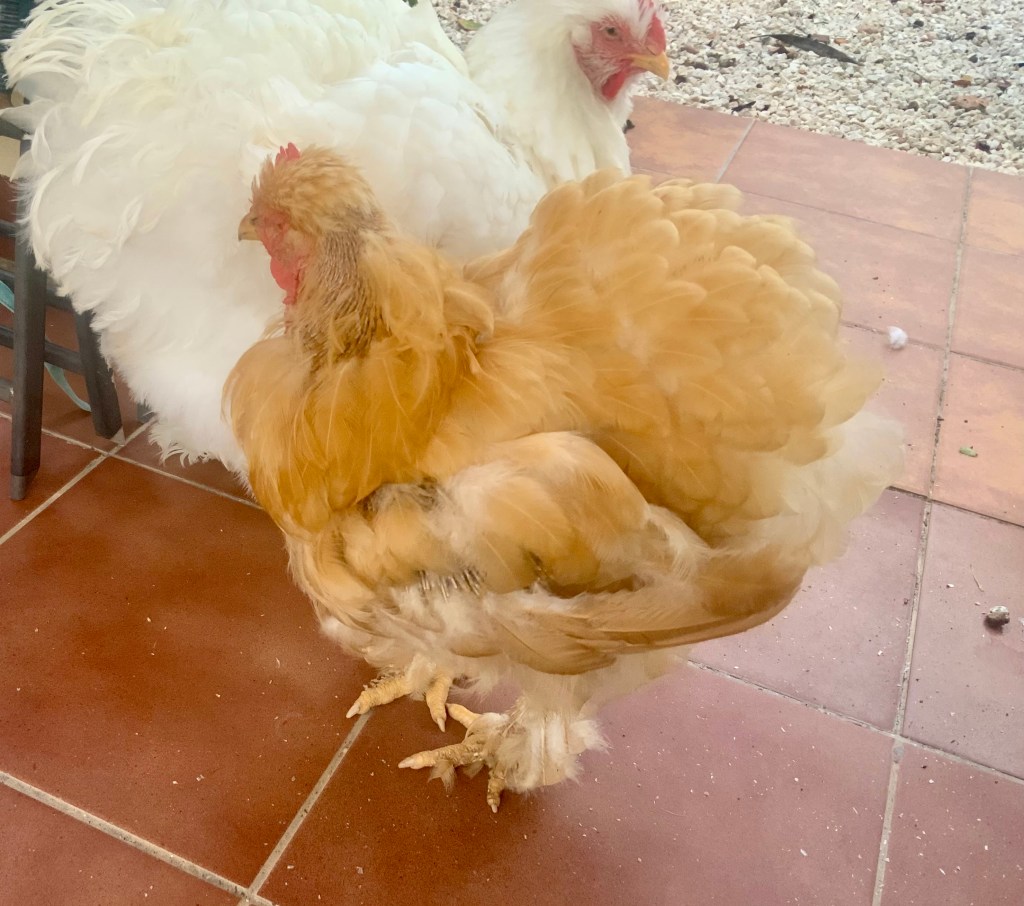
Another early morning model training session, even then you could see she wasn’t interested in the food; I warned Cruella she was pushing them too far
The others begin to shun her and she thinks it’s because she is fat. Cruella has started reading her the ugly duckling story

I prepare for Autumn and Cruella insists the chicken have raincoats

As we move towards autumn so you should be preparing your garden for the end of the growing season. We are not quite at the gathering seeds stage, but it is definitely a good time for taking a few cuttings.

Thank goodness we are having a bit of rain and the scorching heat is no longer with us. However, there is still plenty of warmth in the soil and this is a good time to get new plants into the ground and give them a head start for next year.

Cruella (my wife) has been at our UK house mothering our idiot son. But now she is back and it’s raining she is insisting that I buy raincoats for her girls. I explained that their feathers are their natural raincoats but she is insistent. I am going to cut up some black sacks and glue them into chicken shapes; that should do. Any way on with the gardening.

3rd October 2026. Things I have been doing in the garden lately.

  • Lightly scarifying my grass
  • Deadheading and tidying annuals
  • Cutting back trailing plants to stop wind damage and Preparing Chillis for winter
  • Taking cuttings
  • Dealing with wet chickens

Lightly scarifying my grass. I know only idiots like me have lawns in southern Spain, but Hey Ho they are such fun. Anyway, if you have a lawn then the long hot summer will have created a dense thatch on the surface of your lawn mainly consisting of dead and dying grass.

Now is not the right time to scarify as the grass will still grow through the autumn. However, if you leave the lawn right the way through to next Spring without scarifying it, then the thatch will hinder growth. So, what you have to do is lightly scarify it now but leave the big scarify till March/April next year.

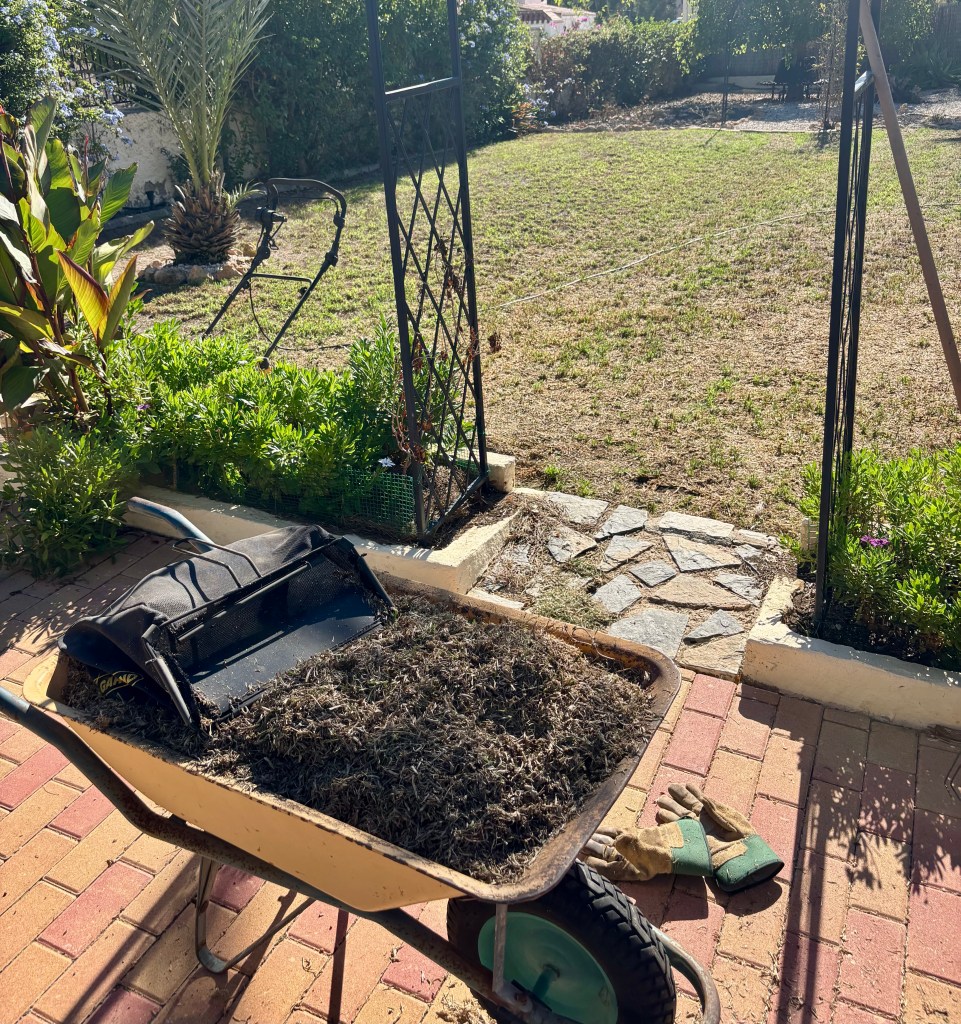
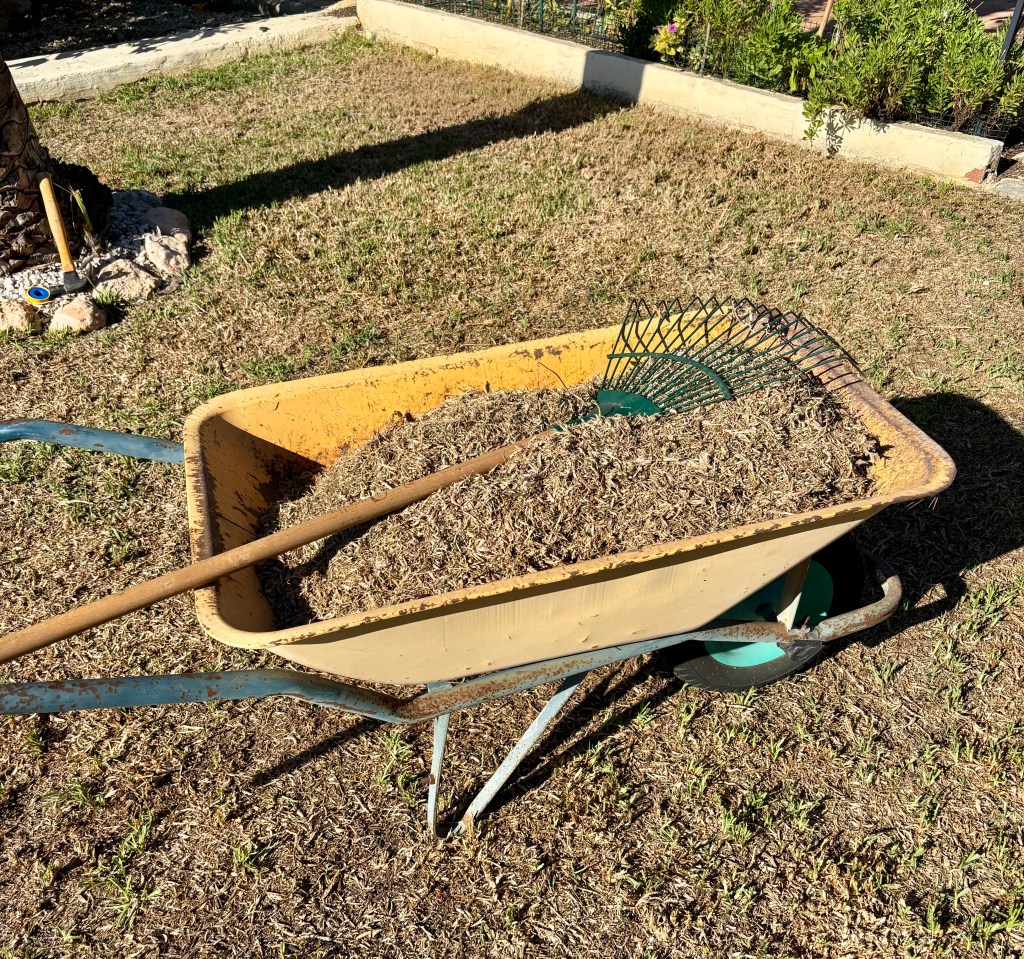
I have an electric scarifier so I set the tines to just touch the grass surface and I do not set the slitters to penetrate the lawn. If you do not have a machine then use a lawn tined rake and lightly scrape the surface of your lawn. You will get plenty of thatch up. I got five bags and this is not the big scarify. See photos below.

The scarifying machine. I wander behind covered in clouds of dust

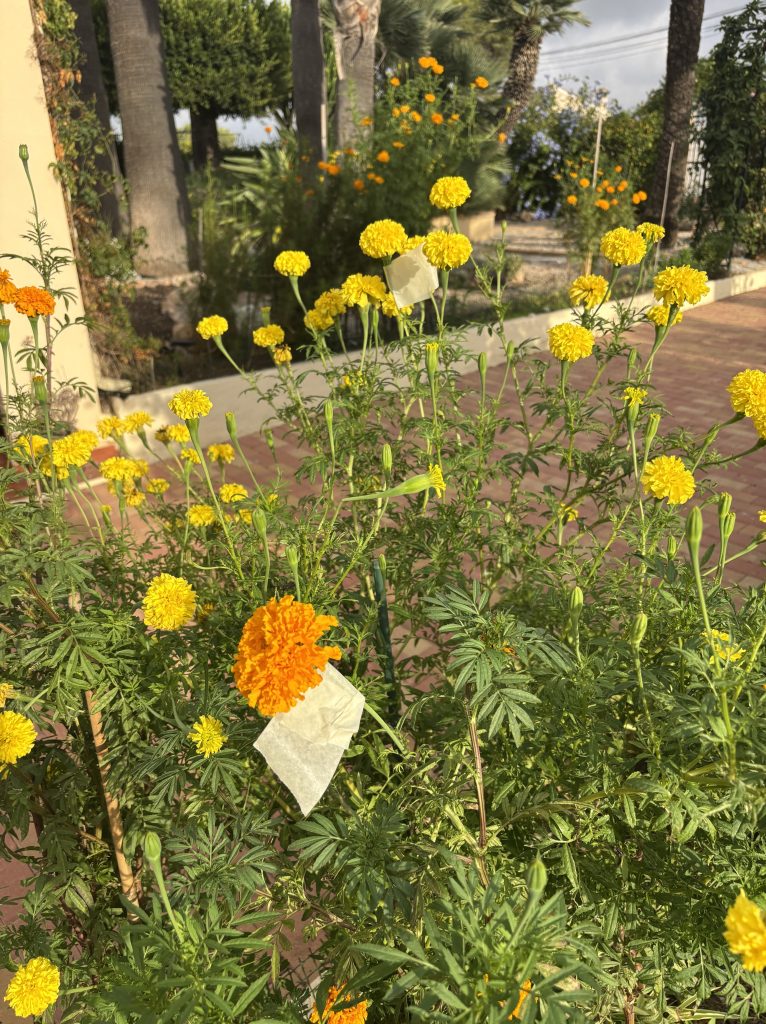
Deadheading and tidying annuals. I grow all my annuals from seed, and where possible I will have selected the seeds from the best flowers in last years growth. If you do this over a number of years you will eventually get strong beautiful flowers. I have been selecting Marigold seeds for over 10 years and now have plants that are almost 2 metres tall. See photo.

I proudly show off my giant Marigolds. Note that I still don’t know where to look at the camera

To get plants this strong you need to select and mark up the best flowers in order that you don’t deadhead them (though this does happen!). The photo below shows my selected Marigolds marked up with masking tape ready for me to collect seed later this year.

Next years beauties are already marked

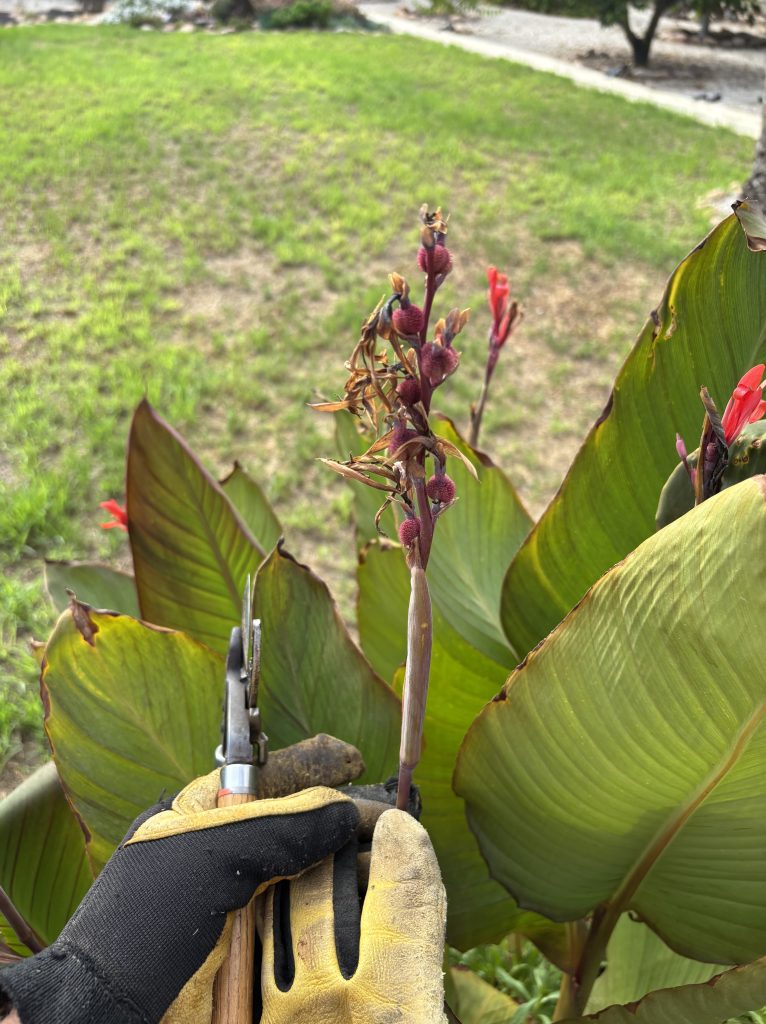
Finally, when dealing with this summer’s flowers you need to deadhead your Cannas. Do not touch the foliage as you need to let this die right back to feed the rhizome. Just take off the flower spike and watch the foliage die gracefully. The photo below shows you where to cut.

Cutting back trailing plants to stop wind damage. Lovely though the current rains are, they unfortunately can bring strong winds that will damage trailing and climbing plants or those plants in pots with “whippy” growth. At the moment this means the trailing plants on windows at the back of my house and my chilli plants. Both are in danger now but others will need dealing with later this month.

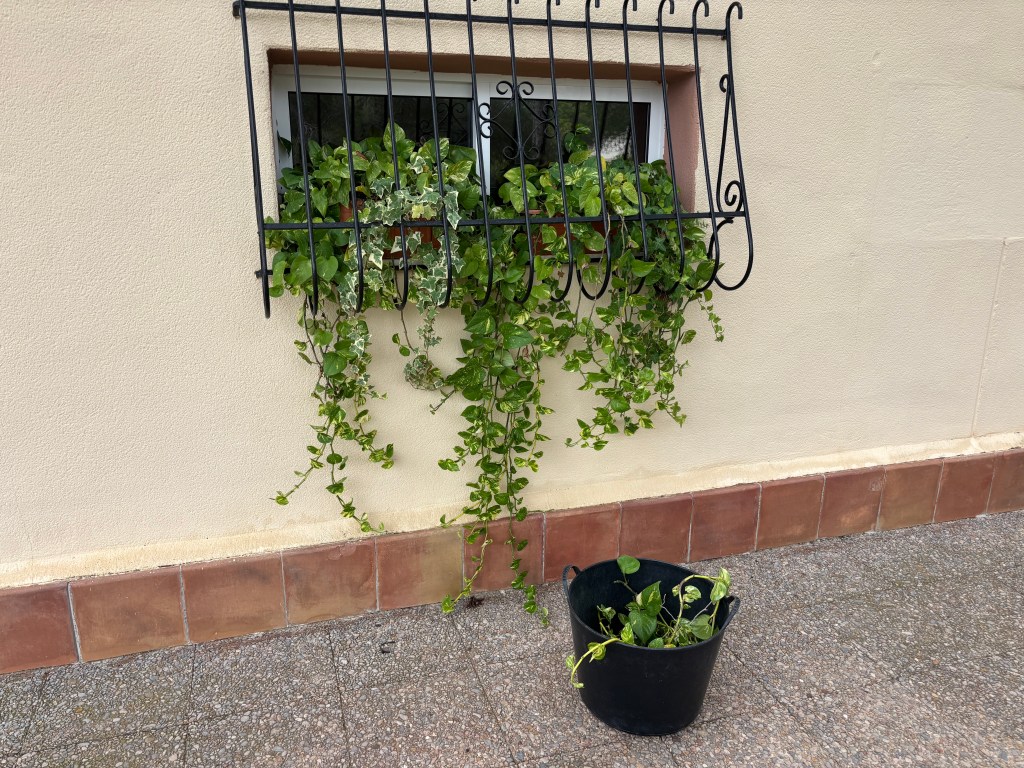
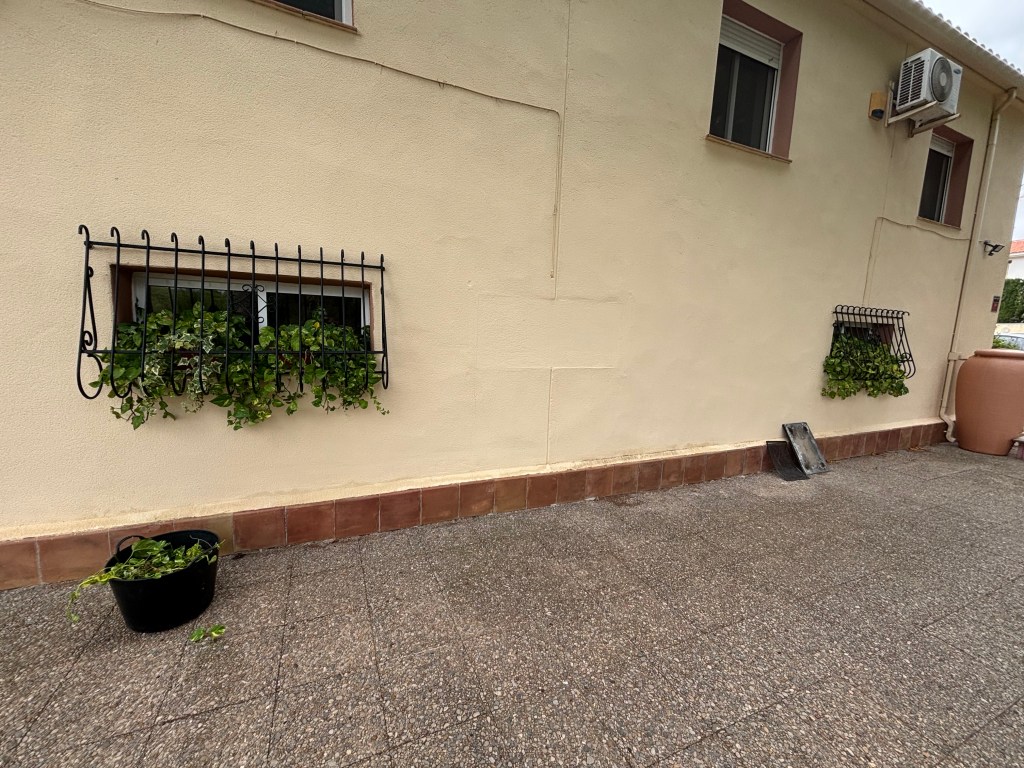
Turning first to my window trailing plants. I have grown a selection of ivy and Golden Pothus etc at the back of my house that is north facing. This suits this type of plant and brings some colour to an otherwise shaded area. If I don’t cut these plants back then the wind will whip them around and tear them apart. The first photo shows one of the untrimmed windows, whilst the second shows all the window plants trimmed back and safe from the wind.

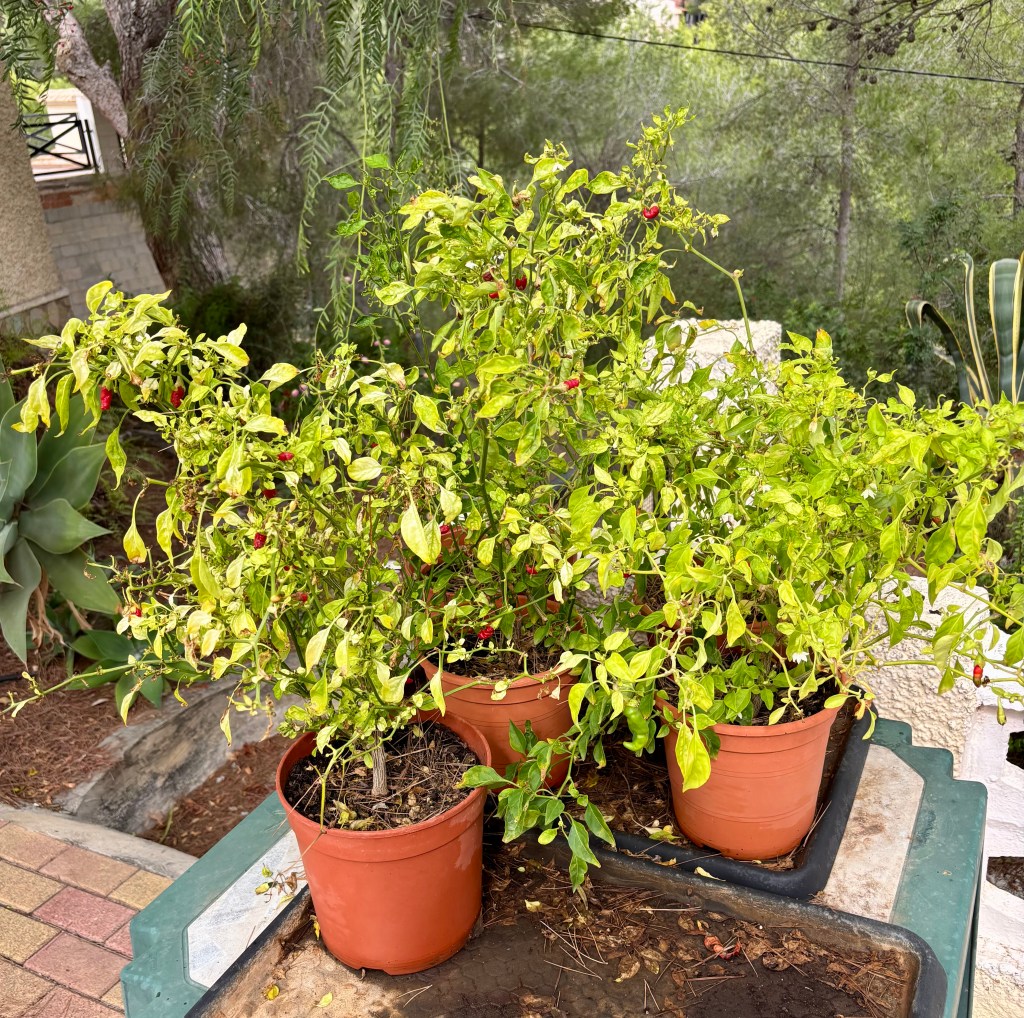
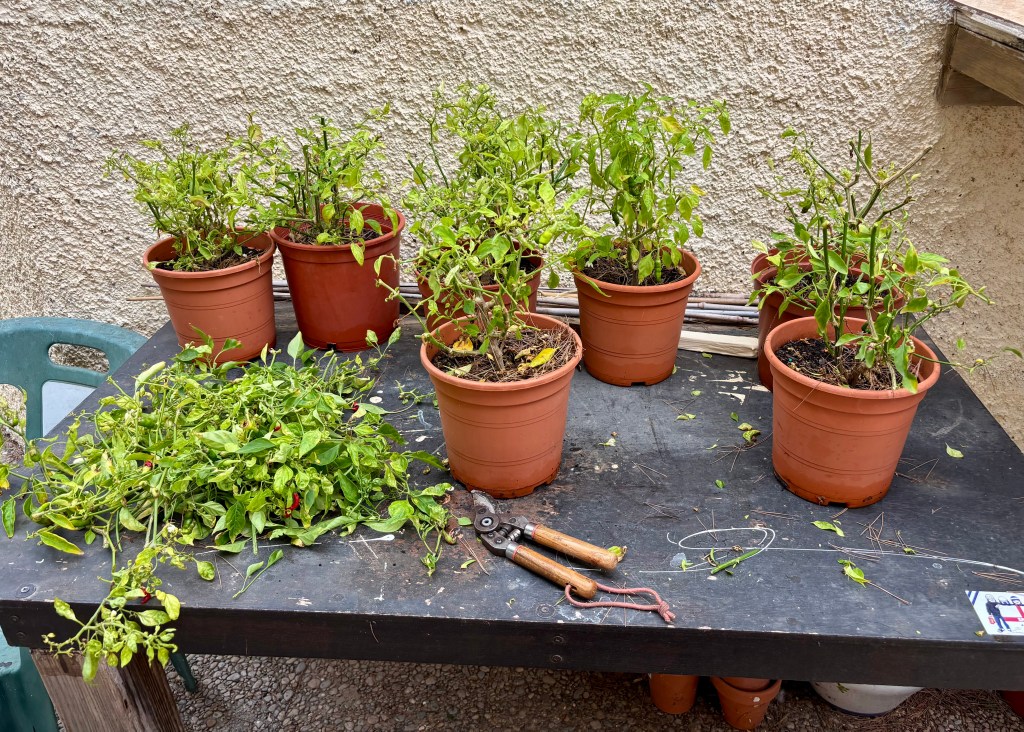
My Chillis will need cutting right back and root trimmed, but not quite yet. At the moment I just need to cut them back a bit, take off all the little fruits, give them a feed and make sure the wind doesn’t destroy them. I will come back to them in a month or so when they have stopped growing. The photos below show my Chillis before and after their trim.

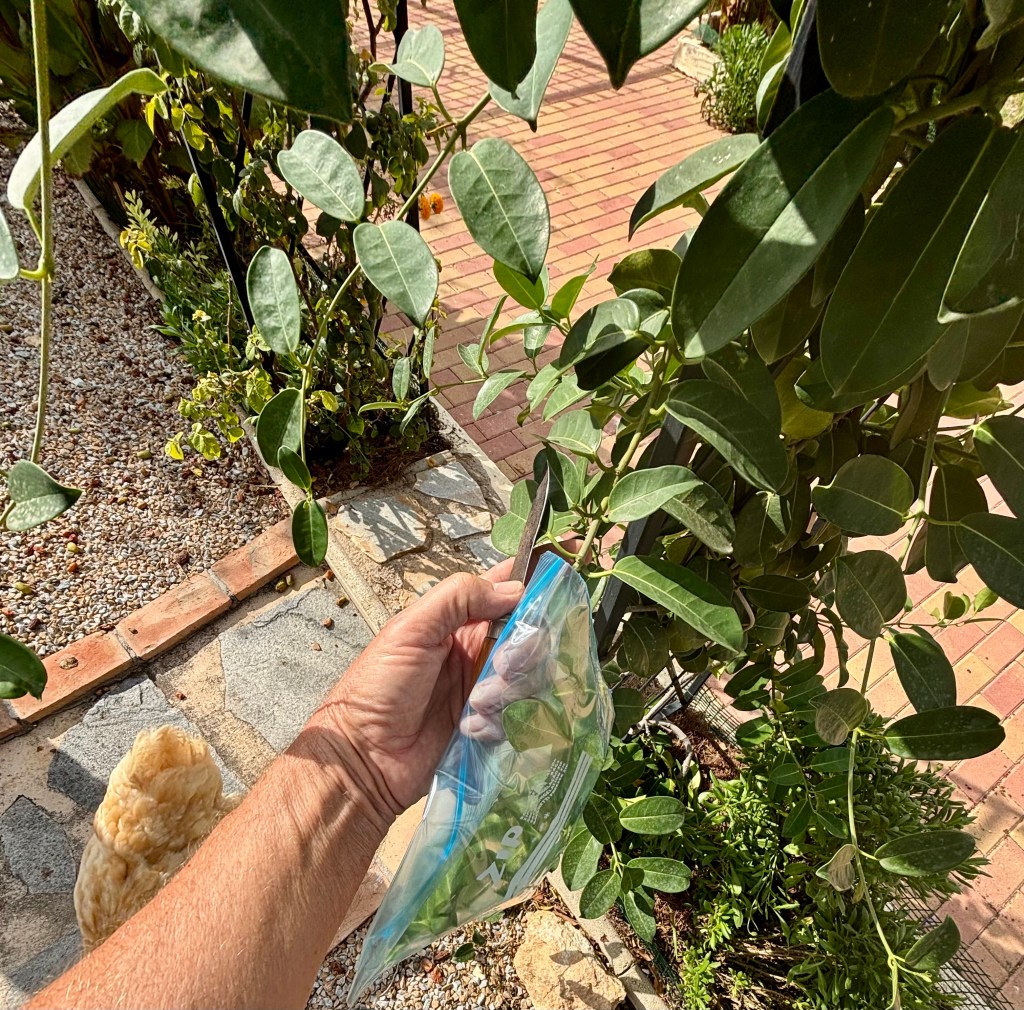
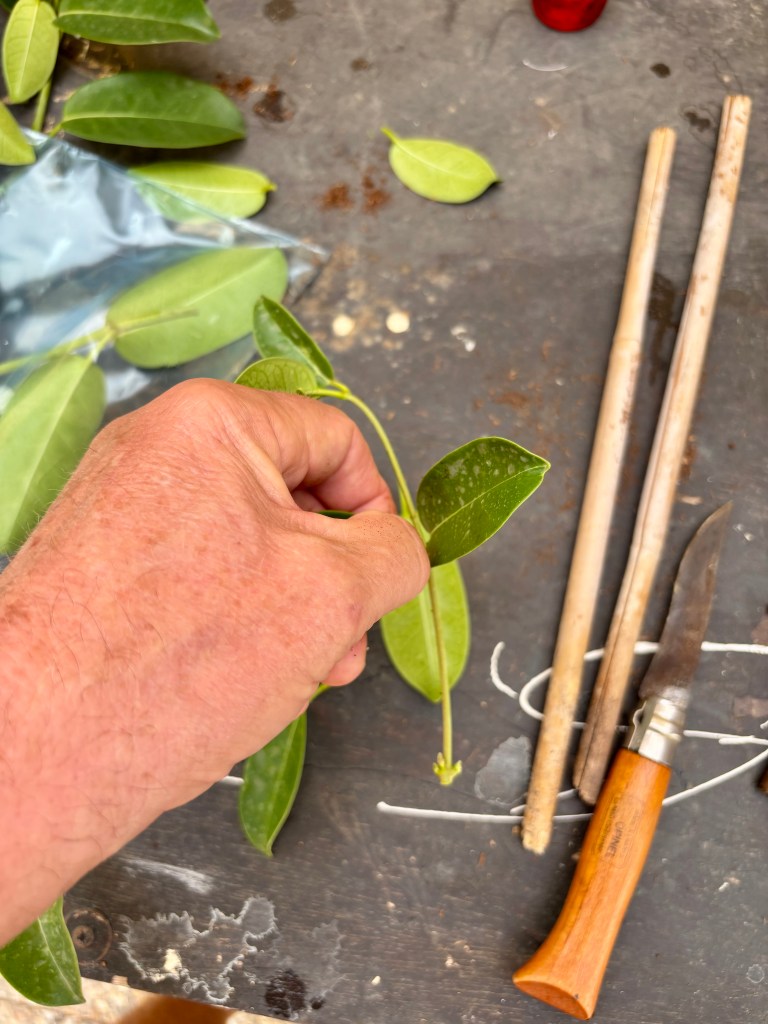
Taking cuttings. Now for the good news, now is the time to start taking cuttings. This is an easy way to grow your garden for free and it will give you immense joy to grow your own plants. For my first cuttings this year I was taking Stephanotis and Pink Trumpet vine; photos of both below.

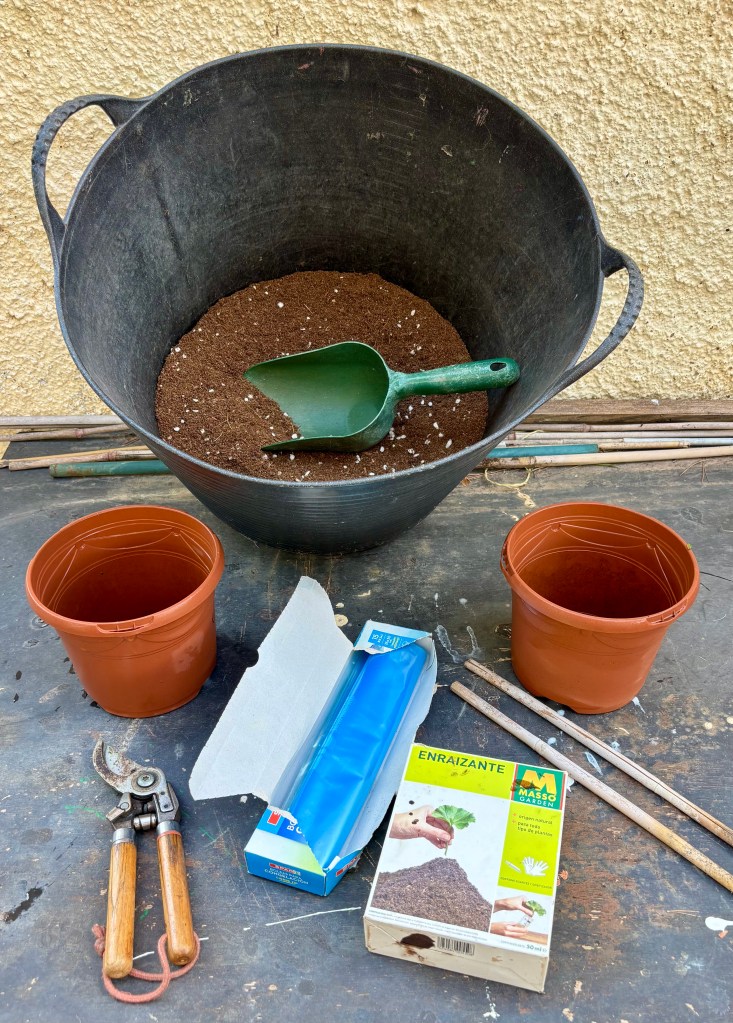
Do not start to take cuttings before you have everything ready. Once the cutting is removed it starts deteriorating so you need to be ready. Use a cutting knife rather than secateurs as this method will not crush the stem. Also place the cutting straight into a plastic bag, especially if you will be taking a number of them.

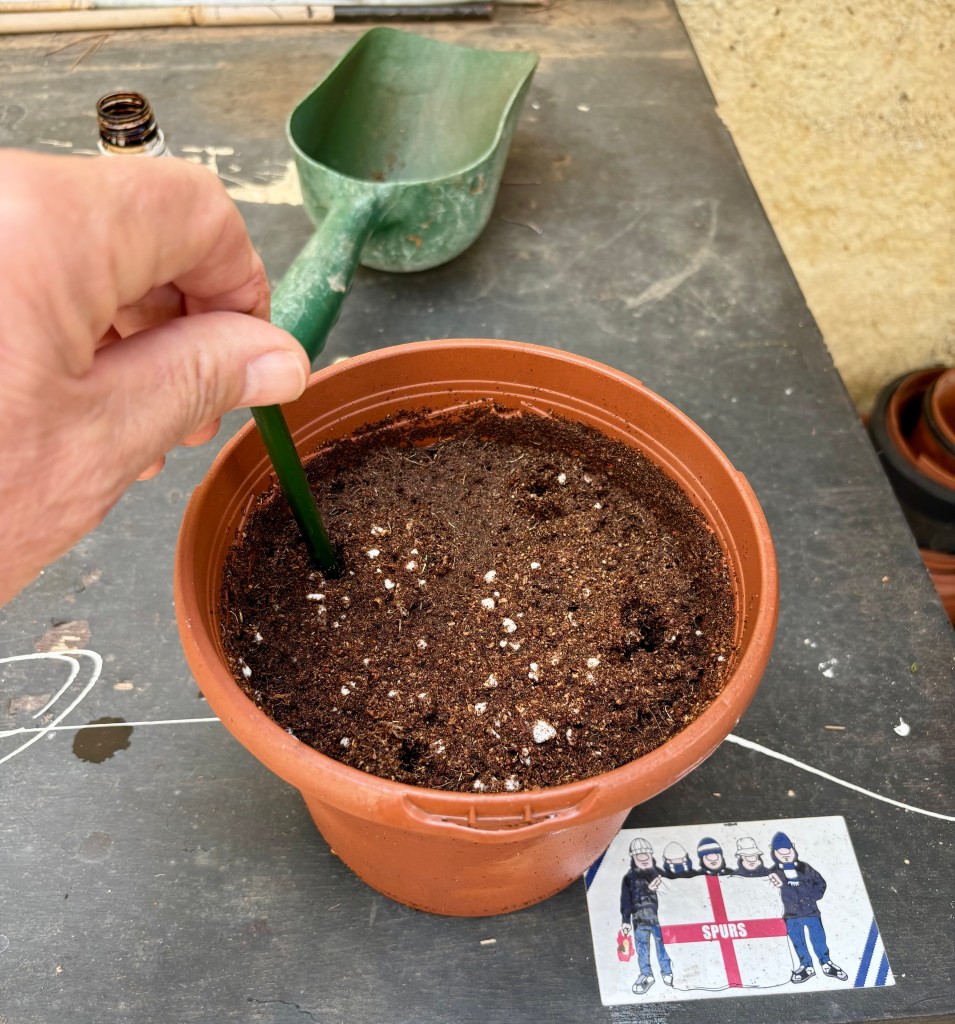
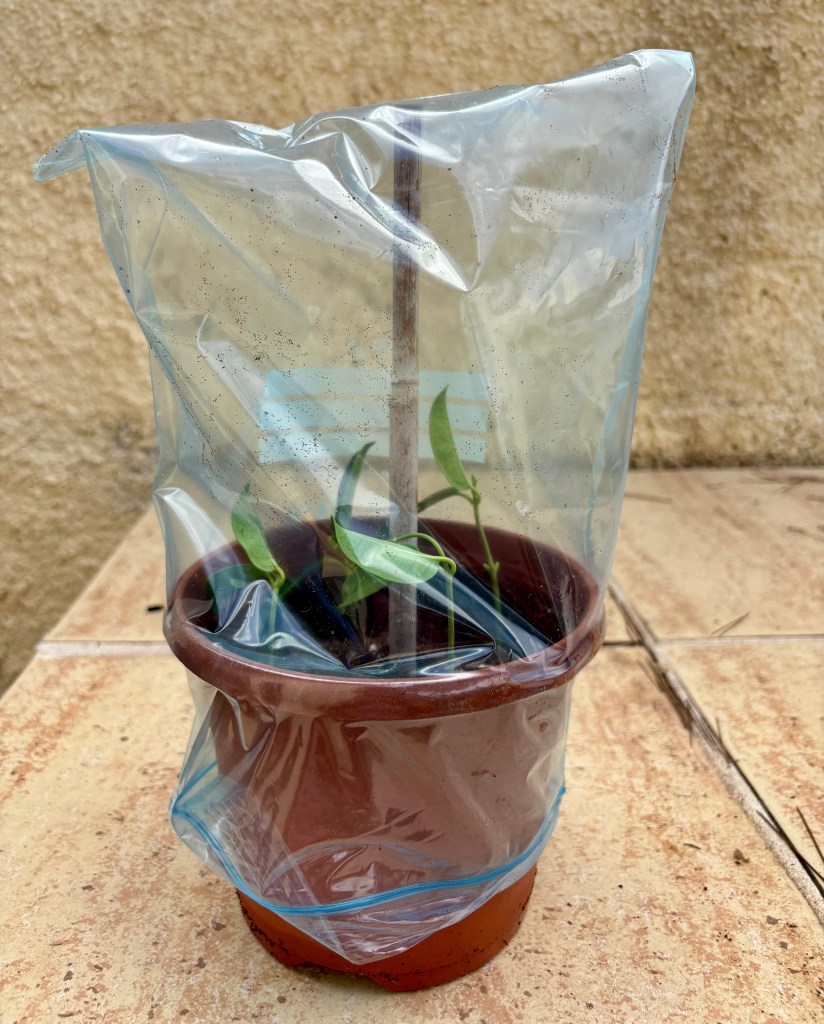
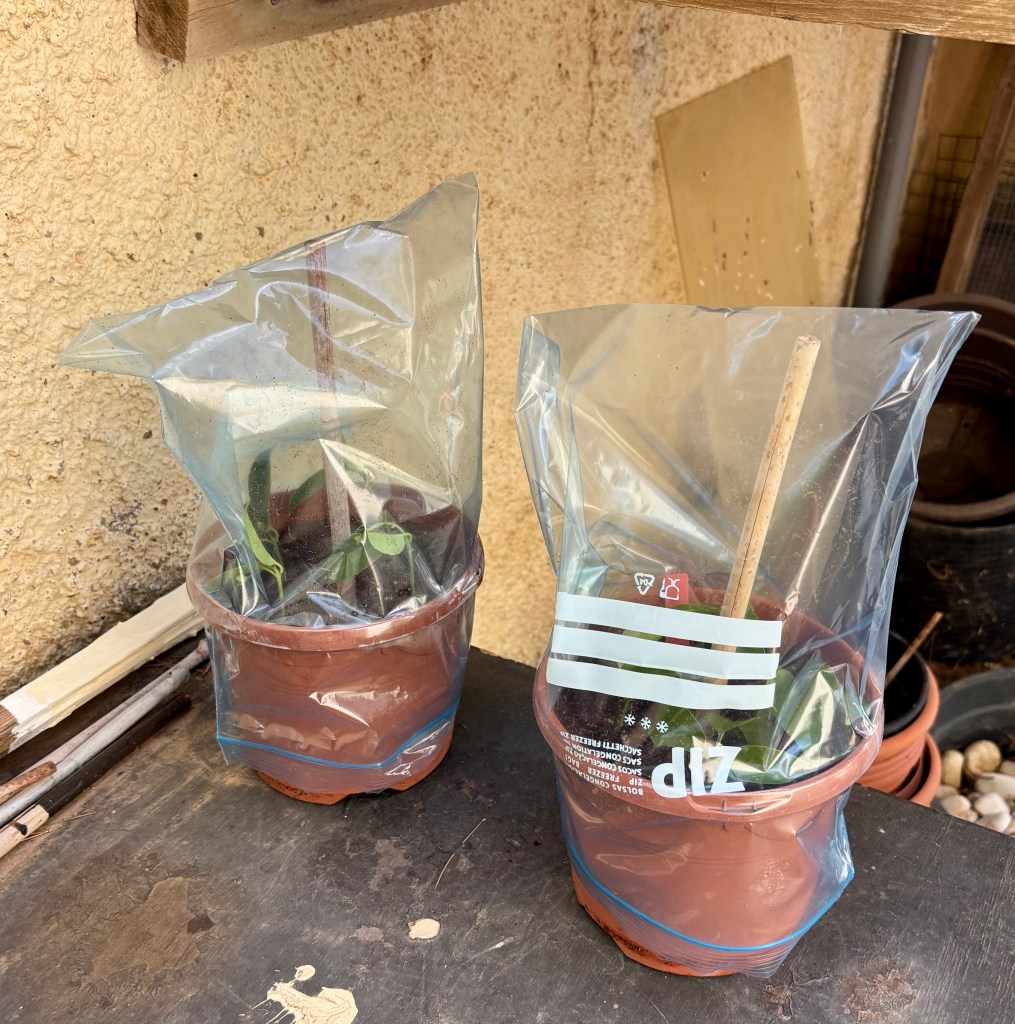
Once you have your cuttings dip them in hormone rooting powder or liquid, then place four of them around the edge of a pot (for some reason this makes them take better). In addition to placing them round the edge of the pot, I also place a stick in the centre of the pot and cover the whole thing with a plastic bag. The plastic bag ensures they have a nice moist environment to begin growing whilst the central stick ensures the plastic bag doesn’t drop and smother your cuttings. See the photos below.

Dealing with wet chickens. Well we certainly have a storm on our hands. My phone keeps going off with that terrible siren noise that the government insists they bombard us with to let us know we are in a storm. As if we didn’t know we are soaking wet and the thunder and lightning is deafening us.

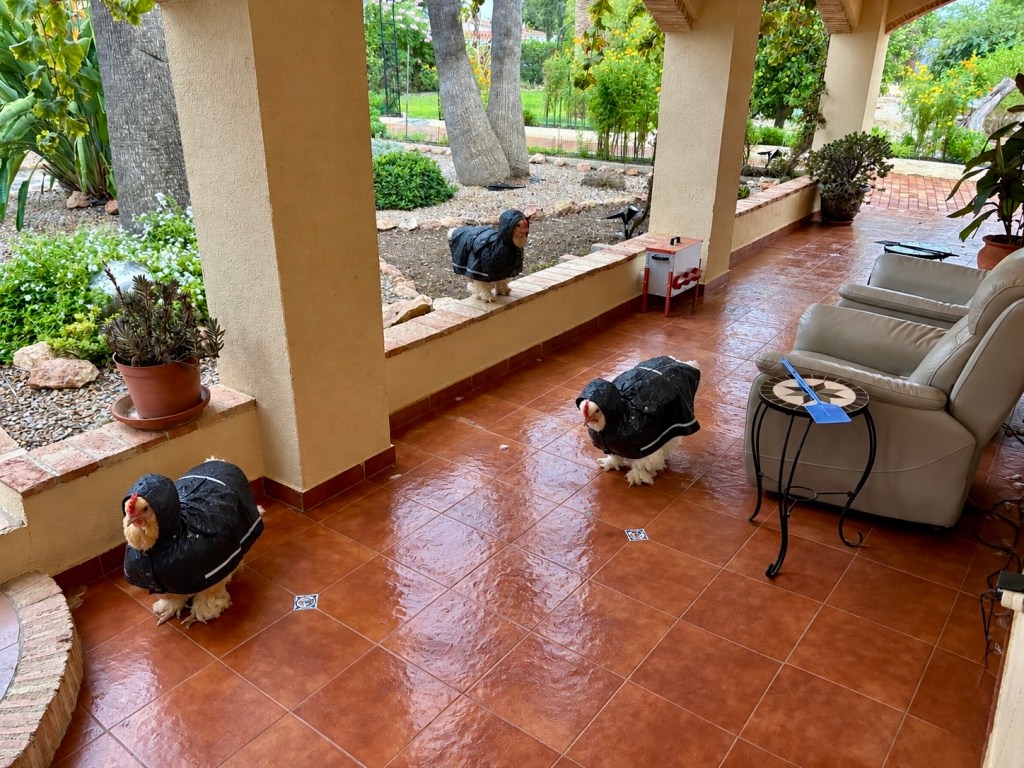
Cruella is in a panic that her girls may be struck by lightning or that they will get chicken pneumonia. I have told her that I am comforting them but really I just whisper KFC and show them pictures of Colonel Sanders on my phone. Any way she has insisted that they need little raincoats and keeps murmuring about Burberry. I told her not to worry as I would take care of it.

The first photo below show the chickens distressed by the storm, whilst the second shows them decked out in their new designer raincoats. It took almost three bin liners, but I think it was worth it.

Panic in the storm, the little brown one is hiding in the coop
I think they look smart and stylish, however, we have no more black bin liners

I undertake the annual lawn makeover and Cruella is in a photo shoot

If you have a lawn then now is the time to undertake your annual makeover and get it ready for next Summer. Over the year your lawn will become tired and congested with a thatch of mowed clippings, weeds and general detritus. To bring your lawn back to life you have to be totally ruthless and take your lawn through a near death experience.

When I told my Cruella (my wife) that I was going to scarify the lawn she was delighted and immediately went and told her girls. I could hear them all chuckling and chatting away in chickenese. At first I couldn’t work out why she would be so thrilled at lawn repairs, but then it gradually dawned on me. Halloween, is coming up soon and she assumed that scarifying was linked to Halloween. Anyway more of this nonsense later, there is a lawn to repair.

11th October 2025. Things I have been doing lately:

Undertaking the annual lawn makeover. I know not many people in Spain have lawns (for the obvious reason). However, if you do have a lawn then don’t take it for granted. Yes, of course you should cut it and feed and weed it. But every one or two years you need to dethatch and aerate your lawn otherwise it just becomes a congested mat that gradually goes from green to brown.

There are a number of stages to the annual makeover process:

  • Mow the lawn twice
  • Scarify and aerate
  • Top dress and brush
  • Water in and feed

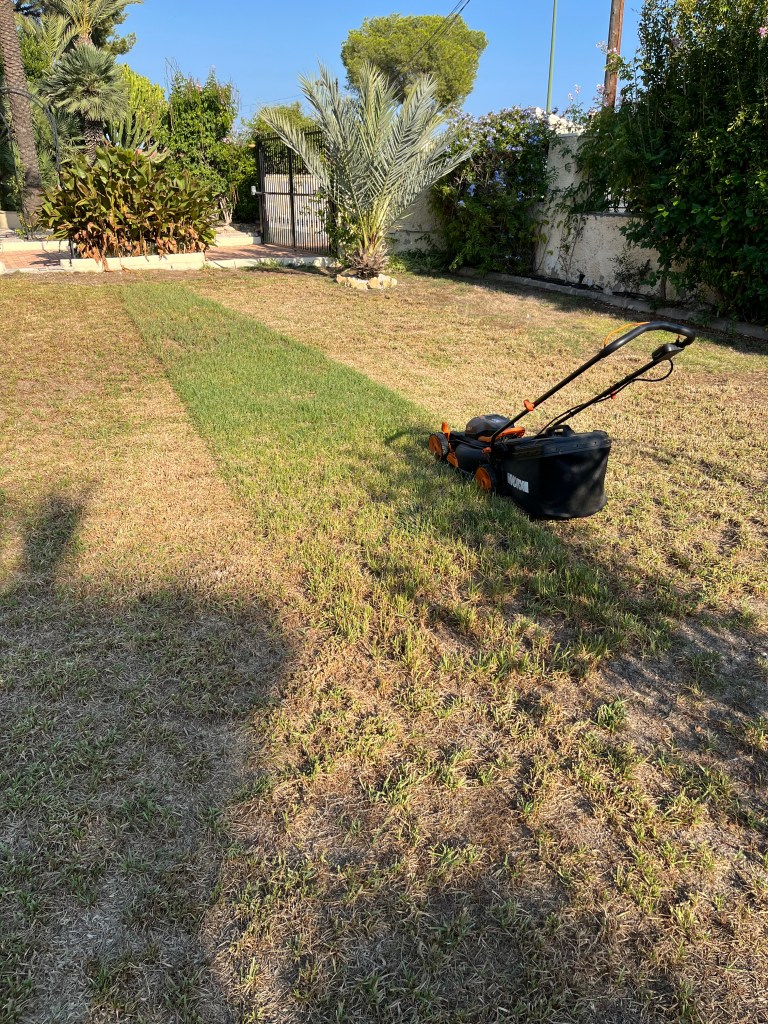
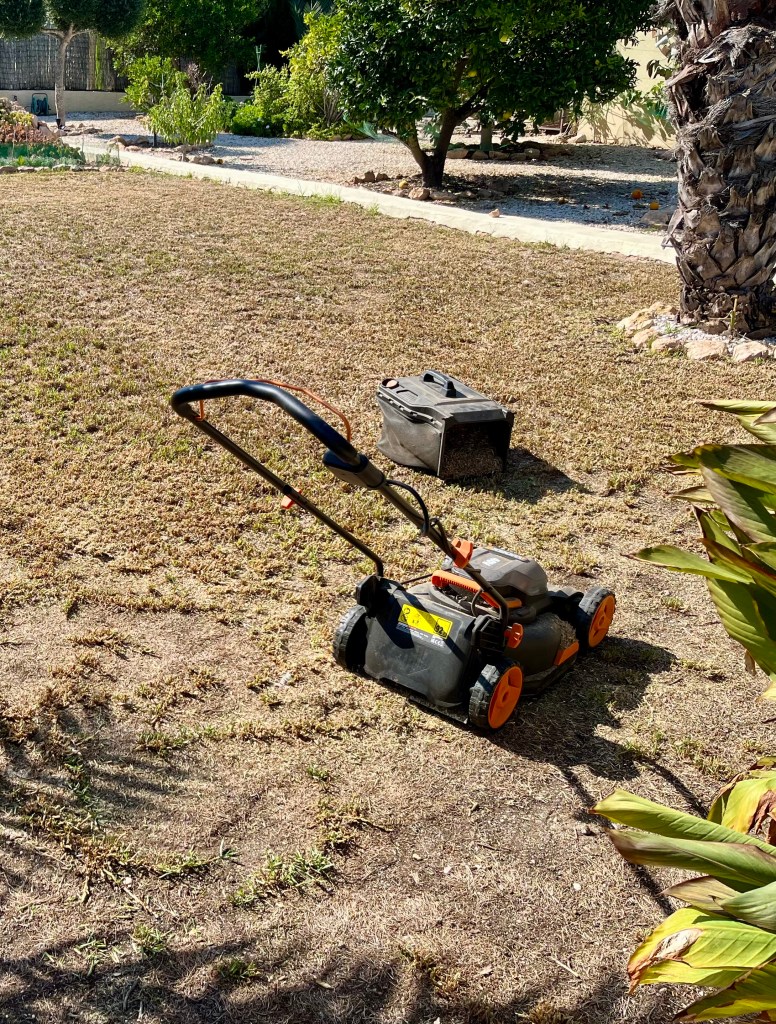
Mow the lawn twice. The starting point for your annual makeover is to cut the grass as short as you can. The best way to do this is in two stages as this will do the least damage to the grass. On the first day set your mower blades to half way and mow the lawn. On the second day the grass should be standing upright again and you now need to mow on the lowest cut possible without scalping the lawn. The reasoning behind getting the grass as short as possible is that when scarifying you wont tear the grass out by its shoots. The photos below show my first and second mows.

Scarify and aerate. Once you have got the grass as short as possible it is time to scarify and aerate. In essence this means raking the lawn with a specialised lawn tine rake to remove all the thatch and then pricking all over with a fork. This can be amazingly tiring, so if you have lots to do get yourself an electric scarifier and aerater.

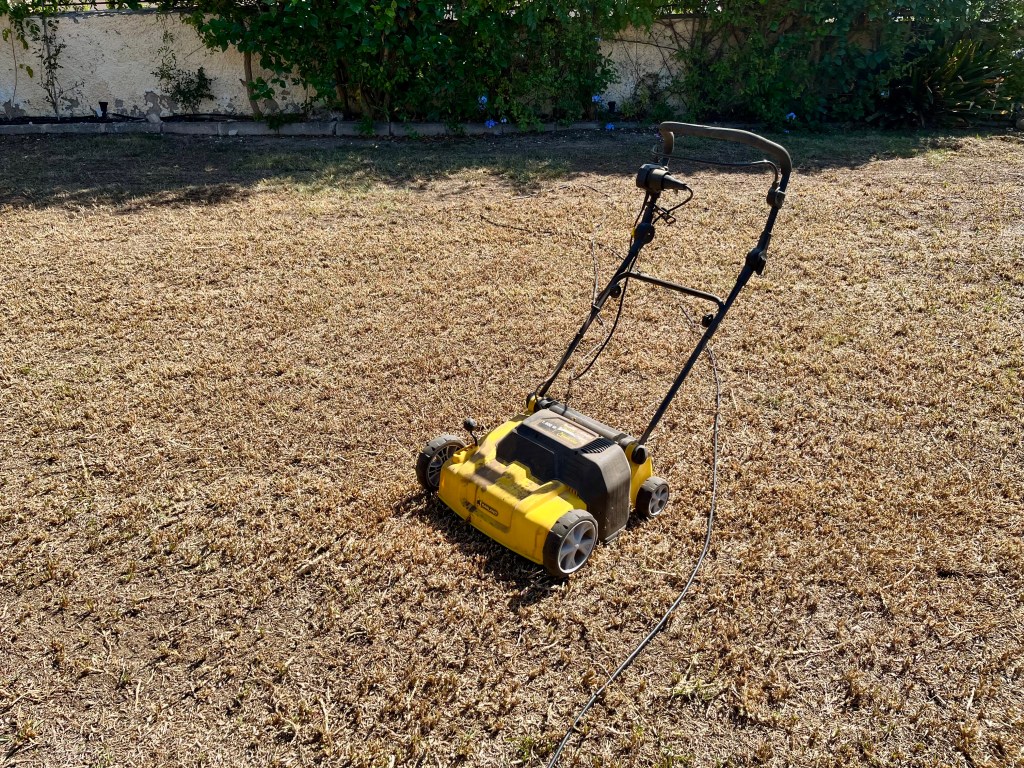
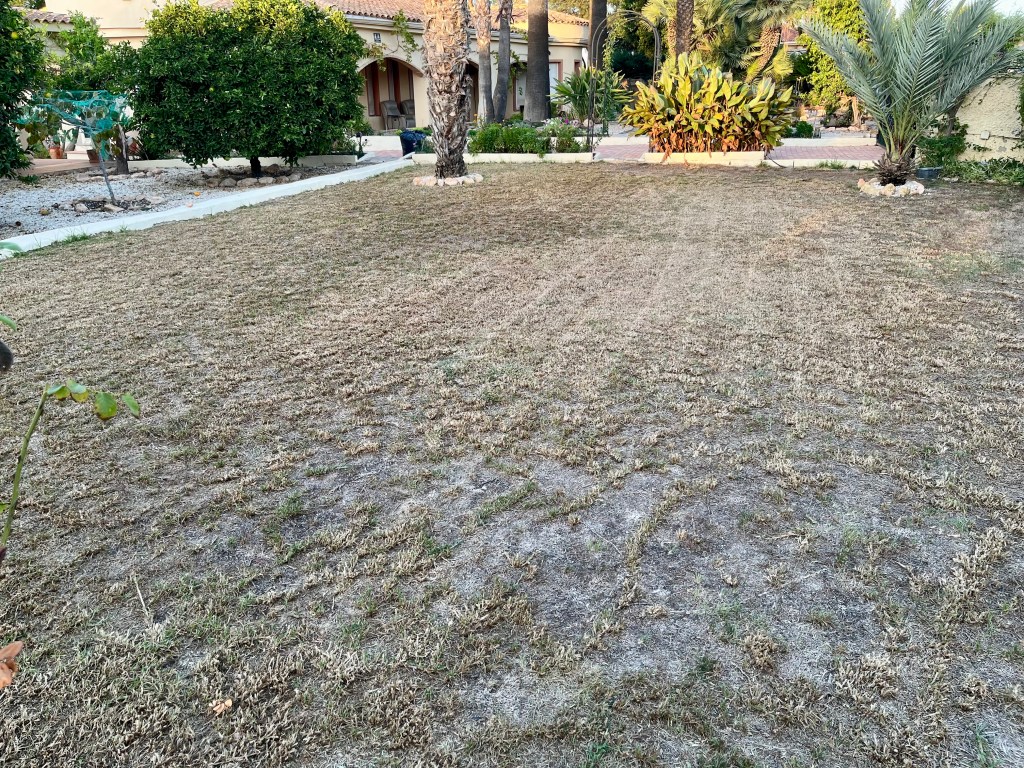
I bought an electric scarifier years ago, and although it is only used once per year, it has proved invaluable in saving me hours of back breaking work. The photo below shows the scarifier and the outcome. I know the lawn looks dead, but just you wait.

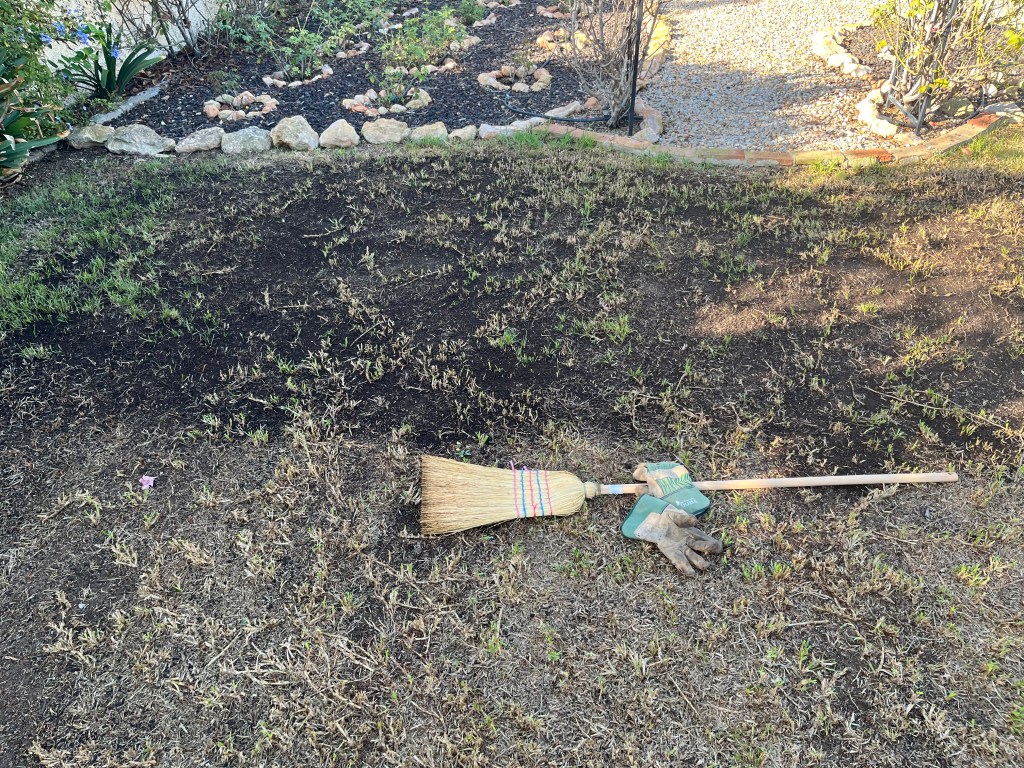
Top dress and brush in. The next and most tiring stage is to apply a top dressing of fine compost. Here in Spain this is known as Mantillo. In total I used 18 50 litre bags – you should see my muscles. The photo below shows the 9 bags of Mantillo that I thought would suffice, only to be forced to go and buy 9 more, together with my first of many loads.

To top dress you spread shovels of Mantillo lightly across the lawn in manageable stages. Once the Mantillo is down you then need to brush it in with a besom type broom first one way then the other to ensure an even spread. Luckily, my house has a ready supply of Witches besoms.

As you can imagine the brushing in stage takes a long time the photos below shows the process in action.

I was at the point of maximum tiredness when I hit upon a brilliant idea. When Cruella (my wife) walked by and asked what I was doing I told her I was scarifying the lawn for Halloween. I explained that in effect I was preparing the lawn as I had been contracted to produce a witches gardening calendar and that the lawn had looked too green and cheerful to be in the photo shoot.

When she asked what was involved I explained that each month would feature a witch undertaking gardening activity. I then explained that I was stumped as I did not yet have a Miss October. Instantly she said could her and her girls feature. At first I said really I am looking for a professional model but eventually I relented and went and sat in the shade whilst she strutted her stuff. Occasionally I strolled out and took photos of her which I assured her would be sent to “the Agency”. The photos below show her in action.

When she had finished I told her that her agent should contact me as there may be future work; I even hinted at a film. Her and her girls ran off chattering away in Chickenese about what they would wear to the Oscars. Anyway, the photos below show my fully top dressed lawn.

Water in and feed. The final stages of the annual lawn makeover would normally involve copiously watering of the lawn to ensure that the top dressing filters down to the soil, followed by the application of a good lawn food. Well if you live in this part of Spain you will know that the watering in was taken care of by a three day thunder storm. The feeding I will do in a few days when the grass is dry. The photo below shows my sodden lawn with the Mantillo well and truly washed into the soil.

The rain came right on time

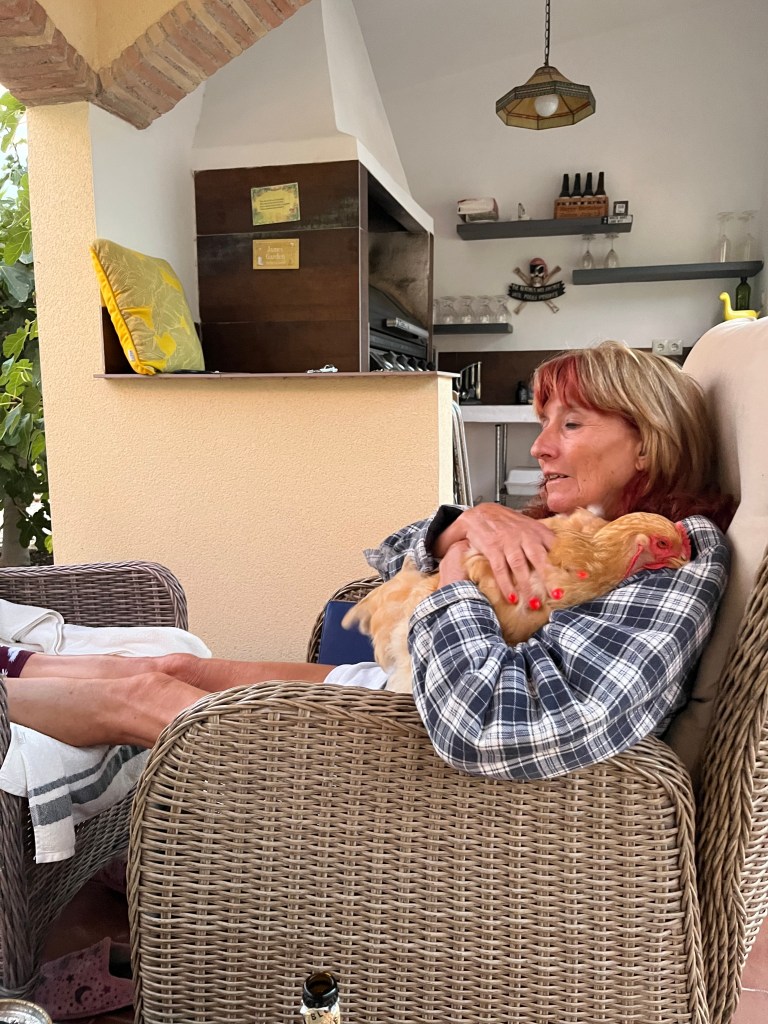
Finally I thought you might like to see a photo of Cruella (my wife) after her hard day sweeping the lawn. I had no sooner shouted “it’s a wrap” than she had fallen fast asleep with Helga her favourite chicken in her arms.

She slept for over 2 hours

I prepare the garden for the autumn and Cruella holds a Chickens for Trump rally

Well it’s that time of the year again when we begin the slow process of winding down the garden for the year. However, just because the flowers have stopped coming and most of the fruit is now in, don’t think you can let up, there is still so much to do.

I am still working on my lawn , but as yet, it is not fit to be seen in public, maybe in the Spring. In the meantime I still have major chicken problems mainly involving digging, scratching and intimidating me by staring. But things have taken a strange turn as Cruella (my wife) has started holding chickens for Trump rallies! Ah well, more later, let’s get on with the gardening.

18th October 2024. Things I have been doing lately:

  • Harvesting the last of the summer fruits.
  • Autumn planting
  • Don’t forget these autumn jobs
  • Cruella holds chickens for Trump rallies

Harvesting the last of the summer fruits. Most of the summer fruits have gone now and we await the citrus fruits from December. But here in the Costa Blanca there is still a few fruits we can harvest:

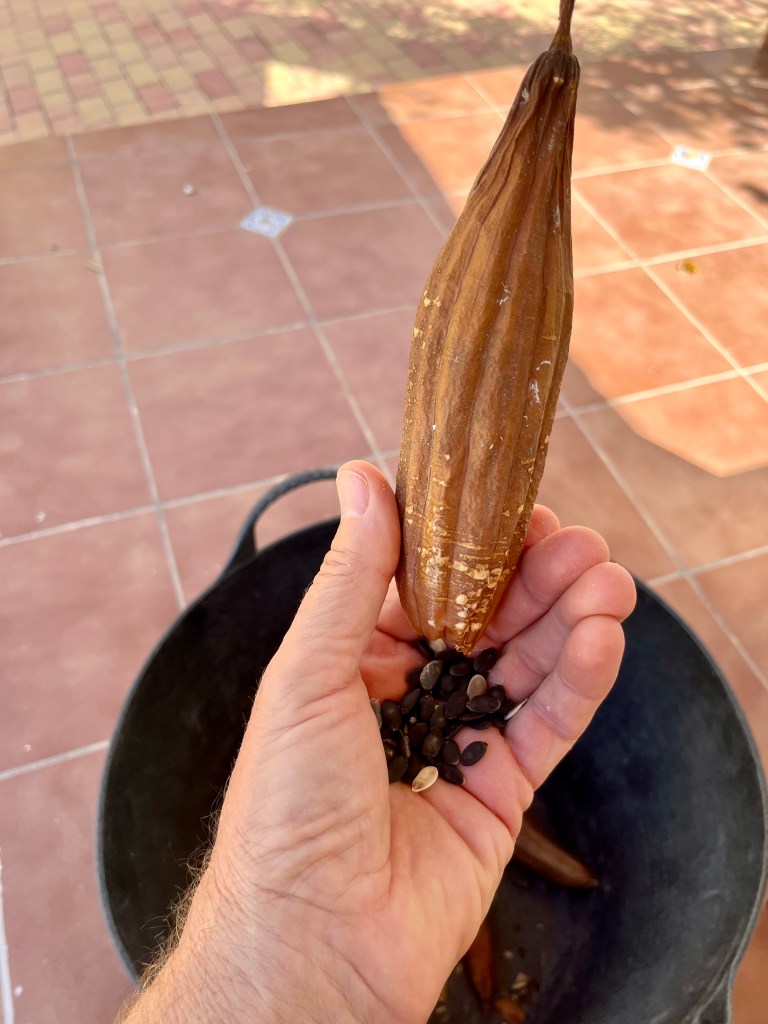
Loofahs. I only grow loofahs for their cosmetic purposes. Once harvested and prepared they can be used as a skin defoliant whilst showering. Normally I make a small fortune this time of year selling loofahs to Cruella’s coven. They highly prize them for their ability to remove warts from their noses. However, the crop of loofahs this year has been terrible. The photo below shows my paltry crop ready for harvesting. Click on each photo for a larger view.

Neverthless, don’t let this put you off, loofahs are a lovely crop with lots of little yellow flowers and usually a crop of up to 10 loofahs per plant. Loofahs are simple to process.

  • When the pods are completely brown, dry and wrinkled (Cruella just looked over my shoulder and asked if I was writing about her); shake each pod and you should hear the seeds rattling inside. If so they are ready to harvest.
  • Using your secateurs cut off each pod leaving about 1 inch of stem attached.
  • Holding the pod upright, use your thumb to press against the stem and the top will pop off Leaving a neat hole at the top of the pod.
  • Turn the pod over and pour the many seeds into the palm of your hand. This is next years crop.
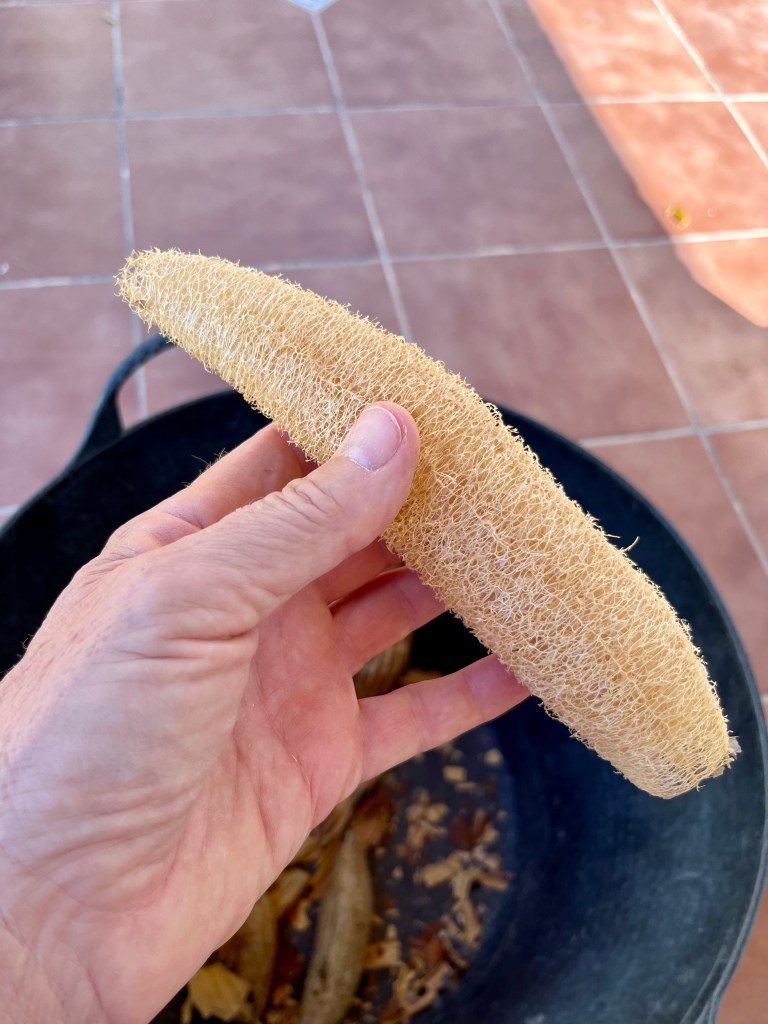
  • Once the seeds have been successfully harvested take the pod in both hands and gently crush it. This will cause the skin to crack and break open. You then just need to peel the skin away to reveal your lovely loofah. Store this in a drawer and each one can be used for about three months in your bathroom as a skin defoliant.
  • Lastly store all your seeds in a paper envelope and keep ina dark place till next year.

The photos below show this process in action. Click on each photo for a larger view.

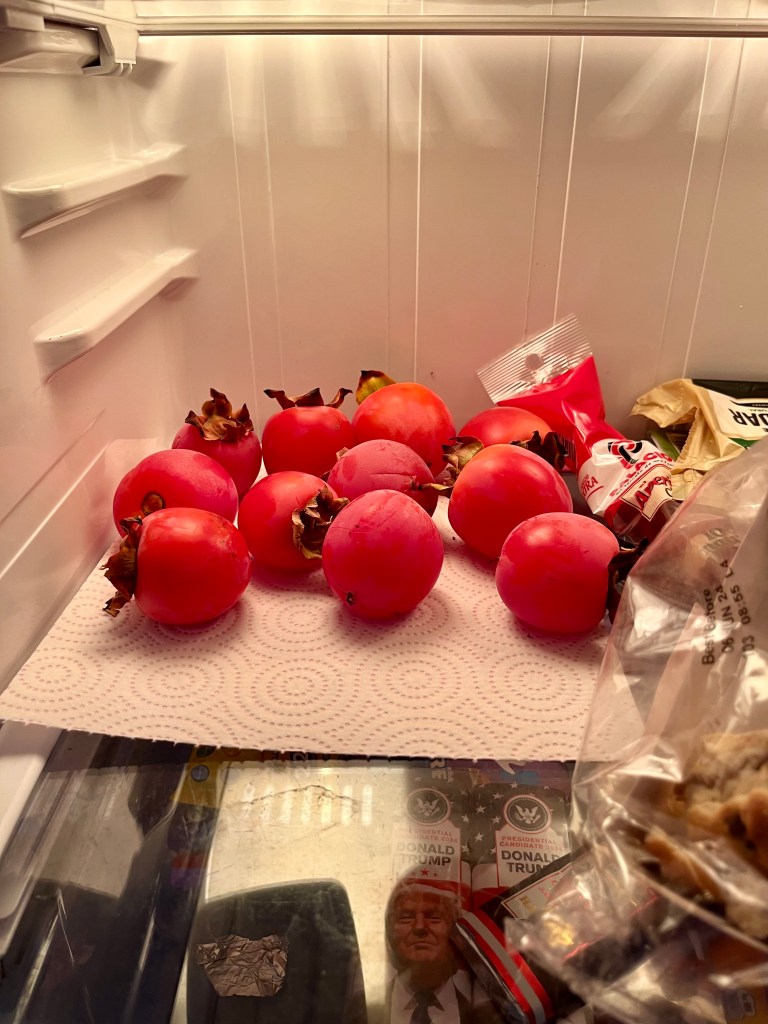
Persimmons. Persimmons are a lovely juicy sweet fruit about the size of an apple normally, but this year, the size of a tomato. The birds love this fruit so you have to net and pick the crop daily. Luckily persimmon is one of those fruits that happily continue ripening after picking.

All you need to do is beat the birds to them every day, then just wash them and place them in the fridge. Use them daily, either eat them on their own or add them to your breakfast cereal, either way they are lovely.

The photos below show my persimmons happily washed and then nestling in my fridge ready for use. Spookily if you look carefully at the fridge photo you can see the face of Donald Trump smiling up at you. This is because Cruella (my wife) has purchased lots of Donald Trump chocolate bars which she uses in her “chickens for Trump rallies”. Click on each photo for a larger view.

Pomegranate. Pomegranates are really the last of my summer crops and I don’t really get many of them. In Spain, pomegranates are the most valued summer cash crop. Over the years I have tried many a routine aimed at retrieving the seeds to eat, but by far the best way is as follows:

  • Cut the pomegranate in half.
  • Hold the cut side down in the palm of your hand over a bowl.
  • Bash the round half of the fruit with a heavy wooden spoon
  • Let the seeds fall between your fingers into the bowl. Keep bashing till you have them all.

The photos below show my paltry crop and the process for retrieving the seeds. Click on each photo for a larger view.

Autumn planting. If you have taken some cuttings and you have grown them on, or if you have been to the garden centre and bought lots of plants, then now is the time to plant them out. The extreme heat of the summer has gone, but there is still plenty of warmth both in the air and the soil.

In the Costa Blanca we have a growth window between now and December when you can put plants in the ground or repot and you will still get some growth before everything more or less stops for the Winter. If possible try and stand your new plants in the area where you intend to plant them for at least a couple of days to see how they acclimatise.

My usual planting regime includes:

  • Watering thoroughly the new plants or cuttings the night before.
  • Digging the planting hole at least twice the size of the new plants roots.
  • Filling the planting hole with water and letting it drain.
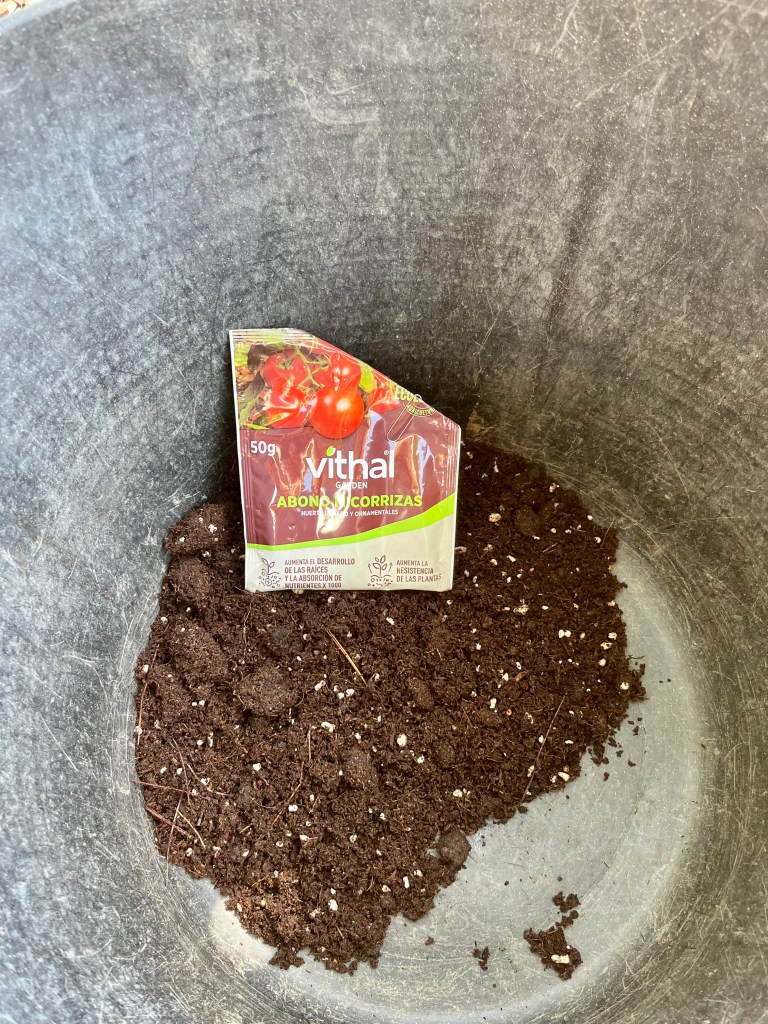
  • Using Mycorrhizal fungi sprinkled on the roots (not essential but helpful).
  • Firming the new plant in with fresh compost and watering thoroughly.

The photos below show the planting process for some Swedish Ivy cuttings that I have been growing on for a couple of months. Click on each photo for a larger view.

Don’t forget these autumn jobs. In the rush to close your garden up for winter, don’t forget these two important jobs:

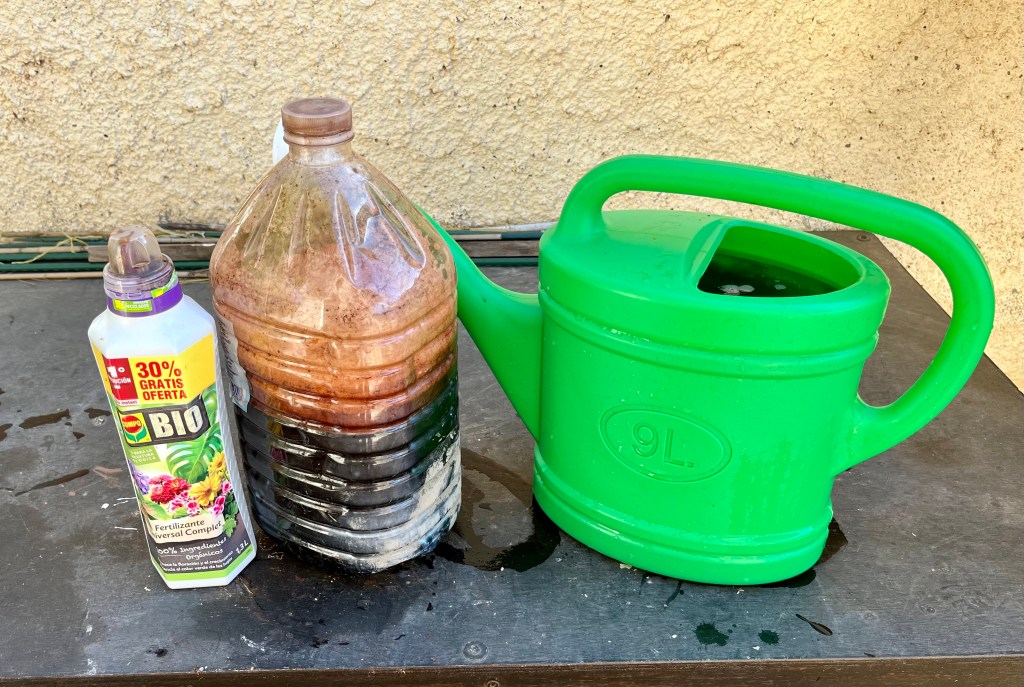
Feed all your plants in pots and maybe include a few of your favourites that are in the ground. By feeding them now you will be ensuring that they will still have some oomph (an old English gardening term) as they slowly subside into their period of non growth. In addition to feeding them add a little bit of Iron to each watering can just to stop them taking Chlorosis into the winter.

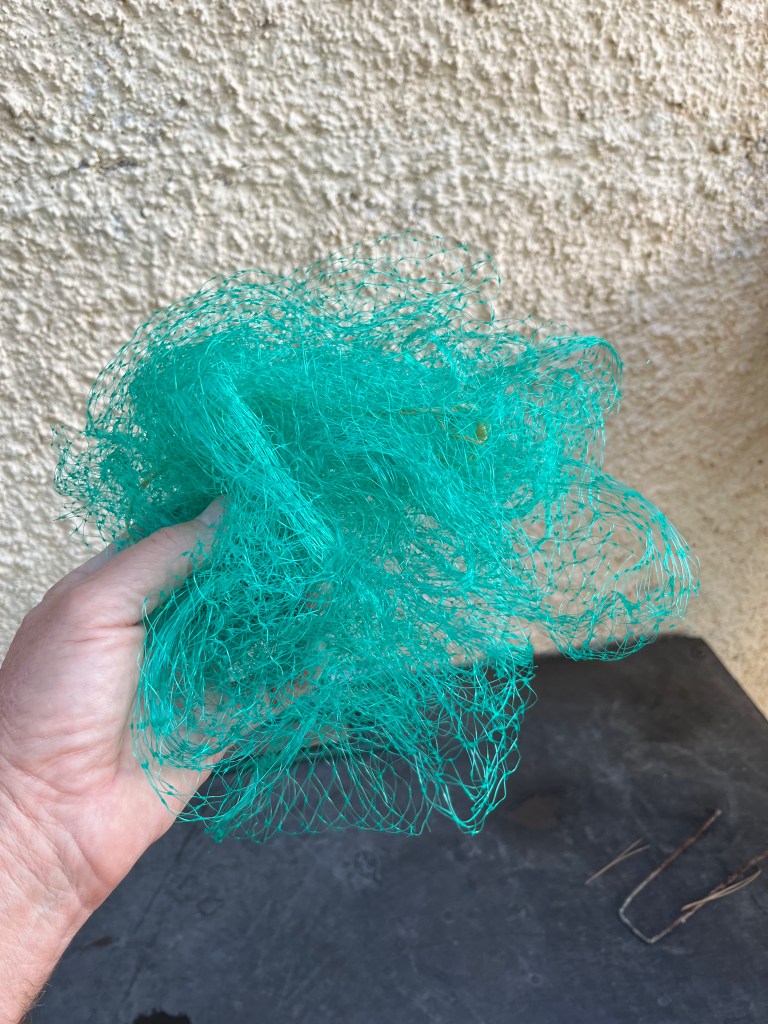
Lastly, don’t forget to take any nets off of tree or bushes you may have placed them on to save your fruit. Nets left on will definitely snare a few little birds as they search around for winter food. Photo aide memoir below. Click on each photo for a larger view.

Cruella holds chickens for Trump rallies. Cruella (my wife) has always been interested in politics, but usually she has stuck to British politics. Lately however, things have taken a strange turn and she has started following USA politics in general, and Donald Trump and the Republicans in particular.

This mania all started when someone told her that Donald Trump likes chickens. This knowledge made her determined that her and her girls would do all in their power to secure Trumps election to the Presidency. No matter what I tell her, she is convinced that she will have a vote in the elections and that when elected Mr Trump will support chicken emancipation and universal chicken suffrage.

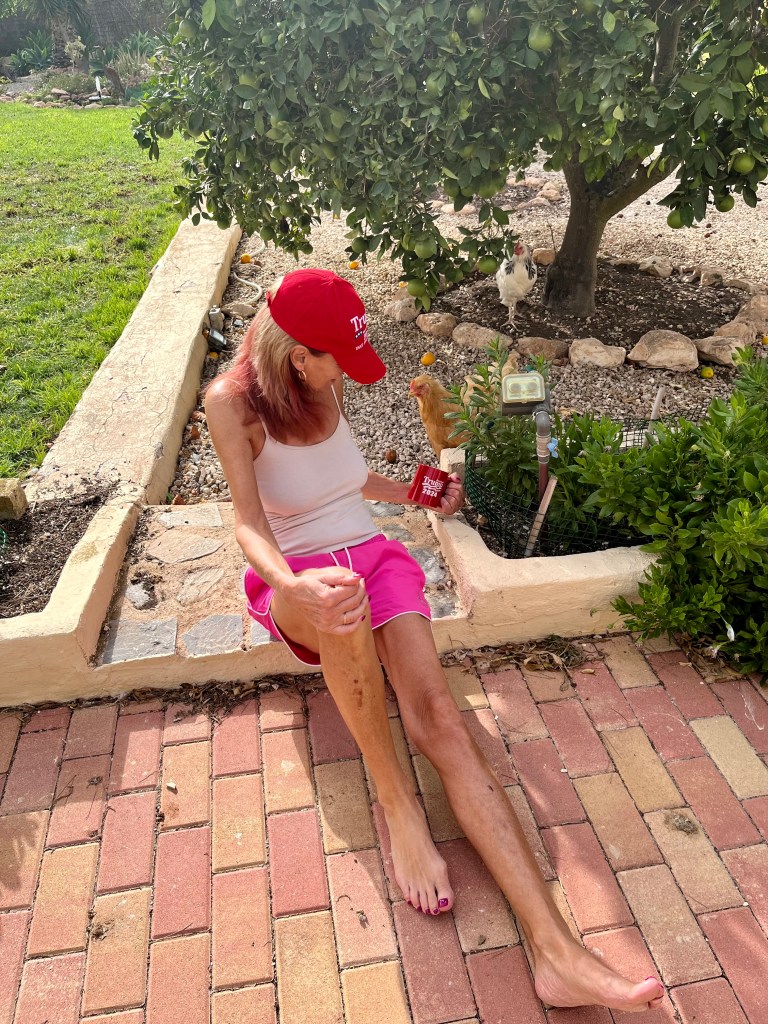
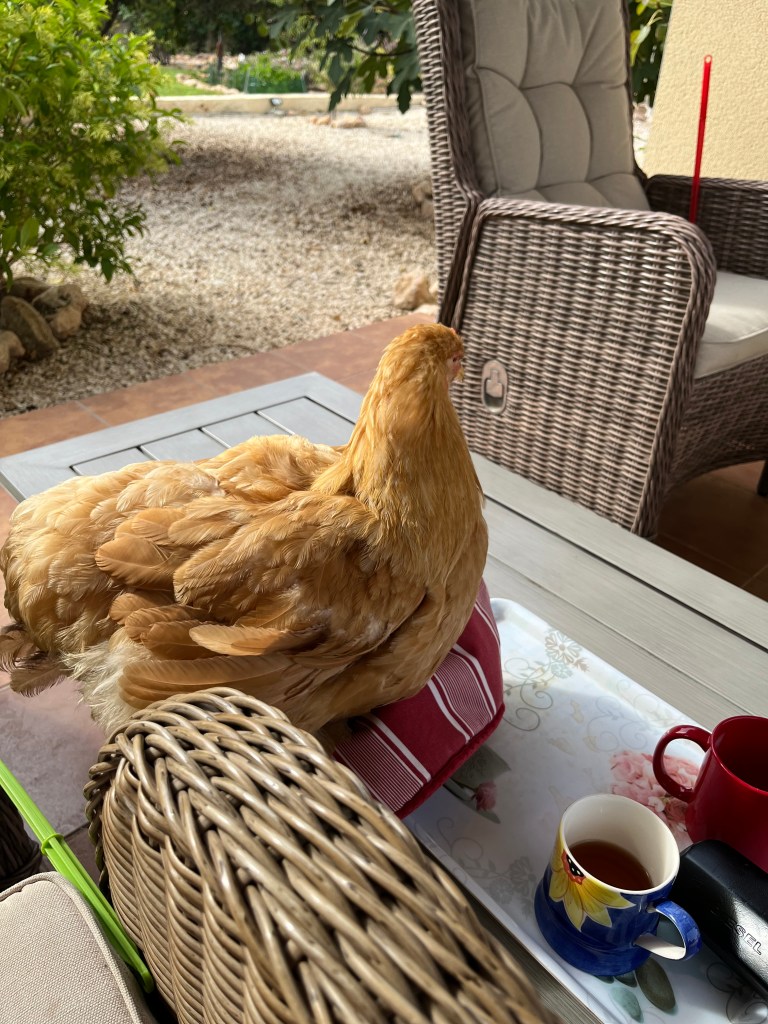
I am only telling you all this because it is radically affecting my gardening. Every morning she holds a chickens for Trump rally and they march up and down the garden singing “Born in the USA” and “Eye of the Tiger”. This is followed by Cruella insisting that all the chickens drink out of her Trump mug. I consistently refused and stuck with my tea till she sent Helga to stop me by sitting on my teapot. The photos below show the latest idiocy. Click on each photo for a larger view.

I continue the Autumn tidy up and the chickens get a shoe fetish

Cruella (my wife) has been away visiting our idiot son which means I have been able to get on with all the autumnal jobs I need to do in the garden. But it hasn’t been easy, the chickens follow me everywhere and just stand there staring at me. To make matters worse they have developed a shoe fetish and I think they need counselling. Anyway more of this later, on with the gardening:

24th October 2023. Things I have been doing lately.

  • repairing the lawn
  • dealing with the end of the soft fruit season
  • repotting plants
  • tying up Canna and relentlessly deadheading
  • dealing with the chicken shoe fetish

Repairing the lawn. I know that most of you do not have lawns, as only an idiot would have a lawn in Spain – I have to hide from Cruella every time the water bill arrives. Anyway if you have a lawn now is the time to repair it. The heat of the summer has gone, but it is still warm and there is the odd chance of rain to encourage your new seeds.

Begin by getting everything together that you will need to successfully complete your lawn repairs. The photo below shows everything you will need all loaded into my wheelbarrow. This includes:

  • sifted compost mixed with soil
  • good quality grass seed
  • garden protective fleece and ground staples
  • antpowder

Once you have assembled everything, then you need to cut the lawn quite short and rake over the patches you are going to repair. Once you are happy that you have raked sufficiently to bring the soil to the surface, spread your new mixture of soil and compost in heaps over the repair area. Next you will need to evenly rake your soil over the proposed repair area and roll it to ensure it engages with the surface of the lawn. Once you have rollered you should gently rake the new patch with a garden tined rake. Next sow your new seed by sprinkling left to right and then up and down to give you a nice even spread. Finish the sowing stage by rollering once more to ensure the seed has good contact with the soil and is slightly embedded.

That is it, you are finished; just make sure you never let the seed dry out. And if you left it there, then tomorrow when you come out to inspect your work there would be absolutely no grass seed left – not even a tiny bit. And that is because the birds and the ants are both stocking up for winter and your lovely expensive grass seed is very nutritious. So you have to protect your work. First by covering the seeded area in a garden fleece that will stop the birds, and then by sprinkling ant powder in a continuous line all around the fleece edge – leave one little gap and the ants will be in. The photos below show the whole process in action.

Dealing with the end of the soft fruit season. We are nearly at the end of the soft fruit season and we are about to enter the citrus season. And there are a few final things you need to be doing. Firstly keep picking fruit on a daily basis. Where fruiting has finished then it is time to remove your nets. My advice is not to try and save your nets for next year, you will cause more damage to your plants. Instead just get a pair of scissors and cut your old nets off. Finally, if you have espalier plants then you need to tie them in to ensure the correct growth. The first two photos below show my daily fruit pick. The next photos show my net removal technique and espalier tying in.

Repotting plants. Most of your pot plants should be almost dormant by now, so if necessary, this is the best time to repot those of them that have outgrown their pot. The first thing to do is to select a pot that is just one size up from the existing pot. If you go for a much bigger pot then there is a danger of a virus infecting the empty soil that has yet to be filled by roots. Place your plant into the new pot whilst it is still in its existing pot. Then fill around the old pot, ensuring you tamp the new compost firmly around the old pot. Wiggle the old pot around and then remove, leaving a pot shaped space in the compost for the plant to be replanted into. The photos below show this first stage.

You now need to remove your plant from the old pot. If it is a plastic pot, then you can normally remove the plant safely without damage. However, if it is a terracotta or clay pot, then it is better to give up on the pot and just smash it as this will cause less damage to the roots. The photos below show the journey from old smashed pot to nice new home.

Tying up Canna and relentlessly deadheading. Most flowering plants will have finished by now, though I have to say my Marigolds have been flowering unstoppably since March and are still going strong. The secret to my long flowering Marigolds is daily deadheading, ruthless removal of spent plants and propping up those left. The photos below show the valiant veterans gallantly flowering on into November.

Most bulb based plants can have all their top growth cutback now. However, the big exception is Cannas. Do not cut Cannas back yet, instead tie them up and leave their top growth to die back ungracefully. it doesn’t matter if your plants end up looking like a gang of drunks on a night out. By leaving the top growth to die back all of the goodness will be passed back down into their rhizomes, thereby ensuring powerful growth next Spring. The photo below shows my Cannas dying disgracefully.

Dealing with the chicken shoe fetish. It all started the very day Cruella flew off. I remember it well because she hit the top of the Mulberry tree on take off. No sooner had she vanished over the roof tops than the chickens started following me around. They didn’t actually do anything, they just followed me staring all the time, it was quite intimidating.

I phoned Cruella that night and told her about the problems with the chickens, she instantly said “what did you do to them” she then asked me to put them on the phone. I gave the phone to Big Bertha -their leader – and she squawked away in Chickenese to Cruella. When Cruella came back on the phone she said that her girls were suffering from separation anxiety and needed to be kept calm. She went on to say that she would arrange counselling when she got back!

Anyway when it came to putting them in their coop at night I found them all crowded around the shoes that Cruella wears when she goes out to their coop. I tried to shoo – no pun attended- them into their coop but they refused to move. In the end I had to carry one of Cruella’s shoes and place it in their coop. They all followed me clucking and eventually went up. Things are a lot better now as Cruella has sent me recordings of her singing all their favourite songs in Chickenese. I play these at night and during feeding times. So far it’s working; their favourites are “the ugly duckling” and “the chicken dance”; you should see them dance around to the chicken dance. The photo below shows the start of the shoe fetish.

Cruella kills the garden, I try and rescue it, and the chickens are on the Hollywood Diet

I’ve been away, not for long, but long enough for Cruella (my wife) to try and destroy the garden. Despite the fact that I leave copious instruction notes she still manages to kill things. On top of all that her bloody chickens are now on the worlds most expensive diet. I think it is all becoming too much for me, I may abandon the garden and take up stamp collecting. On with the gardening; for now, including:

  • Repairing the garden
  • Dealing with plant disease before winter
  • Reshaping my olive tree
  • Dealing with fruit issues
  • Coping with Prima Donna chickens

6th October 2023. Things I have been doing lately:

Repairing the garden. When I left for my short absence the garden was in superb condition. However, upon my return there was neglect and decay everywhere. I honestly thought of calling up the RHS helpline to report Cruella and hopefully get her a lifetime ban from ever owning a garden.

One of the main problems was the lawn. Cruella had allowed it to grow feral as she claimed that her girls prefer long grass. The photos below show the lawn before and after I cut it all back.

Perhaps the worst item of neglect was the death of my poor little advocado cutting. I had been growing this on for two years from a stone, and I was thinking of planting it in the ground in the autumn. The photo below shows what is left of it.

Dealing with plant disease before winter. Now is the time to go round and inspect all of your perennial plants before winter. This is an important process before the plants go into hibernation for the winter season. Any disease that your plant is harbouring will go on causing harm when the plant is in hibernation, and in many cases can be fatal. My inspection found me two typical cases that needed dealing with.

The first involved a lovely Dipladenia that had been happily growing up a trellis for a couple of years. It had got itself a severe case of Mealy Bug, which with its sticky honeydew droppings had caused considerable leaf drop. I had sprayed a couple of times to no avail, so now it was time to take drastic action and cut back. Don’t be afraid to cutback plants to near the ground to get rid of pests. In most cases this will invigorate your plant and give it a fresh start. The photos below show the Dipladenia in its diseased state and then with its new start in life.

My second disease problem was on a lovely Jasmine which grows up the corner of my house on wires. This stalwart reliable plant got itself a bad case of mildew. Now Jasmine normally die back and look a bit dead this time of year, but in this case the leaves were not dry and crisp, instead they were powdery and limp. This was obviously caused by the high humidity this year, and can normally be cured by spraying, but it was too far gone and too late in the year, so it had to be drastically pruned. If you have to do this don’t worry, Jasmine doesn’t mind being taken back to the ground every few years. The photos below show the Jasmine before and after.

Reshaping my olive tree. Once you have cloud pruned olive trees into the shape you want them, then you need to trim them up about three times a year to keep them sharp. The photos below show my olive tree before and after it’s smartening up.

Dealing with fruit issues. This year has been fantastic for fruit, and there is still a bumper crop of oranges and lemons to come. However, in the meantime keep picking and processing fruit on a daily basis. I still have lots of figs and persimmons galore, with pomegranates yet to come. The first photo below shows my daily haul of figs, the second shows my little persimmon tree with its final fruits and lastly my pomegranates waiting to be harvested. Remember, if possible leave your pomegranates till they go red. Don’t worry if they split a bit, as these are one of the few fruits you can still eat after splitting because of their compartmentalisation.

Sadly, I have to report the only fruit I have had a problem with this year is my little white peach tree. I have grown this from a cutting and this would have been it’s first year fruiting. There was an abundance of fruit on the tree and I was looking forward to a bumper harvest. But unfortunately the heavy rain last month caused the fruit to swell and split its skin. The first photo below shows my little tree bursting with fruit, but as you can see in the second photo, all of it split. Oh well that is gardening, there is always next year; God willing.

Coping with Prima Donna chickens. While I was away Cruella (my wife) has become even more indulgent with her chickens. When I returned she explained that her girls were now on a new expensive diet which she said had been recommended by a Hollywood Chicken influencer (I didn’t know there was such a thing). This diet consists of individually roasted insects which come in very expensive little packets. When I queried why I still only got porridge and Tango the lonely blind Labrador is still fed Chappie, she accused me of trying to give her girls food issues.

The new food was only the start, she then confessed that the chickens have been having exercise classes with a personal trainer. She explained it was called Tai Chicken and was a variant of Tai Chi specially for chickens (I didn’t know there was such a thing). When I said that sounded like Thai Chicken she burst into tears. Anyway, the end result is I have no money left and the chickens are strutting around in designer leggings feeding on designer chicken insect caviar. The photo below shows the chickens and their insect buffet; if you look closely you can see their leggings.

I have a bulb plan, Cruella has become Frankenstein and the little white chicken is back from the dead

This was going to be a straightforward gardening blog packed full of all the things we gardeners need to get on with at the end of Summer; it was to be calming and reflective instilling peace into our souls. All of this has been destroyed by the return of the little white chicken from the grave. How it happened was this. I was calmly digging holes for bulbs when I caught a flash of movement from the corner of my eye, and there walking towards me was the little white chicken! Yes, the one I buried just the other week. I will tell you more later, I need to talk about gardening to keep me sane.

23rd October 2022. Things I have been doing lately:

Making a bulb plan. Bulbs are not something that we often think of for our gardens here in Spain. In most gardens it is all succulents and gravel, however, bulbs can give your garden an added delight in the Spring and late Autumn. You can plant bulbs individually, in drifts dotted throughout your lawn or in dramatic clumps springing up as islands of beauty in your gravelled areas.

There are lots of online bulb suppliers who will deliver a range of healthy bulbs ready for you to plant now or in the Spring. I favour an organisation called “Farmer Gracy”who have a superb on line catalogue and excellent service and delivery. But there are many others. Or you could just buy a few packets of bulbs from your local garden centre. The photo below shows the delight of my bulbs arriving for autumn planting.

Half the joy is browsing the catalogue and then making your choices, I am like a child in a sweet shop

But don’t just rush out and begin planting. If you do, you will never remember where things are planted, you need to make a bulb plan. Just basically measure your planting area and draw up a simple plans that shows you where you have planted your bulbs. Drawing the plan up also helps you to reflect upon which bulbs will go where. You can then allow for shade, full sun and companion planting. The photo below shows the start of my bulb plan process.

Such fun it is like working in God’s planning office

The photos below show some examples of my various bulb plans. Every garden is obviously different, but a bulb plan will make you think it all through, it will also tell you what you planted, where you planted them and in what quantity. Click on each photo for a larger view.

It is important to remember that not all bulbs are the same; some will need special treatment before planting such as chilling or soaking but mostly they are very straightforward. Just remember the golden rule “pointy end” faces up. The photos below show some of my bulb planting activities. The first photos shows some anemones being soaked before planting out in a shady area with companion planting of Kaffir Lillies. The next photo shows some tulips ready for clump planting. The final photo shows how I mark each bulb planted area with a white stone. This is essential as it will stop me hoeing off the new shoots and guide my companion planting in the Spring. Click on each photo for a larger view.

Finally a couple of photos of me with my new super duper heavyweight bulb planter. You will definitely need one of these if like me you plan some drift planting across your lawn. Even with this tool you will need heavy rain or a good watering to make your Spanish lawn soft enough to plant through grass. Click on each photo for a larger view.

Time to remove fruit netting. By now all the fruit should be off your trees and there is no need for netting to remain in place. It is good practice to take netting down as it stops birds being caught up in raggedy nets and obviously you can’t prune back in Spring with nets on. Don’t try and save nets for next year as it is just not worth it, just cut them off. The photo below shows my net removing efforts and some last minute fruits. Click on each photo for a larger view.

There is one danger you should remember when removing nets from fig trees, apart from falling off the ladder and breaking your neck, and that is burns from fig sap. Stupidly I ignored my normal advice of wearing covering clothes, and instead pulled the net off wearing just a vest and shirts. The result was a series of sap burns to my skin. The photos below show you just some of the damage so be careful, especially at pruning time, and only prune in January when the sap has stopped rising. Click on each photo for a larger view.

Time to plant out your spring cuttings. Sometimes you will have plants sitting on your potting bench and they seem as if they have been there forever doing nothing, then suddenly they come to life as they have made sufficient root to begin growing. I have just planted out a Stephanotis and a Jasmine and will soon plant out a rose, all of which have come into growth spurts. I can thoroughly recommend taking cuttings, there is nothing as satisfying as seeing a little twig you potted up six months ago suddenly come to life. The first photo below shows the little Jasmine in its new home, followed by the Stephanotis ready to propel itself up a trellis. Click on each photo for a larger view.

Take Dipladenia cuttings. If you have Dipladenia, and lots of you do, because it is now very popular in Spain, then why not take some cuttings. Just cut off some strongly growing stems (with a knife never secateurs), pinch out the lower leaves, leaving just a few at the top. Then dip in rooting hormone if you have it (not essential) and plant them in fours around the side of a four inch pot. They probably won’t all root, but you will definitely get some new plants out of the process and it’s free. The photos below show how simple it is. Click on each photo for a larger view.

The resurrection of the little white chicken. As a Christian I obviously believe in resurrection, but not for chickens. So it was to my amazement that I witnessed the second coming of the little white chicken. There it was strolling around the garden spying on me as usual, despite the fact I had recently buried it. I confronted Cruella (my wife) about this phenomenon and her only comment was “oh is she back already, good, we have work to do”. I’ve checked the grave it’s empty.

You know the worse thing? The little white chicken is now accompanied by a small black chicken with a white head, who is now its evil companion. I accused Cruella (my wife) of conducting Frankenstein like experiments with chickens and mixing body parts, which she of course denied. But I know something is up because every time she sees the little white chicken she shouts out “she lives” and cackles like a maniac. The photos below show Cruella speaking chickenese to her new, or recycled girls! Click on each photo for a larger view.

Finally, Cruella (my wife) has adopted a new chicken hairstyle that she affects when marching her girls up and down the garden as they chant in chickenese. I am thinking of moving.

She just told me a joke in chickenese and then started laughing at me

The little white chicken is dead but Tango the blind Labrador is keeping morale up

It is with great sadness that I have to tell you that the little white chicken, or as I called it “the spy”, is dead. Cruella (my wife) was at our English house with the idiot son, so all the blame has fallen on me. Despite my assuring her it was not my fault, she has lapsed into only speaking chickenese and muttering darkly with her remaining “girls”. I sleep with the wardrobe pushed up against my bedroom door.

In mitigation, this is how it happened. The little white chicken began to look ill, wouldn’t eat, and barely came out of the coop. With the help of YouTube, chicken websites and other reliable sources I diagnosed that she was egg-bound. One of the remedies offered was to bath her in Epsom Salts. At great expense I ordered Epsom Salts and duly bathed her, towel dried her and then blow dried her. By the time I finished she looked like a fluffy cotton bud had exploded. But it was to no avail, as she died anyway. But as the photos below show at least she died clean. She lies at rest in the Wild Wood. Cruella goes to her grave every night and howls in chickenese whilst I cower down by the compost bins. Click on each photo for a larger view.

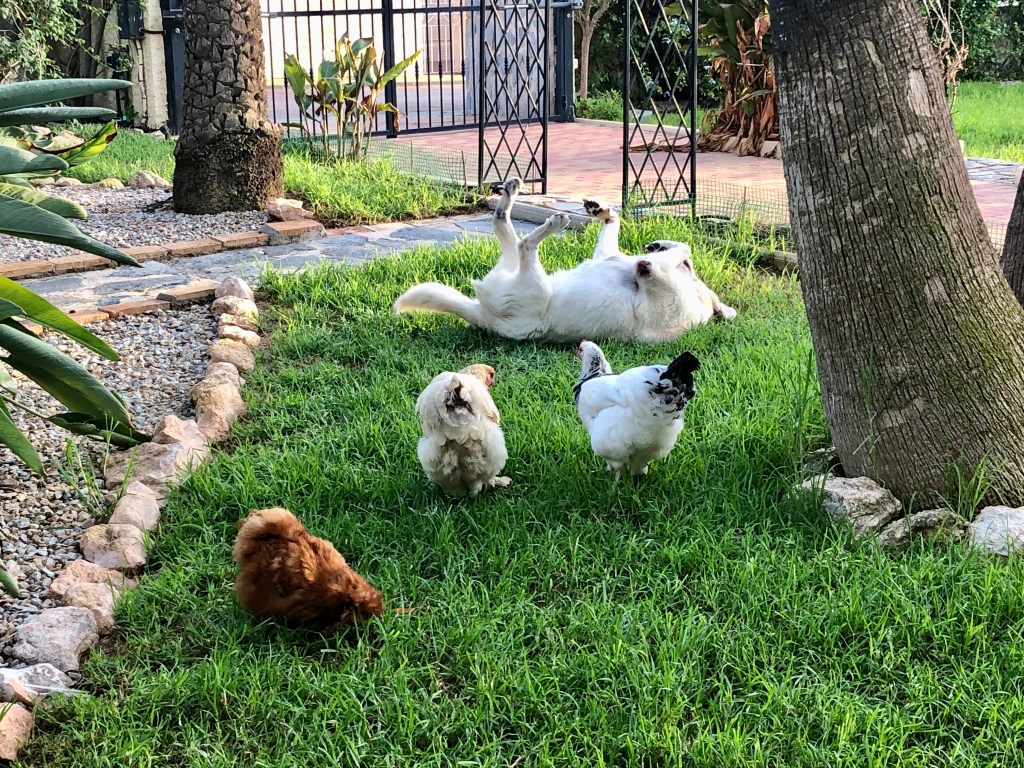
However, there is some good news before we get on with the gardening. I have taught Tango the blind Labrador to do “rollovers” to cheer up the other chickens. The photos below show Tango performing to a rapt audience of bemused Click on each photo for a larger view.

11th October 2022. Things I have been doing lately:

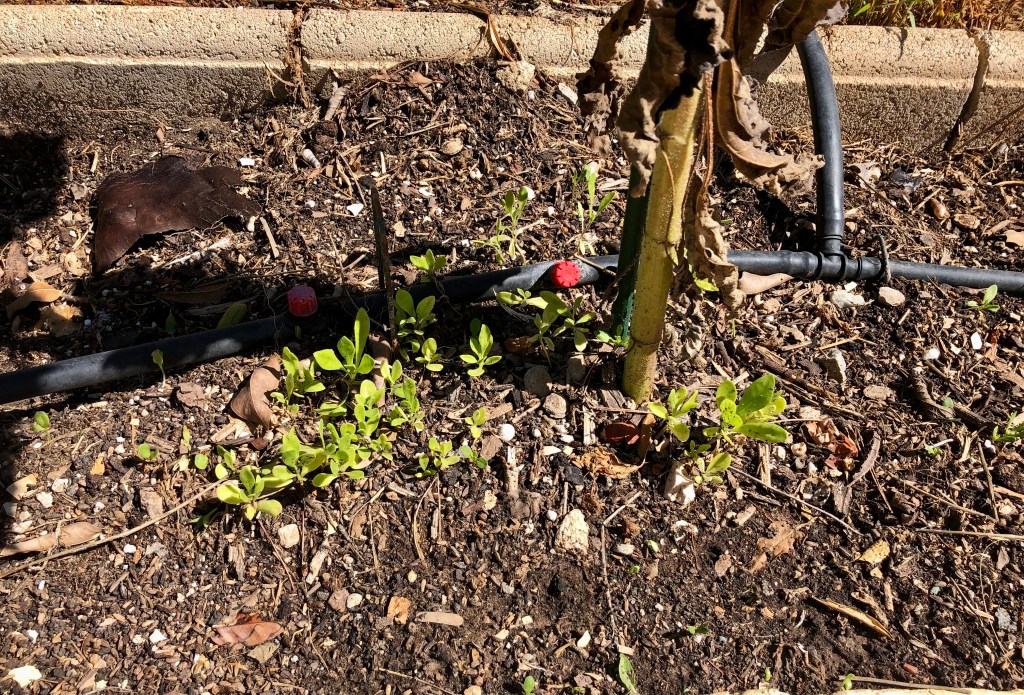
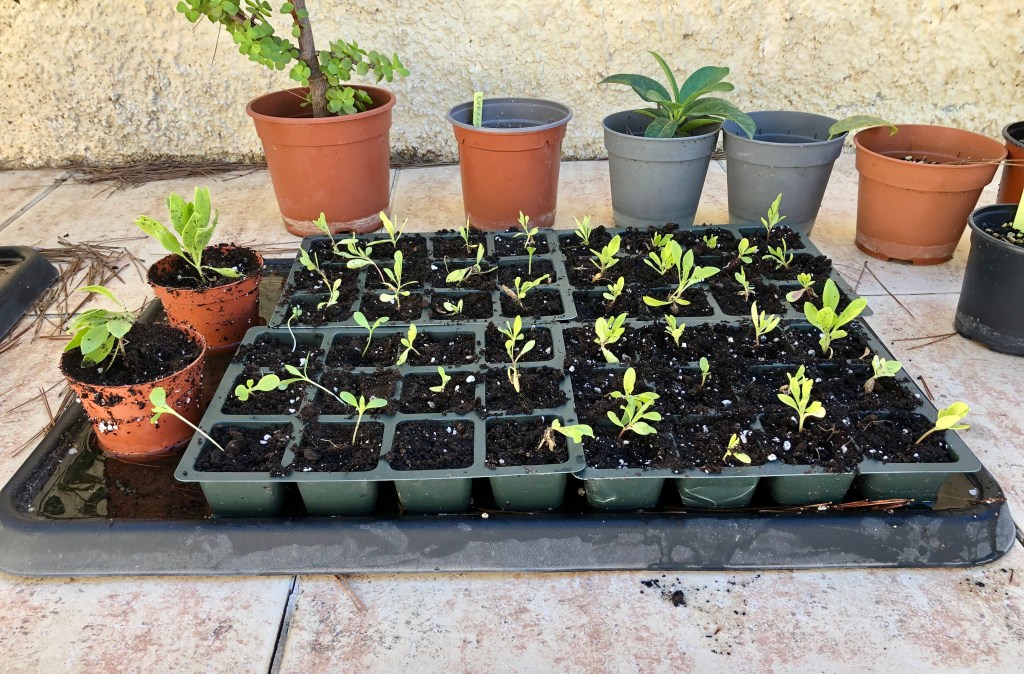
Potting up seedlings. If you have osteospermums in your garden or any Margarita type Daisy, then they are magnificent self seeders and now is the time to dig up the seedlings and pot them on. I also cut back some mature osteospermum and leave them in the beds to over winter, but mostly I rely on fresh seedlings each year.

The process is simple. Look under and around any Osteospermums and you will see a profuse amount of little seedlings. Gently ease these out in clumps using your trowel to lever them out of the soil. Then holding them by the leaf, never the stem, pot them up into pre prepared seed trays in a free draining compost with added Perlite for drainage. The first photo below shows the little seedlings waiting to be plucked to new life. The second shows the pre-prepared seed trays, the third shows my trowel action. The next shows a seedling with healthy roots being transplanted. The final photo shows the trays of happy seedlings. It just shows how simple it is to get new free plants from your garden. Click on each photo for a larger view.

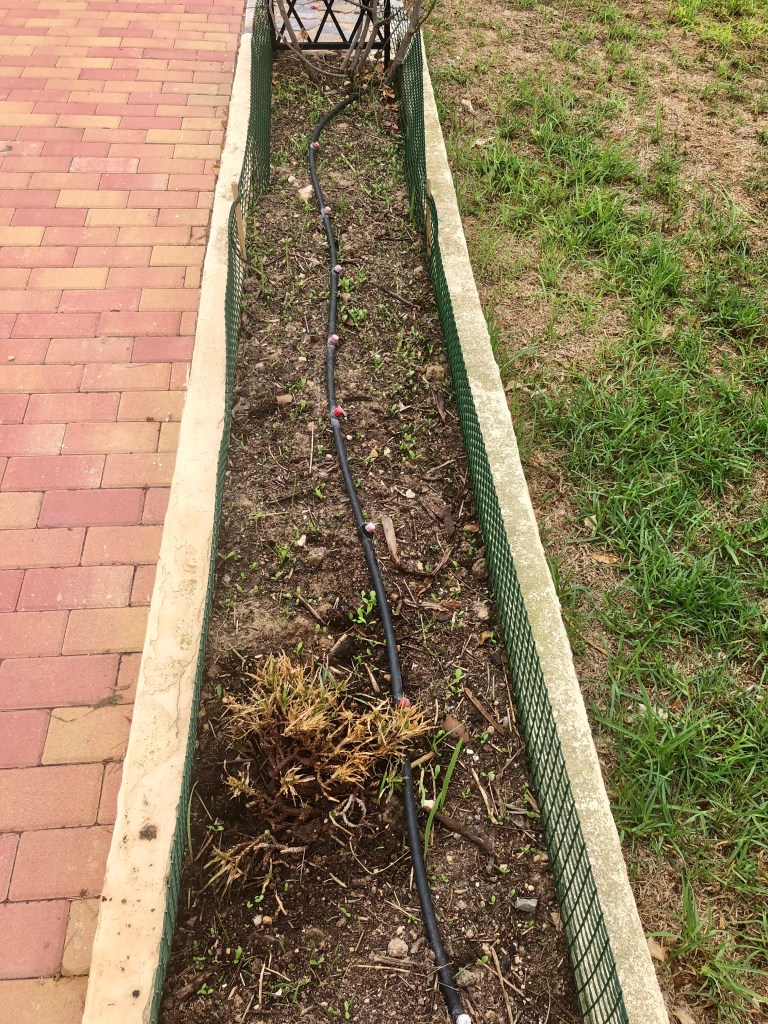
Clearing and mulching beds. By now you should have cleared all of your summer plants out of your beds and borders and it is now time to give them a good mulch before putting in your winter bulbs and plants. After clearing the beds of plants, give them a thorough hoeing to clear out any residual weeds. Following this thoroughly water before adding your mulch as this will ensure that the mulch will lock in moisture. Do not plant anything in the beds for at least two weeks to allow any remaining weeds to show themselves before a final hoe and planting.

The first two photos show the final clear up. The third shows the necessary watering before the mulch. The next shows the finished bed waiting for its new plants. The final photo shows a bed that I mulched a couple of weeks ago, and you can see the weeds making a re-appearance. Click on each photo for a larger view.

Time to take your last cuttings of the year. October is the last month you can take cuttings in Spain. Any later cuttings will not have time to make some root before the cold weather. Prepare everything before taking any cuttings, as it is important you get your new cuttings into the soil as soon as possible to stop any drying out. The first photo below shows everything you need before starting. This includes:

  • Pre-prepared pots
  • A sharp knife to take cuttings (never use secateurs as these can crush stems)
  • Rooting hormone liquid or powder (not absolutely necessary, but can help)
  • A dibber to make holes for your cuttings

The final photo shows my tray of winter cuttings that I am preparing for a friend who has a particularly dry garden. Click on each photo for a larger view.

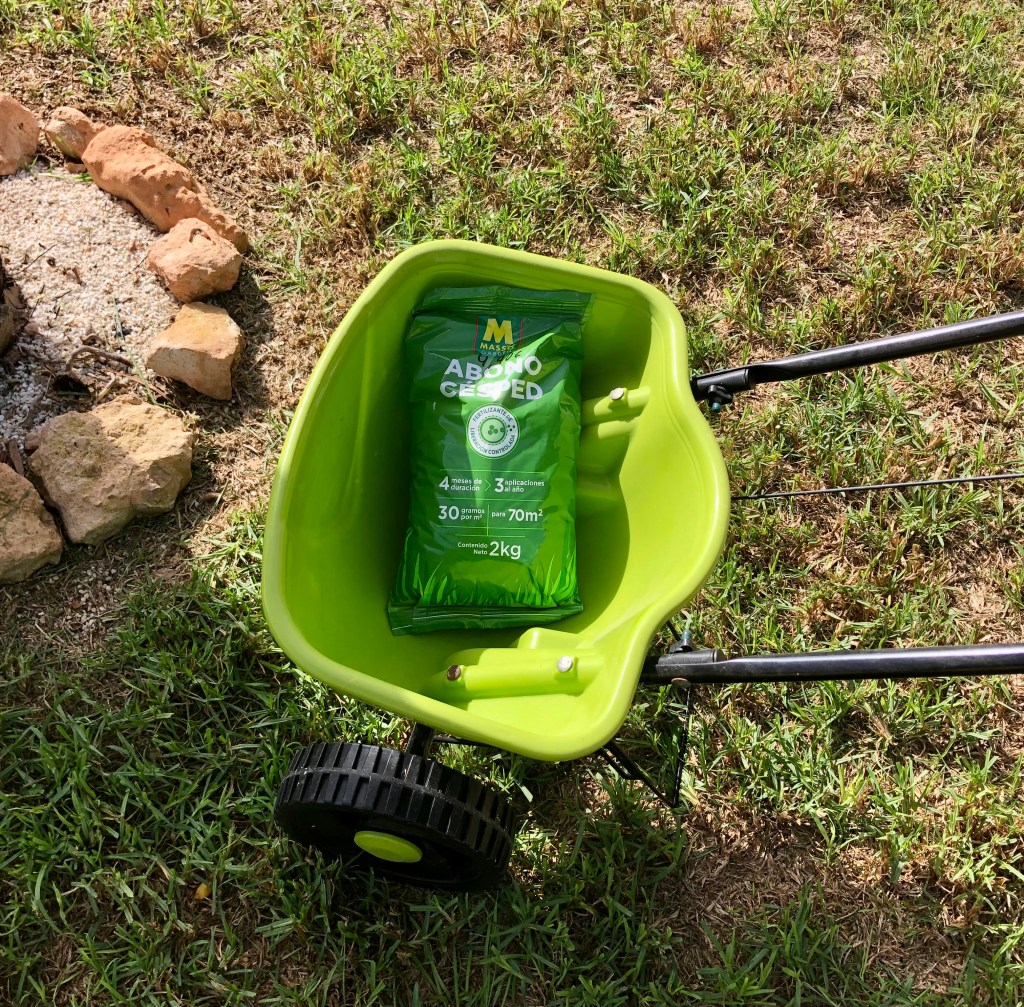
Some last jobs. There are always last jobs to be done in a garden at this time of year. I would recommend trimming Jasmine back to the wall or supporting trellis. Left to it’s own devices Jasmine will flop forward and inhibit the growth underneath making it go brown. By trimming it back you will encourage good healthy new growth all over the plant. Another final job is to give your lawn its final feed of the year. This needs to be done when your grass still has some growth or you are wasting your time and money. The first photo below shows my trimmed back Jasmine. The second shows the grass food I use (others are available). Click on each photo for a larger view.

Cruella and her friends scared my lawn

When I told Cruella (my wife) that I wasn’t looking forward to scarifying and slitting the lawn. I explained to her that the scarifying machine was terrifying. Don’t worry she instantly said I’ll do it, I like scarifying and I will invite some friends over to help. And that dear reader is how it came about that I woke up the next morning to find Cruella and her terrifying friends dancing around the lawn in ritualistic circles. The photo below explains all.

It took me ages to get the scorch marks off the lawn

23rd October 2021. Things I have been doing lately:

Scarifying the lawn. If you have a lawn – and I recognise that not many people do in Spain – then now is the time to give it a reviving scarification. All lawns get a build up of thick matted dead grass, which if left in place long term will cause water logging and patchiness. To stop this happening then you need to completely scarify the lawn every year or at least every two years. Now if you have a small lawn then you can do this with a grass rake, just scratch away at the surface and gradually remove all the underlying dead grass which has formed a thatch.

However, if like me you have a large lawn then you are better off buying or renting a scarifier. I have owned a scarifier for about 3 years but have to work up my courage to use it. It makes a tremendous noise stirs up huge clouds of dust and coats me from head to toe in dead grass. To scarify your lawn, first cut it very short, then water it and wait till the next afternoon before scarifying. The blades of grass should be dry, but the soil moist. All you have to do then is just hang on and pray for dear life. The photos below show me toiling in the wake of the scarifier.

It is not time to prune trees or to undertake the big Winter cut back; that will all happen in January. However, there is some tidying up you can be doing. Here are some of the things I am up to at the moment.

Trimming up the False Pepper tree. The Californian or Peruvian False Pepper Tree is a big favourite in Spain. This tree with its weeping willow looks can be a stunner in any garden, providing you keep it neatly trimmed. Too often I see glowering monstrosities spilling over garden fences and onto the pavement. To get the best out of this tree keep it neat but not constrained. I trim my tree back about every 6 months to keep its shape and do a drastic chop back every 5 years. The photos below show my False Pepper before its very overdue trim and in its new neatly coiffed appearance.

Tidy Yuccas and Palms. If you have growth coming from the bottom of your Palm trees and unwanted growth on your Yuccas (all of which sounds a bit Frankie Howerd; international readers will need to look him up on Google) then now is the time to take them off. This growth saps strength from the main plant and to my eyes is not aesthetically pleasing. Just using long handled lopers slice off the unwanted foliage and compost where appropriate. The photos below some examples of foliage I removed.

In addition to snipping off the unwanted foliage I also tackled the big cutback of my European Fan Palms. The photos below show the battle; I emerged the victor bloodied but unbowed.

Tying up Cannas. By now your Cannas will be looking untidy and scraggly. But don’t you dare cut them down; if you do you will be left with weak, weedy growth next Spring. Instead you need to tie your Cannas up and hold them in place. By doing this you will be allowing the plant to draw the maximum benefit from the foliage back into the Corm (ugly bulb) fattening it up and getting it ready to burst with life next Spring. The photos below show some of my Cannas newly tied up but looking like Cruella after a night at the Coven.

Finally check your irrigation. Now that we are firmly moving into Autumn you need to do a couple of things with your irrigation systems. Firstly, alter your timings to allow for the fact that most things will either stop growing, or grow only very slowly. So you will need to alter the watering intervals and also the length of watering time. Secondly, you need to check your batteries. I have 10 seperate watering timers, but I change all the batteries at the same time to ensure that all are in good working order. It is a false economy to think some are ok, and that way lies confusion. Dont forget to make a note of the date when you did the big battery change over. The photo below shows me at the start of the process.

This is one of my least complicated configurations.

I’m taking cuttings and growing seedlings whilst Cruella is growing a puppy

As the poet Keats said, “It is the season of mists and mellow fruitfulness”which means it is time for seedlings, cuttings and new plantings . All of this exciting activity can be found in this post ; what’s not to like lets get gardening

11th October 2021. Things I have been doing lately:

Collecting the Persimmon harvest. The Persimmon or Caqui as the Spanish call it is a lovely soft and very sweet fruit which looks much like a large tomato when it is ripe. This is my last fruit of the season and is well worth waiting for. When it is ripe you can just cut the top off the fruit and then using a small spoon you can eat as if you were eating a yoghurt from a pot.

I would highly recommend getting a Persimmon tree. it is easy to grow doesn’t get too big and a new tree can be planted out anytime between now and the end of January. When the tree is fruiting you will need to net it as the bright red colouring of the fruit as it ripens signals dinner time to the birds. When you harvest the fruit you need to ensure that you snip it off leaving some stem still attached. You can use the fruit directly from the tree in a manner of ways. served individually as a pudding, spooned out into your cereal or porridge, or just eat it as a snack.

The photos below show the netted Persimmon tree safe from birds, being harvested with stalk attached and finally ready to eat. Click on each photo for a larger view.

Harvesting seedlings. Regular readers of this blog will remember that I removed all of the Osteospermums from my flower beds a couple of months ago. I did this because they get woody and leggy after a long Spring/Summer of flowering, but also safe in the knowledge that they would have set seed. By removing the parent plants I let in air and moisture to the seedlings confident that they would soon show up. Well the photo below shows that they didn’t let me down.

Hello new plants I’m your Daddy

Once the seedlings look big enough to prick out then there are a few simple stages before you get your nice new plants:

  • First prepare a nice free draining compost by mixing a good amount of Perlite into your compost.
  • Fill plug trays with your nice compost making sure to tamp it down to remove air pockets, but not so much that you compact the compost.
  • Thoroughly water and drain the plug trays then using your dibber make a nice wide hole so that you can get all the roots in

Each of the above stages are shown in the photos below. Click on each photo for a larger view.

Now the preparation is over, it is time to go get your new plants.

  • Using your trowel slide it under a group of seedlings and ease them to the surface. Take care not to damage their delicate roots.
  • Gently separate the seedlings and begin to pick out those with the most leaves and the best roots.
  • Holding the seedlings only by the leaves, gently lower them into your pre-prepared holes pushing their roots into place with a pencil and cover them.
  • Finally stand back and admire the fact that you now have 96 new free plants.
When grown on each plant would cost you 4 euro, so you see it makes sense to grow from seeds and cuttings.

Taking late summer cuttings. Now is an ideal time to take a few late summer cuttings. And if they take then great, but if they don’t you have lost nothing. I don’t normally grow geraniums and pelargoniums because of the dreaded geranium moth. But I grew some this Summer and sprayed them regularly and they were ok, so I have decided to take some cuttings. The photo below shows my plants ready to be reshaped for winter and to provide me with my cuttings.

The first thing to do is to search down into the plant and look for a non flowering stem that has not gone woody. Geraniums stems will turn woody quite quickly, but you are looking for the succulent still green stem. Cut of the stem and then cut off all the leaves on the stem leaving only a couple at the top. Next dip your cut and prepared stem into some hormone rooting liquid before planting against the edge of a four inch pot. You can plant two cuttings to each pot. Finally place a cane at the centre of your pot and place the pot into a plastic bag. Blow the bag up with your breath so it is full of nice carbon dioxide and then tie at the top with twine. This neat little wigwam will stop your cutting drying out over the next few weeks. You can use this method to take soft wood cuttings over the next month. The photos below show the process. Click on each photo for a larger view.

8 geraniums to add to my 96 seedlings

Planting Golden Pothos. Before I went on my recent trip to the UK to see our idiot son. I put some Golden Pothos cuttings in a glass of water to see if I could grow them on. Regular readers will remember that I have a Golden Pothos on my Naya that I grandly wish to grow around a mirror. I had attempted planting cuttings straight into the pot but they failed, so I thought this method might work. I am pleasd to say that they produced good roots and are now planted in the main pot to supplement the mother plant.

The photos below shows the new roots in all their glory, and finally planted in with the mother plant. Click on each photo for a larger view.

Cruella is growing a puppy. When I told Cruella (my wife) all about the seedlings and cuttings that I had taken to make new plants, and explained to her the process, she feigned her normal disinterest. However, despite her show of indifference I could see that she was somewhat interested; I can always tell because the wart on the end of her nose glows and makes her look like an evil Rudolf the red nosed reindeer.

Anyway a few hours later I found her furiously brushing Tango our blind Labrador, or as we now call him “last of the Labradors”. When I enquired what she was doing she informed me that she would use the hair brushed from Tango to grow him a new companion. When I complained that she was being stupid, she said it is either that or she would raise Nero (our recently deceased Labrador) from the dead! The photo below shows Cruella and Tango together with her potting material.

My bald patch has come back and Cruella calls me Wayne

Whenever Cruella (my wife) wants to be horrible to me – which to be fair is quite often – she mentions my bald patch. In the case of most men this would refer to their receding hair, but in my case it’s the lawn. She knows that twice I have tried to repair the bald patch on my lawn, in both cases at great expense, but both have similarly failed. She now calls me Wayne Rooney. When I asked her why? She said we have both spent a lot of money on failed transplants and are ugly.

Now I know that not many people have lawns or any type of grass in Spain. And that those do have them are either mad or masochists. But you can’t beat the look of grass, the fun to be had feeding it, strimming, mowing, raking and scarifying and that’s just one week. So if like me you have a bald patch then in the words of Henry V “once more unto the breech dear friends”.

24 September. Things I have been doing lately:

Dealing with my bald patch. My past efforts at dealing with the patch on my lawn have involved using the very expensive “Kikuyu” seed. This is reputedly hardy and can stand anything. Unfortunately I did not get one blade of grass despite great expense, watering twice daily and being covered by fleece to protect the seed from birds.

For my new attempt I am trying a brand of proprietary ready mixed seed and feed all in one treatment. The starting point for any grass sowing is to make sure that it has a suitable base soil. In my case this meant sieving soil that I had stored from various digs around the garden. Once you have sieved an appropriate amount of soil, you then need to rake over the bald patch and sprinkle the sieved soil over the bald patch to provide a suitable base for the seed.

As I began to sprinkle my “all in one” seed and feed the birds began to gather like vultures surrounding a thirsty man in the desert. They even began to chirrup and whistle cheerfully like fat men looking forward to dinner. In an effort to ward them off both I and the marauding Labradors charged them. But all of this was to little avail as Tango is blind and couldn’t see them and Nero has crippling arthritis in one of his front legs so wasn’t very good at charging. the birds just hopped back a couple of metres and commenced the cheerful chirruping.

As a last resort I covered the seed with lightly sieved soil to hopefully hide the seed from the birds – who were watching my every move. I finished the whole thing off by hanging some old CD’s from canes and finally watering. I will let you know what happens. The photos below show my my assembled bald patch fighting equipment, soil sieving production line, and finally my CD’s waving bravely in the wind. Click on each photo for a larger view.

Shaping trees and bushes. You should always leave the really big prunes till January. But, If you want to keep your bushes and trees shapely, now is the last time you will be able to trim and prune this year. The benefit of trimming now is two fold. Firstly, you keep the major infrastructure parts of your garden intact and shapely which gives overall structure. Secondly, by trimming whilst there is still growth you ensure that if you over trim or create a bald patch then you will still have growth that will cover your mistake.

The alternative is that you trim later when there is no growth and you suffer the indignity of an over trimmed bald tree or bush all winter till next Spring’s growth arrives to hide your shame. In my case you also have to suffer the indignity of Cruella bringing it up at every opportunity. I have already been to counselling over her haranguing over the lawn bald patch.

I always start my shape pruning by bringing my Olive tree back into shape. I cloud pruned this a number of years ago and when it is freshly shaped it is lovely and a talking point in the garden. Many of you will have Olive trees and will just let them grow into shapeless lumps. Left to themselves these trees will look scraggy and untidy and eventually make a mess underneath as the Olives fall off. If you are not processing the Olives then I would advise you to reshape the tree to make it a visually stunning part of your garden.

The first photo below show my Olive tree just about ready for its twice annual trimming.

The two photos below provide examples not only of my prowess in cloud pruning, but also hint at my hidden artistic talent. I mourn for the career I could have had in fashion photography. Click on each photo for a larger view.

After reshaping the Olive tree I tend to look down my drive to where a large Californian False Pepper and a Myrtle bush dominate the end of the drive. This view down the drive and on into the wild wood sets the overall feel of the garden for those either driving in or walking down the drive. If these two plants are left to get scruffy and overgrown then it removes much of the shape and overall structure of the garden.

The big Californian Pepper I had professionally loped a while ago to bring it back into my overall reach. The new growth is now sprouting like crazy both from the trunk and the top of the tree. So if I don’t get on top of it now then it will again be out of reach. The photos below show the tree before its trim and afterwards. Cruella claims she can see no difference; but as she can only come out at night it does prove problematic. I have provided a caption on each photo for clarity.

Reshaping the Myrtle bush is all a matter of timing. It provides the forefront to a stand of Yuccas set behind it. The starkness of the Yucca spikes are a good foil to the rounded shape of the Myrle. It flowers profusely and is a real joy to behold. So you need to time the trimming so that you lose as little flowering as possible, but still have some growth to cover up any mistakes you might make.

As I walk down the drive towards what I term the “Technical Area” the Myrtle guards the entrance to this sacred place. The Technical Area is where the shed, potting benches, compost bins and water tanks are, and it is from this area that all of the garden eventually emerges as seeds or cuttings. In her usual disparaging way Cruella (my wife) calls this area the dump.

The photos below show the Mytrle prior to its trim and in all its proud glory afterwards.

Giant blood oozing Maggots and Sawfly Caterpillar soup

No, this is not a Halloween special it’s just another week in the garden. I’ll explain later, but we really must get on as Summer has ended and Autumn is chasing me around with so many things to do. Are you ready, let’s go.

28th October: Things I have been doing lately.

🥅 Taking nets off trees. Now is the time to start taking nets off your Fig and other fruit trees. By now all the fruit should have been eaten (hopefully by you and not the birds). Leaving the nets on any longer will impede Autumn leaf fall and be a danger to the birds. Don’t try and save your net; it’s not worth it and it will be damaged already, if not you will undoubtedly tear it as you take it off. However, you should save any CD’s or other repellents that you have hung on your tree as these can definitely be used next year. Cruella (my wife) still asks what ever happened to her CD of the Monster Mash by Boris Pickett and the Crypt-Kickers, I just smile knowingly.

The photo below show one of my Fig trees ready to be de-netted. The second photo shows the net ready to be dumped and the CD’s all set to be saved till next year; shush!

🐛 Dealing with Sawfly. Now I really shouldn’t be dealing with Sawfly caterpillars at this time of the year, as normally I would have battled with them from round about March to May. And I did, every day I was out there making sure no Sawfly Caterpillar had a free meal on my Roses. But, they are back and like Arnie in the Terminator they mean business – I blame global warming!

Sawfly Mummy’s (or the bitch as we gardeners call her) saws a long strip out of the stem of a Rose and then lays her eggs in nice little boxes. All the caterpillars hatch at the same time and proceed to voraciously eat down the Rose till they reach the ground where they bury themselves until they emerge next year and guess what; “the bitch is back”

The first photo shows the damage they can do to a Rose. The second photo shows the naughty caterpillars and their birth place. Click on each photo for a larger view.

🛏 Re-making beds. Obviously I am not talking about household matters, but preparing your flower beds for next year. Now is the time to take out all those tired leggy plants, renew the soil and plant you new seedlings.

From the photo below you can see that the flower beds down the edge of my drive have gone floppy and leggy. Now I tolerate this for a while as it makes for a nice end of Summer display as the plants droop and soften the view of the drive. However, if I leave it much longer it will be too late to get seedlings in whilst the ground still has some heat. The second photo shows their final resting place from where they will rise once again next Easter. (remind you of anyone).

Once you have cleared the beds then be sure to water them before adding compost as the addition of the compost mulch will then lock in the moisture. The first photo shows one of my nicely cleared beds with just perennials left. The second photo shows the mid watering process; notice I am using a watering can and rainwater – Extinction Rebellion would be proud of me.

The next stage is to add a compost mulch from your compost bin. Add about 2 inch depth of compost. If you do not have a compost bin (why not it is so easy) then just buy some bags of compost from a garden centre and spread it over. The long term aim of using a compost mulch is to provide a good soil structure that is full of micro-nutrients that plants love. The first photo below shows my half empty compost bin. The next photo shows my wheel barrow of black gold ready to go on the soil.

Don’t begin planting into the flower bed for at least two to three days. The reason for this is that Blackbirds will zoom in on your new compost and dig around for tiny insects. Although this can be messy, at least they won’t be digging up your newly planted seedlings as they do it.

🌱 Repairing the lawn. Now is really the final time you can repair your lawn this year as the grass is stopping growing. Because of our two Labradors this is a perennial problem. The photo below shows Nero the golden Labrador sitting and explaining to me that Nero who is skulking in the back ground is sorry and won’t do it again.

Nero digs and Tango is the peace maker.

🧟‍♀️ Giant blood oozing maggots and Sawfly Caterpillar soup. When I told Cruella (my wife) that I was emptying the compost bin and that the Sawfly Caterpillars were back, her face lit up. She enquired coyly “will there be maggots”. As we approach Halloween she is always looking for new recipes and with this in mind she proceeded to boil everything into a nice gloopy soup. If you are not doing anything over Halloween pop round there is still plenty left. The photo below shows the maggots which if touched ooze blood.

I’m sure there were six here a moment ago

It’s raining and I’ve got nothing to do

We are at our English house and it is pouring with rain, and just as I was about to go into the garden. In the meantime Cruella (my wife) has gone shopping with our idiot Son. We are having people round tonight and she is doing a buffet. When I asked what was for dinner she said “nothing special just the usual: Eye of newt and toe of frog, Wool of bat and tongue of dog, Adder’s fork and blind-worm’s sting, Lizard’s leg and owlet’s wing”. Sounds yummy; I didn’t dare ask what we were drinking.

In the meantime I am stuck inside, unable to get near the garden because of the weather. The photo below shows my predicament. As we live right on the river bank it can look a bit miserable when it rains. But the second photo shows the lovely Autumn colours that are just creeping into the garden and that is some compensation.

12th October: Things I have been doing lately

✂️ Reshaping and pruning. To compensate for my lack of English gardening I thought I would tell you about the stuff I was doing just before I left Spain. As summer ends you need to prune and reshape plants that are normally kept in a nice tight growing shape. This is not the big annual cutback prune, but instead, this prune is aimed at keeping the plant tidy and pleasing to the eye. To this end I have begun to reshape plants that are normally pruned to shape. This includes my large Olive tree that I cloud pruned a few years ago. To keep this in shape you need to regularly prune it once every 2/3months.

Olive trees are ideal for cloud pruning as when they are pruned they keeps a nice tight growing shape that is ideal for amateur topiary. However, left to themselves they can become big large amorphous lumps that just sit in your garden like a dishevelled guest that has overstayed their welcome. I used to cloud prune with shears (as all purists should) but now I use an electric hedge trimmer and finish with shears.

The photo below shows my Olive tree after its pruning. Unfortunately I forgot to take a photo before, so you will just have to use your imagination.

If you would like help, advice or assistance in reshaping your Olive tree, just get in touch.

🌳 Reshaping my standards. In this case I am not alluding to my morals or principles, but to those plants that look like lollipops on a stick. I only have two standards that sit inside my swimming pool gates. When in full flower and kept well shaped these look lovely. But of course during the flowering season you have to slow down on the trimming as otherwise you would be cutting off the flowers. This means that by the end of Summer standards can become overgrown and untidy.

The first photo below shows my standards looking rather unkempt. However, after a quick trim they are reshaped and ready for future Spring growth. After trimming I give them a good feed of a general purpose fertiliser that peps them up after the shock of pruning. Another important benefit of trimming standards at this time of year is that you will not suffer wind damage in Autumn breezes which can easily blow the plant over and destroy your lovely pot. In addition the plant will not suffer from “root rock” which by the way is not a form of music found in the USA Deep South. But, instead a problem whereby the plant is continually rocked by the wind and cannot ensure continuous root contact with the soil which in turn can kill the plant.

Money for nothing and your plants for free…

Which is what Dire Straits would have sung if they were gardeners instead of just rock stars. Well it is their loss because this time of the year; just as Summer tips towards Autumn is the time to get some more free plants. Now is not the time for cuttings, but it is time for self sowed seedlings, seeds and viable plantlets. Everywhere you look in your garden there is an abundance of free plants – what’s not to like; let’s get started.

3rd October: Things I have been doing lately.

🌺 Planting up Marguerite seedlings. Marguerites are one of Spain’s favourite plants and can be found in most gardens. However, I struggle to grow them from harvested seed, instead I let them self seed under the parent plant and then harvest them for planting up. Now is the time to do this. Just look under your Marguerites and you will see hundreds of small seedlings beginning to emerge. The photos below show Marguerites in beds alongside my drive, and then some of the seedlings peeping out from under their parent in my borders.

As the old plants die back they leave you their offspring as presents for the future.

Using a trowel ease a group of seedlings out of the soil then tease them apart using a pencil. Carefully transplant the seedlings into a pre-prepared seed tray. It is very important that you use the pencil to carefully tuck every bit of root into the soil. If you leave any bits out of the soil then there is a real danger the seedlings will not take. The first photo below shows my pre-prepared seed tray with my trusty dibber. The second photo shows seedlings being carefully tucked in with my pencil (I have had this pencil for 30 years) Cruella (my wife) mocks me for this but she has no soul – no I mean it I’m not joking she actually doesn’t have one.

🕷 Harvesting Spider Plantlets. Lots of people think of Spider Plants (Chlorophytum comosum) as permanent denizens of badly lit bathroom window ledges where they often lurk sadly in the gloom. But in fact these versatile and colourful plants are ideal for brightening up shady areas of your garden. They can’t stand full Sun but they don’t mind lurking in half shade areas. In fact, in the shade their variegation becomes more brilliant as they cut through the gloom. Anyway, enough of me rhapsodising about Spider Plants, the important thing is that now is the time to harvest their plantlets. The photo below shows the Mother plant with its babies dangling on long stems which are used to position the new young plants in soil far enough away so that they do not compete with the main plant.

Prepare 3 inch pots with good free draining compost and then holding the stem in one hand carefully cut off the plantlet at the end of the stem, being sure not to cut into the nascent roots. Once you have removed the plantlet then just push it down into the pot about quarter of an inch and you have a new plant. The photo below shows me acting as midwife to the new babies.

It s a bit like cutting the umbilical cord!

🌺 Harvesting Pink Trumpet Vine seeds. Pink Trumpet is another popular Spanish Plant that can be found creeping up and over most Spanish walls and houses. This strong and vigorous plant will provide you with a constant show of flowers all Summer long followed by stunningly beautiful and unusual seed pods. The photo below shows one of my many Pink Trumpet Vines.

From the photo above you can see the plant both in flower and in seed. Normally I will cut the seed pods off at least once to ensure the plant keeps flowering. However, at this time of year you should harvest the seed pods when they are fully brown and dry. Once you have the pod off the plant, place it on a table and gently prise the sides of the pod open. Inside you will find hundreds of flat seeds which you can place in an envelope and plant out in seed trays next Spring to get yourself more plants for free. The first photo below shows some of the pods ready for picking. The second photo shows the seeds bursting from the pods waiting to go into my envelope.

Notice that I haven written the type of seed and date on the envelope. This is essential otherwise you end up with all these envelopes in January with no idea what the seed is.

📎 Splitting Albuca Spiralis (corkscrew plant). I don’t often buy plants, prefering to grow from seed or cuttings, but I saw this plant last Summer in a garden centre and I just loved its corkscrew leaves. You can see the plant in the photo below.

From the photo above you can see that the plant grows from a Corm like bulb which goes green in the growing season and then dies back to a dead brown. At the end of last season I cut back the top growth and then left it on my potting bench and just waited with only light watering. Then gradually I noticed green creeping back into the Corm, see photo below.

It lives!

From the photo above you can see that the plant on the right has the potential to be separated into two plants. By taking the Corm out of the pot I was able to cut the plat in half and create a whole new plant for free. The first photo below shows the Corm after it was split in such a way as to leave enough root for each plant to be viable. The second photo shows the miracle of three plants from two.

Finally a photo from the potting bench showing some of the new plants; and al for free. Get out there and get some free plants for yourself.

The big composting special

Hooray its that time of year again when I regale you with advice on the merits of composting. Remember that Coca Cola advert that appears on the television every Christmas, where a large truck with a picture of Santa Claus on the side goes through towns accompanied by the sound track singing “holidays are coming…holidays are coming”. Well that has been me for the past few weeks I have been singing “compost special is coming…compost special is coming”. To say this has annoyed Cruella (my wife) would be an understatement, so much so that I now mumble it under my breath, and when she says what did you just say, I reply “nothing”. I know it’s not much, but I count that as a small victory.
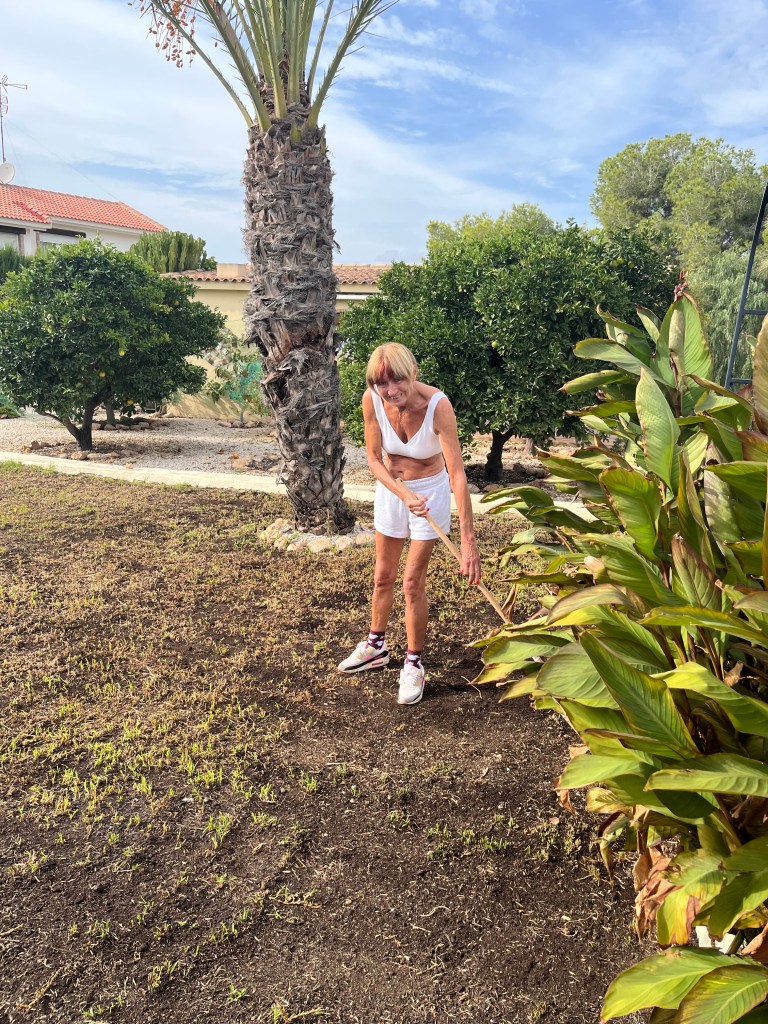
Anyway, on with the show let’s keep the excitement bubbling.

30th October: Things I have been doing lately

🧠 Why compost. All garden soil gets depleted over time and lose micro nutrients either they just get washed away by the rain or the plants take them up and the soil needs replenishing. Composting can help improve soil by adding back these nutrients and encouraging helpful bacteria that will break down and improve your soil. When added to your garden compost will help suppress weeds, lessen the need for chemical fertilisers, retain moisture and give you a warm feeling that you are doing a “green thing”. So no matter what your motivation, by composting you will be improving your garden.

👨‍🎓 How to compost. You don’t have to make a big deal out of composting and anyone can do it. Whether you have a large garden or just a little patio garden with pots adding compost will improve your garden. The basic need is to have compost bin, or compost heap where you can store your compost. This can be very basic such as a little patch of your garden where you tip excess produce and cuttings etc. You could just have a heap in the corner covered by an old carpet, or if you like make a basic container out of chicken wire.  It might be easier just to buy a compost bin from a store and there are thousands of them, from basic one simple bin, right up to multi-bin purpose built composting systems.

As you would expect, I have a purpose built composting system consisting of two large bins with lid for easy access and doors that can be raised to allow me to get at the compost from the bottom. The photo below shows my composting system.

974E5825-BFE7-4A21-88D4-5694E402B8B8
Pretty cool eh!

Now, I don’t want you getting compost bin envy, that’s not the idea. I designed these and had them built when we first moved to this house because this size garden calls for this amount of compost. There are fruit trees to be mulched, lots of beds that need seasonal replenishing, lawns that need some topping and all the planting and stuff on the potting bench.

🌿 What to compost. Now you can compost most organic material. Examples would be:

– all plant cuttings and mown grass

– vegetable trimmings etc from your kitchen

– old newspapers and cardboard

– hair and fur from your dog, cat, hamster or velociraptor

– twigs and branches up to about an inch thick

– eggshells, coffee grounds and filters, tea bags

– fruit, but not too many lemons or oranges as they will make the heap acidic

☠️ What not to compost. You must be careful not to compost the following:

– cooked food of any sort (this will encourage rats and cockroaches). This includes: meat, bones, fish, fat or dairy

– leaves or cuttings from plants that have been infected with disease or pathogens such as rust on Roses or mildew. If you compost these then you will infect the heap.

– dog or cat poo; and don’t even think of human poo.

🔐 The key ingredients of compost. Quite simply good composting requires four things:

1. Green items: that add nitrogen (grass, leaves etc)

2. Brown items: that add carbon (twigs, branches, newspapers etc)

3. Water: to keep the heap moist but not wet (don’t let it dry out, but don’t over soak it)

4. Air: oxygen is needed to encourage the composting process, so once a month you need to stir your compost with a fork or spade to keep the air circulating.

There is one other vital ingredient that you can choose to add to your compost heap, and that is “compost accelerator”. This is normally added as a powder which encourages the development of microbes in your compost heap and speeds up the composting process. The photo below shows all the key ingredients apart from air; but I assure you it is there. In the photo you will also see a special compost turning tool that I bought some 20 years ago. You just push this into your compost heap then the two little wings at the bottom of the rod come out as you pull up and the whole heap is lifted and turned. If you can find one, buy it.

2A335C51-F6E9-4091-BD87-1A1C547C75E5
Note the shaft of sunshine – God smiles on composters

🔭 What should  compost look like? A question I am always asked (I lead an interesting life). The photos below show the current state of my compost bins. The first photo is the bin currently in use, and you can see all the ingredients I talked about above. The second photo shows the resting bin that is just about ready for use. You can see from this photo that the bin is half empty, and this is because all the insects and beneficial microbes will have eaten stuff whilst making the compost. The final photo shows the finished compost; or as I call it black gold. Each of these bins will on average give me 20 wheel barrow loads of compost each year.

Gettting in the compost bin. One of the great joys at the end of a hard days gardening of trimming and cutting is to get in the compost bin and tread it all down. What do you mean you’ve never done this, just me then. The photo below shows me happily stomping up and down in one of my bins. Just after she took this photo, Cruella slammed the lid down and I was in there for two days. I must say they where the happiest two days of my life. She only got me out because the dishwasher needed emptying.

08F278DD-06C3-4048-B009-323B8497FAA6
I wear the sunglasses because I want no publicity


White fly have invaded the earth…I have become a super hero

What happened was this, I was happily walking under a large Bay tree in my garden when a couple of brown leaves fell on my head. Given that they shouldn’t be falling this time of year and the fact that I am a fan of the works of Sir Arthur Conan Doyle, and I was aware of Sherlock’s famous dictum “Once you eliminate the impossible, whatever remains, no matter how improbable, must be the truth”. Therefore “cogito ergo sum” as my old friend Descartes used to say … it must be bloody white fly.

Now that opening paragraph is a tour de force of shoehorning literary allusions into a gardening blog and we haven’t even got to the plants yet. Anyway, on with the show there is work to be done.

22nd October: Things I have been doing lately

🚿 Spraying white fly. After the fateful leaf fall mentioned above, I looked up and the Bay tree was infested so heavily with White fly that you could barely see the leaves in some areas. There where millions of the buggers, and to be fair I should have seen this before as the area under the tree was covered with dead leaves. The first photo below shows a part of the infestation, whilst the second photo shows the ground under the tree. Click on each photo for a larger view.  It can be difficult to identify an infestation such as this because it could be Aphids or Mealy Bugs. But the tell tale sign is the clouds of small flys that take off when you disturb the plant.

Now, to be honest, white fly are immune to most insect sprays and ideally you should just try and knock them off with a jet of water. But this infestation was mega and needed drastic action. The photo below shows me in my full super hero garb as I battled the White fly. Hopefully I didn’t kill too many beneficial insects.

33B0CD46-C276-4E0F-817B-4119BC1C610F
I wish I had a jet pack and could just fly around the tree

👃 Enjoying the scent of Dame de Noche. Because of the great drought and the subsequent heavy rains we are now enjoying the best ever blooming and therefore scent of our Dame de Noche (sometimes Galan de Noche). This night scenting Jasmine is a glorious addition to any garden as it gives off a very heady perfume at night. The plant itself is relatively plain and the flowers are more or less non descript. However, the scent at night is wonderful. It is worth planting near to a sitting out area or barbecue so that you can enjoy the beautiful scent. The photo below shows the Dame de Noche in full bloom; but if you sniff it during the day there is absolutely no scent, it is only at night that it releases its glorious smell.

C5F09B65-7B69-4FCE-B8B7-D0873E28BB26
It may not be pretty, but, it smells gorgeous

🍊 Getting ready to harvest Persimmon. If you don’t grow Persimmons, then you should. Sometimes known as Sharon Fruits, this is a very tasty orange size fruit which when it is ripe can be scooped straight out of its skin. Cruella (my wife) says it has the consistency  of a tomato and the taste of a Peach (but then again she eats dead bats; sometimes before they die). The fruit ripens on the tree after the leaves have dropped, and you need to be patient and wait till the fruit turns a pinky red. If you pick it too early it has a strong astringent taste and it will suck all the moisture out of your mouth leaving you with puckered lips and a disapproving look. The photo below shows some of my Persimmon patiently waiting to turn pinky red.

FBA37241-26F2-438C-A0C7-F8A02201F5DA
The net is to stop birds beating me to the fruit.

🌿 Planting out Bush Lily. I had a plant growing under a North facing wall which meant it had lots of shade. Also it was growing under a substantial hedge of greedy Hibiscus etc but it seemed to be thriving and flowered with lovely deep orange flowers that then turned to berries. I took the opportunity to split the plant to create lots of new ones. The cuttings have been happily sitting on my potting bench for about five months (May the cuttings were taken) but I still didn’t know what it was. After extensive detective work (books, internet, plant finder sites) it is Bush Lily (Clivia miniata) that comes from South Africa.

This is an excellent plant for shady spots or under trees (not Pine; too acid) it’s bright flowers light up dark spaces. The first photos below show Bush Lily when it first arrived on the potting bench. The second photo shows the strong fibrous roots it grew over it’s time in a pot. The final photo shows some of the five Bush Lilies that I have planted out (plants for free, what’s not to like).

⛈ From drought to deluge. Many of you will have been fed up with me moaning about the great drought we have suffered here in Spain. The last few months have seen plants die and the lawn turn into the Sahara desert. But, as is the way with gardening it has all turned around and we have had torrential rain on a number of occasions. I have gone from having no water to having too much. I have filled every water butt, box, receptacle, dog bowl. Everything is bursting out, including the weeds which are enjoying a late summer renaissance, even my gravelled areas are beginning to look like meadows. The photo below shows just some of my water bounty – I have lots more. I am thinking of selling it back to the government.

6A934855-F749-4F38-9FE3-60A590B78D5F
It may be unattractive, but, it’s effective

Life and death in the garden

Sometimes gardening can be a bit depressing. Things that you grew from seed or nurtured from a cutting, one day they just die on you. No note, no goodbye, one day they are there then they are gone. It’s true it’s always worse for those of us left behind. We are left wondering why? was it something I did or said; or didn’t do or say. Anyway the upshot of the depressing start to this post is that I have lost two of my favourite plants a Rose and Plumbago. I will try to cheer up, but this could end up reading like the most depressing book in history: Thomas Hardy “Jude the Obscure”

2nd October. Things I have been doing lately

🧟‍♂️ Dealing with dead plants. Sometimes death may not mean death (reference Jesus Christ) and there can be a way back. Anyway I went out one morning lately and found two dead plants. A lovely large Plumbago that I had grown from a cutting had suddenly turned brown literally over night. Normally I would suspect Cruella (my wife) had poisoned it or had been using it in spells, but, she swears she is innocent. This particular plant is part of an extensive hedge to the front of our house that also has a few more Plumbago but none of the others were affected.

Now Plumbago is very hardy and it takes a lot to kill it off. My first suspect was Whitefly, which can suck all the sap out of the leaves and debilitate the whole plant to the point of killing it. But I would have seen this happening. My next suspicion was that the irrigation under the plant had malfunctioned and delivered too much water that would eventually drown the roots. But I checked round the roots and it was not unduly wet. Nevertheless action needed to be taken.

When faced with this type of situation you have to be bold if there is any chance of saving the plant. Some plants such as Jasmine, the answer is to cut them right down to the ground. But this would not work with Plumbago, so I have cut it down to about two foot and hope that it may shoot from there, or suckers may come true from the root. I will let you know what happens.

The first photo below shows the Plumbago in its distressed state (if it was a horse it would have been shot). The second photo shows the Plumbago cut back and in intensive care. I have fed it some Iron to assist the roots to take up nourishment (in liquid form of course I’m not an idiot).

The Rose that appears to have died is Rosa Blythe Spirit, this is one of my favourite Roses which is a prolific flowerer and sometimes in the height of Summer needs to be deadheaded twice a day. Anyway, just like the Plumbago it went brown more or less overnight. Again like the Plumbago, the other Blythe Spirits in the same row did not die back. I have checked for all the usual suspects and I even sprayed for “Rust” in case it was an extreme case.

The photo below shows the poor Rose in its distressed state. Since I took this photo all the leaves have fallen off. I plan to collect up all the fallen leaves from under the plant in case they are harbouring a pathogen. I will then do a drastic prune and see if I can bring it back. But I fear this one may be gone and it will have to come out. I may then purchase another Rose to fill the gap or, I think I will try and take a cutting from one of the other Blythe Spirits.

87BFBAB3-41E2-40FE-B309-5DF475531C4D
All the leaves are brown and the sky is grey…

🗡 Taking off Yucca flower spikes. By now most of your Yuccas will have flowered, and I hope you took the opportunity to enjoy the flower spikes. They have been fantastic this year because of the drought. If your flower spikes are too high because your Yucca has become too large, then it is time to consider chopping it back (but that’s for another day). You need to cut the dead flower spikes off now, as they will only go on to produce seed that you do not want, besides dead dried Yucca flower spikes are not a thing of beauty. Using long handled shears cut at the very base of the flower spike trying not to cut too many green fronds. If you need to get close to The plant then make sure you wear protective glasses as Yucca leaves are notoriously spikey and will easily damage your eyes.

The photo below shows one of my large Yuccas that I cut back a few years ago to create a more rounded shape. You can see that it has flowered profusely this year and therefore there are lots of dead flower spikes. Put the dead flower spikes on your compost heap.

F5EBE64A-370C-4042-8EF4-F86B3B7E2D73
Note the long handled lopers that ensure I do not have to get too close to the spikes.

👻 Scarifying the lawn. If you have a lawn now is the time to begin scarifying. Just cutting a lawn is not enough because a thick thatch of cut grass builds up at the roots and stifles new growth. Scarifying at least once a year will remove the thatch and encourage new growth. Now if you have a small lawn you can do this by hand using a lawn rake. It’s tiring but quite fulfilling as you can rake up lots of moss type grass. If you were in England this could be used as lining for hanging baskets; but as we’re  not put it in the compost heap but make sure you layer it in with other things.

I have just bought an electric scarifier and aereater that takes all the back breaking work out of scarifying. However, it gets a frightening amount of thatch out of the lawn and leaves it quite bare; hopefully it will recover. The photo below shows my new scarifier sitting on our biggest lawn at the end of a hard days scarifying. Note the wheel barrow full of thatch, this was one of 9 barrow full I got from this lawn alone.

69AD529A-31CA-4702-BCAF-F6DEBB3DABF2
I love those late Summer lengthening shadows you know it’s time for a beer.

☠️ Dealing with Cruella’s Creatures. Normally I put up with Cruella’s creatures; she has the cat, an owl a frog/prince and both dogs can be co-opted. The cat is the only true “familiar”, that is until the other night at dinner she suddenly informed me she had taken on something new. Just at that moment I looked down at her wine glass and there it was the “Wine Mantis” when you run out of wine it prays for more. Check the photo below, I have asked her if I can have a “beer bee”.

8DDF8803-697A-47AF-A3DA-92A98CEDEBB5
Note the cap on Cruella’s glass; she is afraid of being poisoned.

The giant blood oozing maggots are back; just in time for Halloween

After all the excitement about the Church garden award in my last post, it is back to the everyday gardening stuff you should be doing this time of year.

22nd October: Things I have been doing lately

I lied about this post not being exciting as I am declaring it a “COMPOST SPECIAL”. My wife Cruella just rolled her eyes and left the room muttering about divorce lawyers; she has no soul. Anyway the compost bins are decorated with balloons lets get this party started.

🌿 Starting a compost heap: Anyone who takes gardening seriously should have a compost bin (or two). You don’t need anything grand, mine are purpose built, but you can just make a heap in a corner somewhere out of the way in your garden and cover it with an old carpet. I’ve told you before, but I’m going to tell you again, you need four things for good compost:

1. Green stuff (nitrogen): vegetables from the kitchen, garden cuttings, grass etc. Nothing cooked and no oil or fat, otherwise you will attract rats.

2. Brown stuff (carbon): twigs, egg cartons, newspapers, boxes and cartons (not greaseproofed ones), egg shells. Not leaves (I will explain why later)

3. Water: you need to keep your compost moist but not wet. Too wet and the compost can become slimy and smelly (coincidentally the name of the two people I sat next to at school).

4. Air: I know this sounds obvious but you need to occasionally stir or turn your copmpost to let air in. Once a month should do it.

Once you have your compost heap going, try to add things in alternate layers; nitrogen then carbon. You can also add an accelerator which is a powder you sprinkle over the heap to aid the composting process.

🗑 Emptying your compost bin: Depending on how your compost has developed it usually takes 6-9 months to get good compost, but that depends on lots of variables. Once you have a bin or a heap full leave it for this amount of time, turning occasionally. At the end of this period the magic will have happened; all that garden waste and rubbish will have turned into lovely rich, dark, and beautifully smelling compost ready for you to use in your garden or for potting. The first photo below shows the compost bin that I am emptying. The second photo shows a barrowload of lovely compost; I don’t like to boast, but each of my compost bins will give round about 20 barrowloads of compost.

🌱 Using leaves in compost: I told you I would get round to leaves eventually, I was just trying to keep the tension building before the Maggots. Anyway, you can’t compost leaves in the normal way, don’t ask me why it is just the way God made it. Leaves require an anerobic process, where as normal composting is aerobic. At its simplest it’s all about air. To compost leaves, gather them when they are dry, stuff them into black sacks, lightly tie the top and then slash holes in the sides. Leave the sacks somewhere out of the way for about a year, then you can use the resulting leaf mold. I leave the sacks for about nine months then I add the part composted leaves to the top of a full compost bin that I am just about to leave for 6 months. The photo below shows a full compost bin with 9 month old leaves added.

2F377F68-934E-49BE-9AB0-07F3975B5A85
What’s not to like

🐛Finally, as it is a Compost Special, and it’s Halloween, here come the maggots: Every year when I empty my compost bins I discover giant maggots lurking in the compost; there are hundreds of them. These are curious creatures, when you pick them up they instantly ooze blood from their head, it is quite disconcerting. Unfortunately, they cannot be left in the compost as they will destroy plants in the garden. I have tried leaving them out for the birds, but the birds are too scared to touch them. The only answer is to drown them, but after a day I recycle them back into the compost. The photo below shows a few of the giant blood oozing maggots. What a finale to this Compost Special, such fun. As they used to say on Crimewatch,  before the BBC axed it “sleep tight, don’t have nightmares”

9163A43D-8774-46C6-AA73-EA0329F13ECD
I’m sure there were six here a moment ago

Our award winning Church garden

I haven’t posted much lately, not because I haven’t been gardening – oh no, there has been lots of gardening of which I will post more later. However, something much more exciting has been taking place. I have been preparing for the Church of England’s Garden Oscars. What do you mean you haven’t heard of them, you must have “Green Church Awards 2017”. It is a really big event in worldwide Anglican Church circles.

Anyway, straight to the exciting stuff. Our little Church garden here in our village of Pinar de Campoverde had been nominated for the Green Church Awards. Now if you were cynical you may say so what! But that would be to misunderstand what we are talking about here. Our garden was created from a parcel of wasteland beside our Church, it was a derelict eyesore, unloved and uncared for by anyone. That is until our super congregation all 20 of us got stuck in. The garden was designed by a well known gardening blogger (alright it was me, now you ask), but that was the easy part, the hard part was raising the funds, getting the plants and then making the garden. The pictures below show me starting to layout the garden at the start of the project.

E86362FC-2F20-4D9F-904F-31A166A9E9EE
The sunglasses are for no publicity

Everyone at the Church got stuck in, we started a plant donation and sponsor a plant scheme, we held fundraisers to pay for the hard landscaping, and then most importantly we enthused the whole village so that lots of people come along with their garden tools and wheelbarrows etc to help create the garden. The photos below show us developing the garden and then some of the team at the end of a long day. The final photo shows the garden in all its award winning glory.
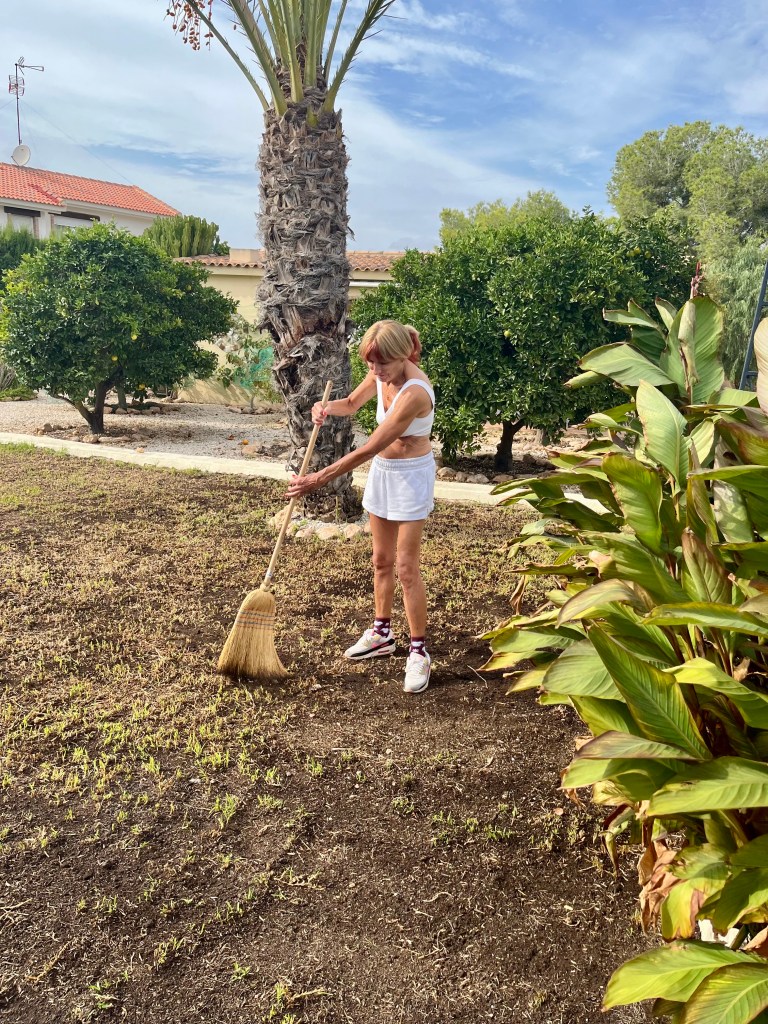
DCIM100MEDIADJI_0045.JPG
Note the inspirational sign, we miss no opportunity in bringing people to Jesus

Anyway, the end result was that myself and Cruella (my wife who is notorious for plant destruction in this blog) went to Lambeth Palace to the awards ceremony as representatives of our Church. Bear in mind our little Church in Spain was shortlisted from 117 entrants worldwide; and that everyone we were up against had full time workers and most had Lottery funding. Anyway after a week of practising our disappointed Oscar face, and Cruella debating whether when she was asked “who she was wearing” would Primark be a good answer, we turned up at Lambeth Palace.

The outcome was that we were awarded a “highly commended” certificate; for us gardeners that is the equivalent of a “silver gilt” at the Chelsea Flower Show. Disappointing but still very acceptable. Especially when the Church who won had three full time workers and National Lottery funding. We were very proud to accept our certificate from the Bishop of Salisbury on behalf of everyone in our village.

The award ceremony was given added tension and spice when Cruella (ever the attention seeker) suddenly announced that in solidarity with all the other women she too had been propositioned by Albert Einstein at an audition. When it was pointed out that the father of Physics had nothing to do with show business she changed her story and claimed it was Leonard Bernstein. It was further pointed out to her that the famous Conductor was now over 70. Eventually she claimed it was actually Arnold Weinstein and she met him when he was playing the part of the “Terminator”.

The photos below show me and Cruella at the ceremony and with the Bishop of Salisbury. We both brush up rather well I think, but the Bishop looks as if he is about to go to sleep, it must have been my gardening stories.


My Hibiscus is in a coma, but there is life after death

Morrisey and the Smiths May have sung “girlfriend in a coma”, but can they say they have suffered the trauma of a Hibiscus in a coma for two years. Yup, that’s what we are talking about here, real drama, real life, gardening on the edge, the sort of thing that makes you wake up at night in a cold sweat thinking it’s all been a dream only for you to sink back realising the nightmare goes on. Oh I tried everything, I sat by the bed and played her favourite music, I talked to her as if everything was normal and she was still part of the garden community. I even had Alan Titchmarsh send her a recorded “get well” message. Well, no longer, the torture is over, today I turned off the machine and let her go peacefully.

8th October: Things I have been doing lately.

🚑 Saying goodbye to a Hibiscus. In the immortal words of Michael Caine, not a lot of people know this, but Hibiscus have a habit of falling into a coma. They just stop growing, shed all their leaves, and to all intent and purposes look dead. Now I have quite a few old Hibiscus bushes that form a hedge along the wall at the front of our garden. They must be 20/30 years old but most are in good health. However, three years ago one went into a coma, and after researching this – and the fact that they can just come out of it – I just left it alone. Sure enough after a year or so it started thriving and flowering again. This miracle I put down to fervent praying, but it seems that divine intervention isn’t always needed, it is just one of those things, when Hibiscus are old sometimes they just need a rest – a bit like me really.

When the latest one went into a coma I was calm about the whole thing, but after a year I started to panic and went into recovery mode, hence all the special coma care described above. But all to no avail. Now if your Hibiscus goes into a coma, and I hope it doesn’t – I wouldn’t like to wish that worry on to anyone. But let’s just say it does. If it is a young plant only a couple of years old and under50cm high, then let it go and start again. However, if like me your plant is big and will take you 20 years to get one the same size then try the following:

– feed it with a high Potash feed

– water thoroughly then mulch around the base

– after three months scrape the bark of the branch with your fingernail and check whether it is green underneath

As long as there is green under the bark then there is hope. You can leave it for up to 2 years to see if it recovers. But, sadly once you start to find brown consistently, then it is all over and you have to say goodbye. Now in my case with this particular plant we were doing well; although it was in a coma, it was really just “locked in syndrome”. When I explained that to my wife Cruella, her retort was “it’s only a plant you idiot get rid of it”,  mind you she does drown kittens for fun. The picture below shows my poor dead Hibiscus.

1C8B5389-A2AE-4978-9D72-805520096F18
The late Hibiscus. Notice the sneaky Palm trying to grow behind it.

Anyway the moral of this tale is that all is not lost, even with a dead Hibiscus life can go on. The strong branch framework of your late Hibiscus will provide you with a useful support framework for growing climbers up and thereby retaining the integrity of your hedge without the necessity of trying to dig out the substantial root ball of the Hibiscus. The picture below shows another old dead Hibiscus that I have used as a growing framework for Pink Trumpet Vine, Plumbago and even Pomegranates. Now that looks much better than a big gap with a small plant stuck in the middle waiting years for it to grow the same size as surrounding plants.

3E629D00-830F-4624-A27C-7C133A0B70DC
That’s better – in death there is life.

✂️ Taking Jasmine cuttings to grow up the Hibiscus. My plan is to take cuttings from some fast growing Jasmine and then to grow these up the Hibiscus. This will give me rapid evergreen cover that will close the gap in the hedge whilst at the same time giving me lovely flowers and scent – what’s not to like.

Anyway, I’ve said before, and I am sure you were listening, never take cuttings from tendril plants like Jasmine by using secateurs as you will only crush the stems. Use a sharp knife to cut a long stem that has no flowers or buds showing. Cut just below a leaf node and take a number of cuttings. As you cut each stem place it into a plastic bag to keep it moist and away from the wind. Once back at your potting bench (or wherever), cut the stem higher up to give a nice fresh cut, but leave enough stem to plant. Take off all the leaves up the stem apart from 2/4 at thetop. If you have it use hormone growth powder (but don’t worry if you don’t). Place the cuttings around the edge of a four inch pot – four to each pot. Keep it moist but not soaking. If it works, great if not just keep popping cuttings in there, they will take eventually. When this is ready I will plant the whole pot under the dead Hibiscus. The photos below show the cuttings being prepared and in their pot.