As the gardening year draws to a close, I thank God for the peace, pleasure and knowledge that this year has brought forth from my garden. I extend to you and your family the joy of the season and wishes that your gardening activity in the coming year is both bountiful and floriferous.
Merry Christmas and a happy new year.
from
James, Cruella (my wife), her chickens, the little white Dove, the spirit of Tango the lonely blind Labrador and the idiot son.
Well it’s that time of year again when gardeners need to “stiffen up the sinews and summon up the blood…once more unto the garden, dear friends” yes, it is time for the big winter cutback.
If you prune and cutback your garden now you will see amazing results in spring and summer; failure to do so will leave your garden tired and browning during the summer months. Over the next few posts I will be be cutting back my garden which is full of common Spanish plants that you will find in your garden, and if you follow me week by week then by the time we have finished your garden will be ready for the summer.
The only thing that will hold me back is the obvious festivities celebrating the birth of Christ and the fact that Cruella (my wife) is in paroxysms of ecstasy as she awaits the arrival of our idiot son. All week she and the chickens have been preparing for the return this has included a special Christmas song, a dance and a Japanese Haku – he speaks Japanese and a bit of English! I thought you might like to see the Haku:
Wings flare, voices rise – Our lost chick returns at last, – Yuletide clucks resound.
In addition she has told the chickens that we are having Tofu for Christmas dinner which is of course inaccurate as we are having Turkey; so I now have to call it the “T”word in front of the chickens. The photo below shows the chickens practicing the Haku.
The little white dove leads the chorus
Anyway enough of this festive nonsense, on with the gardening.
13th December 2025. Things I have been doing lately:
Over wintering Chillis
Pruning Dame de Noche
Trimming Oleander
Cutting back my towers of flower
Pruning Mediterranean Fan Palms
Over wintering Chillis. I do not grow any vegetables apart from Chillis, and if you do the same then it is time to overwinter them.
By now your Chilli plants will be looking tired and a bit ragged and their compost will be completely exhausted. If you leave them like this over winter then they will die. The photos below shows my exhausted Chillis before their cutback and after the big trim. To revive them you first need to cut the whole plant back leaving just a few leaves low on the stem.
Bedraggled Renewed
Once you have done this you then need to ease each plant out of its large pot ready to fit into a smaller overwintering pot. As you take each plant out radically trim its roots – it won’t need all these roots in a small pot. You then need to repot your plants into a much smaller pot. You need to use a good quality compost to refresh them. Water profusely then leave them sitting on your potting bench over winter. When they start to show new growth in the spring, ease them out and back into their bigger pots and off you go again.
The photos below show the chilli reviving process in action.
Too much rootLight trimReady for pottingNice snug fitTime for a winter rest
Pruning Dame de Noche. Night flowering Jasmine is a perennial favourite in Spanish gardens, prized for it’s beautiful night scent it is often situated by outdoor seating areas.
This plant can grow very tall if left to its own devices, but it benefits from two prunes a year. Prune once after it has flowered in June/July and it will re flower. Give it a final cutback to your preferred height in Dec/Jan – you can go as low as 18 inches. As I gave my plant a very radical cutback last year, I am leaving it longer this year. The photos below shows my plant before and after its haircut.
Trimming Oleander. Oleander is a Spanish favourite grown either as a single plant or as a hedge. I have a few dotted around my garden mainly as statement plants or part of a set area arrangement.
The first photo below shows an Oleander that I grow in my dry garden area as part of a set arrangement with Osteospermums and yuccas etc. If not cutback every year or so then the Oleander will overwhelm the other low growing plants and ruin the symmetry of this part of the garden. You can cut Oleander back quite radically and it will spring back within a year or so.
The photo below shows an Oleander that stands alone in another part of my garden as a statement plant. Here I only need to prune a couple of inches off the edge to keep the plant shapely.
Cutting back my towers of flower. Regular readers of this blog will know that I grow a number of climbers up an old palm tree that I had chopped back a few years ago. This flowers profusely all summer and gives me a “tower of flower”. To trim this beauty back all I need to do is run my hedge clippers up it and it is ready for another year of flowering.
I would add a note of caution should you wish to copy me. At first you will be able to lean your ladder up against the old palm trunk as you trim. However, after a number of years the centre of the trunk will rot and it is not safe so you need to use a stepladder. Apart from that it is lovely as can be seen below with its seed pods giving winter interest before it is cut back.
Beautiful seedheadsStep Ladder after 5 yearsThe rot sets inAll ready for next years tower of flower
Pruning Mediterranean Fan Palms. December and January are the best time to prune palms as the dreaded Red Palm Weevil will not be flying. I have a professional Palmista for my large palms, but for a stand of Mediterranean Fan Palms I just get stuck in myself. The photo below shows the palms I need to cutback.
From these photos you can see that there are two key areas of pruning. Firstly the undergrowth of pups needs to be reduced so that you can successfully walk past the palms without being snagged. Secondly the crowns on the large palms need to be pruned back so that the top fronds stand up. When cutting back palms it is always wise to wear a thick jacket and make sure you wear goggles. Despite my best efforts I ended up with a Palm frond hanging by a thorn from my nostril – very painful.
Normally I use short handled lopers for the low growth and my long handled lopers to reach the crown. However, this year I experimented and used my new electric hedge trimmers to cut most of it back. I must confess it was a lot easier although not as neat as normal. The photos below show my efforts.
In times past gardeners would have judged when to begin the big winter cutback by the weather and seasons. But when your wife has chickens you know it’s almost time when the chickens get their new winter hats.
Cruella (my wife) has been knitting for days to provide her girls with their new winter bobble hats. They get them every year for Christmas along with their other presents. Their hats are always in a variety of colours to best reflect their personalities and they all have different colour bobbles on top. Some even have little tie up chin straps so they don’t fall off as they peck for food.
She knows when it is time to begin knitting as the chickens gather in a huddle on our Naya to get out of the cold winds. Helga (her favourite and a really clever chicken) even flys up to the window ledges and taps on the glass to be let in. Cruella (my wife) even begins to gather them up and carry them to bed every night and sometimes stays out there for hours with them; I think they have wine!
The photo below shows the sure signs that Cruella needs to get knitting.
The winter huddle beginsHelga taps on the window to be let inCruella heads to the coop with Isabella for a night of wine and nibbles
Anyway enough of this nonsense here are a few things you can be getting on with as we work our way up to the big winter cutback.
5th December 2025. Things I have been doing lately:
Planting bare root roses
Lifting and separating canna
Peeling Yucca
Planting bare root roses. Roses do surprisingly well in Spain especially if you plant them at the right time and make proper preparations for their future success. I have had a couple of Roses die back on me and now is the time to dig them out and replace them.
I have chosen two roses for their new interest. One is “Rhapsody in Blue” which is the first blue rose whilst the other is a new Rambler to replace a current disappointing climber. Both can be seen below as they arrived. The first thing you need to do is soak them for at least 4 hours to get them fully hydrated after their travels.
Bare root and container rosesSoak for at least 4 hours
Remember you can’t just plant roses directly into the hole left by an old rose. Roses are very hungry feeders and quickly deplete the soil of all beneficial nutrients, therefore you need to completely replace and replenish the soil before you replant.
I mix up a special mixture of 1/3 rd of my old compost, 1/3rd good professional compost and 1/3rd horse manure compost. I add a bit of Rose food to this mix and always sprinkle the roots with Myocorrhizal Fungus to help quick rooting. The photos below show this process in action.
The essential horse poohThe secret ingredient Myocorrhizal fungus
When you have the planting hole ready then fill it with water and let it drain away whilst you have a cup of tea. For bare root and container roses there are two different planting levels. Bare root roses need to be planted with their bud junction at least three inches under the soil, whilst container roses should keep the same soil level as in the pot when replanted. The photos below show them planted.
Bare root bud junction must be buriedContainer roses planted at their potted level
Lifting and separating Cannas. Canna are beautiful plants for Spanish gardens as their lush foliage and beautiful flower spikes add height and colour to any garden. The secret to getting the most from Cannas is to lift and separate them every 3-5 years as they can become congested.
Cannas grow from rhizomes (ugly bulbs) and they produce more and more flowering nodes on each rhizome and therefore need to be separated every few years. Cannas can be left each winter till their foliage is quite brown and raggedy, then you need to cut their stems back to 3 to 5 inches from the ground. The photos below show foliage before cutting back and the correct size to cutback the stems.
Remember you must leave 3 to 5 inches of stem
Once you have cut the stems back then it is time to lift and separate the rhizomes. Just ease them out with a fork and spade. You will be surprised how many new rhizomes and canna plants you now have. The photo below shows my new harvest of canna rhizomes drying out on top of my compost bin lids. They will now be stored in the dry and out of the sun till I plant them again or give them away to friends.
Lots of new Canna
Finally, when planting cannas you need to bury the rhizomes just below the surface of the soil with the old stem sticking out of the soil. The new flowers will come from nodes on the rhizomes and not from the stem. The stem is only there to stop water seeping into and rotting the rhizomes. The photo below shows some that I am just replanting (note the depth).
It’s very important that you plant just below the surface with the stem sticking out.
Peeling Yucca. If you live in a windy area and you have large Yucca in pots, then now is the time to peel them otherwise they will blow over in the wind and probably smash your nice pot.
The back of my house has different type of succulents and yucca in pots and this area can be very windy in the winter. I have given up using many clay pots in this area as they tend to end up smashed as the plants go over. However, peeling the yucca leaf blades makes them less susceptible to being blown over. Just peel one blade at a time by pulling down sharply; make sure you wear protective glasses and gloves as yucca blades are both sharp and pointy.
The photos below show my yuccas and other succulents peeled and shorn ready for wintry gusts.
As the gardening year draws to a close, I thank God for the peace, pleasure and knowledge that this year has brought forth from my garden. I extend to you and your family the joy of the season and wishes that your gardening activity in the coming year is both bountiful and floriferous.
Merry Christmas and a happy new year.
from
James, Cruella (my wife), her chickens, Tango the lonely blind Labrador and the idiot son.
Now that is what you call a title, no messing around or euphemisms, you know exactly what you are getting in this blog post. It is the last real post before we begin the big winter cutback, so there is still lots to do. Added to this I have had the problem of Cruella (my wife) preparing the chickens for a Ball. Anyway on with the gardening.
12th December 2024. Things I have been doing lately:
Gathering seeds
Composting leaves
Last minute clean up jobs you need to do
Planting out cuttings
Cruella prepares the chickens for a Ball
Gathering seeds. Take a look around your garden at this time of year and you will find lots of seed heads and pods ripe for picking. If you pick them off now, store them to dry, and plant them next Spring, then you will have lots of lovely new plants for free. But what’s more you will be on your way to being a gardener rather than a shopper for plants.
You will have lots of different seed heads in your garden of all different types, just waiting for you to harvest them. To process the seeds is very simple.
Wait until your seed heads have completed their cycle, the flowers have died and fallen off and the seed pod that is left has gone fully dry and brown.
Cut the seed head off with your secateurs and if possible leave a little bit of stem.
Place the seed heads into a plain white envelopes, one for each type of seed, until you are ready to process them.
Depending on the type of seed pod, the process is more or less the same; carefully remove all the outer casing of the seed pod till you expose the seed. Pour this into the palm of your hand.
Gently blow across the seeds as you transfer them between your palms, this just removes any chaff.
Place the seeds in plain white envelopes by type with the name and year clearly written on the envelope and store them in a cool dark place (a drawer is fine).
The process is shown for Marigolds and Trumpet Vine in the photos below. Click on each photo for a larger view.
MarigoldsTrumpet VineRipe seed headsCruella took the photos I look younger in real lifeRoll seedhead between your fingersGently blow away the chaffJust split trumpet vine seed pods Let the seeds flow into your handMy seeds ready to be stored away safely for Spring planting
Composting leaves. Most gardens have a tree or two, and as we all know deciduous trees shed their leaves every Autumn. Now you can either see these fallen leaves as a mess that needs to be cleaned up, or, you can see the leaves as compost gold.
I have lots of pine trees, but their leaves whilst perfectly compostable over time, tend to produce an acid compost. So if you have lots of pine trees it is ok to add pine needles to your compost bin, but no more than 10% of each layer. However, if you have a deciduous tree, like my large Mulberry or even better a Fig with its large leaves then you are lucky. The photo below shows my Mulberry and one of my figs shedding their leaves. Click on each photo for a larger view.
You don’t have to wait till all the leaves are off your trees. Instead get into the habit of clearing the leaves once every two weeks. Just rake the leaves up into piles and then store them in plastic garden sacks. See photos below.
Leaves compost in a different way to normal compost, so don’t just add them to your compost bin. Store them in plastic sacks, but before you store them prick the sack with a fork in a number of places to allow for air circulation. You will need to store your sacks somewhere in your garden where they won’t be unsightly and where they do not get sun. See photos.
Your leaf compost will be ready in about a year, roughly the same time as you will be harvesting the next lot. You can cheat if you want. After about six months just pour the sack into your normal compost. It won’t be fully composted, but when you get to my age you go for quick wins.
Last minute clean up jobs you need to do. There is still a few little jobs you need to do before next month’s big cut back.
You can start by cleaning up fallen citrus fruit such as oranges and lemons. The recent high winds here in the Costa Blanca has meant we have lots of fallen fruit. If you leave this fruit on the ground for any length of time then you will get an active green mould growing on it. Left to itself this will release spores which are not very healthy for other plants or us. My efforts to stop a future plague are shown below. Click on each photo for a larger view.
If you have Fig trees that still have residual fruit, just take them off. Any fruit left on your trees will never mature and will only take strength away from the tree. With figs the sap will not yet have been drawn back into the roots so be careful you don’t get a sap burn.
Take all the fruits offLook carefully and you can see the caustic sap seeping out.
Planting out cuttings. If you have any cuttings you have grown out, then now is a good time to get them in the ground. There is still warmth and moisture in the ground so it will not be a great shock.
I have grown a number of cuttings over the Spring and Summer. During the Summer I mostly just dot these around the garden in pots, just to see how they get on. By now I will have either put them into larger pots or if they have really performed then they go into the ground.
I have a problem area in one of my hedges where a Jasmine cutting is being very slow to grow to fill the gap left by a dead Hibiscus. The photo below shows the problem. From the photo you can see that there is Plumbago to its left and Pink Trumpet Vine to its right. The idea was that the Jasmine would grow and provide colour variety between these two.
In order to deal with this problem I have been growing a Trumpet Vine to add to my hedge. I like to keep hedges over planted and competing for space and light thereby guaranteeing more flowers. The Trumpet Vine has grown strongly during the Summer and now needs to go into the ground. The Jasmine has had its chance, now for some competition. The photo below shows the new gap filling contender.
I have trimmed it back ready for its transplantation. On a sad note, my lovely teapot confection on the pillar was blown over and smashed in the recent storm; Cruella is devastated.
When planting out make sure you do all the usual stuff like clear the area of any weeds or stones then dig a planting hole big enough not to cramp the roots. When you take the plant out of its pot make sure to tease out the roots so that they can be encouraged to reach into their new soil. Also, if possible sprinkle some Mycorrizhal rooting powder into the planting hole and onto the roots as this will definitely aid early root growth. The photos below show the process. Click on each photo for a larger view.
Cruella prepares her chickens for a Ball. It all started when Cruella (my wife) read a magazine article about Queen Charlottes Ball where debutantes are presented and come out into society. She breathlessly told me that this was just the sort of opportunity her girls needed, and if they could only come out formally she would be the happiest mother alive – I have given up explaining that she is not their mother.
Despite my explaining that Queen Charlotte’s Ball was not for chickens, she refused to accept this and began looking up Finishing Schools in Switzerland. I only averted her flying to Switzerland by persuading her that it would be far better if she prepared the girls for “finishing” at home.
It has been almost a month now and every day has been filled with Cruella schooling her girls in all sorts of arcane skills and manners. They start most mornings with “dining etiquette”, this involves politely pecking at their food, not pecking each other and definitely no eating worms. This is followed by “elocution”, to be honest as it is all in chickenese, I have no real idea what they are saying. They all cluck away as Cruella nods enthusiastically, but it does sound a bit like “how now brown cow” but in chickenese.
The afternoons are spent in “deportment, dance and formal bowing”. It is quite fascinating, especially if you have never seen a chicken walk up and down with a book on its head. Dance is my favourite as Cruella stands in the middle of the lawn playing Mozart on her phone whilst shouting out the timings. Despite her best efforts the chickens gyrate wildly in a figure of eight in front of her and all end up colliding and fighting.
I am involved in the formal bowing part. I have to sit on a chair pretending to be the King whilst Cruella acting as a Herald formally calls each of her girls forward and introduces them to me. Each bird has a new sash in soft pink silk and they formally approach me and bow. From my perspective though the whole effect is ruined by them poohing on my shoes. The photo below shows a dancing lesson in action.
The music was Mozart – Ascanio in Alba, the dancing was appalling
Yes, it’s that time of year again when you begin the work to build your garden for next year. The idea is that over the next couple of months we bring the garden back into shape ready for next year’s growth. Remember this is a staged process so don’t rush out now and chop everything down. Let nature take its course, let leaves fall, stems wilt and sap descend to roots. Cut back too soon and you damage the potential for next years growth. The starting point is always your flower beds. All the annuals should have more or less died back and the perennials are in need of a trim. Needless to say I have been doing all this under a continuous state of siege as I am harried by chickens at every turn. More of this later; on with the gardening.
2nd December 2023. Things I have been doing lately:
Cutting back Canna. If you have followed my instructions – and I am sure you have – you will have left your Canna to wilt and wither to ensure that all the sunshine can be gathered from the dying stems and taken back into the rhizomes (ugly bulbs). The photos below show a selection of my dead and dying cannas. Click on each photo for a larger view.
To be honest it has not been a good year for Cannas they suffered from the lack of rain, so by cutting back now we can hopefully have a better flowering next year. The secret to cutting back Cannas is not to cut them right to the ground. If you do, then you are in danger of letting water and eventually rot get down into the rhizome. Instead cut the stem about 3 to 5 inches from the ground and just leave them. The cut stems will mainly dry off and can be plucked out next year, whilst new stems will grow from other “eyes” in the rhizome. The photos below show some of my cannas cutback. Click on each photo for a larger view.
Clearing Marigolds. By now most of your beds will have been cleared as you will have deadheaded and removed spent plants throughout the summer. You should just be left with stubborn annuals and perennials. I have been selectively saving Marigold seeds over a period of about 10 years so consequently I can have quite large Marigolds flowering all the way from March to December. But now is the time to take out the survivors. The photos below show my by now deshabille Marigolds. But I love them and we always say a prayer of goodbye when it is time for them to go. Click on each photo for a larger view.
Reshaping Osteospermums. These daisy type plants are real garden troopers. They will flower all summer and then put up with the harshest of cutbacks at the end of the season. I generally cut back to new leaf growth at about between 3 to 5 inches using secateurs. But where I have massed plants I quite happily get my garden hedge trimmer out and go at them with a will. The photos below show my overgrown Osteospermums before and after their drastic trim. Click on each photo for a larger view.
The main benefit of cutting back Osteospermums now is that they are prolific self seeders. By cutting back you are letting air and light get to the soil and this will encourage the hundreds of seeds under the plants to begin to come to life. I will begin to see tiny seedlings spring up over the next month or so. I then remove these and pot them up in seed trays ready to plant out in February. In this way I get all the benefits of the self seeding plant, but, I get to put them where I want them.
Weeding around emerging bulbs. Another important reason for clearing your flower beds is that if you have lots of bulbs then you might begin to see the early flowerers beginning to emerge. If you are not a knowledgeable gardener (and I don’t mean you of course), then there is always a danger of cutting off new bulb growth in the mistaken belief they are weeds. To stop this happening you need to get back to old fashioned gardening, get on your knees and hand weed.
New bulbs will often emerge surrounded by grass and other weeds. To differentiate the bulb stems from weeds you just need to take off your gardening gloves and feel the stems. Bulbs stems will be rounded, whilst grass will be in thin flat blades. If the grass is too close to the bulb stem to remove it with your trowel, then just pluck out the blade of grass. Do this weekly and it will eventually kill off the grass, or at least keep it at bay until the bulb growth can shade it out. The photos below show my poor bulbs surrounded by grass, then how to differentiate between the two, and finally the resulting weeded area. Click on each photo for a larger view.
Keeping my chicken defences up. Regular readers will know that I have had to erect small mesh fences around my flower beds to stop Cruella’s (my wife) chickens from marauding through them and digging up plants. I will be honest with you it has been very stressful working on the flower beds. It is like being a dying man watched by vultures. They have hung around me, watching and waiting for any gap in my defences. The photos below show my finished flower beds and the problems I have faced. If you look carefully in the photos you can see lurking chickens. The last photo shows Big Bertha brazenly eyeing up the newly weeded flower beds. When I protested to Cruella she said “what’s the matter with you she’s only looking”. Click on each photo for a larger view.
Bertha getting ready to destroy all my hard work
Cruella invents a chicken heroine. The whole flower bed issue was so stressful that I complained to Cruella that her chickens should be kept in their coop and not allowed the run of the garden. Cruella flew into a rage denouncing me and the Patriarchy saying that I have male privilege and that she and her girls are oppressed. She stormed off shouting that “the counter culture fight back starts here”.
Anyway, the outcome is that she has invented a chicken heroine and is writing a self help “chicken power manifesto” along with a positively reinforcing novel for her girls. The heroine in her novel is called “Clara Cluckles” who although born in a lowly chicken coop, eventually rises up against the patriarchy , becomes a super heroine and performs a series of vengeful liberating acts against male privilege using her super powers. It appears that the arch villain in the novel is an evil gardener called ““Malevelo”. When I complained to Cruella. That this was demonising gardeners and smacked of cultural appropriation, she called me a privileged Prat and swore at me in chickenese (at least I think she did).
Since Cruella issued her Chicken Manifesto things have moved very fast. She has made herself a Clara Cluckles costume so that her girls can visualise the struggle. She has written to Disney floating the idea of a film to be called “The Eggventures of Clara Cluckles”. She has also suggested a Theme Park ride to be the main attraction in “Cluckles World”. She is making all her girls Clara costumes for Christmas and reads them the Eggventures of Clara Cluckles every night before bed. Unfortunately you won’t be able to buy it in the shops yet as the first edition is only in Chickenese. The photos below show Cruella in her Clara costume and the chickens lining up for their evening story. Click on each photo for a larger view.
Clara Cluckles ready to take on the patriarchyThe little white chicken stayed at the back and ran away for the scary bits
As the gardening year comes to an end I want to wish all followers of spanish-garden.com blog a peaceful blessed Christmas and a floriferous happy new year. I am sure that all of us are looking forward to having the sun on our skin and our hands in the soil in the new year.
God bless,
James McAllister
23rd December 2022. The Chickens Christmas Party
As an end of year treat I am posting some photos from the chicken’s Christmas party that Cruella (my wife) insisted we hold. I was extremely reluctant, as we are having Turkey on Christmas Day and thought it would be disloyal. Anyway she got her way especially as our idiot son was arriving for Christmas and this would be a double treat.
I spent a day decorating the chicken coop, whilst she prepared a festive buffet for the chickens from her chicken fusion menu. I refused to get involved in wrapping their presents as I thought it was a stupid idea, but she said “wait till you see their little faces on Christmas day.
Anyway, we have all been practising singing carols in chickenese. I pretend that I understand but really I don’t. The idiot son is good at languages and speaks both Spanish and Japanese with a basic understanding of English.
The photos below show the festivities. Don’t worry we will be back to gardening very soon and to be honest I am already not sleeping with excitement about the big January cut back.
The first photo below show me preparing the fresh orange juice which Cruella insisted upon. The next photo shows Cruella with her party food. The following photo shows the idiot son laying out the buffet.
Those are my gardening shoesCruella insisted on the best
Cruella had planned a full evening of party fun for the chickens starting with a magic show where the idiot son changed costume constantly and made chickens disappear (he just stuffed them up his tee shirt, but we all went along with it).
The evening ended with us all playing charades, which for some reason involved the idiot son being dressed as an elf. The photo below shows him acting out a four word answer, whilst Cruella standing behind him cheats by signalling answers to the chickens. I was loudly booed for suggesting Kentucky Fried Chicken and acting the whole thing out including the frying part.
The evening ended with everyone tired but happy and all the chickens were put to bed by Cruella still dressed in her party frock.
This may look like a headless chicken, but in fact it is “big Bertha” who does not like having her photo taken as she gets embarrassed about her weight.
We are now well into Autumn and you should be finishing off all the loose ends of summertime. Do not be tempted to start your big winter cutback until January, instead you need to be doing the pre cutback chores which will be too late by January. In addition to all my normal tasks, Tango the blind Labrador and I have also taken on the task of chicken entertainers, but more of that later, let’s get on with the gardening.
5th December 2022. Things I have been doing lately:
Cutting back and tidying Bird of Paradise. Strelitzia is one of the delights of Spanish gardens and they flourish here in the Costa Blanca. However to keep it at its best you need to regularly deadhead and cutback flopping fronds. When deadheading, don’t just cut off the flower head, I find it is best to go down the stem until you see a diagonal join in the stem. If you cut here then a new stem and flower will grow from this spot. You can only do this once on each stem before you have to cut right back to the ground next time.
In addition to cutting back stems, it is helpful to peel the dead parts of flowers away as this stimulates further flowering from the front of the flower head. Once you have cut back flowering stems and stimulated further flowering, then it is time to go round the whole plant cutting back any floppy fronds and taking non flowering stems right to the ground.
The first photo below shows my Strelitzia ready for its winter tidy up. The second shows how to stimulate further flowering, whilst the next shows where to cut on the stem to produce another flowering stem. Finally the tidier plant. Click on each photo for a larger view.
Don’t cutback Cannas yet! At this time of year it is tempting to tidy up your Cannas. All those lovely tall flowering stems are gone and the beautiful showy leaves are a shrivelled mess. But don’t cut back now or you will hinder next years growth. Canna need to fully die back with no green left in their leaves. This allows the plant to draw back into its corm (ugly bulb) all the energy from its dying leaves which will power next summers flowers. The photos below shows some of my canna clumps not yet ready to cutback. Strangely they possess a passing resemblance to Cruella (my wife) and her coven as they come home from another night drinking strong potions. Click on each photo for a larger view.
Time to harvest Chilli seeds. Regular readers of this blog will remember that I have been growing some lovely Chillis for the last couple of years. To keep this process going each year I harvest seeds for my next years crop. In August I marked the best looking chillis for seed gathering by marking their stem with tape to ensure I didn’t harvest them by mistake. I then leave the marked chillis on the plant to fully wither and to allow the seeds to ripen and mature. Once harvested I place the full chilli pod in an envelope ready to recover the seeds next Spring.
The first photo below shows me checking out the almost mature chilli. The next photo shows an almost mature chilli but not ripe for harvesting as long as the stem is green. Finally, the fully mature chilli ready to produce next years crop. Click on each photo for a larger view.
Close weeding your bulbs. Most of the year my favourite garden tool is my hoe. This allows me to perform a quickly daily sweep up and down my flower borders to keep them weed free. However, once bulbs start to come through their is a danger that you will accidentally hoe off your lovely new bulb shoots by mistaking them for grass stems. Well now is the time to hang up your hoe and get down on your hands and knees for some close weeding; and if you like say a prayer while you are there.
Close weeding is very therapeutic as it lets you get down close to your plants and allows you to feel the soil running through your fingers. Using your trowel, gently work around bulb stems to probe and lift out any encroaching grass stems. Although it can be difficult to tell grass stems from bulb stems at this stage of growth, a good rule of thumb is that generally bulb shooting stems are round whilst grass is flat in blades.
The first photo below shows my last hoe of the year and the beginning of the close weeding season. The next photo shows me feeling for the tell tale round stem of a bulb, and finally the gentle easing out of grass stems that threaten to choke emerging bulb stems. Click on each photo for a larger view.
Tie up your climbing plants. If you have climbing plants, then now is the time to tie them up and make sure that your wires and trellises are secure. Whilst normally the weather in this part of Spain is usually lovely, we can get strong winds occasionally. Strong winds are usually ok in the summer as the plants are full of sap and are flexible and better able to bend with the wind. It is different in the winter. The sap has been withdrawn to the roots and the stems are less flexible and much more brittle which means you can lose a plant as it will snap off at the roots.
It is time to wander round and check all your trellises and wires. If you are using vine ties, then tighten them up and if you can oil them to keep them usable. It is silly little jobs like this that you can do now that will ensure your plants stay climbing as opposed to crashing to the ground destroyed or losing years of growth.
The first photo below shows me midst tightening with my various accoutrements. The second shows some of my newly oiled vine ties. It may look boring but it is heaven, it keeps me out of the house and Cruella can’t see me when I am close to walls and not moving; she has the same type of vision as a Velociraptor. Click on each photo for a larger view.
Chicken entertaining. Regular readers of this blog will know that Cruella’s fancy chickens are causing havoc in my garden. At the first sight of bare earth they immediately begin digging with their huge dinosaur type feet. I have tried my best at chicken proofing the garden by placing small wire fences around my flower beds. In addition I recruited Tango the lonely blind Labrador as a watch dog. The folly of this approach soon became obvious as he is blind. However, I supplemented Tango’s efforts with my trusty water pistol which I would wield at the first sign of any chicken indiscretion.
But unfortunately it was all to no avail. The first minute my back was turned one of the chickens would hop over my little fences and start digging up my bulbs. As a last resort Tango and I have been holding evening concerts in the garden for the chickens in the hope that this will act as a diversionary tactic. Each night we assemble on the front veranda. Usually I start by telling a series of “why did the chicken cross the road” jokes; which I have to be honest do not go down too well. I put this down to chickens lack of road safety awareness as opposed to my joke telling skills.
After I have finished my turn, or as I prefer to call it set! we have the interval. At this point Cruella emerges carrying a tray like an old fashioned cinema usherette. The difference is that she is dressed in a full chicken costume and on her tray are a huge range of very expensive insect based treats for her girls. She proceeds to address them all by name in chickenese whilst at the same time dishing out individualised treats. The chickens have become such fussy eaters that Cruella now has them all on bespoke diets, or as she calls it her chicken fusion menu.
After the break it is over to Tango the lonely blind Labrador who performs a series of stunts mainly involving bumping into things and falling down steps. Tango’s act is a real chicken favourite as they wave their wings and cluck enthusiastically at each bump and crack on poor Tangos head; if you can imagine Romans in the Colosseum whilst Christians are being eaten by Lions that is the sort of thing. Tango finishes his turn with his old favourite roll overs which are well received.
The whole evening comes to an end with an enthusiastic singing of the national anthem in chickenese; (as a staunch republican I take no part in this and remain as silent as an Iranian footballer). As the sun goes down Cruella leads her girls back to their roost lustily singing The Battle Hymn of the Republic again in chickenese.
The first photos below shows the audience assembling for the evening concert. The second shows Tango the lonely blind Labrador nervously waiting his turn to go on. The next shows the evening finale with Tango doing his world famous roll over. The final photo shows an exhausted Tango resting after the show; it really takes it out of him. Click on each photo for a larger view.
Cruella (my wife) has been in a frenzy preparing for the Christmas visit of our idiot son. To most people this would just mean tidying the house and preparing his room, but to Cruella there is so much more to do. First she drew concentric chalk circles around the outside of our house, then she sacrificed a number of small animals, before finally howling at the moon and calling curses down upon the head of anyone who hindered his passage to Spain. I bought him a six pack of beer!
But perhaps most worrying is that Cruella, in her preparations for the idiot, has conjured up the Devil Peacock again (see picture below). He sits on our roof and keeps a ghoulish vigil, squawking and shrieking if anyone approaches the house; and his eyes glow red at night. Anyway, because of all this activity I have been able to keep under the radar and get on with quite a lot of gardening.
This is the best photo I could get. If I come any closer it alerts Cruella to my presence
17th December 2021. Things I have been doing lately:
Planting out seedlings. You need to get any seedlings you have been growing on into the ground very soon. Here in the Costa Blanca we do not get very cold winters and usually we have no frost. However, all seedlings will benefit from getting into the ground whilst the soil is still warm. If you remember from previous posts I collected some 120 Osteospermum and Marguerite daisy self sown seedlings and potted them up. I kept them out of full sun whilst they were taking root and then brought them out into the sun for a week before planting out.
The first photo below shows the newly pricked out seedlings resting on the potting bench, whilst the second shows them luxuriating in the sun before being planted out. Click on each photo for a larger view.
Before you plant out your new seedlings make sure that you thoroughly hoe the planting bed to remove all weeds; don’t be shy about getting your hands into the soil to clear out any stubborn weed seedlings. Also as you plant each individual seedling I like to fill the planting hole with water, followed by a prayer to give the little chaps a fighting chance. The photos below show me ready to begin hoeing, then my famous hand in the soil shot, and finally a healthy well rooted seedling ready to get growing. Click on each photo for a larger view.
In addition to planting out the Osteospermums I also planted out some Chlorophytum comosum, usually called spider plant. This under rated plant is very easy to grow and provides some nice winter variegated colour to shady areas. The photos below show the baby spiders ready to go. The second photo shows the strong root growth these plant can put on in just over a month. Click on each photo for a larger view.
Normally the final job for me when I plant out seedlings is to put up canes to protect them from my rampaging Labradors, Nero and Tango. But as regular readers of this blog will know Nero died not long ago and poor old Tango is blind and lonely. Anyway, I put up the canes just to make Tango feel better, I even kicked over a few canes and pretended to trample some seedlings to perk him up, but I am afraid his rampaging days are over. The photos below show my normally tempting cane structure and the sad, lonely, blind Tango resisting my encouragement. Click on each photo for a larger view.
Pruning grapevines. Grapevines can be safely cutback now as the sap will have stopped rising and most of the leaves will be off. You can, if you wish, wait till every last leaf drops, but if you do, you are in danger of cutting off the new growth as it tends to come through very quickly. To prune grapevines you simply need to cut off all the side growing shoots to leave a strong thickening stem. The photos below show my grapevines prior to pruning and in their newly pruned state. Don’t forget you can use the pruned side shoots as cuttings and they will take very well this time of year. Click on each photo for a larger view.
In the background Tango dreams of Nero
Pruning Fig trees. By now all the sap from your fig tree will have been drawn back into the roots and most of the leaves will have fallen. One of the benefits of pruning now is that you will not have the corrosive fig sap weeping out of every cut as this can cause burns to those of us with delicate skin. You may be interested to know that Cruella (my wife) uses fig sap as face cream; she swears by its efficacy in maintaining her complexion by keeping her deathly pallor and deepening her wrinkles.
I have two fig trees one of which is an espalier. Now the problem with fig trees is that they are robust and are capable of tremendous growth once they are mature. Left unpruned this can leave you with a behemoth of a tree that dominates your garden, darkens your house, and yet has unreachable fruit. When pruning mature figs you have to be brave and prune severely to an open structure that you maintain each year. As figs fruit on new growth you have to make sure that you do not cut branches back to the trunk or there will be no fruit on that branch.
The photos below show my trees before and after pruning. I know it looks drastic but they will be fine. Click on each photo for a larger view.
Now normally I would wheelbarrow away the prunings to shred them down by my shed, but in a burst of inspiration I decided to bring the shredder to them – this is how the wheel was invented and civilisation develops. In addition, in a further burst of inspiration I decided to place the shredded branches around my fig trees as a mulch. Now I have to give you a warning here, in case you rush headlong to copy my new approach. Normally, I would compost shreddings before placing them on soil as I have always believed that fresh tree shreddings would impart too much nitrogen to the soil. But hey ho, you only live once I’m going for it, call me crazy, but I’m just that kind of guy. The photos below show history being made. You might want to cut these out and save them to show to your grandchildren. Click on each photo for a larger view.
If you follow my foolishness, don’t forget to kep the shredded material away from the base of the trunk.
By now everything should have stopped growing in the garden, but apart from annuals you should not be cutting anything back yet till the end of this month at the earliest. If you chop things back too early you do not let the dying leaves do their job of returning the goodness back to the roots, bulbs, corms etc. So in this hiatus as we await the big cutback, there are a number of jobs you can be getting on with.
7th December 2021. Things I have been doing lately:
Cleaning my gardening tools. Now is the time to clean and overhaul all your gardening tools and get them ready for the new season. At its simplest this should include:
Tightening screws and nuts and bolts on tools
Checking handles are not loose
Washing down spades, forks and hoes of any dried in soil
Cleaning and oiling all small tools such as secateurs
Conclude by sharpening everything that needs sharpening
It is also useful to make a list of any tools you don’t currently have so that you can put them on your list to Santa. The first photo below shows some of my small tools ready for their annual overhaul. All you need is some oil such as WD40 to help you remove any rust, a small sand block to rub things down; (you can get this from DIY shops), some rags for wiping down and a sharpener to give some tools an edge. The second and third photos show the cleaning process in action. I happily spent a couple of hours down by the potting benches absorbed in this heavenly activity. Click on each photo for a larger view:
Cruella said that I should enter myself for “tool of the year”, but I think she is just being sarcastic
After all my efforts at cleaning I was proudly showing my work to Cruella when she started to compliment me on how well I had done, anyway the upshot was she asked if I could possibly clean the instruments in her hobby room. I spent the whole day in there and scrubbed everything clean even the stubborn red stains. I must admit overall I was pleased with my efforts, but unfortunately I couldn’t get the scratch marks off around the door, they were just too deep. The photo shows the hobby room after my big clean up.
I used two whole cans of WD40
Cleaning up fallen fruit. After the recent rains you will probably find that a lot of your fruit may have started to split and have fallen from the tree. This is caused by the pulp in the fruit expanding faster than the skin can grow, hence you get a split. It is ok to leave this on the ground for a couple of days so that the birds and insects can get a feed. But, do not leave fallen fruit any longer as it can become mouldy and introduce spores and pathogens into your soil that may cause long term damage. The photo below shows my timely clean up efforts.
Taking Ice Plant cuttings. One of the few plants in flower at the moment is the hardy Ice Plant. This lovely trailing plant is ideal for rockeries, or in my case planted out on my water feature. It is doing so well on the water feature ever since I diverted the water flow and created a rockery because of Cruella’s mouse army – see previous posts. Anyway, I want to plant some more on the water feature amongst the rocks.
It is easy to take cuttings from Ice Plant. In my case I used another plant that I have in a pot. Just find a nice strong growing non flowering stem and snip off about 4- 6 inches. Nip out the leaves all the way up the stem leaving a couple at the top. Plant 4 cuttings around the edge of a four inch pot filled with very free draining compost. when you have finished put the pot in a sheltered place out of the sun. They should start to root in about a month.
The first photo below shows the Ice Plant happily growing in my water feature rockery. The next photos show the host plant with lots of potential cuttings, and the cutting process in action. Click on each photo for a larger view.
A big snake has taken up residence in the rockery , I hope it eats Cruella’s mice army!
Getting ready to plant out seedlings. If you have been growing on seedlings in a shady area to protect them from the sun, now is the time to get them out in the sun ready for planting. Put your seedlings trays out in a sunny area for about a week so that you can acclimatise them before planting them out. You will need to get any hardy seedlings planted out before the end of December whilst the soil is still warm. The photo below shows a range of plants ready to go out in various spots around the garden.
Nothing beats the pleasure of planting out your own plants. Give it a go instead of buying forced plants from garden centres
Agave Attenuate flowering again. I have lots of Agave Attenuate planted around the garden and I am always taking cuttings and planting them elsewhere including in the Wild Wood. Well I don’t want to boast, but in this period of Advent when we are awaiting the birth of Jesus, I am awaiting the flowering of not one but two Agave Attenuate. Given that these plants normally flower about every 20 years, and I have already had a flowering elsewhere in the garden this year, it is nothing short of miraculous. The photos below show the two new Agave flowerings in the Wild Wood. Click on each photo for a larger view.
I have spoken to the Pope and I am awaiting approval, but I think we will give Lourdes a run for its money this year with coach trips
As the gardening year comes to an end I want to wish all followers of spanish-garden.com blog a peaceful and blessed Christmas. I am sure that all of us are looking forward to having the sun on our skin and our hands in the soil.
This post is really a continuation of the second stage of the big cutback set out in the last post. By now I should have been on to the third stage of pruning the Roses, but two things have been distracting me. Firstly, Cruella (my wife) flew home from our English house and her visit with our idiot son. Secondly, I spend most nights keeping vigil with the flowering (and dying) Attenuata mentioned in the last post (more later).
Cruella’s flight home was more eventful than normal. Usually she just flys straight home and lands in a tree in our wild wood were she perches till the morning. However, low cloud meant that I had to lay out a landing strip for her on the lawn with tea lights. Unfortunately she overshot and landed in the big mulberry tree. Thank goodness the tree is ok. The photo below shows the lawn as I laid it out according to her instructions, goodness knows how she missed.
15th December. Things I have been doing lately:
🪚 Pruning Dame de Noche. Everyone in Spain should have at least one dame de noche planted close to their sitting areas. The scent from this night scented Jasmine is intoxicating. However, to keep the plant flowering and providing you with that lovely scent, then you have to do a bit of pruning.
The pruning you should be doing now is the big prune. You need to cut the plant back by at least two thirds, just leaving a mound of shaped stems to form the New Years growth. The easiest way to do this is to firstly use electric hedge trimmers to take it back to create a basic mound of stems. Then using lopers get into the stems and prune out any that are dead or crossing .
The first photo below shows the dame de noche in its unpruned state. The second shows the lopers getting to work. The final photo shows the finished pruned plant. This will grow by at least six foot this year. (Click on each photo for a larger view).
🪓 Cutting back fountain grass. All grasses need to be pruned back heavily once each year if you hope to keep them looking their best. Nothing looks worse than a grass that has been left unpruned as the overall effect is of a floppy misshapen mound. By cutting back your grasses now you will ensure fast new growth with tall stems standing and waving in the wind. The photos below shows my fountain grass before and after its annual prune. (Click on each photo for a larger view).
In a few weeks time it will be sprouting again ready for the Summer.
⚔️ Pruning back Pink Trumpet vine. Regular readers of this blog will know that instead of fully cutting down dead palm trees, I instead use them as a prop for climbing plants such as Trumpet vine. This gives you a tremendous aerial display of flowers in what would otherwise be an arid stump sticking out of the ground. Most of my Trumpet vines are in my hedges and they won’t be cutback till January as they are mixed in with other hedging. But in this case it is a stand alone plant which is part of the structural look of the garden. The photos below show the plant before and after its cutback. (Click on each photo for a larger view).
In a few months it will once more be a tower of flower.
🍷 Pruning grapevines. This year has not been a good one for my grapevines. To be honest they haven’t even got going so I was glad to prune them back as I feel guilty every time I look at them. With grapevines the technique is very simple just trim off all side shoots leaving just the main stem of the vine. Over the years the main stem of the vine will become very thick and strong. When the weather warms up in the Spring it will send out new fruit bearing side shoots.
I have three grapevines. The main one grows along the front of the house and I have trained it on wires. Unfortunately because this one grows so close to the wall it tends to suffer from mildew in late Summer; nevertheless I grow it more for ornamental purposes rather than fruit. The other two grow along the swimming pool balustrade and because of air flow never get mildew. You can see the before and after photos below. (Click on each photo for a larger view).
🧛 Scarifying the lawn. This time of year, when the grass has stopped growing, is a good time to deal with the thatch of dead grass that will impede new growth next Spring. I have a scarifying machine that is so fierce and noisy that I dread bringing it out each year. The machine has fearsome rollers with scarifying tines that scratch at the grass accompanied with slitting knives that cut into the lawn; it is like something out of “Game of Thrones”. I basically start it up then hang on behind it as it rampages around the lawn covering me in a thick layer of dust and grass. The end result looks like the Sahara desert, which I then finish off by hand scarifying. The photo below shows what I call my desertification process.
I am sure it will grow back?
☠️ Tending to the flowering Agave Attenuata. I asked Cruella to take this photo of me with the flowering (but dying) Attenuata. It is just so that I can show her babies what their mother looked like in all her glory. I will keep you informed of progress; I wanted to post daily bulletins on our gates but Cruella won’t let me.
The above heading gives only a flavour of the excitement we gardeners have to deal with on a daily basis. But before I get you involved in the adrenaline rush of this post. Let’s remember what we are up to. Todays post covers the next stage of the big annual cutback. Remember there are five stages:
Initial cutback for structure and shape (covered in the last post)
Cutting back large shrubs and climbers including tidying up (this post)
Pruning Roses and cutting back grasses
Pruning back flowering hedges
Tackling trees
5th December. Things I have been doing lately:
🐀 It’s true the mice have eaten my water feature. Regular readers of this blog will remember that I created a stream like water feature a couple of years ago. Up until now it has been happily flowing along. However, I made the mistake of turning it off whilst I was away as I did not trust Cruella (my wife) to keep it topped up. Anyway the upshot is that when I came back I topped it up and turned it on. Imagine my consternation when the water did not flow down the stream, but just disappeared.
I spent two weeks dismantling various parts of the water feature including moving more rocks than the slaves building the great pyramid. However, only to discover that whilst I was away some mice had been happily chewing on my pond liner. I confronted Cruella with the damage and demanded to know if she knew anything about it. She looked hurt at this suggestion and vehemently denied any involvement saying she knew nothing about mice; commenting as she left “I’ve only got my rats”. This first photo below shows early dismantling efforts to find the leak. The second photo shows mice damage.
🌿 Trimming back Jasmine. If you have Jasmine you will know that it is a lovely plant for its flowers, perfume and climbing ability. However, if you are not careful, as your plant grows up, the top part will flop over and disguise the fact that it is killing the growth underneath. What looks like a healthy green plant can become completely brown underneath. In addition you need to make sure that Jasmine does not get into your gutters or under your roof tiles.
The first two photos below show the Jasmine folding over at the top and also threatening to get into my gutters and under the roof tiles.
Naughty Jasmine
The next two photos show the Jasmine trimmed back and ready to continue flowering without tearing the house down.
You will probably notice one of our Labradors “Tango” wandering up the drive. Tango is blind. But he appreciates the irony that he needs a “guide dog”.
🍁 Clearing up leaves. We are not quite in the season of the big leaf clear up. However, it is important that you clear at least some leaves up as you go along. If you have a lawn then the fallen leaves will kill off your grass. Now I recognise that not many people have a lawn in Spain but you still need to clear leaves from gravelled areas as they will break down into a fine mulch and provides good growing medium for weeds. The two photos below show my early stage leaf cleanup.
Now as you probably know leaf mould provides a lovely composting material which I will deal with in my up and coming big compost special; “be still my beating heart”. In the meantime gather up the leaves and store them in plastic sacks. All you have to do at this stage is prick the sacks all over with a garden fork and store them in a shady area of the garden. The photo below shows my entry in the best pricked sack competition 2020.
It’s harder than it looks you know; I came third.
🙏 Death of my Agave Attenuata. The Queen of Agaves, the Attenuata is a favourite Agave here in Spain. It has lovely large green leaves and no spikes or teeth. The plant grows for about 20 years and then flowers. The flowering process is astounding. Suddenly the plants leaves begin to distort into a swirl at its centre, and then it begins to grow a flowering raceme (flowering spike) from its centre. This grows over the weeks and eventually will be over 2 metres long. The plant then flowers. However, the sad bit is that it then dies. The only saving feature of this death bed tableau is that as the Attenuata dies it is surrounded by its babies that all grow from its base. It is a moving scene and makes me cry every time I pass it.
The photos below shows the various stages of the Attenuata as it grows its raceme. Note the babies clustered around the base looking up at their mother, it is a scene reminiscent of the famous painting death of St Clare. I will not of course record the death; it would be unseemly.
Yes, I know that Christmas is gone and that you are left fat, with no sense of purpose and an empty wallet, but the real fun is about to begin. It’s time for the big annual cut back – hooray! Here in Spain from late December and throughout January you need to cut back all of your perennials, bushes, trees etc; but not succulents. You need to do this for three reasons: First, to reshape your plants; if you don’t you will get uncontrolled growth that will leave you garden looking like a burst cushion. Second, by cutting back you can get rid of weak, diseased and crossing growth that is stopping light reaching the centre of the plant. Third and most importantly it’s great fun and you get to use all your dangerous bits of garden equipment – what’s not to like. Finally in the words of Cruella (my wife) who has been reading a book on motivational Psychotherapy over Christmas – “get out in that garden fat boy”.
30th December: Things I have been doing lately
✂️ Cutting back Canna. You will of course remember that a few posts ago I tied up my Cannas and left them to die back in order that all the goodness from the stems would be fed back into the Corms (ugly bulbs). Well now is the time to cut them right back. With Cannas you need to cut the stems back to about 4 inches from the ground. This length will stop them trying to grow again on last years growth and will also keep the cut and drying stems away from infection by the soil.
The first photo below shows one of my Canna clumps ready for its big cut back. The second photo shows the stems cut back and ready for new growth. The marked areas on the second photo show where the corm has thrown up new plants outside of where I want them. In a few weeks I will dig down and cut these off the mother plant and replant elsewhere. (Click on each photo for an enlarged view).
I know I’ve said it before but the first photo looks like Cruella in her new Christmas dress.
💐 Pruning Roses. One of the first plants you need to tackle in the big cut back is Roses. As a rule of thumb, Roses need to be cut back severely. However, before you rush out and hack all your Roses down to the ground it is important that you differentiate between climbers and standard Roses. Climbing Roses are not cut to the ground. Instead you should only do the following:
Leave the overall height of the plant as you want it to grow and climb.
Cut out all diseased, crossing or weak branches.
cut back all side branches by two thirds.
By the end of this process you should have taken away a lot of the side bulk of the plant and encouraged upward growth and new flowering stems ready for the flowers. The first photo below shows one of my climbing Roses before it’s annual prune. The second photo shows it’s new svelte figure. (Click on each photo for an enlarged view).
And yes, as usual I did fall off the steps!
Standard Roses are tackled differently. If they are relatively new (in their first year), then cut them back only by a third. If however they are already well established then you can be quite brutal. I will take some plants back to a couple of inches from the ground depending on their stem structure. Again follow the same rules as climbing Roses in terms of cutting out diseased, crossing or weak branches. But then cut the whole thing back to 2 or 3 inches from the ground. Try and aim for a nice open shape of the stems – a bit like a champagne glass – to ensure plenty of light gets into the centre of the plant. The first photo below shows one of my Rose beds ready for pruning whilst the second shows another pruned back. From the second photo you can see that perennial grasses sneak in and grow under the Rose stems. This results in my annual battle to remove the grasses; it not only takes a long time, but also results in severe blood loss, by the end I am positively anaemic. (Click on each photo for an enlarged view).
🍁 Continue clearing up leaves. By now every leaf should be off your deciduous trees and you should now rake everything up. It is important that you do this for two reasons. Firstly, if left on the soil or gravelled area the leaves will initially smother anything that is underneath them. But secondly, and more importantly they will eventually break down to a fine tilth that will clog your gravelled areas up and present an ideal medium for weeds. The first photo below shows the last of the leaves under my Mulberry tree ready for raking up. The second photo shows the leaves placed into a bag, which I aerate by making holes with a fork. The bag is then set aside for six months to compost down and then added to my compost bins. Cruella (my wife) laughed when she saw the second photo and said if I included it people would think I was stupid. But she has no soul and doesn’t understand the miracle of composting.
I have started using blue bags as I consider myself composting royalty.
😢 Nero has had an operation. For those of you interested in cute photographs of animals I include below a photo of Nero one of our Labradors. Nero snapped all the ligaments in one of his back legs and now has pins holding his leg on (at great expense). The gardening link is that Nero is the dog who given half a chance will dig up the lawn. I took him for a walk on the beach and he was chasing a ball when his leg just gave way. Cruella claims that I did it on purpose to get my own back on him. But she wasn’t the one carrying the fat, wet sandy sod a quarter of a mile back to the car. And anyway, he started it first.
Don’t worry he will soon be back to destroying the lawn
Cruella (my wife) said that I shouldn’t say this sort of thing as it may be misconstrued as boasting and could result in my blog being listed under pornography as opposed to gardening, and that I may get unsavoury characters looking at my blog. My only reply was that they would be disappointed. Anyway, setting aside all vulgarity, and I don’t mean to boast, but all this rain in the past month has resulted in the fact that the orange harvest this year is enormous which means you can start harvesting oranges now.
4th December: Things I have been doing lately.
🍊 Beginning to harvest oranges. Normally around here you could start harvesting oranges about the end of December or early January. But because of the rain the oranges have swollen up to quite an extraordinary size and they haven’t stopped yet. Oranges will continue to swell right through till nearly the end of May. The only problem with all this swelling is there a strong propensity for the skin to split which in turn lets the birds and insects in to the fruit which is then spoiled.
You should try and pick some oranges every day to juice or eat. Pick the largest fruit first as these are the ones in greatest danger of splitting. If you haven’t got a juicer then go and get one as this is an effective way of using and storing orange juice. The photos below show some of the record harvest, together with my juicing implements and lastly a photo of me in my special juicing apron (doesn’t everyone have one). I apologise if it looks like I am eating my phone, but I don’t know how to take a selfie and Cruella was out taking a torture class. Click on each photo for a larger view.
This is one of my small tangerines!
🍇 Pruning grapevines. If you haven’t pruned your grapevines yet then you really need to get on with it. Trim back all side-shoots to leave just the main stem. Once you have trimmed it back the plant will spend a short time resting, but in late January you will start to see the new leaves coming through. If you leave grapevines unpruned then they just become a big sprawling unsightly mess. Once you have trimmed back to the stem then make sure the stem is firmly tied to what ever structure you are growing the plant up. The Winter winds can easily tear the stem loose and let it thrash around and become damaged. I always use wire in Spain as the sun just rots wood very quickly. The photos below show my various grapevines before and after their annual trim up.
🌴 Pruning European Fan Palms. I love Fan Palms and they look elegant. However, they grow like “Topsy” – note literary reference, and they can be dangerous at eye level. I have a lovely stand of these Palms which we have placed in a raised round bed which stands in the middle of the main path to the front gate, with the path flowing around the bed. This looks lovely until the fronds start to poke out over the path and into everyone’s eyes. This one of my least favourite jobs as the stems are filled with strong spikes and the Palms fronds give you painful (paper) cuts.
If you have European Fan Palms then you have to prune at two levels. The low level will be new self seeded plants coming through (which are technically termed eye pokers). Whilst the higher ones are the fronds that are dipping below 45 degrees and need taking off to ensure the plant retains its jaunty look (well I think it looks jaunty). The photos below show the Palm in its original dangerous state, me manfully tackling the high branches, the final trimmed palm, and some of the fronds trussed up ready for recycling. Click on each photo for larger view.
if you look carefully (just under my raised arm) you will see Cruella (my wife) in her new Autumn dress and new stone shoes.
💦 Harvesting rain water and turning compost. No this is not about prostate and bowel problems, but about the need to catch water when ever you can. Here in Spain it is quite common for us to go for months without rain so it is imperative that you have a system in place to capture rainwater. I have various systems but the main one captures all the water that falls into my tiled pool surround and then channels this through a pipe into a large 1,000 litre tank. When there is so much rain that the tank overflows, I siphon the water out into large plastic dustbins. The beauty of this system is that I can add and take away the dustbins when necessary. In effect the dustbins are neatly stacked one inside the other all Summer and only come into use when needed. The photo below shows my emergency bin cohort in place ready to to siphon off the downpour.
Guess which one is the odd one out?
Another important job to do when it is raining, is to make sure that you open the lids of your compost bin to moisten the compost. I have been known to wake up in the middle of the night, hear it is raining, and rush out to open the bin lids, (of course I’m a bloody idiot). Once your compost is nicely wet then you need to turn it over to make sure that it is composting down evenly and that you are spreading the moisture. The photo below shows my compost bins. The nearest one is the resting bin which is being left to compost over a period of six months or so. You can see that it is already showing good results. The further bin is the active bin which is being filled now.
This was the winning photo in “Compost Fancier Monthly”
‘The time has come the Walrus said to talk of many things: Of shoes – and ships – and sealing wax – Of cabbages – and kings- And why the sea is boiling hot – And whether pigs have wings and why Processionary Caterpillars are still amongst God’s things”. Alright I admit it the bit about Processionary Caterpillars was put in by me. But I ask you, where else could you find great literature allied with gardening. I feel I am wasted on this blog; I’m going to write a book or start a night time radio programme aimed at insomniac gardeners who are worried about Processionary Caterpillars.
28th December: Things I have been doing lately.
🐛 Destroying Processionary Caterpillar nests. If you live in Spain or some other part of the globe that is blighted by Processionary Caterpillars then you will know the danger these blighters present both to humans and animals. The Pine Processionary Caterpillar is the larval stage of the Pine Moth. The moth itself is harmless if a bit ugly (but I know a lot of people like that). The problems is that it lays its eggs high up in Pine trees across Southern Europe, the eggs eventually hatch into caterpillars that feed voraciously on the trees during the night, but then retire to nests during the day that resemble large sacks of cotton wool. These hang from the trees and can contain hundreds of caterpillars who successfully hide from predators during the day.
The problem comes when the caterpillars descend from the trees and form large processions, sometimes 20 foot long with the lead caterpillar leading all the others in a poisonous conga that resembles a large snake. Each caterpillar is covered with long hairs that are extremely dangerous to both humans and animals, particularly dogs; (cats are too clever to bother). If you disturb the procession then the caterpillars release the hairs which float in the wind and can cause anaphylactic shocks in humans and animals if inhaled. It is quite common for dogs in Spain to curiously approach the procession and sniff it, only to receive a nose full of poisonous hair. In many cases this can result in dogs having to have operations to remove parts of their tongue. Most caring dog owners carry special antihistamines between January and March which is peak season for the caterpillars.
To stop all this happening you need to cut down and destroy the nests before the caterpillars descend and begin to process. The photo below shows me ready to start destroying the nests; note all the protective gear, this is necessary if you want to avoid any problems.
The satellite dish in the background is used to track the moths as they fly around – only kidding.
The basic idea is that you cut down the nests and then destroy them with all the caterpillars still inside. Look away now if you are of a sensitive nature. The first photo below shows a nest in the tree. The second photo shows your intrepid blogger bravely cutting it down ready for destruction; they have been known to land on my head.
Once you have the nests on the ground then you need to burn them. There is no other safe way to destroy them. During the burning process you must make sure that your nose and mouth are covered as hairs will float away and could enter your mouth or nose. The first photo below shows the nests contained in a metal container ready for burning. This is important in Campoverde as we live right in the middle of a Pine forest with the ground covered with very combustible pine needles that will soon give you a nice forest fire if you are not careful. The second photo shows the conflagration. I will not show you the aftermath, but it important that you burn every part of the nest and it’s contents and then leave the ashes covered overnight before disposing in a closed container (a tied up plastic bag is fine as long as there are no Whales around), don’t consider putting them on the compost heap.
I hope I haven’t scared you? If you deal with Processionary caterpillars every year then you will gradually reduce the nests (this year we only have two). If you fail to deal with them then eventually you will have ugly dead pine trees and no dogs.
I was going to go on and write about more cheerful things I have been doing but I am emotionally exhausted and Cruella (my wife) has just announced dinner is ready; just the usual old stuff: “Eye of newt and toe of frog, Wool of bat and tongue of dog, Adder’s fork and blind-worm’s sting, Lizard’s leg and owlet’s wing”. I expect you are having left over Turkey!
To be honest I’ve been back almost two weeks, but I have been too busy catching up with the garden that I have not had time to post anything. It has been a struggle to catch up especially as we have had to do lots of things for the Church; it is Christmas you know!
The excitement of Christmas and the birth of Jesus is a fantastic time of year; now I wouldn’t like to try and overshadow this, but the big January cut back is coming and I’m counting the sleeps till I can get started. Anyway on with what I euphemistically call the show.
11th December. Things I have been doing lately
☠️ Dealing with damaged Pomegranates. When I left to go back to England for a few weeks I left behind the best of my Pomegranates happily ripening on the tree. Upon my return I fully expected to be enjoying Pomegarante seeds liberally sprinkled on my Porridge. Unfortunately the birds had other ideas and plundered every last seed. Now pomegranates are usually quite immune to bird attack because of their unusually thick skin; Theresa May is a Pomegranate. However, once they become slightly overripe they can crack and this is the birds cue. Birds will visit Pomegranates every day and watch for the slightest crack. Once they see even the smallest crack they will use their beak to open up the whole fruit.
The lesson is to look at your Pomegarantes every day (no pun intended) and at the first signs of cracking harvest and if necesssary ripen off the tree. The photo below shows my poor Pomegarantes. I was about to place them in the compost bin, when Cruella (my wife), pointed out that they reminded her of a necklace of shrunken heads she once had as a child. She asked if she could have them and has since then been wandering around the house wearing them. To be honest they do look quite nice, she pairs them with her frog legs bracelet.
Cruella reckons she needs just two more. I’ve taken to locking my bedroom door at night.
🐶 Repairing the lawn. Having two Labradors means that lawn repairs are a constant chore. To be honest they do not normally dig, they save this for their kennel area where they know it is ok. But when we are away Nero (the black one) suffers from separation anxiety and likes to dig holes and lie in them. The problem this time of year is you cannot plant grass seed. But in my case it is necessary to repair the hole or Nero will take it as permission to head for Australia.
I backfill the hole with a mixture of compost and normal soil and then cover over the restored area with wire mesh. This usually results in the surrounding grass creeping into to cover the bald area; but, if not I will just reseed in March. The first photo below shows the damaged area with the culprit sleeping in the background. The second photo shows the newly repaired and protected area. I have so much metal mesh in my lawns that they remind me of the moment in Terminator when Arnold Schwarzenegger has his skin scratched only to reveal he was a Cyborg.
✂️ Cutting back Cannas. You will remember a few posts ago that my Cannas were damaged by high winds, but I couldn’t cut them back as you have to wait for the leaves to die back. Failure to leave Cannas to die back as much as possible will result in poor growth and flowering next year as you have to let all the goodness from the leaves make their way back into the rhizomes (ugly bulbs).
Well now is is the time, you can cut them back. Cut each large stem back to between 4 and 6 inches from the ground. This length is important. Cut too low and there is a danger that the stump may become water logged and rot. Cut too high and the plant will try to start growing again and produce weak growth. The first photo below shows the Cannas supported by stakes after the wind damage. The second photo shows the neatly trimmed stems ready to grow again in a few weeks. I intend to lift these plants and separate them next year as they have produced lots of ugly baby rhizomes.
🍂 Cleaning up leaves on gravel. If you have gravelled areas in your garden, and many people do in Spain. Then now is the time to clean fallen leaves off your gravel. If you fail to do this then the leaves will mulch down into a fine tilth and provide a perfect bed for weed seedlings. Failure to clear up leaves over a number of years will result in your gravelled areas gradually becoming congested weed patches. The easiest way to clear up is to use a blower and blow them on to your lawn and then mow them up. Failing this get out there with your lawn rake and rake them up – it’s good for the waist line fatty.
The first photo below shows a part of my gravelled areas covered in leaves. The second photo shows the leaves blown on to a lawn ready for mowing. I believe this article is both interesting and informative; I showed it to Cruella and she laughed so much wine came down her nose – at least I think it’s wine.
I know it’s not the worst premature problem to have, but I just can’t help myself. And yes, I know I should wait till January to start the big chop down, but I’ve got myself over excited and I’ve started. I comfort myself by the fact that I am not in full swing yet, I am more or less just warming up before the main event starts in January. Anyway here are some things I’ve been doing lately; and if I’m doing them you better get on with them as well.
22nd December: Things I have been doing lately.
Planting next year’s garlic. I don’t really grow vegetables as they are very cheap to buy in this part of Spain. However, the one exception is garlic. I grow it just for fun and it is the easiest thing to grow. Each year at this time (just before Christmas) I take cloves of garlic and plant them in the garden. You can use cloves of garlic from the supermarket, but I use cloves from last year’s crop. The first photo below shows some of the sprouting cloves from last year. These have been kept in the fridge for use since they were harvested in May. So if you plant now you will have free garlic for six months.
I plant the garlic under the trees where I have grown Butternut Squash as the soil here has been fed during the summer. Plant the cloves about a fingers depth deep by just sticking your finger in the soil and pop in a clove. It is best to plant in a recognised shape as if you don’t there is every chance you will hoe off the seedlings as weeds. I plant four cloves in a cross shape either side of the tree trunk. I consider it part of my Christian gardening duty. The second photo below shows a little garlic clove just sticking out of the soil – cute eh!
Pruning fig trees. I have two fig trees and a deep and abiding passion for figs; especially when accompanied with goat’s cheese. Anyway I am digressing and drooling. Fig trees don’t need much pruning, all they really need is trimming back to keep the figs within reach, and thinning in the centre to make sure air and light can get in. One of my fig trees I am attempting to espalier up a wall and along wires. It is early days, but as you can see from the photo below, it looks quite promising.
Future figs
My other tree is bigger but still needs a bit of a Chop back to ensure it stays in shape. The extent of the pruning can be seen from the two photos below. The first one shows the fig in its pre-pruned state, whilst the second shows it pruned. You have to look closely to see where the pruning has taken place. And that’s a good thing. A little prune each year is better then a drastic cutback every 10 years. Spain is full of giant fig trees that have got out of control and the fruit is so high up only the birds can benefit from them whilst us poor humans are left to slip up on fallen over-ripe fruit. So get out there now and prune your fig tree – you know it makes sense.
Daphne’s Dame de Noche and the Solanum. Regular readers of this blog will know that earlier this year I planted a Dame de Noche cutting for my friend Daphne at the same time as planting Solanum cuttings. Subsequently there was a mix up when my wife Cruella and my friend Karl proceeded to kill the Solanum and then compounded their crime by passing off the Dame de Noche as the Solanum (see September 13th posting for the full story). Anyway, although it still rankles I have moved on (counselling was involved).
Putting all that behind us it is now time to move the misplanted Dame de Noche ready for its future transportation to Daphne, whilst at the same time planting the Solanum cutting where it belongs. Mature Dame de Noche can be pruned right back to bare branches, as I showed a few weeks ago. But young plants need to have some leaf left or they may not recover from the shock of pruning. The first photo below shows the newly pruned Dame de Noche, potted up and ready for future transportation to Daphne once it has stabilised in the early Spring.
The second photo shows the newly transplanted Solanum in its new home. I planted this in a mixture of home made compost and store bought with Pearlite mixed in and some soil from the planting hole. I then watered this well and gave it a small trellis to get it going. Once I have seen it is ok, I will fix wires to the wall to grow it up and along. Watch this space; I am thinking of cameras and trip wires to secure it from Cruella and Karl.
Killing Ivy. I dislike Ivy, I know some of you love it and even grow it out of choice. I find it invasive, and once it gets into soil it takes a lot of hard work to get rid of it. Anyway, I’ve got some, I didn’t want it and never asked for it. Despite my best efforts at digging it up (you need to get every bit or it comes back) and spraying it with weed killer (its waxy leaves make it impervious). My new approach is to cut a number of leaves to break their water tight barrier and then paint them individually with undiluted weedkiller. The picture below taken by my son James shows me gamely painting each leaf. It may look like I am thinning on top, but really, it’s just a trick of the light. I will keep you informed of progress – about the ivy not my hair!
Not long now to the big day. To be honest I can’t sleep at night I am so excited and sometimes the anticipation is just too much. I expect you feel the same; all over the world gardeners are wishing the days away in a trembling state of excitement. You thought I meant Christmas didn’t you. Well I am sorry to disappoint you, whilst the birth of Jesus Christ the saviour of the world is the most important thing at this time of year, I meant the second biggest thing – “The Big Winter Chop Down”. Yes, it will soon be that time when we cut down the summer growth and prune back ready for Spring growth. Yup, the “Big Winter Chop Down” can’t come soon enough. Whilst we gardeners love to plant and grow things, our next best thing is chopping things down, pruning, shredding, mulching and composting. We get to use sharp implements: blades, saws, knives, shears and a large variety of power tools and ladders; what’s not to like.
11th December: Things I have been doing lately
✂️ Cutting back Dame de Noche. Yes I know I am supposed to wait until January to start the big Chop Down, but I got over excited and couldn’t wait. I have so much to do that I have decided to get an early start. Think of it as like unwrapping your presents before Christmas Day. Now Dame de Noche needs to be cut back hard, so don’t be frightened. My plant is quite large and will grow to 2 metres in the summer; see the first photo below. But if you want good flowering and that lovely night scent then you have to act now. Whilst the plant is dormant you can cut it back to about 25cm. This looks brutal and you will be left with a bare branches, but only for a couple of months. Once the sap starts rising in the Spring it will be off again and covered with leaves ready for the lovely summer scents. The second picture below shows my Dame de Noche with it’s new haircut. Looks good eh?
🌳 Pruning back Standards to stop root rock. I must admit this does sound a bit like I am putting myself in moral jeopardy, but it only involved a quick trim of standard bushes. I have two main standards that are either side of a small gate to my swimming pool area. This can get quite windy at this time of year, and you will remember that in my last posting I complained about the high winds. Well they are back so these standards both had to be cut back to a smaller lollipop. If you leave standards then the wind will either knock them over and they will break, or else the wind will rock them and loosen their roots. The photo below shows the newly pruned standards.
🍊 Doing the Persimmon Snip. It will soon be time to prune trees, but I have decided to keep my hand in by pruning a small Persimmon tree that I put in two years ago. This small tree is about 5 foot tall and produced six lovely Persimmons last year. I expect it to produce many more next year, so I just had to remove any overlapping and crossing branches. If you look at the first photo below you will see the tree unpruned. It may look as if it doesn’t need pruning, but all those little crossing over branches will fill with leaf and stop air and light getting to the centre of the tree. The second photo shows the tree lightly pruned. This weeks competition is to find the difference.
🌿 Clearing up leaves. You can wait until all the leaves are off your trees before starting to pick them up. The exceptions to this are if you have leaves on a lawn, these must be cleared up straight away or they can kill the grass. The other exception is if you have leaves falling on gravel. If you leave them there they will eventually form a fine leaf mulch that will sink through the gravel and provide an excellent base for weed growth. The first photo below shows my Fig tree, whilst the second shows my Mulberry tree. Both trees are a rich source of large leaves which I compost in bags till next year. More about this later.




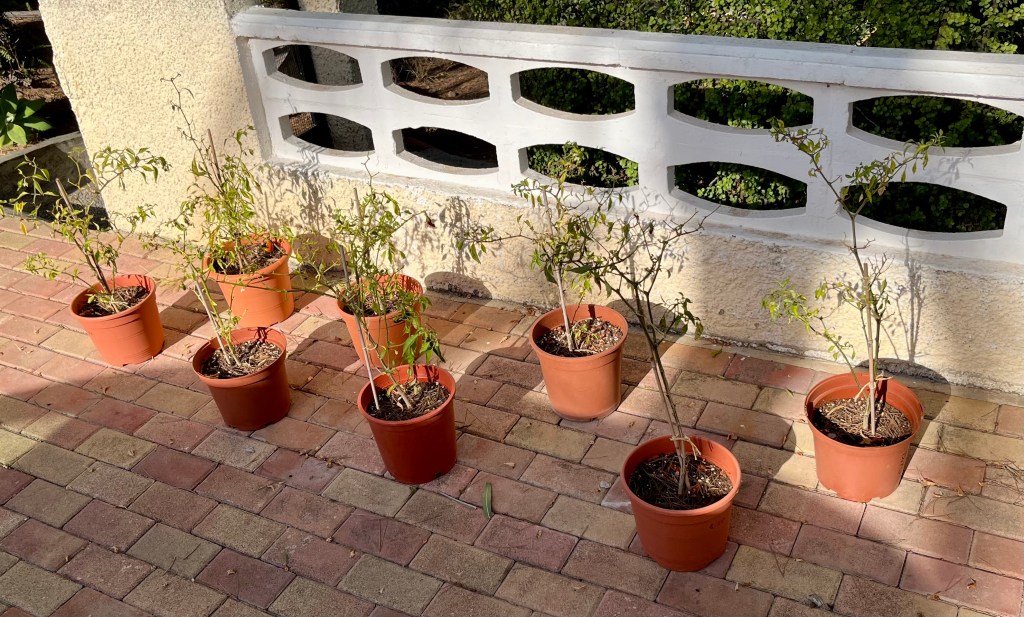

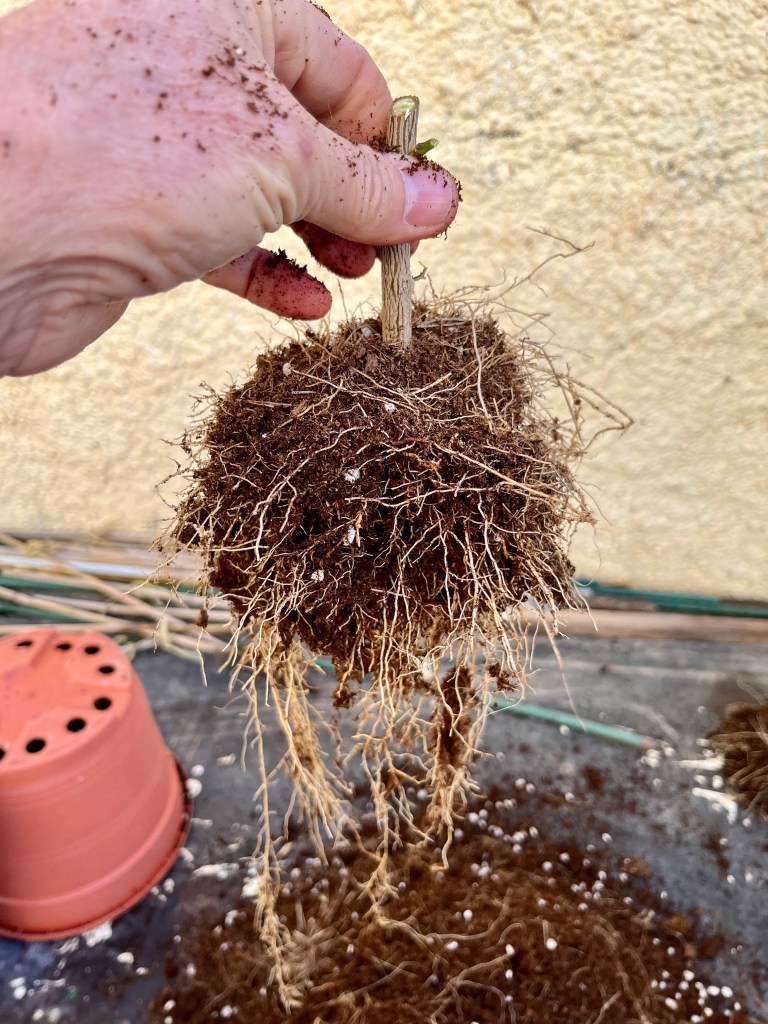


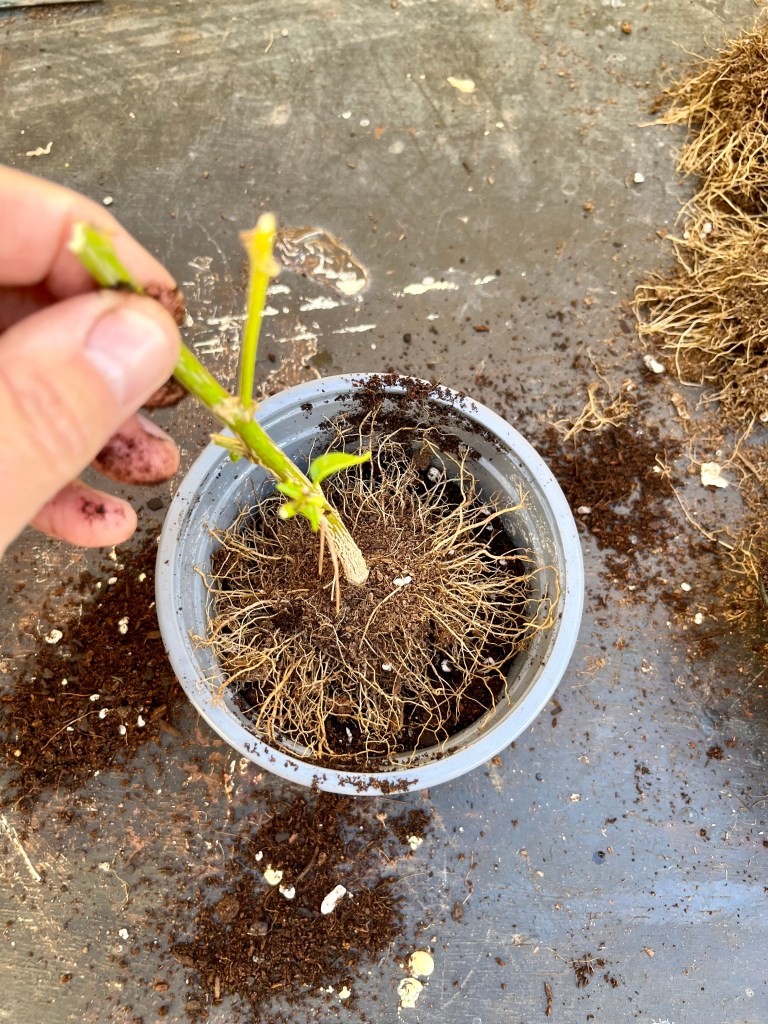

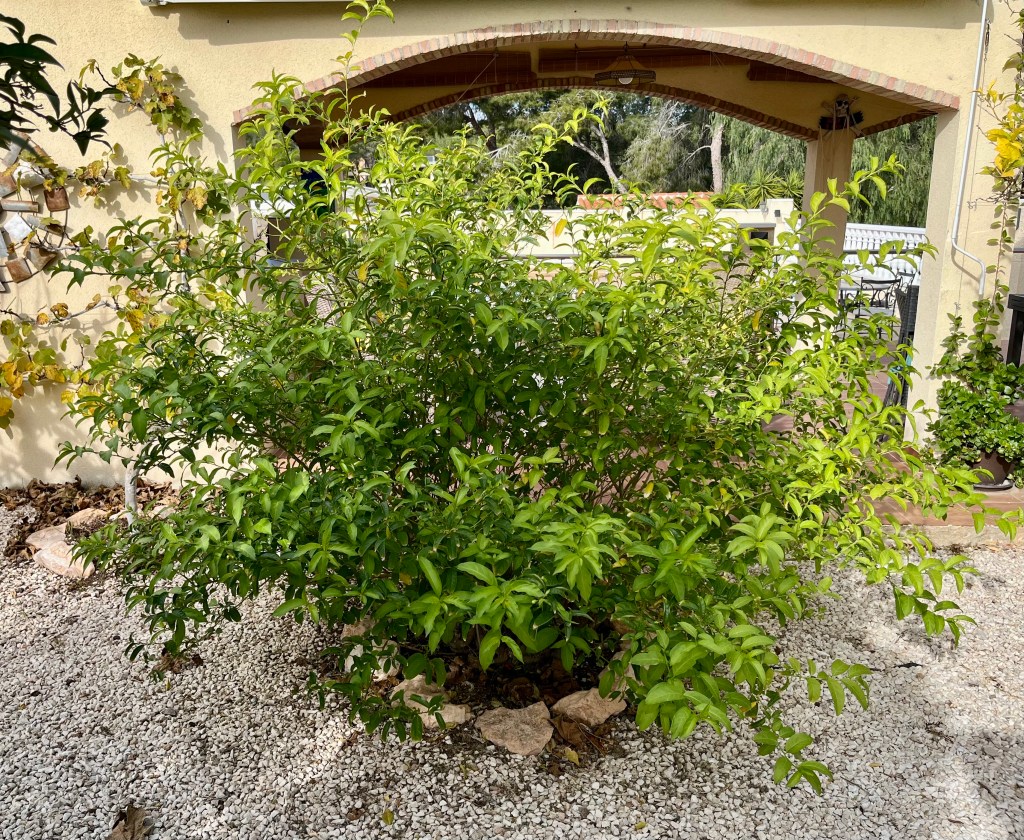


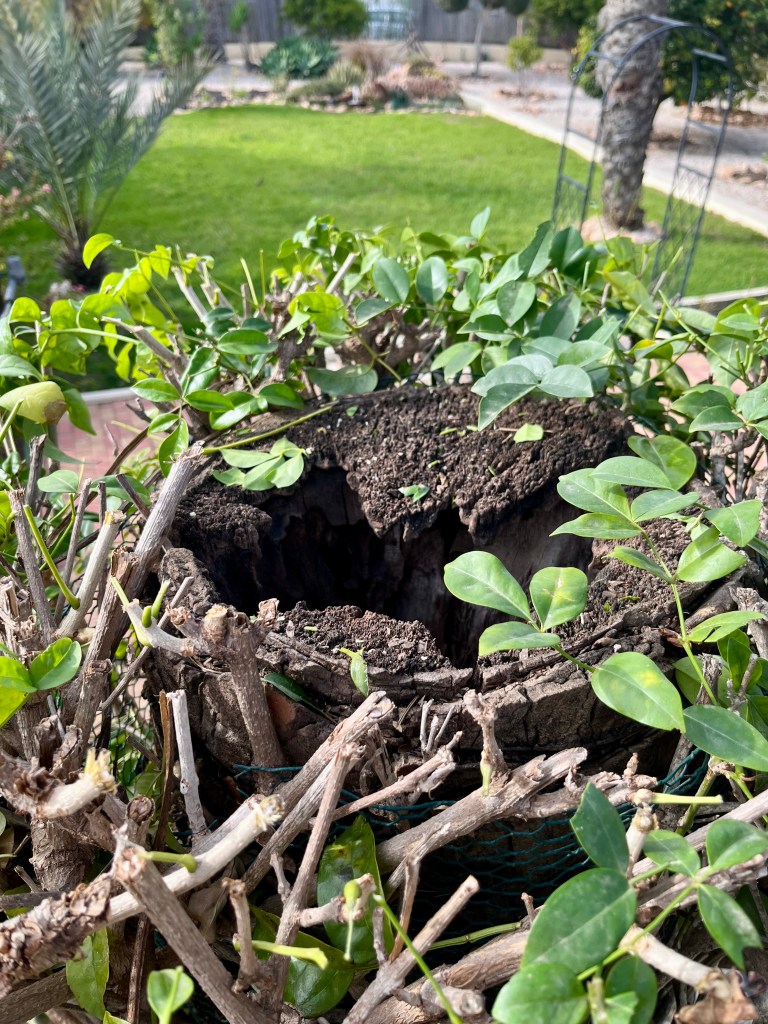


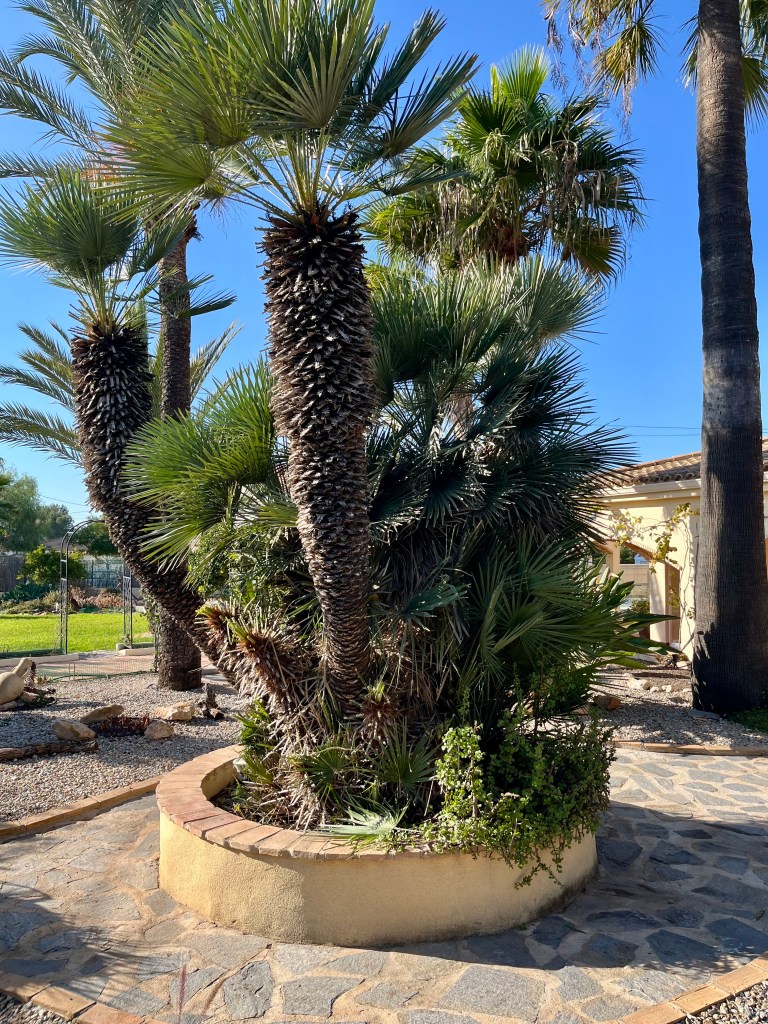
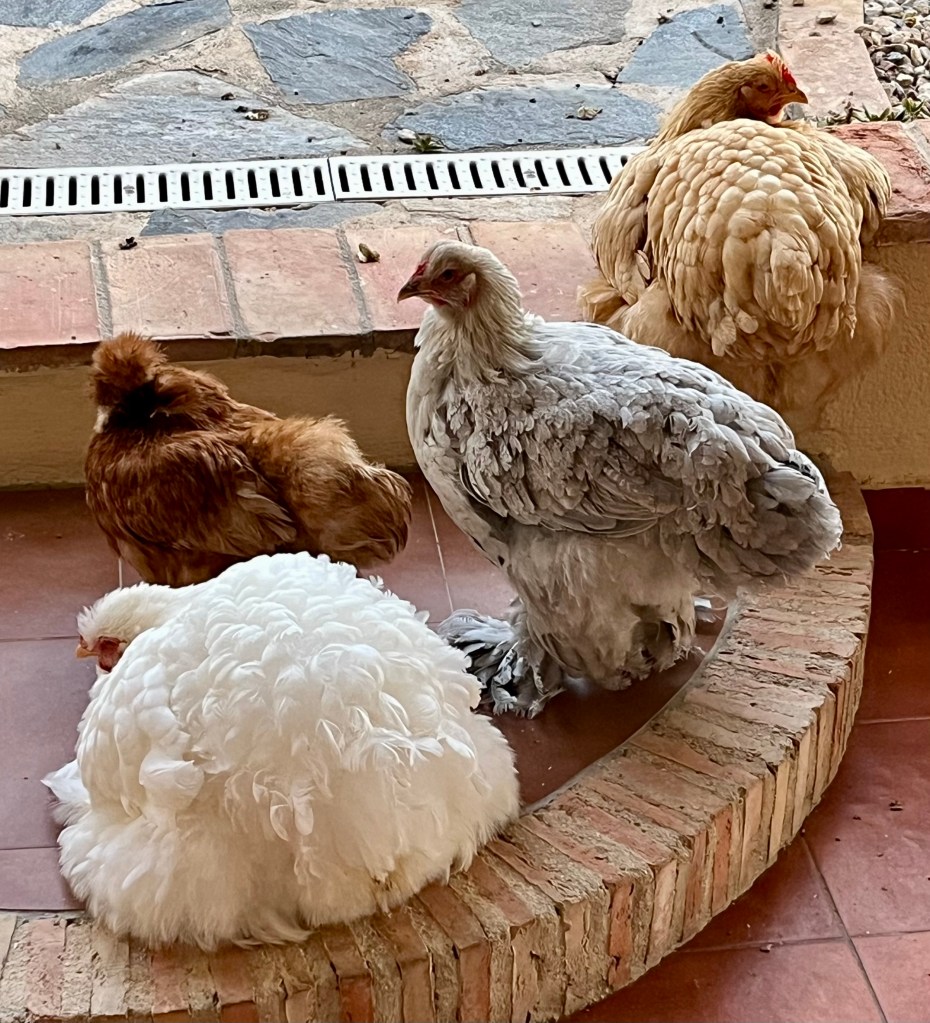
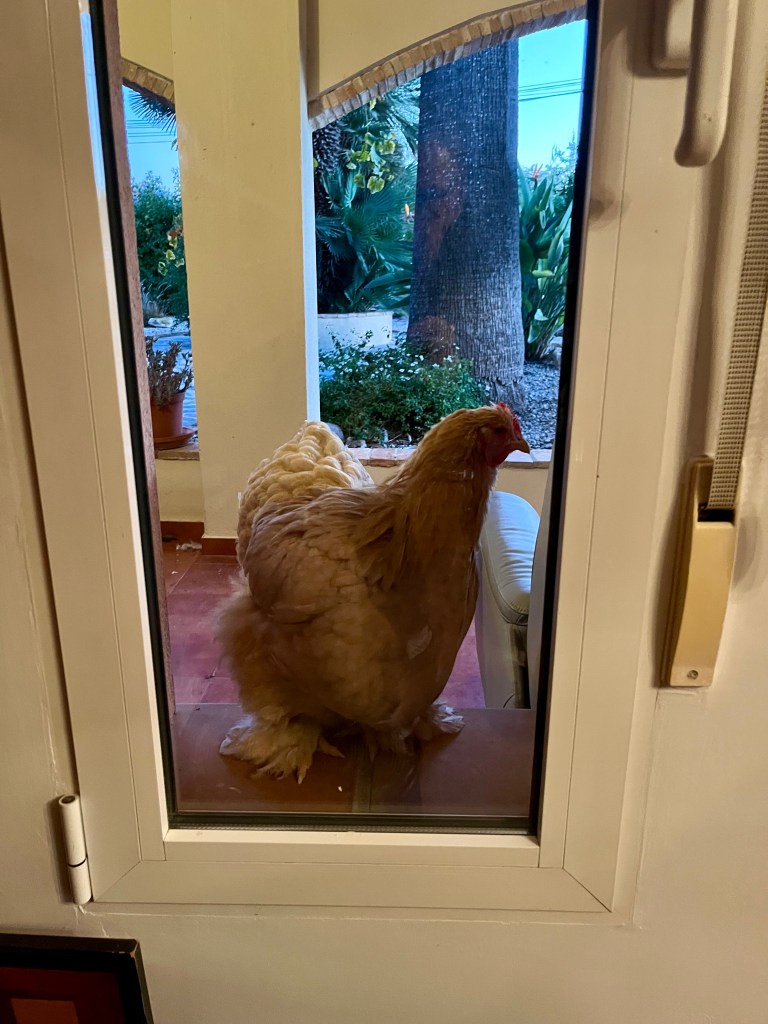

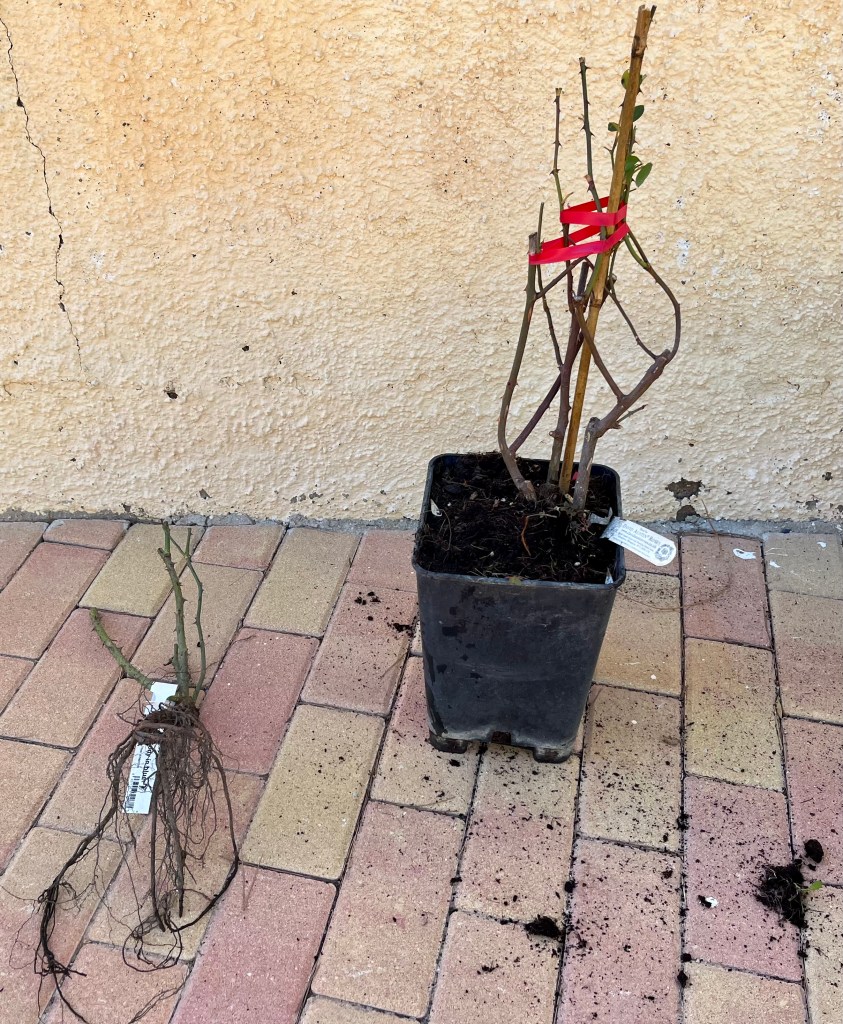
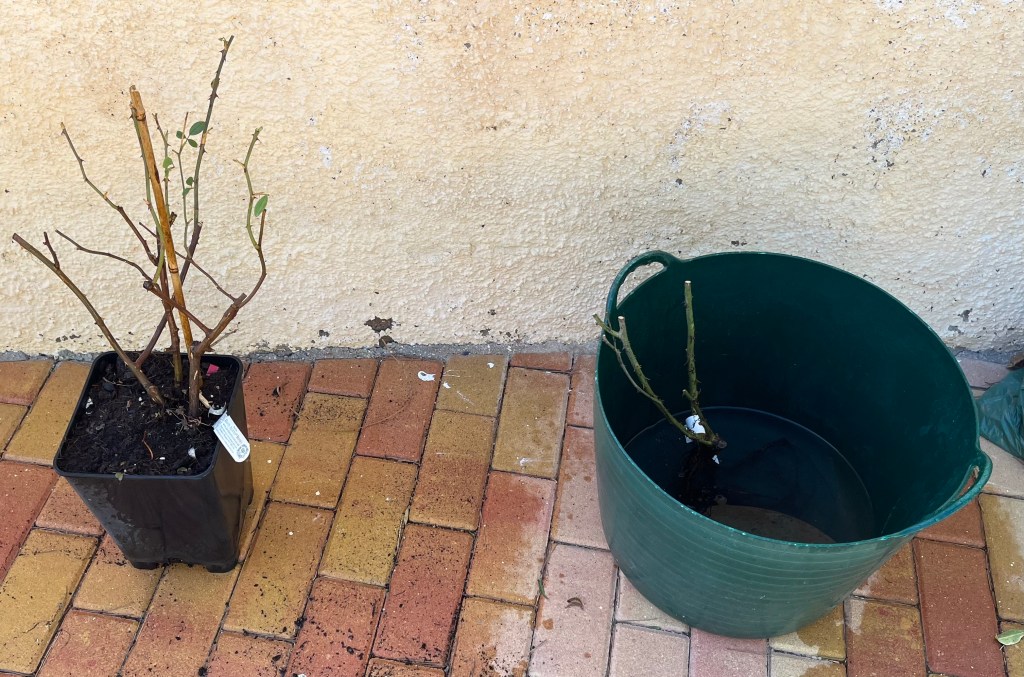
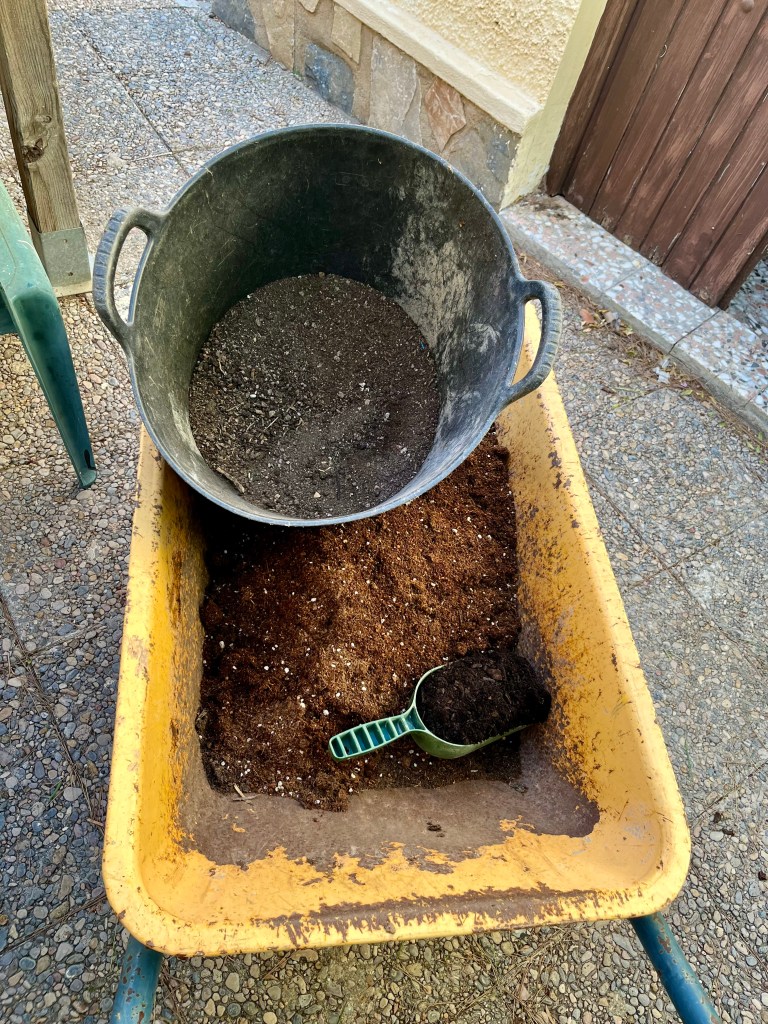


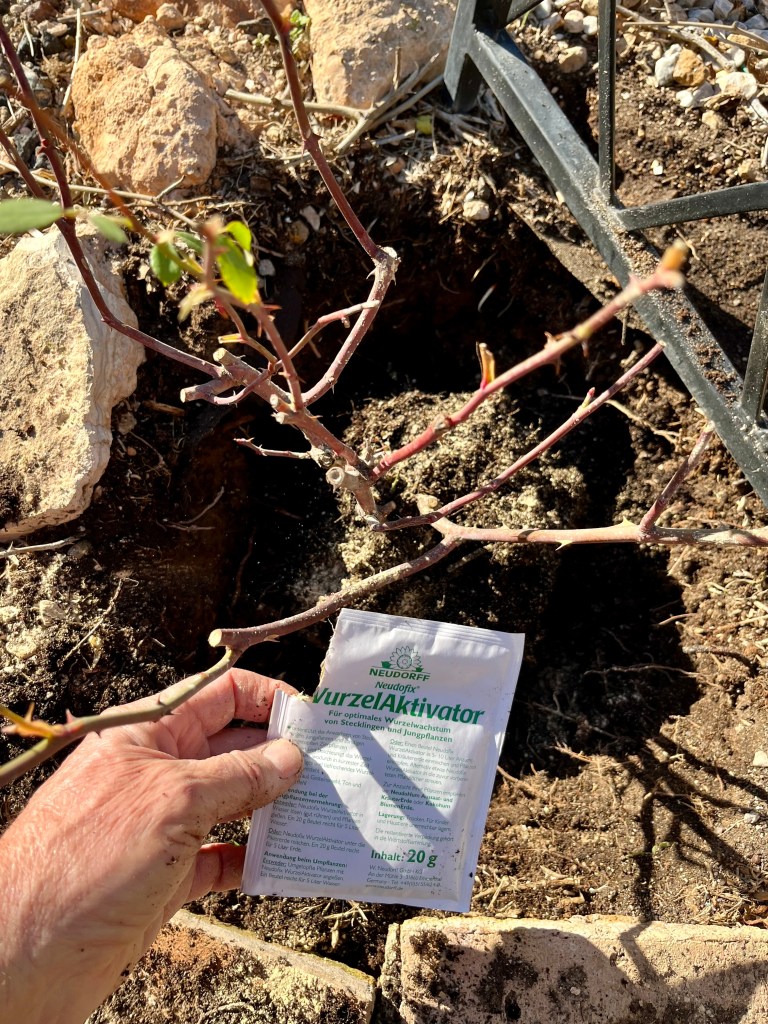


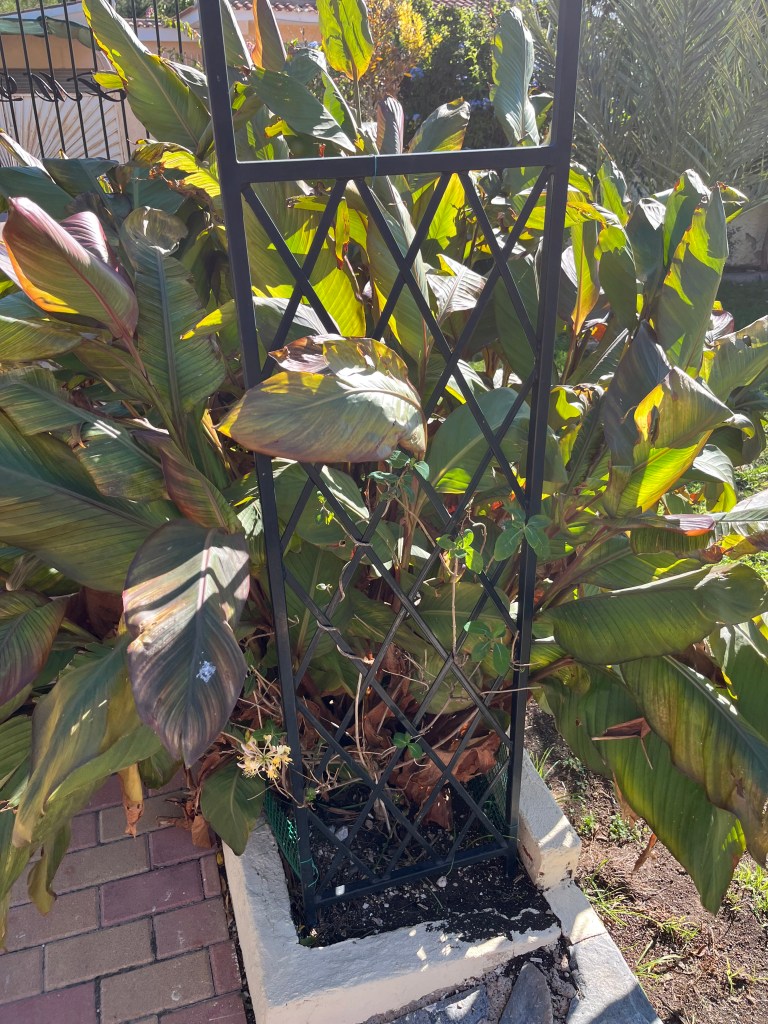
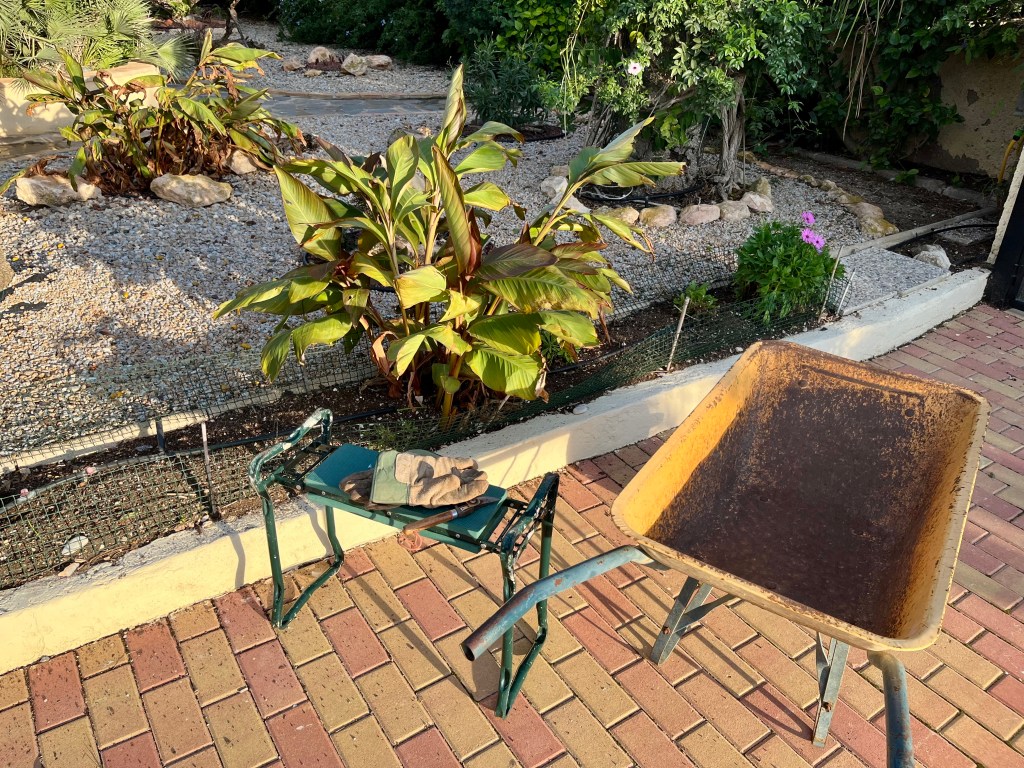
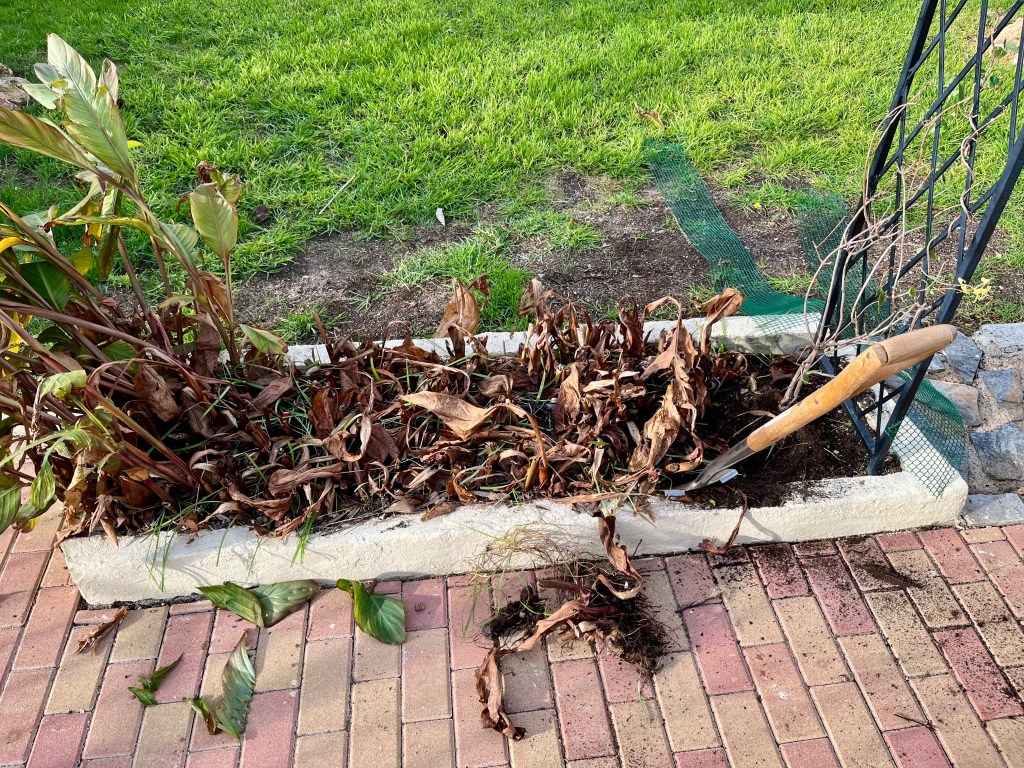
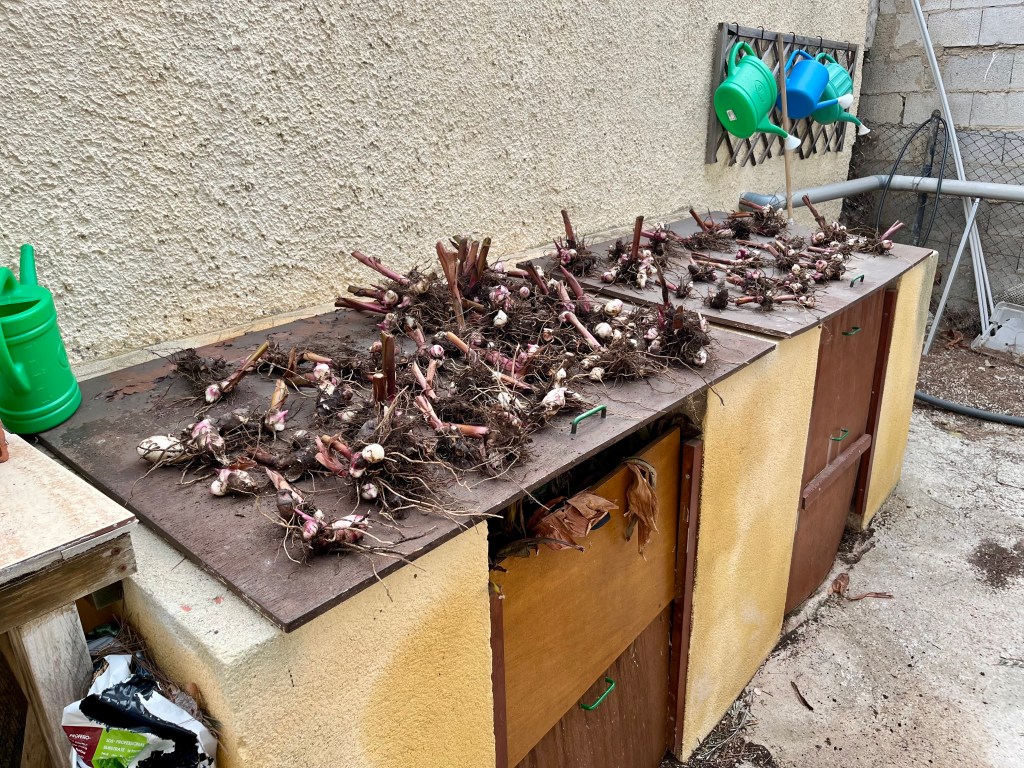
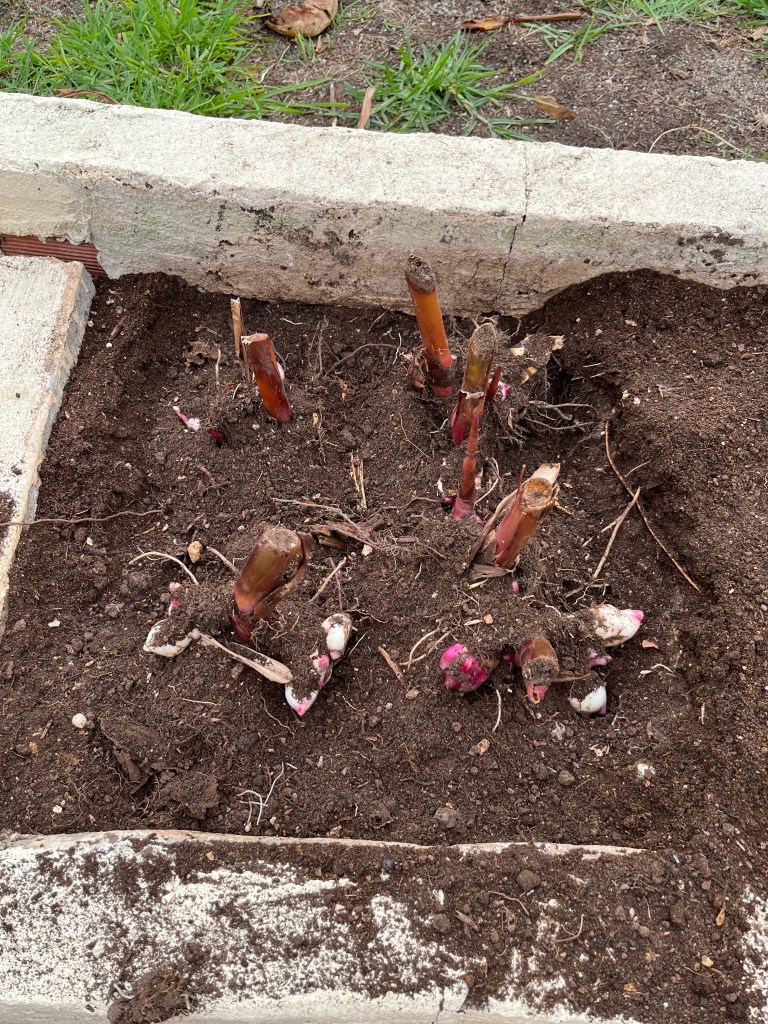



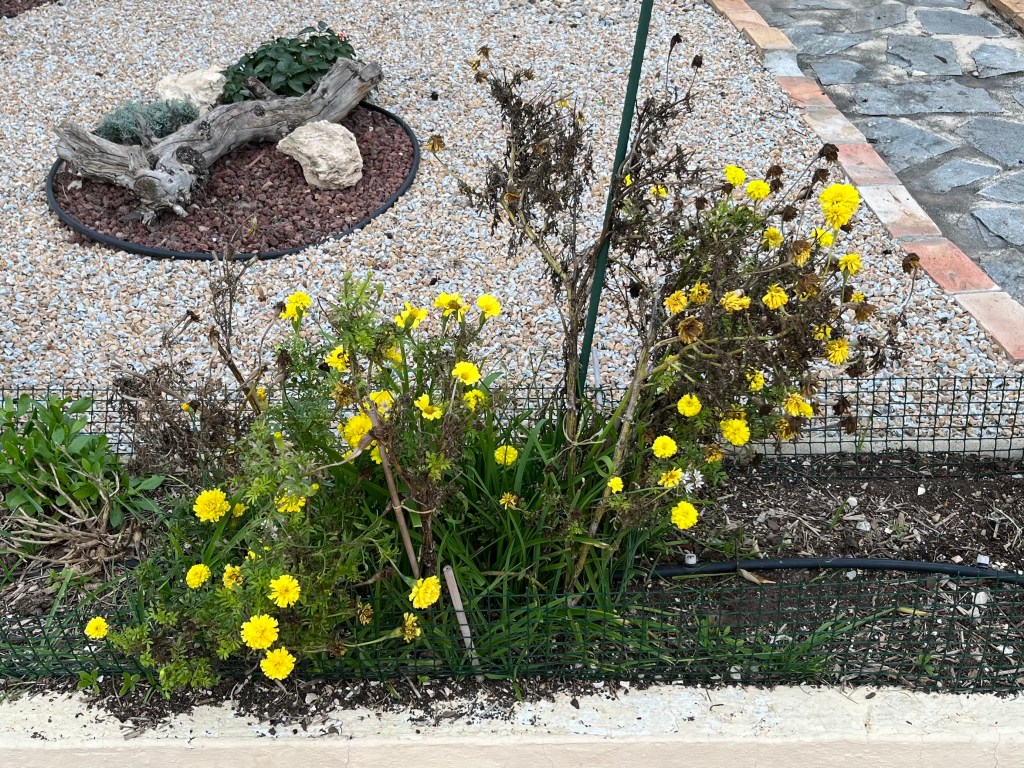
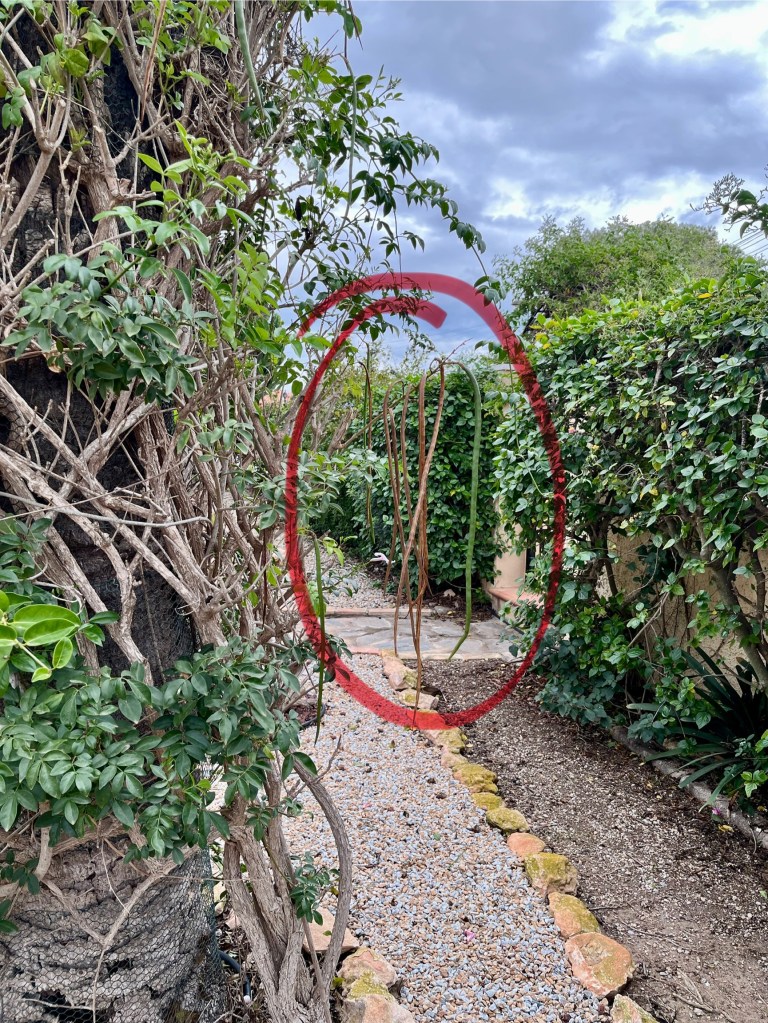

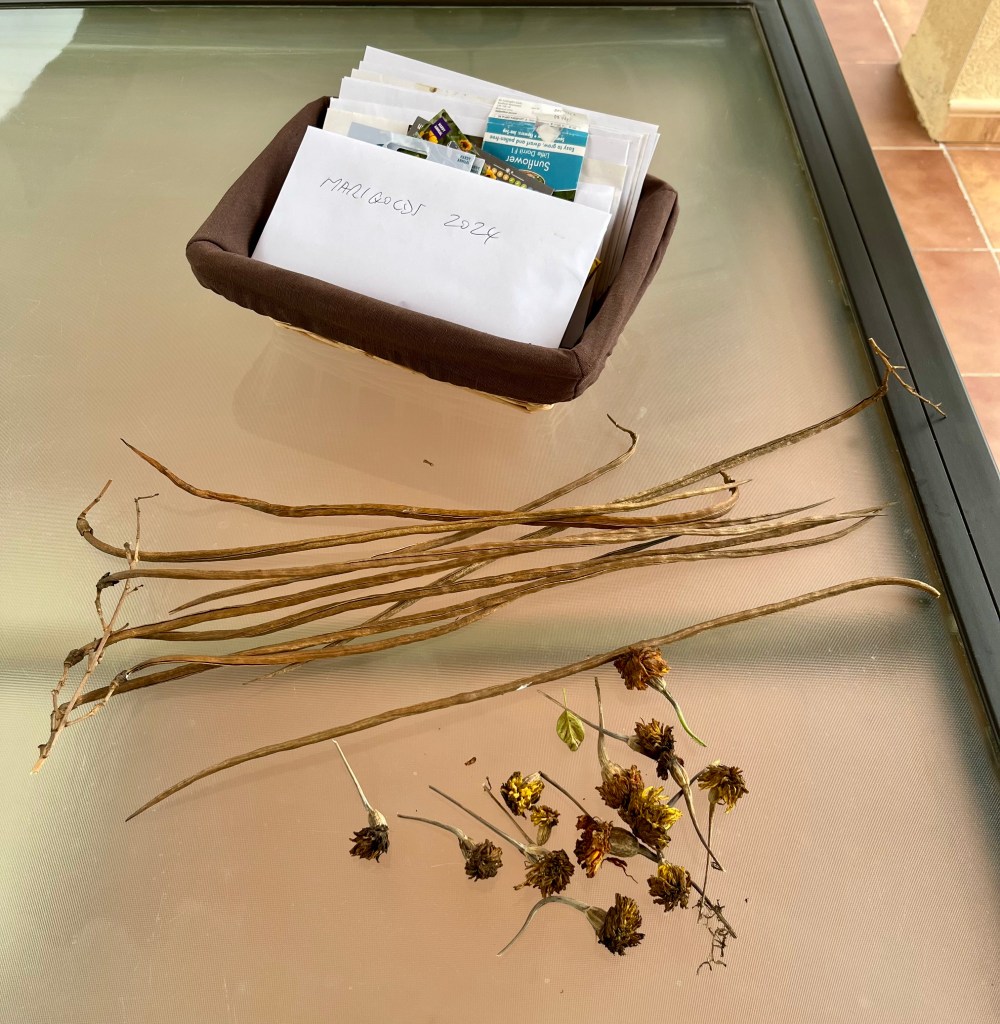
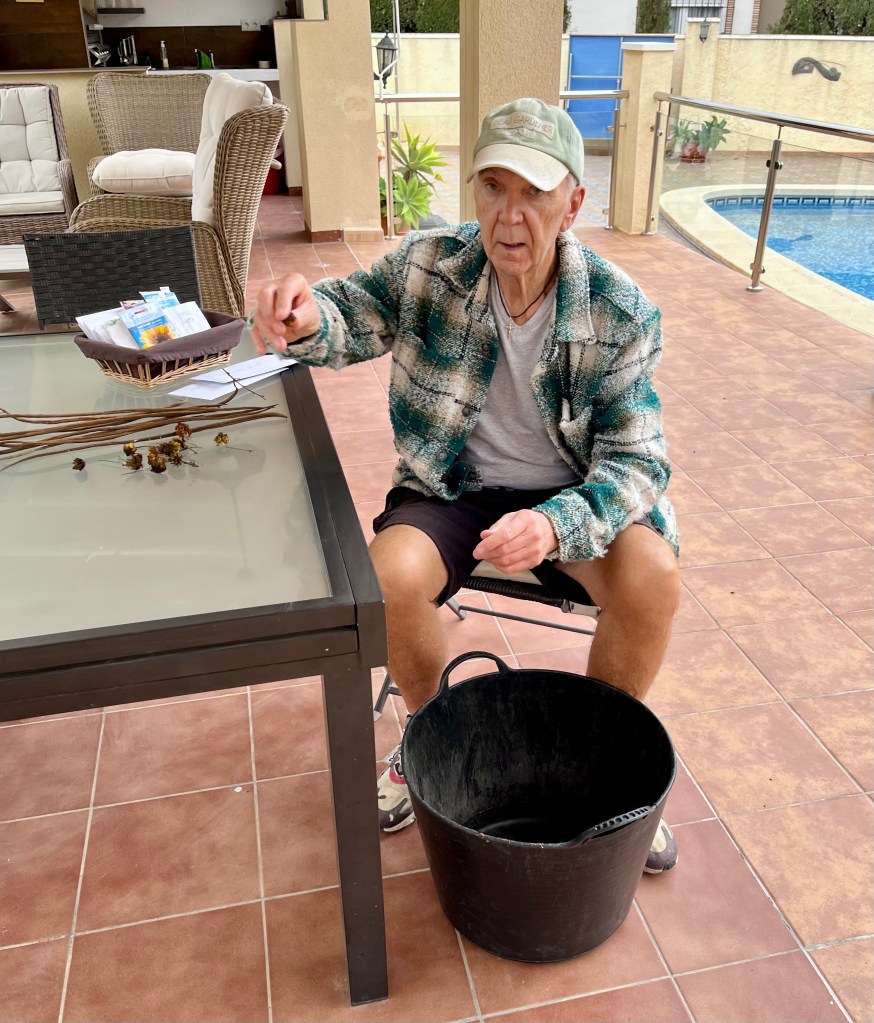


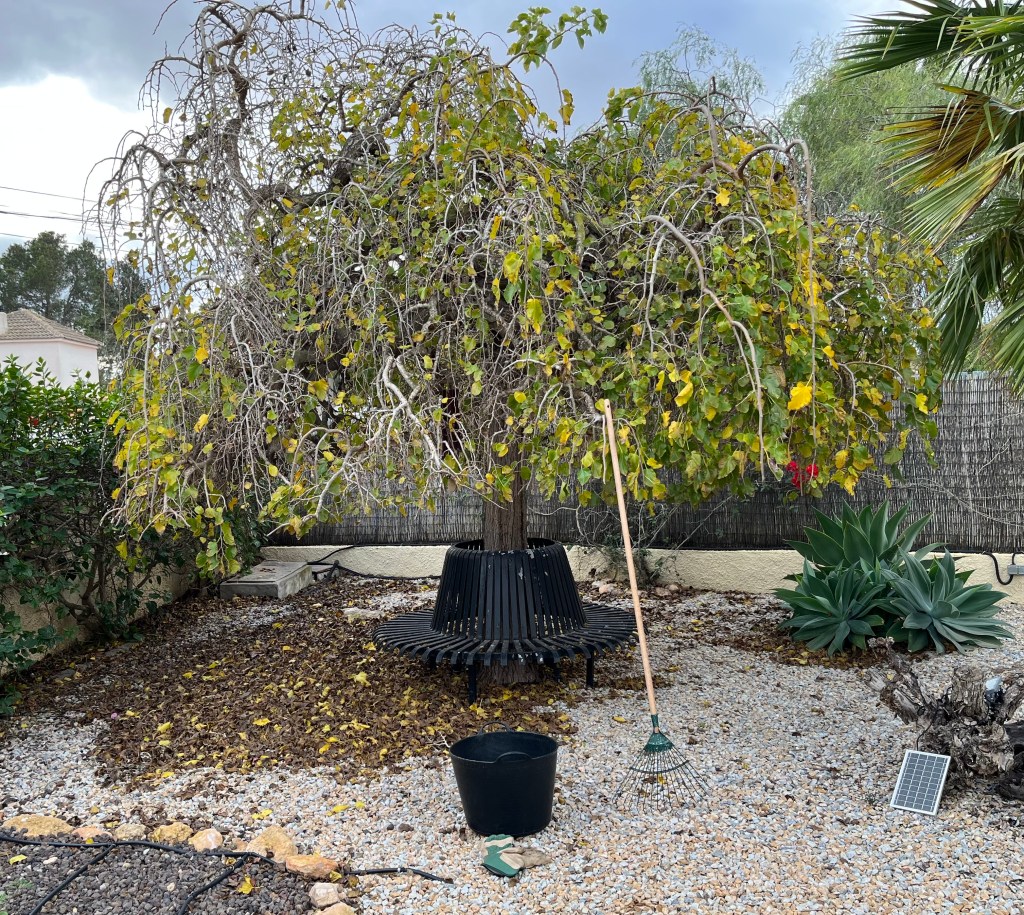
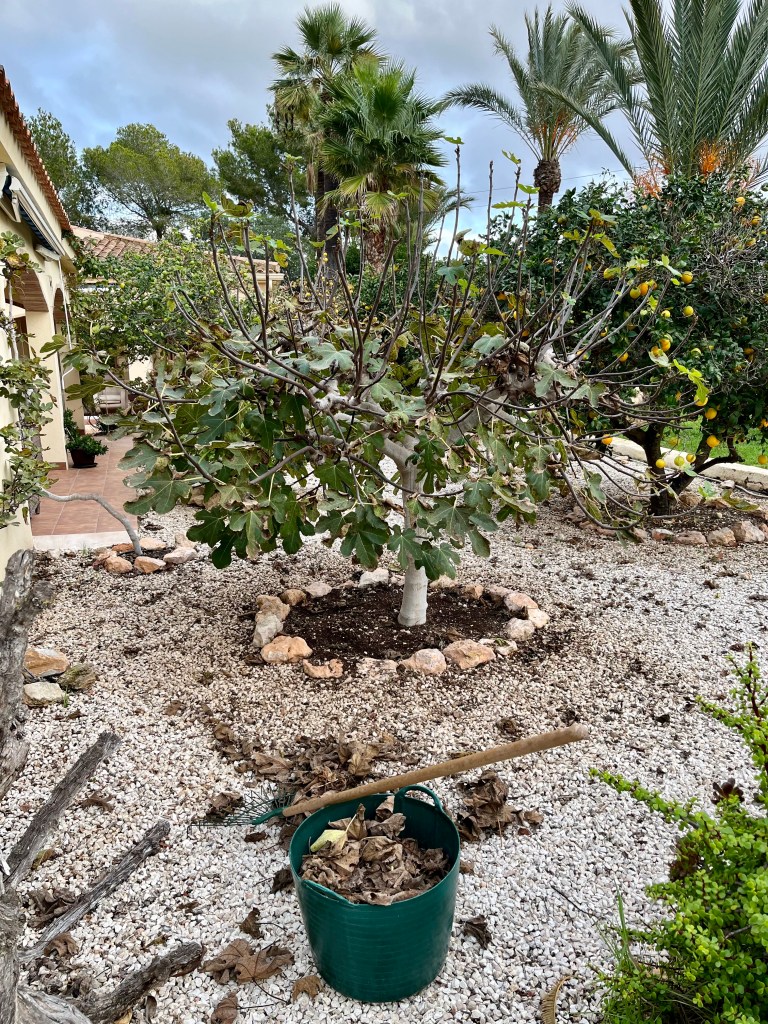
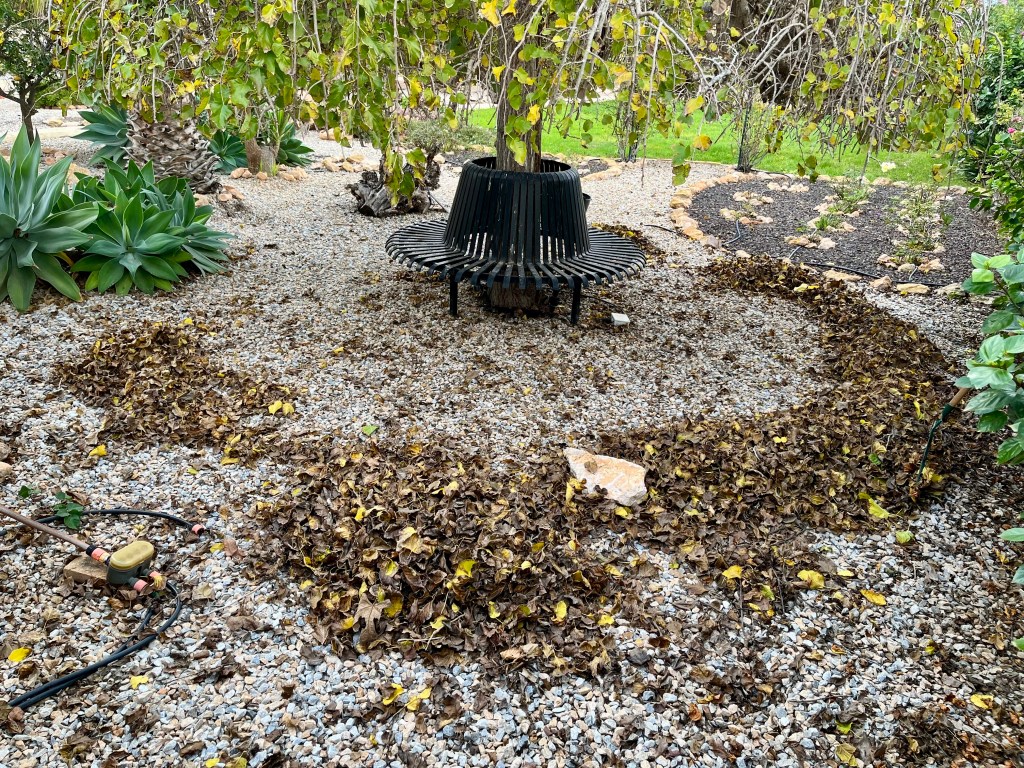


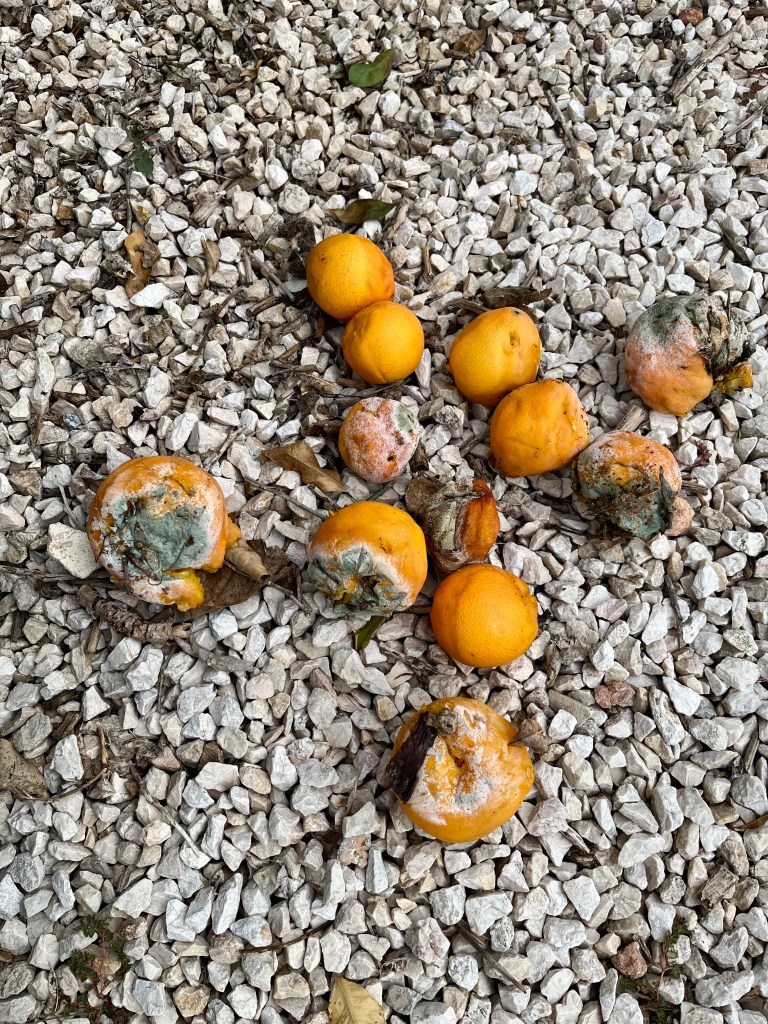


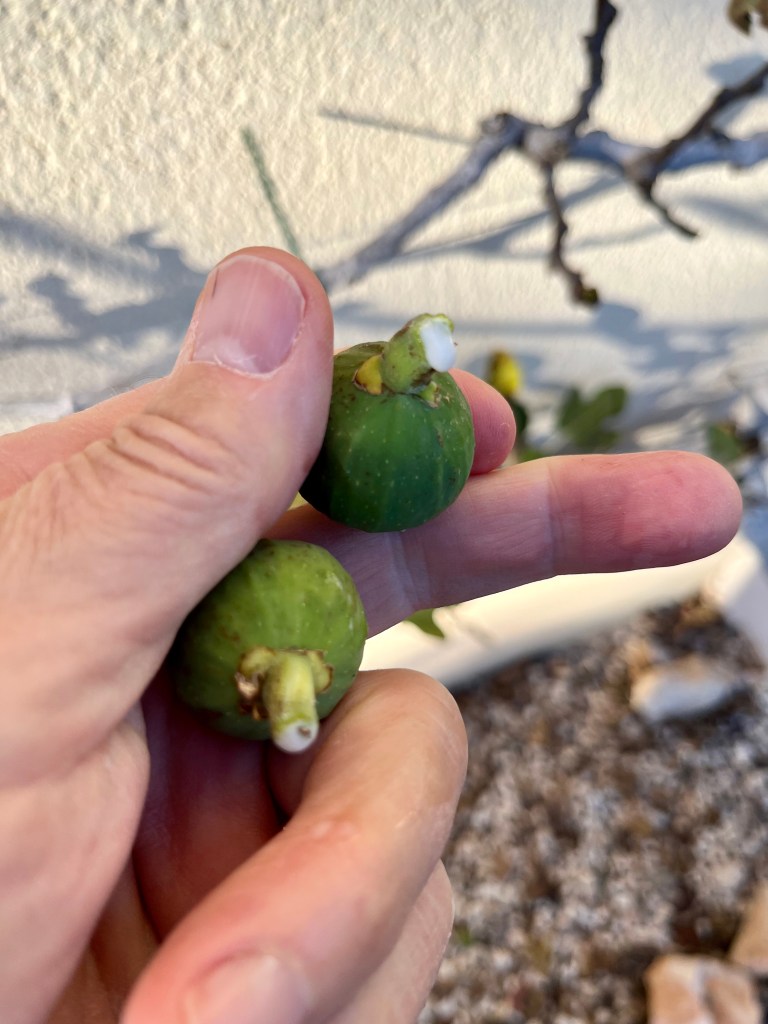

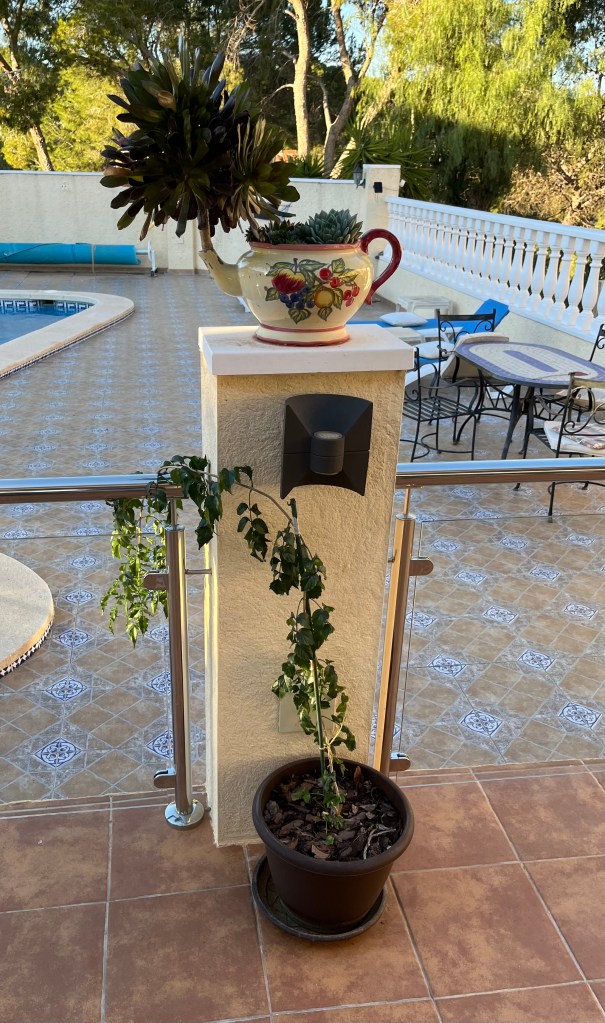

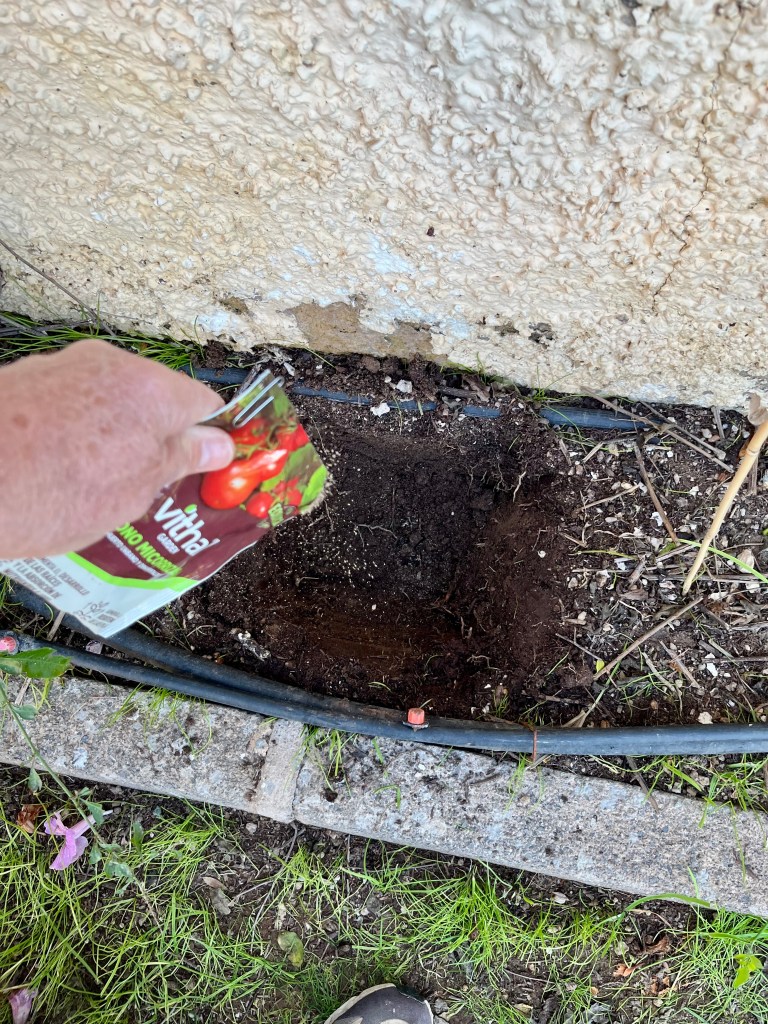
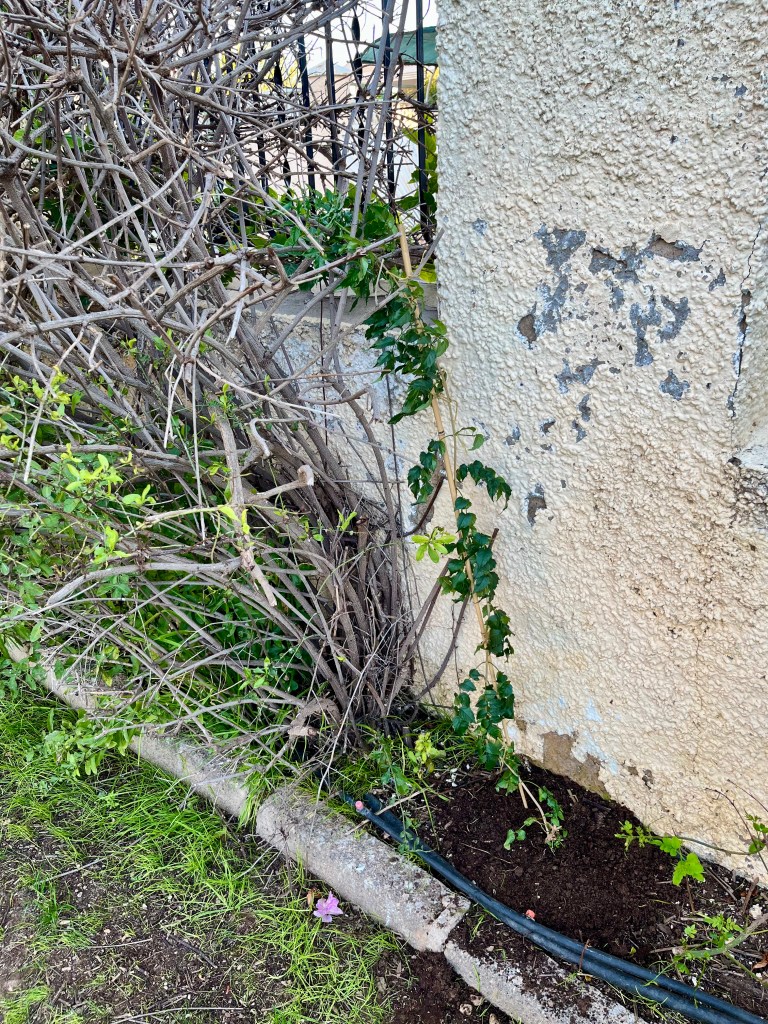
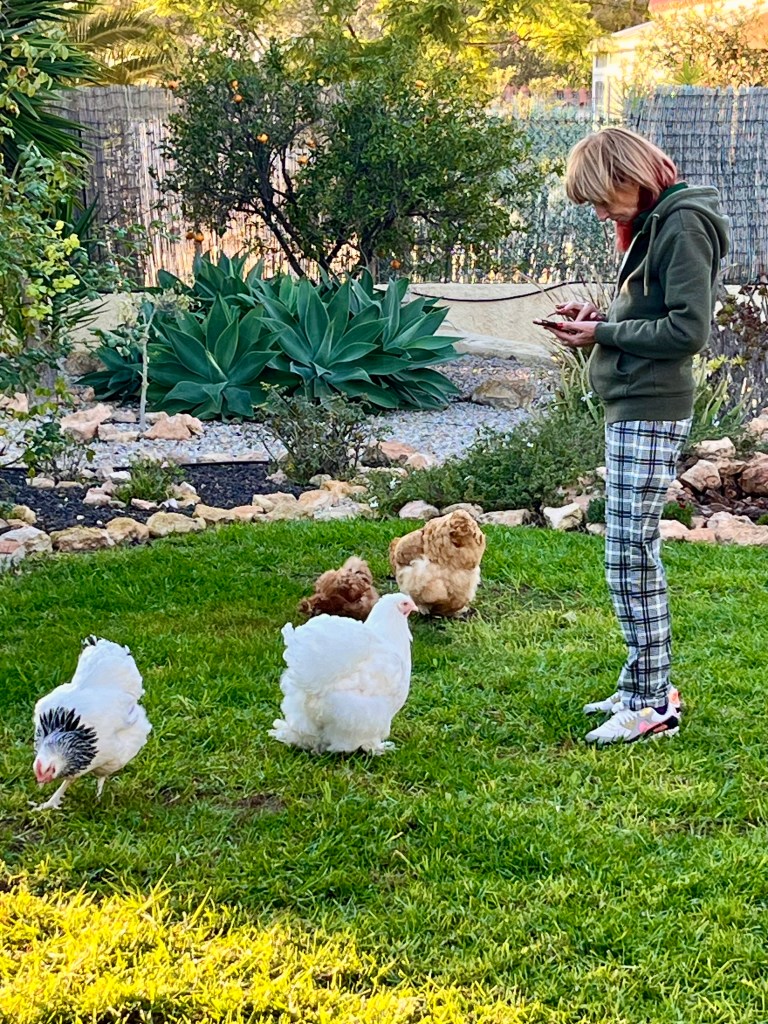

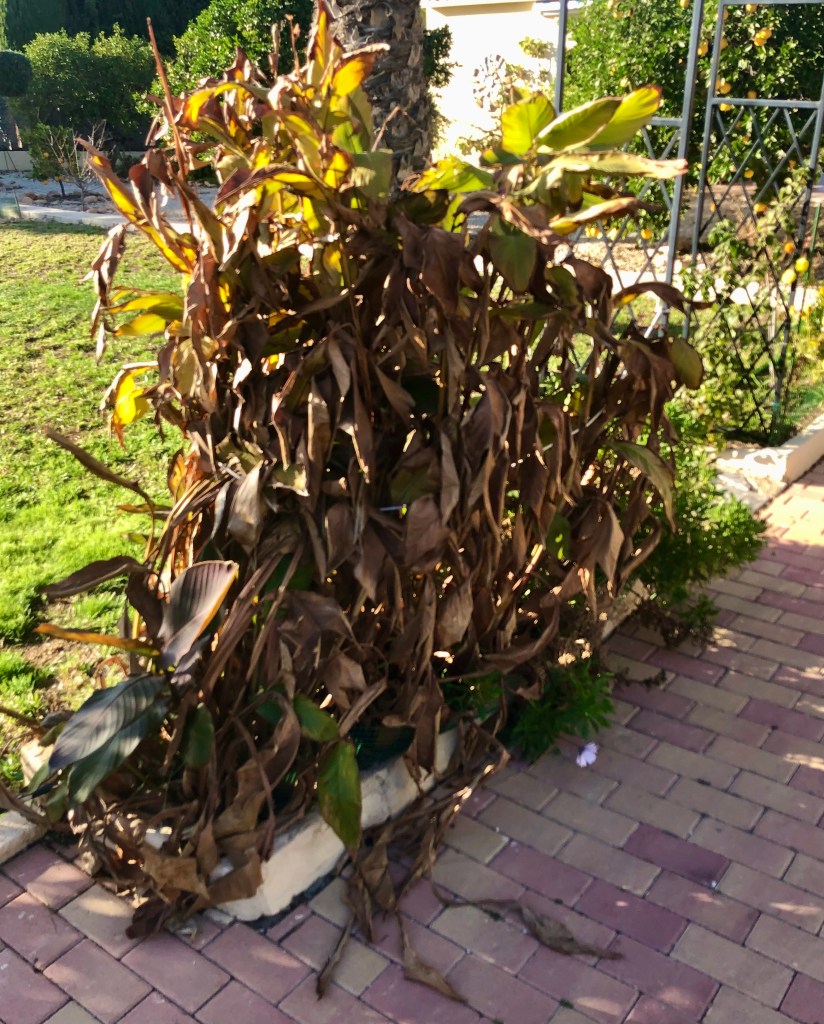
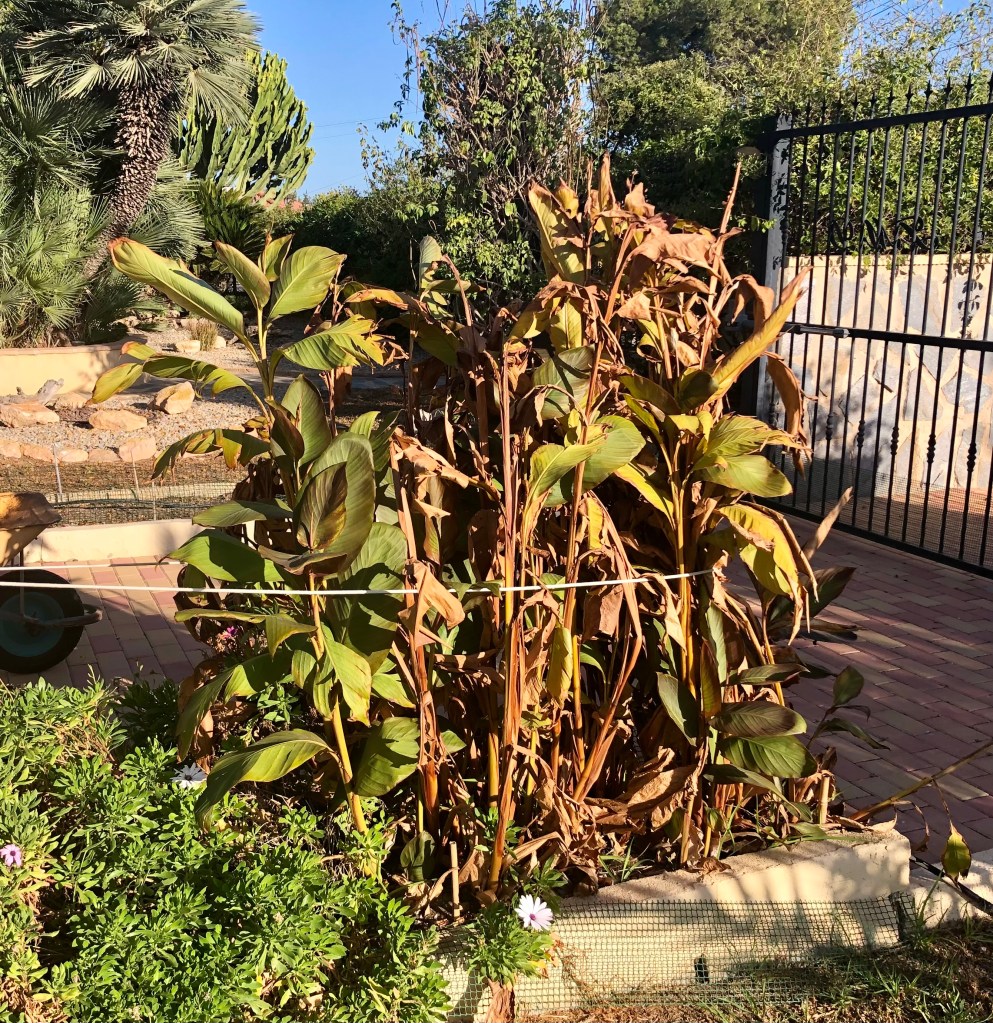
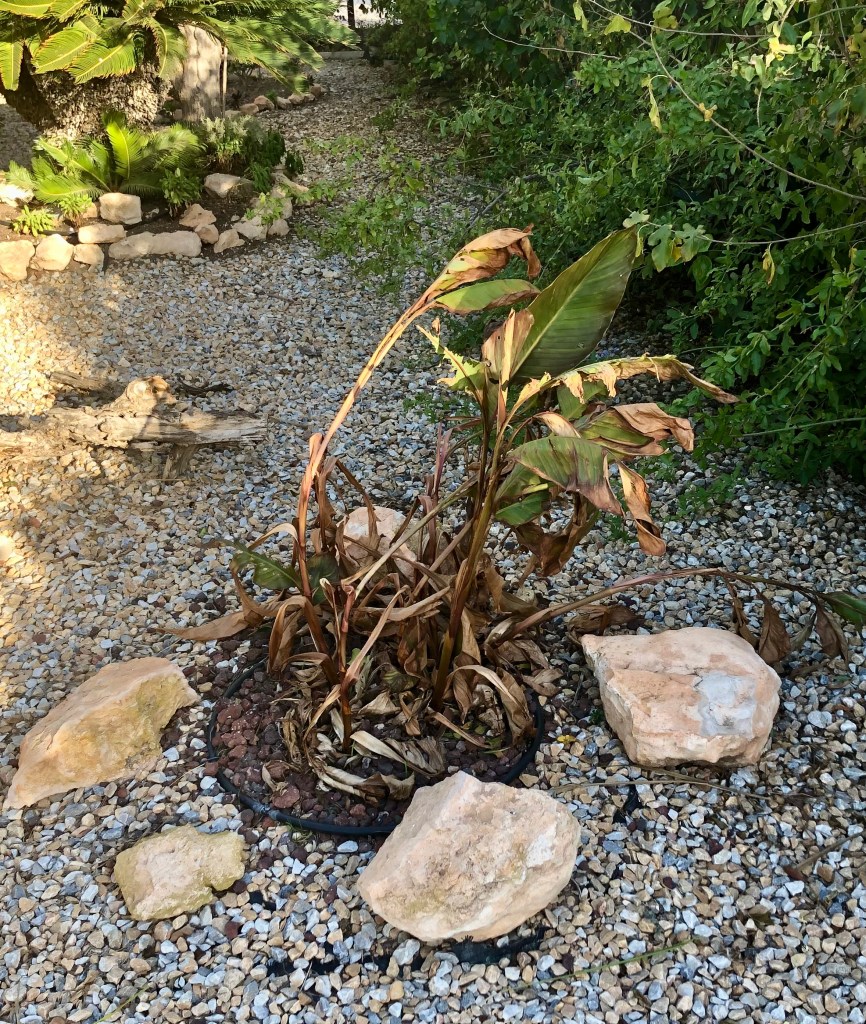
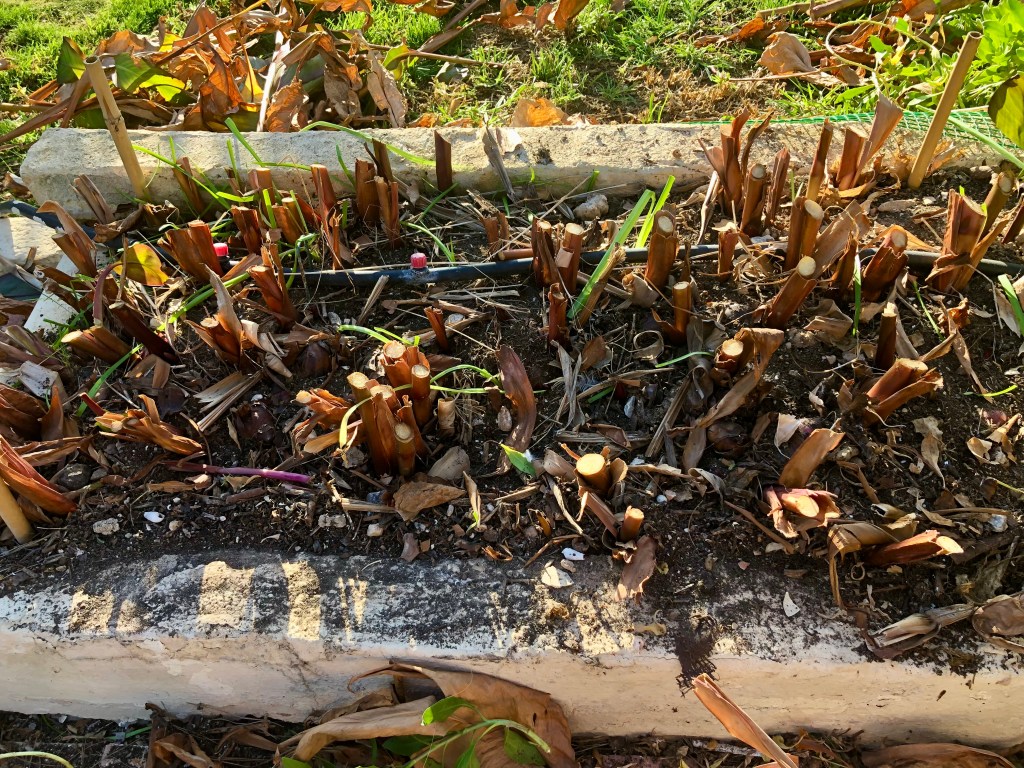


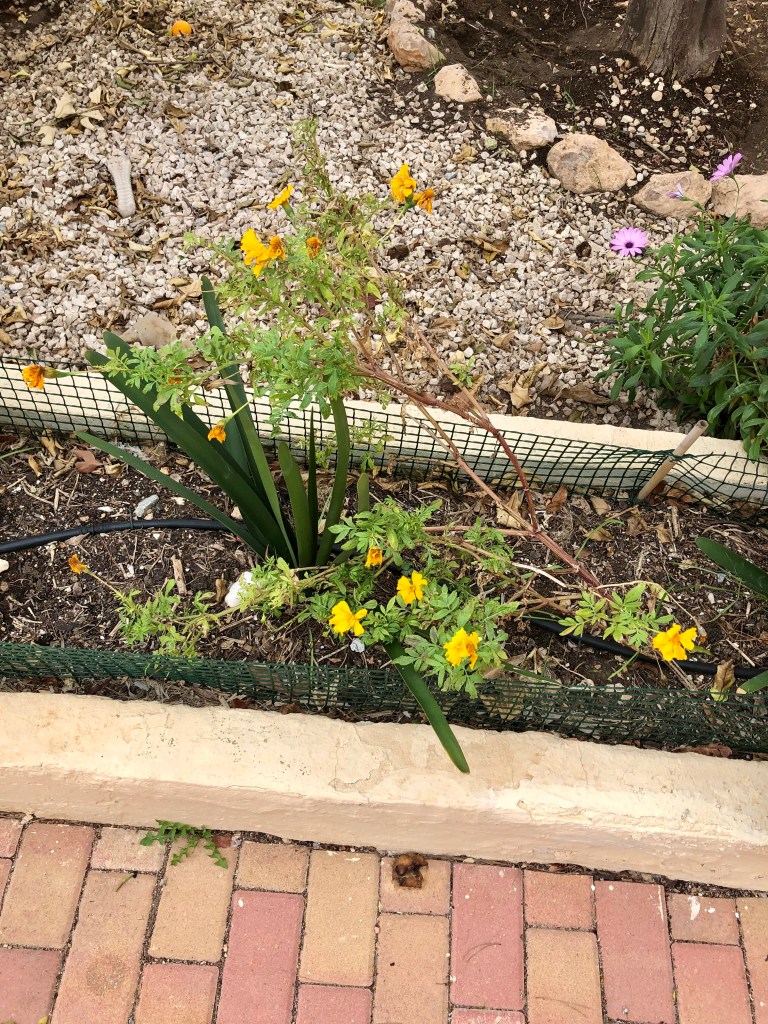


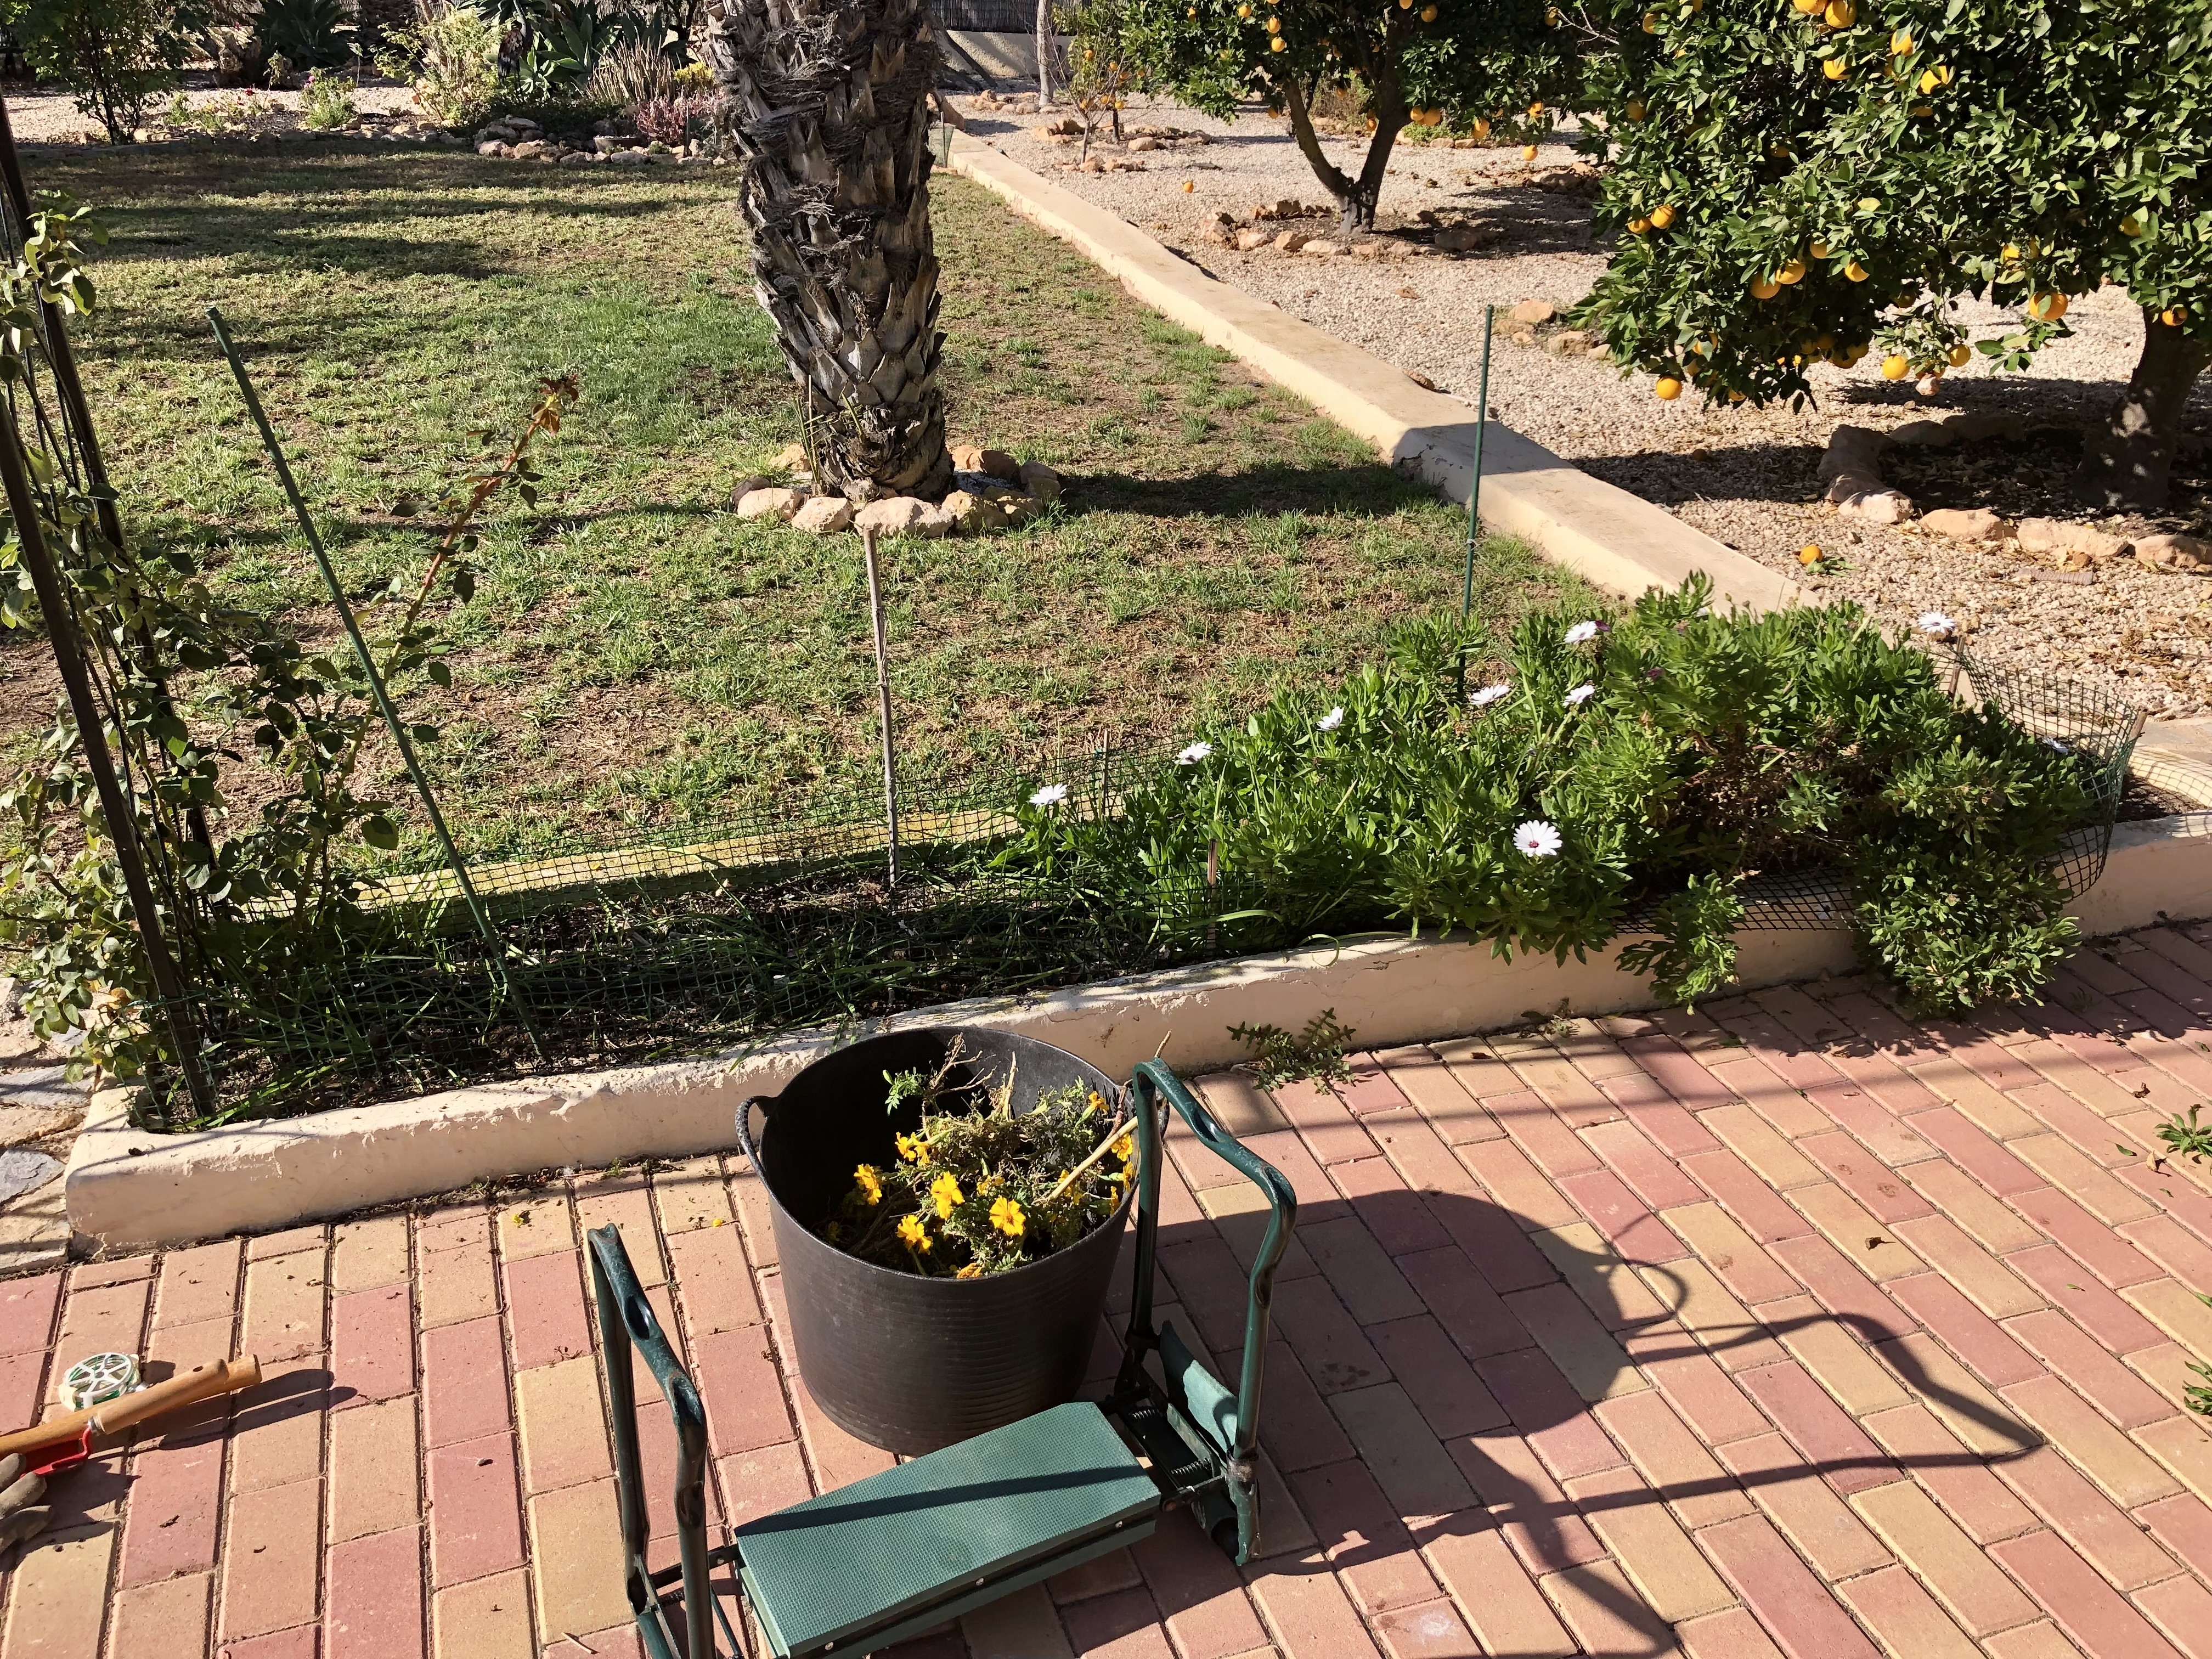


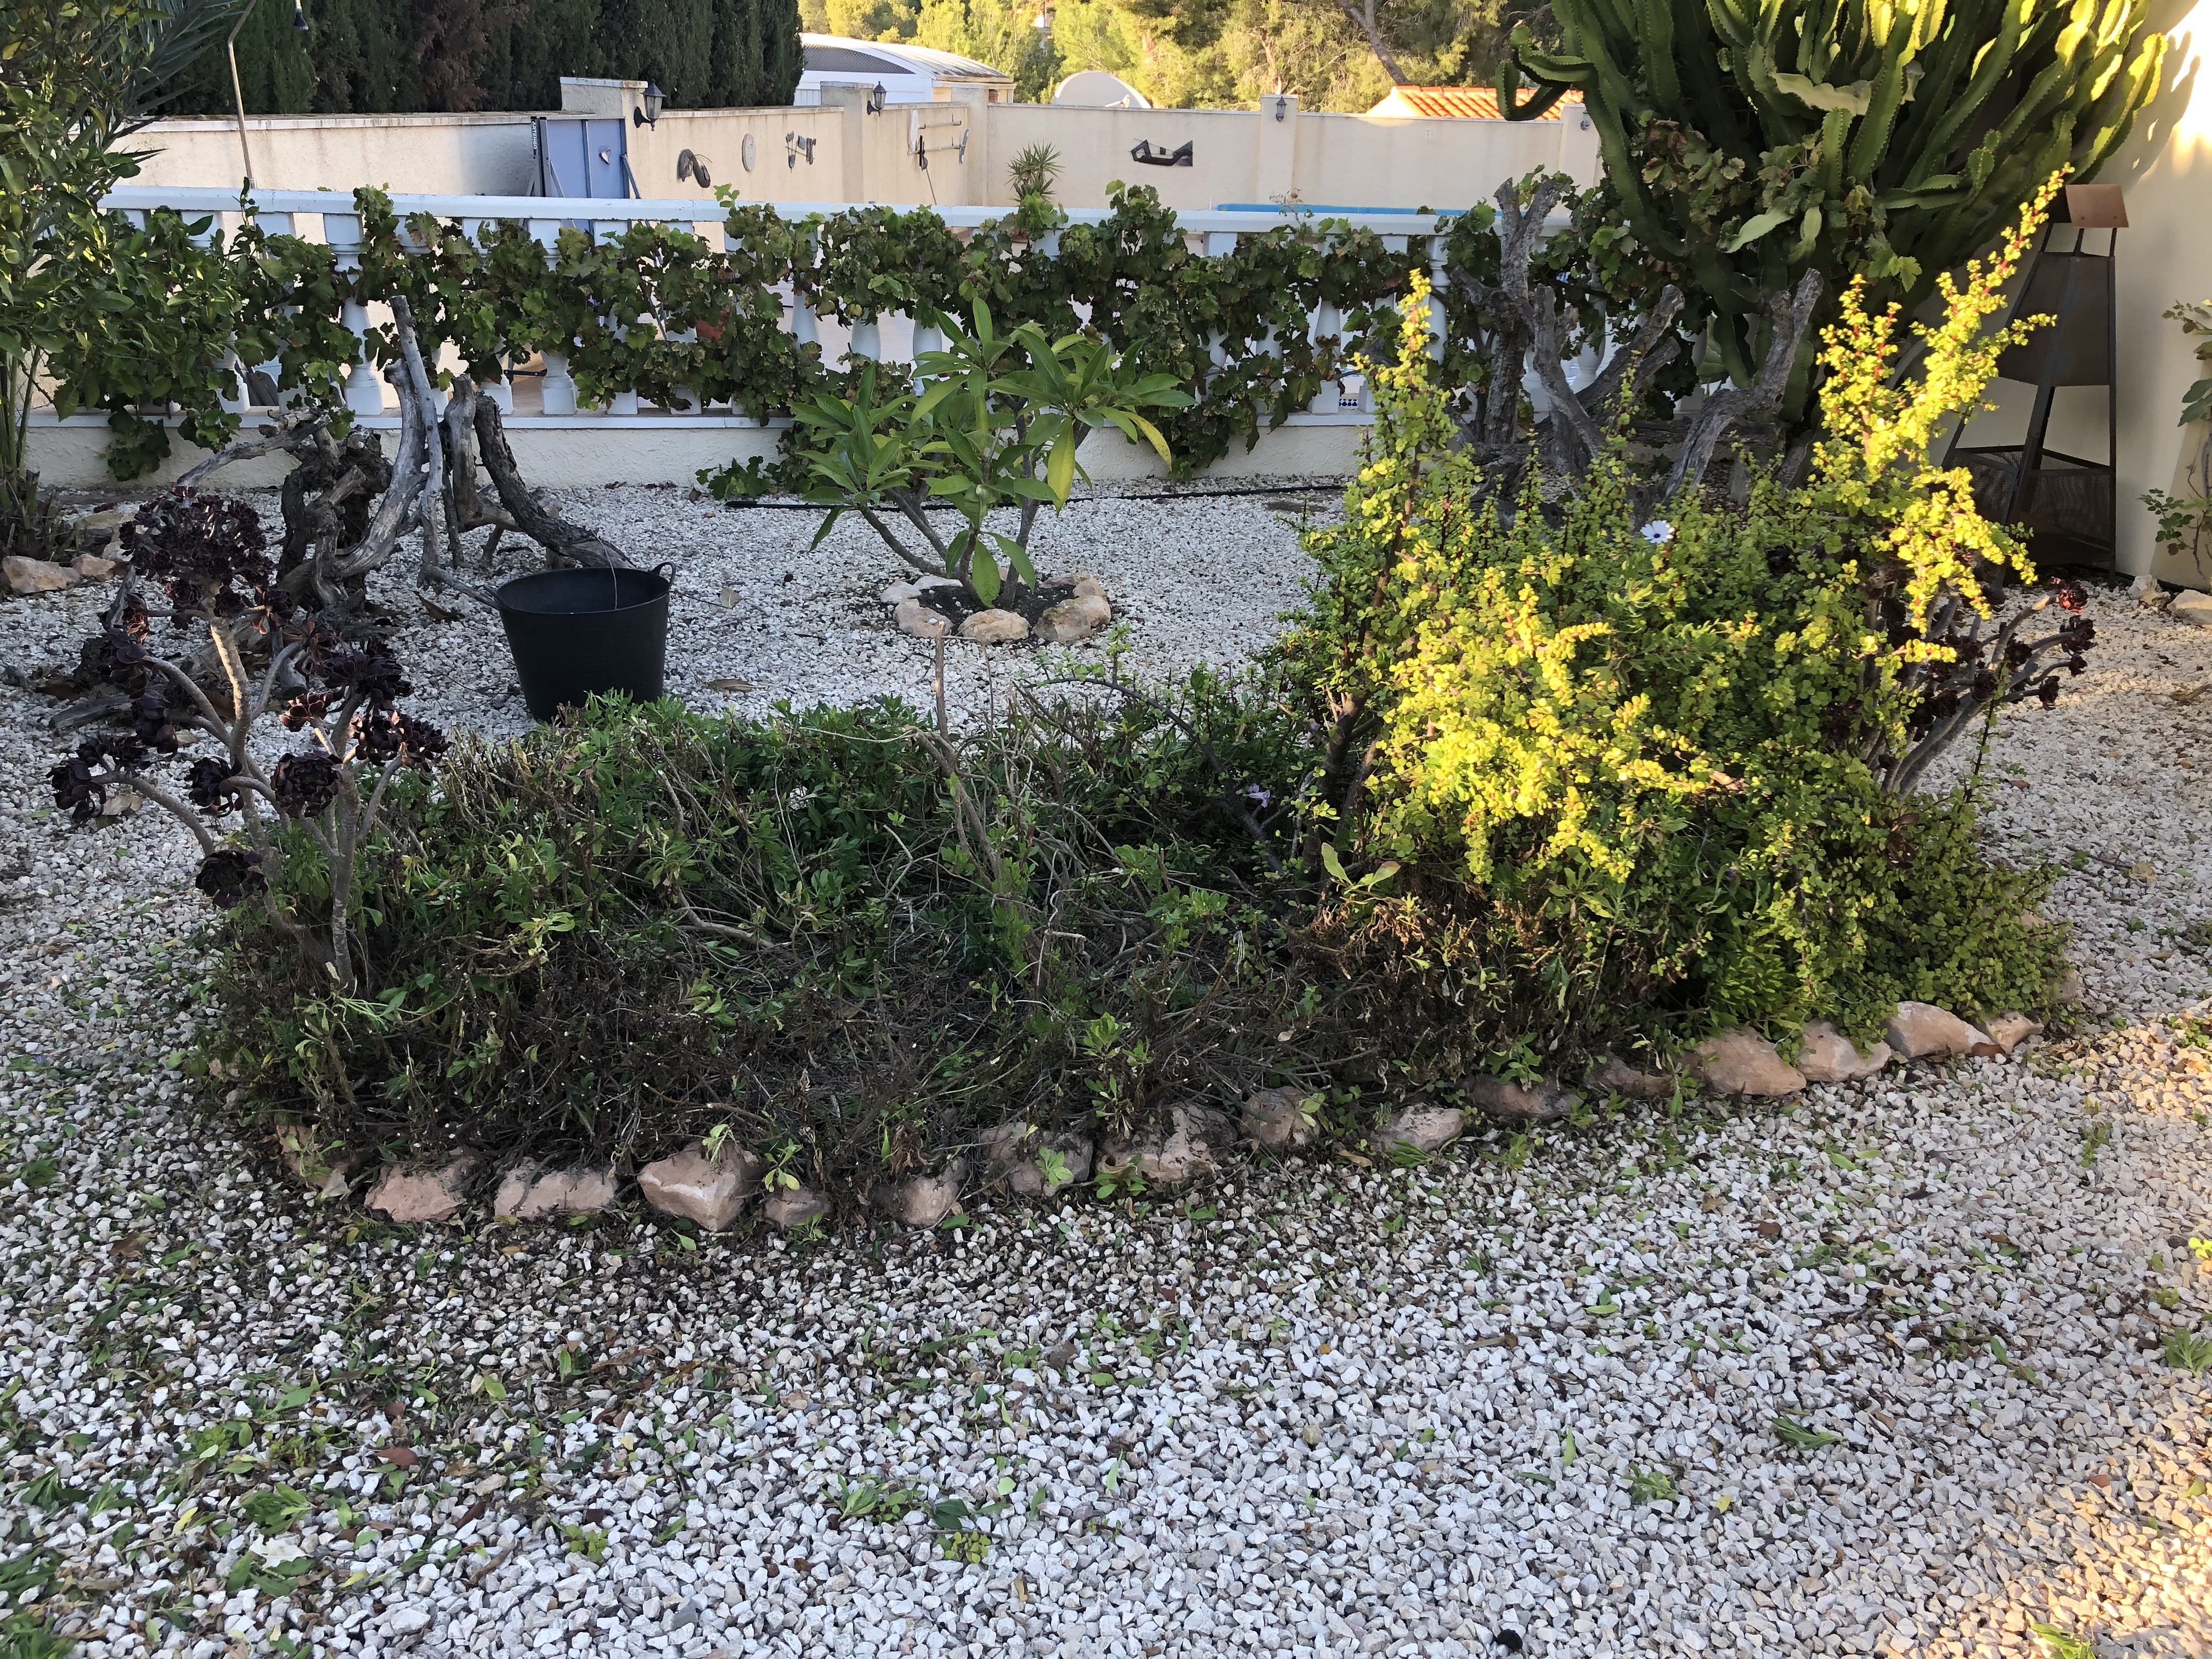

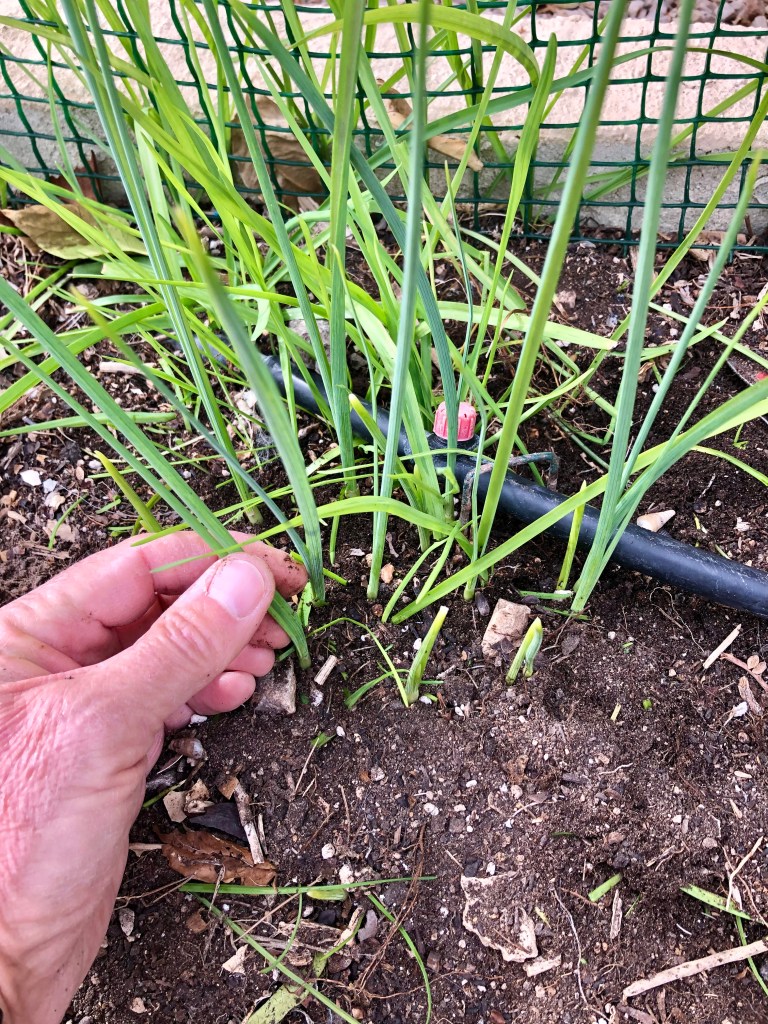

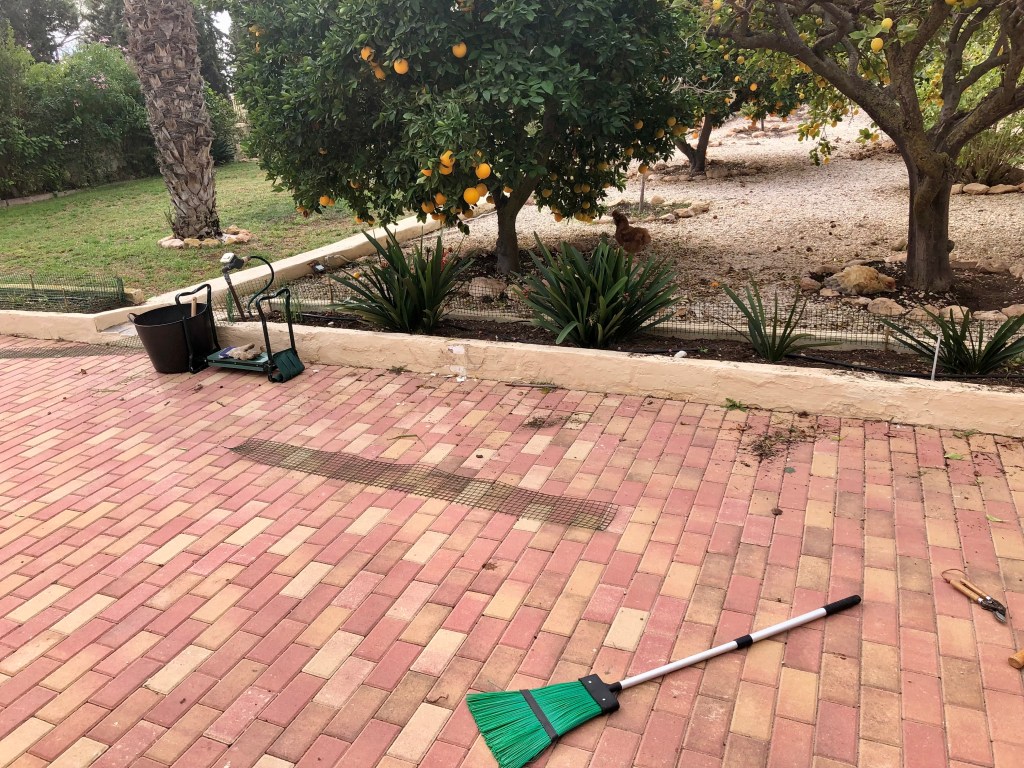


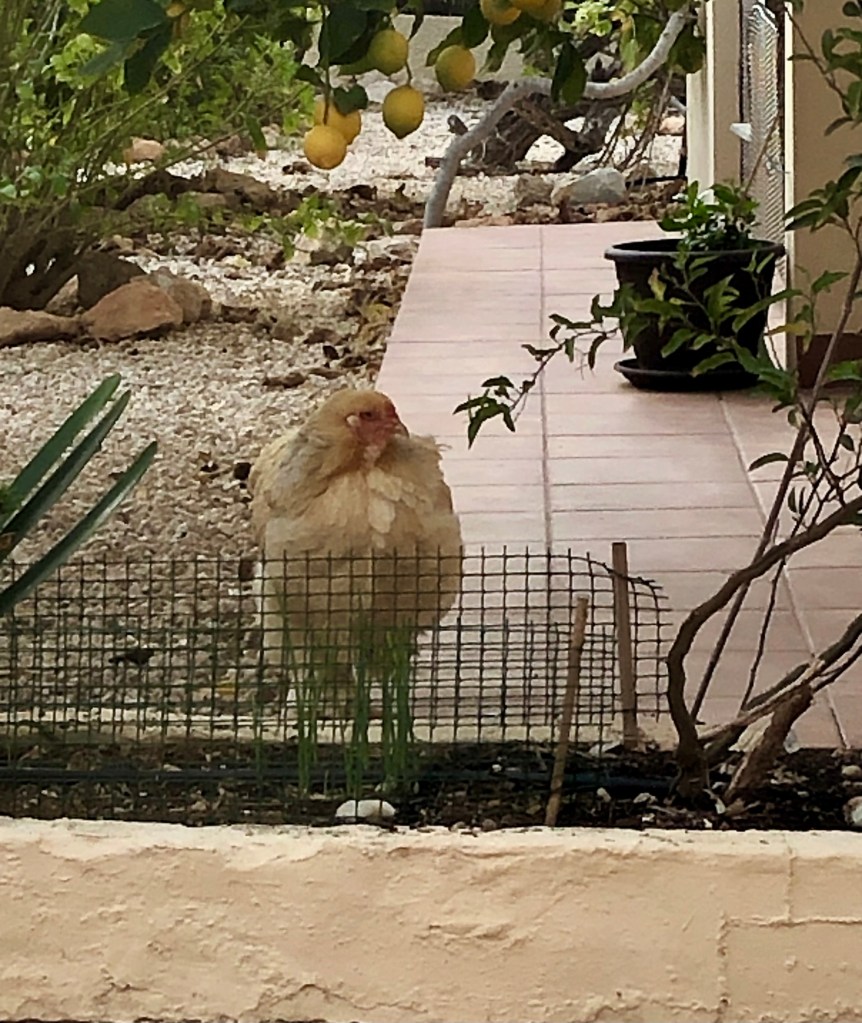



You must be logged in to post a comment.