Next Saturday 30th May is our annual Campoverde Open Garden Day. This is an event that I organise every year for my village Church. But I have been away at my UK house and Cruella (my wife) and her girls have had a sleepover and invited Blackbirds.
In what I can only assume was some sort of orgy of destruction they have wantonly dug up all my Petunia seedlings from their seed trays. I am bereft these were special ones I had grown from the best of last year.
Since the first act of destruction I have replanted twice only to be struck by other raids. I have now taken to hiding my seedlings in new places every night, but by the next morning they have been dug up again. I think one of the chickens is spying on me and informing the Blackbirds!
To be honest I am too upset to go on writing this post but I’ll will just finish off by showing you the length I have had to go to protect my seedlings. My potting bench now looks like a prison camp I have so much protection. See photos below and click on each one for a larger view.
Anyway, if you would like to come along to Open Garden we would love to see you, see poster below.
If you do want to come along to Open Garden Day and commiserate with me then just so you know Pinar de Campoverde is south of Torrevieja and just inland from the town of Pilar de la Horadada in Alicante Province. The map below shows you the location of each garden.
Yes it is true that Campoverde Open Garden Day is this Saturday 24th May, the weather is predicted to be fantastic, and there will be 7 gardens open from 11-4pm. But I can’t vouch for the veracity of the rest of the claims in the above title.
The problem is that Cruella (my wife) insisted that she should be in charge of marketing for Open Garden Day. At first I resisted this, but I eventually gave in when she threatened to set fire to the compost bins.
Her big marketing plan revolves around stunning feats performed by the chickens and the bees. She promises to start with the chickens performing complex Morris dances. This mainly involves Cruella scattering lots of chicken feed on the ground and as the chickens scurry to and fro to get it, she leaps around banging a tambourine calling out the time.
Whilst all this is going on she promises the bees will fly past overhead in formation and eventually swoop down to spell out “Don’t worry, bee happy”. The big finale involves a mixed chicken and bee fancy dress parade. Some of the bees are coming as Buzz Light year, whilst others will be dressed as Beeyonce. The chicken costumes include Hen Solo and the Beak Rider.
To be honest, I don’t know if Cruella will pull it off. So don’t come to Open Garden Day for Cruella’s spectacular. Instead come along and visit seven interesting gardens, talk to the gardeners, share knowledge and indulge in some light refreshments.
The best thing is that it’s all free, all we ask is that you make a small donation to Campoverde Church for our work with children. All the information you need is below. See you there.
The end of dance practice. I am told the dove has a starring role. The bees are just out of camera shot.
I like the Sawfly bit in the title, I know it doesn’t have the same sense of menace as the famous Texas chainsaw massacre, but it gives a frisson of excitement to gardening. Anyway, there is much to do as we are at the time of year when the garden explodes with growth and unless you are out there every day it will soon get away from you.
7th May 2025. Things I have been doing lately:
Harvesting the last citrus fruit
Starting deadheading
Planting out seedlings
Potting up Loofahs
Dealing with Sawfly
The bee and chicken pamper day
Harvesting the last citrus fruit. By now your citrus trees should have blossomed and now be setting fruit. This is a good time to take off all of last years oranges. You don’t have to do this as the tree will eventually reject last years fruit, but why let the tree waste energy that could be going into this years fruit. So get your ladder out and pick off those high up fruits you have been leaving. The photo below shows the last of my crops. Lemons I leave a bit longer.
You can’t see me as I am in the tree.
Starting deadheading. This is not the main deadheading season as this will really hot up as we go through mid-summer. But now is the time to deadhead spring flowers and early summer flowerers like roses etc.
I normally start by deadheading and tieing up spring flowering Iris. I have both Spanish and Dutch Iris, but their treatment is the same. Deadhead the flowers individually as they are spent, and when most are finished tie them up to let the stems and leaves decay and return the nourishment to the bulbs.
The photos below show where to deadhead these particular plants.
Once the Iris are out of the way the next job is to prune both Dianthus and Ice Plants. Both of these will have flowered early and provided you with lots of joy. Take off the spent Dianthus and Ice plant flowers using either shears or long one-handed shears. The benefit of this particular tool is it allows you both to shear lots of dead flowers at the same time, whilst being able to deadhead individual blooms.The photos below show me in action.
The final early summer bloomer is roses. Try to deadhead roses every day as this will encourage repeat blooming. Depending on your rose variety some will bloom once and others will repeat bloom throughout summer. For both types the deadheading is the same. Move your secateurs down the stem of the rose you want to deadhead until you meet the next leaf node; cut here as it will leave as little dead stem as possible. The photos below show the process.
Planting out seedlings. May is the last month when you should be planting out seedlings. After this month it will just be too hot and they will wither. When I plant out seedlings, I first make space in my flower beds by ruthlessly taking out plants that have just finishing flowering. If I waited till everything finished flowering it would be too late for seedlings. So be brave and make space.
To make room for seedlings I take out huge clumps of Osteospermum. I then plant Marigolds, mini sunflowers and Alyssum in the new space. These will eventually grow and fill my flower beds with blooms all the way through till October. The first photos below show the removal of the lovely Osteospermum. These are followed by examples of the various seedlings going in.
Potting up Loofahs. I enjoy growing Loofahs for two reasons: First they are unusual and provide flowering interest in the garden. Second, I sell the subsequent loofah plants to my wife (Cruella) and others from her Coven who use them to defoliate nose warts from the ends of their noses.
Plant loofahs seeds in four inch pots by pushing the seeds a finger nail deep into compost. They will grow quickly and you will need to pot them on when they are about two inches high. Loofahs do not like having their roots disturbed, so fill your new pots with compost around the existing 4 inch pots and then replant your loofahs into the subsequent pot shaped space. See photos below.
Dealing with Sawfly. If you have roses then you need to keep an eye out for Sawfly caterpillars or they could decimate your plants. Sawfly specialise in chomping through roses and they have a very simple but effective strategy.
Mummy Sawfly lands on your rose stem and saws a sliver from the stem and lays rows of eggs into the exposed stem. Once the eggs hatch as caterpillars, they have one mission to chomp through your rose leaves as they make their way to the ground. Once at ground level they burrow into the soil and the whole process starts again next summer. The first photo shows the caterpillars chomping on my roses, whilst the second shows the type of damage they can do, together with some of the culprits.
Most caterpillars you can just pick off your plants and throw them to the ground. But with Sawfly if you do this then you are fulfilling their life cycle. Instead you must break their life cycle by either spraying or plucking them off and drowning them in a pot.
Luckily I managed to arrange my own Sawfly massacre by eventually persuading Cruella’s chickens that they were tasty. I have to tell you this was no mean feat persuading chickens that are hand fed grapes and strawberries that the wriggly worm like things I presented to them were tasty. I even ended up shouting at them that there were chickens in Africa that would be overjoyed to have Sawfly caterpillars.
Eventually after covering a few of them in chocolate I persuaded Helga my favourite chicken to try a few. The photo below shows the start of the Sawfly massacre as Helga tentatively sniffs the caterpillars before being joined by the others in consuming every one.
Helga bravely tastes a sawfly caterpillarA feeding frenzy
The bee and chicken pamper day. Well, the bees are here, and I am now the proud owner of 2 hives, 20,000 bees and two queens. It has taken a year of planning and much learning but I made it. Cruella is beside herself since she found out that most of the bees are girls. I mentioned in my last post that she and her chickens were planning a massive welcome ceremony for the bees, and they out did themselves.
Apart from the banners and balloons, there was a special buffet, a fancy dress competition and bunting over each of the hives. By the time both Cruella and I had got all our bee keeping outfits on and placed the Bees in their new hives, Cruella decided that they would be too tired for the fireworks so we just let them settle in. In case you were wondering what we look like in our new outfits I took a photo for you.
I sent our idiot son this photo and he reckons we look like demented Teletubbies.
The next day Cruella rose early and by the time I got up she was already well into her girl pampering and wellness day. This started with the chickens getting a pedicure and then having nail polish applied to their toenails. At the end of it all Cruella asked me whether bees have toenails? I confessed that I didn’t know as I hadn’t got to that stage in my training course.
The early afternoon was spent in what Cruella termed a “Power Brunch”; she insists all her girls will eventually get professional jobs. As far as I could see this consisted of what Cruella calls a balanced diet for the chickens: strawberries, grapes, mulberries and infused juices. The bees got honey and I got some stale crisps.
After the brunch, the afternoon involved mainly chicken and bee therapy sessions, which included topics such as:
Bee assertive
Never Chicken out
Striving for Eggcelence
How to stand out in the hive
The day ended with Cruella excitedly announcing there would be a grand sleepover with her and her girls joining the bees down by the hives. I wasn’t invited as it was girls only; I was glad really as bees snore! The photo below shows Cruella and her girls heading off to the sleepover. I went to bed early but was kept awake all night by renditions of “I will survive” and “ girls just wanna have fun”.
Cruella is cuddling Helga as she has difficulty sleeping
It’s that time of year again when the good people in our village of Campoverde are persuaded by me to open their gardens to the public. As Cruella (my wife) is away at our English house pestering the idiot son I have been able to get on with things. The only slight hiccup is that she is determined that Open Garden Day should be retitled ChickenFest 24 and that her girls should take centre stage. I am not sleeping at night with worry, she is ordering special costumes from designers and she is calling it “Cluck Couture” she says she will be the next Victoria Beckham; I fear the worst. Anyway on with the gardening; more details about Open Garden at the end of this post.
11th May 2024. Things I have been doing lately:
There is lots to be getting on with in the garden as summer begins to make its appearance, including:
Cloud pruning your olive trees
Keeping up the deadheading with Dianthus and Chrysanthemum
Filling gaps in your hedges
Dealing with False Garlic
Admitting it has been a terrible season for seeds
Campoverde Open Garden Day
Cloud pruning olive trees. If you have olive trees and you don’t really use the olives, then you know what a mess they can make of your garden with squashed rotting olives mixed with bird poo. An alternative to this is to cloud prune your tree into an interesting shape that is aesthetically pleasing to you.
I cloud pruned my olive tree a number of years ago and once you have done the initial shaping, all that is required is to lightly reshape two or three times a year. The photos below show my olive tree before and after its short back and sides. Click on each photo for a larger view.
That looks much better
Keeping up the deadheading with Dianthus and Chrysanthemum. Although we are not at peak deadheading season you will still need to deadhead plants that are in flower if you want to see repeat flowering. Two early flowerers here in Spain are Dianthus and Chrysanthemum. Both are dealt with differently.
With Dianthus you should carefully nip out dead flowers using your thumb and forefinger. If you try to use secateurs then you will definitely damage the twin flower sitting beside the spent one. I have mentioned before about growing your thumb nails long in the summer, and this is why; your long thumbnails ensure you always have home grown secateurs with you at all times. The photos below show my thumbnails in action. Click on each photo for a larger view.
Chrysanthemum are different. Because they flower so lushly and in a dense flower formation you can be fooled into thinking that once the flowers start dying it is all over for another year. But this is not the case, if you push back the dead and dying flowers you will see another flush of little buds ready to come forward.
What you need to do, is on a daily basis snip off the dead flowers and a portion of attached stem to lower the flowering level to let light into the news buds. It is also a good idea to give the plant a good feed to encourage the new flush of flowers. The photos below show me exposing the next generation of lovely flowers. Click on each photo for a larger view.
If you look carefully you will see the next little buds
Filling gaps in your hedges. Hedges are an important part of my garden as they provide a riot of colour throughout the summer. I have deliberately packed my hedges tight, as this forces them to fight for space, light and air, which in turn produces profuse flowering.
Unfortunately some times a plant dies (not often with hedges), but I recently lost a Plumbago which would have left a dead space in my summer hedges. Normally I would have had to take a cutting from an existing plant and grow it on, all of which would have taken time. Fortunately, my friend Pip from Church had a Jasmine which she was dissatisfied with and kindly donated it to me.
Normally I would be looking to plant hedging plants in November or at the latest January. But needs must. My starting point was to use a chainsaw to cut the new plant some breathing space within the hedge. This will allow it to get established this summer before the rest of the hedge comes rushing in. The photos below show the gap created. Click on each photo for a larger view.
Once I had made space then it was necessary to dig out a decent sized planting hole, fill it with water, let it drain and then dig in some good compost. Hedges are generally greedy feeders and they will deplete the soil, so it is necessary to give your new plant the best possible start by replenishing the soil. The photos below show the new plant settling in. By the end of summer the gap will be completely filled with hedges. Click on each photo for a larger view.
Dealing with False Garlic. False slender garlic is a weed. But, like many weeds it has a lovely flower. I don’t really mind it growing in the only lawn I have left (thank you chickens). But I don’t want it in my flowerbeds. If you are not in Spain this won’t be much of a problem to you. But here in Spain it is a pain (alliteration).
False garlic grows from a tiny bulb that in turn grows from a set seed. Short of digging the bulbs up up there is not much you can do. However, over the years I have found that by pulling the flowers out stem and all, you can gradually outcompete and exhaust the bulb. It is important that you pull out as much of the stem as possible. The plant has spent so much energy creating the stem, so when you remove it, it exhausts the bulb trying to grow another. It may take years but you will eventually win the war. The photos below show me involved in a minor skirmish. Click on each photo for a larger view.
Excuse the lawn I am experimenting before big changesMake sure you pull all the stem
Admitting it has been a terrible season for seeds. I don’t know about you, but it has been a terrible year for seeds. Everything has either not germinated, or if it has the seedlings are scrawny little things. Normally at this time of year my potting bench would be filled with trays of healthy seedlings waiting to take their place in the garden.
Currently everything I have is now planted in the garden, and even then they do not look that healthy. Apart from the early season chicken sabotage, it has just been one of those years. The photos below show my seedling season ending with a whimper. Click on each photo for a larger view.
The last of my weedy cropI call this my tower of failure
Campoverde Open Garden Day. Yes, it is that time of year again when I want you all to come along and have a wander around some of the nice gardens here in Pinar de Campoverde. This is not a competition and these are not show gardens, but just some local people who are keen gardeners opening their garden for the day for a good cause. All the details are shown below, and you will have a lovely day.
The only problem I am still having to deal with is Cruella (my wife) insisting that the day should be turned into ChickenFest 24“a clebration of all things chicken”. I mentioned earlier that she is ordering some special costumes for “her girls”, so called Cluck Couture. She has been emailing me asking me to measure her girls so she gets the right sizes. I have tried my best but to be honest I don’t know where a chicken waist is.
Tango the lonely blind Labrador asked me to ask her if he was to have a special costume for the day. When I asked her she just laughed and said “I’m not wasting any money on that blind mutt”. When I told him he wasn’t to have a costume, he tried to put a brave face on it, but tears sprang into the corners of his little milky eyes and dropped off the end of his nose.
Anyway the upshot of it is that I am trying to run him up a costume from some old compost sacks. It may not be much, but at least he will have a cape and a little flower pot hat. The photos below show the bloody chickens waiting to be measured up for their Cluck Couture and poor Tango the lonely blind Labrador dreaming of his costume. Click on each photo for a larger view.
They scoff at TangoHe just turns his head away and the tears flow
Oh, I nearly forgot below are the details for Campoverde Open Garden Day. I look forward to seeing you there.
I’m back, but to be honest I wish I hadn’t gone away. Despite my leaving detailed care instructions, (Cruella my wife), has systematically neglected my garden. She has neither watered, weeded, sprayed or basically just loved the garden. She knew that I was preparing for this years Campoverde Open Garden Day on 27th May between 11 and 4. When she saw me crying at the devastation she just stood there laughing surrounded by her chickens saying “what, what, what’s the matter”. The worst thing is I now know chickens can smirk. I have been working night and day to try and save what is left of the summer garden.
Anyway I have reported her to The Royal Horticultural Society (RHS) Garden Crimes Tribunal. This meets in The Hague, next door to the War Crimes Tribunal. I am busy preparing my case against her and I am hoping for a hearing in the Autumn. Anyway, let’s dry our tears and get on with the gardening.
13th May 2023. Things I have been doing lately:
Saving my Rosesand other plants. There are a number of pests that will infest Roses and other plants this time of year, so it important that you stay on top of them. Inspect your plants every day and deadhead frequently for succession flowering. Failure to do this will leave you with diseased plants that will not repeat flower. The photos below show the damage to my roses, oleander and Dipladenia all caused by Cruella’s neglect. The first photos show the damage from greenfly and wooly aphids the second shows wild garlic allowed to grow through the roses. Click on each photo for a larger view.
The answer to all of these problems is to spray the plants weekly with your favourite spray. I know that some of you like to be organic, but personally I use the spray below. For wild garlic, pluck the flowers out at the bottom of the stem and do this daily. The photos below show my spray and my wild garlic plucking in action. Finally, and very importantly feed your roses and other plants, it is essential for healthy floriferous plants in Spain. Click on each photo for a larger view.
Lawn care. I know not many of you have lawns in Spain, because it is stupid to have one. But Hey Ho, I love my lawn, and this is where Cruella (my wife) has been at her cruelest. My lawn has been turned into the equivalent of the Gobi Desert. The grass has not been watered, chickens have been allowed to dig and there are bare patches as if beasts with cloven hooves have been pawing the ground. And that is how I know that Cruella has had her coven round for a party.
Anyway, if your lawn is looking terrible you need to do the following. First cut it on the highest setting possible. Then give the lawn its first feed of the year. Once you have spread your fertiliser, water profusely but only in the evening and after the earth has cooled. The first photo below shows the state of my lawn. The second shows me after mowing the lawn. What you can’t see in this photo is that I am completely covered in dust – it was like mowing in a sandstorm. The final photo shows the lawn food I prefer. Ideally your lawn should have three feeds over the summer growing season. Click on each photo for a larger view.
Saving my seedlings. If you have been growing plants from seed then now is the time to “prick out your seedlings”. Basically this involves teasing out each of your new little plants and replanting them in a separate tray or pots to let them grow on before planting out into the soil. Start by assembling everything you need, including:
Good compost
Perlite to mix into the compost to make it free draining
Seed trays or pots for your little seedlings
A dibber to make holes for your new plants and a pencil to tease them out with
The photos below show my assembly and the process. Make sure that as you gently tease our your new seedlings you hold them by their leaves and never by the stem. If you hold by the stem then you can easily damage their capillary system in the stem. Finally, place your new seedlings on your potting bench and leave them for two weeks to harden off before planting them out. Whatever you do don’t let them dry out. Click on each photo for a larger view.
Put drip trays under your pots. I don’t normally think of myself as a gardener with pots, but in fact I have some 30 or so plants in pots. Anyway, as I stood idly watering my pots the other day I noticed the precious water running out from the bottom of each pot. I instantly punched myself in the head for being an idiot and immediately rushed off to buy drip trays to place under each pot.
The benefit of drip trays for plants in Spain is twofold. Firstly they stop water run off. Secondly they aid hydration as the water from the drip trays evaporates and keeps the plants misted. The photos below show my drip tray strategy in action. Click on each photo for a larger view.
Campoverde Open Garden Day 2023. Finally, if you want to come and see what is left of my garden, meet Cruella and her chickens and see Tango the lonely blind Labrador then come along and make a day of it. Just to cheer you up there are four other lovely gardens you can see if you don’t want to come and see my waste land. Details below:
Everyone knows how hard I work to try and make our local Open Garden day a success, but this year Cruella (my wife) has decided to try and upstage me by purchasing chickens. I wouldn’t mind if they were ordinary chickens, I could cope with that, but she now has little fancy fluffy chickens and large ones that appear to be wearing trousers. She has threatened to rename Open Garden Day “Chicken Day 2022”and invite all her strange friends. When I complained she just screamed “you and your bloody garden, get over it”. She has taken to calling me chicken and making clucking noises every time she sees me. I am making enquiries about moving and taking the garden; I will keep you informed.
In the meantime if you want to come along to Open Garden Day then the details are below. But Cruella has insisted that in order to provide balance I have to include a photo of her with one of her fancy chickens.
Note the Chicken legs, and the chicken has quite nice legs too
In these times of re-wilding etc, we are supposed to try and harmonise our activity with the natural world. And personally I have been doing my bit by feeding a local Blackbird with a large number of Rose Chafer maggots as I empty a compost bin. In total I must have given this Blackbird over 60 maggots, but has it been grateful. No it bloody hasn’t it has started digging in my seed trays and has now moved on to digging up new seedlings when they are planted out. To see seeds and seedlings I have lovingly cared for torn up by this winged demon has been unbearable.
I approached Cruella (my wife) to ask about the rogue ungrateful demon, as she is usually behind any plan to destroy the garden; but she denied any knowledge apart from offering to find 23 others if I want to make a pie. I have become like David Copperfield’s aunt Betsey and her alarm at donkeys, only in my case it is Blackbirds. At the first sight of any Blackbird I jump up and run out into the garden flapping my arms and screaming “Blackbirds”.
The first photos below show one of the many maggots I have been feeding the ungrateful bird followed by some of the senseless damage he caused in return. Click on each photo for a larger view.
The next photos show my attempts at defence. At first I tried suspending a CD disk over the seedlings, but this didn’t stop him so I was forced to cage my seedlings in. Click on each photo for a larger view.
Lastly, the culprit himself who when thwarted by my defences turned to digging up seedlings. Click on each photo for a larger view.
If you look carefully he has red eyesHe knows I am watching
16th May 2022. Things I have been doing lately:
We are about to get into full summer mode, so there are some jobs you need to get sorted before the big onslaught starts.
Clearing leaves. Whilst the great autumn fall of leaves has gone, there will still be leaves falling on to your lawn and gravelled areas. Yes, they may be few and far between, and you may just stop noticing them, but they mulch down to a fine tilth and present a perfect medium for weeds. so get out your blower, rake etc and clean them up. The photo below shows the fruits of my efforts.
I huffed and I puffed and I blew the leaves down
Time to look at the lawn. I know it is only idiots like me that have a lawn in Spain, but if you have one fhen you have to take care of it. This includes starting the first cut of the year. After all the rain my lawn is looking quite lush, but at the same time its is absolutely full of wild false garlic. This is obviously weed of the year and is very prevalent at the moment in Pinar de Campoverde where I live. Whilst wild garlic has its upsides, such as lots of Cruella (my wife) special friends dont visit, this obviously has to be dealt with. My strategy to date involves three prongs. Firstly, I pull all the flowerheads off as I wander round the garden, Secondly, I hoe it out of the borders, and thirdly I treat it with selective weedkiller and mow the lawn so it just looks like grass. The main problem is that it happily grows from little bulblets under the lawn.
In addition to dealing with wild garlic, now is the time to feed your lawn. Ideally you should feed your lawn round about three times over the summer growing season. If you don’t feed then your lawn will become exhausted with weak growth. The first photo below shows the horror of wild garlic, the second shows my trusty mower surrounded by a forest of wild garlic, the final photo shows the start of the lawn feeding season. Click on each photo for a larger view.
Deadhead and cutback bulbs. If you have followed my advice, and I am sure you did, then you will have cut the seed heads off your bulbs a number of weeks ago. Well now is the time to cut the stems right back to the ground. Once you have done this then top dress them with a deep layer of compost. Don’t forget to say goodnight and thank them for flowering, and if you can say a little prayer with them just as you would with a child going to bed at night. The first photo below shows the deadheading process, followed by the big cutdown, the overflowing compost bin and finally top dressing.
No sooner had I spread this mulch than the Blackbird was in it
Final trim of hedges. Although I am being preyed upon by a maniac Blackbird it does not mean I have any ill intentions to birds in general, so that is why now is the absolute last time to cut back your hedges until September. Bird’s nests will proliferate throughout your hedges and just because you cant see them doesn’t mean they are not there. So lay aside your shears and trimmers and enjoy the birdsong. The photos below show the light trim given to the Solanum by my front gate. Click on each photo for a larger view.
When I told Cruella (my wife) that I had to urgently deal with the Red Palm Weevil, she just curled her lip and scornfully replied “it’s only a bloody beetle get over it”. I hope this conveys some of the pressure I face on a daily basis. I would leave her but she is holding the garden ransom, and on a number of occasions she has threatened to curse the ground so nothing grows. All of this may seem strange especially as she is our local Church Warden, but I think she is working undercover.
4th May 2022. Things I have been doing lately:
Dealing with Palm weevils. First some background. The red palm weevil first arrived in Spain in 1994 probably in a cargo of trees from Egypt. Since then it has rapidly infested Spanish Phoenix palms. At the moment it appears not to attack Washingtonia palms in Spain but it has been known to do so elsewhere. In the main it will attack trees under 20 years old but not exclusively.
The adults will cause a certain amount of damage by feeding, but the main damage is caused by the larvae. The adult female lays up to 200 eggs at the base of the fronds in the crown of the tree. When these hatch, they merrily munch their way up the inside of the fronds, eventually resulting in the fronds collapsing and the tree dying. In a severe infestation you can put your ear to the trunk of the tree and hear the grubs feeding. The first photo below shows the enemy. The second shows some of my palm trees and explains why I need to be careful.
The Palm Weevil in my palm, but not the tree.Note that my trees are neatly trimmed, but only cut in winter when the weevil is not around
Preventative treatment for palm weevil. When you first arrive in Spain, no matter how good a gardener you are, you are not prepared for the palm weevil as we do not experience it in Northern European. When you lose a palm you are distraught, so it is important to act quickly. If the tree is relatively low, or you can reach the crown with a short ladder, then you can spray the crown and this should act as a preventative.
If the tree is large then you need to either bring in professional sprayers every couple of months, or devise a method that can deliver chemicals directly to the crown of the tree. I have devised and revised a method over the years that works for me, so please feel free to copy the system described below.
Preparing the palms. At its simplest this process seeks to deliver the chemicals into the trunk of the palm which the rising sap will then take up to the crown of the tree and infuse the fronds with weevil killing chemicals. Over the years I have refined and revised my methods. But at the heart of the process is to drill a hole at a 30 degree angle half way into the trunk round about a metre from the ground. You then need to insert a piece of simple irrigation pipe into the hole. The hole and the tube is at this angle because you don’t want the chemical dribbling out and also you want to keep a gravitational pull on the chemicals so that they constantly feed into the tree. (I hope that doesn’t sound complicated, as it is not).
The first photo shows a simple perforated tube inserted into the trunk which could be topped up each month. The next photo shows my new deluxe minimalist weevil killer (top of the range). This has a short piece of tubing just to fit into the tree (this version stops the perforations clogging up). Note that each version has a cap at the end, this is to stop anything else getting into the tree. Make your own one up or just stick a bit of rag in there. The final photo shows the weevil system in place. You can see from the angle of the cap that the liquid is always being forced into the tree by gravity. Click on each photo for a larger view.
The equipment. All the equipment is very cheap and can be bought in any local gardening store. The photos below shows the basic equipment and mixing method which is simple. Click on each photo for a larger view.
a proprietary weevil killing chemical that can be diluted
a measuring jug to make sure you get the right amount of water (in my case 1 litre)
a garden syringe to measure out the chemical before adding it to the water
an old Fairy Liquid bottle needed to squirt the chemicals into the tree
The process. Once you have mixed your chemicals, then how you use them depends on the palm size. The first photo shows my trusty Fairy Liquid bottle being used to squirt liquid into the trunk. This method is used for high trees where you cannot get to the top.
The second photo is the method used for small trees. Just use your Fairy Liquid bottle (other brands are available) to squirt the chemicals on to the base of the palm fronds. This will act as a deterrent to the adult weevils.
The final photo is the process for those trees that are just a bit too big to get at easily. You could get a ladder out, but if you can’t be bothered. Just squirt the chemicals up into the base of the fronds. Don’t do this on a windy day and if possible wear a mask. Many a day I have weevil proofed myself and it doesn’t taste nice.
Don’t despair if you lose a palm. I lost two palms when I first arrived in Spain and I was of course upset. The thing to do is don’t just chop the tree down and leave an unsightly trunk shaped root sticking up in your garden. Nor should you try and make a table out of the palm by chopping it back and placing a table top on it. The resulting table will never be in the right place and you will eventually abandon it.
Instead, what I did was to get the palm chopped back to about 12ft. I then wrapped mesh around the trunk and grew climbers up its length. This gives a spectacular display of flowers all summer and is a joy to behold. The photo below shows my dead palm tree brought back to life.
Now those of you who know me, will know that I cannot abide crudeness. It is not that I am a prude, but it just seems wrong and an abuse of language. The problem started when I told Cruella I was worried because my balls were misshapen. No sooner were the words out of my mouth before she launched into a full blue comedian routine starting with, she wondered why I walked that way etc. When I explained that I was talking about my Olive balls, this only made her worse. She has now written up a complete comedy routine around my innocent statement; and I’m not talking to her. On with the gardening.
25th May 2021. Things I have been doing lately:
🍈 Reshaping my Olive balls. Don’t you start! – As regulars readers of this blog will know I cloud pruned my Olive tree a few years back into a series of balls. This is relatively easy to do and adds structure and shape to your garden. Most people have Olive trees which are large amorphous lumps sitting in their garden, and they never even process the Olives. If this is you then it is time to cloud prune your tree. Olives are easy to prune to shape and you can shape it to boxes, stars or balls which ever you prefer.
Once you have chosen you design just get stuck in using hedge trimmers and make you basic shape. You will need to trim it up twice a year but this doesn’t take long. The first photo below shows my misshapen balls – stop it! Whilst the second and third shows my newly pruned balls, right that enough I’m leaving this topic. Click on each photo for a larger view.
I lay on my back under the tree to bring you this photo; now that is what you call dedication.
🌸 Cutting back Daisies. By now the first flush of flowers on all types of Daises, Margarites, Oesteospermum etc should be finished. Now is the time when you should prune off the seed heads and reshape them so that they will keep flowering. If you have a lot of these it can be a time consuming process. So whilst you have your hedge trimmer out reshaping your you know whats, then just run it over the Daisies. This looks brutal at first, but I promise you they will grow back as good as ever.
The first photo below shows a bed of Oesteospermums that are more or less spent. The second photo shows them brutally cut back. In the words of Arnie “They’ll be back”. Click on each photo for a larger view.
🍽 Feeding plants. Now that summer is about to get into its stride, don’t forget to feed your plants. And just as people don’t all like the same food, the same is true for plants. Your citrus trees need a weekly feed at the moment with specialist citrus food. Similarly your non citrus fruiting trees and plants need a different type of food. Your lawn, if you have one needs to be fed at least three times over the growing season. You will also need a good all round universal plant food for everything else, especially potted plants. In addition to the various types of plant food, I also mix up a big container of iron and put a glug of this into most waterings (but not succulents).
The first photo below shows some of my different types of plant food, together with mixed iron feed. The second photo shows my trusty feed spreader ready to give the lawn a snack. Click on each photo for a larger view.
🪚 Cutting back some Iris. If you have heeded my advice in previous posts, you will have deadheaded your Iris and left the stems there to feed the bulbs for next year. I know this can look a little untidy, but you get your rewards next year. By now some of your Iris stands should be ready for cutting back, but not all of them. Cut the stems right back to the ground, and don’t forget to thank them for their beautiful flowers. Always say goodnight and I either say a prayer or sometimes we sing a hymn or song. Favourites at the moment are “Abide with me” or “We’ll meet again”. Don’t be tempted to crack jokes, or make attempts at gallows humour, I assure you it is not appreciated and a tad insensitive.
The first photo below shows a stand that is ready for cutting back. The second photo shows one that is not ready. The final photo shows the use of a trailing Lantana to cover the bare area where the Iris has been. Click on each photo for a larger view.
👌 Some updates. For those of you interested, and that includes all of you I am sure. I thought you might like to see how my Loofah experiment is going and get a look at how my mighty Agave Americana flower spike is going; Cruella has just sniggered when I told her I was going to show you this. The first two photos show the progress of one of my Loofahs, including the start of a new baby Loofah. The final photo shows the Agave spike, it is now about 15 foot tall. Click on each photo for a larger view.
I don’t know what will happen when it reaches the tree
I know this is not the type of smut you are used to in my much respected and loved gardening blog, but I am afraid that an aspersion has been cast and it needed to be answered. I need to explain this to you from the beginning. My friend Jenny mentioned that she had a large cactus that had outgrown her garden and she enquired as to whether I knew any one who might like it. I suggested that our local Church garden would be a good recipient and it was agreed that I would call round and collect it.
However, little did I know that this was a mere ruse to frame my poor agave (I think lawyers call it a fishing expedition). Upon arrival at Jenny’s and the usual inconsequential chit chat we gardeners indulge in, Jenny showed me her Agave Victoria (no pun intended) which was obviously showing exceptional swelling and beginning to flower. I of course congratulated Jenny, when suddenly she became stern and serious. “How do you think that happened she enquired”. I of course said I had no idea. She responded saying “I think you do”. You are the only person in this village with flowering Agaves and they have obviously been setting seed!
To cut a long story short she went on to accuse my Agave Americana of impregnating her Agave Victoria. I was astonished and responded that my Agave had been grown properly in a Christian household and knew how to treat females with respect. Jenny responded sarcastically that my plant was obviously Agave Arnold Weinstein, I thundered back that her plant must be Agave Jezebel Floozy. Jenny then demanded maintenance payments for her plant including specialist plant food and a bigger pot. I responded that I would see her in court, but offered to go to mediation with Alan Tichmarsh.
Anyway the case is pending, but I still haven’t calmed down I feel stressed with this hanging over me. Let’s get on with the gardening. The first photo below shows my innocent Agave with the next showing the Jezebel.
Jenny will never win in court, my Agave looks nothing like her flower. I might demand a sap test.
13th May 2021. Things I have been doing lately:
🪡 Tieing in plants. It can get quite windy on the Costa Blanca so you have to make sure that tall or delicate plants are suitably tied in and secure from being broken or just whipped around. I use canes, twine and for some plants I use plastic ties. The plastic ties are very cheap and the most useful in many cases. It is important that you place the tie round the cane first before then looping it around the plant in a figure of 8. This means that you only have to untie the plant part to slide it up without damaging leaves. The photo below shows a growing sunflower with its plastic tie.
Another use for plastic ties is when you are tieing in whippy espalied stems. I have been growing an espalier fig tree for 5/6 years and it is important to tie the leading branches in before they get too woody. The first photo below shows a fig stem about to be tied. The second photo shows the espalied fig on its way to fulfilling its potential of covering the wall.
🔪 Keep trimming Yucca. Regular readers of this blog will recall that I severely cut back all of my Yuccas that were in pots because they kept blowing over in the wind. As expected all started to resprout from the shortened trunks and now have to be selectively pruned. The aim is to have the emerging leaf spears equidistant from each other in a pleasing pattern that stops overcrowding. Also don’t have any leaf spears pointing into the centre of the plant as it ruins the aesthetics.
The photos below show a range of my Yuccas being pruned to be lovely.
All you need is a sharp knife and an artistic soul
🌼 Pinch out Marigolds. If you have grown Marigolds from seed then you will already know easy they are to grow. By now all your seedlings should have been planted out and the first ones should be coming to flower. Now this is where you have to be cruel to be kind. If you want bushy multi-flowered plants then you need to do the following.
As soon as you see the first flower bud appear at the top of the stem, pinch it out between your thumb and forefinger (I know you will all have grown your thumbnails long as I told you). After a week or so the flower will then throw out two further flower buds, one left and one right. Again pinch these out between your thumb and forefinger. The plant will then panic and think it is under a sustained attack by a grazing animal and it will then throw flower buds out all over the place.
Once you have pinched out those first three flower buds do not do any more, instead let the plant flower and deadhead as normal. The photo below shows the first buds being nipped out. As I do this I tell them to close their eyes and I recite St Julian of Norwich “All shall be well, and all shall be well and all manner of thing shall be well.”
🤺 Continue to take cuttings. I have already discussed in previous posts about taking cuttings. Growing from seed and taking cuttings is all part of being a gardener. If you just buy plants from garden centres or markets then you are not really gardening you are shopping. This is not to say that getting the odd new plant is not important, but it should definitely not be the mainstay of your garden.
Try and get out in your garden each morning and take three cuttings per day. Also, carry your knife and a small plastic bag everywhere you go, so that if you see a nice plant you can quickly take a cutting. If you get stopped by the police for carrying a knife, tell them it is ok as I have given you permission. Not all of your cuttings will survive, but if you have too many to use then give them to friends and family as presents, they will love it.
The photos below show a variety of cuttings I have been taking lately. This includes a nice Geranium from my litigious friend Jenny. As I snipped it off she sarcastically commented that it was “not the only thing that needed snipping round here”.
I don’t want to worry you but my garden appears to have become a miraculous plot a bit like Lourdes, but for plants. My garden is a place where plants that only flower every 50 to 100 years have started flowering. Now this may be a portent of the end of days or it may be that I am just a very good gardener! I prefer the latter possibility. Let me explain. You will remember that one of my Agave Attenuata has started to flower after 20 odd years; the down side being that it dies after this. But also, there has been another miracle flowering, one of my Agave Americana (known as century plants for the time it takes to flower) has just started throwing up a flower spike. More of this later, let’s get on with the gardening.
6th May 2021. Things I have been doing lately:
😪 Saying goodbye to the Agave Attenuata. Those of you who follow this blog will know that to my astonishment one of my Agave Attenuata threw up a flower spike. This has been a source of great joy tinged with sadness, as after flowering the plant dies. I have been preparing for this moment for weeks, I don’t mean to be disrespectful, but the funeral of the Duke of Edinburgh was as nothing compared to my arrangements.
The Agave had said all its good byes to its pups and we had already made arrangements for which area of the compost bin she would be laid. She had not requested a blindfold as she said the saw held no fear for her. The music had all been agreed. If you are interested here is the running order:
Miserere mei Deus
Chopin funeral march
Elgar’s Nimrod
After the formal stuff and whilst I laid the large Agave to rest in the compost bin, all the plants on the potting bench belted out the potting bench chorus of happy songs. The biggest hits were “Wind beneath my wings” and “Somewhere over the rainbow”. There was not a dry eye in the house. The whole event was almost spoiled by Cruella (my wife) shouting at us and telling us to “stop that racket”.
The first photo below shows the flower spike at its peak. The second photo shows me about to administer the coupe de grace by saw. Finally, the flower spike lies ready for composting and a return to the earth. But happily the Agave leaves lots of happy pups behind to continue the line. Click on each photo for a larger view.
🛁 Planting out Loofahs. You may remember that I sowed Loofah seeds earlier this year and they have been very successful. Loofahs need lots of heat, water and good supports to help them climb. You need to pot on seeds and cuttings when you start to see roots creeping out the bottom of their pot. Unfortunately loofah do not like being disturbed so it is a dangerous time when you are potting on.
I have decided to grow my loofahs in our pool area so that they grow up and along balustrades. I haven’t told Cruella (my wife) yet, but it should be ok as she cannot go out in daylight!. The photos below show the loofah ready to be potted on, followed by their place in the pool area. The final photo shows them beginning to take off. Click on each photo for a larger view.
🧹 Little things you need to do now. Now that everything is coming along nicely in the garden, there are little jobs and activities that you should not neglect. These include:
Tidy overgrown grass at the edge of paths
Now that the first bloom of Roses is almost over, prune further back for shape
Shade your potting bench in the afternoon sun to stop scorching
The photos below show my efforts in each of these areas. Yes, I know the potting bench shading is like a shanty town; I’m a gardener not a builder. Click on each photo for a larger view.
🇺🇸 Celebrating Agave Americana blooming. I am obviously a very lucky gardener to have two of the most reluctant flowering Agaves to come to bloom in my garden. Just when I was at my lowest point, mourning the loss of Agave Attenuata, God sent me comfort in the amazing flowering of Agave Americana. For those of you who don’t know, Agave Americana is known as the “century plant” as it takes a very long time to flower. The downside is, like the Attenuata it will die after flowering. However the good news is that the flower spike is spectacular rising in many cases to over 20 foot. I am looking forward to the next few weeks as the flower spike emerges (sometimes by two foot a day).
I don’t want to be morbid, but we are planning the funeral already. The potting bench chorus are rehearsing “Pie Jesu”, this will be followed by “Guide Me, O Thou Great Jehovah” which the Americana has informed me is its favourite hymn. Watch this space for future updates, I am thinking of getting a funeral plan.
The first photo below shows the Americana when I first noticed the flower spike emerging. The next photo shows me pointing out the obvious. The third photo shows me standing in awe, Cruella decided this blog’s photos are too boring and she insisted that I posed dramatically; perhaps you can tell I didn’t go to drama school. Click on each photo for a larger view.
I have been in lock down so long that I have done all the normal gardening jobs that keep me busy. I have now got to the stage where I am hunting down things to do hence I have entered my Maria Kondo phase. Now to put this in context we are speaking about a man who can spend 8-10 hours in the garden, but I have literally done everything apart from dig it up and start again; and I have considered this. So this post is all about those little things you should be doing, and all those little areas that need tidying up once all the big things are done.
By the way, if you think this blog is losing some of its gardening edginess, then nothing could be further from the truth. I am deliberately saving my story of the battle with the giant rat in my compost bin; but only because the outcome is still in the balance. I believe that it what television dramatist call a “pot-boiler”. Anyway, enough of this, on with the gardening.
10th May. Things I have been doing lately
🙇♂️ Discovering new areas for plants. When you have done everything in your garden look around for new areas you can exploit. I have a small bed of gravel that runs around the edge of my Naya (veranda) that just sits there. Whilst passing it the other day I suddenly thought how nice it would look planted with lots of small succulents. The only problem was I didn’t have enough cuttings ready so I went around the garden hunting for hidden or overshadowed plants that could be moved. The two photos below show the potential gravel edge waiting with all its potential. Click on each photo for a larger view.
Ignore the dogs they have no part in this story; especially after their failure with the big rat.
After scouring the potting bench and removing overshadowed plants from elsewhere in the garden I have made a start. Although this looks a bit sparse at the moment, I will build it up over the next few months and eventually I will have a green ribbon of succulents where once there was only gravel. This is something I would recommend you to try at home. For instance this would give a good effect along the edge of pathways. The pictures below show my efforts so far. The last photo shows my discovery of a little hidden plant that had been overshadowed over the years. Click on each photo for a larger view.
🌳 Reshaping the Mulberry tree: Some trees need to be reshaped otherwise they are just big amorphous lumps that do nothing for your garden. I have a number of reshaped and cloud pruned trees in my garden that give interest and life to areas of the garden. Some years ago Cruella (my wife) and I decided that we needed a bench under our Mulberry tree. To achieve this I had to hollow out the branches under the canopy to create the headroom and then trim the edge to create a sight line across the garden. This is now something I need to do twice a year to keep the tree functional and shapely. The photos below show the tree prior to its trim, after its trim and the hollowed our centre. Click on each photo for a larger view.
Now you know how to do it, go find a tree to shape.
🧹 Tidying up my window boxes: Regular followers of this blog will remember that I have some North facing window boxes along the back of my house. I am not normally a fan of window boxes in Spain as they will obviously dry out in the intense heat of Summer. However, where you have a North facing wall they are a good way to bring some greenery to shady areas. I have planted these window boxes with various shade loving plants such as variegated ivies and Transcedentia etc. Over the gardening year these grow and cascade down giving me a green waterfall effect. However at this time of year you just need to trim them up and take off the old straggly growth. Once you have done this give them a little feed and they will be off again with a nice new green waterfall. The photos below show the before and after. Click on each photo for a larger view.
🏺 Tidying up my pots: The ultimate Maria Kondo task in gardening terms is tidying up your old pots. Like many gardeners I find it difficult to throw away pots, and consequently have accumulated so many that in the past they have toppled on top of me leaving me to be rescued by being pulled out by my legs. Now that Cruella (my wife) is still at our English house, and the added danger of the big rat (another teaser) I worry that not only will no one be there to rescue me if I suffer another pot avalanche, but the big rat may eat me alive whilst I’m trapped. Faced by these perfectly reasonable dangers I decided to tidy up the pots. The photos below show my efforts after the first sift and at each stage. It was difficult I kept making excuses for some pots and putting them back on the keep pile. After two hours I only had ten pots on the throw away pile – I hope I made the right decision. I got up in the middle of the night and rescued some from the bin! Click on each photo for a larger view.
The first photo is after a 50% sift, the second photo is my almost final sift, and the final choices are shown in the third photo. The last photo is one of three barrow loads I threw away.
👍 Growing my thumb nails long: This is the time of year when you will be constantly deadheading around your garden and taking off spent flowers to encourage new flowering. This will require numerous trips backwards and forwards to your potting shed to get your secateurs or scissors; sometimes for just one or two blooms. Well, here is a better way, why not carry your secateurs at the end of each hand. By growing your thumbnails long you can handily use the thumbnail and your forefinger to form readily available secateurs. By the end of Summer my thumbnails are so long that I look like a member of the Ming Dynasty.
It is traditional at this time of year that I post a photo of my thumbnail together with those of Cruella. Unfortunately, her absence in the U.K. meant that I had to ask her to send me a photo. The first photo below shows my growing thumbnails. The second is the photo Cruella sent of one of her necklaces. Click on each photo for a larger view.
Somebody has stuck my thumb onto an old hand!
What worries me is she told me this is part of a set; I dread to think what the earrings are
To be honest I have been back from our English house about two weeks, but I have been spending about 8 hours a day just trying to catch up with the garden. If I ever suggest leaving my garden for over two weeks at the start of Summer, then just shoot me. People keeping asking me why there have been no posts lately, now you know why; I toil all day and sleep on the lid of the compost bins at night. I have even been gardening by torchlight. Anyway, just to prove it, this is what I have been up to, and , if I’m doing it so should you.
22nd May: Things I have been doing lately.
✂️ Deadheading. My Roses in particular were in desperate need of deadheading. Before I left the first flush of flowers had almost ended and up until then I had been deadheading daily. Now the thing about Roses is that if you don’t deadhead then they will not repeat flower, instead they will use all their energy in making seeds and rose hips. The first thing I had to do was undertake a mammoth dead heading exercise. This was swiftly followed by spraying for greenfly. While I was away the greenfly had founded a new nation of greenfly and happily housed it in my Roses.
The first photo below shows the start of the dead head marathon. The second one shows the start of the Sprayathon.
Note my new gardening gloves and secateurs. Birthday presents.
Notice that the support on my knee has disappeared, but I’m still in pain.
🌳 Trimming trees: The only trees I trim at this time of year are the Mulberry and Olive trees. The Mulberry has gradually been shaped over the years to provide a lovely shady spot for me to sit after mowing the lawn. Whilst the Olive has been subjected to my amateur topiary for a number of years and now looks lovely as a statement tree. If you have an unloved Olive tree and you are not using the fruit than have a go at reshaping rather than leaving it as big amorphous lump in your garden. The photos below show the Mulberry before and after its annual trim and a photo taken by me lying underneath the Olive tree; when Cruella (my wife) saw me lying under the tree she rushed off to check my life insurance policy and had already changed her profile on Match.com by the time I came in the house. Click on each photo for a larger view.
🌿 Thinning out borders. By now your bedding plants such as Marguerite and Carnations etc should be going over to seed and crowding your beds out. You now need to trim things back and make a little room for the second wave of plants. So get stuck in and be brave. Once you have created some space then hoe and weed the beds. When you are satisfied that the new plants have space then feed the whole thing with a general purpose feed. Feeding is important as your soil will easily become exhausted if you are growing things intensely as I do. The photos below show my flower beds at various stages of the process and finally a photo showing the general purpose food that I use. Click on each photo for a larger view.
🔪 Shredding the branches from the citrus trees. A couple of months ago I gave my Orange and Lemon trees a good prune. Rather than throwing the cuttings away I leave them aside until all the leaves have gone brown and the branches have dried up. I then shred everything and use some of it for my compost heap (carbon) but not too much. The rest I spread on paths in our wild wood garden. The photo below shows me mid shred.
Nothing goes to waste in this garden. The branches too thick to shred I construct into what I call modern art installations in the garden and what Cruella calls sticks!
🌱 Repotting cuttings. From previous posts you will remember that I took a number of cuttings at the end of Winter whilst I was pruning. These now need repotting on as they have been planted around the edge of pots and now need room to grow. I am particularly pleased with the Fig tree pruning as every one has taken and I now have 5 new Fig trees. The first photo below shows the cuttings when I originally pruned them. The second photo shows them planted up and the final photo shows my lovely new trees. Click on each photo for a larger view.
😢 Mourning the loss of my seeds. You will remember that I had carefully planned to alter my late Summer beds by planting a range of late flowering perennials such as: Geum, Gaura etc. Sadly the best made plans have gone astray. Whilst I was away my seed trays got baked in the Sun and my poor seeds never made it. The photo below shows my baked trays.
It gives a whole new meaning to baking tray.
🐶 Taking the dogs out. Although not technically part of my gardening duties, it is nice now and again to take the dogs out for a long walk. Normally they just roam around the garden as it is big enough to keep them happy. So I thought I would show you them out and about to cheer myself up. Notice in the first photo they start out all enthusiastic, but they are soon seeking any shade they can find.
Yes, you have guessed correctly Cruella (my wife) and I are over visiting our English house. We are here amongst other things to celebrate my 70th birthday. Ok I know, I don’t look it, but that is one of the perks of having a Witch for a wife, that and living in a house with sweets stuck on the outside. Anyway this post isn’t about my garden as normal, but instead I wanted to introduce you to a garden I visited the other day which I think is worth you visiting if you are ever in England.
April 30th. Things I have been doing lately:
⛰ Visiting Riverhill Himalayan Gardens. The gardens are in Sevenoaks in Kent and are set over 12 acres. They were first laid out by John Rogers in 1840 and the house and gardens are still owned and run by the family. The plot is hilly with steep climbs in places, and overlooks the Weald of Kent. The soil is acidic which means it is perfect for the Rhododendron and Azaleas that were brought back from the Himalayas, and which make this garden special.
If you visit in Spring (as we did) you will have the special delight of the bluebell walks where you have drifts of wild bluebells growing throughout the woods and amongst the Rhododendron. There is also an excellent cafe which Cruella highly recommends as they let her stir their soup pot and do a little bit of chanting and cackling. Anyway, here are some of the highlights.
🌿 The bluebells. There are fantastic walks were you can get wonderful views of the bluebells. The photos below don’t really do them justice. Click on each photo for a larger view. The final photo shows Cruella wandering off into the distance; I told her to find some Witch-hazel and she actually went looking for a witch called Hazel.
Still no sign of Witch Hazel, but it kept her busy
🌺 The Rhododendrons. There were lots of fine mature plants with a full range of colours. In many places the flowers were just starting to come through so it should look good for a month or so. The photos below can only hint at the full range. The final photo shows Cruella communing with a Unicorn she had found in a field; she was after its horn for spells. Click on each photo for a larger view.
⛲️ Rock garden, Ferns and water features. Those of you who are regular followers of this blog, will know from a past post that I have recently created a water feature in our Spanish garden. Well, when Cruella caught sight of the Riverhill water features she could barely suppress her mirth and kept comparing my puny efforts to those at Riverhill.
In addition to a formal water feature there is an excellent rockery and woodland pool that is surrounded by a fernery (if there is such a word) anyway, lots of ferns. The first photo below shows the blackboard that explains what they are trying to achieve, followed by some photos of the gardeners planting the ferns around the pool and finally the rock pool and the formal water feature. Click on each photo for a larger view.
👋 Meet the owner. Finally credit where it is due the owners of Riverhill have done a fantastic job in keeping the garden relevant and interesting. Whether you are a gardener or would just like a day out with a nice cup of tea, go and visit this garden it is a pleasure. The photo below shows Sarah Rogers who with her family and staff keep the gardens in such great shape.
Every year I convince/coerce a number of local gardeners to open their gardens for the day to the general public. The idea is that people can wander round the gardens hear from the gardeners what they are trying to achieve and everyone can give and receive tips. Everything is free including the refreshments all we ask is a small donation to Campoverde Church. All was going well I had tidied up the garden using my blower. There was not a leaf or unsightly twig in sight, Cruella (my wife) had brushed all around the swimming pool, we were looking good. That was until enormous winds swept through Campoverde. When I say winds, I mean the type that carried Dorothy to Oz. The end result was that the garden was covered in Pine needles and other tree detritus, to add insult to injury it rained, but not your normal rain; we had the dreaded Sahara rain that brings sand with it!. So not only did we have Pine needles but also sand dunes. Hey ho, the joys of gardening.
24th May: Things I have been doing lately
Making sure Marigolds flower abundantly. Marigolds love it here in Spain and we gardeners reciprocate that love. But first you have to be cruel to be kind. Marigolds will try and give you one single flower, but we obviously want more. To achieve this you must pinch out the main flower as soon as it becomes visible. You can do this either with secateurs or if you are a real gardener by using your long specially grown thumbnails (see previous post). But it gets worse, not only do you need to pinch out this first flower, you also need to pinch out the next two side shoot flowers that will appear within a week or so. By doing this you will send the plant into panic mode and it will proceed to send out multiple flowering stems all over the plant. After this you need only deadhead as normal when the flowers are spent. We will return to this topic in a few weeks time, but in the meantime the photo below shows a lead flower ready for pinching out.
Off with its head
A warning about using old seed. You may remember that I did some repair work to an area of lawn the other week. I put a layer of new topsoil onto a patch where the dogs had decided to dig, I sprinkled it with seed and duly covered it with fleece to protect it from birds. What I didn’t tell you because I was too ashamed, was that I decided to use some old grass seed left in the bottom of a box in my shed. To be honest I think it was about two years old. But as it was only a small patch of lawn I was too mean to buy another whole box. Well, false economy, a month later, despite dutiful twice daily watering I removed the fleeece to reveal not nice new grass, but the same seed lying there staring back at me. I could kick myself because it is now too late to reseed as the heat would just cook it. So the moral of the story is throw away old seed as it will probably be unviable after a year or so. The photo below shows my bald patch which Cruella considers quite funny and tells everyone I now have two bald patches.
One of my bald patches
Early crop figs removal. Those of you who are regular readers of this blog know that I love figs with a passion. Figs coupled with goat’s cheese is my favourite. Having said that you may find it surprising that I am to be found cutting out the early crop of figs on one of my fig trees. Well the truth of the matter is that it was difficult and emotional. For the first time this year one of my fig trees has produced an early crop of figs. Mature figs will normally produce two crops, this usually happens when the tree is over 5 years old. Well, it happened this year the fig tree produced its first early crop for its birthday. Unfortunately, this early crop doesn’t really mature on a young tree and the danger is that if you leave this crop on the tree too long, then it will stymie the growth of the second crop which is the one you really want.
Are you with me? I feel I’m losing some of you. To repeat if I leave the early crop on we will end up with a small unripe second crop, which in turn means no figs and goat’s cheese for me. So I had to take drastic action and cut out the early crop. The first picture below shows some of the early crop waiting at the bottom of a trug to be condemned to the compost bin – I know they look healthy but they taste like cardboard. The second picture shows the early crop on the tree before removal if you look carefully where the big red circles are you can see the second crop coming through. Let’s hope I’m not making a mistake.
Some pictures of my garden. This year for Open Garden Day we added the great innovation of overhead drone pictures of the gardens. My friend David (who is not a gardener) has a “state of the art” drone and I managed to convince him to stop wasting his time making his drone follow him around as he usually does, and instead step into the giddy world of gardening. Armed with David’s technical expertise and lovely gardens we managed to get stunning photographs of most of the gardens. The photos below show some areas of my garden, and if you look carefully that figure clad in a white vest standing in the outside kitchen; yes you’ve guessed it it’s me; Cruella is standing next to me, but unfortunately she is not visible in daylight. Click on each picture to see it full size.
I’m leaving Cruella in charge of the garden. I’m going back to our English house for just over a week and have to leave Cruella in charge of the garden. I have given her strict written instructions and have walked her through everything. But, I’ll be frank, this is a bit like leaving a Fox in charge of a hen house; no good can come of it. Cruella has just read this over my shoulder and has started calling herself “foxy”, heaven help us.
The photo below shows the potting bench as it should be, I spent last night praying with all the plants for deliverance from evil.
If you look carefully you can see that the plants are cowering; Cruella was standing behind me when I took this photo
The above headline is a clarion call to all gardeners. If your thumbnails aren’t long in May, then you are not a real gardener! So for all you fancy Dans and Doras this post is your last chance to grow those nails.
17th May: Things I have been doing lately
🧟♂️ Deadheading. By now you should have started summer deadheading of various flowers. If you want repeat flowering then you must deadhead on a daily basis. This is especially important with Roses, but all plants will stop flowering once more than 50% of the plant has gone to seed. At this point the plant believes that its job is done and it can just shut down. By deadheading daily you are forcing the plant to continue flowering to make seed.
At the moment I am deadheading Roses every morning and sometimes I have to do it twice a day as one of my Roses “Blythe Spirit” flowers so profusely. I am also deadheading Carnations on a daily basis and soon it will be the turn of Marigolds. Right, this is where the thumbnails come in; just in case you were wondering. By growing your thumbnails long at this time of year you have with you at all times your very own personal pair of secateurs. As you stroll round the garden you can deadhead wherever necessary just by pinching the flower head between your thumbnail and your forefinger. By way of a health warning don’t try this with Roses, it hurts, instead use a pair of sharp secateurs.
Before we leave deadheading and go on to another thrilling topic, let me finish this by explaining the importance of proper deadheading. When you cut or pinch the dead flower out, don’t do it just below the flower itself. Instead follow down the stem until you come to the next leaf and cut just above this instead. In this way you are not leaving an unsightly dead piece of stem that can be easily infected.
And lastly the thumbnails; the first photo below shows them in all their grandeur. Notice the slightly green tinge to each nail and the nicks in each one caused by deadheading. The second photo shows Cruella (my wife) thumbs. She insisted that if I was having a photo of my thumb nail she wanted one as well. As you can see she doesn’t garden.
🚿 Spraying for garden pests. Some of you may be organic gardeners and never use chemicals in your garden. I, on the other hand would use nuclear weapons if I could get away with it. Don’t get me wrong I like the idea of chemical free gardening and I know all the arguments in favour. However, faced by a bed of Marigolds destroyed by snails or Roses sucked dry by Aphids, I would rather get my retaliation in first.
There are a few pests you should be watching out for at the moment. Slugs and snails will chomp through any newly planted out seedlings, so use slug pellets, but make sure they are bird and child friendly. Watch out for scale bugs on Oleander. If you are like me you will need to put your spectacles on. Scale will show up as a series of orange coloured dots. But put your glasses on and each little dot can be seen as a tiny bug. Last, but not least you have greenfly which can quickly infest Roses in their thousands. Greenfly also like Dame de Noche, Pink Trumpet Vine and strangely Lemon trees. The photo below shows the gardeners best friend at this time of the year.
A spray a day keeps the pests away.
🛌 Preparing bulbs for bed. By now all of your bulbs should have died back. If you have done as I recommended and left the stems on after deadheading, then the stalks should now be ready for cutting down. If you have cut them before now then you are a bloody idiot and a disgrace to gardening. It is only by leaving the stems intact to feed the bulb that we refresh the bulb for next year. Anyway, it’s time for the bulbs to go to bed for the Summer.
Cut the stems off as close to the ground as you can, but, try not to cut below the ground as you may let infection into the bulb. Once the stems have been cut off, place a thin layer of compost over the top and then give them a nice liquid feed. Don’t forget to say “goodnight, see you next year” it’s only polite and sends them to sleep knowing that you love them. The first photo below shows the bulbs shorn of their stems, whilst the second shows them tucked up in bed.
🖼 Making minor repairs to the lawn. Regular readers of this blog will know that my garden contains two great big lumbering Labradors who will roll, fight and generally cavort all across our lawns. They particularly like the small lawn right in front of our Naya (covered terrace) where they sleep most of the day. The end result is lumps, bumps and bare areas all over the place. To repair this I simply sieve some top soil and throw it over the lawn, then brush it in with a hard broom. This more or less levels the surface and I just allow the grass to begin mending itself. Where the patches are too bare or they have dug a hole, then I have to reseed and cover with fleece to stop the birds feasting on the seed.
The first photo below shows the small lawn after its new coat of soil. The second photo shows Tango dreaming of digging up the lawn.
🌱 Repotting seedlings and cuttings. By now your seedlings and cuttings should be ready for potting on. If you have taken lots of cuttings (and I told you to) then you will have a range of new plants for free. You need to leave cuttings in their pot until such time as you can see roots coming out the bottom of the pot. Then, if you have planted four in each pot, you need to separate them out and place them in larger pots. Similarly with seeds. If by now your seeds haven’t come through then it is likely that they won’t. If only a few have grown, don’t hang around waiting for the rest to grow as it won’t happen. In my case I needed to pot on some Lantana cuttings that had all taken successfully and some Pink Trumpet Vine seedlings, where only two had come through.
The first photo below shows the plants on my potting bench awaiting their transition to the next phase of their life. The second photo shows them happily seconded with the rest of the new plants waiting to be bedded out in a few weeks. Such joy!
🐴 Spreading horse poo. Horse poo or more politely “manure”, is widely recognised as a great garden elixir. I was overjoyed to be given a bag by a friend from Church and couldn’t wait to get muck spreading. However, a word of caution horse manure is fantastic, but not for all plants. Roses are ideal, as they are very hungry feeders and can easily cope with the strength of manure. Many other plants cannot so don’t just put it anywhere as you can badly burn and kill lots of plants. Also horse manure can contain lots of weed seeds because unlike cows with their four stomaches that effectively kill weed seeds, horses like humans have only one. So be prepared for extra hoeing.
The photo below shows Rosa “Creme de la Creme” avidly awaiting its three shovels full of poo.
If you look closely you can see the Rose salivating.
🌋Spreading ash from log fires. Log burners are very popular in Spain and many people don’t realise that the ash byproduct of burning can be spread on to the garden to provide a beneficial feed. Burned wood doesn’t contain nitrogen, but it does provide phosphorous, potassium, calcium, boron and other elements that growing plants need. It’s also very alkaline and useful for raising the pH in gardens. You’ll need about twice as much of it as lime, but it will supply nutrients at the same time, and if you have a wood-burner it’s free.
Now I don’t have a wood burner, but I do have an outside fire pit (sort of) which we use beside our outside kitchen if the evening is a bit chilly. The last few nights have provided lots of ash and I have duly recycled it back into the garden. The photo below shows a fig tree becoming the happy recipient of ash.
Cruella has entered this for the most boring picture of the year competition – I think I’m in with a chance of winning.
I forgot to mention I was going away, but I’m a modest type of guy. Anyway I’ve been in Northern Ireland for a week with friends. We flew over and had a lovely time Cruella (my wife) came by broomstick. Now that I am back there is so much to do in the garden and I’ve barely had time to stop and write anything. Without further ado let’s get on with the garden stuff.
May 6th: Things I have been doing lately
✂️ Trimming and shaping a Jasmine arch. Jasmine grows spectacularly well in Spain and I am sure you have some. But as well as having lovely scent, Jasmine can also be used to drape or grow over man made or natural features in your garden. In other words it’s a good sprawler and coverer of the unsightly if required (what I call clothes). I have various Jasmine plants throughout the garden and I have been growing some over an arch by my gate. This has taken about two years to get it right and I am almost there. The first photo shows the Jasmine before its annual trim up. If you are growing Jasmine over a structure such as the aforesaid Arch, then it is best to tuck it in, wind it around, and only then start to trim any branches sticking out that offend your sensibilities or shape. The second photo shows the newly trimmed Jasmine. At the end of this growing season the arch should be complete. If it looks good I will show you a photo, if not, you will never hear of it again.
🙈 Trimming fig espalier. Those of you who are regular readers of this blog will know that another long term project of mine is to grow an espalier fig up the wall of our outside kitchen. This takes time and patience as the first shock of the espalier cut sets the plant back a bit. The fig and I have had a discussion and we have decided that this is the year for real growth. I have promised feed and it has promised growth. Forget all that North/South Korea stuff the tension is building here in my garden.
The first photo shows the current state of the fig; and I have to admit it is trying its best. To keep the espalier going you need to trim all the leaves that are growing against the wall as these will do nothing for the plant. Secondly you need to tie in the new growth along wires. Tie in when the branches are still green and “whippy”. You will have to do this little and often. If you leave the branches till they “Brown” and harden up, they will just break when you try to bend them. The second photo shows the fig trimmed and tied in. What do you mean you can’t see any difference! I can and that’s what counts; I don’t get paid for this you know.
🌱 Tieing in the lovely Solanum. Regular readers will know that I have been growing this Solanum from cuttings from my friend Margarita. To say it is flourishing would be an understatement. Planted out as a rooted cutting earlier this year, it must be almost 20 foot and growing like Topsy (literary allusion to famous slave era novel in the USA, c’mon look it up). Anyway, the aforesaid Solanum is now growing horizontally along wires, but like all plants, it yearns for the vertical. So to keep it going the way I want it to, I regularly have to get out my ladder and tie it along the wires. This plant is going so well that I am taking cuttings for elsewhere in my garden and also for my friend David, who is to gardening what Atilla the Hun was to world peace.
The first photo below shows the Solanum trying to creep over the roof of the outside kitchen. The second photo shows the Solanum tied in (at least for the moment). The third photo shows the new front I have opened up (military gardening term) whereby I am training the Solanum around a corner and along another wall. Click each photo to see an enlarged version.
🌳Trimming back hedges. Now at this time of the year hedges can begin to look a bit straggly, but in the case of most of my hedges they are made up of flowering plants such as: Jasmine, Bignonia, Hibiscus etc and obviously whilst I want them to look tidy I don’t want to lose the flowers. All to often as I walk around our village I see people trimming their hedges right back to a nice neat square shape for Summer, not realising that they are cutting out all the potential flowering stems. What you need to do is just trim back the leading shoots (those that are longest) but don’t cut into the body of the hedge. In this way you will get the basic shape, but you won’t lose the flowers.
This first photo below shows a straggly section of hedge that looks untidy, the second photo shows it trimmed back but not scalped.
🌿 Tidying up the Mulberry tree. We have been shaping our Mulberry tree for a few years to make it a focal feature of one part of the garden. By trimming out the under canopy branches we have been able to make a nice seating area where we have placed a circular metal bench we had made specially. This provides a lovely shaded area to sit and take in the view over this part of the garden. However, Mulberries need trimming up or they begin to look like someone with a bad fringe.
The first photo below shows the untrimmed Mulberry looking like the missing Beatle (Musical sixties allusion, apologies to all young gardeners). The second photo shows the tree ready to face the world with its new sensible haircut.
🍈 Trimming the topiary Olive tree. Regular readers (both of you), will remember that I have given up processing my own olives ever since Cruella (my wife) pointed out that we had cornered the market in out of date bottled jars of olives. Instead I cut the olive tree back and am aiming for a topiary effect. Well the picture below shows my first effort. I cut the tree back last year and have been letting it regrow in selected areas. I did the first trim the other day, but it will gradually fill out and I think it will be quite spectacular. Watch this space. The photo below shows the olive in all its glory. I have entitle my creation “spheres”, Cruella calls it “balls”.
Finally to finish off this post here is something really cute. Whilst Cruella and I were sitting having our morning cup of tea on the terrace; which in itself is unusual as Cruella doesn’t normally come out in the daylight! We were surprised to see one of the Red squirrels that frequent our garden admiring himself in a water feature. I thought how nice, Cruella thought it would make nice mittens.
Today was our open garden day when six gardens opened for local people to come along and enjoy the delights of the lovely and varied gardens of Campoverde. If you missed it then you missed a lovely day when people came from far and wide and we all talked about plants and gardens and then afterwards stuffed our self with scones and cream and jam – which I call a cream tea, but, my wife insists is only its constituent parts!
Anyway no plants or plant talk in this post just a few photos of the day; including below this fetching photo of me ready to sell plants to unsuspecting passers by.
Would you buy a plant from this man?
The photo above shows a handsome, but I notice slightly balding chap showing people round his garden and impressing them with his encyclopaedic knowledge of his garden. Notice the cross in the photo on the left this serves to remind me there are always two gardeners in any garden; God is the gardener and I am only the assistant; though I must point out he never takes his turn digging out the compost heap. The photo on the right shows me expounding on a self seeded pomegranate which a lady pointed out to me I had a moment before called a pumpkin – an easy mistake to make on your 23rd tour of the garden. You may also notice that the lady in the foreground is performing a clog dance, which we all joined in later.
The photo below shows my wife Maggie performing her role of belligerent catering assistant- still denying that scones, cream and jam make a cream tea.
You can’t get the staff – next time I am going self catering.
Right that’s your lot I am off to England for three weeks to top up my damp. I will post some stuff from our English garden, which is very small – but perfectly formed.
I think I may have been in the sun too long today as I have started imagining a type of Miss World competition; but, for compost. I mean I know I’m biased but don’t you think the compost in the photo below is good looking?
24 May. Things I have been doing today.
🗑 Emptying one of my compost bins and mulching plants. If you have a compost bin, and if not why not? Then it is time to take the last lot of compost out to make room for the summer green stuff you will be cutting down. When you take the compost out be sure to leave a 4cm layer of the old compost. This will ensure that the micro fungal elements in the old compost will help to kick start the new compost heap.
Now for those of you don’t have a compost heap the photo below shows you why you should have. This is one of over 20 barrow loads of compost that I have taken out this summer from just one bin. Each barrow load is the equivalent to an 80k bag of compost from a garden centre. But more importantly you are not just saving money, you are recycling all your garden waste and any vegetables fruits etc from the house. What you get out the other end is a nutrient rich compost full of micro organisms that are an ideal planting medium. You do of course get a few giant blood oozing maggots, but we have already discussed this.
Miss compost 2017
🌯 Cutting a Californian False Pepper tree. The Californian (or sometimes Peruvian) False Pepper is a common tree here in Spain. Its drooping trailing leaves make it look like a poor man’s weeping willow. This tree can be cut back really hard in the winter when the sap has stopped rising. When I say really hard I mean really hard, you can chop off big mature branches and leave more or less a single trunk. The benefit of this approach which I favour, is that the tree very quickly starts growing again in the Spring and has a lovely weeping willow look. In a year or so large thick branches will form again and you need to start the whole process over. The only drawback of this approach is that the trunk will sprout suckers like crazy and you will need to trim these with a hedge trimmer, but it is worth it. See the photo below of the fruits of my labour. An added benefit of this tree is that it produces garlands of small red berries which are the size of pepper corns and which when dried can be used in a similar way to pepper – hence false pepper.
A nicely trimmed Californian False Pepper – I am up the tree!
This blog is now becoming officially X rated and my garden is gradually turning into something from the Island of Dr Moreau (look it up, this is both a blog and a literary tour de force).
22 May: Things I have been working on today.
🐛 Begin mulching under your plants but beware giant maggots. I have been emptying one of my compost bins ready to provide mulch for placing around plants. At this time of the year the sun starts to become very intense and plants need help to retain moisture. Start by weeding round the stems of the plants you are going to mulch. Once the area is weed free, water profusely and really soak around the plant. Then apply a heavy mulch around the stem and area close to each plant, you don’t have to do the whole flower bed just around each plant. You can mulch with compost as I do or you can buy shredded tree bark from a garden centre.
Now the scary bit. Every year when I begin to empty compost bins I find giant maggots lurking in the compost. Now when I say giant, I mean giant. Not only that if you touch them they ooze dark blood. I can get around a hundred or so from a compost bin. In the past I have tried leaving them out for the birds, but so far no bird will touch them, they are too scared. I don’t blame them see picture below.
Maggots that even scare the birds.
👿 Still weeding under my roses. As you know I have been weeding under my roses for the past week or so; and this is a job I detest as it means massive loss of blood as the ungrateful plants punish me for helping them. Anyway, I forgot to mention that what ever you do, do not place the weeds on your compost heap. Especially if they are the ones that I dramatically name the Devil’s pearl seeds. These have a bulb at the end of the stem which contains a number of pearl like seeds and each seed can form a new weed bulb. If you place these on your compost heap they will happily wait until you spread mulch next year and off they go again. See the photo below you have been warned.
The Devil’s pearl seedlings
🌼 Pinch out the lead flowers of Marigolds. If you grow Marigolds then it is time to pinch out the lead flowers on each plant; and if you don’t grow Marigolds! What’s the matter with you they are so lovely. By pinching out the lead flower you will encourage a bushy multi flowered plant; if you don’t you will get one flower only. Look down into the top of the plant and you will see a small flower bud just appearing (see photo below). Using your thumb nail (which I told you to grow this time of year) and your forefinger just pinch the bud out. It will try and grow again within the next week or so and just do it again. After this leave it, twice is enough or the League Against Cruelty to Marigolds will come round your house.
I can see you! Off with it’s head
🛏 Time to put your bulbs to bed. If you have followed instructions (and I hope you have) you should have chopped the seed head off your bulbs and then tied the stem up with string or elastic bands (see photo) This process allows all the goodness to go back down into the bulb ready for next year. Now it is time to cut the whole stem off. Taking your secateurs cut the stem off as close to the soil as you can. Once you have done this carefully weed around the area where the bulbs are planted and then water profusely. Finish this process by then putting a layer of well rotted compost about 4cm thick over the area. This serves three functions, it locks in the moisture, it suppresses weeds and it also provides a source of nutrients for the bulbs for next year. Don’t forget to say goodnight to the bulbs and tell them you will see them next year – God willing.
One last thing don’t forget to compost the stems, but also remember to remove the elastic bands as they won’t compost. Mind you I am thinking of telling my granddaughter Florence that I am growing her a bouncy castle.

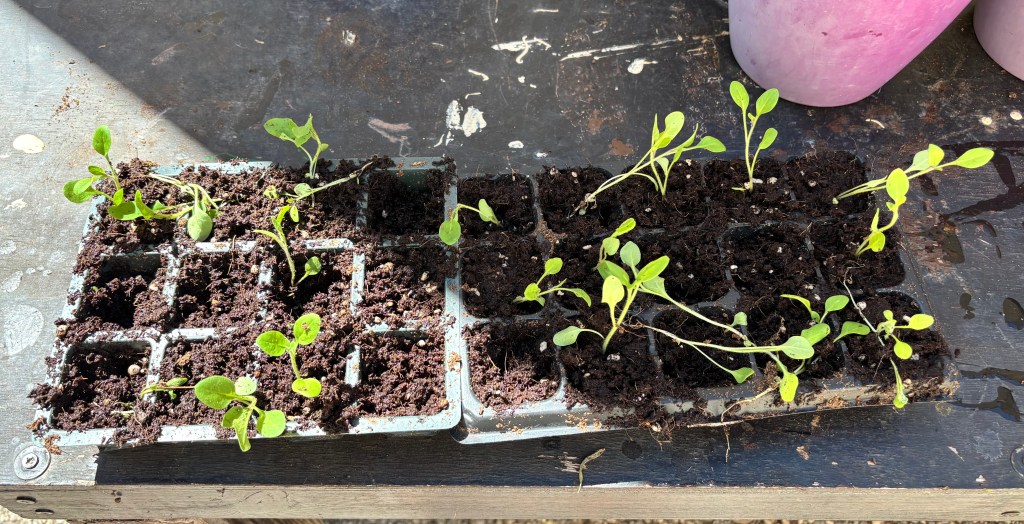
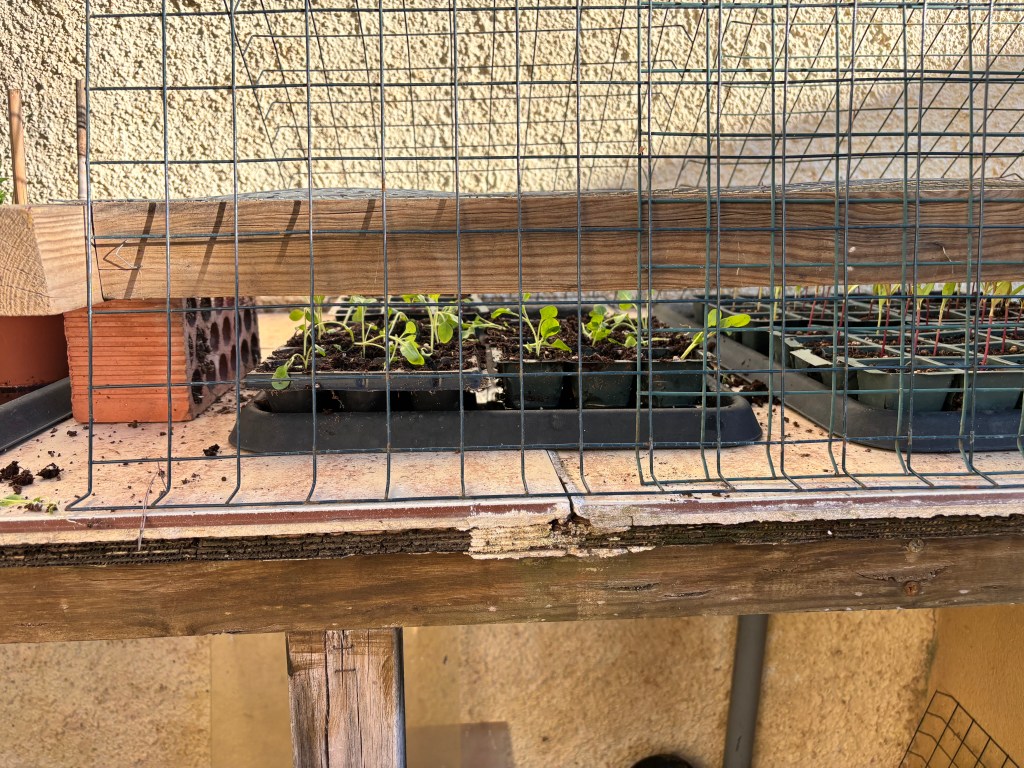
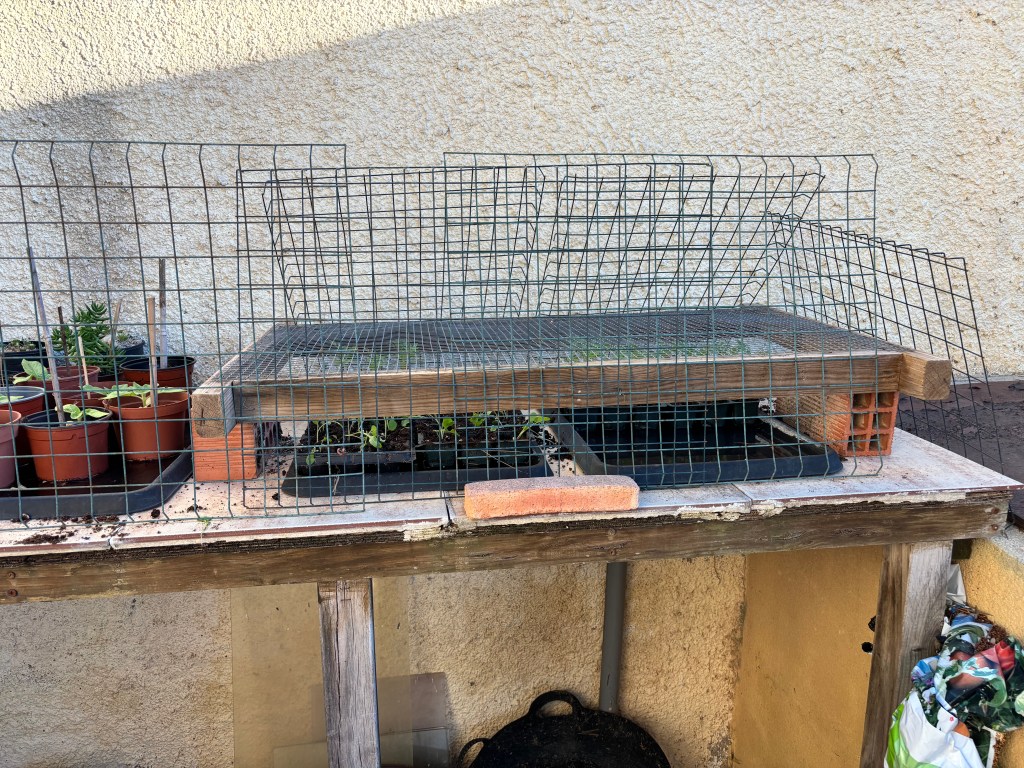
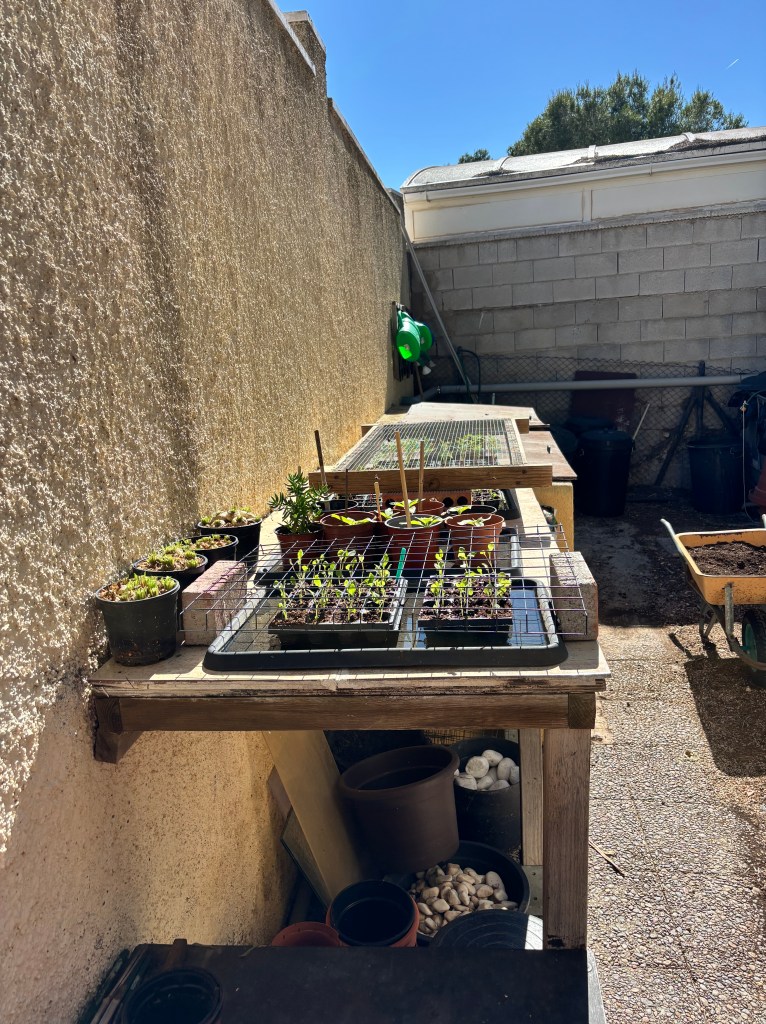
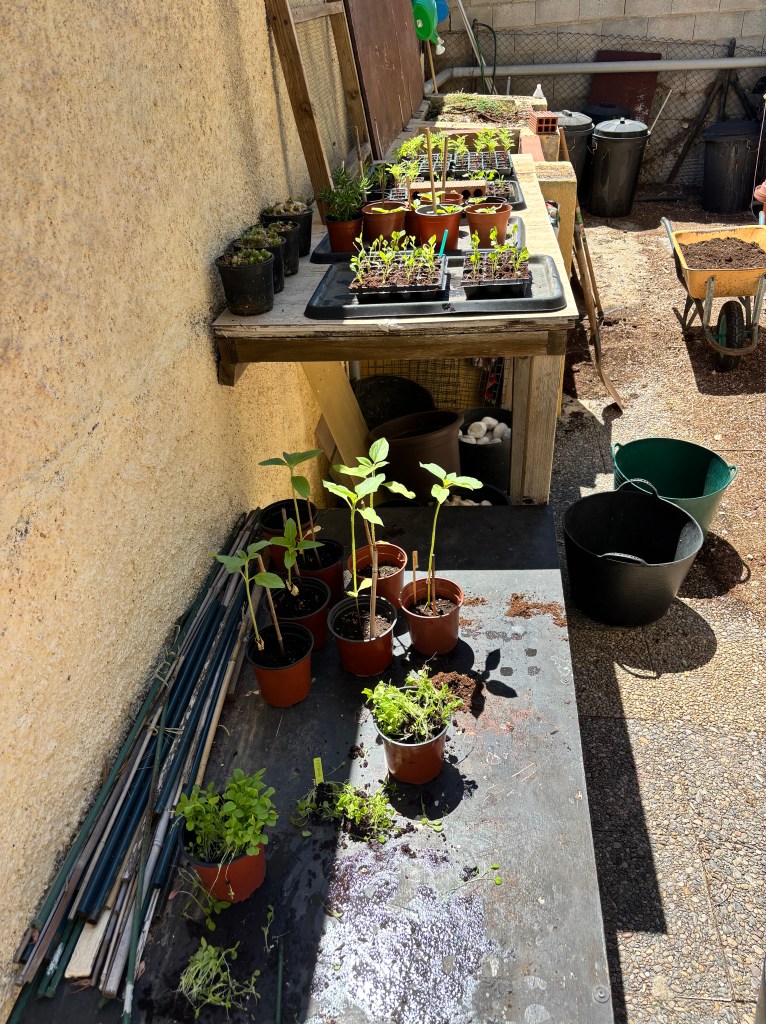
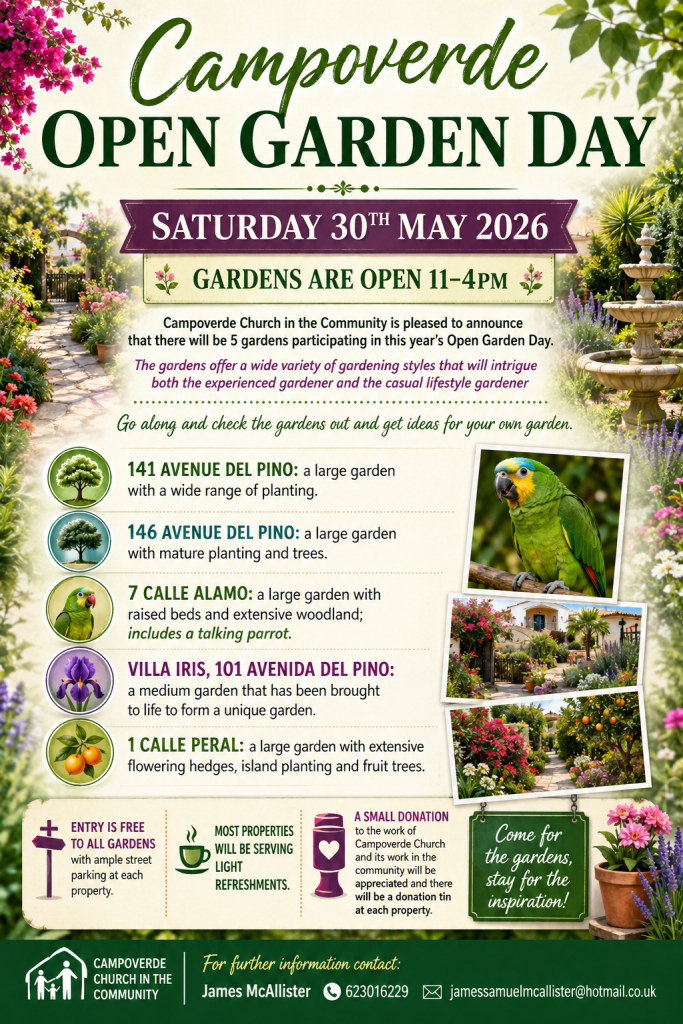
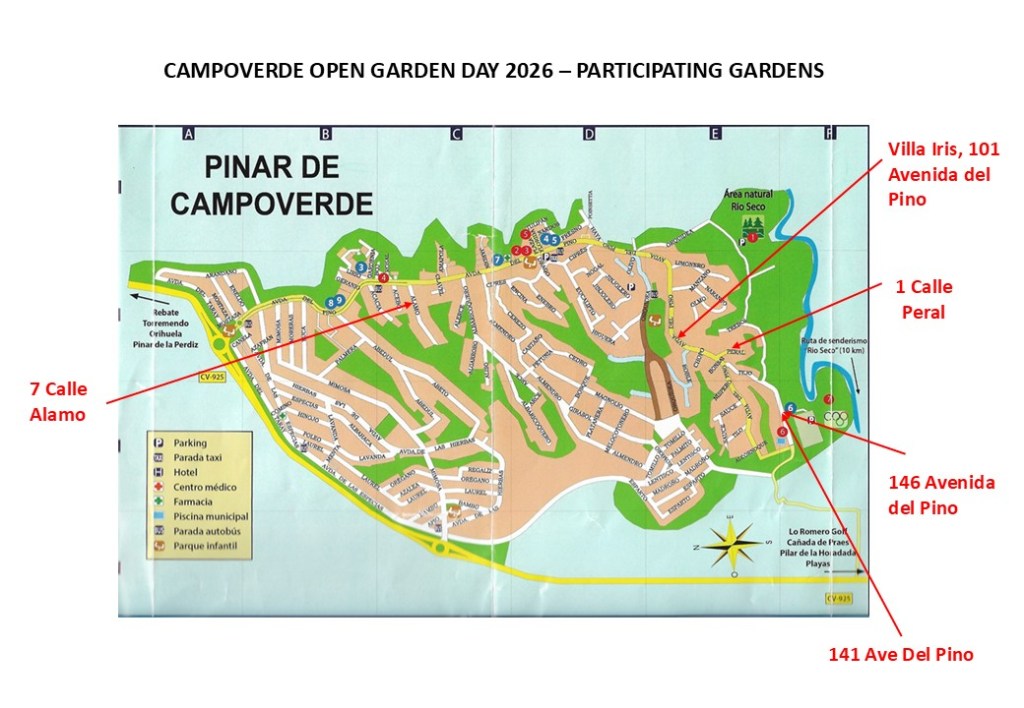
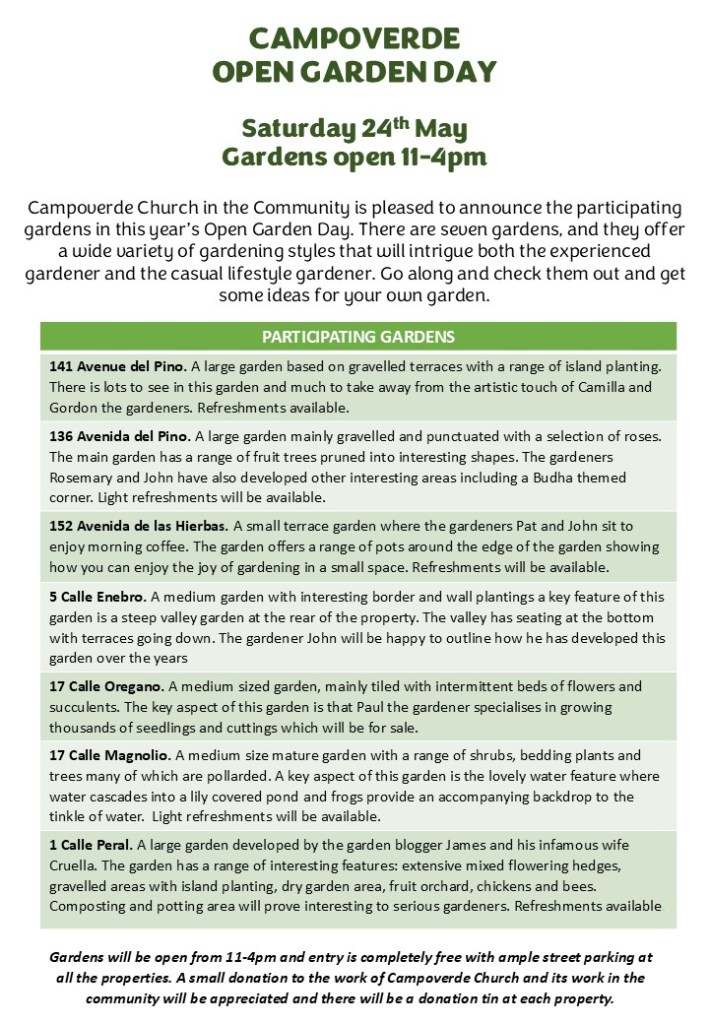
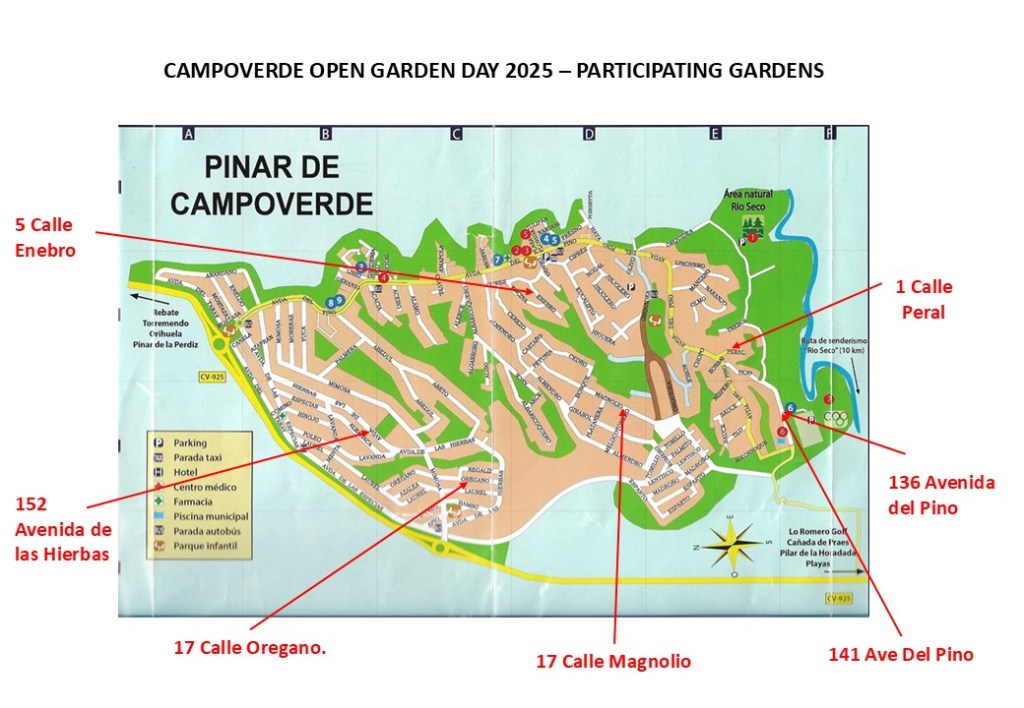
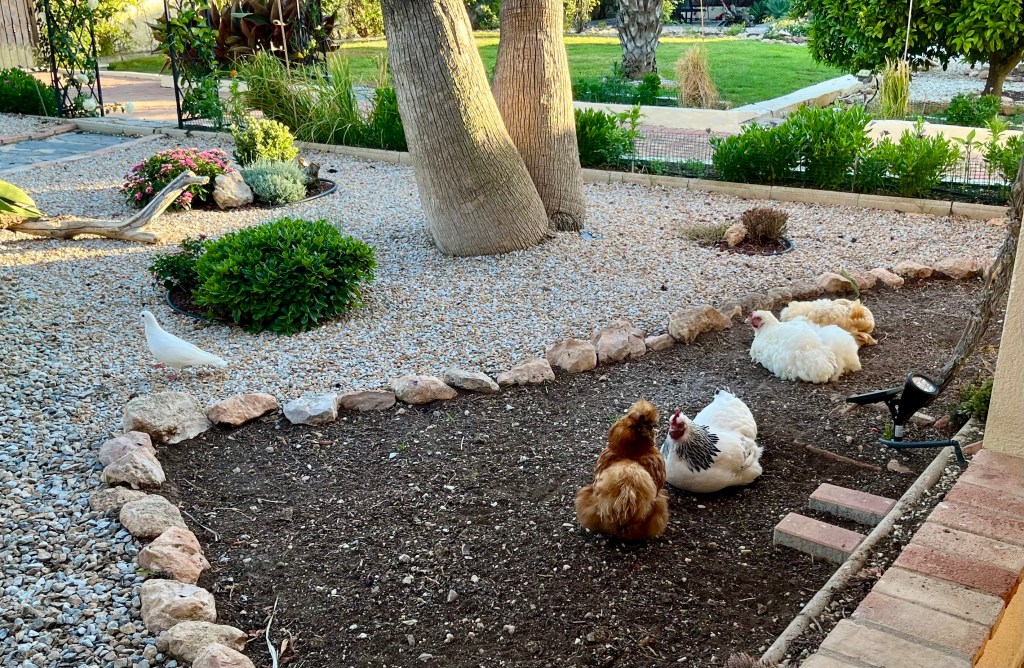


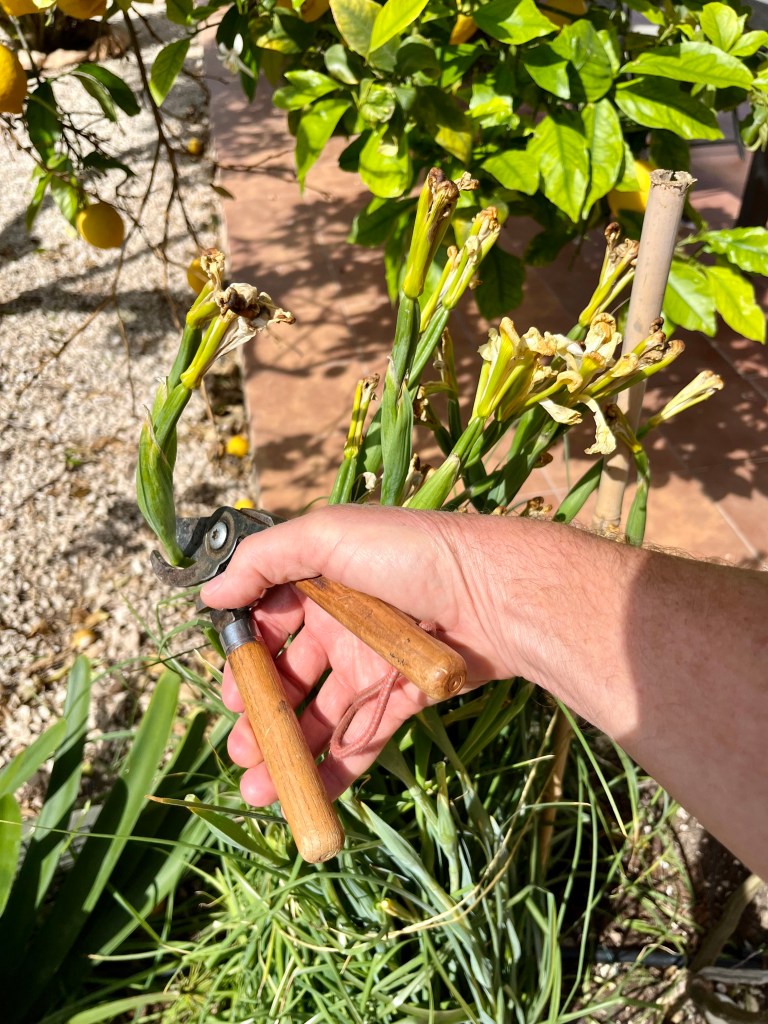


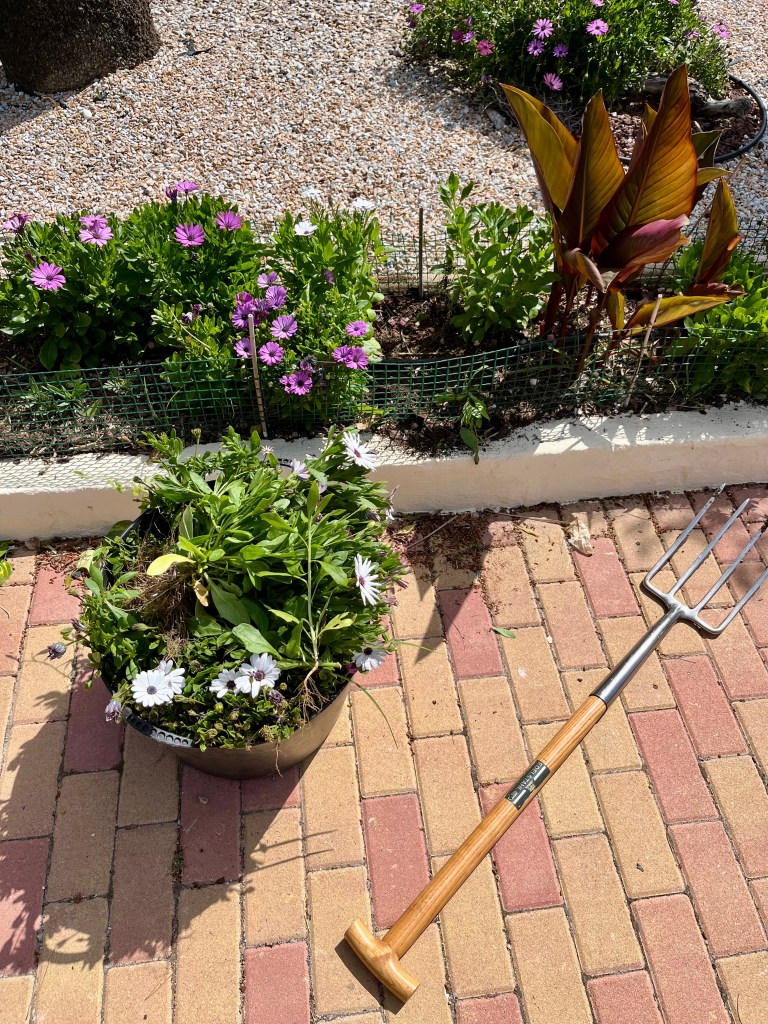

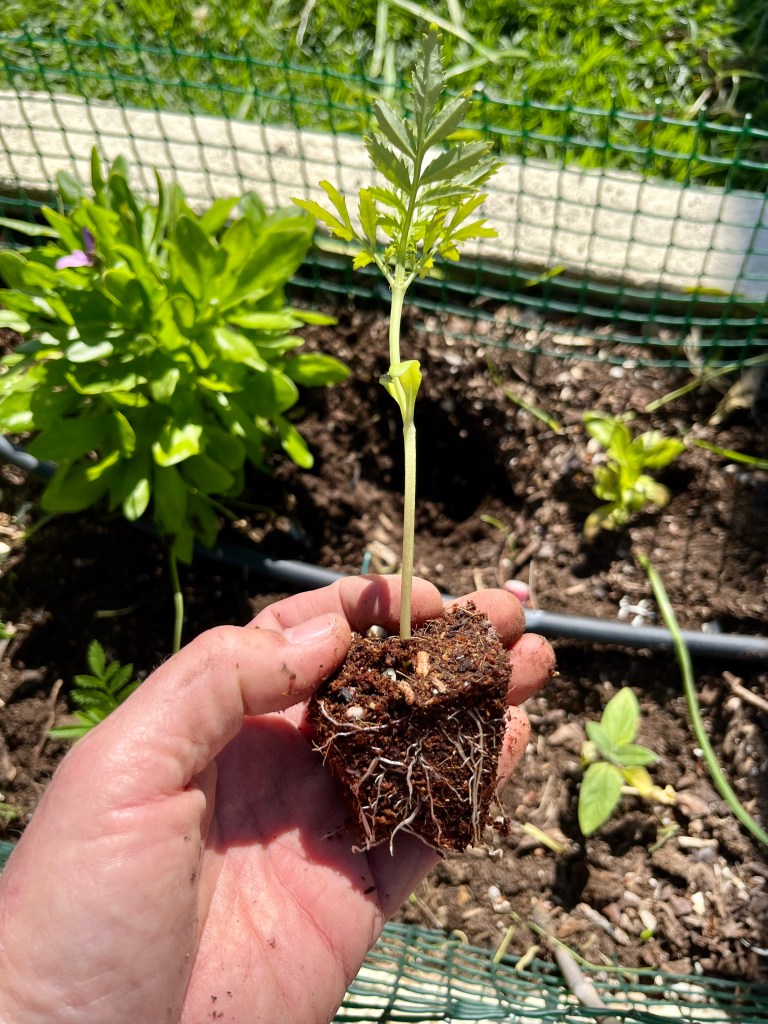

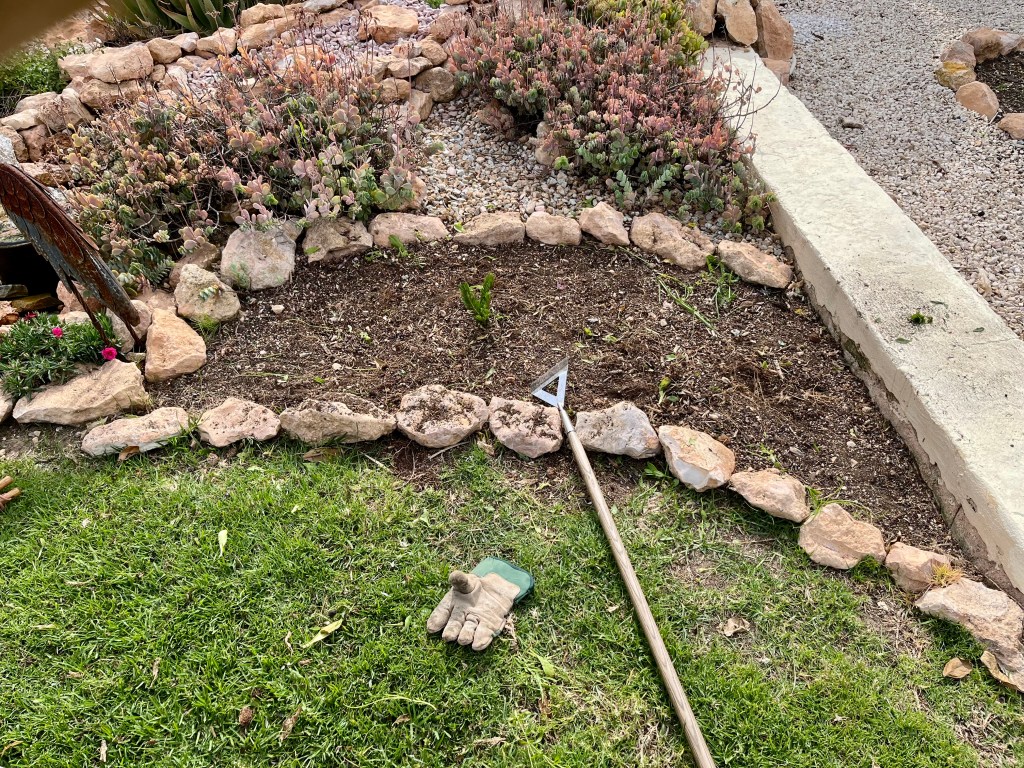
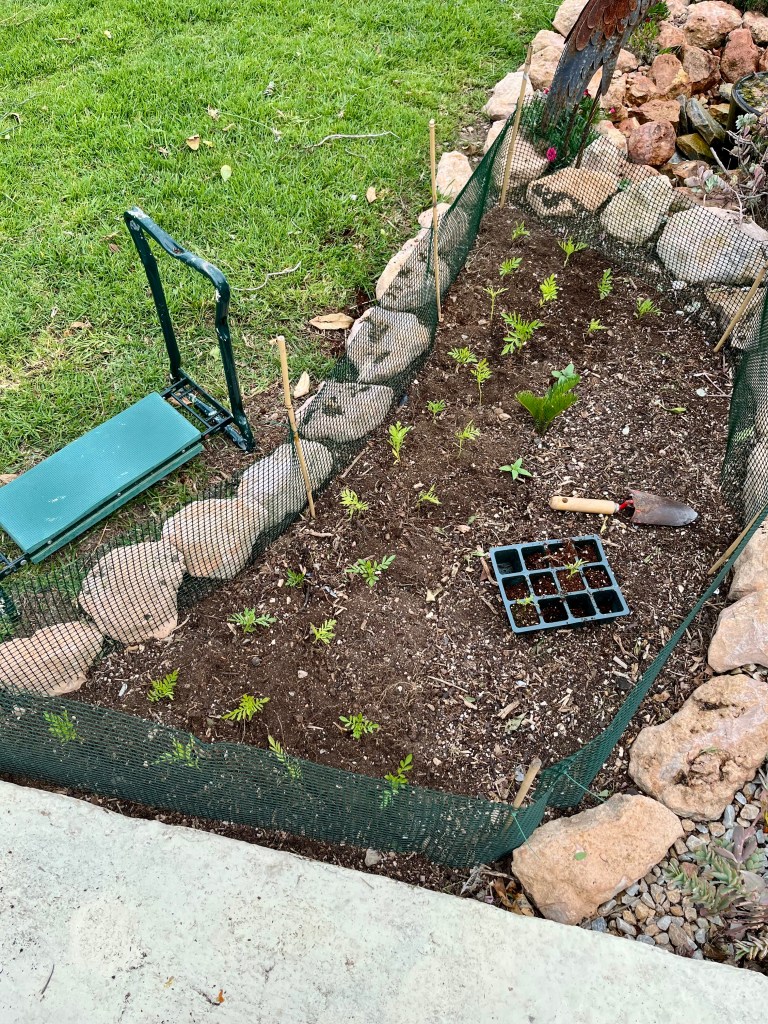
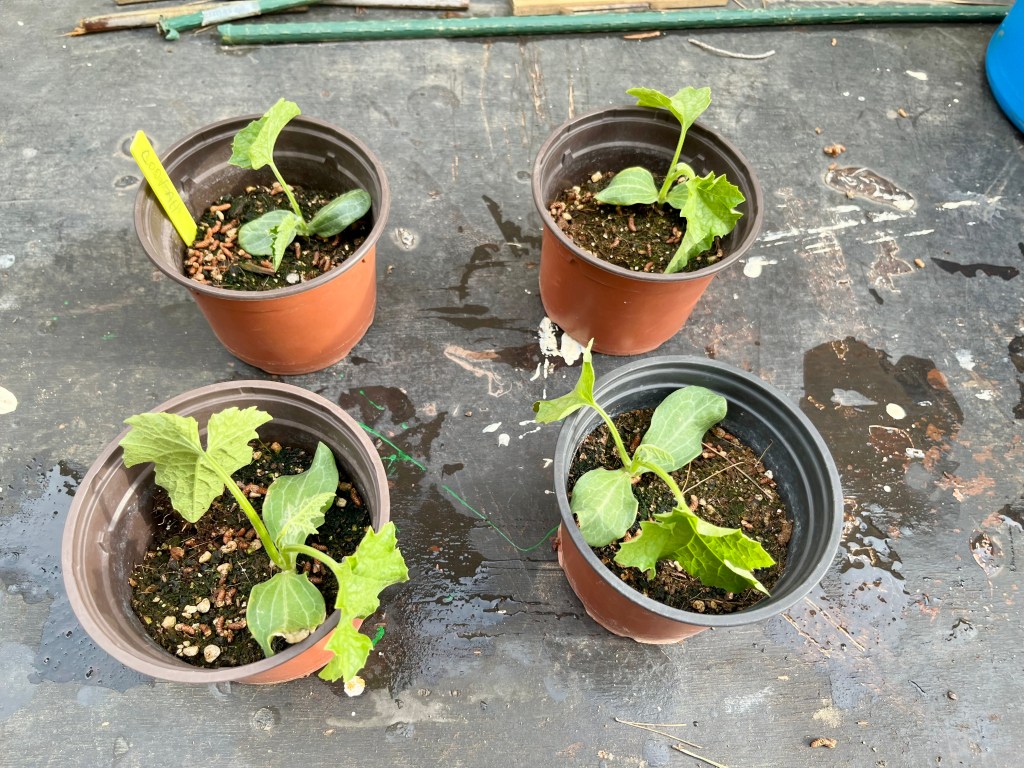


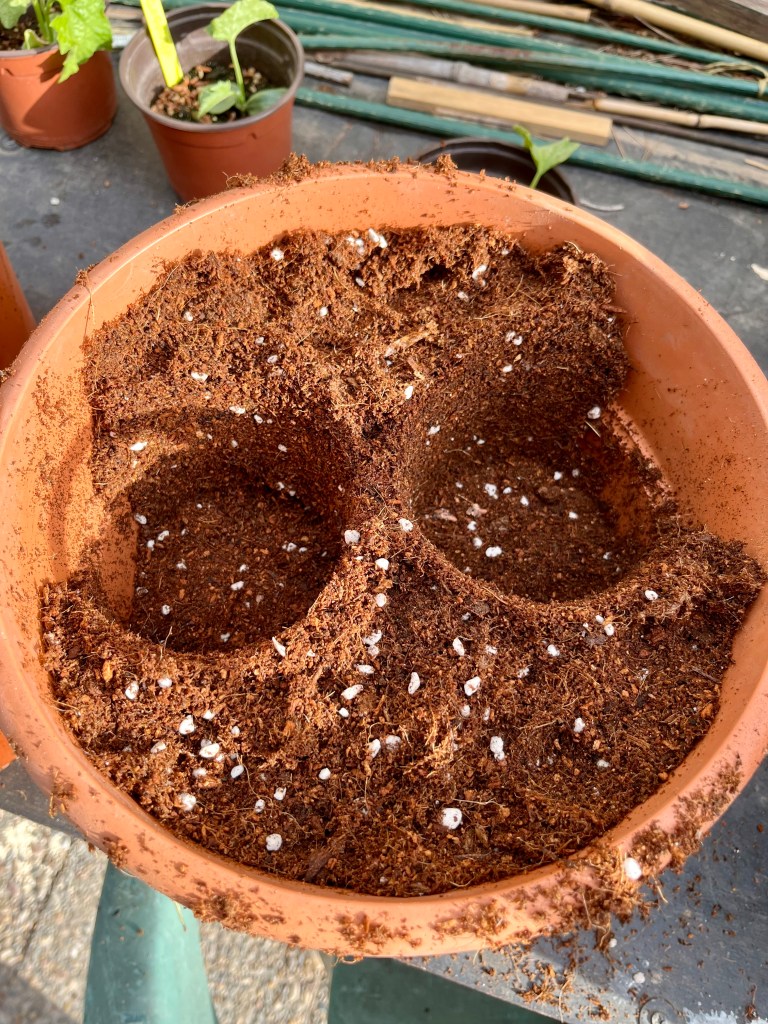


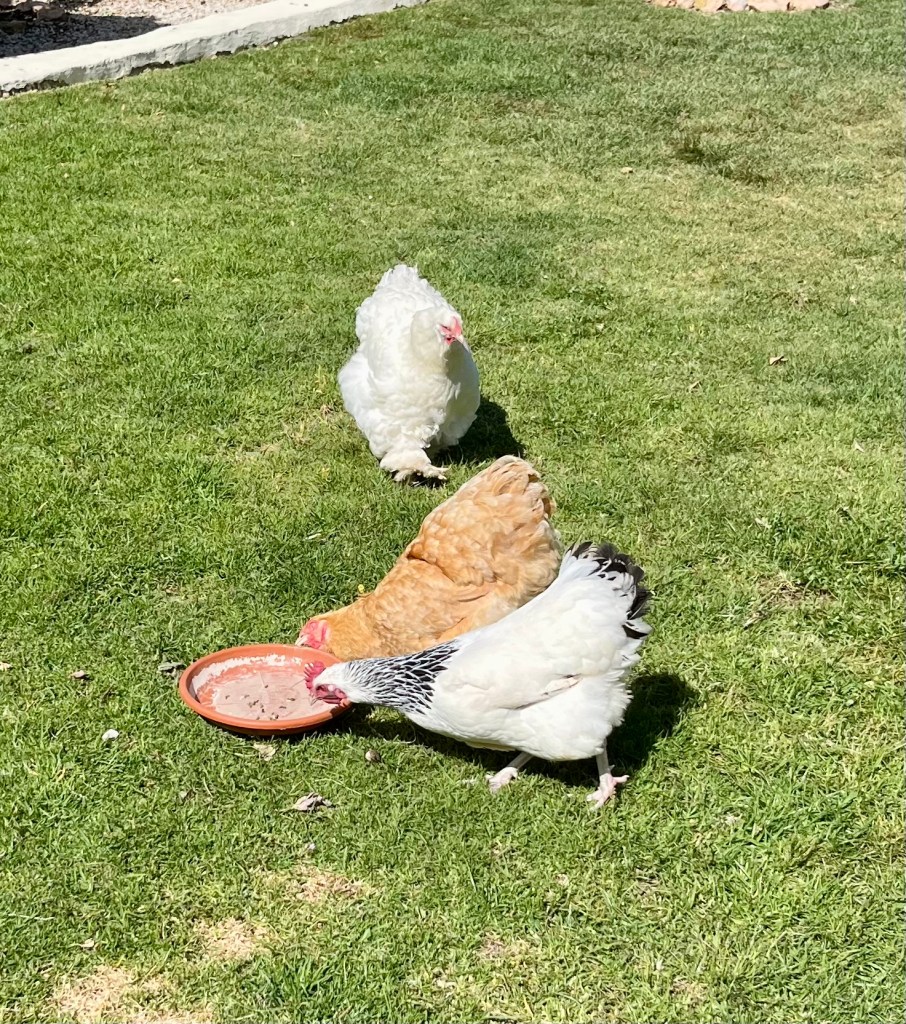
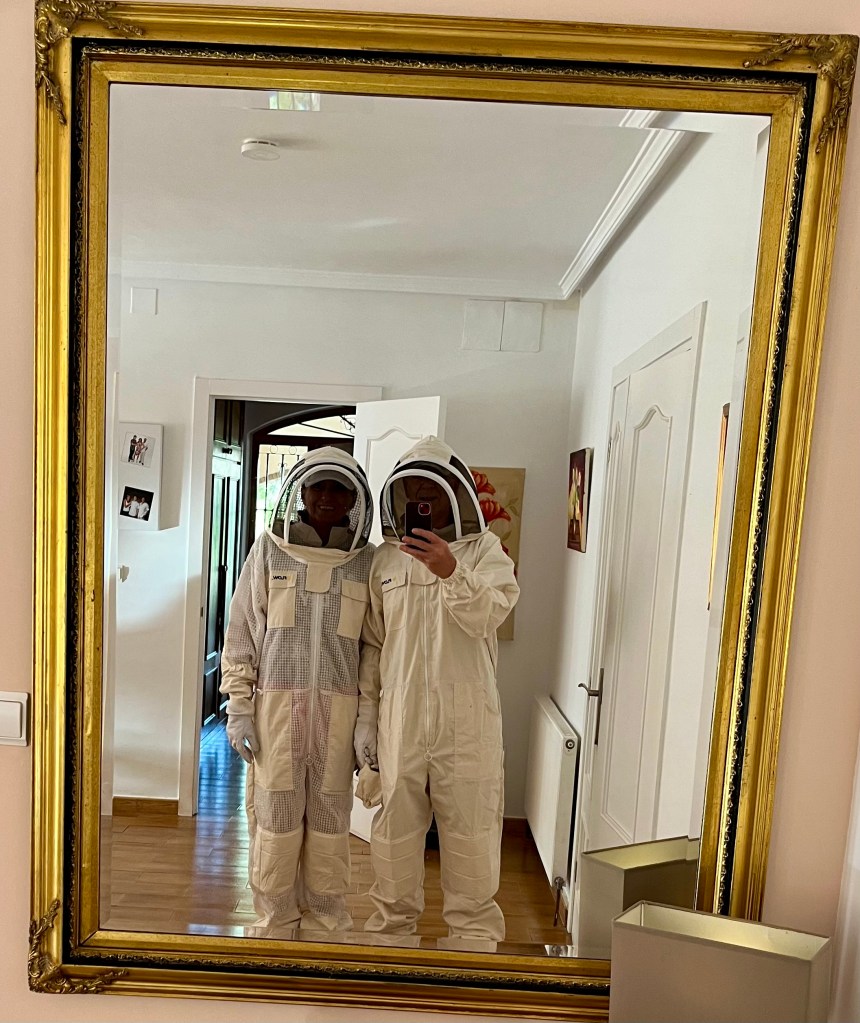
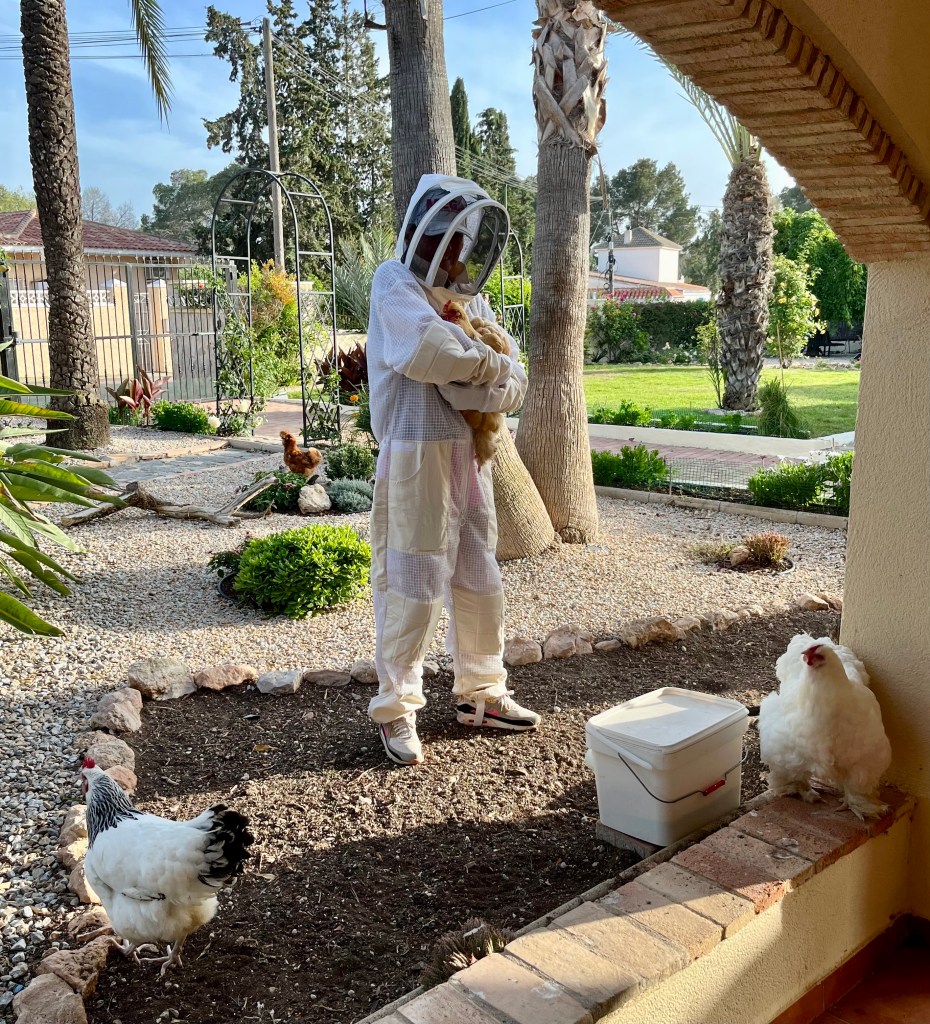

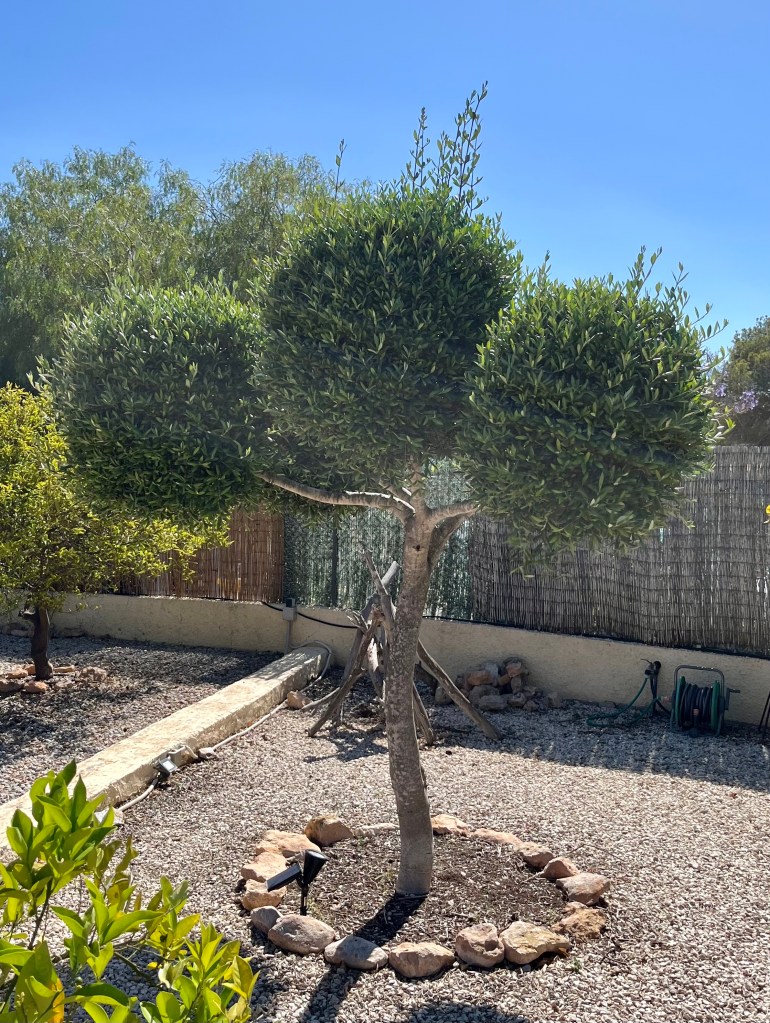

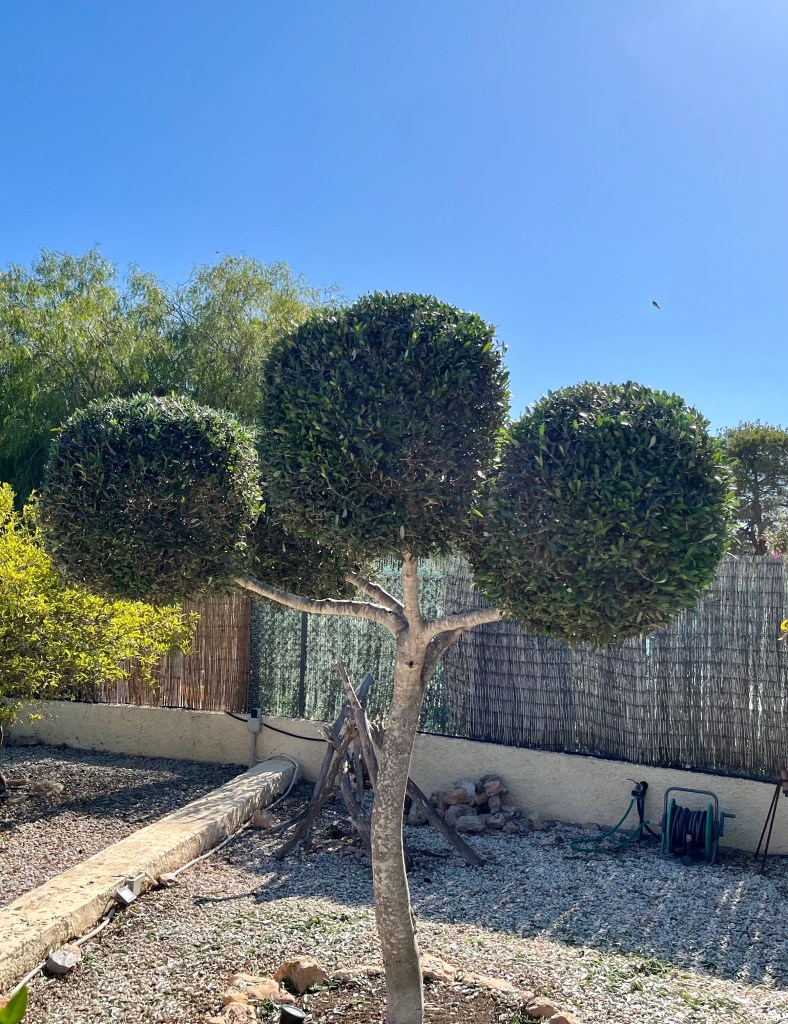

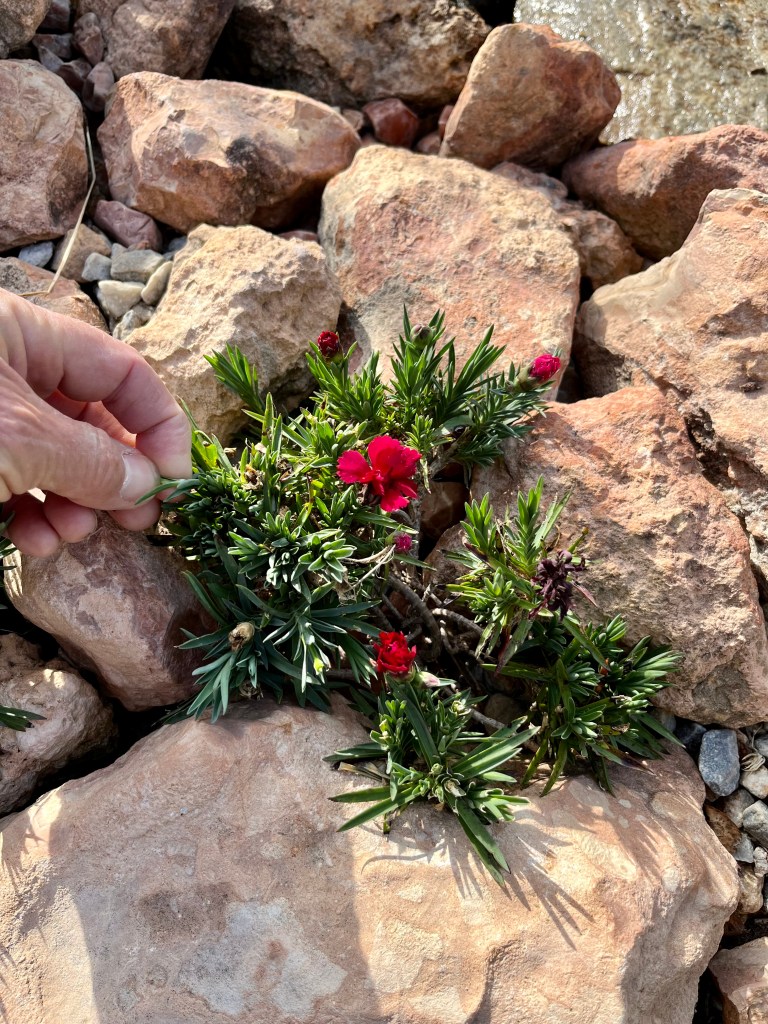


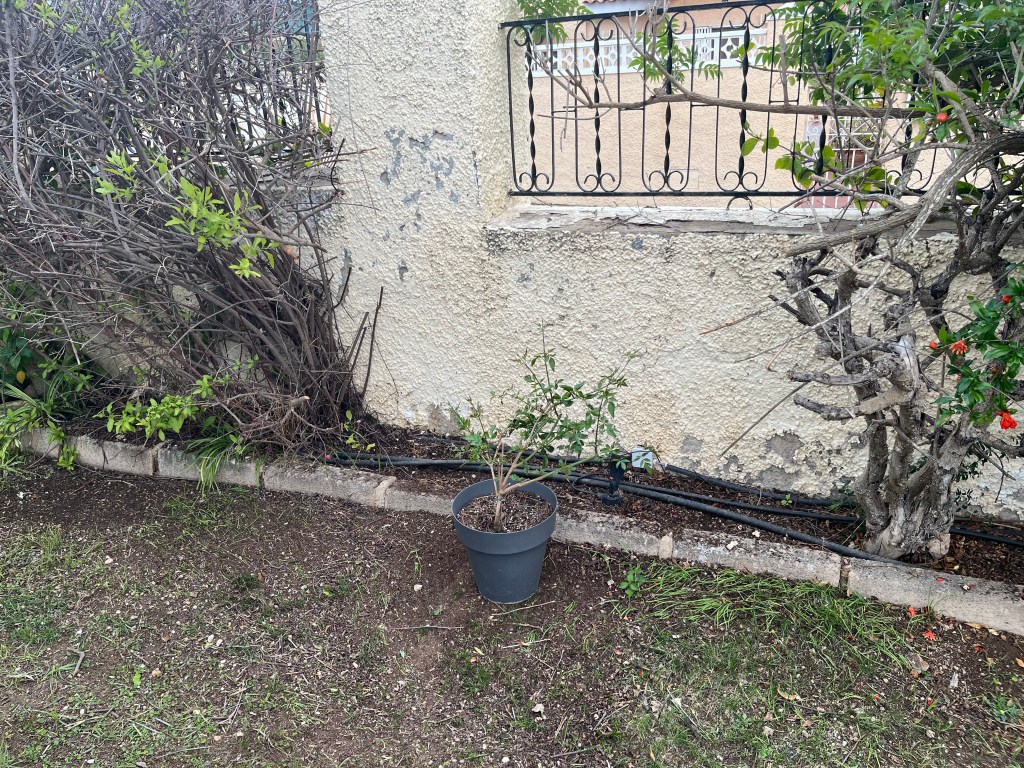


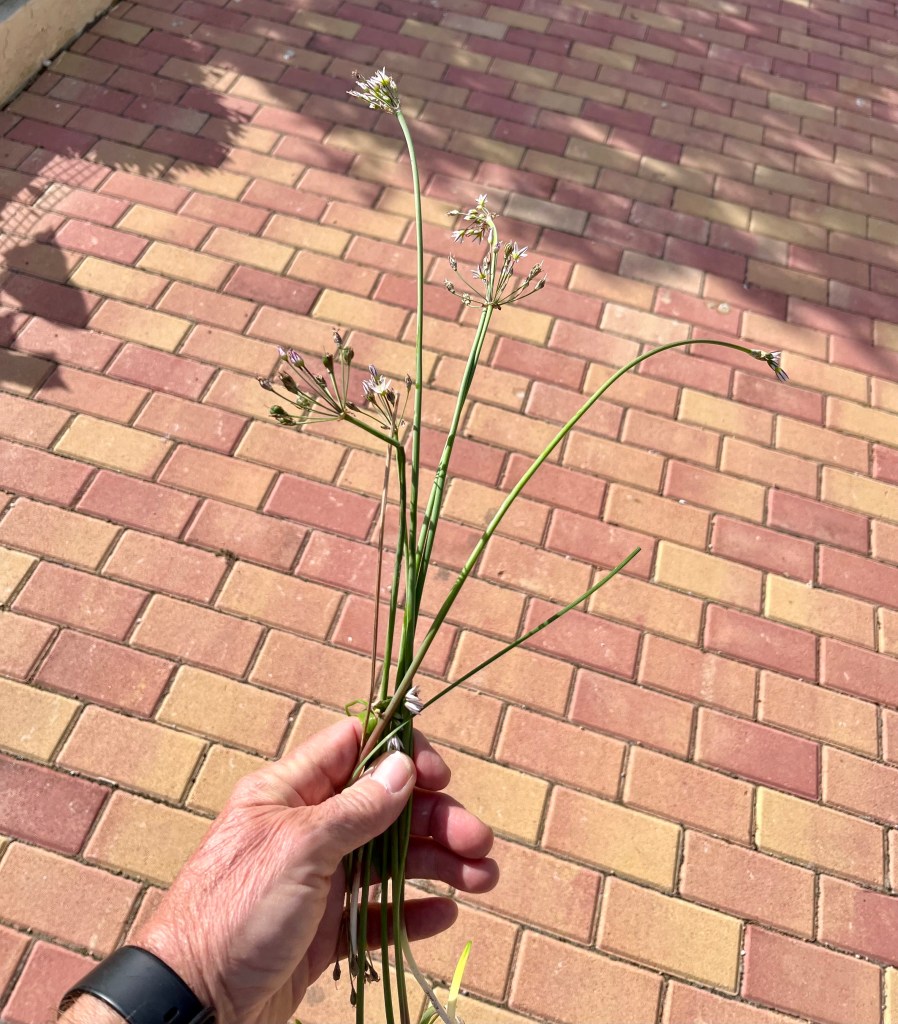
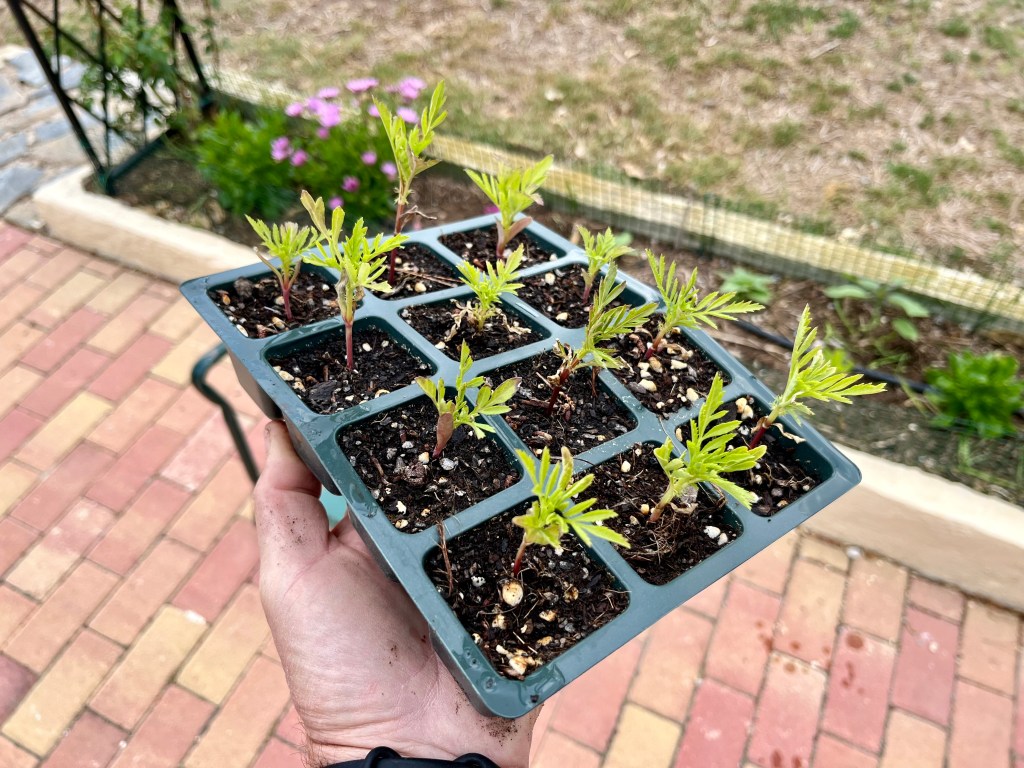

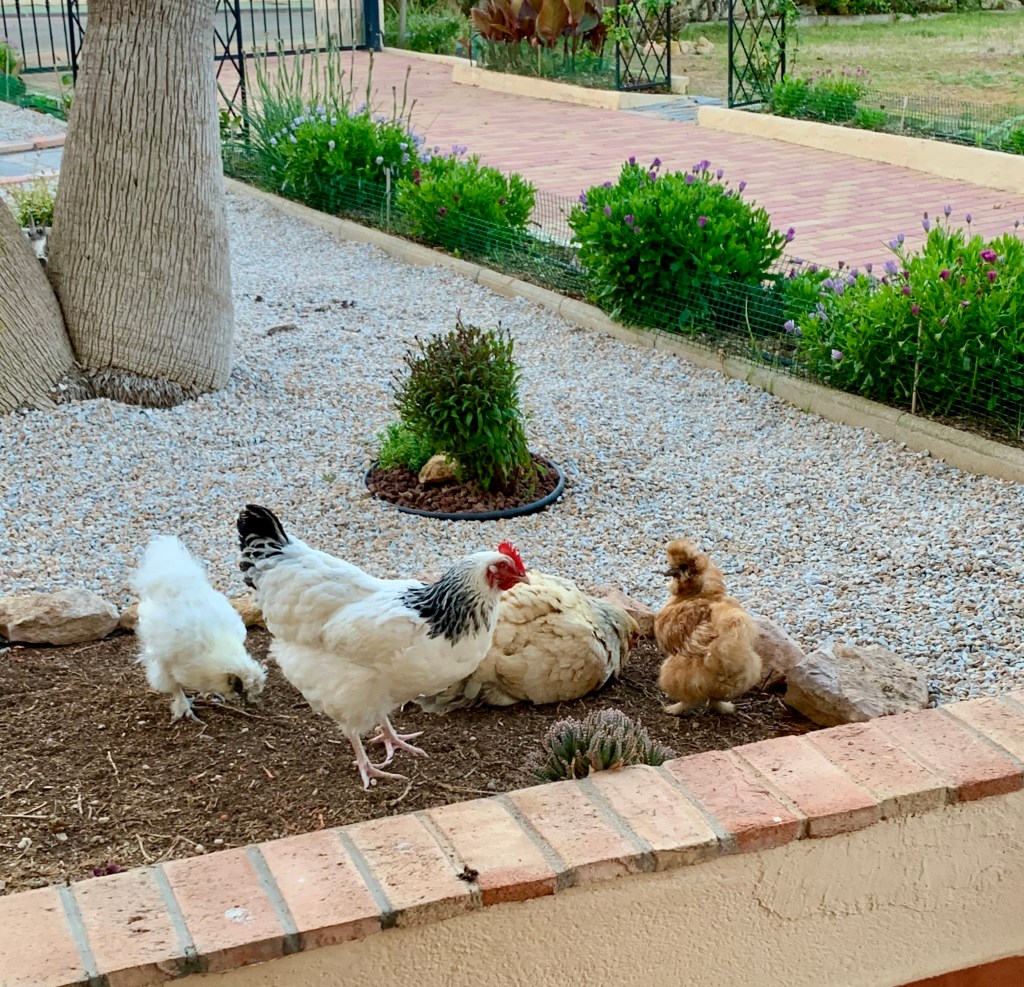
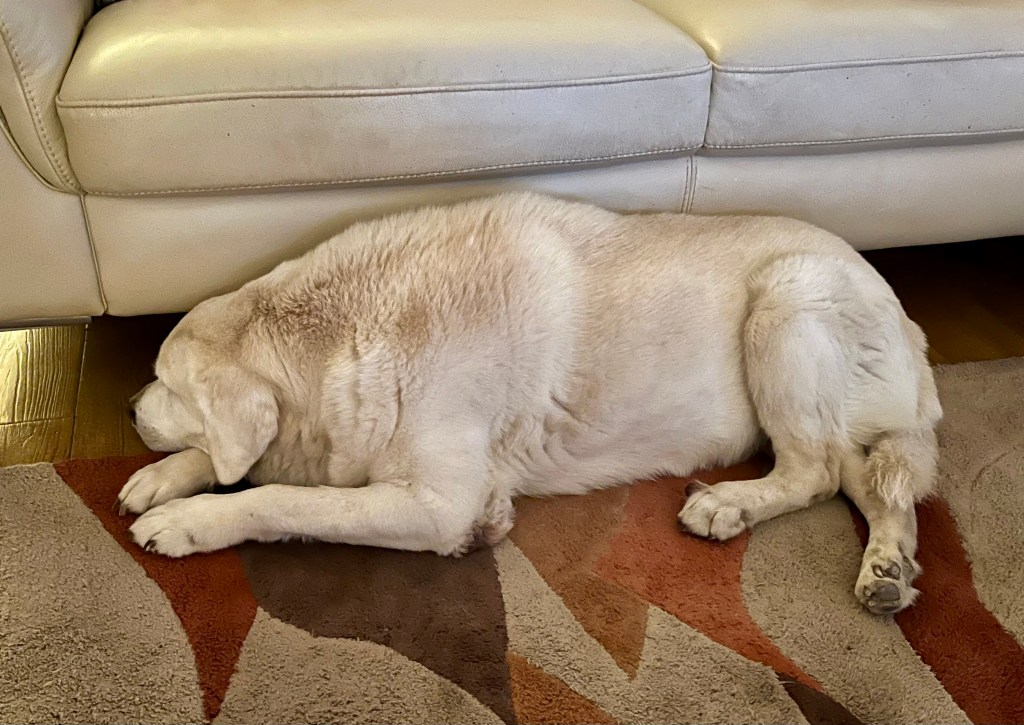
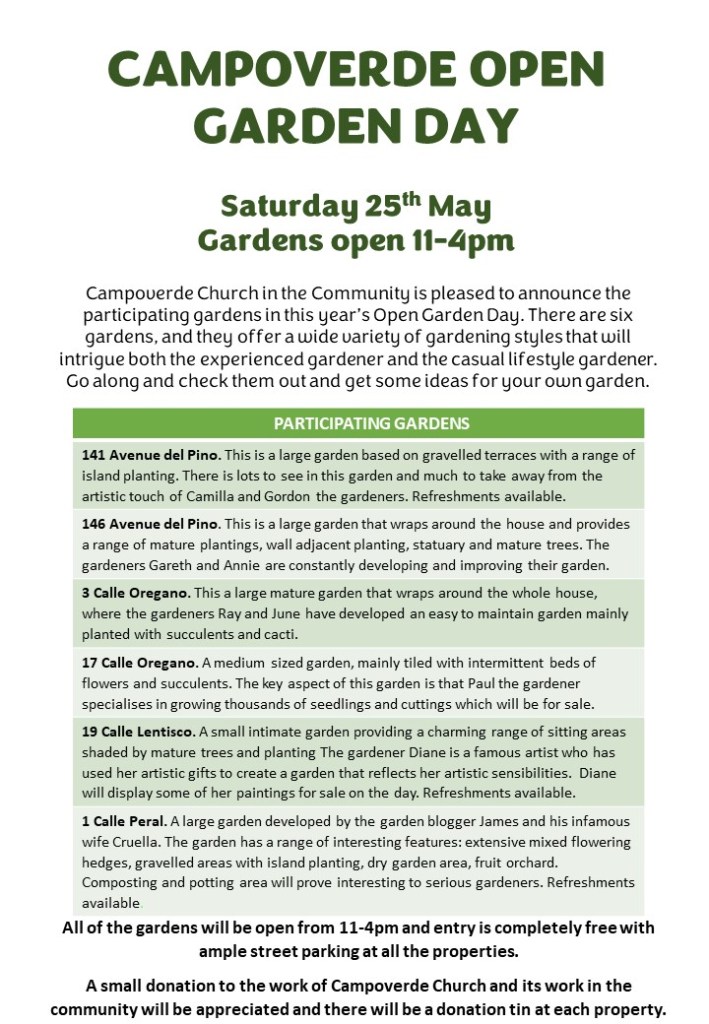
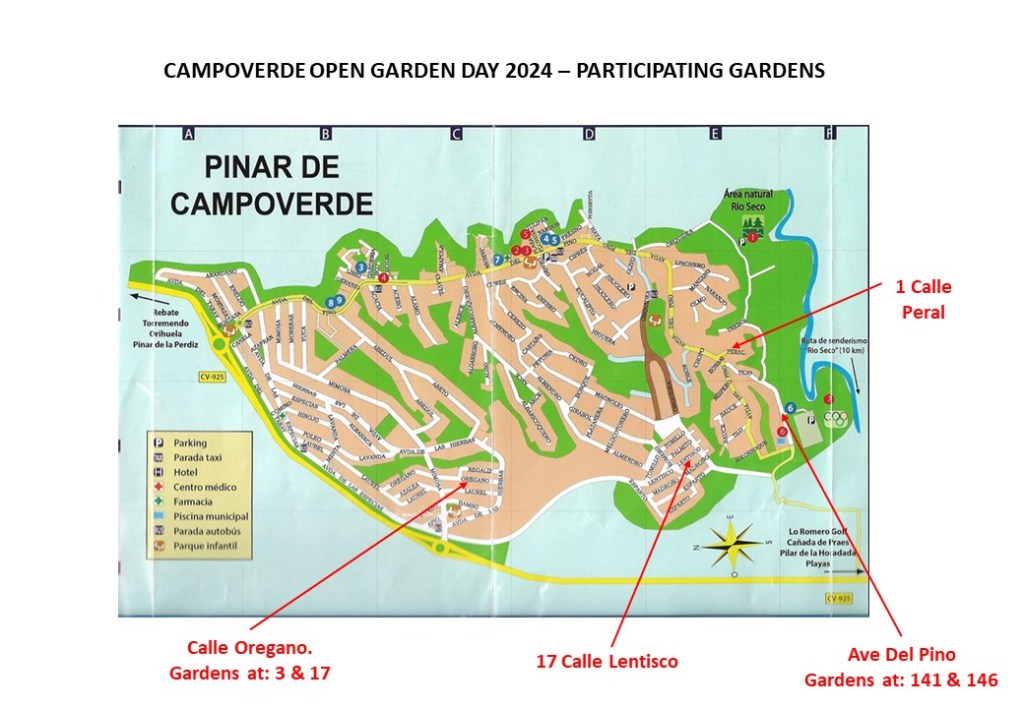


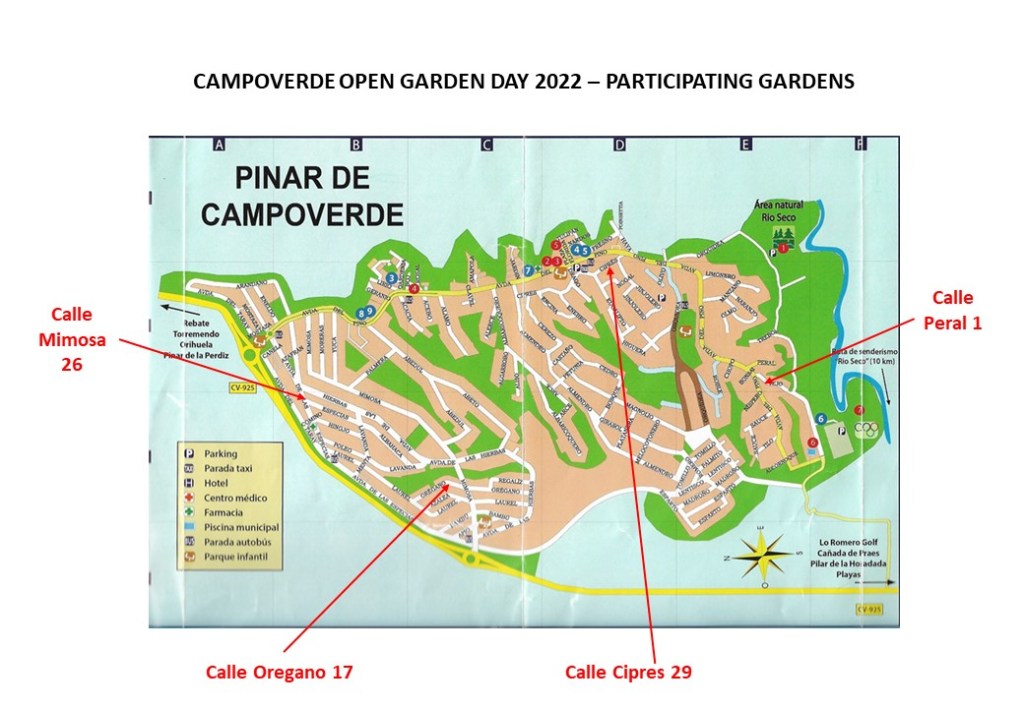


You must be logged in to post a comment.